Week 12
Molding and Casting
| group assignments | — |
|---|---|
| Review the safety data sheets for each of your molding and casting materials | |
| Make and compare test casts with each of them | |
| Compare printing vs milling molds |
| individual assignments | — |
|---|---|
| Design a mold around the process you’ll be using, produce it with a smooth surface finish, and use it to cast parts. |
General notes Neils lecture
Tips and tricks:
- watch out for exothermic (temperature) because molds can be very hot.
- with endothermic molds we need to put the heat in. so a toaster oven is a good way to help it set. And accelerate the cure time.
- main reason for making flexible mold is that you can bend it to get the shape out. With a vertical face making draft angles will be helpful.
- Storage, keep it clean, cold, and use it before it’s shelf life. It won’t set well afterwards except for the stone fills.
- cerrotru: metal casting for jewelry or coins
- stir while keeping the angle of the spatula fixed, pour with a thin strings to prevent air bubbles,
Safety
check the safety data sheet carefully to understand how to use it
ventilation
protection for your skin, clothes
dispose, best to mix and let it set
Tip from Michelle: for the nasty kinds of polyurethane materials there is new legislation in NL since last august that makes it mandatory to do a safety course before using them for professional use (the ones with the red warning label)
milling the molds
You make a smooth finnish in layers of milling consisting of:
rough cut: fast, big steps horizontally
finish cut: with a big stepover
finish cut with a fine stepover
finish cut: two directions zo Z axes is moving along, 0.1 mm
tips for info about tool types and calculating the chip load: https://www.sorotec.de/shop/Cutting-Tools/sorotec-tools/2-flute-mills/
mills
- flat gets steep steps
- ball gets smooth steps
- finnish cut : move the Z in the same time as X and Y for smooth finishes no matter which tool
- length of the tool, for deep narrow features, you need the right tool for it. Miniature mills have short shanks so you can’t go very deep. Long neck’s break fast or deform. So you need to slow down.
- watch out for the tool, shaft, collet, head to hit your project.

Software:
- mods also has a toolpath generator tooldiameter for depth cut
- I want to try out fusion360
workshop at Waag
Michelle gives us an introduction about the milling and pouring. We will be using machinable wax to mill the mold. We will mill a positive, pour a negative and pour a positive again. The wax we are using had been reused a lot of times. When you want to reuse wax after melted and poured, let is cool down slowly this is the trick for a nice result.
tips for designing the mold
- think about ways to cure the mold on top of each other
- think about how to pour the mold so make pouring holes
- make air vents if necessary so prevent trapped air.
3D milling tips
- measure the milling stock
- level on the top of the block or the bottom, choose
- watch out for the length of the milling bit and the collet to make sure you don’t hit the stock with the collet.
- make sure X and Y are correctly
- because we reuse the wax we don’t use the extractor also make sure you properly vacuum the table before you start milling so you don’t mix the wax with other stuff.
At Waag they use the program VCarve and the Shopbot I will mill my designs using Fusion360 and the lunyee 3018 to create the toolpaths. So I will have a different workflow but I made notes of speeds and feeds and other stuff I can learn from V-carf:
- mostly used toolbit is a fletend of 3 mm
- Roughing path: spindle speed: 9000 r.p.m., Feed rate : 50 mm/sec, plunge rate 15 mm/sec, stepover 1,8mm
- Finnish path: stepover 10 percent, Feed rate: 50 mm/sec, plunge rate: 10 mm/sec, no pass depth because it’s non planer
- To attach the wax block: wood al around it and clamp it in the wood, double sides tape
Group assignment
Safety
We all have a different material to look up the data sheet and I have the Smooth-Cast 305 White together we came up with 14 important things to check. Below you can read my findings.
- Room conditions work environments
- wash hands after use
- keep containers closed and labeled
- store cool, dry well ventilated place away from direct sunlight and heat
- indore storage should meet OSHA standards
- room size ventilation or in proximity to a forced outlet air vent
- PPE Personal protection equipment
- adequate local exhaust ventilation
- wear MSHA/NIOSH or European standards EN 141, 143 and 371 respirators with filters
- procets hands with butly rubber, neoprene or PCV gloves
- provide eye bath and safety shower
- Exothermic or endothermic
- Castings with significant mass may be hot to the touch and irritate skin immediately following cure. Let casting cool to room temperature before handling.
- Toxicity
- irritant to eyes, if contact flush eyes
- muscous membranes
- skin, if contact wash skin with soap and water
- do not breath fumes, in inhaled go outside, give artificial respiration and oxygen if needed
- is swallowed do not vomit but drink water and get help immediate.
- Environmental harm
- don’t spill material is sewers, drains, or any natural waterway use sand to stop spills when in accidents
- 0% BOD biodegradable on the OECD guideline 305 E
- unstable in water
- empty containers with residue are need to be handled as chemical waste and returned to a waste centre to handle it properly
- Specials or others
Material properties 7. Shelf life
- 24 months
- POT time
- 7 minutes
- Curing time
- 30 minutes
- Demold time: Low mass or thin-walled castings will take longer to cure than castings with higher mass
- Ratio mixing
- 1A:1B by volume
- 100A:90B by weight
- Viscosity
- 80 cps
- Shore hardness
- 70 D
- shrinking
- 0.0065 in. / in.
- Specials or others
- Castings resist moisture, moderate heat, solvents, dilute acids and can be machined, primed/ painted or bonded to other surfaces (any release agent must be removed). If machining cured material, wear dust mask or other apparatus to prevent inhalation of residual particles.
- Unpainted castings will yellow over time - more quickly when exposed to ultra-violet light.
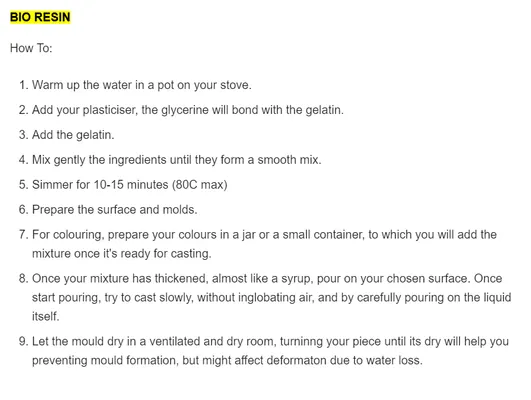
Casting Bio plastic transparent Resin
In the afternoon we casted many different materials together. Here you can find a picture of out tests.
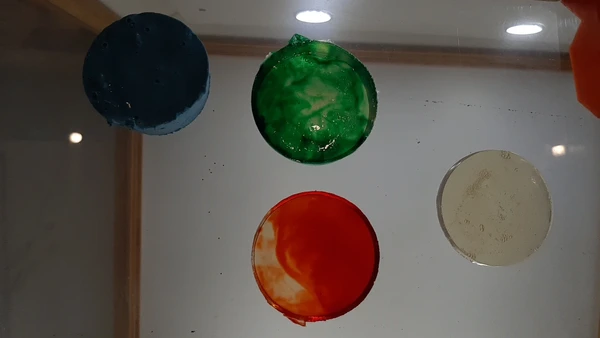
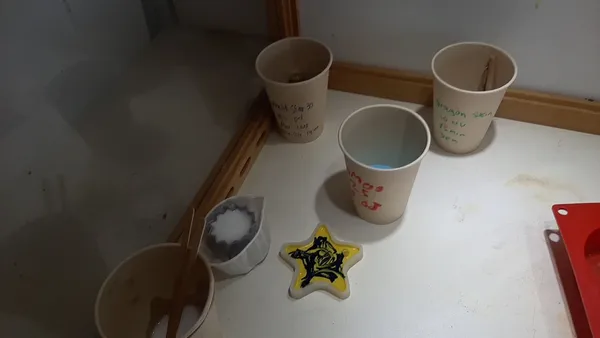
- Joe worked on Dragon skin
- Edwin worked on the mold star 30
- Edwin and Joe worked on the jesmonite starter kit
- Edwin worked on the smooth cast 305
- Leo worked on the Oomoo
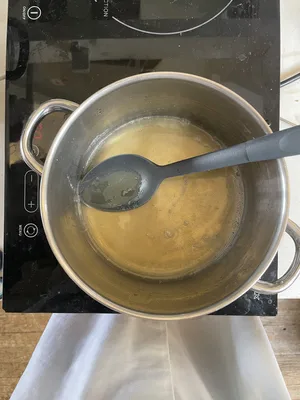
- Joany and I teamed up to make a bio plastic Resin made from gelatine and glycerine.
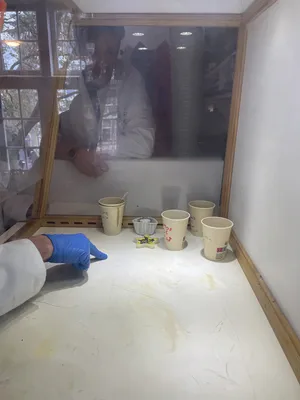
We found this recipe from Jiawen Wong site that we used for making the samples.
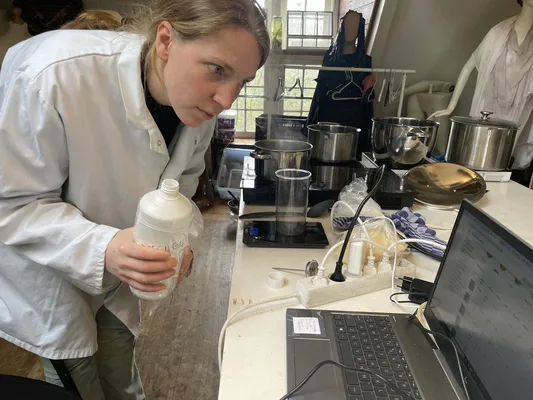
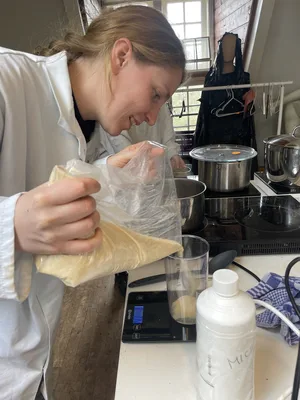
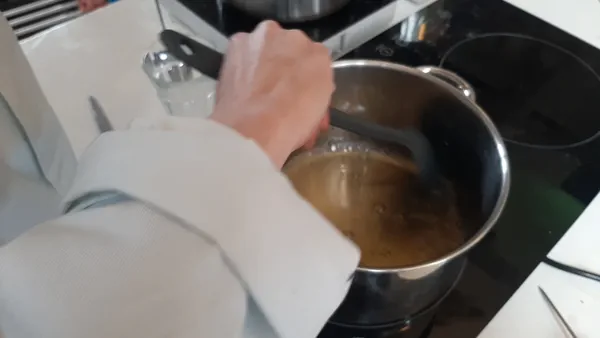
Here you see the process of us following the recipe. Starting with measuring heating up the material and after 15 min pouring. Joany has some ecoline ink to color the bio plastic she pours a bit in the mold before adding the biomaterial.

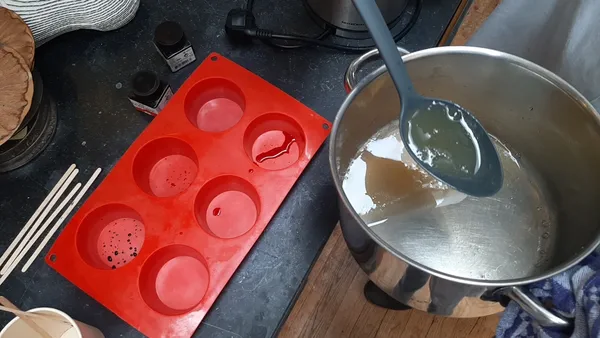
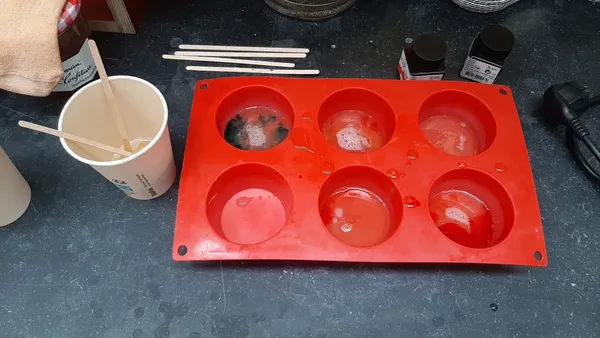
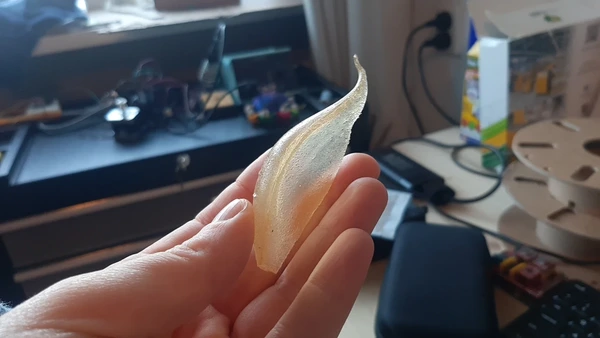
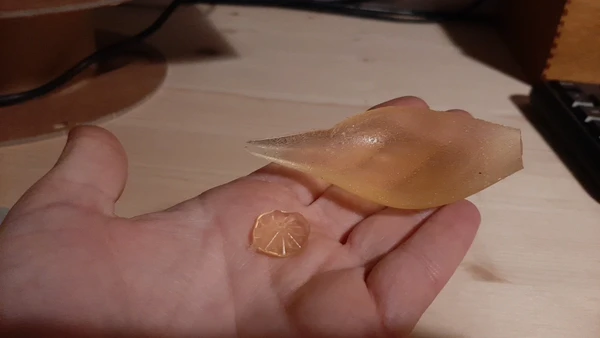
- I measured the transparent red disk one hour after pouring to see how much it will shrink during the comming days. It’s 6 mm in thickness right now.
- gelatine smells bad to prevent the smell add lavender oil
- more gelatine makes it harder, less makes it softer
Personal assignment
I will work on casting a transparent leaf like shape that could be functioning as the light bending object for the night night part of my final project. I’m looking forward to start 3D milling for the first time! The flower shape will be an experiment. Since I have an allergy for epoxy I will try out the bio resin. If I decide I want to pour these shapes and the bio resin is not a good fit I could also try out transparent polyurethane since I don’t have allergies for this material.
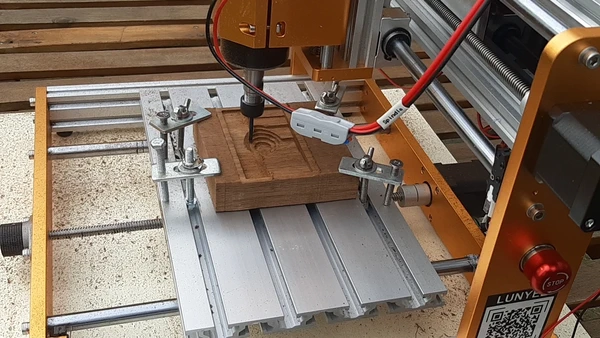
I decide to work in Fusion for designing the mold shape since I got myself equated with Fusion CAM during week 7 making something big here you can find a lot of information about creating a set-up and feeds and speeds. So this week I will also use it for generating the 3d toolpaths. Since I have very little time to work on this project at the Fablab Arnhem or Fablab Amsterdam, i’m planning on taking the Lunyee 3018 home and work on it in the weekend. I have worked with the Lunyee for creating PCB’s. In week 4 electronic production I introduced the machine and UGS. So I will continue working from this previous knowledge.
Mold design CNC
I start the design process by drawing the base the pedal will be stuck to in the night light design.
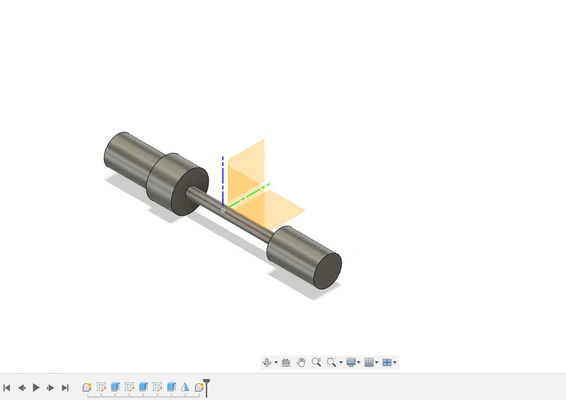
I measure the moving mechanism and set some constraints size wise so the pedal will be able to turn without hitting other parts of the object.
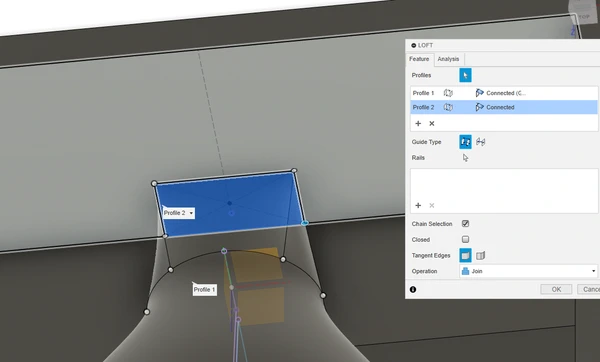
I try out different ways to create a petal like shape. Here you can see some process pictures of me trying out surface modeling and different ways of creating the shape.
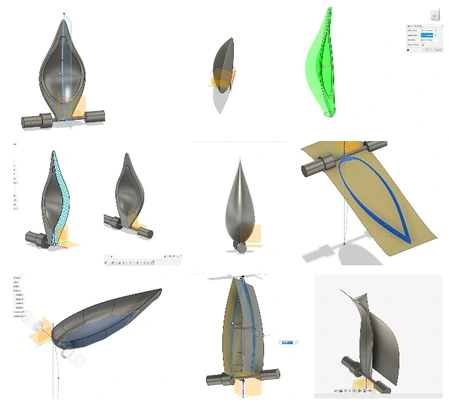
I decide a few things in the process:
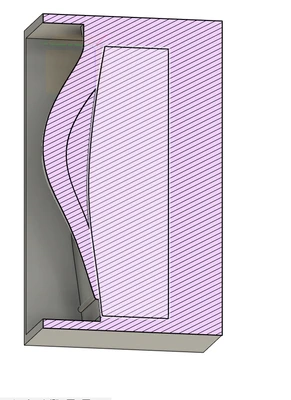
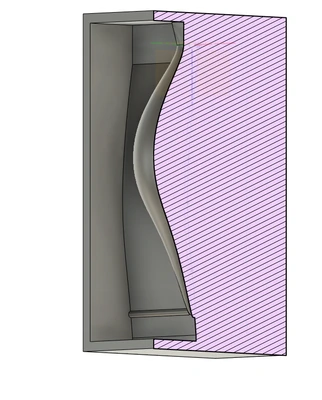
I want the dividing midline (parting line) of the mold where the two part connect to follow the wavy shape of the petal, so not flat, to make it more dynamic.
I made a release mold consisting of two part that will not be identical
The pouring hole will be the start of the petal
This is the design I stuck with
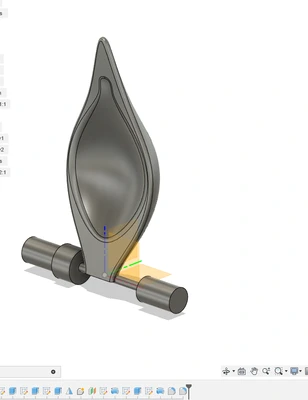
I continue making the mold around It and this turned out to be a breinbreker specially since the mold has a hollowing part on top, this makes the visualizing harder than a symmetrical part.
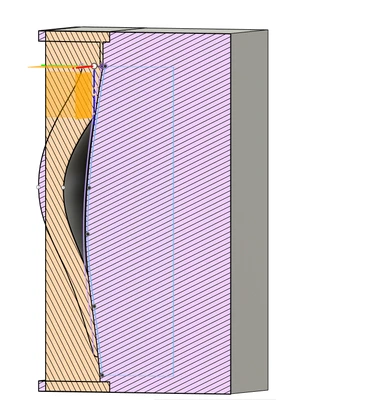
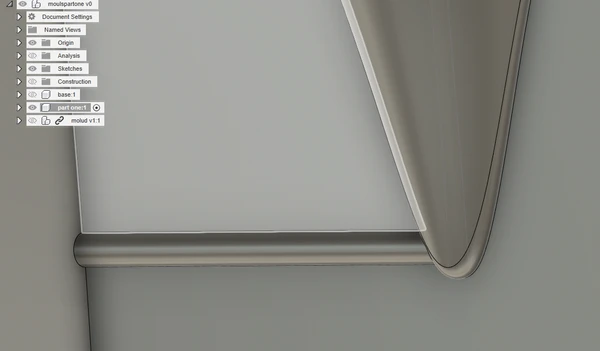
To make the two parted mold I create a mid-face inside surface modeling by offsetting the spline in the middle of the fillet and extruding this line. I use the face to cut the model in to two parts. create new components of the two models.
I make an assembly of the two parts of the mold to make sure everything looks good.
I draw a rectangle shape at the outline for the mold and use the extrude function to extrude it up to the mid-face.
I use the boundary fill tool to get all the shapes filled.
I add the pouring hole at the beginning of the petal.
I add the air vent at the end.
The design are ready for creating the toolpaths!
here you can download the files.
Toolpath and milling
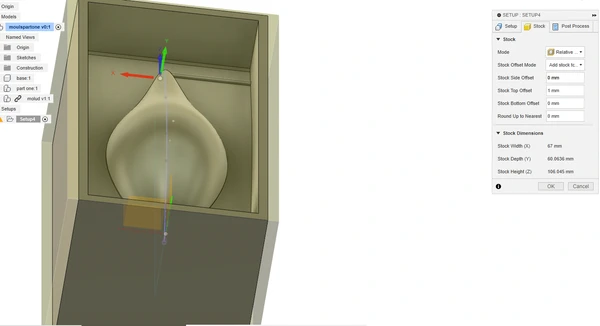
Set-up
- I create a new set-up and I put the stock side offset to 0 mm so the border of my design will be the end of the milling.
- Next I give it a top offset of 1 mm since the wax is not completely level. I select the origin on top of the stock.
- I check the motors of the Lunyee and the X is in the long axis and the Y the short. I will change the origin to match this orientation.
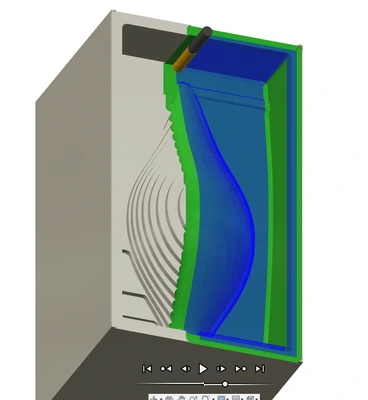
Toolpaths I play around with different kind of 3D toolpaths since this will be my first using the CNC for making a 3D object.
- I tested the following toolpaths:
- 3D pocket
- 3D adaptive
- 3D parallel
- 3D morphed spiral
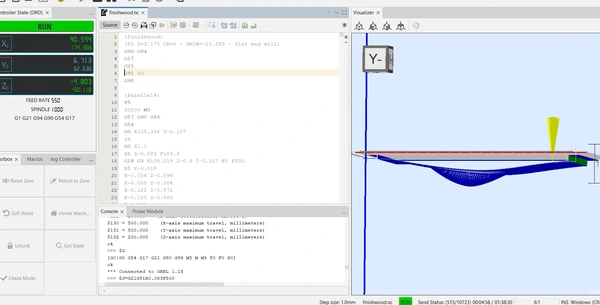
Here you see a roughing 3D pocket toolpath
 Here you see a finnish 3D parallel toolpath
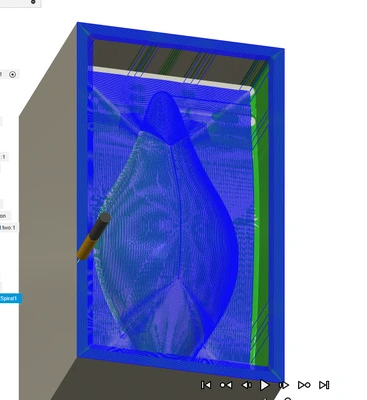
 Here you see a finnish 3D morphed spiral toolpath
For feeds and speeds I had a loot at this page from MIT about chip load speeds and feeds and this video about CNC machining machining Wax. I also asked Edwin about his findings and then I started experimenting I end up using the following settings for the mold testing Machinable Wax and limba wood.
| material | path | step down mm | stepover mm | XY speed mm/min | RPM | chipload mm | tool mm |
|---|---|---|---|---|---|---|---|
| Machinable wax | 2D face path | 2 | 1.5 | 3000 | 9000 | 0.17 | 3 endmill |
| Machinable wax | 3D roughing path | 2 | 1.5 | 2000 | 5000 | 0.2 | 3 endmill |
| Machinable wax | 3D finnish path | - | 0.31 | 1000 | 3500 | 0.14 | 3 endmill |
| Wood (limba) | 3D roughing path | 2 | 1.5 | 550 | 2500 | 0.11 | 3 endmill |
| Wood (limba) | 3D roughing path | - | 0.31 | 550 | 2500 | 0.11 | 3 endmill |
Stock to leave: I used 0.5 mm stock to leave for the roughing paths.
I used these endmills
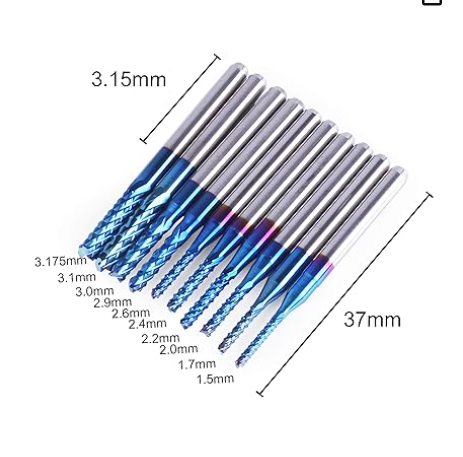 .
.After generating the toolpaths within the post process step I choose Grbl as processor. this creates a .nc gcode file similar as mods. I opened this file inside UGS and deleted the G28 within the first part of the code so the machine wont home again when you start. I wont go i depths about zeroing and stuff like this because I already did in week 4, electronic production! :D

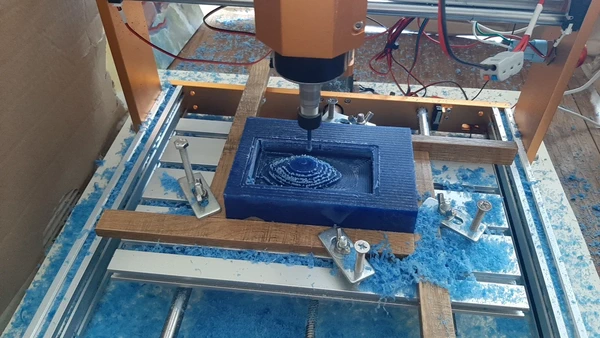
After milling the first part from wax I realize my plan to turn the block of wax around for the second part is a big tricky since it’s milled more than halfway through… So new plan is to make it with wood. It’s good practice for me and I want to mill a wooden base for my final project to so I just go for it. I have a piece of limba wood that is light in weight and I will use this for the second part of the mold.
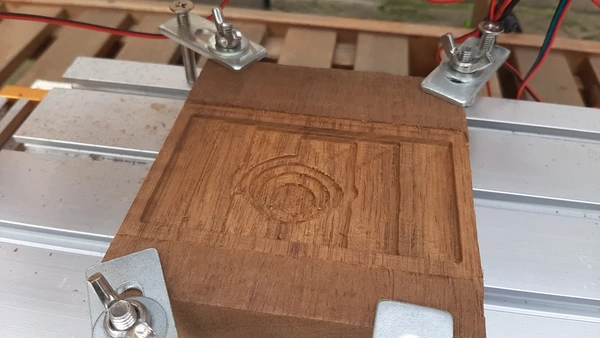
the actual milling - biggest lessons
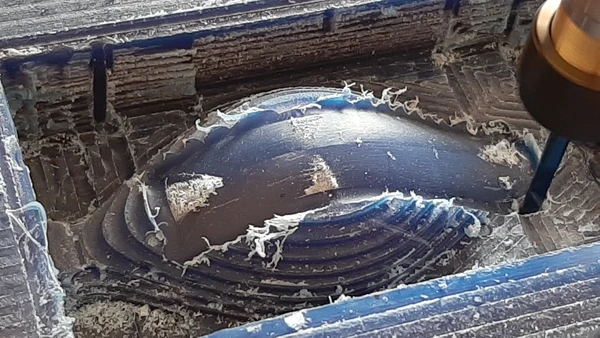
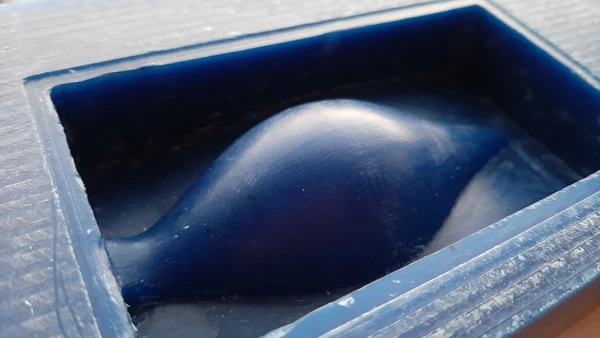
- I don’t think I have found the perfect settings but I made it succeed. I had to clean up the mold a bit after it was finished I think I generally milled a bit to slow. Since the way sometimes got to hot and the woodchip was on the tiny side.
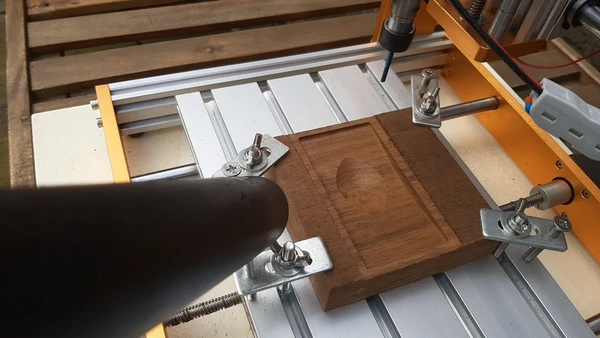
- I have learned that the toolpath has much influence for failures or success. For example with milling wax when the milling bit it lifting next to a wall of way slowly moving upwards it can melt the wax so you want to prevent this. I ended up changing the finnish toolpath from parallel to morphed spiral and now i did not have this problem.
- When ever I did not trust something for example if the bit would get clogged I would pause the machine in UGS put of the spindle check the bit and start again. this took me much time but I like so be on the safe side because i’m new to it.
- I messed up big with leveling accidentally filling in 12 mm instead of 1.2 mm for a step down.. I was surfacing the top of the wax when this happened.. thank god it was wax and I found the power of button fast enough but you need to keep paying attention to every detail with this machine!
- Trying some new stuff with the wood I went for the adaptive toolpath but this took so much time I switched after it milled the first two layers back to 3d pocketing for the rough cut.
Resin printed mold
During week 9 output devices I designed new beveled gears also to maybe use for the final project. And I did not do anything with it yet. I quickly designed the mold by simply adding a round shape with a boundary to later pour the silicon. I first try to generate toolpaths for milling in Fusion360. But after a closer look I see the design has small undercuts. I use the draft analyses function to check if it’s a release design. It’s not. Because of the undercuts, it can only be milled with 3 axis. 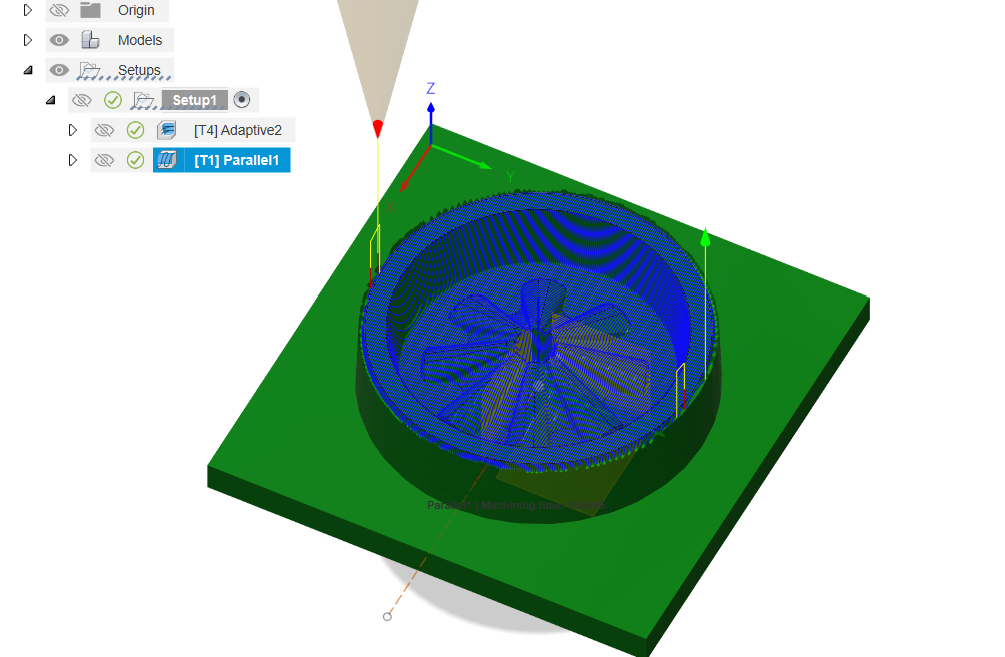
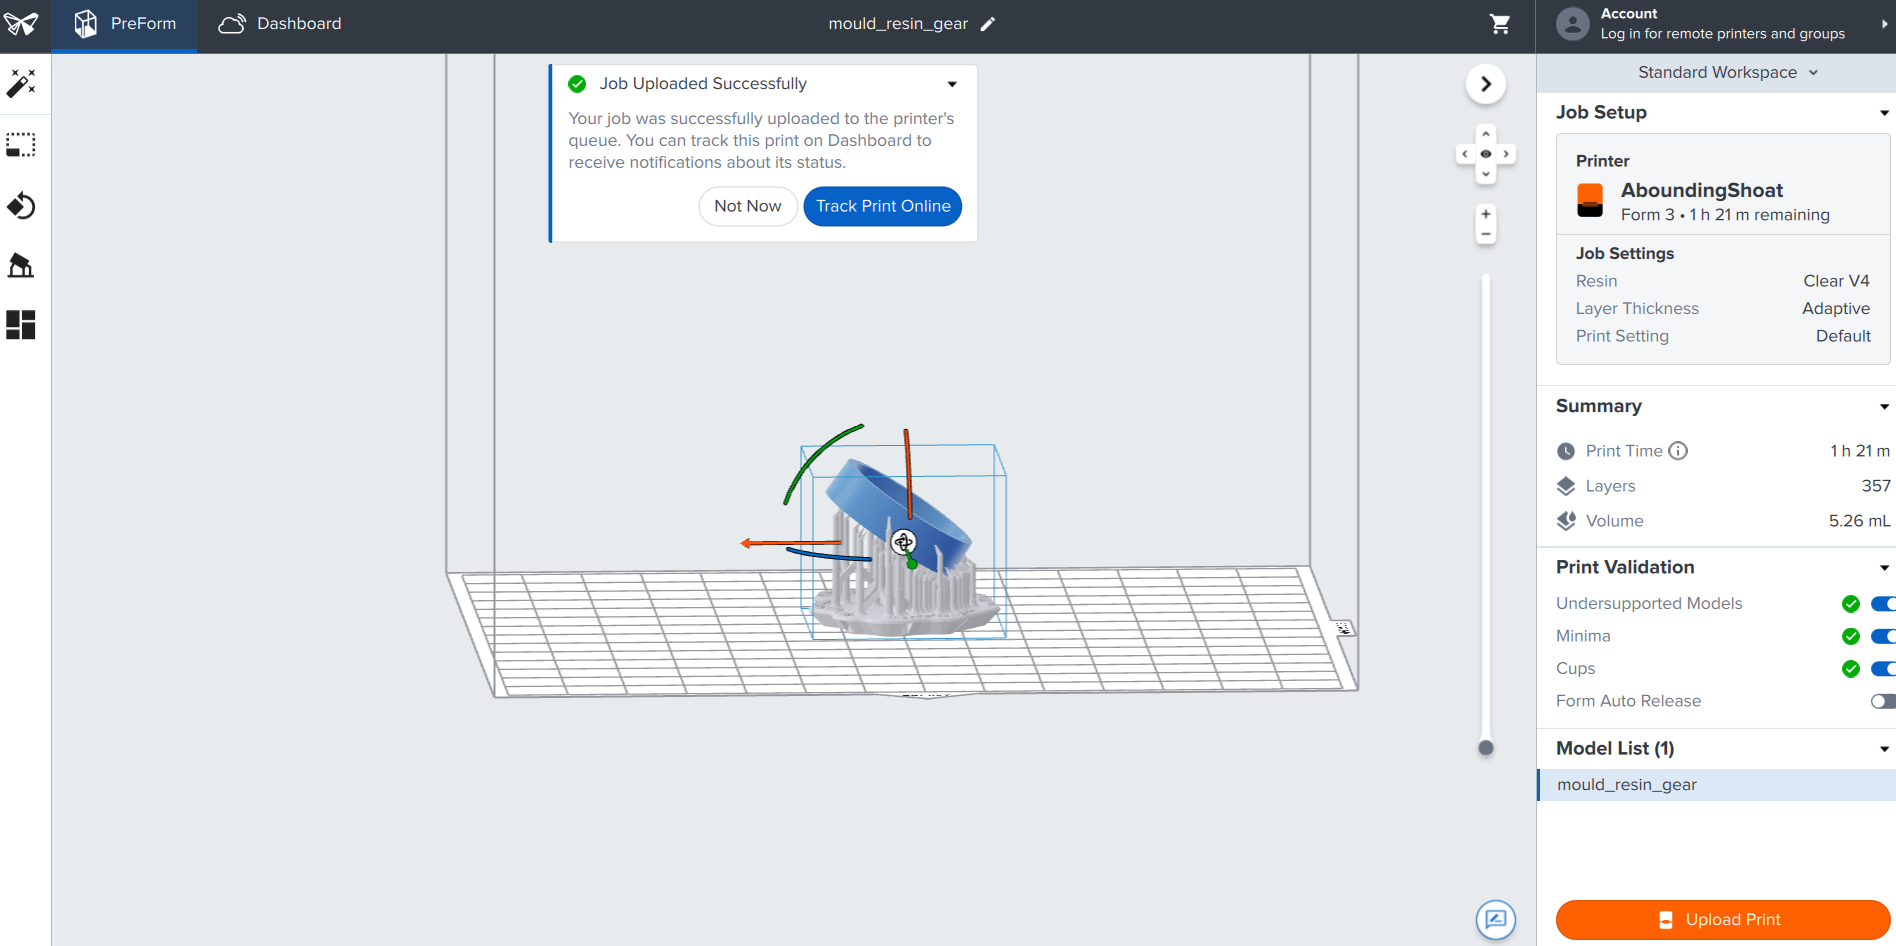
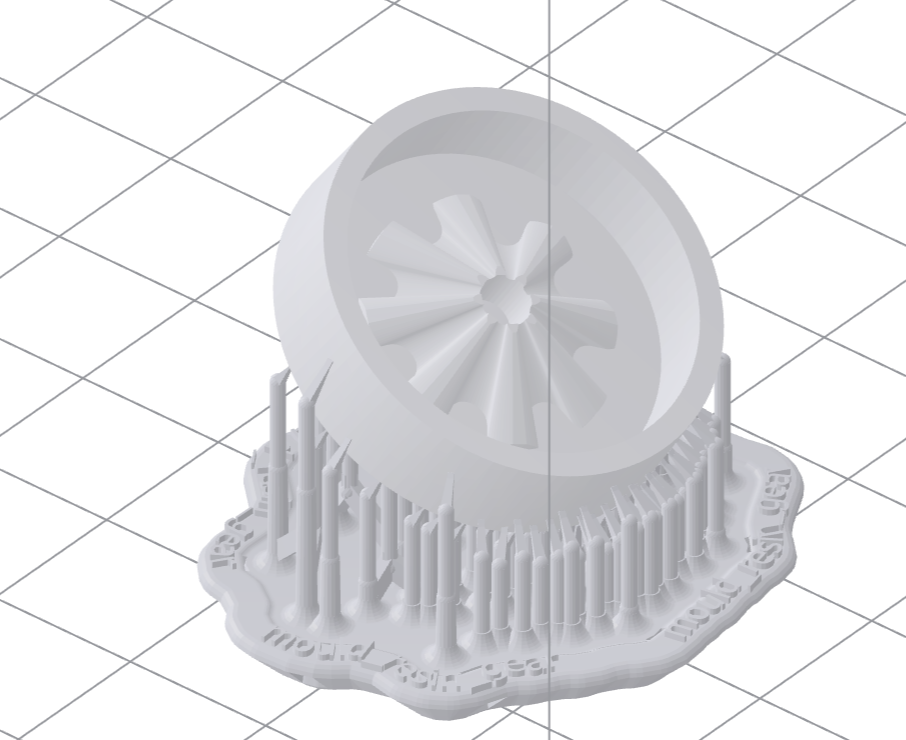
It’s a super small detailed object so I thing it would be great to use the SLA printer for it. I Use the Form3 SLA printer from Formnlabs situated at Fablab Arnhem for this design. I print it in clear resin using adaptive layerheigt I tilt the design slightly to prevent cupping and start the print. When It’s finished I make sure to wash it thoroughly using Isopropanol alcohol and the form wash. I cure the design using the form cure.
Casting
Silicon mold
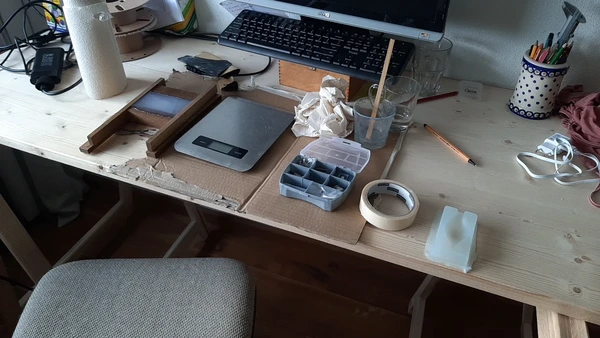
- I start with casting the dragon skin10 medium silicon from Smooth on that I took with me from waag. I use it for the wax and wooden base. I use the following equipment:
- scale
- buckets
- wooden stick for stirring
- gloves
- paper towel
- cardboard for the table
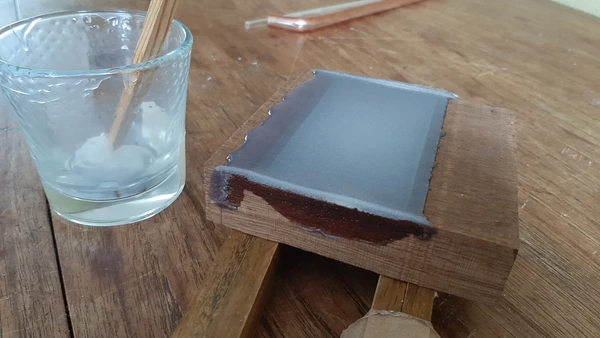
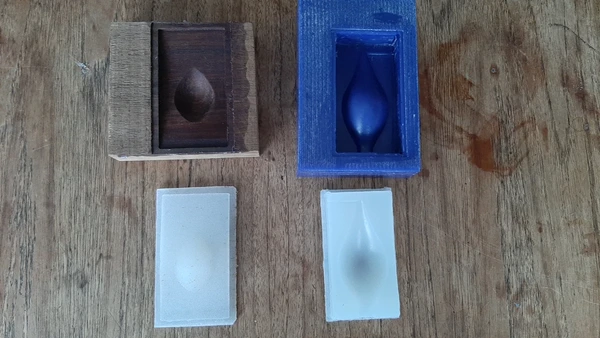
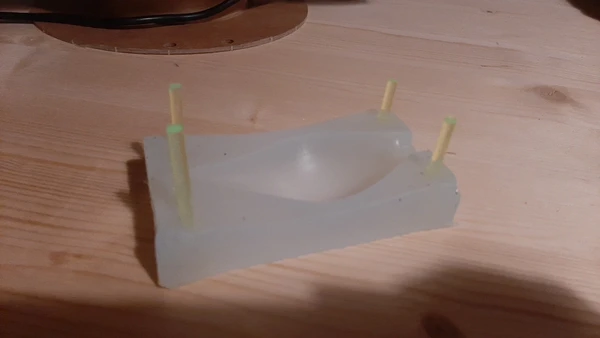
The wood and silicon are not a happy match you can see on the picture that the wood absorbed the silicon. Also i did not have a vacuum pomp to suck out air and it seems the air bubbles happily attached to the wood so it’s making the surface structured with tiny air bubbles.. however the wax mold seems to came out nicely.
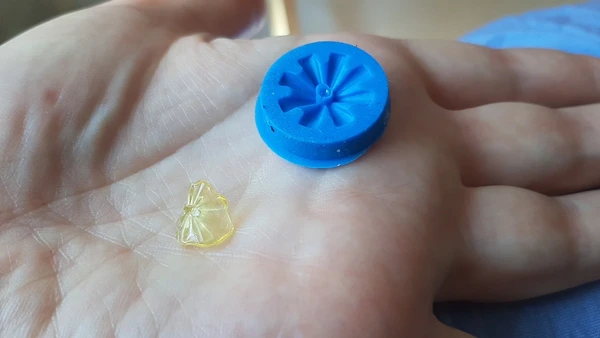
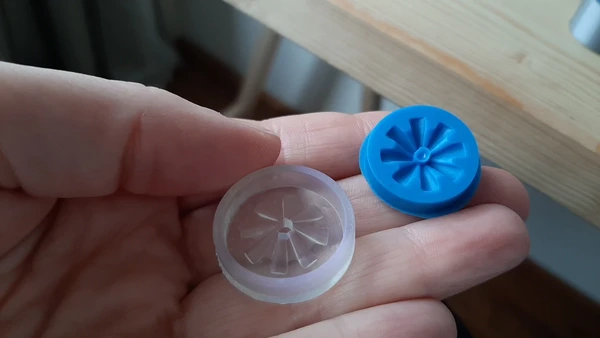
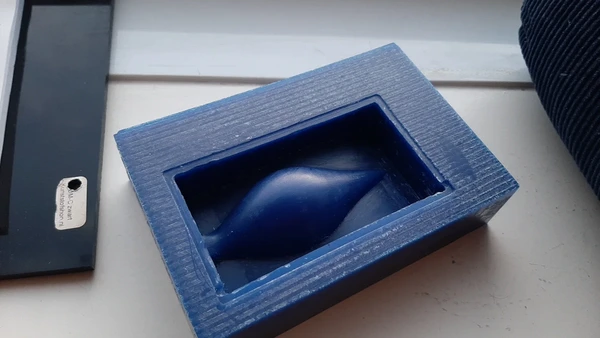
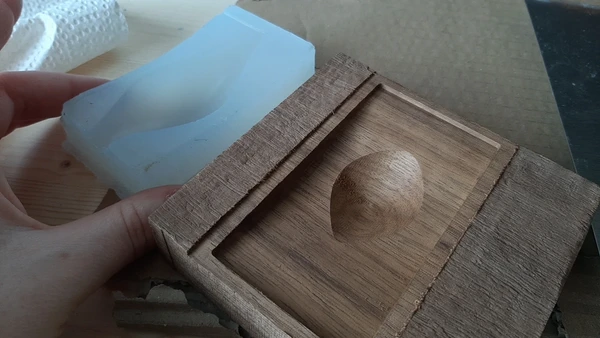
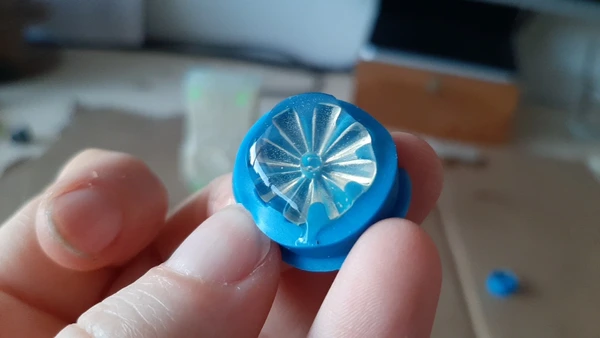
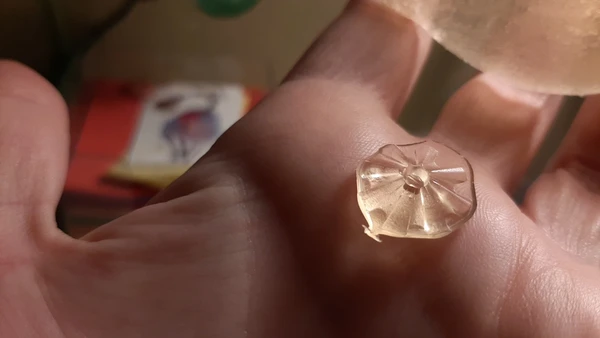
- For the 3D printed mold of the beveled gears I’m using Eurosil 22 blue silicon. It sets much quicker than the Smooth on dragon skin and it’s a left over from work so i can finnish this can with the tiny bit I need for this project. the mold came out great! I like the blue color because it’s clear to see there are no air bubbles on the surface.
Bio Resin
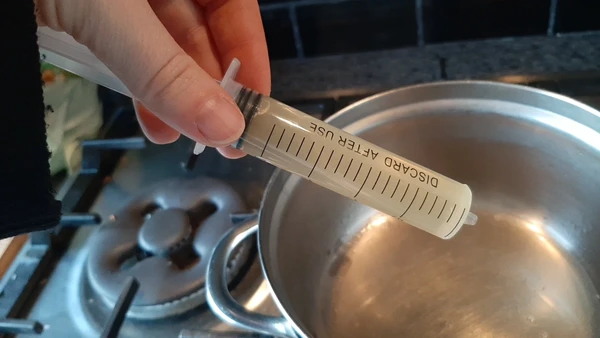
I prepared the mixture using 1/4 of the amount I made with Joany. Using the following:
- -60 ml water
- 2 gr glycerine
- 12 gr gelatine
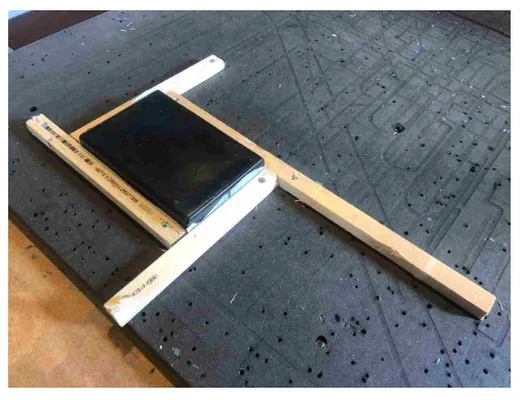
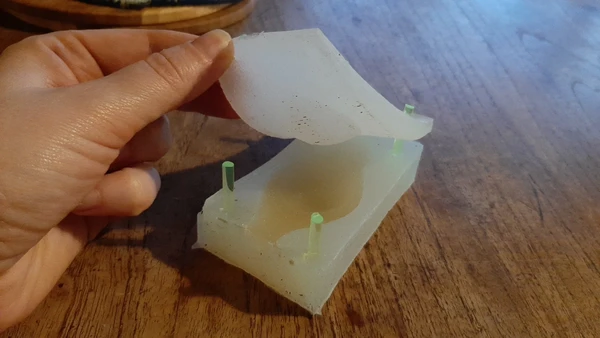
I pour the mixture in the mold using a syringe and hold my mold together using a bit of tape and a few stick that I pouched through after drilling holes.
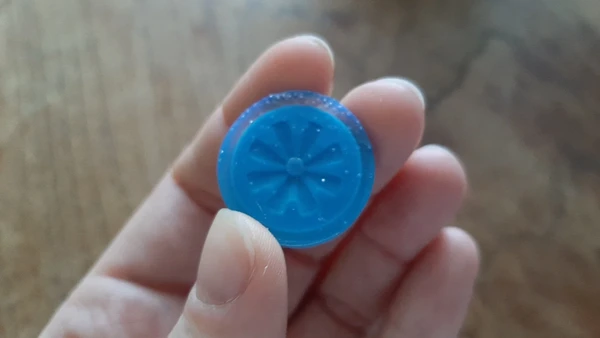
 . I filled the mold and after about 30 min I gently take the shapes out. the material still needs water to evaporate it’s now like a gummy bear but I can inspect the shapes already because it’s set. I see lots of bubble prints on the bioresin coming from the wooden silicon mold part. Bit bummed about that but besides that the shape came out looking really nice and the air vent did it’s job. I wil let it dry for a couple of days now and see what it will look like.
Reflection
In the post above I already typed a lot about thing I learned this week. I had much fun working with the Lunyee CNC at home. I’m really happy I got to try so many different materials since the start of the Fabacademy! The casting part I could have done better. I should have used the vacuum bucket for the dragon skin to get rid of bubbles and the bio resin was a fun experience but it will deform when drying so for a lot of applications it won’t be a solution. But after reading the data sheets of al the casting material and my epoxy allergies it’s nice to work with gelatine and glycerine for a change! After the local review I got asked why I did not coated the wood before pouring the silicon, good question.. I should have done that, it would have given me a better surface finnish! I could have used spray putty to do this.
Here you can see the biomaterial after a few weeks, the small gears shrunk to one third of it’s original size. So did the petal. They both started to warp. But the good news is it did not grow fungus, the samples we made at Waag did, so I threw them away but these didn’t. At home I was able to work cleaner and prevent this!