
Week 05
3D Scanning and Printing
Brief Overview
Welcome to Week 5 of FabAcademy! This week's assignment delved deep into the world of 3D printing and scanning, broadening my understanding beyond my existing hobbyist knowledge. I explored the fundamental differences between additive and subtractive manufacturing, delving into the design constraints and rules specific to 3D printing. The exploration further encompassed various materials, processes, and printer types, equipping me with a foundational understanding of this versatile technology. Hands-on experience played a crucial role in solidifying my learning. I actively participated in both individual and group projects, utilizing 3D scanning and printing equipment. Overall, this week's exploration solidified my passion for 3D printing and equipped me with the necessary knowledge and skills to integrate it into my final project. The learning outcomes encompass not only technical understanding but also the ability to translate theory into practice, making this an invaluable experience.
My Heroshot for this Week
.jpeg) |
.jpeg) |
 |
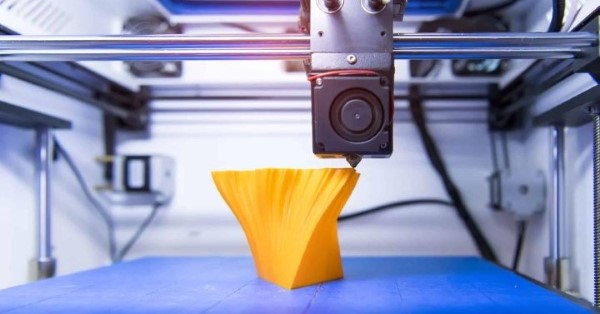
Manufacturing: Foundations for 3D Printing
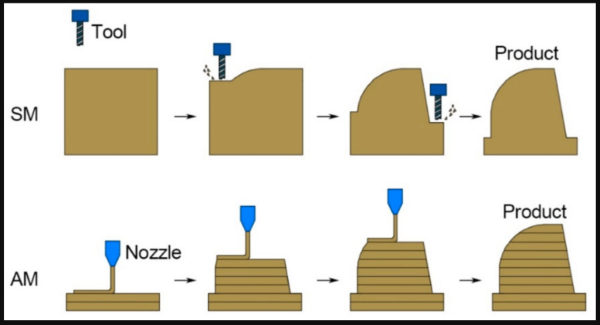
Manufacturing encompasses the diverse methods used to transform raw materials into finished goods. Traditionally, these processes relied on subtractive manufacturing, which involves removing material from a block to achieve the desired shape. This includes techniques like machining, milling, and drilling, often resulting in significant waste.
However, the emergence of additive manufacturing, also known as 3D printing, introduced a paradigm shift. Instead of removing material, 3D printing builds objects layer by layer, adding material until the desired form is complete. This allows for unparalleled design freedom, intricate details, and minimal waste.
While both subtractive and additive manufacturing have their strengths, 3D printing's ability to create complex geometries with minimal waste makes it particularly well-suited for rapid prototyping, customized products, and applications requiring intricate structures. It offers a valuable tool for both industrial and individual creators, pushing the boundaries of what's possible in the realm of manufacturing.
Subtractive vs. Additive Manufacturing:
This week there are two types of assignments, one group and one individual.
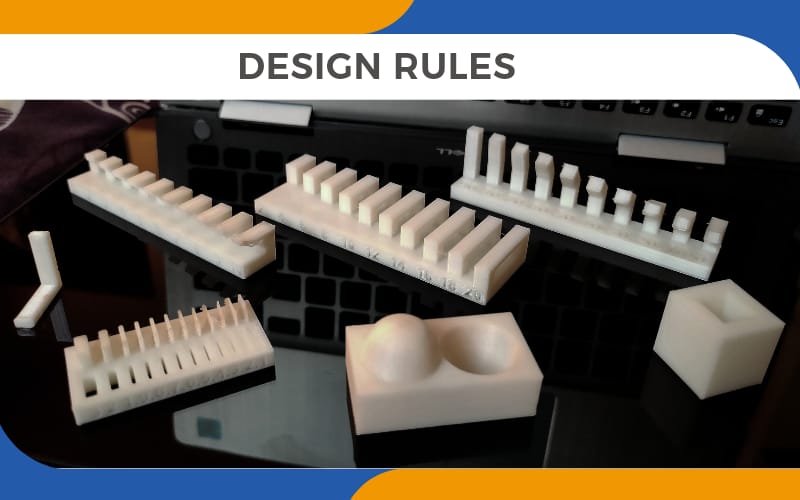
Group Assignment :- Design rules for your 3D Printer
During this week's group assignment, our focus was to test the sample design rules file to know about the capabilities of our 3D printer. The primary objectives of the group assignment were as follows:
To test design rules on our 3D Printer
To Document our work and explain what are the limits of your printer
Our understanding from test print the design rules
3D design and print a object on 3D printer which cannot be made easily by substractive manufacturing
3D Scan an Object and (optionally) try to print it
Visit our Group assignment page here
Group Assignment Brief:
- Gained a comprehensive understanding of additive vs. subtractive manufacturing, including principles, processes, equipment, achievable complexity, producible features, material suitability, and finishing requirements.
- Explored the advantages and disadvantages of FDM (Fused Deposition Modeling) and various materials used with it.
- Familiarized with the features and operation of the Fracktal Works Julia Advanced 3D printer, including control panel functionalities.
- Successfully tested design rules by printing components and the 3Dbenchy model using PLA filament, comparing printed objects with reference dimensions.
- Learned the process of generating G-code for 3D printing using Fracktory slicing software, including loading STL files, setting parameters, and generating G-code for each object.
- Gained practical experience in setting up the 3D printer, including bed calibration, temperature control, flow rate and feed rate adjustment, and filament extrusion.
Overall, the group assignment provided valuable hands-on experience with 3D printing technology, allowing us to understand the process, experiment with different functionalities, and gain insights into the capabilities and limitations of our specific 3D printer.
Individual Assignment:
Design and Printing a Part which cannot be easily made by substractive method
So to start with this I have tought of designing my Final Project Part
For my project I have designed a mounting part for my scarecrow body, I have already designed it in computer aided design week
.jpeg) |
.jpeg) |
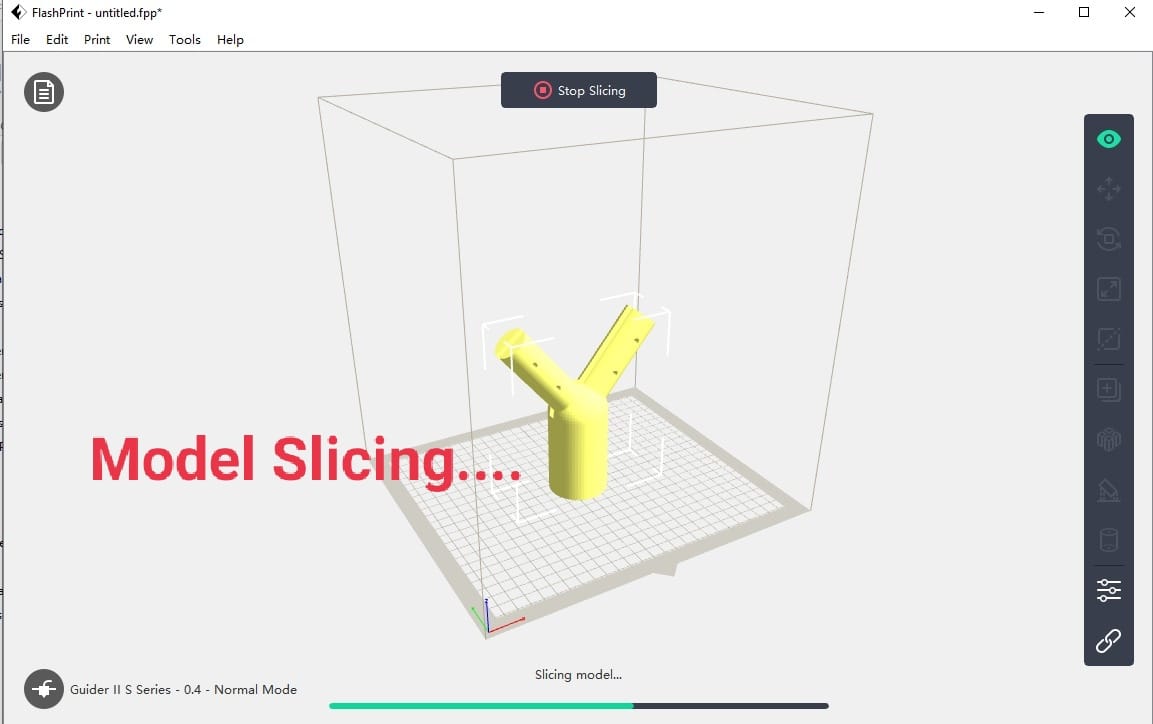
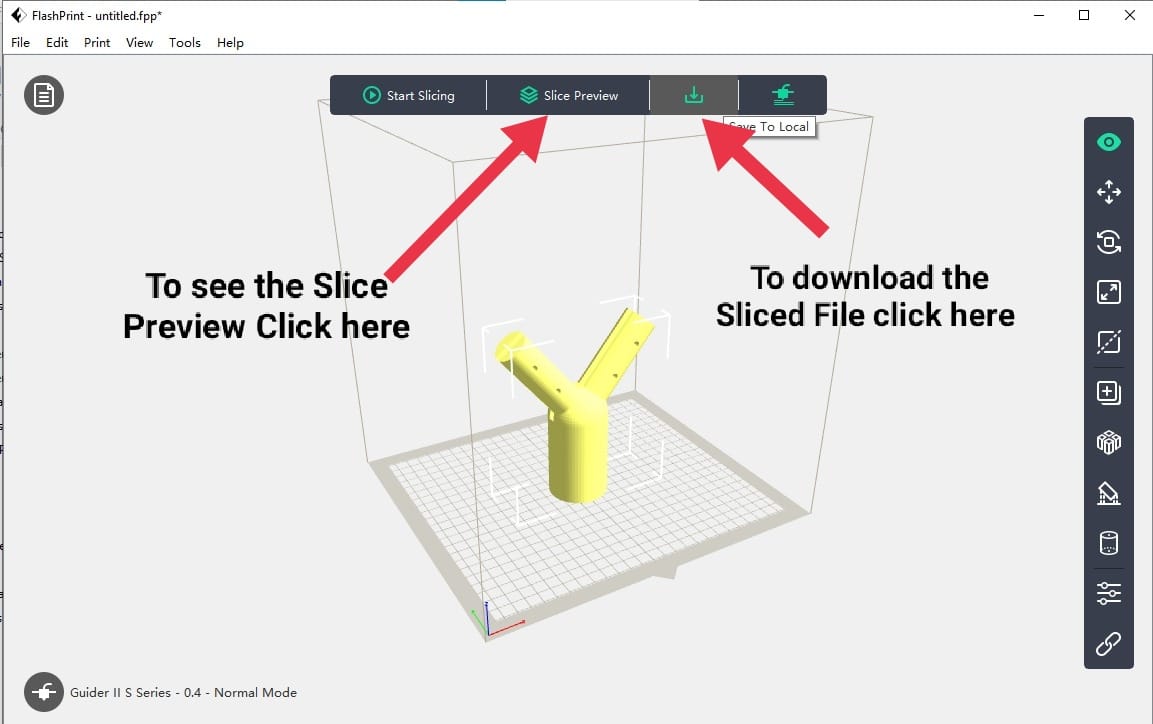
Slicing the part in Slicer and generating Gcode for sending to printing utility
Know your Slicer
Open the Slicer Software : I have printed this part on Flashforged FDM 3D printer
So I have sliced and genrated a G code on Flashprint 5.0 software
.jpeg)
Select Machine Model and Nozzle Size
.jpeg) |
.jpeg) |
Load the Model File (.stl, .obj, etc)
.jpeg) |
.jpeg) |
Adjust the required Parameter from the sidebar menu as per you requirements
.jpeg)
Once the parameter are set click start slicing option at the top of the page.
.jpeg)
The slice window open now, select the slicing parameters and hit the Slice button at the bottom right corner.
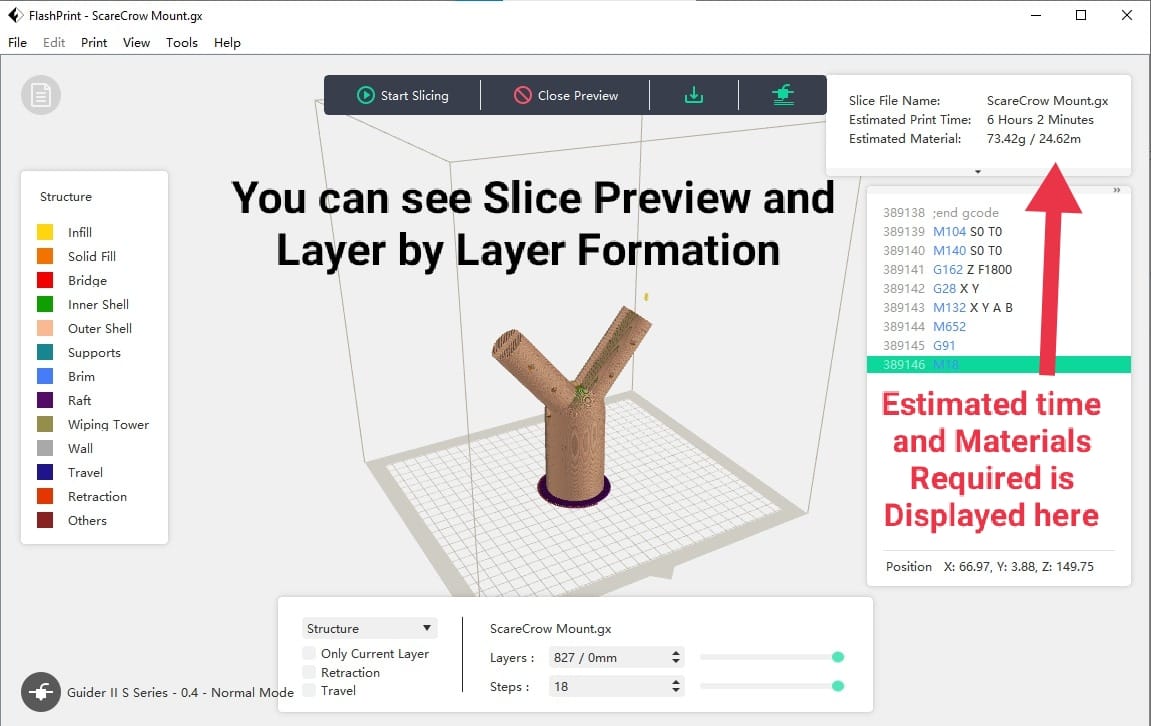
Download the file and send it to 3D printer.
Final Object Ready
 |
.jpeg) |
3D Scanning and Photogrammetry
3D Scanning
3D scanning involves capturing an object's exact shape and dimensions to create a digital representation. It works by projecting beams of light or other forms of energy onto its surface and measuring how they reflect back.
Types of 3D Scanning Techniques
- Structured Light Scanning: Projects known light patterns (lines, grids) onto an object, studying the deformations to acquire 3D data. Well-suited for precise, close-range scans.
- LiDAR (Light Detection and Ranging): Uses lasers to measure distances, generating point clouds of the scanned object. Excellent for large-scale scanning (buildings, landscapes).
- Time-of-Flight (ToF): Similar to LiDAR, but determines distances by measuring the time it takes for a light pulse to return.
Applications
- Reverse Engineering: Creating CAD models from existing physical objects.
- Quality Inspection: Checking product dimensions against specifications.
- Healthcare: Designing custom prosthetics, medical aids.
- Cultural Preservation: Digitizing historical artifacts and structures.
- Entertainment: 3D models for movies, VR, and video games.
Photogrammetry
Photogrammetry extracts 3D information from multiple overlapping photographs of an object taken from different angles. Specialized software helps identify common points between the images to reconstruct the object's geometry.
Process
- Photography: Capture a series of high-quality, overlapping photos of the object. Good lighting and coverage from different perspectives are key.
- Software Processing: Photogrammetry software analyzes the images, identifies common points, and calculates their positions in 3D space.
- 3D Model Generation: The software combines the calculated points to create a dense point cloud and, eventually, a textured 3D mesh.
Applications
- Surveying and Mapping: Generating topographic maps and 3D models of terrain.
- Architecture: Documenting buildings and creating as-built models.
- Archaeology: Digitally preserving artifacts and sites.
- Film and Game Development: Creating realistic environments and assets.
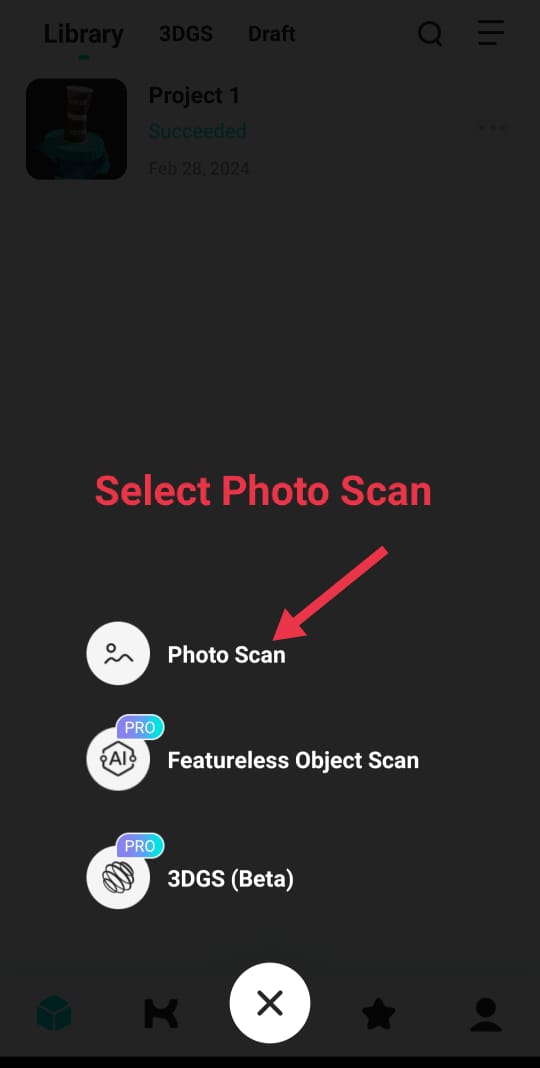
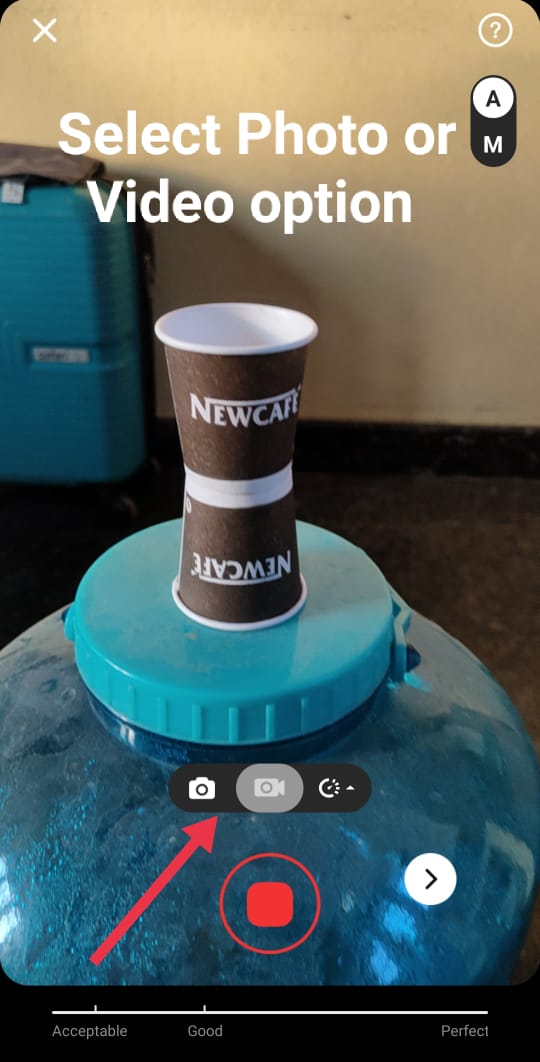
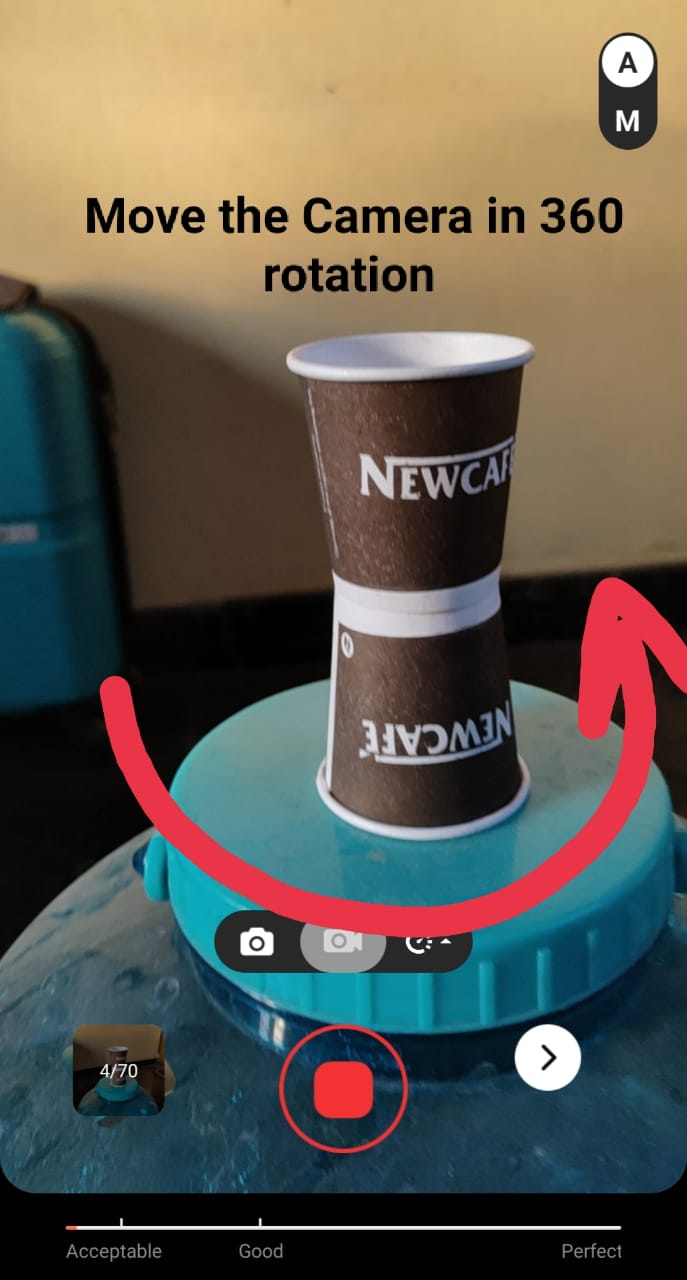
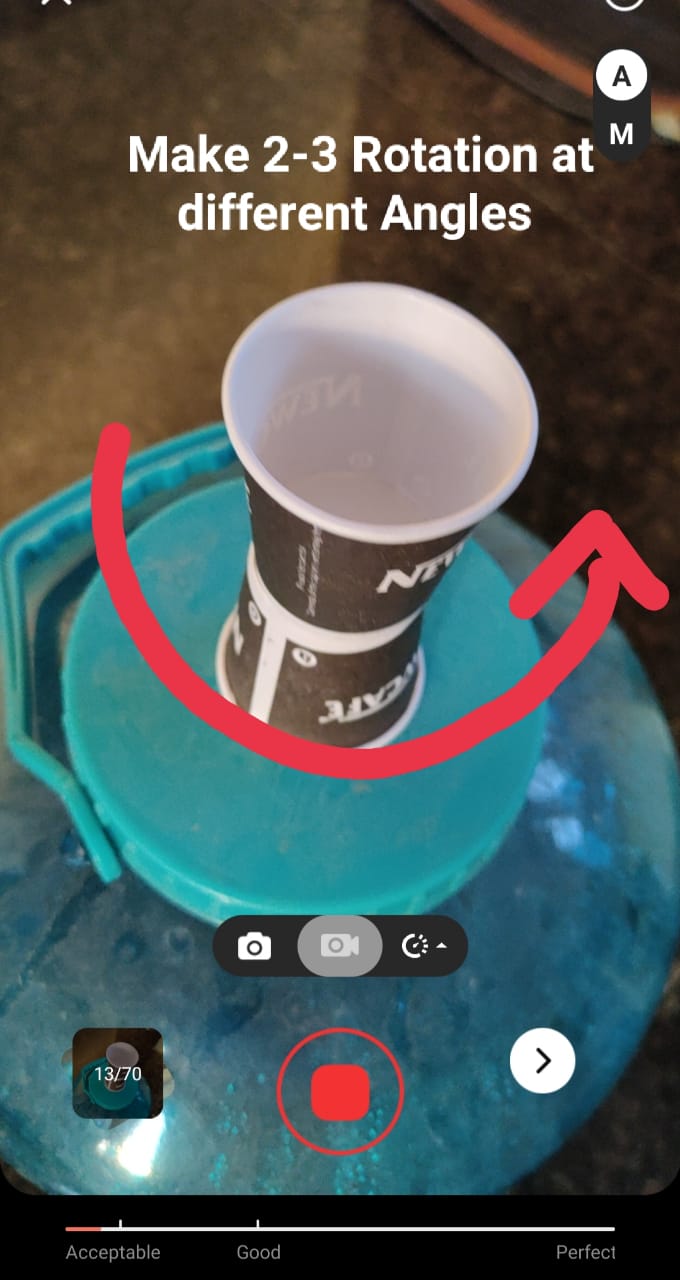
3D Scanning object on KIRI Engine Andriod Application
Scanning Object using Photos and Video Shots
 |
 |
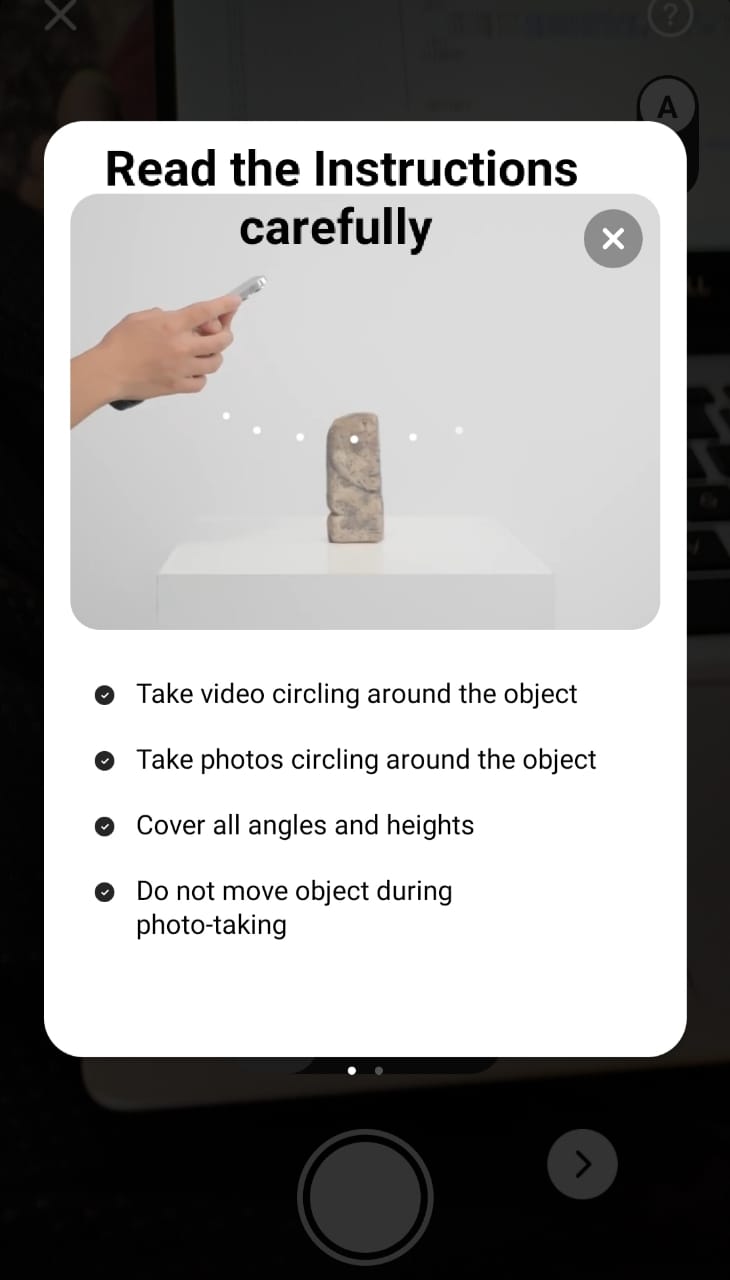 |
Collect ample of shots with different angles and resolutions
 |
 |
 |
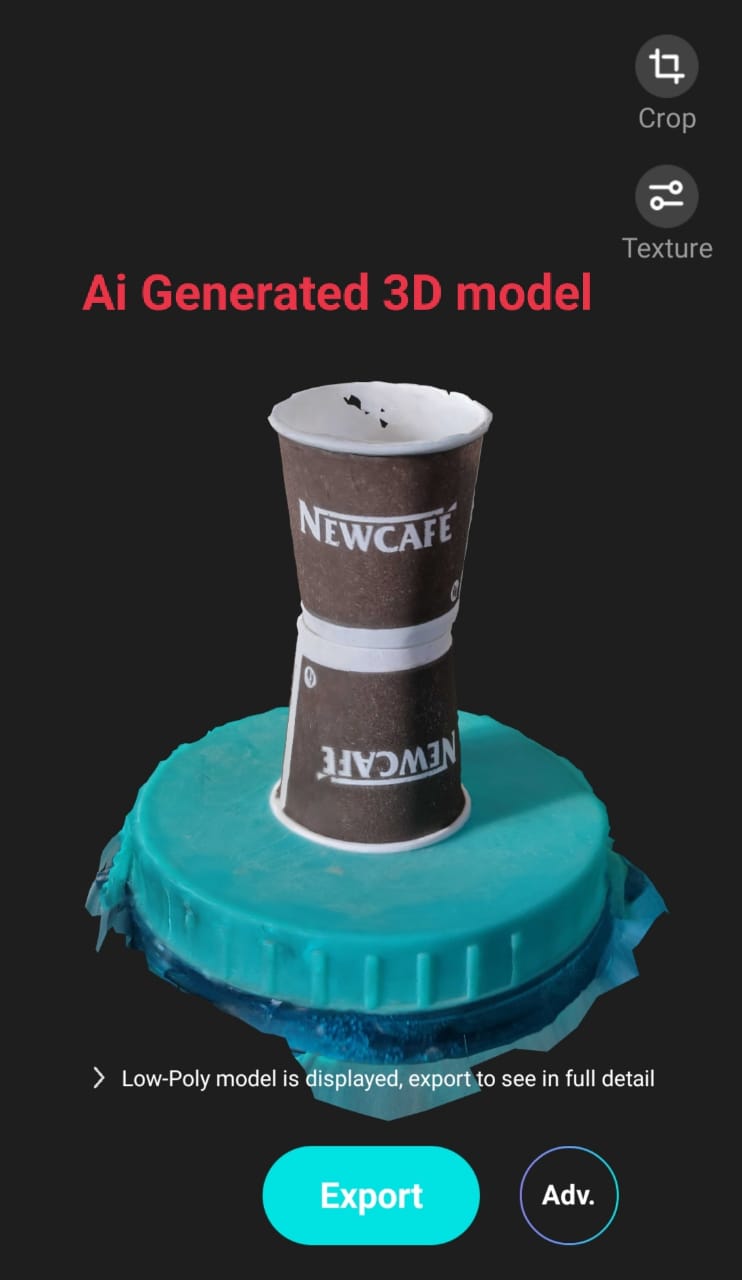
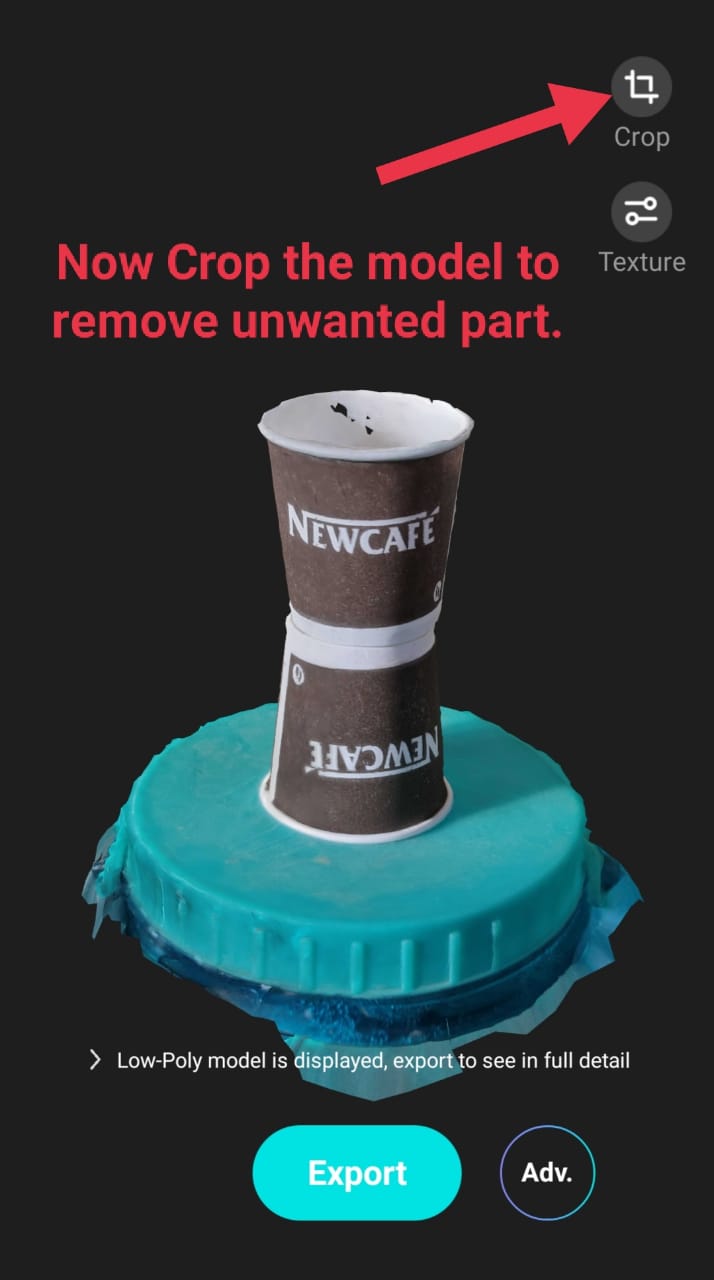
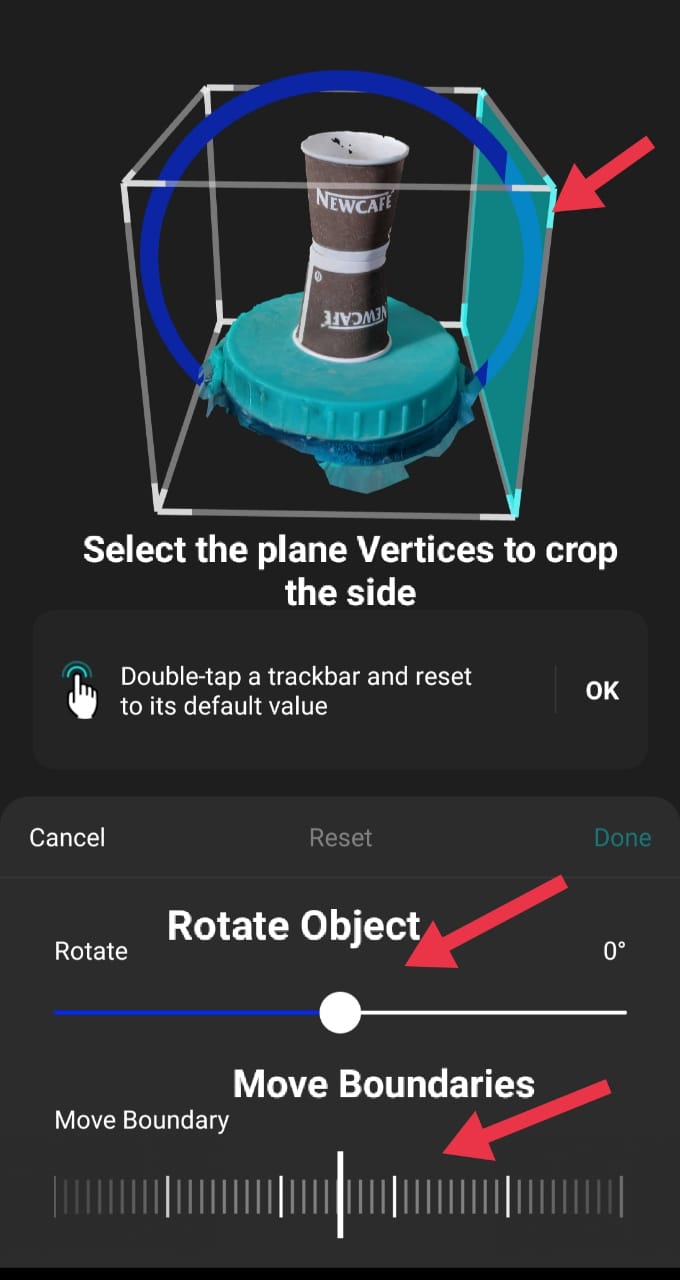
Model refining and modification
 |
 |
 |
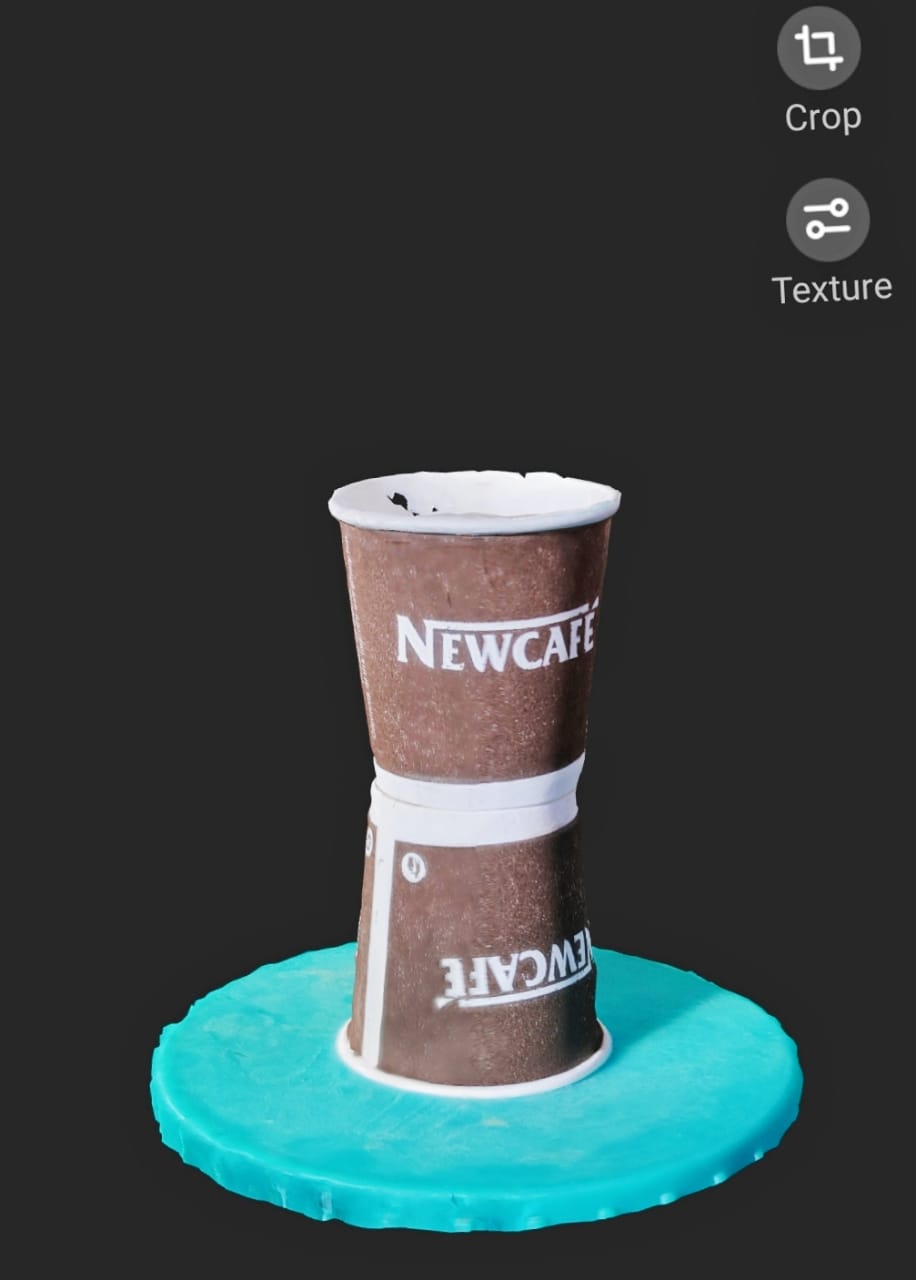
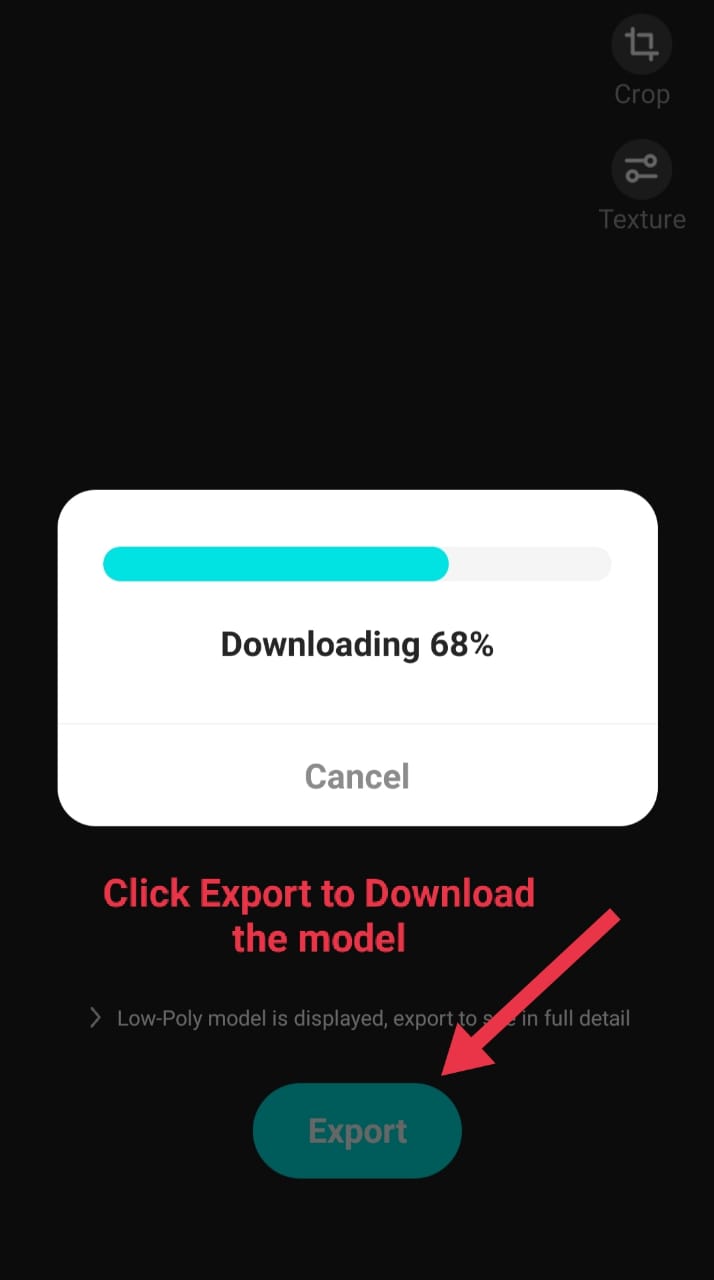
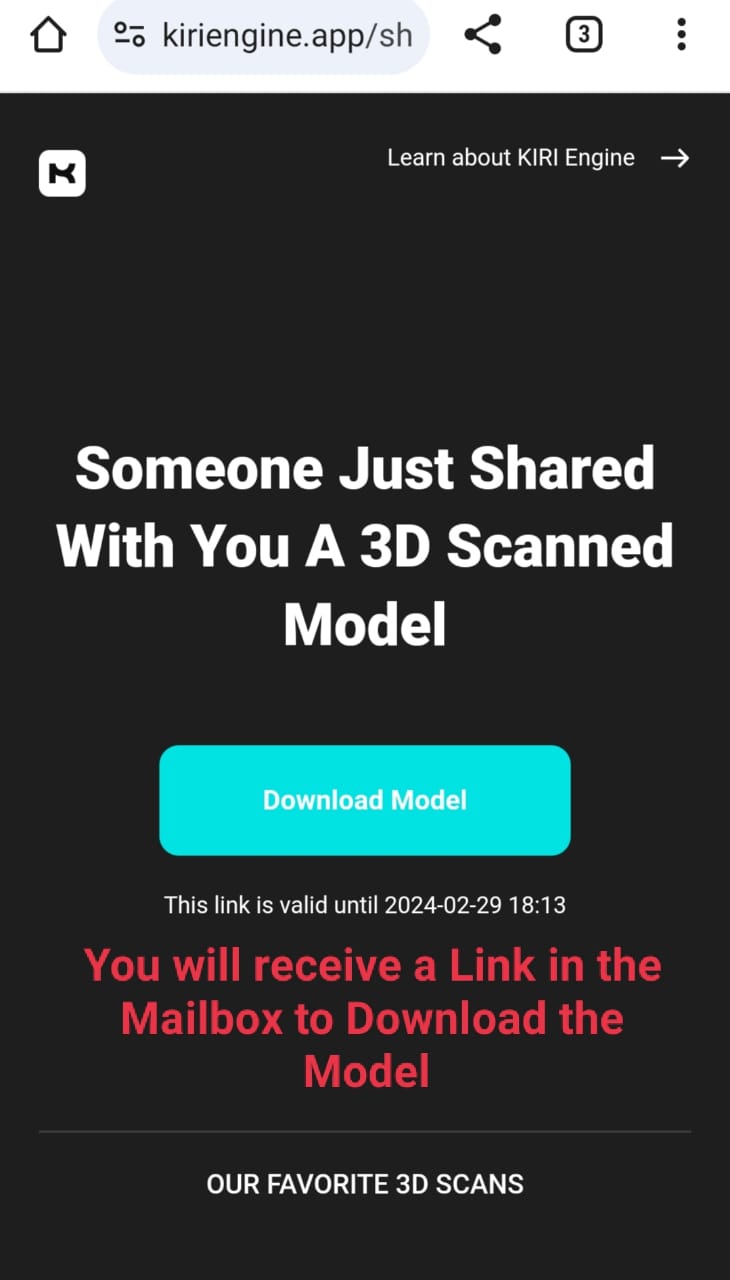
Exporting model and downloading STL File
 |
 |
 |