Week 7. Computer-controlled machining
Group assignment
do your lab's safety training
Individual assignment
make (design+mill+assemble) something big (~meter-scale)
extra credit: don't use fasteners or glue
extra credit: include curved surfaces
Individual assignment
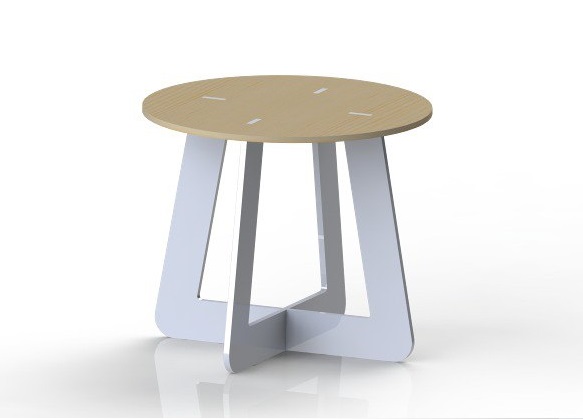
First of all, I do the design. I use Solidworks because I am more use to it. And I made this render
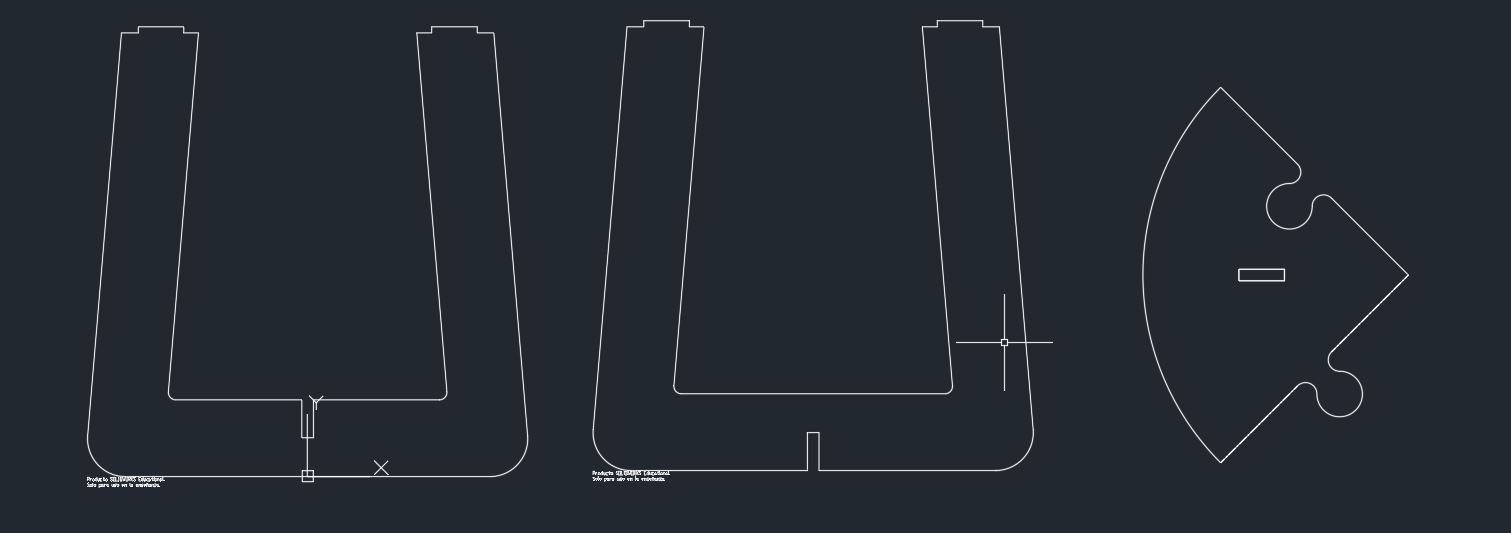
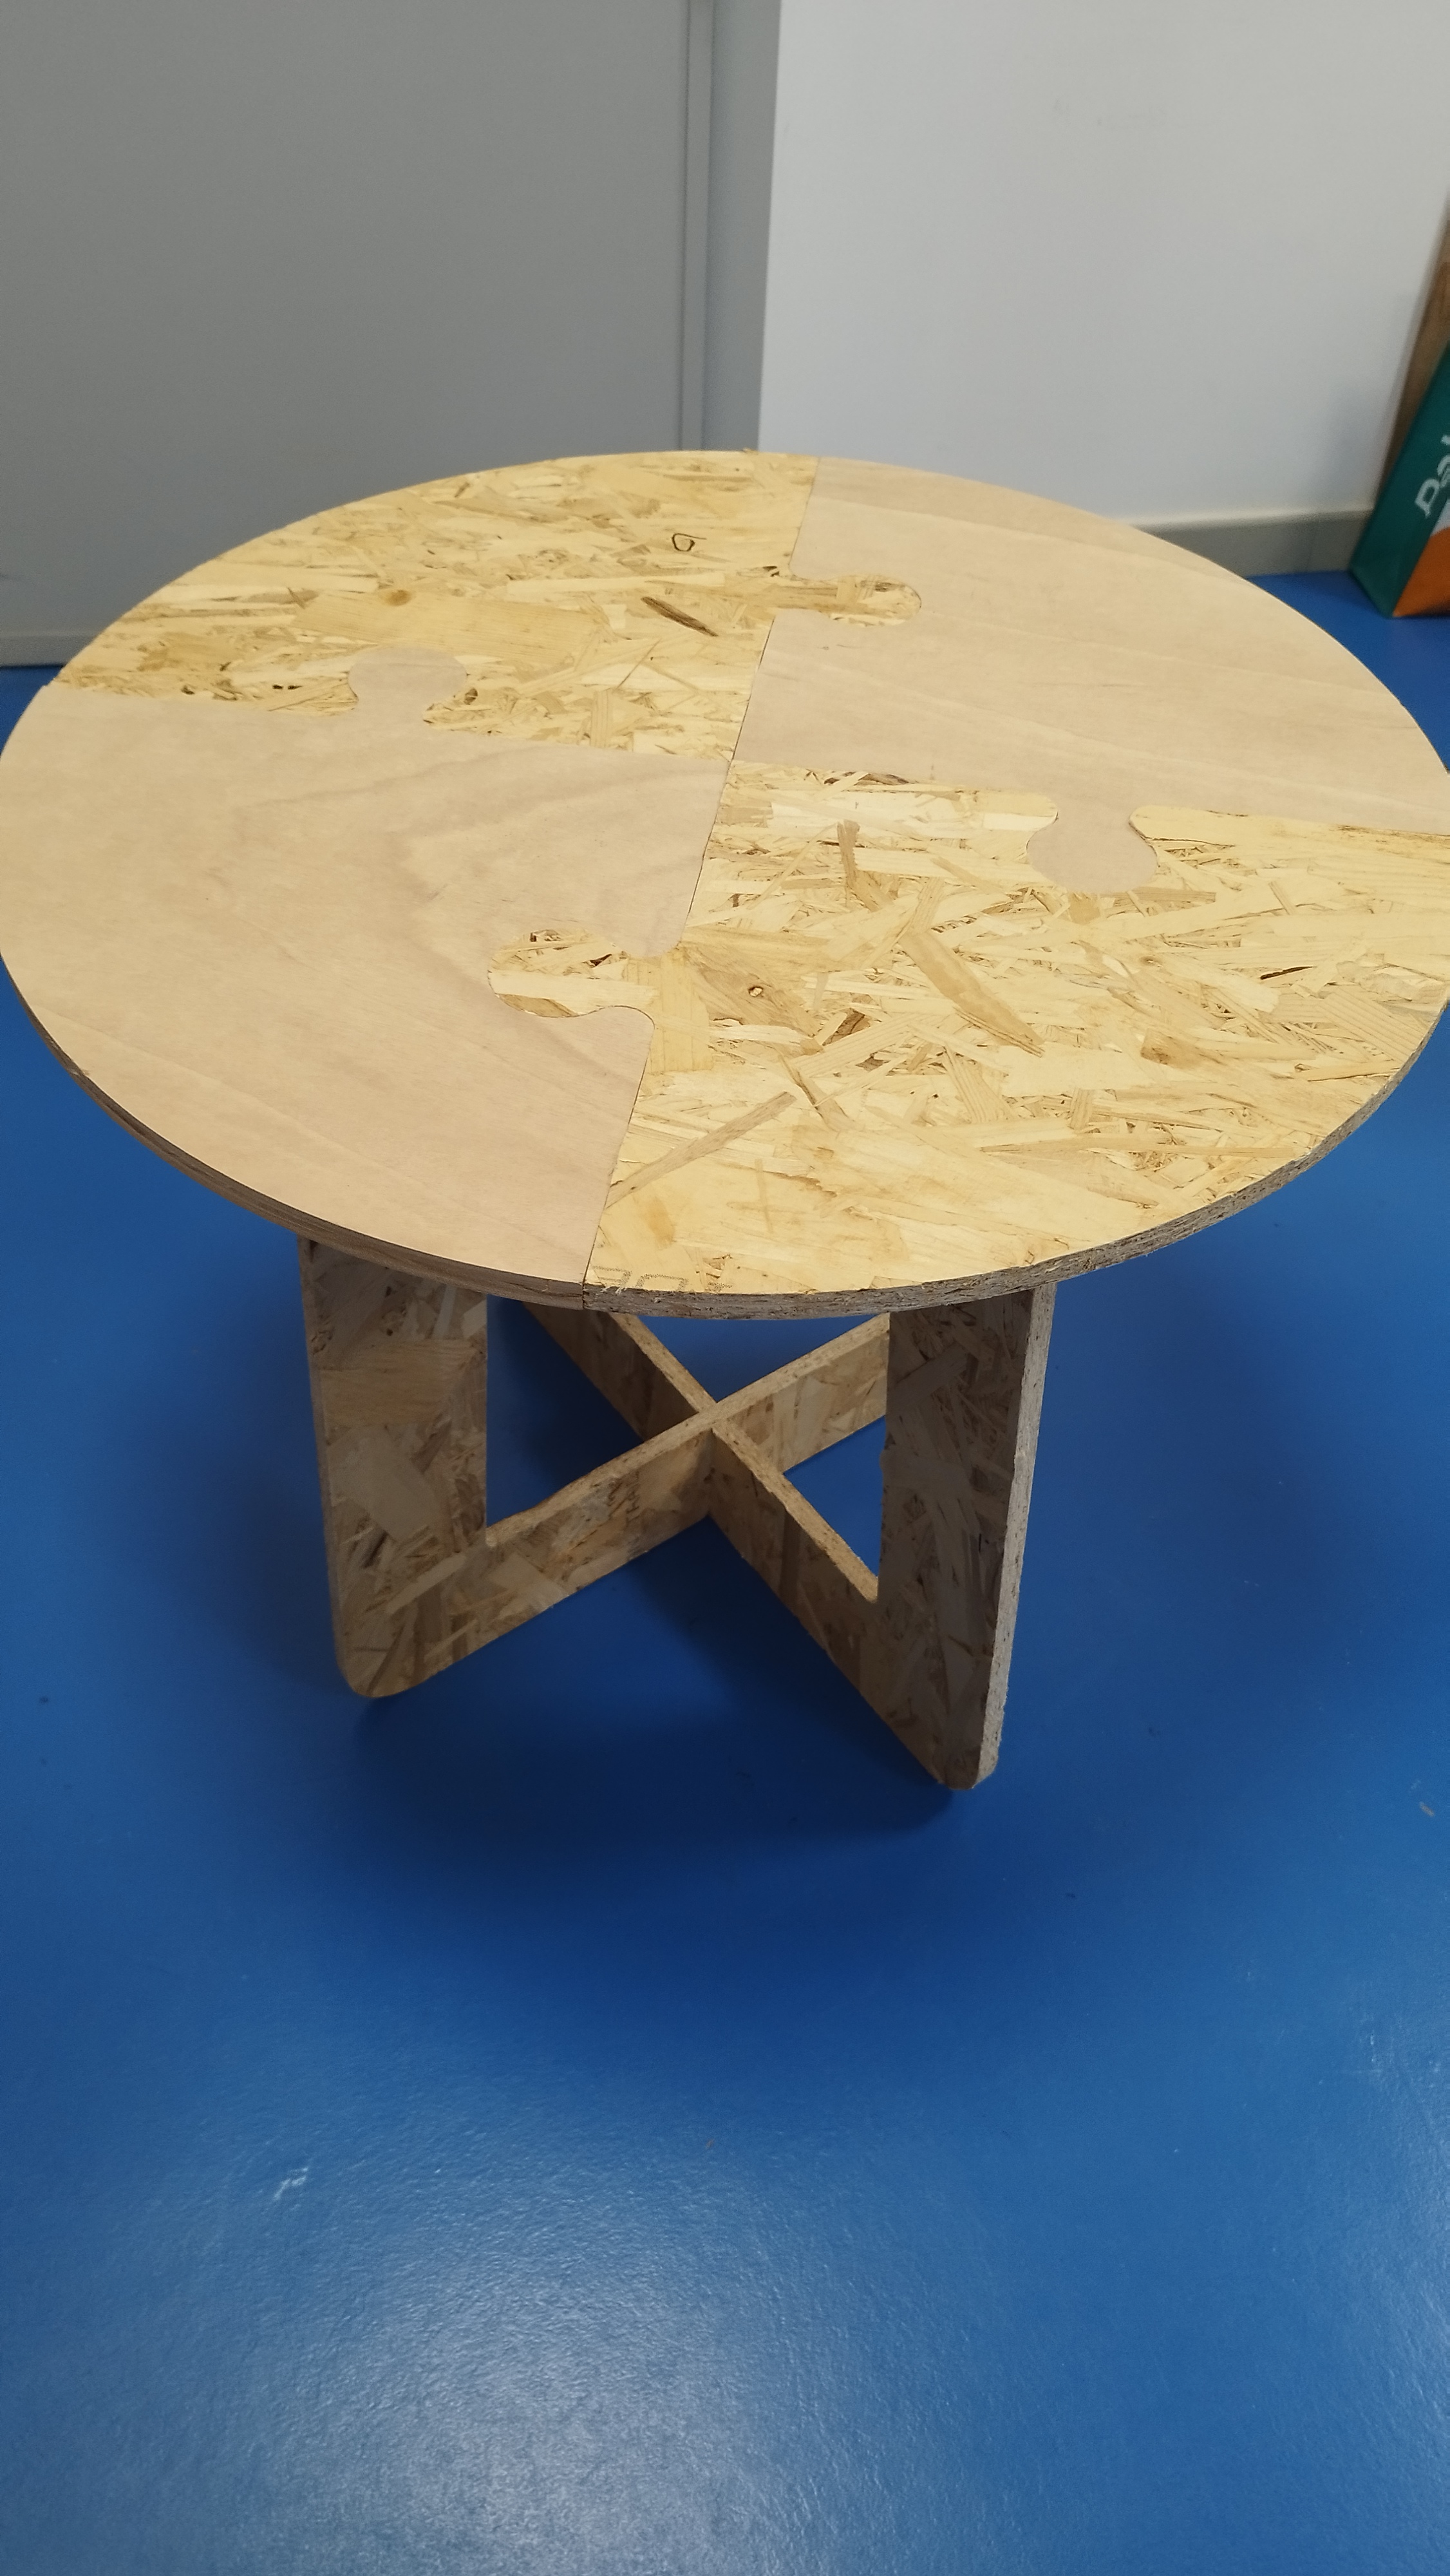
But I made a mistake, I did not consider the dimensions of the available materials. The desing diameter was 70cm and the maximum dimension was 60. So I decided to make it shorter and change the desing to a puzle.
Then I exported as .DWG
With dwg files I went to Aspire Software, to create the code for milling machine.
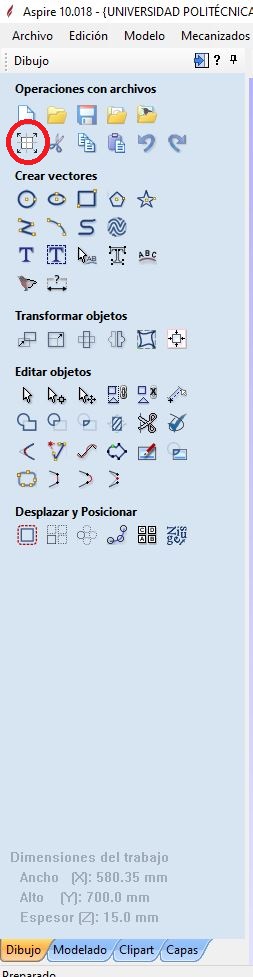
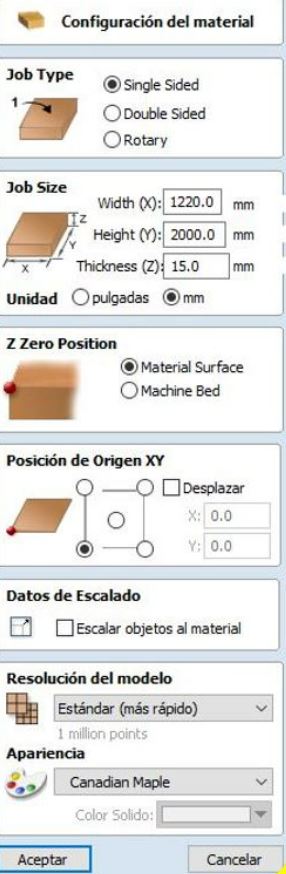
When opening the program, the first thing I do is set the dimensions of the board. To do this we can press on the following icon
Then insert the dwg files and close vectors
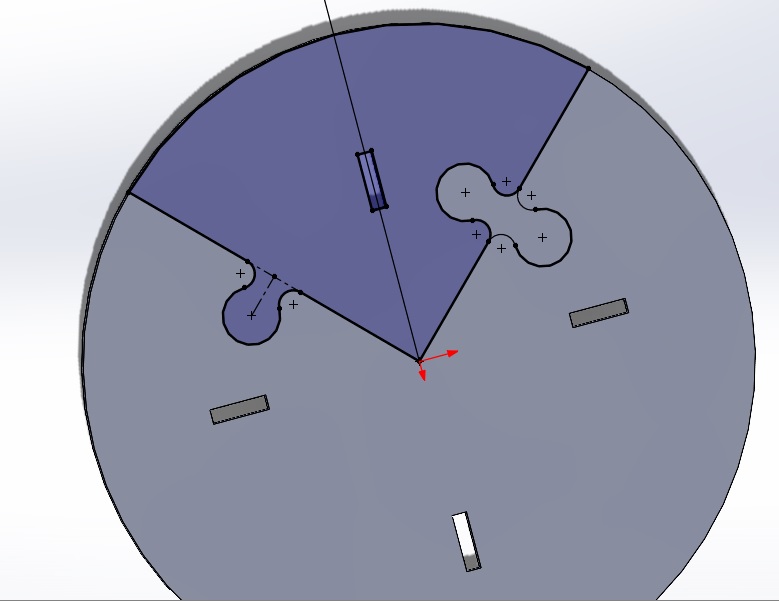
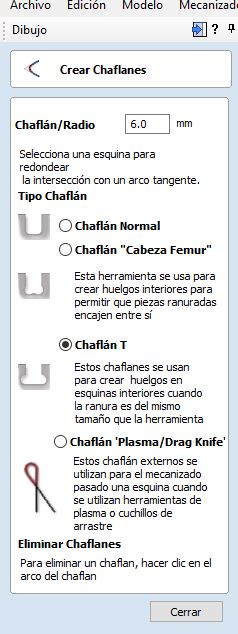
Using edit mode, I put some chamfers in the corners of the joint regions. If chamfers are not placed, due to the geometry of the mill, the corners will be rounded.
This is how it looks like in the software.

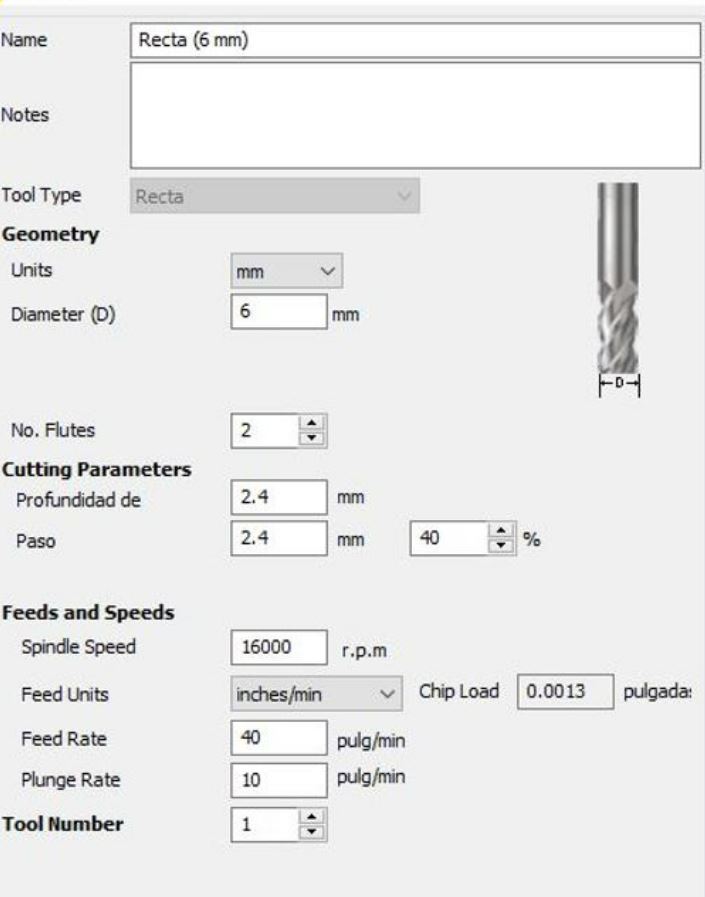
Now, I started with milling operations. Inicial Depth = 0mm, final depth = 18mm. External or right mechanize. If Edit tool is pressed, it opens the second following image. In which tool can be edit. In this case I used a 6mm mill for wood, 2 Flutes
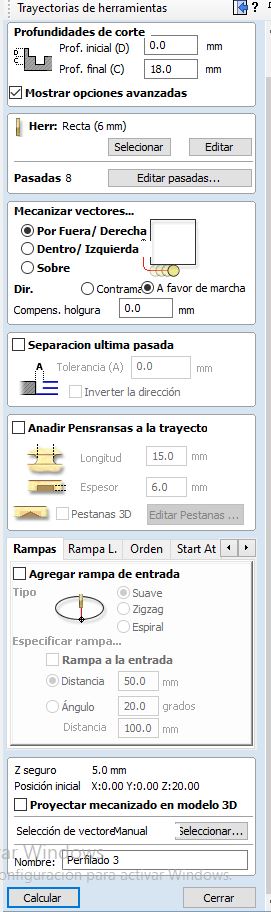
To prevent moving during the milling, I added some tabs. And then press calculate. Export to gcode. And put it on the pendrive that its connected to the milling machine.
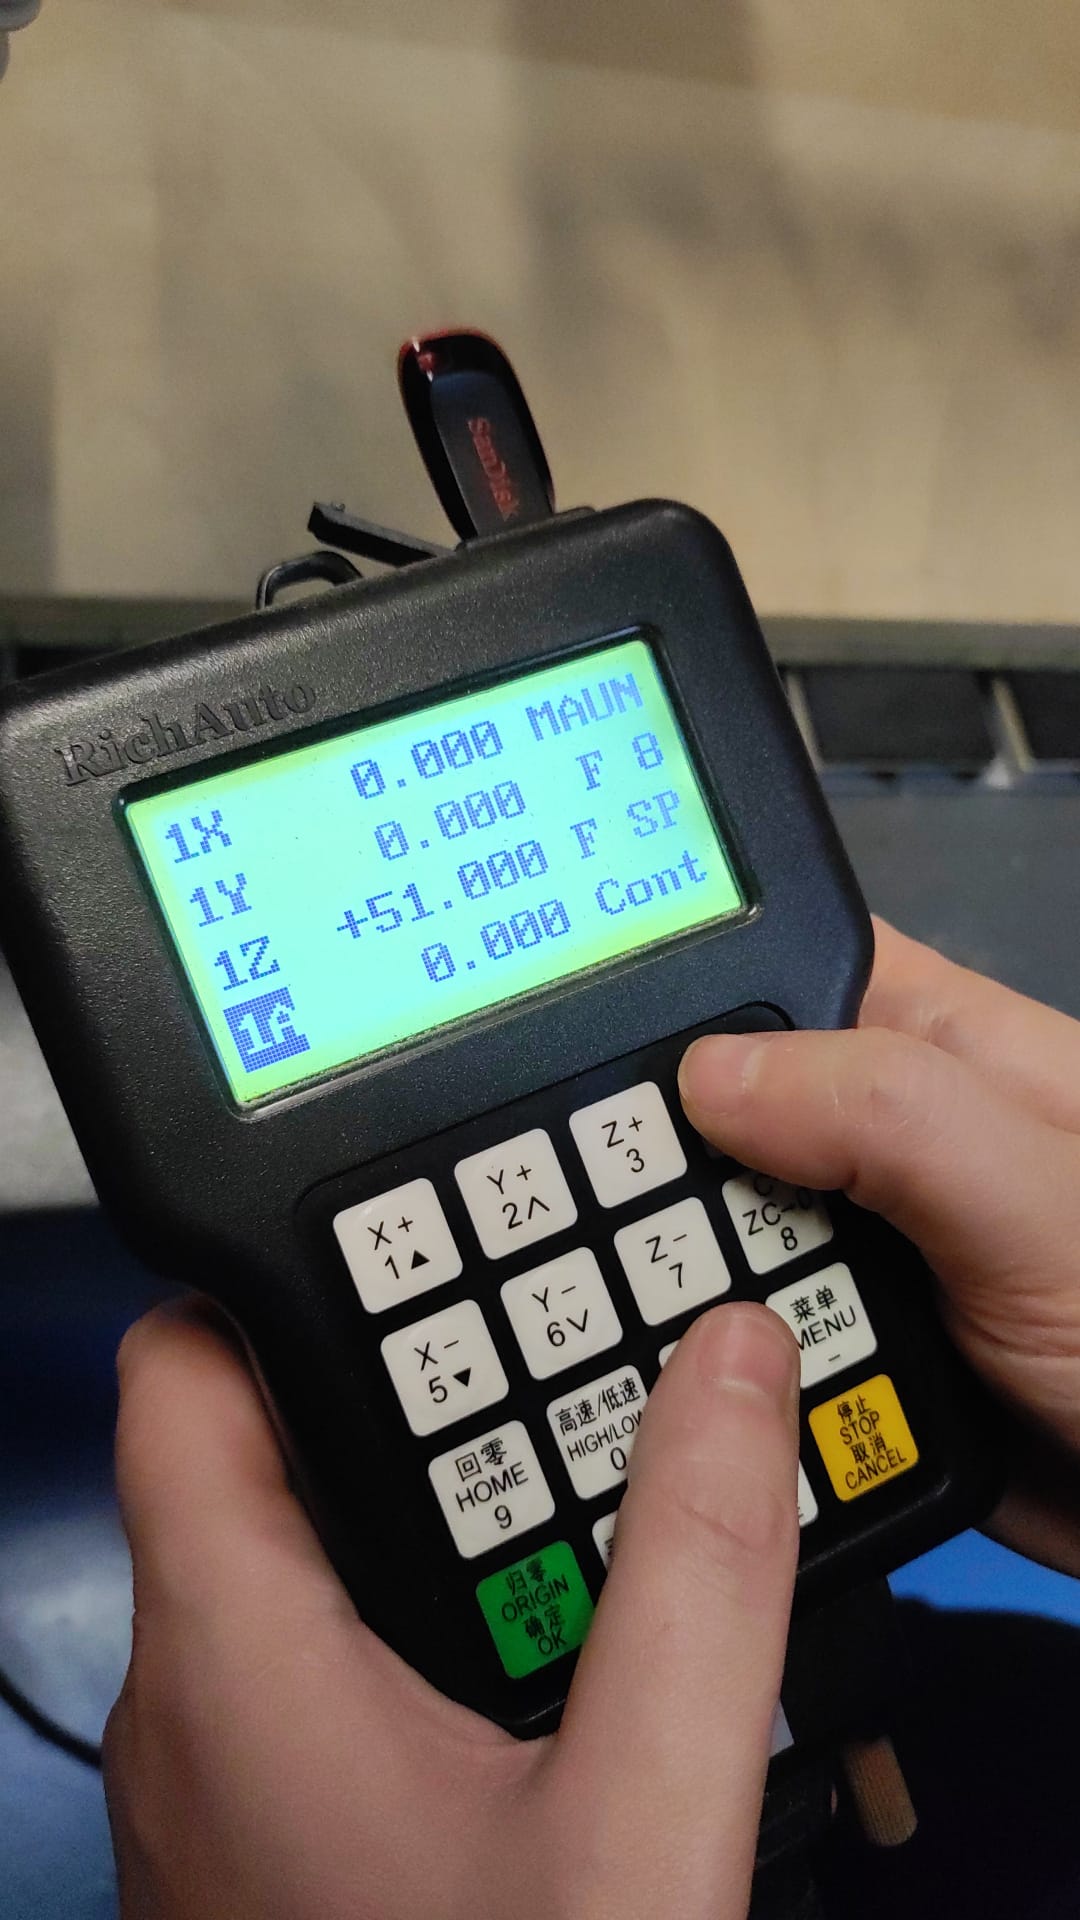
Mill started.
Once I had all the pieces, assembling was needed, without glue or fasteners

And this is the final result
Group assignment
Conclusion and experiences
There were problems, mostly organisational, as I could have solved these problems if I had for example looked at the sizes of the boards and noted them down before making the design.The assembly was easy but I had trouble removing the tabs because I programmed them too thick.