Week 3. Computer controller cutting
This week I have two machines for laser cutting, the Mercury III and the Framun FL1409. I finally decided on the Mercury III, because It seemed easier to start with it and and because it was not being used at that precise moment..
group assignment: characterize your lasercutter's focus, power, speed, rate,
kerf, joint clearance and types
individual assignment:
design, lasercut, and document a parametric construction kit,
accounting for the lasercutter kerf,
which can be assembled in multiple ways,
cut something on the vinylcutter
and for extra credit include elements that aren't flat
Group assignment
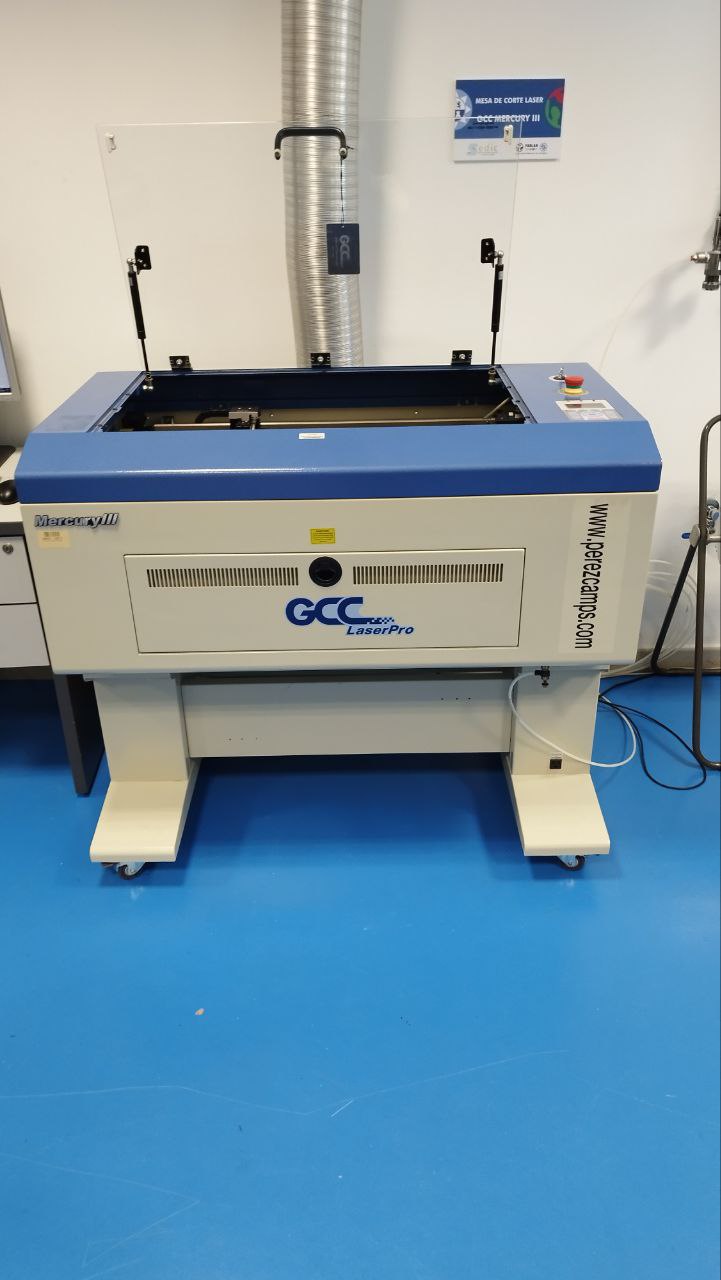
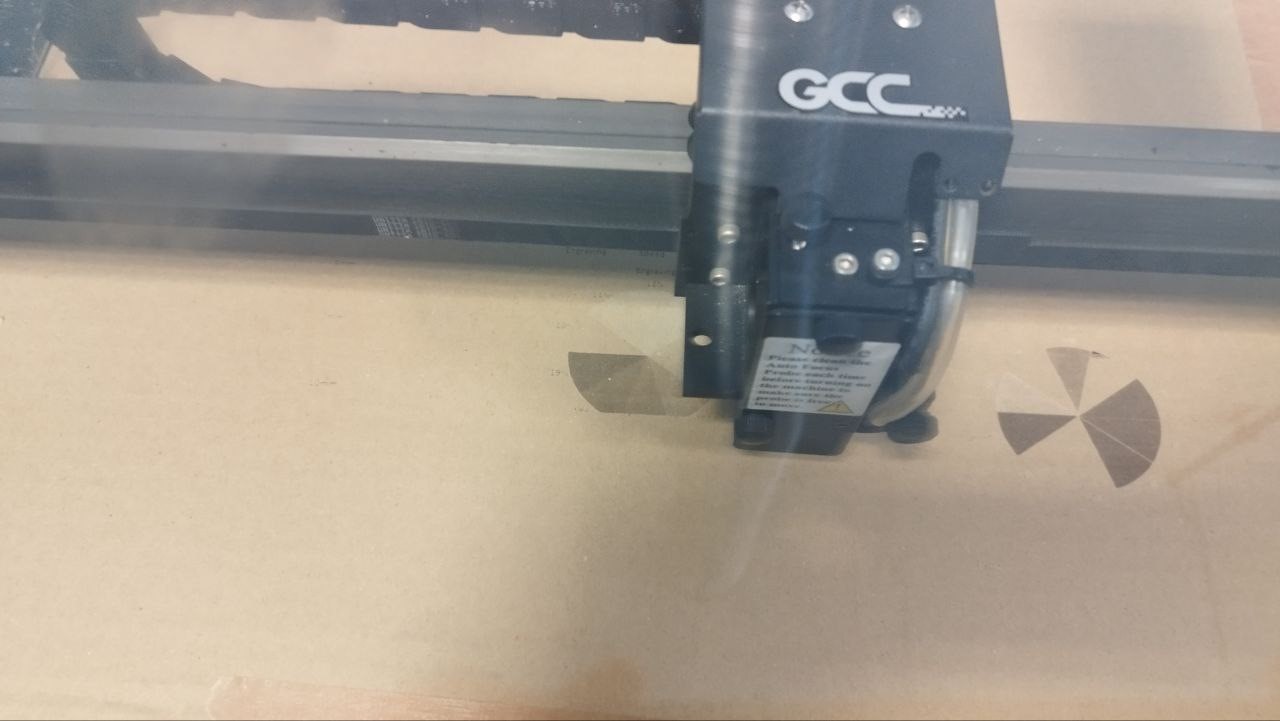
The lasercutter machine I used in this group assigment was GCC-Mercury III.
This is a CO2 lasercutter machine with a power of 60W.
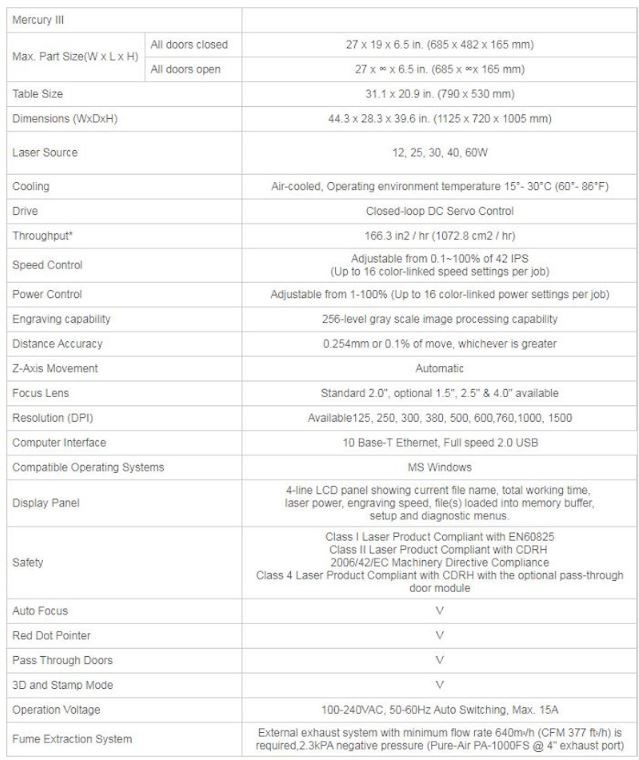
And this is its datasheet
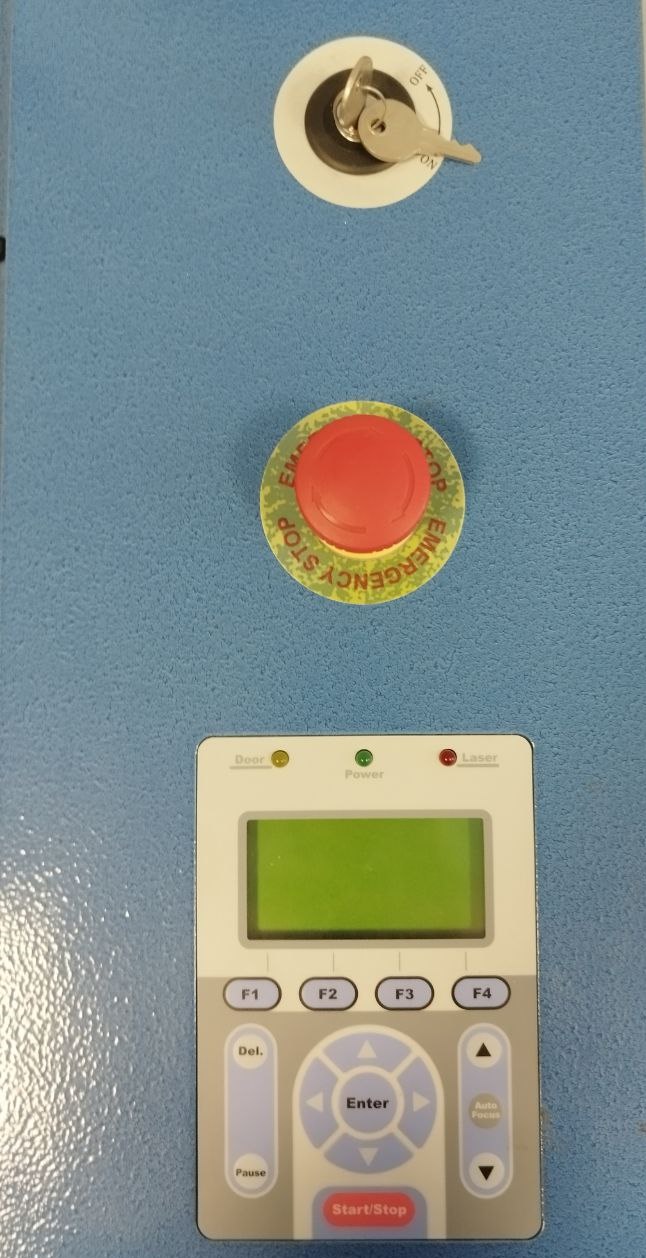
To connect it, you have to press on bottom at the right part of the lasercutter.
Its is important to use CO2 and air extraction. Turn the key to on, unpress the emergency stop.
To set the height put the material and press Autofocus. If you want to move the platform press the up or down bottom at the right (in black). And to move the header press the arrows in white.
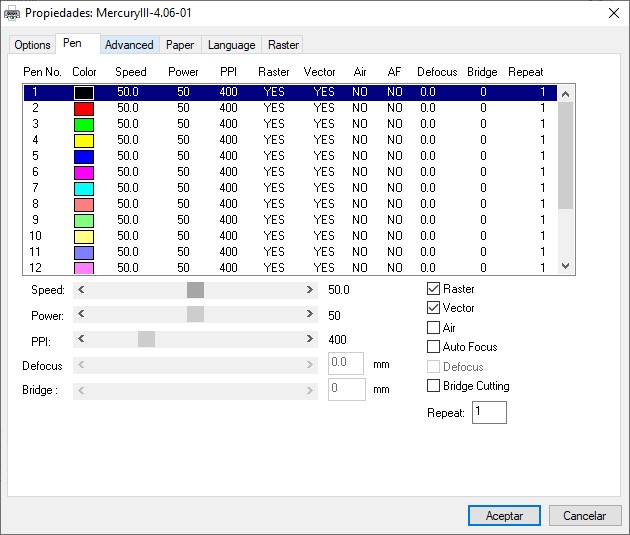
The main parameters that can be modified are power and speed.
Power parameter
According to the specs 0.1~100% of 42 IPS (Up to 16 speed settings linked to colors per job).
The power needed depends on the material and the thickness of the material.
Speed parameter
Adjustable 0.1~100% of 42 IPS (Up to 16 speed settings linked to colors per job)
As the power, this speed need depends on te material and the thickness of a specific material.
Those parameters, power ad speed, must be caracterized to each material and thickness.
Caracterize
To use the lasecutter I worked with CorelDraw.
Once the desing is done, press print , select Mercury-III as printer.
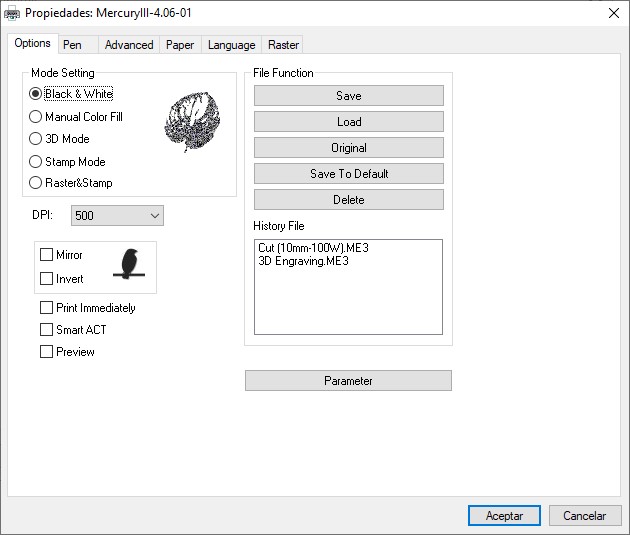
I always use the “Selection” “Printing range”, because this way I avoid sending something drawn accidentally. Then, if the gear at the right of printer selection is disabled, click in apply, it is needed to click on the gear to open Mercury III properties. The second Windows is the power and speed configuration. The color indicates the order of cuts and engraving.
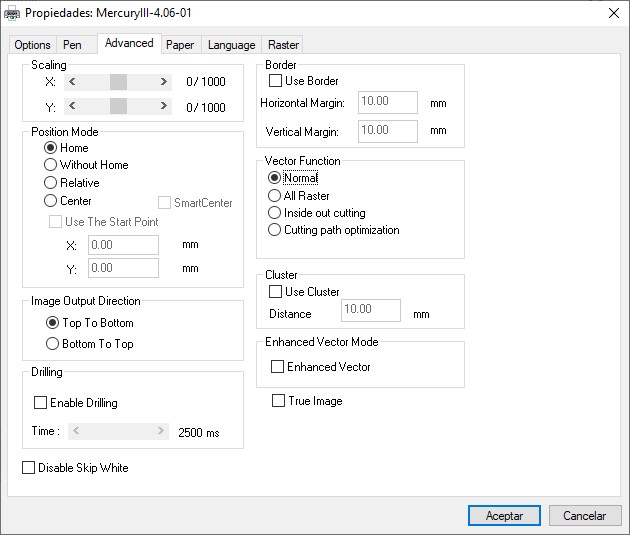
The next Window is advanced, where start point can be selected.
Home: from factory start.
Without home
Relative
Center
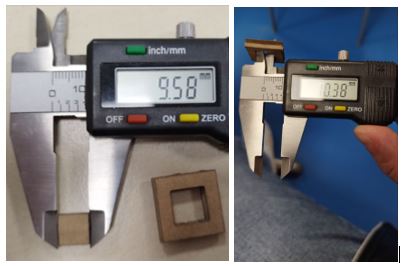
started calculating kerf parameter. I draw two concentric squares, 10mm and 20mm.
10-9.58=0.42
10.38-10=0.38
[(0.42+0.38)/2]/2=0.2mm
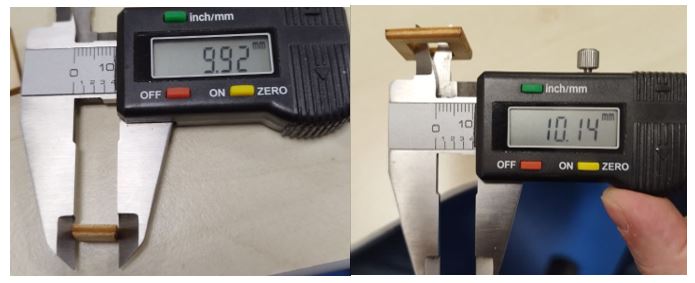
10-9.92=0.08
10.14-10=0.14
[(0.08+0.14)/2]/2=0.055mm
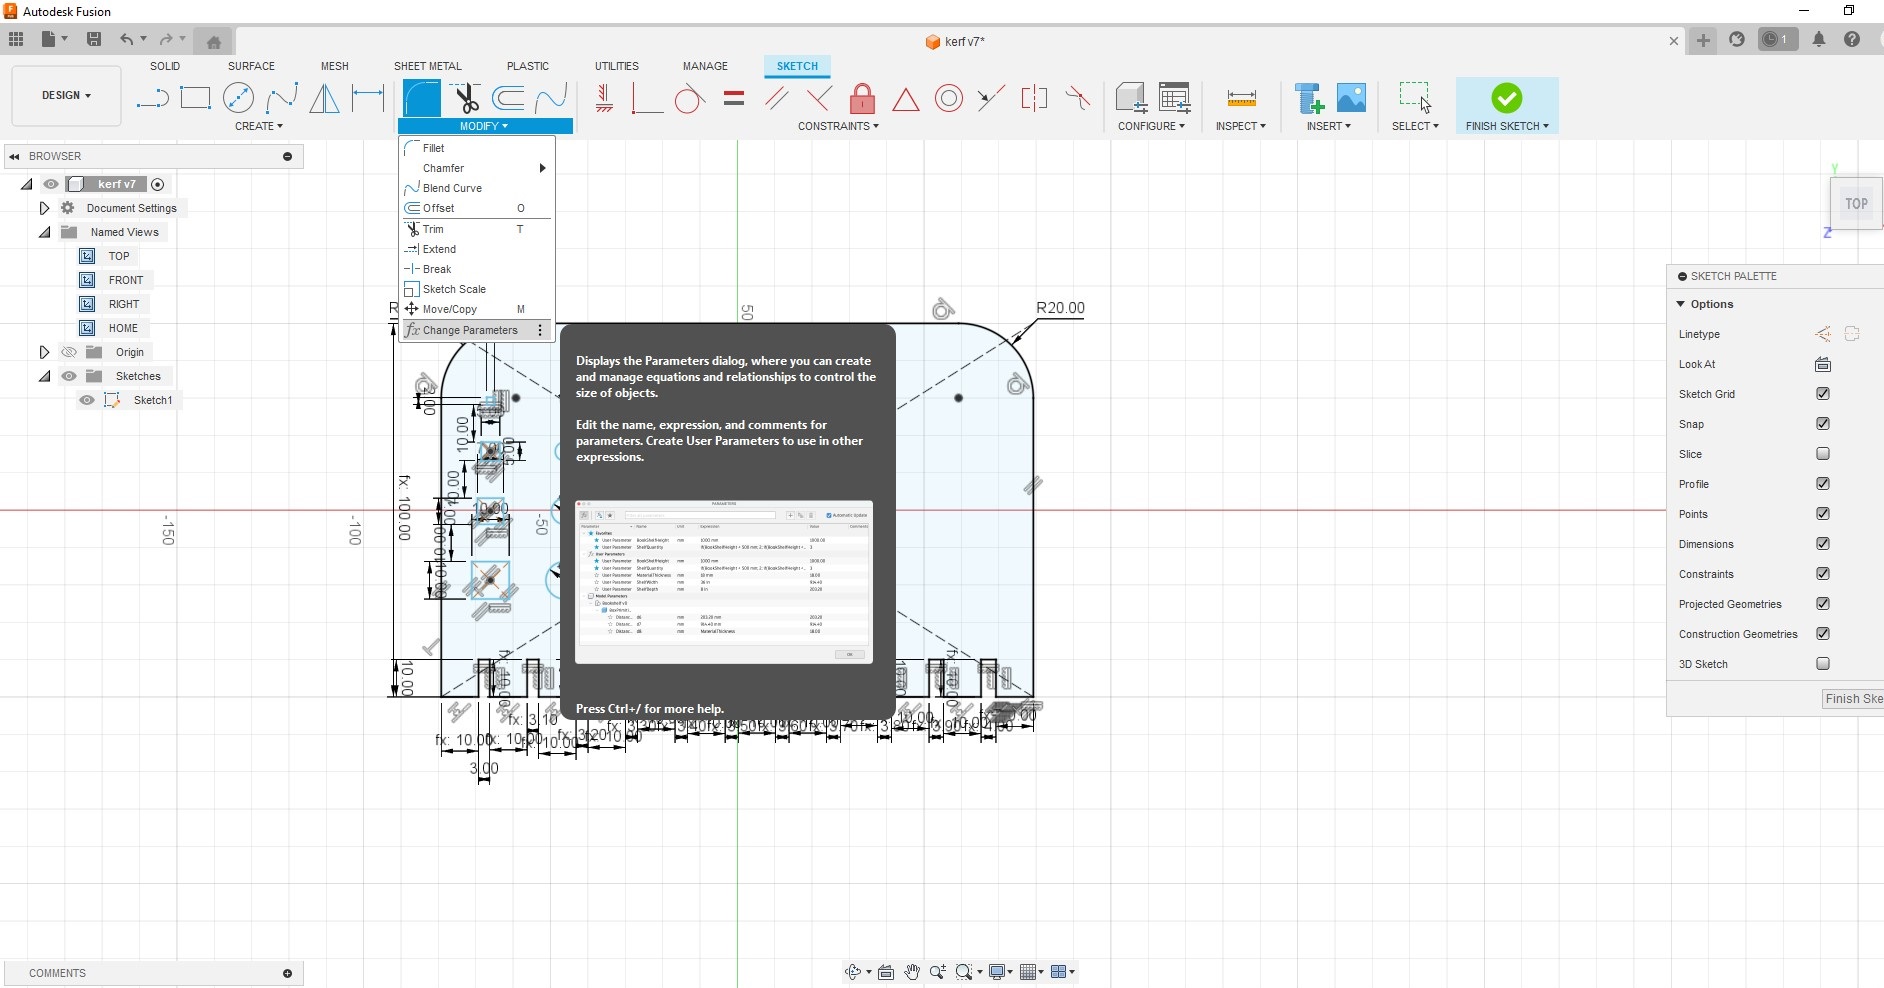
Next step, was make a template for characterizing materials.
I draw this with fusion, making use of parametric values accounting the kerf value.
To change parameters press Modify -> Change parameters
Then, with corel draw, I made this sections, so I have a gray scale to see how the engraving works depending on the amount of black that we give to the design.
Now, I made some test on carton.
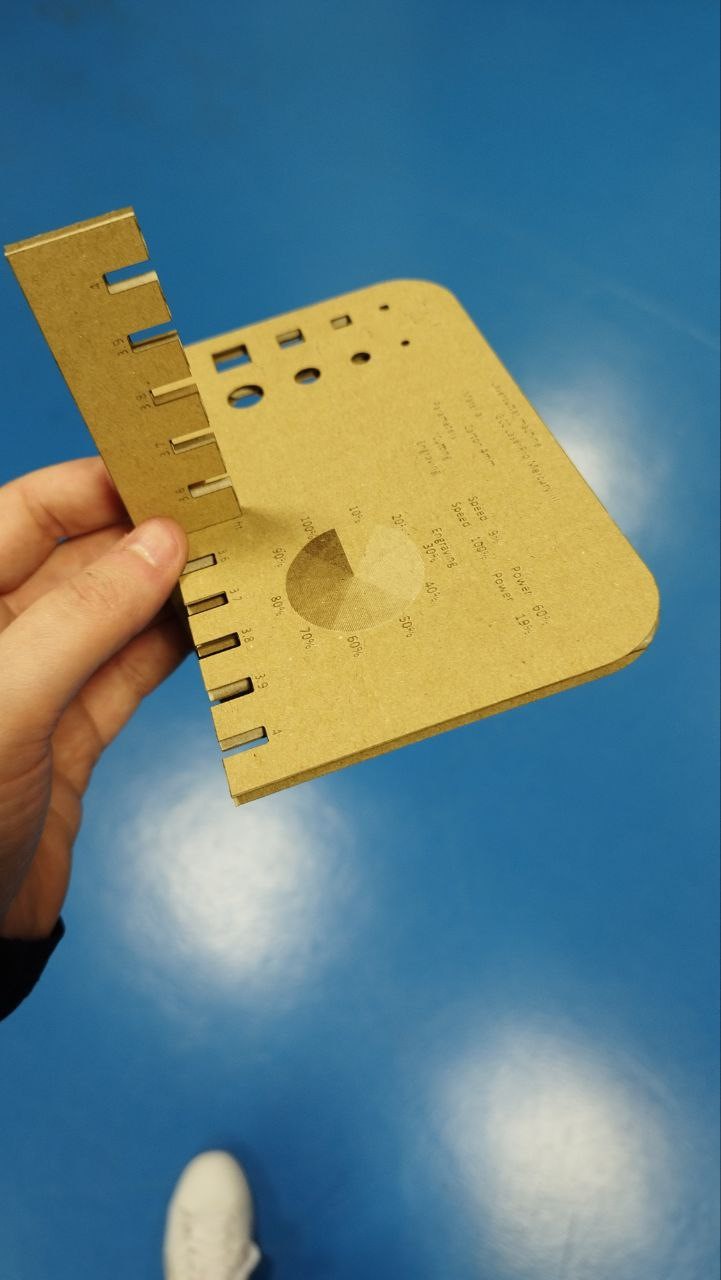
nd wood
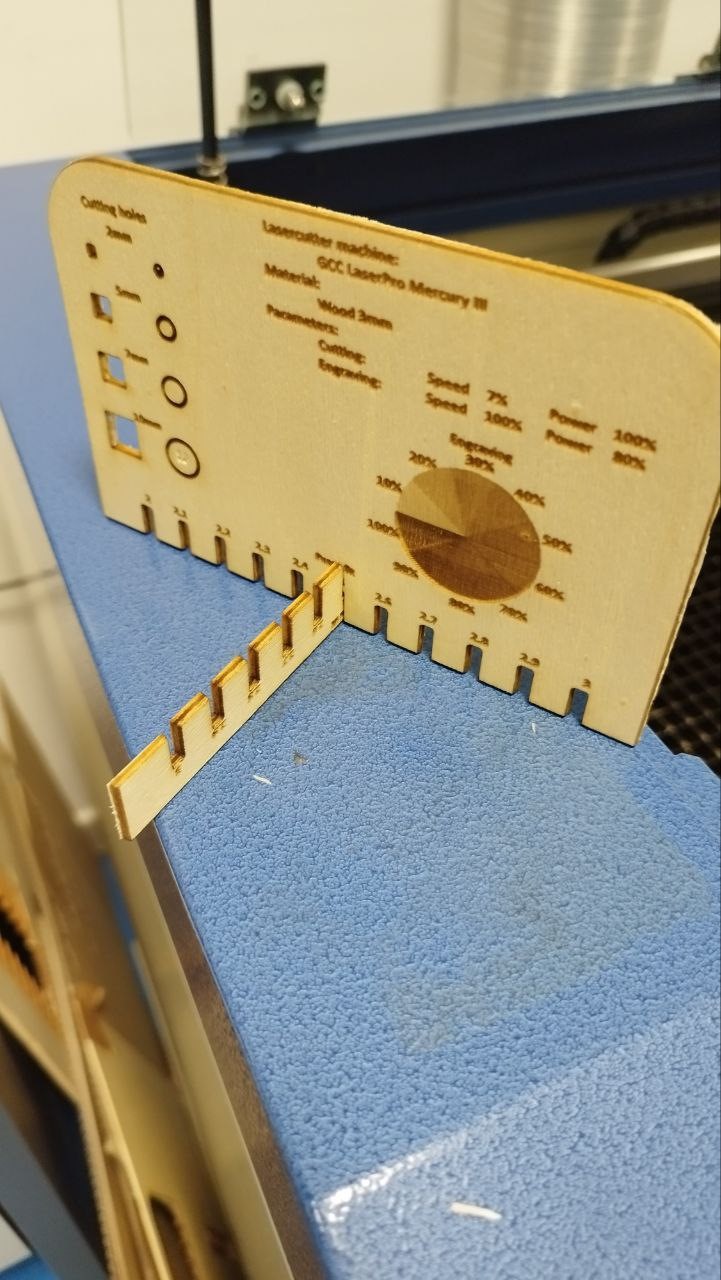 >
> Conclusion, results and observations
Its important to clean the laser lens to get a better cut.
When Mode Setting black and white is selected it makes the engraving test continous, according to % power, but if color is selected it makes the engraving by layers, that depends on the color order on the right scale, and with color is easier to have a mistake selecting the power and speed, because the software do not use the same color scale in the diferent windows.
Individual
Parametric construction kit
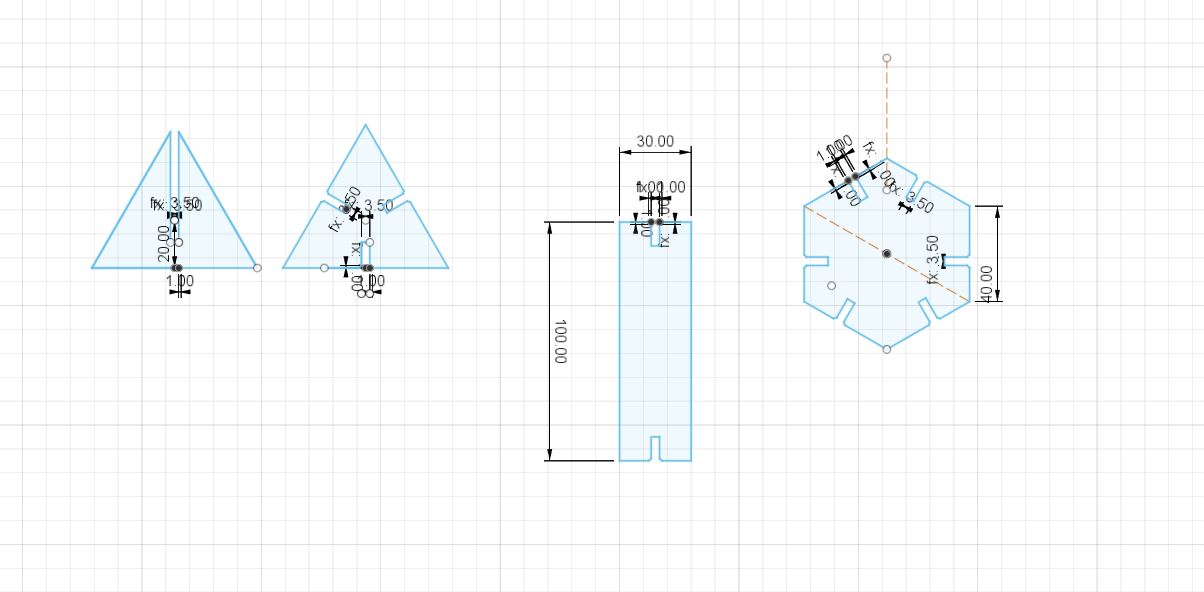
For this section I have continued using Fusion360, for ease of use of parametric parameters. So I started making the cutting parameters with it.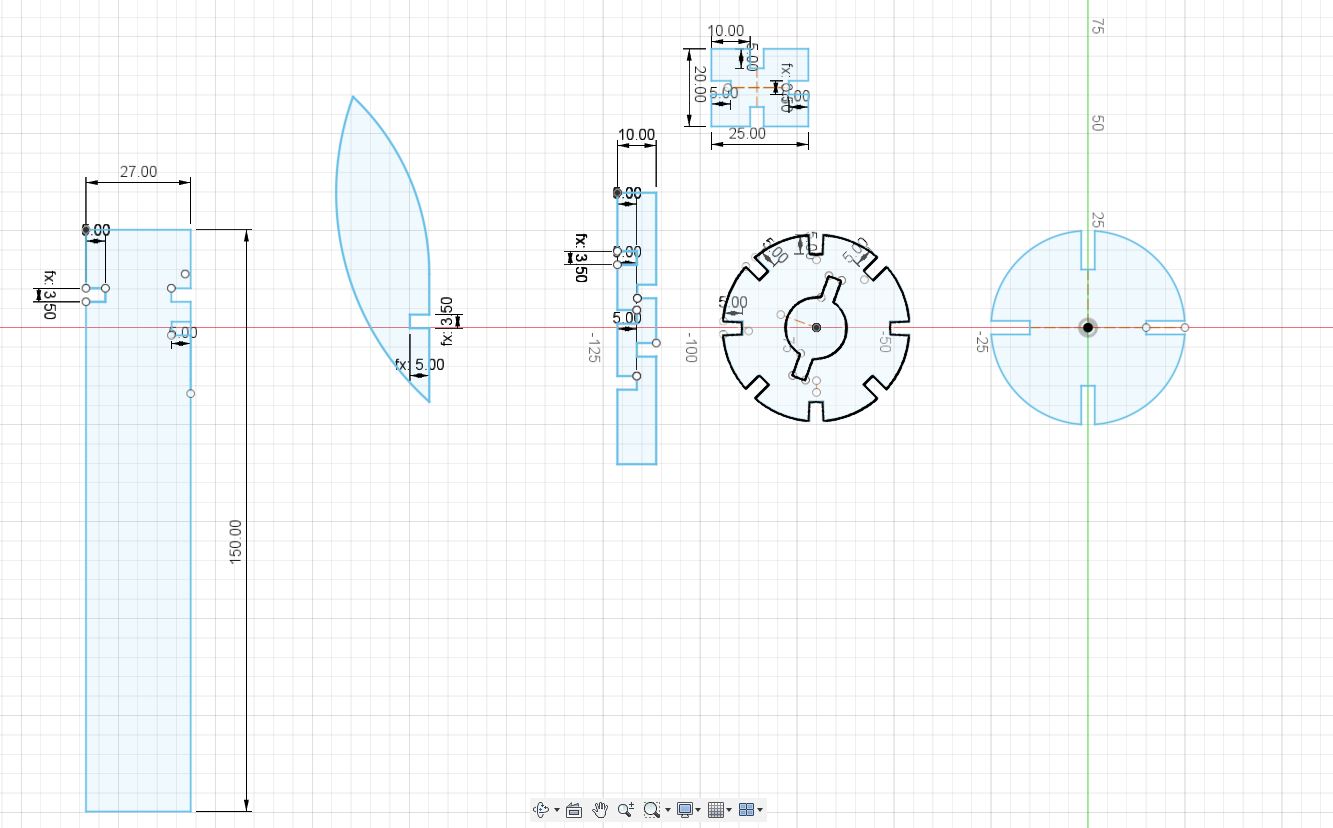
I have parameterized the models with a 3.5mm pressfit in the Fusion360 project and export it in ".dwg" format, once I ensambled and checked everything its ok
Next step was exported it to .dwg and import it to CorelDraw.
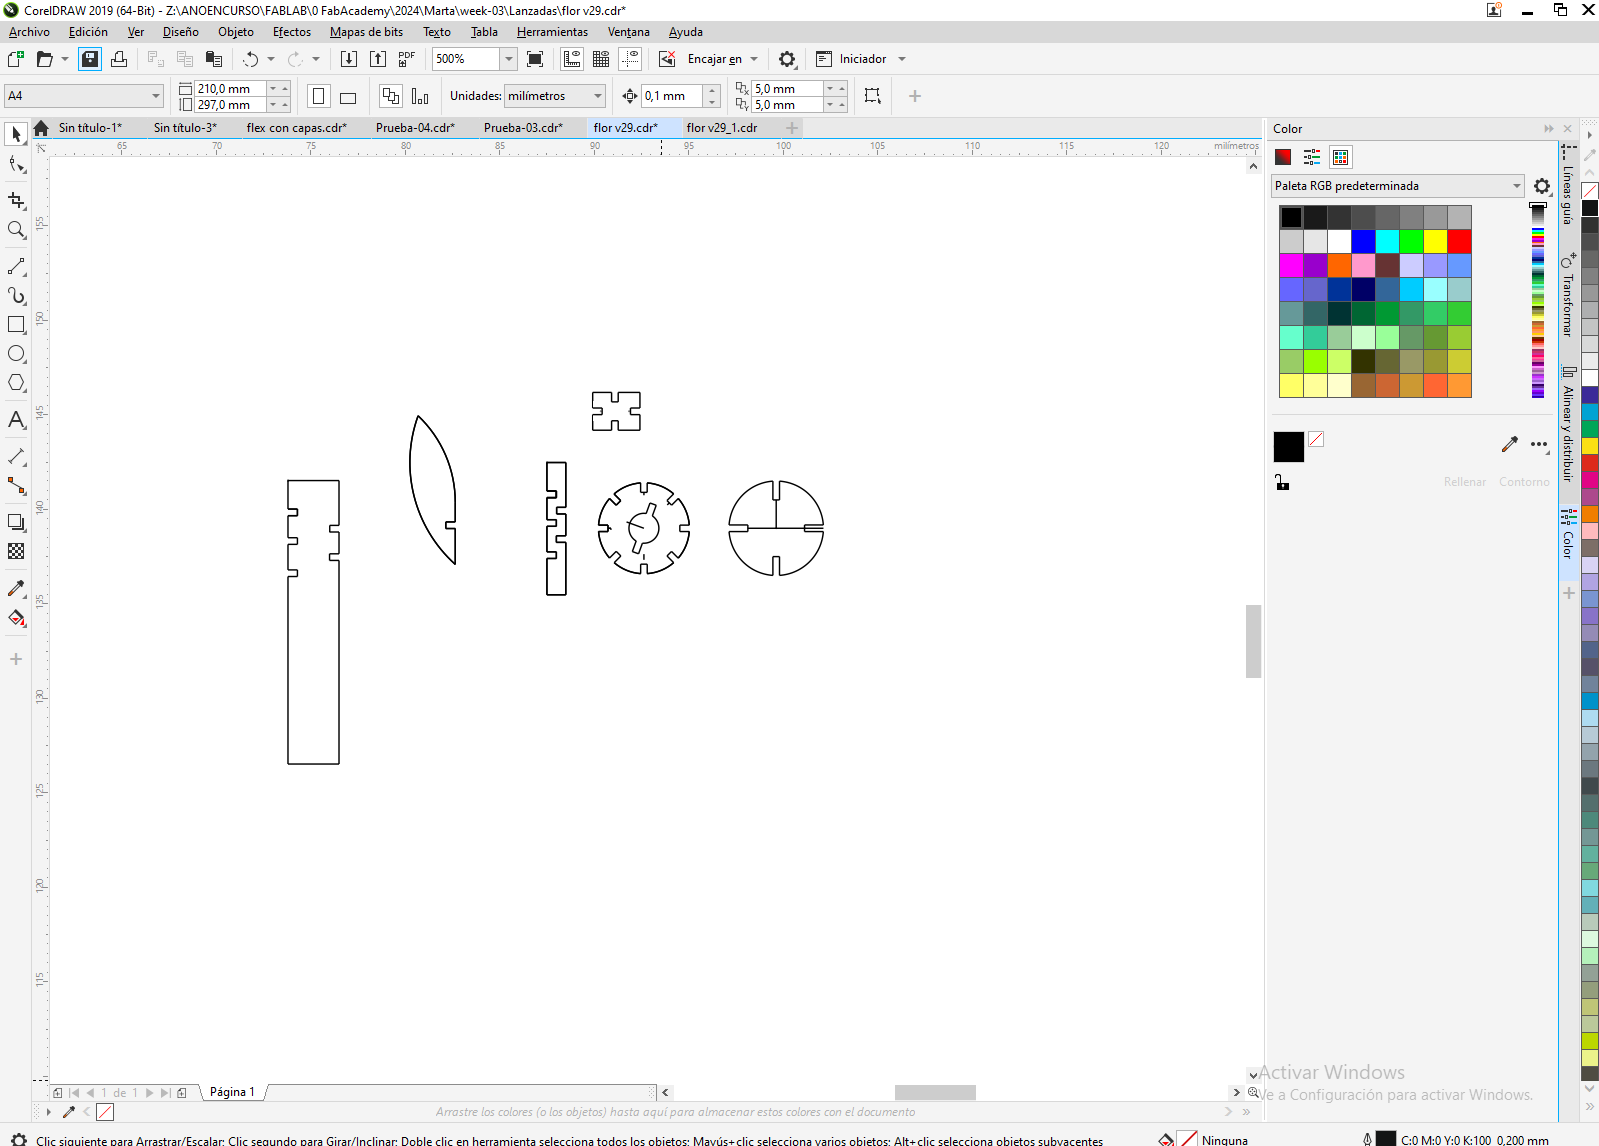
It is important to put the line "Muy fina" (very fine). If not the Mercury takes that line as engraving, not cutting.

and I give it "print". Configure the printer "MercuryIII" and the properties of Speed and Power of laser cutting of the template for cardboard material "Speed: 9% and power: 60%". Once I sent to print, I start print pressing start/stop bottom on Mercury-III
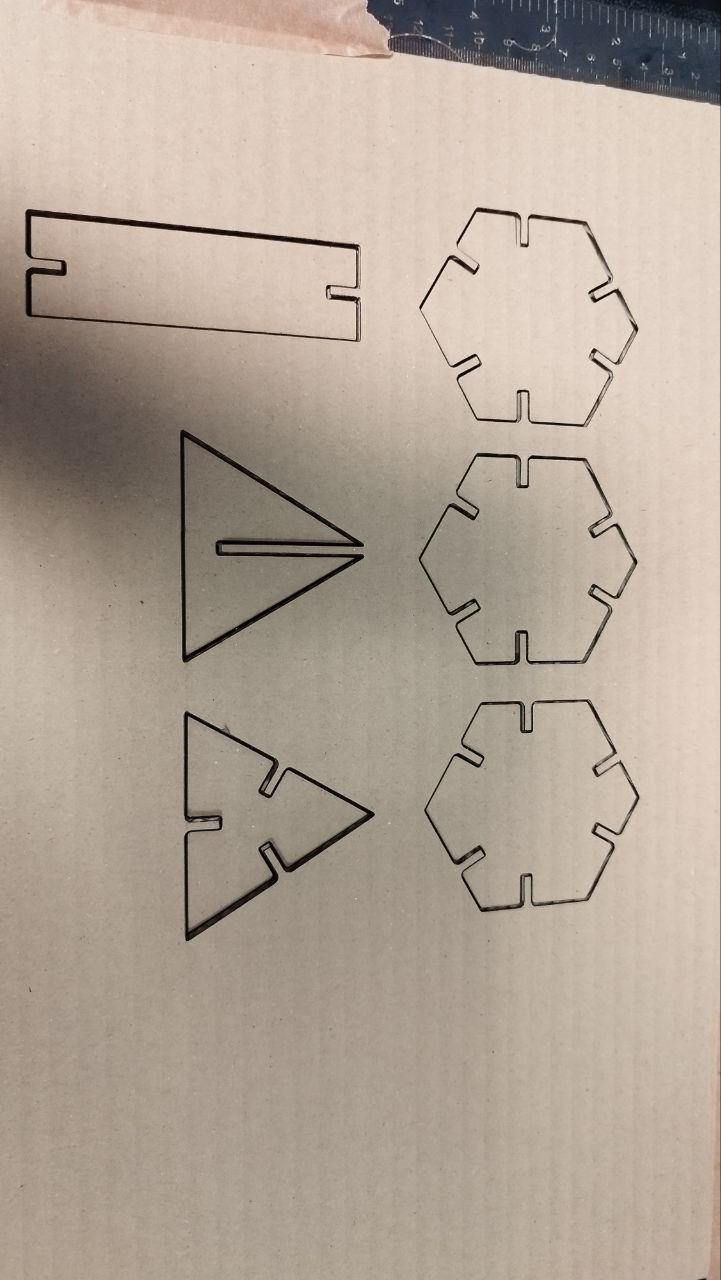

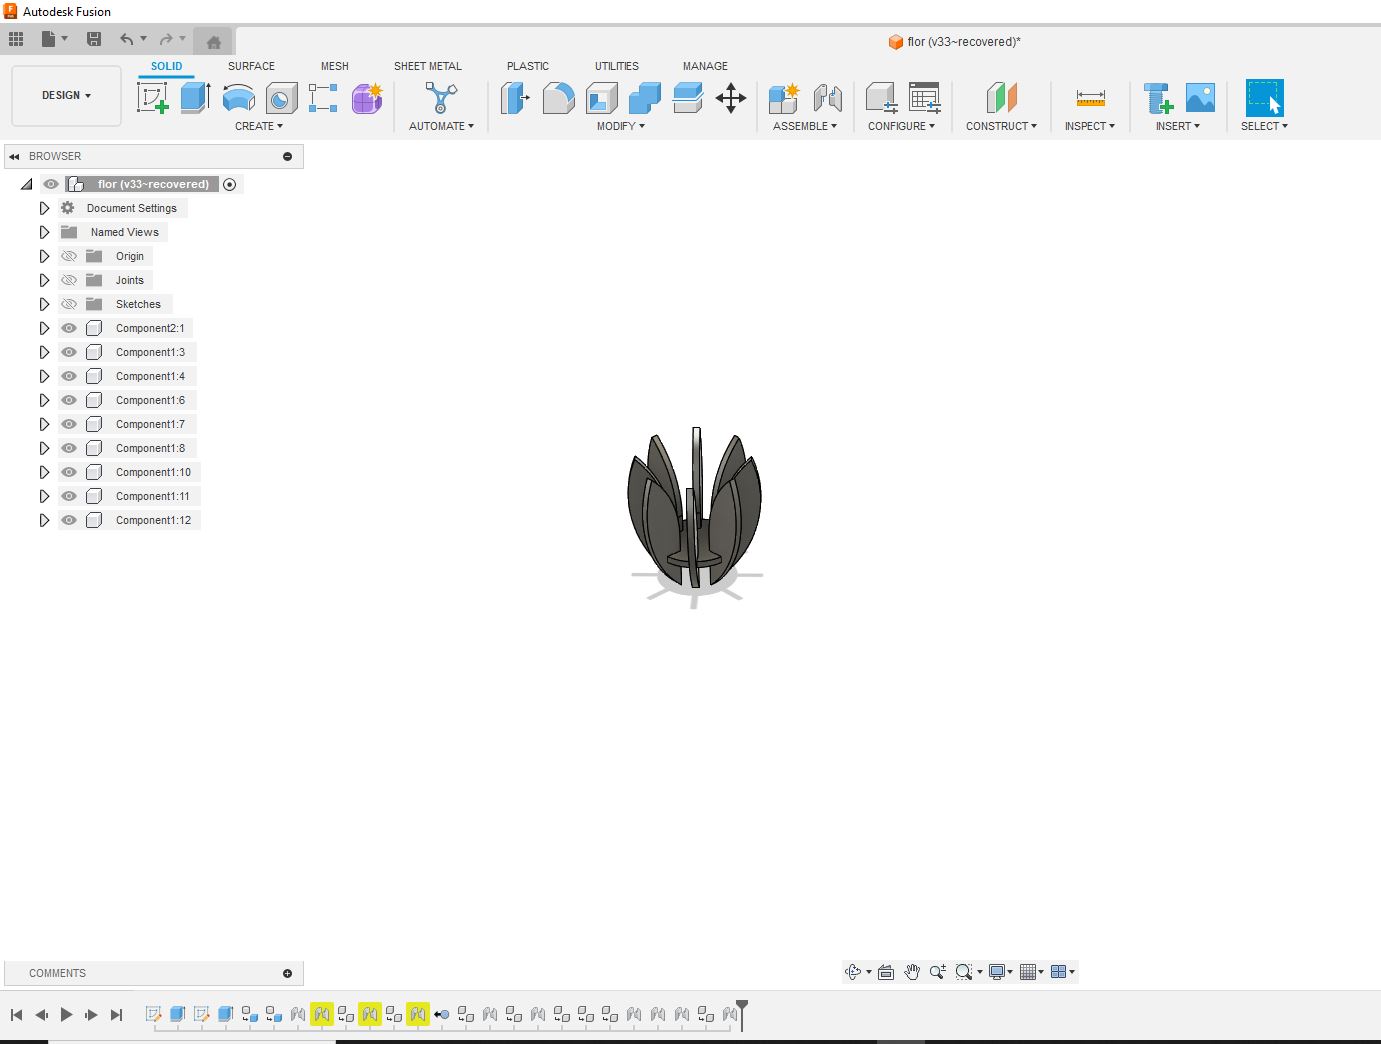
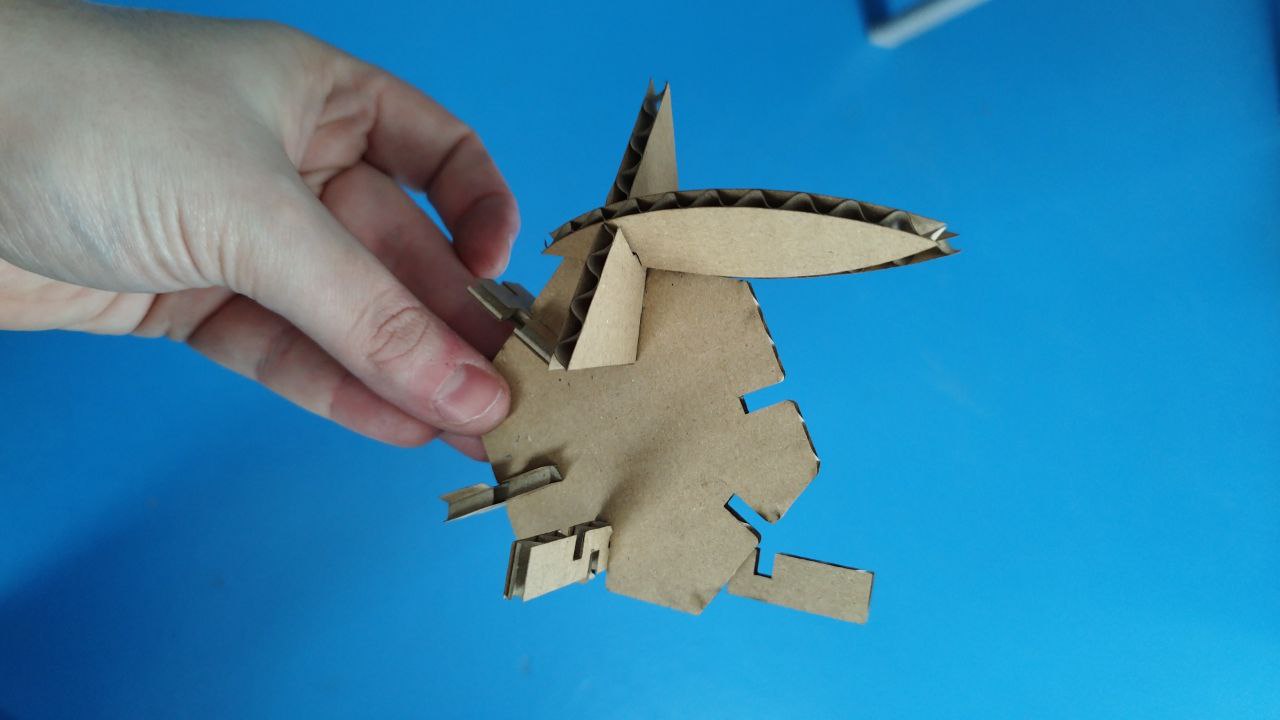
these are the results
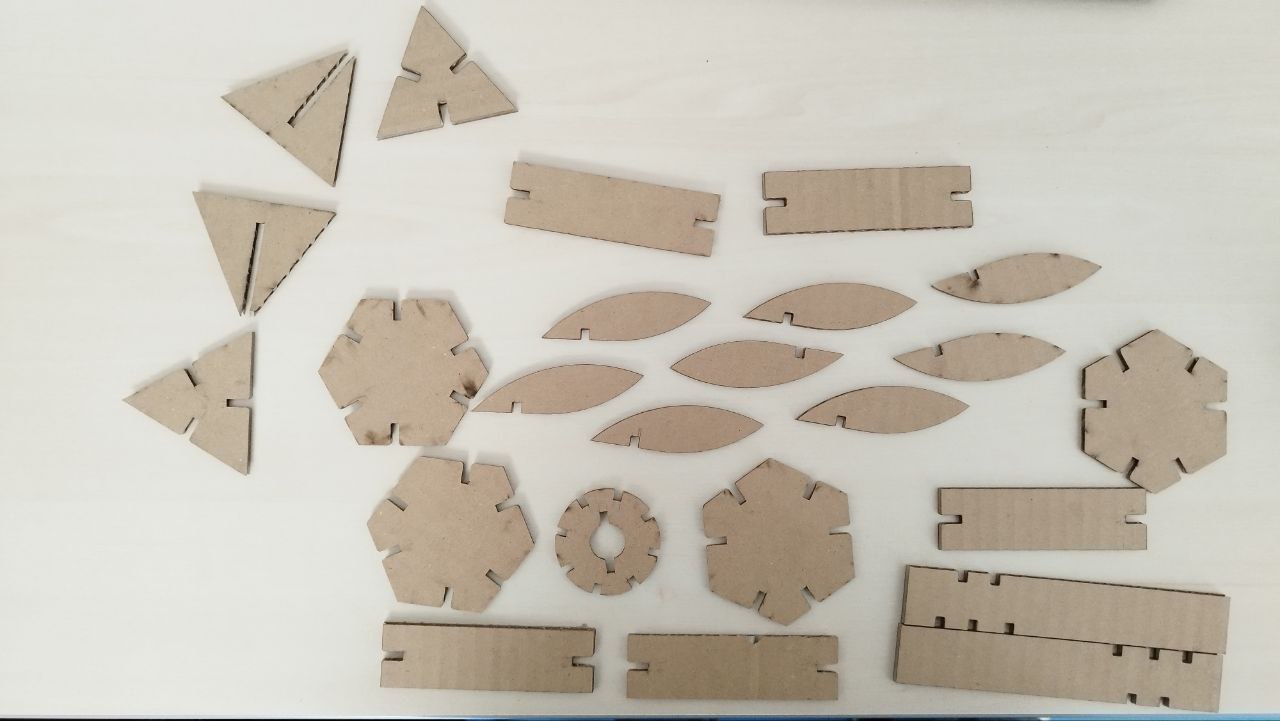
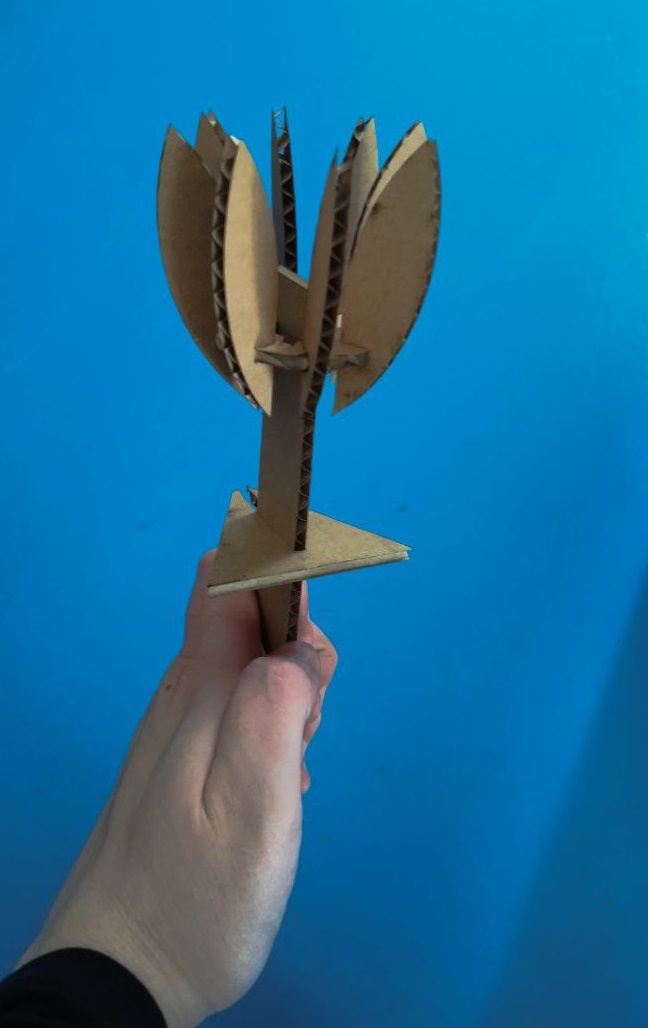
I use those pieces to make a flower and with the "petals" I also made the ears of this weird animal
Flex cutting
Following the same protocol that with carton, I made some flex on wood.

With these patrons. I used 7% speed and 100% power to cut wood. I also used colors to select the cutting order And I got this result
As we can see the first one is more flexible than the second one.
Vinyl cutting
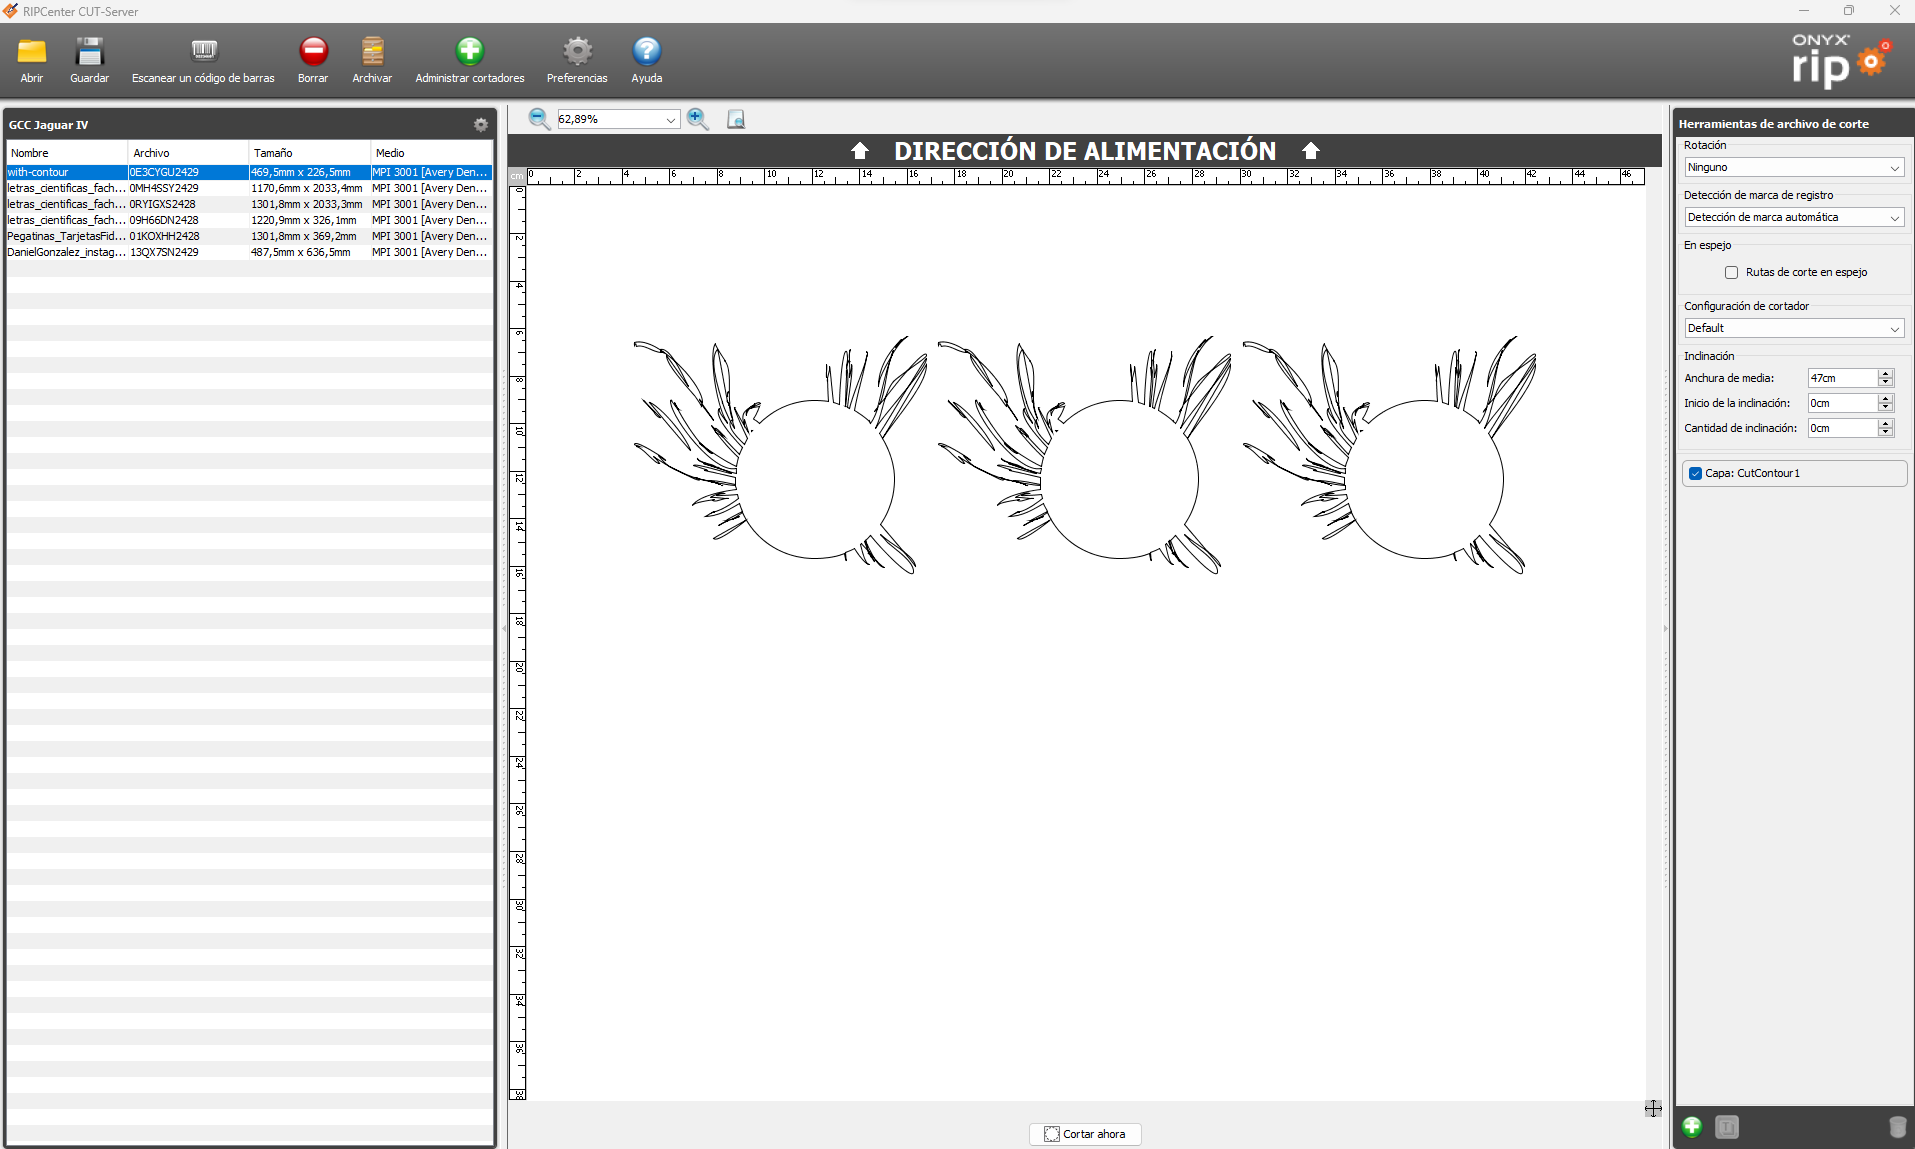
For this I made a painting, based on Mockingjay. But, representing a Phoenix, thats why its red. I also choose a white point to represent braille.

Then with illustrator , I reduce the curves, nodes and lines. And to cut it I used a personalized contour.

I imported it to RIPCenter, and print it, I also configure the contour cutter with the “GCC Jaguar Cutter” vinyl cutter (for automatic cutting use the “JaguarIV GCC” vinyl cutter), then hit Apply.
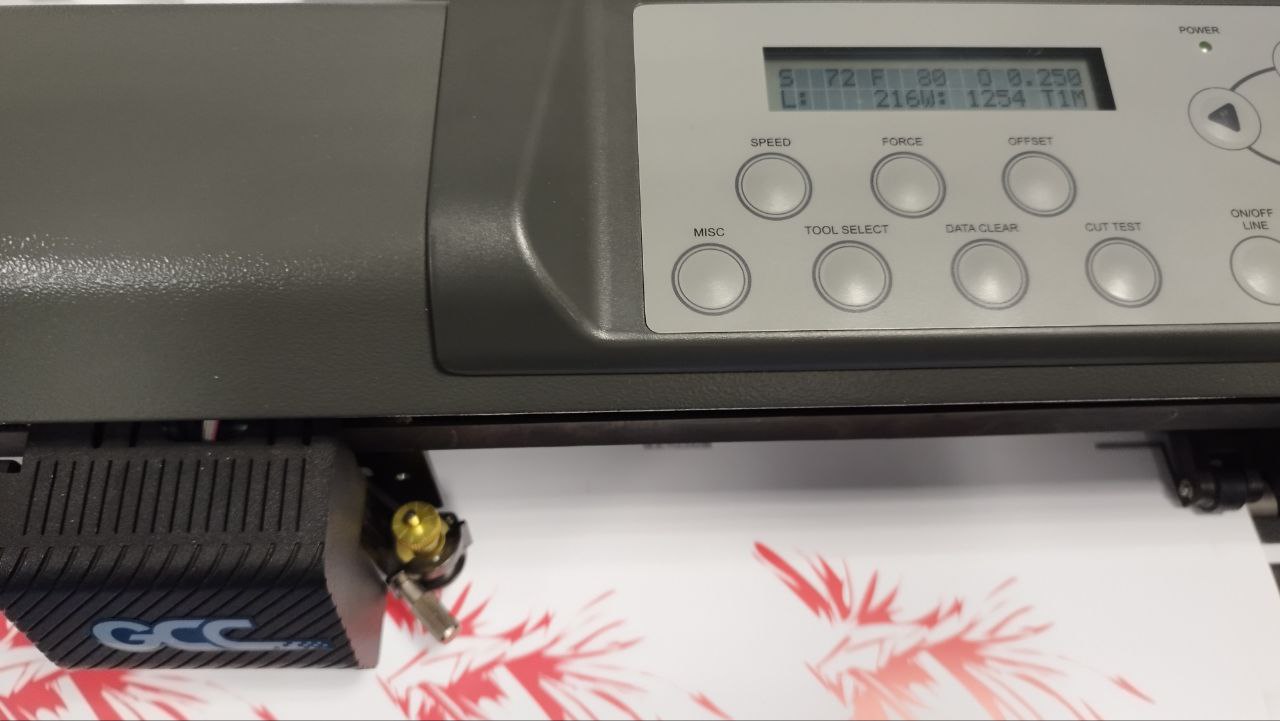
I place the vinyl on the Jaguar cutter and position the landmarks.
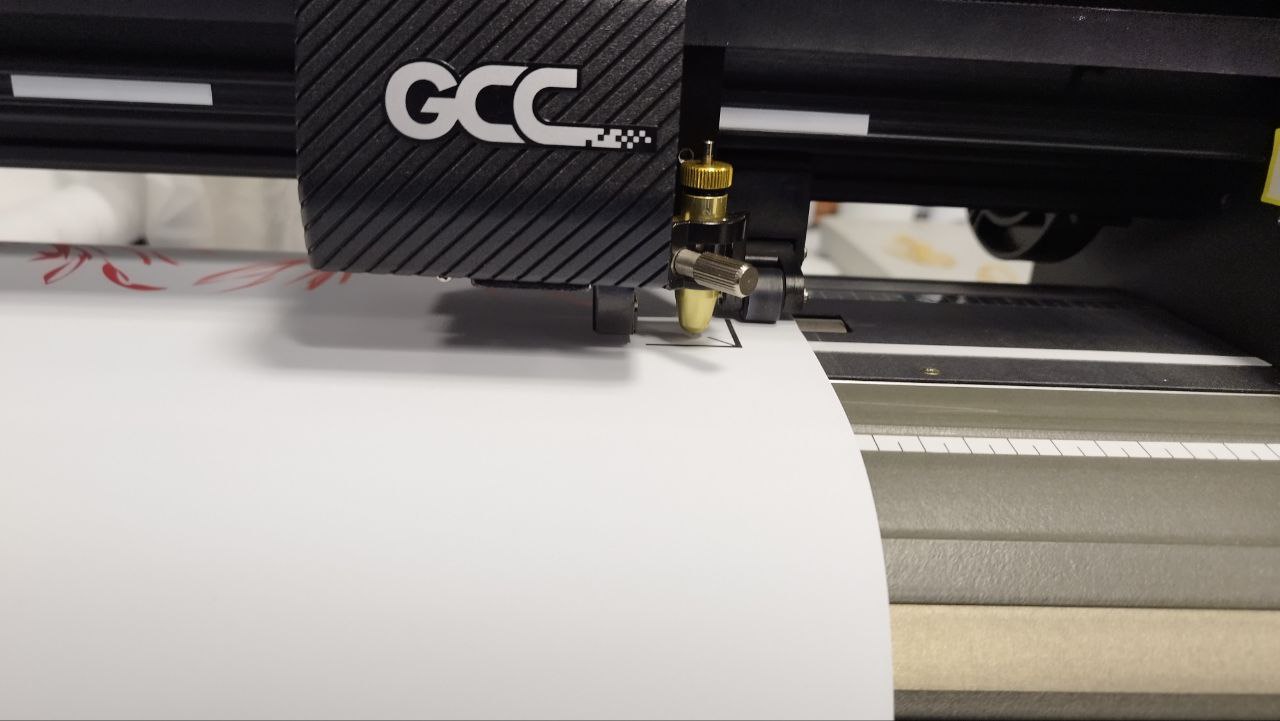
I selected F80 because the characteristic sheet said that those are the force needed. DATA
I used the Beinsen thermal press for stamping. I selected 125ºC 10 seconds. And started.
Then I take off the FLEXTAPE
This is the final result, as it can be seen this have with white marks but its because I did not take off that parts because I like how it looks.

Conclusion
It is very important to have a desing checked previous to start any work.
Always read data specs before start because it can save time.
These conclusions are based on the fact that first I did it without assembling the design so it went wrong and I lost time, then I did it properly and got the desired results.