In system integration, my final project includes different types of systems such as CAD Modelling with fabrication, Electronics part with PCB Milling and soldering, raw testing with microcontroller, raw testing battery, assembling all the components on helmet, Final testing with microcontrolller after assembling all the components on helmet and final packaging of helmet.
First, I designed a CAD drawing for the packaging of COB led using Solidworks which is placed on the front side the helmet.
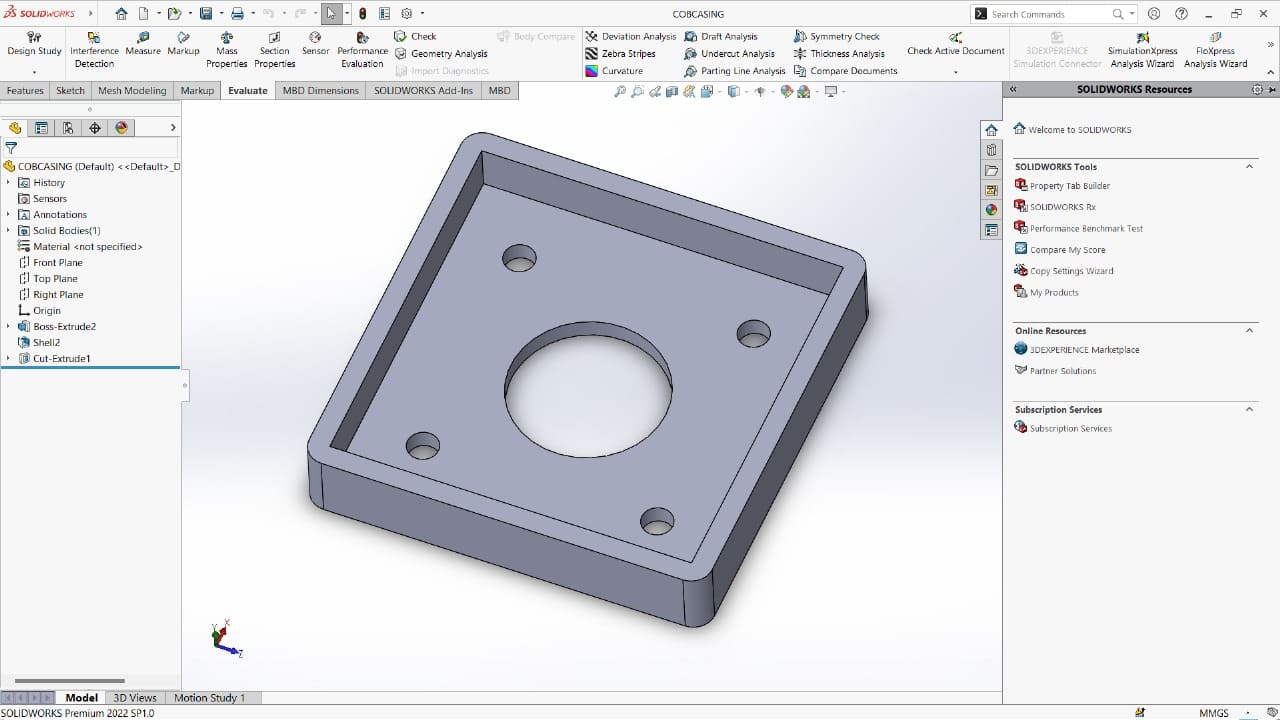
Then, I generated GCode of the design for 3d prinitng using Cryality software.
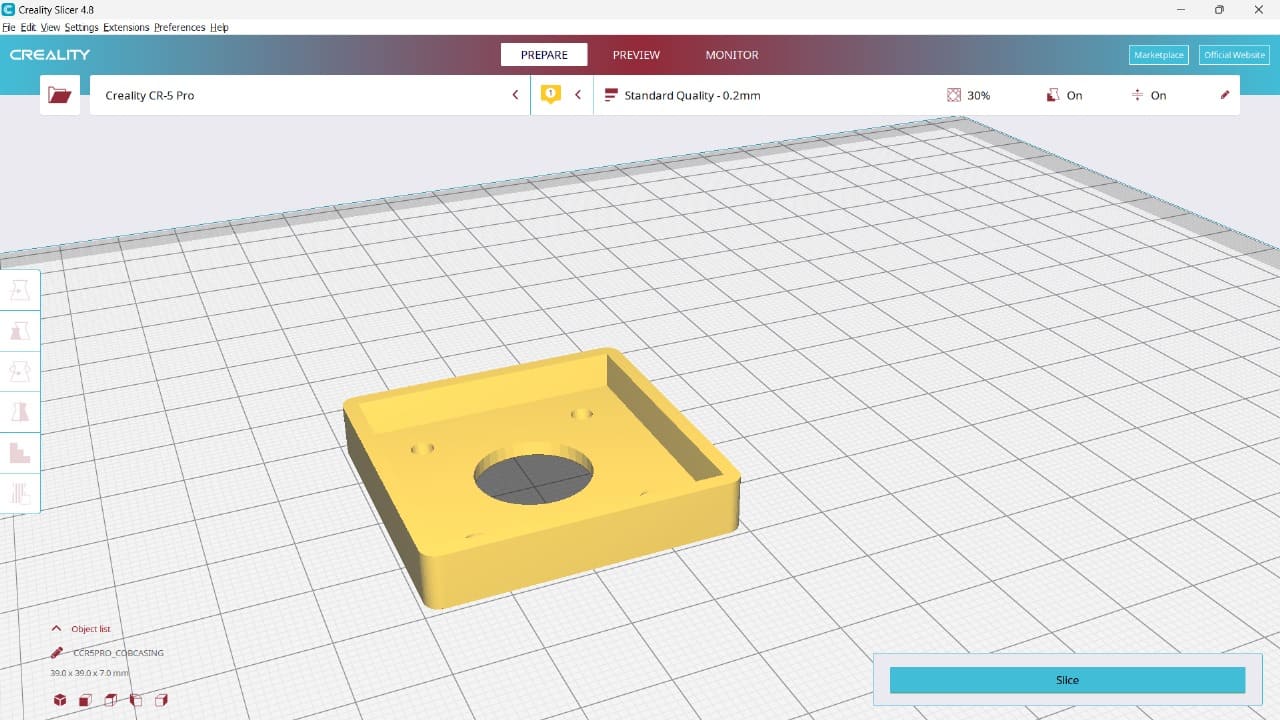
Here is the final output.
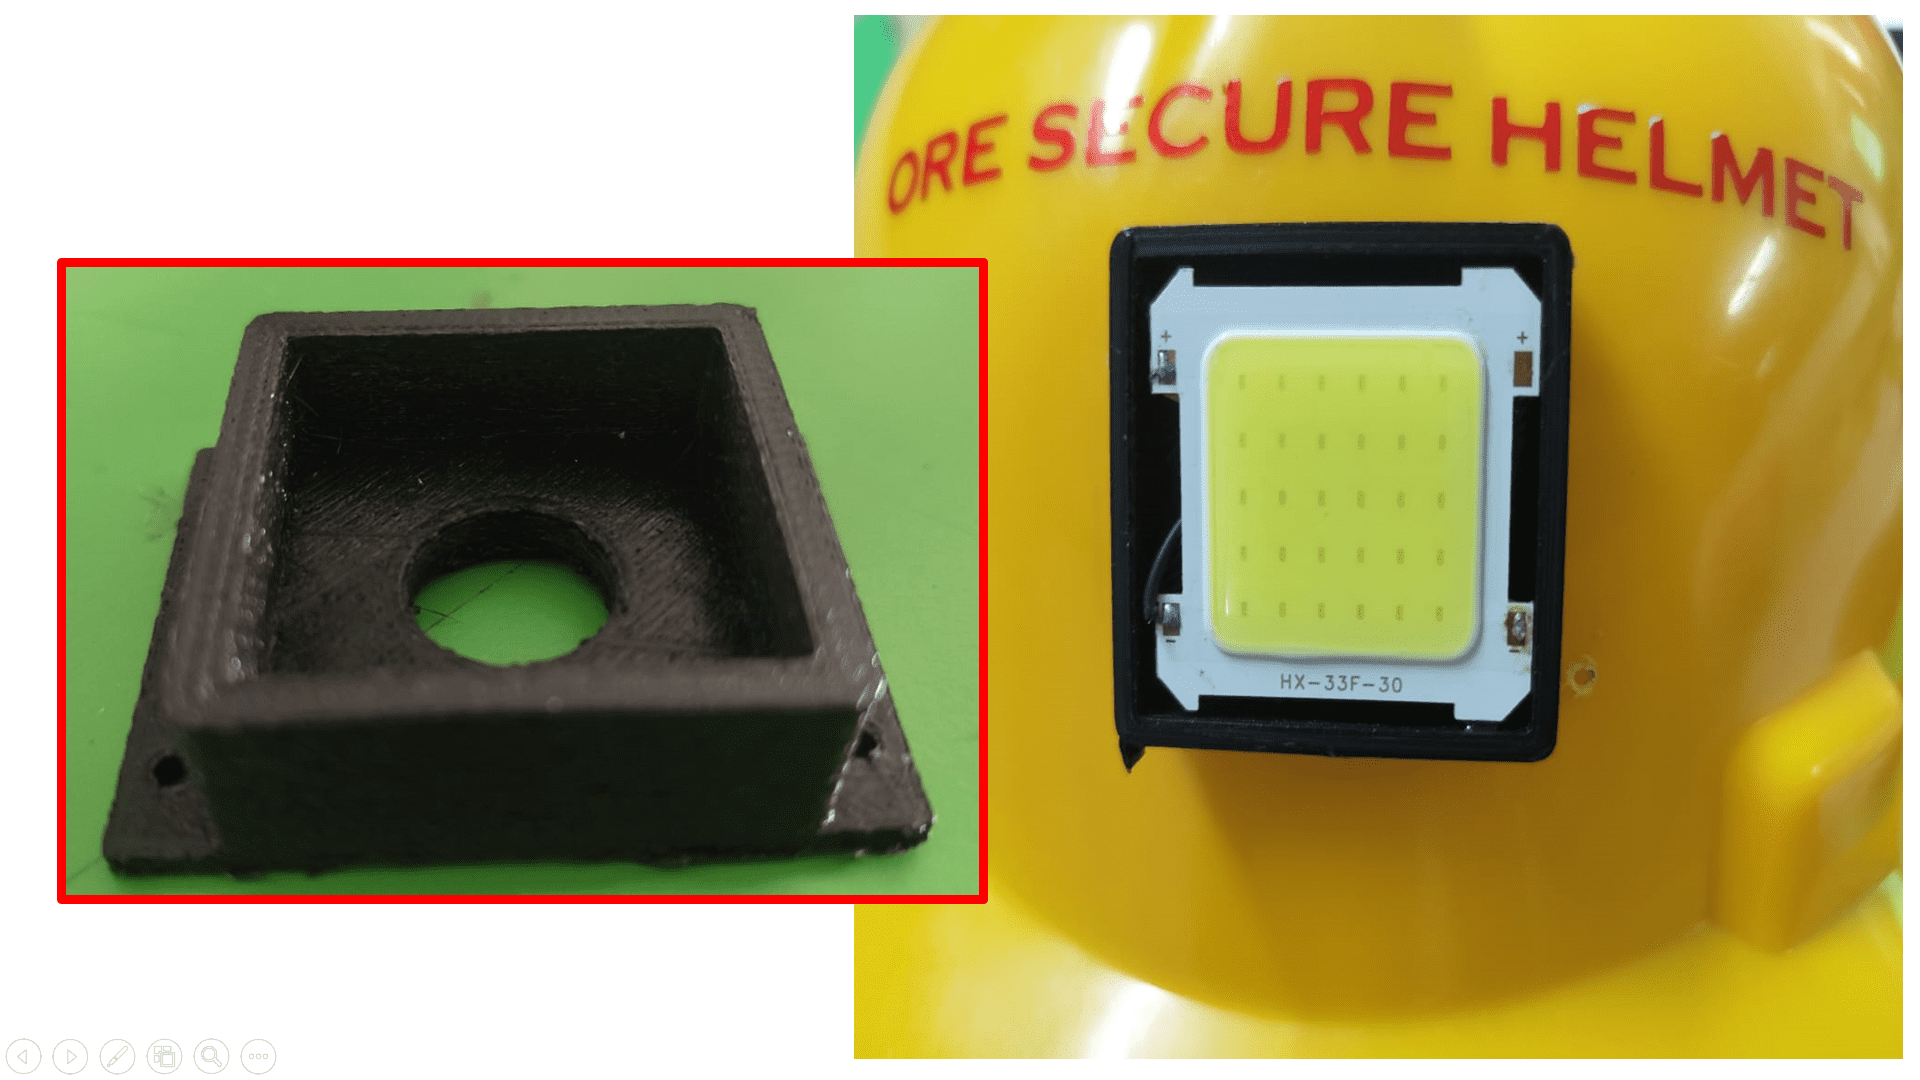
Here is the final output after placing it on the helmet.
Then, I have designed casing for PCB of my finnal project using laser cutting.
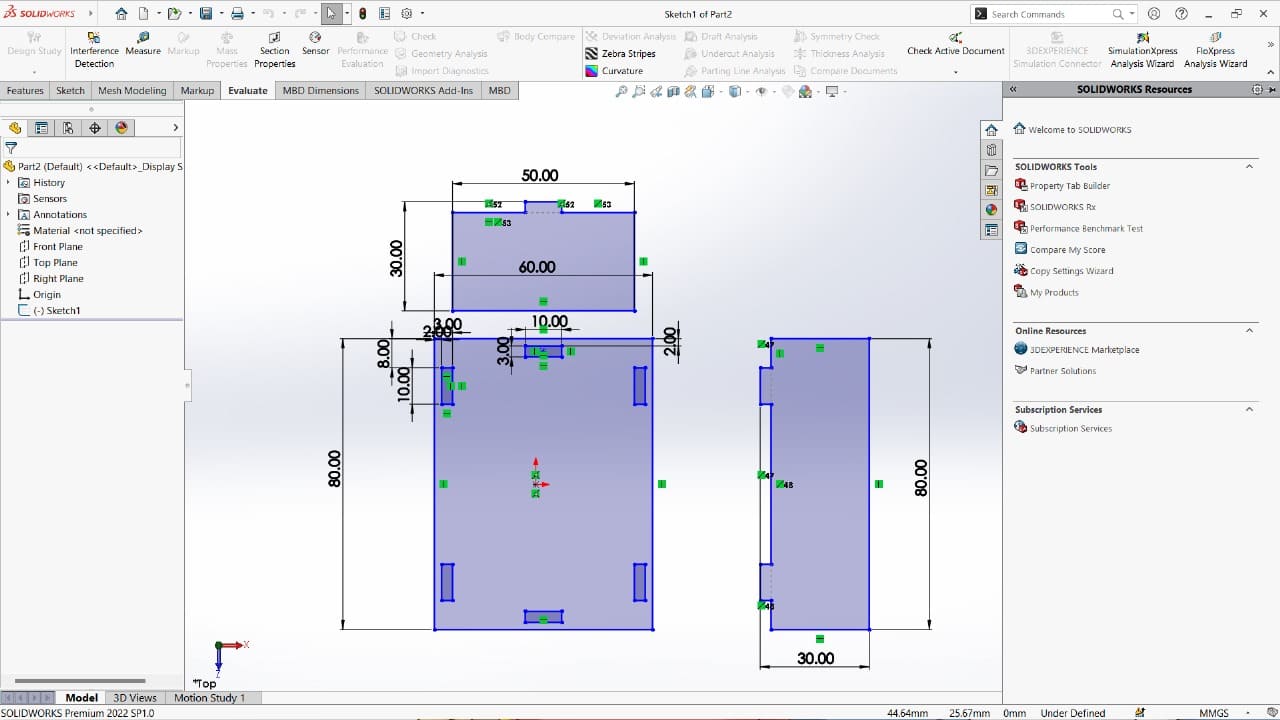
I have designed casing for PCB of my final project using Solidworks for laser cutting.
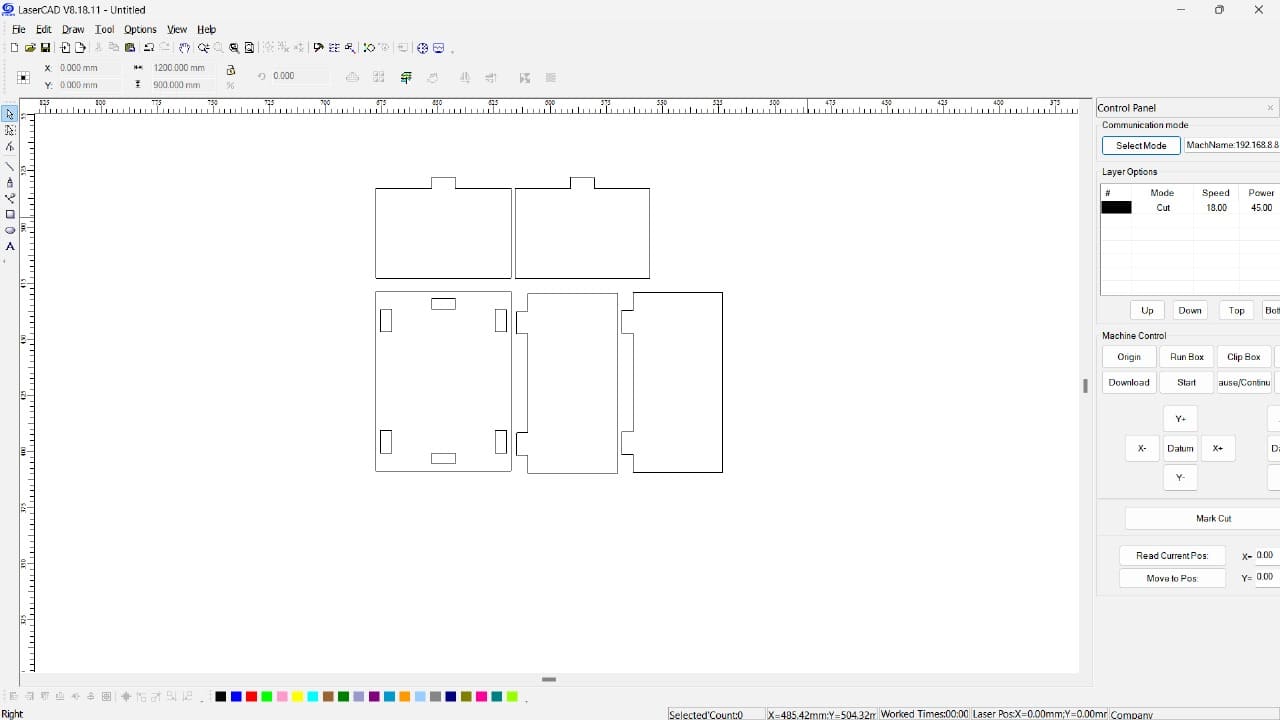
Here, I used LaserCad software to generate GCode for laser cutting.
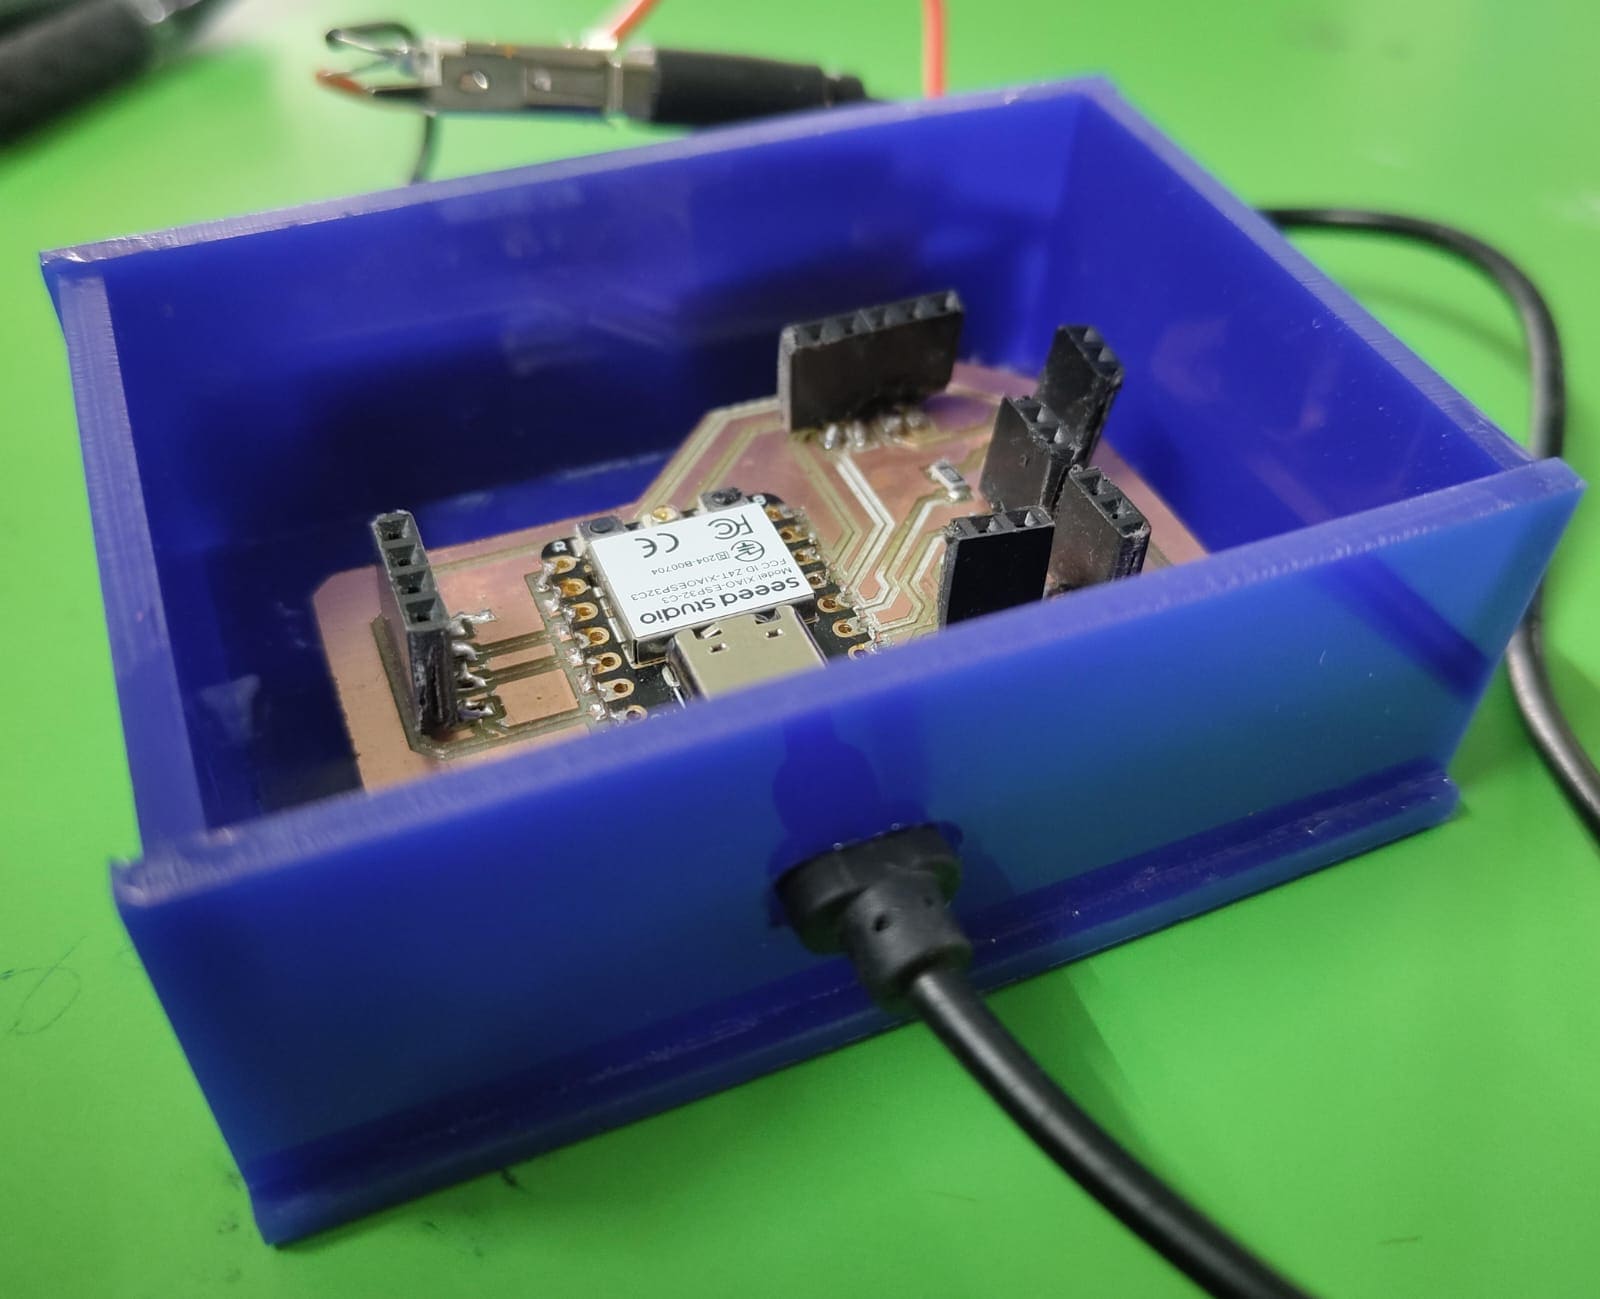
Here is the final output.
Firstly, I calibrated the MQ135 Gas Sensor with XIAO-ESP32-C3 microcontroller.
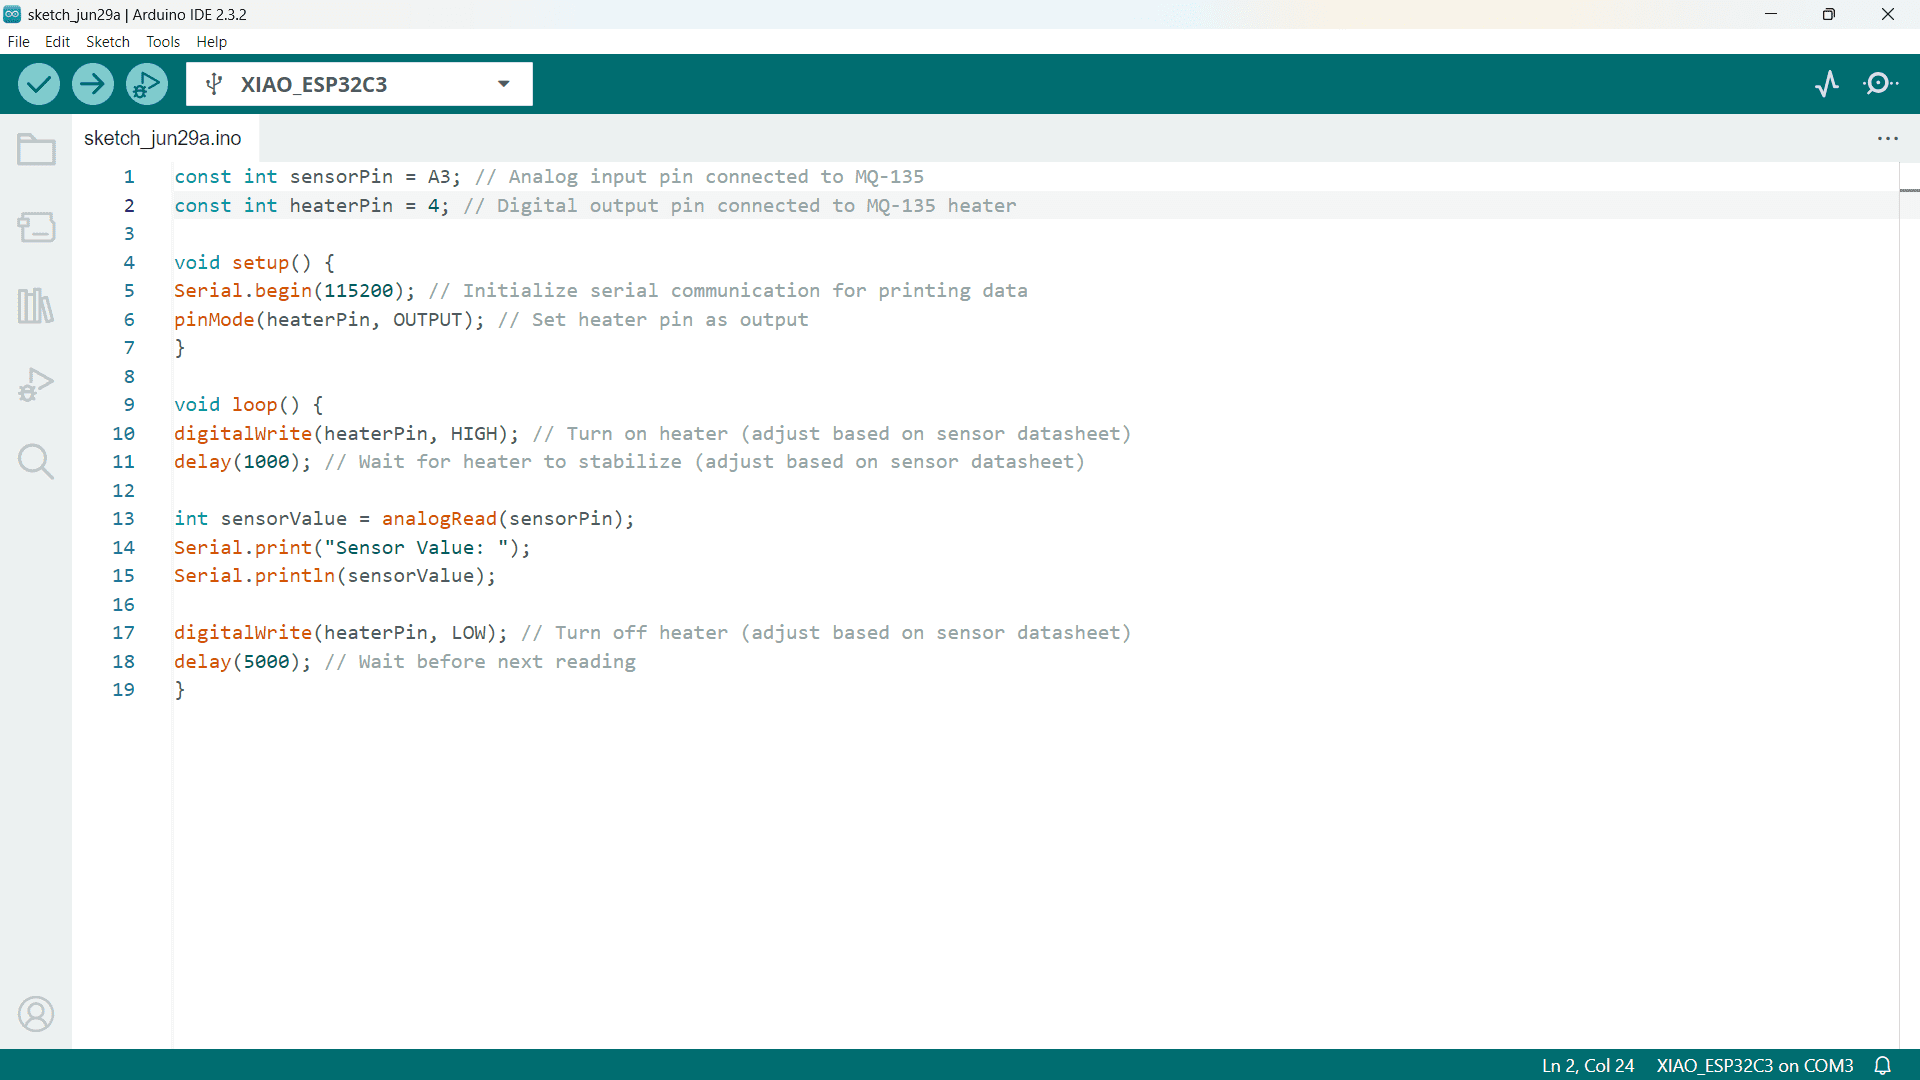
Code:-
        const int sensorPin = 34;  // Analog input pin connected to MQ-135

        const int heaterPin = 25;  // Digital output pin connected to MQ-135 heater


        void setup() {

          Serial.begin(115200);  // Initialize serial communication for printing data

          pinMode(heaterPin, OUTPUT);  // Set heater pin as output

        }


        void loop() {

          digitalWrite(heaterPin, HIGH);  // Turn on heater (adjust based on sensor datasheet)

          delay(1000);                   // Wait for heater to stabilize (adjust based on sensor datasheet)


          int sensorValue = analogRead(sensorPin);

          Serial.print("Sensor Value: ");

          Serial.println(sensorValue);


          digitalWrite(heaterPin, LOW);  // Turn off heater (adjust based on sensor datasheet)

          delay(5000);                   // Wait before next reading

        }
Output:-
Then, I calibrated the Pressure Sensor with XIAO-ESP32-C3 microcontroller.
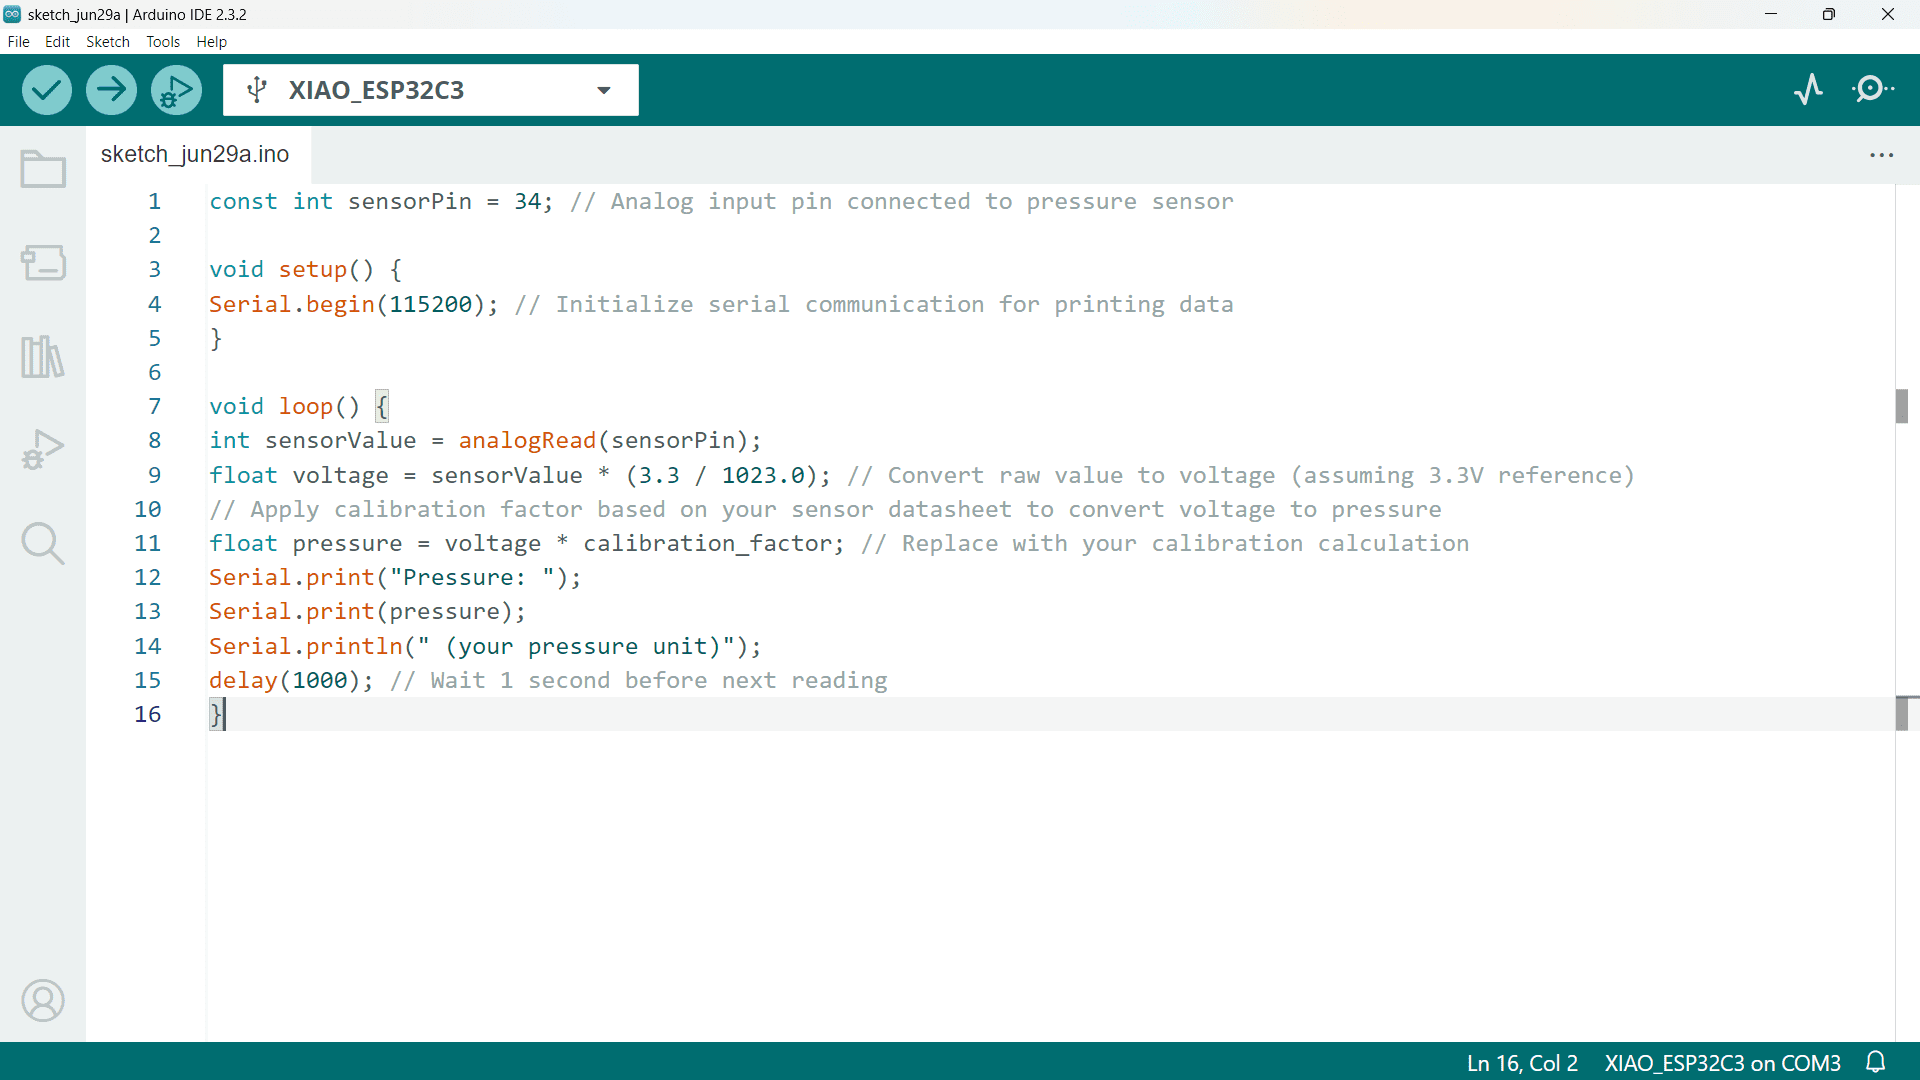
Code:-
        const int sensorPin = 34; // Analog input pin connected to pressure sensor


        void setup() {

          Serial.begin(115200);  // Initialize serial communication for printing data

        }


        void loop() {

          int sensorValue = analogRead(sensorPin);

          float voltage = sensorValue * (3.3 / 1023.0); // Convert raw value to voltage (assuming 3.3V reference)

          // Apply calibration factor based on your sensor datasheet to convert voltage to pressure

          float pressure = voltage * calibration_factor; // Replace with your calibration calculation

          Serial.print("Pressure: ");

          Serial.print(pressure);

          Serial.println(" (your pressure unit)");

          delay(1000); // Wait 1 second before next reading

        }
Output:-
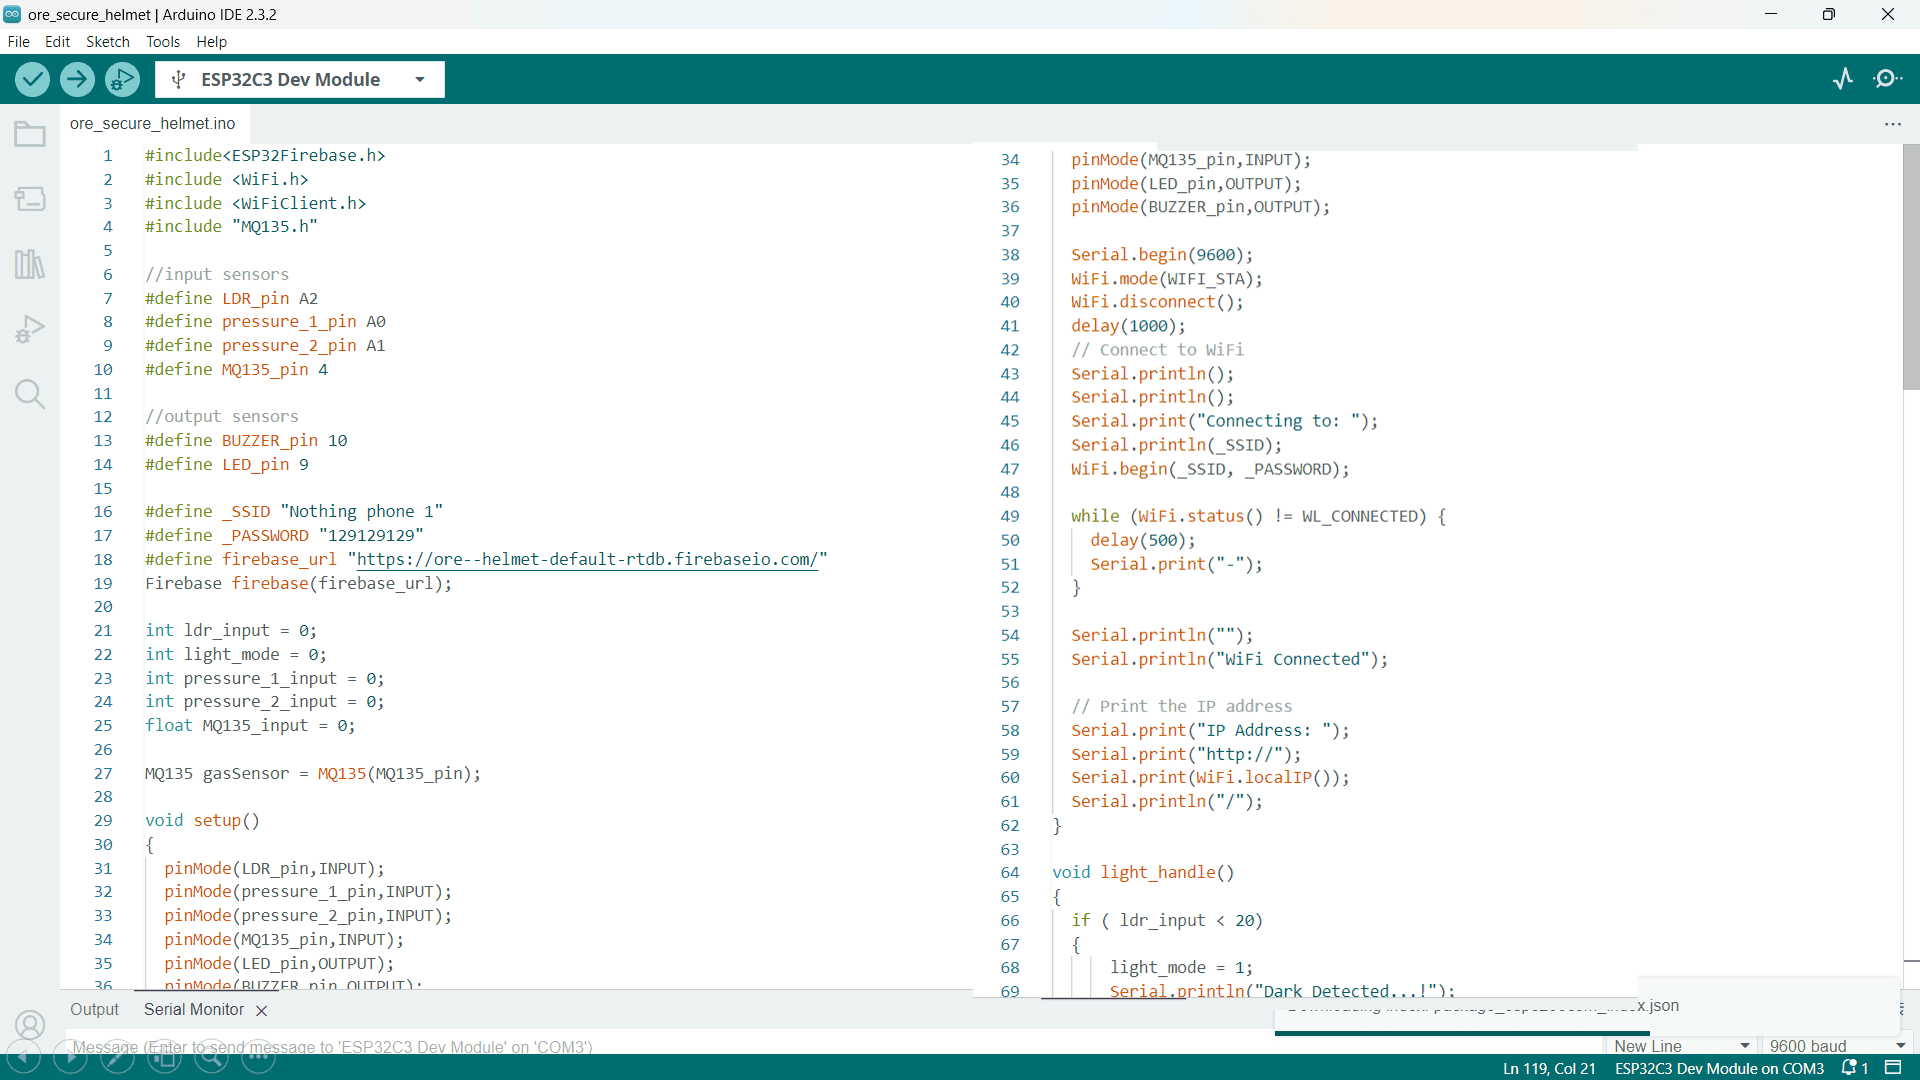
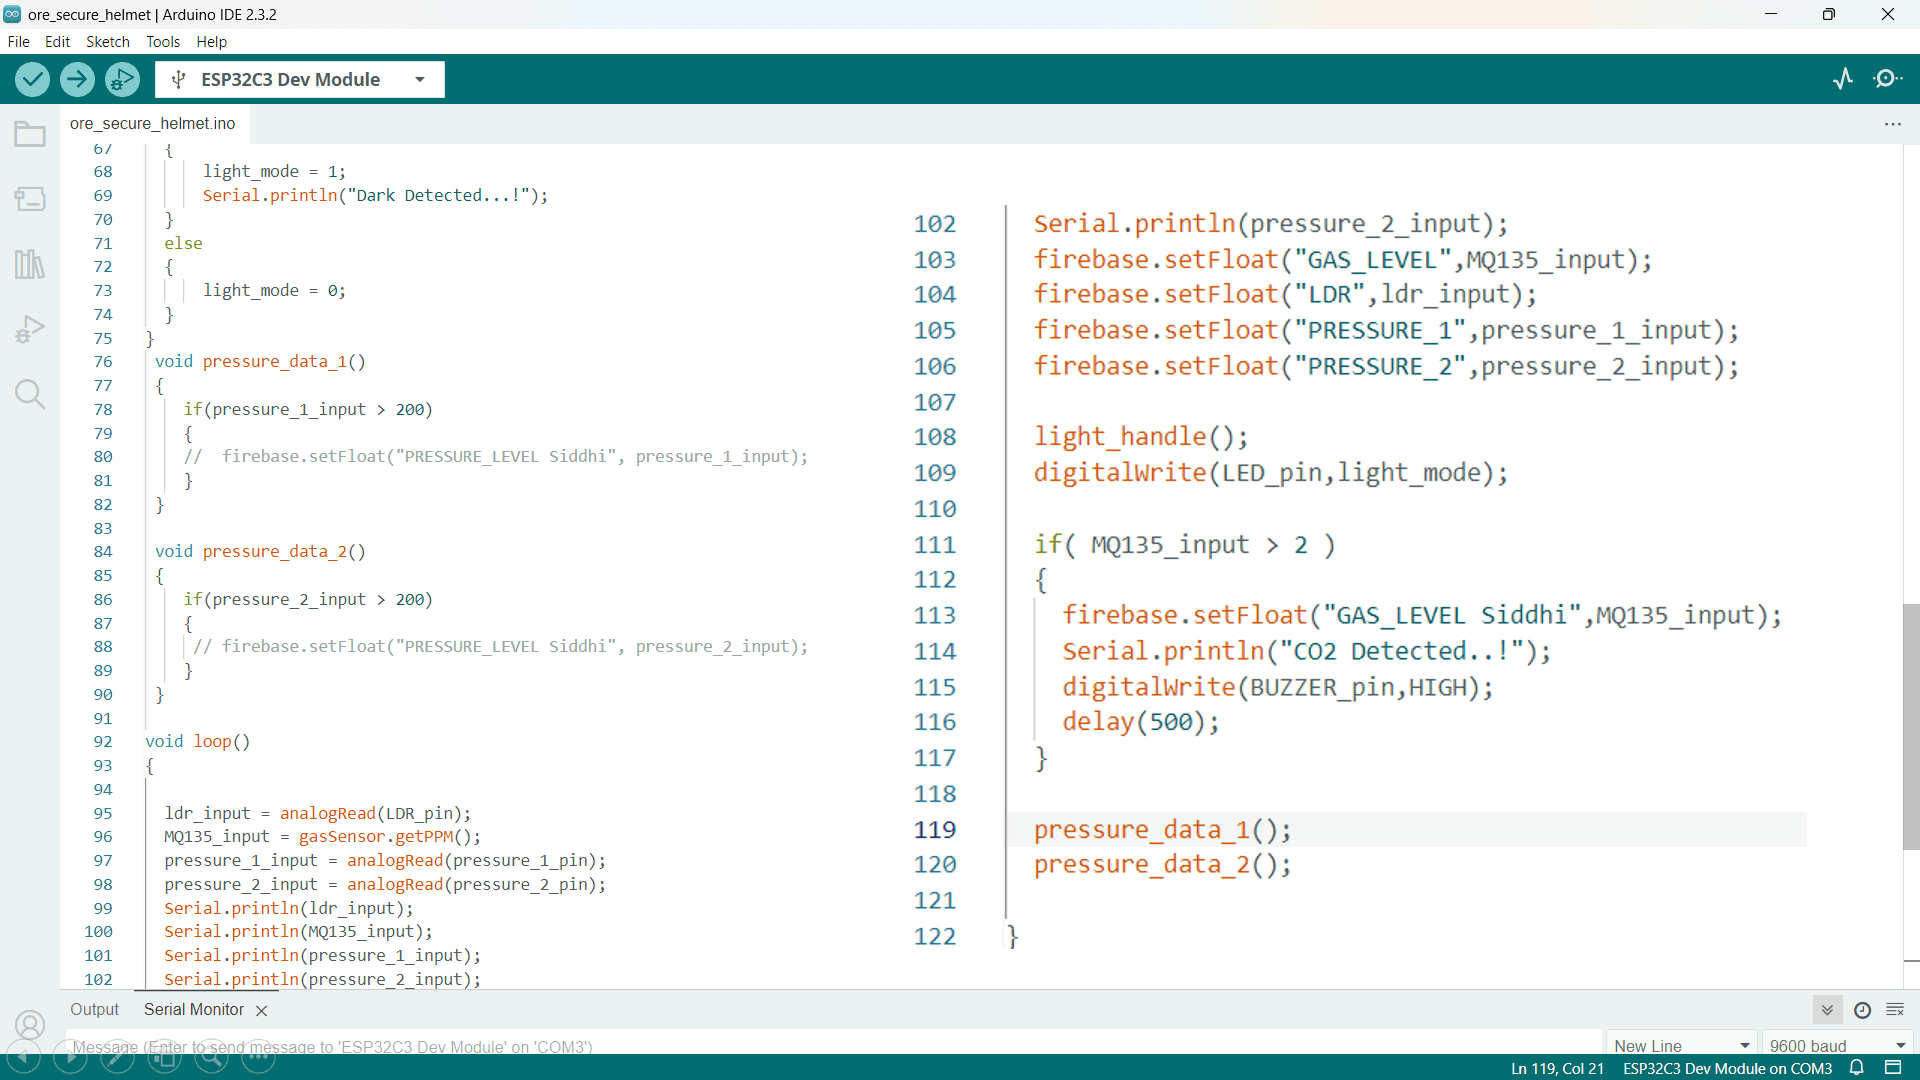
Here is the raw testing of all the components with the micocontroller.
Program:-
        #include< ESP32Firebase.h >

        #include < WiFi.h >

        #include < WiFiClient.h >

        #include "MQ135.h"


        //input sensors

        #define LDR_pin A2

        #define pressure_1_pin A0

        #define pressure_2_pin A1

        #define MQ135_pin 4


        //output sensors

        #define BUZZER_pin 10

        #define LED_pin 9


        #define _SSID "Nothing phone 1"

        #define _PASSWORD "129129129"

        #define firebase_url "https://ore--helmet-default-rtdb.firebaseio.com/"

        Firebase firebase(firebase_url);


        int ldr_input = 0;

        int light_mode = 0;

        int pressure_1_input = 0;

        int pressure_2_input = 0;

        float MQ135_input = 0;


        MQ135 gasSensor = MQ135(MQ135_pin);


        void setup()

        {

          pinMode(LDR_pin,INPUT);

          pinMode(pressure_1_pin,INPUT);

          pinMode(pressure_2_pin,INPUT);

          pinMode(MQ135_pin,INPUT);

          pinMode(LED_pin,OUTPUT);

          pinMode(BUZZER_pin,OUTPUT);


          Serial.begin(9600);

          WiFi.mode(WIFI_STA);

          WiFi.disconnect();

          delay(1000);

          // Connect to WiFi

          Serial.println();

          Serial.println();

          Serial.print("Connecting to: ");

          Serial.println(_SSID);

          WiFi.begin(_SSID, _PASSWORD);


          while (WiFi.status() != WL_CONNECTED) {

            delay(500);

            Serial.print("-");

          }


          Serial.println("");

          Serial.println("WiFi Connected");


          // Print the IP address

          Serial.print("IP Address: ");

          Serial.print("http://");

          Serial.print(WiFi.localIP());

          Serial.println("/");

        }


        void light_handle()

        {

          if ( ldr_input < 20)

          {

              light_mode = 1;

              Serial.println("Dark Detected...!");

          }

          else

          {

              light_mode = 0;

          }

        }

         void pressure_data_1()

         {

            if(pressure_1_input > 200)

            {

            //  firebase.setFloat("PRESSURE_LEVEL Siddhi", pressure_1_input);

            }

         }


         void pressure_data_2()

         {

            if(pressure_2_input > 200)

            {

             // firebase.setFloat("PRESSURE_LEVEL Siddhi", pressure_2_input);

            }

         }


        void loop()

        {


          ldr_input = analogRead(LDR_pin);

          MQ135_input = gasSensor.getPPM();

          pressure_1_input = analogRead(pressure_1_pin);

          pressure_2_input = analogRead(pressure_2_pin);

          Serial.println(ldr_input);

          Serial.println(MQ135_input);

          Serial.println(pressure_1_input);

          Serial.println(pressure_2_input);

          firebase.setFloat("GAS_LEVEL",MQ135_input);

          firebase.setFloat("LDR",ldr_input);

          firebase.setFloat("PRESSURE_1",pressure_1_input);

          firebase.setFloat("PRESSURE_2",pressure_2_input);


          light_handle();

          digitalWrite(LED_pin,light_mode);


          if( MQ135_input > 2 )

          {

            firebase.setFloat("GAS_LEVEL Siddhi",MQ135_input);

            Serial.println("CO2 Detected..!");

            digitalWrite(BUZZER_pin,HIGH);

            delay(500);

          }


          pressure_data_1();

          pressure_data_2();


        }
Programming in arduino IDE.
PCB Designing using Autodesk Eagle
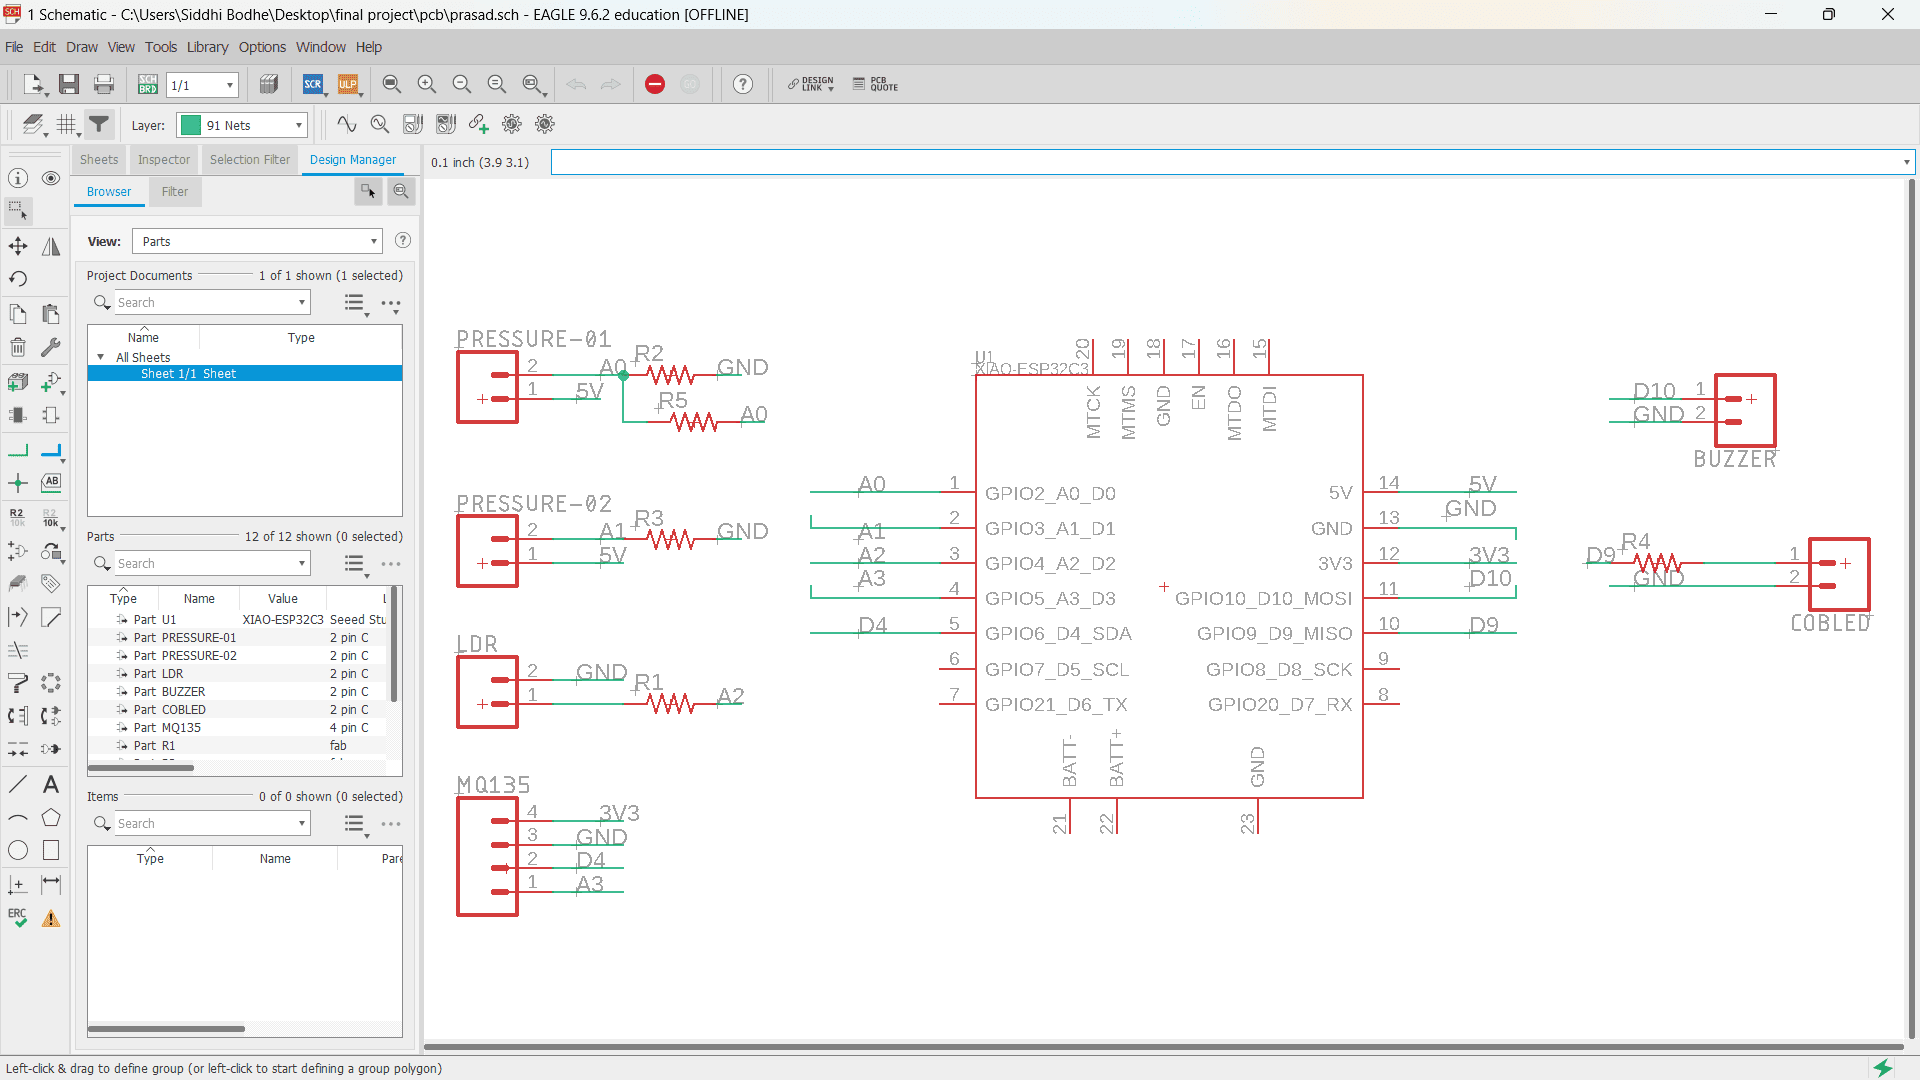
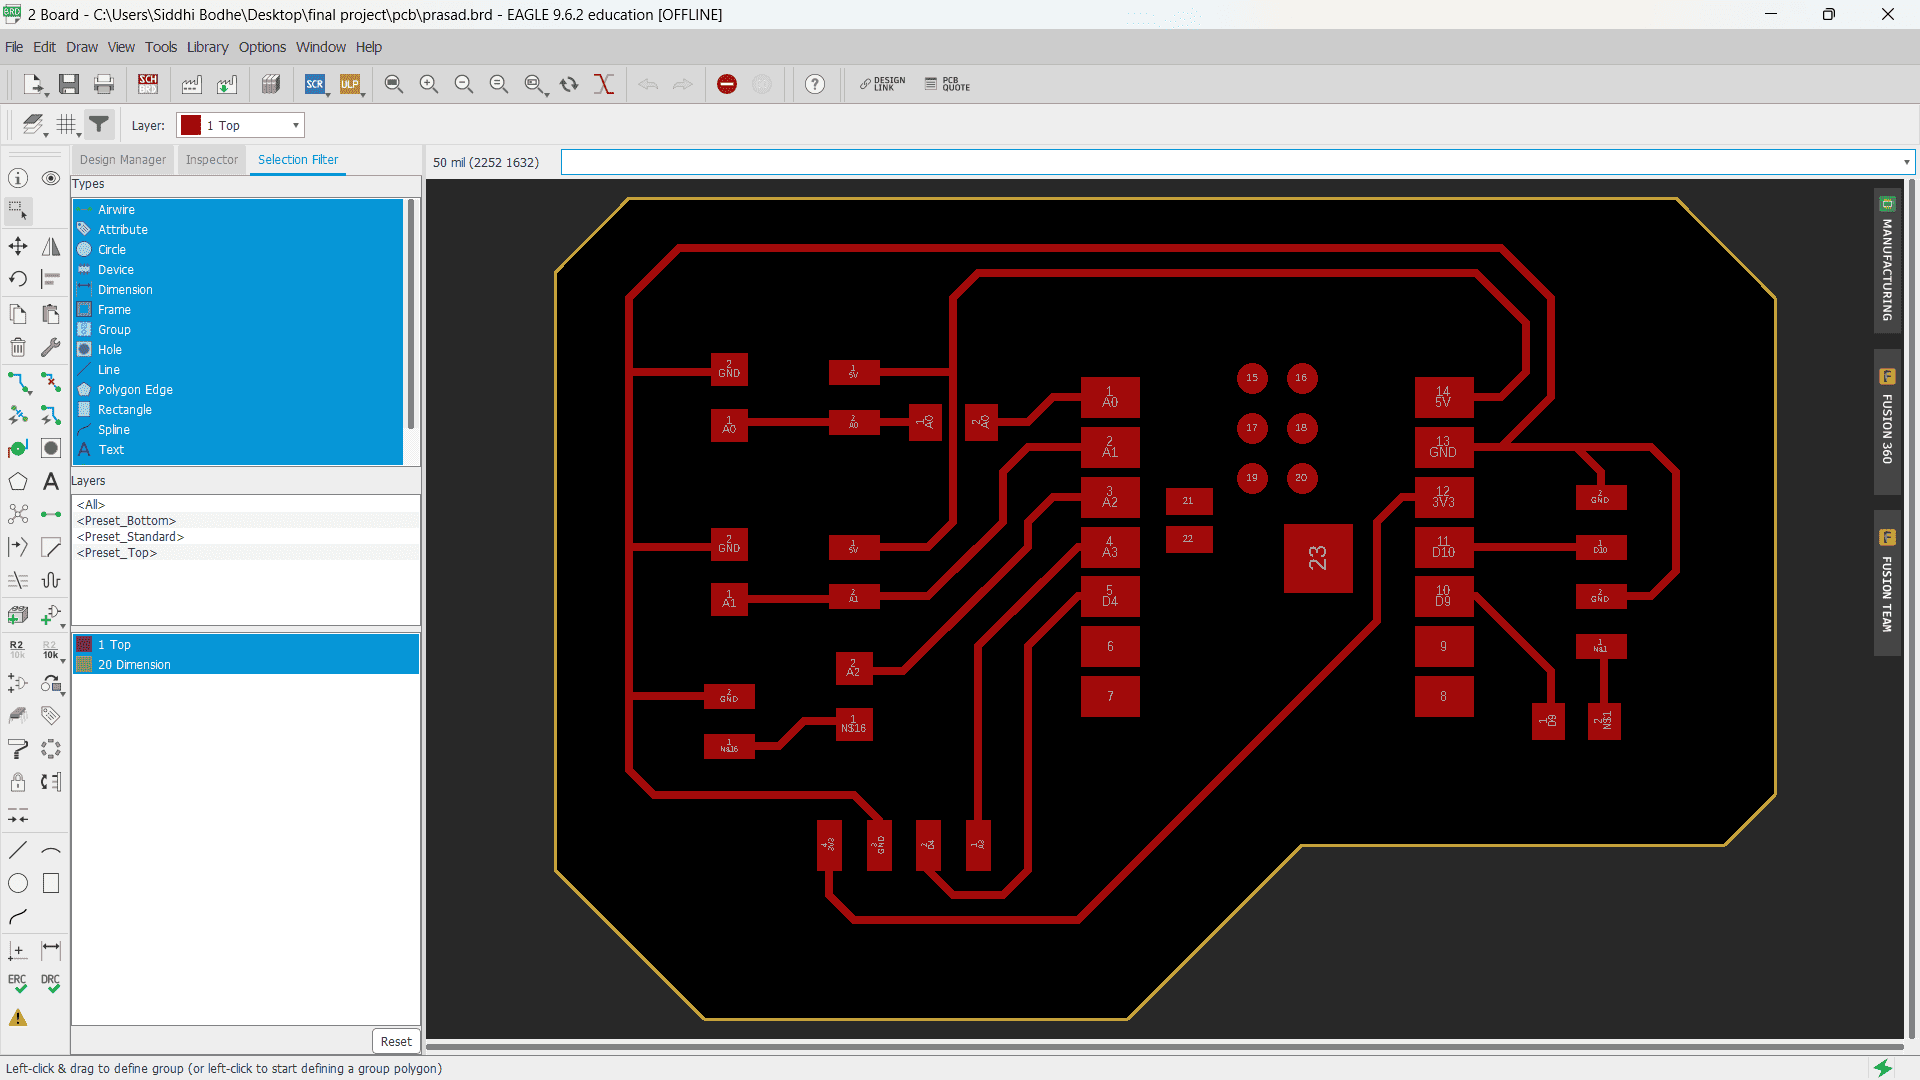
Output
Here, I did the testing by giving the power supply through 3.7V rechargeable battery cell to the whole system.
Here I assemble all the components on the helmet.
Here, I tested all the components after placing on helmet.
Here is the Packaging video and final look.
Finally, My Ore Secure Helmet is ready!
Here is the final output of my final project.