On this day, MIT Professor Mr. Neil Gershenfold Sir has taken our first global online session of Fab Academy 2024. At first time I felt very nervous but he makes everyone calm by his friendly interaction with each and every person present in the meeting. He has given a brief idea on what Fab Academy 2024 course is and what actually we are going to do. Firstly, he explain the history of Fab Lab, how Fab Lab originated and how Fab Lab gets evolute. Later on he has given the brief ideal flow of course and explained the assignments of Week-01 includes website developement, project management and version control. At the end, he has motivated everyone with his extraordinary positive thoughts which encouraged everyone to work dedicatively.
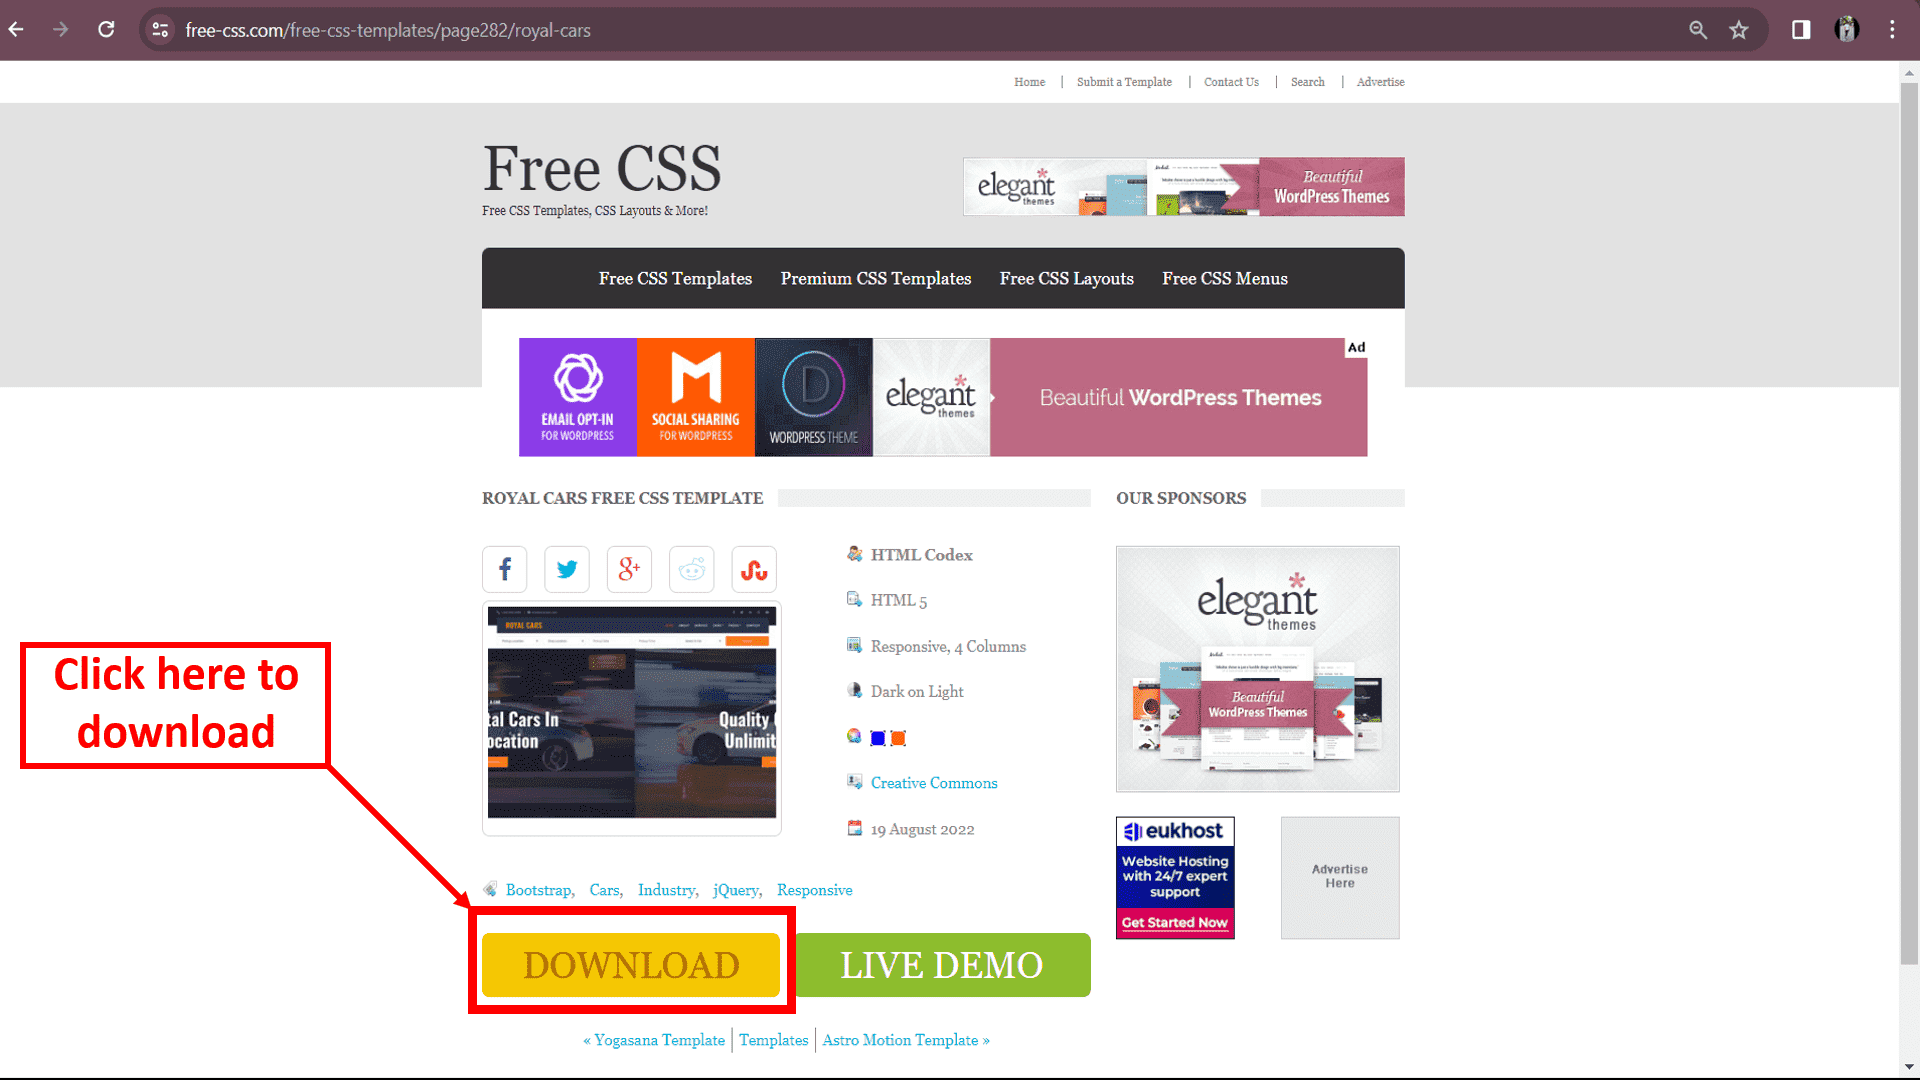
Now I have to develope my own website but I didn't have any idea about it. On 2nd day, Instructor Mr. Suhas Labade Sir has taken online meet to give brief idea on website development. He taught us developement of webiste using html, css and js. By referring him, I downloaded free html-css template from Free CSS Templates, CSS Layouts.
According to above image, I have downloaded my website template and started editing in Web development softwares includes VSCode NotePad++.
Firstly I have made changes in header of my website. I have added my contact number, email address and tabs includes "Home", "About", "Assignments" and "Final Project".
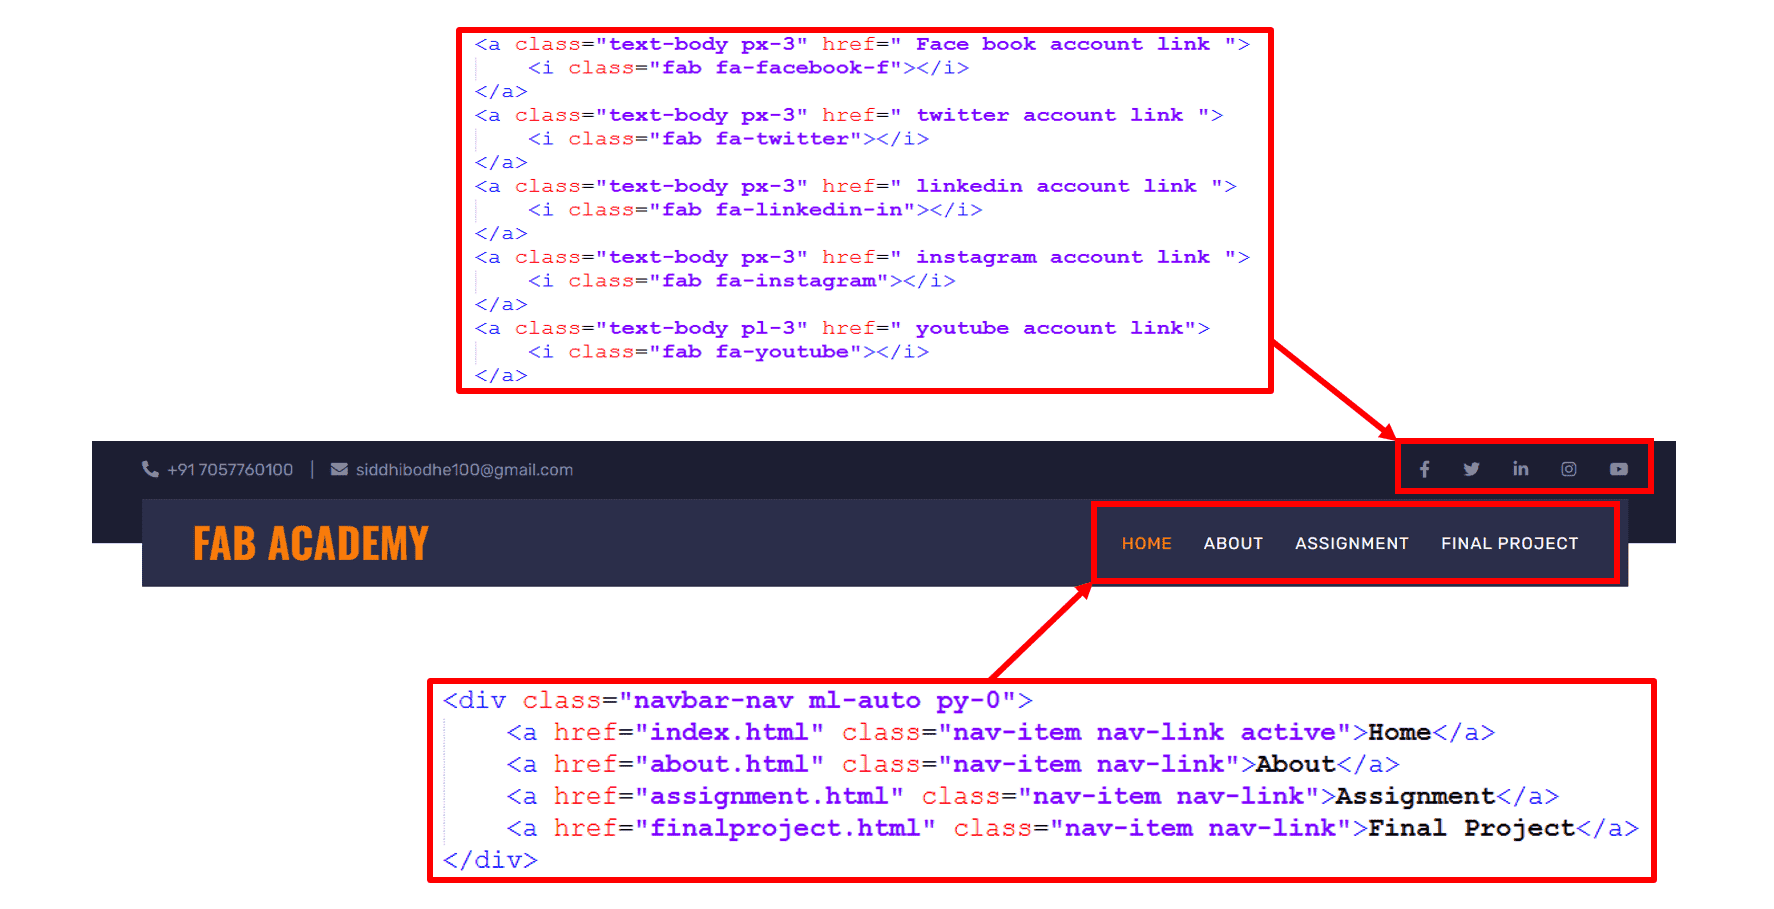
According to above image, I have used following commands which I have refer from W3School.
1) "DOCTYPE html" declaration defines that this document is HTML Document.
2) "html" shows the main element of HTML page.
3) "head" shows element contains meta information about HTML page.
4) "title" used to specify title to HTML page.
5) "body" defines the document's body includes whole construction of HTML page.
6) "h1 to h6" used to give font size to text (h1-largest heading, h6-smallest heading).
7) "p" defines a paragraph.
8) "br" used to break line or to add blank line.
9) "< !--Comment-- >" used to add comment to respective region or line.
10) "u" used for underline the text.
11) "b" used to bold the text.
12) "font color" declares color to text.
13) "img src" used to add image.
14) "a href" used to link another page or hyperlink.
15) "div" used to divide text into blocks.
These are the basic commands which I have used to edit my website.
On 3rd day, My instructor Mr. Kiran Wakchaure sir has checked my whole code and website that I have edited using basic commands of HTML. He suggested me to make some changes to make my website more attractive and interesting.
I have made following changes by taking his suggestions.
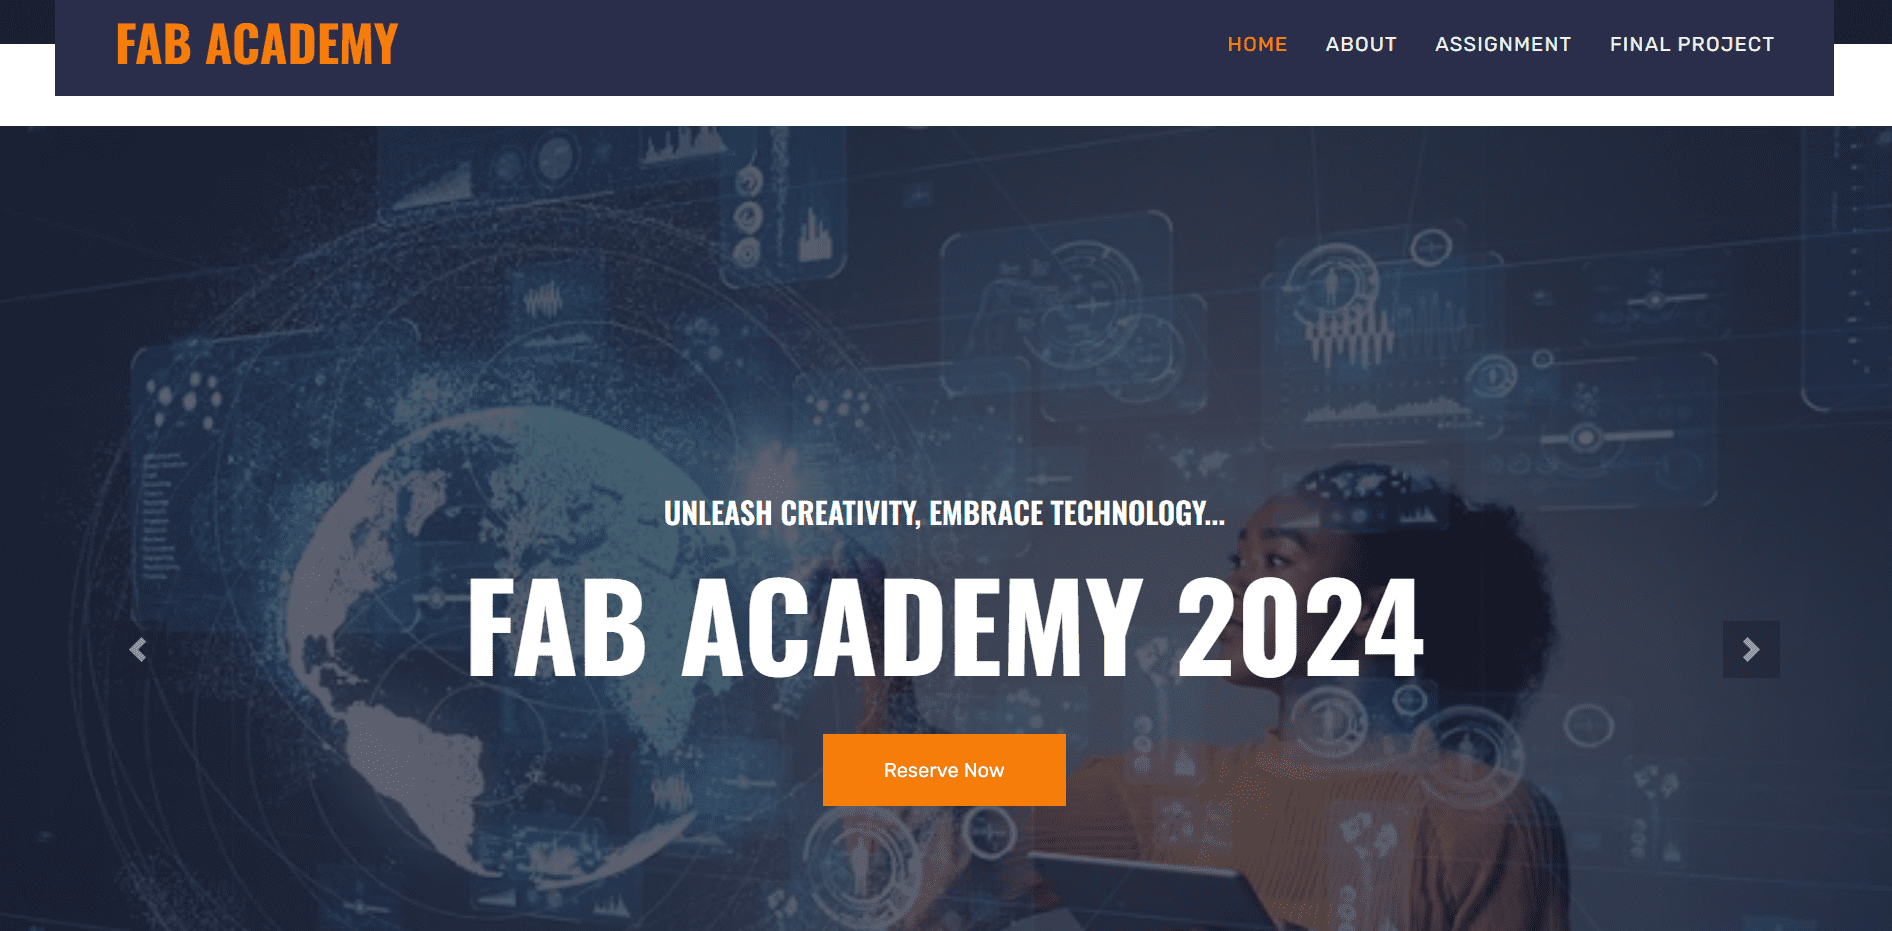
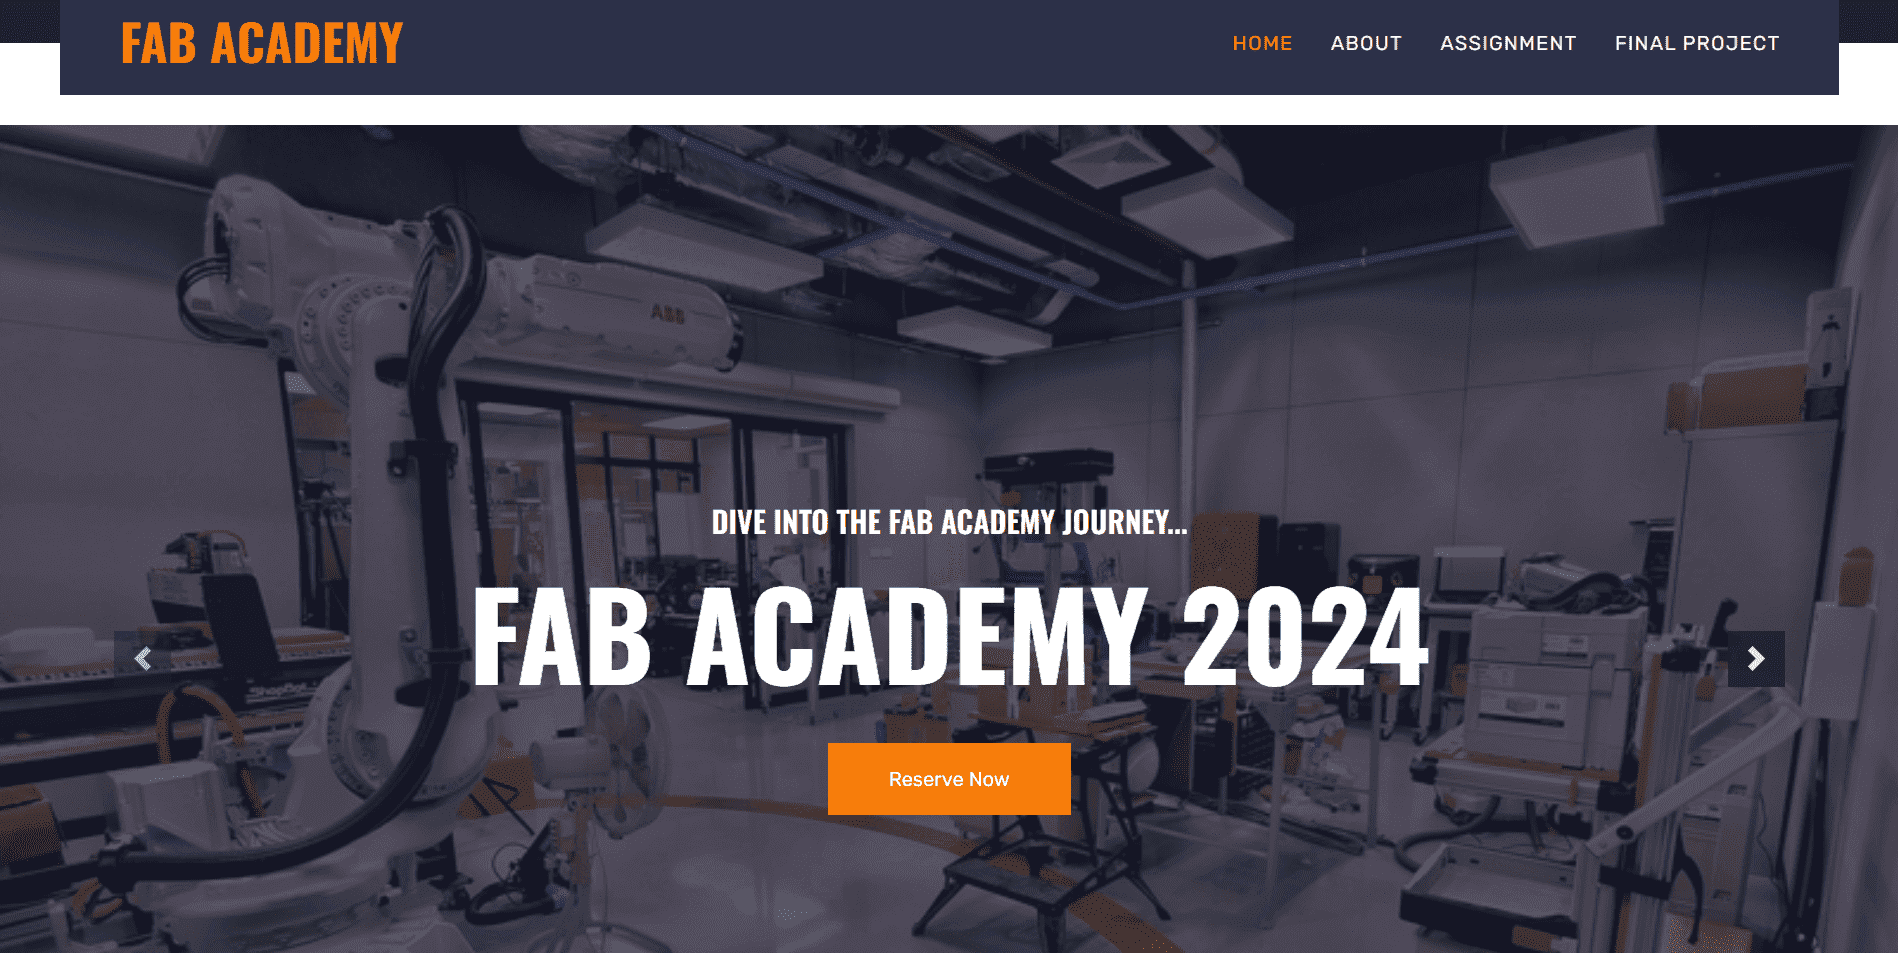
1) I have removed background images of "Home" page and added some quotations using "img src" command and "h4" heading command.
Here is the view of change:-
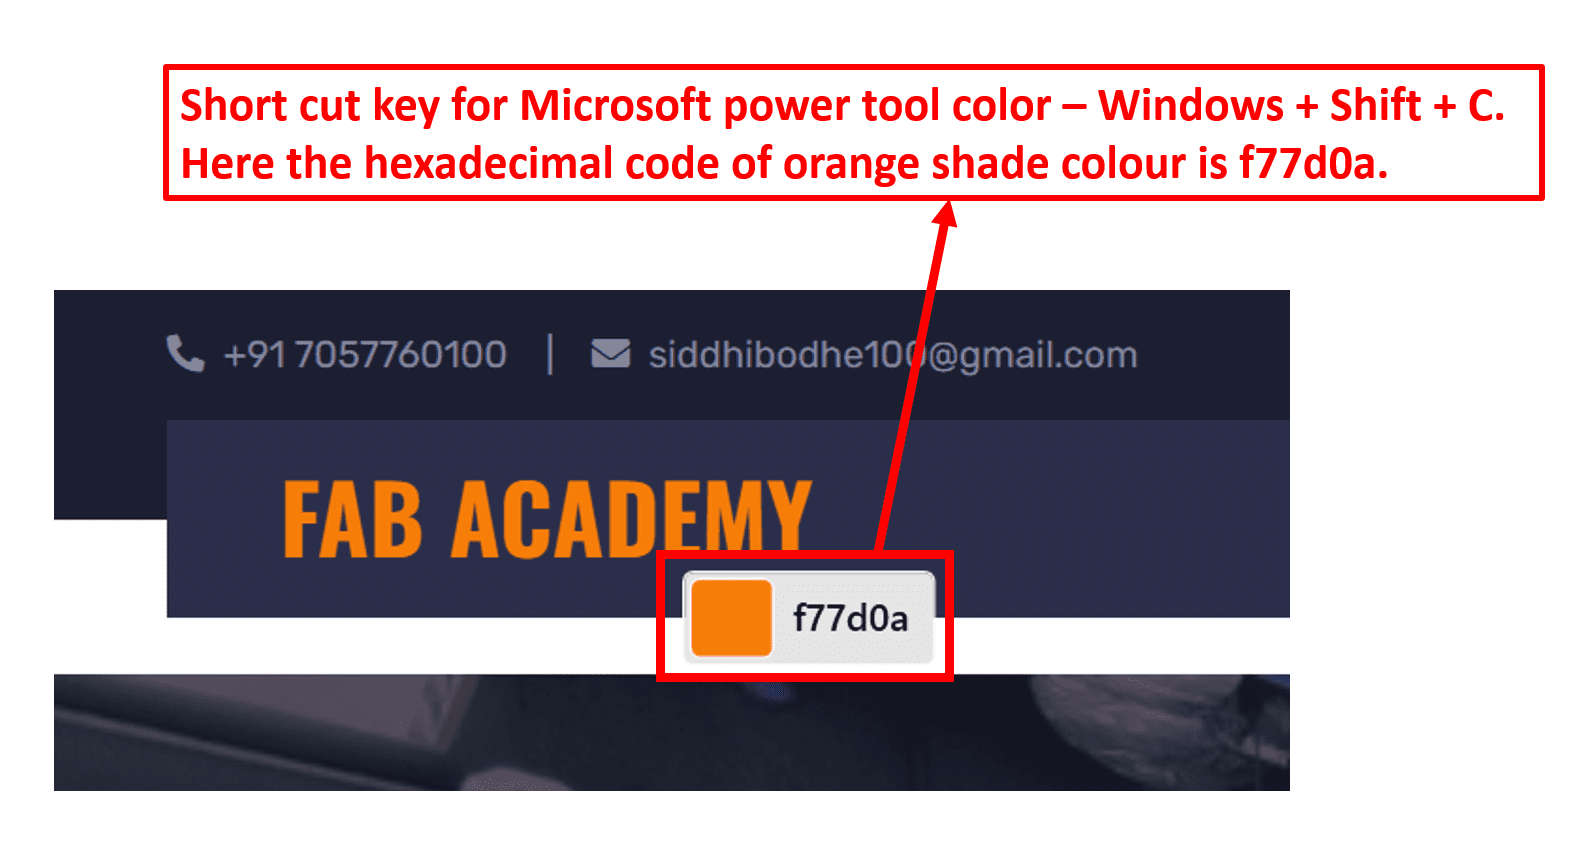
2) I wanted to change color of word "Fab Academy" in header. So, I used "FONT COLOR" command which changes color from white to orange. To get exact color of the text I used Microsoft power tool which help me to find the hexadecimal code of the respective colour.
Here is the view of change:-
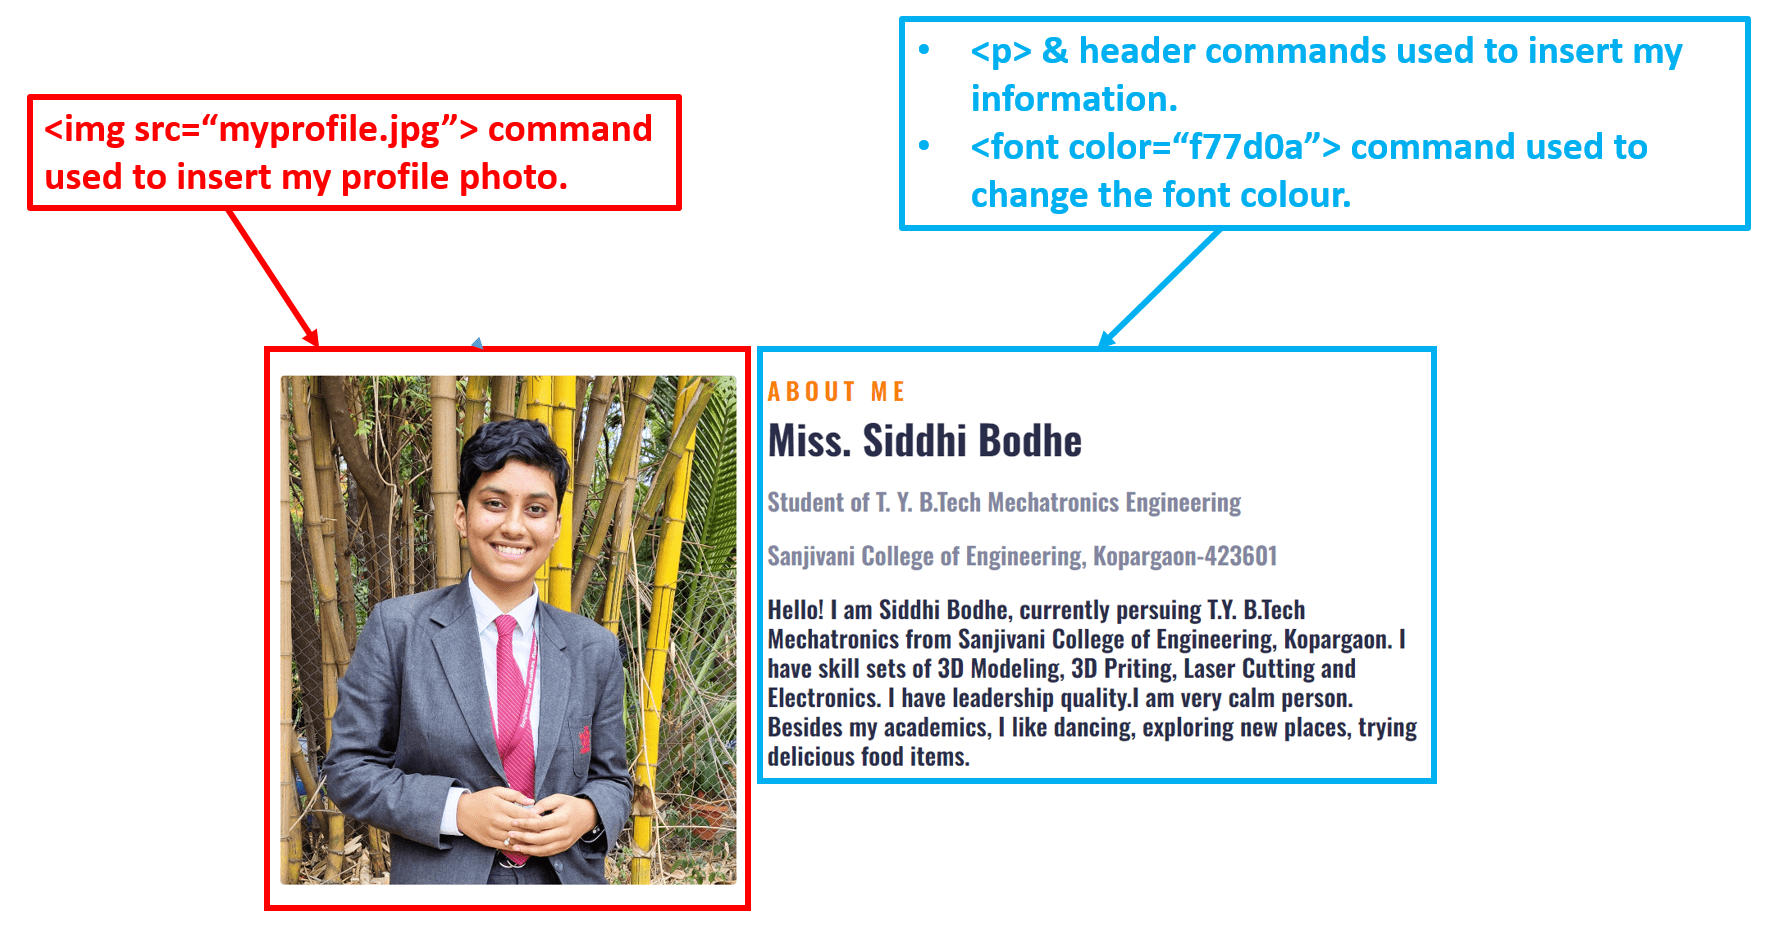
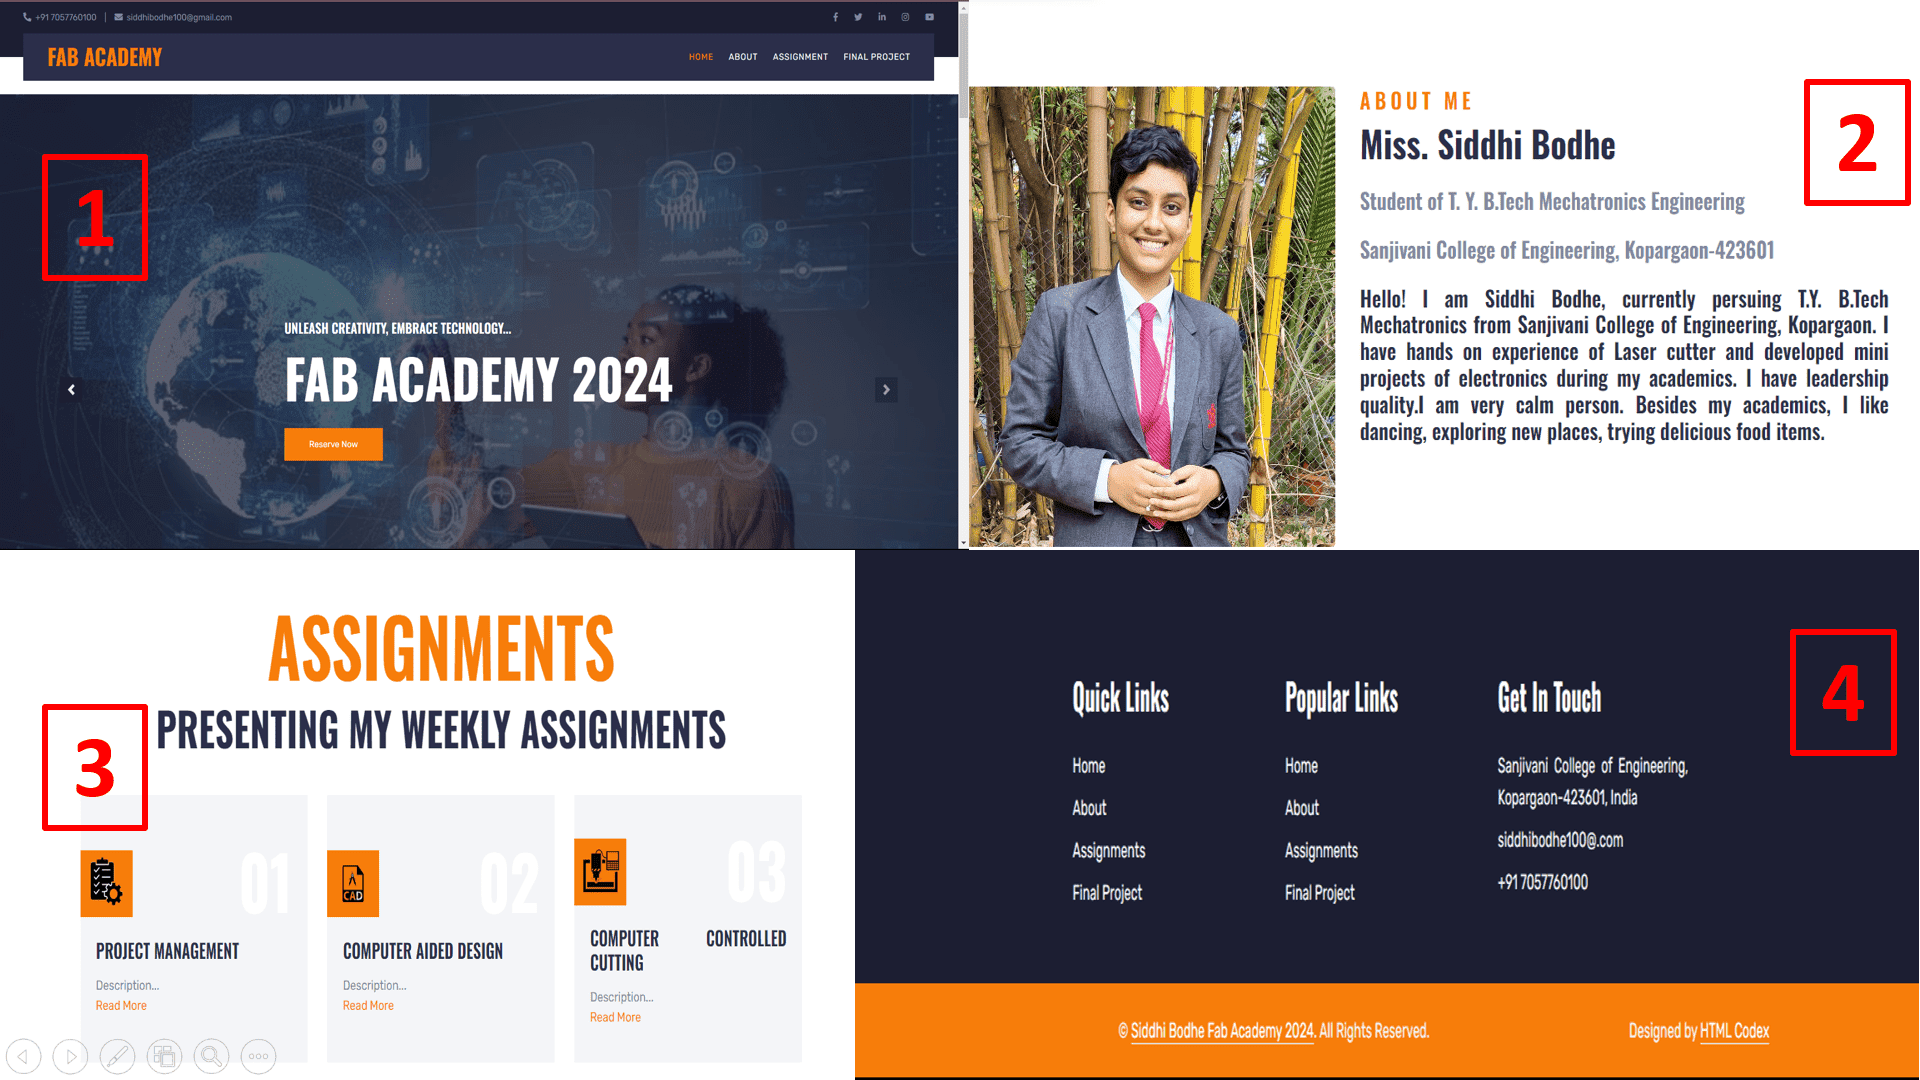
3) Now I wanted to add my profile photo along with my short introduction.
Here is the view of change:-
4) Here I have created blocks of weekly assignments includes logo, text and hyperlink of respective week assignment page.
Here is the view of change:-

5) I wanted to add footer to my website includes my location and contact details.
Here is the view of change:-

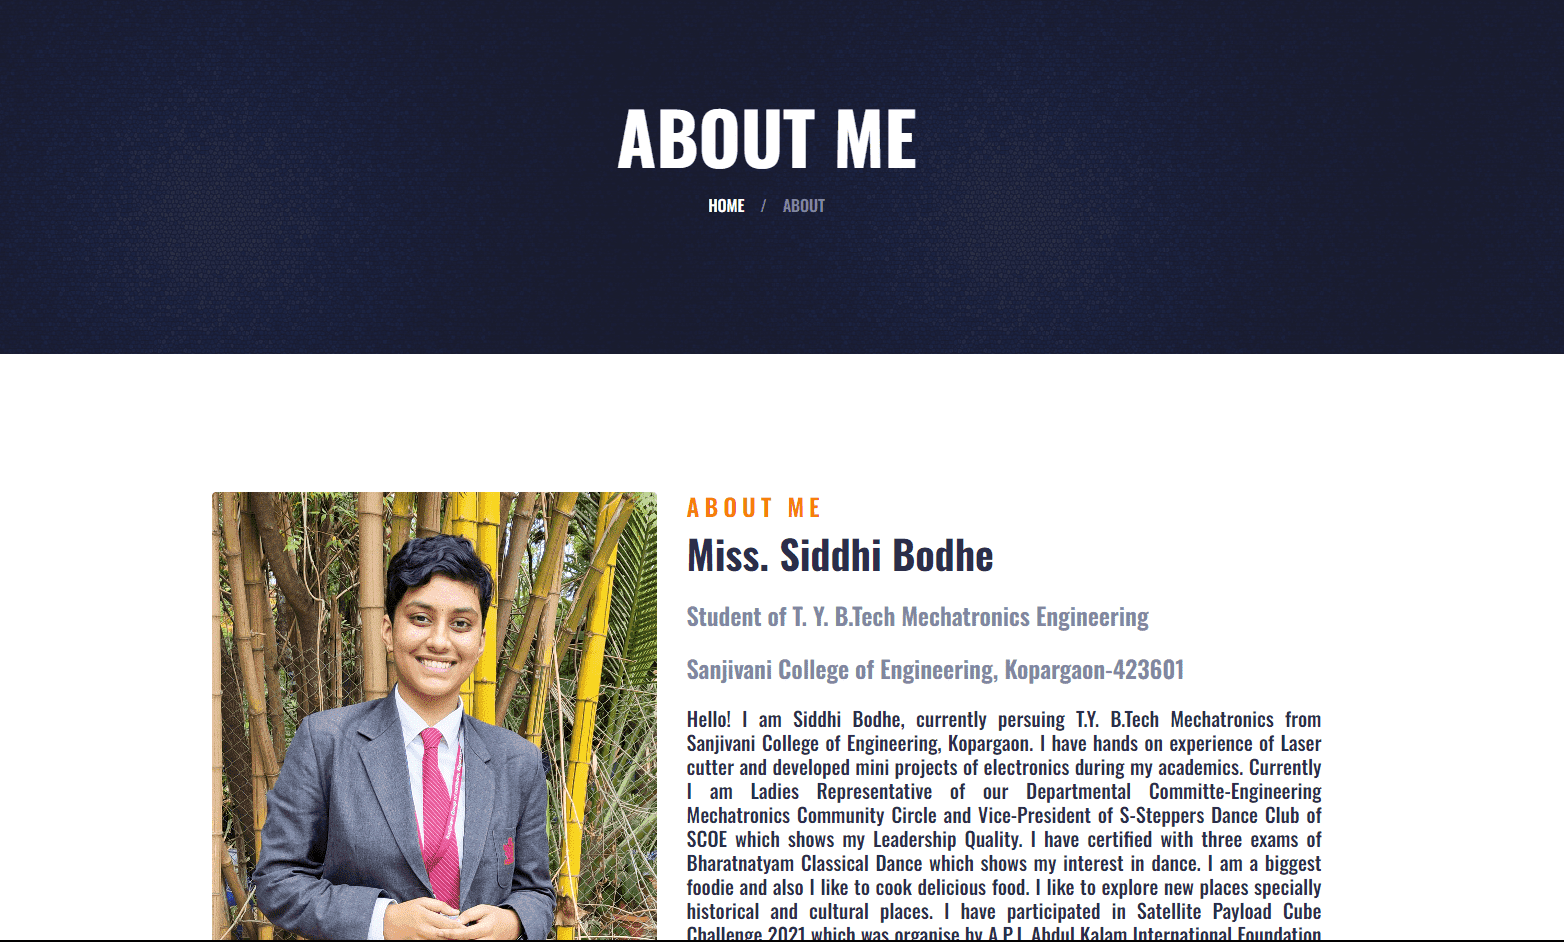
6) Here is my about page.
7) Here is weekly assignment page.

8) Here is final project page
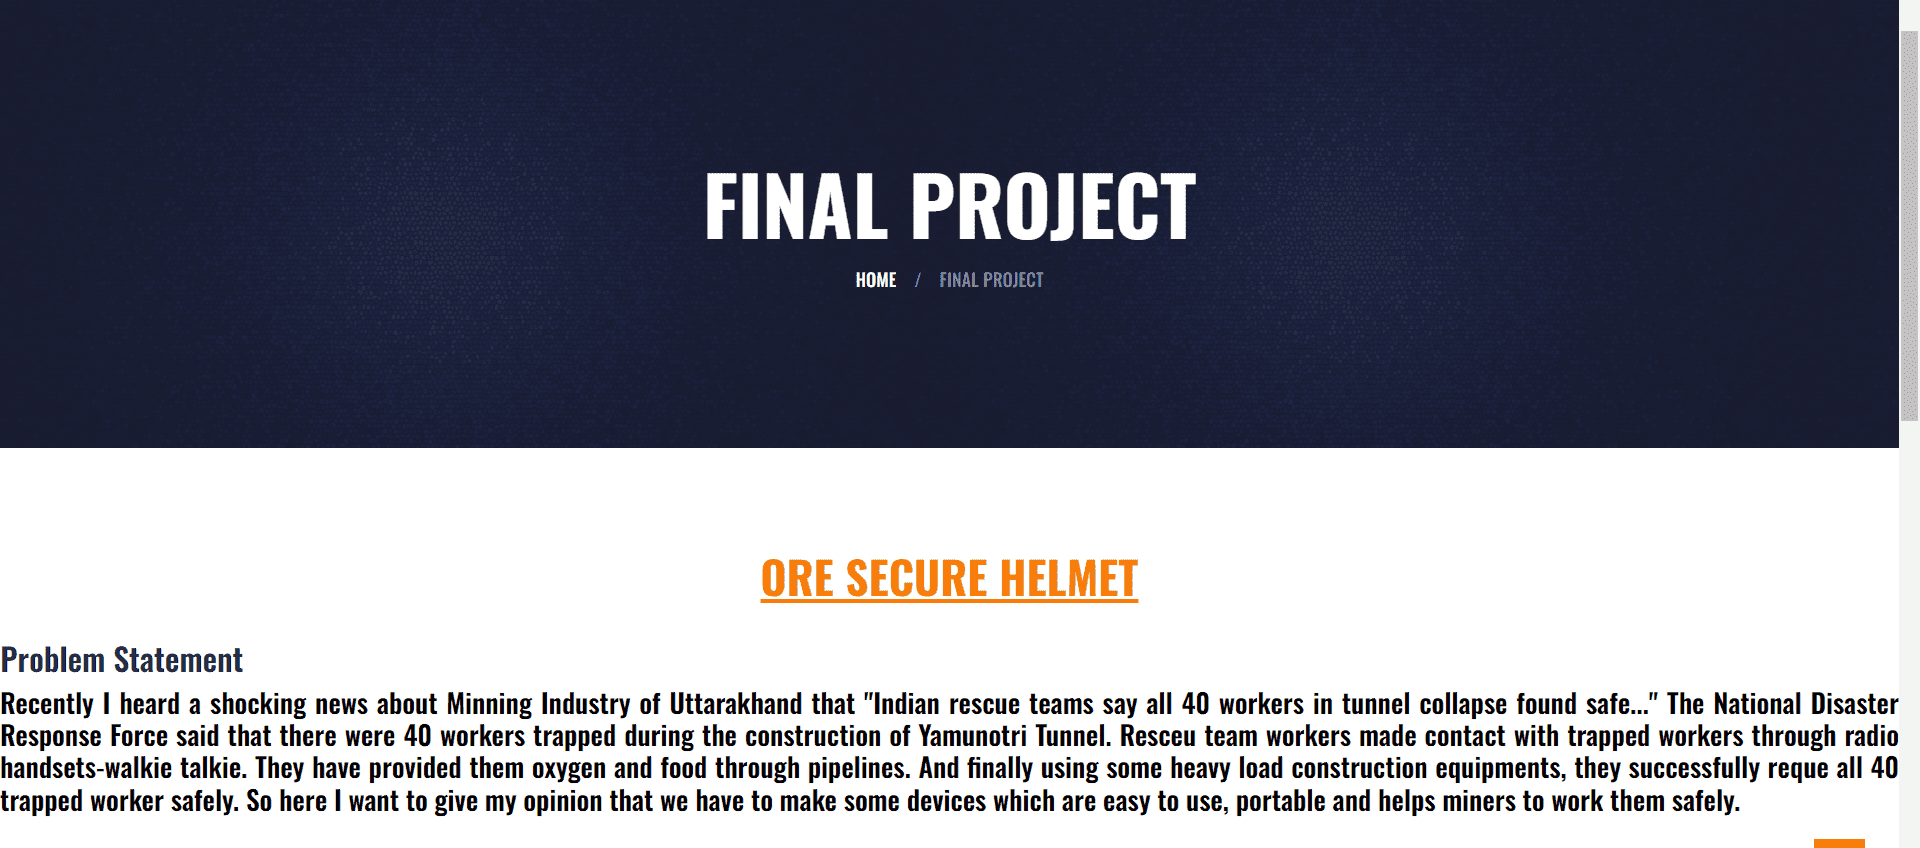
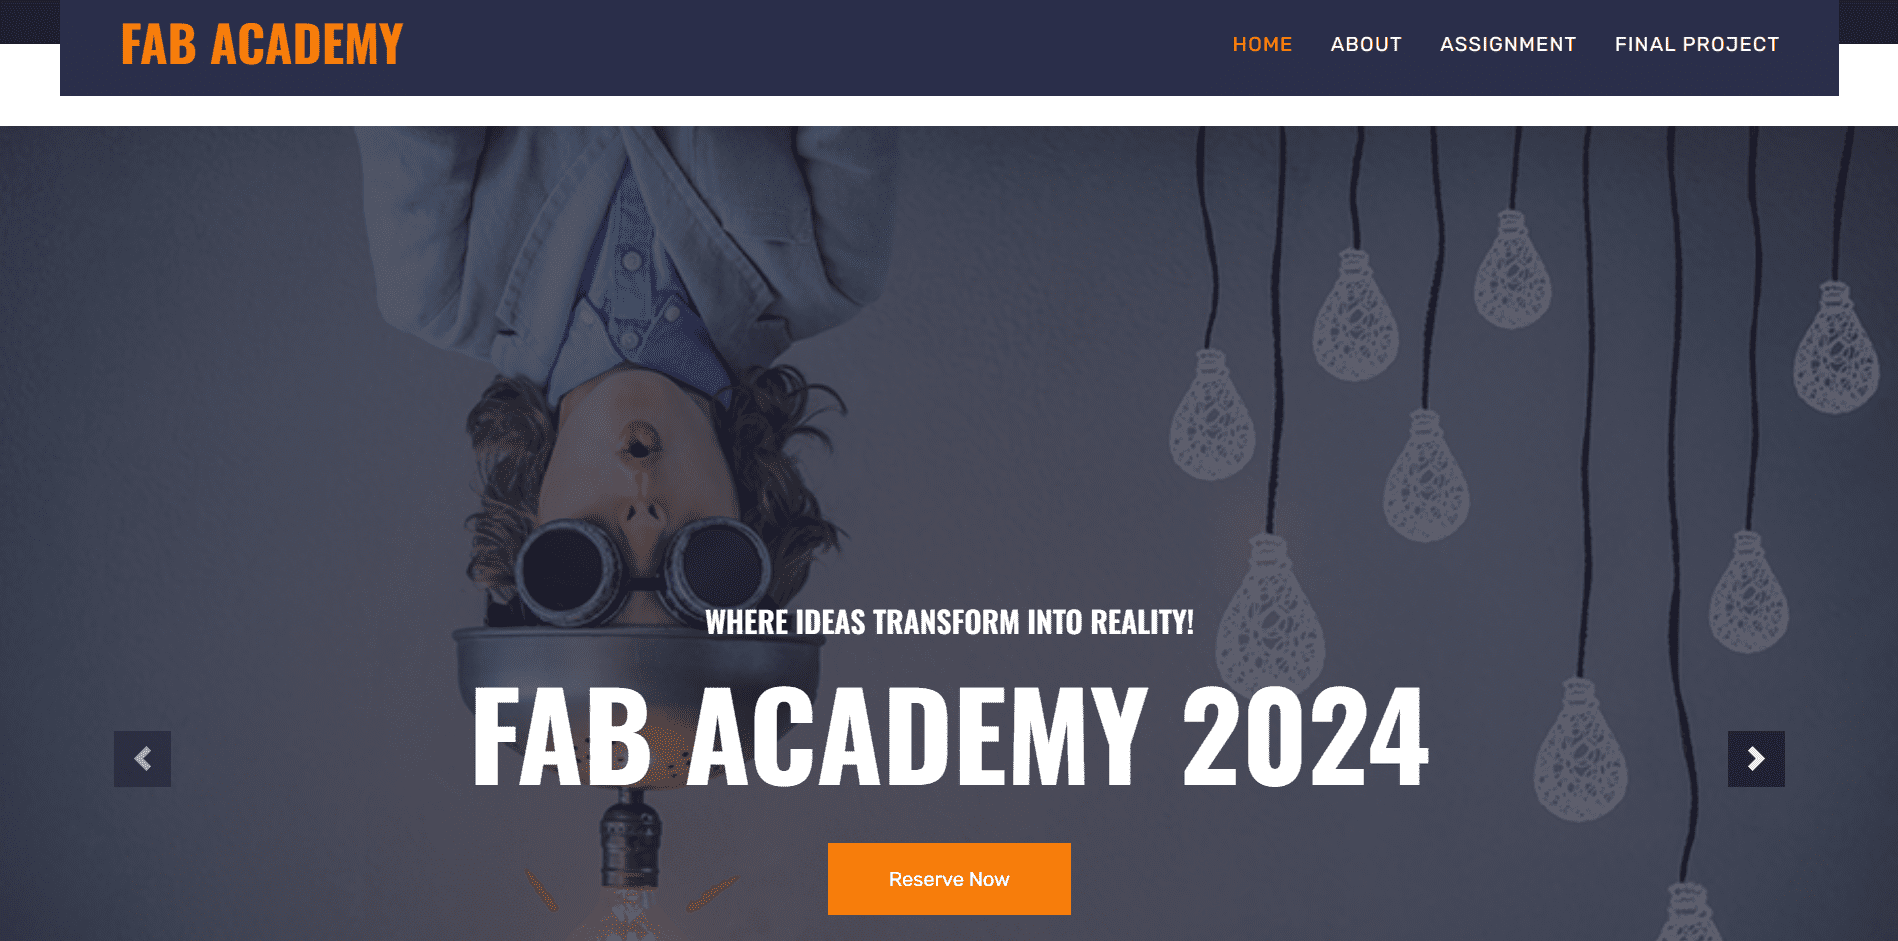
9) Finally my website is ready.
Here is the Before view:-

Here is the After view:-
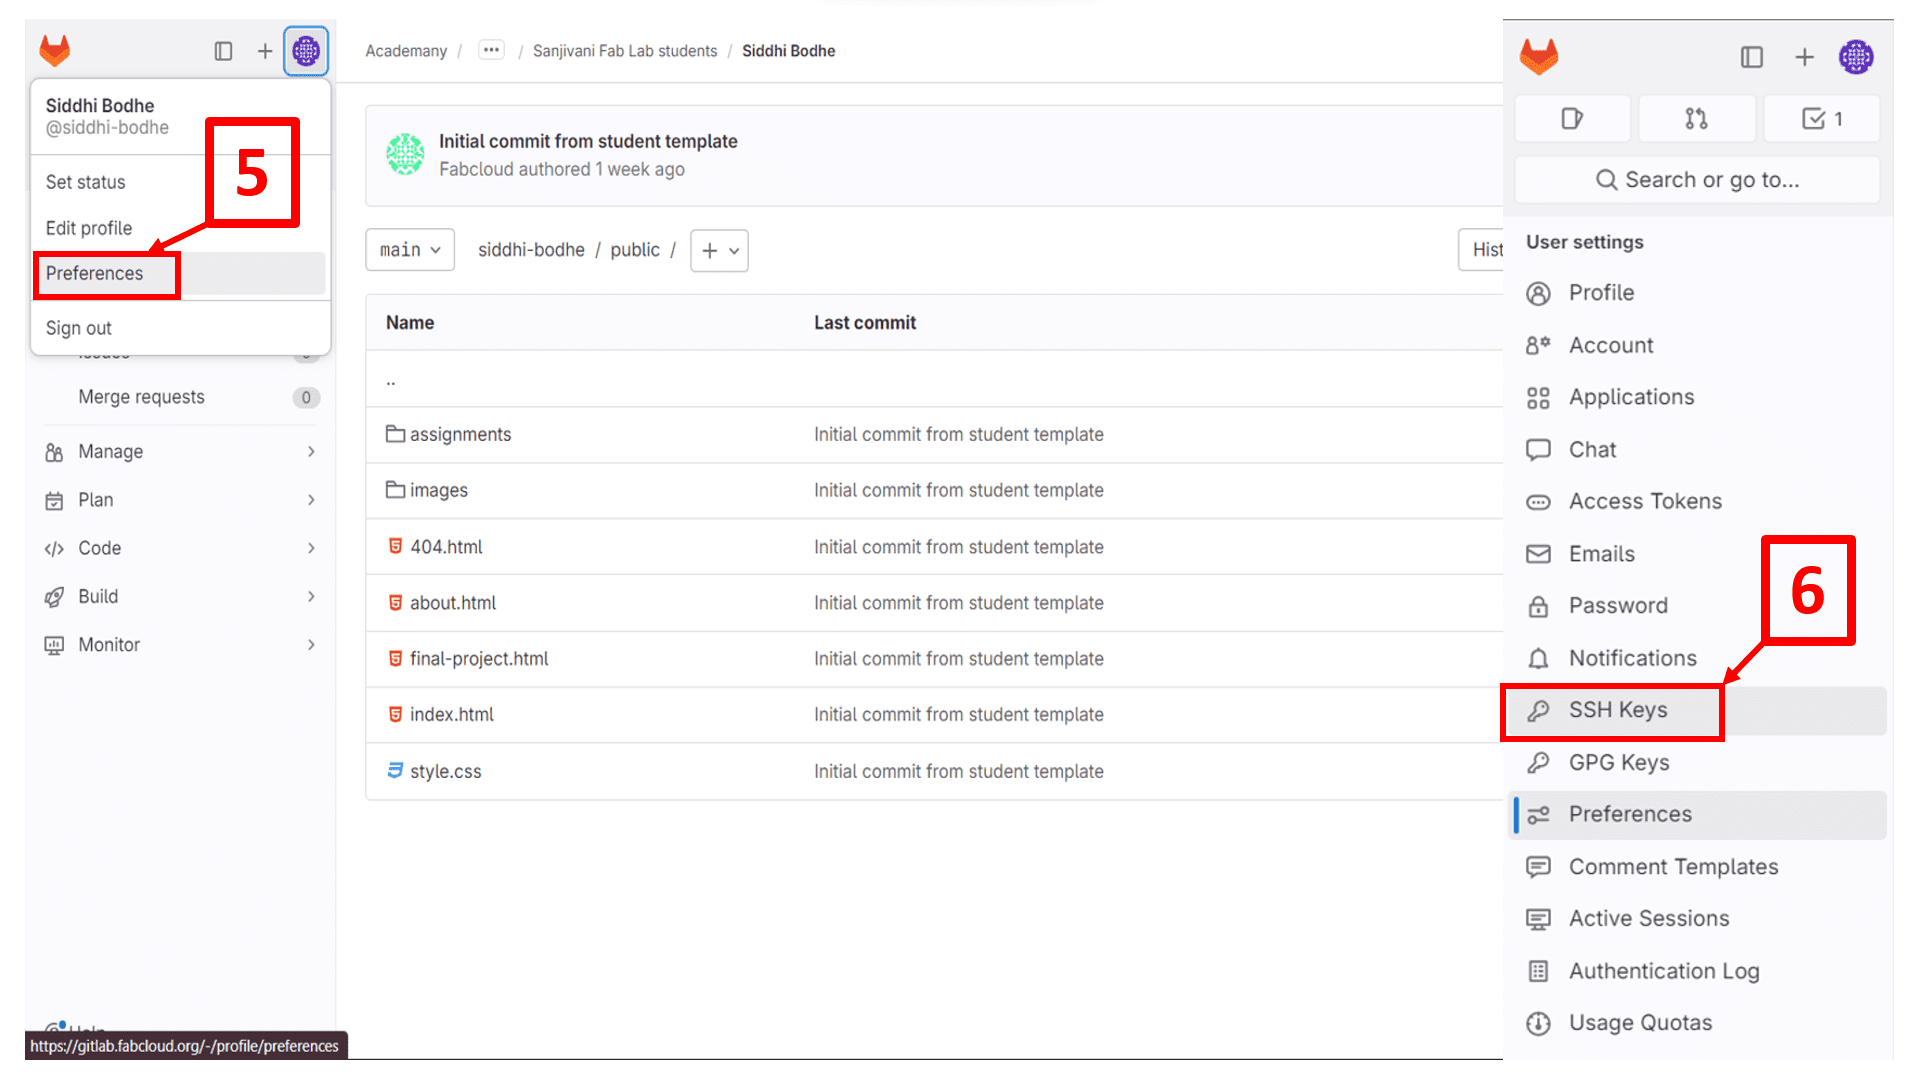
On this day, Mr. Suhas sir conducted online meeting to explain the process of version control. He taught step by step process of GitLab and how we can push our website on Git. By reffering him, I did following steps to push my website on Git.
I used Git bash for windows to clone my repository on fabcloud to my local computer.
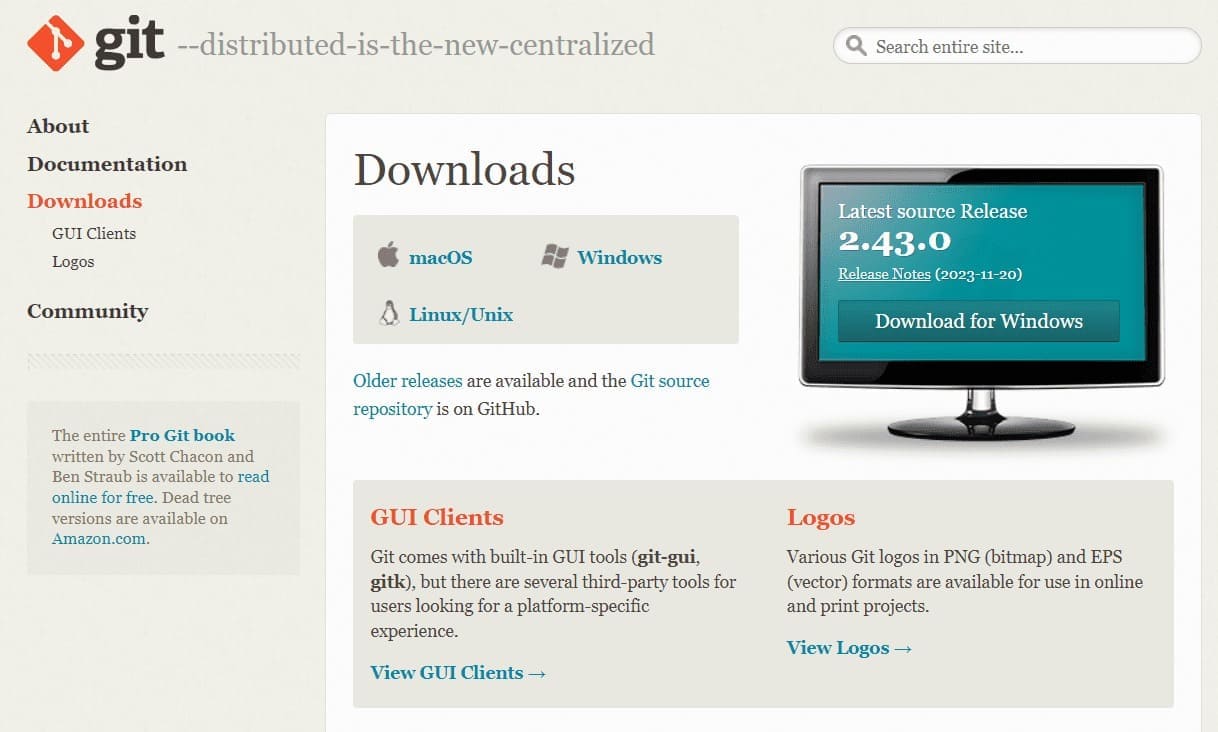
I have followed the (tutorial) of Git
Git Workflow -
1. Working directory: This is your local machine in which we can make changes in our website.
2. Staging area or Index: This is an intermediate saving area, in which the data is stored in virtual memory on cloud.
3. Git repository: This is your Git repository or central server, on which website is uploaded.
Reference: k21academy
How Basic Git Workflow Works?
The working directory is where all your files are present, where you make changes in your files.
The staging area is an intermediate layer where you stage those changes that you want to be part of your next commit,
so you add only those changes to the staging area.
Once you commit, it takes these files from the staging area and stores them permanently to the Git repository.
Advantages of Git
1. It is a Free and Open Source software.
2. Git branches are easy and cheap to merge.
3. No need to connect to the central server.
All the operations can be performed on the local copy stored on the developer machine making it really fast.
Commands used in Git
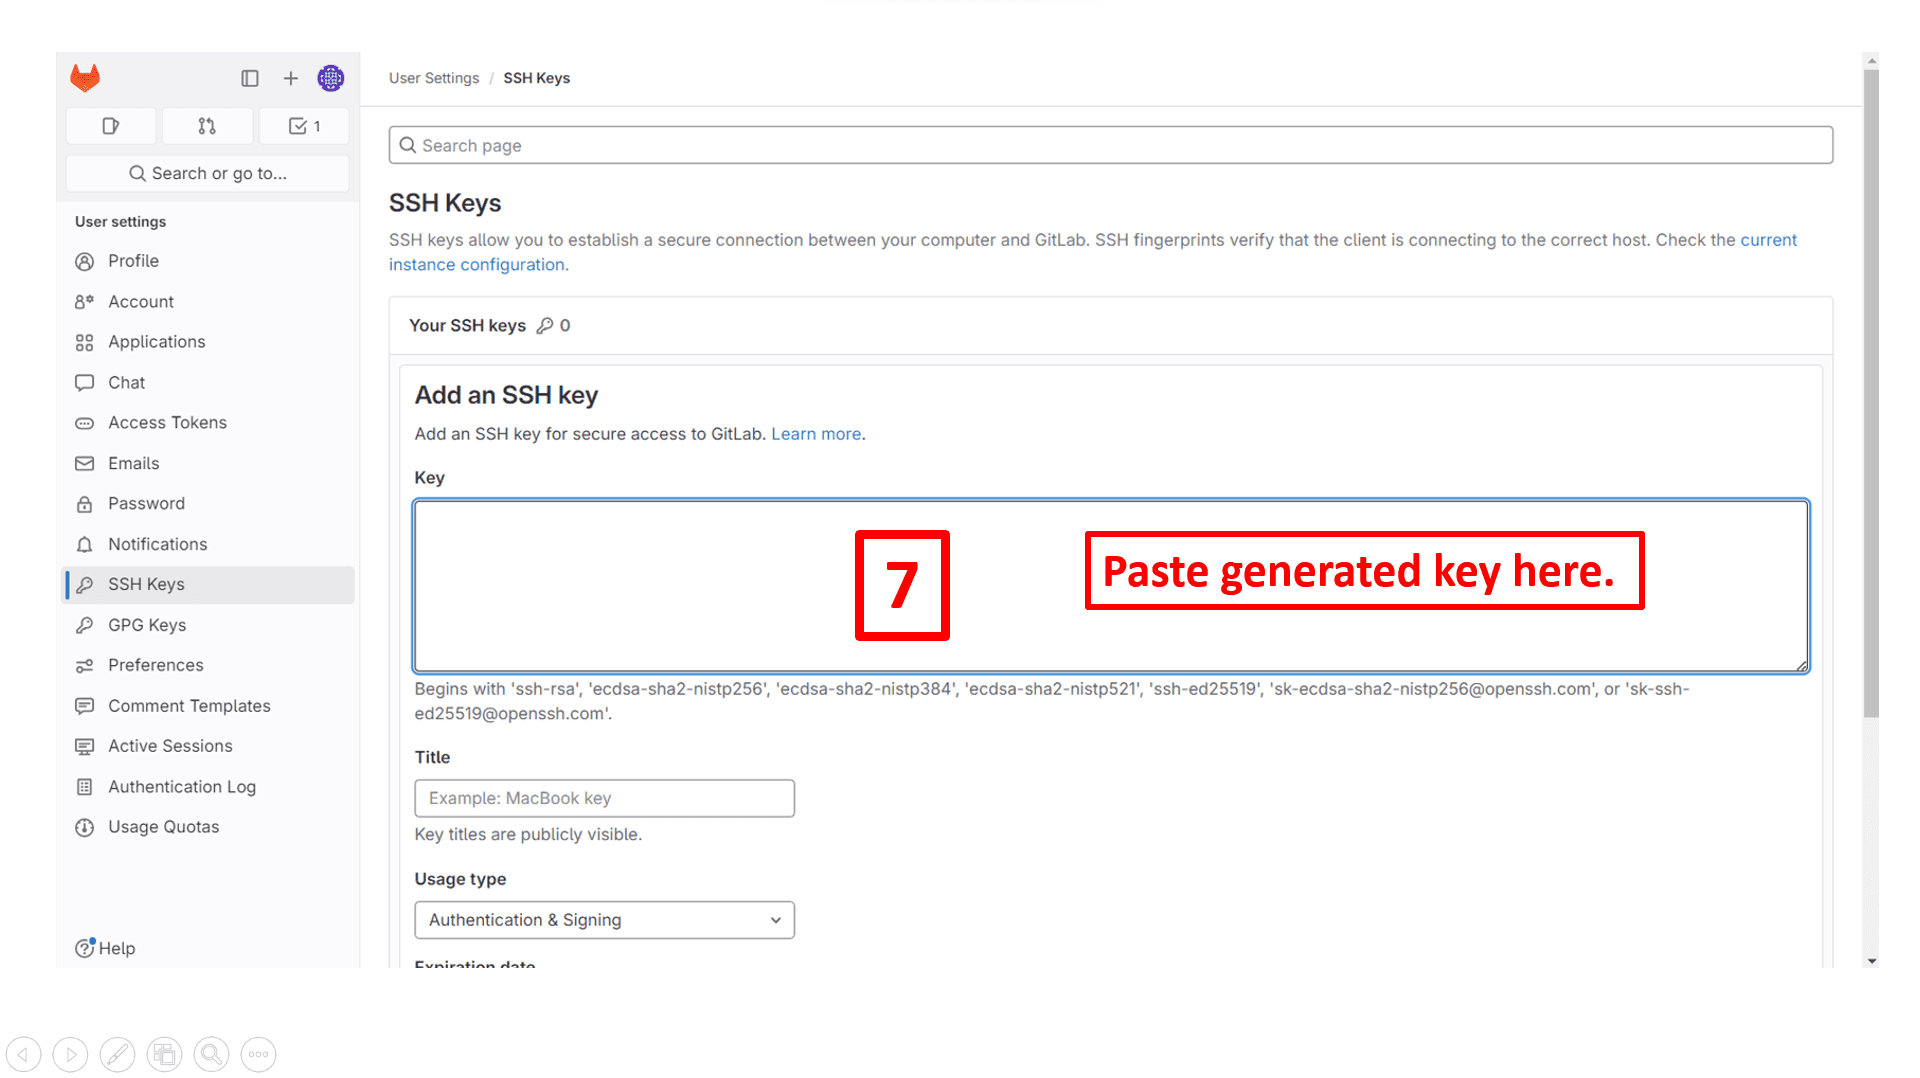
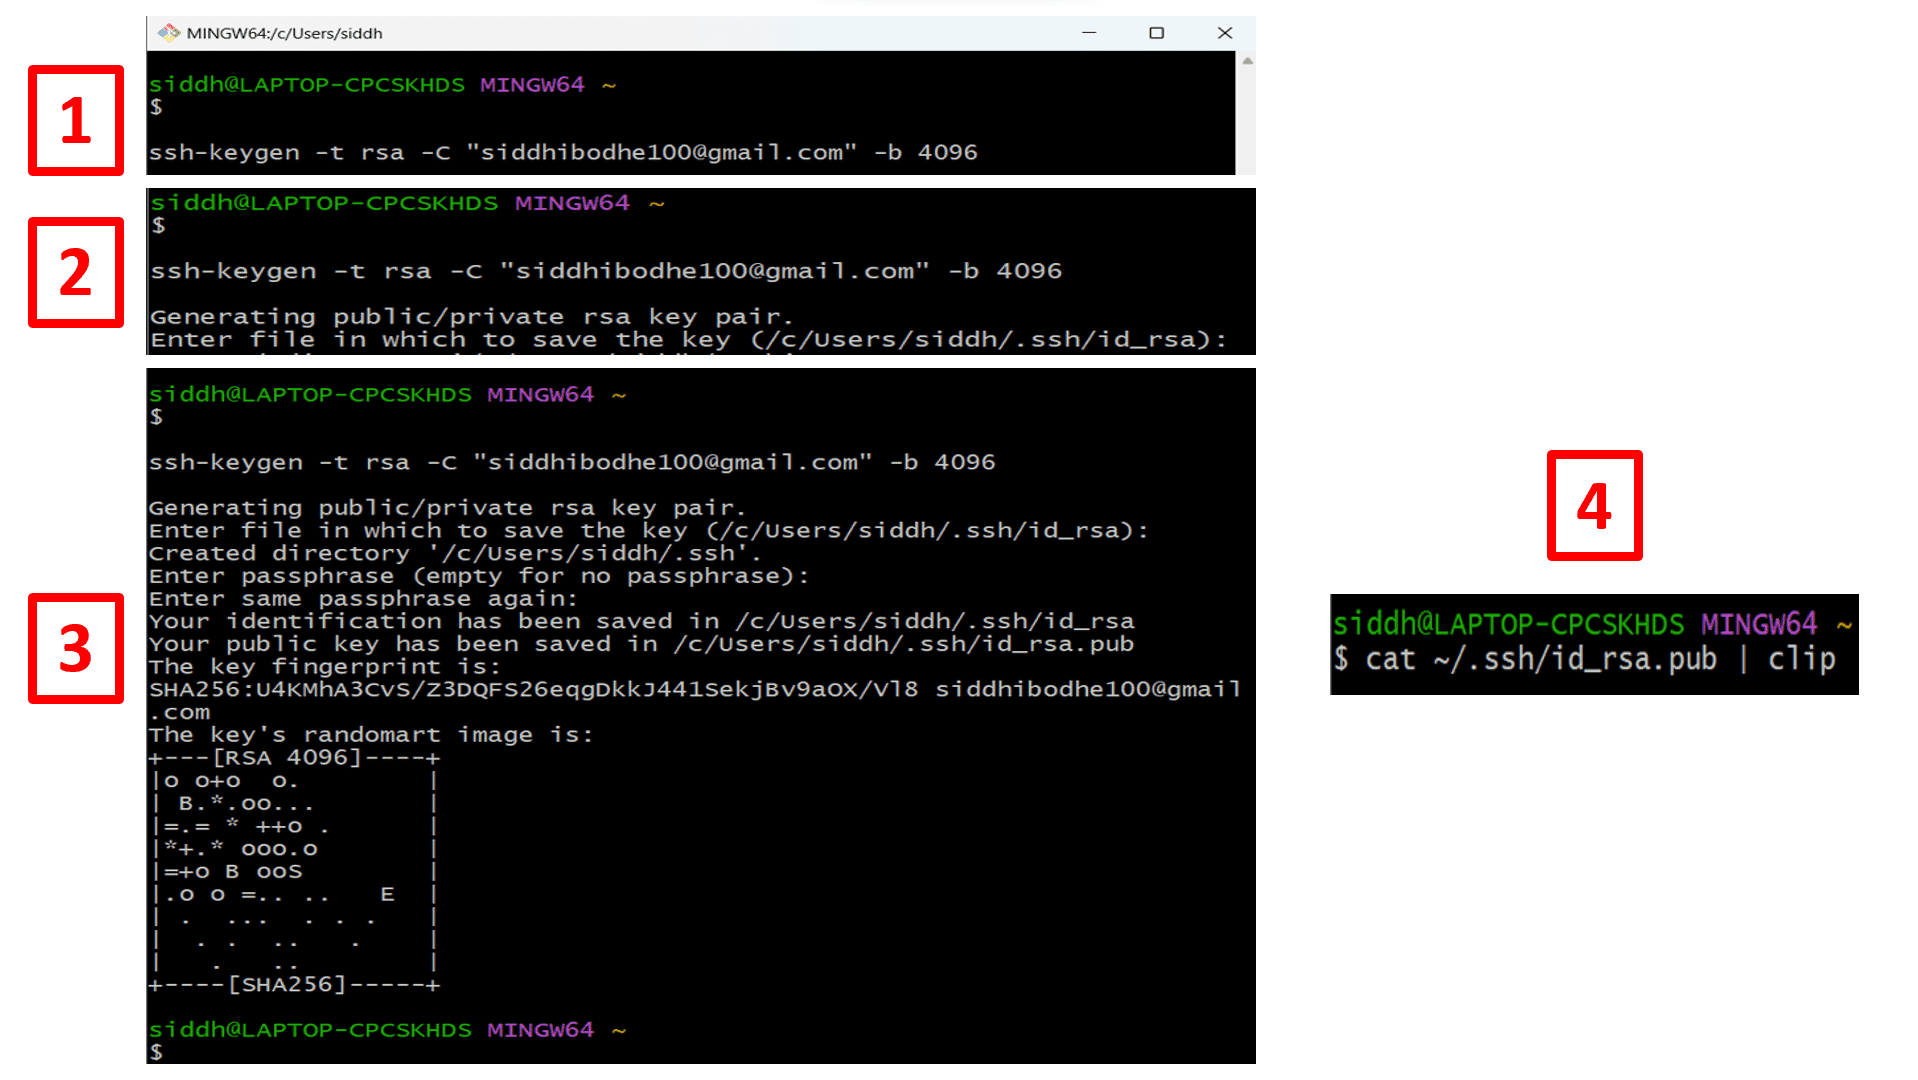
1. ssh-keygen -t rsa -C "Email ID" -b 4096
--Used to generate keygen
2. cat ~/.ssh/id_rsa.pub | clip
--Used to copy the key
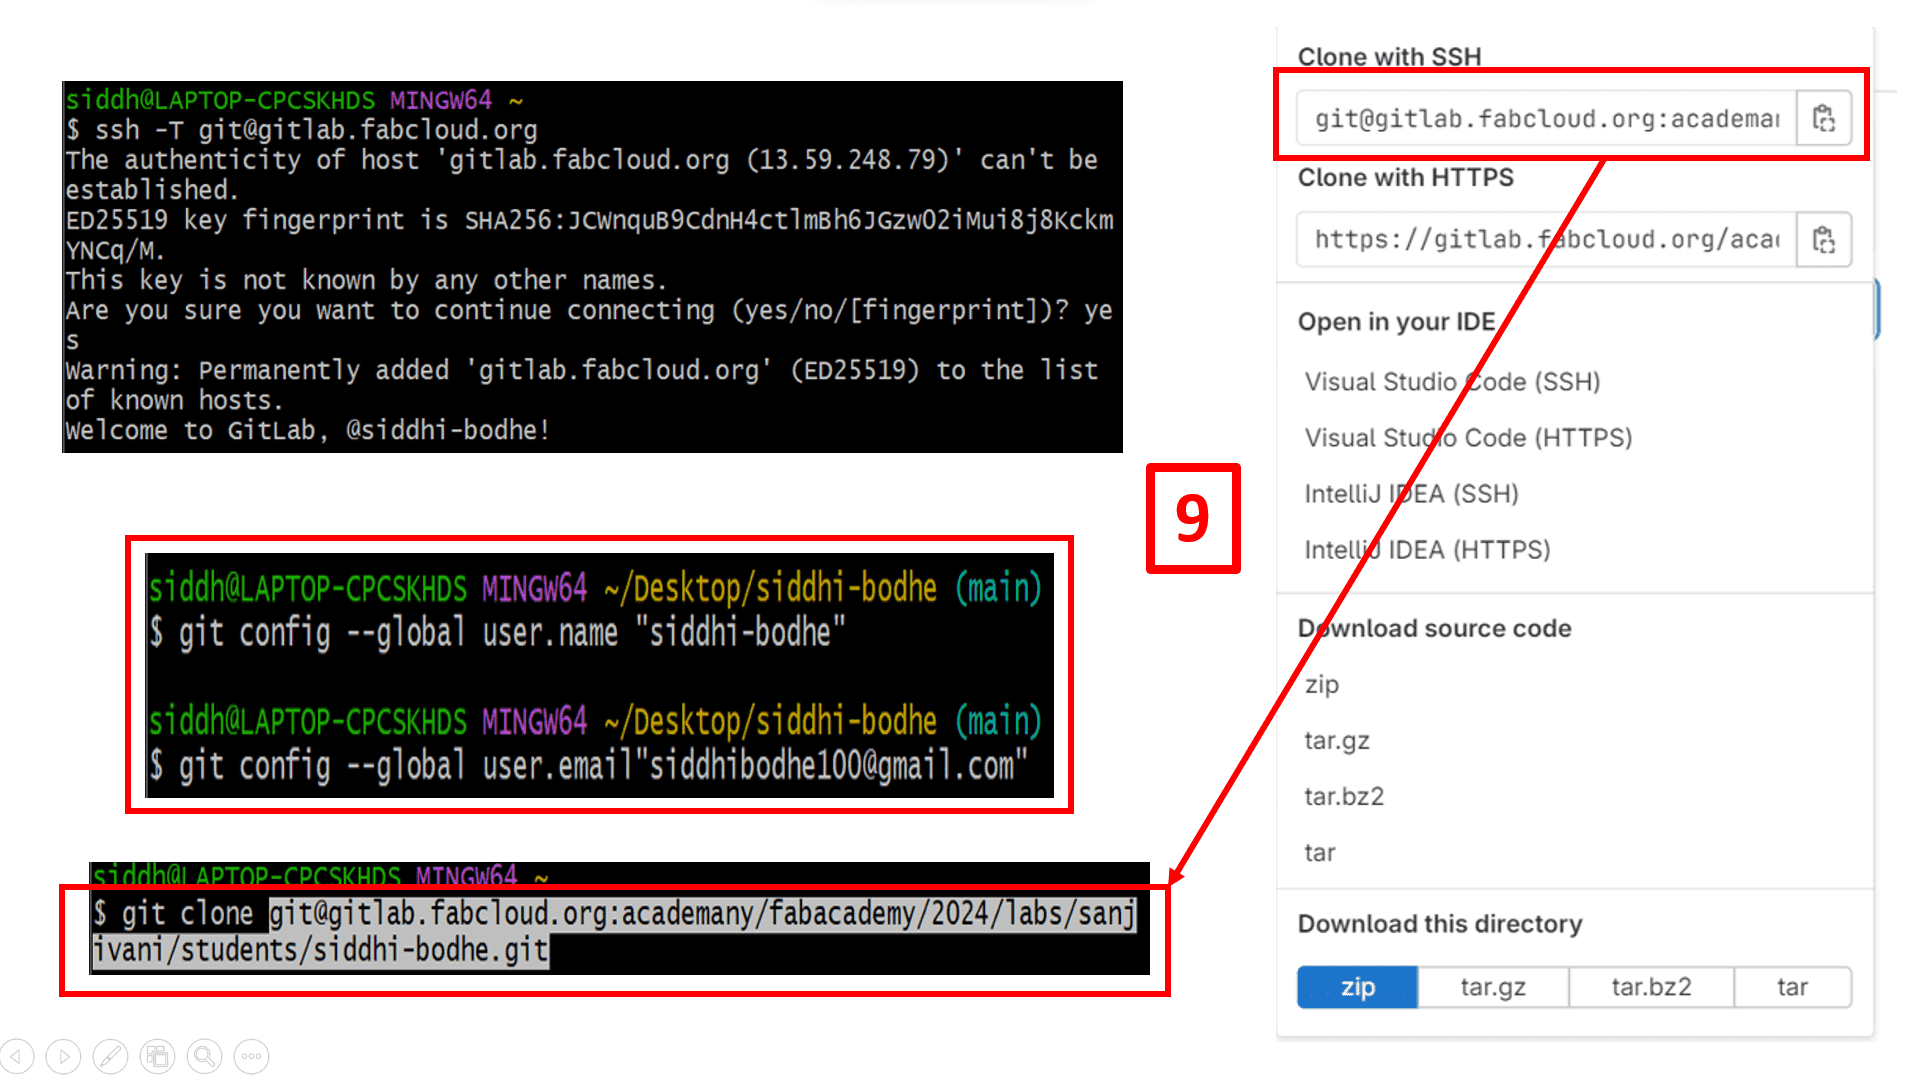
3. ssh -T git@gitlab.fabcloud.org
--It initiates the SSH connection to the gitlab.fabcloud.org server
4. $ git config --global user.name "USER NAME"
--used to set global user name
5. $ git config --global user.email "Your mail ID"
--stores your email in global configuration file of git
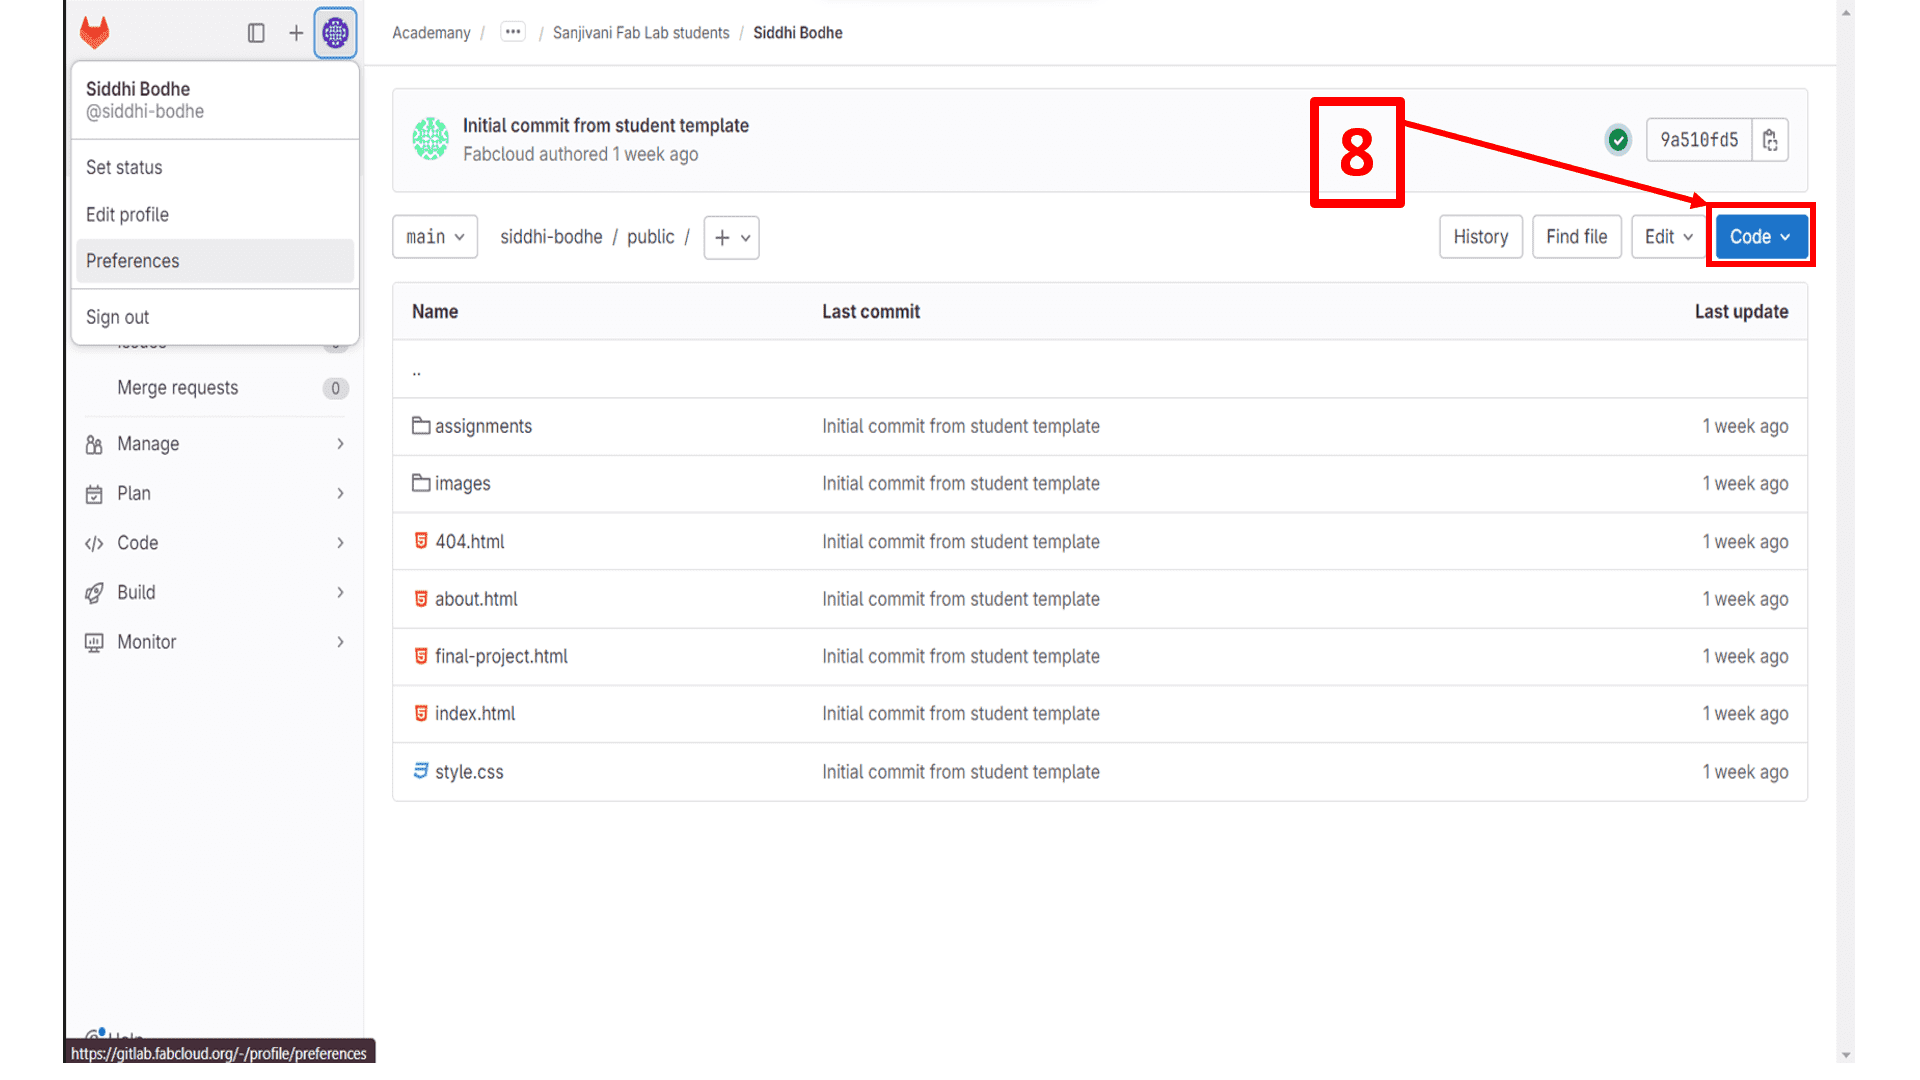
6. $ git clone < copylink >
--It will creates a local copy of the git repository on computer
7. git pull
--used to fetch and download content from a remote repository
8. git add --all
--Used to add the files or changes to the repository.
9. git commit -m"mesaage"
--Commits the changes to local git repository
10. git push
--used to upload local repository content to a remote repository