Group Assignment of Week-07
This assignment is about documenting what we learned in Computer Controlled Machining week that includes doing our lab's safety training. After doing this training, we did some test runouts on CNC Router to check our machine alignment, fixturing requirements, speeds, feeds materials and toolpaths generation. We cut a sample part with slots and projections to understand the machine accuracy, tolerances and fitments in press-fit joints. Based on the measurements of these test jobs, we concluded on design parameters for the press-fit joints.
Objectives of Group Assignment:
1. To do our lab's safety training.
2. To do test runouts, understand alignment, fixturing, speeds, feeds, materials and generationn of toolpaths for our machine.
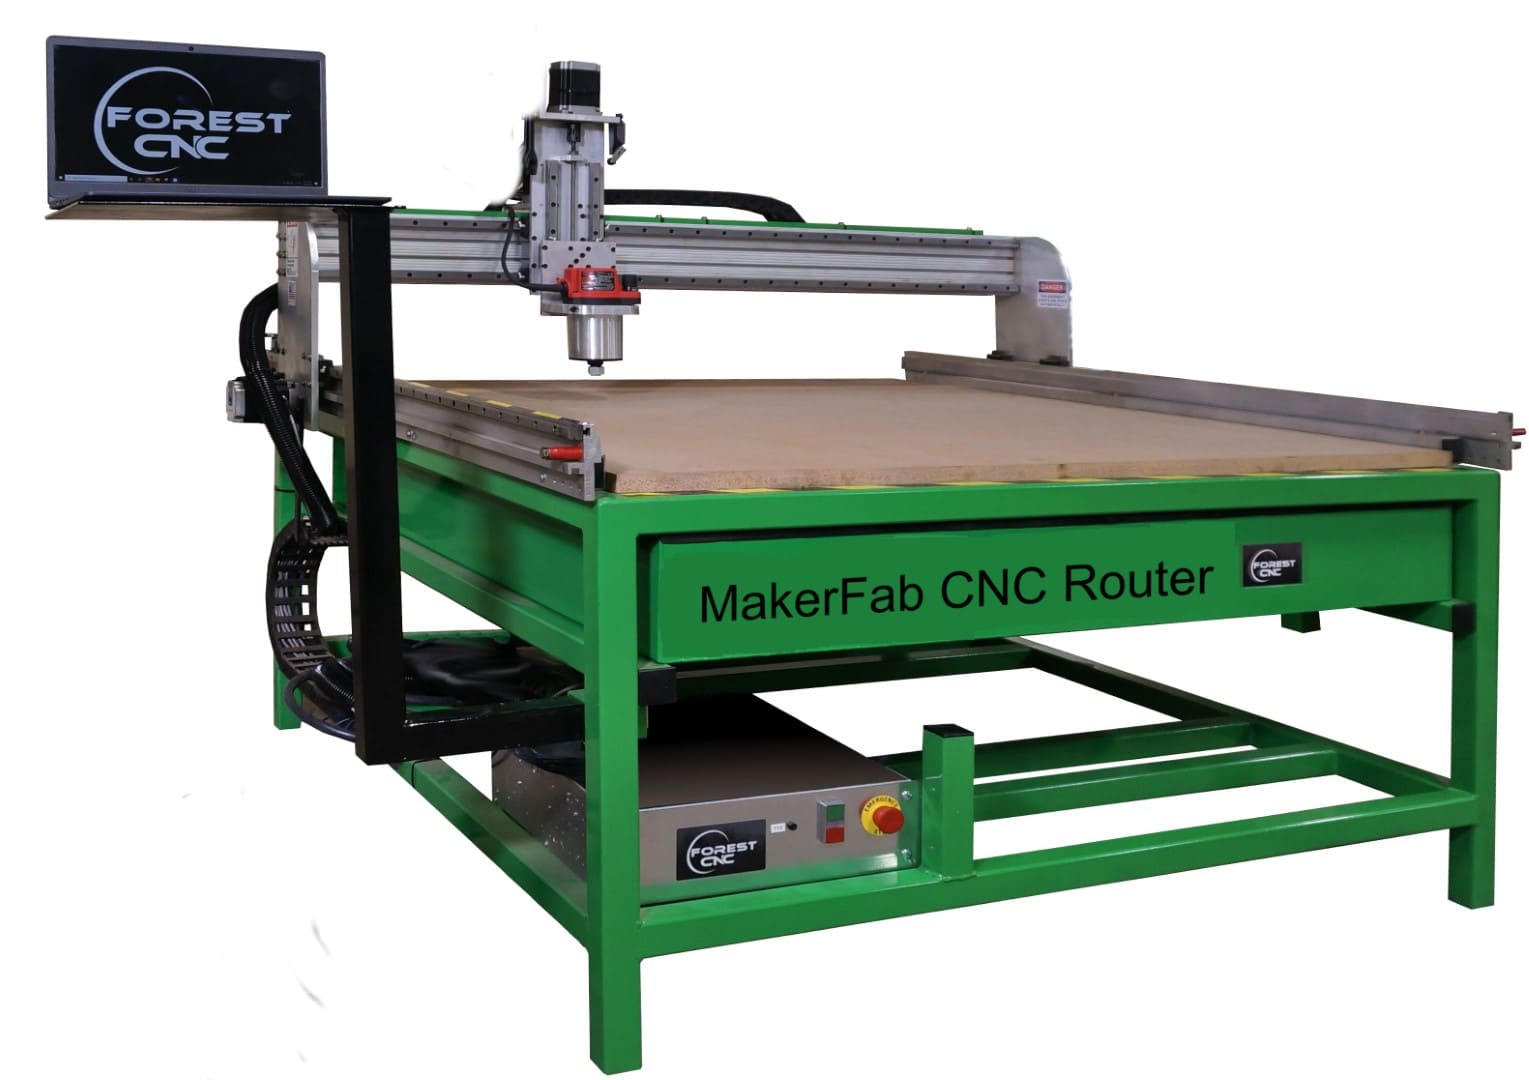
We have completed this assignnment using The MakerFab CNC router machine manufactured by "FOREST CNC" at Vigyan Ashram Fab Lab. The MakerFab Routers are known for being affordable and durable, making them perfect for schools and workshops. These machines are built with a strong steel frame using 2” tubular steel, providing the rigidity needed to handle heavy use and last for many years. They come with a control computer that makes operation easy and precise, and CAD/CAM software for designing and manufacturing projects. A complete set of tools is included, along with a sturdy MDF table that has aluminum T-slots, allowing for versatile and secure clamping of materials. The clamping system ensures that your work stays in place for accurate and safe operation. Additionally, the package comes with a curriculum, making it an excellent teaching tool for learning CNC machining principles. The powerful 3-1/2 HP router motor delivers reliable cutting performance, and the necessary wrenches are provided for easy maintenance and adjustments. Operating on a standard 110V 20A electrical supply, the MakerFab Routers offer a practical and comprehensive solution for high-demand environments, ensuring long-lasting performance and versatility.
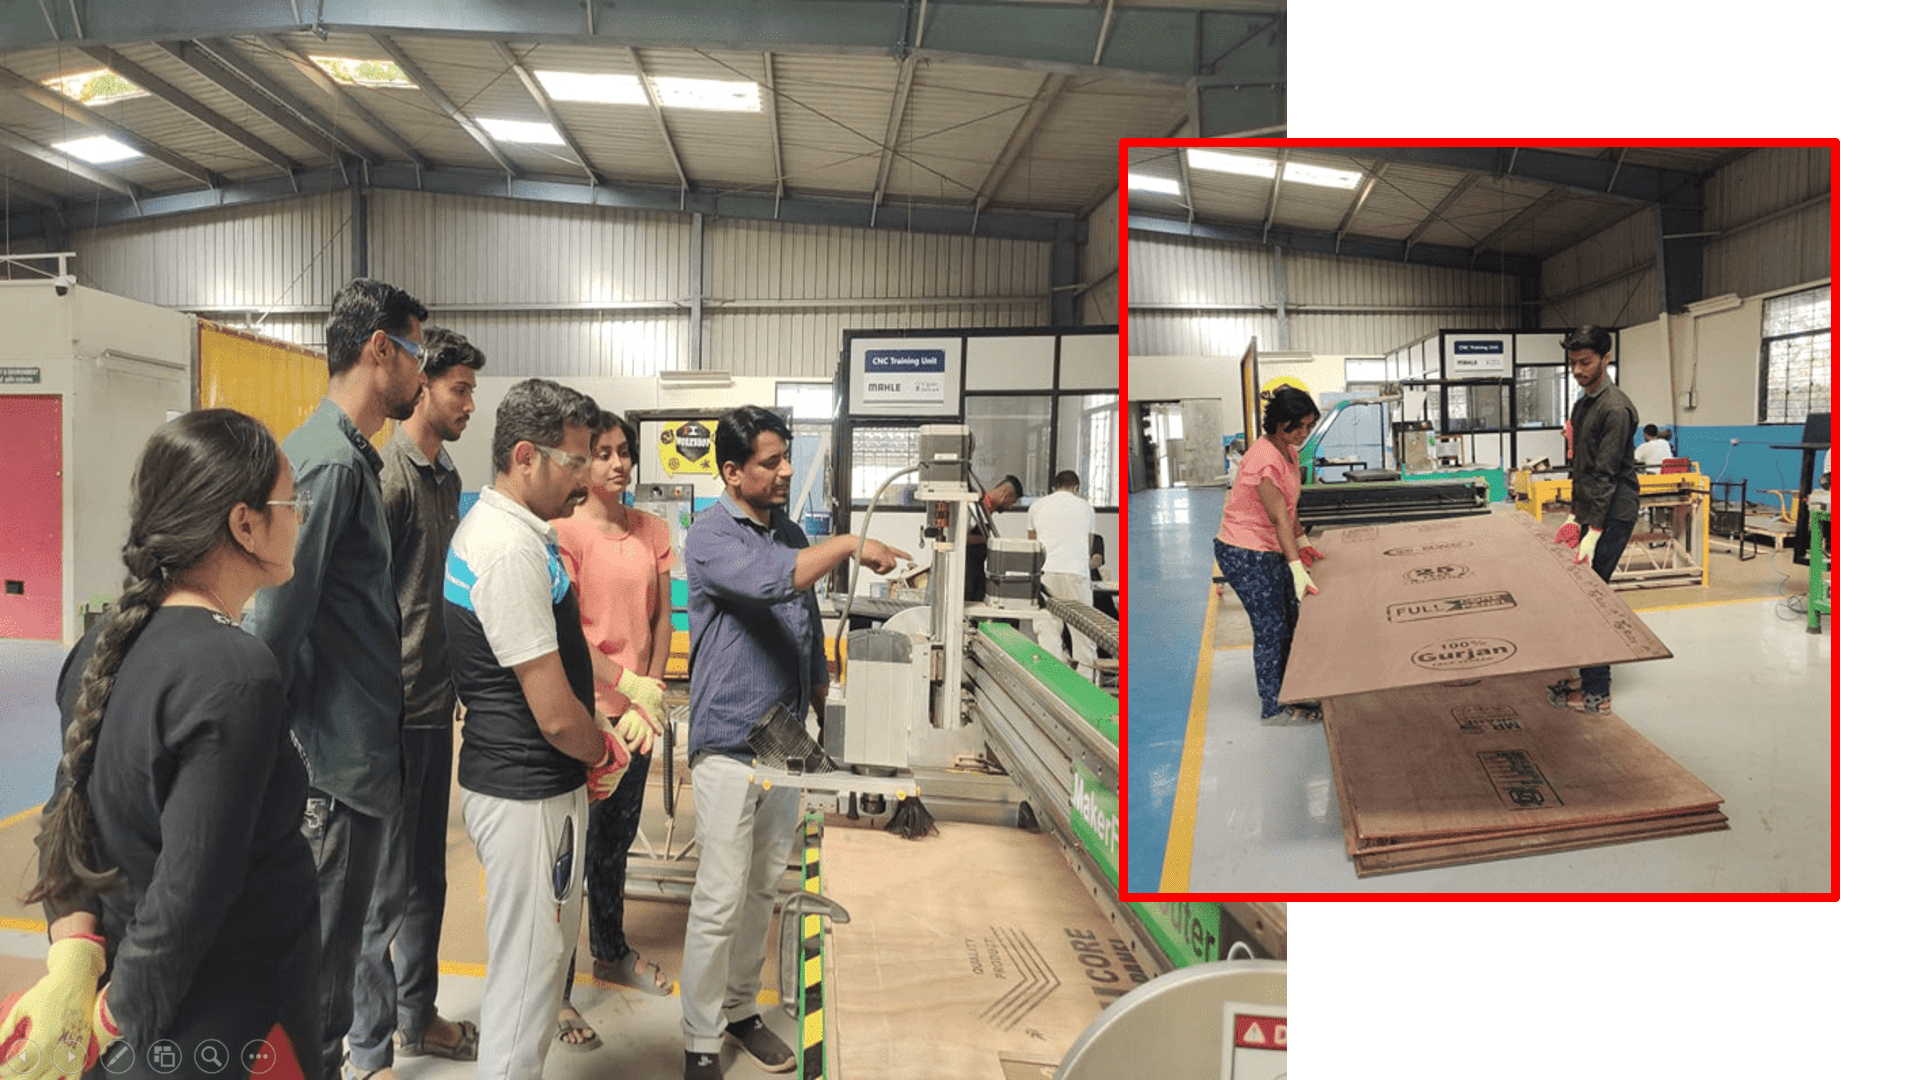
Lab Safety Requirements and Training
(A) Personal Protective Equipment:
1. Safety Glasses/Goggles:- Protect your eyes from flying debris and dust.
2. Hearing Protection:- Use earplugs or earmuffs to protect against high noise levels.
3. Dust Masks/Respwirators:- Wear these to avoid inhaling fine dust particles.
4. Gloves:- Use gloves when handling materials, but never while operating the machine as they can get caught in moving parts.
5. Close-Fitting Clothing:- Avoid loose clothing, jewelry, and tie back long hair to prevent entanglement.
(B) Machine Operation:
1. Training:- Only trained and authorized personnel should operate the CNC router.
2. Pre-Operation Checks:- Inspect the machine for any damage or issues before use. Ensure all safety guards and covers are in place.
3. Setup:- Securely clamp the workpiece and ensure it is properly supported. Check that all tools and fixtures are properly installed.
4. Software Checks:- Double-check the CNC program for errors before running the machine.
(C) During Operation:
1. Stay Alert:- Remain focused and avoid distractions while the machine is running.
2. Emergency Stops:- Know the location of emergency stop buttons and how to use them.
3. Safe Distance:- Maintain a safe distance from the machine while it is in operation. Never reach into the machine while it is running.
4. Ventilation:- Ensure proper ventilation to reduce the buildup of dust and fumes.
(D) Post Operation:
1. Power Down:- Always turn off the machine and disconnect the power before performing any maintenance or adjustments.
2. Clean Up:- Remove dust, debris, and waste materials from the machine and surrounding area.
3. Tool Maintenance:- Regularly inspect and maintain tools and equipment to ensure they are in good working condition.
(E) General Safety:
1. Know Emergency Procedures:- Be familiar with the lab’s emergency procedures, including the location of fire extinguishers, first aid kits, and emergency exits.
2. Avoid Crowding:- Limit the number of people around the CNC router to prevent accidents and ensure a clear workspace.
3. Report Issues:- Immediately report any safety hazards, equipment malfunctions, or accidents to the lab supervisor.
Types of tools used:
1. Drill Bits:-
Drill bits are essential for creating cylindrical holes in various materials. Common types include twist drills, center drills, and spotting drills, made from high-speed steel (HSS), carbide, or cobalt. They initiate holes that can be refined later, making them fundamental in the initial stages of CNC machining.
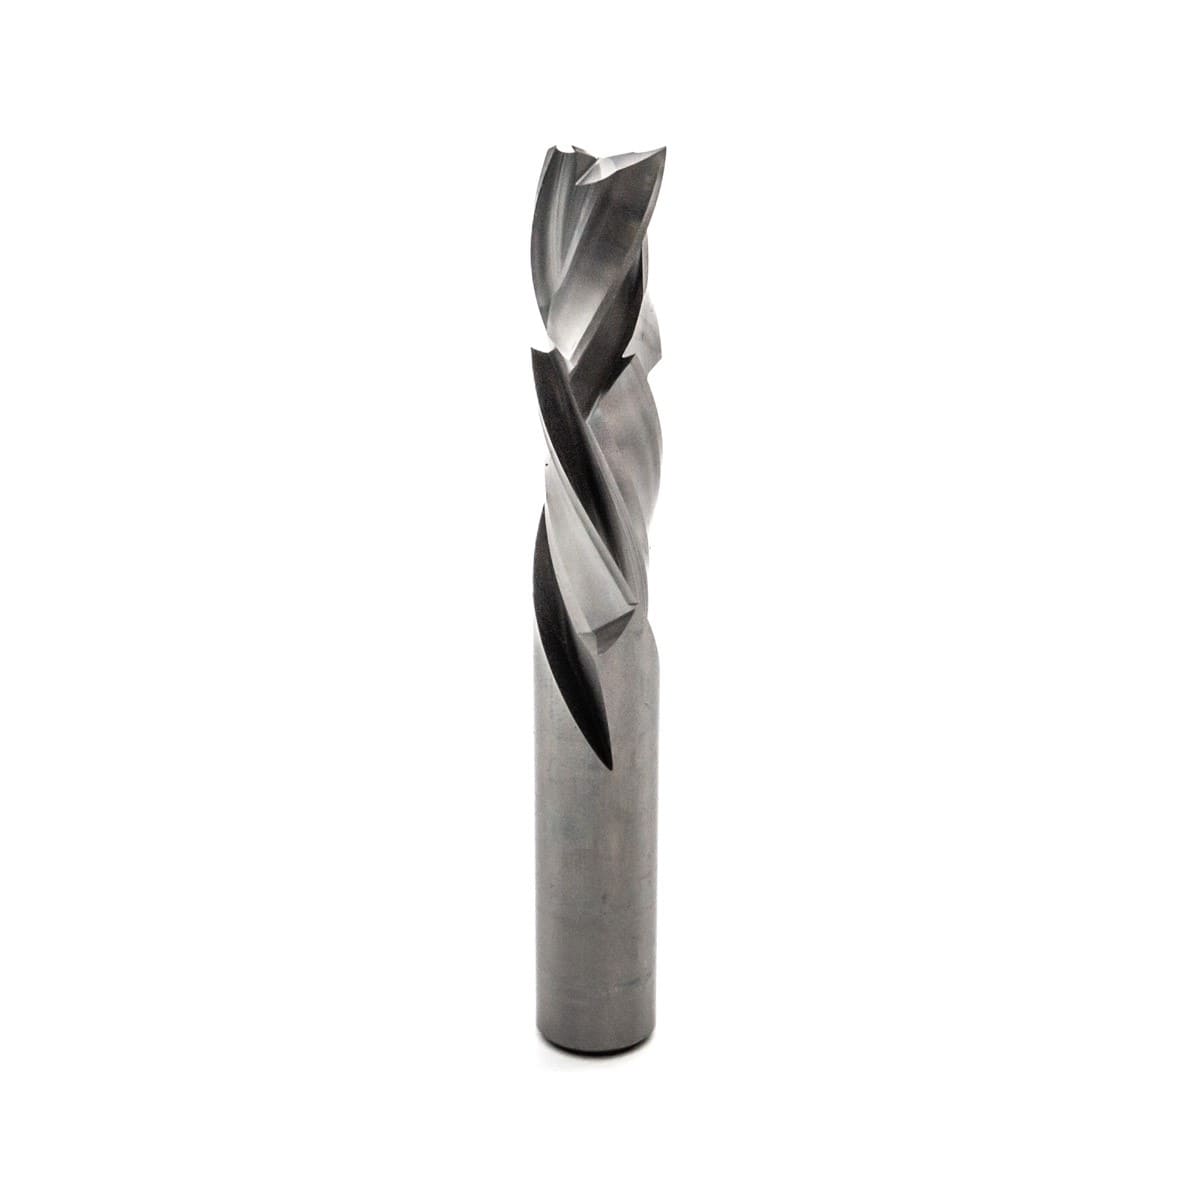
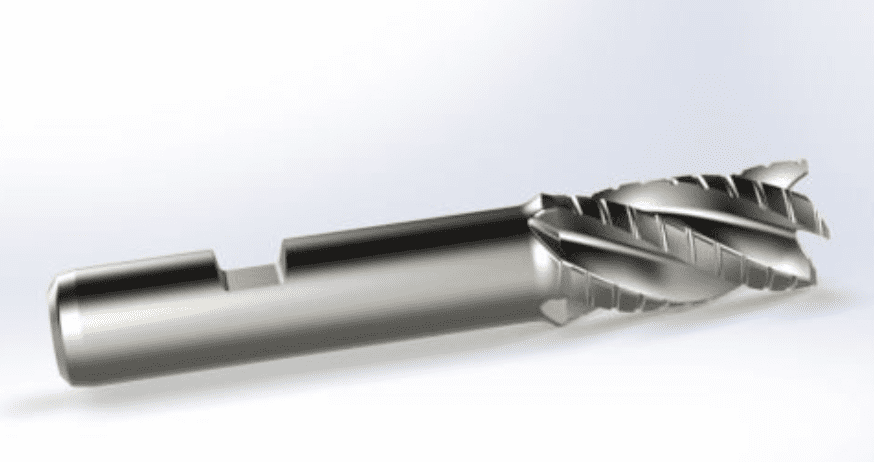
2. End Mills:-
End mills are versatile tools used for cutting, slotting, profiling, and contouring. Types include square end mills, ball nose end mills, and roughing end mills, made from HSS and carbide. They are crucial for shaping and detailing workpieces, allowing for complex cuts and intricate designs.
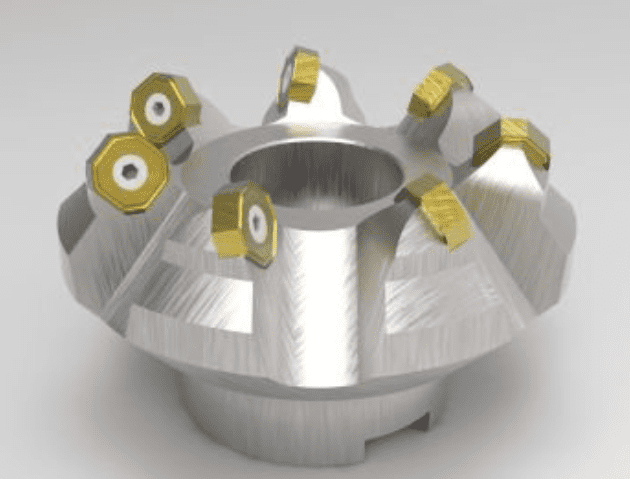
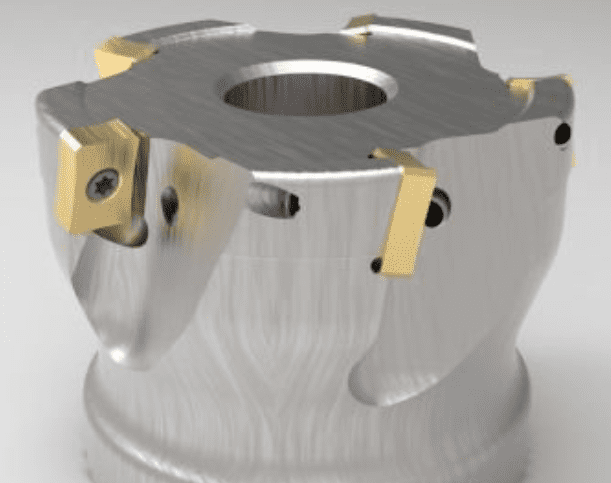
3. Face Mills:-
Face mills are used for creating flat surfaces on workpieces, essential for facing operations. They feature multiple cutting edges and cover large areas quickly. Types include shell mills and fly cutters, typically made from carbide or HSS, providing smooth, even finishes.
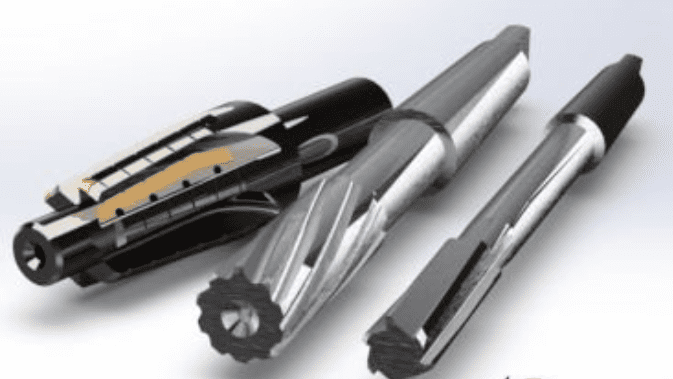
4. Reamers:-
Reamers enlarge and finish previously drilled holes to precise dimensions and smooth finishes. Available in straight-flute, spiral-flute, and tapered forms, they are made from HSS and carbide. Reamers are key for achieving high precision in hole diameter and surface finish.
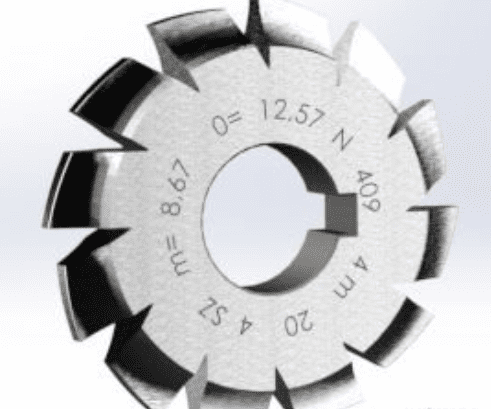
5. Gear Cutters
Gear cutters are specialized tools for manufacturing gears. They create the teeth profiles on gear blanks, ensuring accurate gear dimensions and smooth operation. Made from HSS or carbide, they are essential in industries like automotive and aerospace for producing high-quality gears.
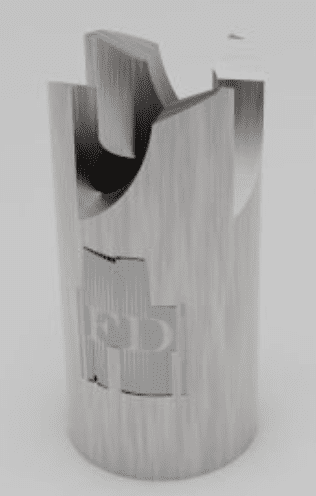
6. Hollow Mills:-
Hollow mills are used to machine cylindrical surfaces on workpieces, particularly for creating shafts and similar components. These tools have multiple cutting edges arranged around a hollow center, allowing them to encircle the workpiece. Made from durable materials like HSS and carbide, hollow mills ensure uniform material removal and precise cylindrical shapes.
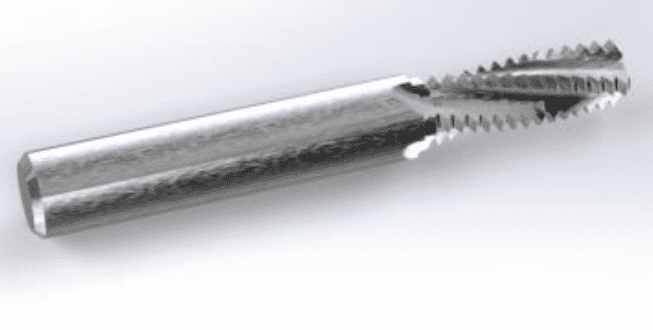
7. Thread Mills:-
Thread mills are tools designed for cutting threads into materials, providing an alternative to traditional taps. Unlike taps, thread mills can create threads without the risk of breaking in the workpiece, and they can produce threads of different sizes with the same tool. Made from carbide or HSS, they offer flexibility and precision in thread cutting.
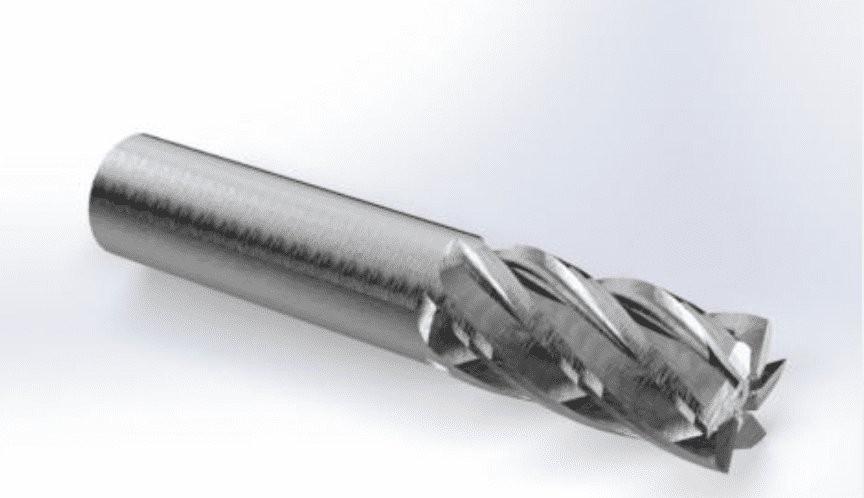
8. Slab Mills:-
Slab mills are used for heavy cutting and large material removal, primarily in horizontal milling operations. These wide, cylindrical tools have multiple cutting edges along their length, making them ideal for cutting broad, flat surfaces. Typically made from HSS or carbide, slab mills are essential for efficient, large-scale material removal.
9. Fly Cutters:-
Fly cutters are single-point cutting tools used for creating flat surfaces and achieving high-quality finishes. They consist of a single cutting tool mounted on a rotating arm, allowing them to produce smooth, even cuts. Made from materials like carbide or HSS, fly cutters are commonly used for light finishing operations in CNC machining.
Now, it was a time for test runouts. For the test runouts we designed a dog bone profile slots sample shape to check our machine alignment, fixturing requiments, speeds and feeds.
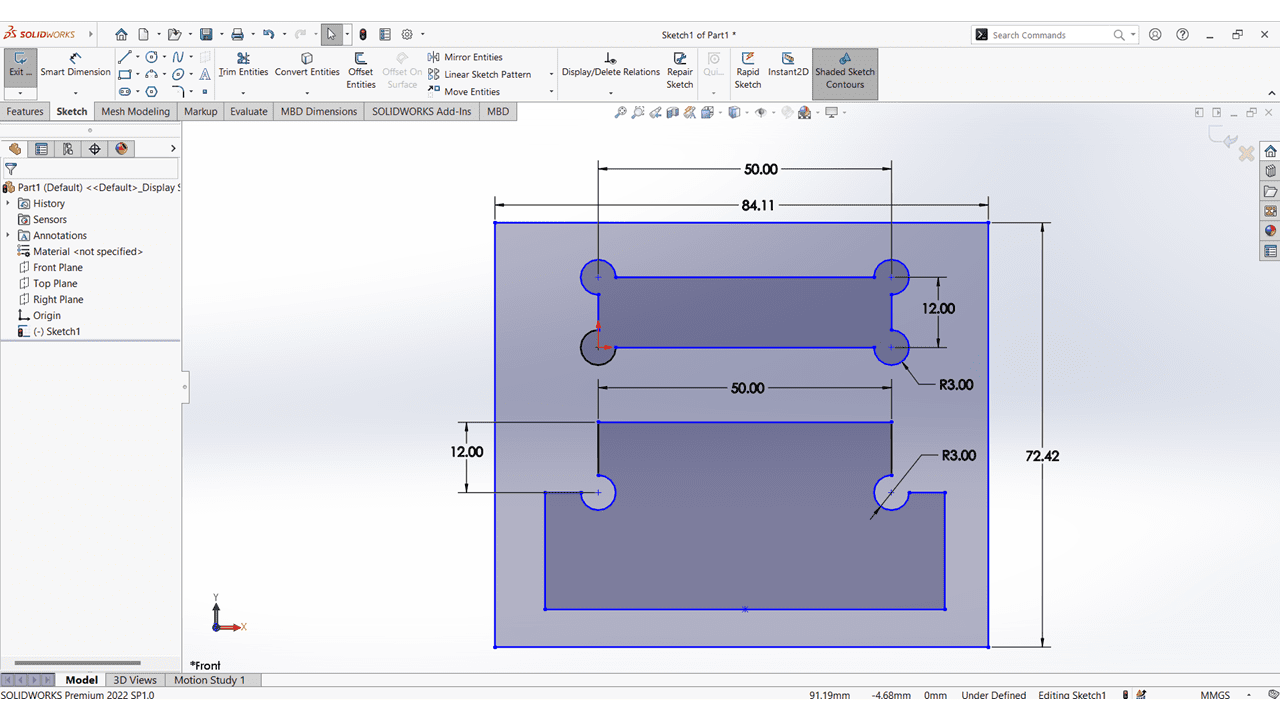
Here, we used SolidWorks CAD Software to design sample shape.
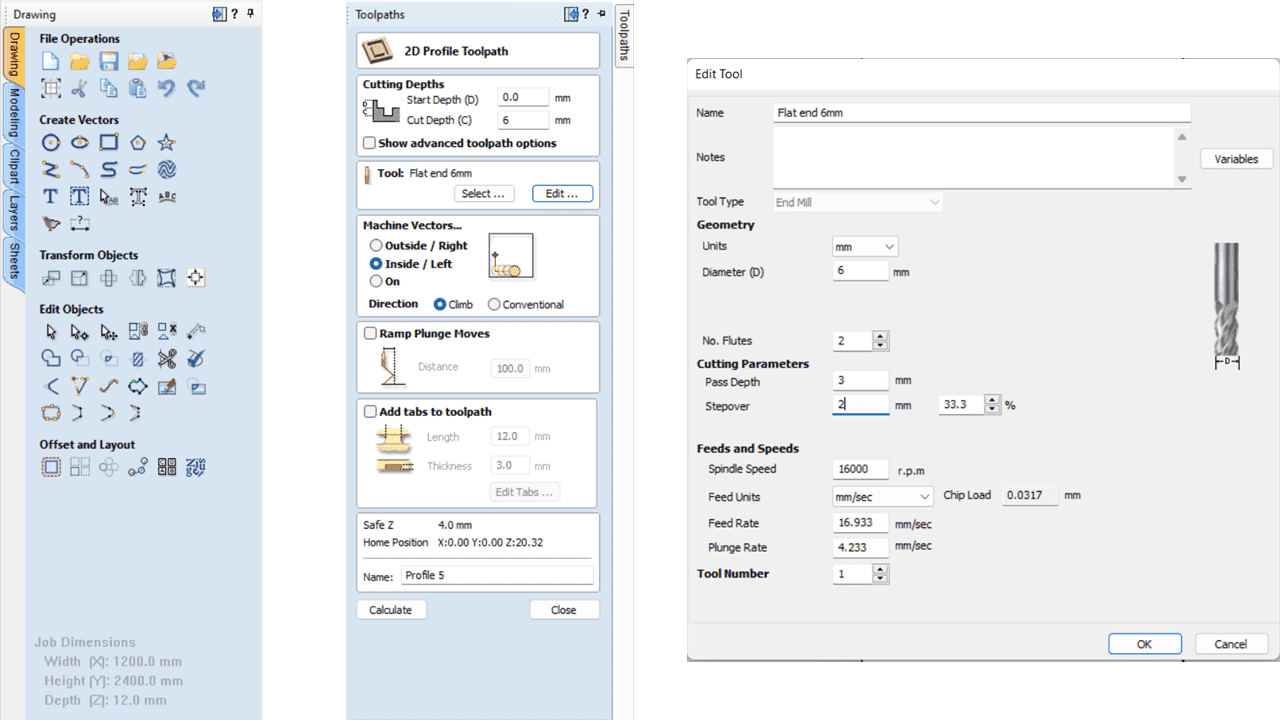
To create paths for our designs, we use VCarvePro software. This program helps us turn our design files into instructions that the CNC machine can follow precisely. It allows us to specify how the machine should cut and shape materials, like outlining shapes or making grooves. VCarvePro is easy to use and supports different types of tools and materials, making our CNC machining process efficient and accurate. This software is essential for ensuring that our designs become high-quality finished products.
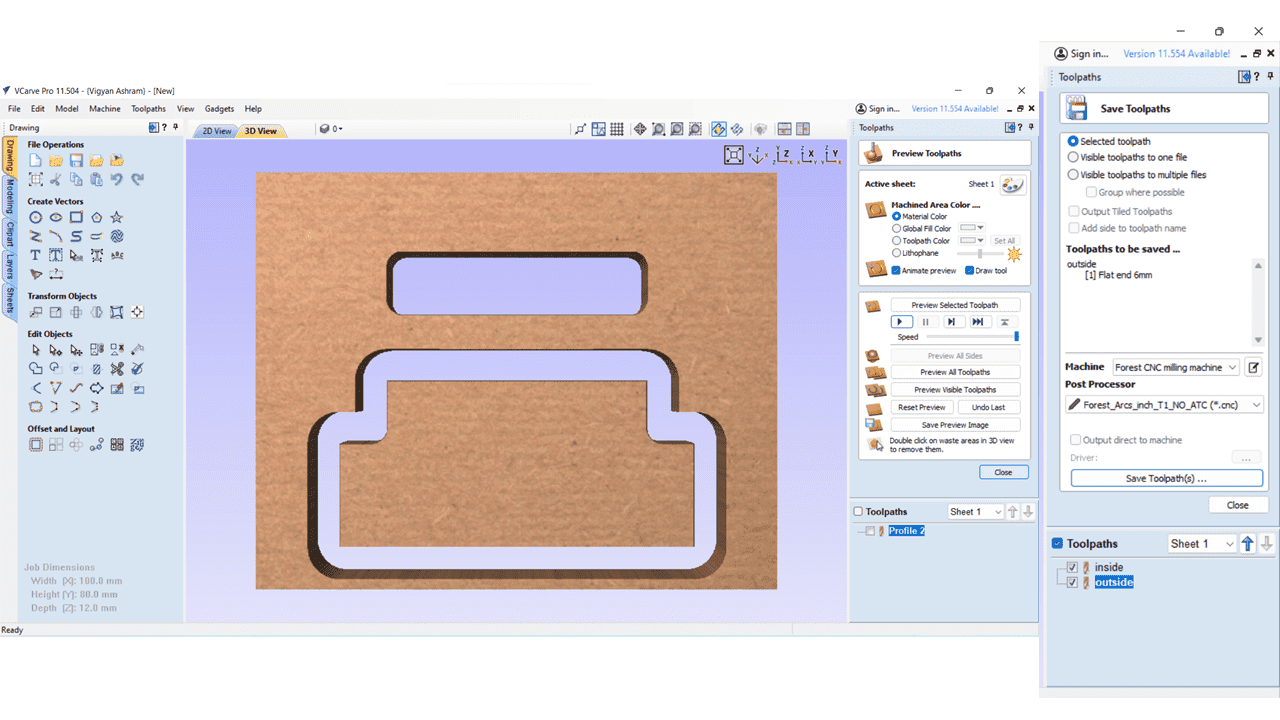
We generated this toolpath using our software by importing a .dxf file and choosing from three options: outside, inside, and on line. We selected "outside" to cut the outer edges and "inside" for closed slots. After setting these parameters, we saved the toolpath as a .cnc file. This format is compatible with the Forest CNC machine software, ensuring that the instructions for cutting and shaping our design are accurately communicated to the CNC machine. This process allows us to achieve precise and efficient fabrication of our projects.
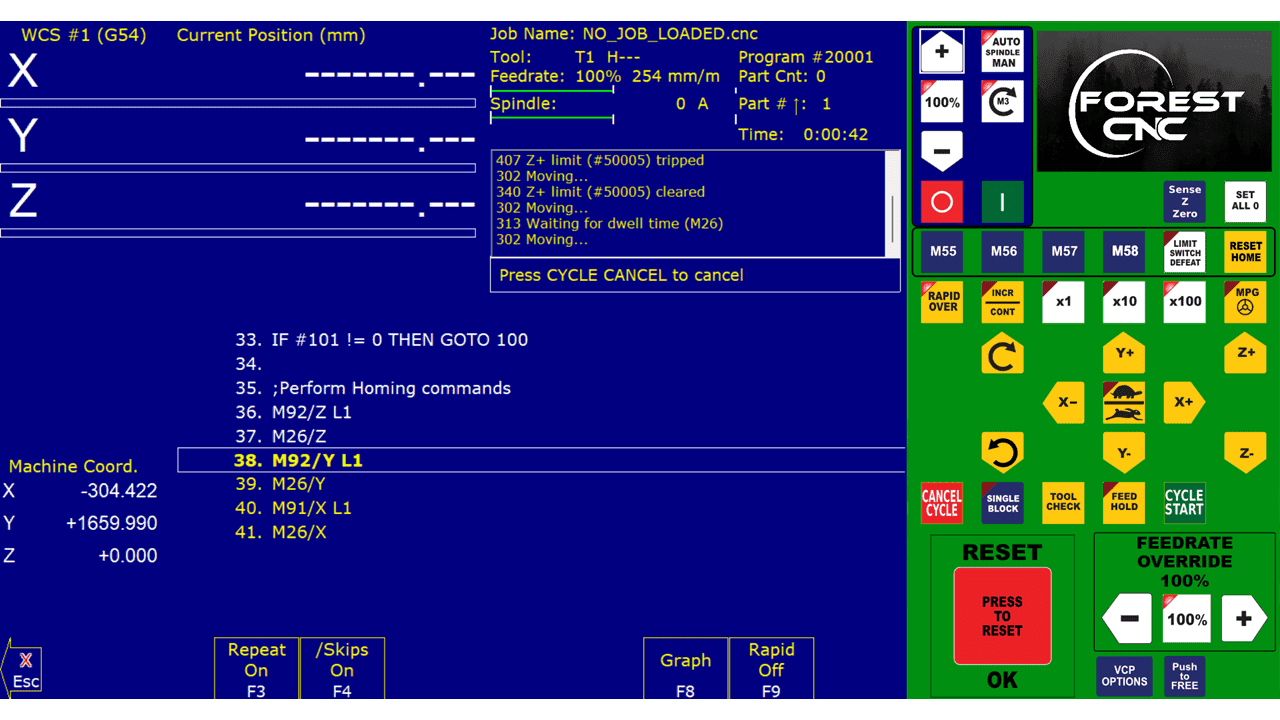
The machine's software interface provides control over the CNC machine's X, Y, and Z orientations, along with settings for spindle speed and feed rate located on the right side. To start, we import the .cnc file using the "Load" option within the software's graphical user interface (GUI). To preview the toolpath, we use the "Graph" option. Setting the origin point using the software is crucial before initiating the cutting process. Once ready, we begin cutting by selecting "Start Cycle." At this point, the CNC machine executes the programmed toolpath, shaping and cutting the object according to our design specifications. This streamlined process ensures accurate and efficient fabrication of our projects with precision control over each machining parameter.