Week 6
Embedded programming
The group assignment here
The goal of this week is to get familiar with microcontrollers and programming them.
- I will be using the arduino IDE to write for the program the Quentorres swd+uart adapter+hello board - xiao ESP32C3; I built during the electronics production week which has one input devices which is a pushbutton and a three LEDs as output devices.
- Secondly, i will be adding a remote wired devices
- Lastly i will be browsing through the data sheet of the XIAO ESP32-C3 which is the one i used as the microcontroller then compare it's performance and development workflows with other architectures as group assignment.
Programming
Arduino Ide connects to the Arduino boards to upload programs and communicate with them. Programs written using Arduino Software (IDE) are called sketches. These sketches are written in the text editor which almost does similar as what other language model does, i personally choose it because i quickly familiarized with it's Version: 2.3.2 , it's simple to use, makes it easy to write code and upload it to the board offline. In addition to a more modern editor and a more responsive interface it includes advanced features to help users with their coding and debugging. For further usage, Download of it's opensource file and other set of instructions can be found here
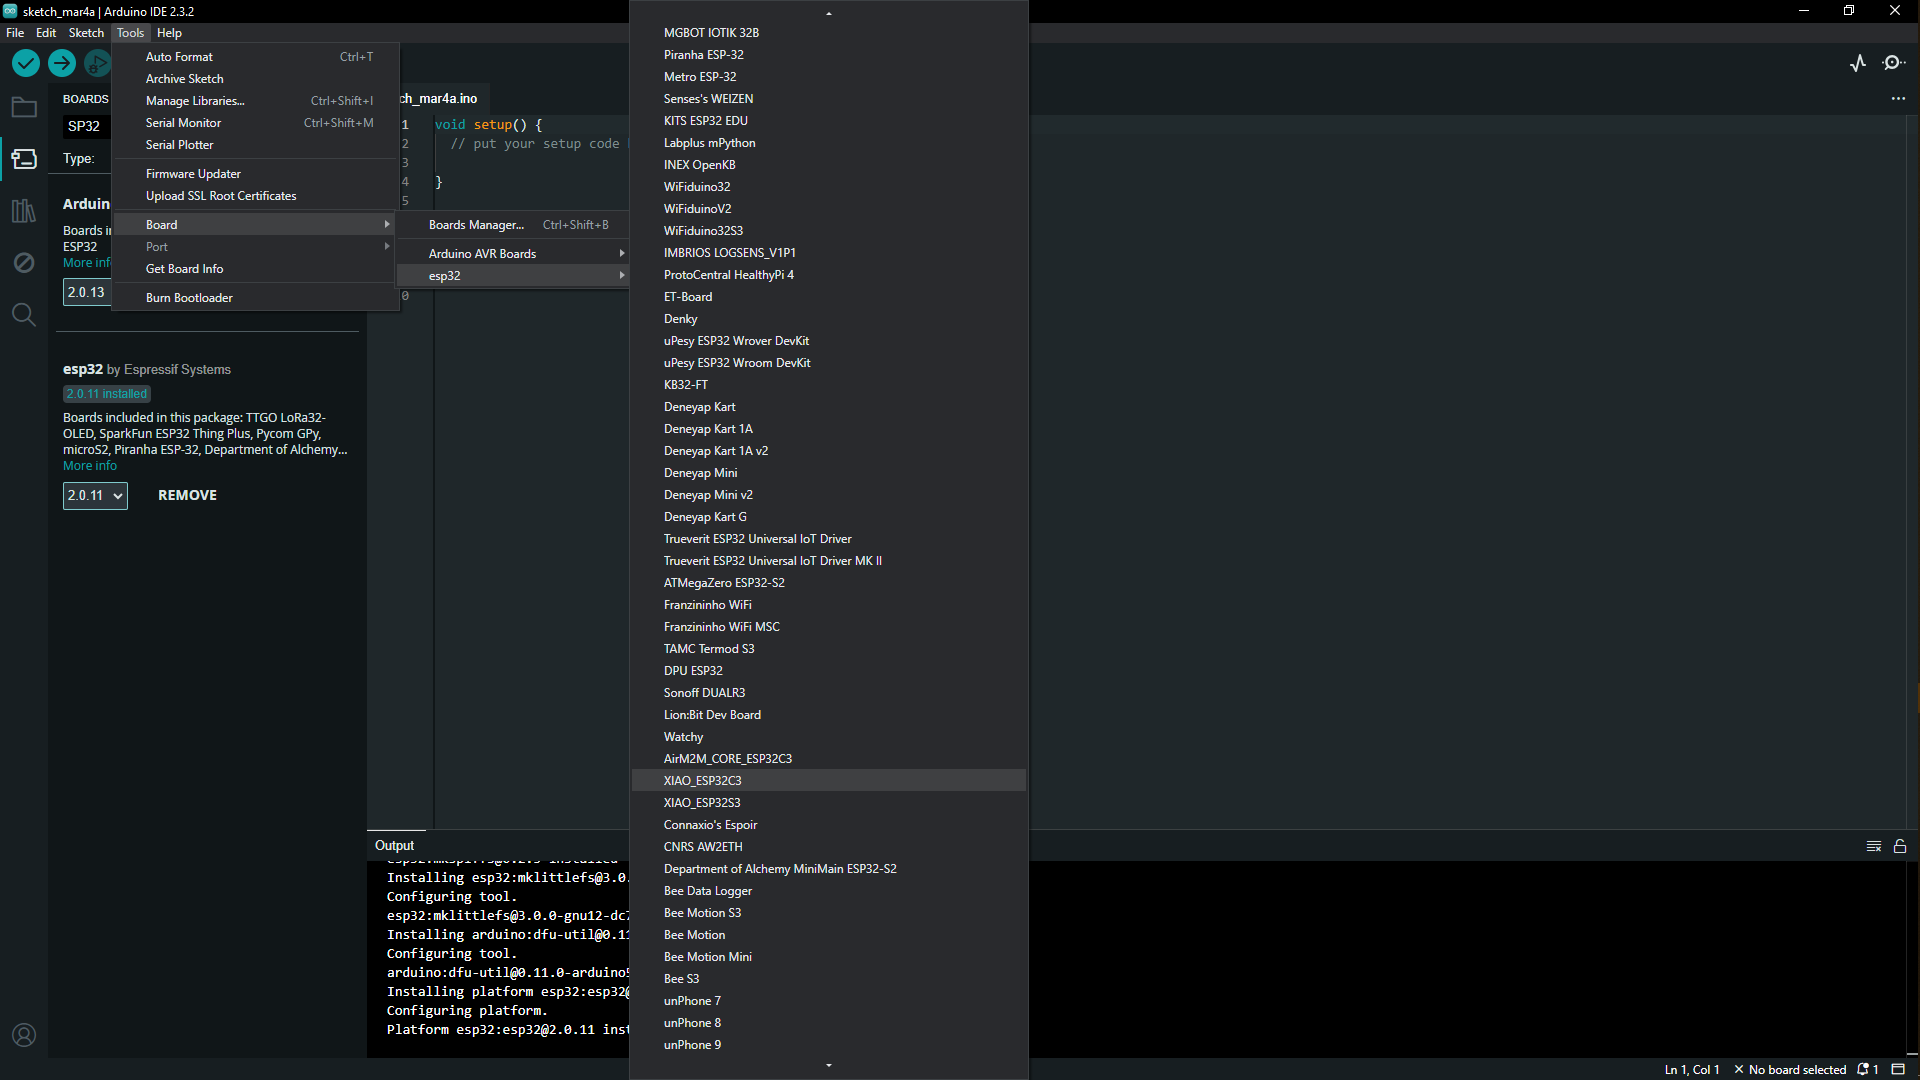
After choosing the board by first going to the sidebar, to the boards manager, typed ESP32 then installed the ESP32 by espressif systems because this link to download additional boards including the XIAOESP32C3didn't have it so i used the boards manager to find an extension that had it, so after installation i moved to configure the XIAOESP32C3 by clicking to Tool in the tool bar, then selected boards, then i selected esp32 then clicked on the XIAOESP32C3 to configure it.
Coding
Input & Output devices
          int LED1 = D0;
          int LED2 = D6;
          int LED3 = D7;
          int PUSHBUTTON = D1;
          void setup() {
            // put your setup code here, to run once:
          pinMode(D0,OUTPUT) ;
          pinMode(D1,INPUT) ;
          pinMode(D6,OUTPUT) ;
          pinMode(D7,OUTPUT) ;

          }

          void loop() {

          if(digitalRead(D1) == HIGH) { // if the button is pressed
            digitalWrite(D7, HIGH) ;   // turn the LED on
            delay(5000) ;
            digitalWrite(D6,LOW) ;
            delay(4000) ;
            digitalWrite(D0,OUTPUT) ;
            delay(1000) ;
            }
            else{ // else, if the button is not pressed
            digitalWrite (D7,LOW);
            delay(2000) ;
            digitalWrite (D6,LOW) ;
            delay(3000) ;
            digitalWrite (D0,HIGH);
            delay(1000) ;
            }
          }
Wired or Wireless Devices
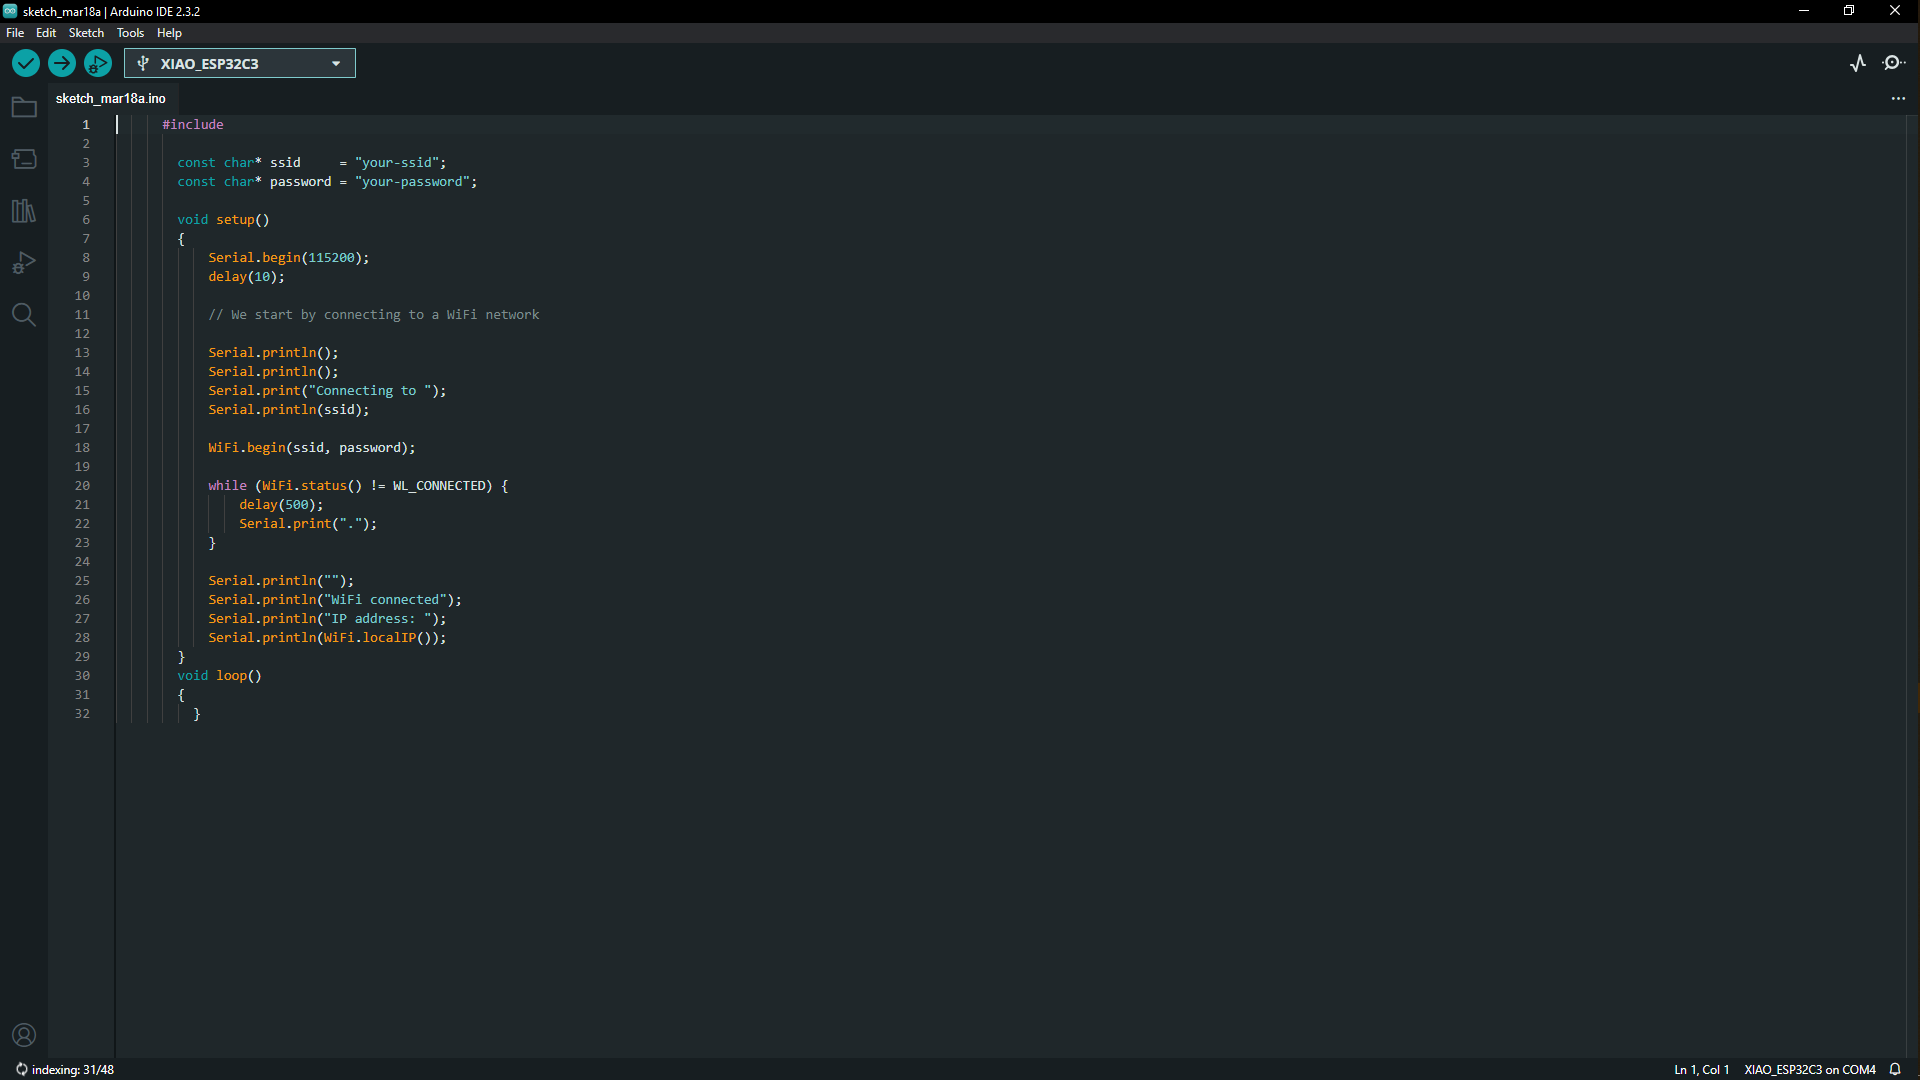
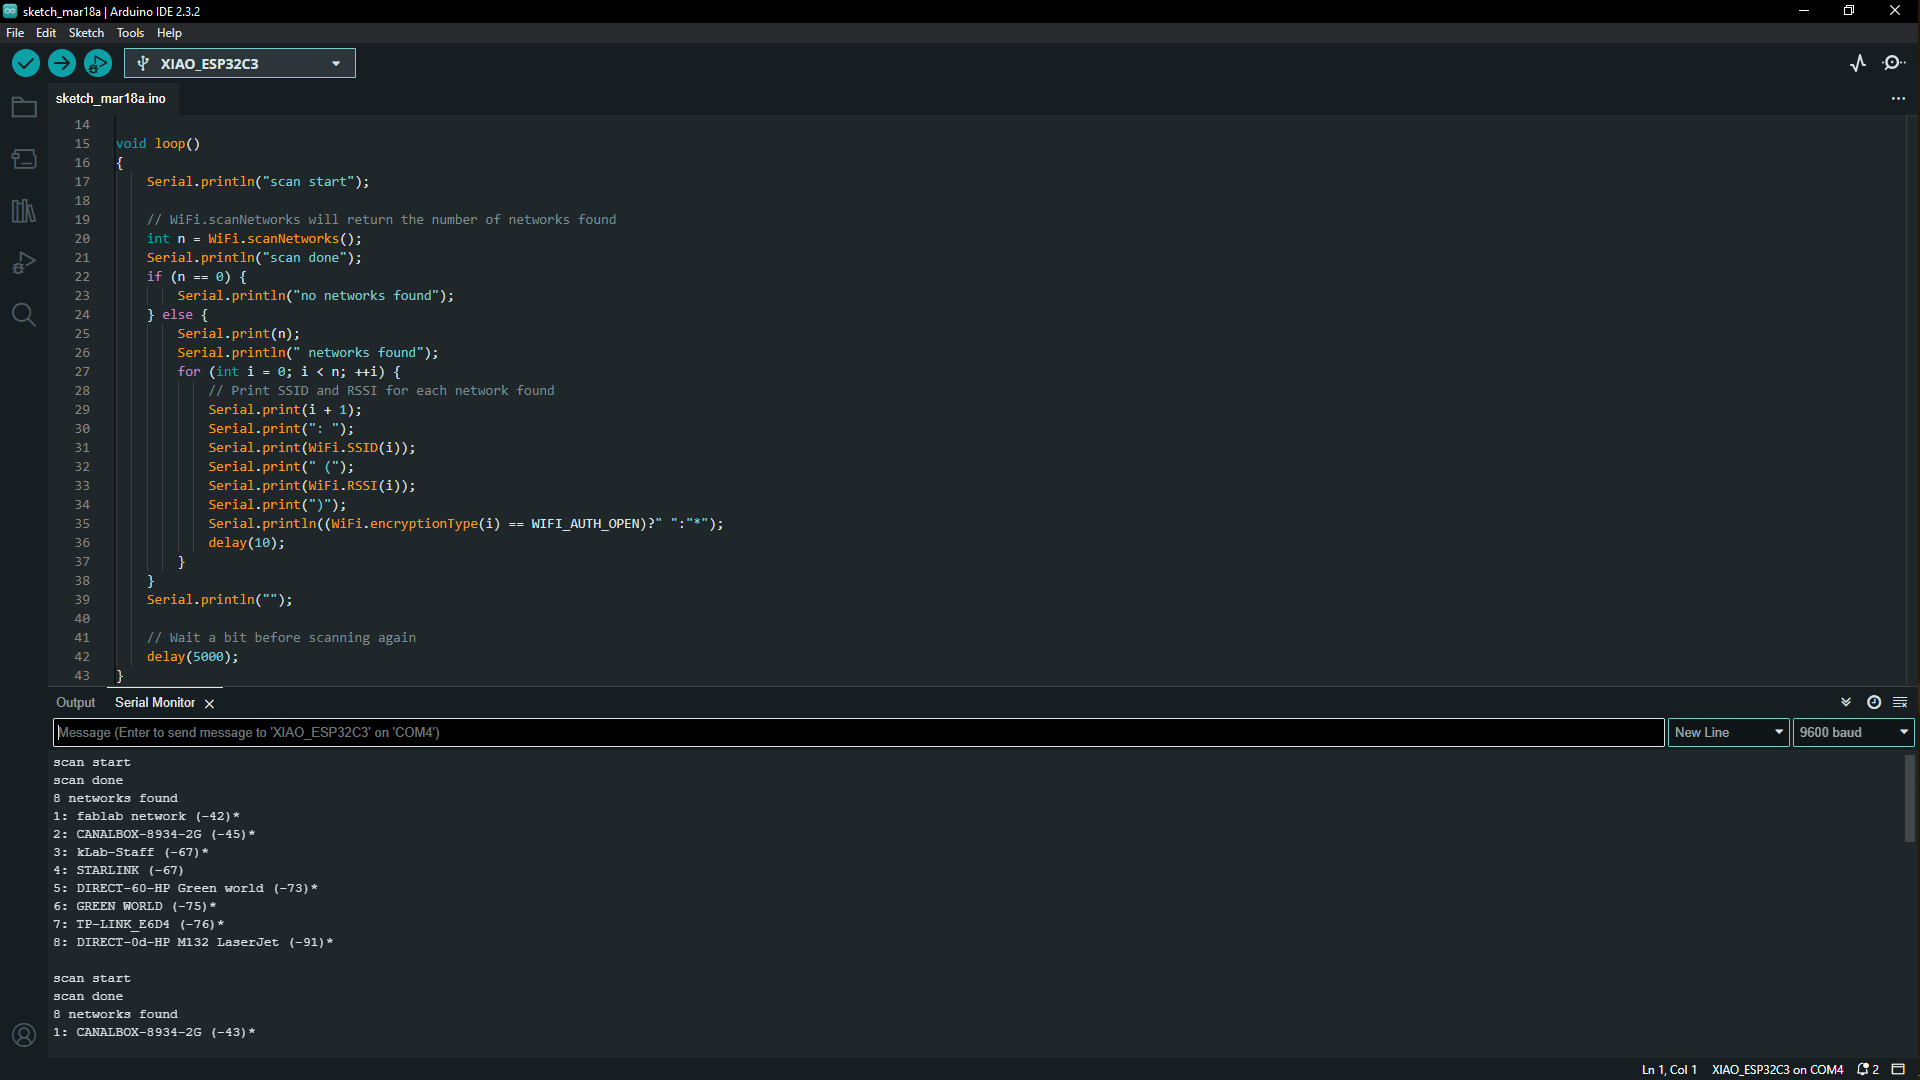
For this part of the assignment i choose to use wireless devices as the XIAOESP32C3 came with the U.FL antenna to make it easier to try this part of the assignment by using the datasheet found here to understand and use it's code to run the wireless devices, i connected the antenna to the board, while the boeard is connected to the computer by USB type-C then i used the datasheet page's example to scan available WiFi networks around while in station mode (to connect the ESP32 module to a WiFi access point. The ESP32 behaves like a computer that is connected to our router. If the router is connected to the Internet, then the ESP32 can access the Internet.) then i copied and added the example codes in the arduino ide. Below are the codes
      #include

        const char* ssid     = "your-ssid";
        const char* password = "your-password";

        void setup()
        {
            Serial.begin(115200);
            delay(10);

            // We start by connecting to a WiFi network

            Serial.println();
            Serial.println();
            Serial.print("Connecting to ");
            Serial.println(ssid);

            WiFi.begin(ssid, password);

            while (WiFi.status() != WL_CONNECTED) {
                delay(500);
                Serial.print(".");
            }

            Serial.println("");
            Serial.println("WiFi connected");
            Serial.println("IP address: ");
            Serial.println(WiFi.localIP());
        }
        void loop()
        {
          }
Adding codes to the arduino IDE done by just copying codes from here, to the arduino IDE.
I then opened the Serial Monitor by going to Tools then scrolling down to Serial Monitor or use the CTRL+SHIFT+M as a shortcut, this opens up the serial monitor on the bottom right next to the output, after that click on upload so below,in the serial monitor are the different wifis we were able to identify in the surroundings and below is the picture of the description.
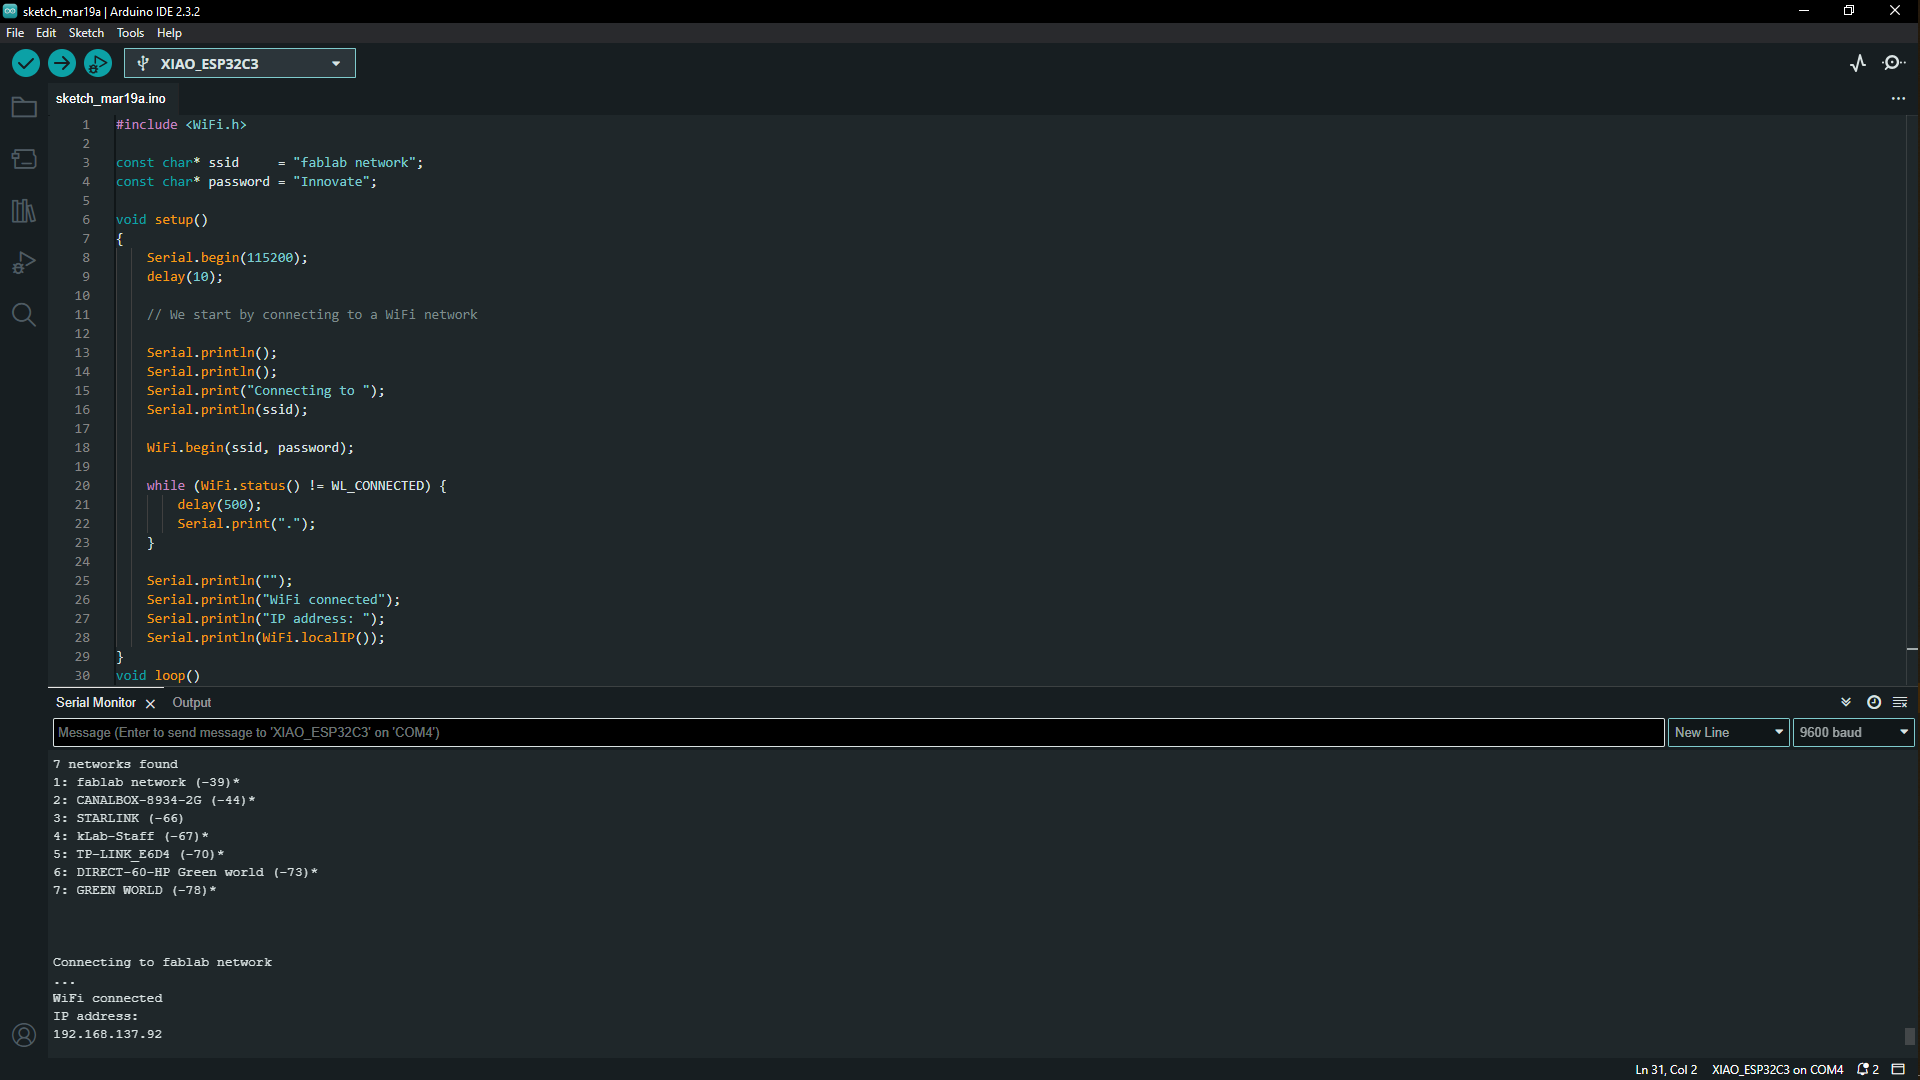
After identifying different wifis i moved on to connecting to one of the WiFI network available using XIAO ESP32C3so i copied the code from here and pasted it in the arduino IDE then clicked on upload. we had choose to connect to WIFI named fablab network, after uploading, in order for somebody to be able to see if it's connected, you have to scroll down to the bottom of the serial monitor to see if it has connected to the wifi. Below is the picture for this desccription.
Group assignment
ESP32C3
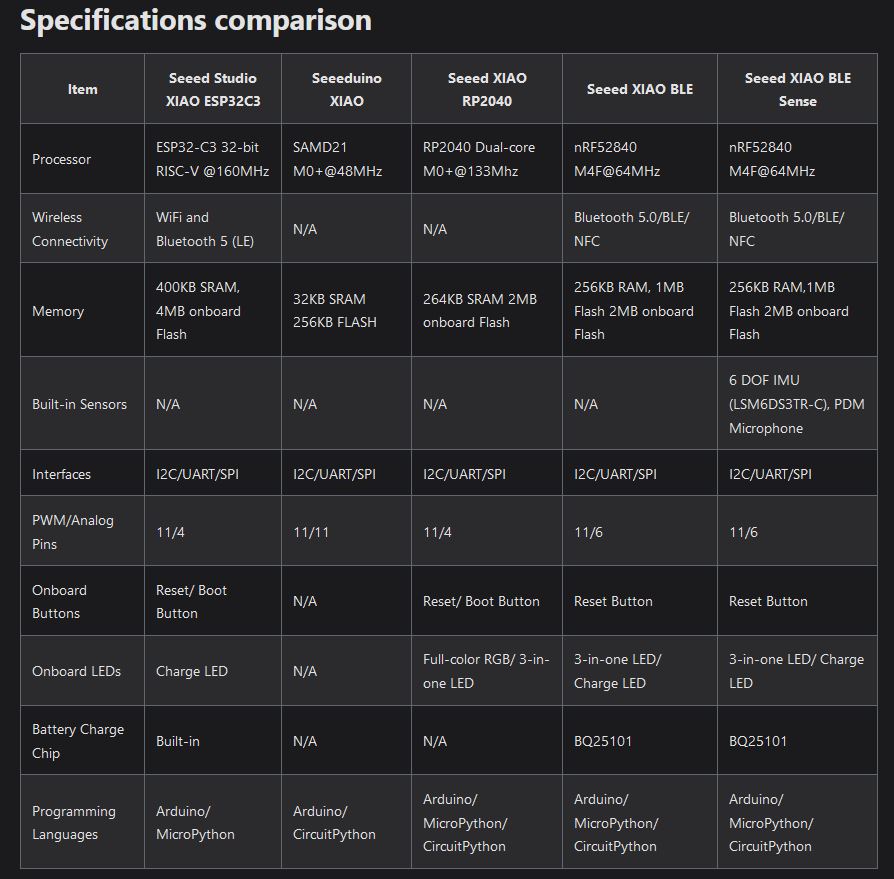
Seeed Studio XIAO ESP32C3 is an IoT mini development board based on the Espressif ESP32-C3 WiFi/Bluetooth dual-mode chip. ESP32-C3 is a 32-bit RISC-V CPU, which includes an FPU (Floating Point Unit) for 32-bit single-precision arithmetic with powerful computing power. It has excellent radio frequency performance, supporting IEEE 802.11 b/g/n WiFi, and Bluetooth 5 (LE) protocols. This board comes included with an external antenna to increase the signal strength for your wireless applications. It also has a small and exquisite form-factor combined with a single-sided surface-mountable design. It is equipped with rich interfaces and has 11 digital I/O that can be used as PWM pins and 4 analog I/O that can be used as ADC pins. It supports four serial interfaces such as UART, I2C and SPI. There is also a small reset button and a bootloader mode button on the board. XIAO ESP32C3 is fully compatible with the Grove Shield for Seeeduino XIAO and Seeeduino XIAO Expansion board except for the Seeeduino XIAO Expansion board, the SWD spring contacts on the board will not be compatible. XIAO ESP32C3 is positioned as a high-performance, low-power, cost-effective IoT mini development board, suitable for low-power IoT applications and wireless wearable applications.
- Comparisons
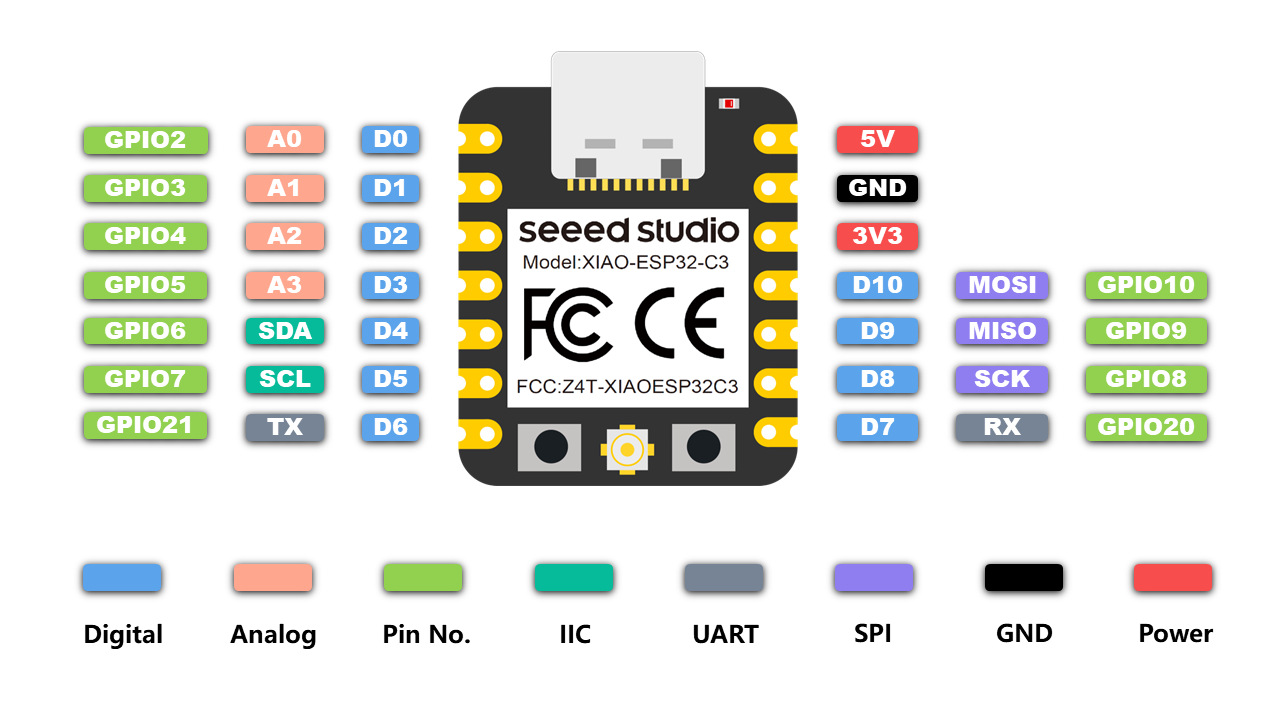
- Pins Map