12. Molding and casting
This week we did moldes and i did a mold of the arm of my guitar with an unused arm I carved in week 4.
THIS WEEK GROUP ASSIGNMENT(click the title)
The mold
i used the design i used for the arm of my final projectwhich i designed in solidworks for my mold. (click on final proyect to see the process of the arm)
then i put the 3d file in vcarve and did pretty much the same thing as in week 7 with some differences since this is an stl file,first i selected the piece and made a vector around the piece

i did this so that in the following steps i could use the offset from vector option so the program wouldnt machine the whole board like in the following image
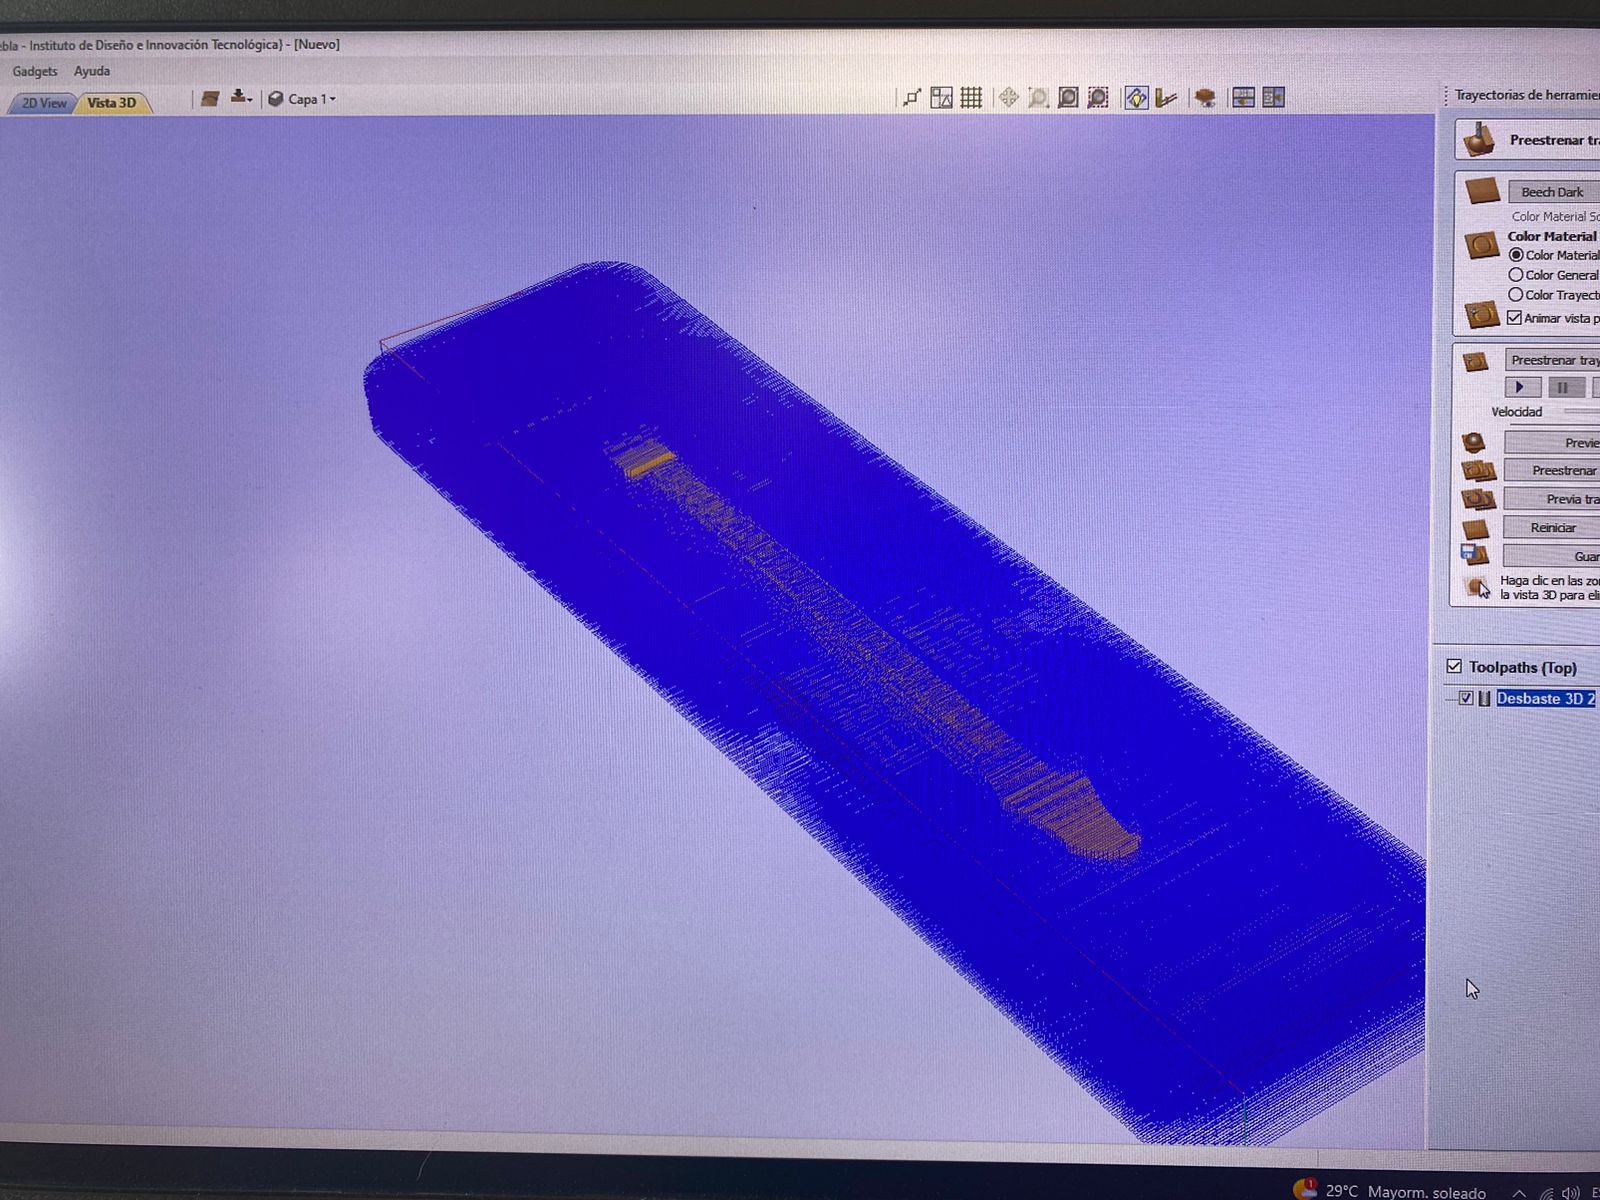
then created two different 3d machining proccesess the first one would make it so the form is visible and the second one to smooth out the design in the wood
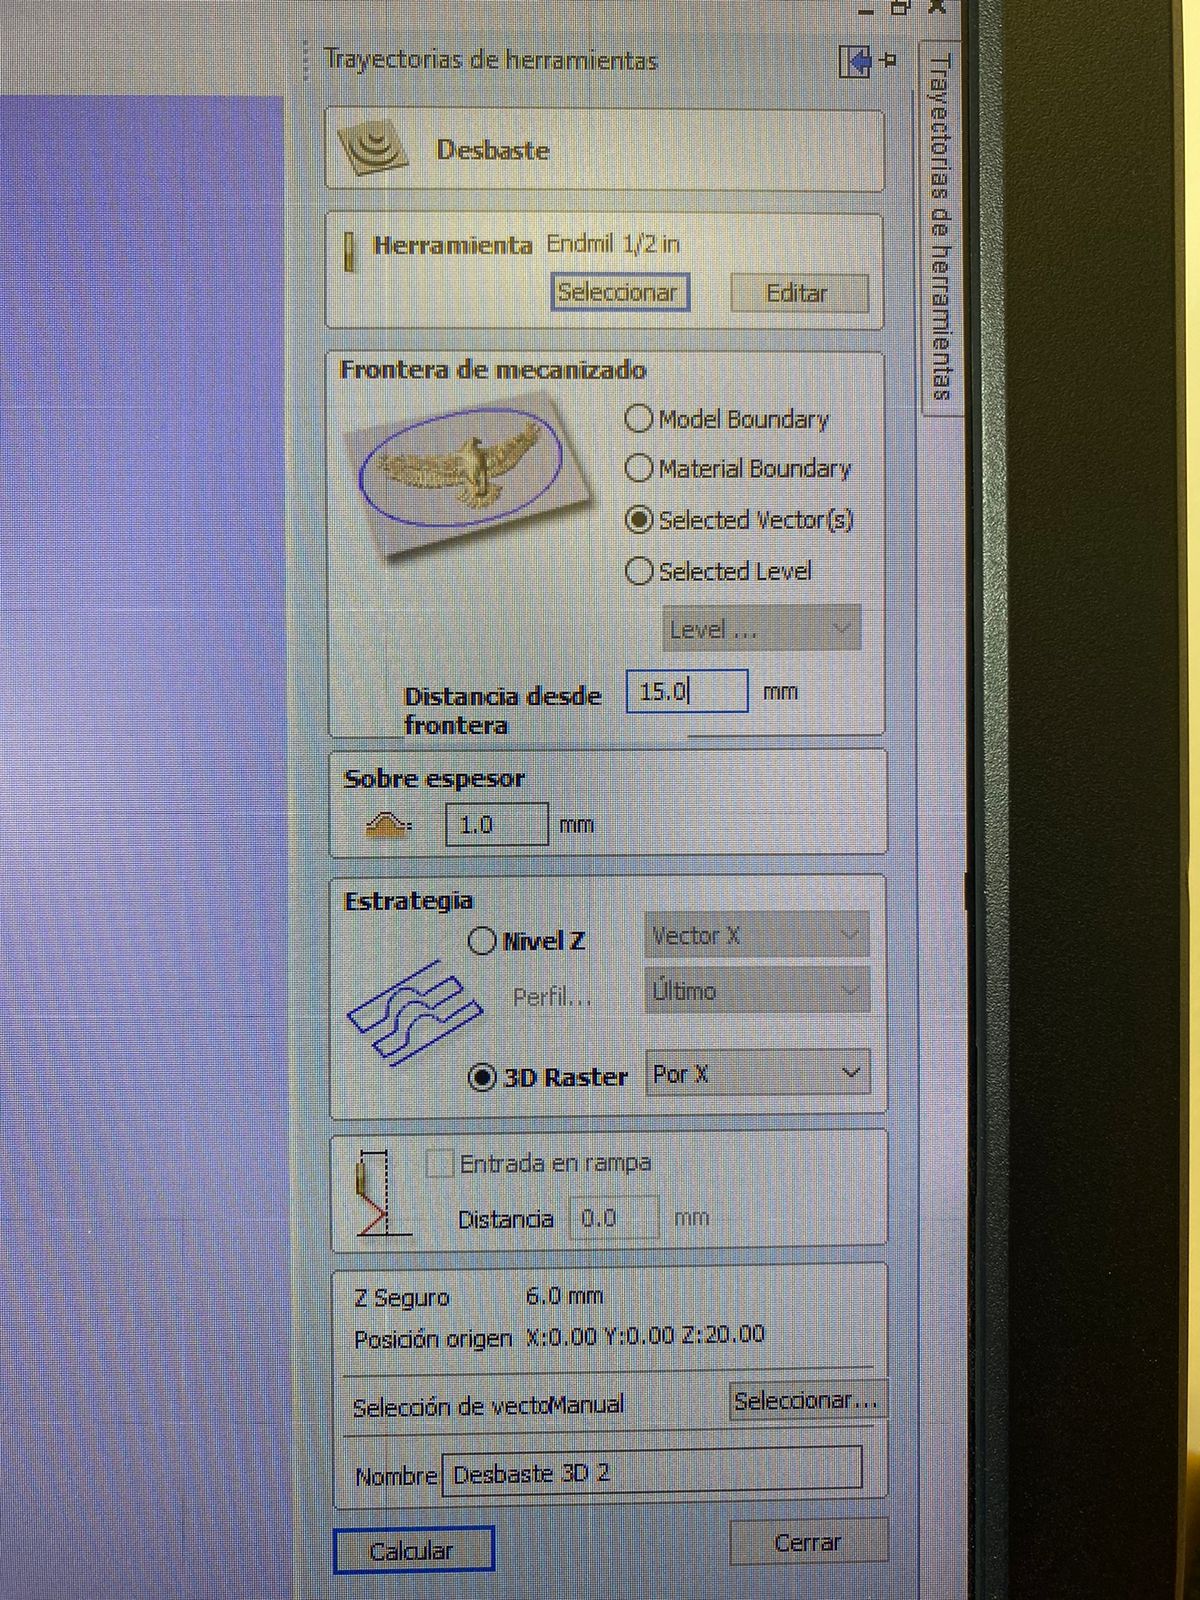
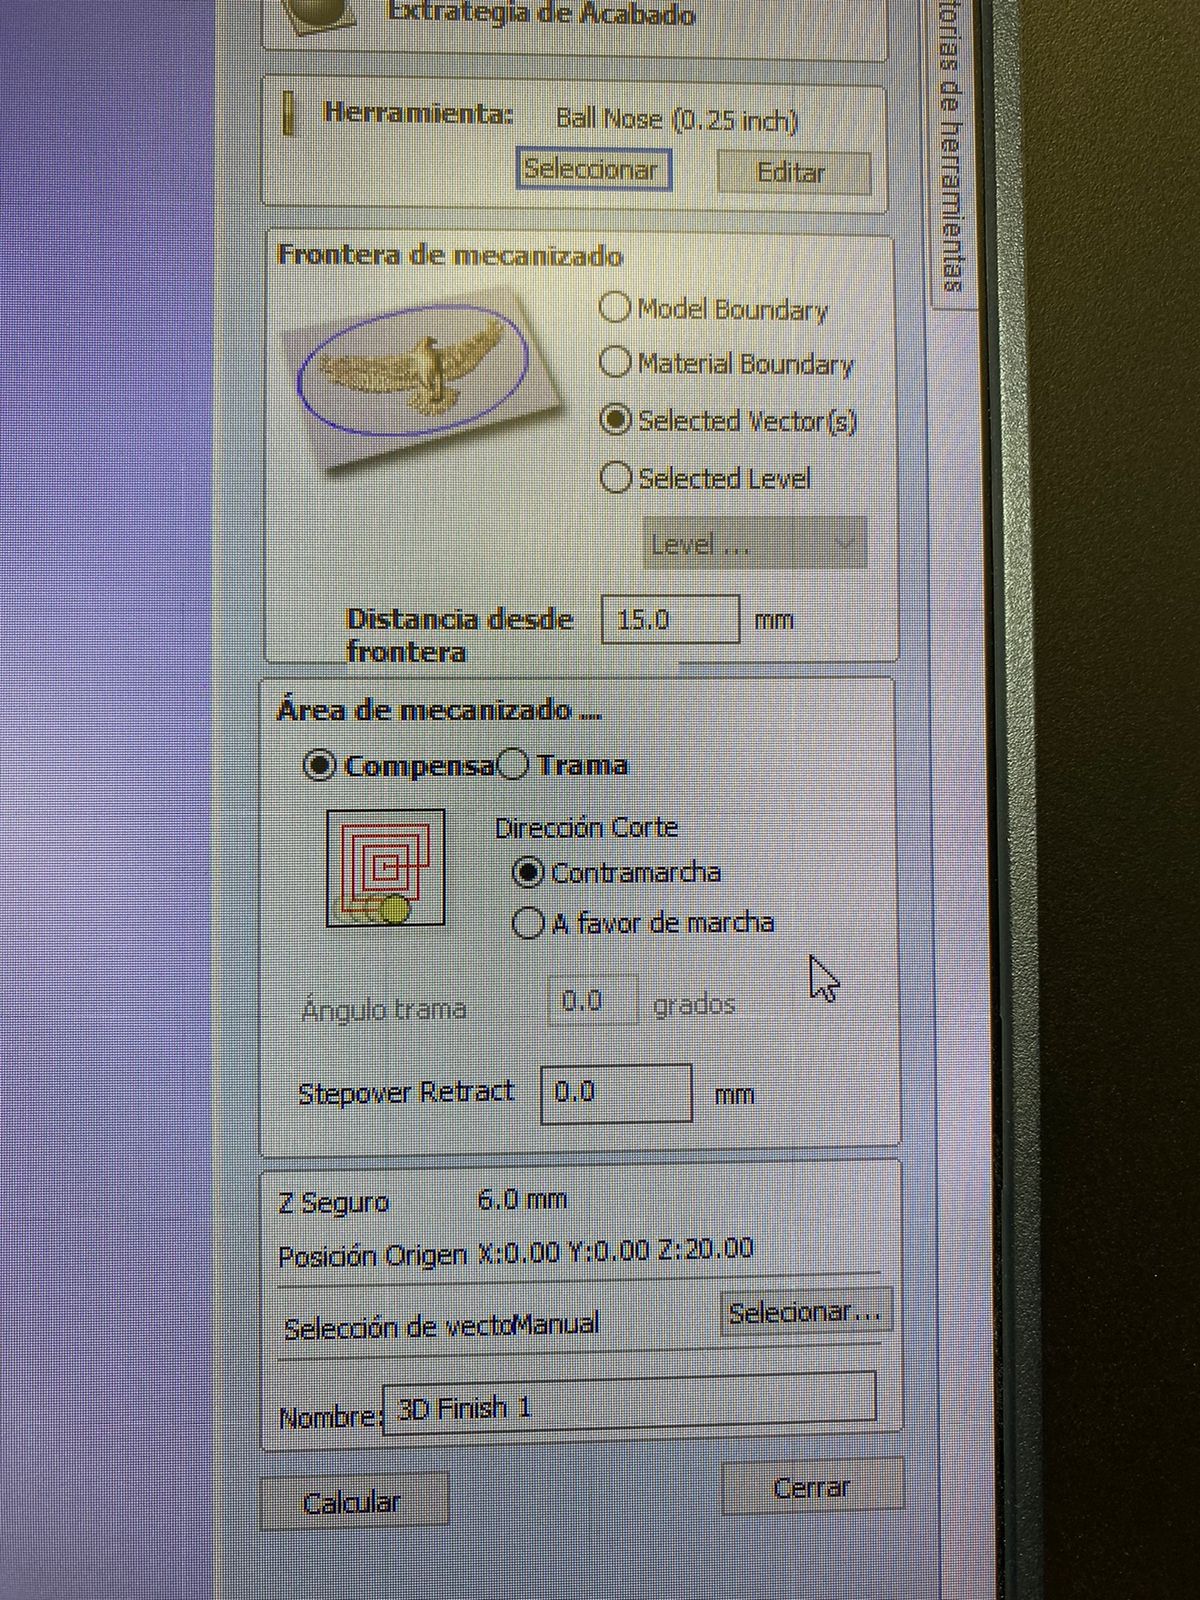
there as you can see i selected 2 different kinds of tools for the machine an half inch end mill for the roughing and a ball nose for the smoothing
then i did the same as in week 7 and machined first the roughing and then i changed the tool to the ball nose for the smoothing
silicone mold
As previously said I used as a mold the first arm I machined for my final project with the cnc as practice
first of all my mold is pretty big since i didnt scale it down which i should have but i dont really have more wood to try so we're
rolling with this.
so first i bought a bucket since i needed a lot of silicone, the in a bascule i weighed the bucket and made it so the weight of the bucket was the
satrting point of my measurement.
having that donei calculated with sand that i needed around 2 kg or maybe a little bit more to fill the gap, im taking a guess here sine the top part
of the mold aligns with the edges becauses the machine didnt rough down and then roughed the model isntead it started roughing the model in the top part of the wood
so when i poured the sand it was going out of the gap.
so to fix this I put a layer of hard plastic around the edges of the mold to make it a bit higher so that the silicone would cover up every part of the model.
Then I poured the component A of the silicone in the bucket till it weighed 2 kg and then added 1/10th of that as part B of the silicone as that
is what the instructions say you have to use for the mix.
having that done i poured the mix to the mold waited for the mix to solidify, once solidified I took my new mold out and i realized it wasnt evenly spread
so the base of the mold did a little arch (oops) but other than that everything was fine.
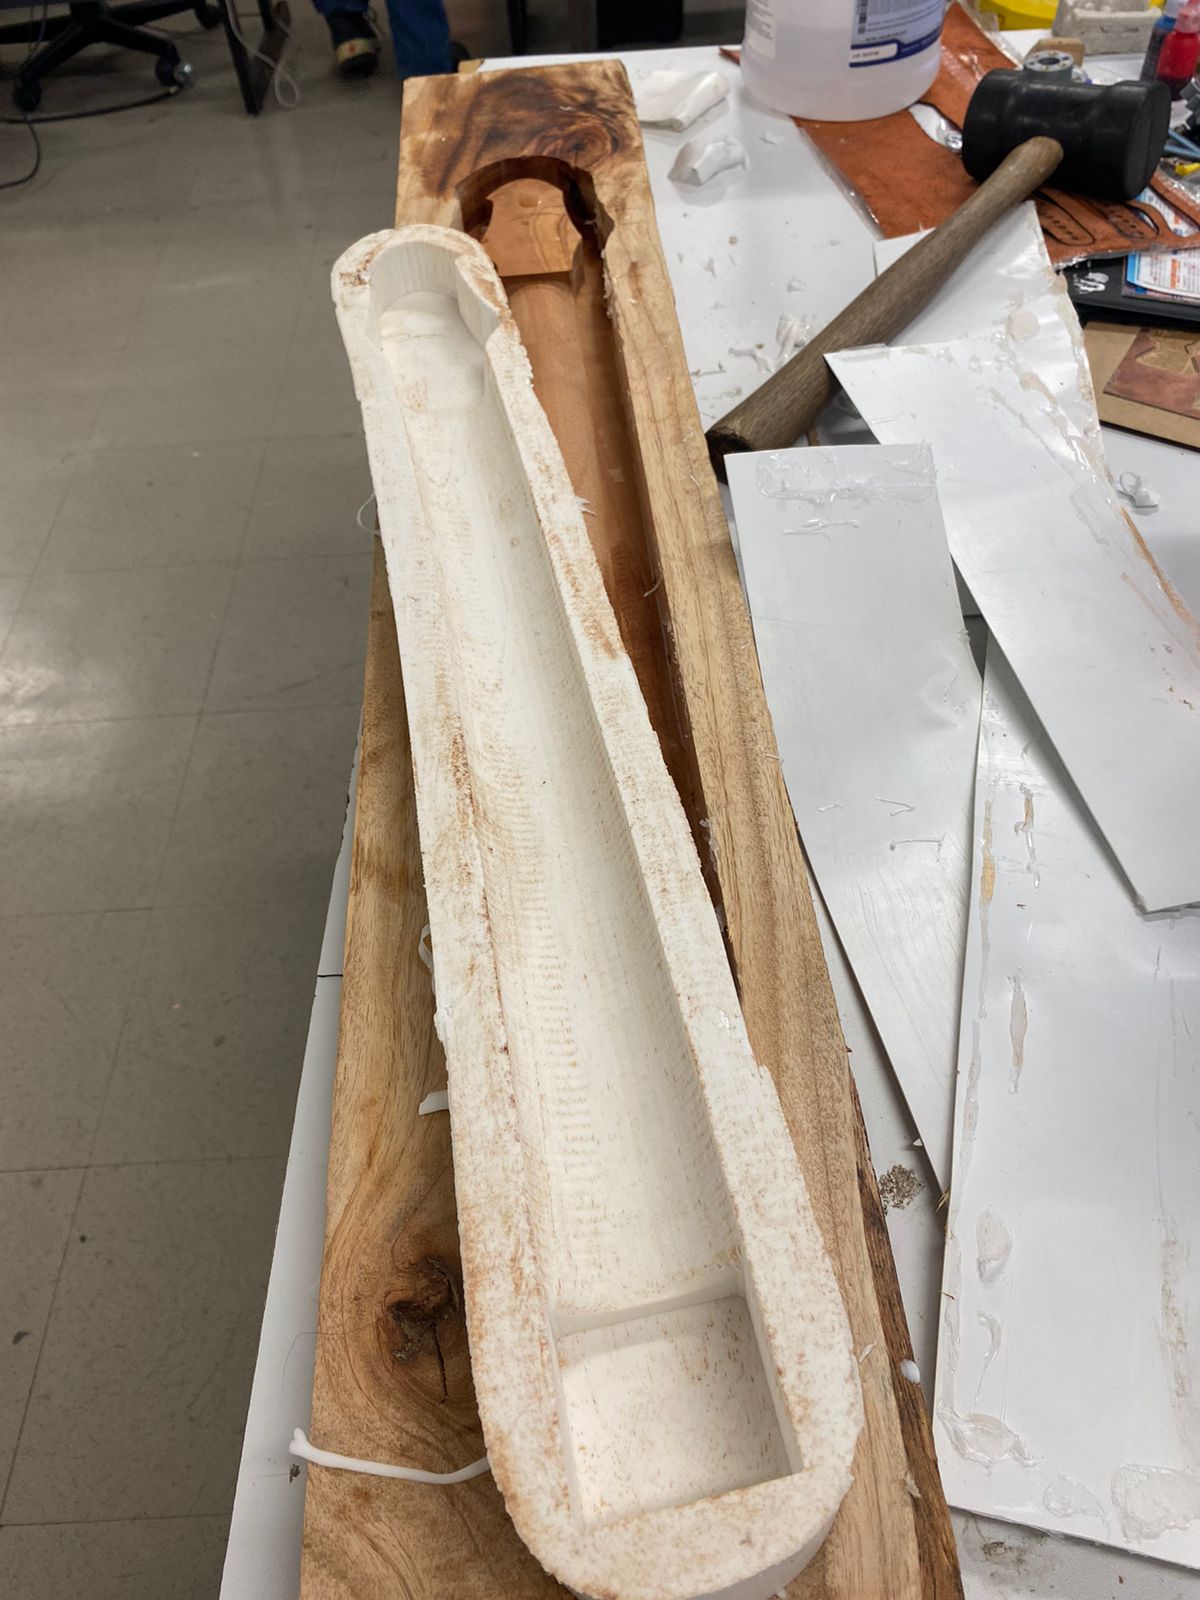
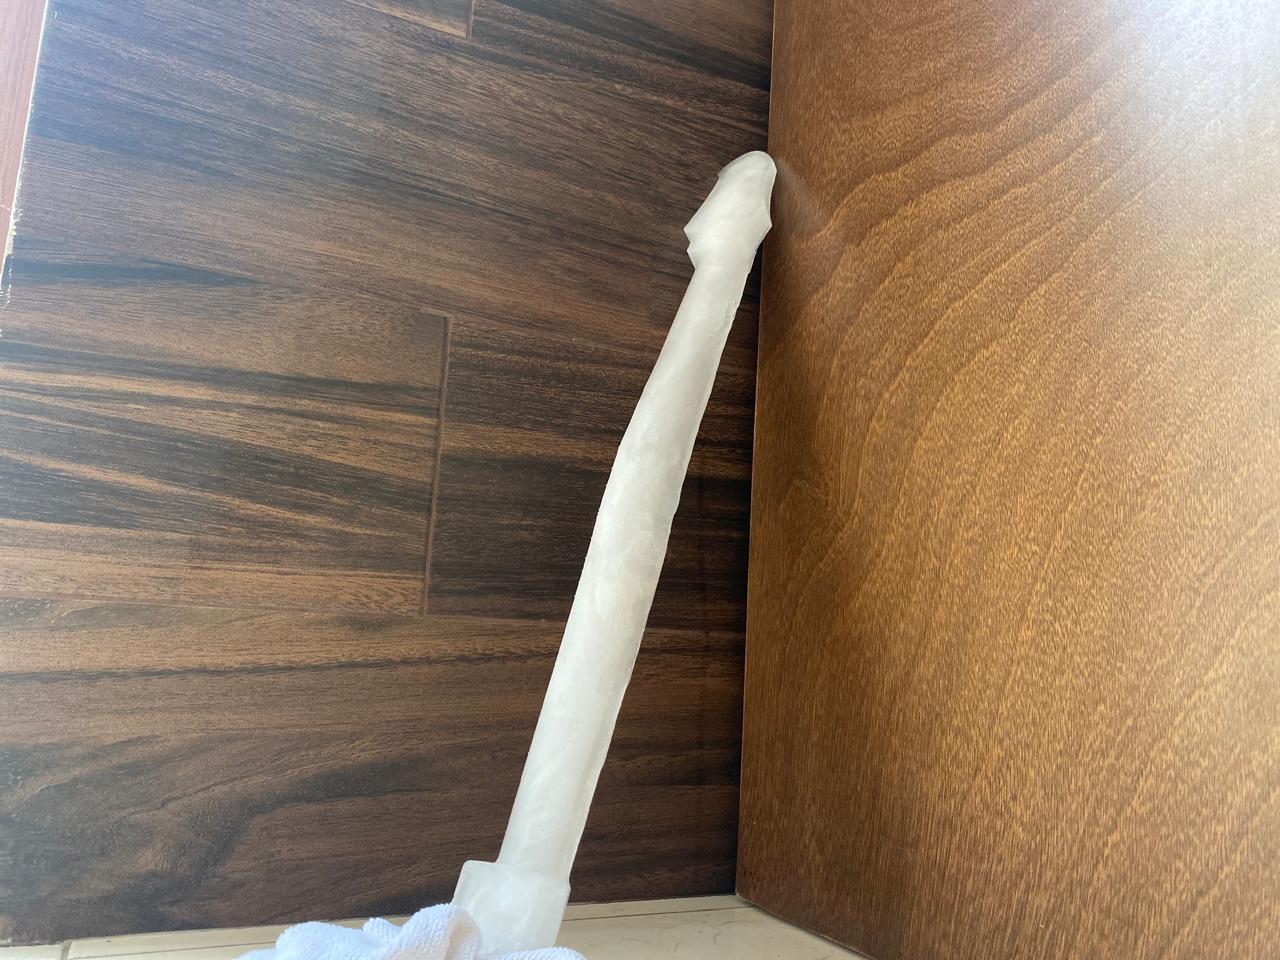
Then I poured water into the mold as I wanted to see what it was like to have a solidified piece and using resin was going to take a long time and was goint to be more dificult to separate from the mold than ice since ice melts.
This is the final result
Conclusion
It isnt very dificult to make the first mold but a little piece of it broke and but i just put more silicomn in the carck and you have to get the mix right since it could take more time to solidify and that consumes a lot of time and i also learned that to use make any food grade mold you need other materials luckily i didnt concusme the ice i made.
