So, you are looking for new toys huh?
CNC Milling for your viewing pleasure
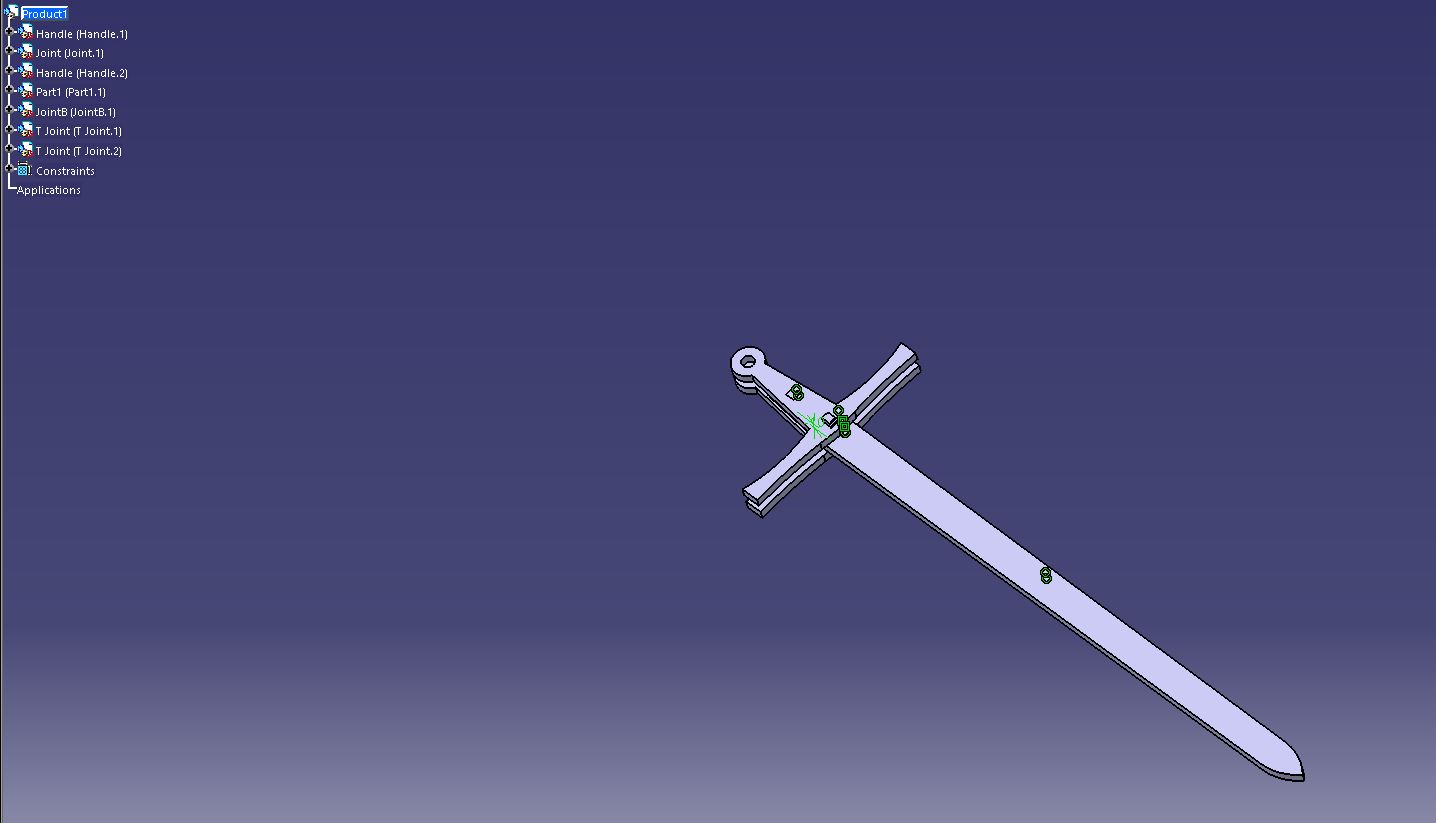
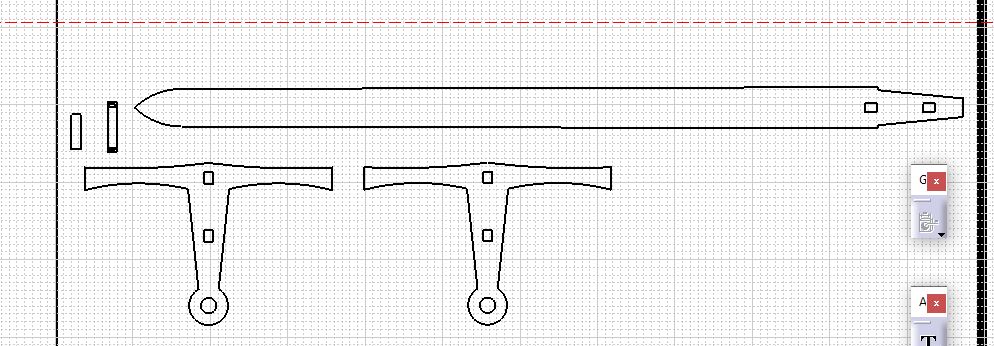
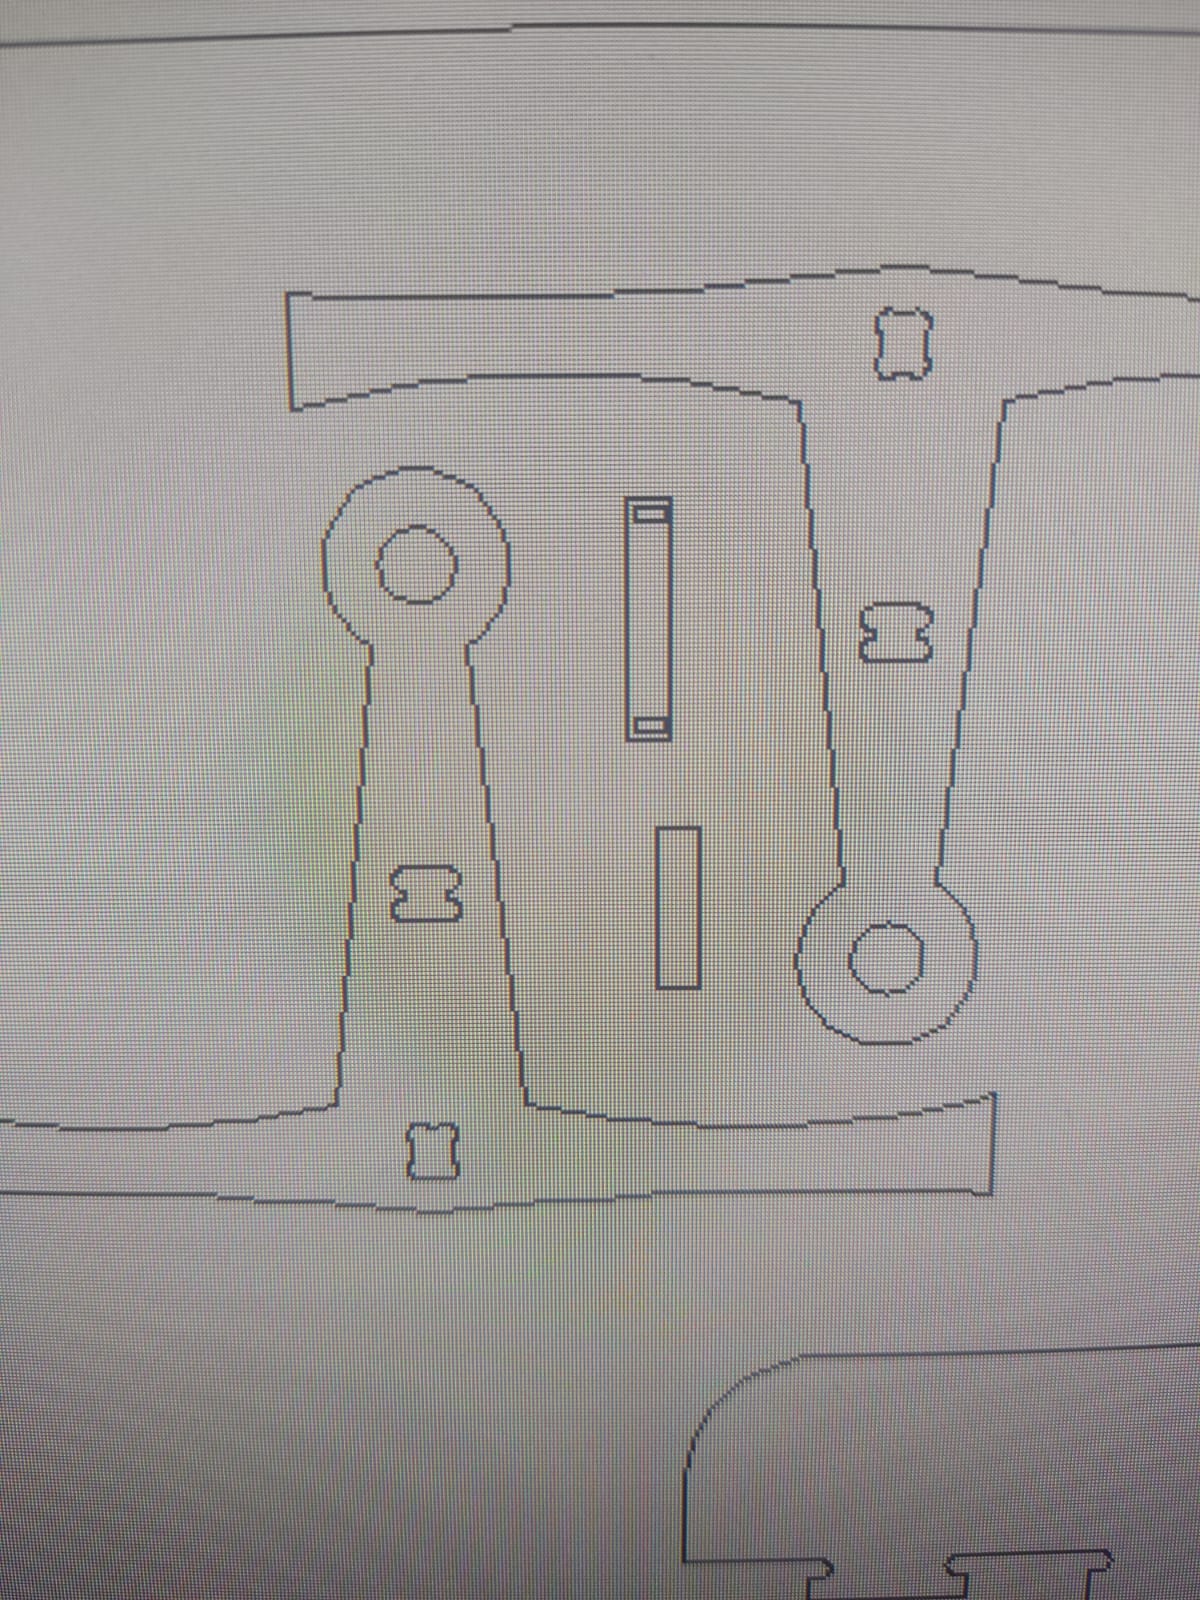
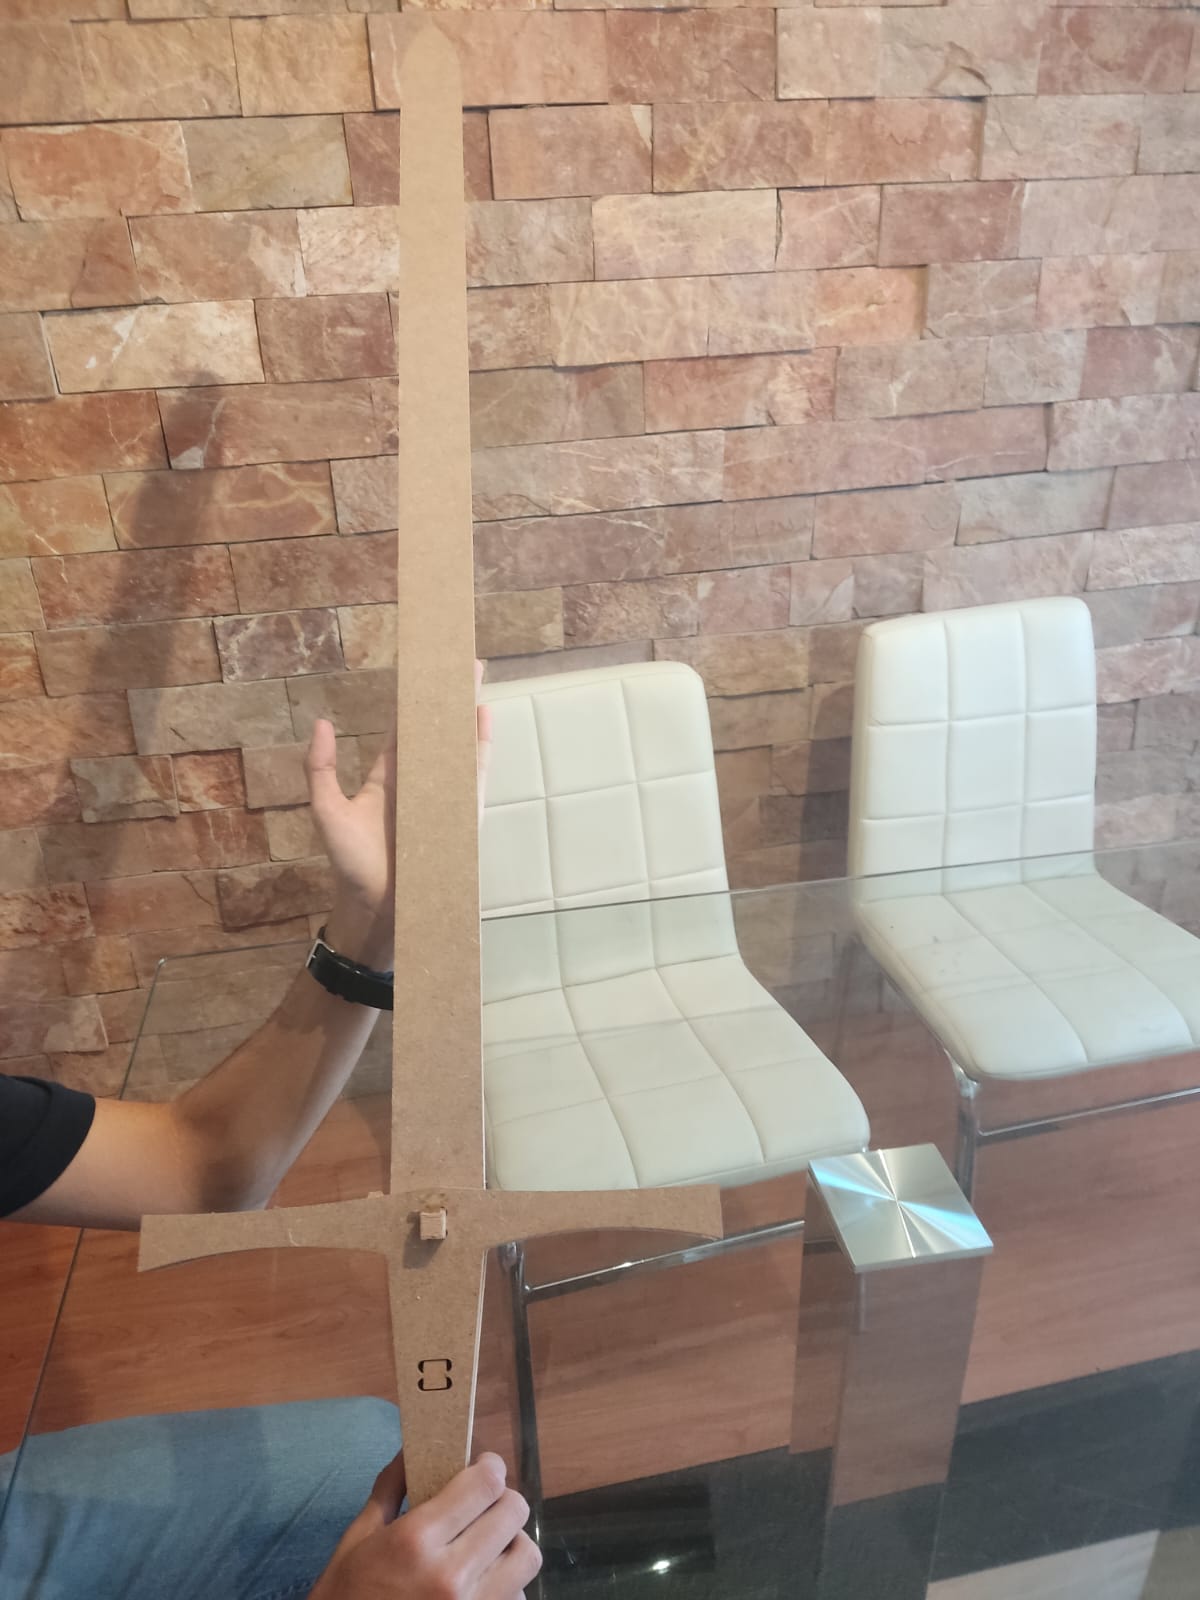
First off, we must come up with a design, in my case I went for a medieval sword inspired in 11th to 12th century English knights. You can see the sketches and the simulated assembly program in the next images. This historic weapon is made up of seven pieces: The blade, two handle pieces, and four pieces of joints that will be arranged in somewhat of a T shape, 3 at the top and one at the bottom.
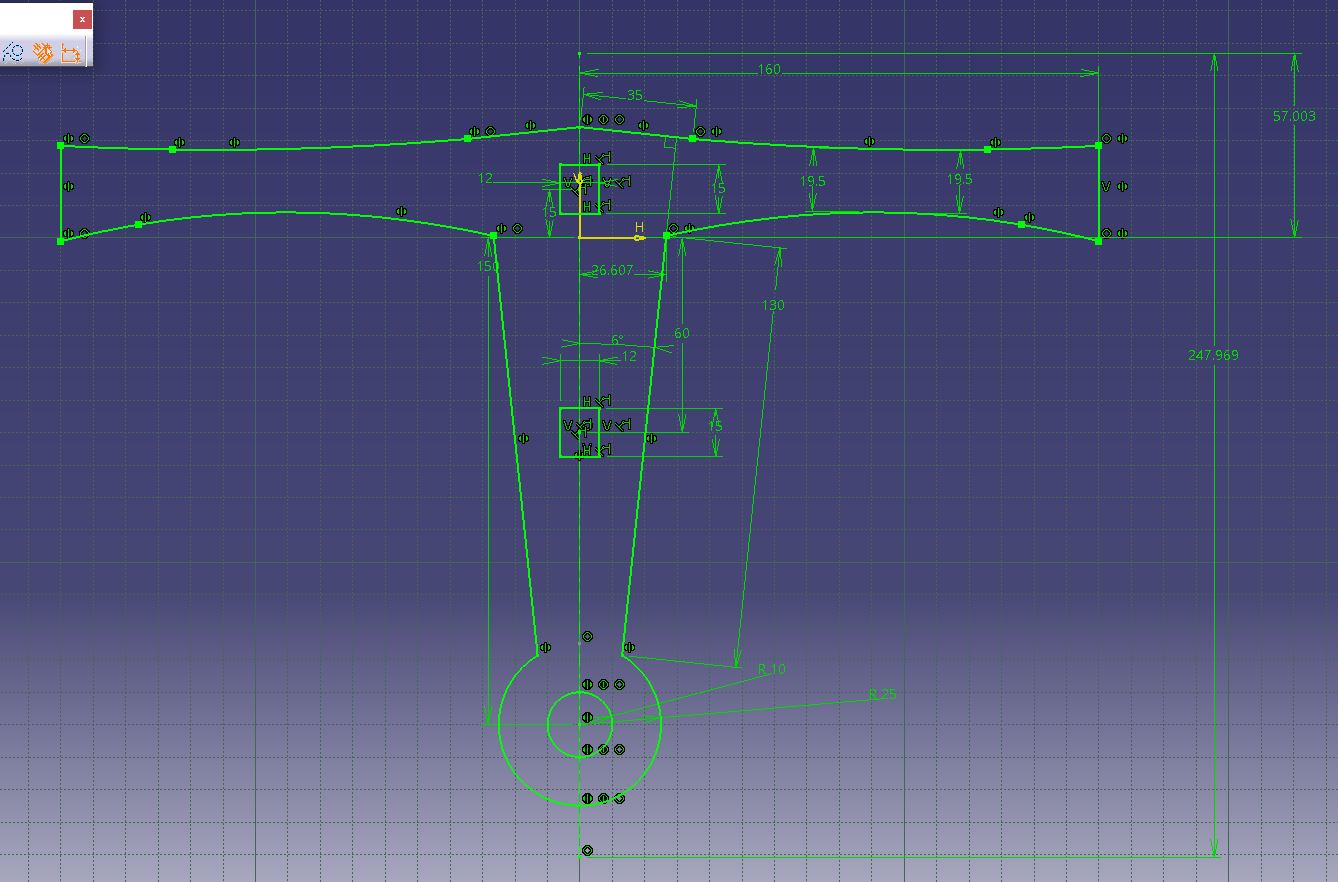
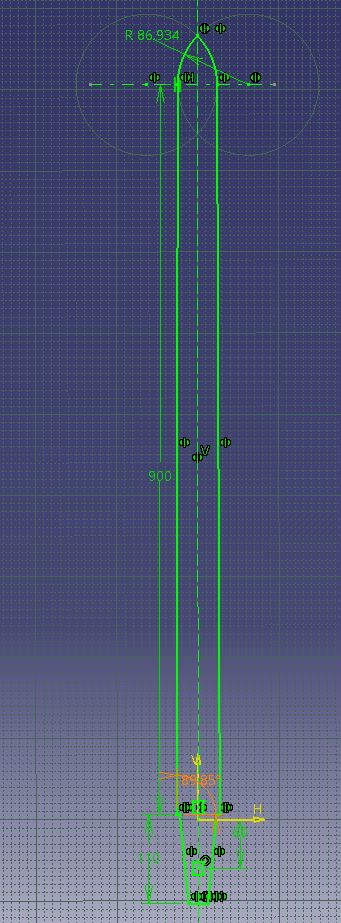
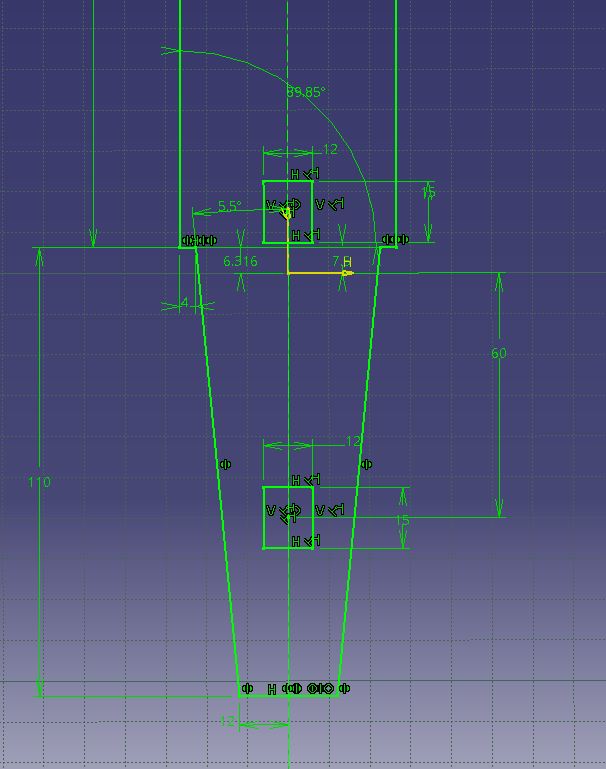


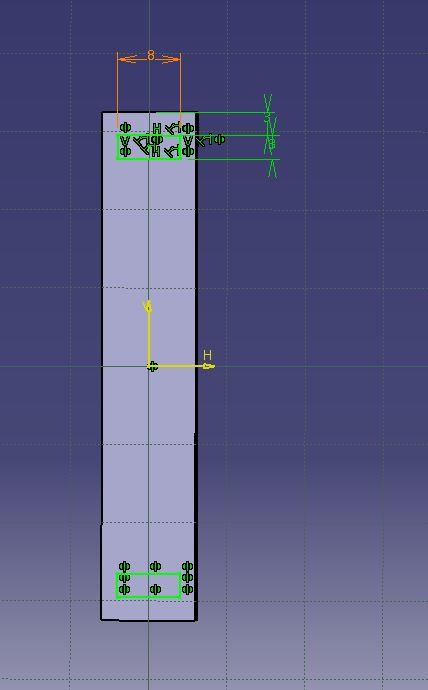
After getting the basic designs the next thing to do is draft the shapes of every single piece that it's going to be milled in the CNC machine, we create a drafting program, and we save up our shapes as a .dxf file. This is done to import those files into our milling software.
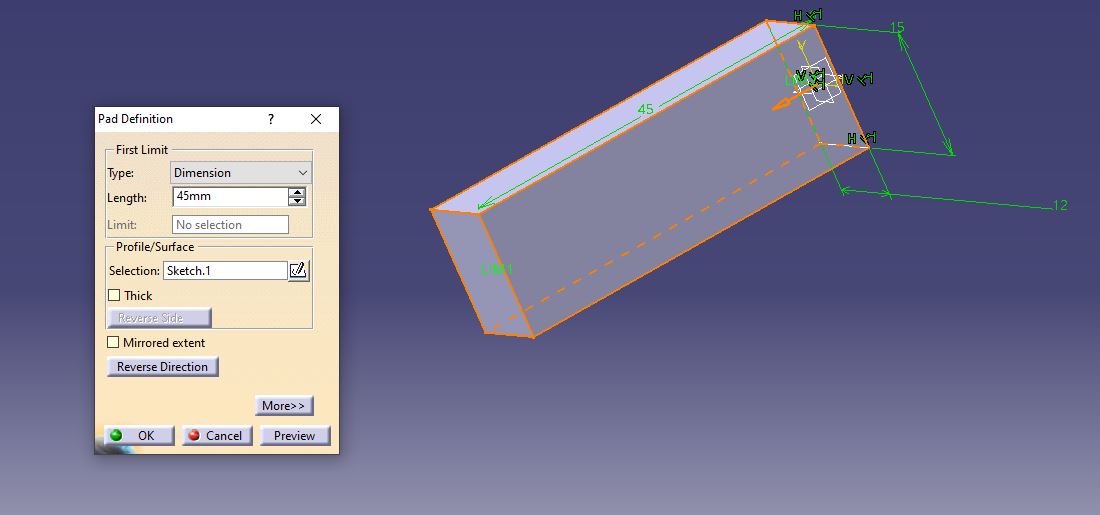
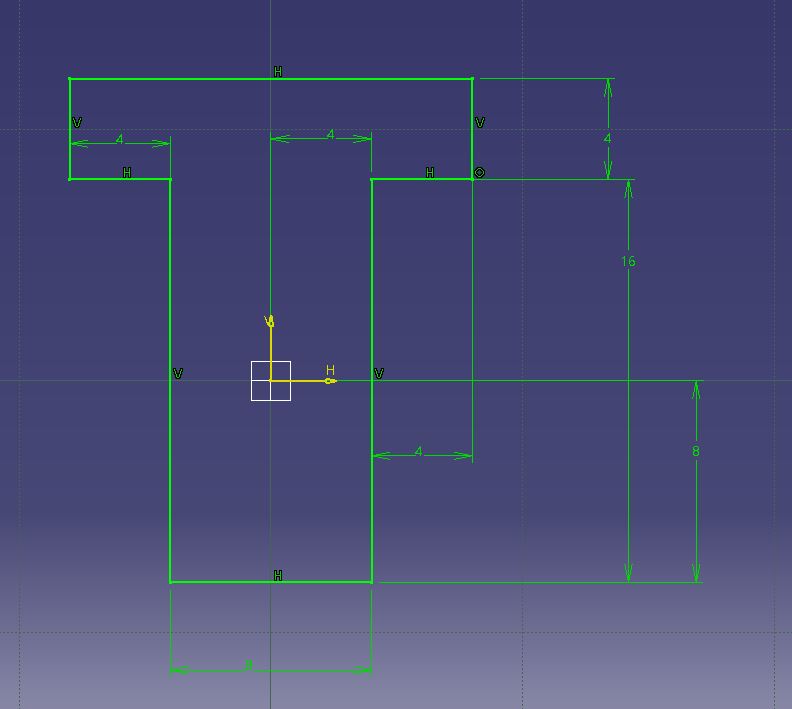
But what software are we using? Well, the software is called VCarve Pro, it's a program designed to carve, drill, cut, and create certain shapes in a desired area, it is mainly used for milling with CNC technology. So, we open up the program and we import the contours of the shapes we made in the drafting software, we check for any overlapping lines and we eliminate them in order to not disrupt the work routine we are going to assign and avoid damaging the material we're going to work on and the tools that we are going to use, we do so as well in checking that there are no open profiles, as this would mean that the machine cannot do the job correctly as the pieces will not be correctly milled. Another thing to contemplate is the distance between each of the pieces, common rule is to leave out at least twice the diameter of your working tool as well as 10 mm to spare for the tool to move from one place to the other without disrupting our shapes.
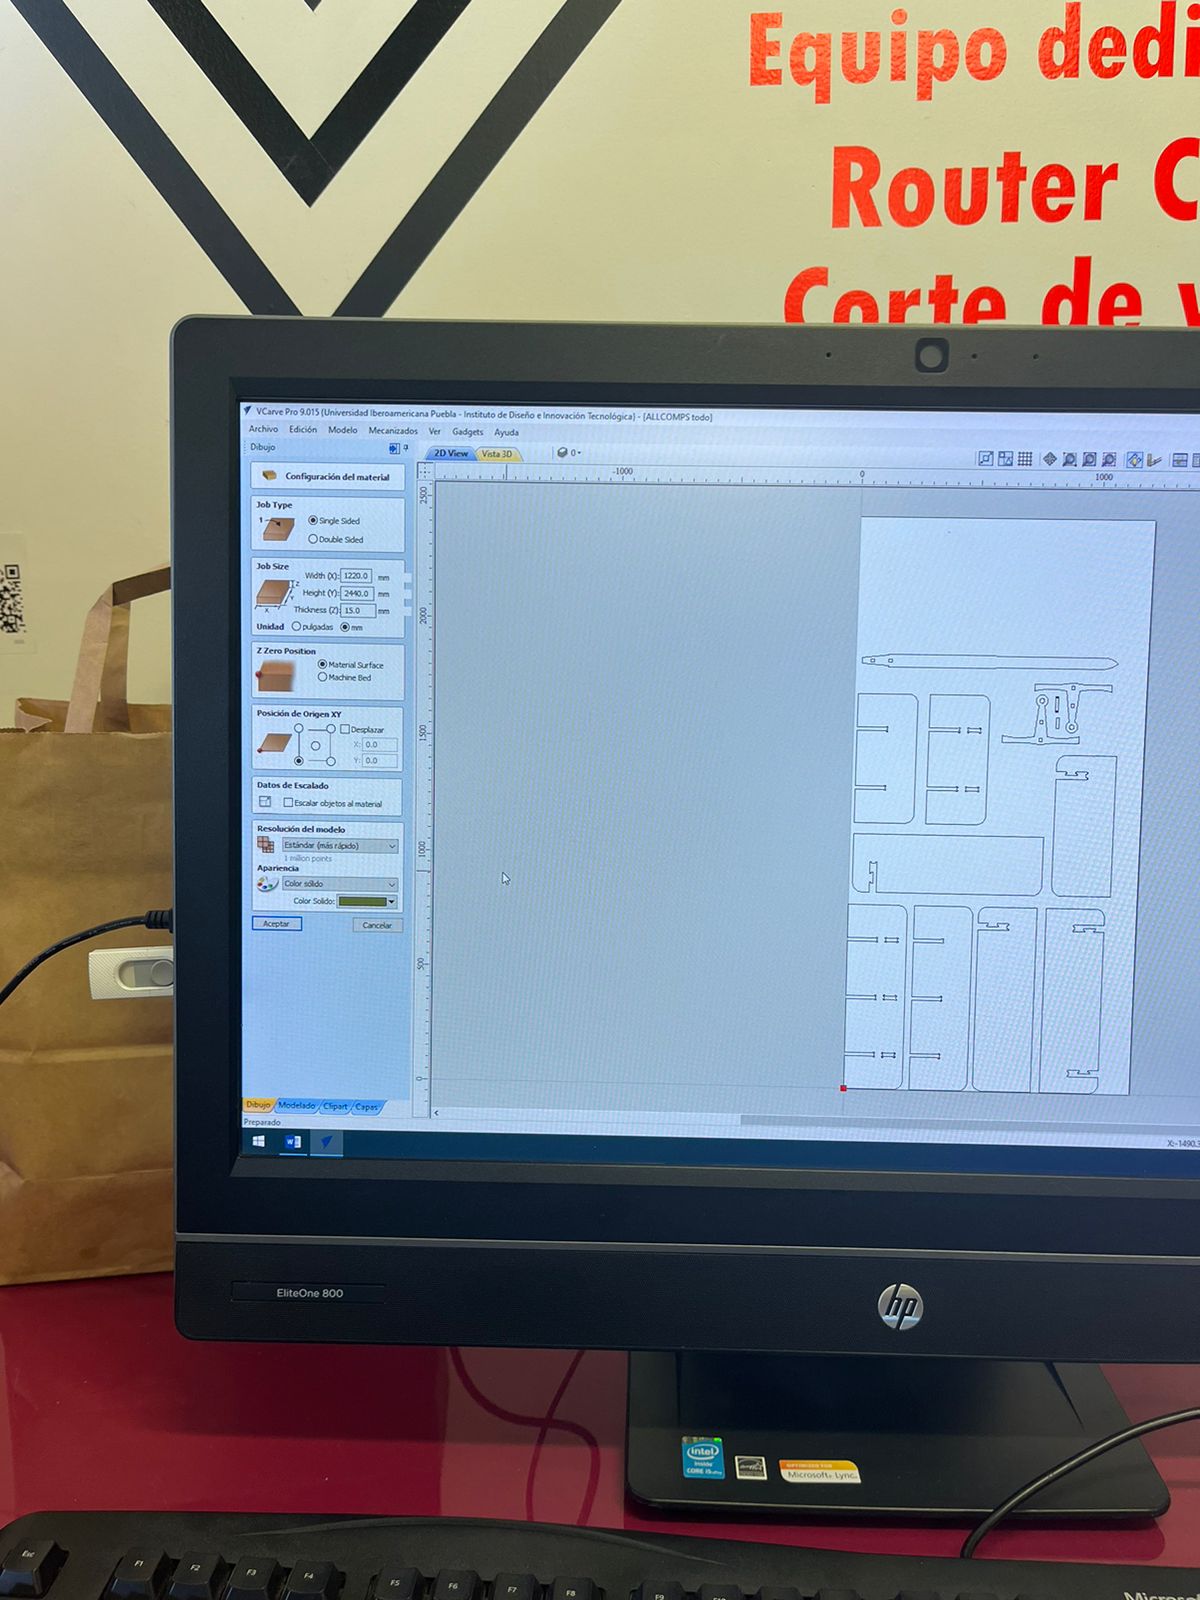
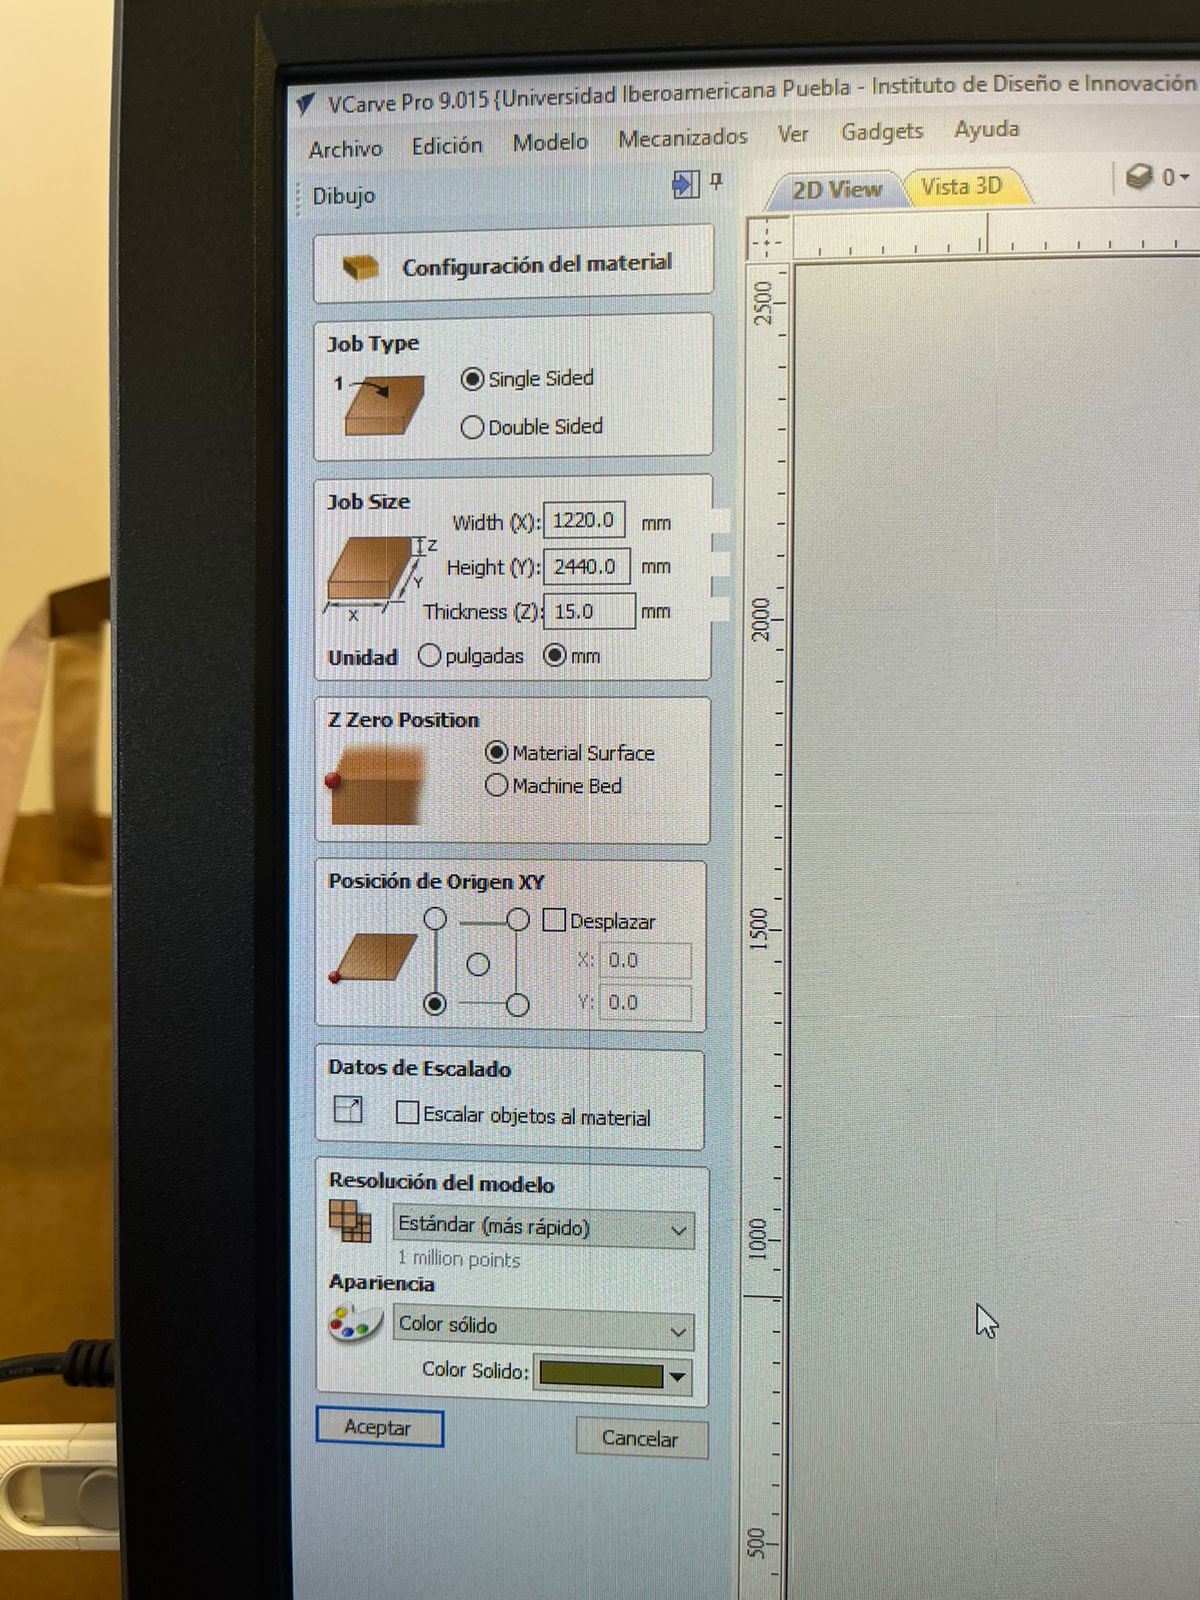
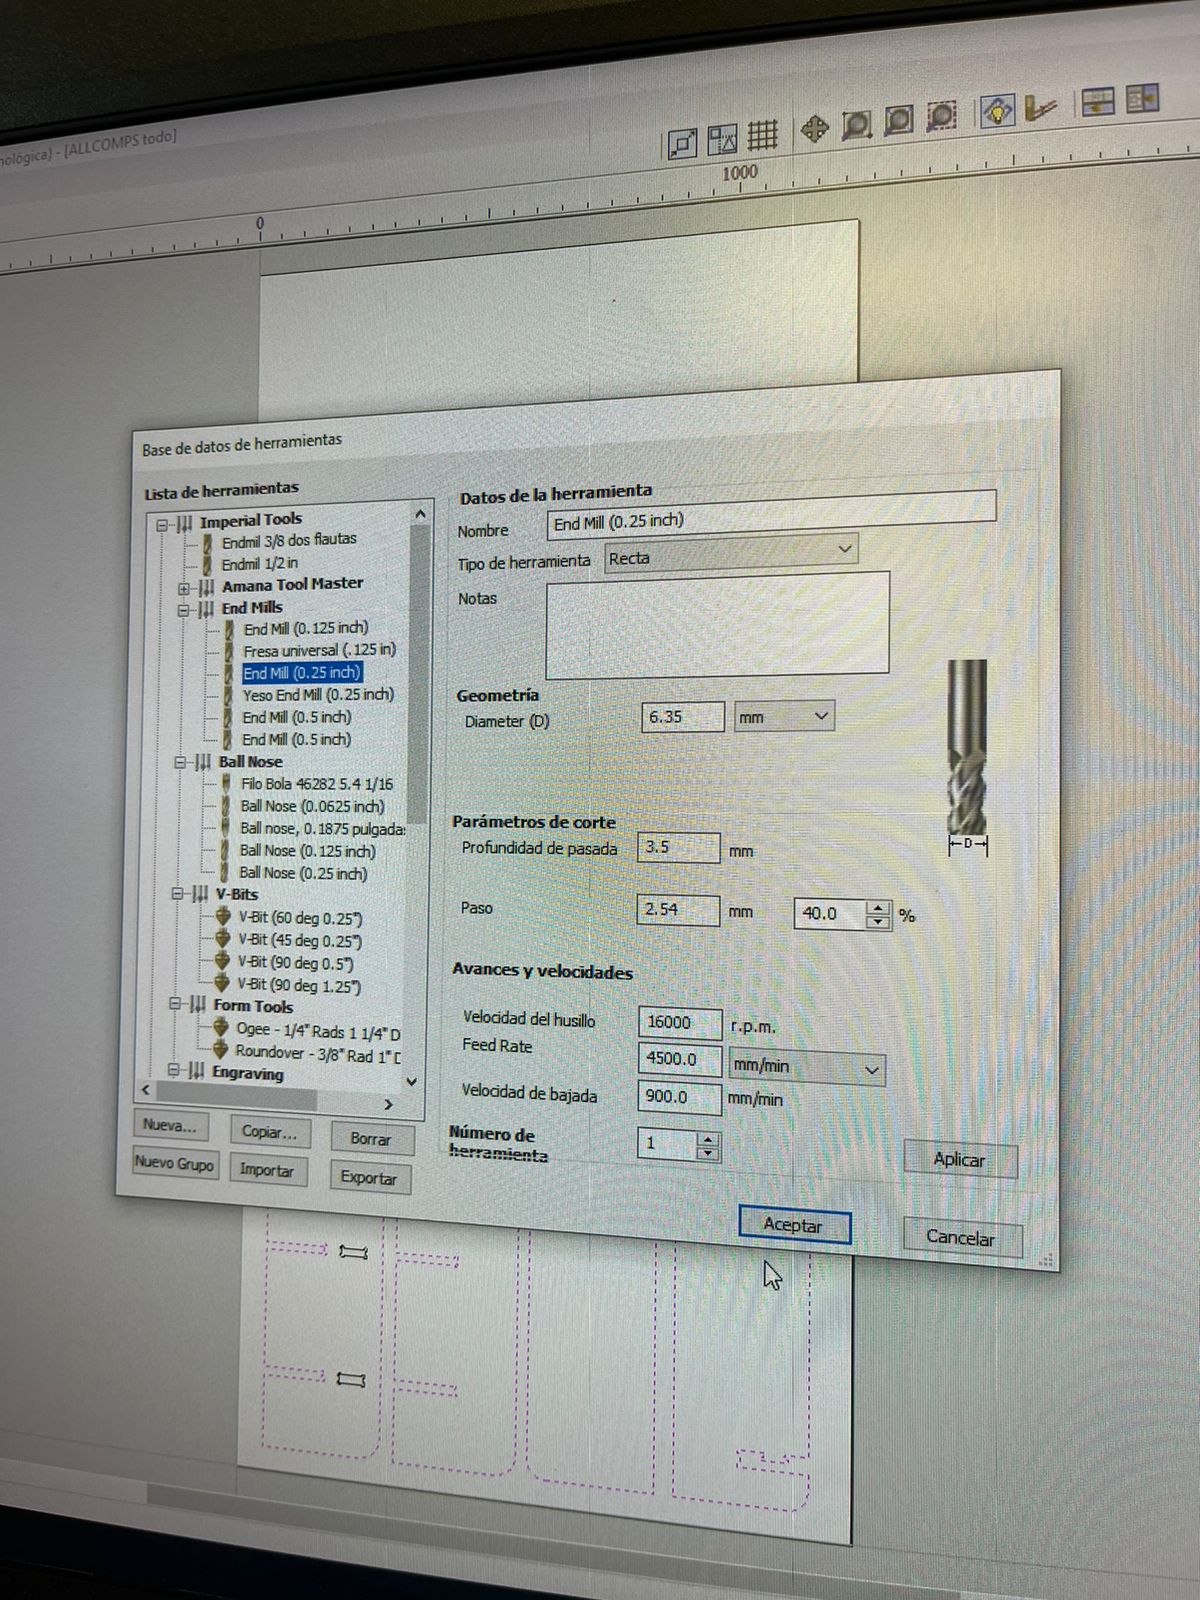
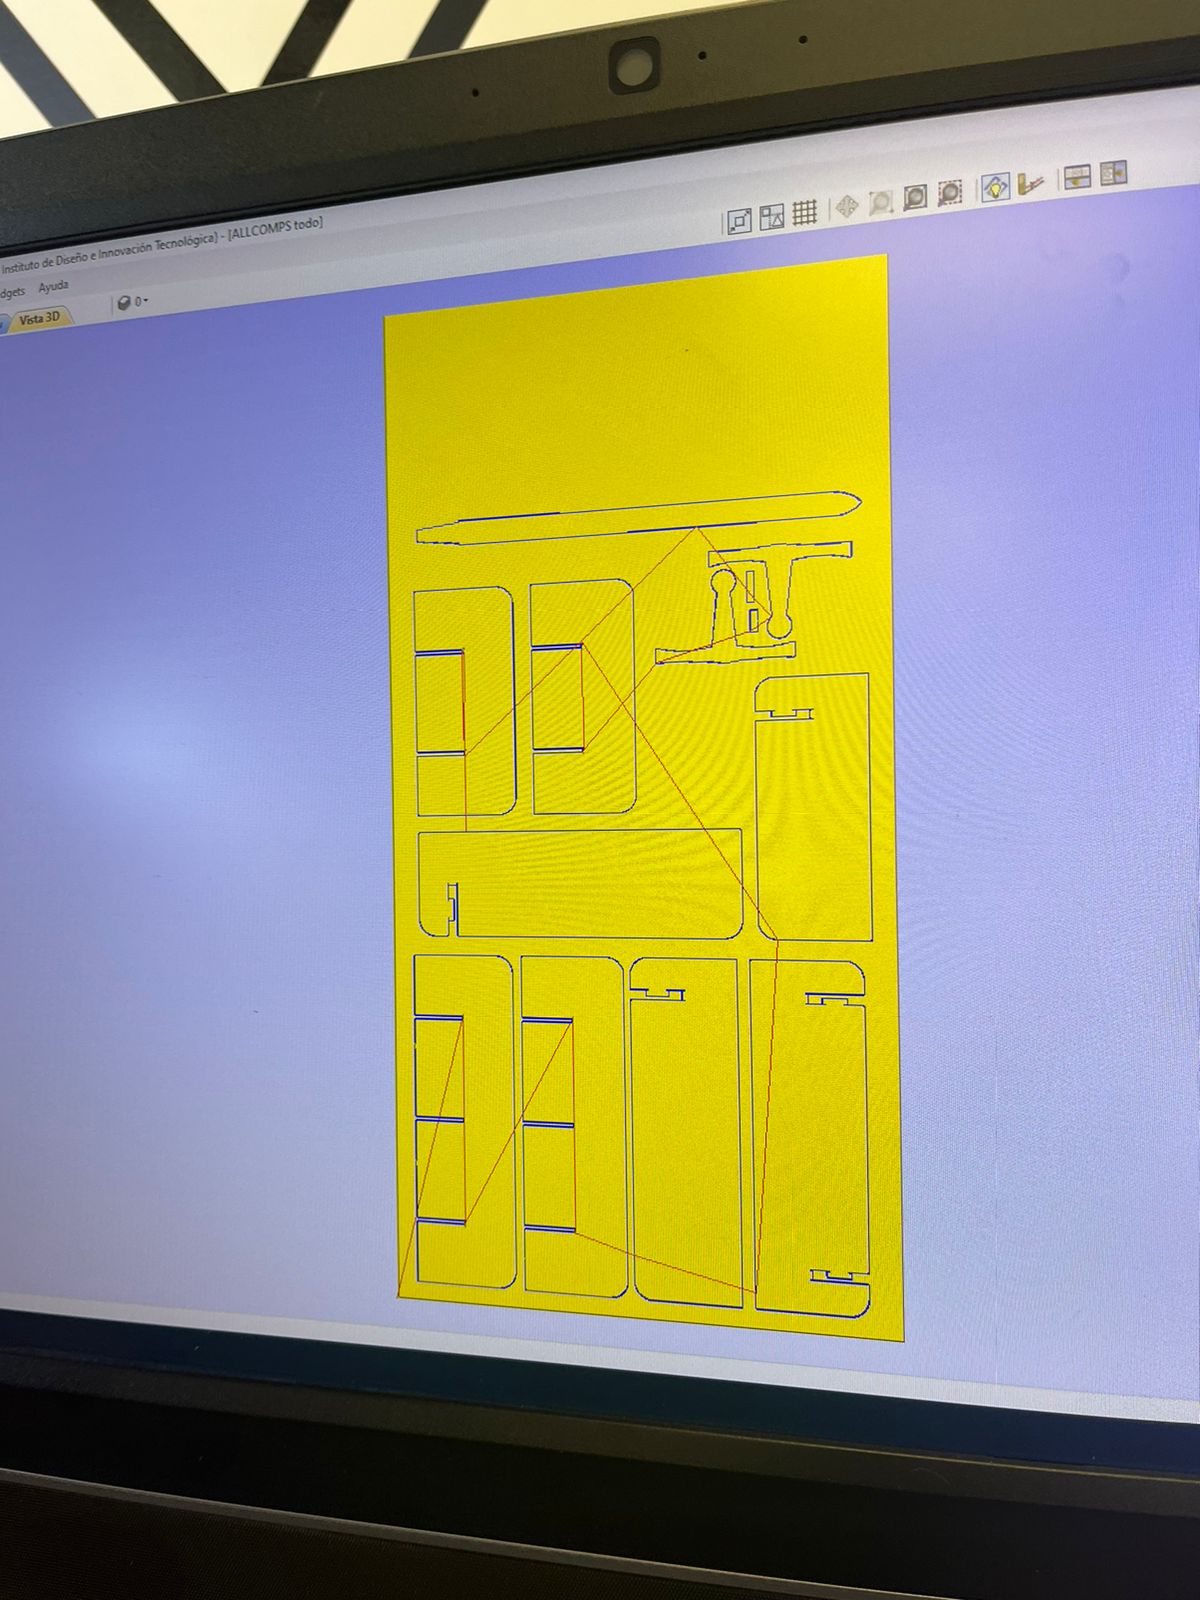
After doing so we also need to designate a workspace, this is equivalent to the material plate you're going to use to carve up your designs, in my case I used a 1.22 x 2.44-meter MDF plate with a 15 mm thickness. I used MDF because it is easy to work on and it is readily available in my institute's facilities. Mind you, you also need to properly document the tool you're using so that the program simulates the routines properly and delivers the correct G-code.
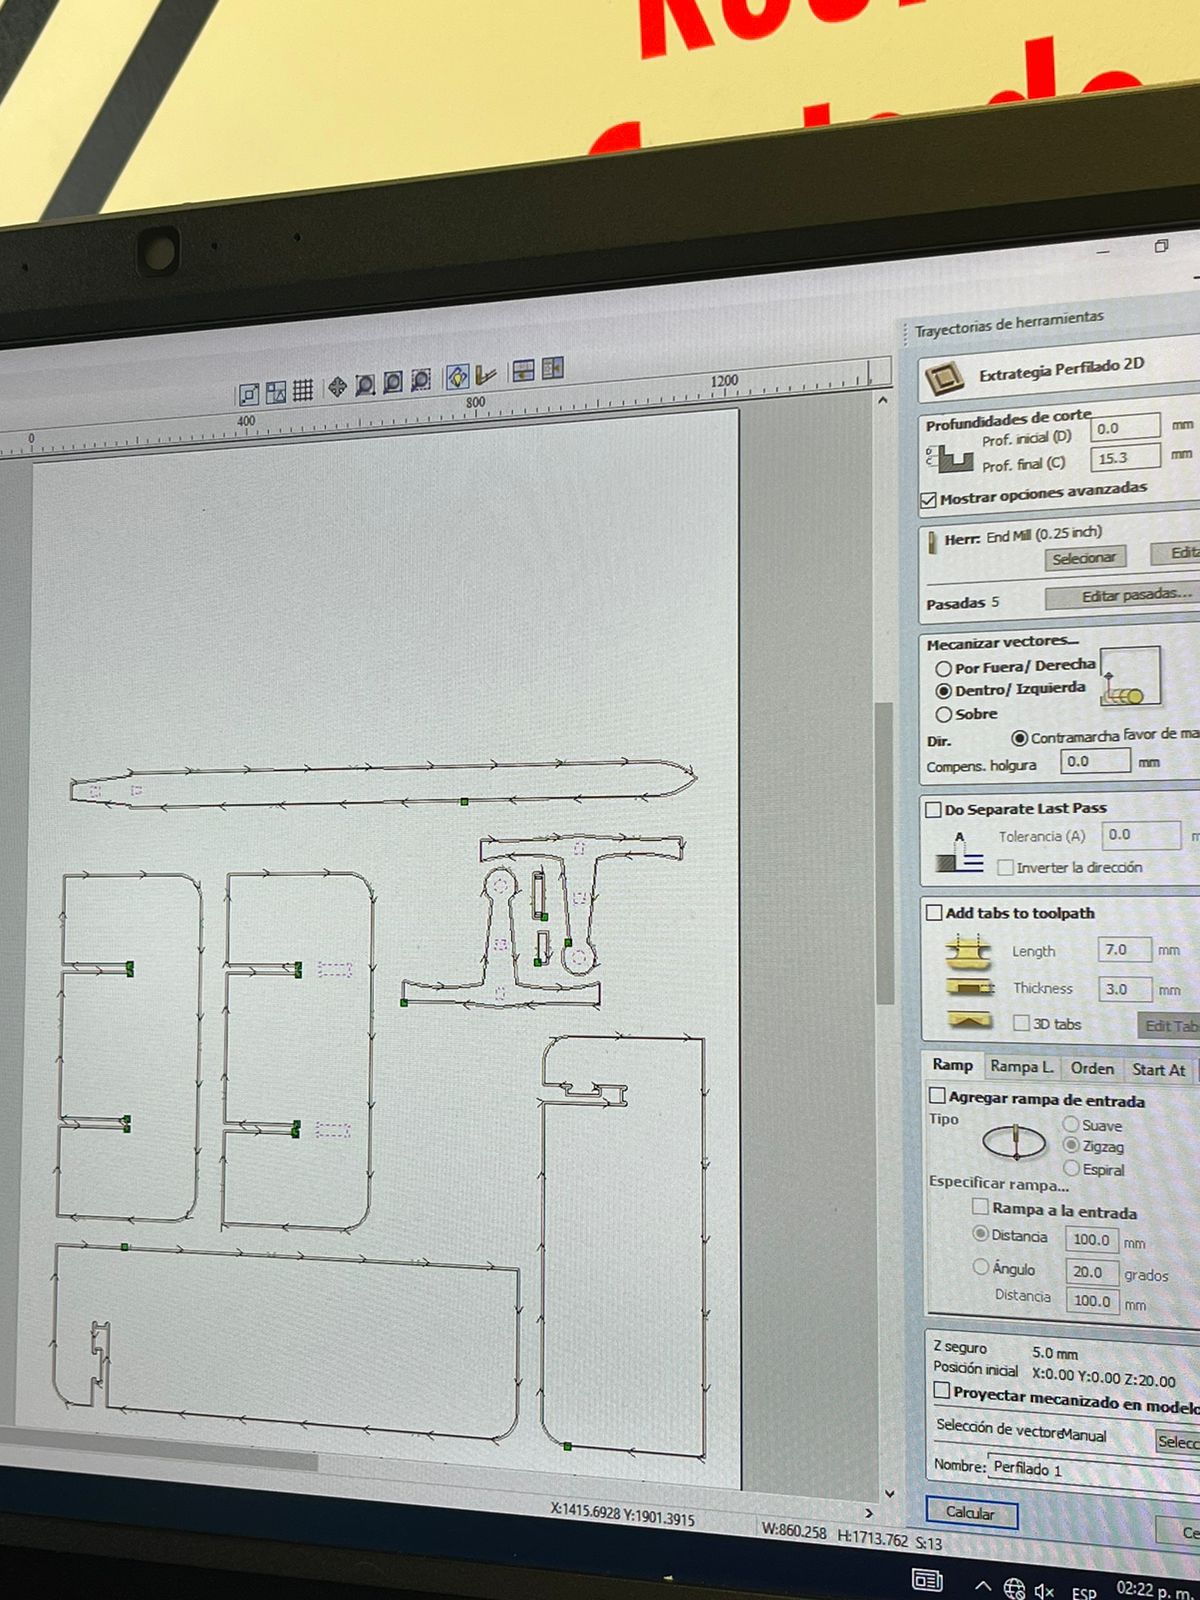
Now that we have a clear workspace and closed profiles we need to move on into the next section of our routine programming, this comes in the shape of a little useful tool that can be used to create so-called "T-bones" and "dog bones", these are some shapes that are used in order to give the Milling tool enough space to actually make the profile we require on inside cuts, due to being of a circular shape, the milling tool isn't able to create perfectly squared contours, so in order to create a shape that allows a rectangular piece to go through that hole we need to implement a dog bone or T-bone contour. This is done by clicking the appropriate symbol in the toolbar and selecting the shape we want to use, then we click the profile we want to shape.
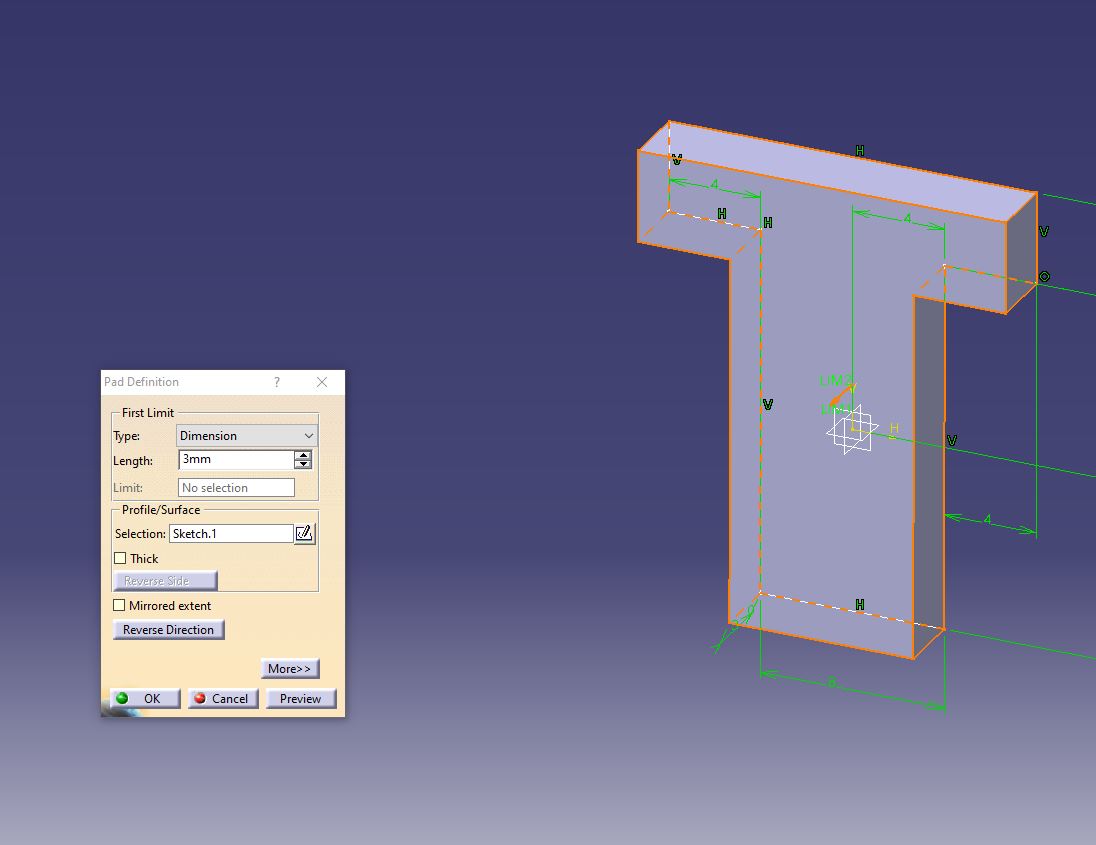
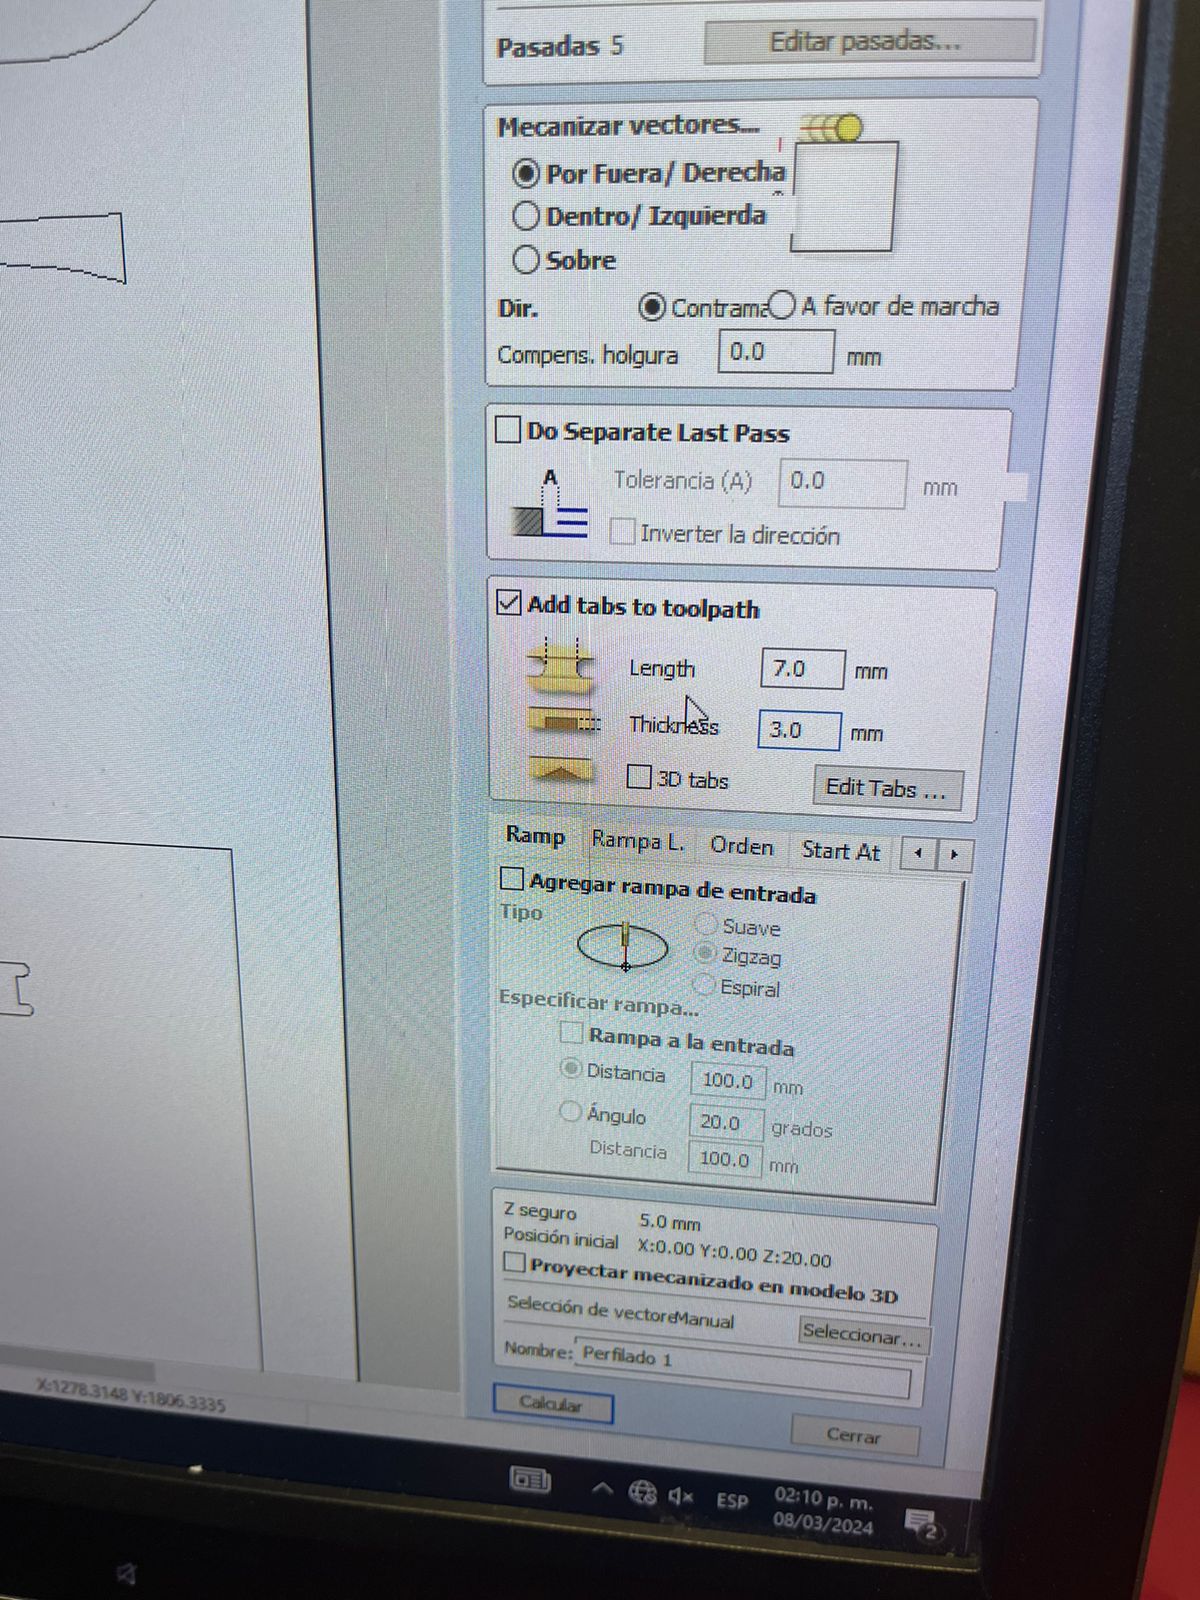
There're only a few steps left to begin the actual work, so the next step is to assign the work routines that are going to be used to mill or cut our shapes, by clicking the section in the upper right corner of the screen and selecting the routine we are looking for. We select whether we want to go through an inner or outer path depending on where the contours are located, we also determine whether we want to use "tabs" which are small remnants of the material we're going to be using that hold the piece in place to avoid any sudden movements that my ruin their work routine, placing them strategically depending on the size of our shapes. Finally, we pick out the proper post-processor software that depends on the brand of the machine we're using, in my case I used an Asia style post-processor that checks out with the CNC machine that I'm going to be using. Then, after doing all that we save the routine in a flash drive so that we can proceed into the milling machine.
Not precisely smithing but it sure feels a bit like it!
The first thing we need to do is placing the work plate and holding it in place with the necessary clamps throughout the machine's workspace After doing so, we power up the machine and proceed to drive the tool into our chosen point of origin using the tool placement and handling console. There, we set the point of origin at the bottom left corner of our plate. We connect the previously mentioned flash drive into the machine, and we select the correct working routine, press play and then we wait for the machine to finish. It is recommended that you stay to supervise that everything goes properly, as well as cleaning all the dust that will be kicked up by the tool milling the MDF plate.

Finally, after the machine is done milling all our desire to shapes, we move the tool to a safe distance with the same console used earlier and we detached the pieces using delicacy and patience, be mindful of the way you remove the pieces from the workplace, has any sudden movements or badly performed attempts might damage the pieces you recently created.
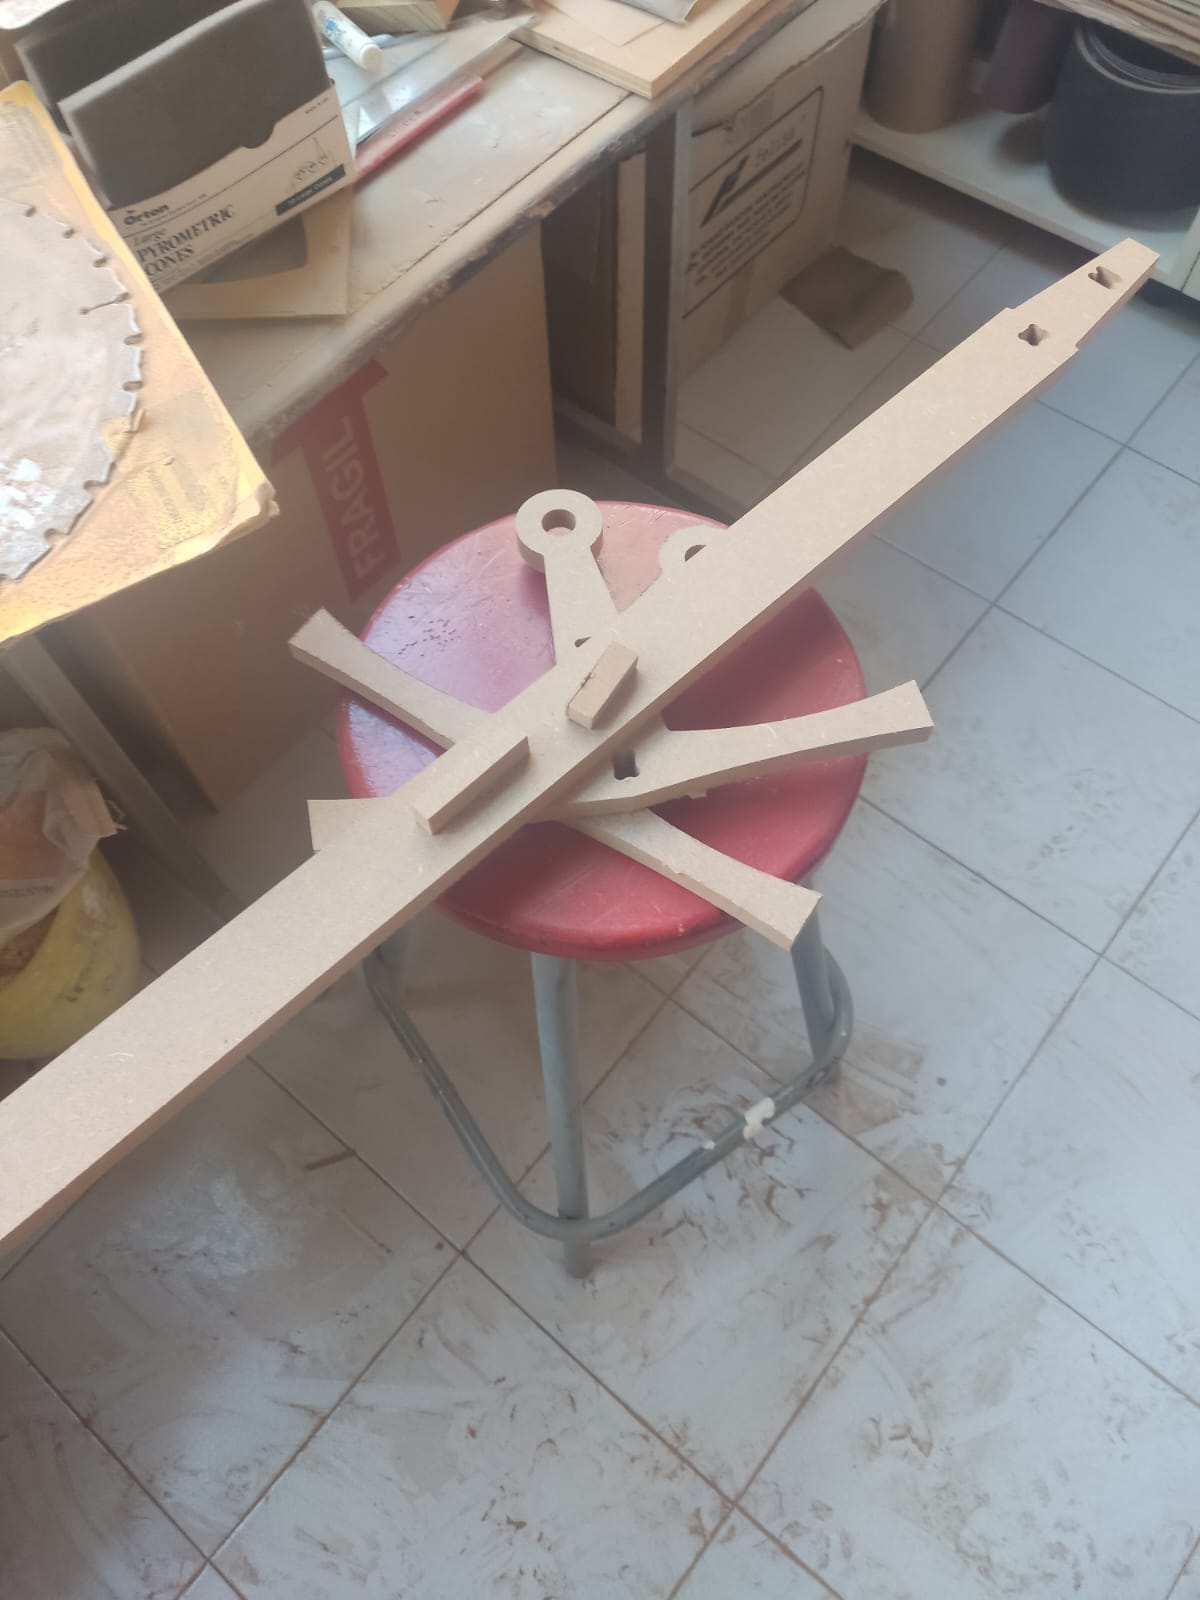
Then it's just a matter of assembling all the components and creating your wonderful medieval sword, we're looking like knights already, all that's left is a mighty steed and a princess to save from the claws of a dragon. What I noticed in the use of T-bones and dog bones is that dog bones are actually narrower fits than the previously mentioned counterpart, but it's a bit tougher to actually get the joints out if there's any disassembly needed.
Here's a little video showing you the milling process. Be warned it's kinda loud.