3D?! More like ... I don't really know were I was going with that.
Signed, Seal and Delivered baby!
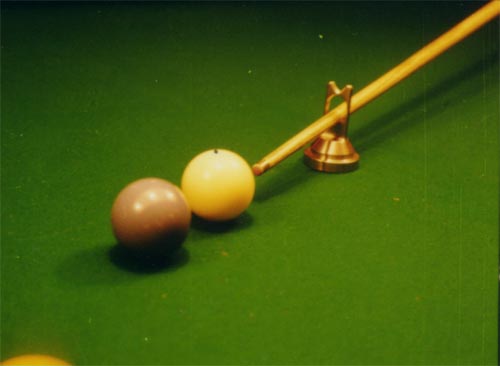
So we're going to start the 3D process, firstly we need to pick a shape to actually print. As of the moment of this article, my right forearm is broken and something I like to do from time to time is playing pool. But I can't really move my right hand or use it for anything at the moment, so I searched the internet for an alternative and I found this, which is an aid for people who can only play pool with one hand.
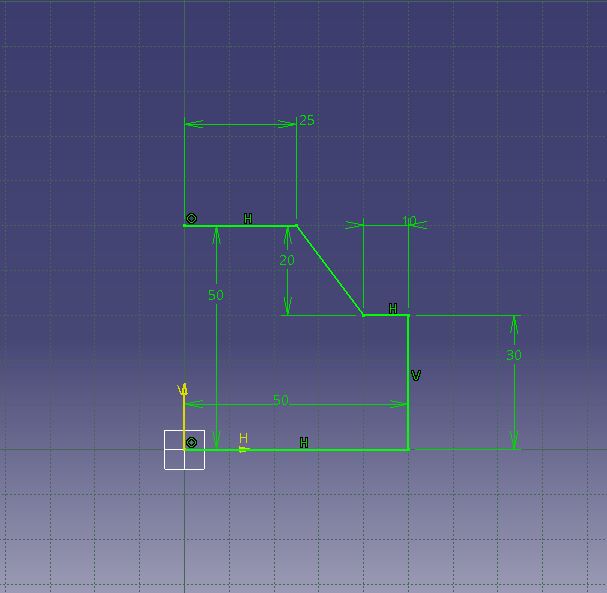
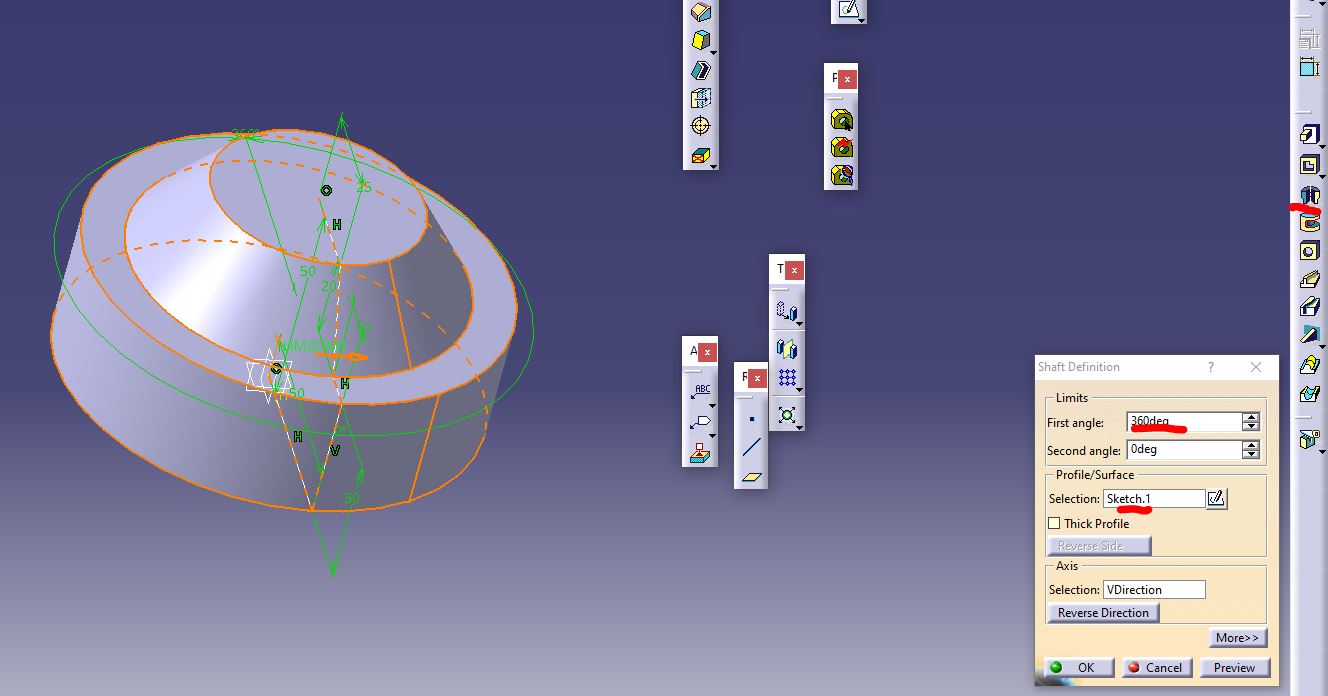
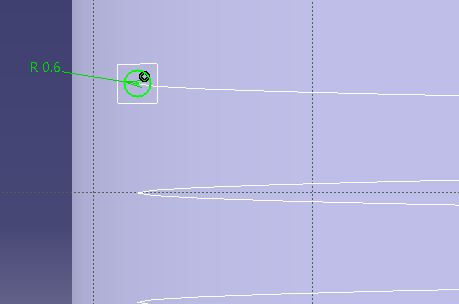
Then I load it up the Catia industrial design software and I created this sketch. After doing so I use the "shafting" feature which allows a circumferential padding pattern that takes place around and access and uses a silhouette such as our sketch to create conical like forms such as mine.
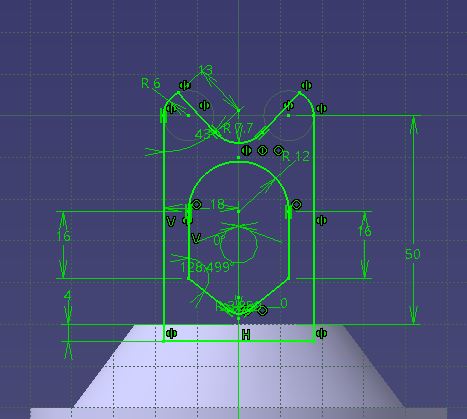
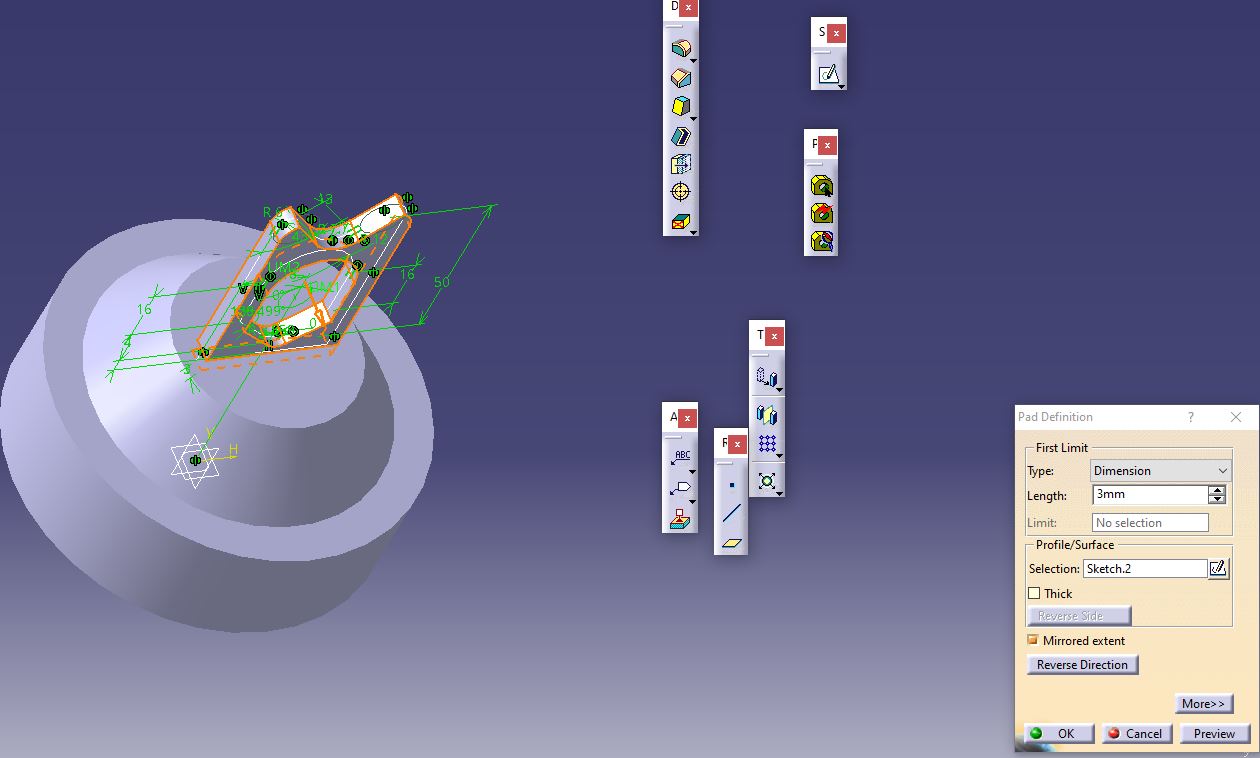
Now, I created another sketch on the top of our already shafted shape and placed it in such a way that when I use the padding tool with the "mirrored extent" option everything is aligned from the center.
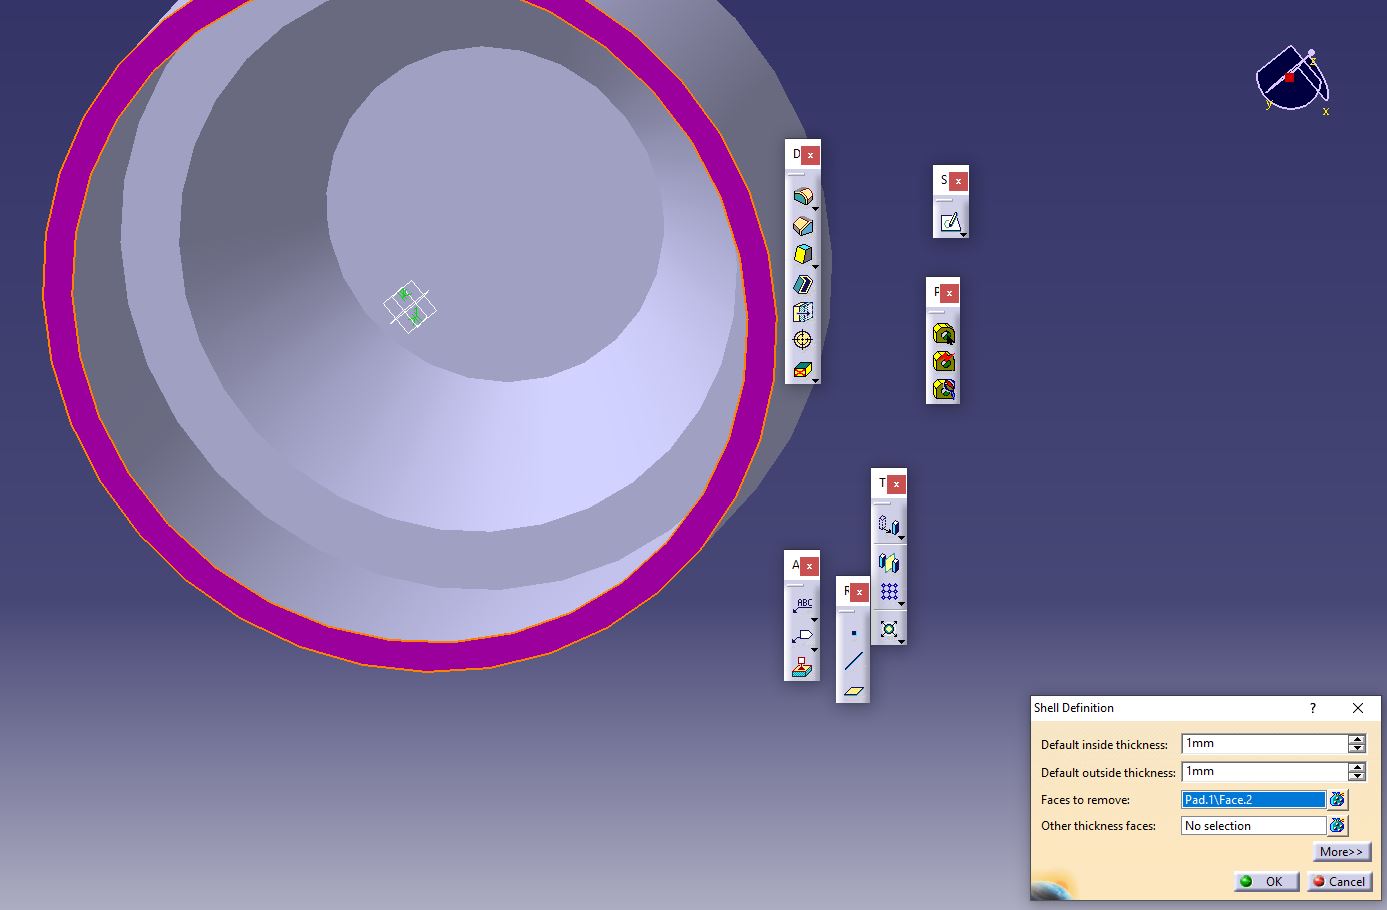
After doing that it was a time for weight shedding, 3D printing takes a while if your shape is big and heavy enough to use plenty of material, so then I used the "shell" tool to hollow out the bottom profile of shape so they weighted a lot less, and then I hollered out the circumference that surrounds the bottom part of the already hollowed out profile. This was done by using inner and outer thickness measures that are selected from the shelling panel.

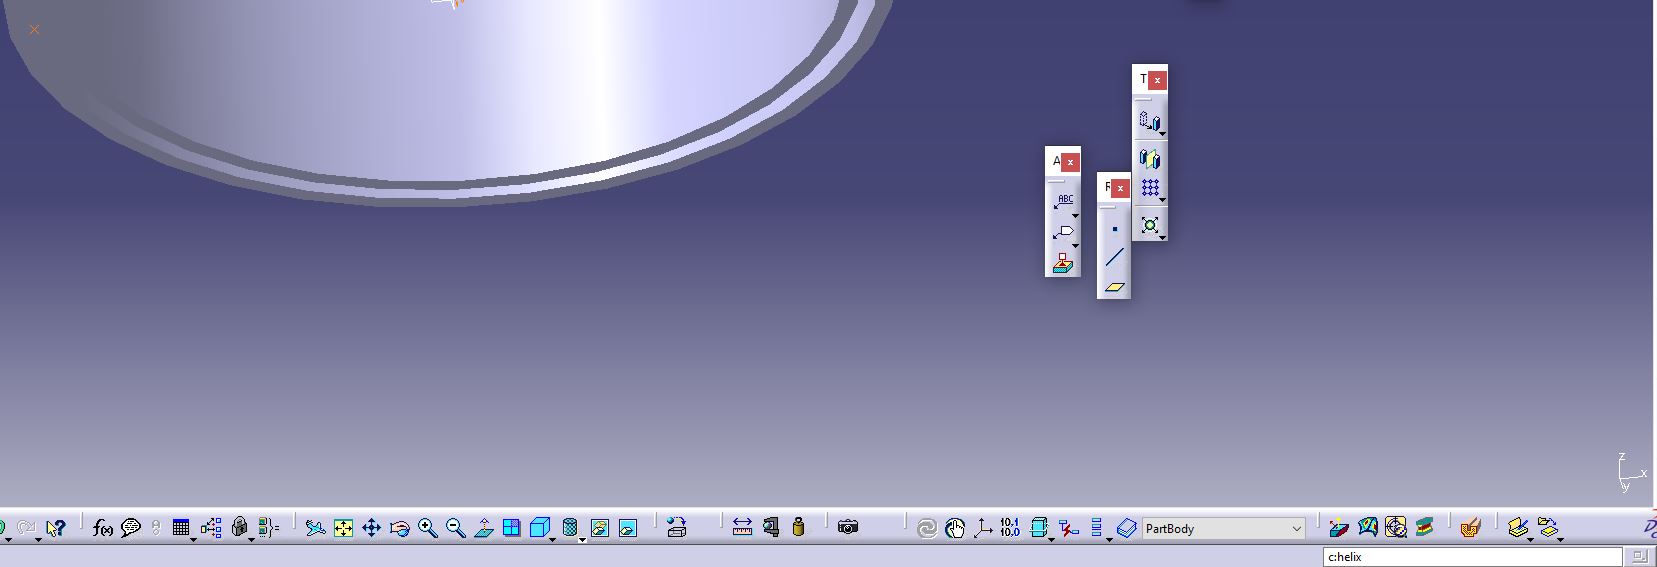
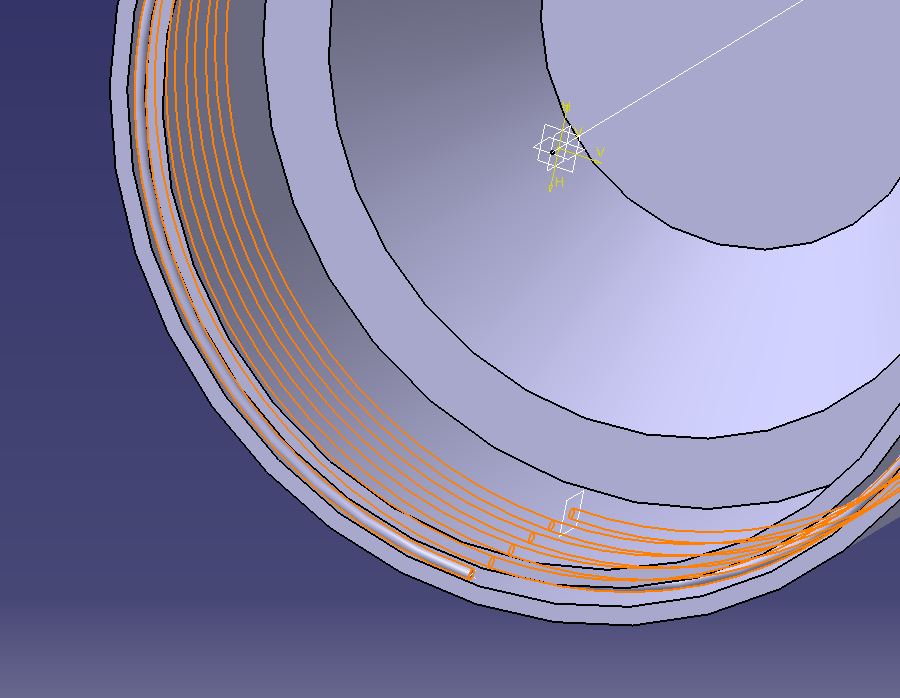
But then I realized that hollowing out so many structural components may create some problems when we are 3D printing. So to have a little bit of a structural support, I use the "helix" feature which can be accessed through typing "c:helix" at the search bar over at the bottom right corner of the screen. This essentially allows us to draw shape of a helix based out an origin point we need to place and has custom options such as the separation between each curve, the number of curves we want to create, and the angling of such shapes.

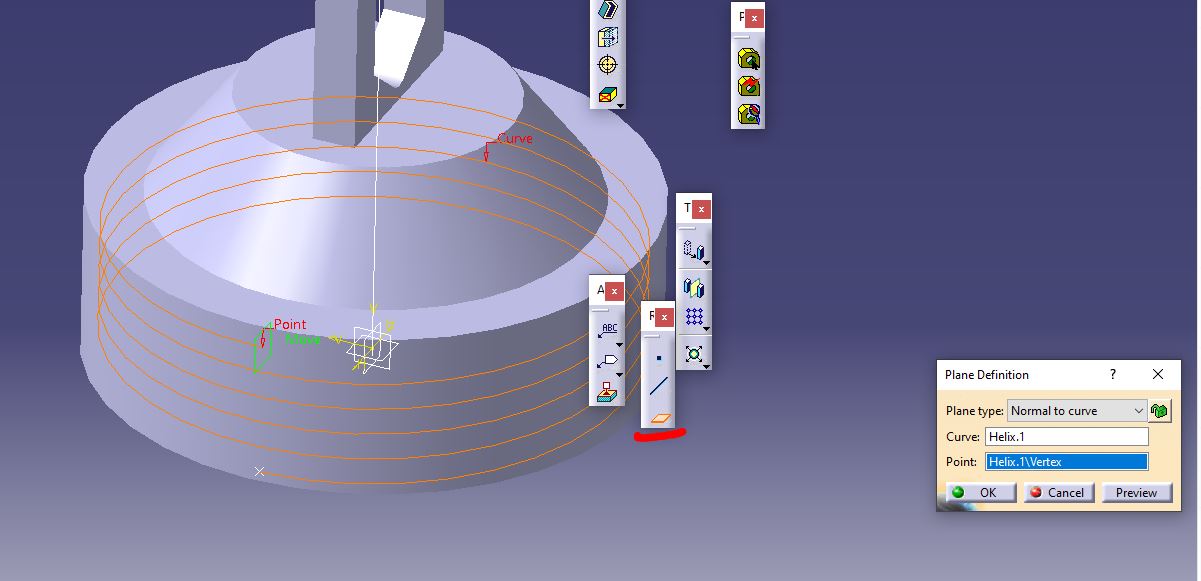
Then I use the "plane" feature to create a plane in the far end of our helix shape in order to sketch a circumference, "plane" is a very useful tool whenever we need to draw something and a place we can really access to in an easy way, we only need to put out either a profile to click on or a distance from certain objects to place our desired plane.
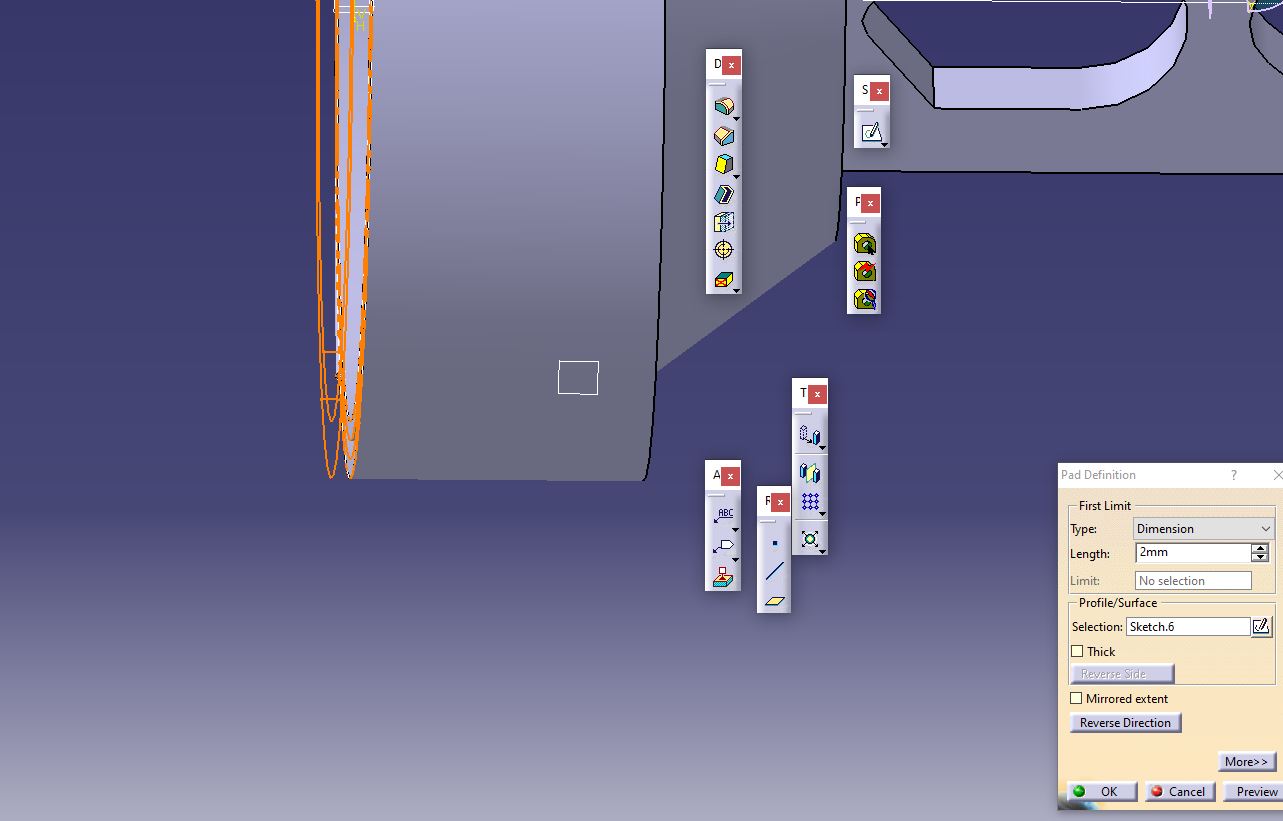
Finally I used the circumference we have drawn with the "rib" tool, essentially creating some padding that stems from a previously drawn shape into another shape we have drawn, this case that shape is our helix. Then, it was just a question of sealing up that part of the structure so that all of the components are hidden away from the elements. A quick save with the .STL file format and we move on to the next software.

Cura? Thats priest in spanish, you know
Ultimaker Cura is a 3D printing software used for the configuration of our G-Code which is used as a set of instructions for our 3D printing machines to follow. The first thing we need to do is to import the file that we saved from Catia.
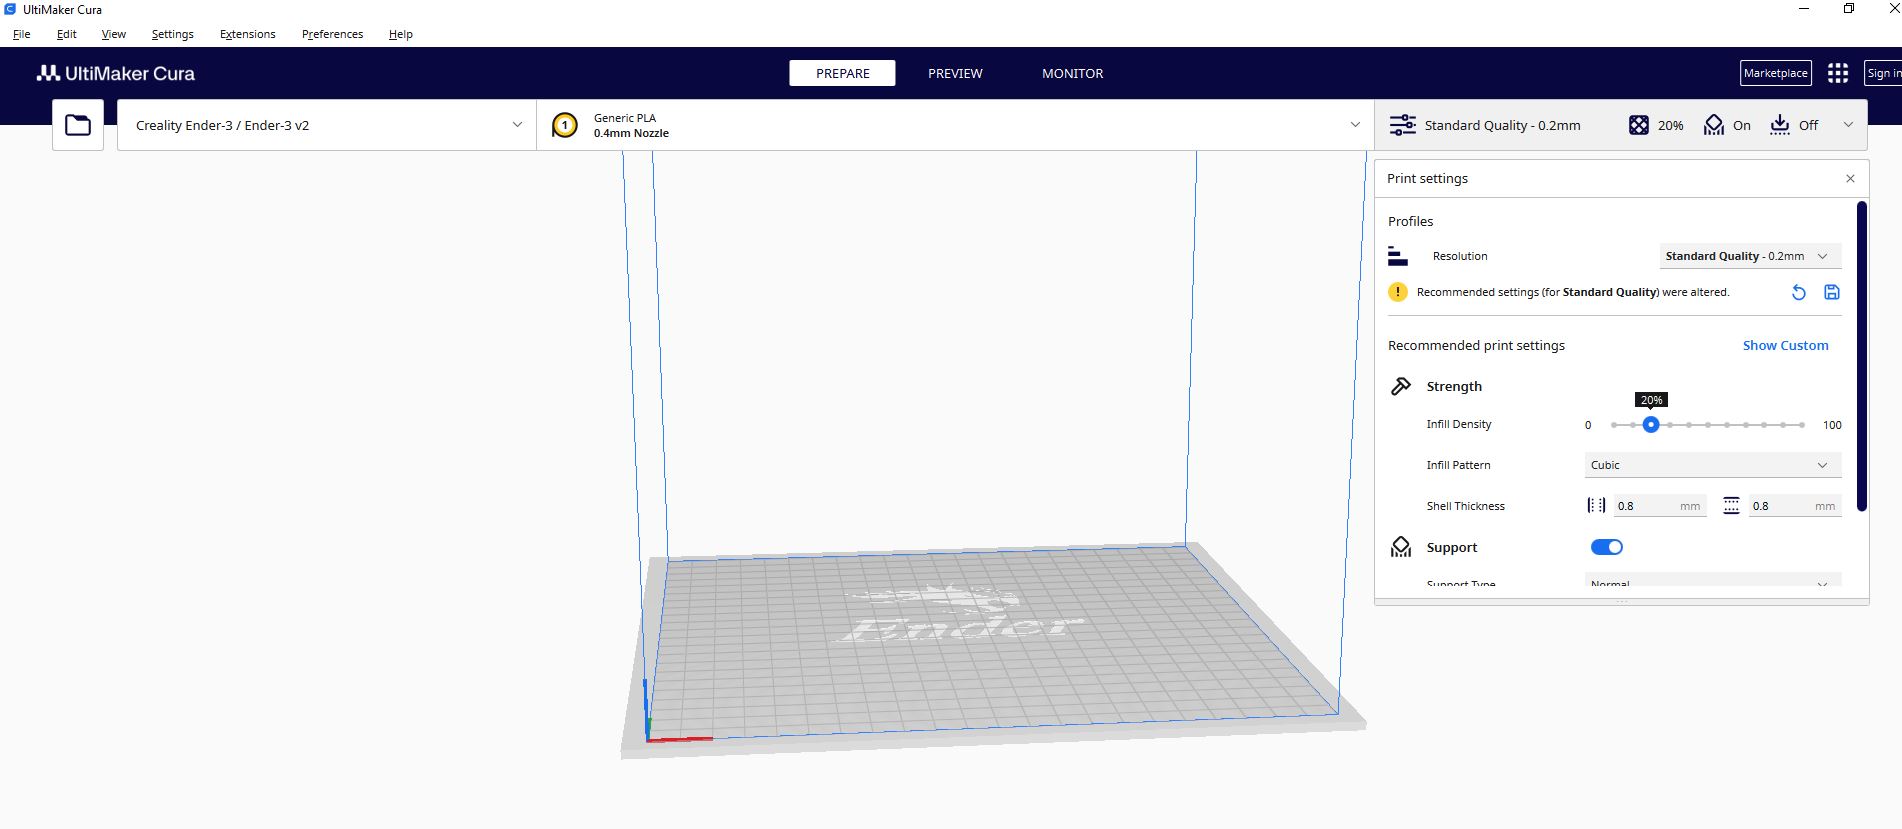
We can see the shape we have drawn on the workspace and so we can get a rough idea on how it's going to look after being printed.
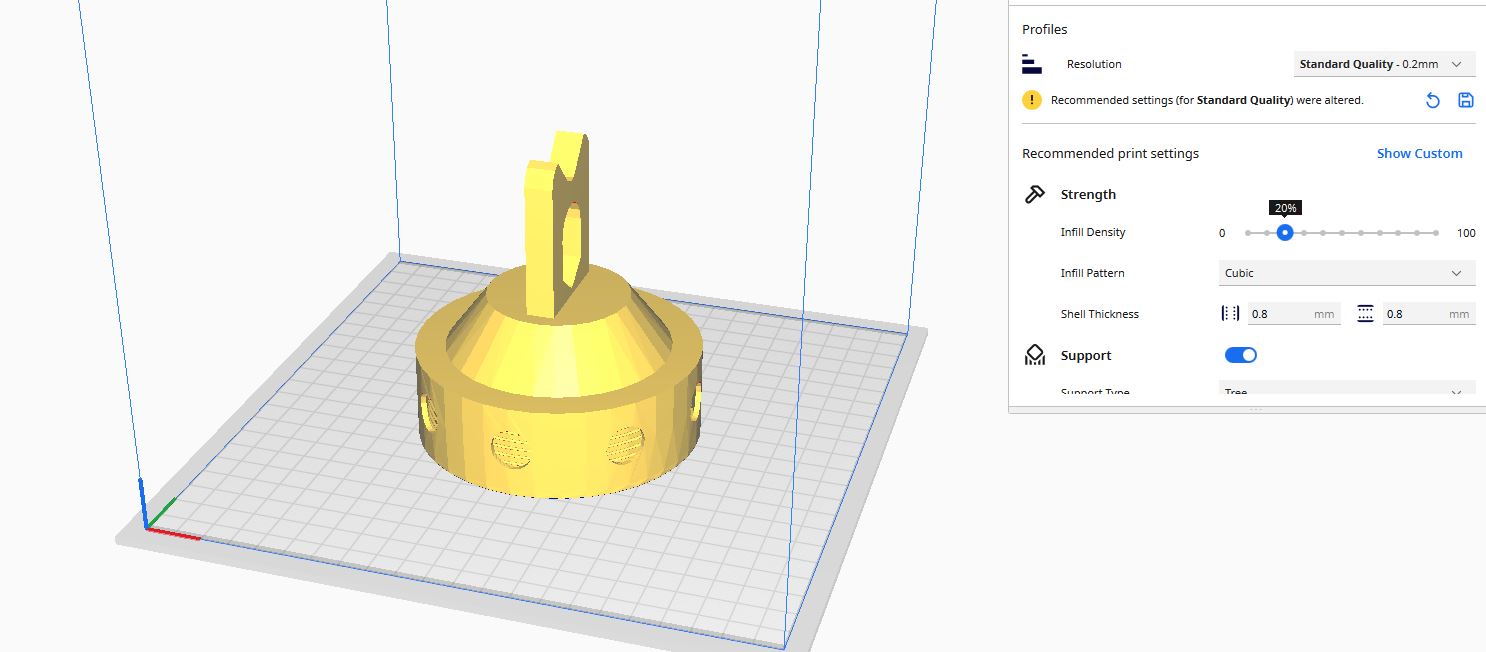
In my specific case, printer I'll be using is called the Ender S3 Pro, so I need to setup the G-Code that the printer is going to use to be tailor-made specifically for that machine. That comes in the shape of putting a 20% infill density with a cubic pattern at a standard quality of resolution, all of these configuration options can be found on the panel on the right side of the screen. Finally, realize that the shape needed some structural supports so that the quality of the printing is not compromised, so I enabled the support option and use the "tree" support type, this kind of support resembles the trunk and branches of a tree, wasting less material but still giving that structural strength that we need. We click on the slice option at the bottom right of the screen and proceed to save the document in an SD card that is going to be inserted into our machine.
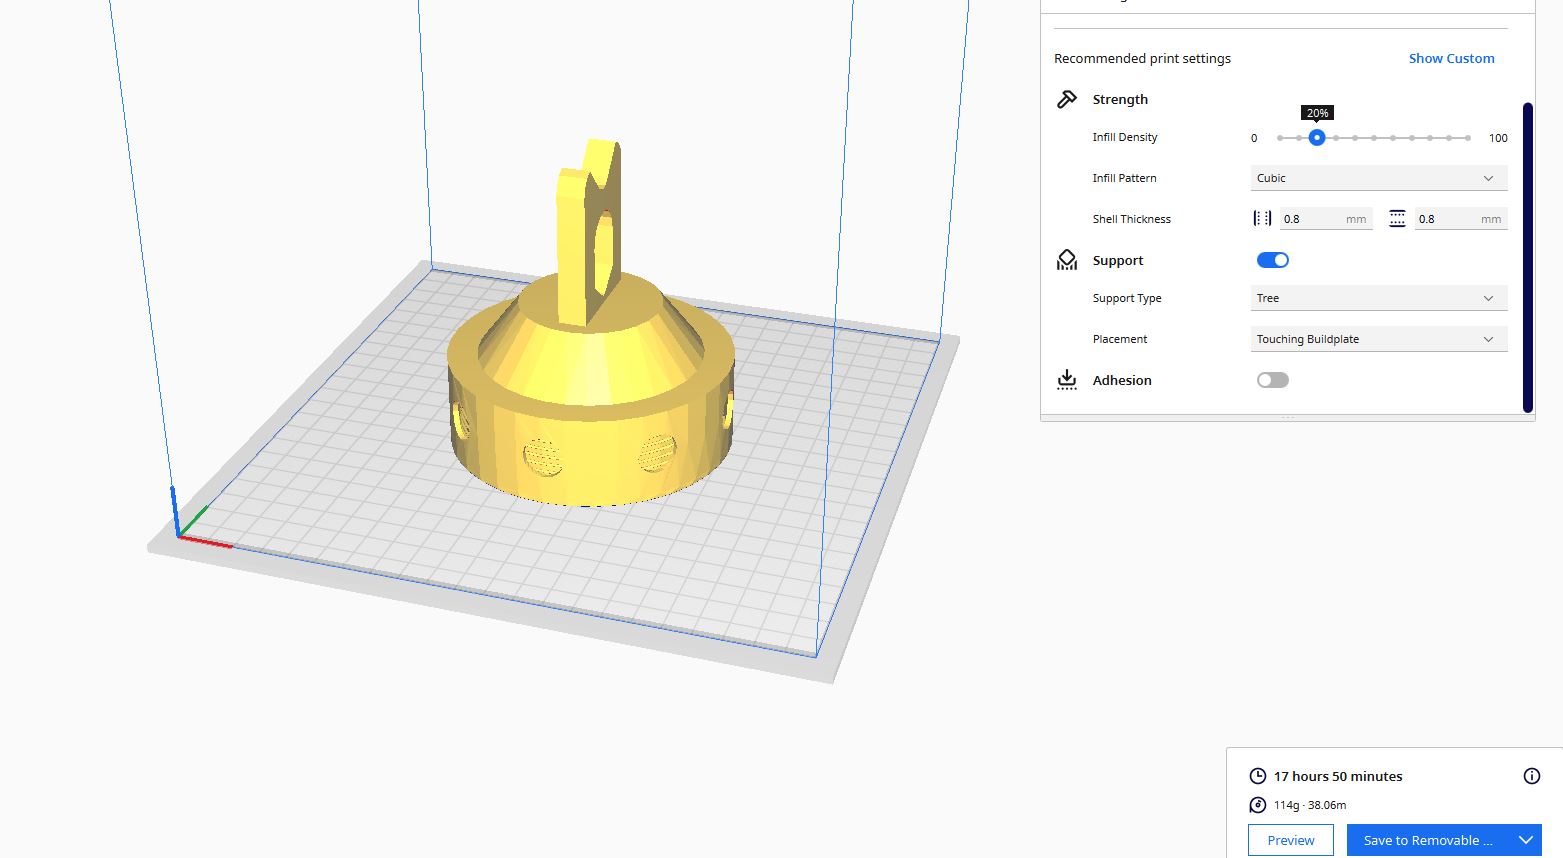

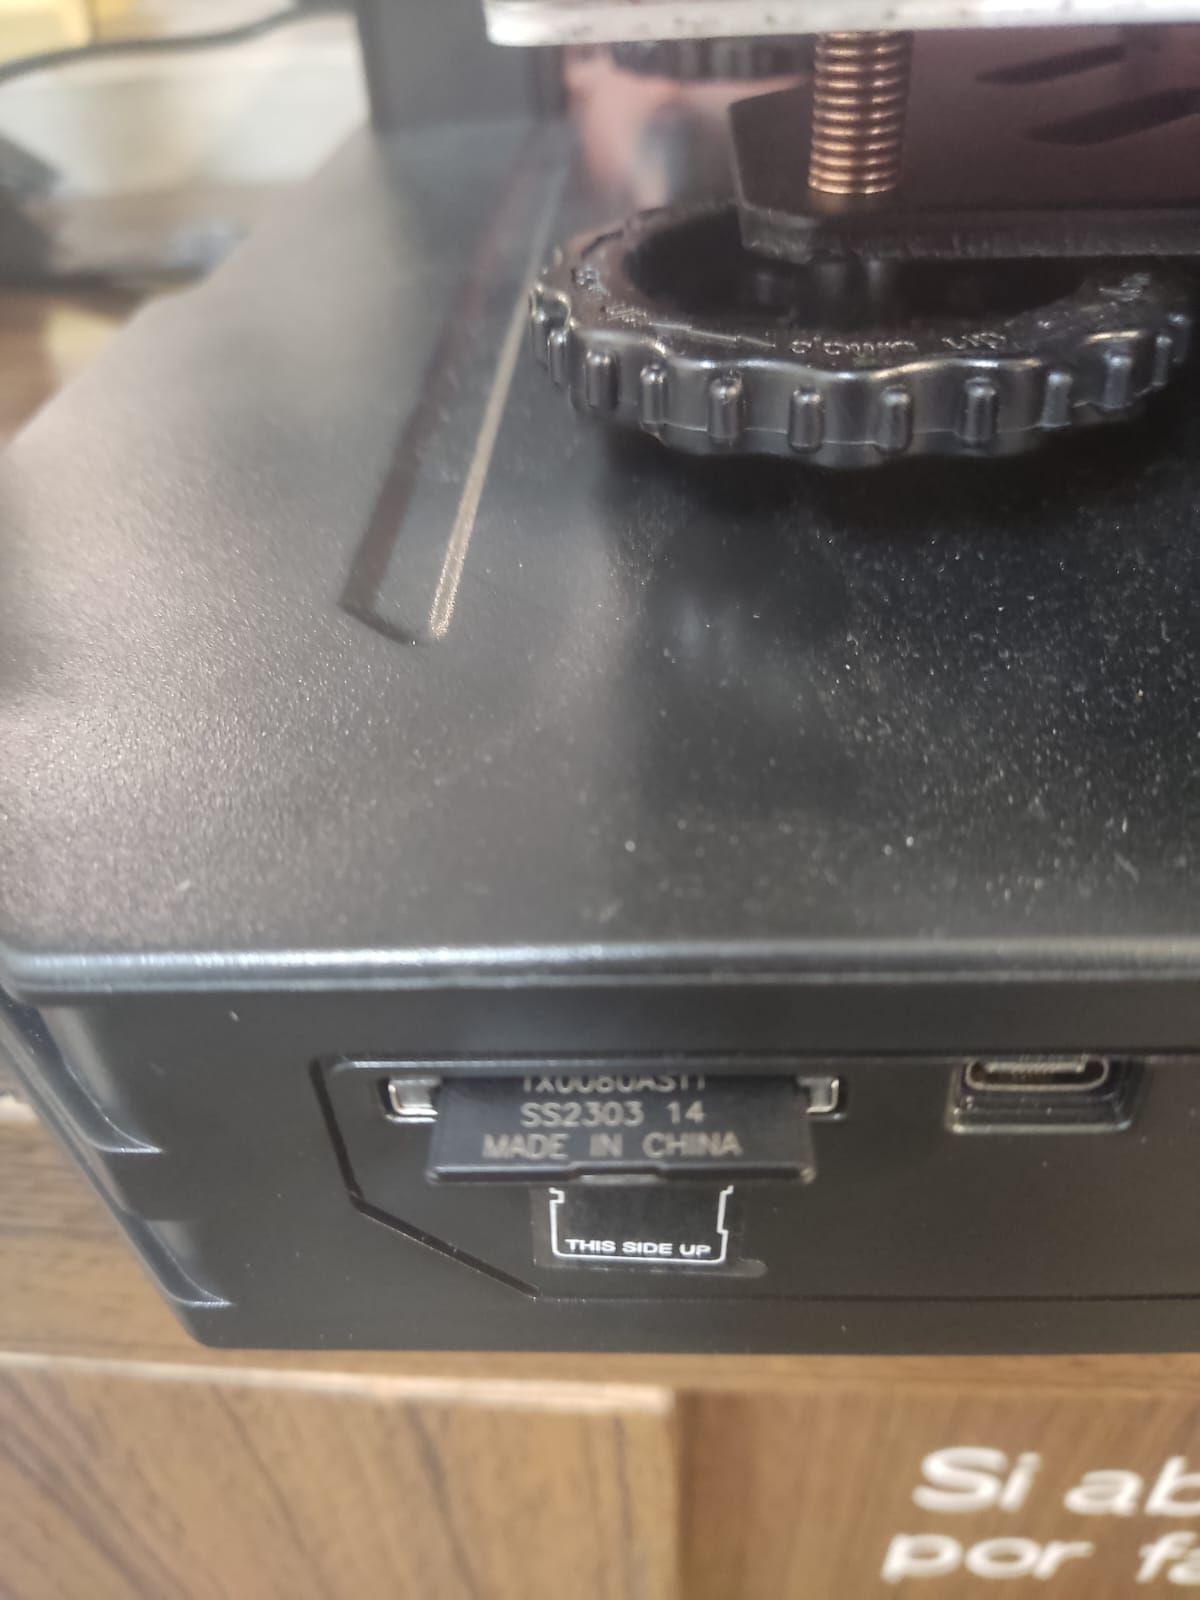
Finally, after inserting the SD card in the Ender, we select the file on the screen that's right next to the machine and we press play, the machine will take a while to begin Printing and it is configuring the code and beginning to heat up the material. When we look at screen as it is printing the machine will actually tell us how much time remains for the process to be finished and how much time has passed.
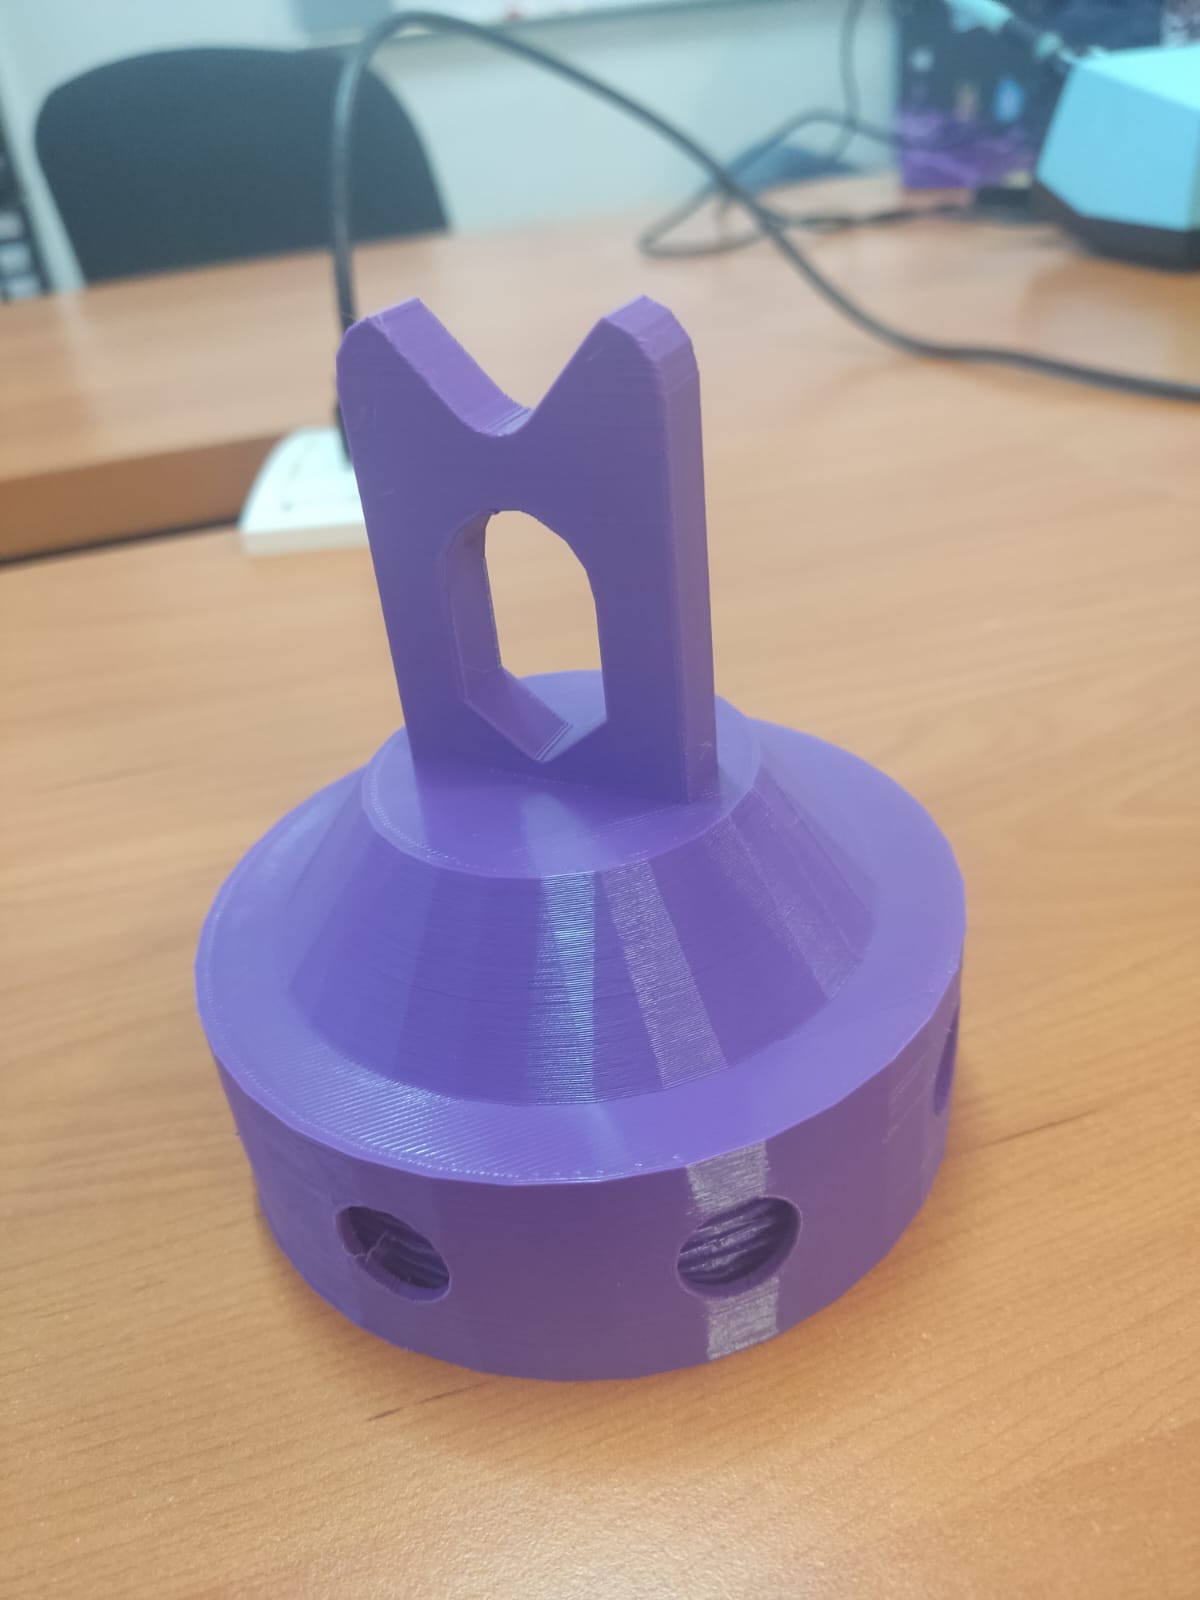
This is the end result and here's a little video showing you how useful it was to actually play pool with that device.
Scan that
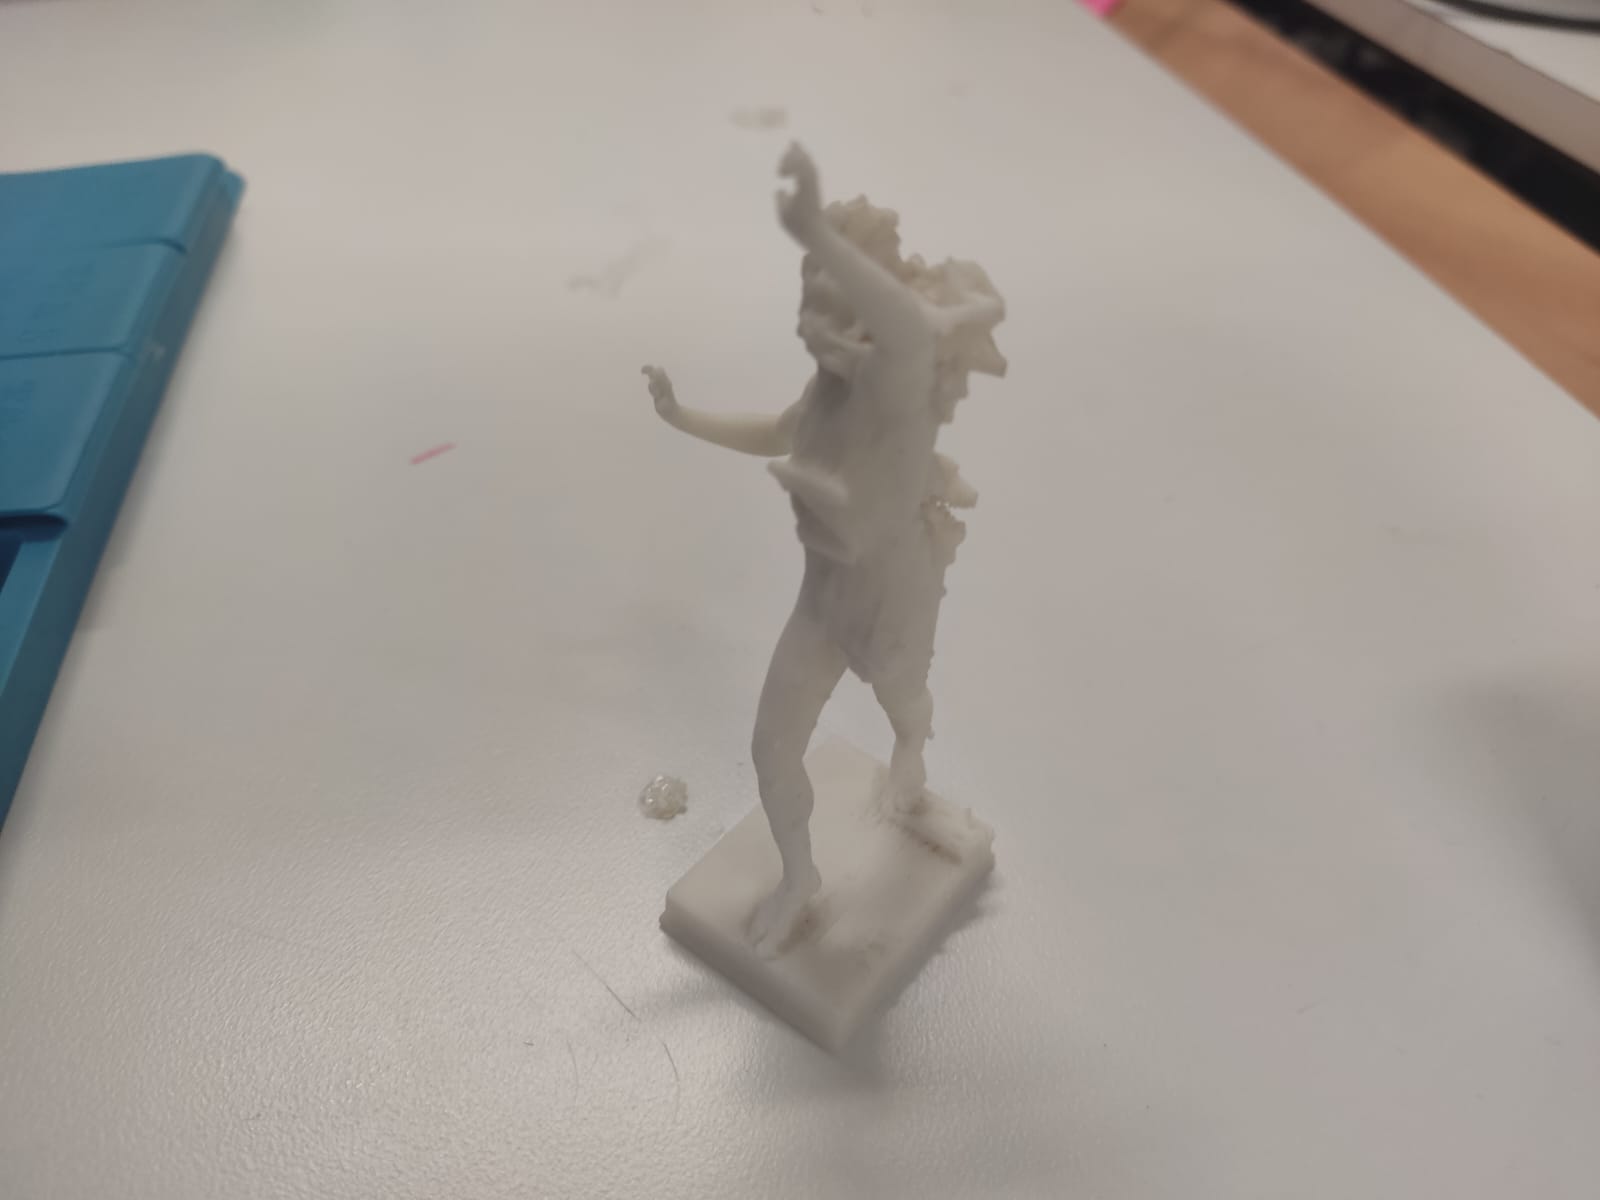
In regards to 3D scanning, it was an easier endeavor that the other stuff we have talked about.I grabbed an already printed object left out by a student years ago. Then I placed it in IBERO's very own EXSCan S 3D scanner, it's a machine that spins a circular plate that is scanned while being uploaded into a 3D scanning software called EXScan 5.
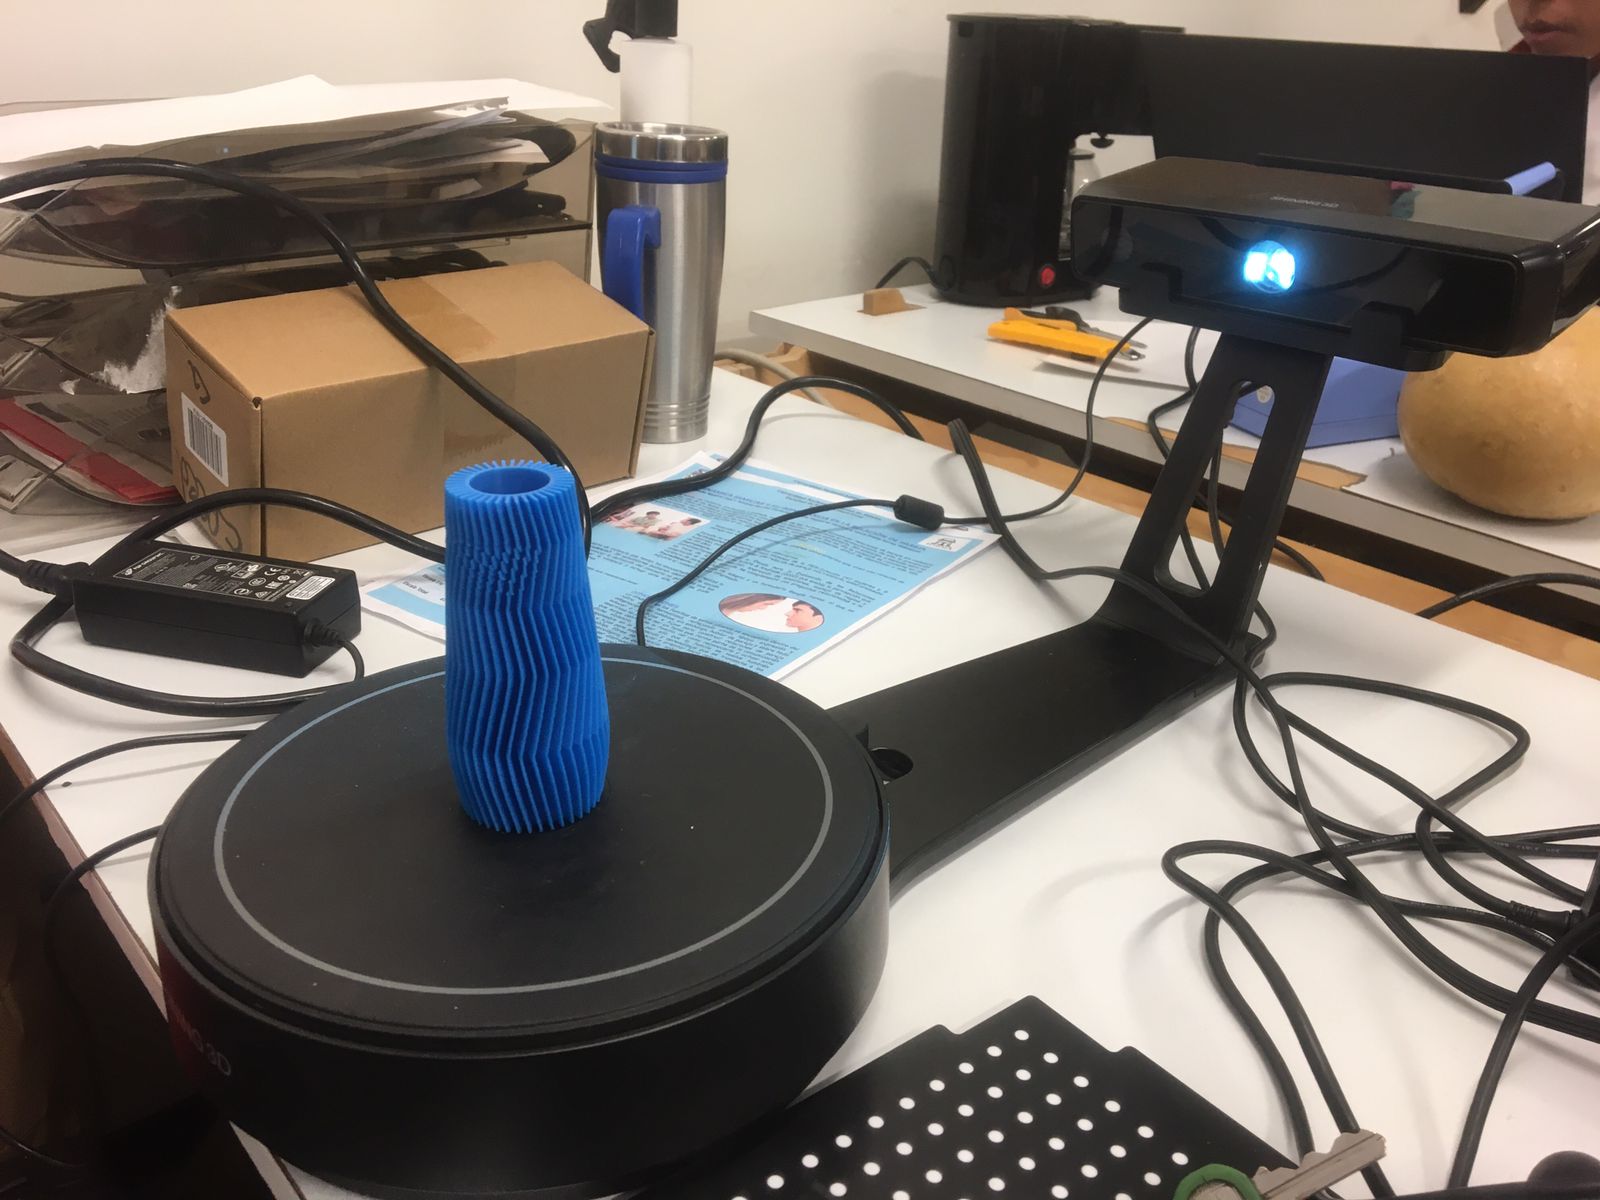
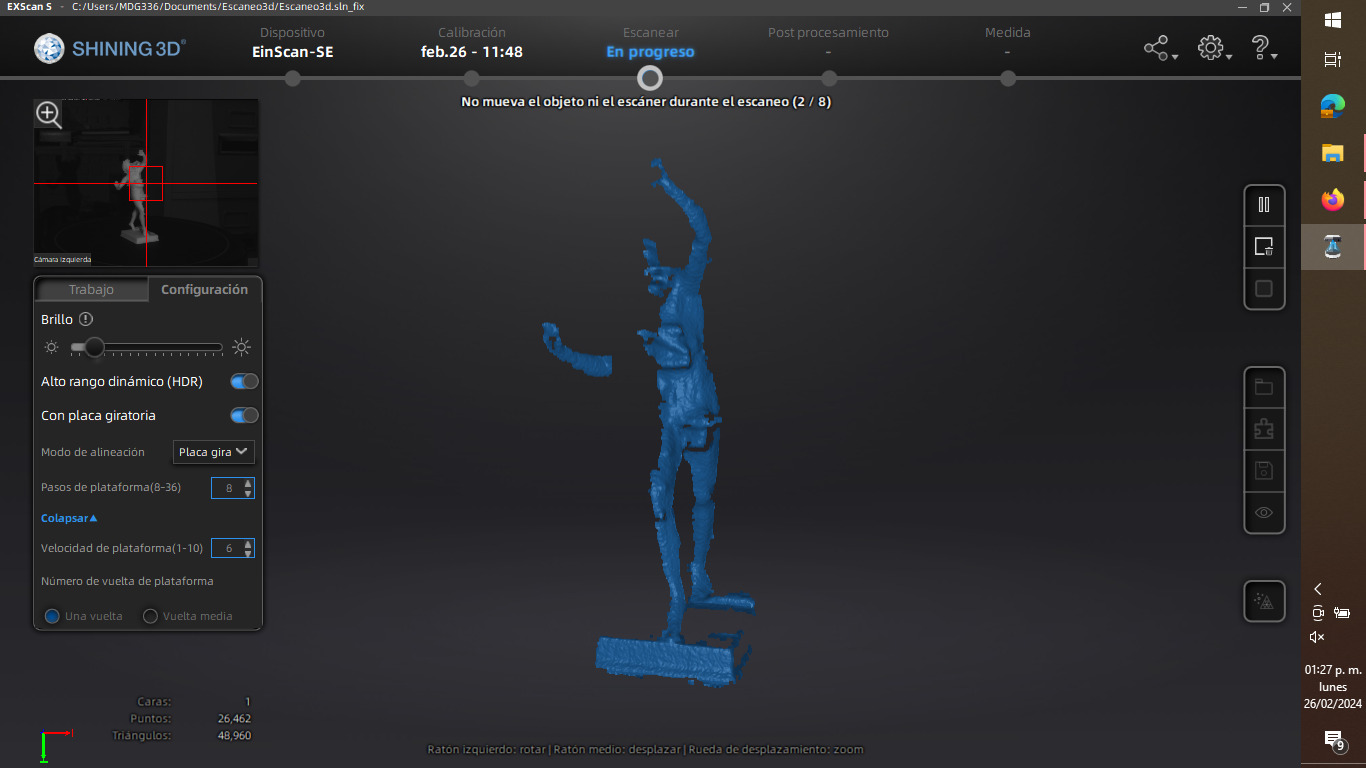
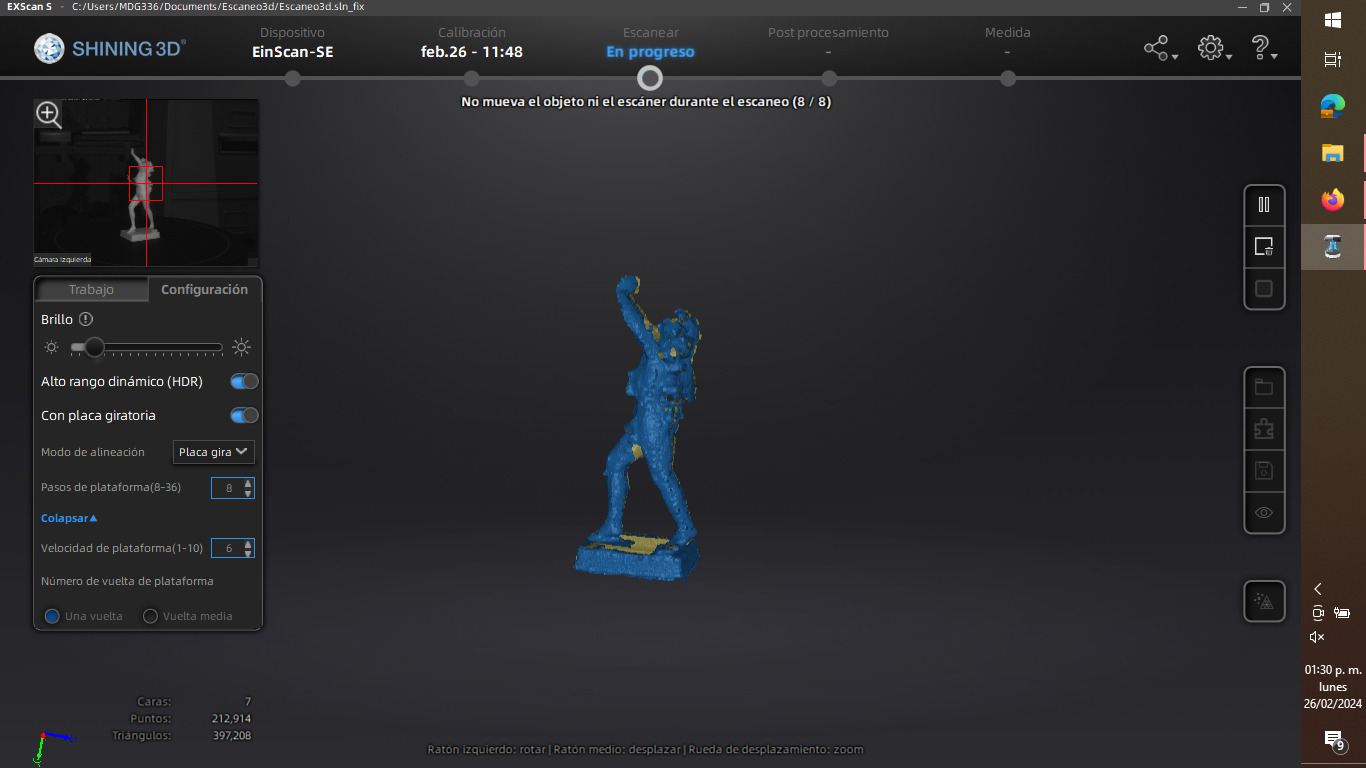

To use this software we need to connect the device to our computer, then some calibration takes place to ensure we have the proper dimensions of the machines work area, and begin scanning, it is going to take a while as the computer will be rendering all of the data that the machine is transmitting, but after the scanning is done we proceed to apply so post-processing properties, this ensures that the shape is properly scanned and uses the computer to fill in the blanks that might have been missed at the process of earlier data gathering. In the end we get a shape that resembles the real one and we can save that rendering as a .STL file, allowing us to print that shape out of the scan we made with the machine. Kinda cool right?