- Design a machine that includes mechanis, actuation, automation and application
- Build the mechanical parts and operate it manually
- Document the group project and your individual contribution
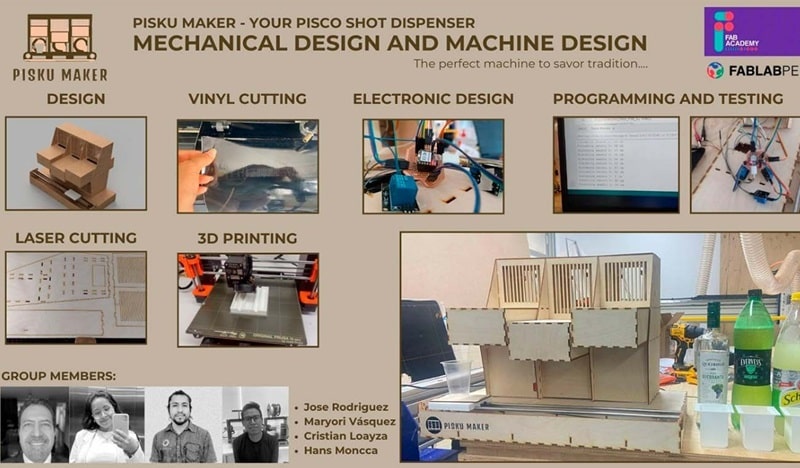
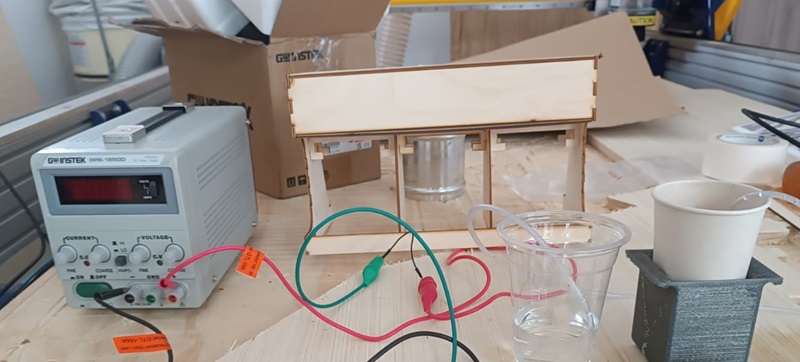
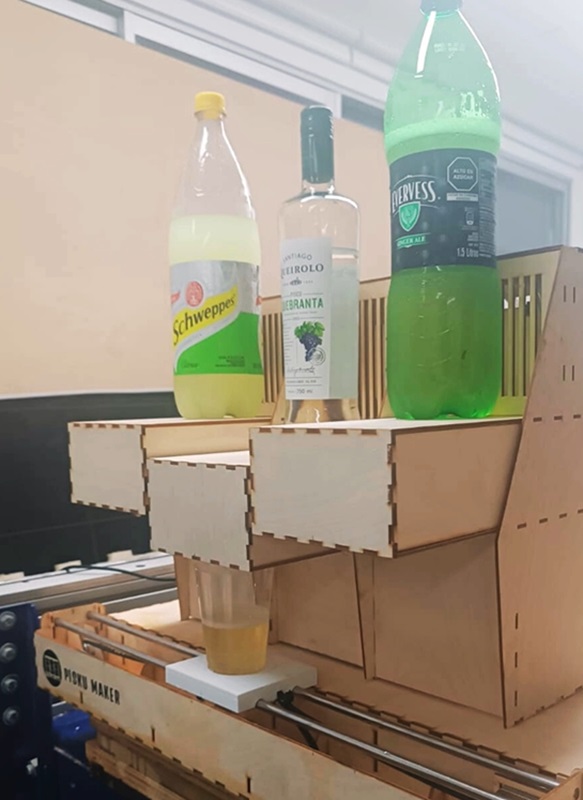
Our group carried out the design and manufacture of a prototype of a pisco sour making machine. This machine uses the following supplies: pisco, ginger ale and lemon juice. Three peristaltic pumps controlled by Xiao 32C3 that receive information from three ultrasonic sensors that detect the position of the glass. A band transports the glass and places it under each spout for the time necessary for it to pour the corresponding liquid: pisco, ginger ale and lemon juice.
In our collaborative efforts, we convened on Saturday at the FAB LAB UCSUR for our group session, utilizing this opportunity not only to advance our collective assignment but also to provide mutual support and address any inquiries. Additionally, we engaged in the GLOBAL OPEN TIME initiative. Subsequently, on Sunday, we convened virtually with colleagues outside Lima to foster a supportive environment conducive to accomplishing our group objectives. Enclosed are visual documentation capturing the output devices' progress over the weekend.
Our engagement with FAB ACADEMY was further fortified by our participation in the OPEN GLOBAL TIME session on Saturday, during which Adrian, Rico, and our peers generously offered guidance to resolve our queries. The enriching interactions during these sessions underscore their value in augmenting our understanding and supporting fellow participants. We express our gratitude to the instructors for another enlightening week of instruction.

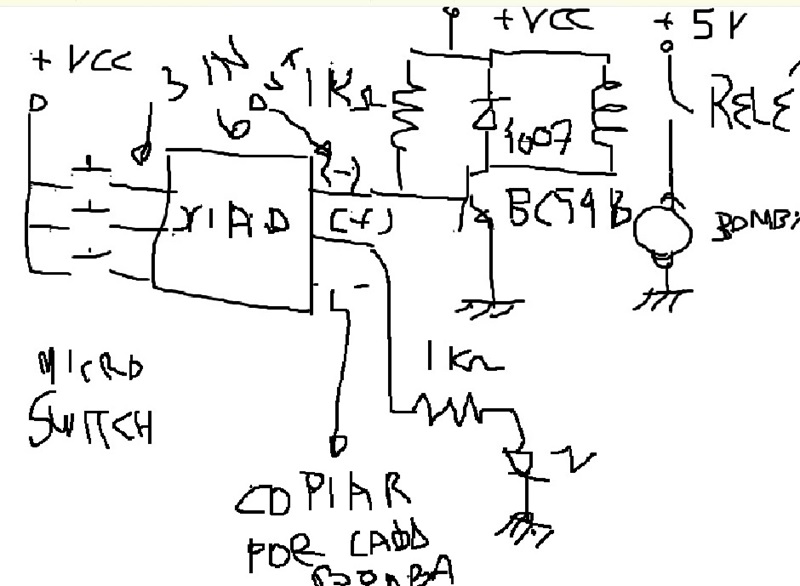
In response to challenges encountered during the previous week's electronic design phase, we iterated on our development board, culminating in the creation of HM, a versatile board housing the XIAO microcontroller for programming various output components. Feedback received during the Global Open Time prompted us to design a board capable of accommodating all output requirements for our final projects, thus informing our design decisions.

Utilizing KICAD for board design, we prioritized functionality, incorporating connectors for the OLED, servomotor, and Neopixel outputs, alongside provisions for programming and indicators such as LEDs and switches. The schematic design of the HM board encapsulates these considerations, aiming for simplicity without compromising utility.
Transitioning to board implementation, we optimized track sizes while maintaining a focus on operational efficacy. A comprehensive list of components was compiled, including resistors, LEDs, switches, connectors, and the XIAO RP2040 microcontroller, ensuring alignment with project specifications.
Following milling, the soldering process was executed meticulously, resulting in the assembly of components onto the board. This pivotal stage marks the transition to the final development phase, captured through visual documentation of the soldering process and the completed board, poised for further assignment development.
Among the output devices slated for integration, the servomotor holds a prominent position. Its connection and programming process were meticulously documented, with emphasis placed on ensuring compatibility and functionality with the HM board. Comprehensive instructions detailing the cable connections to the XIAO RP2040 and accompanying visuals underscore the meticulous approach adopted in device integration.