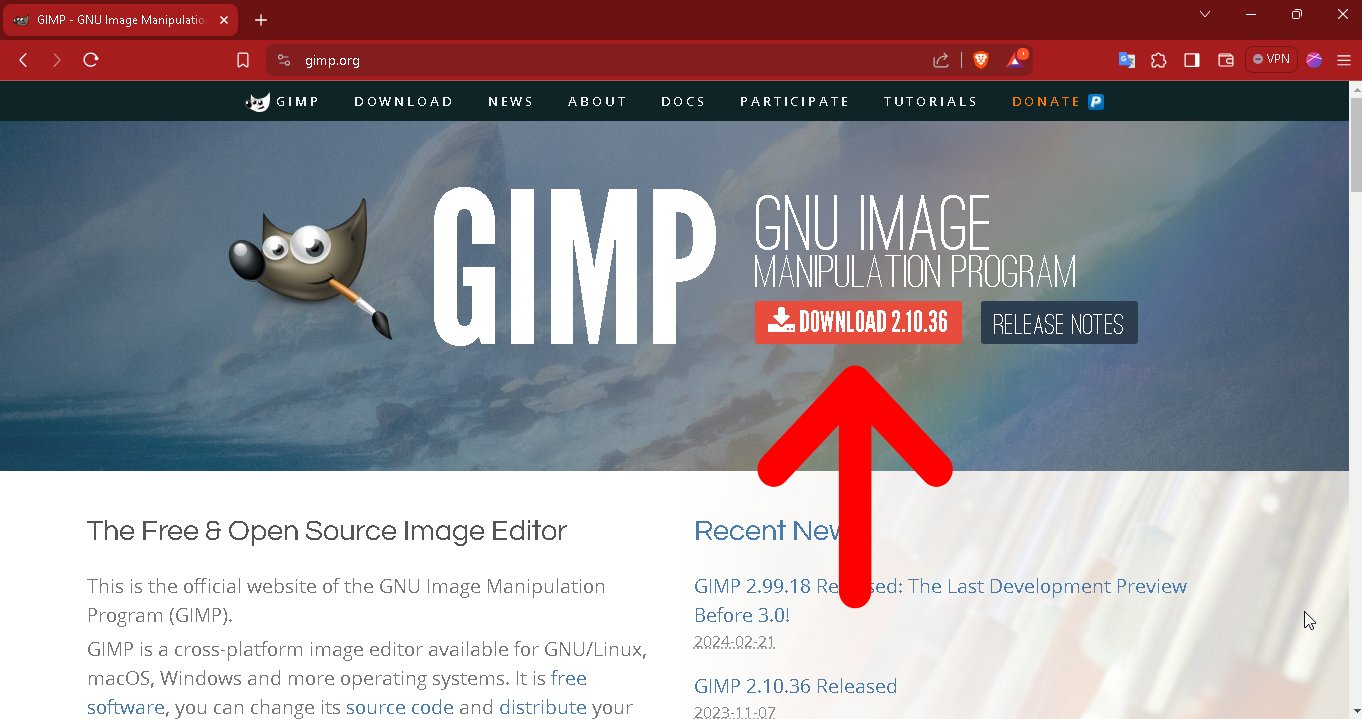
Navigate to the GIMP website and download the latest version of the software.
This week we worked with 2D software with raster and vector objects, we also worked with 3D software, we evaluated its features to see if they help us to develop our final project.
the assignment was:
model (raster, vector, 2D, 3D, render, animate, simulate, ...) a possible final project, compress your images and videos and post a description with your design files on your class page
The first 2D software raster to test will be Gimp and the second software will be Photopea.
Navigate to the GIMP website and download the latest version of the software.
Now that we've downloaded GIMP, we install it and it's time to start using it.

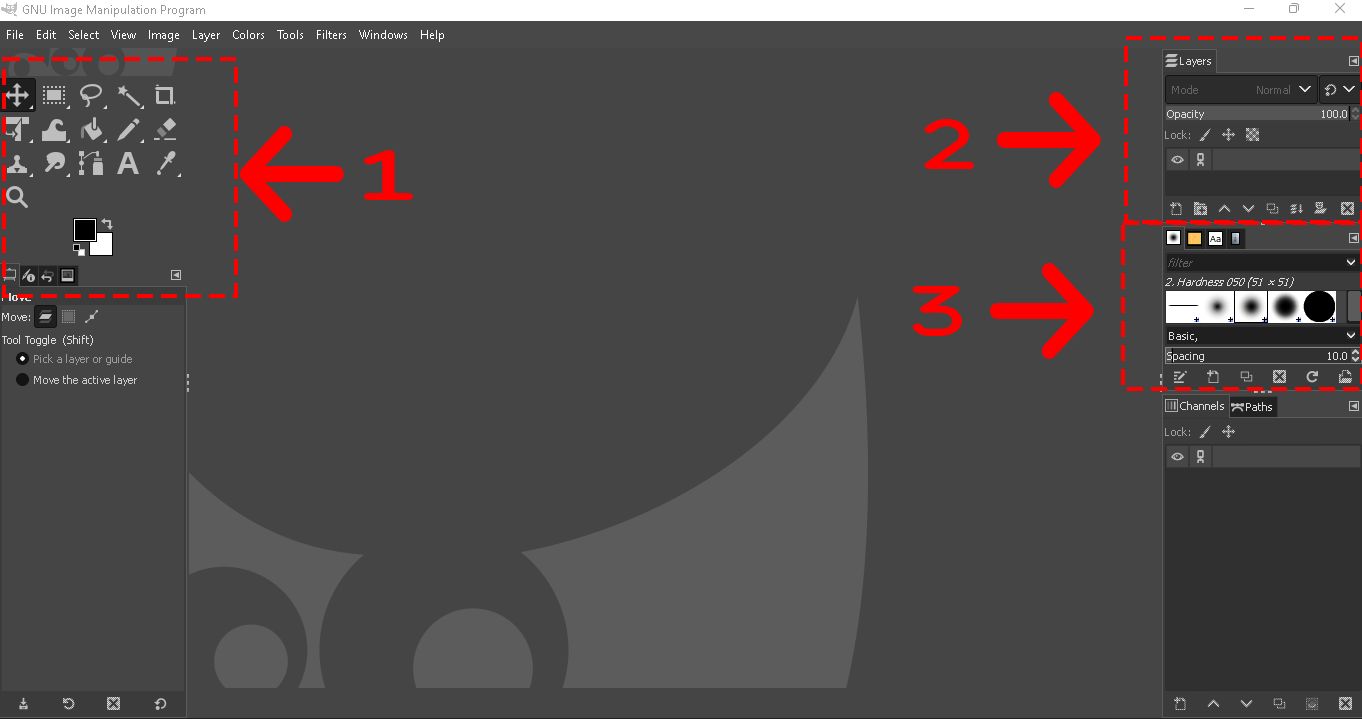
Gimp has a customizable interface
1. Toolbox
1. Layers
2. Brushes
To open and edit an existing image we follow the following flow.
File-> Open-> Select file rout -> Open

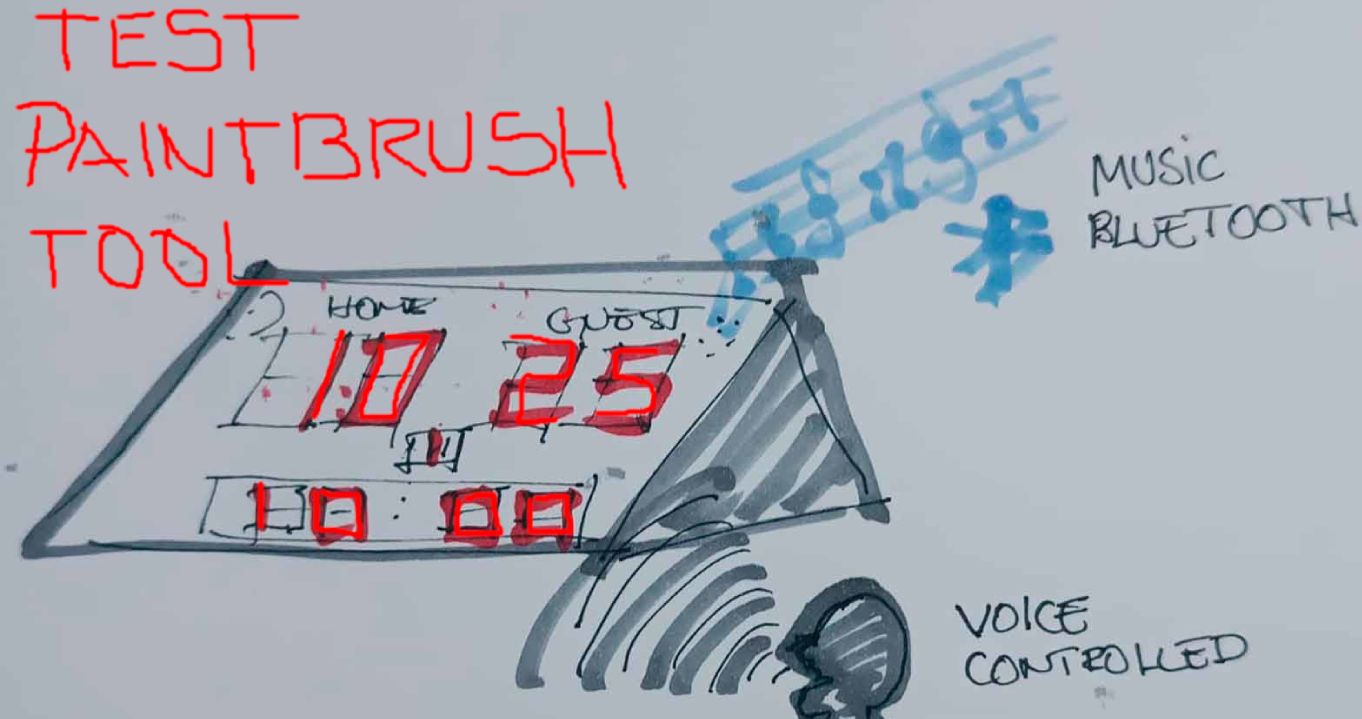
We can edit an image, for this example we will use the paint brush tool.
1. Layer -> New layer ->File-> Open-> Select file route -> Select file name -> Open
2. Tools -> Paint tools ->Paintbrush
3. Select brush type
now we proceed to write the test text "brush tool test".

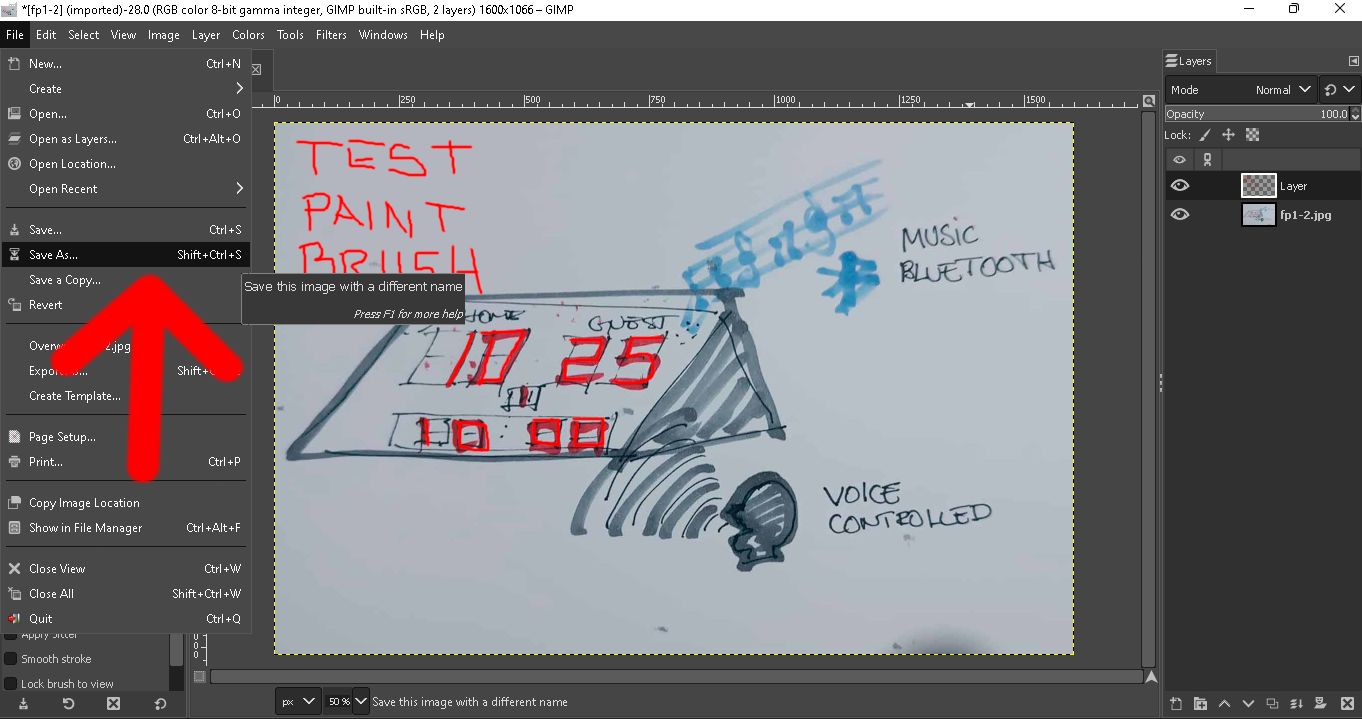
Once the image has been edited, we export it in the format of our choice.
File -> Save As... -> Selec file -> Save
Once the image has been edited, we export it in the format of our choice.
File -> Save As... -> Selec file -> Save
Navigate to the Photopea website and use it online .
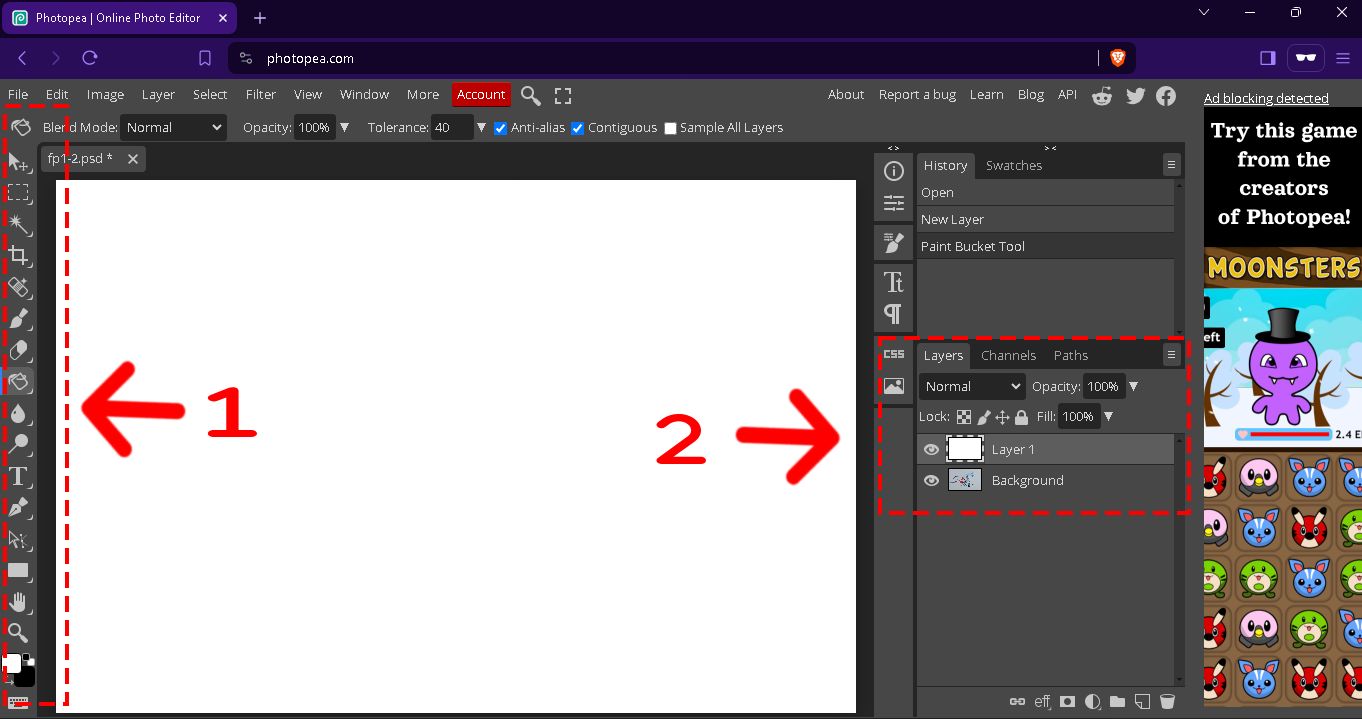
has a customizable interface
1. Toolbox
2. Layers
We can edit an image.
File -> Open -> Select file name -> Open
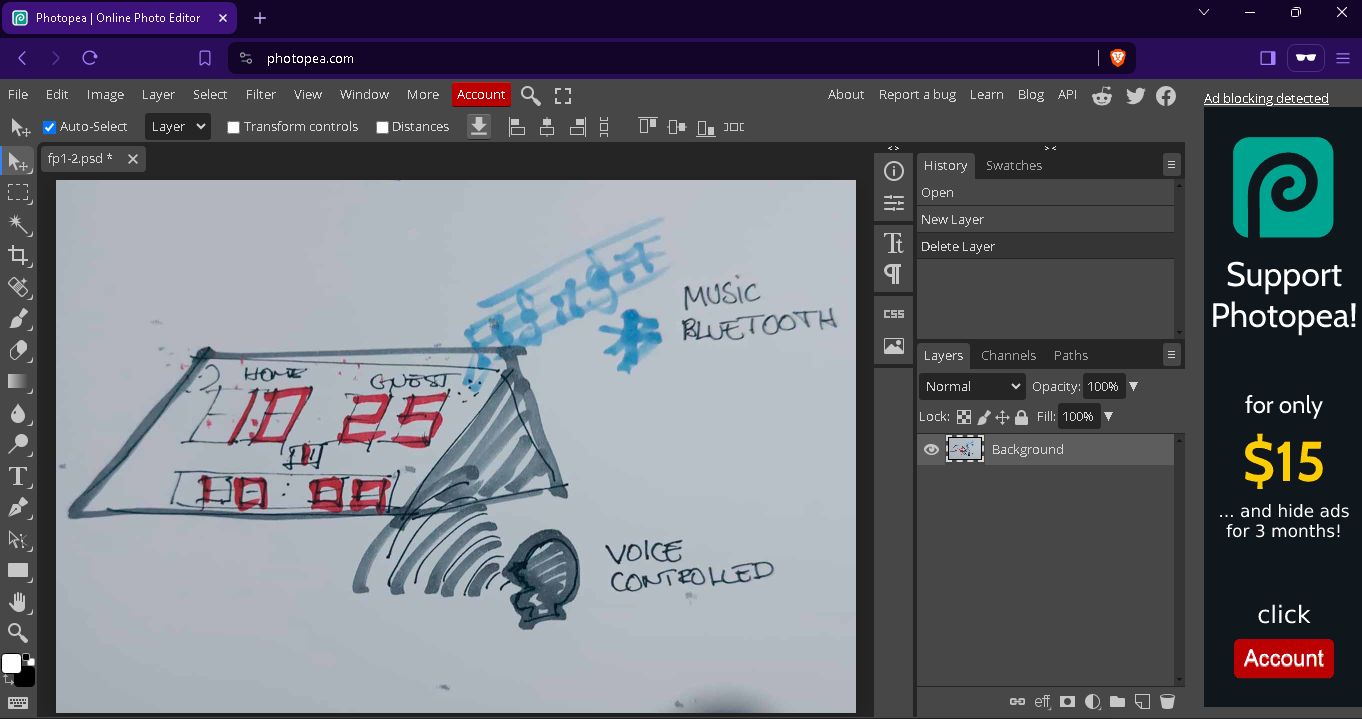
We will create a new layer to work in a non-destructive way.
Layer -> New -> Layer

Test brush tool
Select brush tool -> Select size -> Select stylus

Export as JPG
File -> Export as -> JPG

Comparative chart
| Gimp | Photopea |
|---|---|
| Gimp is a software for editing digital images in bitmap form, both drawings and photographs, it is free and open source. | Photopea is a web-based photo and graphics editor, it is free but ad-supported. |
| Drawing with the brush tool is easy. | Drawing with the brush tool is easy. |
| You can export to multiple formats | Can be exported only to 8 different formats. |
| Good image compression results. | Good image compression results. |
The first 2D software vector to test will be Inkscape and the second software will be Corel Draw.
Navigate to the Inkscape website and download the latest version of the software.

Now that we've downloaded Inkscape, we install it and it's time to start using it.

This is the Inkscape interface
1. Tools
2. Layers

Vector drawing test using the Pen tool
Create New document: File->New
Create layers: Layer->Add Layer->Add

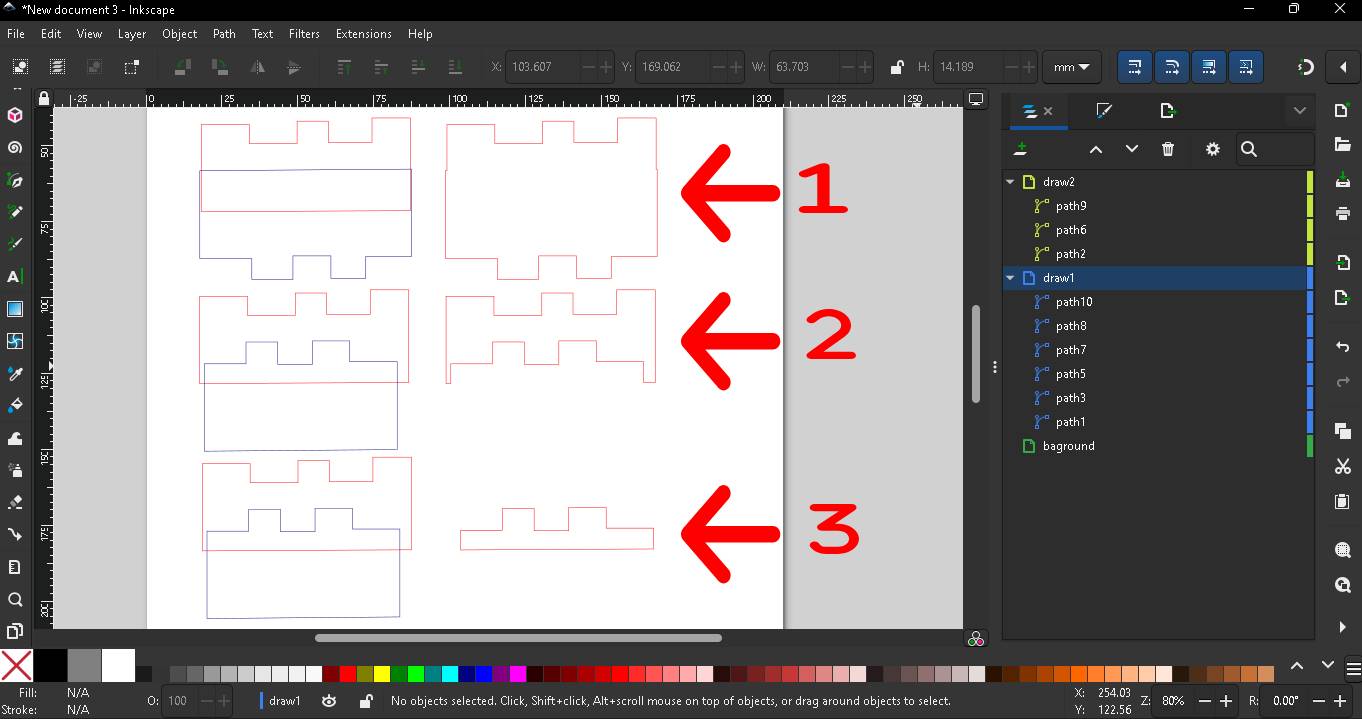
Boolean operations test:
1. Union: Path->Union
2. Difference: Path->Difference
3. Intersection: Path->Intersection
Navigate to the Corel Draw website and download the latest version of the software.
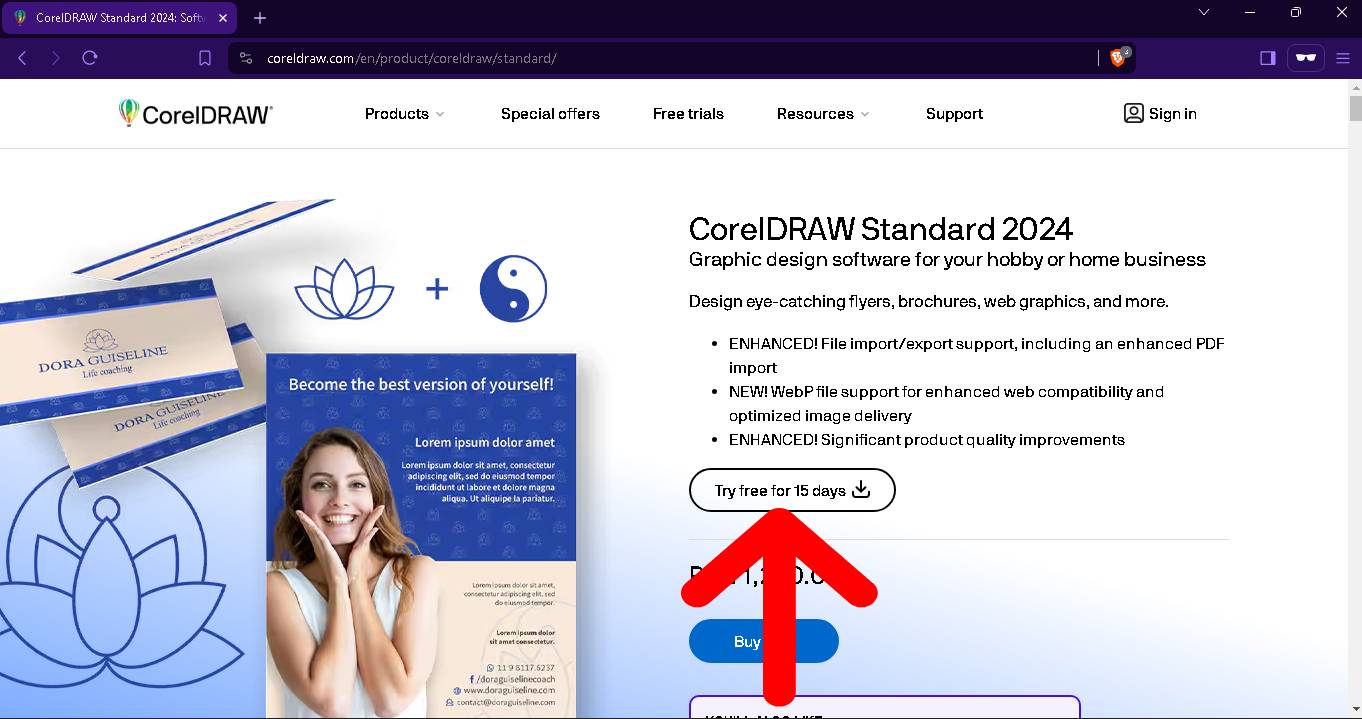
Now that we've downloaded Corel Draw, we install it and it's time to start using it.

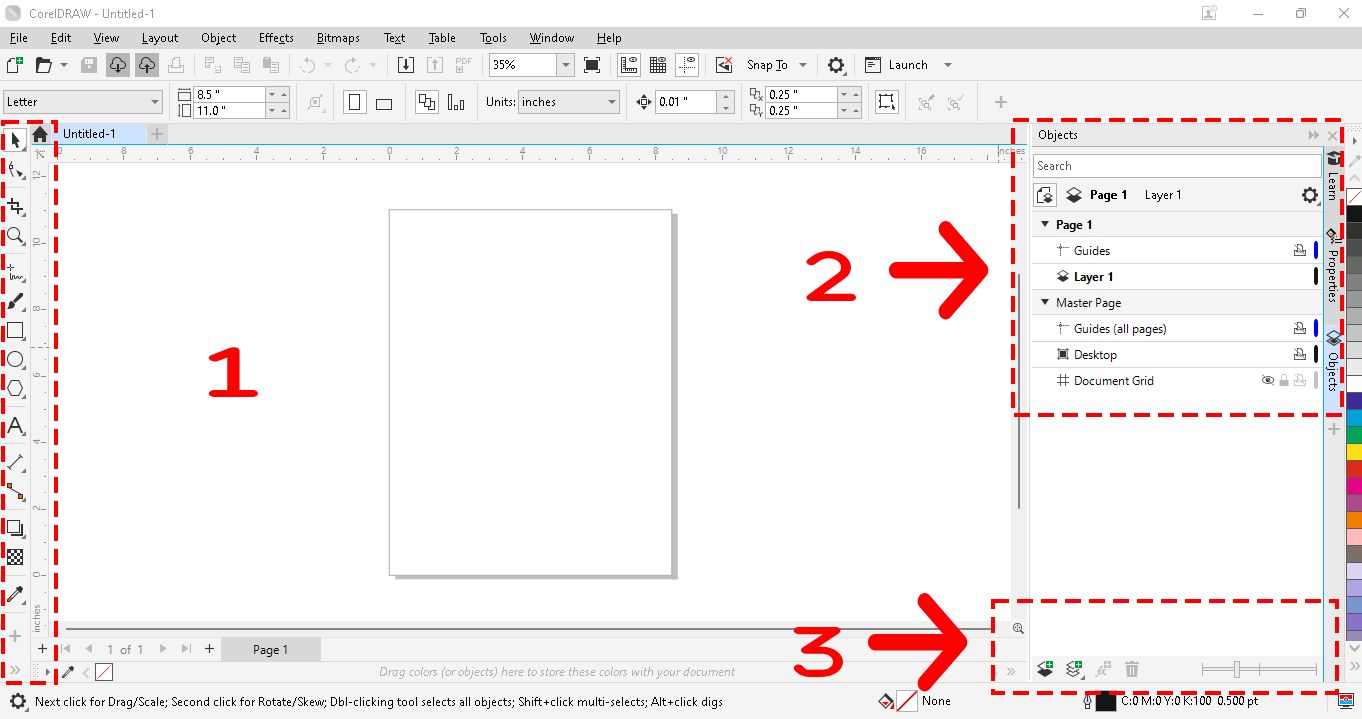
This is the Corel Draw interface
1. Toolbox
2. Objects
3. Layers
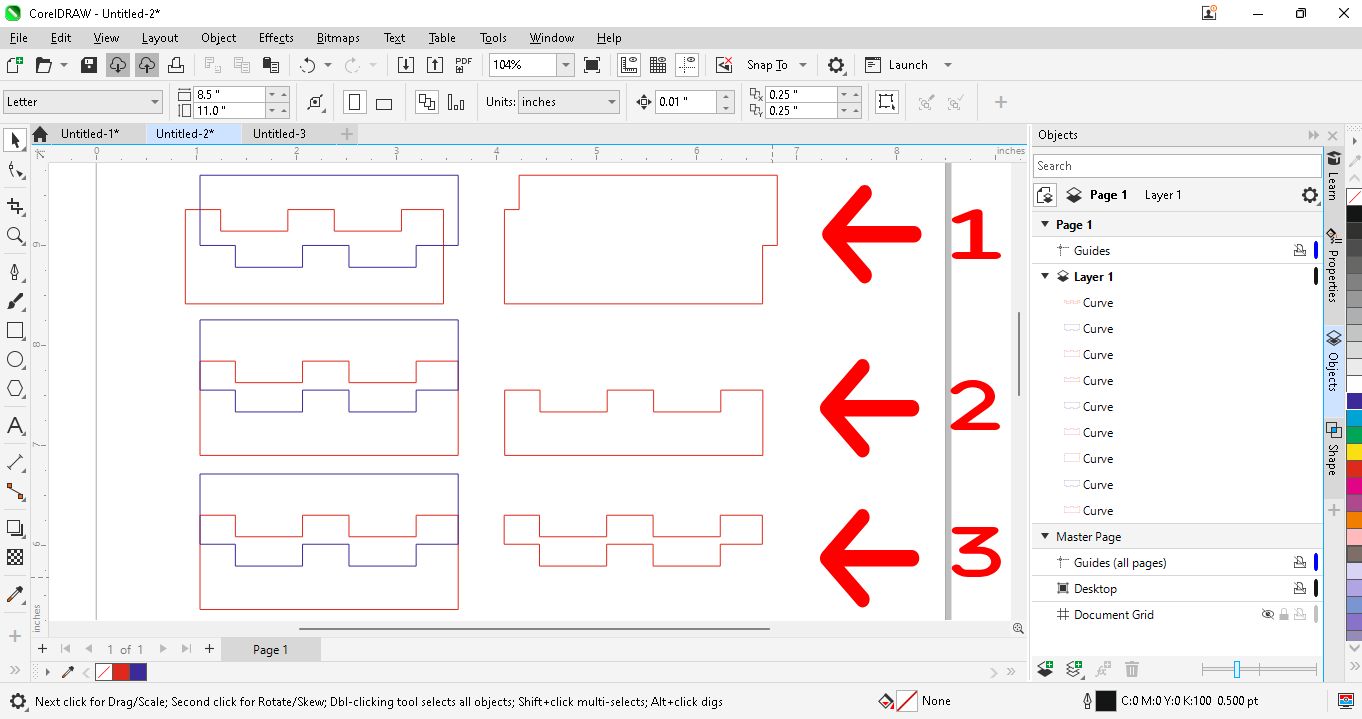
Vector drawing test using the Pen tool
Create a new document: file->New->Ok
Select Pen tool and draw

Boolean operations test:
1. Object->Shaping->Weld
2. Object->Shaping->Trim
2. Object->Shaping->Intersect
Comparative chart
| Inkscape | Corel Draw |
|---|---|
| Inkscape is a free and open source vector graphics editor. | CorelDRAW is a vector graphic design software application, it has a cost. |
| Vector drawing is simple. | Vector drawing is simple. |
| You can export to G-code. | You can't export to G-code. |
| Its interface is not user friendly | Its interface is user friendly |
The first 3D software to test will be Blender and the second software will be Rhinoceros.
Navigate to the Blender website and download the latest version of the software.
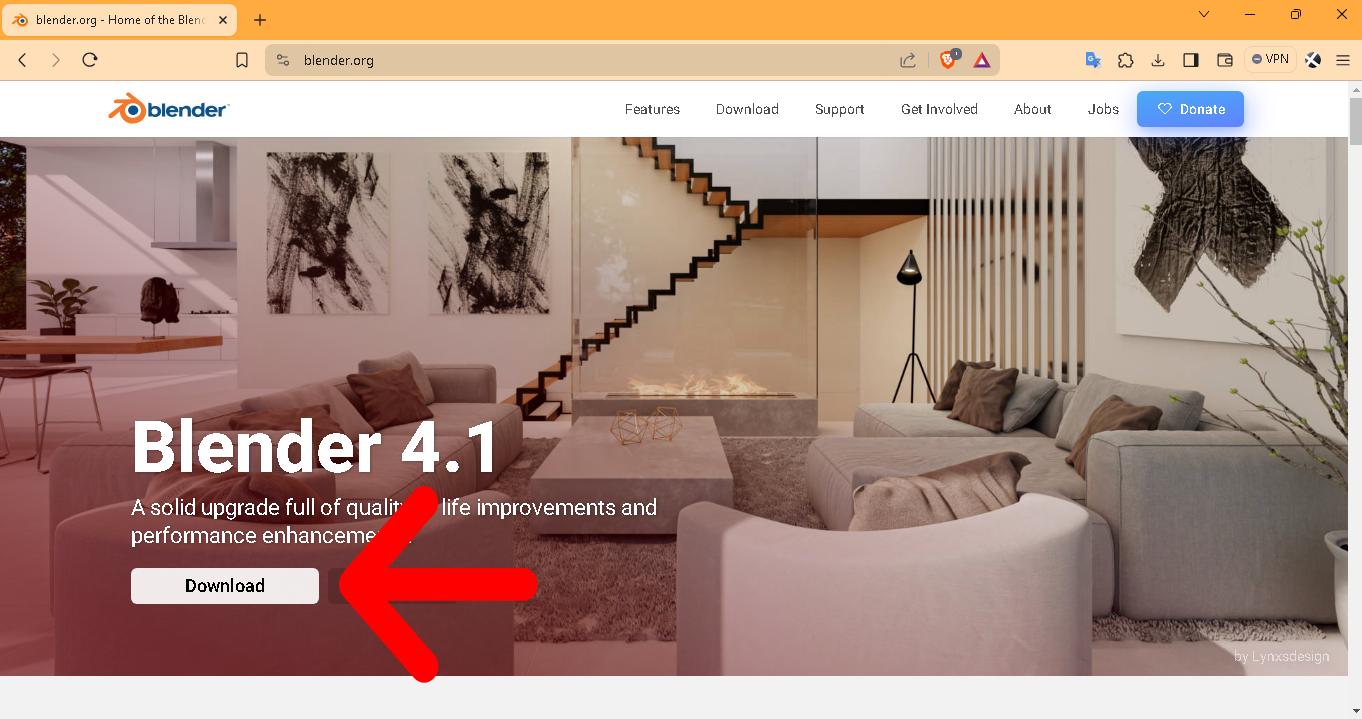
Now that we've downloaded Blender, we install it and it's time to start using it.

This is the Blender interface
1. Topbar
2. Workspaces
3. 3D Viewport
4. Outliner
5. Properties
6. Timeline

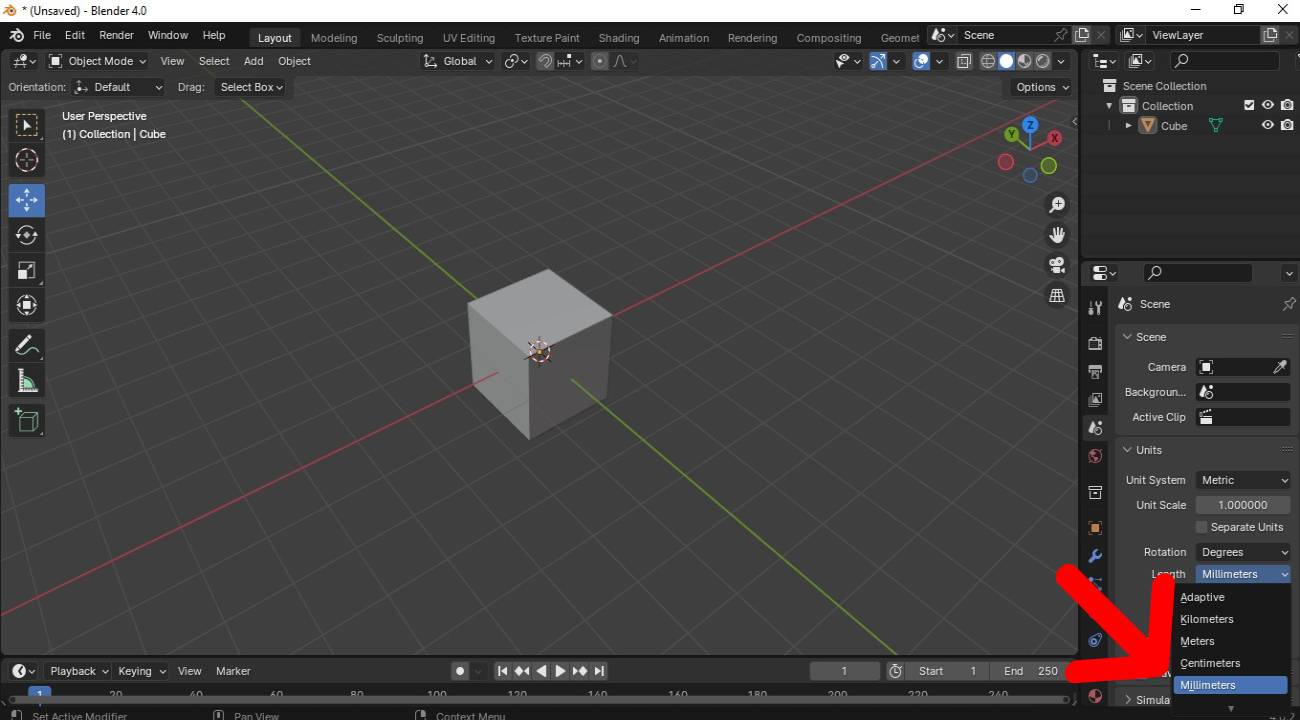
To start drawing in Blender we need to configure the work units, in this case we will configure those dimensions in millimeters (mm.).
properties -> scene -> units -> unit system -> length -> millimeters
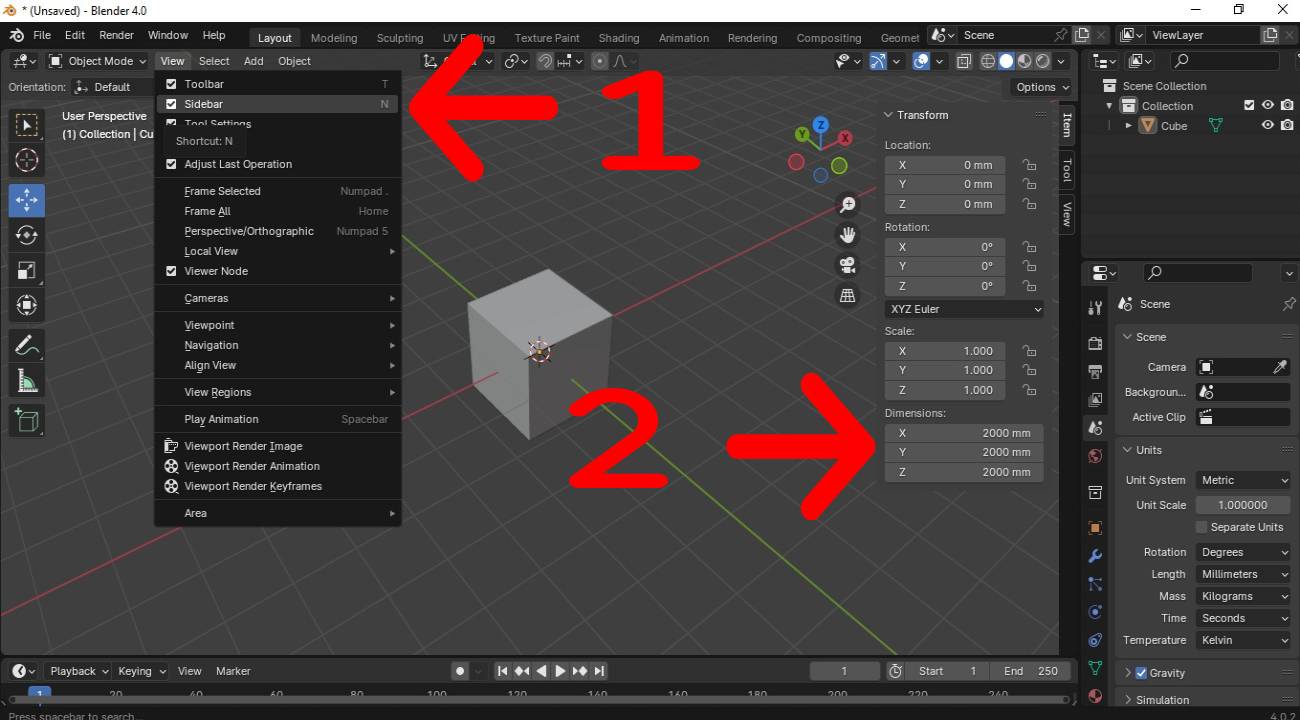
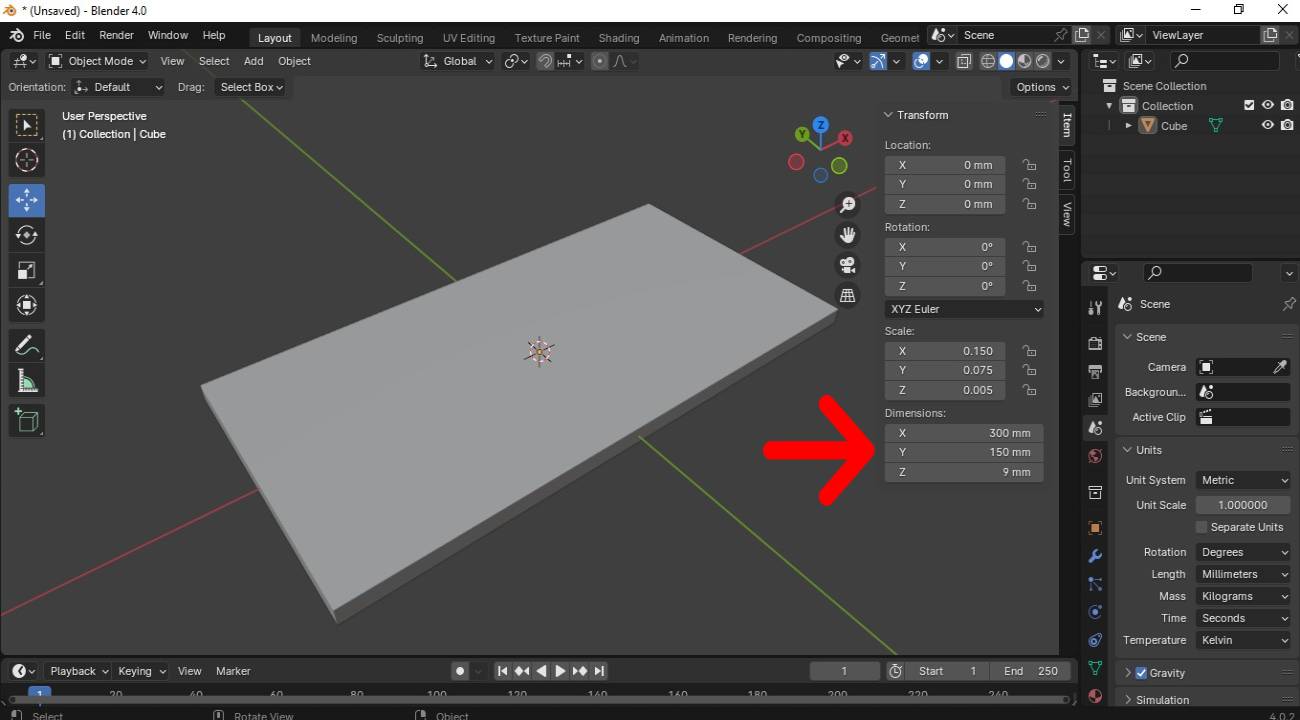
1. To view the dimensions of the objects we must activate the sidebar tool of the 3D viewport.
2. here we can see the dimensions of the object in millimeters.
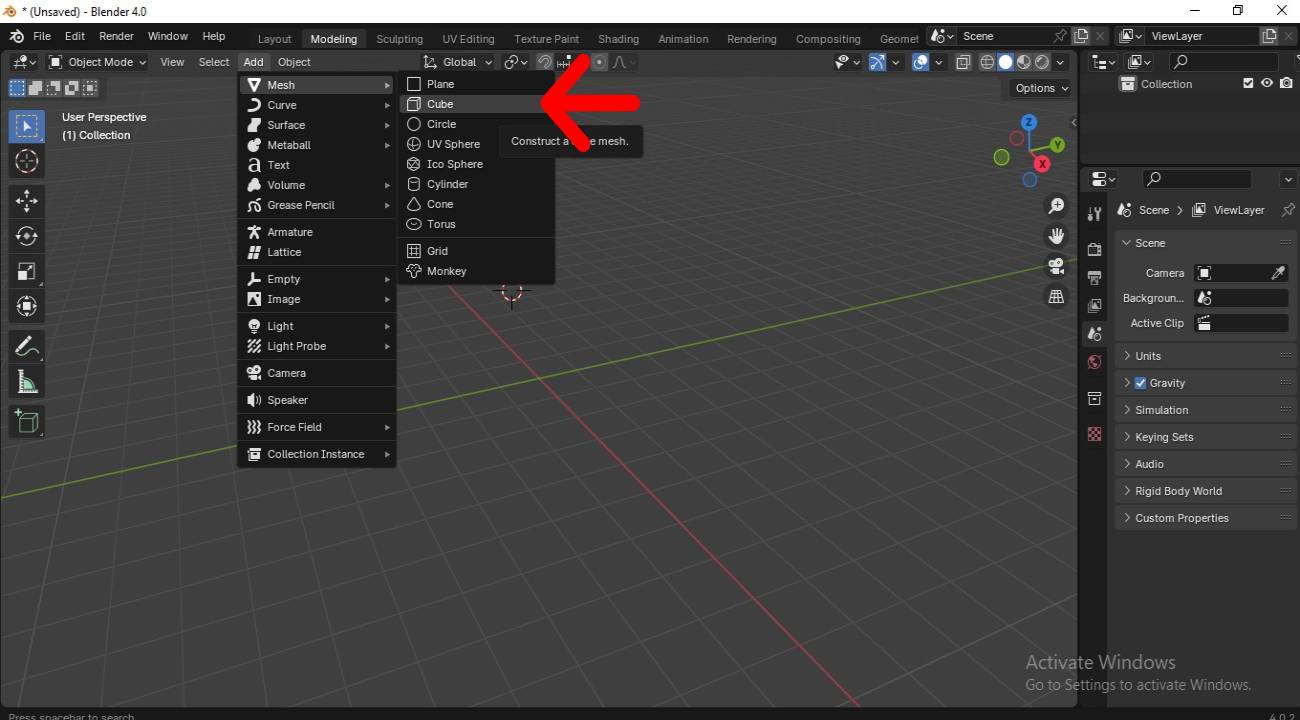
In the 3D View menu we add a cube.
Add -> Mesh -> Cube
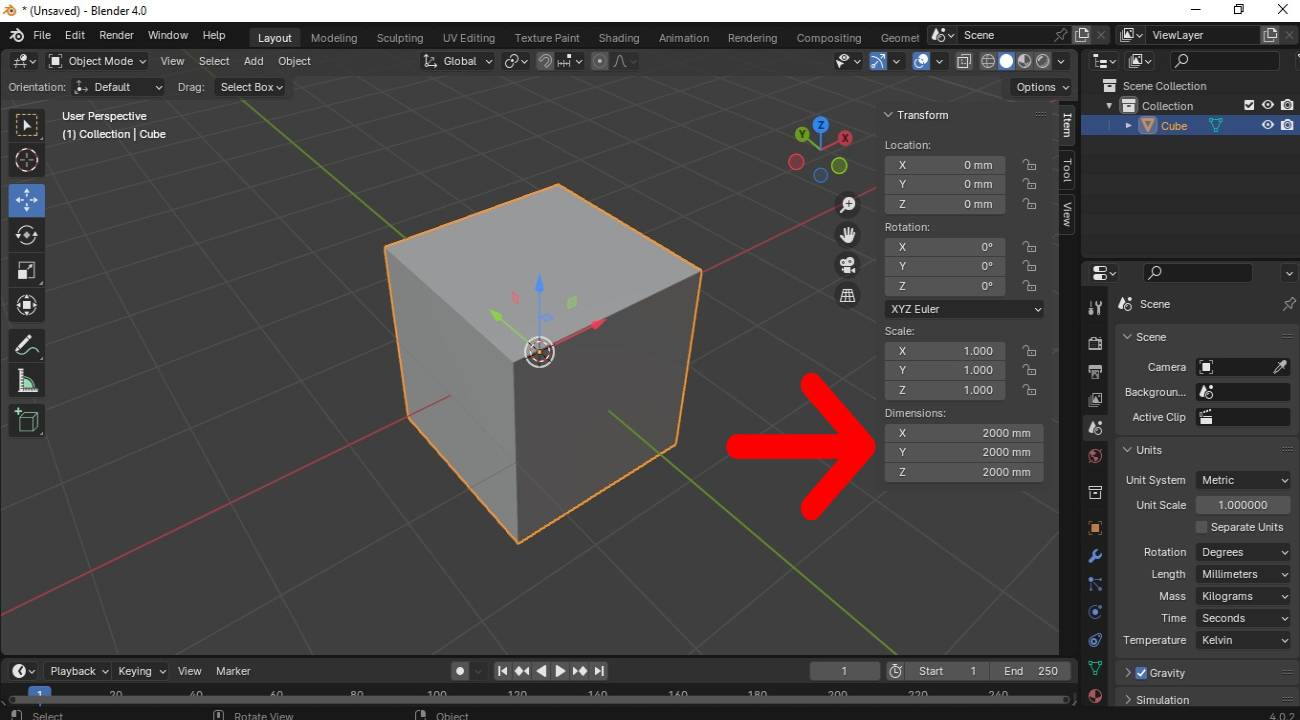
Result of adding a cube, by default the cube that is generated is 2000 mm. per side.
We will use the Scale tool to scale the cube and convert it into the rectangular cube we need, we will scale on its 3 x, y, and z axes.
We can also use the shortcut with the "S" key.
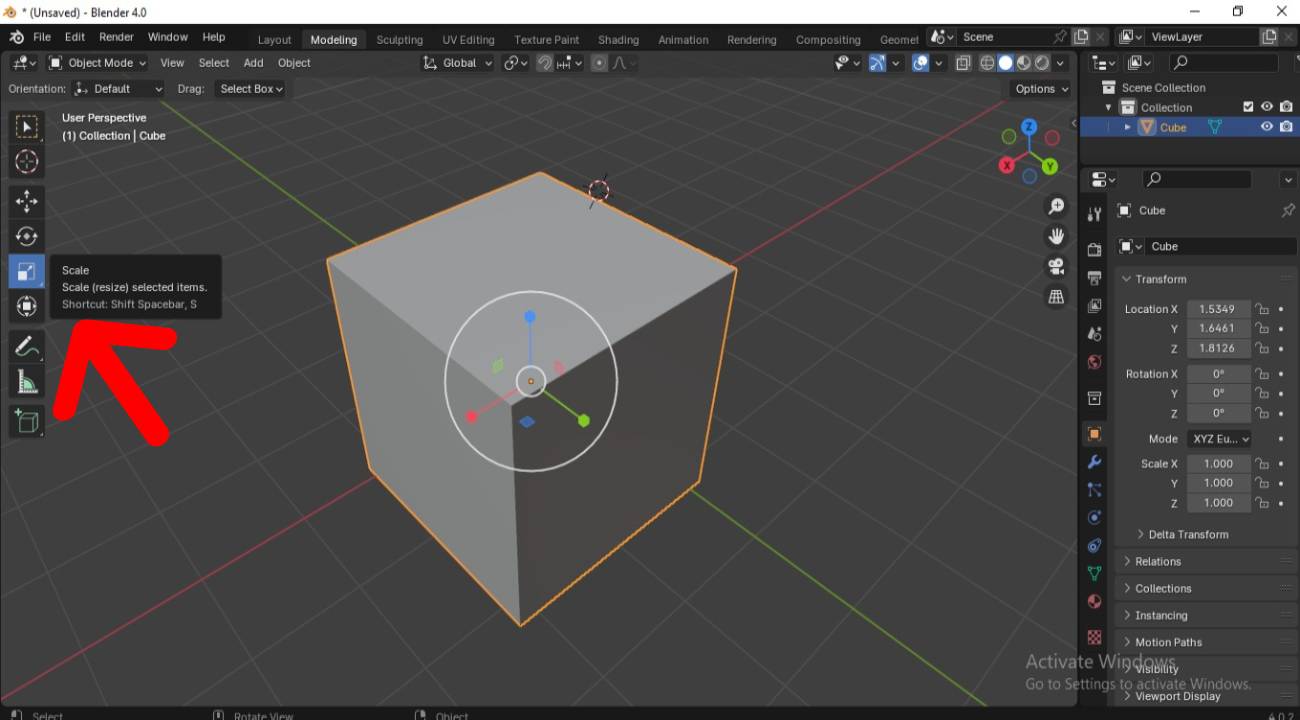
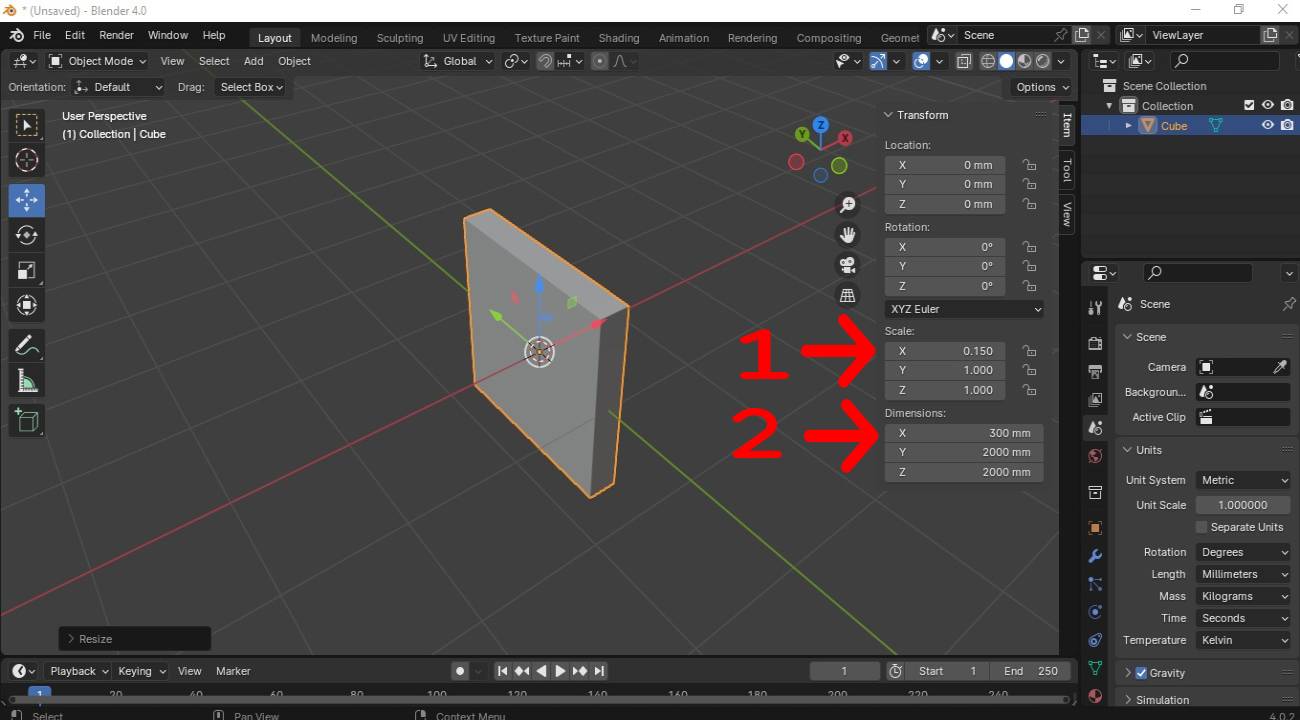
First we select the object, then we use the shortcut "S" to scale, then we indicate the X axis and finally the units that are required 300 units for the piece we are drawing.
1. we use 0.15 to scale to the required dimension.
2. we achieve 300 mm. that are needed.
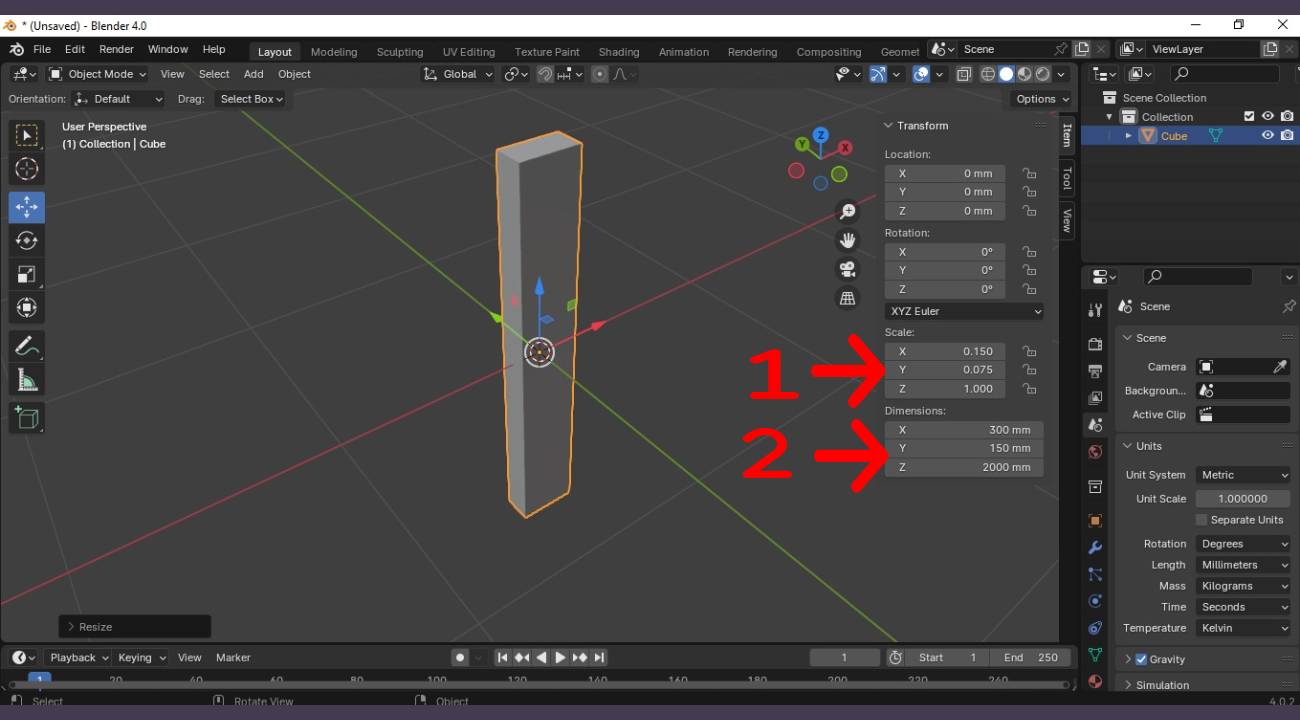
We then use the shortcut "S" to scale, then indicate the Y axis and finally the percentage required to achieve 150 mm. for the piece we are drawing.
1. we use 0.075 to scale to the required dimension.
2. we achieve 150 mm. that are needed.
We then use the shortcut "S" to scale, then indicate the Z axis and finally the percentage required to achieve 9 mm. for the piece we are drawing.
1. we use 0.0045 to scale to the required dimension.
2. we achieve 9 mm. that are needed.
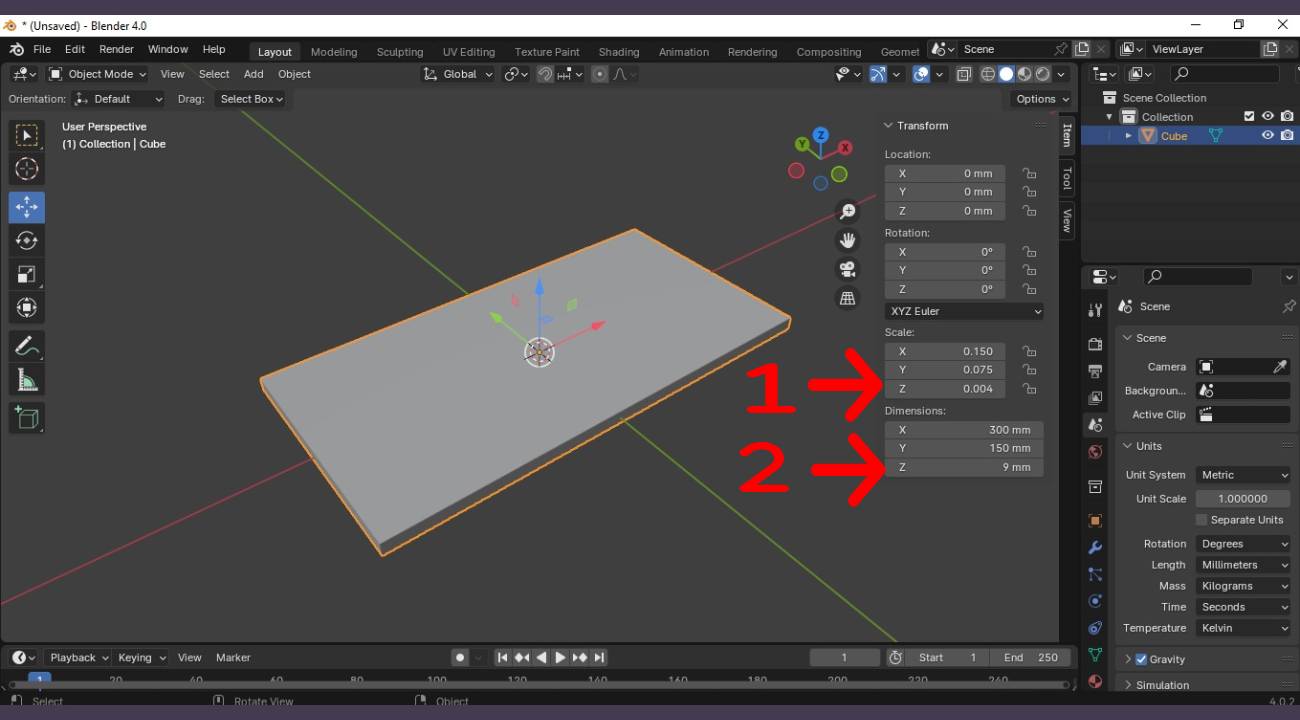
Final result of the piece with dimensions 300x150x9 mm.
The quickest way to modify the dimensions of the object is to change it directly in the sidebar.
To perform Boolean operations we must activate the modifier that will not allow its use.
Add Modifier -> Generate -> Boolean
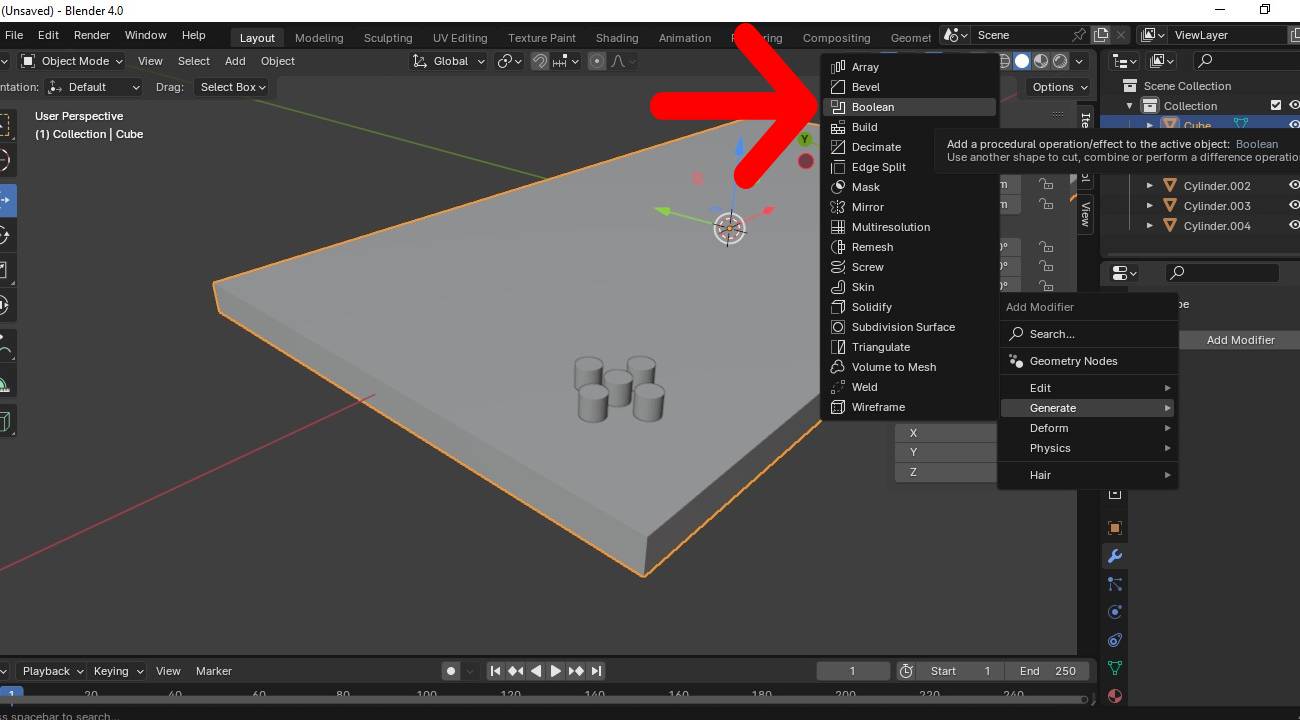
For this exercise we will make a difference of objects.
We select the object from which it is going to be subtracted, we add the boolean modifier.
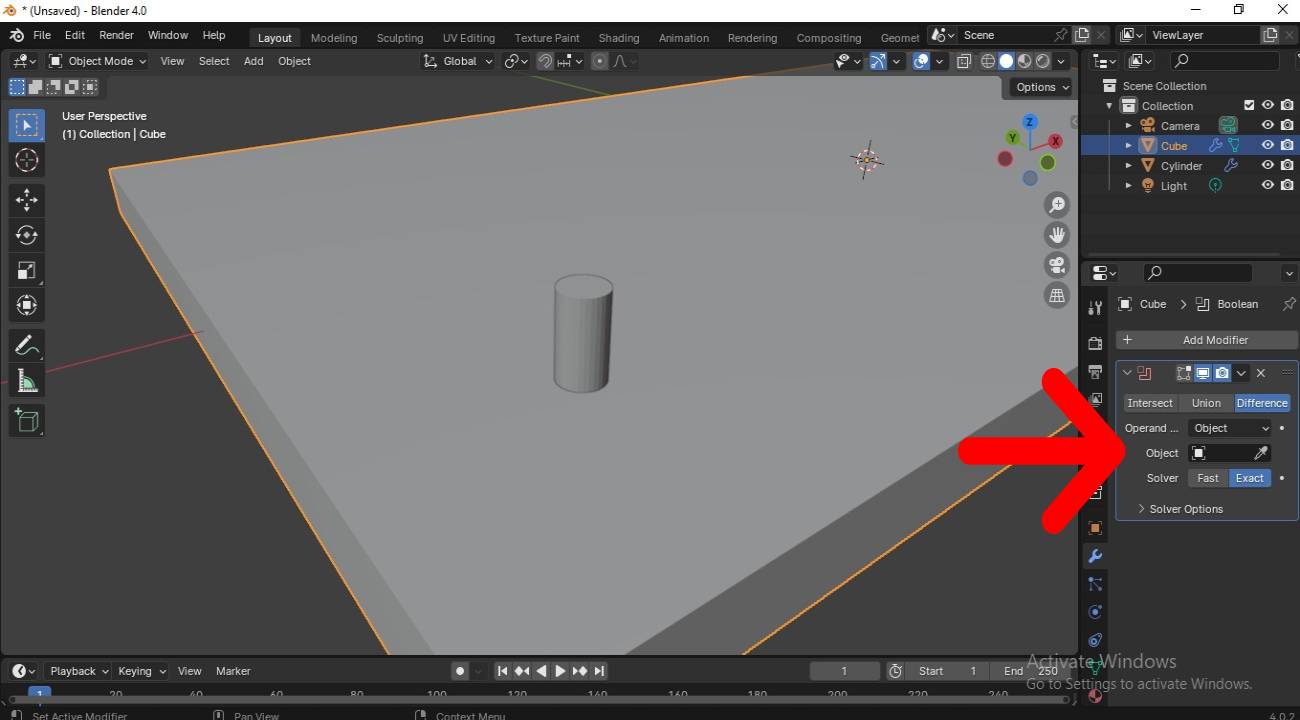
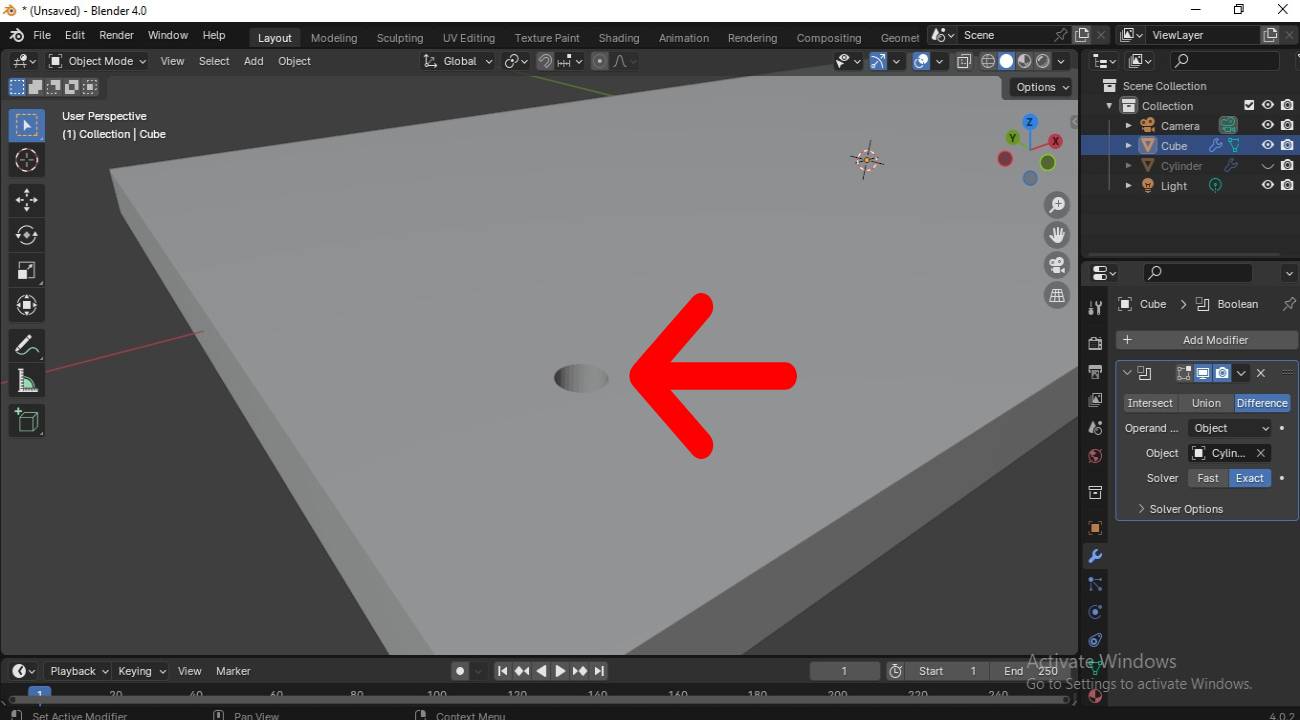
Then in the modifier we select the object to be subtracted and subtraction performed, now we can delete the cylinder we made.
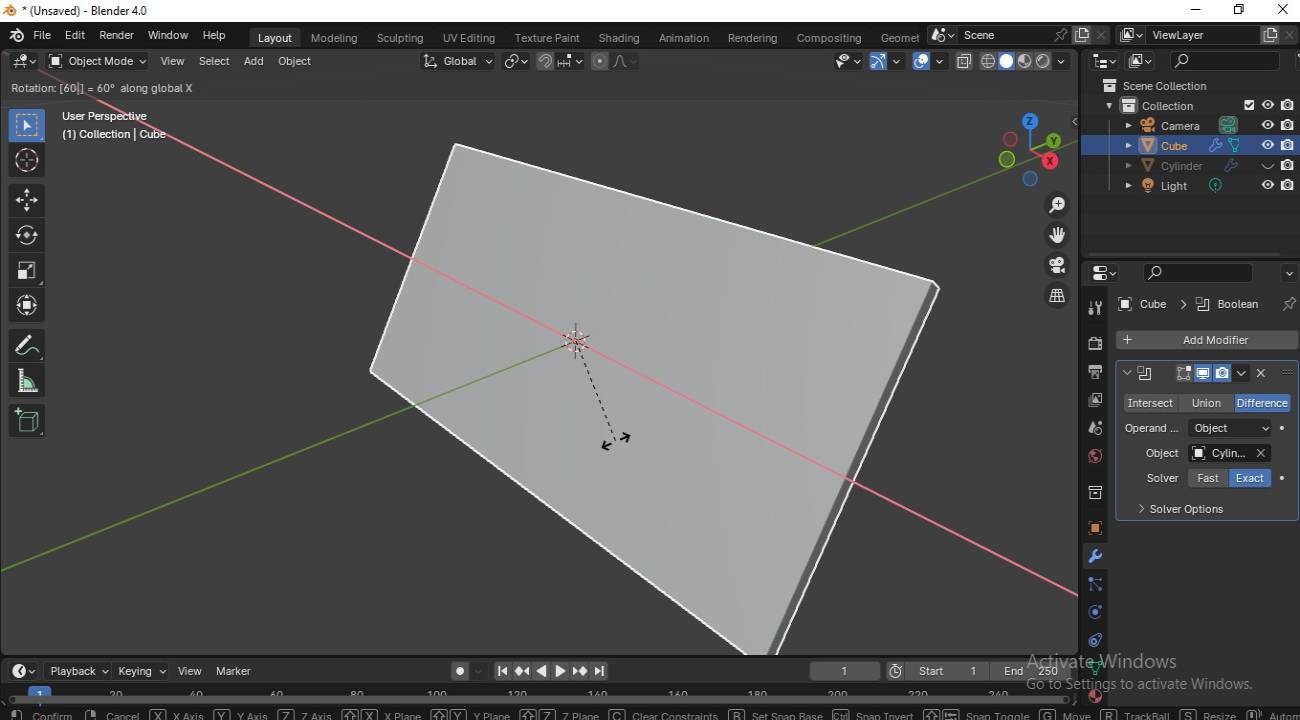
To rotate an object in blender we will use the shortcut "R" then the axis in which we want to rotate and finally the angle of rotation.
R -> X -> 60
3D model test
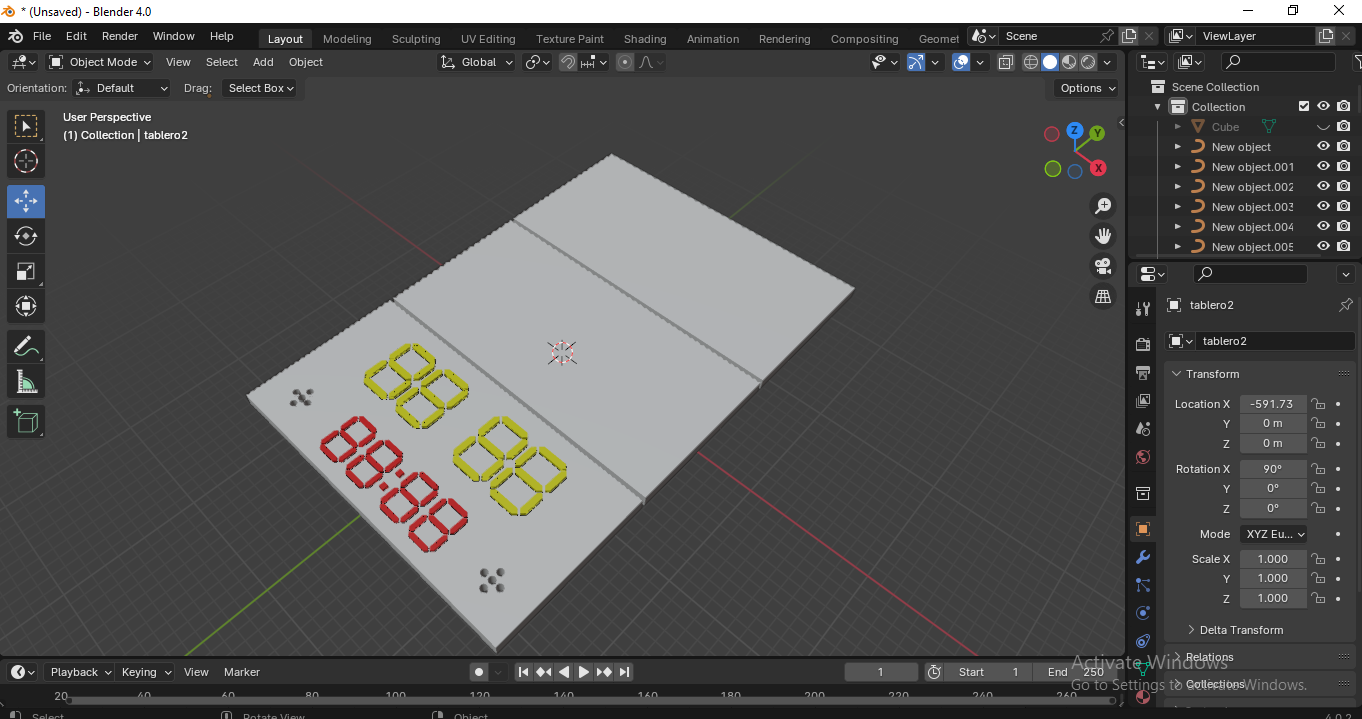
3D model animation test
Use move animation
Navigate to the Rhinoceros website and download the latest version of the software.

Now that we've downloaded rhinoceros, we install it and it's time to start using it.

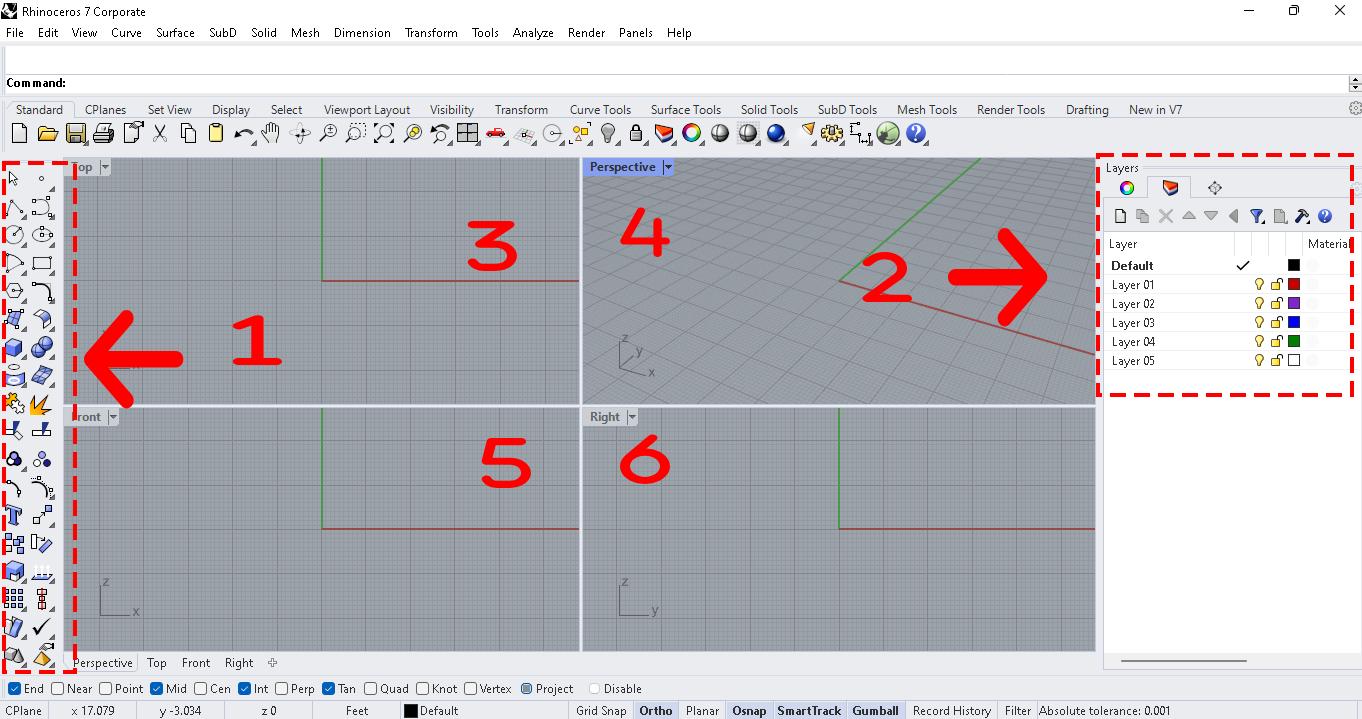
This is the Rhinoceros interface
1. Toolbox
2. Layers/properties
3. top view
4. Perspective
5. Front view
6. Right view
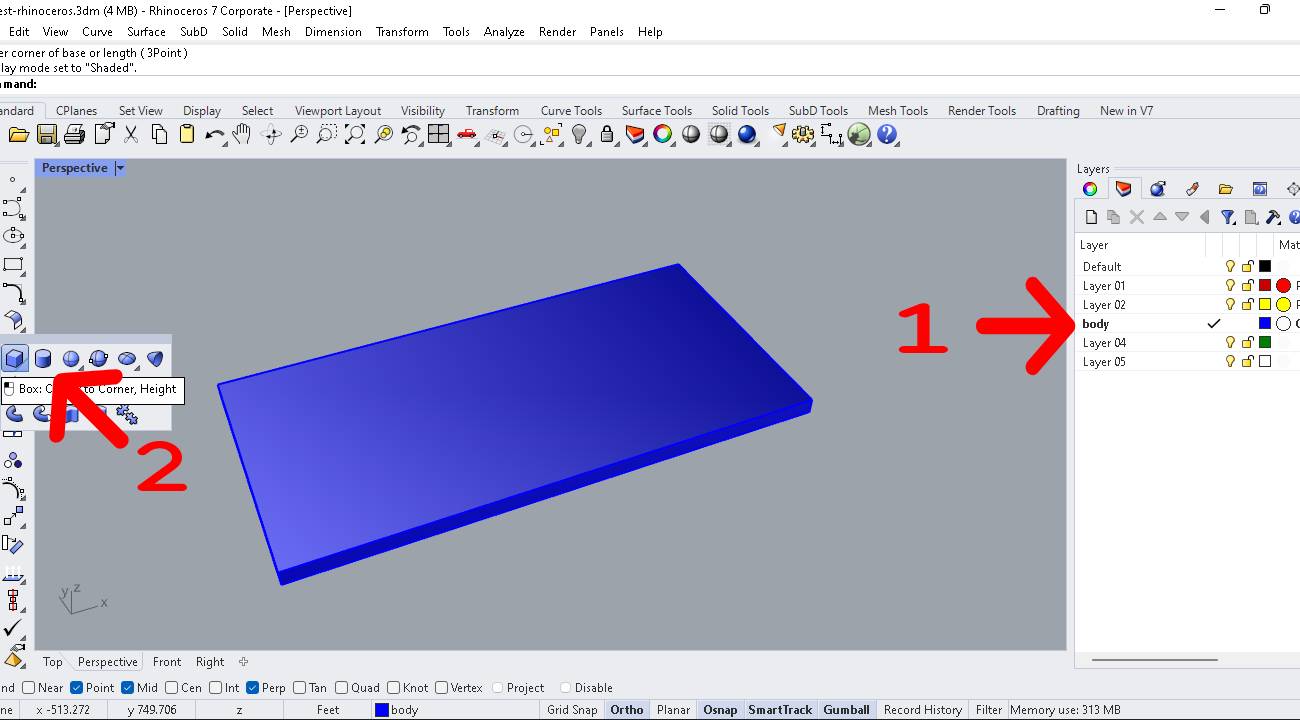
There are two ways to draw a rectangular piece in 3 dimensions, the first is using the box tool.
1. We select the layer on which the piece will be worked.
2. To draw the rectangular piece we select the Box tool and add in order the dimension on the X axis = 300, dimension on the Y axis = 150 and dimension on the Z axis = 9. The dimensions are in mm.
The second way to draw a 3D object is to start from a 2D object using the Extrude closed planar curve tool to convert it into a 3D object.
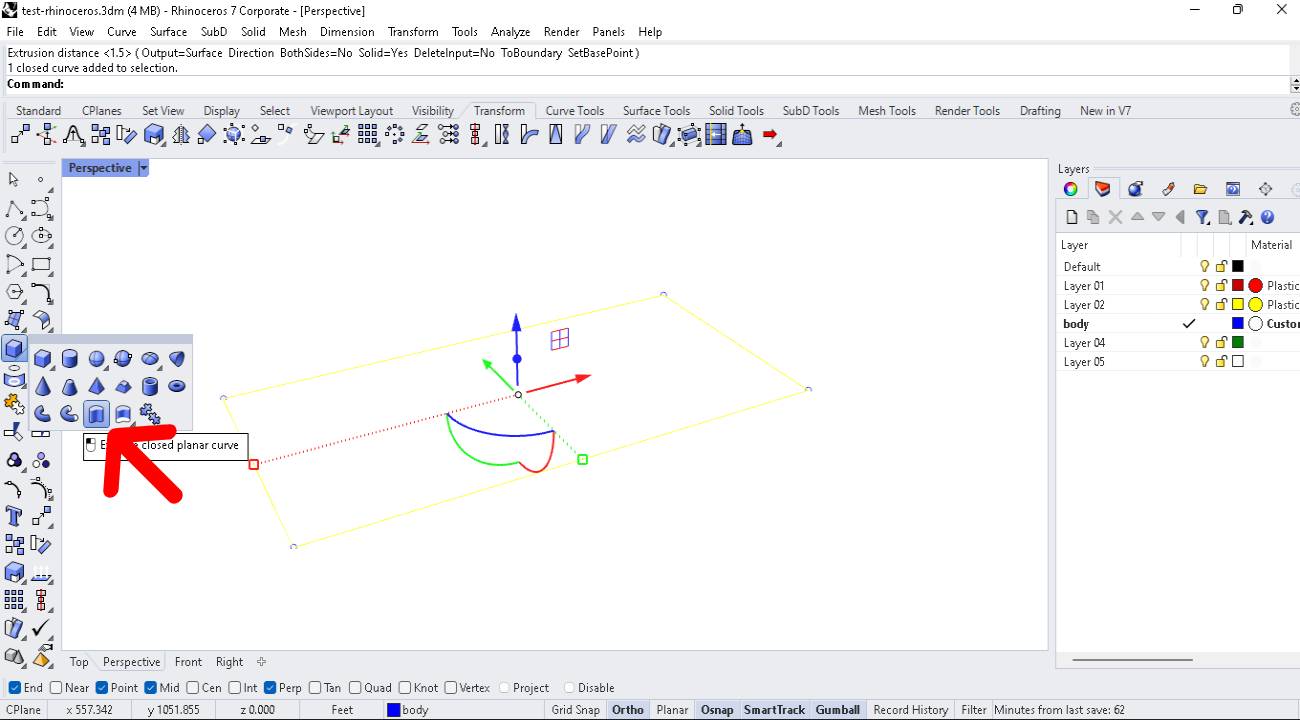
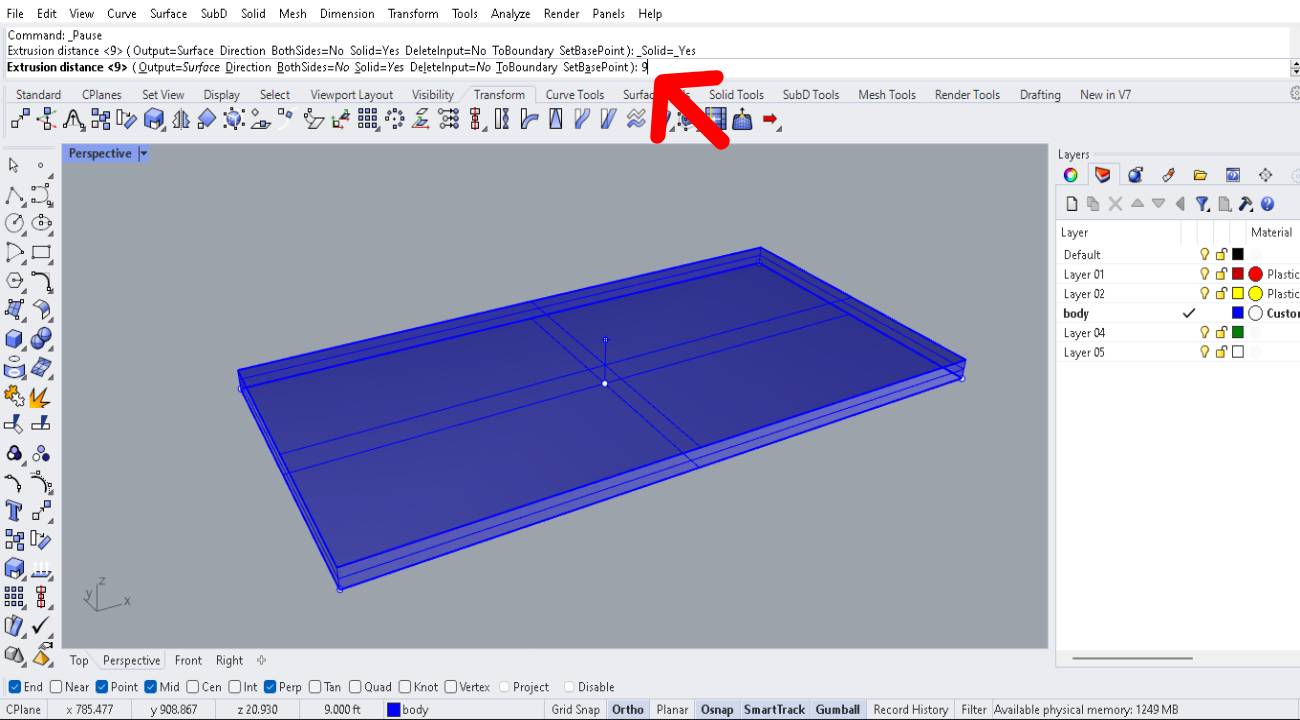
After selecting the 2D object, we select the extrude tool and set the thickness of the part in this case 9.00 mm.
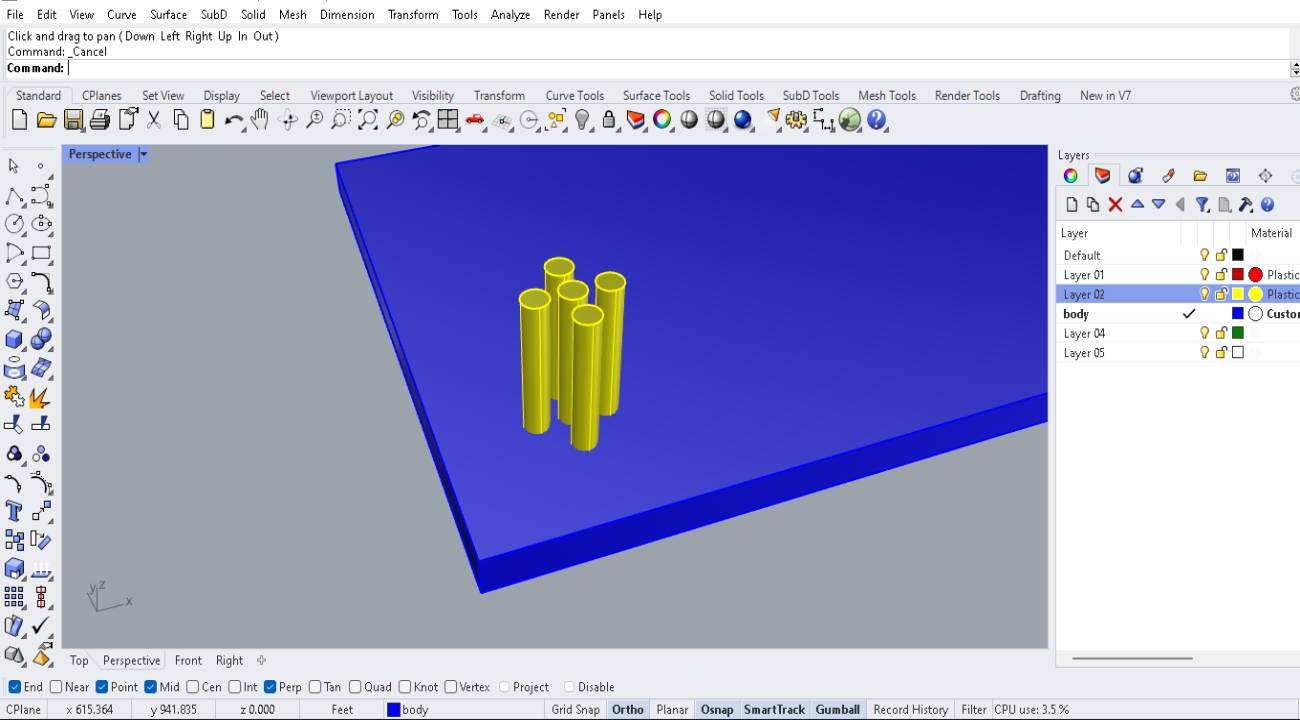
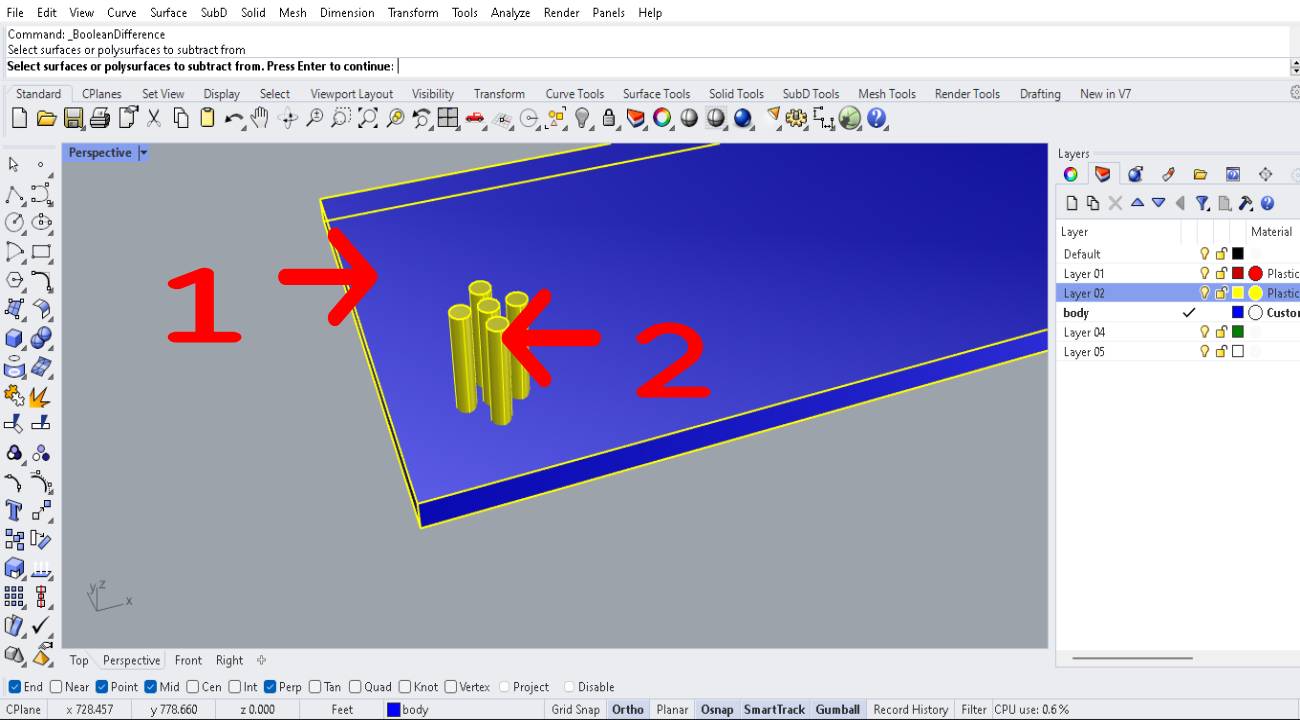
To make the perforations we must first draw cylinders and then use the boolean difference tool.
We select the boolean difference tool.
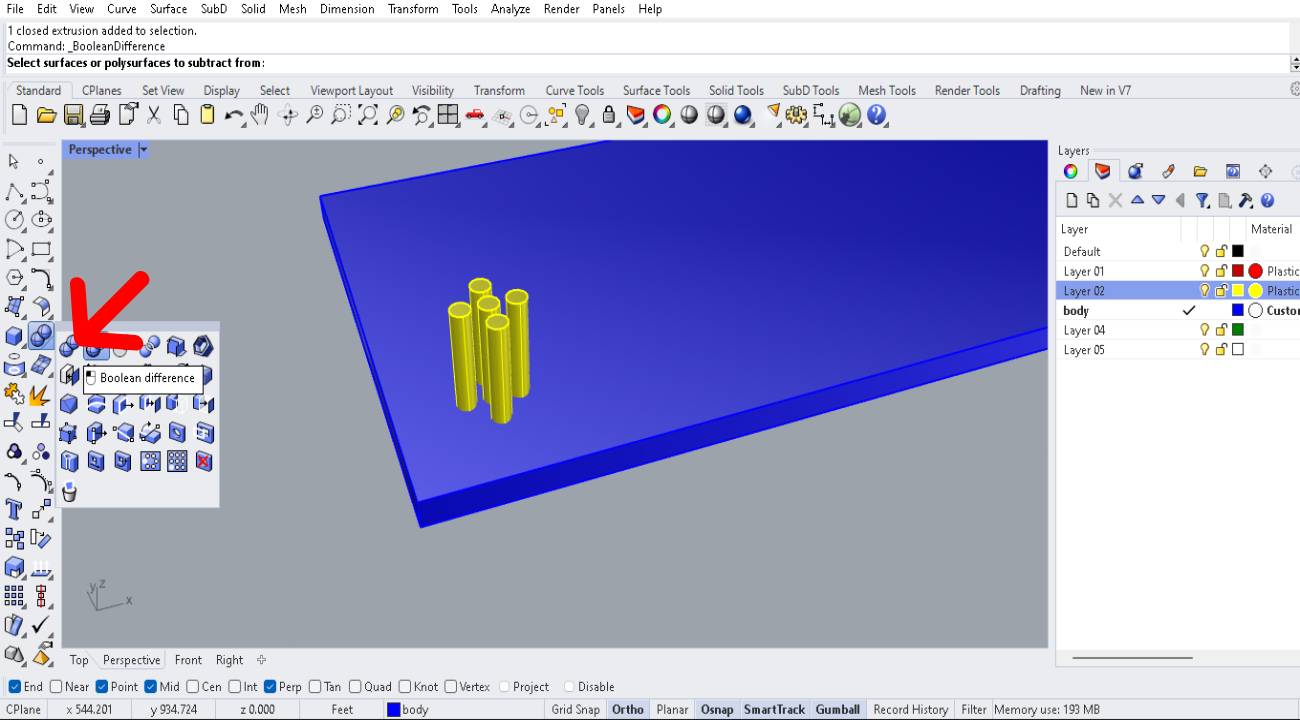
1. We select the object from which we are going to subtract.
2. We select the cylinders and accept.
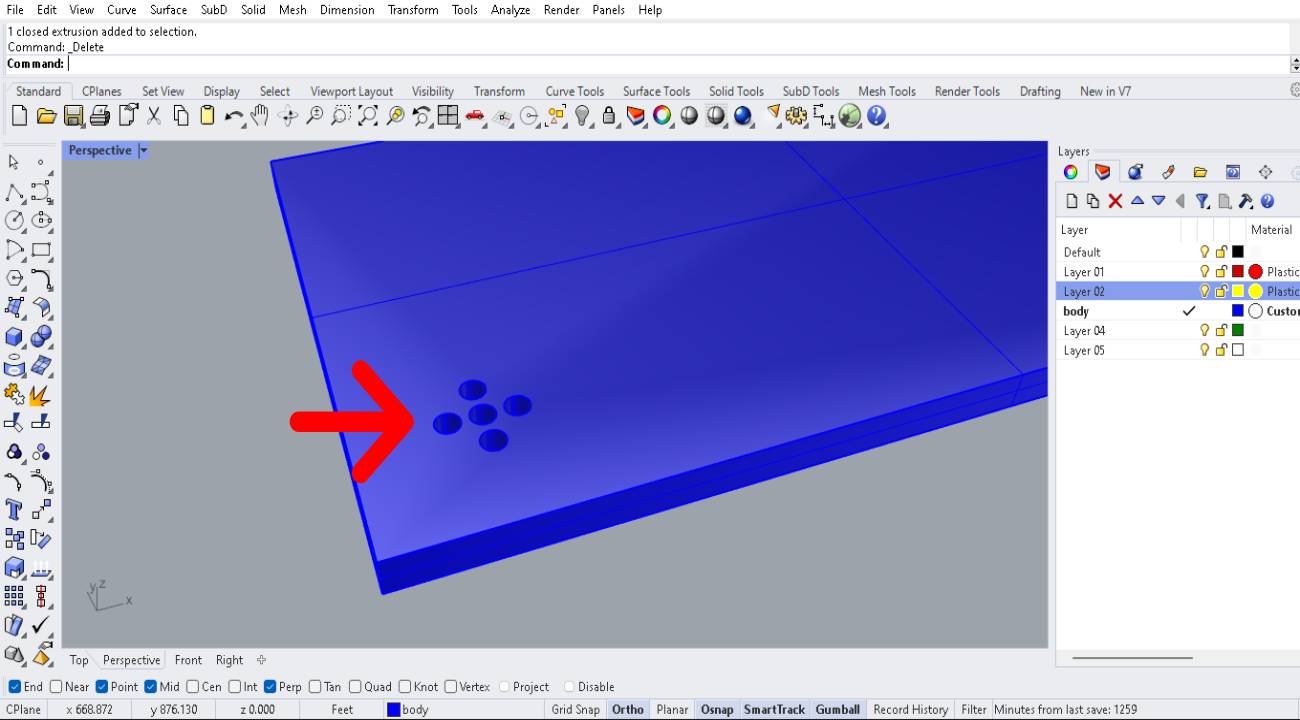
Result of the boolean difference operation.
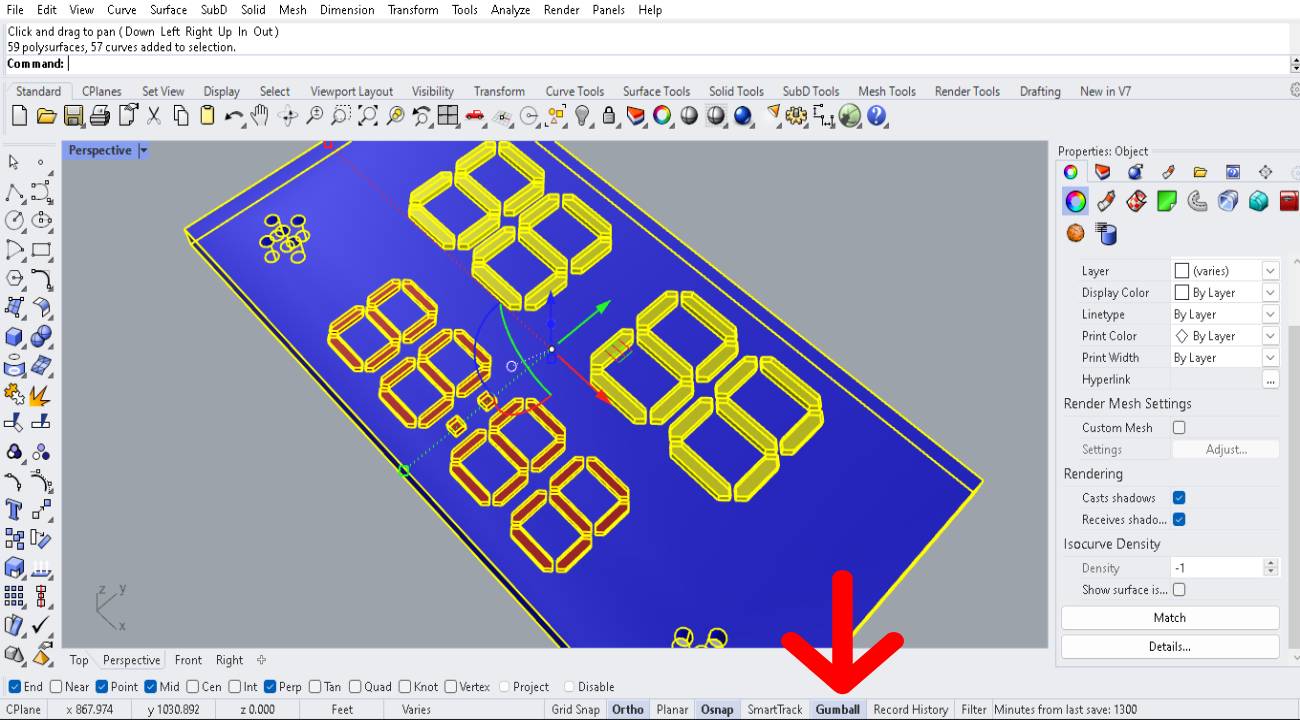
To be able to rotate, move, scale and copy easily without using commands we must activate the widget called Gumball.
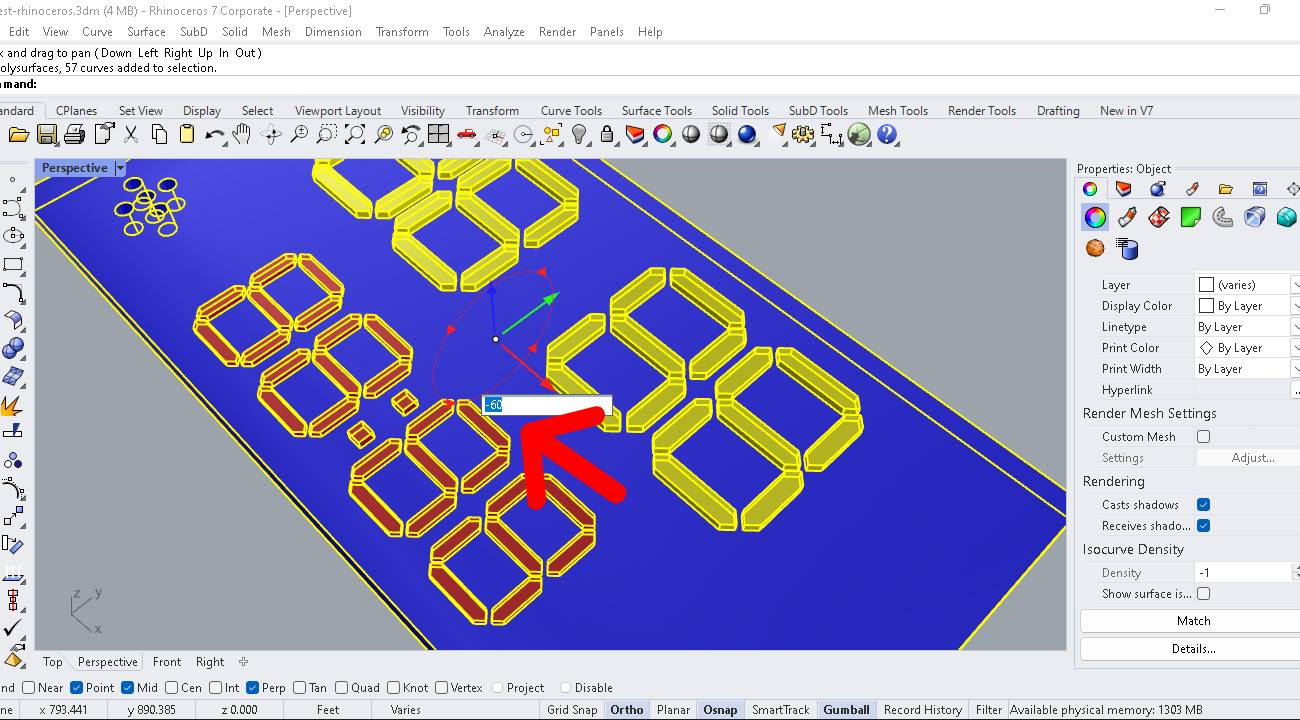
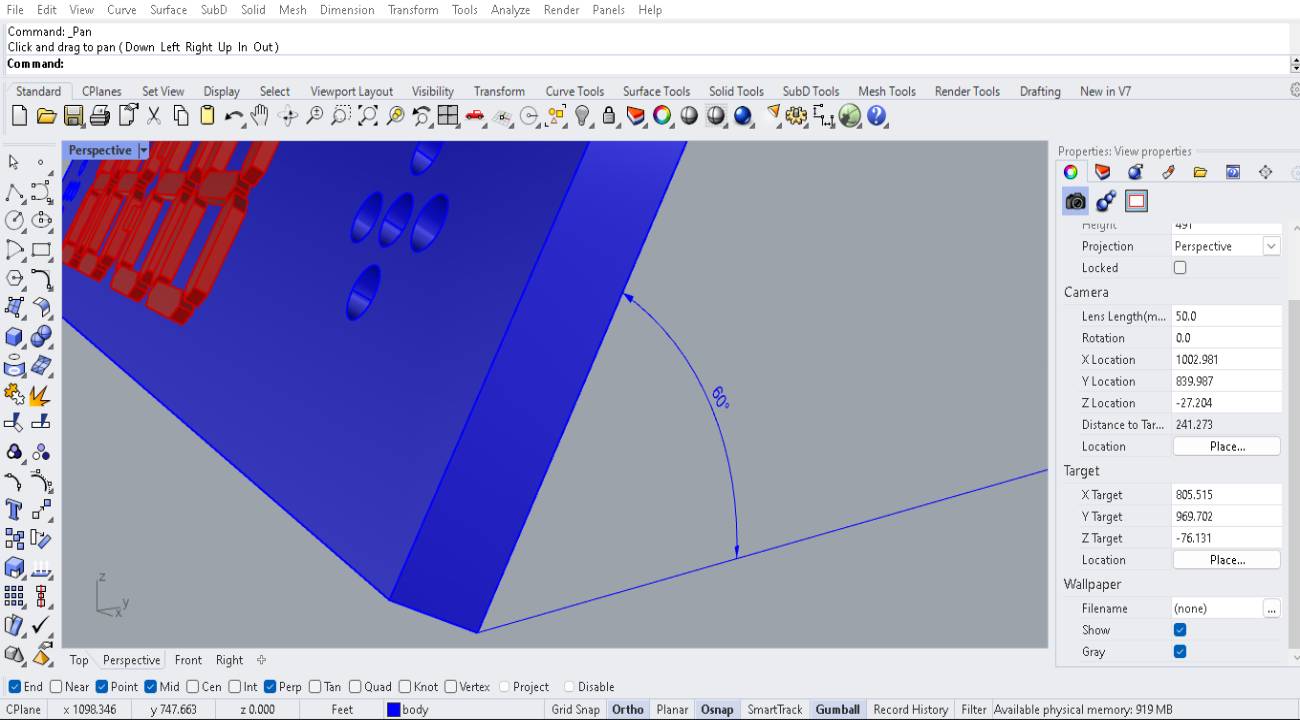
In Gumball we position ourselves on the axis we want to rotate and write the angle we want to rotate, in this example it will be 60°.
Result of rotating the piece 60° using the Gumball.
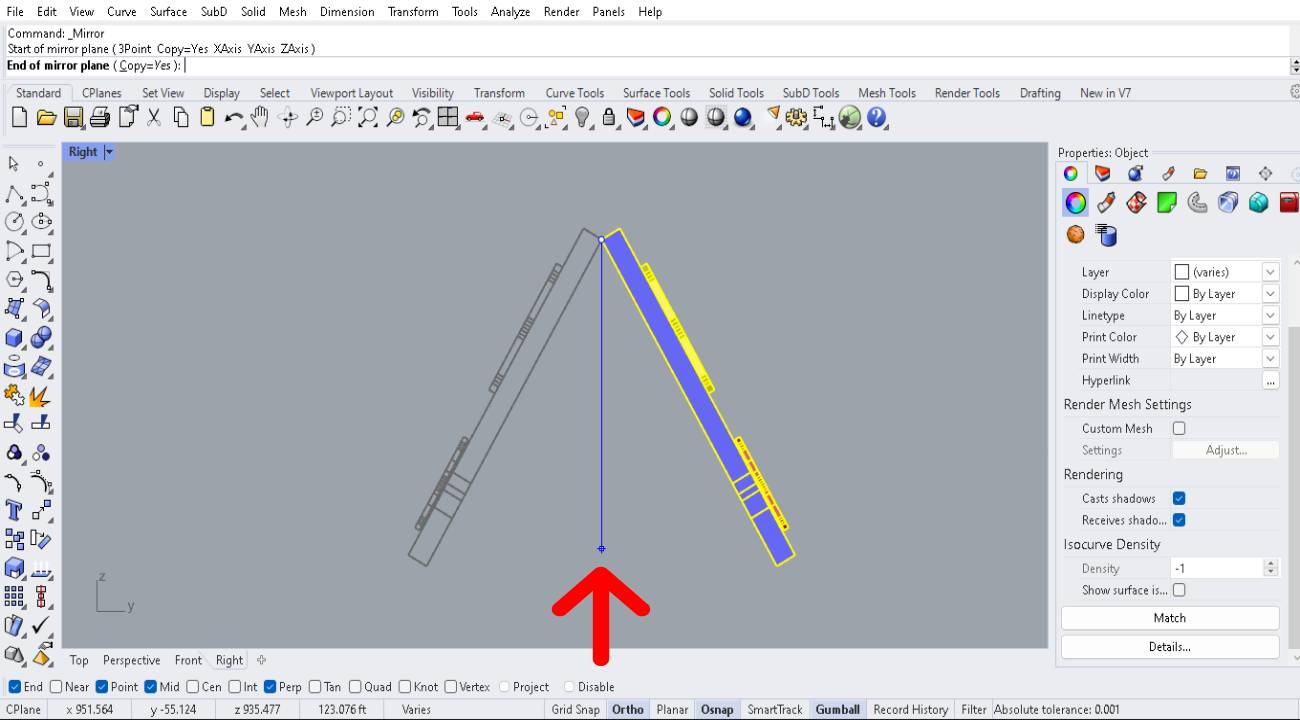
Now we use the mirror tool to duplicate the piece horizontally
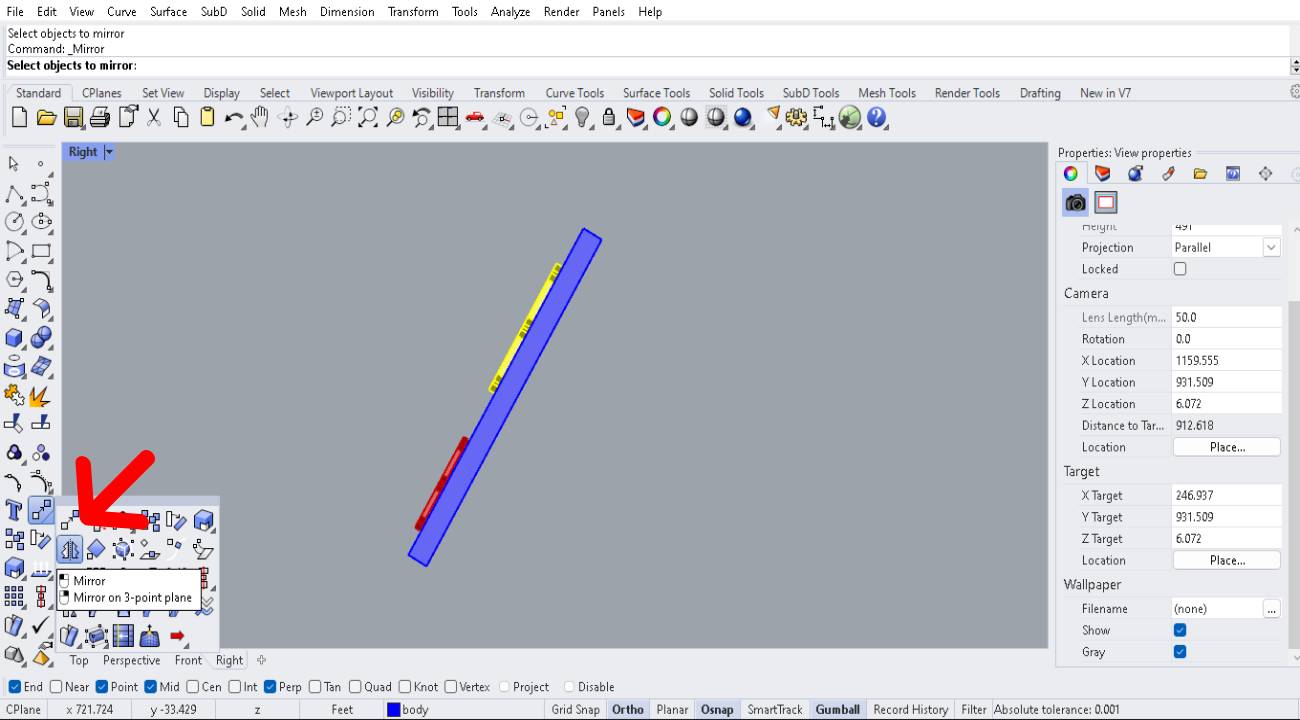
We select the mirror tool, then select the object at a point and move the mouse vertically to make a mirror copy on the horizontal axis.
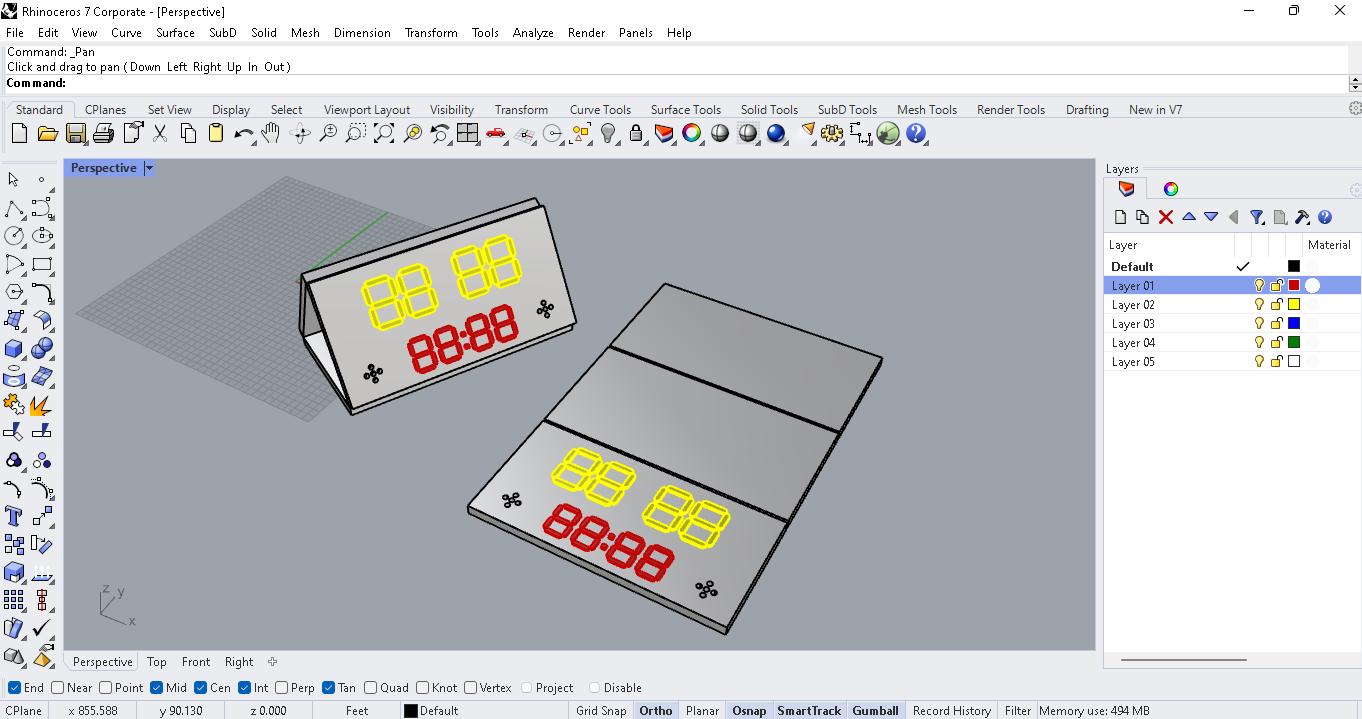
3D model test using vectors and extrude tool
Working in layers
3D render test view
View top
View Perspective
View Front
View Right

3D model animation test
Use the set up 360 degree turntable animation
Comparative chart
| Blender | Rhinoceros |
|---|---|
| Blender is a free and open-source 3D computer graphics software | It is a computer-aided design software for 3D modeling based on NURBS, has cost |
| The modeling is simple | The modeling has some complexity |
| It's interface is not user-friendly | It's interface is user friendly |
| Allows you to make complex animations | Animations are limited |
Here we can find and download the design original files