Interface and Application Programming
Week 14
Group assignment:
- Compare as many tool options as possible
Hans Moncca Contribution
COMPARING MANY TOOL OPTIONS
PYTHON + TKINTER
For the group assignment we divided ourselves individually to investigate 1 tool that Neil recommended to us in class and other tools that our instructors mentioned to us after class. Therefore, in my case I chose PYTHON to learn much more about this tool because I always wanted to discover something more. For this occasion I will focus on TKINTER which is the PYTHON GUI toolkit. Here is my process of getting to know both tools.
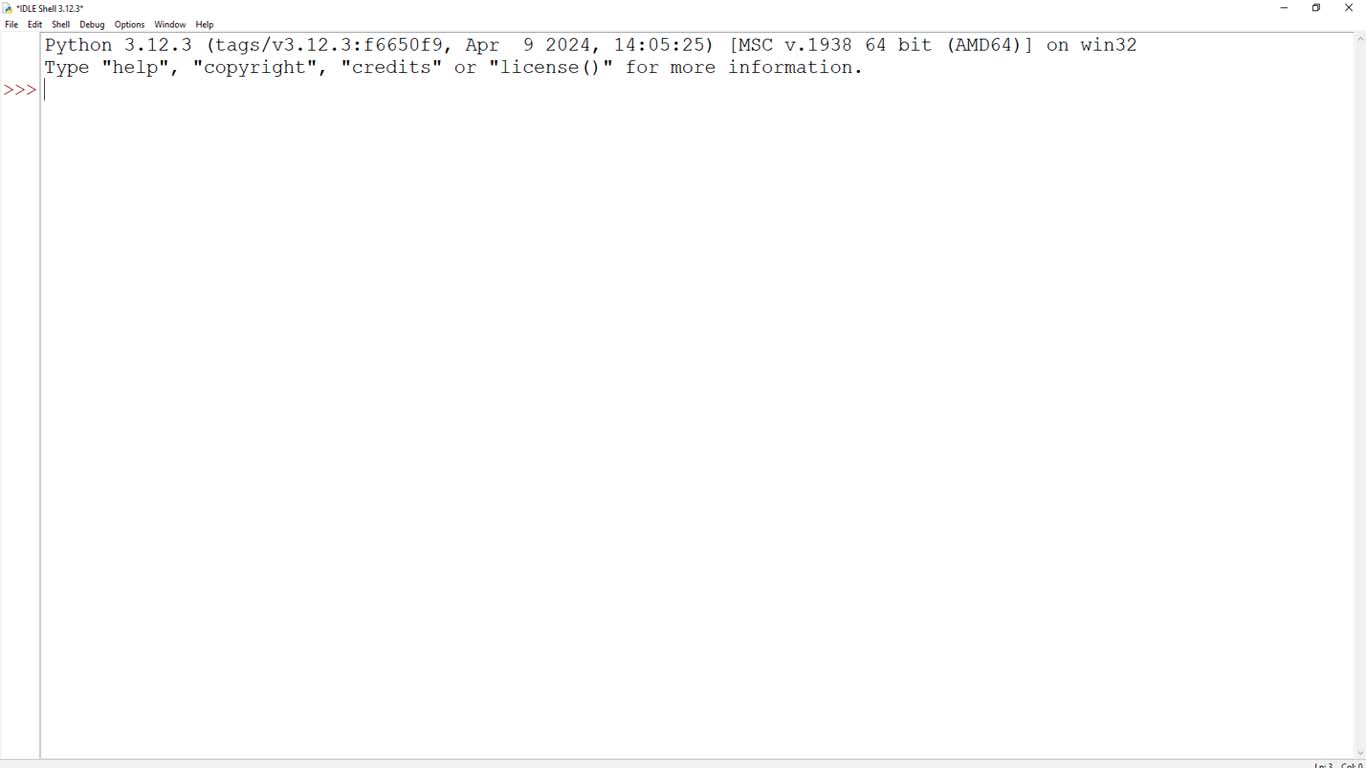
To start using TKINTER, which is the most used package for creating graphical interfaces in Python. It is an object-oriented layer based on Tcl and TK. We have to open a Python IDLE.
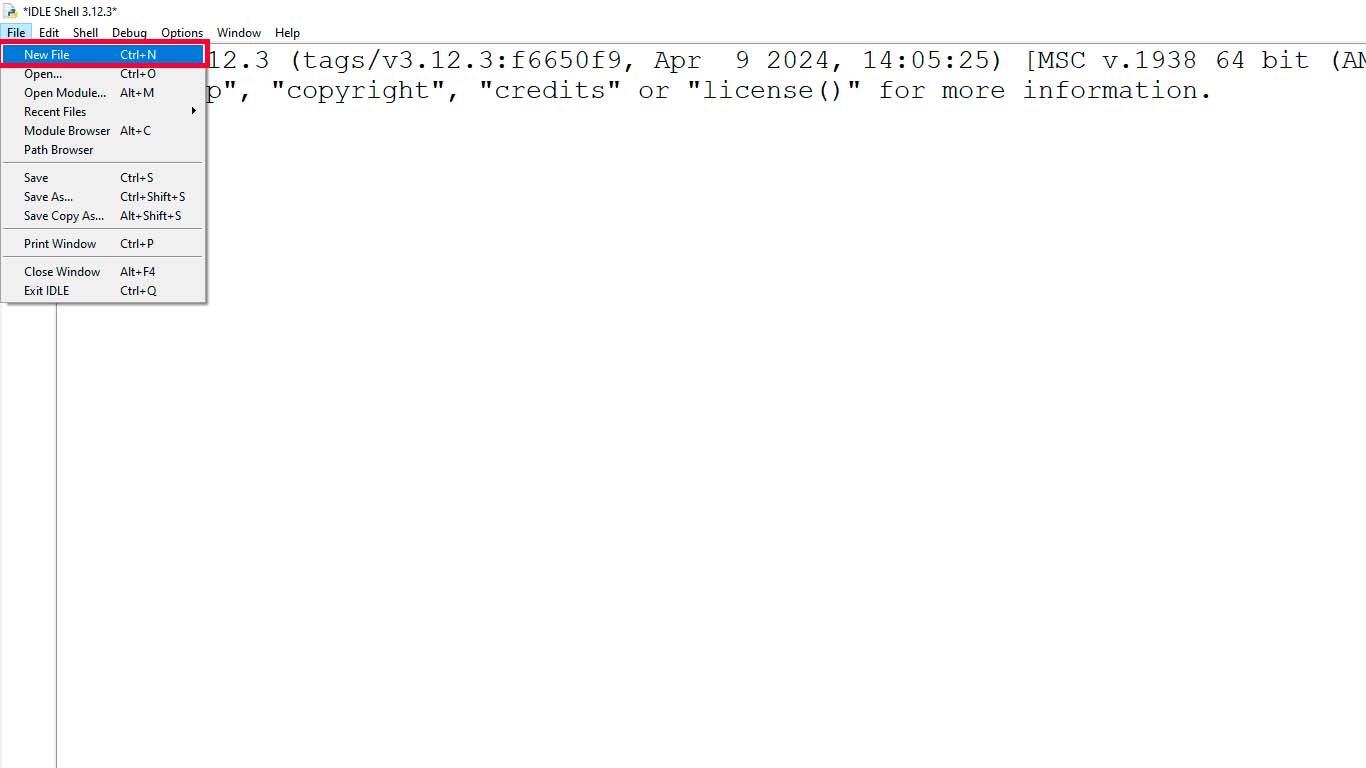
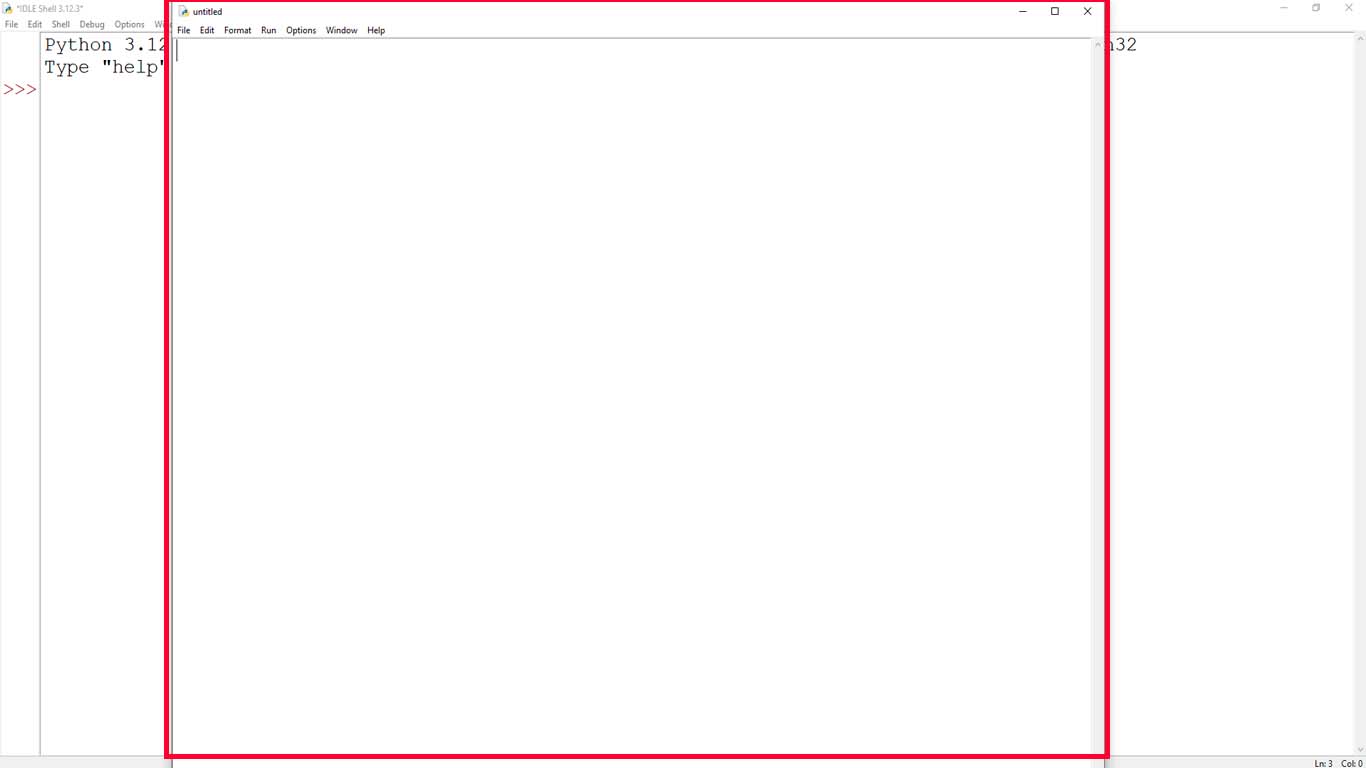
We open a new document at the top of file. And a new screen will open, here we will begin to design our test interface.
After completing the steps, we must import the TKINTER module. You can do it with the following line of code:
import tkinter as tk
Here, we have imported the tkinter module and assigned it to the tk variable. This is done to access the classes and functions provided by Tkinter more conveniently.
Once you've imported Tkinter, you can create a main window or any other widget you want to use. Here is a basic example that creates a main window:
                        import tkinter as tk

                        ventana = tk.Tk()
                        ventana.mainloop()
For this example, we will create a new main window with "tk()" and then write "mainloop()" to allow us to make the window respond to various user events.
Now we will add a title attribute for the window, so that it appears in the title bar. To rename a window in Tkinter, you can use the title attribute of the window instance. The title attribute is used to set the text displayed in the window title bar.
                        import tkinter as tk

                        ventana = tk.Tk()
                        ventana.title("Test Hans Tkinter")
                        ventana.mainloop()
After having all the codes mentioned above, we go to "run" the code in the RUN tab and choose RUN MODULE or simply by pressing F5 on the keyboard.
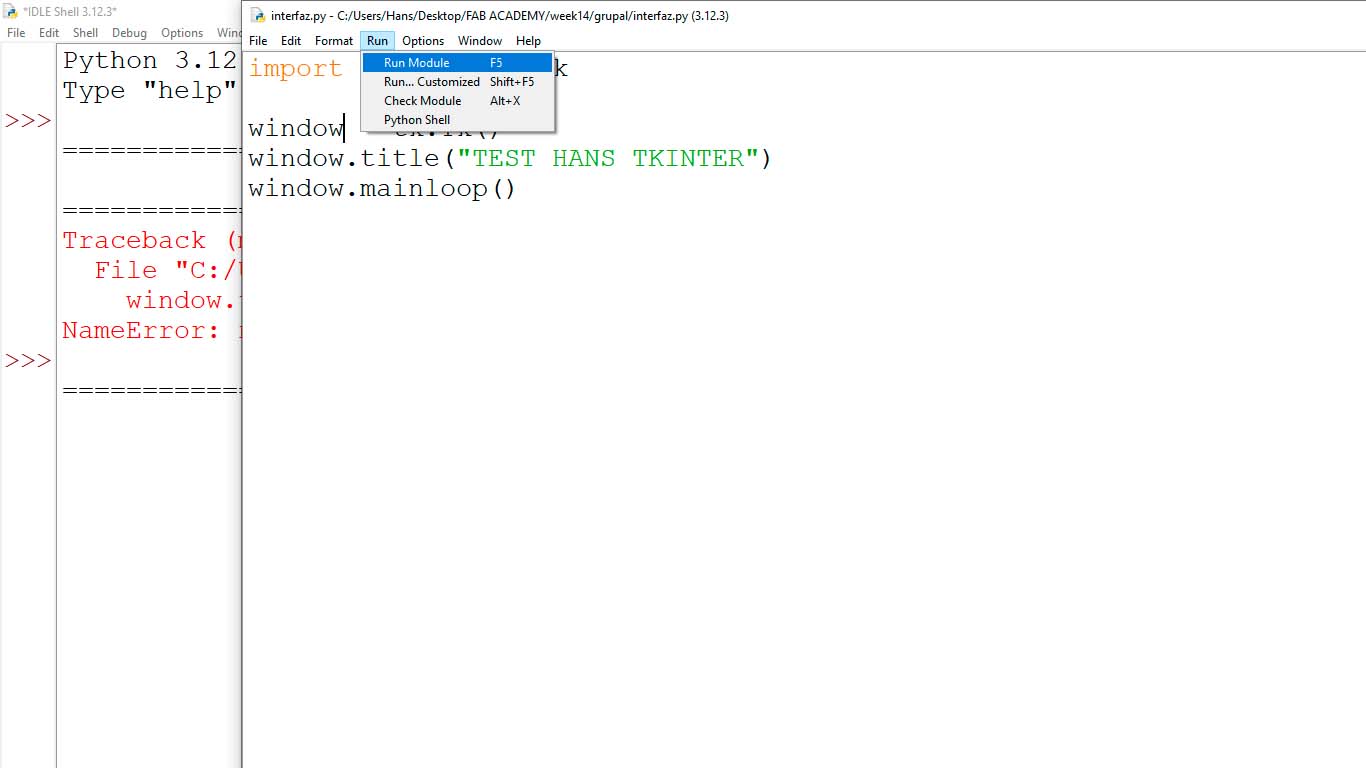
A window will appear where we can see the interface that we are designing and increasing libraries and witgets to achieve our design that we want to apply.

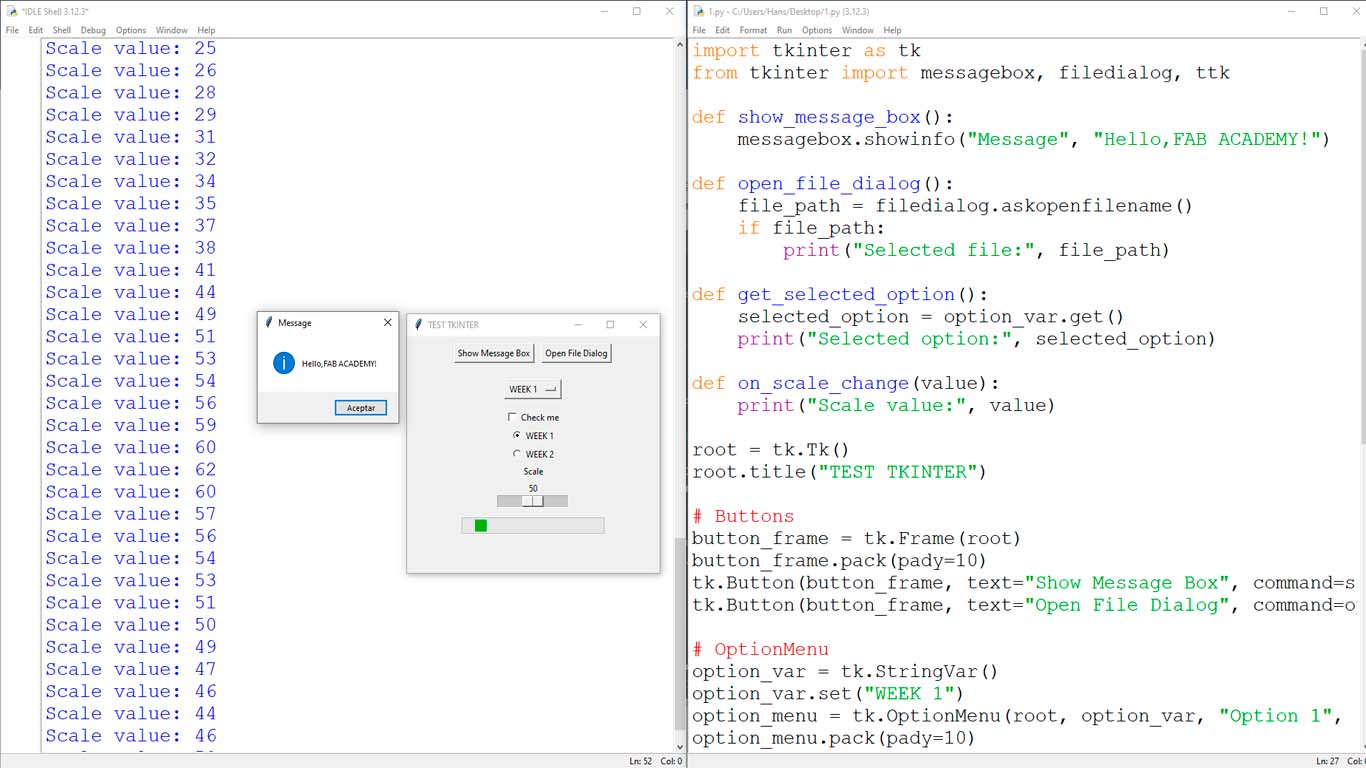
Finally, following some tutorials that I found on the web I was able to use almost all the components of the TKINTER library. Such as message buttons, options menu, list to choose a certain type and graphics. As we can see, they are basic designs that are what we can do and tools that we can use to design our interfaces with TKINTER.
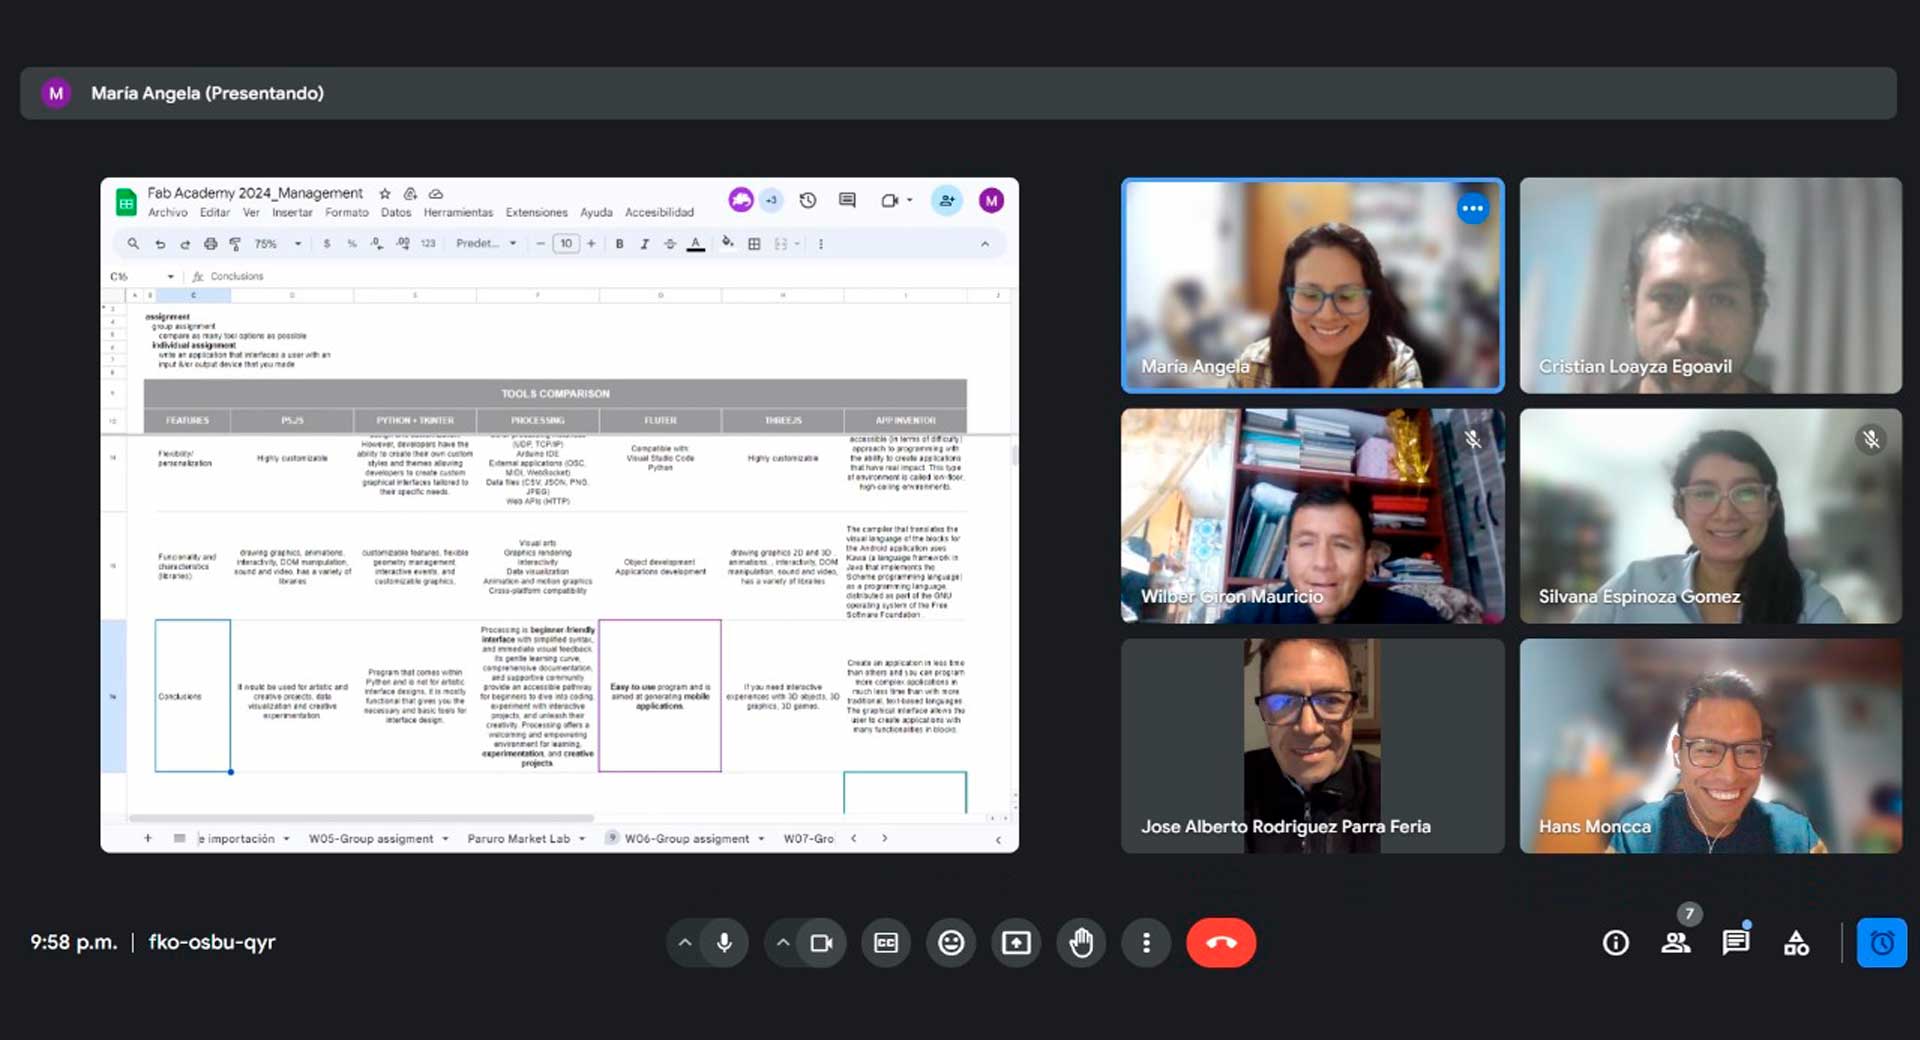
COMPARING MANY TOOL OPTIONS
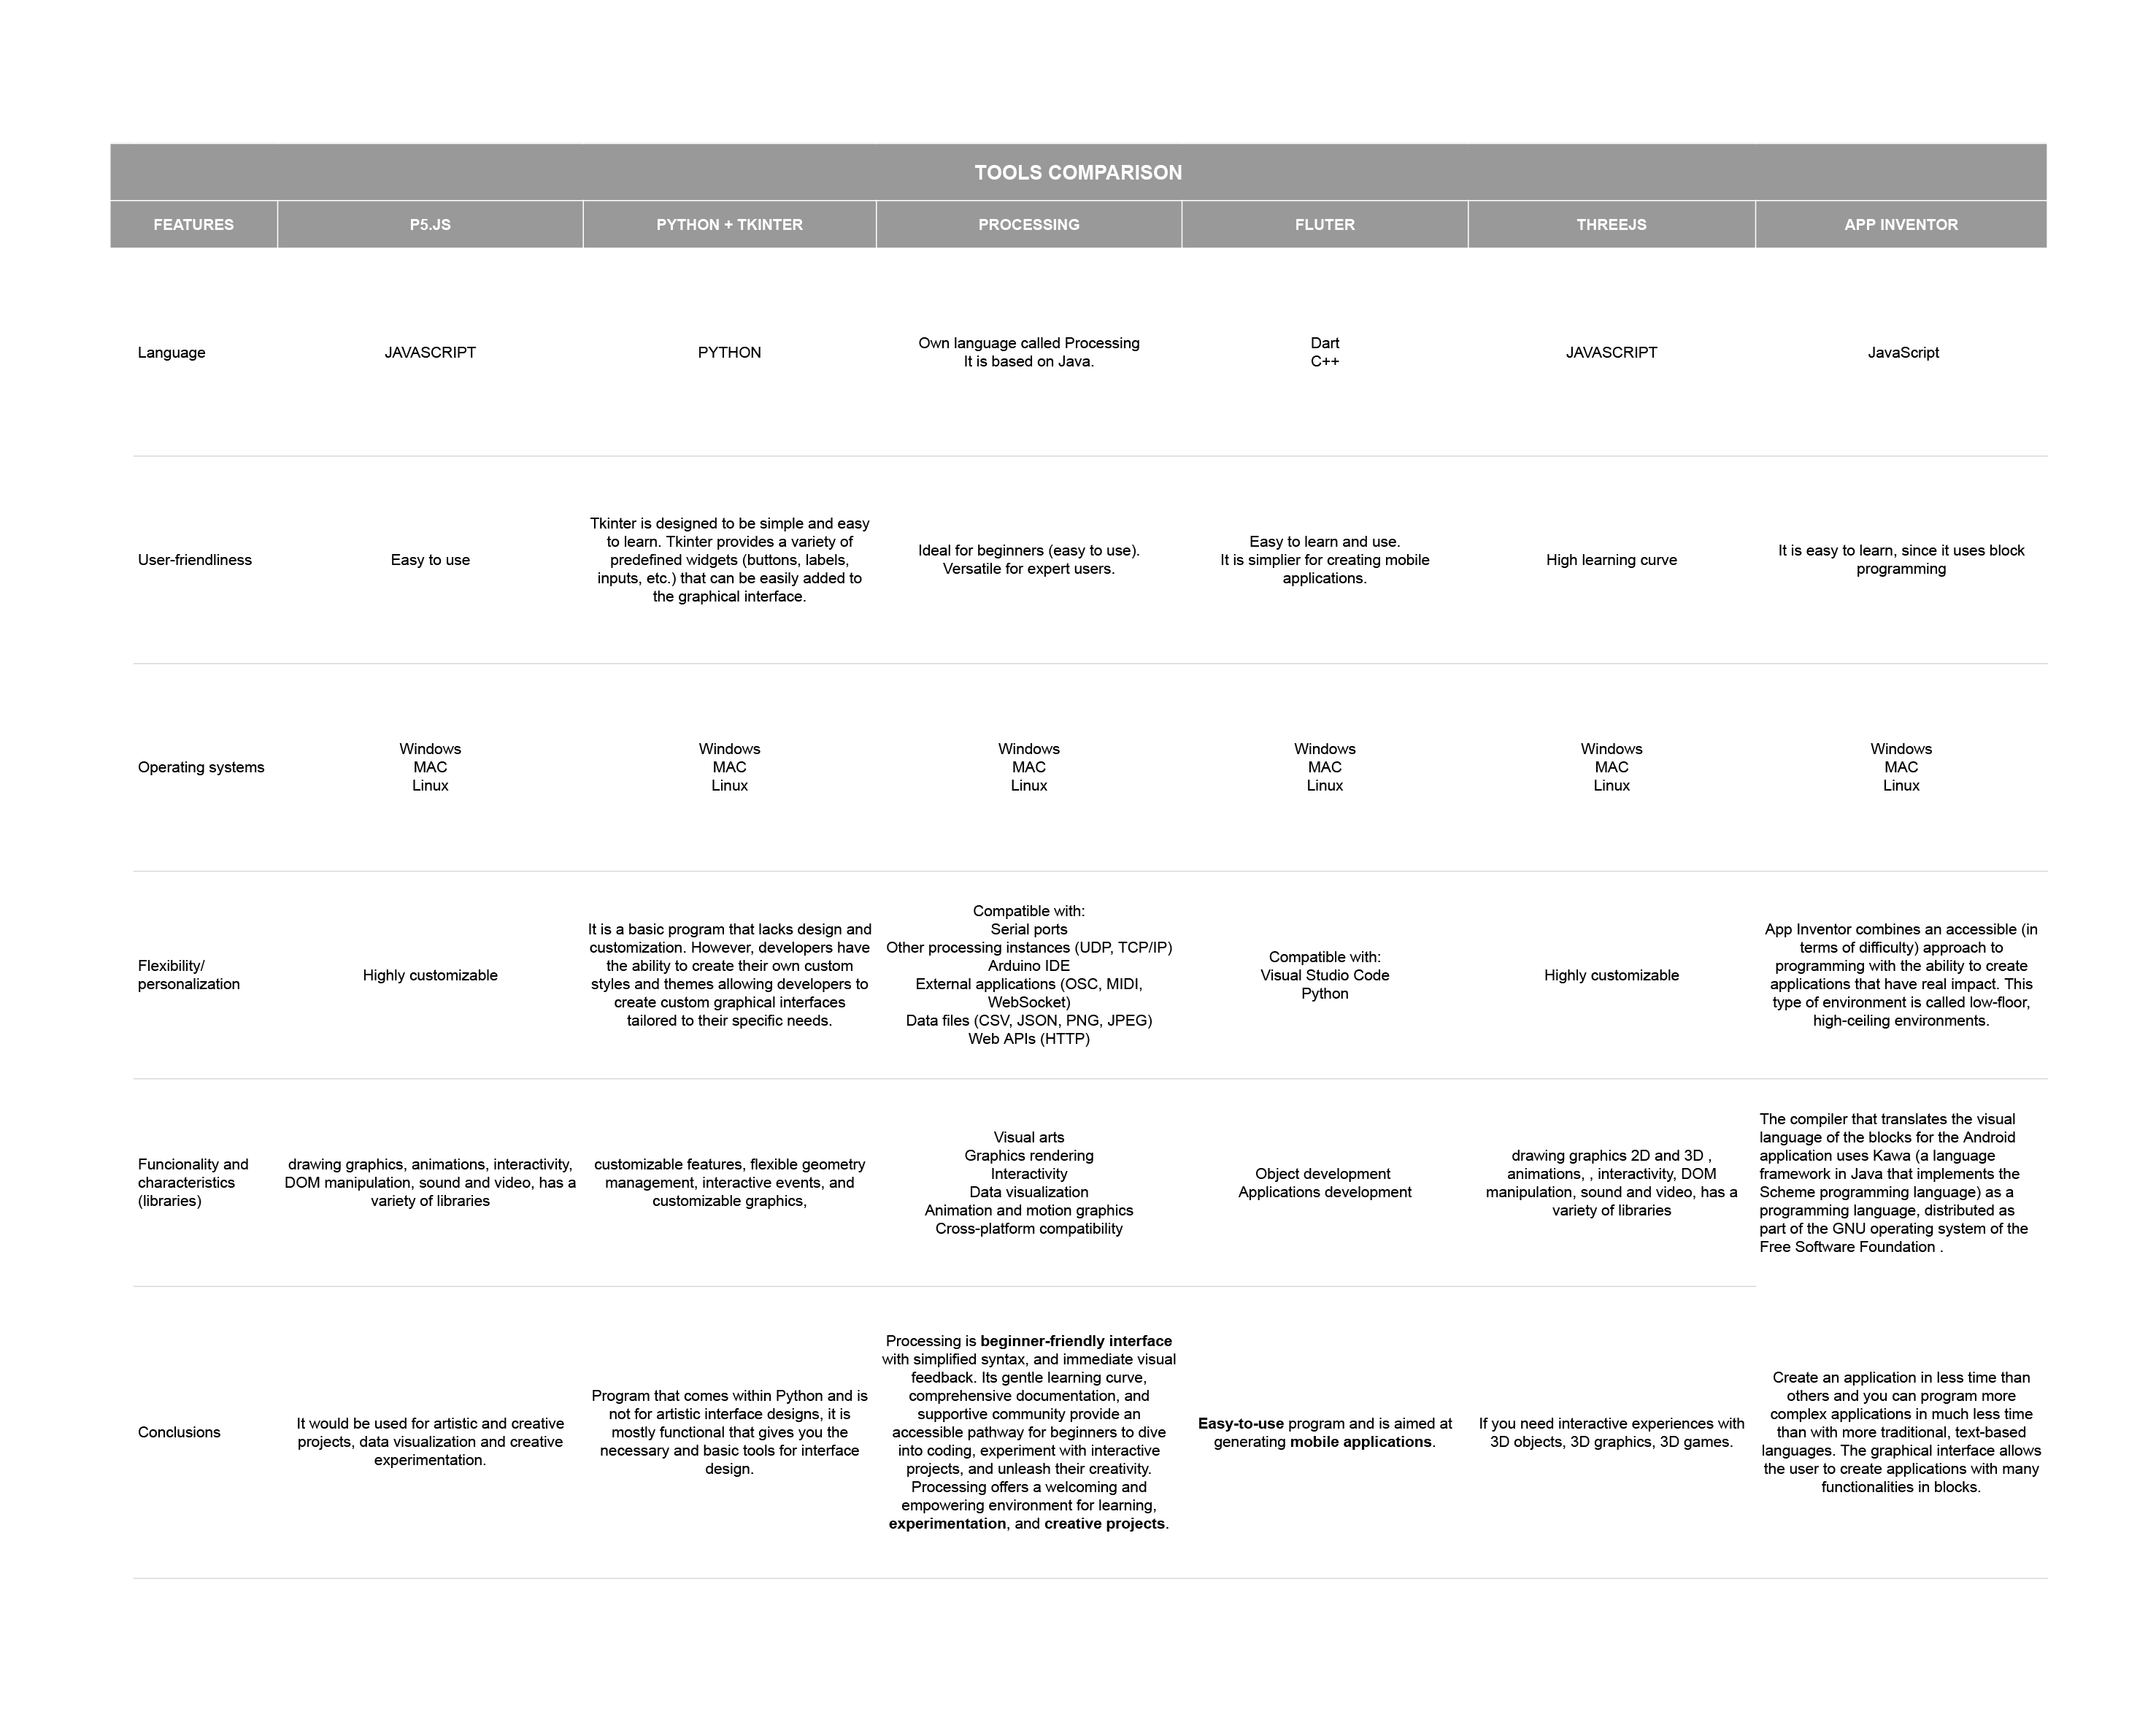
As a group, we worked on this comparative chart of P5.JS, Python, Processing, Fluter, Three.jsm and Inventor softwares on the following features: language, user-friendliness, operating systems, flexibility/personalization and functionality and characteristics.
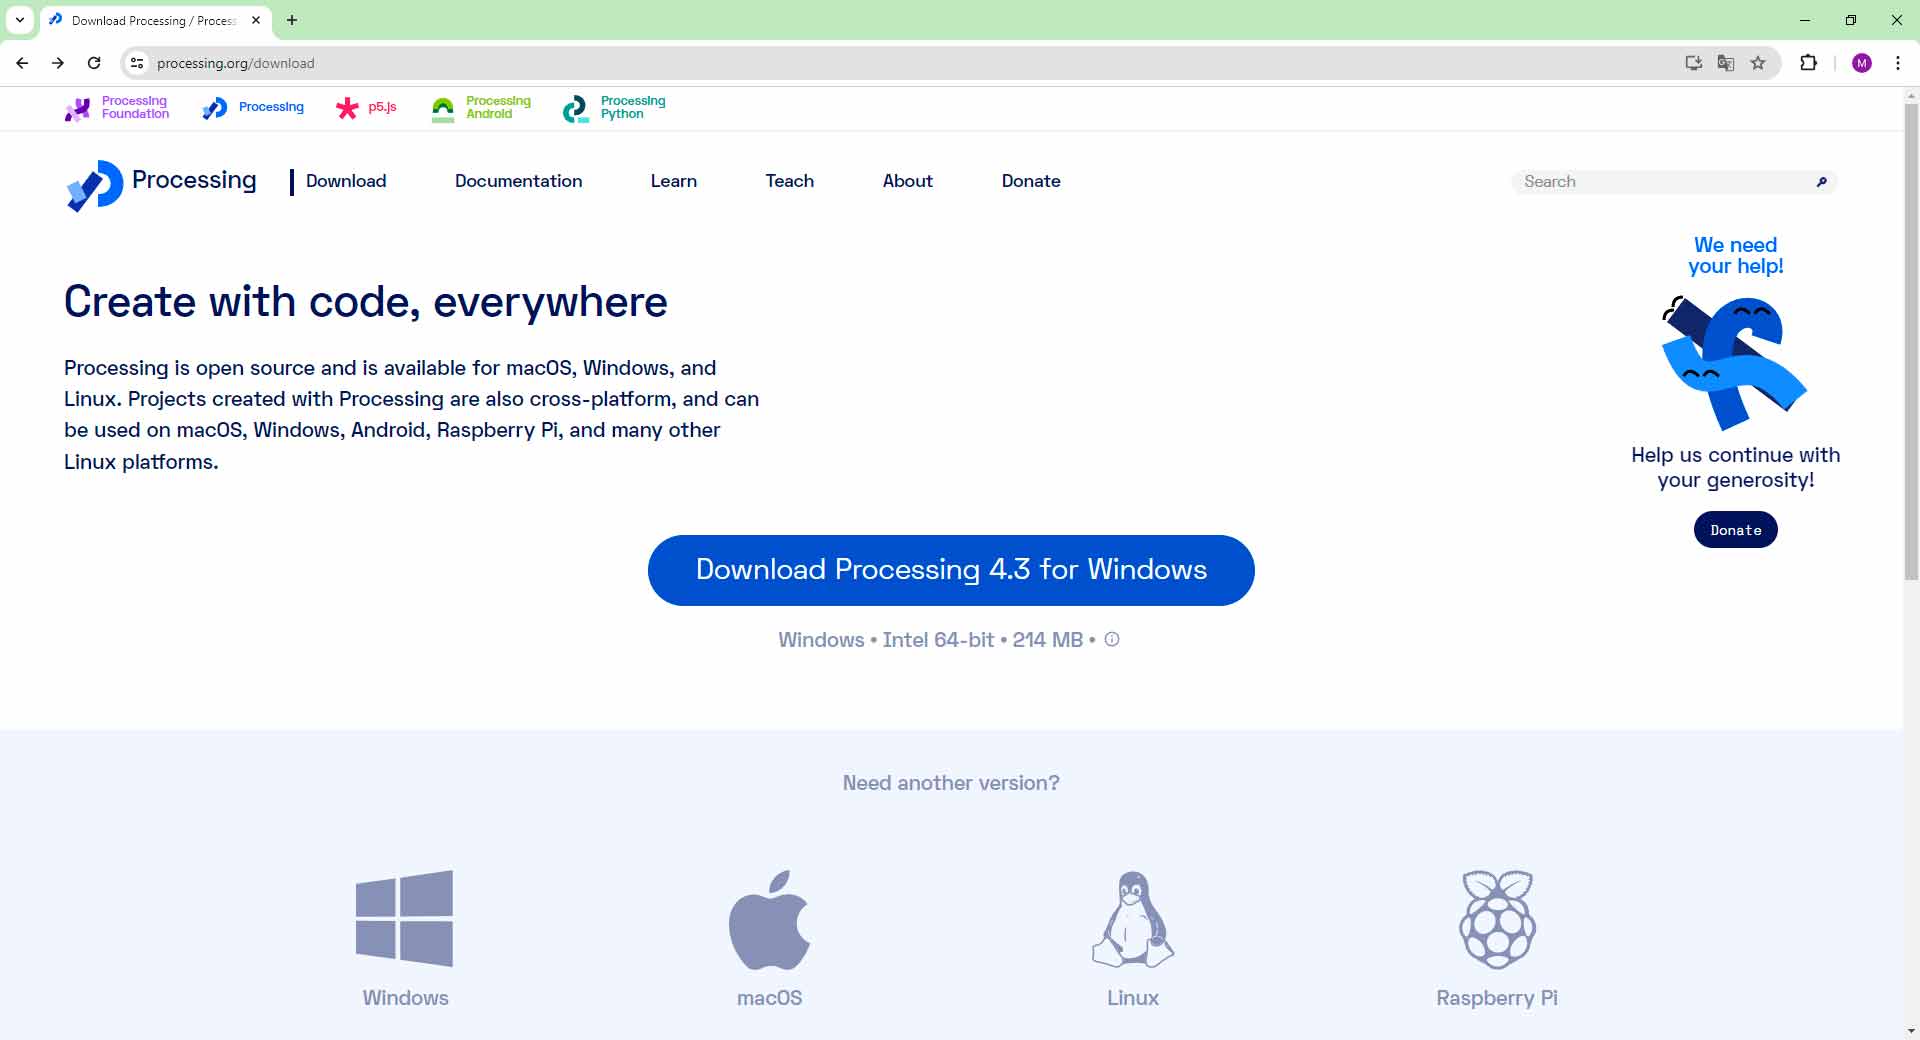
PROCESSING
For this group assignment, I researched Processing and created a tutorial. This tutorial also incorporates concepts taught by our tutor, Michael Hurtado, during our class sessions.
Visualization Controlled by Input's Data in Serial Port
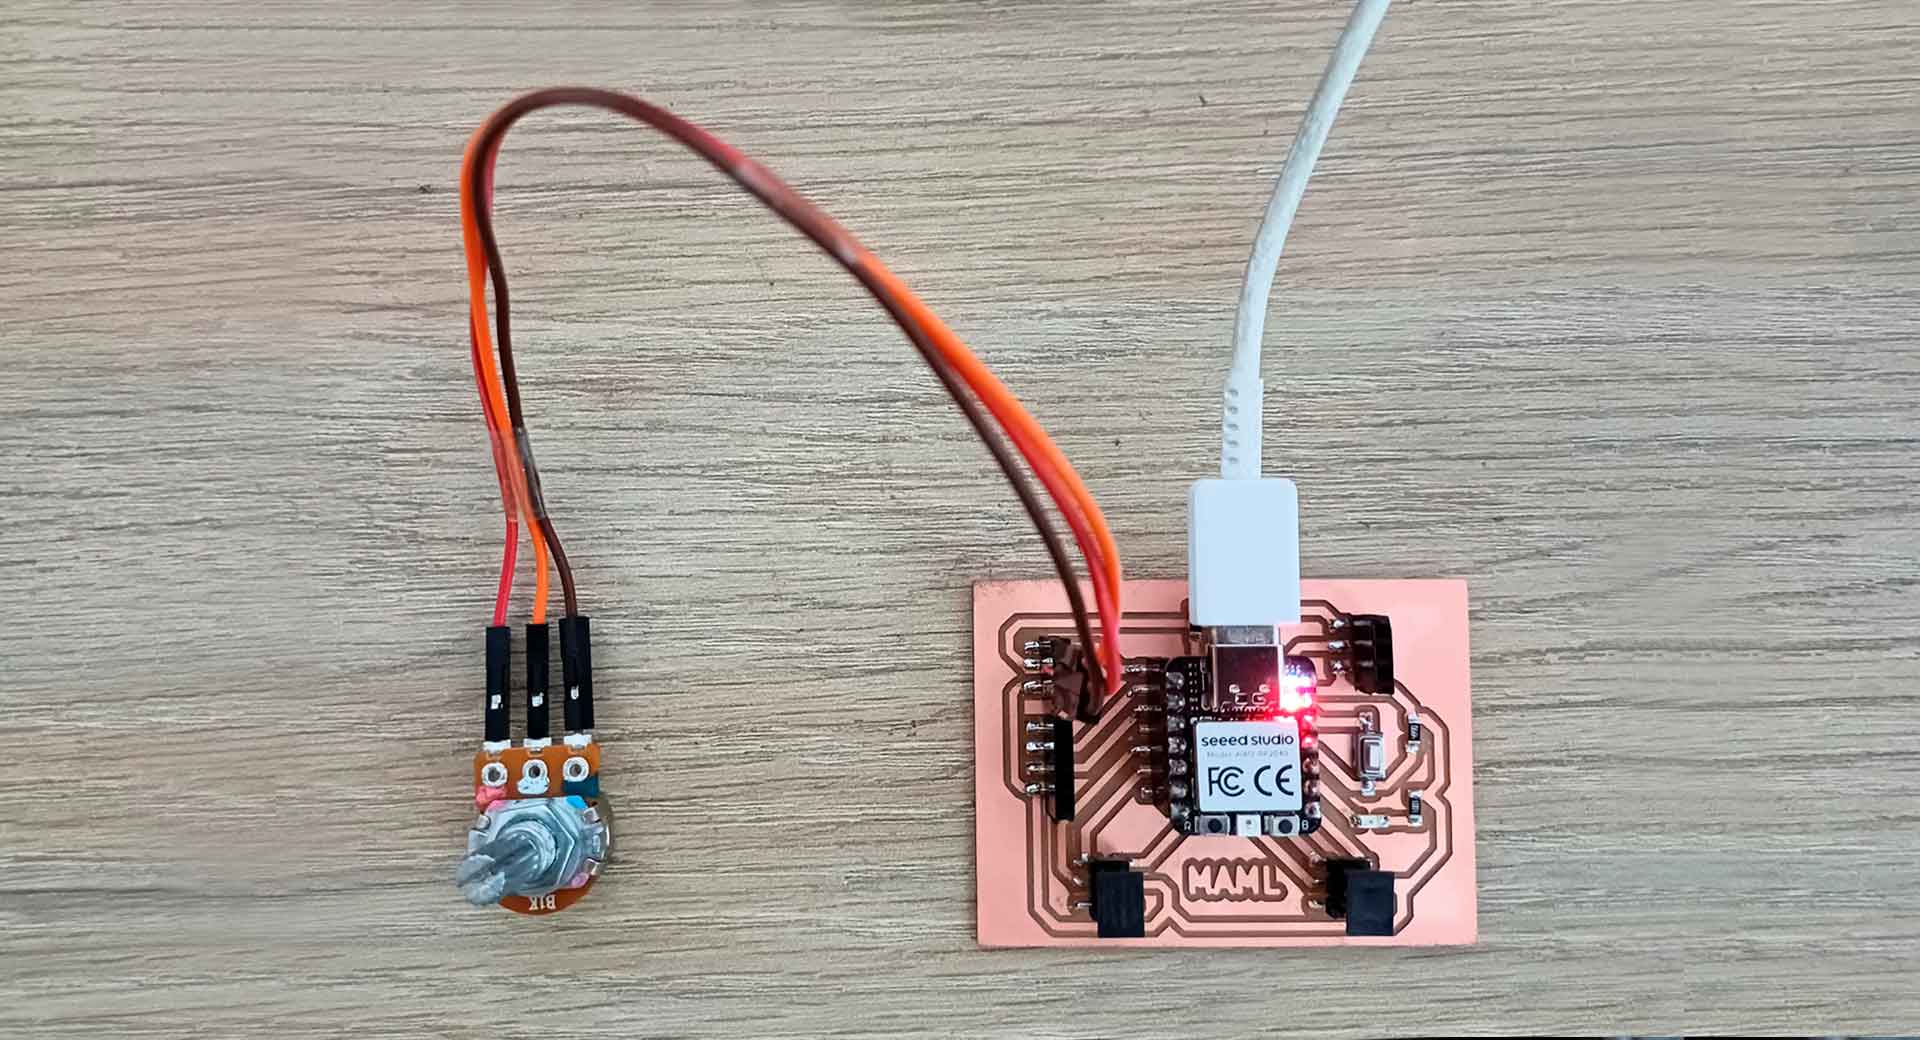
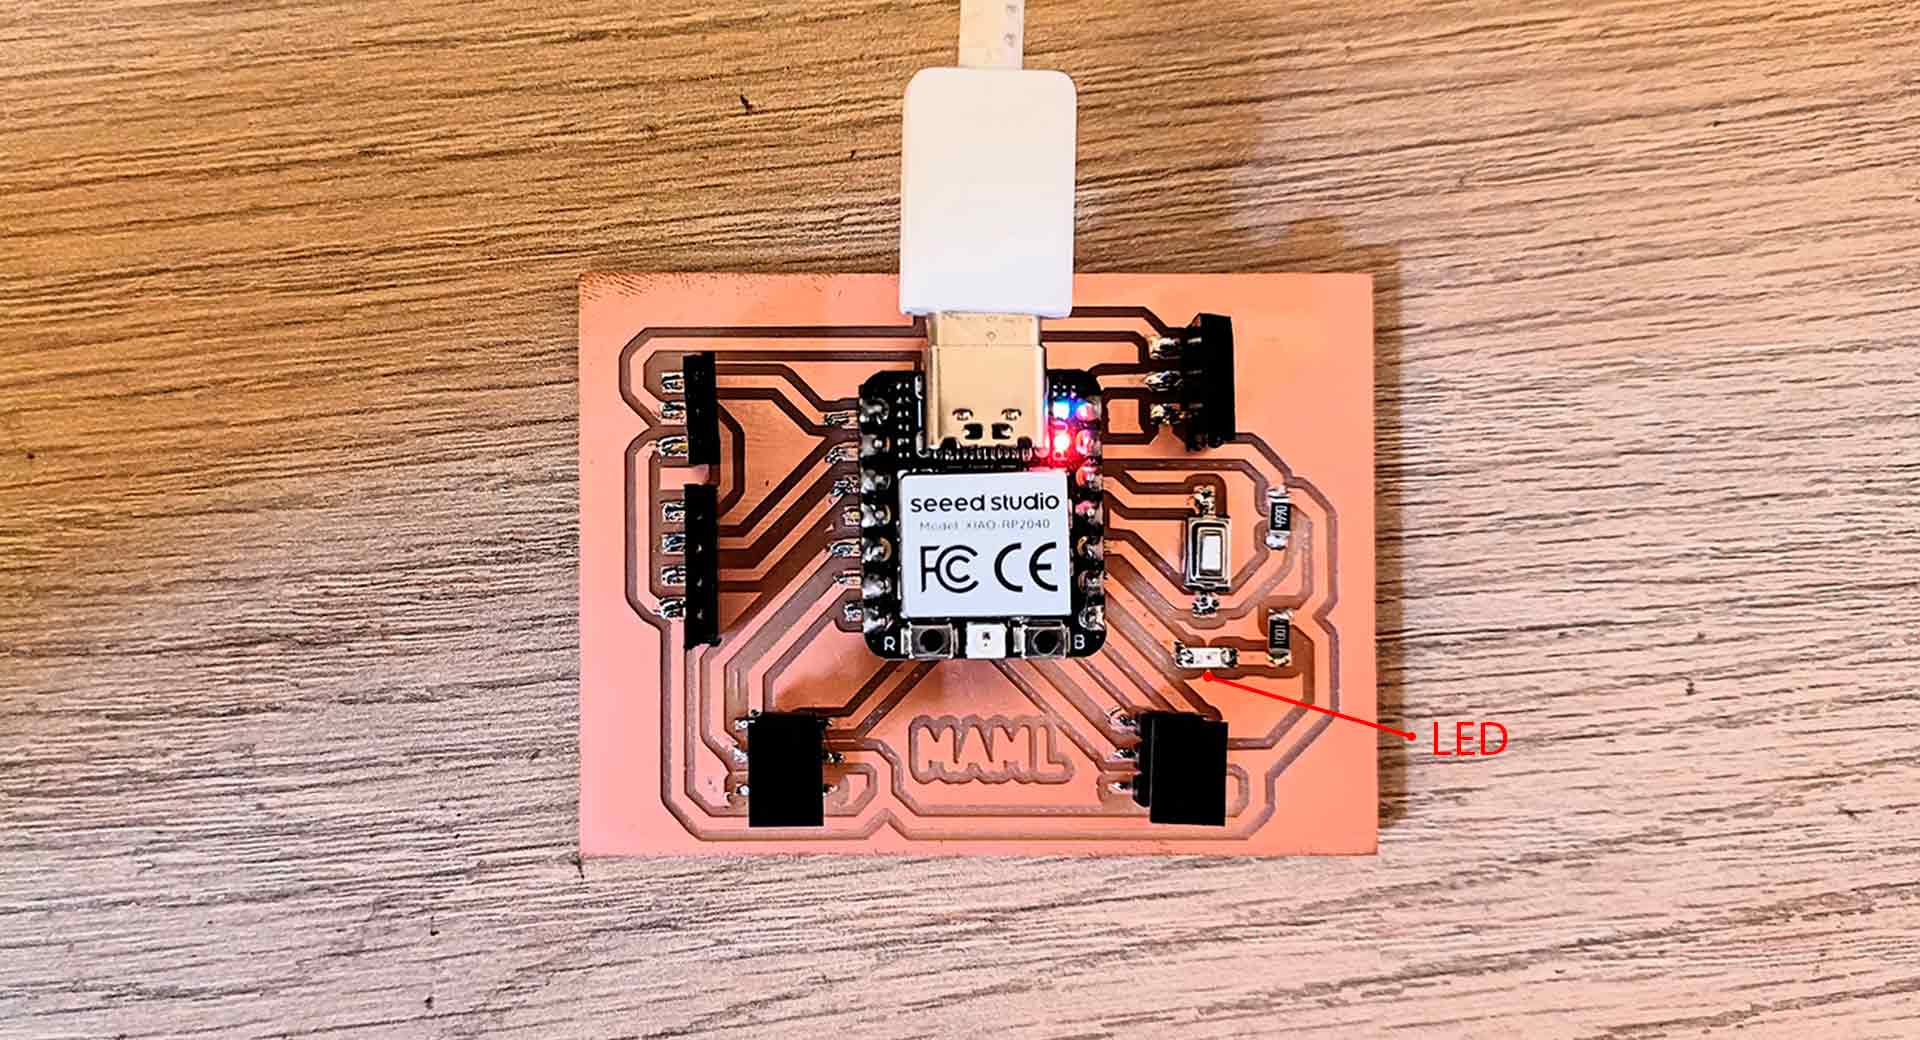
Next, you will need a device that can send data over a serial port. In this tutorial, I am utilizing the PCB I designed in week 13, connected to a XIAO RP2040. As an input I have a potentiometer. Connect your hardware to your computer via USB. Then, write the code that sends data over the serial port. I used this code in Arduino IDE:
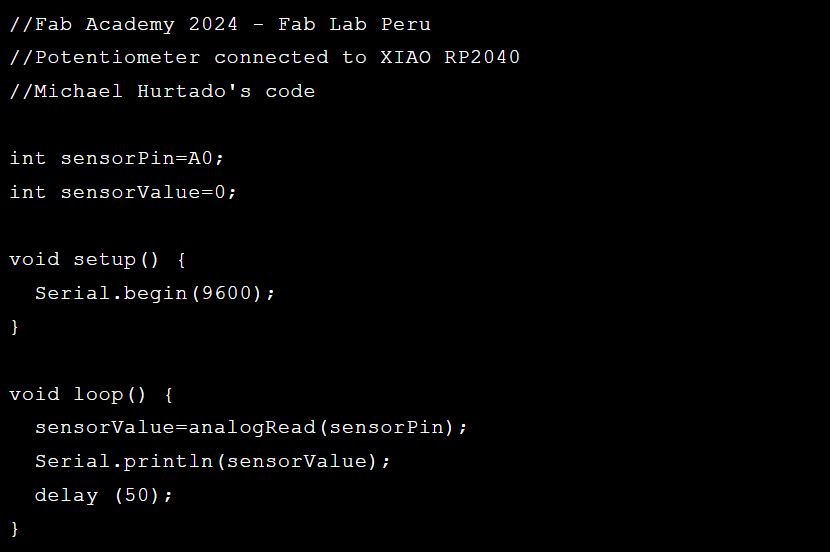
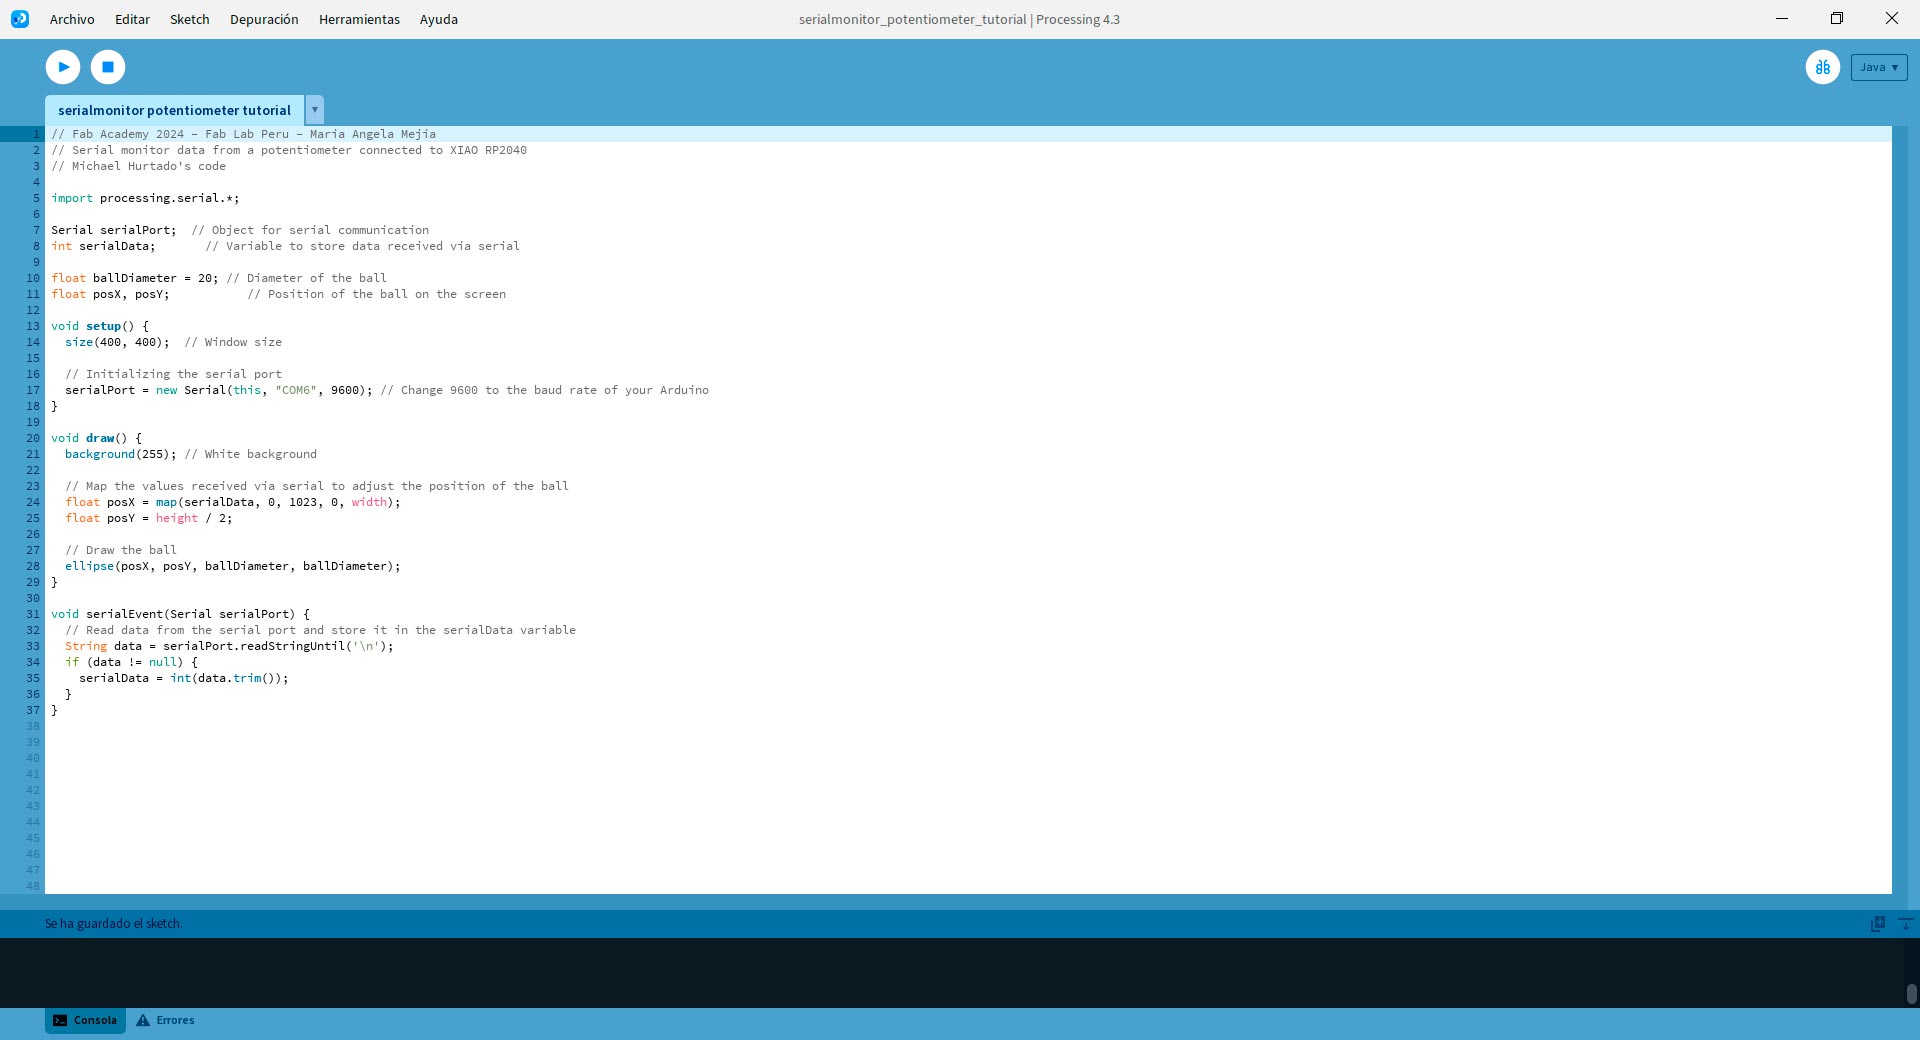
Then, write the Processing code to receive and visualize the data. I used this code in Processing:
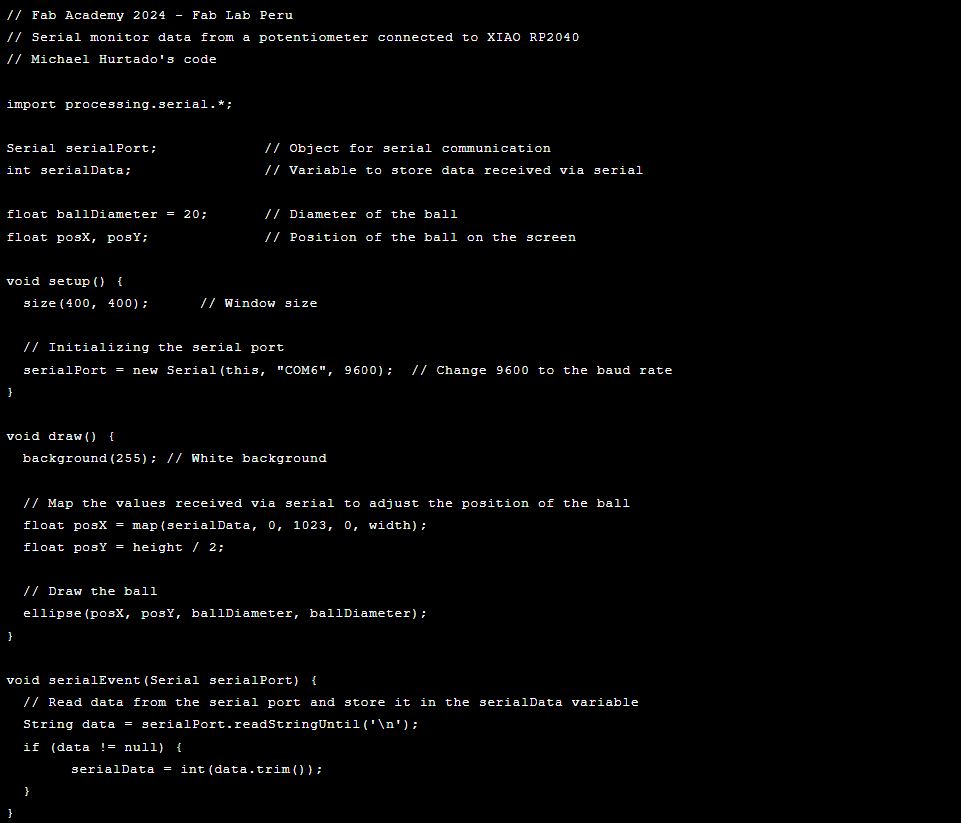
Let's break down the code for understanding it:
1. Importing the serial library with Import processing.serial.*; This line imports the Processing serial library, which allows communication with serial ports. You can check if the library in: Sketch - Import library. If you see the library called Serial, it means it is already installed. If not, go to Manage libraries, find the desired library, and install it.
2. Declaring variables: We declare variables to handle serial communication (serialPort and serialData), as well as variables to handle the visualization (ballDiameter, posX, posY).
3. Setup function: void setup() {...} This function runs once at the start of the program. It sets the window size and initializes serial communication using the Serial object. It is important to identify the correct port so that Processing obtains the data it needs for the application. In my case, I used the port "COM6".
4. Draw function: void draw() {...} This function runs continuously to update the visualization. It sets the background color, maps the received serial data to adjust the position of the ball, and draws the ball on the screen.
5. Serial event function: void serialEvent(Serial serialPort) {...} This function is called whenever new data is available on the serial port. It reads the incoming data and stores it in the serialData variable.
Application Controlling an Output
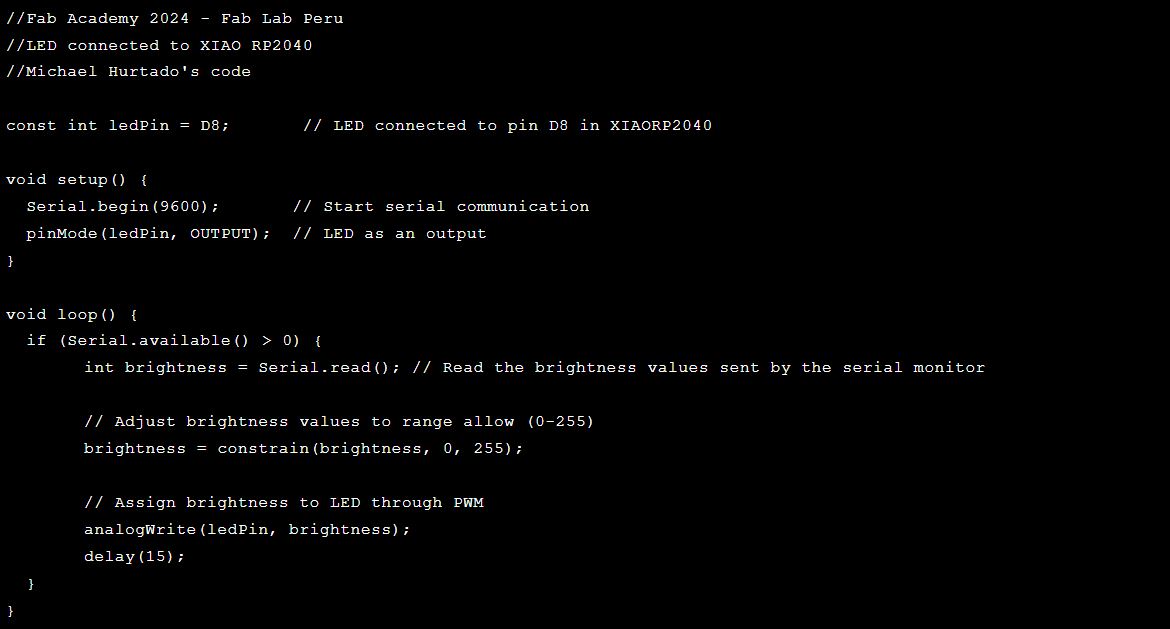
To perform the reverse action-controlling a device based on actions performed on the computer—the steps are similar, with only changes required in the code. In this case, I used the LED on my board as an output. I used this code in Arduino IDE:
Then, write the Processing code to send and visualize the data. I used this code in Processing:
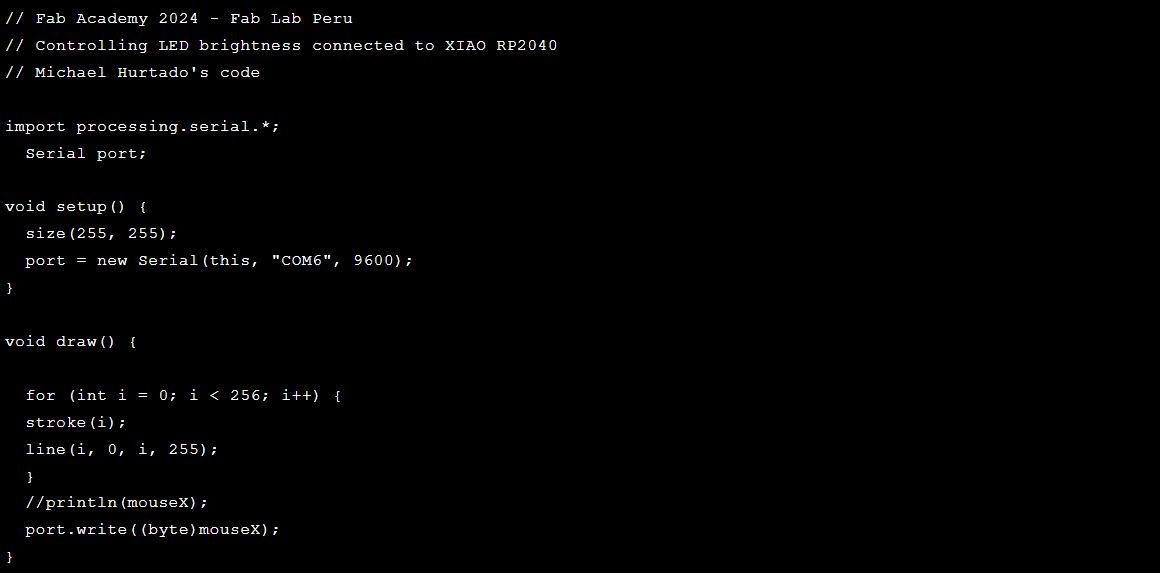
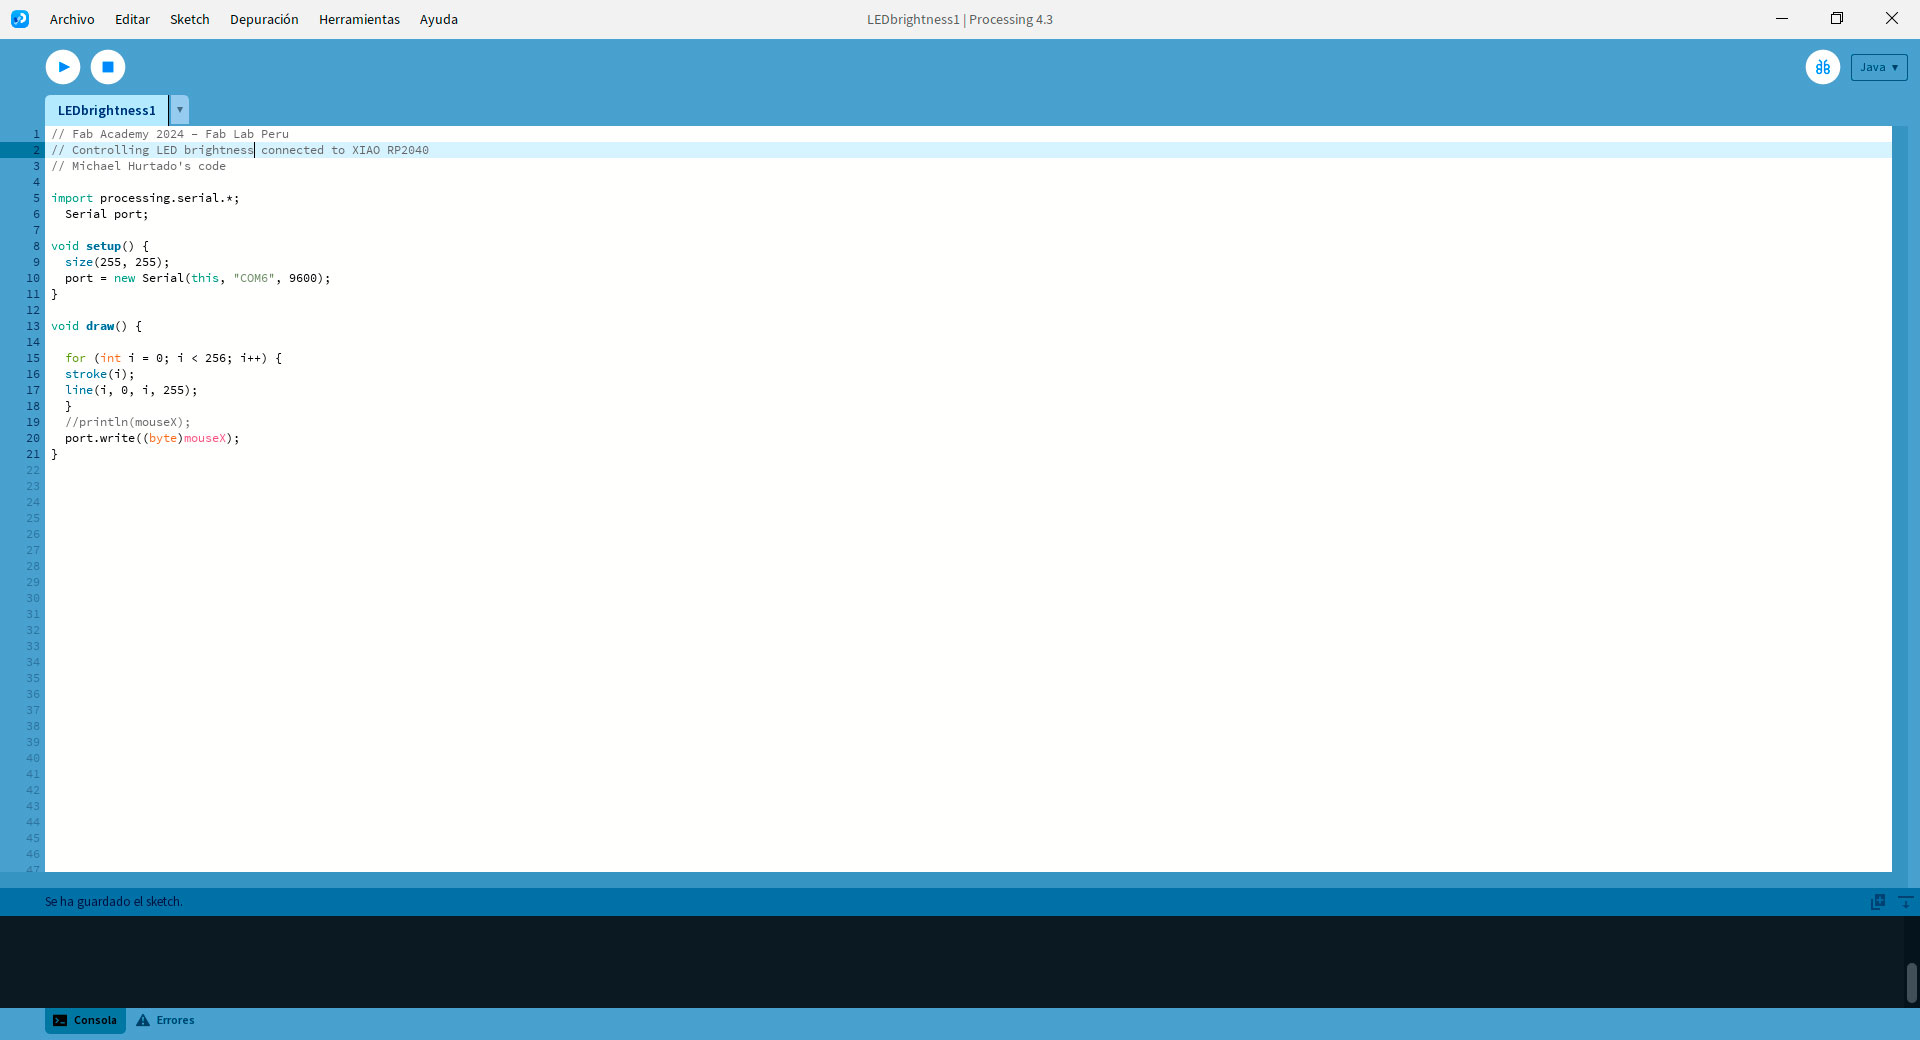
Let's break down the code for understanding it:
1. Importing the serial library with Import processing.serial.*; This line imports the Processing serial library, which allows communication with serial ports.
2. Setting up the serial port: Serial port; Declares a variable named port of type Serial, which will be used for serial communication.
3. Setup function: void setup() {...} This function runs once at the start of the program. It sets the window size and initializes serial communication using the Serial object. It is important to identify the correct port so that Processing obtains the data it needs for the application. In my case, I used the port "COM6".
4. Draw function: void draw() {...} This function runs continuously to update the visualization. It draws a gradient bar to visualize the brightness levels and sends the mouseX position (which represents the brightness level selected by the user) to the XIAO RP2040 board over the serial port.
CONCLUSIONS
- Versatility in visualization: Processing offers a versatile platform for creating interactive visualizations that respond to various inputs. Whether it's data from sensors, serial communication with external devices, or user interactions, Processing provides a robust framework for visualizing this data in creative and engaging ways.
- Integration with external devices: Processing's ability to communicate with external devices via serial ports enables seamless integration with hardware such as microcontrollers like the XIAO RP2040. This capability opens up a wide range of possibilities for interactive installations, physical computing projects, and IoT (Internet of Things) applications. By combining Processing's visual capabilities with real-world inputs and outputs, creators can build interactive systems that bridge the digital and physical worlds.
- Accessibility for creativity and learning: Processing's intuitive programming environment makes it accessible for both beginners and experienced programmers to create interactive applications. Its simplified syntax and immediate feedback loop encourage experimentation and rapid prototyping, making it an ideal tool for learning programming concepts, creative coding, and digital art. Additionally, Processing's active community and extensive documentation provide ample resources for learners to explore and expand their skills in creative coding and physical computing.
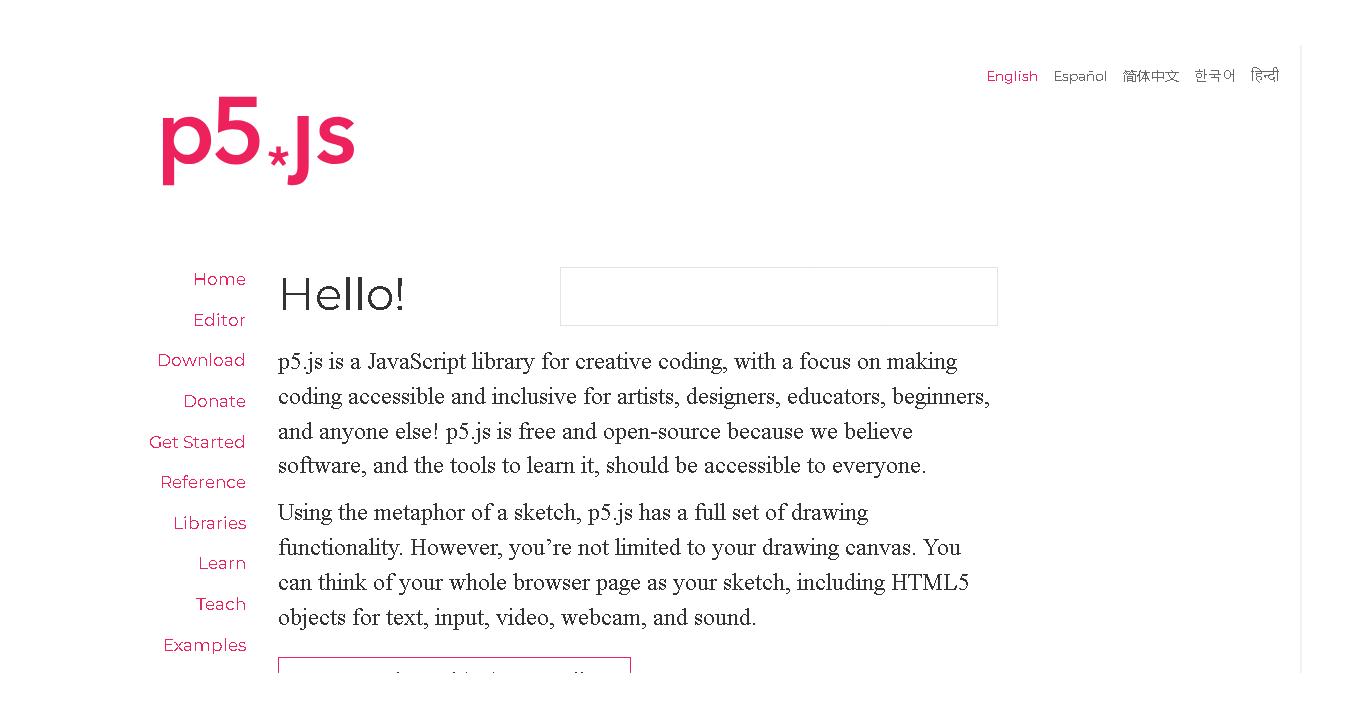
p5.js is a JavaScript library for creative coding
It seeks to be accessible to anyone, whether they are an artist or not.
p5.js is free and open source
You can see the complete documentation on the p5js.org
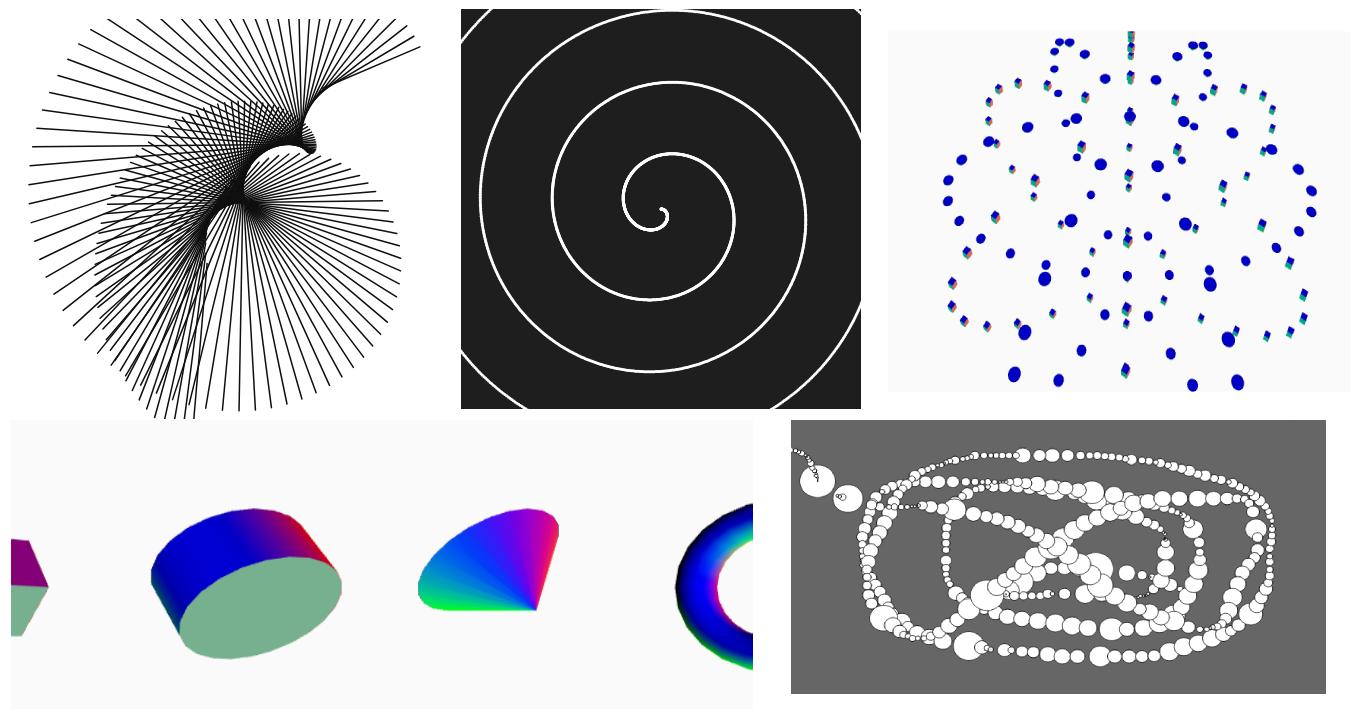
Some examples of what we can do with p5.js
- Parametric Equations
- Trigonometry and Particles
- Orbit control
- Geometries
- Patterns, etc.
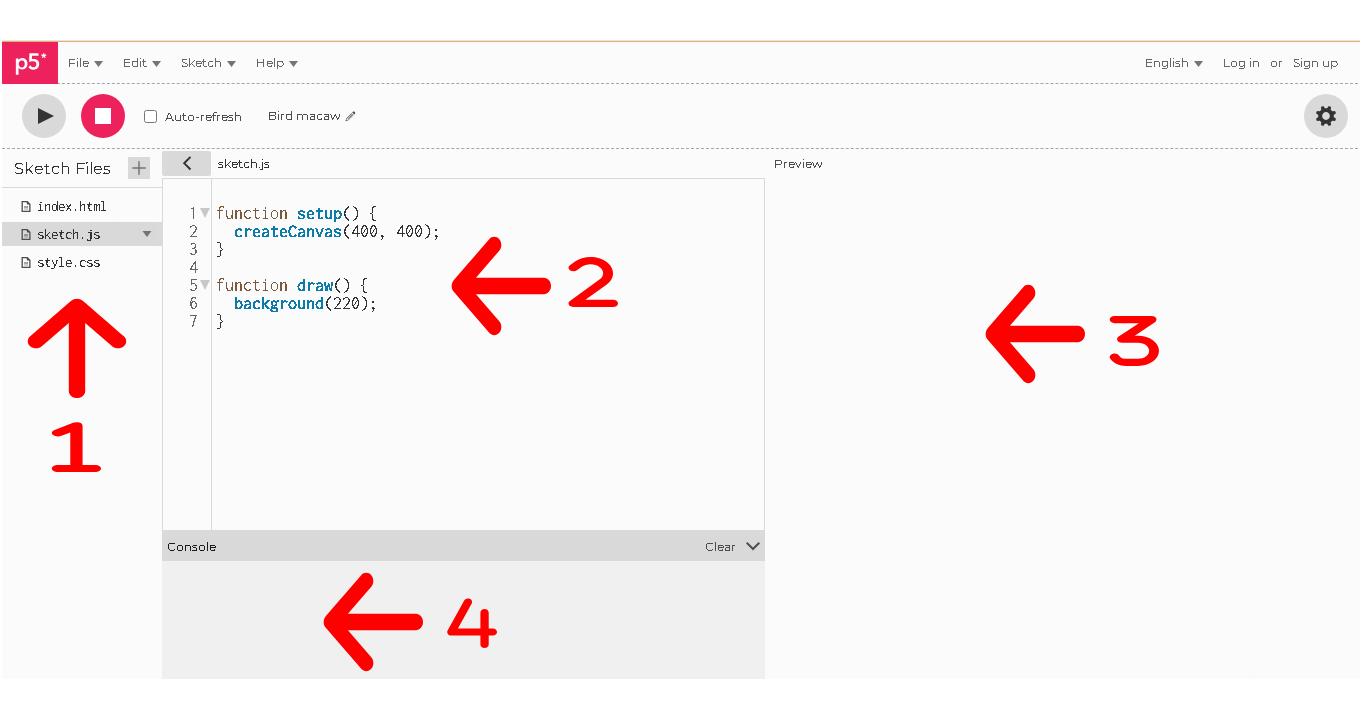
P5.js has an online code editor.
Development environment:
1. Sketch Files area.
2. Code area.
3. Preview area
4. Console area
If you don't want to use the editor, you can deploy the project locally using JavaScript and a code editor.
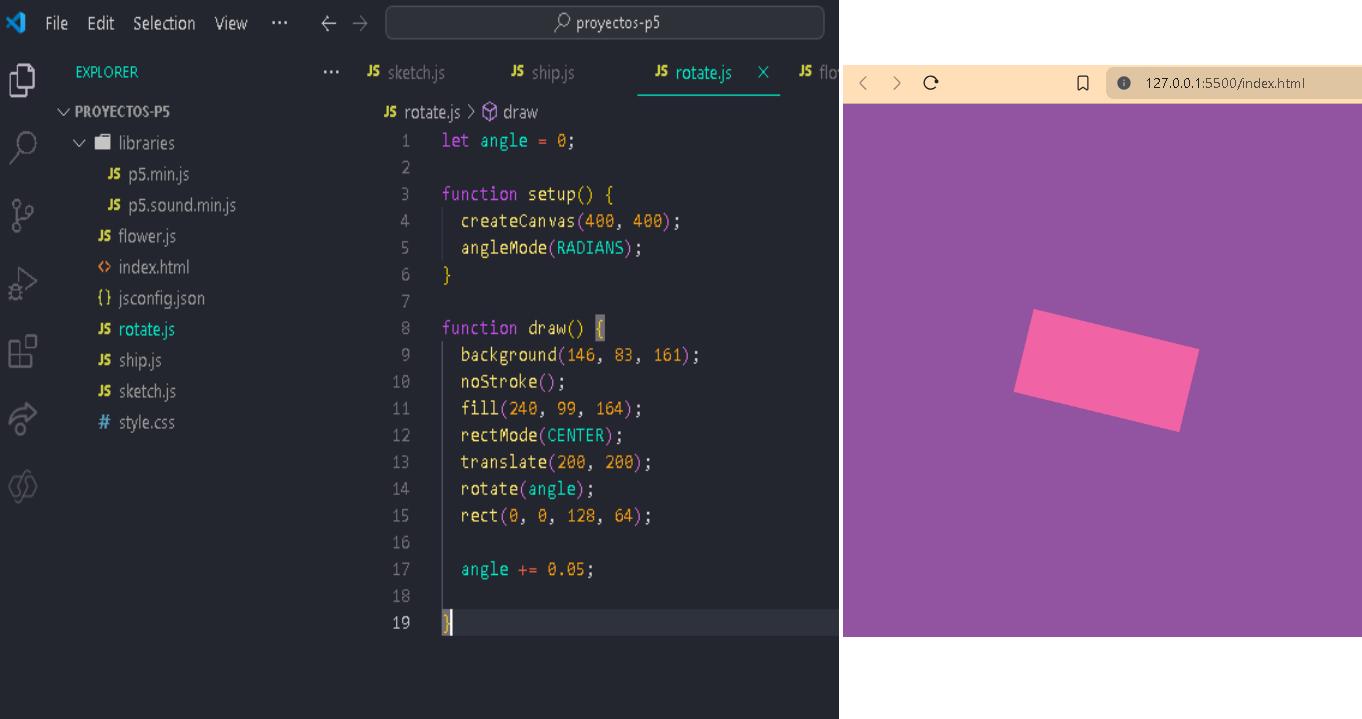
In this example we rotate a rectangle with its origin of rotation at its center
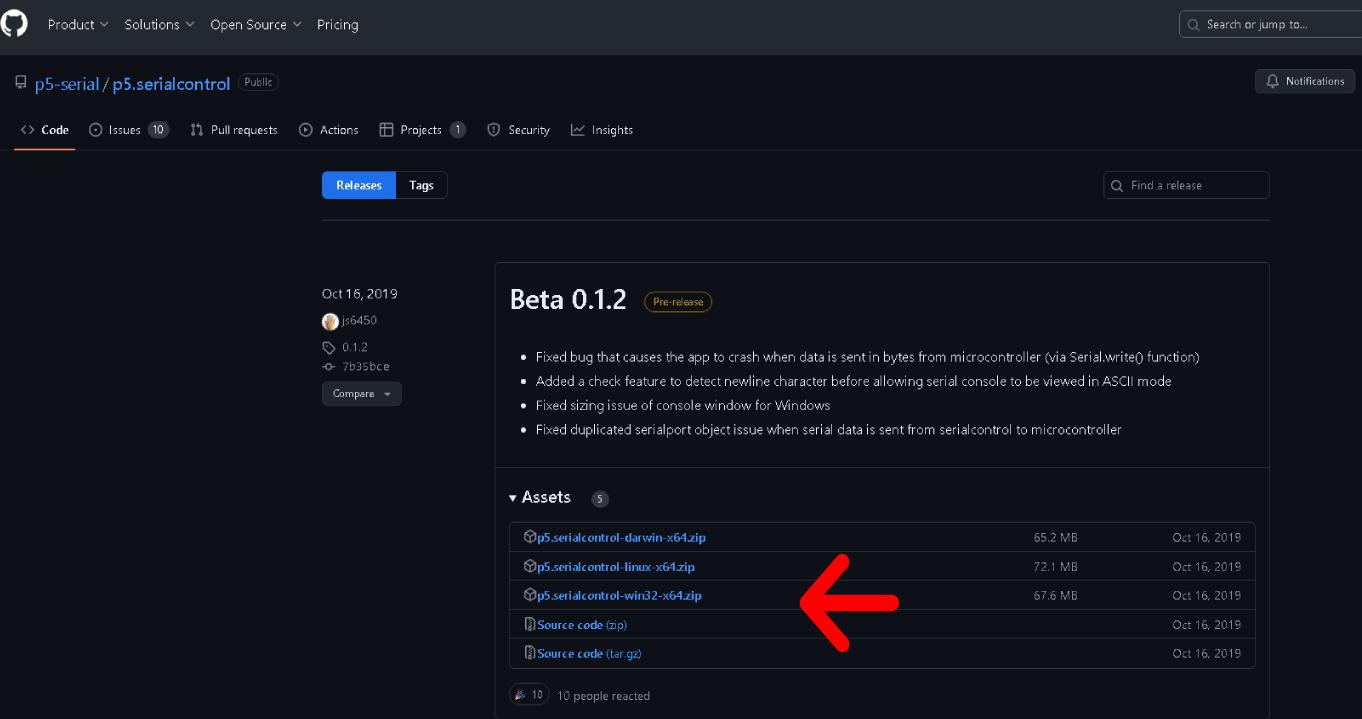
If we want to use the data from a microcontroller we must use the connection to the serial port.
First we must install the most updated version of the p5.serialcontrol library,download the library
As a second step for this exercise we must program in Arduino the code that we will use to generate data, in this case it will be the use of a potentiometer.
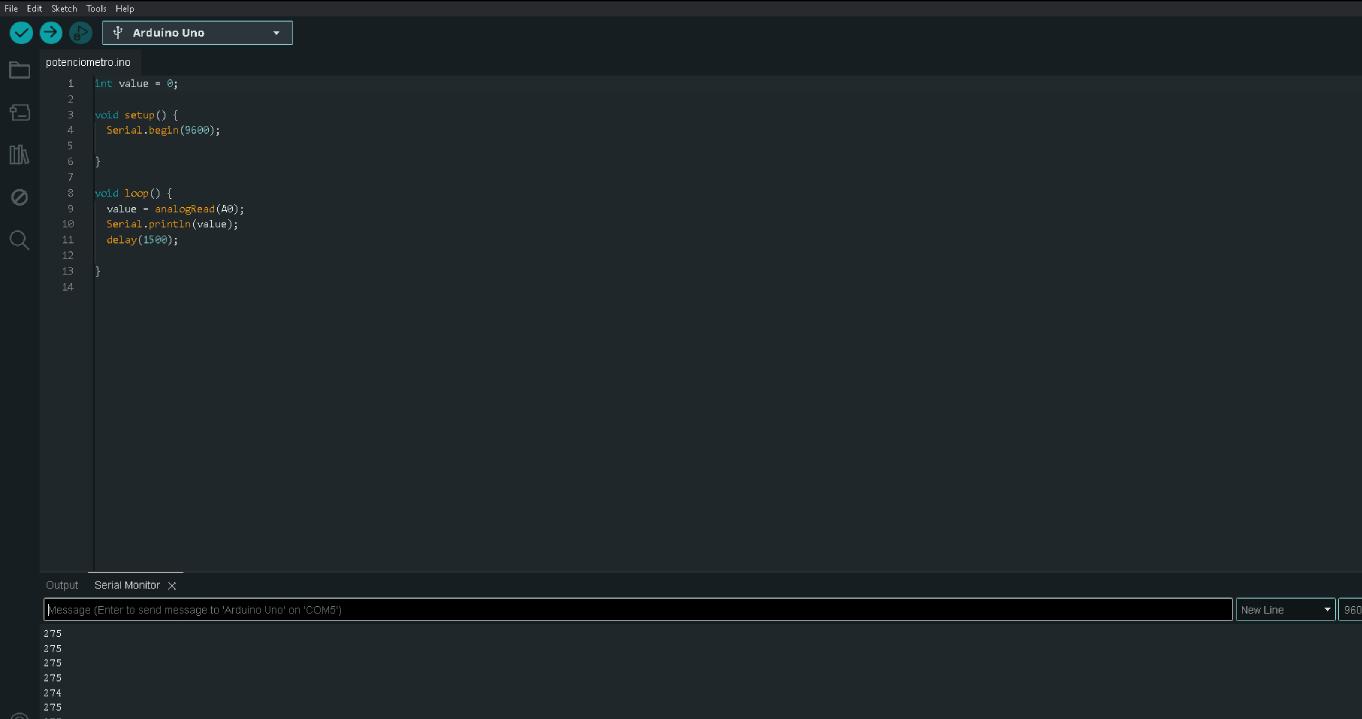
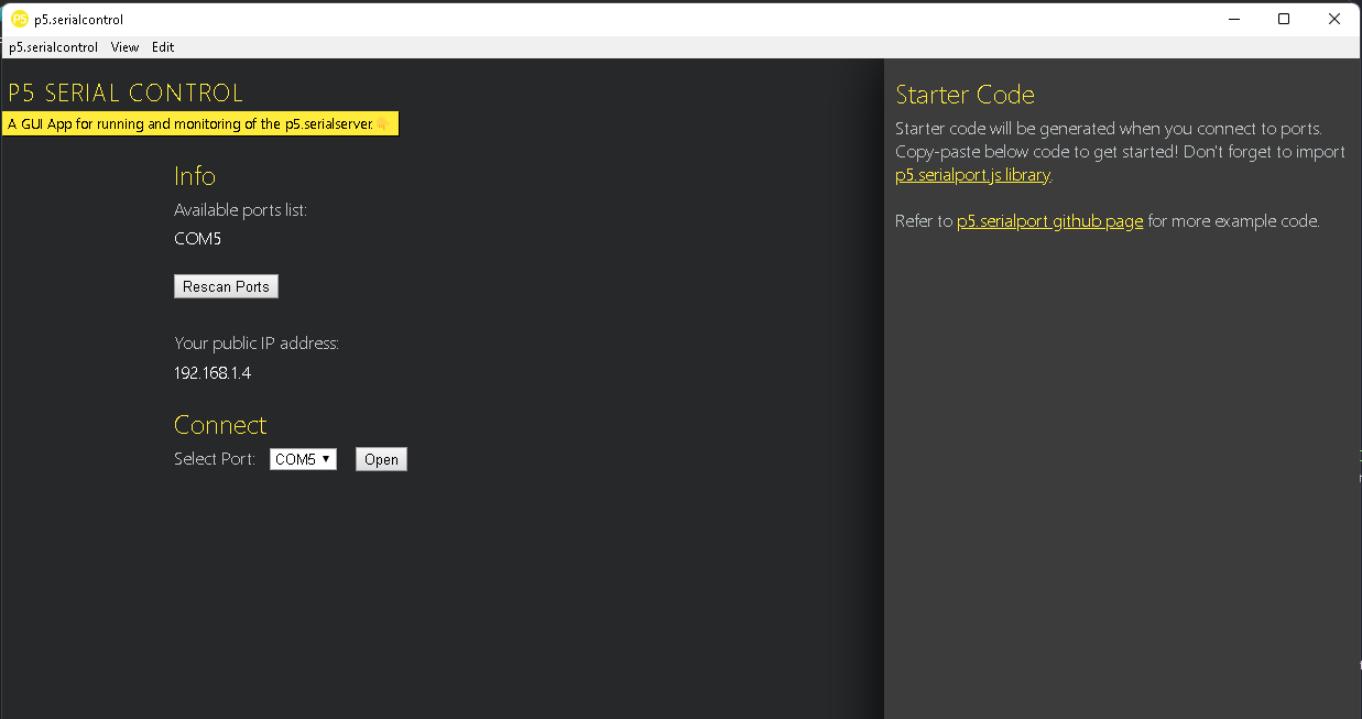
We run the app from the library downloaded in the first step.
How can we visualize the values that are displayed in the library.
The application automatically detects the port where the microcontroller is connected.
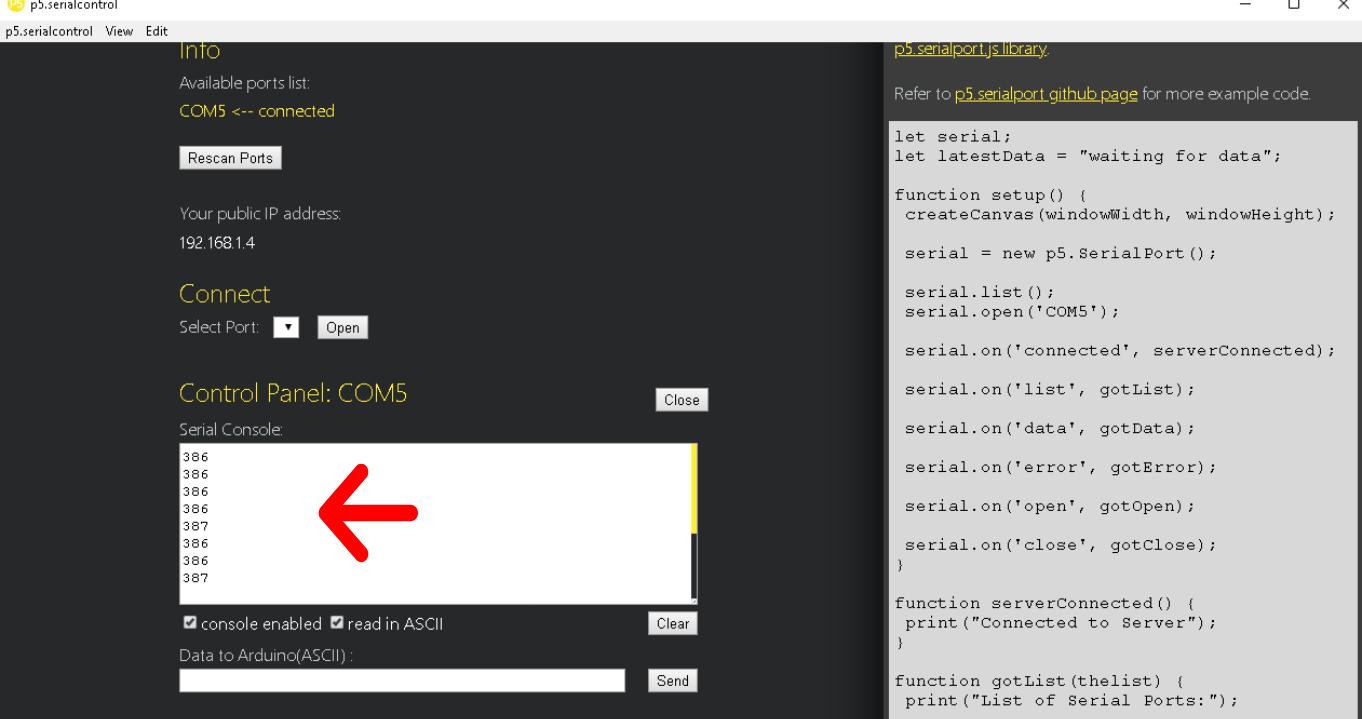
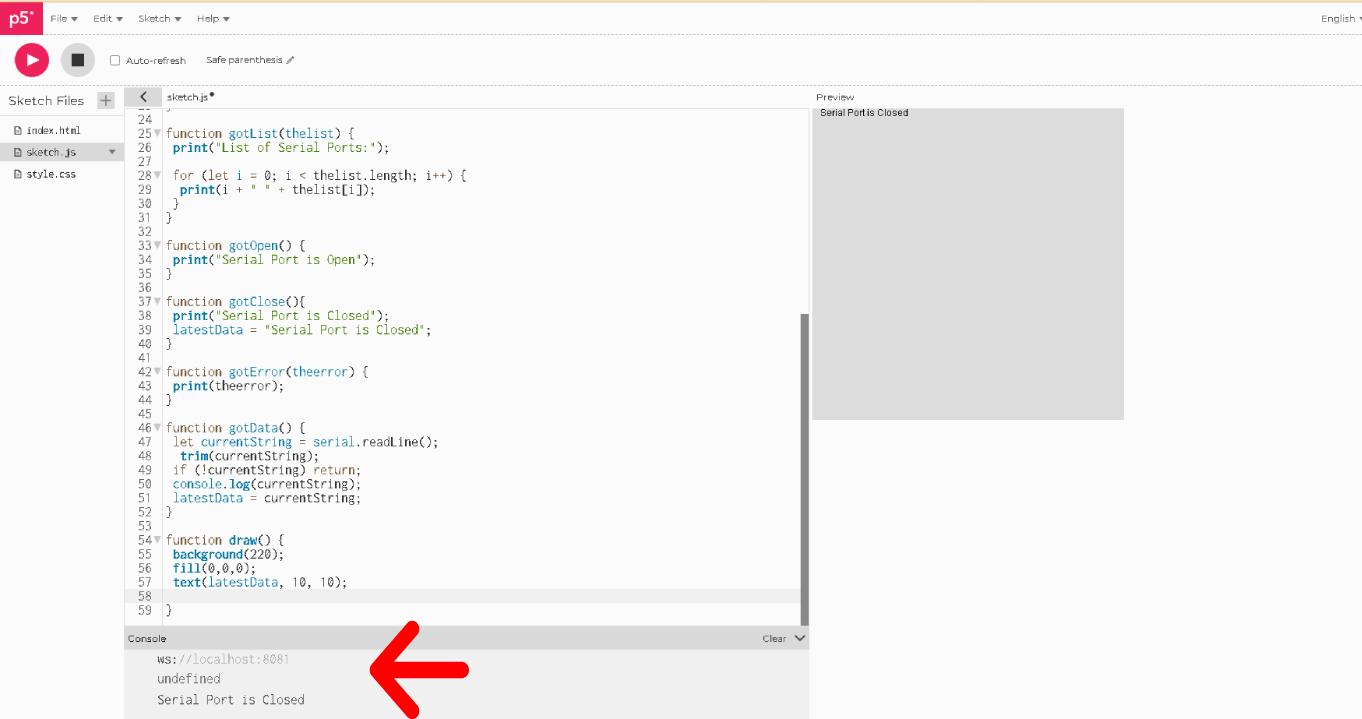
We open the online editor of p5.js and we execute the code to import the data from the serial port.
An unexpected error is generated every time that we can see in the console with the message serial port is closed.
This is the end of my adventure of being able to work with this library to generate graphics from data from a microcontroller.