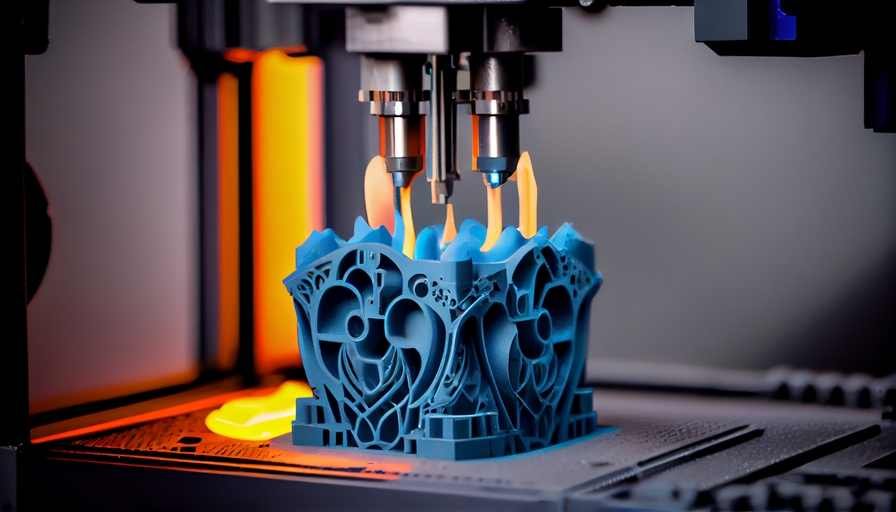
Before diving into the hands-on experience, I familiarized myself with some key terminology related to 3D printing:
- Infill: Refers to the internal structure of a 3D-printed object. It is represented by a repeating pattern of material that fills the empty spaces inside the object. Infill percentage determines the density of this structure, affecting the object's strength and weight.
- Infill Pattern: The specific arrangement of lines, grids, or other shapes used to fill the internal structure of a 3D-printed object. Common infill patterns include rectilinear, honeycomb, and gyroid, each offering different properties such as strength and flexibility.
- Layer Height: The thickness of each layer deposited during the printing process. Smaller layer heights result in finer details but increase printing time.
- Walls: Also known as perimeters, walls refer to the outer shell of a 3D-printed object. They provide structural integrity and define the shape of the object. The number of walls can be adjusted to achieve the desired thickness and surface finish.
- Top and Bottom Fill: The infill pattern used for the top and bottom layers of a 3D-printed object. This pattern can be different from the infill used in the interior of the object and is often adjusted to improve surface quality and strength.
- Support Structures: Additional material printed to provide stability and prevent overhangs during printing. They are removed after printing is complete.
- Print Speed: The speed at which the print head moves during printing. Faster speeds can reduce printing time but may affect print quality.
- Build Plate: The surface on which the first layer of the print adheres. It is heated to improve adhesion and prevent warping.
- Extruder: The component responsible for feeding filament into the print head, where it is melted and deposited layer by layer.
- Infill Density: The percentage of infill material used to fill the internal structure of a 3D-printed object. Higher densities result in stronger, heavier objects, while lower densities reduce material usage and printing time.
- Bed Adhesion: Methods and materials used to ensure that the bottom layer of a print sticks securely to the build plate, preventing warping and lifting during printing.
- Skirt: A perimeter that surrounds the initial layer of a print but is not connected to the object itself. Skirts help prime the extruder and ensure a smooth flow of filament before the actual object begins printing. They also help in verifying bed adhesion and leveling.
- Brim: Similar to a skirt, a brim is a series of perimeters printed around the base of the object, directly connected to it. Brims are beneficial for improving bed adhesion, especially for objects with small footprints or those prone to warping. They provide a wider base for better stability and adhesion to the build plate.
machine introduction
pursa mk 3
The Prusa MK3 is a flagship 3D printer developed by Prusa Research, known for its reliability, performance, and innovation in the world of desktop 3D printing. Building upon the success of its predecessors, the MK3 incorporates a range of advanced features and enhancements to deliver high-quality prints with ease of use. One of the standout features of the Prusa MK3 is its robust construction and attention to detail. The printer boasts a sturdy frame made from high-quality materials, providing stability and precision during the printing process. This solid foundation contributes to the MK3's ability to produce accurate and consistent prints, even when handling complex geometries. The MK3 is equipped with a range of cutting-edge technologies to optimize the printing experience. One such feature is the innovative automatic bed leveling system, which ensures that the print bed is precisely calibrated for every print. This eliminates the need for manual bed leveling, saving time and effort while improving print quality.
Build Volume 250 x 210 x 210 mm
Layer Resolution 50 - 300 microns
Filament Compatibility PLA, ABS, PETG, TPU, others
Max. Print Speed 200 mm/s
Nozzle Diameter 0.4 mm
Connectivity USB, SD Card
Printer Dimensions 500 x 550 x 400 mm
Weight 7.5 kg (approx.)
.jpeg)
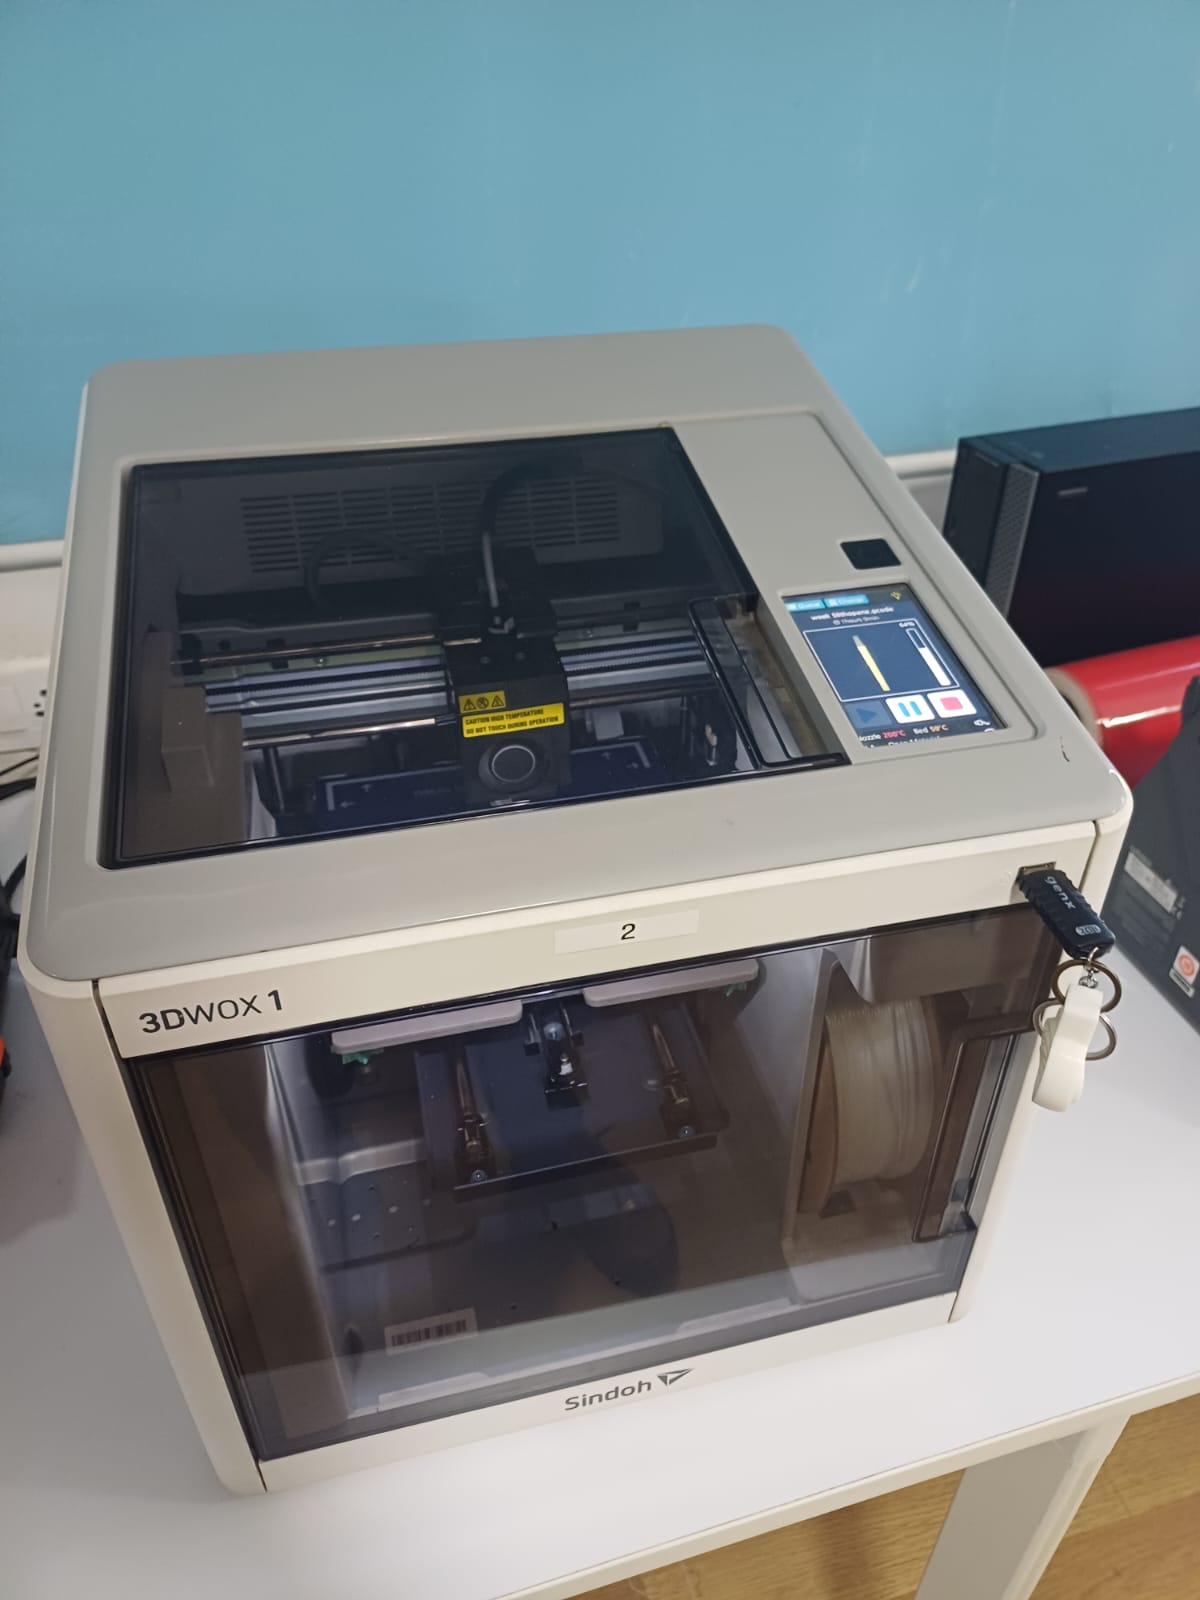
sindoh
The 3DWOX 1 3D Printer, manufactured by Sindoh, represents a pinnacle of desktop 3D printing technology, renowned for its reliability, ease of use, and exceptional print quality. Featuring a fully enclosed build chamber, the 3DWOX 1 ensures stable temperature control and protection from external influences, leading to improved print quality and reduced warping. Assisted bed leveling simplifies setup with step-by-step instructions, while flexible connectivity options including USB, Ethernet, and Wi-Fi facilitate seamless integration into various workflows and enable remote monitoring and control. The printer's filament cartridge system streamlines filament loading and unloading, minimizing downtime and enhancing user experience. An intuitive touchscreen interface makes navigating settings and monitoring print progress effortless. The 3DWOX 1 is suitable for a wide range of applications, from prototyping to education, delivering consistent and high-quality prints with precision and reliability.
Build Volume - 210mm x 200mm x 195mm
Layer Resolution - 20 microns
Filament Compatibility- PLA, ABS, PETG
Max. Print Speed - 300 mm/s
Nozzle Diameter - 0.4 mm
Printer Dimensions 421mm x 433mm x 439mm
3D DESIGN FOR PRINTING
- Sketching the Torus: I started by firing up Fusion 360 and sketching a torus, which serves as the base shape for the donut. The torus was drawn to the desired dimensions and proportions.
- Tessellating the Sketch: After sketching the torus, I tessellated it using the mesh tools available in Fusion 360. This process involved dividing the surface of the torus into numerous smaller polygons.
- Reducing the Mesh Complexity: Next, I reduced the complexity of the mesh to simplify the design while retaining its overall shape and structure. This step helped optimize the mesh for further manipulation and conversion.
- Converting to a Parametric Body: With the simplified mesh, I converted it into a parametric body, allowing for easier editing and modification using Fusion 360's parametric modeling tools.
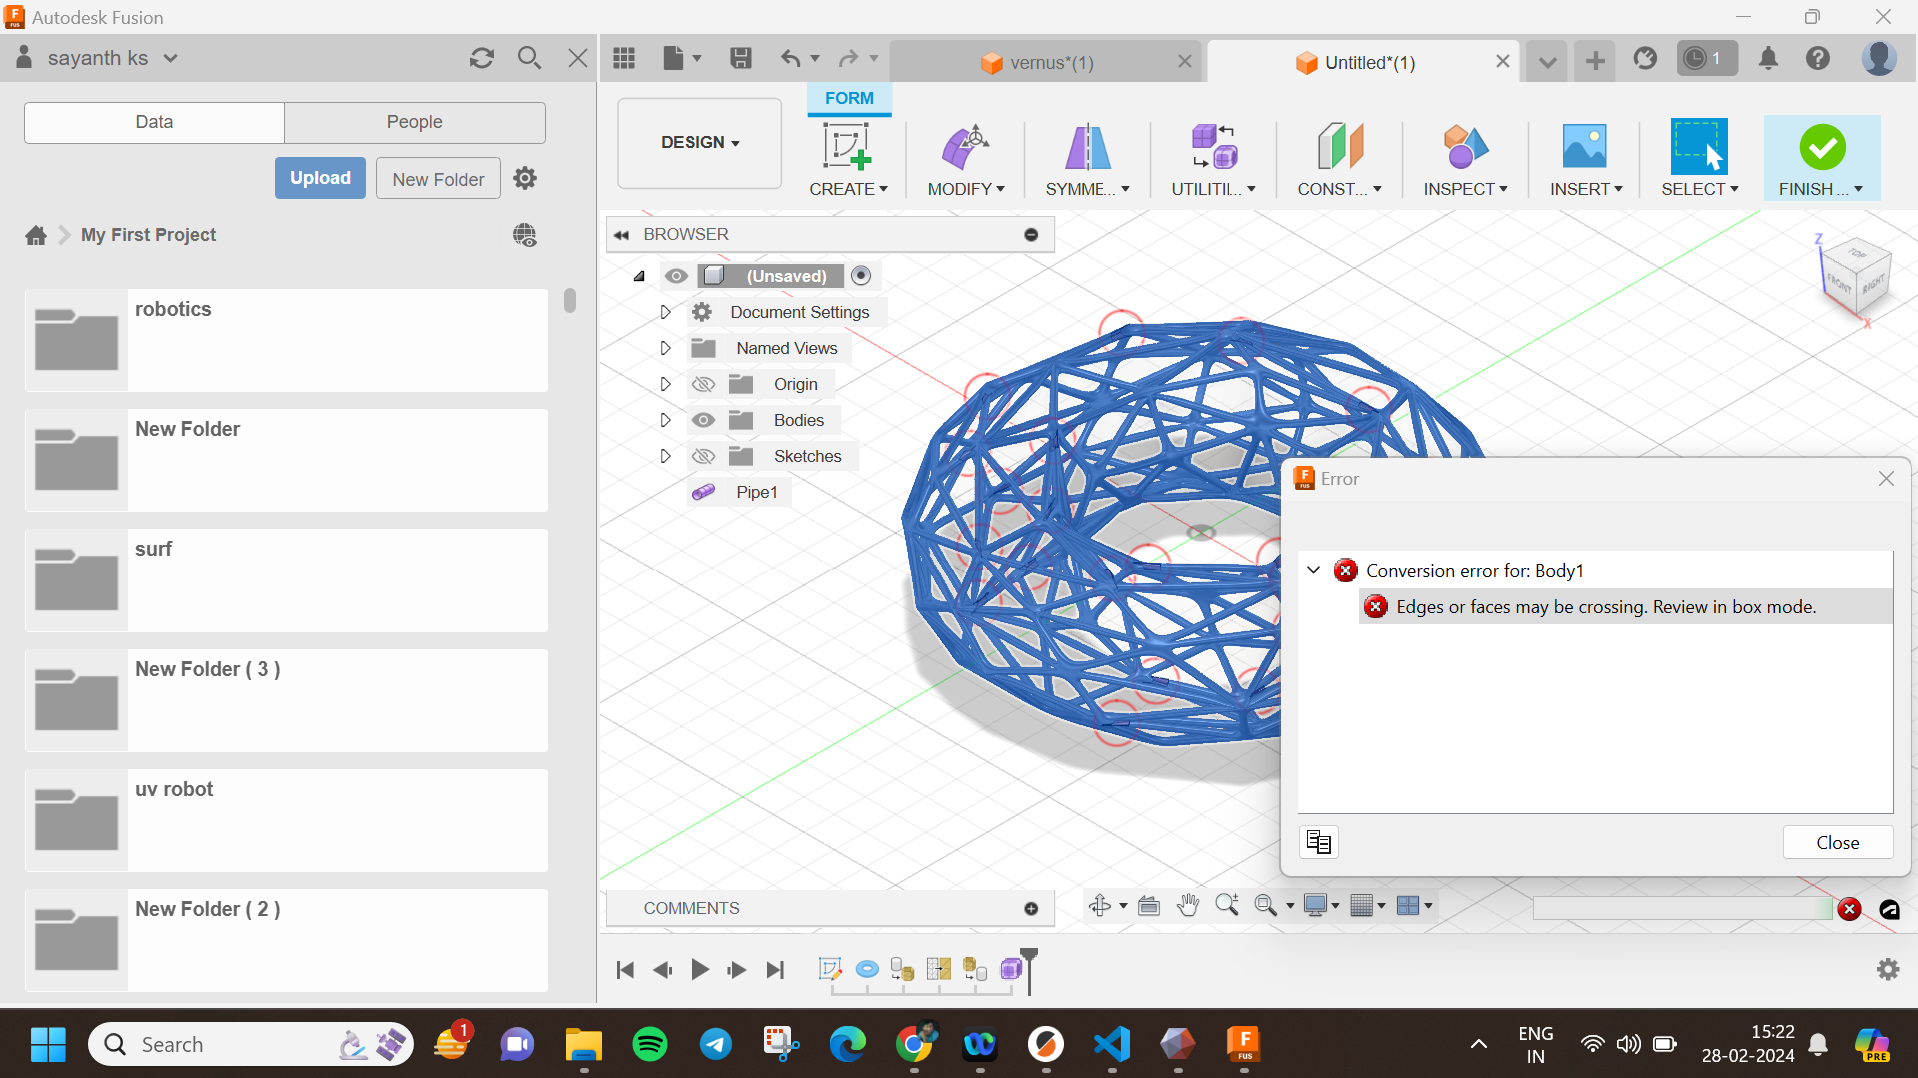
- Creating Voronoi Pipes: My plan was to utilize the edge selection of the Voronoi pattern and convert them into pipes using Fusion 360's form tools. However, I encountered errors during this process, despite multiple attempts.
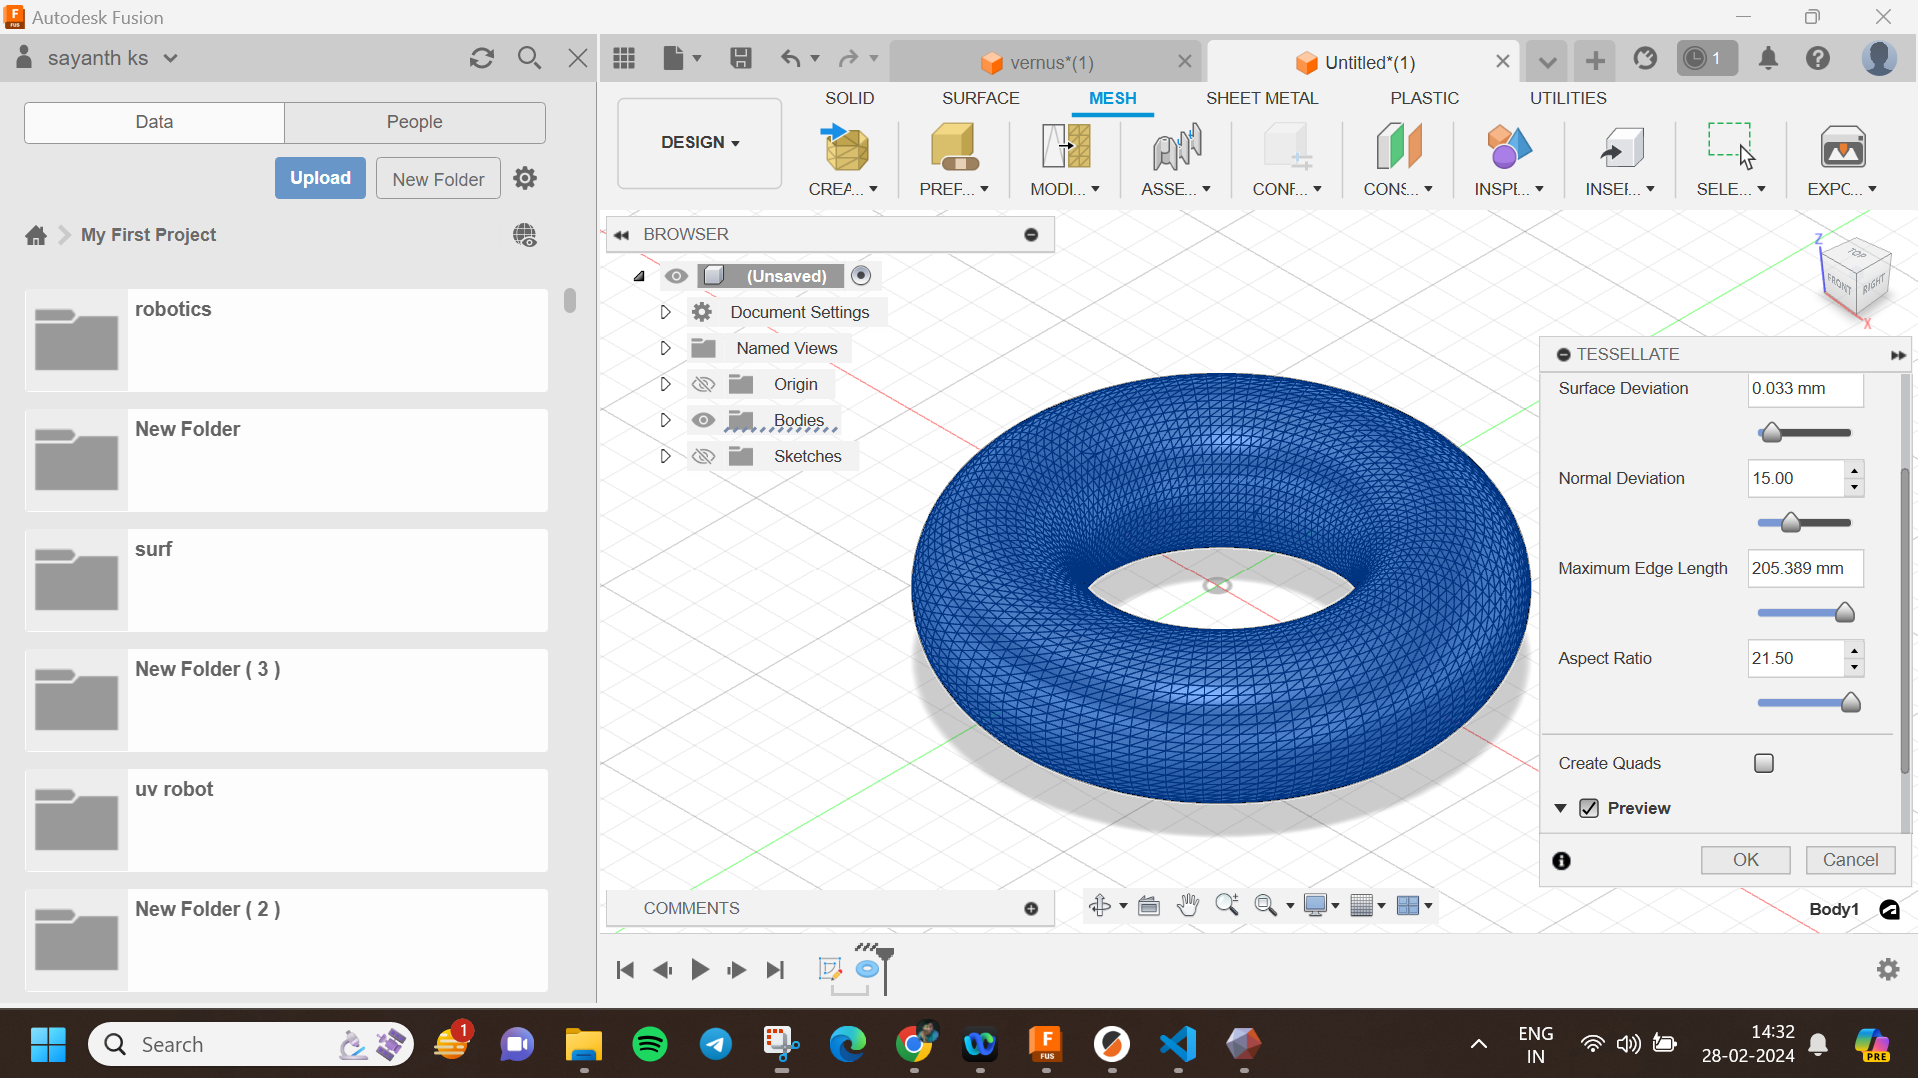
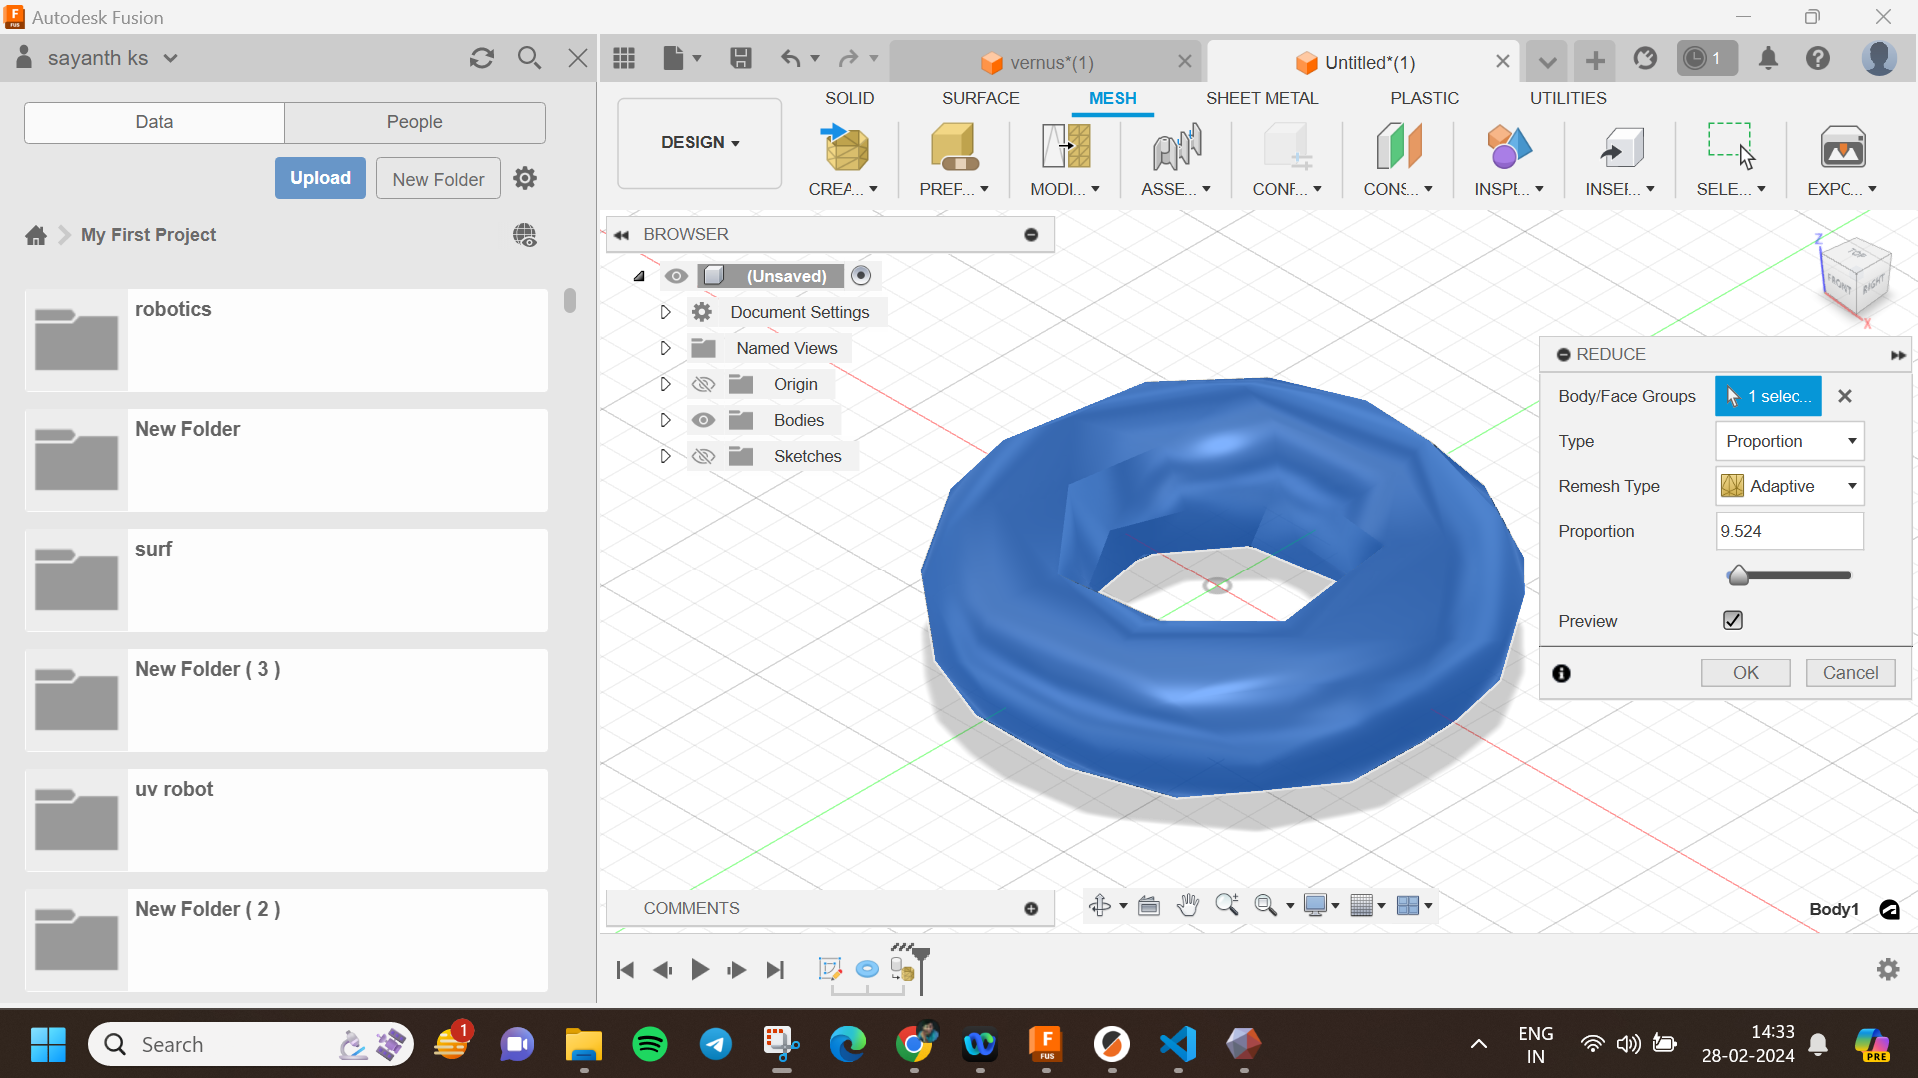
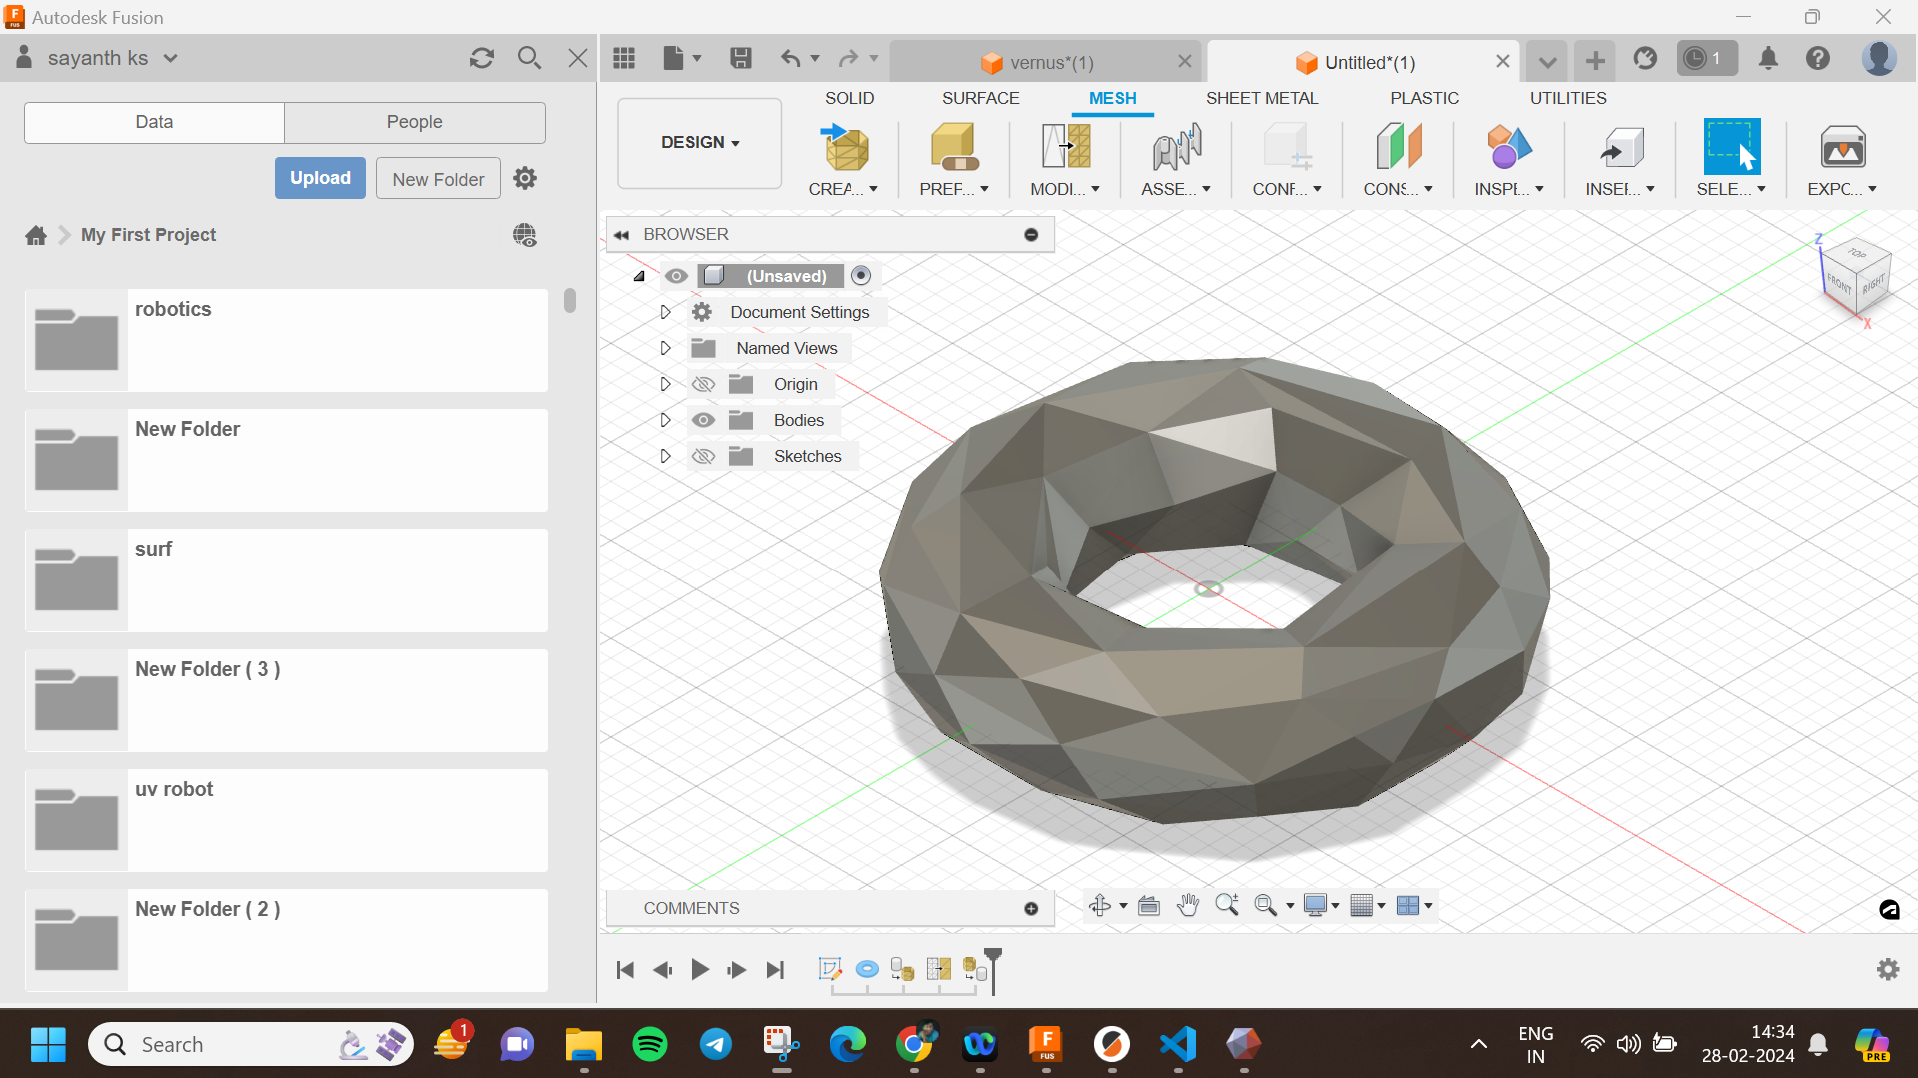
i really struggled to create the final design even after multiple mesh corrections and repaiers
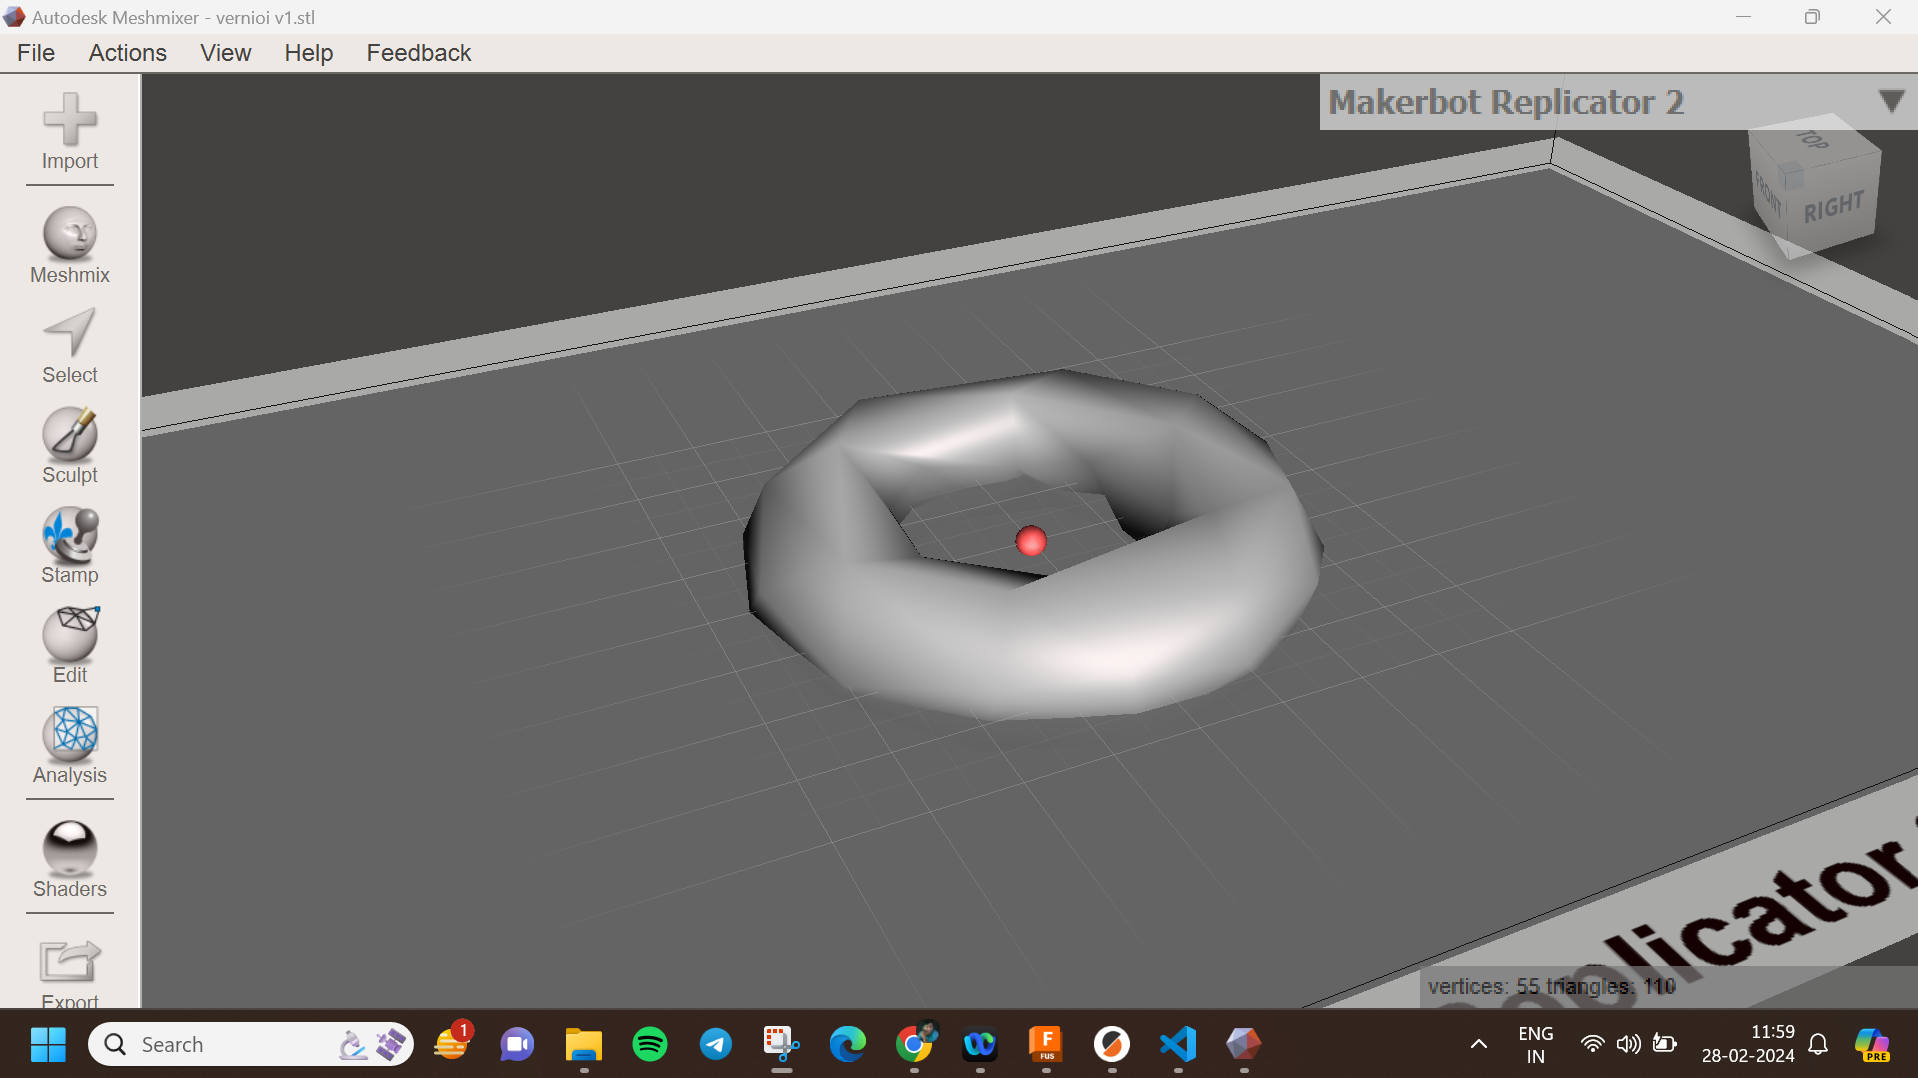
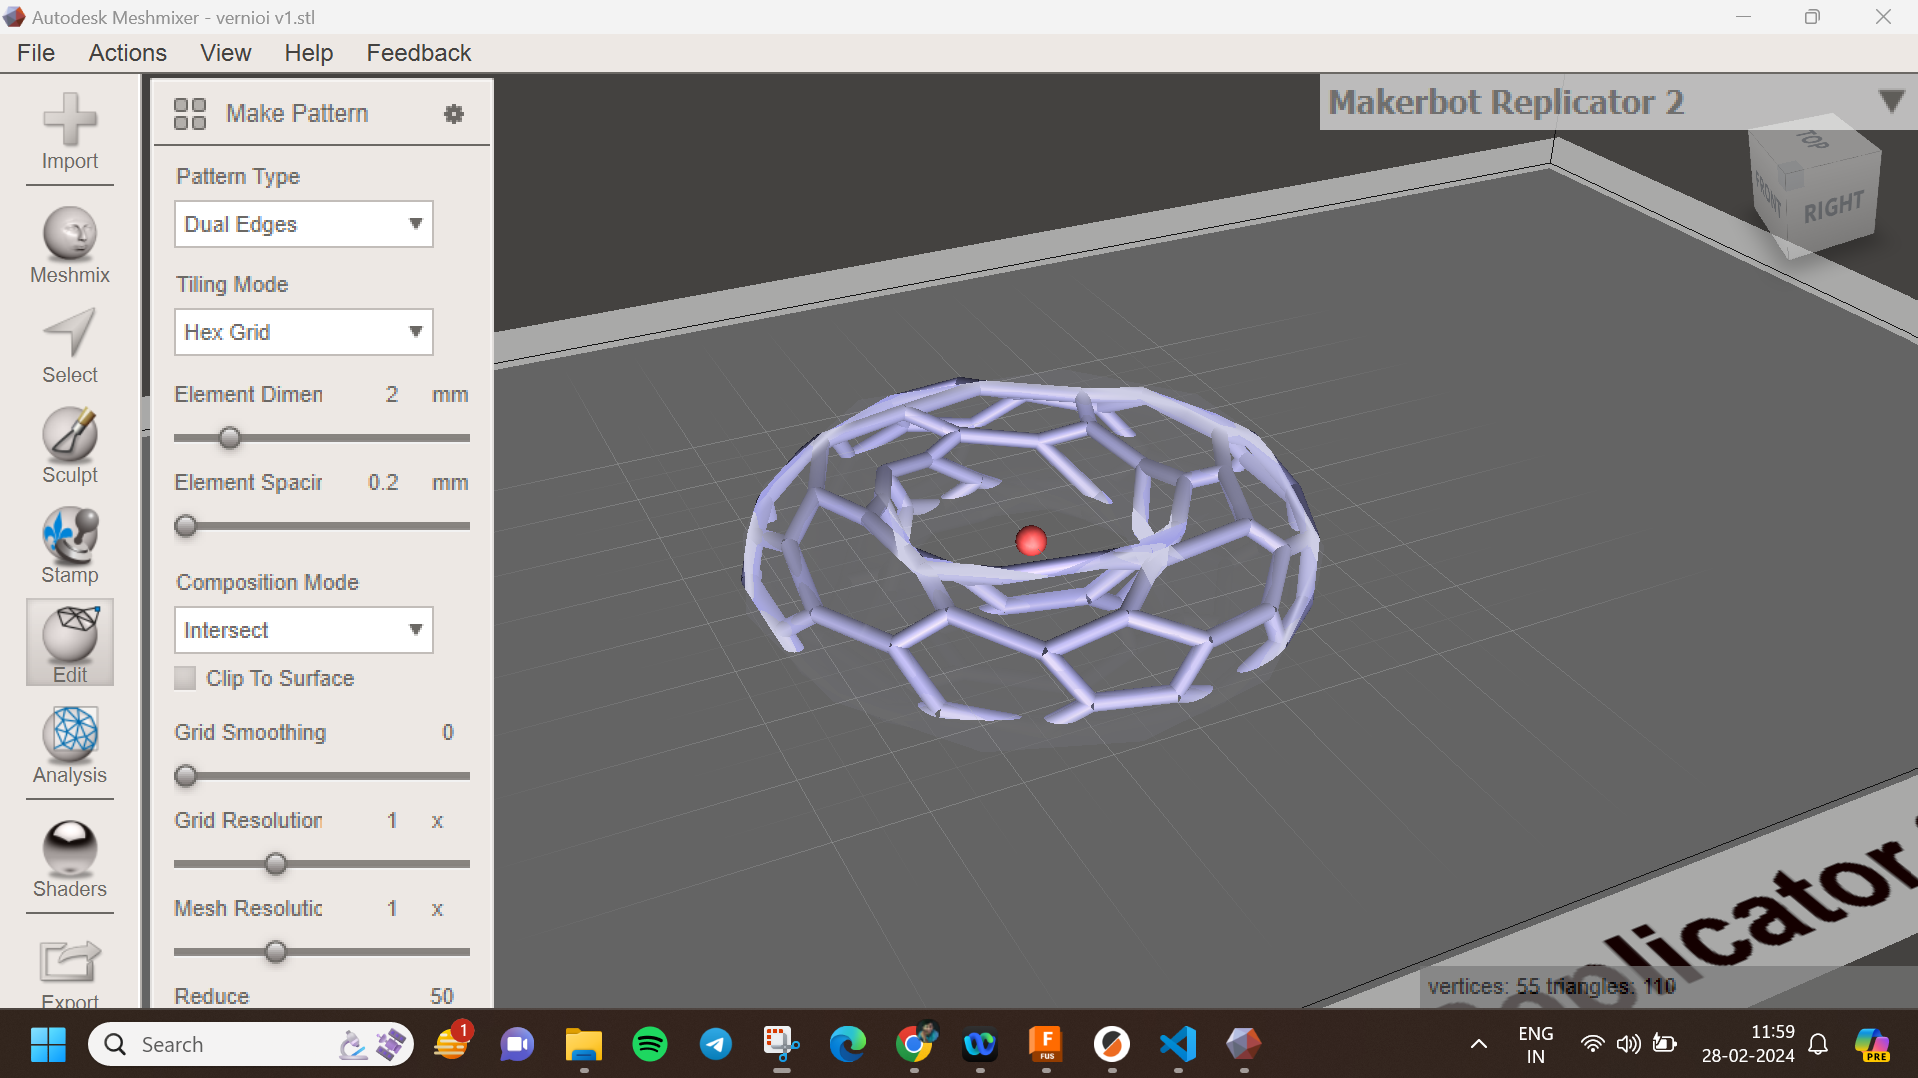
MESHMIXER TO THE RESCUE
Post-Failure Adaptation: Utilizing Meshmixer for Voronoi Pattern Application
Following the setback encountered in Fusion 360 with converting edges to pipes, I turned to Meshmixer as an alternative solution to achieve the desired Voronoi pattern on the torus-shaped donut. Here's how I proceeded:
- Importing the Model: I imported the torus-shaped donut model created in Fusion 360 into Meshmixer, ensuring compatibility between the two software.
- Accessing the Edit Tool: Within Meshmixer, I accessed the Edit tool, which provides a range of functions for modifying and manipulating 3D models.
- Navigating to Patterns: Within the Edit tool, I navigated to the Patterns section, which offers various predefined patterns for applying to 3D models.
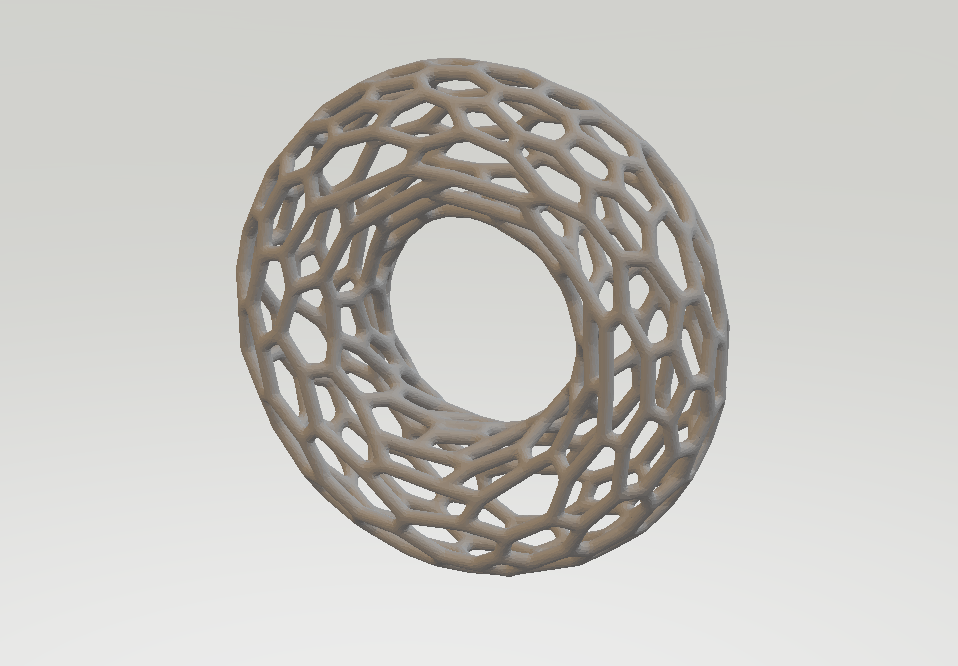
- Selecting Voronoi Pattern: Among the available patterns, I selected the Voronoi pattern, which consists of interconnected polygons arranged in a distinctive lattice-like structure.
- Adjusting Pattern Settings: To customize the Voronoi pattern to suit the design requirements, I adjusted the settings, particularly focusing on the pattern shape to ensure it aligns with the dual-edge configuration desired for the torus-shaped donut.
- Converting and Saving as STL: Once the Voronoi pattern was adjusted to satisfaction, I converted the model and saved it as an STL file, ready for further processing or 3D printing.
SLICEING
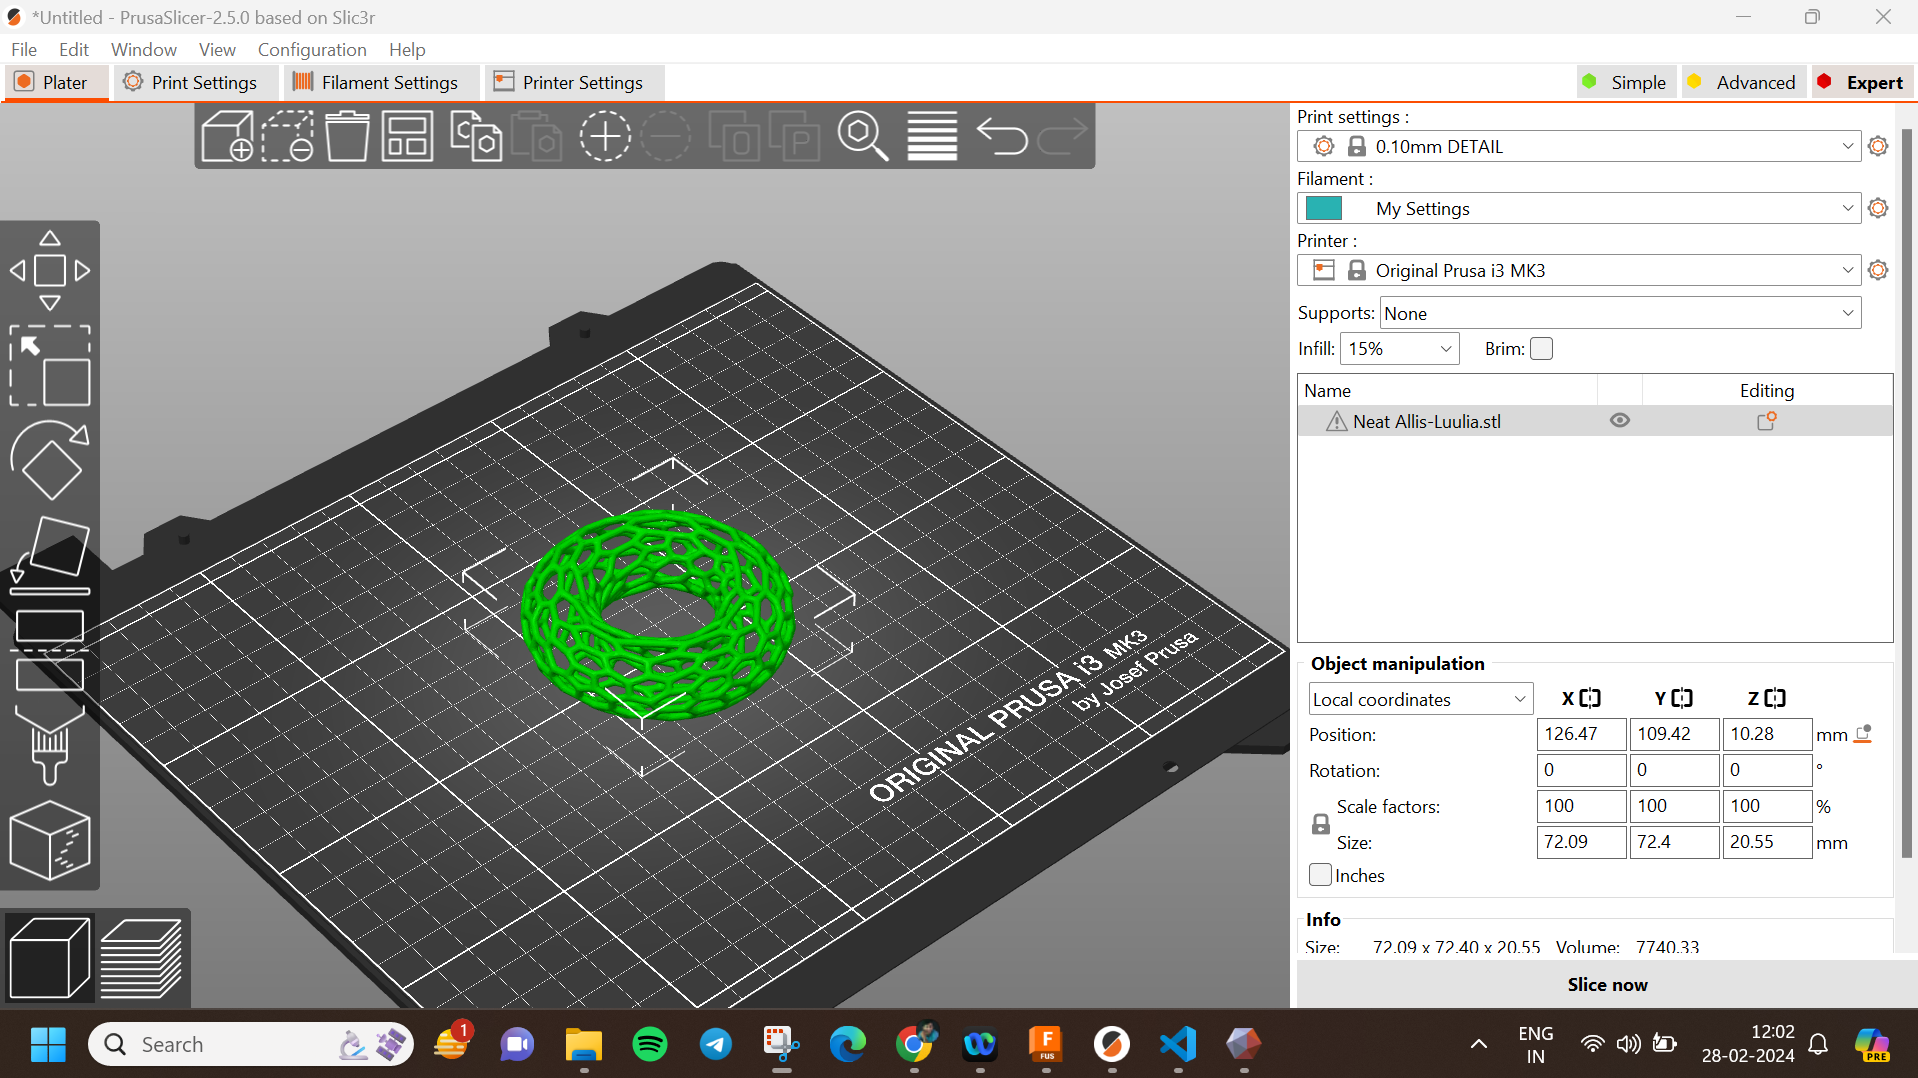
I proceeded to prepare the model for 3D printing using a slicing software called PrusaSlicer. PrusaSlicer allows for precise slicing of 3D models into layers, generating instructions (G-code) for the 3D printer to follow during the printing process. Here's an overview of the steps I took:
- Importing the Model: I imported the modified torus-shaped donut model, now featuring the Voronoi pattern with 2mm diameter pipes, into PrusaSlicer.
- Orientation and Placement: Within PrusaSlicer, I oriented the model on the build plate and adjusted its placement to optimize printing efficiency and minimize material usage.
- Slicing Settings: I configured slicing settings such as layer height, infill density, print speed, and support structures based on the desired print quality, material properties, and printer capabilities.
- Generating Supports: Depending on the complexity of the model and its overhangs, I generated support structures to ensure successful printing and prevent sagging or misalignment during the printing process.
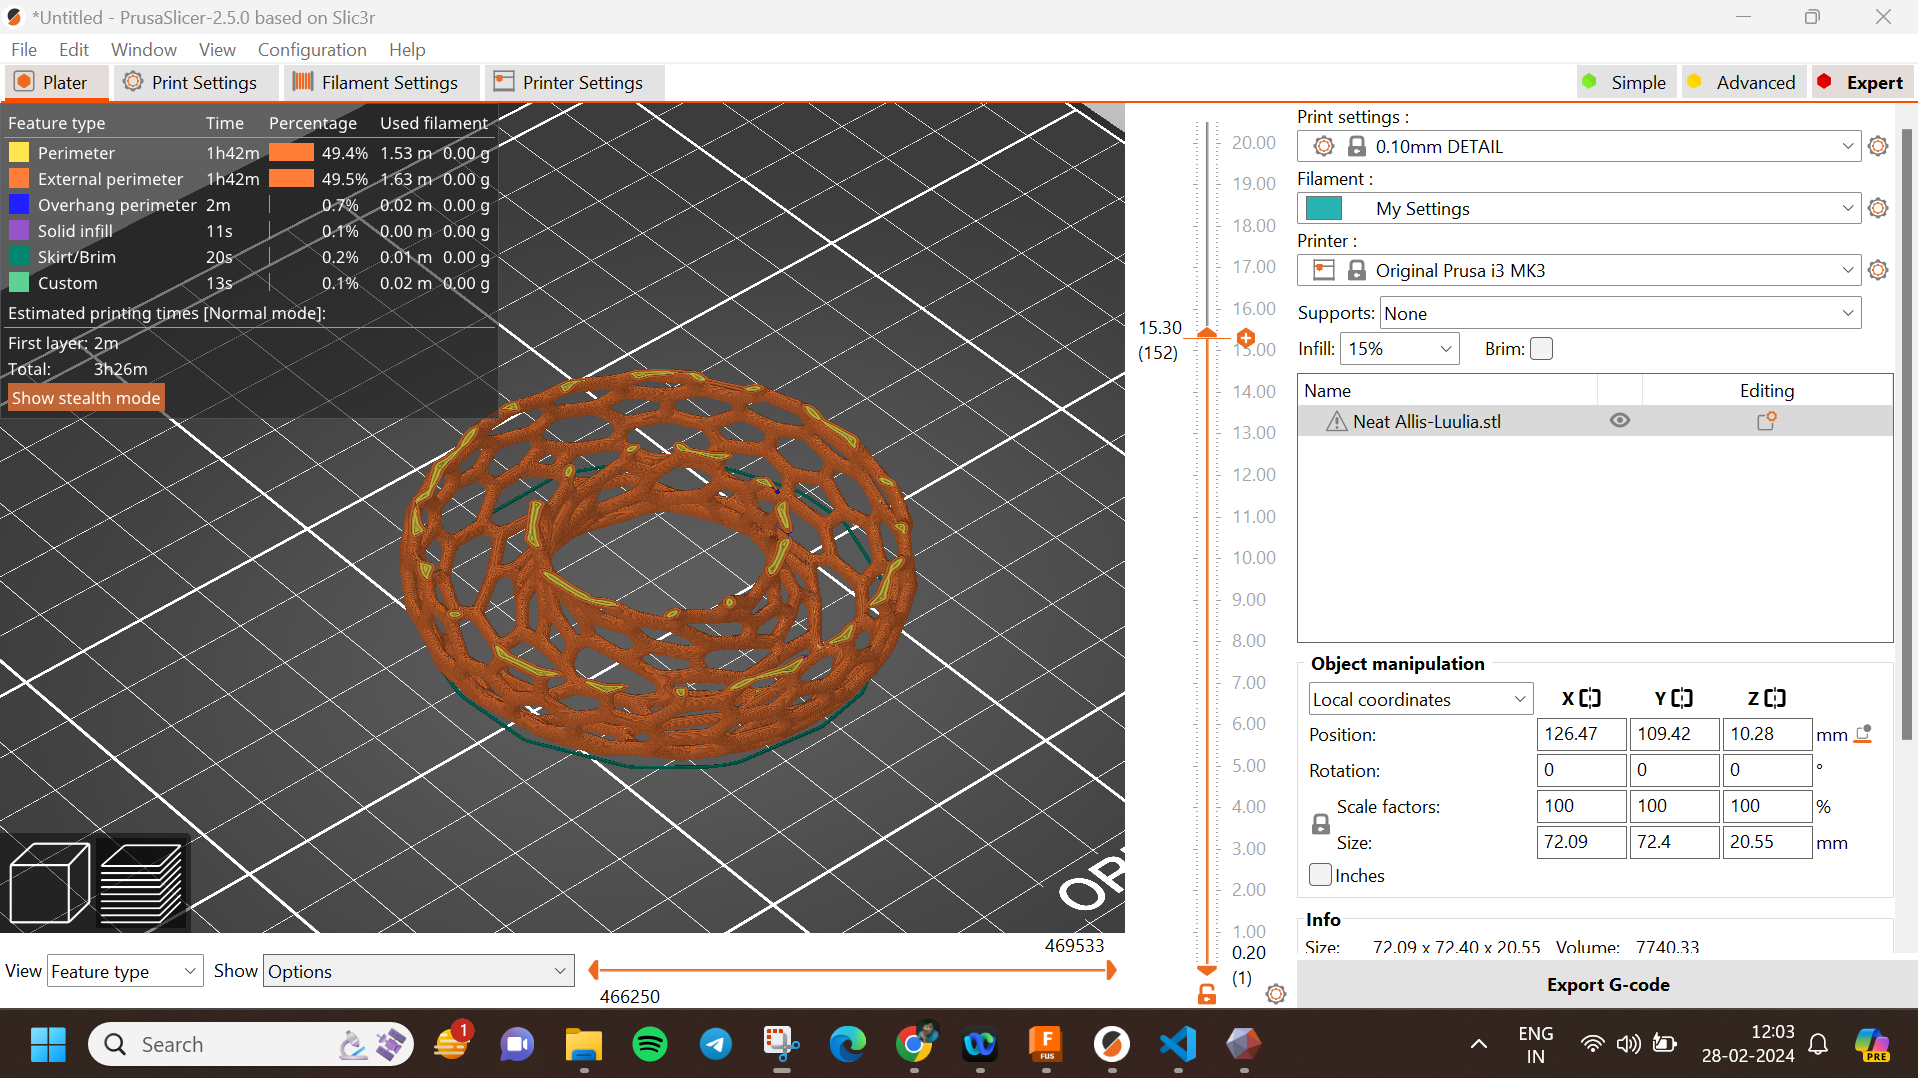
- Slicing the Model: With all settings adjusted, I initiated the slicing process within PrusaSlicer, which generated the G-code instructions required for 3D printing the Voronoi patterned torus-shaped donut.
- Preview and Analysis: Before proceeding with printing, I reviewed the sliced model in PrusaSlicer's preview mode, analyzing each layer to ensure accuracy and identifying any potential issues that may arise during printing.
- Exporting G-code: Once satisfied with the slicing results, I exported the G-code file from PrusaSlicer, which contains the instructions for the 3D printer to follow, including movements, temperatures, and extrusion rates.
SLICER SETTINGS
Infill Density: 15%
Layer Height: 0.02 mm
Wall Thickness: 3
Bed Temperature: 60°C
Nozzle Temperature: 210°C
Filament: PLA (eSun PLA)
Filament Size: 1.75 mm
PRINTING
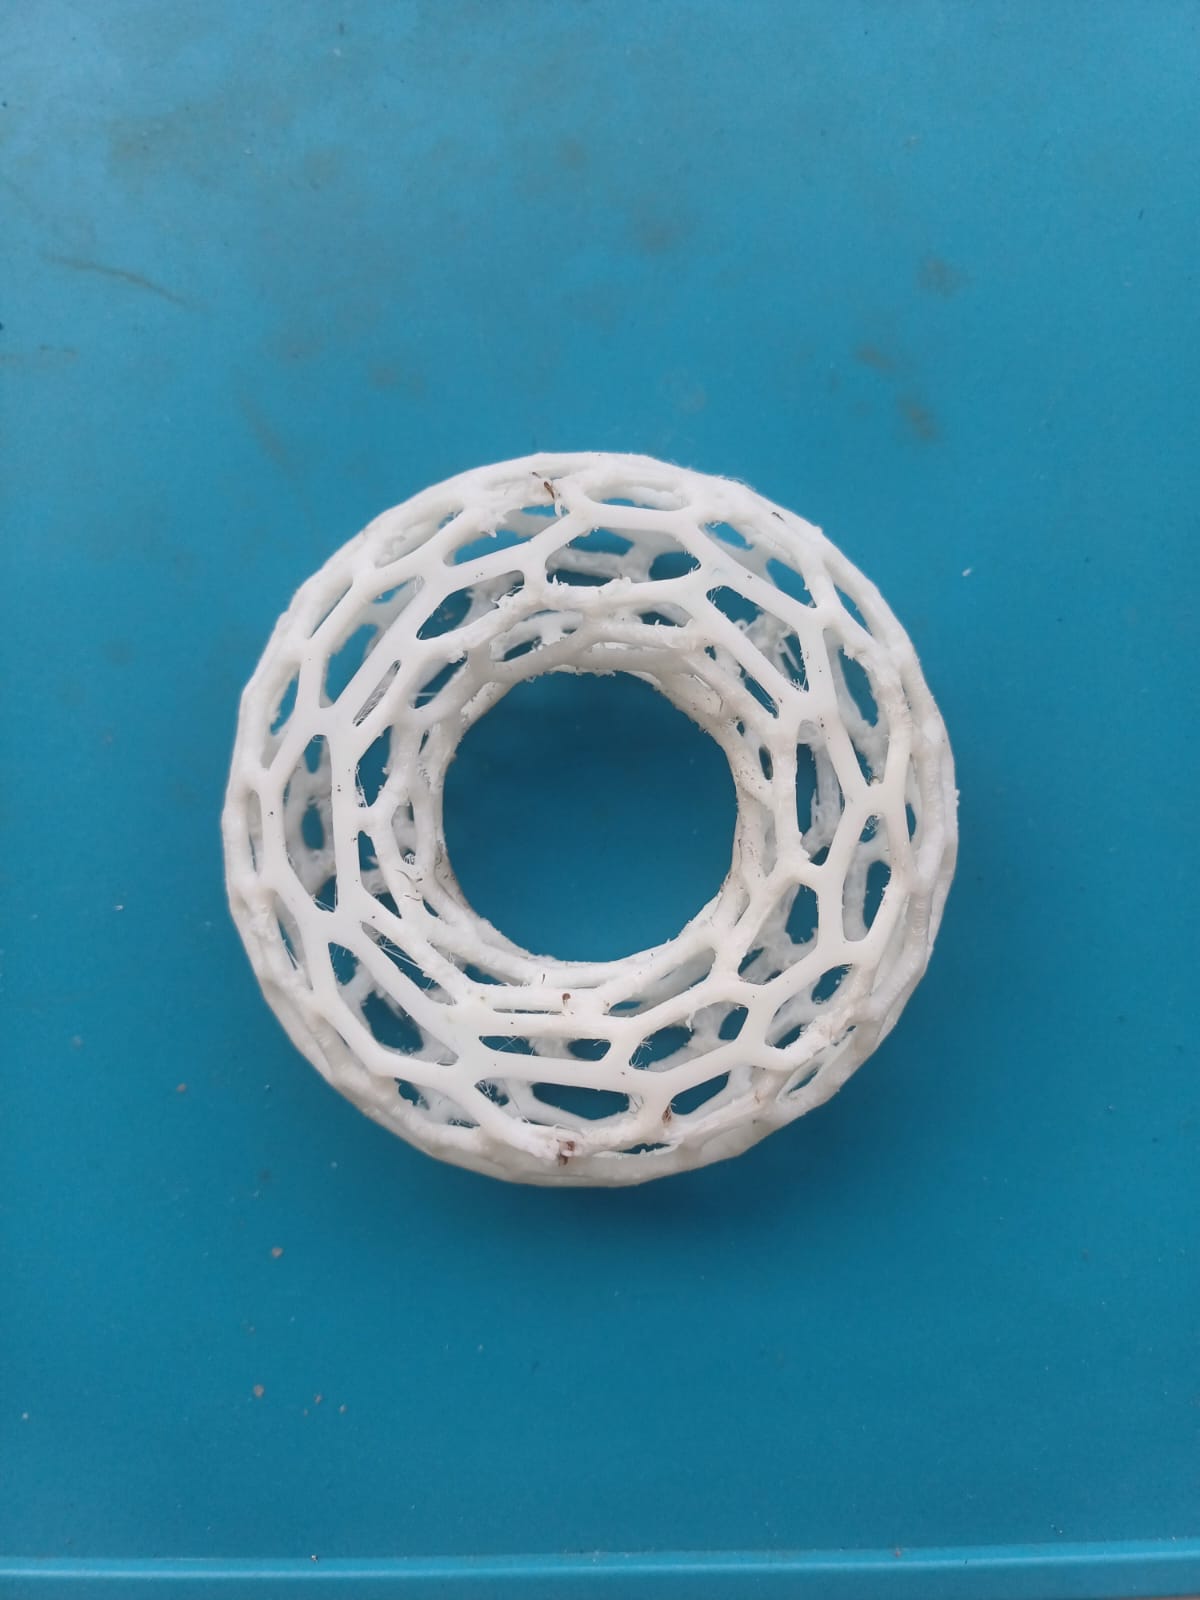
The print process began by inserting the SD card containing the sliced file into the designated slot on the 3D printer. Navigating through the printer's interface, the appropriate file was selected to initiate the print job. With the command given, the printer seamlessly transitioned into action, meticulously depositing layers of filament onto the build plate based on the intricate G-code instructions derived from the sliced file. Throughout the printing duration, diligent monitoring was conducted to ensure consistent adhesion of each layer, optimal filament flow, and overall print quality. This vigilant oversight ensured the successful execution of the print job, resulting in the creation of the Voronoi patterned torus-shaped donut with precision and accuracy.
.jpeg )
3D Scanning
3D scanning involves capturing the shape and appearance of real-world objects to create digital 3D models. It can be achieved using various techniques, including laser scanning, structured light scanning, and photogrammetry.
machine introduction
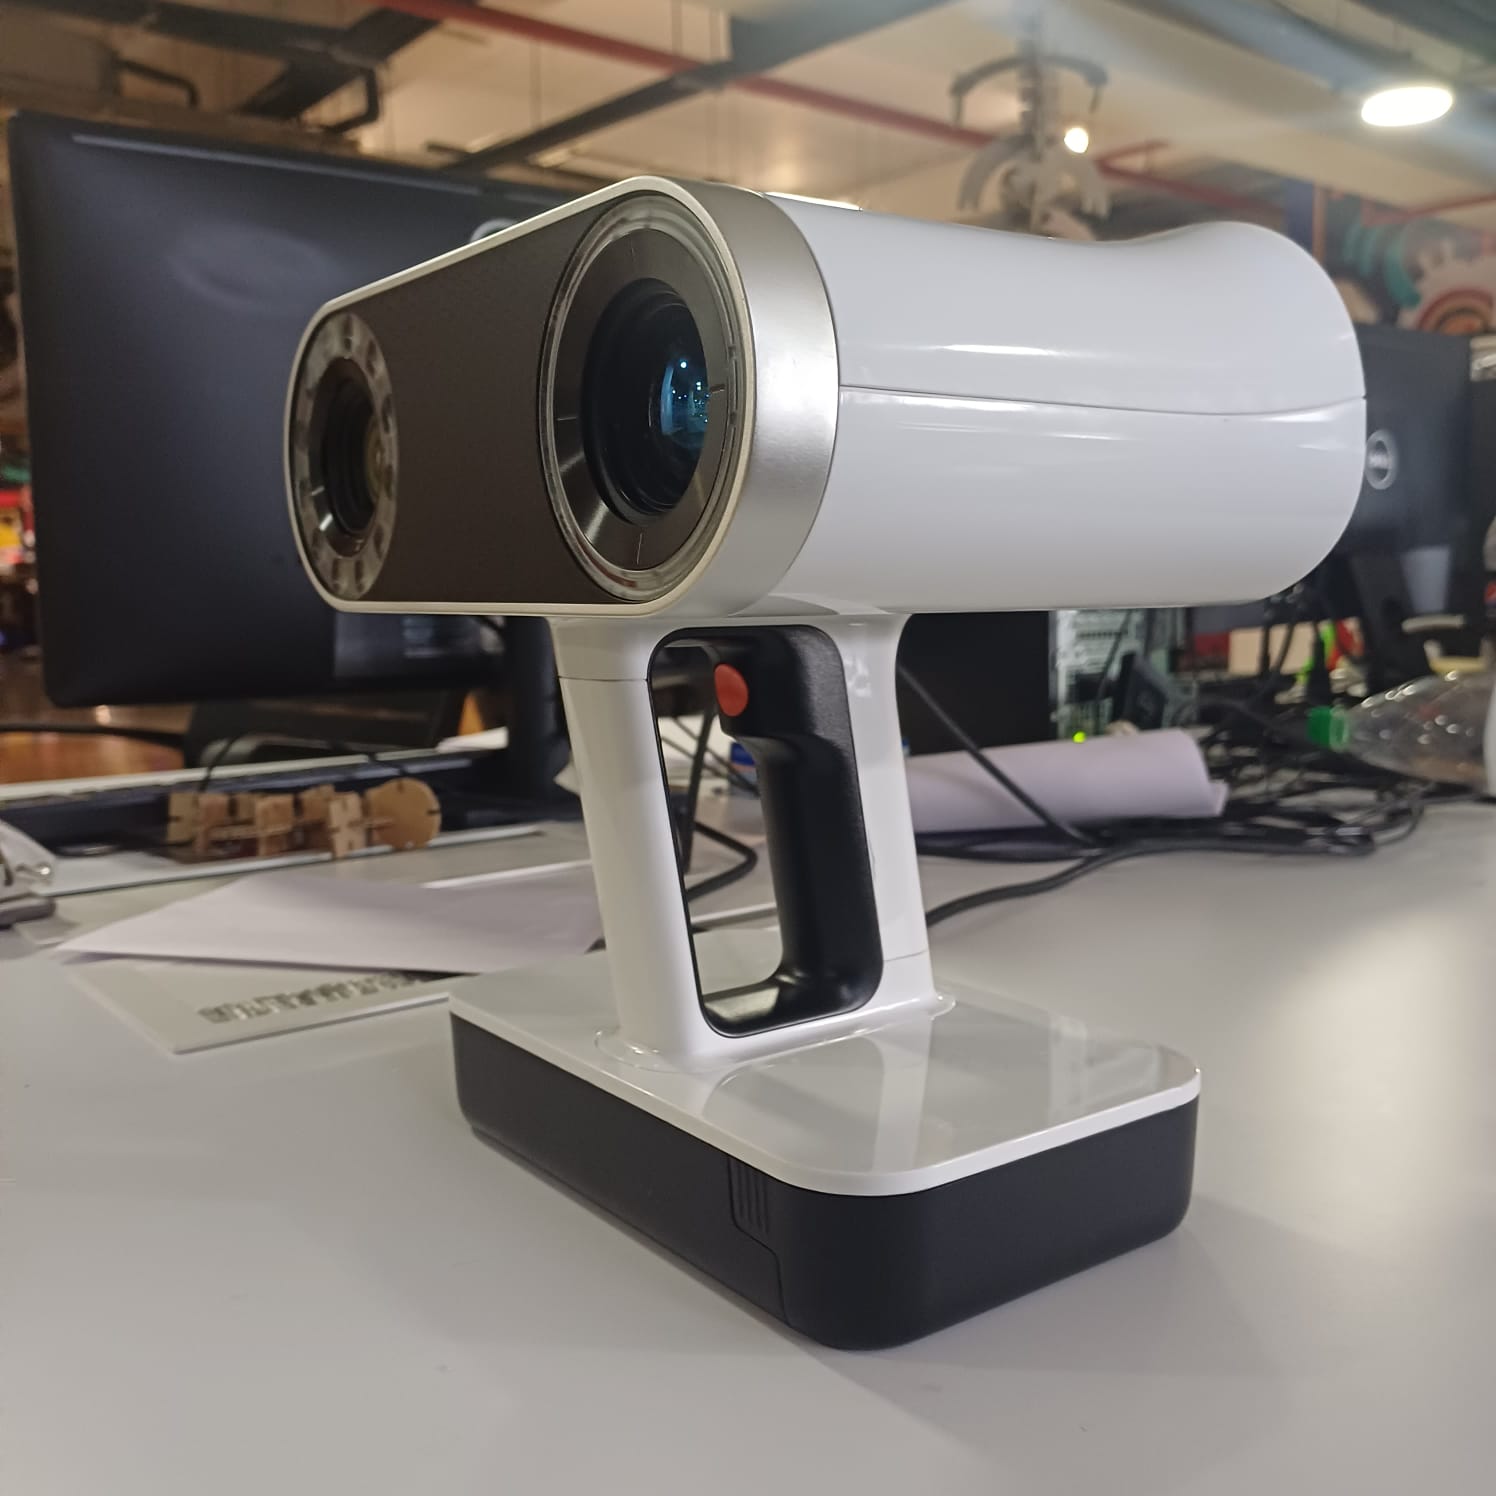
ARTEC LEO
Artec Leo is a cutting-edge 3D scanner renowned for its advanced technology and exceptional performance. Developed by Artec 3D, a leading provider of professional 3D scanning solutions, the Leo stands out for its ease of use and versatility. This handheld scanner offers high-resolution scanning capabilities with remarkable accuracy, making it ideal for various industries such as engineering, design, healthcare, and more. Its ergonomic design, intuitive interface, and real-time scanning feedback empower users to capture intricate details with precision and efficiency. Equipped with state-of-the-art features like built-in touchscreen display, onboard processing, and wireless connectivity, the Leo enables seamless integration into diverse workflows, whether in the field or in a studio environment. With its unmatched speed and reliability, the Artec Leo continues to redefine the standards of 3D scanning technology, empowering professionals to unleash their creativity and innovation across countless applications.
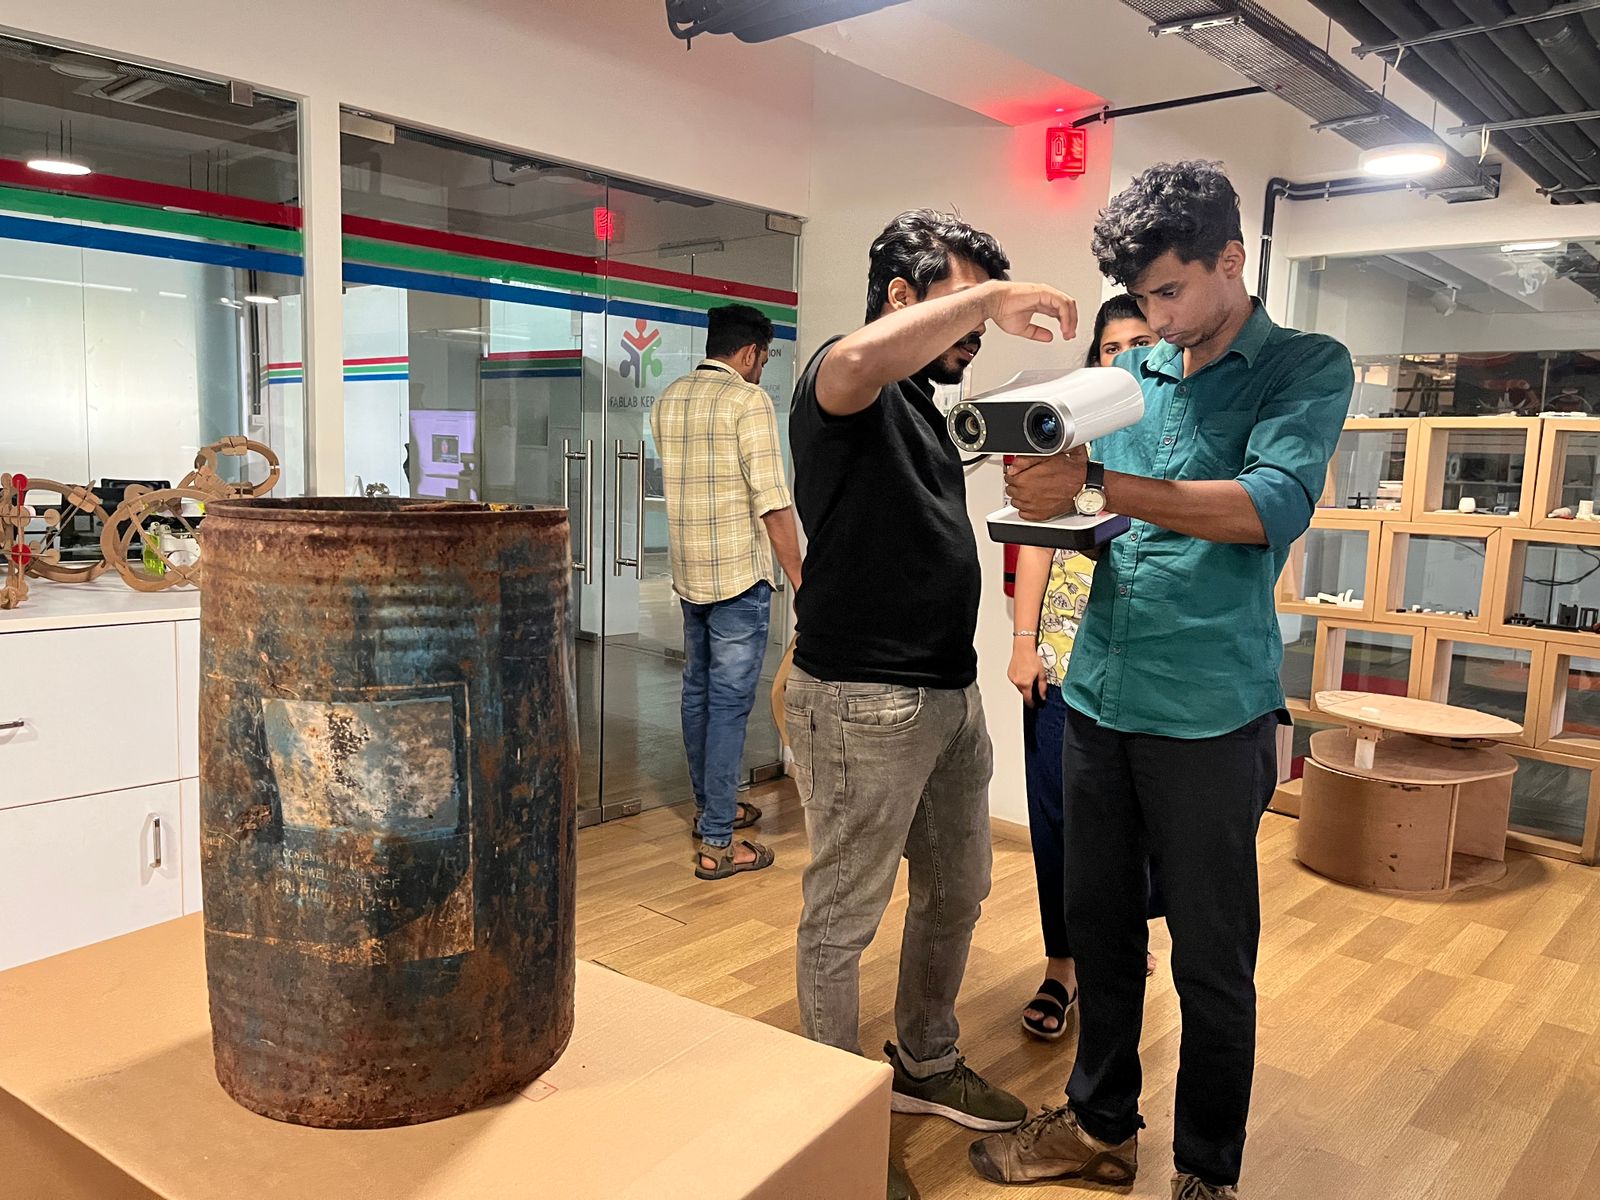
I embarked on a project to capture the texture of an old, rusted can using the Artec Leo 3D Scanner. The process unfolded in three straightforward steps. Firstly, I prepared for the scanning session by thoroughly cleaning the can to ensure a clear surface for scanning. Simultaneously, I made sure the Artec Leo was fully charged and calibrated for optimal performance. With preparations complete, I began the scanning process, selecting the handheld mode on the Artec Leo for flexibility and ease of use. Slowly and systematically, I moved the scanner around the can, ensuring to capture every detail of its textured surface. Throughout the scanning process, the built-in touchscreen provided real-time feedback, allowing me to adjust and refine my movements as needed. Once the scanning was finished, I processed the captured data using Artec Studio software.
ARTEC STUDIO
Step 1: Launch Artec Studio- Open Artec Studio 15 Professional x64 version 15.1.2.60.
- Wait for the software to initialize.
- Create a new project by selecting "File" > "New Project."
- Save the project by selecting "File" > "Save Project As" and specifying the desired location (e.g., C:\Users\ADMIN\Documents\Artec Studio Projects\sayanth\sayanth can\sayanth can.sproj).
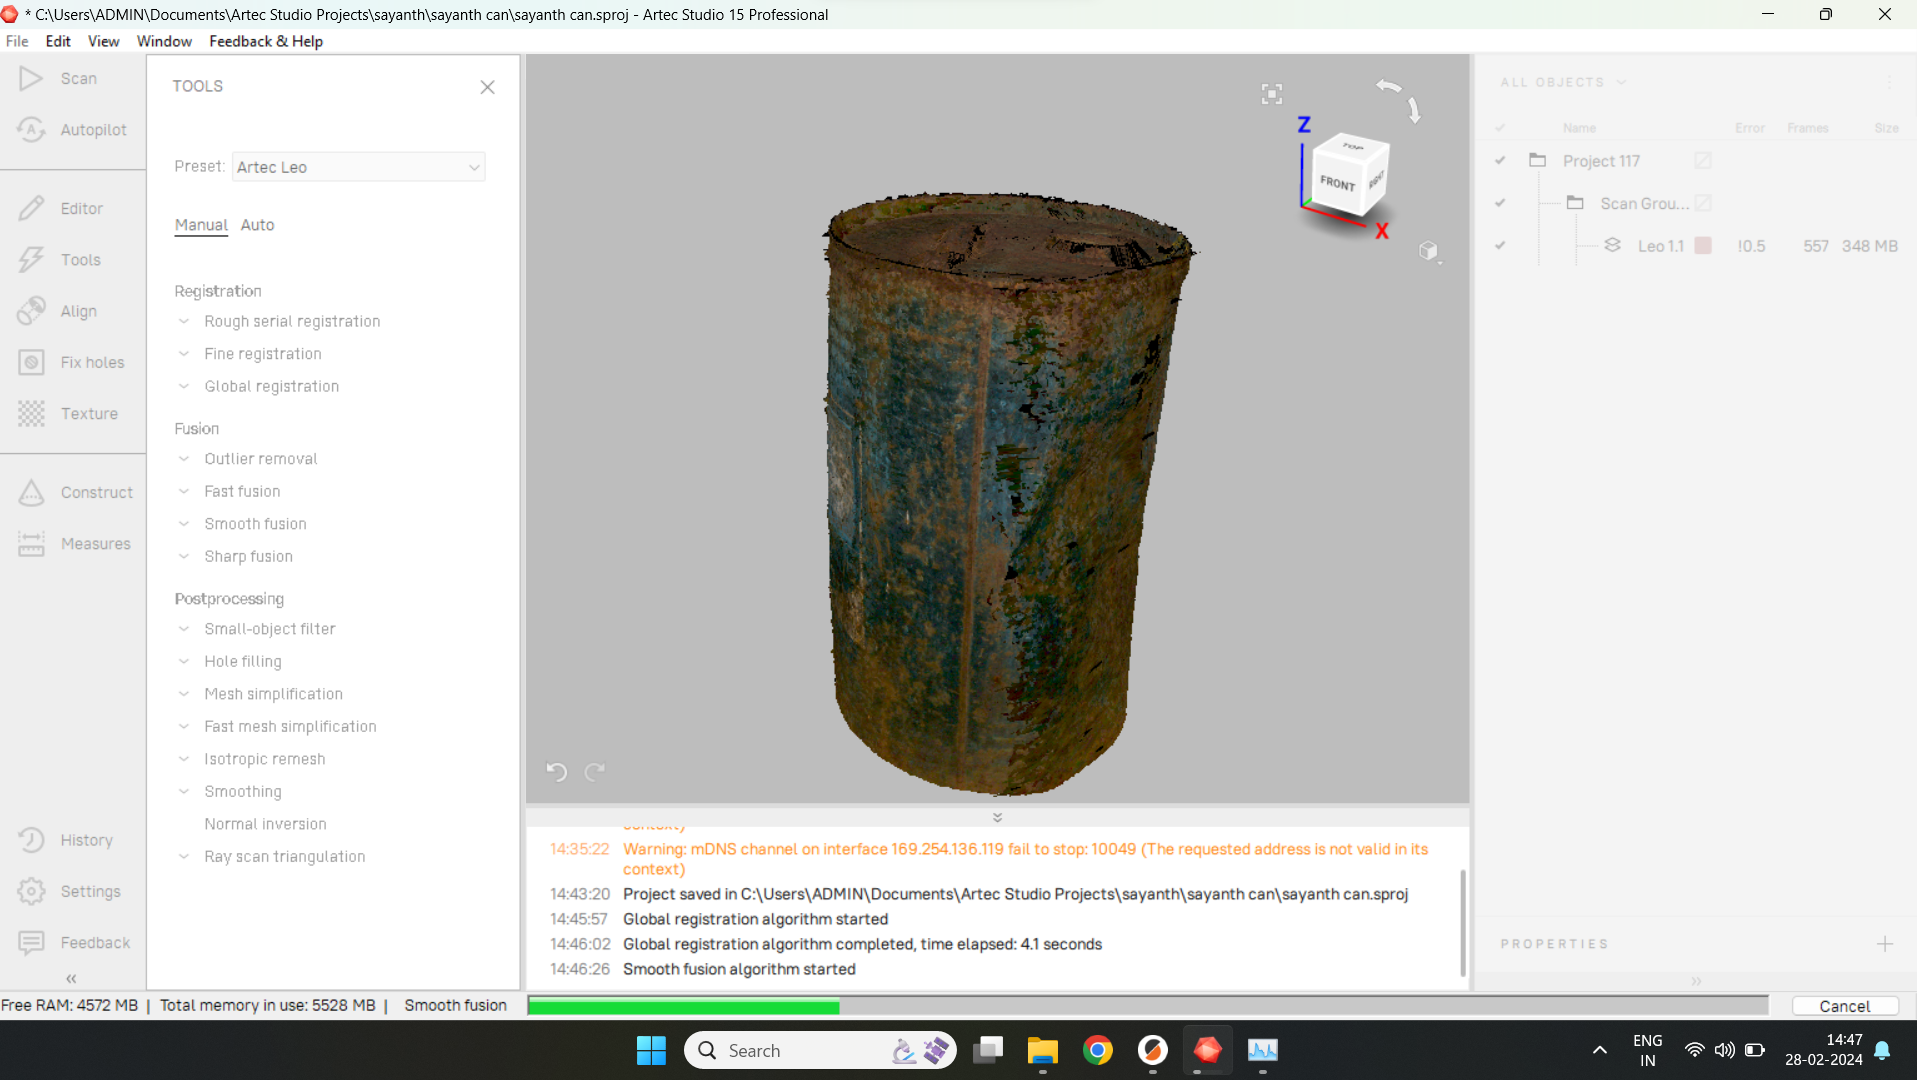
Step 3: Global Registration
- Start the Global Registration algorithm by selecting the appropriate option from the menu.
- Wait for the registration process to complete. This step aligns multiple scans into a single coordinate system.
- Initiate the Smooth Fusion algorithm from the menu.
- Allow the software to perform mesh fusion, smoothing out any irregularities in the scan data.
- Wait for the fusion process to finish.
- Execute the Small-Object Filter algorithm to remove small artifacts or noise from the scan.
- Wait for the filtering process to complete.
- Start the Hole Filling algorithm to fill in any gaps or holes in the mesh data.
- Allow the software to automatically fill in the gaps.
- Wait for the hole filling process to finish.
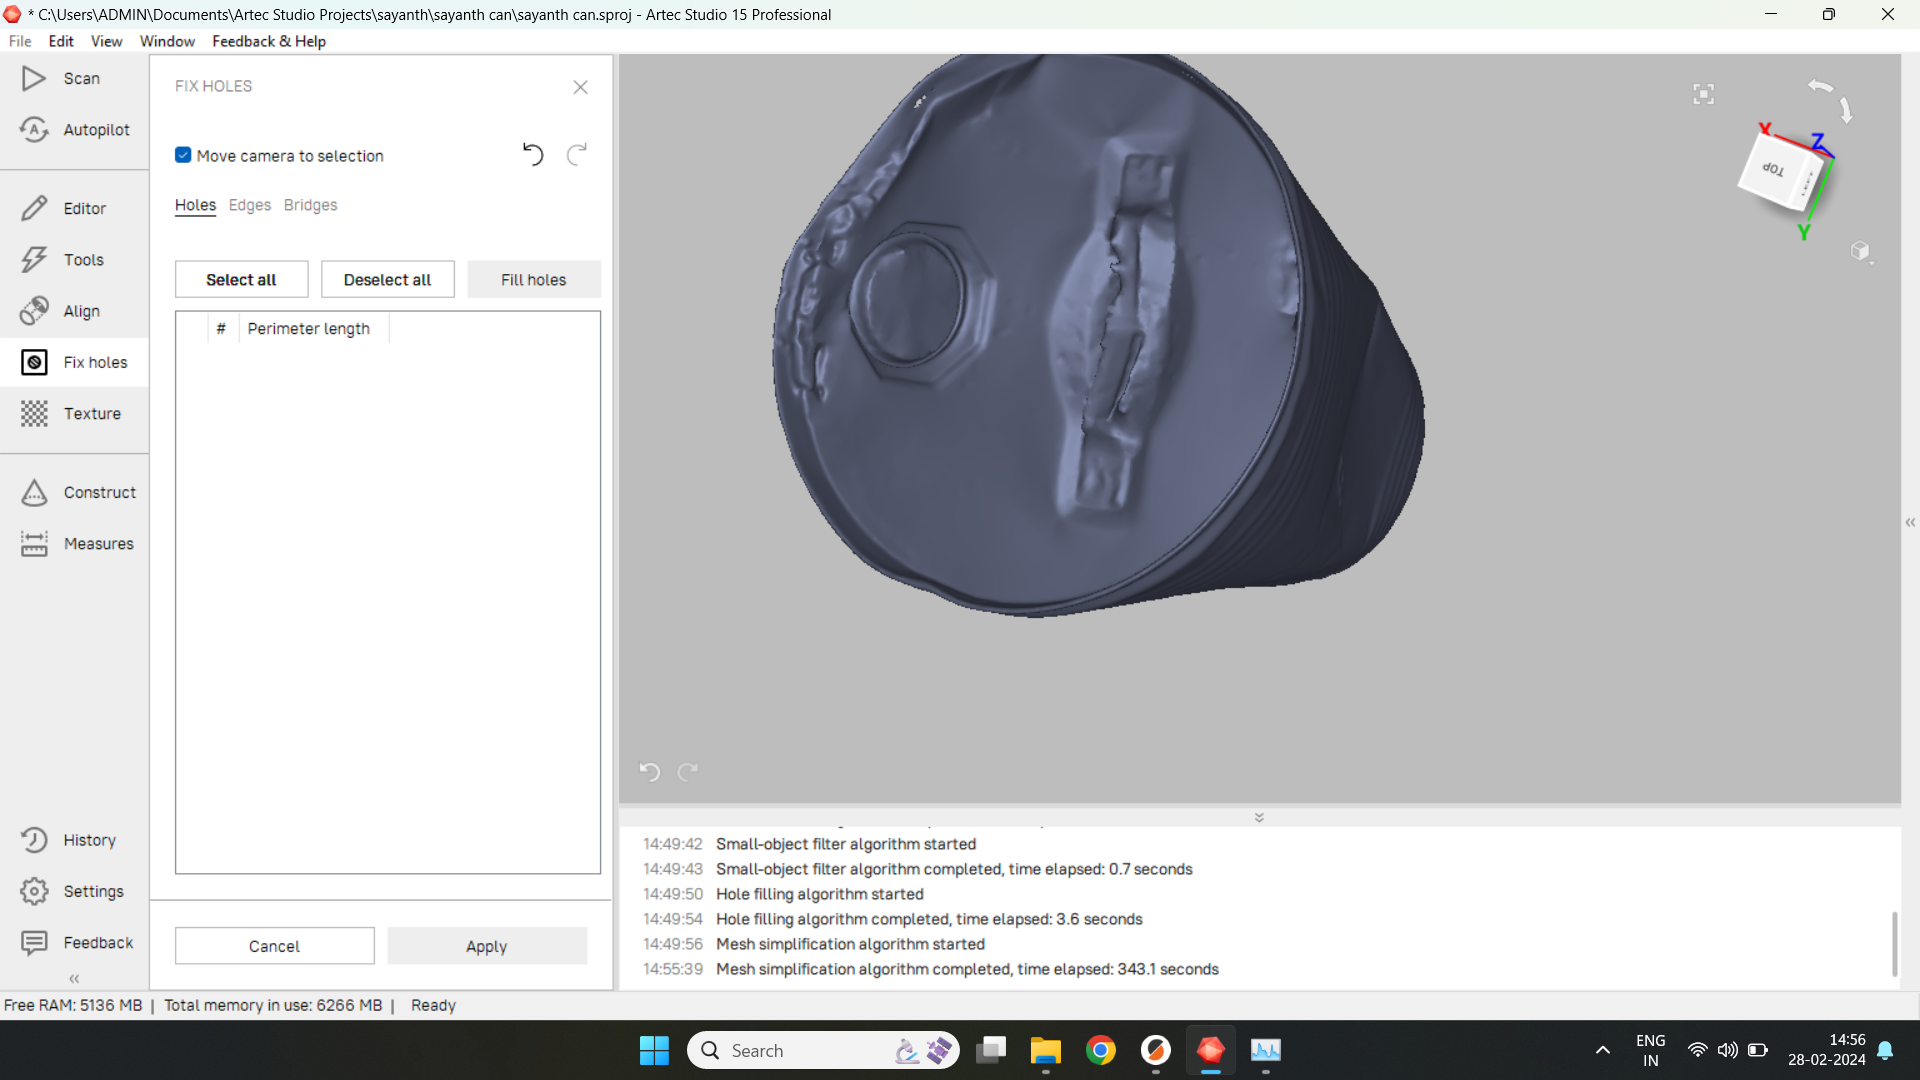
Step 7: Mesh Simplification
- Begin the Mesh Simplification algorithm to reduce the complexity of the mesh data while preserving essential details.
- Wait for the simplification process to complete.
- Start the Texture Mapping algorithm to apply texture data to the mesh model.
- Allow the software to map textures onto the surface of the model.
- Wait for the texture mapping process to finish.
- Initiate the Texture Inpainting algorithm to refine and enhance the texture mapping, filling in any missing or distorted areas.
- Allow the software to complete the inpainting process.
- Review the processed scan data to ensure satisfactory results.
- Save the final project by selecting "File" > "Save Project."
- Document any specific settings or adjustments made during the scanning process for future reference.
this is the links to view the 3d files of my scanned parts
Click here to visitmachine introduction
formlabs form
printing a small part
Preparation: Before diving into printing, I ensured that the Form 3+ was set up correctly and calibrated for optimal performance. This involved checking the resin tank, loading the desired resin, and confirming that the build platform was clean and ready.
Design Setup: With the hardware ready, I focused on preparing my design for printing. I used the Formlabs PreForm software, specifically designed for Formlabs printers, to import and position my 3D model. Using PreForm's intuitive interface, I adjusted the orientation, supports, and other settings to ensure successful printing.
Printing Process: Once satisfied with the setup, I initiated the printing process through the PreForm software. I selected the appropriate print settings, such as layer height and resin type, based on the requirements of my project. With a simple click, I sent the print job to the Form 3+, eagerly anticipating the transformation of my digital design into a physical object.
Monitoring and Completion: Throughout the printing process, I periodically checked on the Form 3+ to ensure everything was proceeding smoothly. The printer's advanced technology, including its precise laser system and automated resin dispensing, inspired confidence in the outcome. After the printing was complete, I carefully removed the finished object from the build platform and post-processed it as needed, reveling in the satisfaction of seeing my creation materialize before my eyes.
download the donut heredownload the vernoi donut here
