Week 2 Assignment
CAD DESIGN
Vector vs Raster Graphics
Vector Graphics
- Definition: Vector graphics use mathematical equations to create shapes and lines. These graphics are composed of paths defined by a start and end point, along with other points, curves, and angles.
- Scalability: Vector graphics are resolution-independent, meaning they can be scaled to any size without losing quality.
- File Formats: Common vector file formats include SVG, AI, and EPS.
- Uses: Ideal for logos, icons, and other designs that require scalability and precision.
Raster Graphics
- Definition: Raster graphics are made up of pixels, each with a fixed color and position. These graphics are essentially a grid of individual pixels.
- Scalability: Raster graphics are resolution-dependent, meaning they can lose quality and appear pixelated when scaled up.
- File Formats: Common raster file formats include JPEG, PNG, GIF, and BMP.
- Uses: Best suited for photographs and detailed images with complex color variations.

This week the goal was to understand 2d and 3d software this is a stronghold of mine I suppose but I think I should use the opportunity to learn software that is not familiar to me in both Rasper, vector, and 3d design software I am familiar will Inkscape for vector ,photope for rasper and fusion 360 and blender for 3d so I think I will use them last and try some new3 software first I chose gimp, photoshop, in the rasper software and adobe illustrator and coral draw and in 3d I will use SketchUp and freeecad. The aim is to broaden my skill set, improve my adaptability and gain a new perspective on how different software can be used to achieve similar results in design.
2D
STARTING WITH RASTER SOFTWARE
GIMP
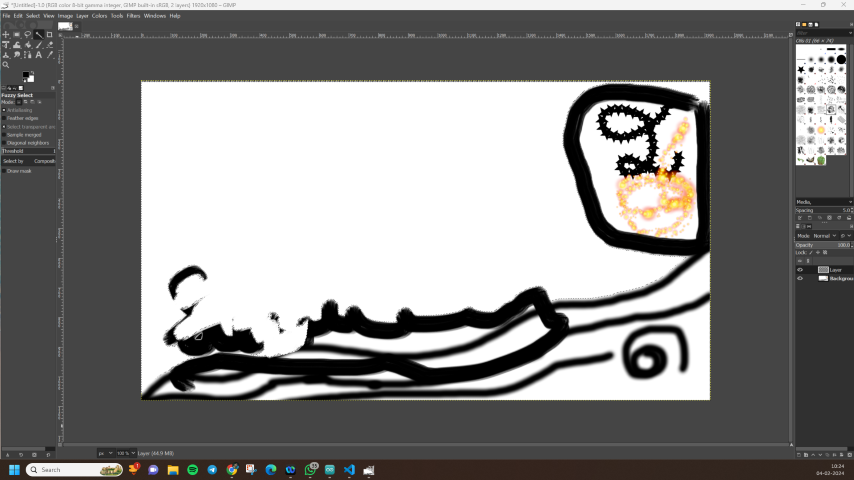
Starting with gimp I downloaded it from the official website to my local PC After installation, I opened the software and familiarized myself with its user interface. I played around with its features, testing out various tools and options to understand their functions. and I decided to do a simple project in it I decided to create a basic logo design. The process started with selecting the right shape and color, and then adding text and other graphic elements. Overall, GIMP proved to be a versatile tool for raster graphics editing.
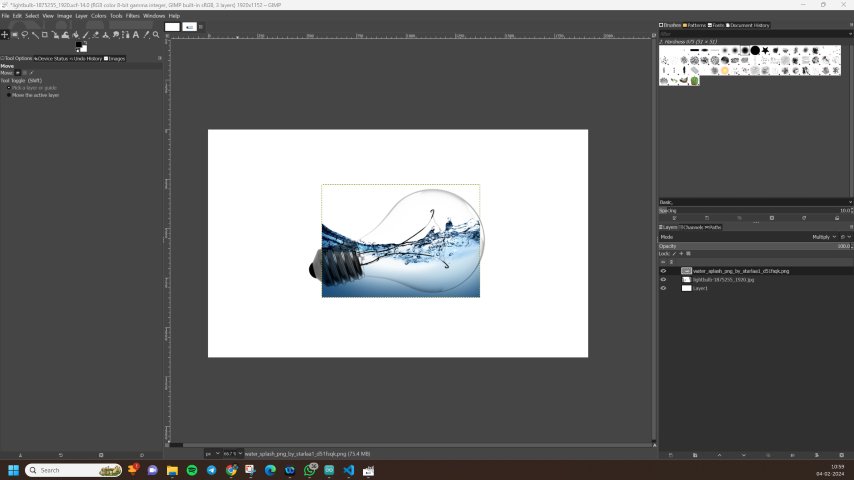
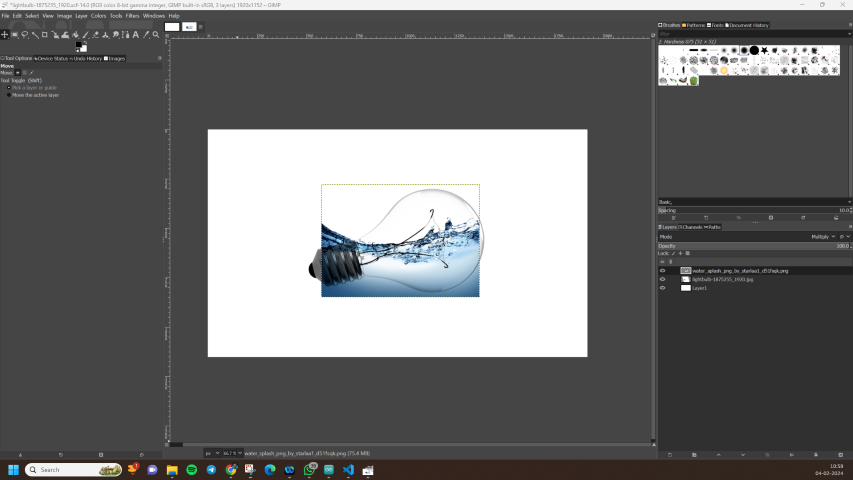
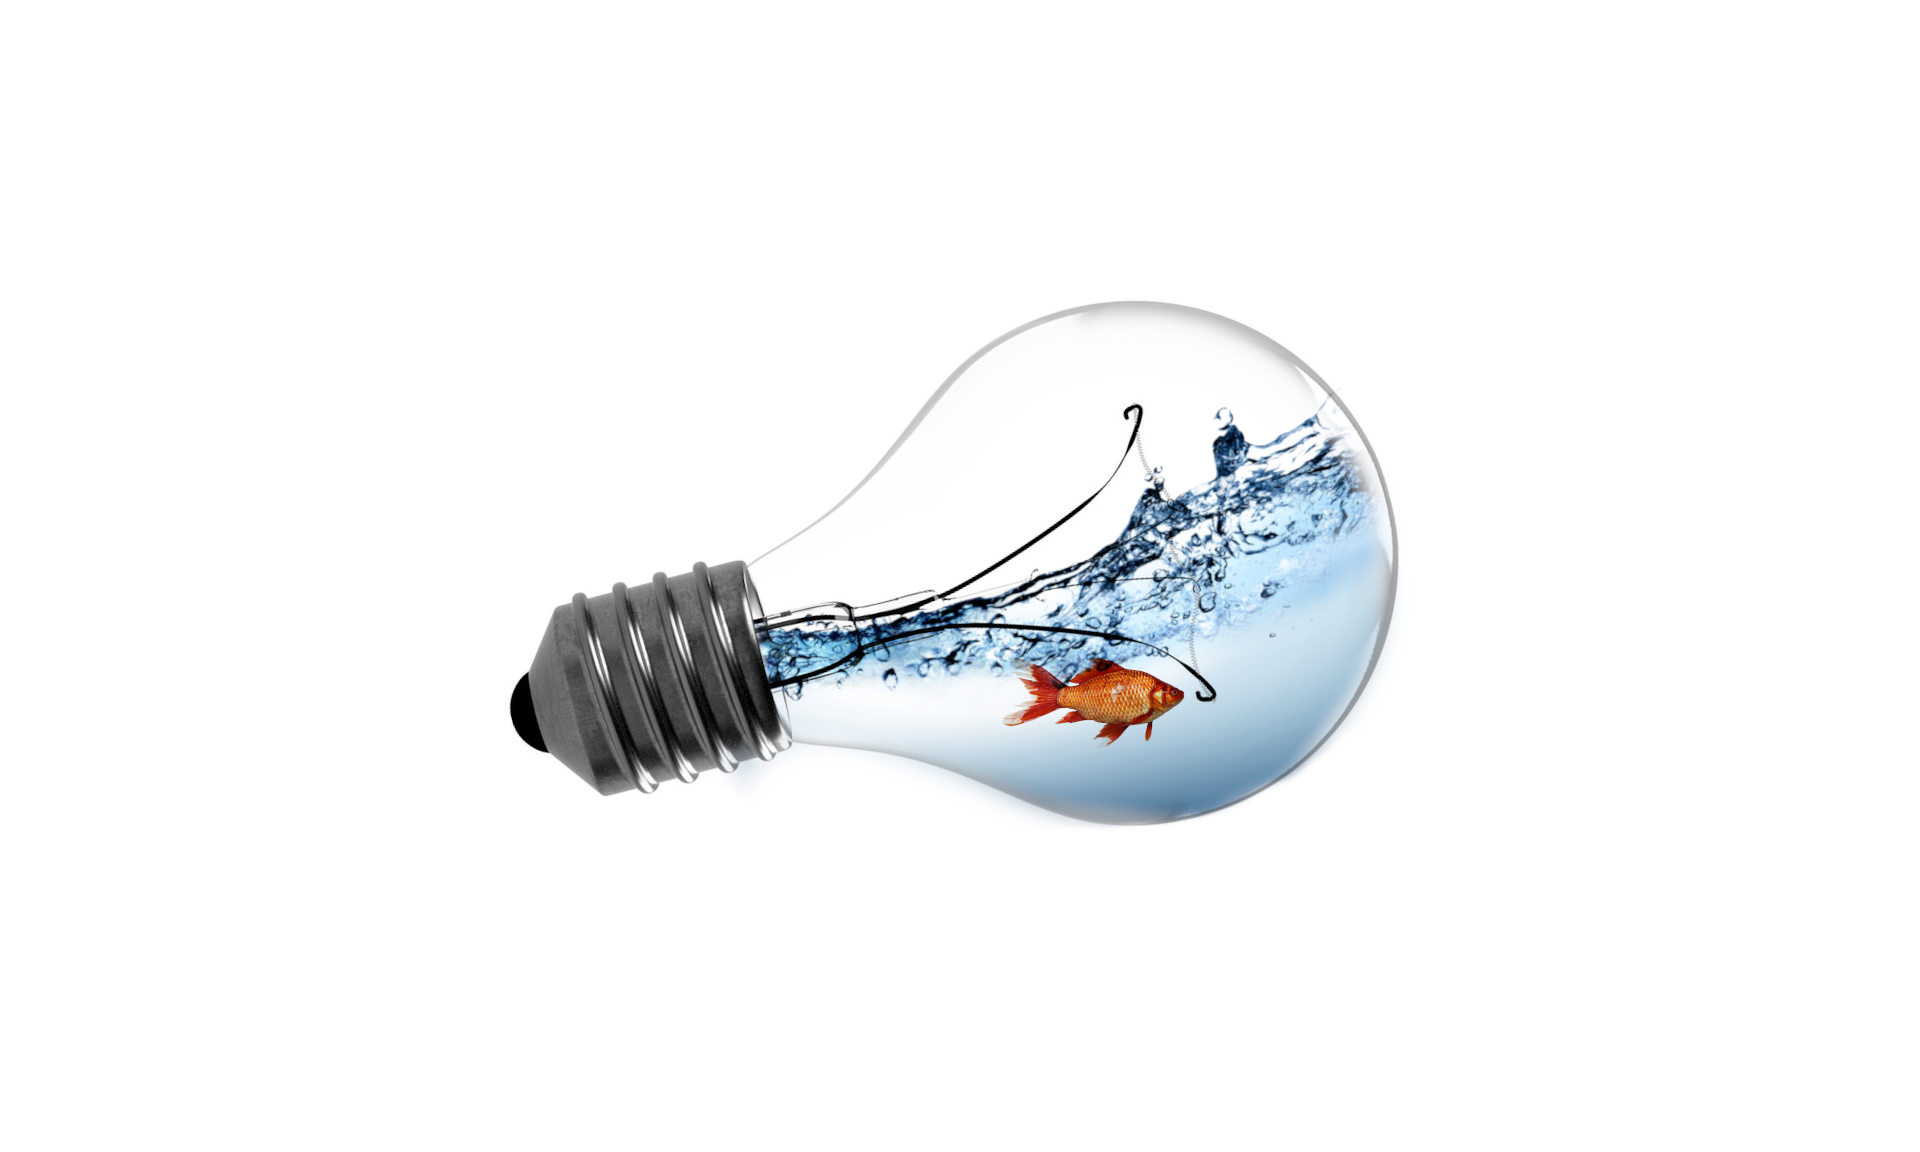
so I started with a YouTube tutorials that covers the basics and took a project that will create an aquarium inside a bulb I started with downloading the image of the bulb water and fish then I first imported the bulb image and treated a layer for it
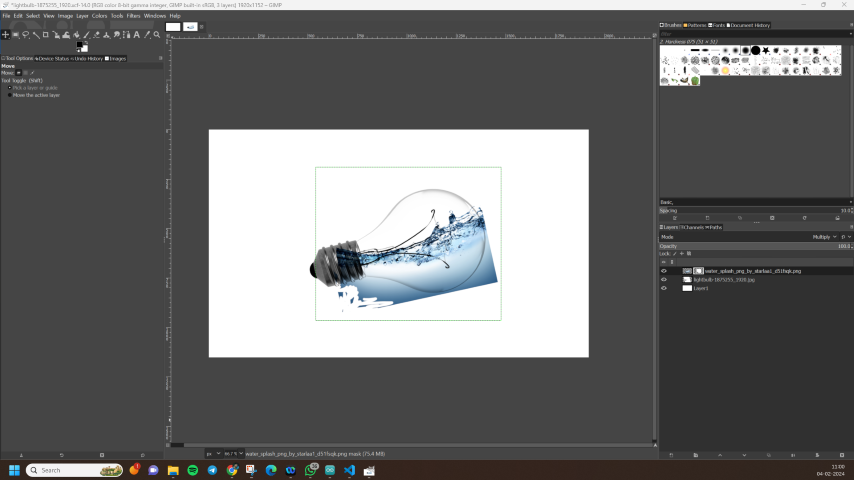
Next, I imported the water image, adjusted its size to fit inside the bulb, and used the multiply setting to make it blend then I added a layer of masks and after that, I used the bresh tool and selected the white color I removed the unwanted parts from the border of the bulb and create another layer for it. I then added the fish images, carefully placing them within the water layer to create the illusion of an aquarium. This project allowed me to explore the layering and blending features of GIMP.

step 1 : impoting the images from my pc to softaware
step 2 : resiziing the images and rotating it
step 3 : adding layer mask and ersing the undwanted parts from the images
step 4 : importing the fish and resizing it and using the multiply it to make it blend wit the image
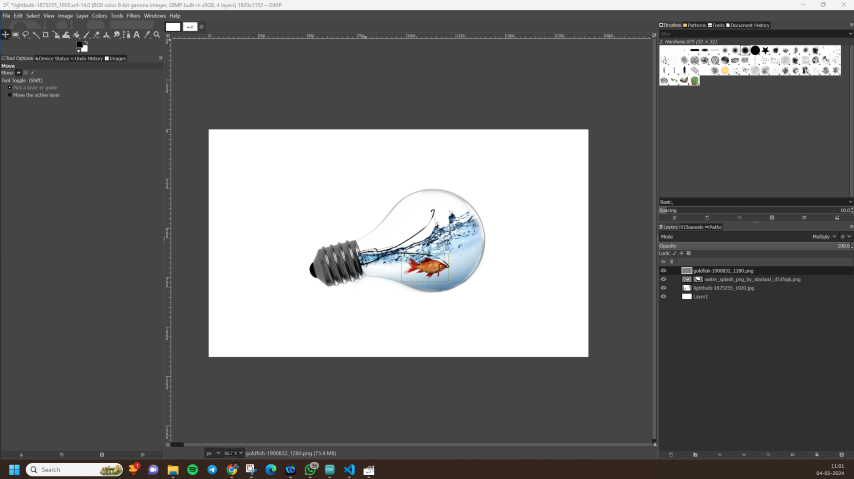
step 5 : tada the final output i think it look sgarte for a first attempt
PHOTOPE
Moving on to Photopea, another raster graphics editing software, I downloaded it and explored its interface. Similar to GIMP, I went through basic tutorials to understand its tools and functions. Photopea, being a web-based application, had a familiar layout for those accustomed to Adobe Photoshop.
i started with building a business card from the template first imported the template then I moved to importing the fab lab logo then I added a bit of text and changed the font settings I imported an image of myself also but I felt the application to be relay old and the interface being really har and confusing for me the I exported the files as PSD file for further edits if needed and a jpg of the image as well
step 1 : impoting a TEMPLATE
step 2 : importing the fab accadamy logo
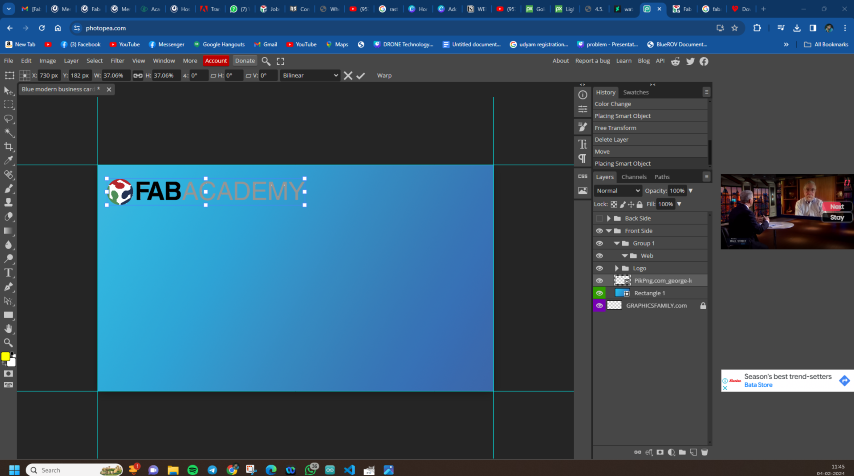
step 3 : adding some text and changeing the size and fonts to match my needs
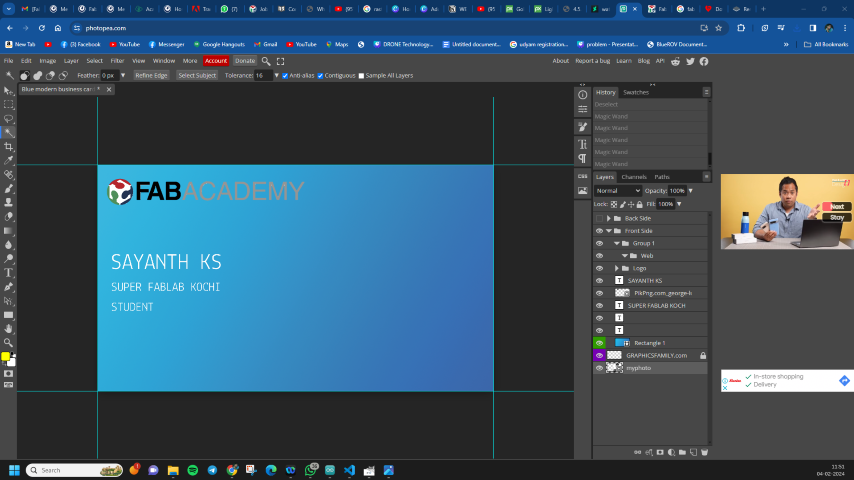
step 4 : importing a picture and turing grayscale to maket black and white
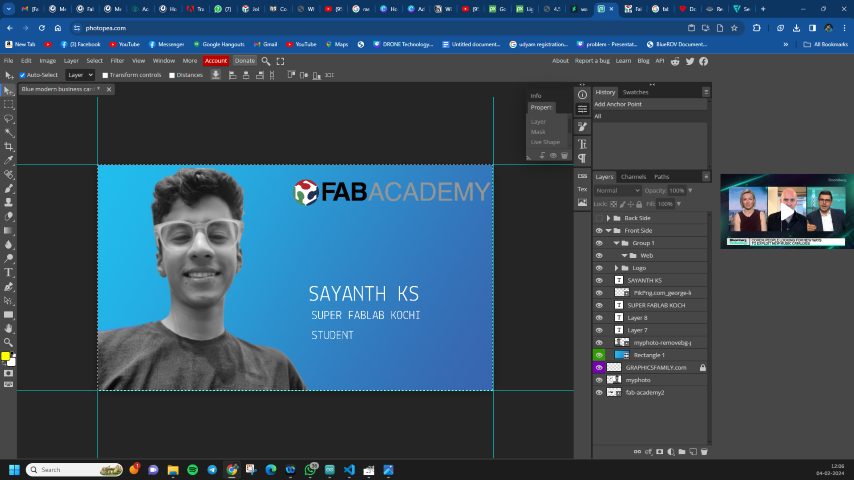
step 5 : exporting the final card

now lets start with vectoer editing software
VECTOR EDITOERS
CORAL DRAW
I downloaded and opened CorelDRAW to familiarize myself with its workspace and tools, focusing on its unique features compared to Adobe Illustrator. For a logo design project, I explored CorelDRAW's creative distortions and blending tools. These features added a different dimension to my design, showcasing the distinctive capabilities of CorelDRAW in shaping and enhancing vector graphics.
I strated with the basic stuffs becuse i had some awarenss because the software is build more similer towards inkskape
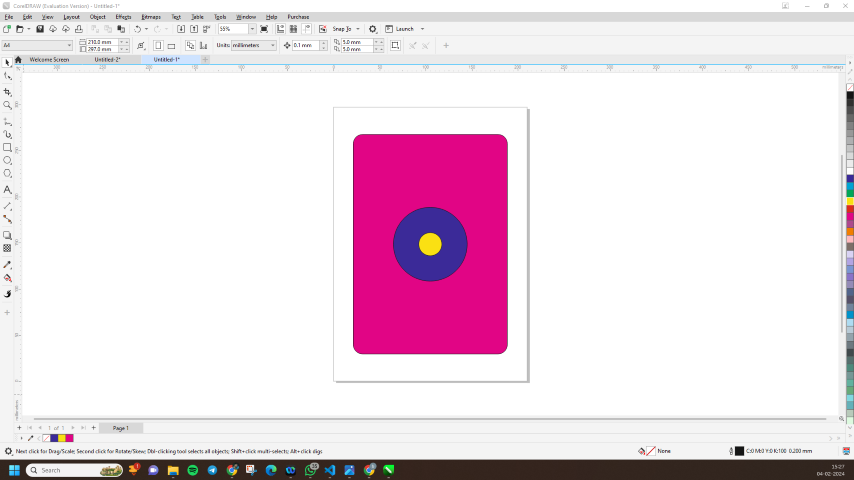
step 1 : I strated with the the generic temaplte of 290*210 mm of the coral draw softwrare
step 2 : i the used the basic shaes and explore eteh fillet,chemfer, align and distribute,groups and fill and created this basic shape below
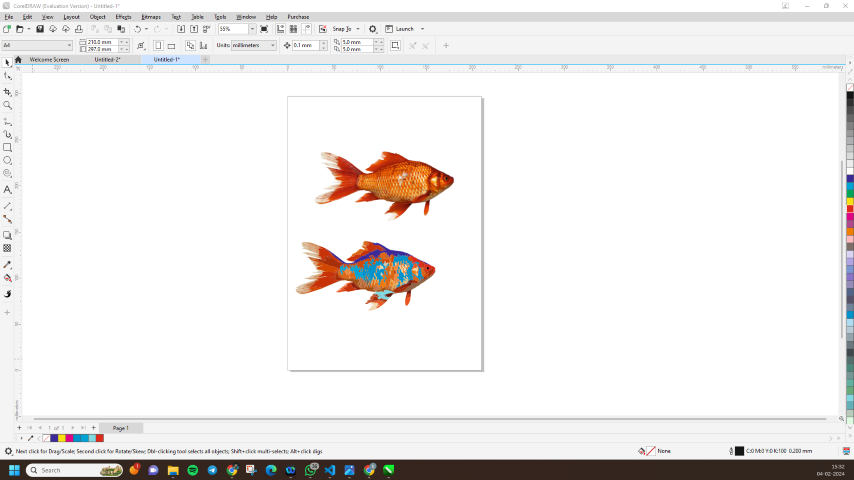
step 3 : then i moved to the bitmap trace function and imported a basic sample image then i used the tace bitmap function to trace it and craete a vectoer out of the image
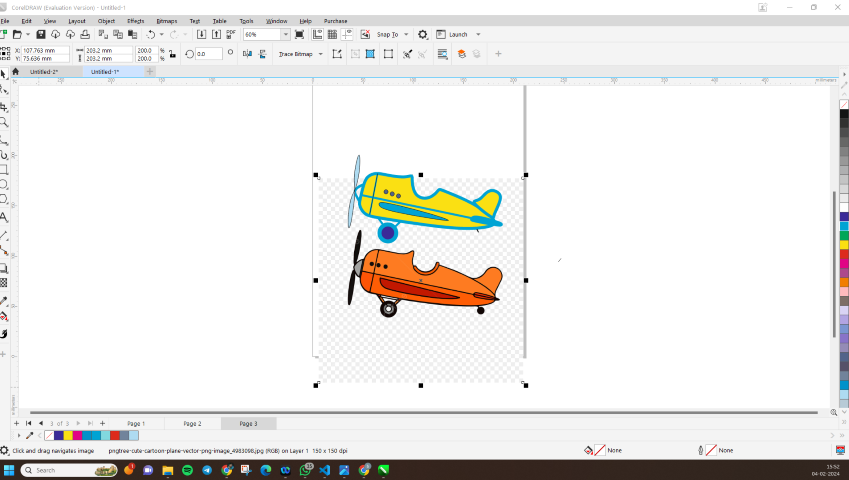
step 4 : then i moved on to using the blaizre tool to trace the line of a image and turnimng the into a small logo
step 5 : exporting the final image in multiple formates is avilabe with coral and i proced with jpg and pdf formates
INKSCAPE
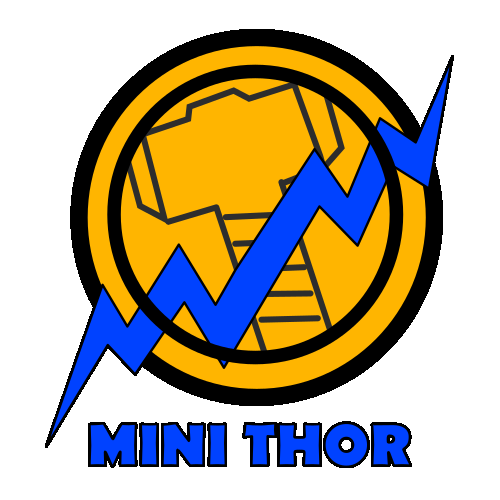
Now i have enterd my strong hold i been using the inkscape software for the last 6years and understood preety much the basics of the software and i bben loving it so far.a fantastic tool for creating cool designs. I know the ins and outs of it and love how it helps me bring my ideas to life. It's like my creative home base. this is the first logo i evener designed back in 2019
so i though i will design something towrads my final project may be a logo or a basic dimntional sketch
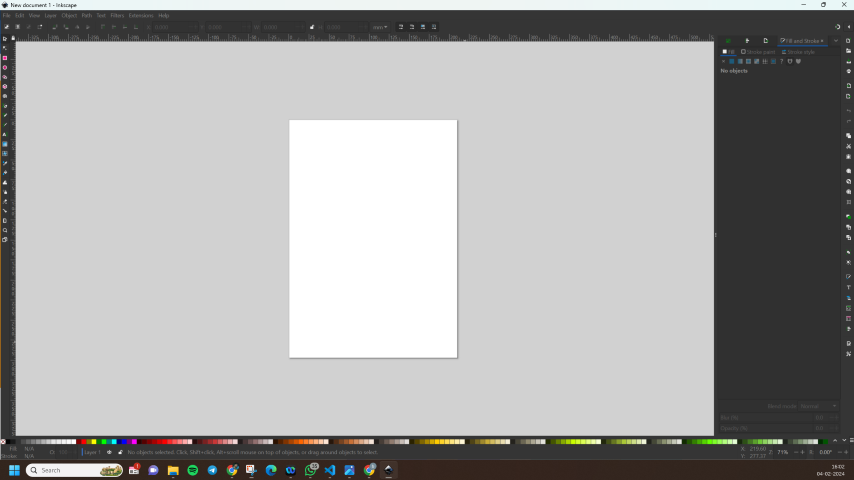
step 1 : as my final project is a edm machine i thought i will name it mini thor so we will start with a basic logo i will set the template size to be 500px*500px
step 2 : Then imported a basic jpg image then i used the bezier tool to trace teh paths and used align and distribute,leyar tool along with other tools
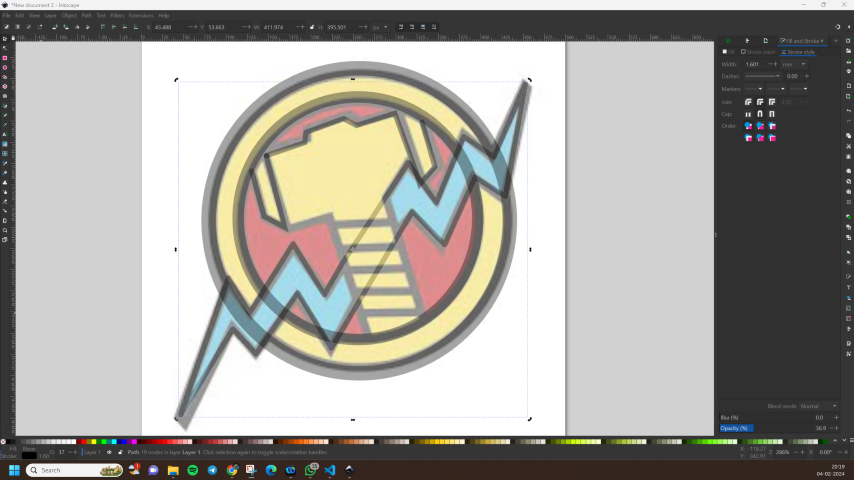
step 4 : then i moved on to using the blaizre tool to trace the line of a image and turnimng the into a small logo
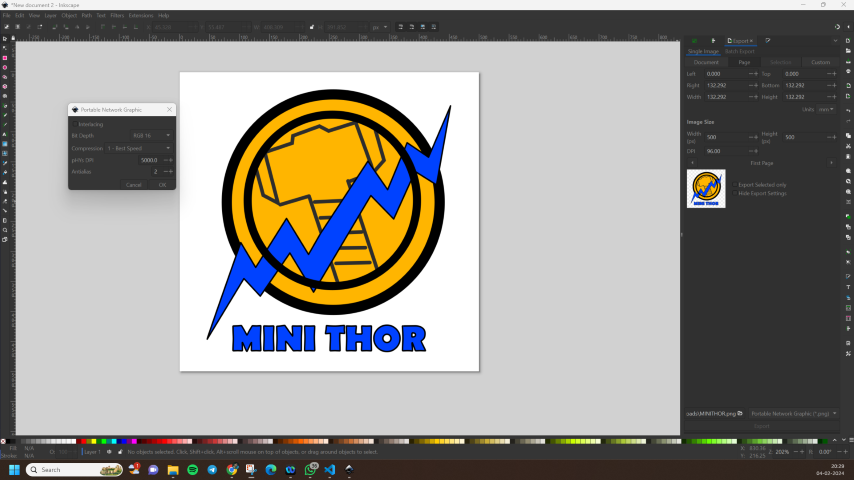
step 5 : exporting the final image and used the export opations to save the image with out changeing the physcial realutions
3D DESIGN
FREE CAD
I was prety fimmiler with bacis of 3d design becuse i have my roots in toola nd die ennginering and manufacturing technolaogy iam fimiler with fusion 360 and a bit of blender so i thoush i will start with some other 3d design softwares so i can get a understnging about aopther softwares as will i kick of with free cad software
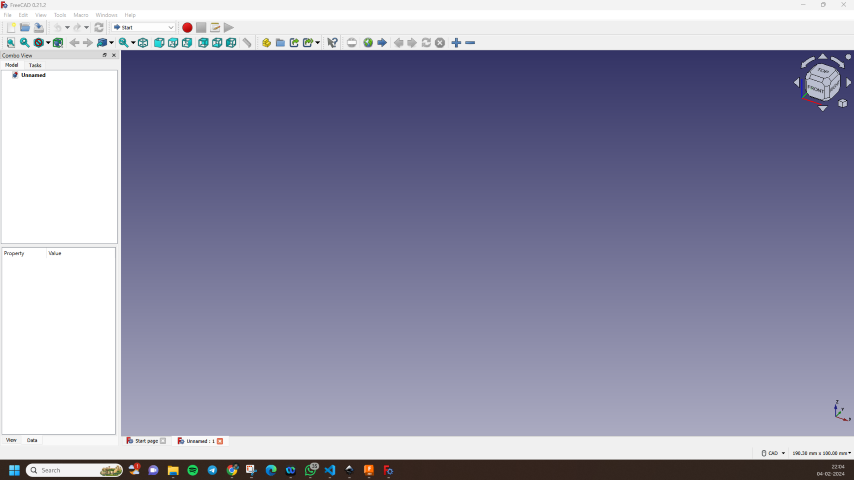
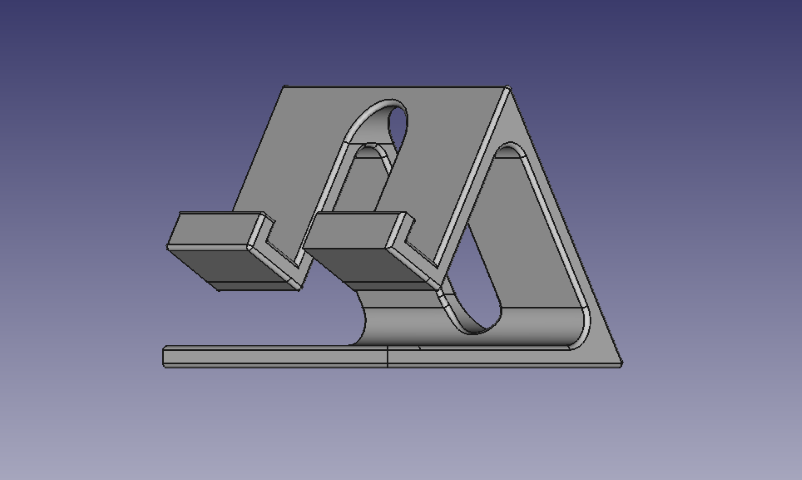
step 1 : i started with just loking around the tools and enviorment then i came a cross a phone holder so i thought i will take up the challange and make it

step 2 : i stared with crteing the basic sketch using the line tool and constrains to get the acurate dimesons and angles in the parts enviorment of freecad
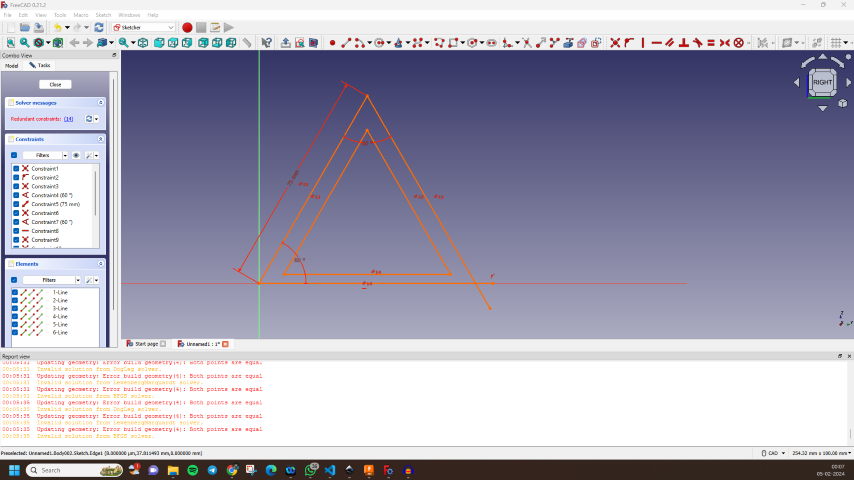
step 3 : then i used the padding tool to extrude the 2d sketch to a 3d obeject vola the part is born
step 4 : so in odder to caret the center hole in th eiomge of the holder i will use the pocketing tool
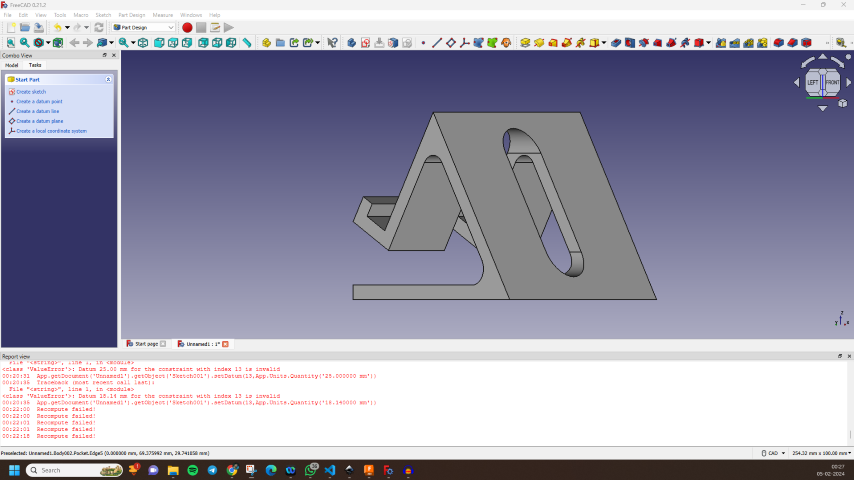
step 5 : afetr thet i use the fillet tool to make the edges round and the procedded to save it in stl formate potentaioly printing it in the future
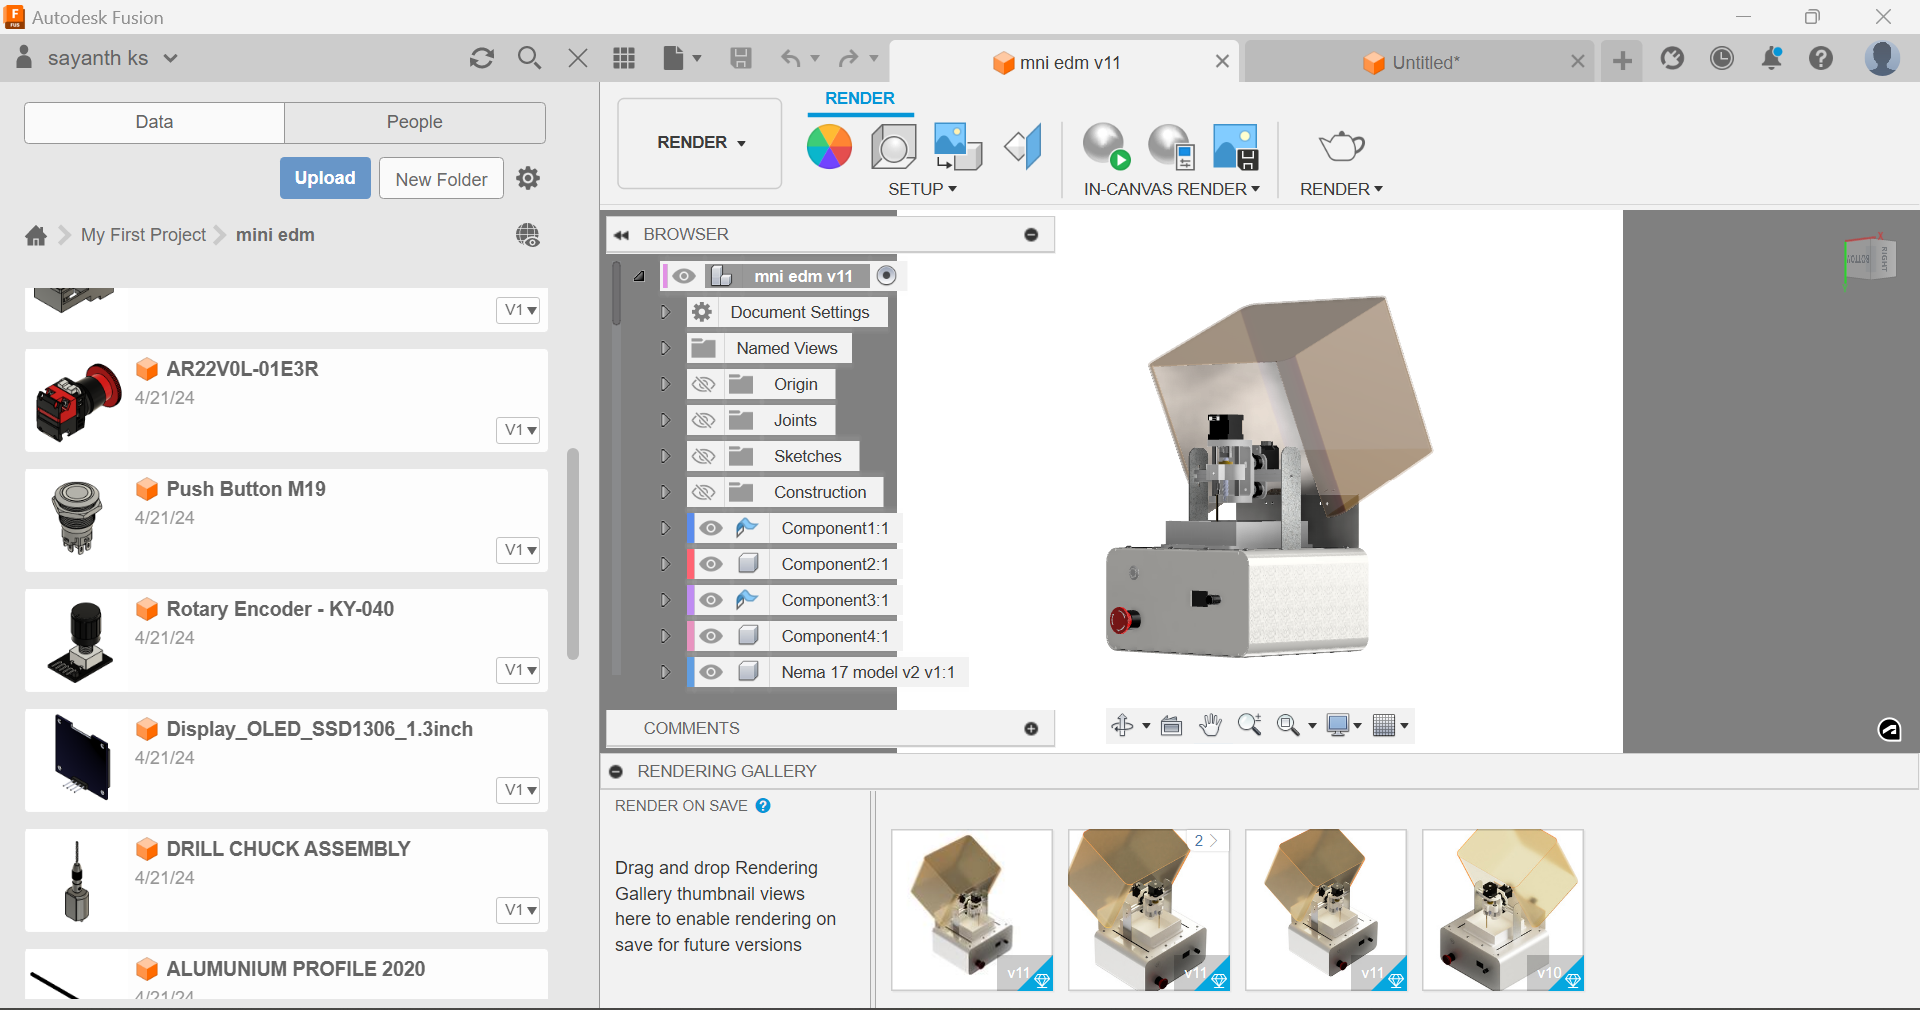
FUSION 360
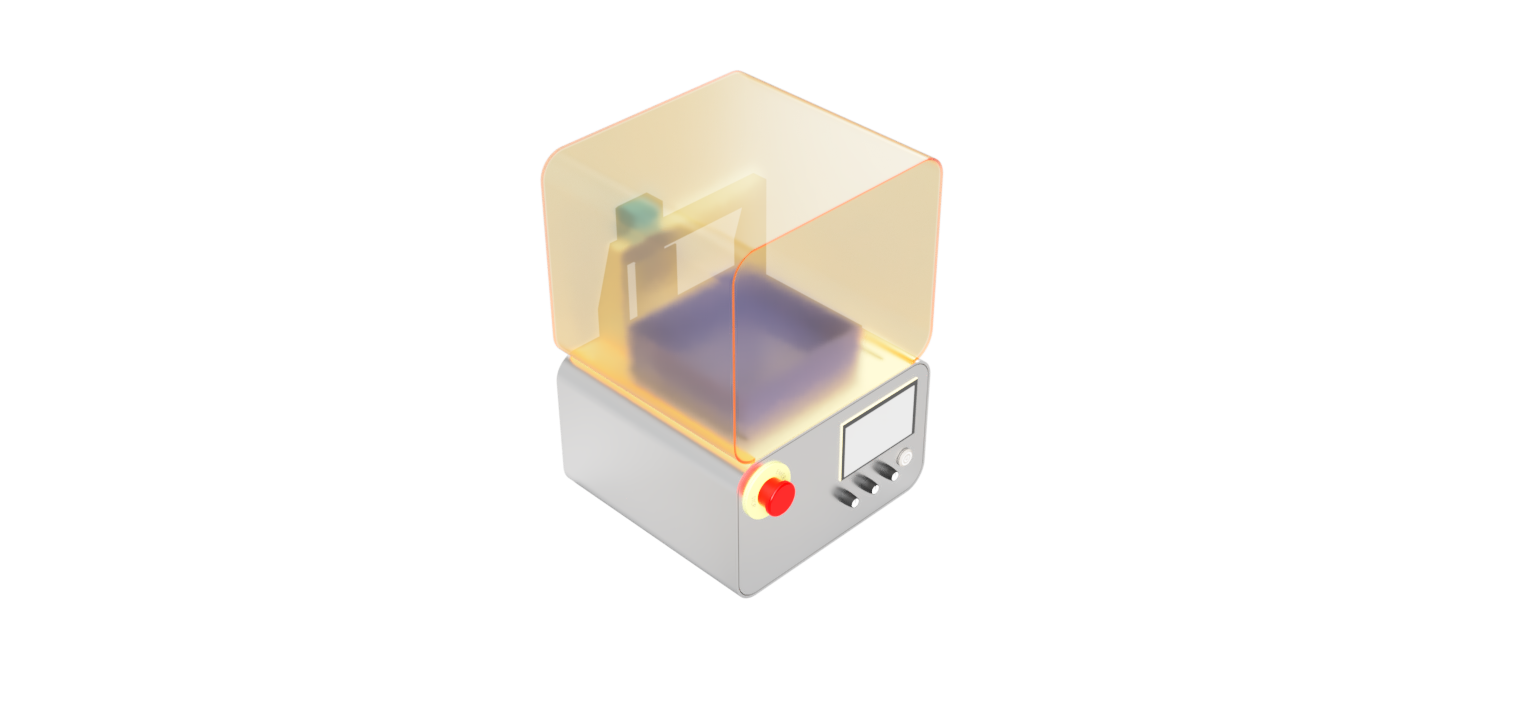
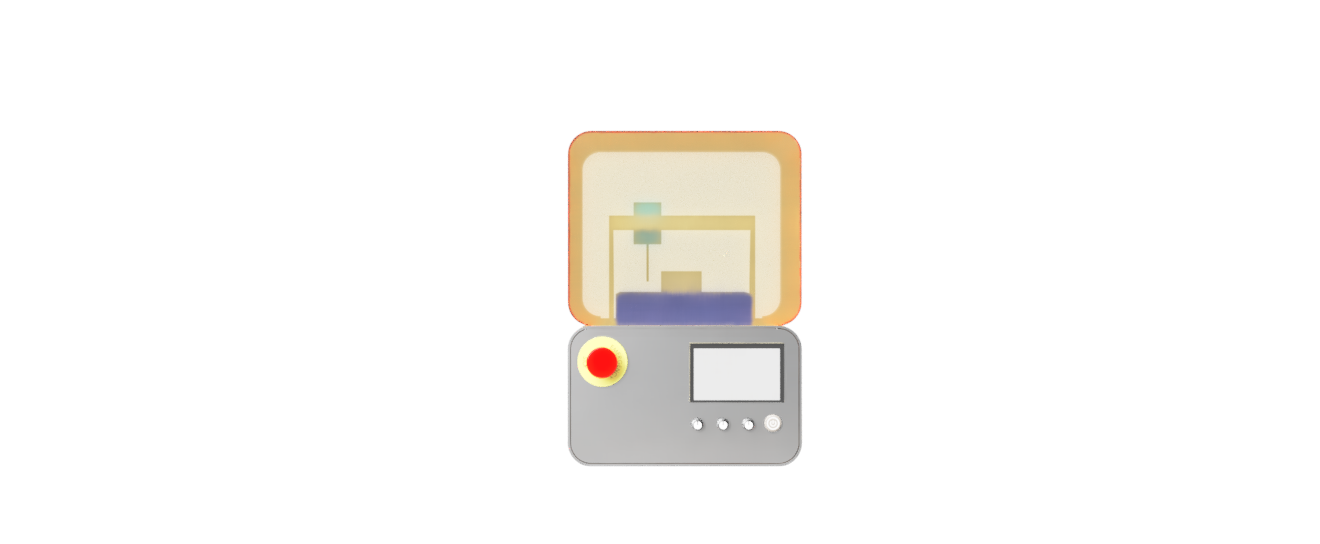
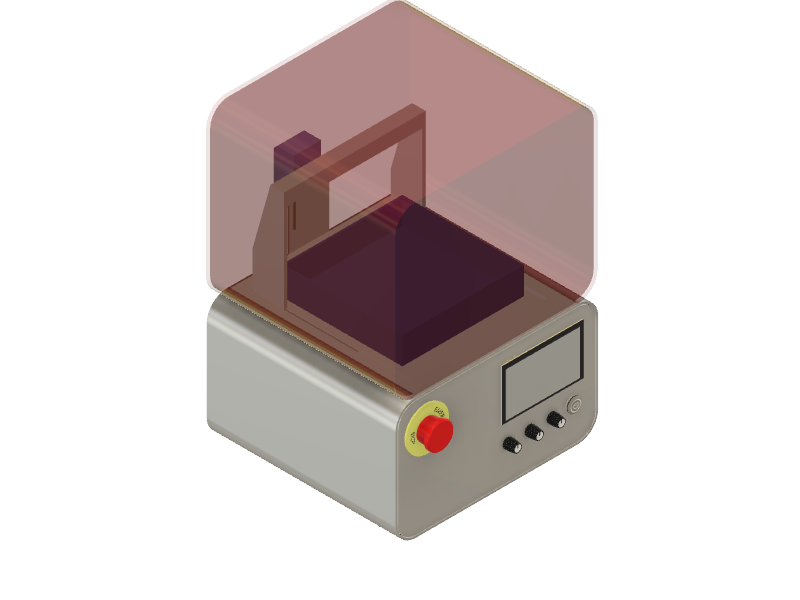
I've honed my Fusion 360 skills over the years, becoming quite the expert if I do say so myself! So, when it came down to design , I dove right into the software and crafted the 3D model and render in a flash. It's all about that seamless blend of experience and intuition, and let me tell you, I've got it down to an art!
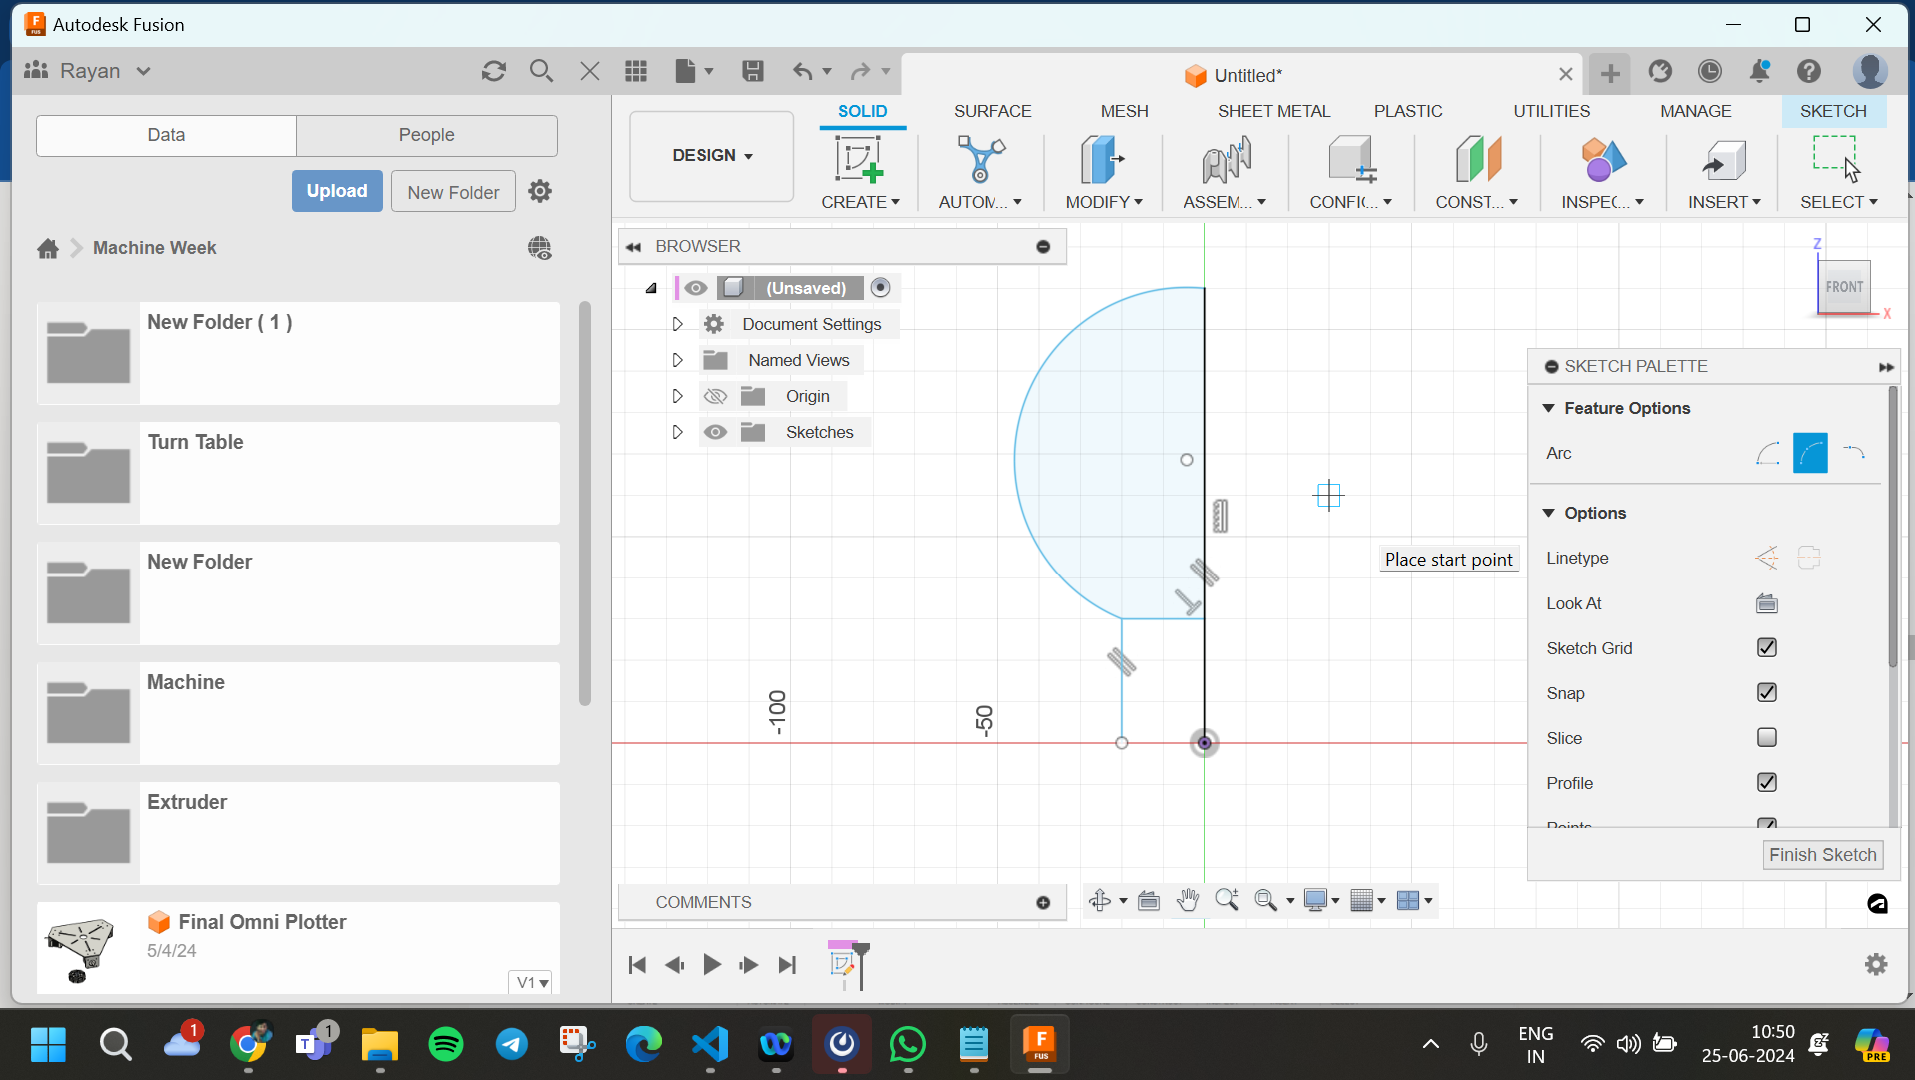
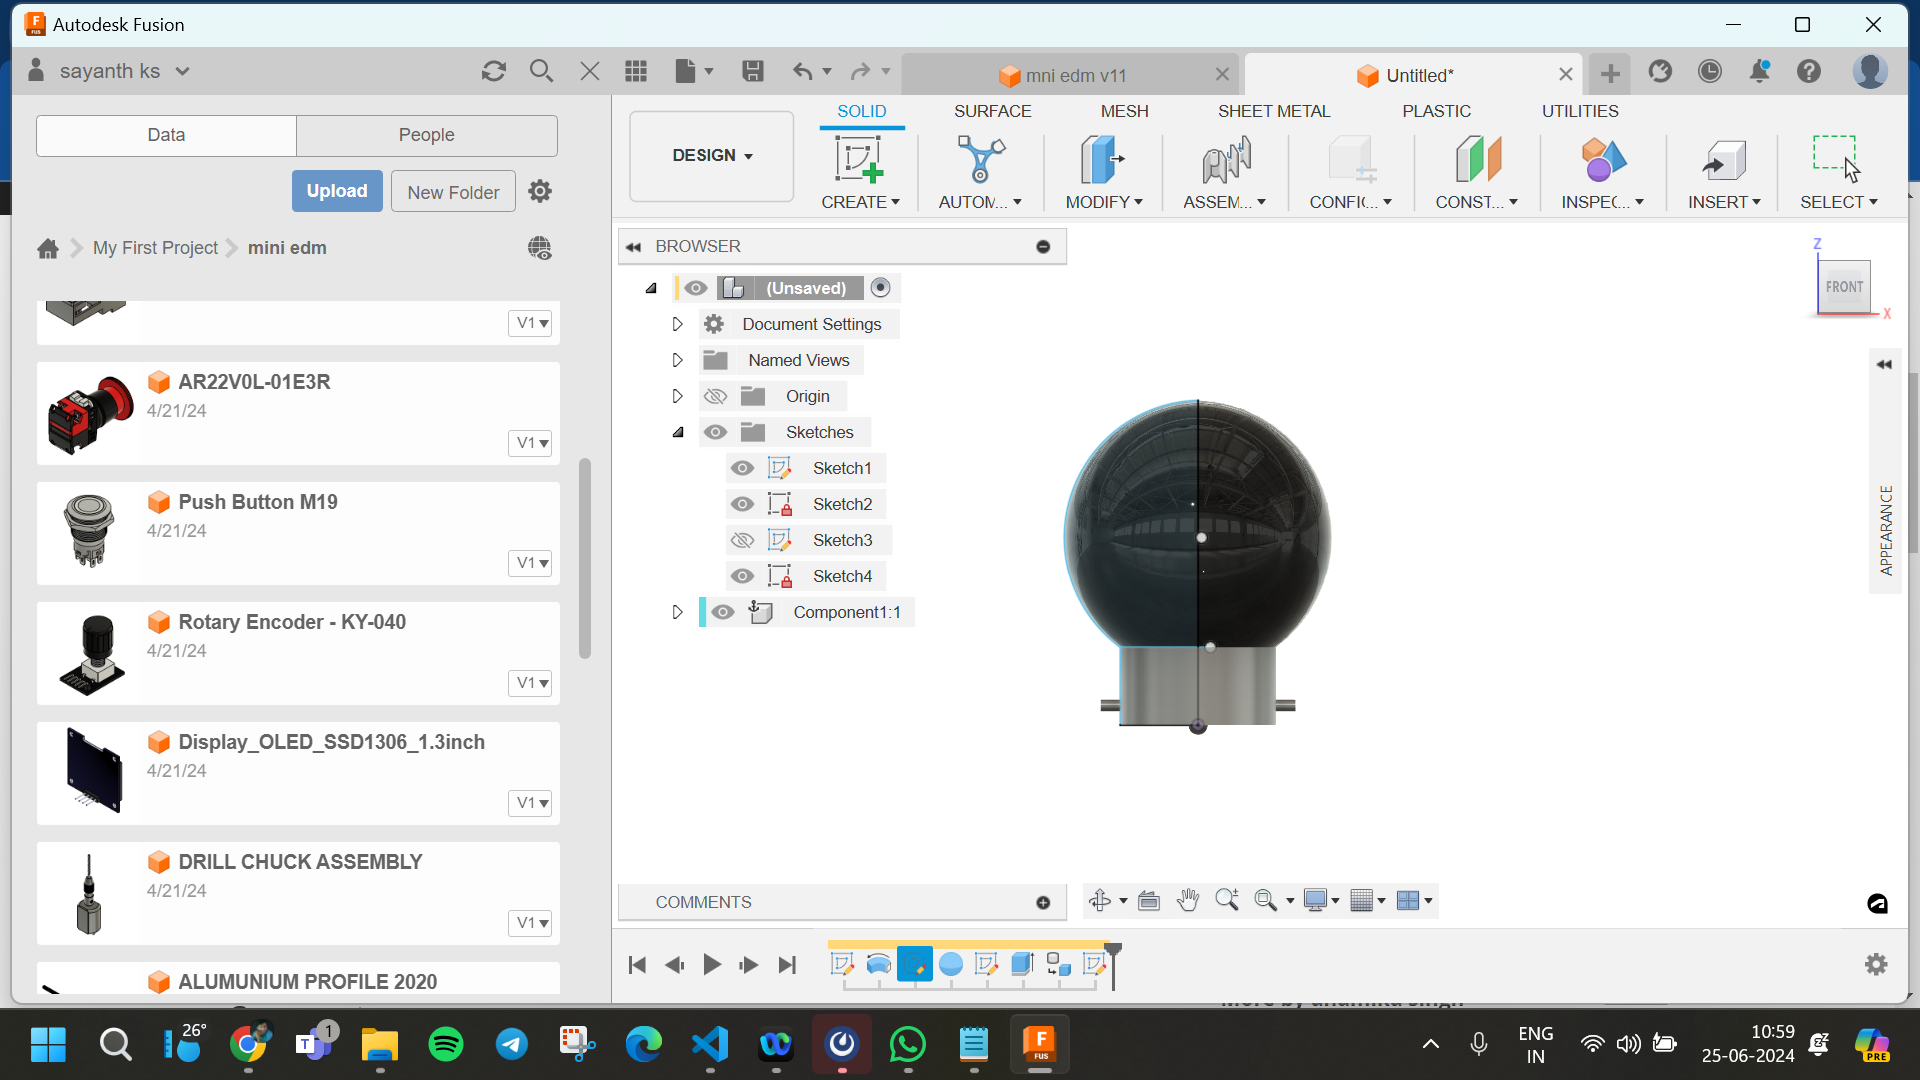
Walkthrough: Drawing a Simple Bulb in Fusion 360
Fusion 360 is a powerful 3D CAD tool that allows you to create complex designs. Here, we'll walk through the steps to draw a simple light bulb.
Step 1: Setting Up Your Workspace
- Open Fusion 360: Launch the application and create a new project or open an existing one.
- Start a New Design: Click on the
+ button or go to File > New Design.

Step 2: Creating the Bulb Shape
Create a Sketch:
- Select the Create Sketch button from the toolbar.
- Choose the front plane (XY plane) for your sketch.
Draw the Profile of the Bulb:
- Use the Line tool to draw the outline of the bulb.
- Start at the origin and draw a vertical line upwards for the stem of the bulb.
- Use the Arc tool to draw the curved top of the bulb. Select the Three-Point Arc option for more control.
- Complete the profile by connecting the arc back to the origin with a straight line.
Dimension the Sketch:
- Use the Sketch Dimension tool to set the dimensions of your lines and arcs. For example, the height of the bulb might be 100 mm, and the widest part might be 60 mm in diameter.
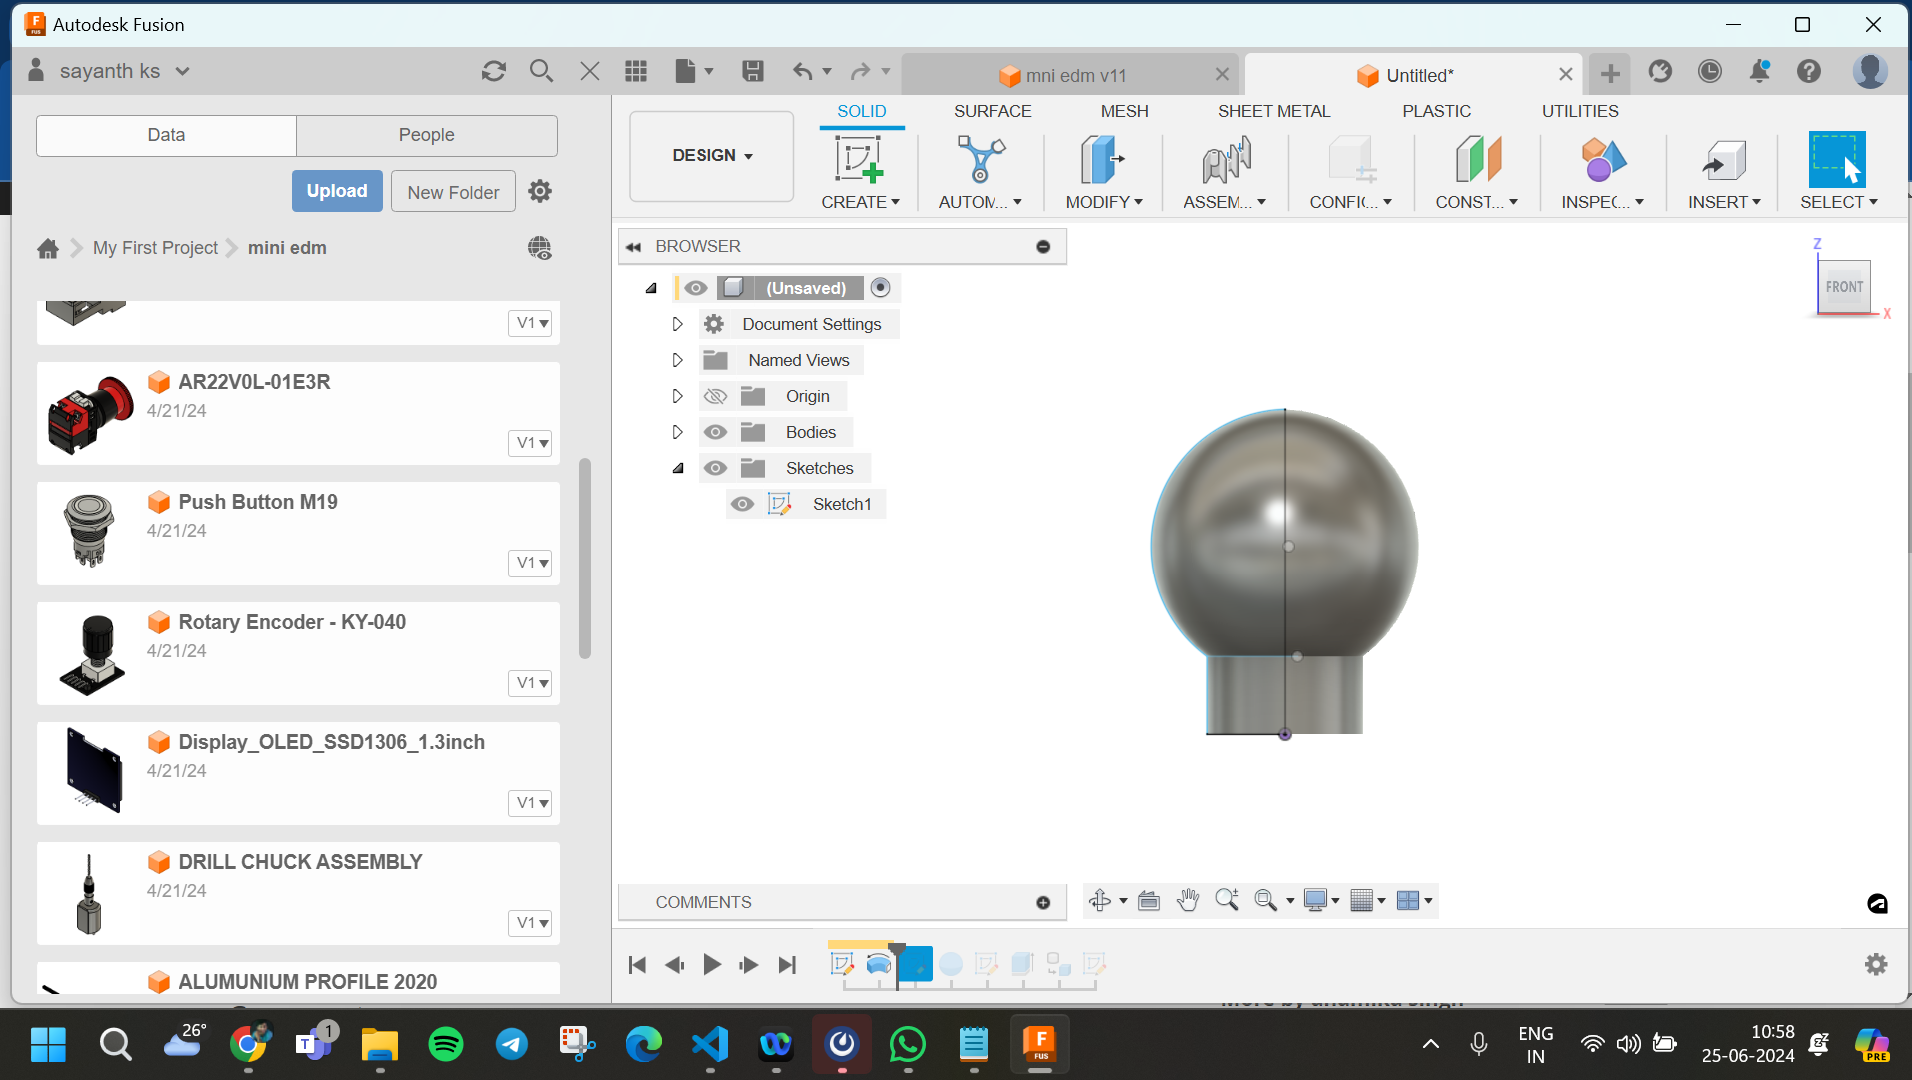
Step 3: Revolving the Sketch
- Finish the Sketch: Click Finish Sketch in the toolbar.
- Revolve the Profile:
- Select the
Create menu, then choose Revolve.
- Click on the profile you just created as the profile to revolve.
- Select the vertical line as the axis of revolution.
- Set the revolve angle to 360 degrees to create a full bulb shape.
Step 4: Adding the Filament
Create a New Sketch:
- Select the top face of the bulb and create a new sketch on this face.
- Use the Line tool to draw the filament shape inside the bulb. This can be a simple zigzag line.
Extrude the Filament:
- Finish the sketch.
- Use the
Create menu and select Extrude.
- Select the filament sketch and extrude it slightly to give it thickness.
Step 5: Adding Details to the Base
Create the Base Sketch:
- Create another sketch on the bottom face of the bulb.
- Draw a circle at the center to represent the screw base of the bulb.
- Use the Circle tool and specify the diameter, e.g., 20 mm.
Extrude the Base:
- Finish the sketch.
- Use the Extrude tool to give the base some thickness, e.g., 15 mm.
Step 6: Final Touches
Fillet the Edges:
- Select the
Modify menu and choose Fillet.
- Click on the edges you want to round off and set the fillet radius.
Add Materials and Appearances:
- Open the Appearance menu (under
Modify).
- Drag and drop materials onto different parts of your bulb, such as glass for the bulb and metal for the base.
Save Your Design:
- Go to
File > Save and save your design with an appropriate name.
Adjust Camera Angles:
- Use the view cube to set up your desired camera angle.
- Click on
Position in the toolbar to fine-tune the camera position and target.
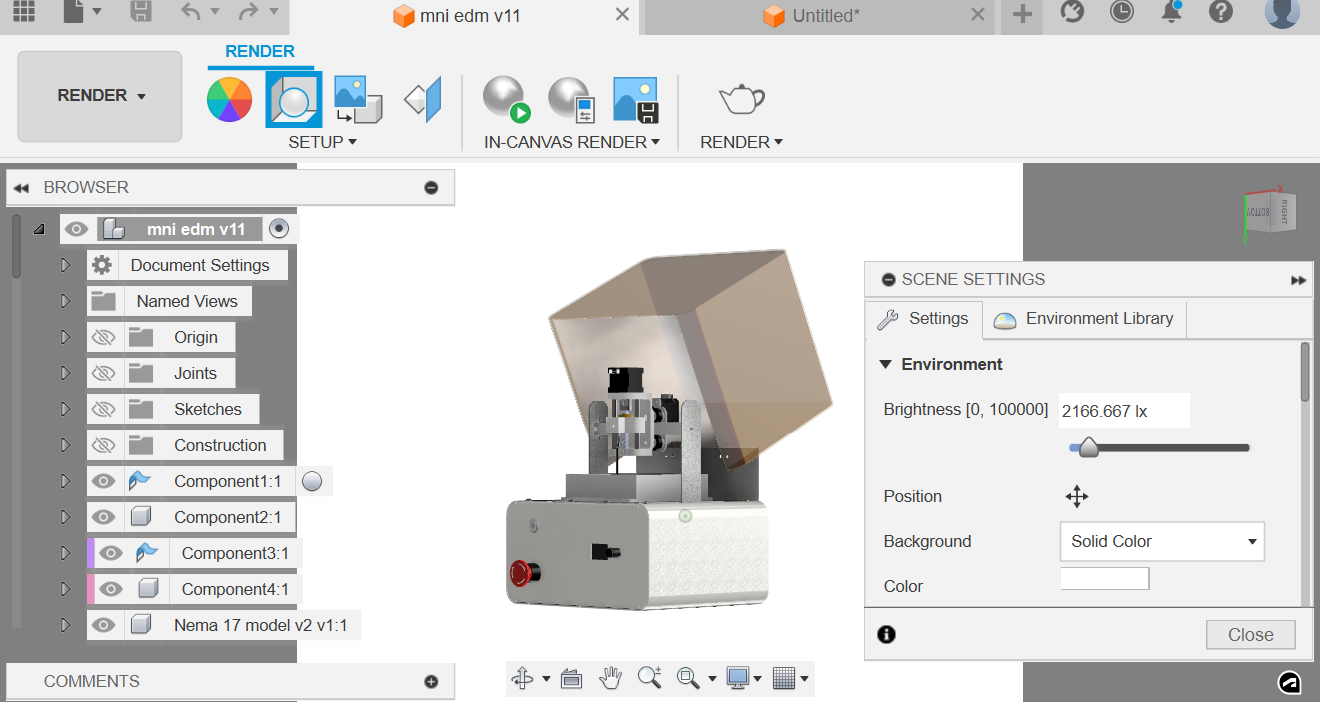
Step 4: Rendering the Image
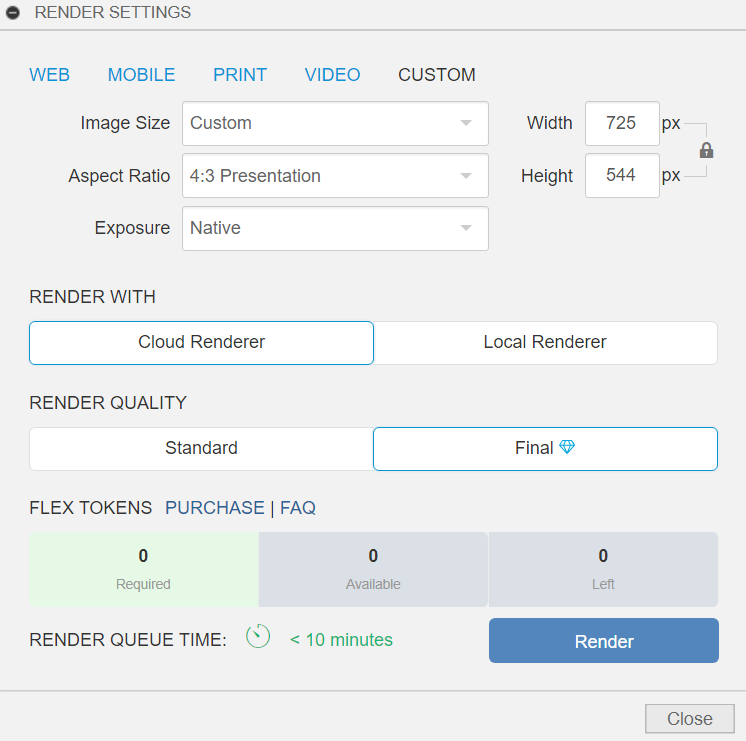
- Render Settings:
- Click on
Render Settings in the toolbar.
- Set the resolution, quality, and aspect ratio as desired.
- Render the Image:
- Click on the
Render button.
- Choose between
Cloud Render or Local Render (local rendering uses your computer's resources).
- Wait for the rendering process to complete.
Step 5: Saving the Render
- View Render Gallery: Once the render is complete, go to
Render Gallery to view your rendered images.
- Save the Render:
- Select your rendered image.
- Click on the download icon to save the image to your computer.
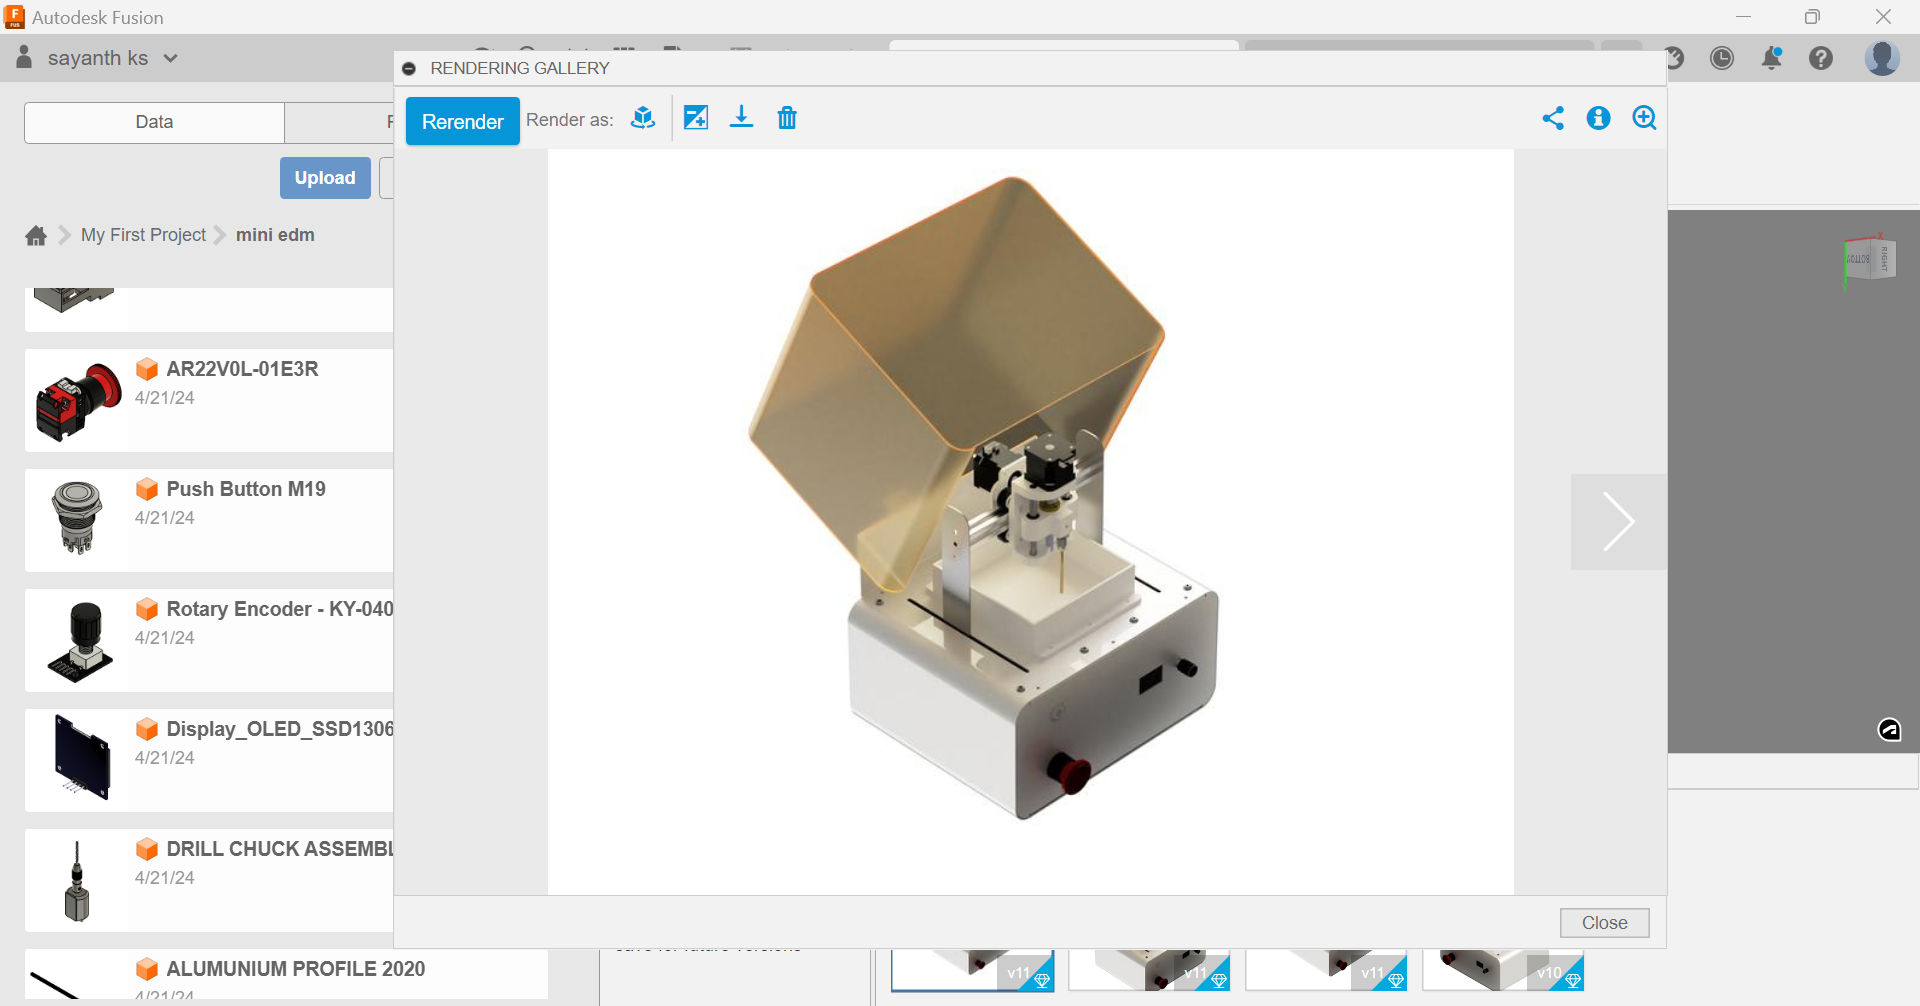
Step 5: final output
DOWNLOAD FILES
download FILES HERE