
Week 7: Computer Controlled
Machining
Design
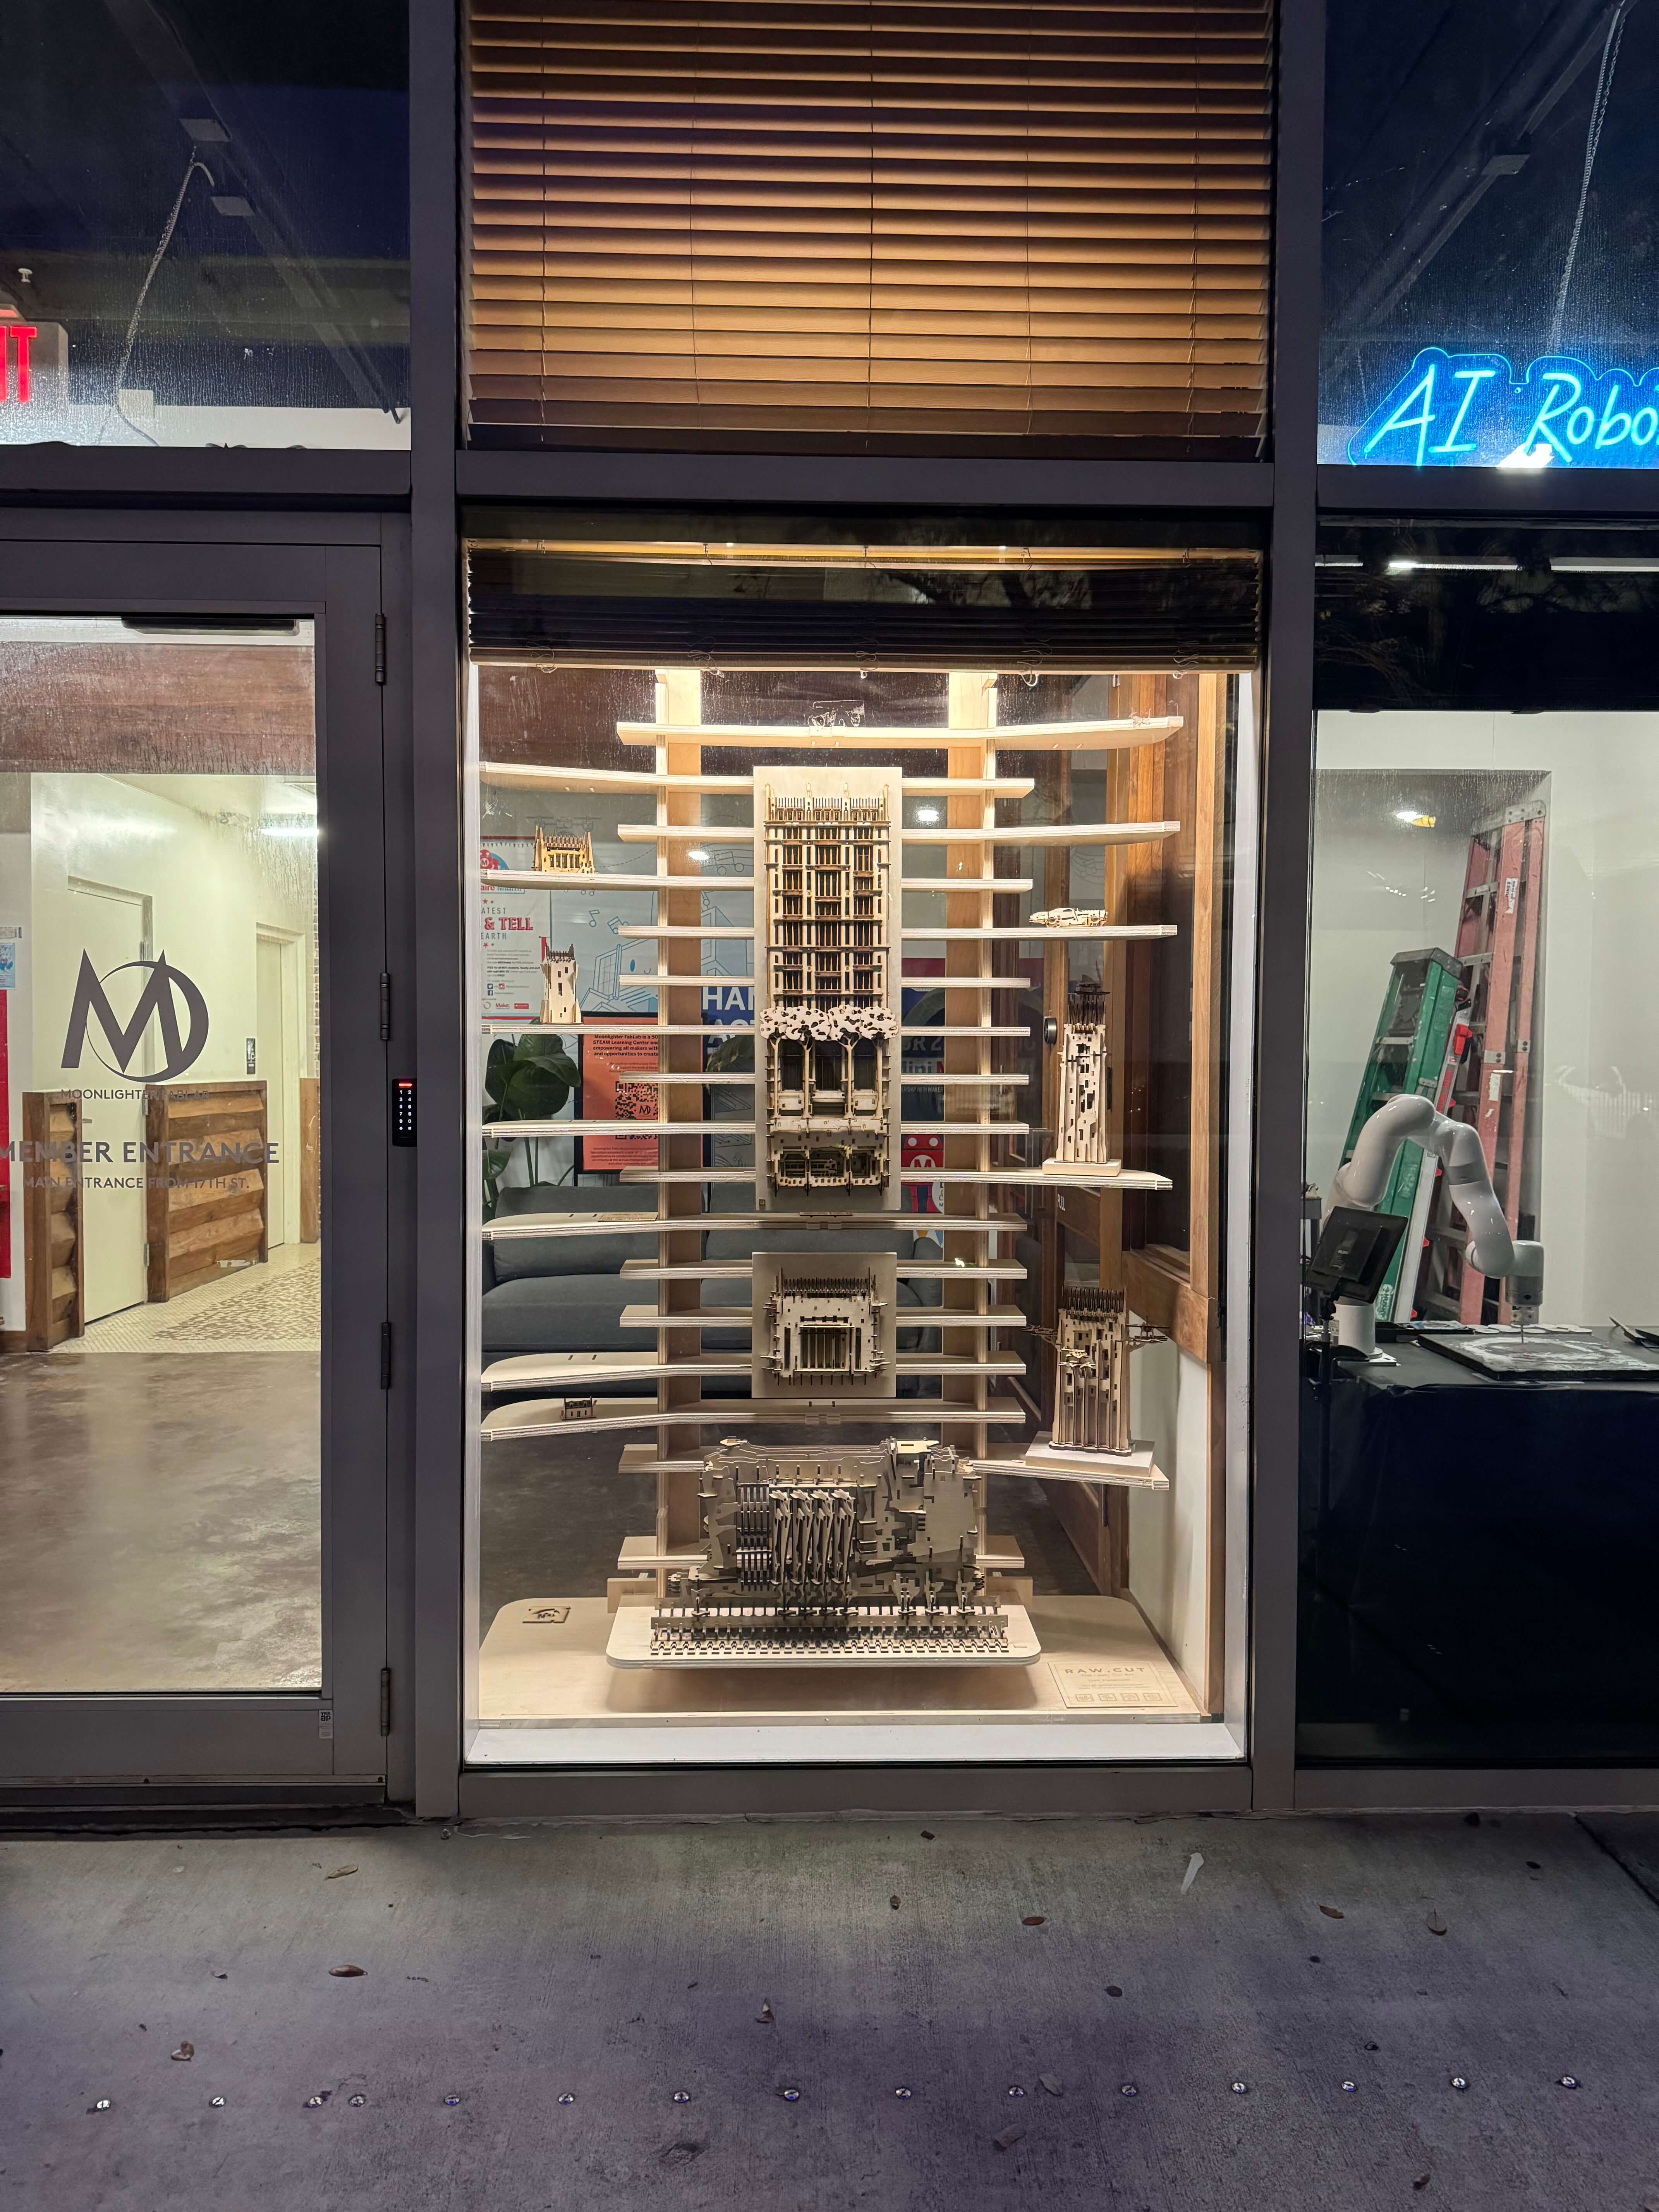
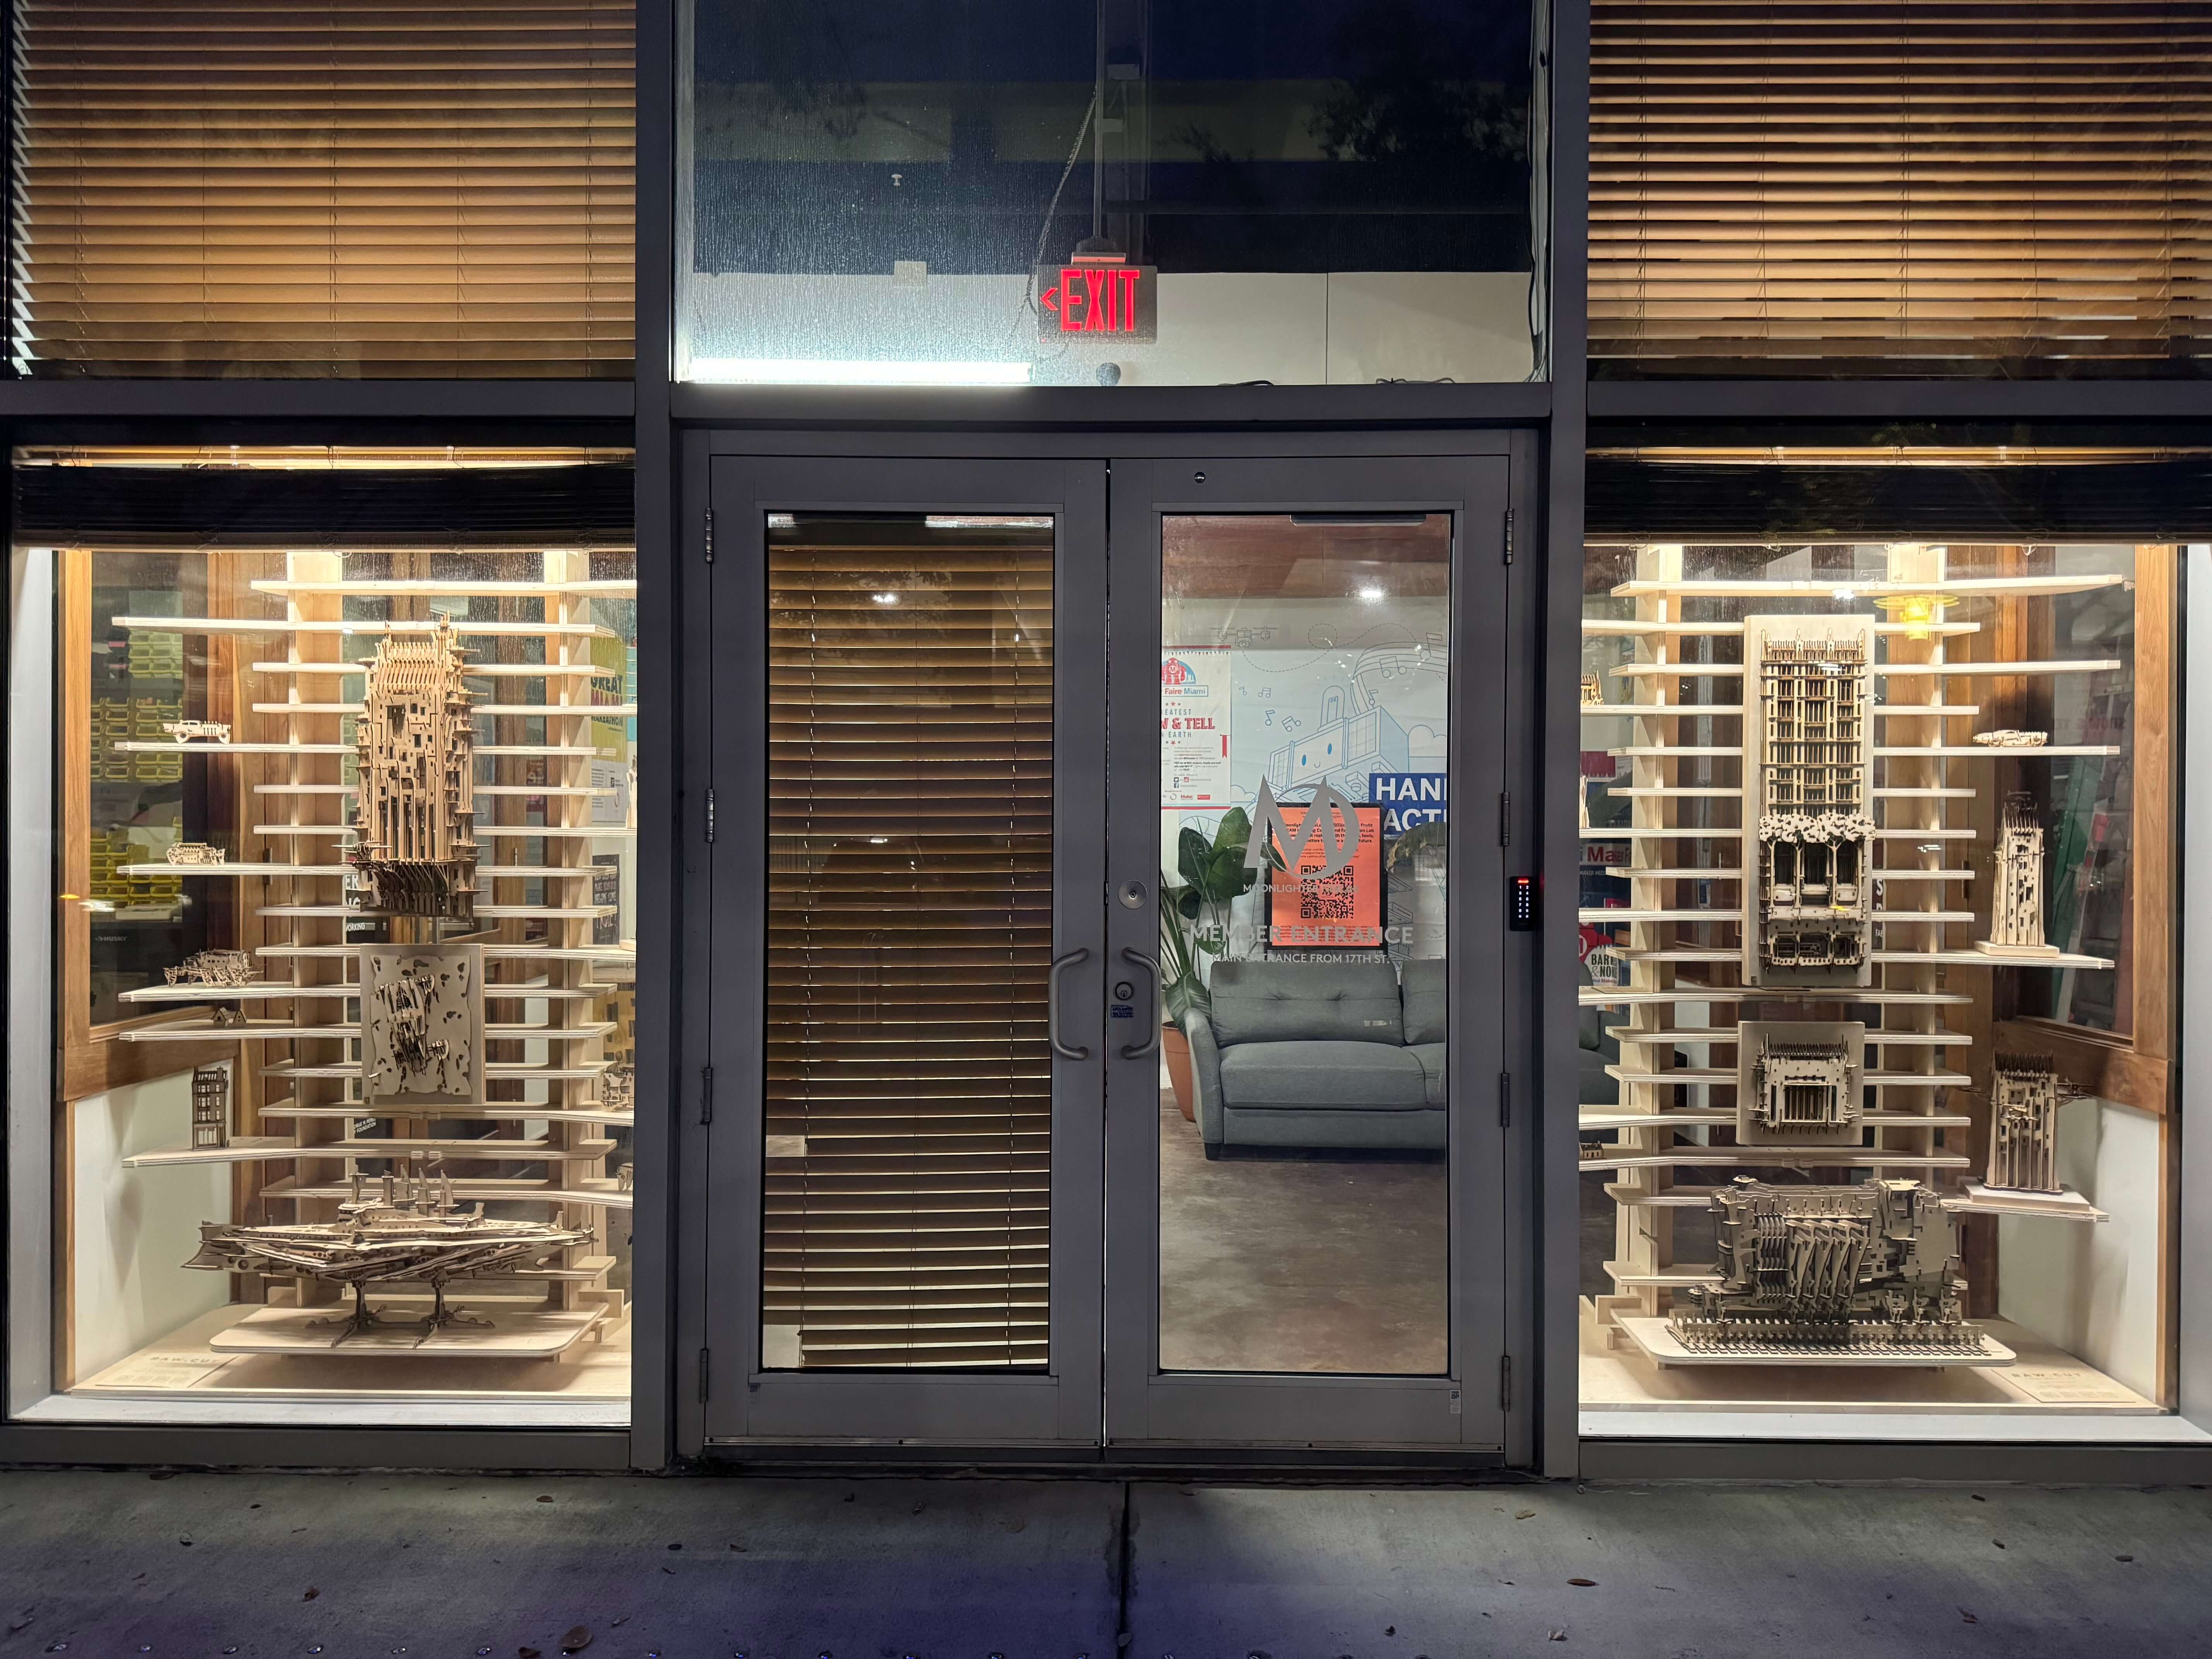
For the "Make it big" CNC routing challenge, I decided to work with one of our resident members to create a display system for his artwork to showcase as a pop-up exhibit in our FabLab's storefront.
Neil Paterson, known in the art world as Hedgeclipper, combines his architectural skills, and sci-fi aesthetic to create slotted 3D puzzles that references scottish vernacular architecture, locomotion, and vehicles.
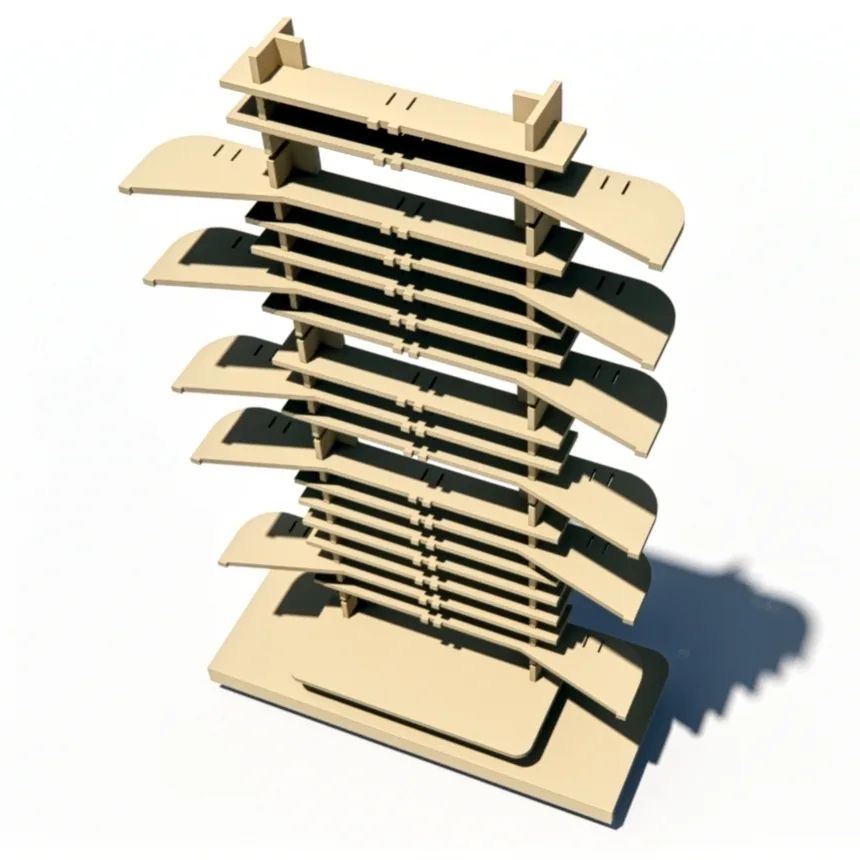
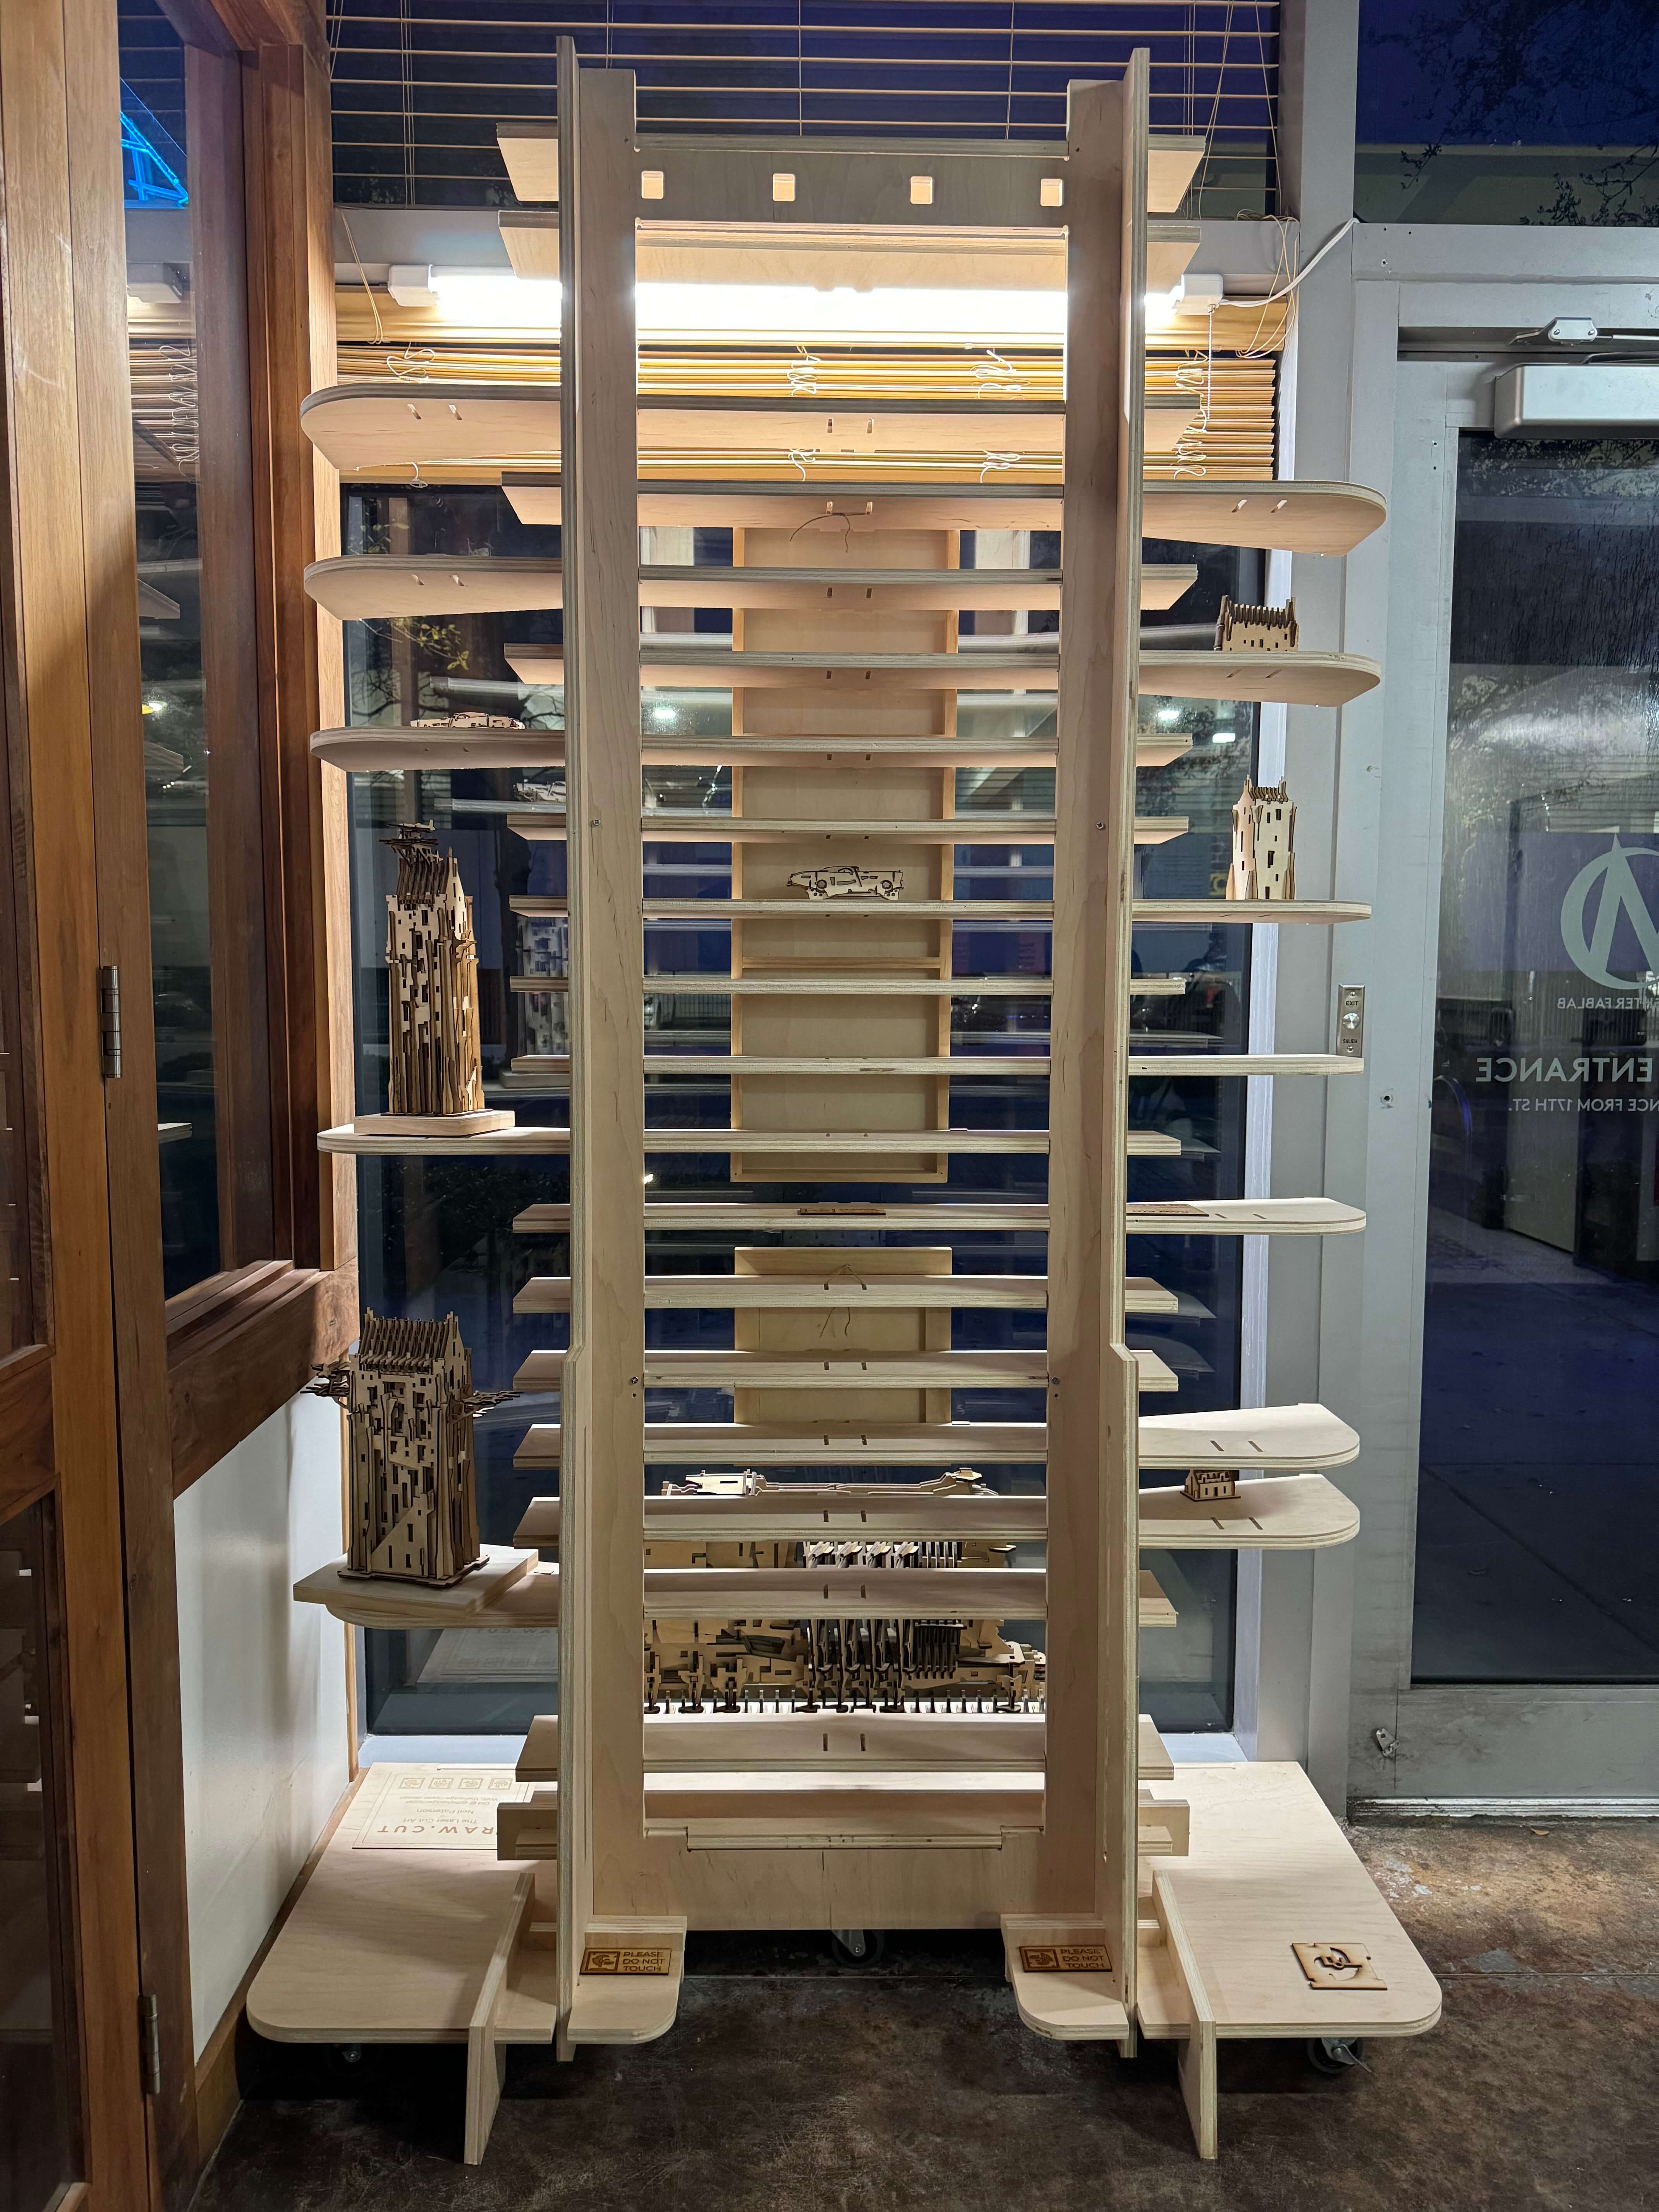
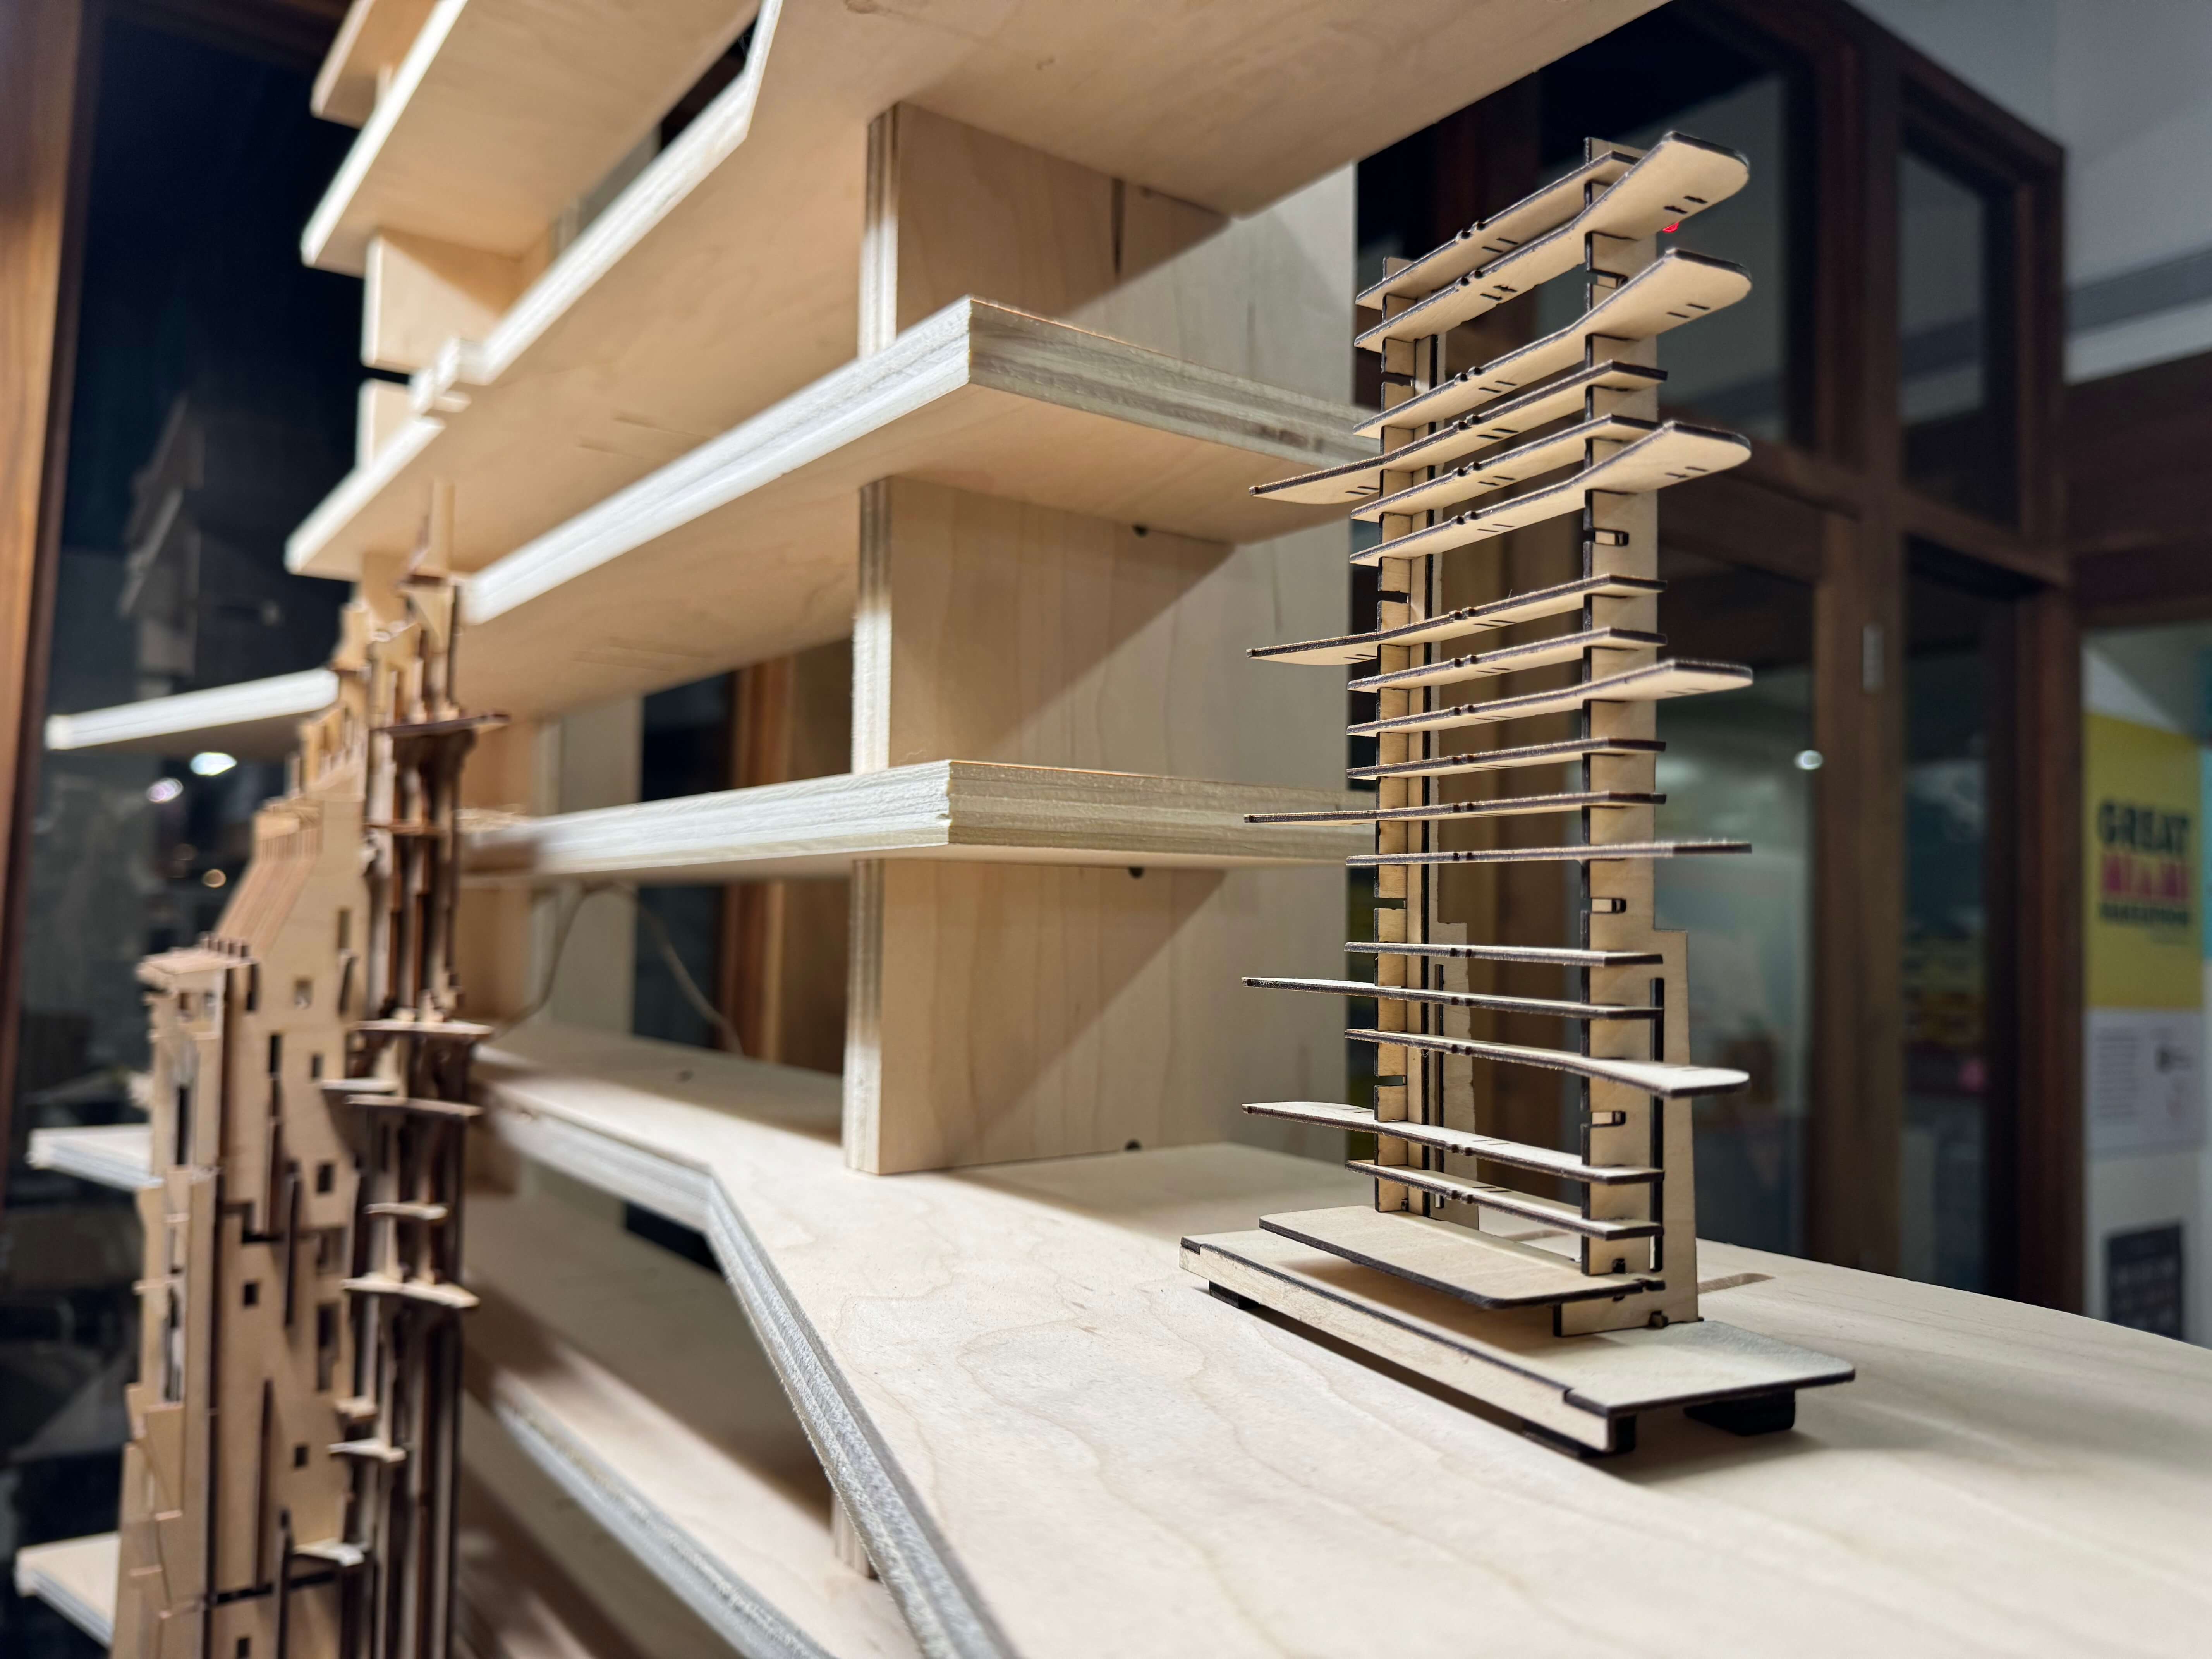
To honor his process, the display system is designed as a slotted modular design that allows for shelves to be hung at different heights, enabling different configurations for various sized works.
Neil also has a varity of free-standing and wall hanging pieces, so the display system has features to support both methods.
Rhino 3D & RhinoCAM
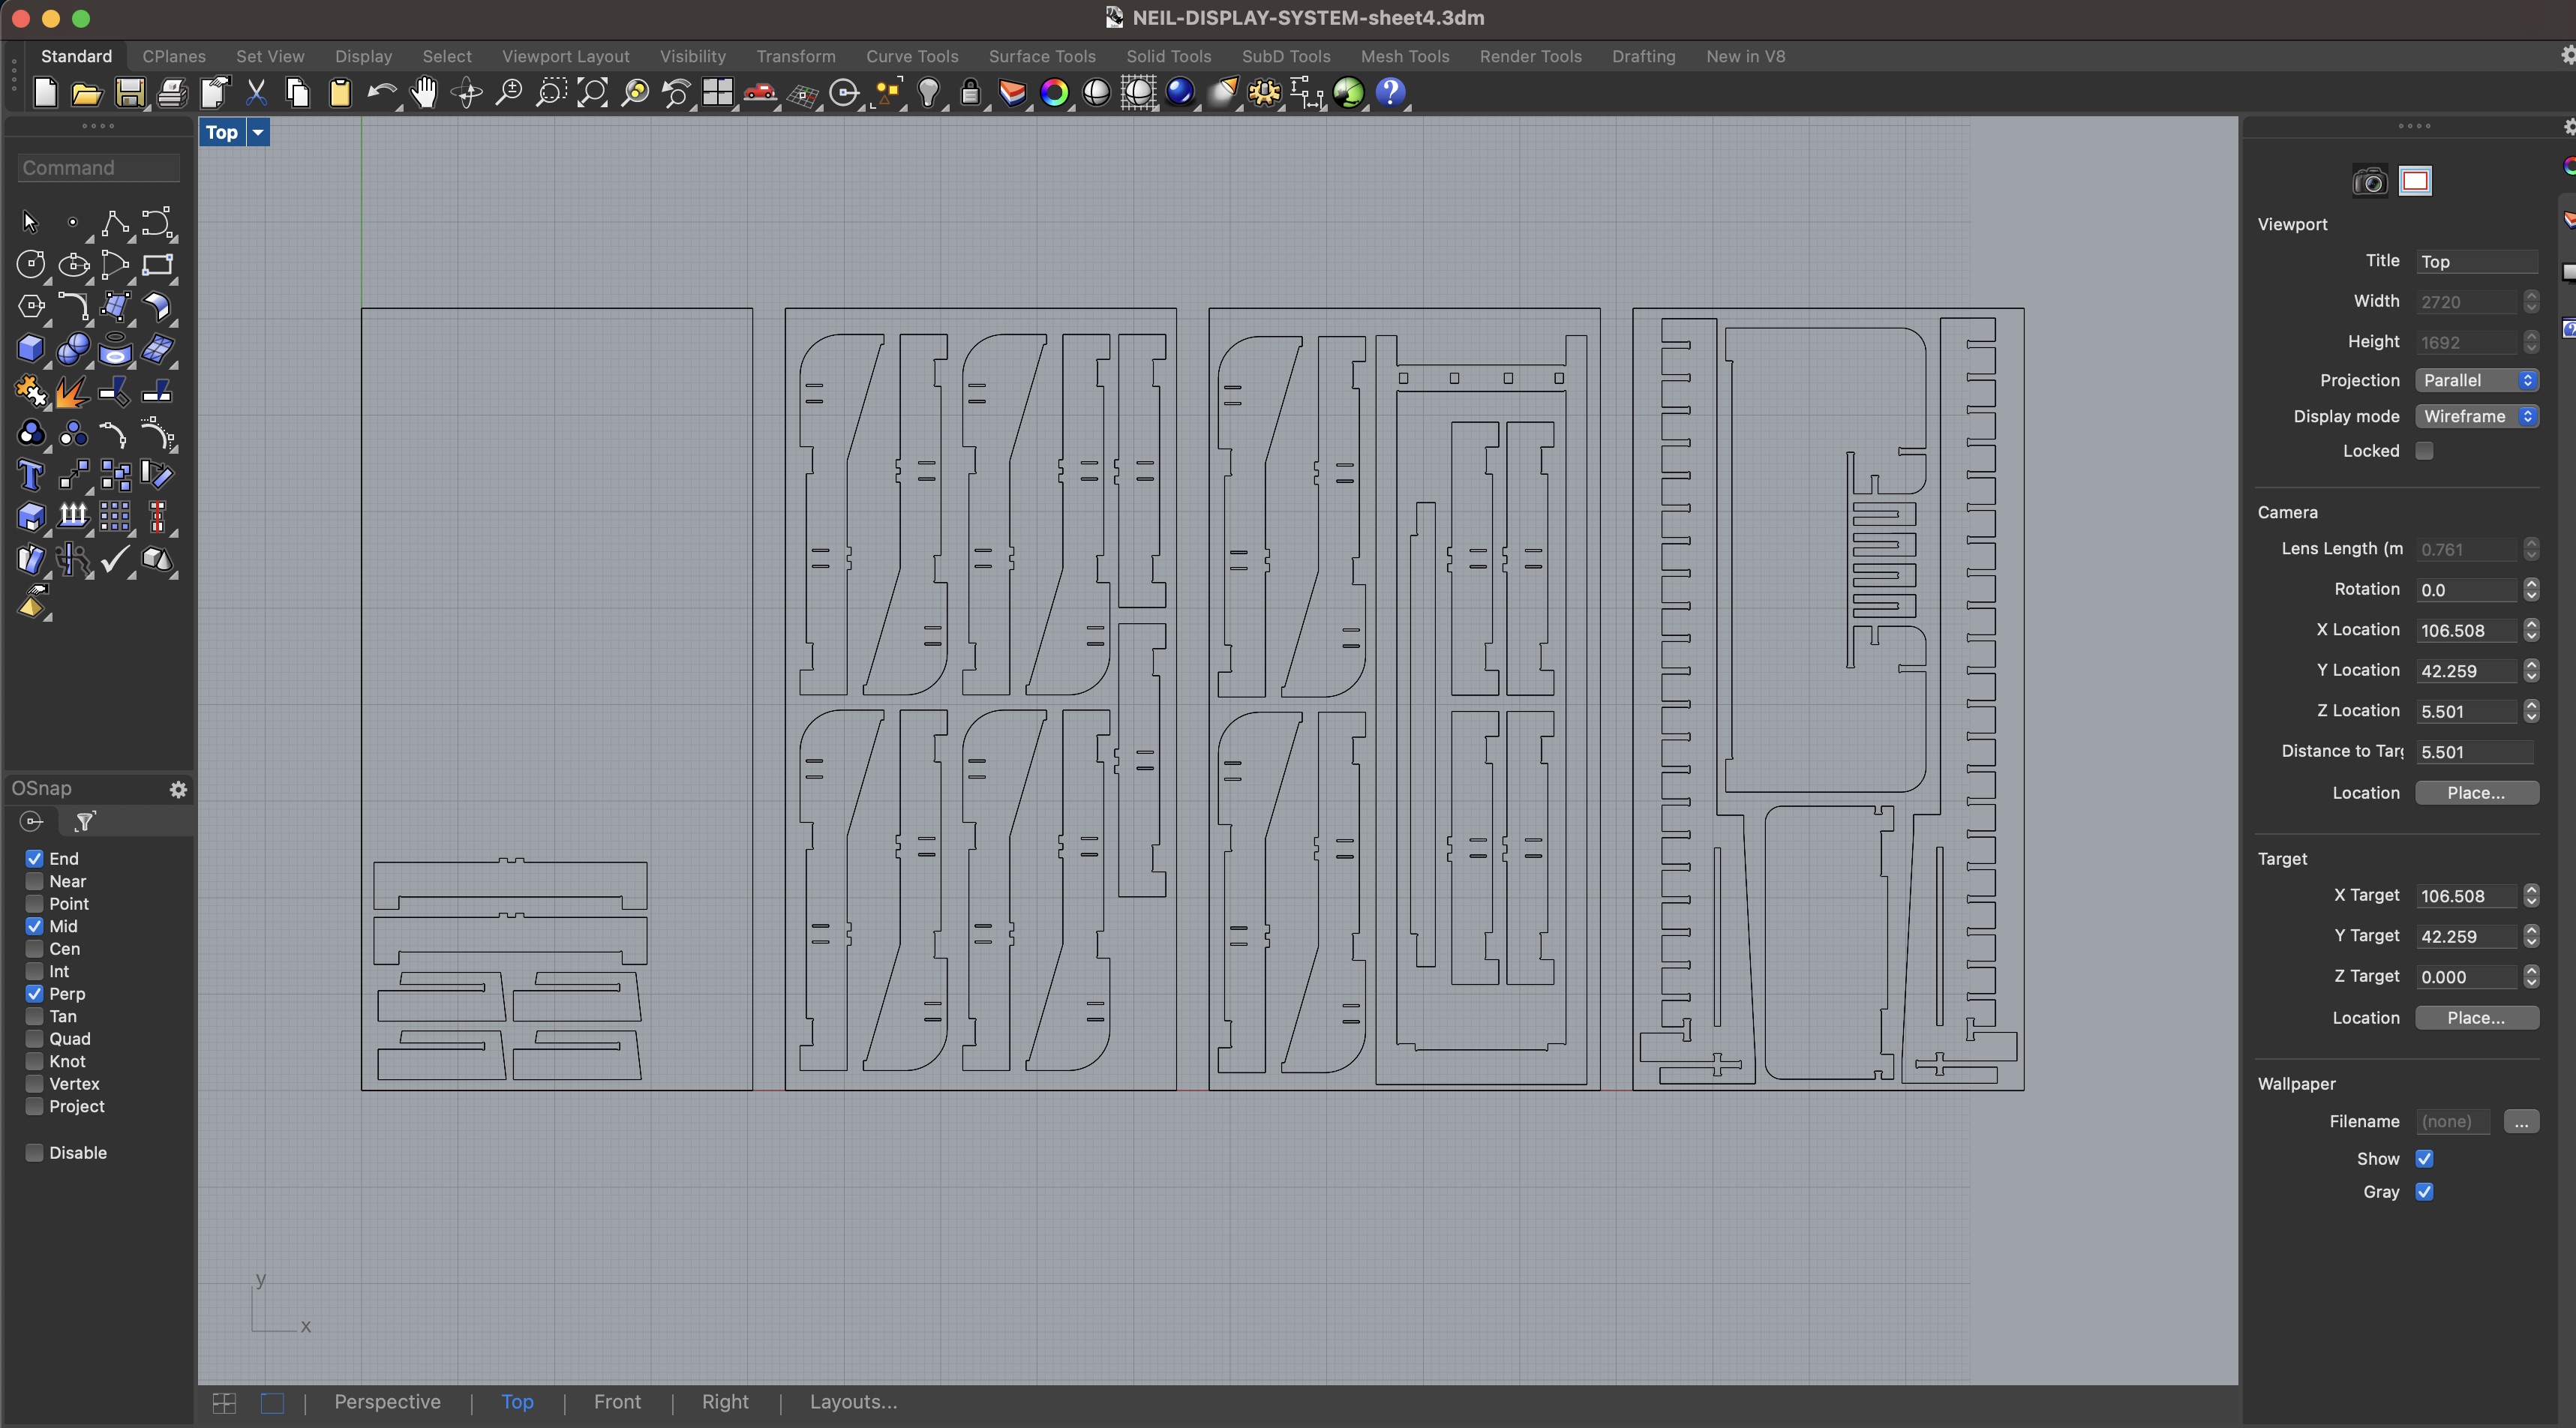
I used Rhino3D for the 3D model, ensuring that the parts slot together according to the actual thickness of the plywood by modeling each piece and assembling it digitally.
Then, I nested the 2D profiles on 4'x8' sheets for cutting, leaving a minimum of .75" of space between each peace in order to have the milling cut with enough material to prevent vibration of the stock.
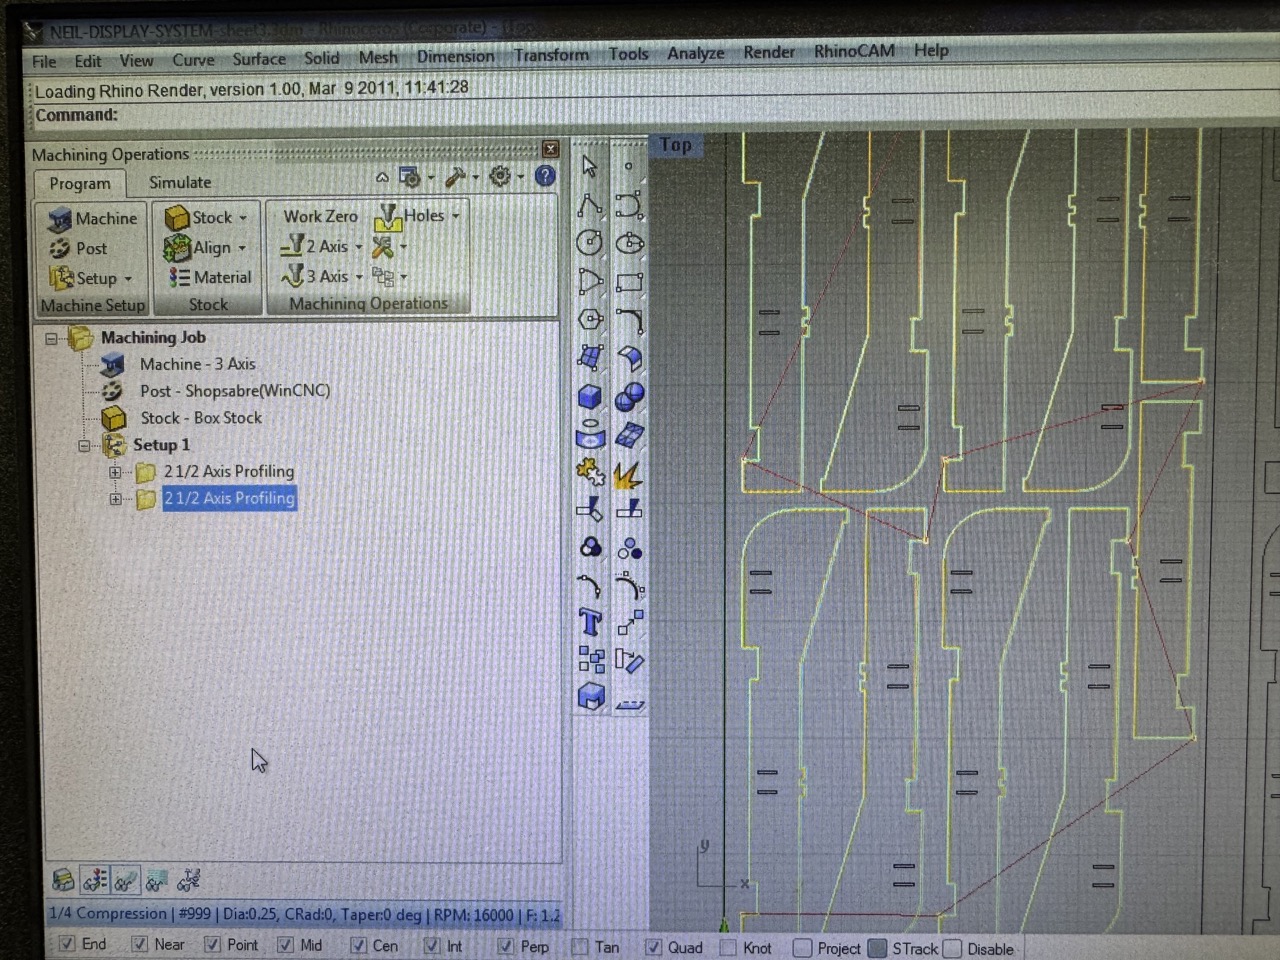
The machine operations I used were inside profile and outside profile. This design didn't have any engraving or pocketing elements to program.
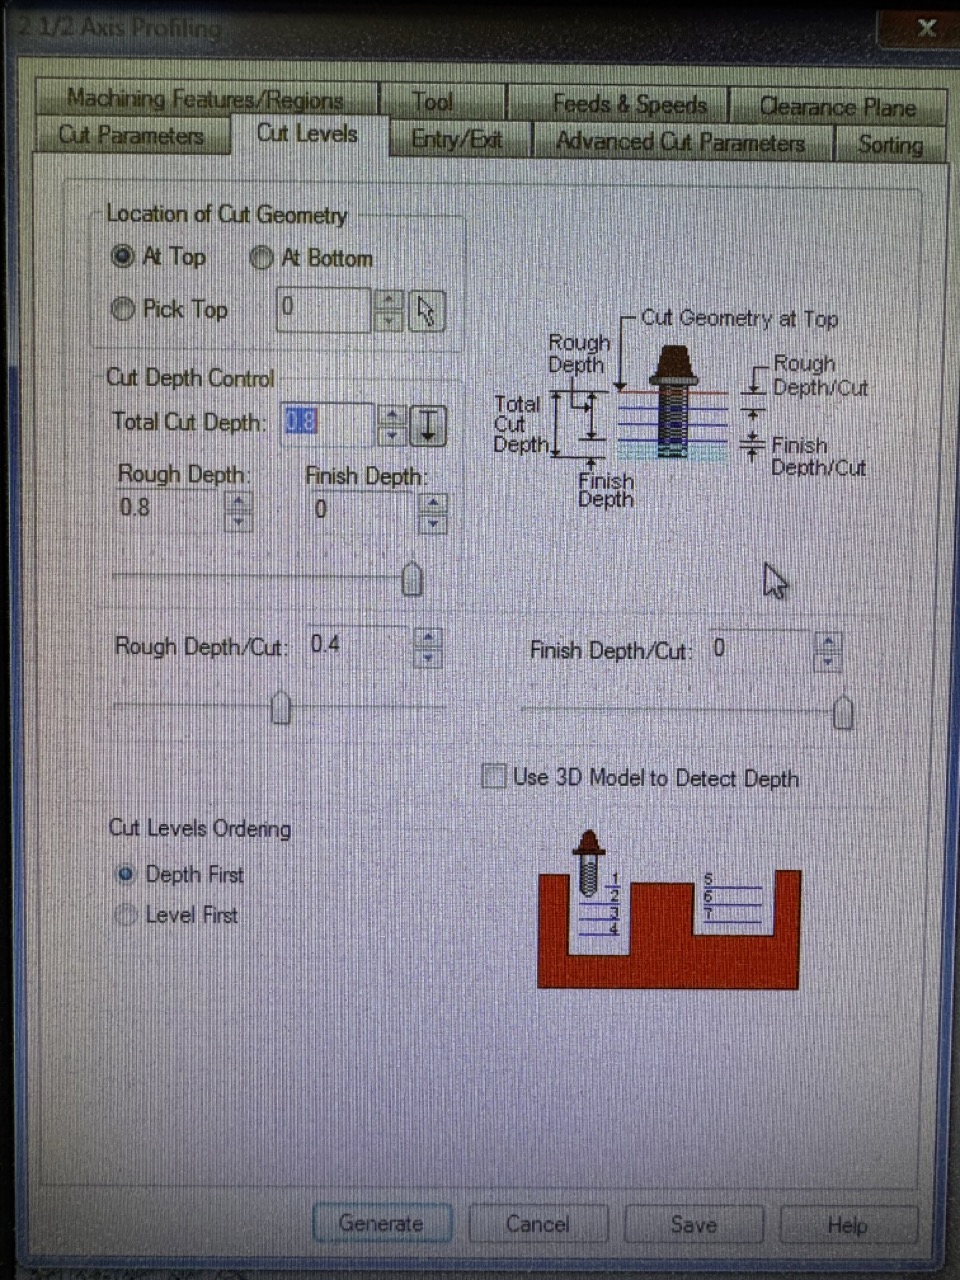
Defining The Settings
Here I define the tool and settings. I used the Vortex Tool App to help select a proper router bit and feed rate. I am setting the recomended speed for the spindle (16,000rpm) and the feed rate (120in/min) and cutting through the 3/4" plywood in two passes each at .4" depth to ensure I cut through the material and only minimal intrusion to the spoilboard below.


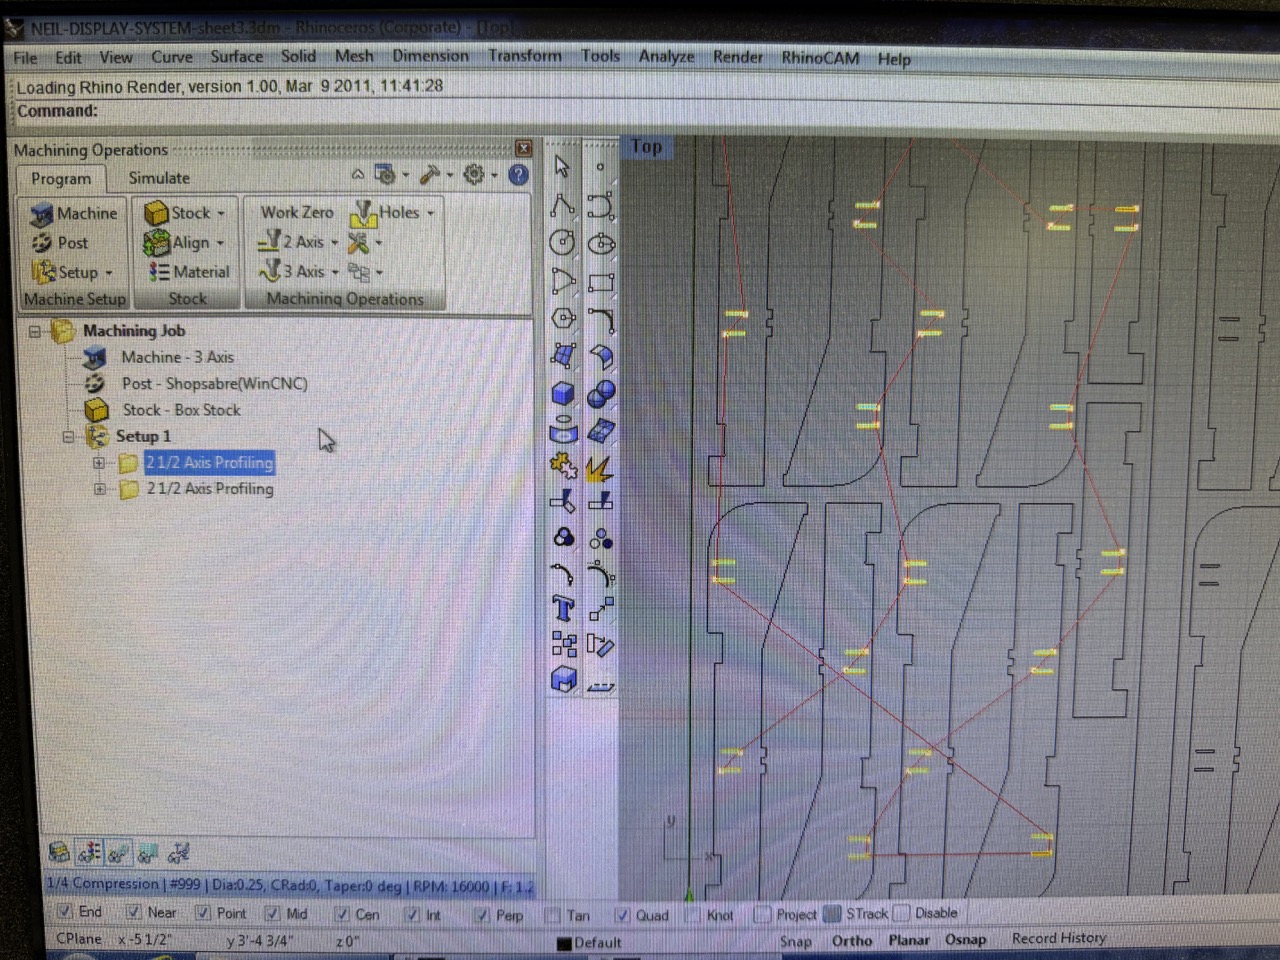
Defining The Tool Paths
Here we are previewing the two profiling cuts I programmed, first the inside profiling for all of the connections, and second the outside profiles to cut out each part.
The Tooling
I used an Amana Tool 1/4" SPEKTRA Compresssion bit to ensure a clean cut on both sides of the plywood with minimal flaking or splintering. By using a high quality Grade A natural birch plywood, the display system has cleaner edges with minimal layer gaps to worry about.

CNC Milling
The cuts were very clean since we were using a new bit and high quality ply. The kerf was fairly consistent at about .26"-.28" wide.
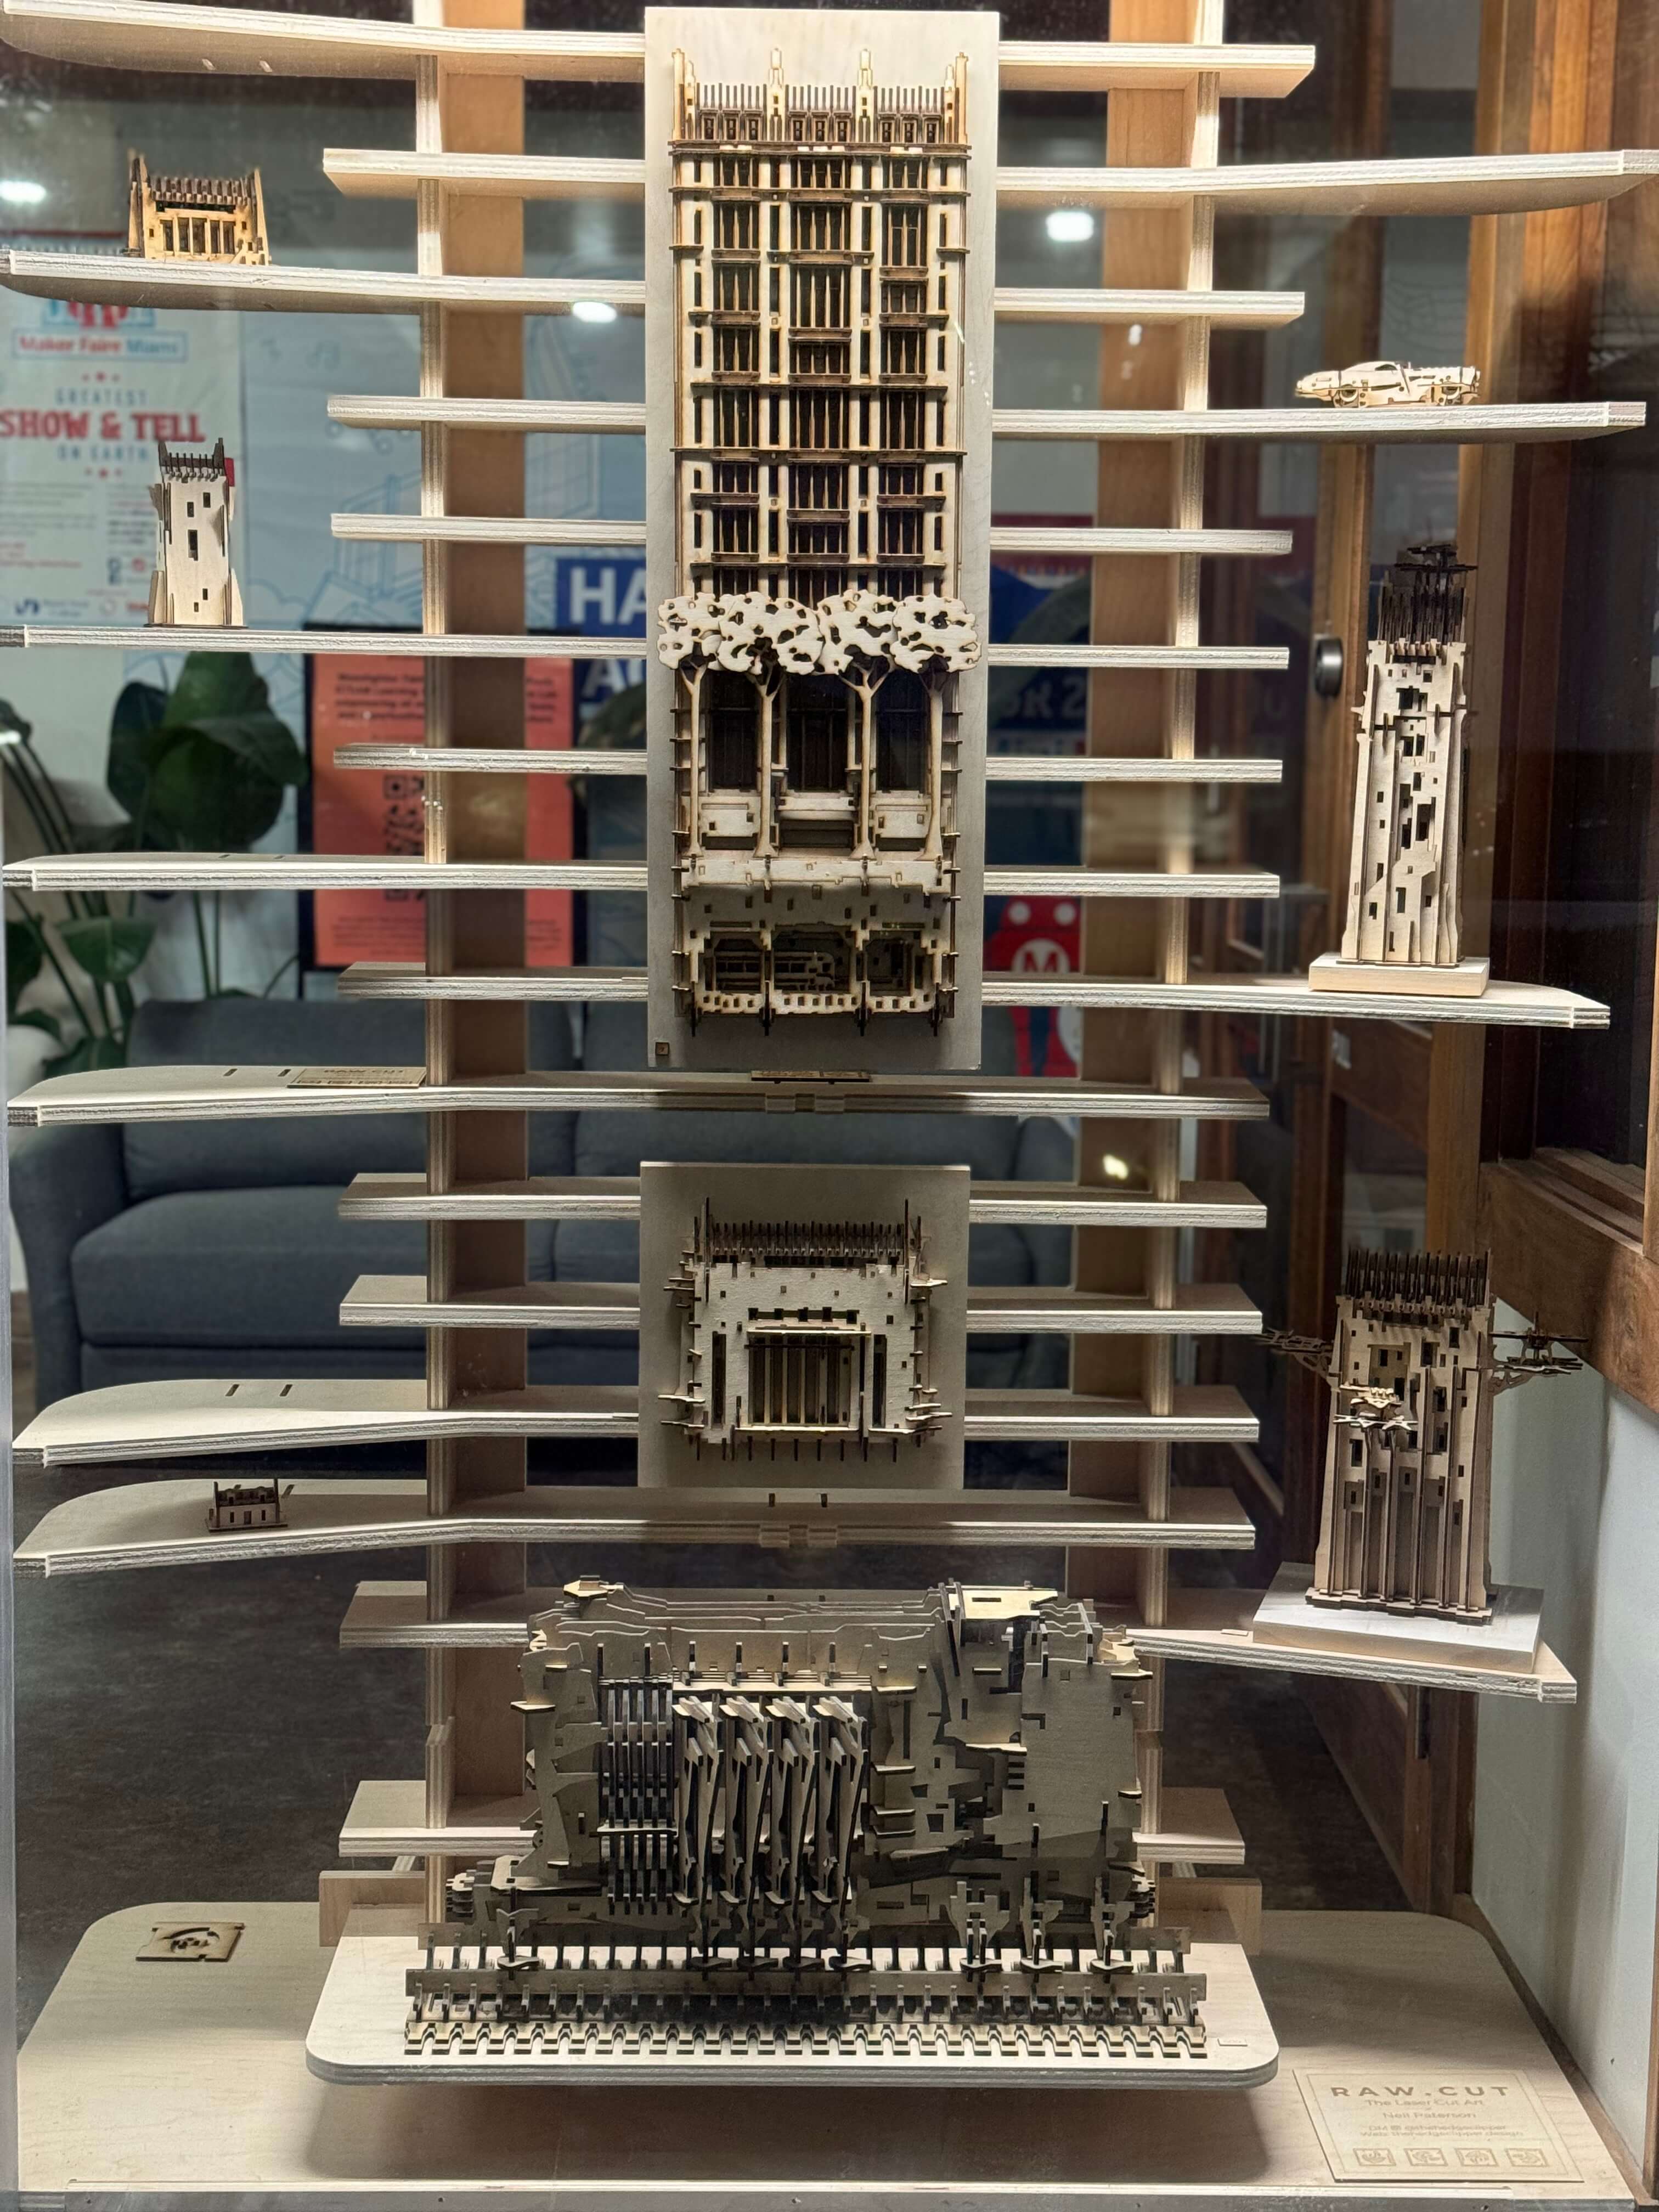
Assembly & Final Product
The finished piece assembles without any hardware or fasteners. It relects the aesthetic of the artwork without competing with the complexity of the pieces. The horizontal elements allow for multiple points to hang the pieces while allowing natural light to still enter the space.
Resources Used
1/4" Spektra Compression Endmill
Files
Download Rhino File Download Sheet 1 NC File Download Sheet 2 NC File Download Sheet 3 NC File Download Sheet 4 NC File
Group Assignment
In this week's group assignment, we are tasked with doing our CNC safety and basic use training and Charactering our CNC Mill.
The Shop Sabre 4896
The shopsabre 4896 has a 48" x 96" cutting area, 2.5 axis, Max 18,000RPM HSD Spindle with a 9.38HP motor operated with WINCNC software on a controller Windows desktop comoputer. For 1/2"-3/4" Plywood, you can run a profiling cut with a 1/4" Bit at 125 in/min. with a spindle speed of 16,000.
Safety & Basic Use
- Never try to grab part while the CNC is on. Simply hit the red emergency button if there is a problem!
- Always keep the vacuum on during cutting.
- Always wear goggles in the Shop Box.
- The kerf is much larger than the laser. This all depends on tool diameter dimension.
- Inside corners will be rounded.
- For profile cuts, we only need a 2D vector file.
- For 3D organic surfaces, you'll need a full 3D model .stl.
- You can not cut overhangs.
- Millable materials include: Solid wood (2 Flute endmill), plywood (compression bit), MDF (2 Flute Endmill), Corrugated plastics and cardboards (Corrugated Bit), Foams (Single Flute Endmill), Plastics like HDPE, PVC, and thin metal composits like 1/8" maxmetal sheets (Single Flute Endmill). Please use the corresponding bit for each material.
Operations for 2D Milling
- Profiling
- Engraving
- Pocketing
Operatings for 3D Milling
- Surfacing
- Horizontal Roughing
- Horizontal Finishing
- Radial Machining
- Vertical Roughing
- Vertical Fininshing
Design Considerations
- Max size to cut is 4' x 8'
- Leave a border on your design file so you can screw your stock material onto the CNC table.
- Leave at least 1” between parts to prevent parts from vibrating. *There is no vacuum table option on this machine.
- Avoid cutting materials thicker than 2” and carving materials more than 3.5” thick.
- Design your object in parts.
CNC Workflow
- Load your stock material on CNC Table.
- Install appropriate bit.
- Use tool height command.
- Set home position.
- Setup CNC commands on Rhino File.
- Export NC file.
- Open in WINCNC controller
- Start Job
- Monitor the job - do not walk away!
Copyright 2024 Thomas Pupo - Creative Commons Attribution Non Commercial
Source code hosted at fabcloud/fabacademy/2024/thomas-pupo