
Week 6: Embedded
Programming
Flashing the Quentorres Board
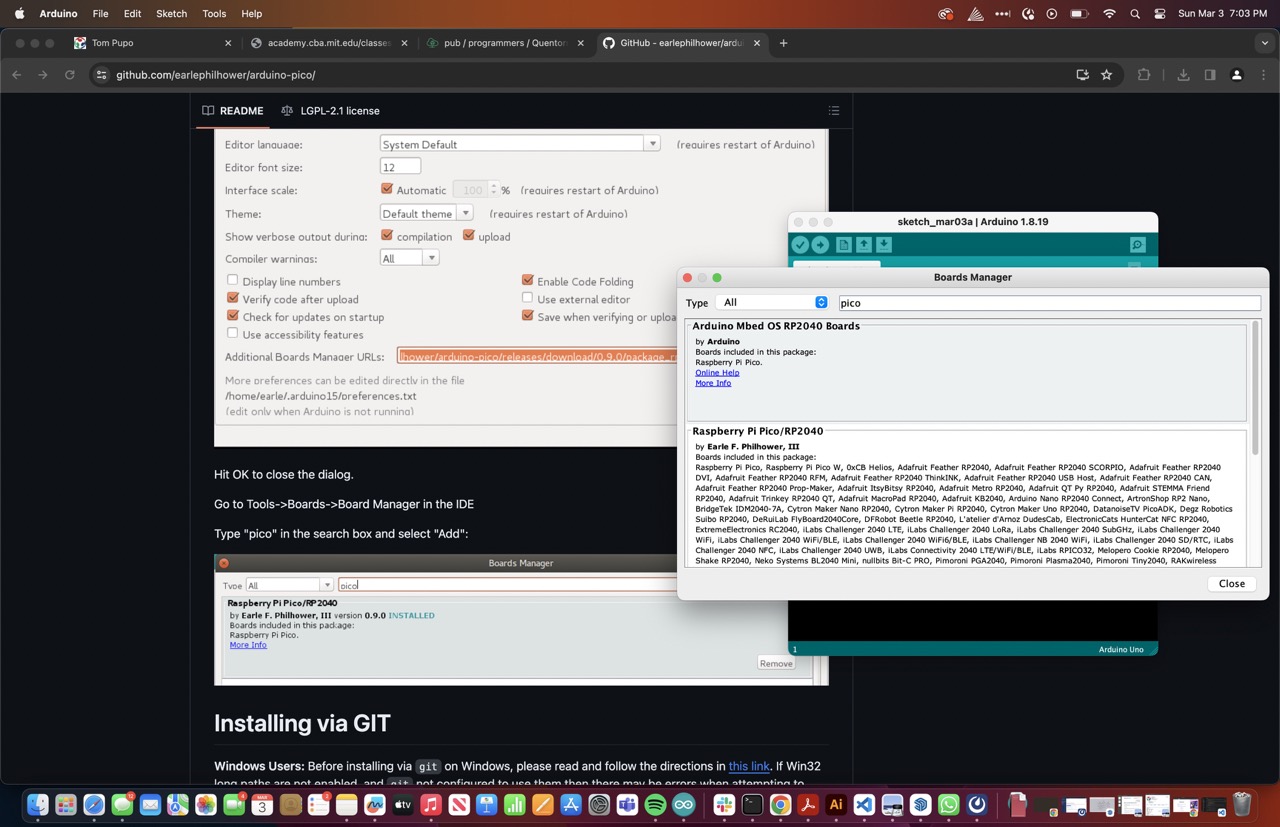
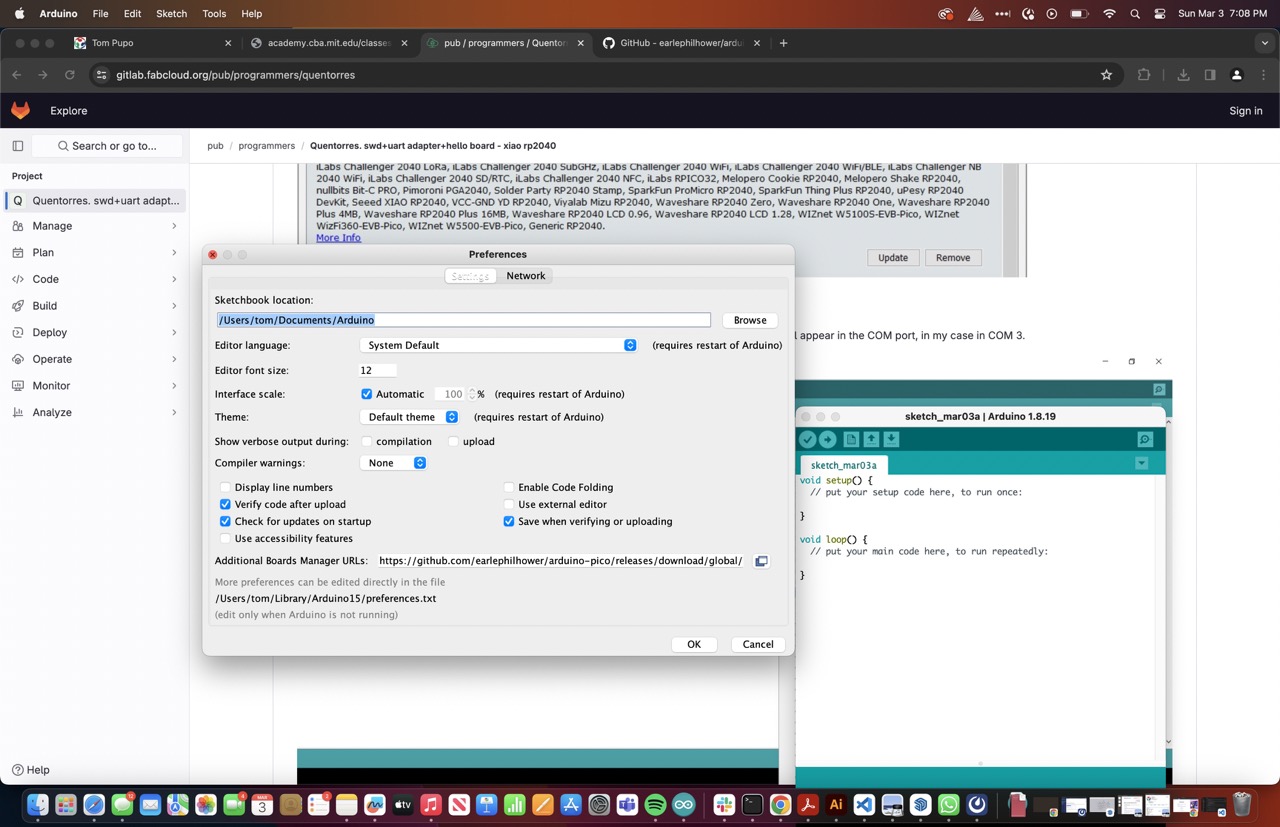
Following the tutorials on the FabAcademy site, I was able to download the Arduino IDE and use the software to flash the control code to the Quentorres board. I also reviewed some tutorials on programming an arduino pico (linked below) and followed the tutorial for using the Earl Philhower rp2040 board control to Arduino.
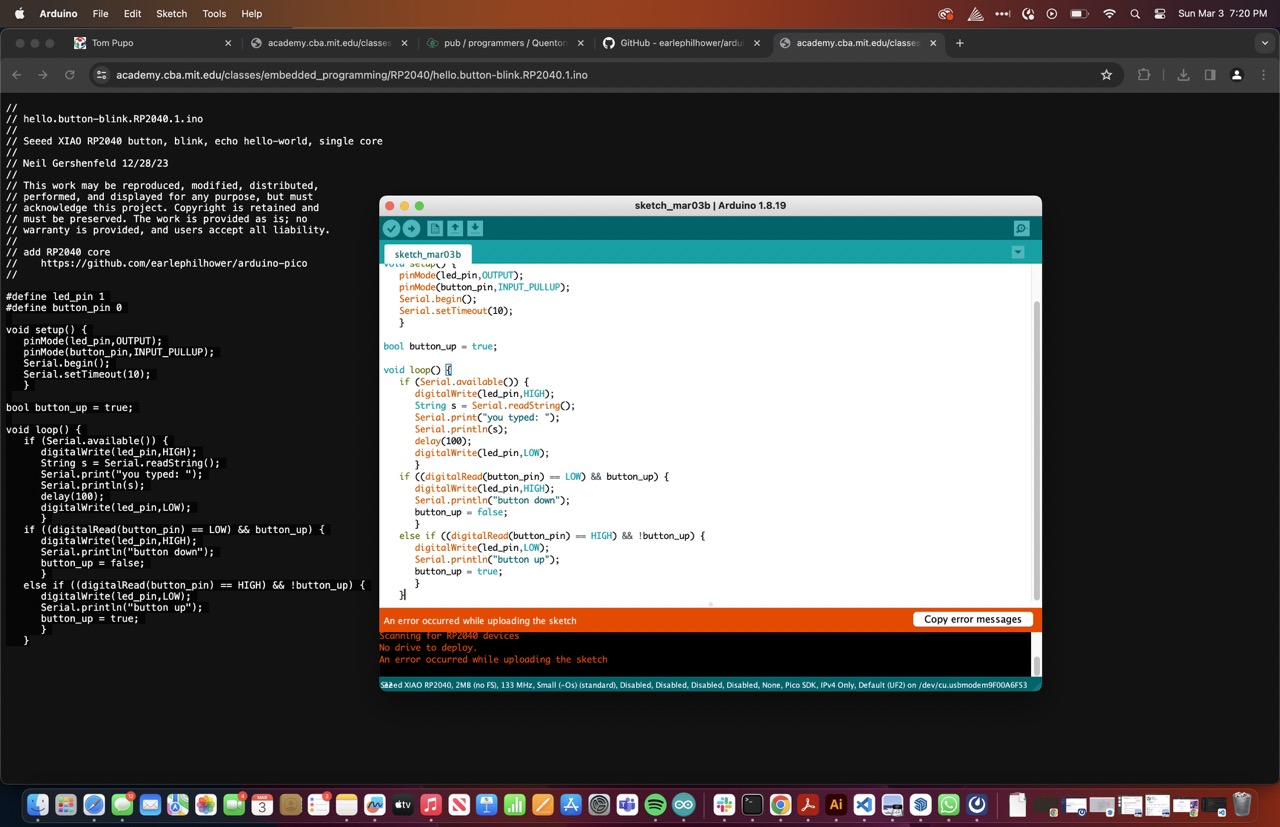
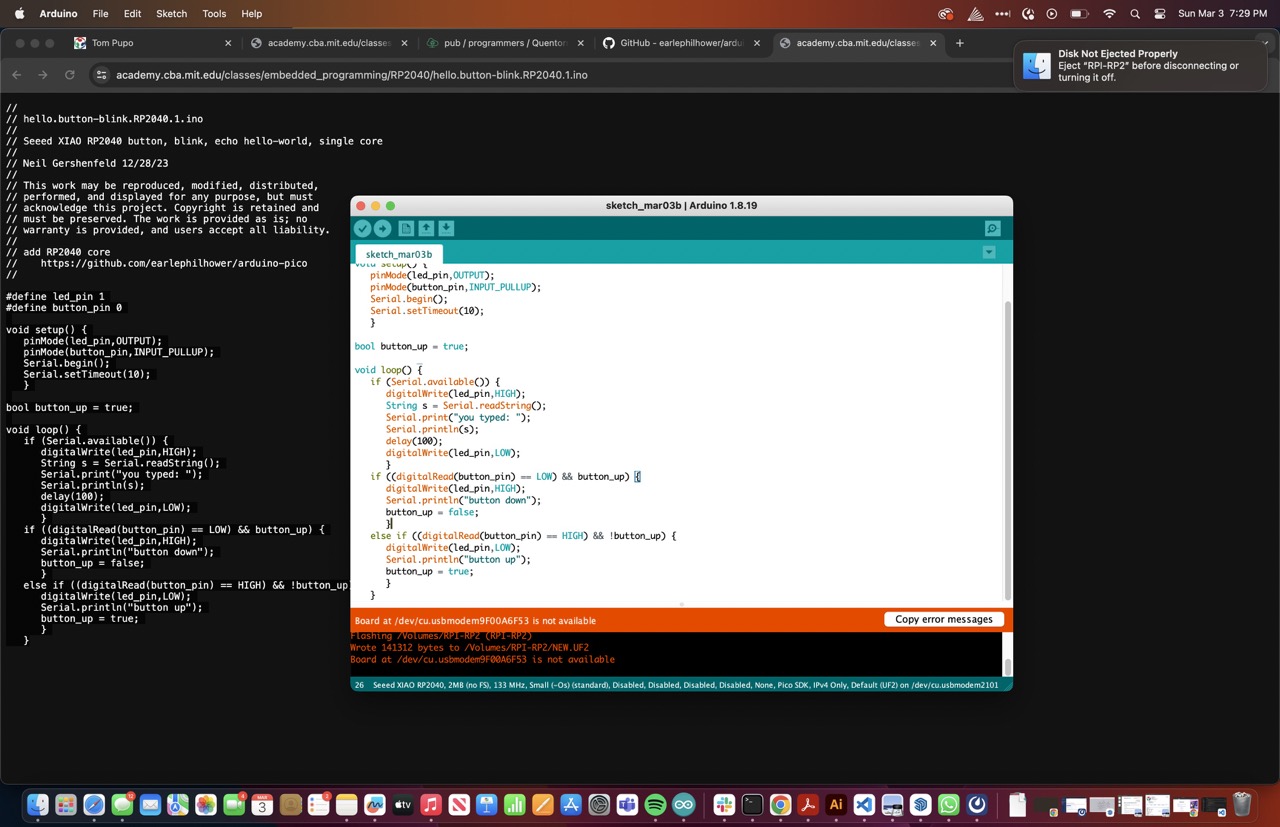
Then, I loaded the sample code provided by the FabAcademy repository for an LED output pattern. When I tried pushing it to the board it gave me an error message that it could not reach the board. I had to follow a procedure of holding down the two buttons on the Xiao board to activate a hard disk mode connection with my computer and then when I tried to push the code again it gave me a different error message.
I realized that I had skipped the instructions on selecting the proper port for the arduino to use to connect to the board. I clicked Tools, Port, and selected the proper serial port. When I tried pushing the code again, it worked! When I pushed and released the button, one led would flash.
I edited the code with an additional led light flash from another LED on the quentorres board. When I pushed the code, it would flash in a sequence one after the other.
Resources Used
Fab Academy LED control Arduino Code

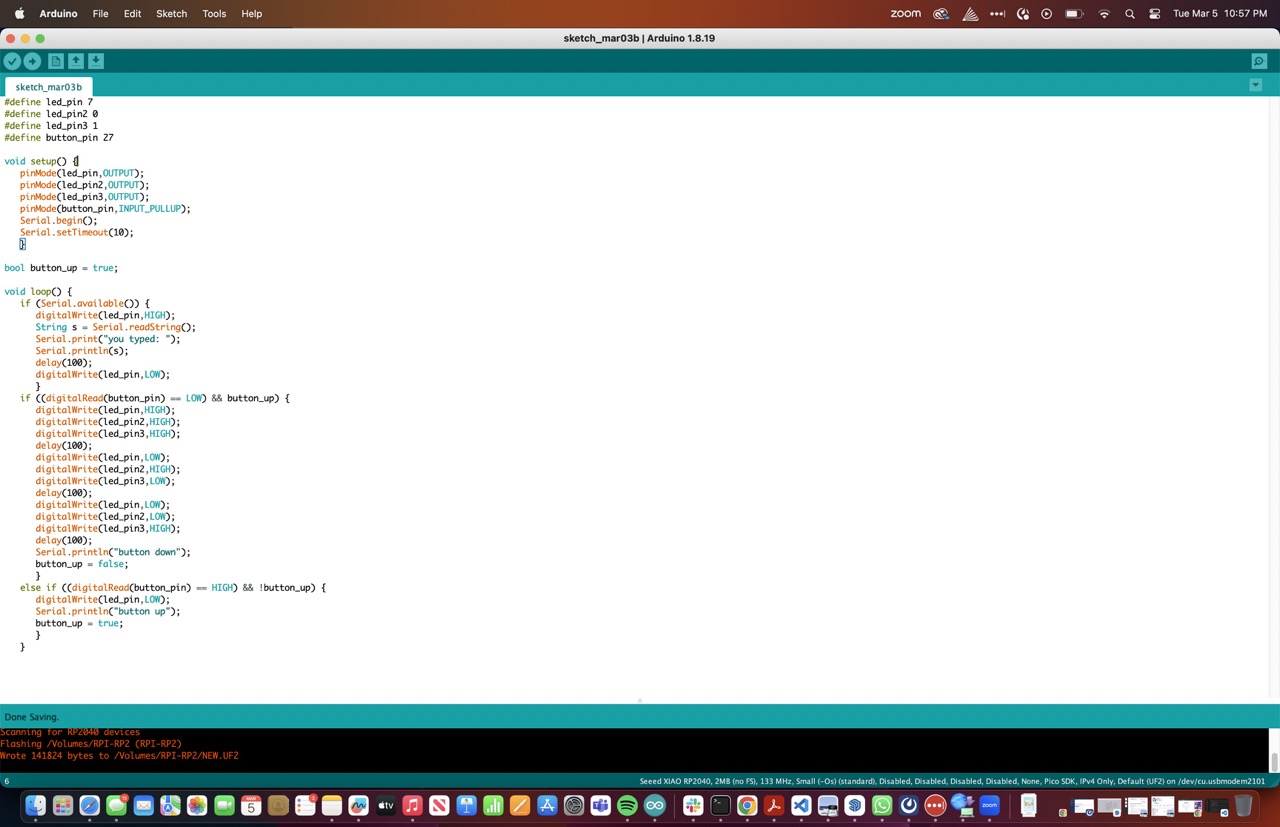
Once the code was loaded on the Quentorres board, I restarted it and the led light pattern would display after I pressed and released the button.
Output LED Pattern:
Files
Download Arduino Sketch
Group Assignment
Comparing ESP32S3 to RP2040
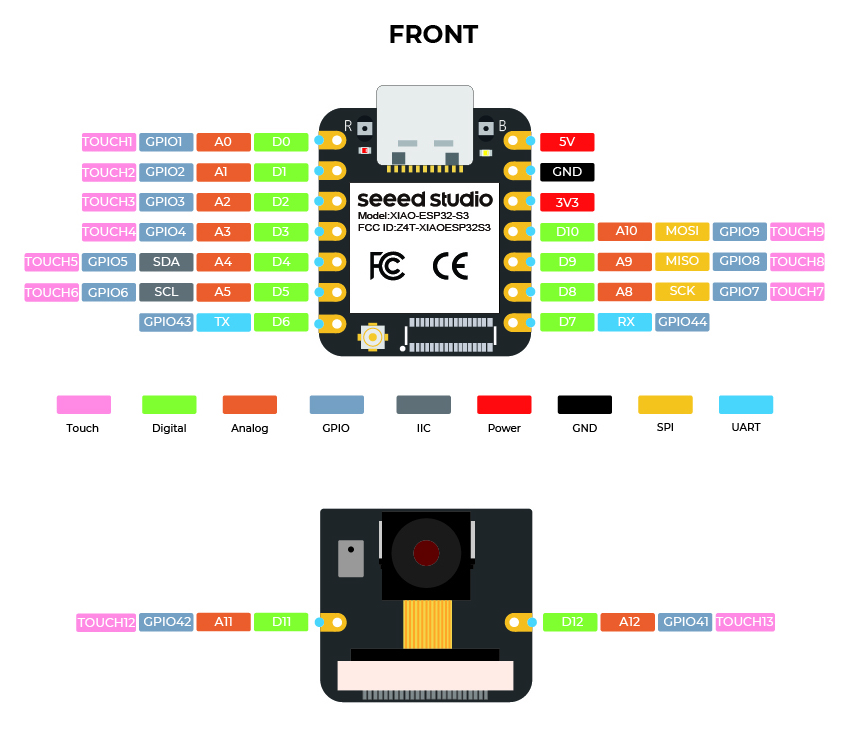
XIAO ESP32S3:
- Built-In Connectivity: Wi-Fi and Bluetooth are built-in, so no need for extra modules.
- Easy Setup: Flashing firmware and getting started with MicroPython is straightforward.
- Compact and Powerful: With plenty of GPIO pins and a small form factor, it's versatile for many projects.
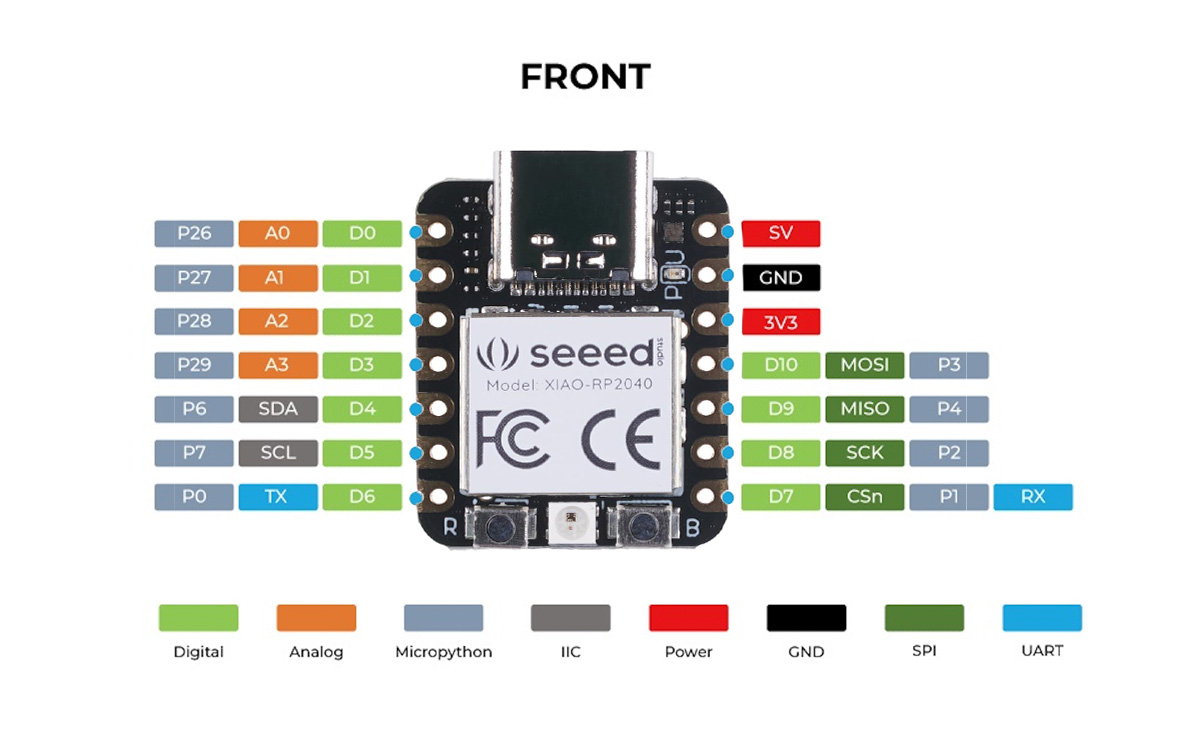
XIAO RP2040:
- Extra Modules Needed: Lacks built-in Wi-Fi/Bluetooth, so you'll need to add those separately, which adds complexity.
- Different Setup Process: You'd use the Raspberry Pi Pico SDK or other methods for flashing and coding.
- Great for Specific Needs: If you're in the Raspberry Pi ecosystem, it's a solid choice but might need extra components for the same functionality.
Conclusion
If you need a compact, powerful board with built-in connectivity, the XIAO ESP32S3 is a great choice, especially for MicroPython projects. It simplifies your workflow by integrating essential features. The RP2040 is still a good option, particularly if you don’t need built-in wireless connectivity or if you’re already working with Raspberry Pi products. But for many IoT projects, the XIAO ESP32S3 offers a more streamlined and efficient setup.
For more details and tutorials, check out the Seeed Studio Wiki at https://wiki.seeedstudio.com/xiao_esp32s3_getting_started/
Copyright 2024 Thomas Pupo - Creative Commons Attribution Non Commercial
Source code hosted at fabcloud/fabacademy/2024/thomas-pupo