
Week 5: 3D Scanning & Printing
3D Printing
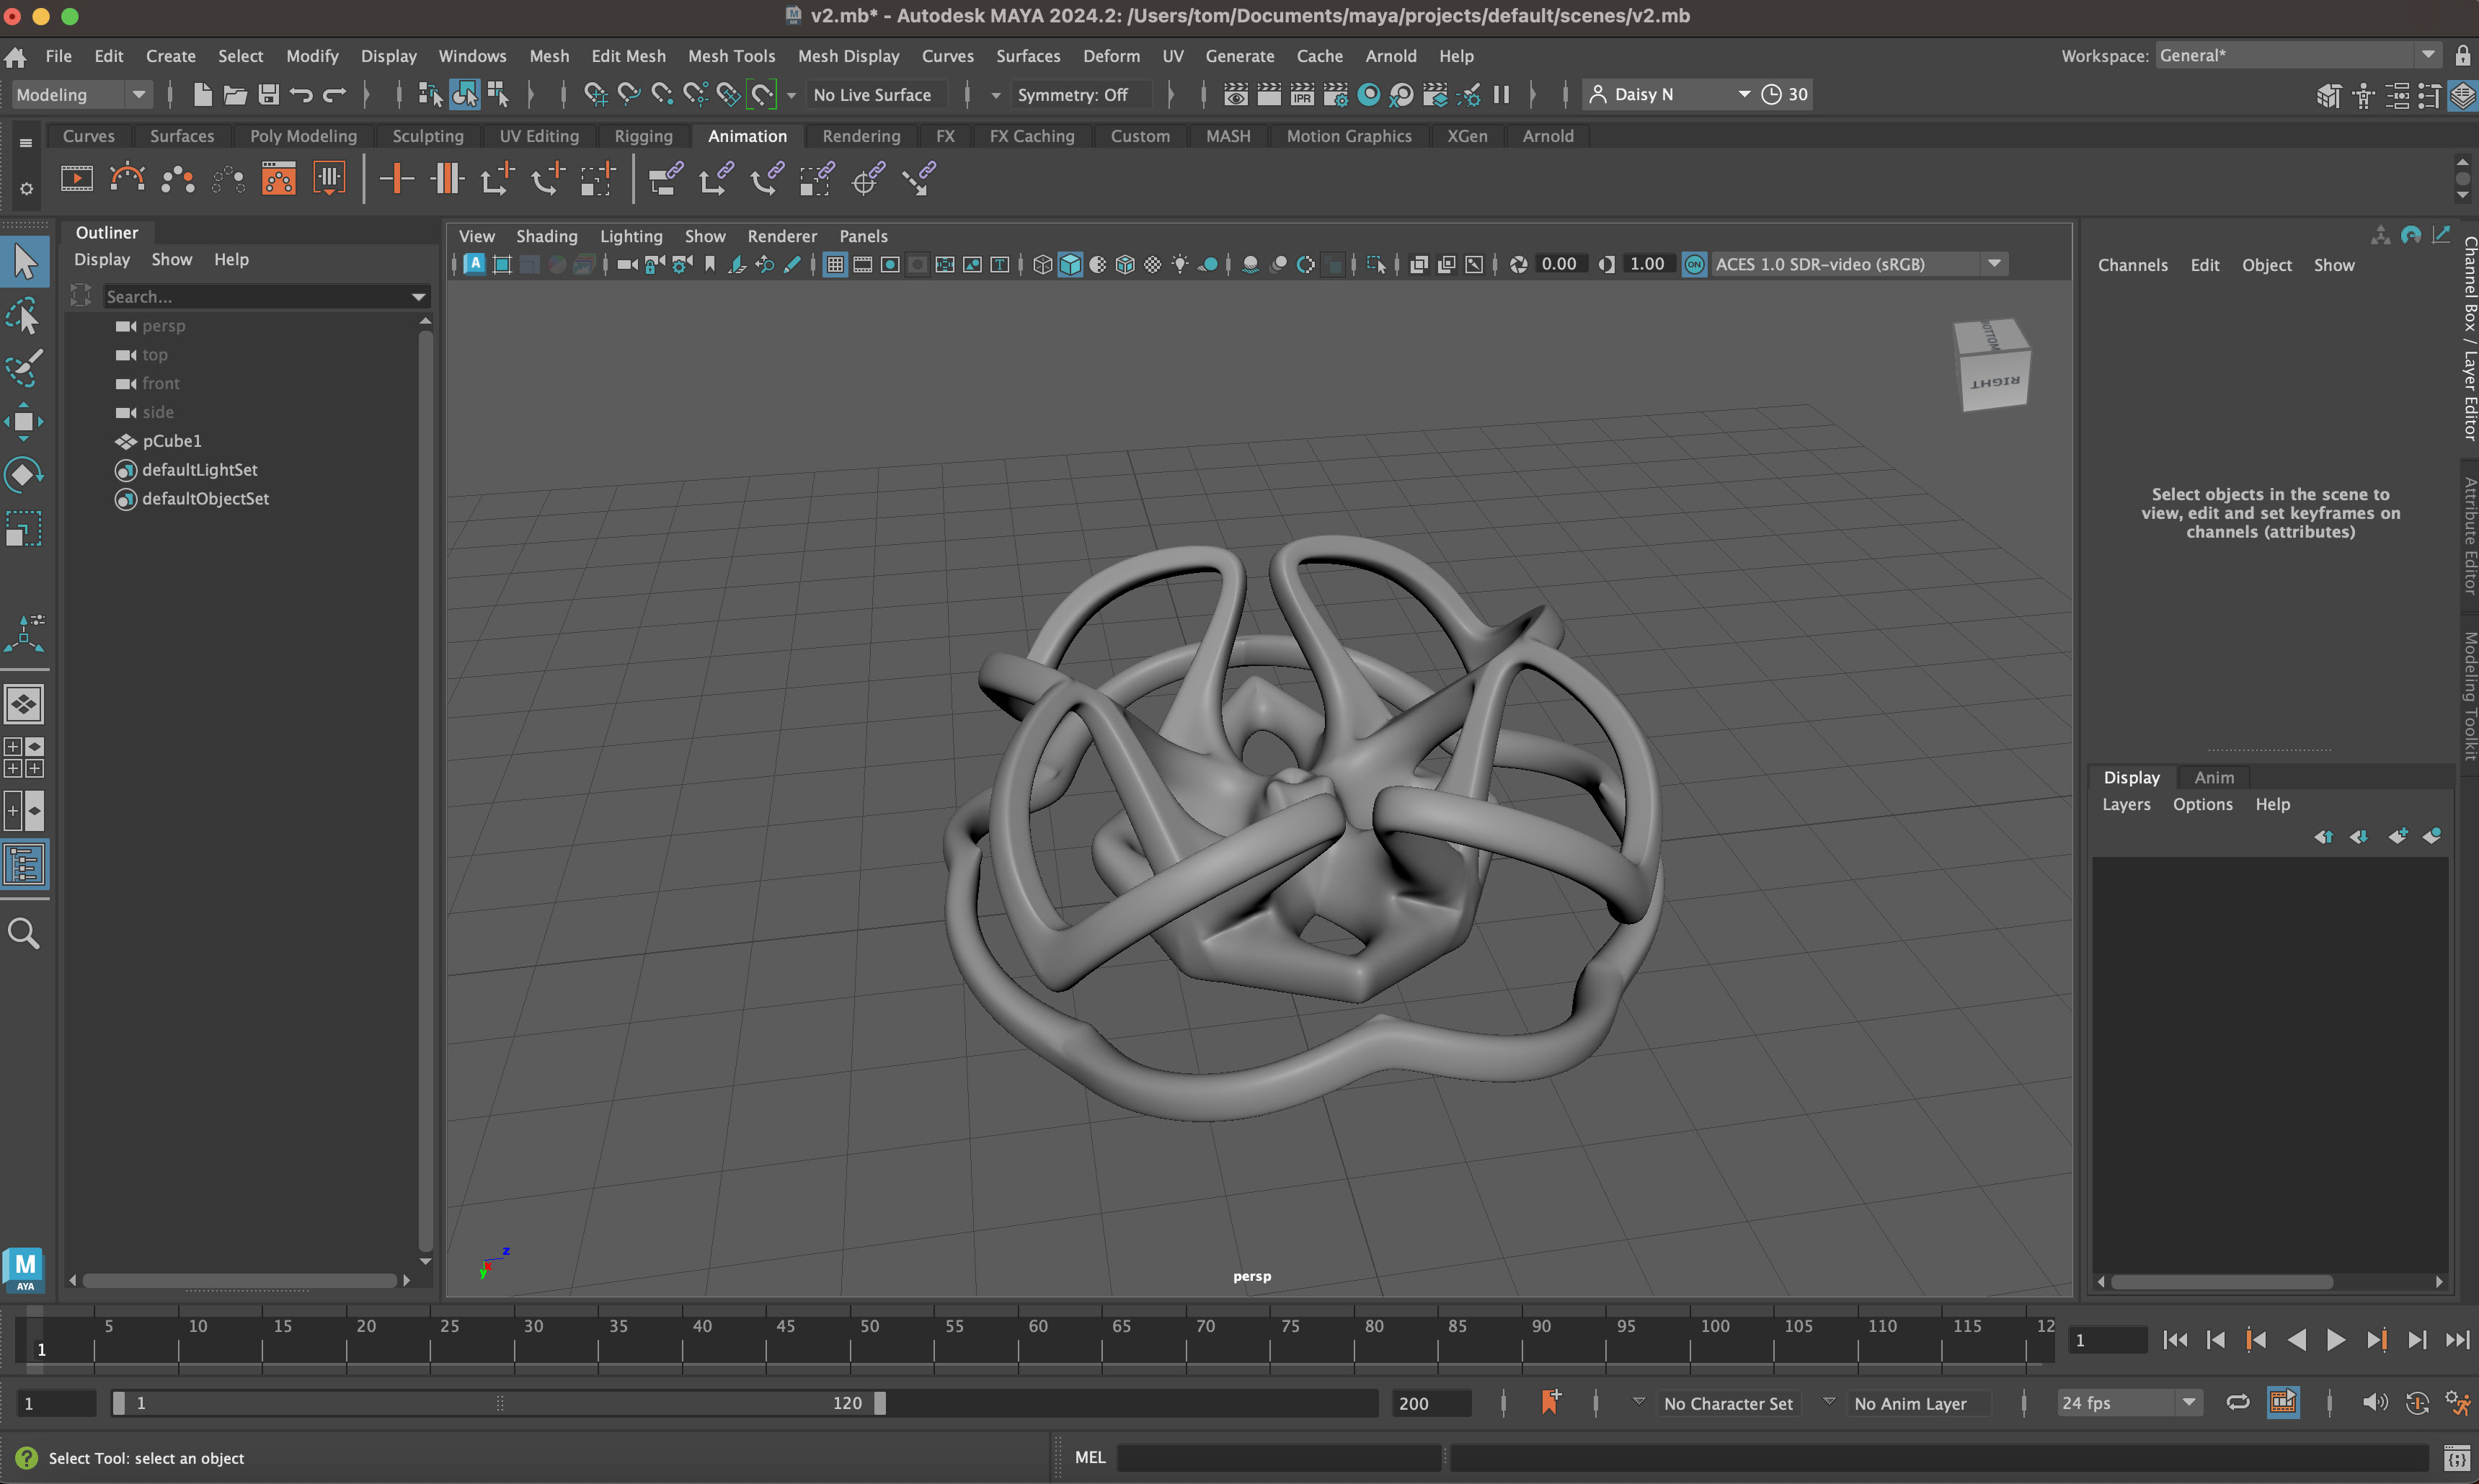
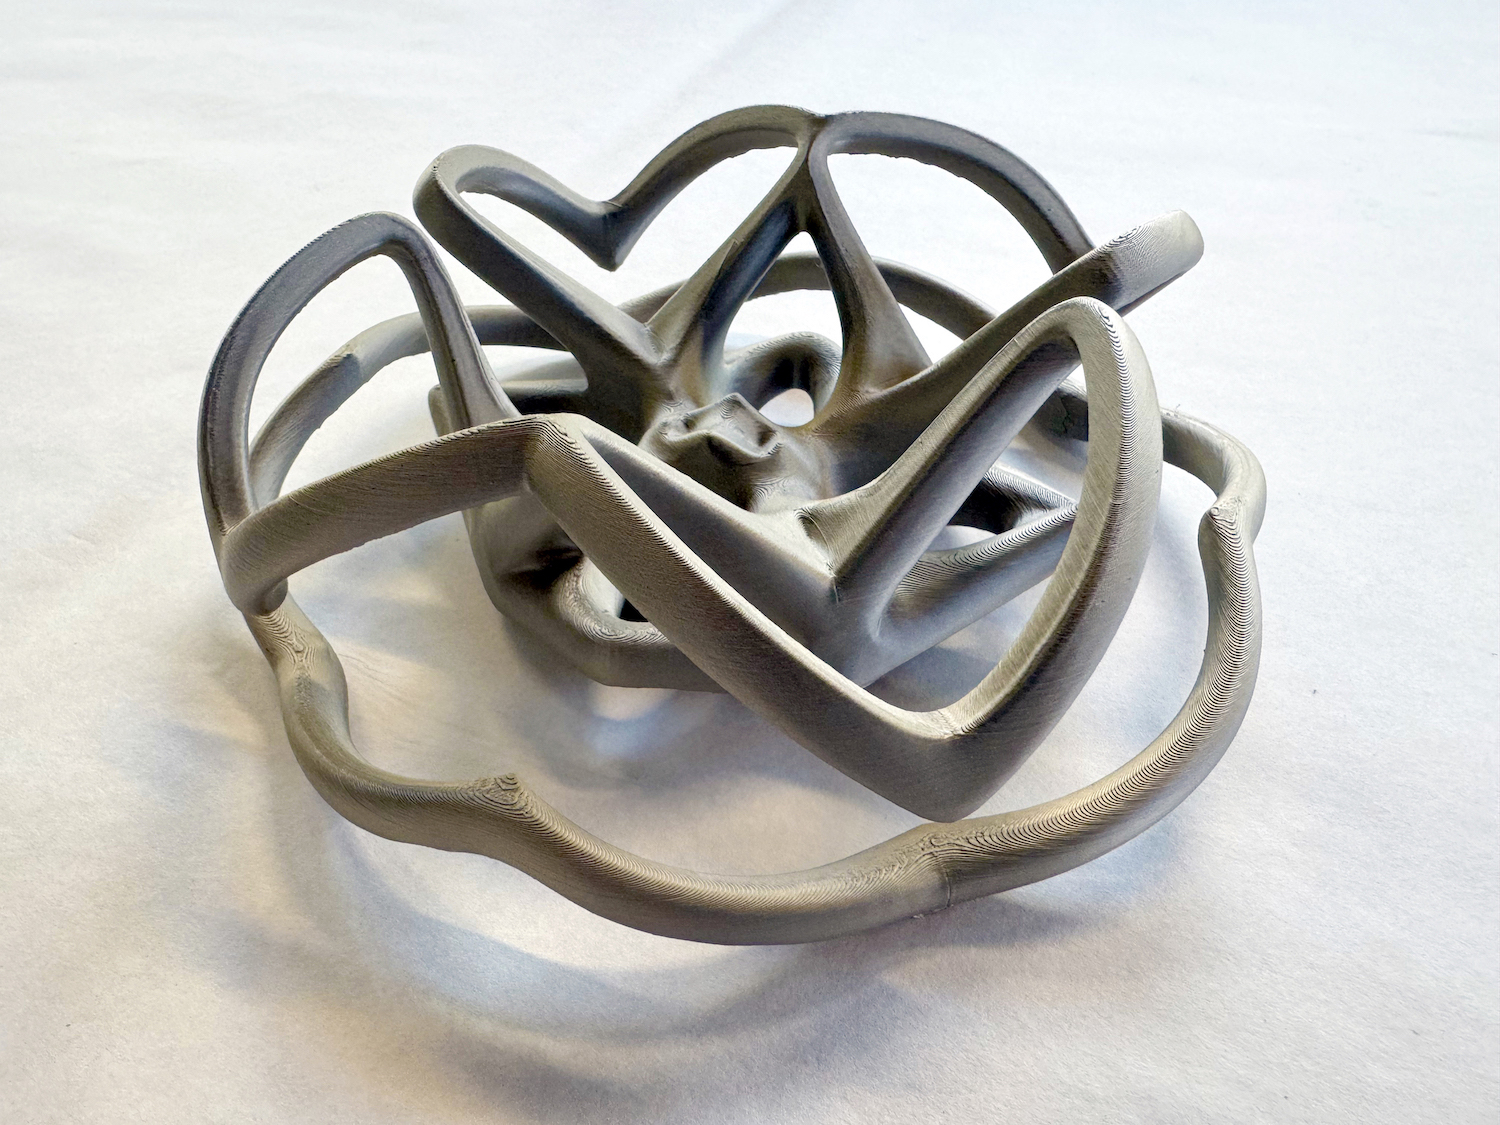
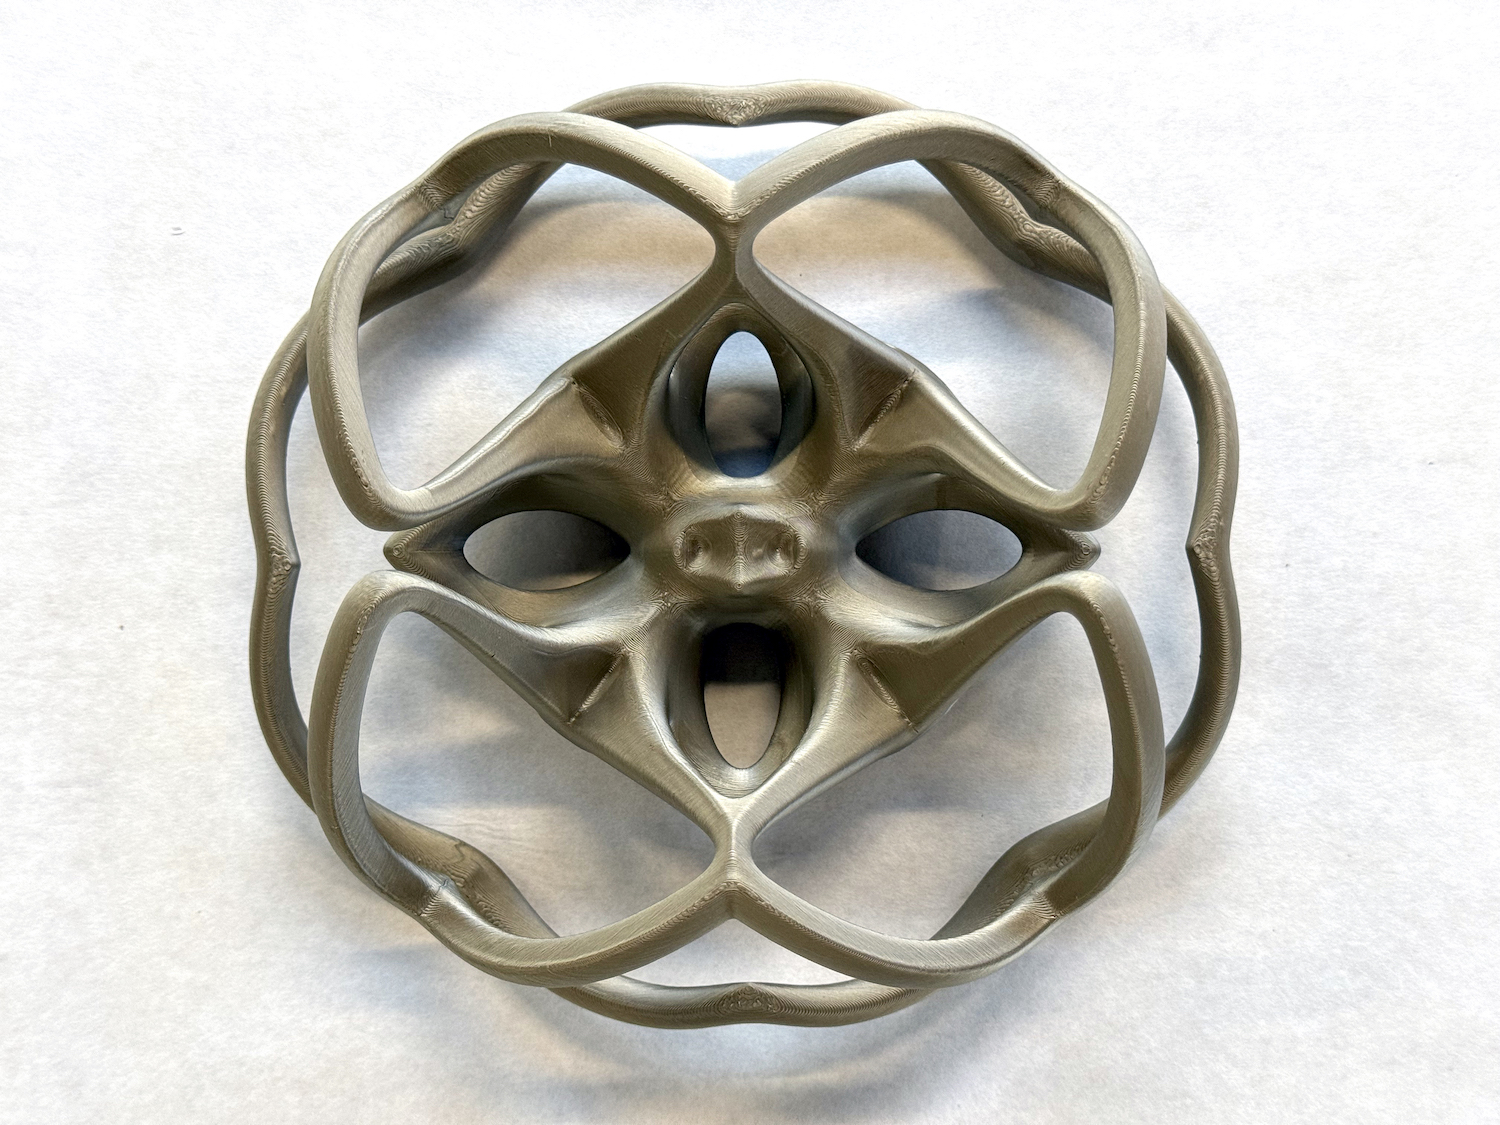
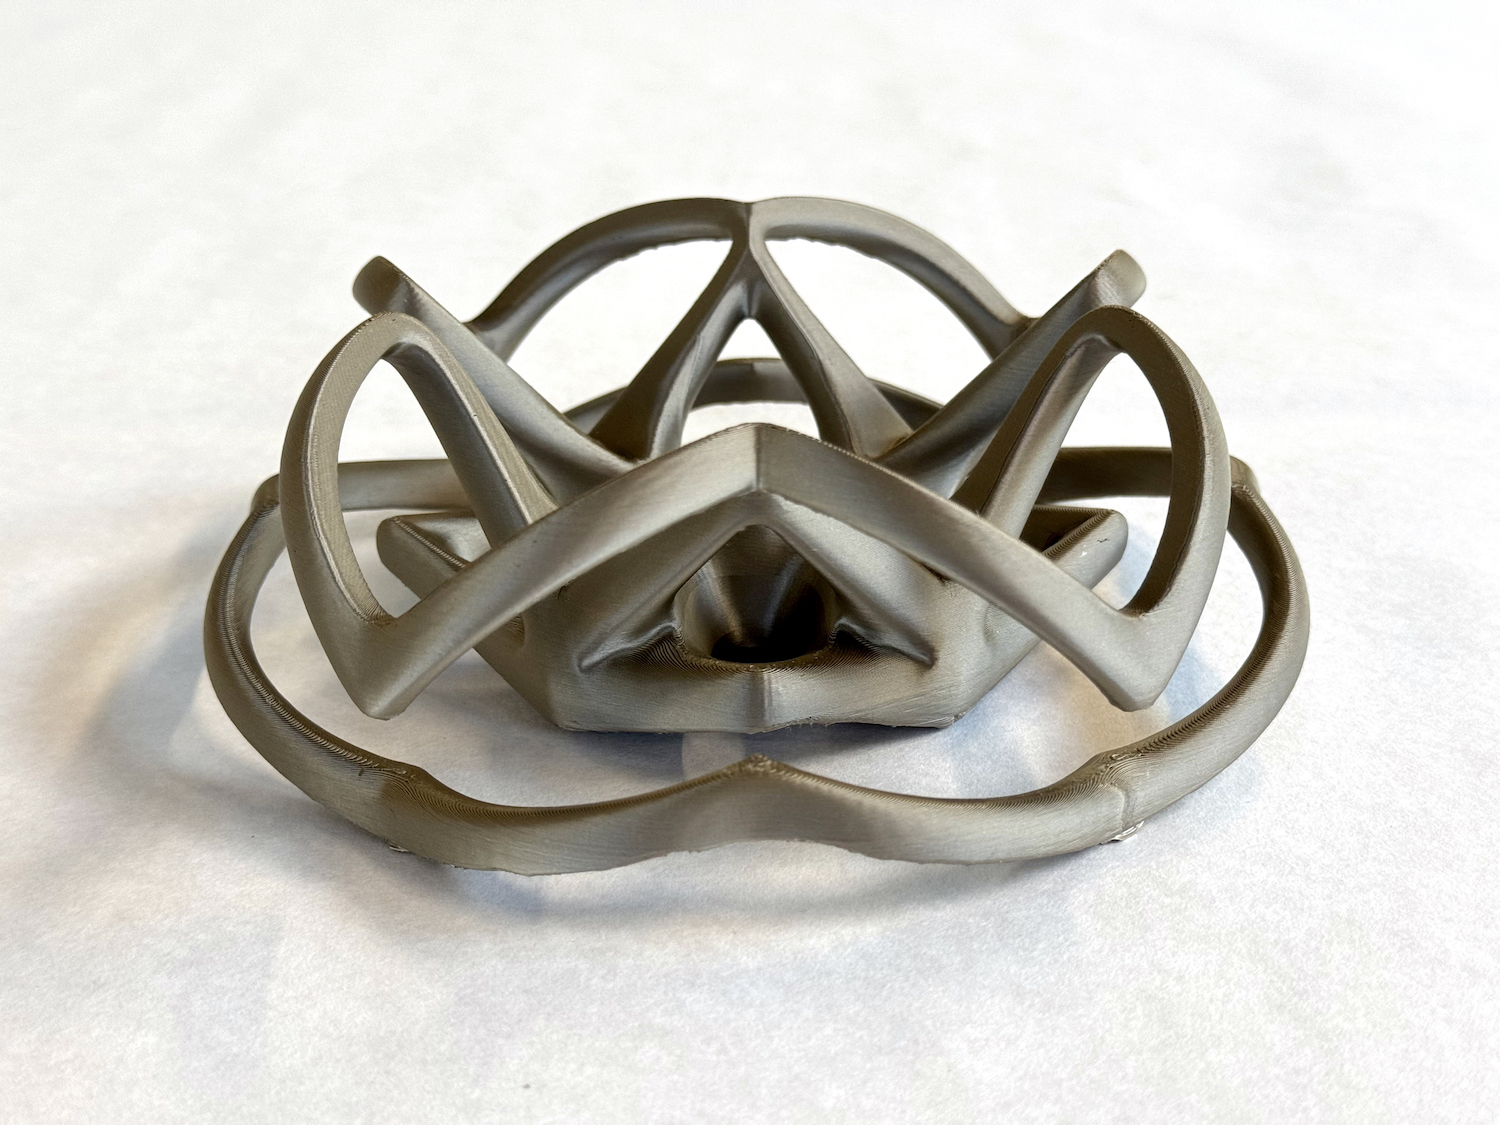
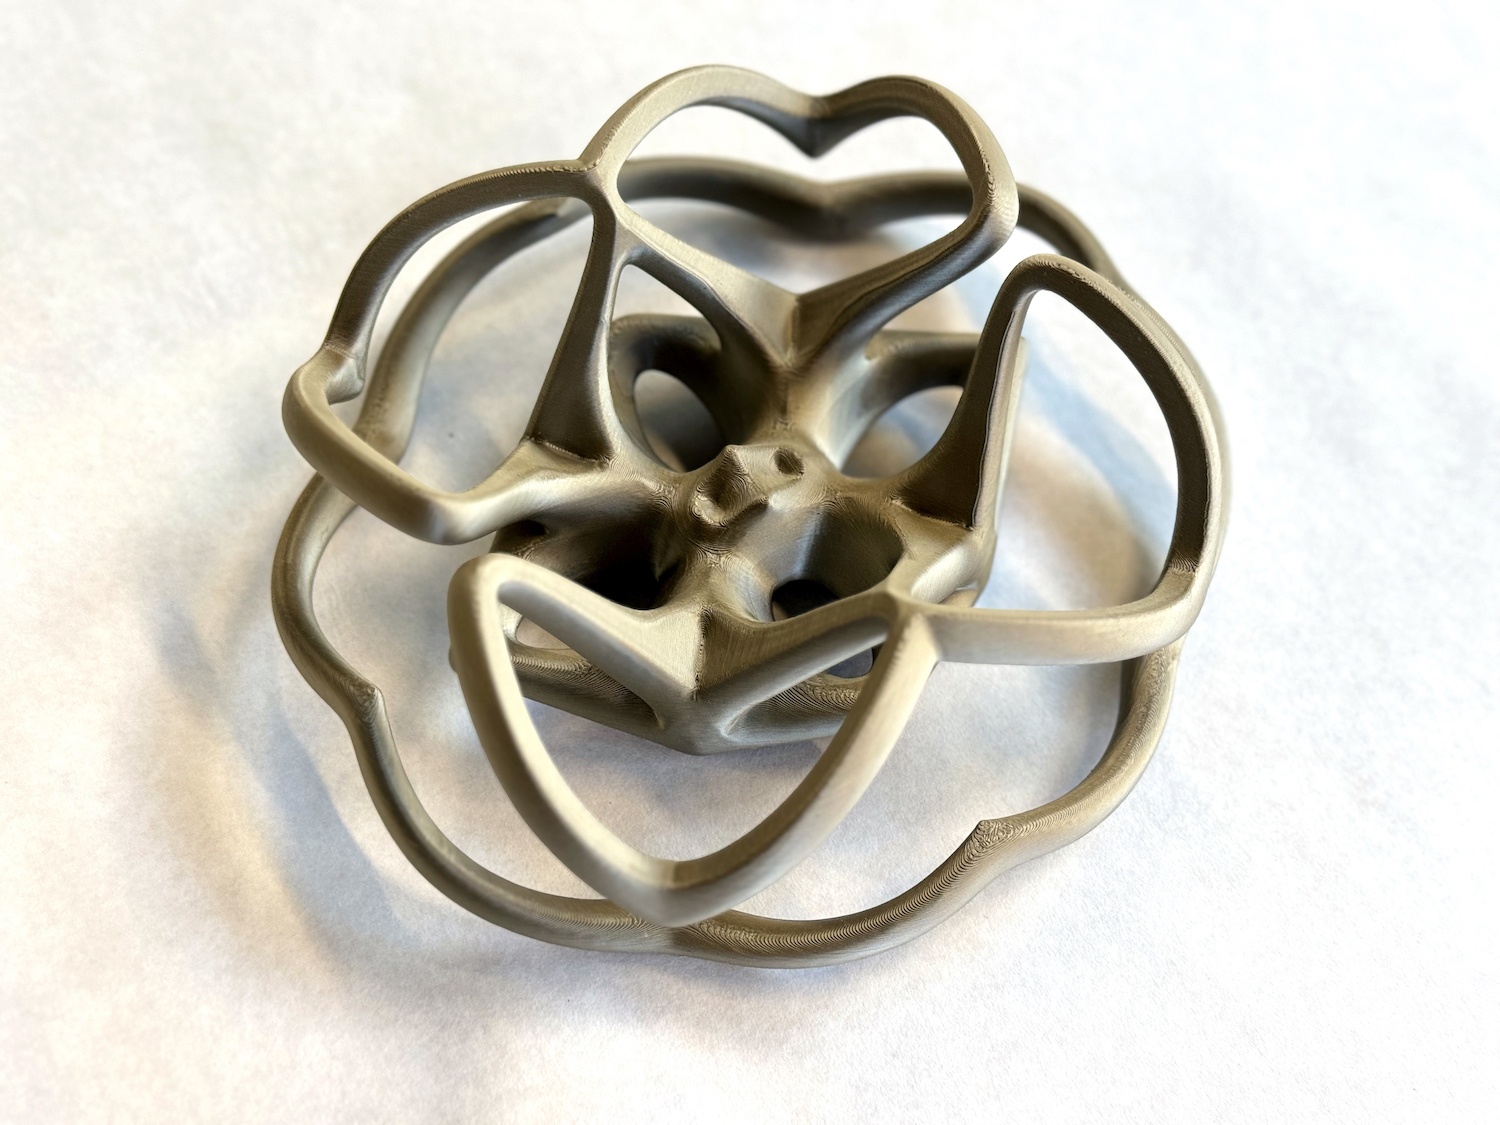
For the 3D printing assignment, we were tasked to print something that would be impossible to make in any other fabrication method. Since I had already used Fusion360 and Rhino in previous assignments, I decided to use a different 3D modeling software to practice and experiment with. For intricate geometries, I chose to use Maya 3D in order to design a geometry that would not only be impossible to machine, but also test the limits of our 3D printer. I documented my process in a timelapse below, where you will see that I was utilizing a few basic commands to create a complex geometry. Starting with a cube, I extrude the face, move it into a new position, bridge two faces together, and implement multiple mirroring commands along the X, Y, and Z axis to explore what forms emerge. In the timelapse you can see how I use these commands to create more layers and complexity, as well as to eliminate complexity until I found an aesthetic form that would not be able to be machined due to its overhands, floating elements, and undercuts.
Maya 3D Modeling Process:
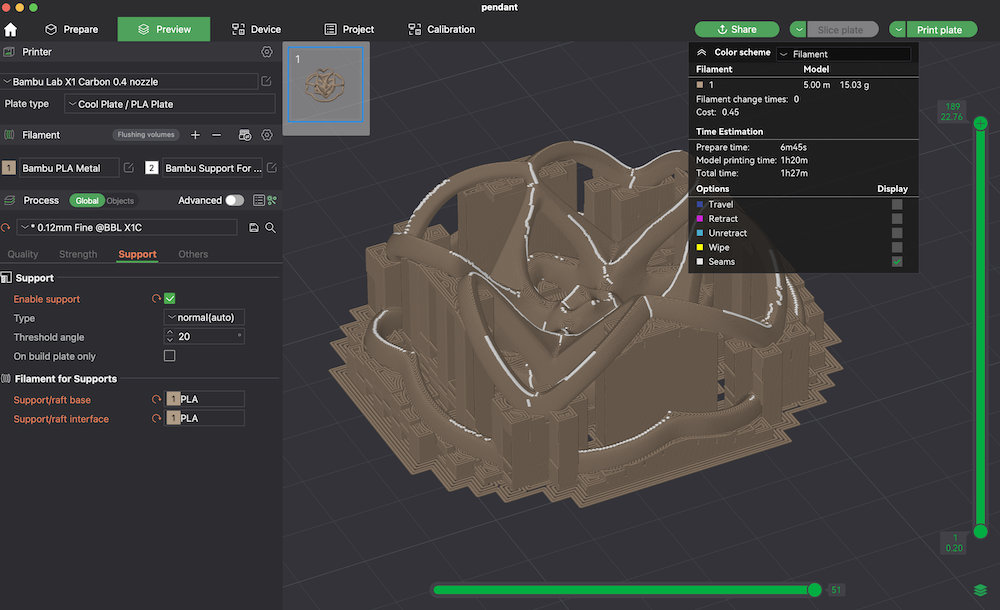
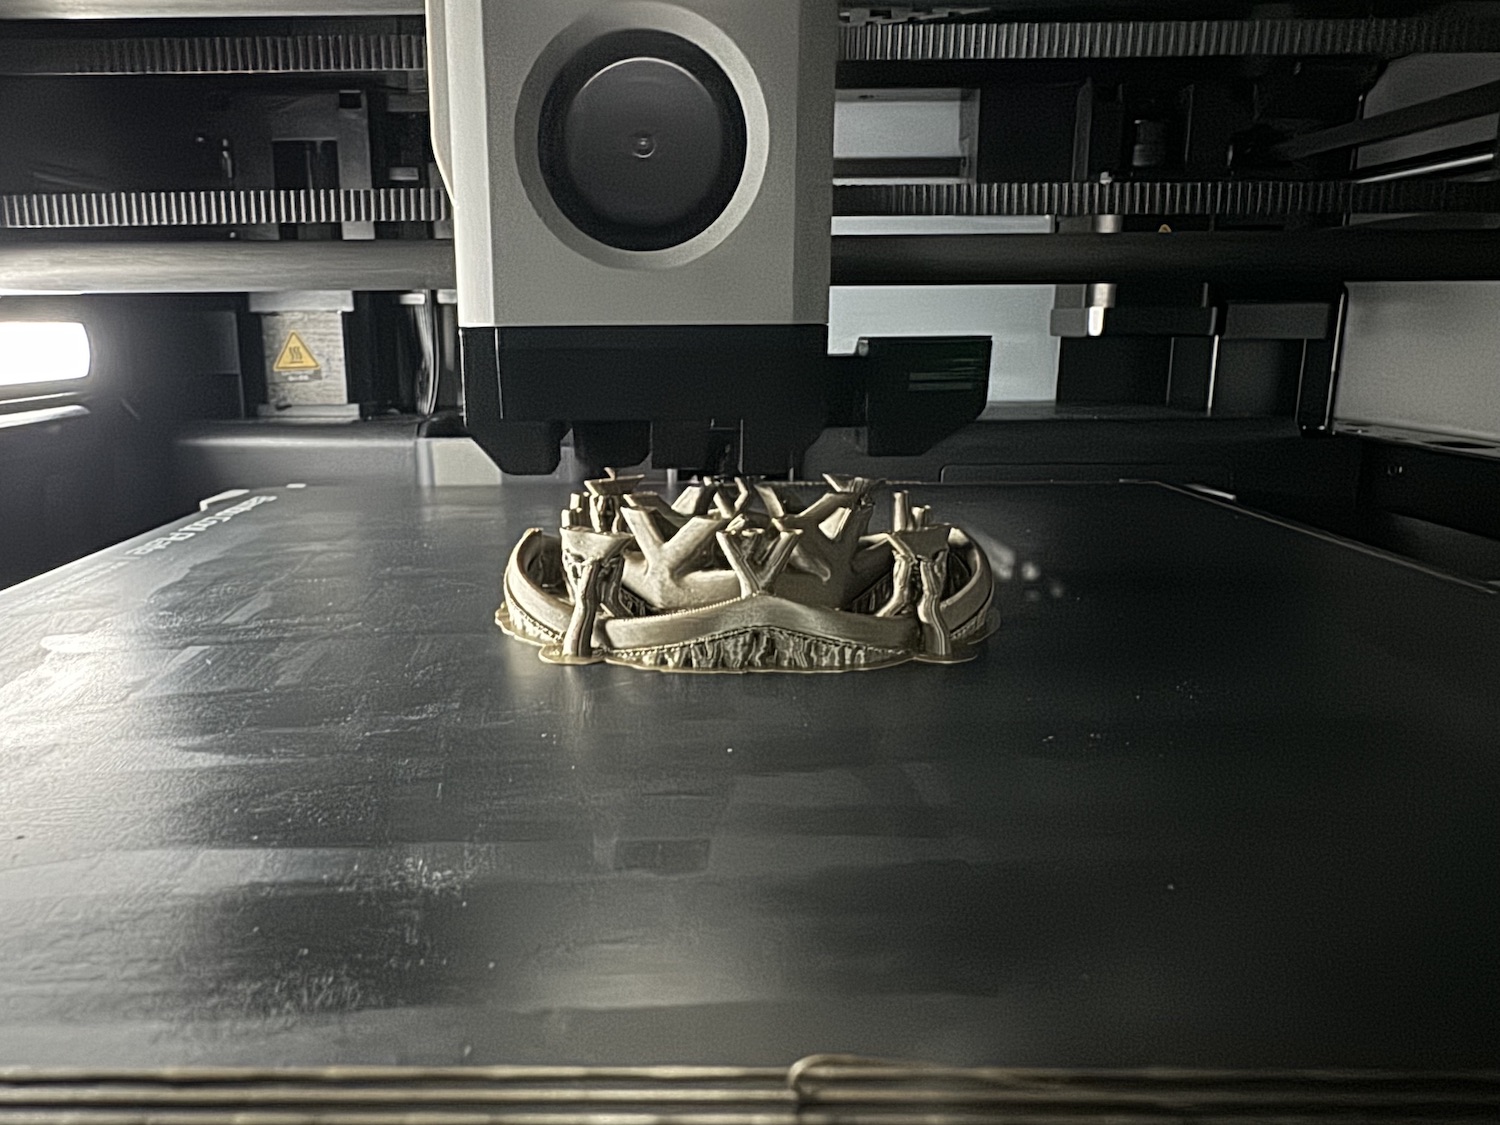
I used a BambuLabs X1C to print the object. I had to edit the support angle in order to successfully print the floating elements. When I went to use the special bambulabs support filament, it made the print 3 times longer so I reverted back to print supports in the same PLA plastic. I was able to remove these fairly easily with little damage to the part.
 3D Scanning
The 3D scanning process I tried was with the lidar capabilities of the iPhone 15 using a free app called Scaniverse.
For a free app, the software was able to capture a fairly accurate 3D model. I tested the scanning capablity by capturing a 3D print of a John Edmark sculpture. The scan captured the layer texture of the 3D print but had blurrier features where the lighting was inconsistent.
Scaniverse Results:
I tried different lighting methods, rotating the object versus rotating slowly around the object, and running multiple passes in different angles. The best result was when I walked slowly around the object and alternated the angle above the object after each rotation.
Files
Download Maya File Download 3D Scan of Edmark Zoetrope Model
Group Assignment
Design and Printing Tips for the Bambulab P1S 3D Printer
Design Tips
1. Choose the Right Material:
- The Bambulab P1S works well with many types of filaments like PLA, ABS, PETG, TPU, and even advanced stuff like nylon and carbon fiber composites. Think about what you need your part to do—do you need flexibility, strength, or heat resistance? Pick your material accordingly.
2. Remember your Build Volume:
- Make sure your design fits within the printer's build volume (256 x 256 x 256 mm). If your model is too big, break it into smaller parts and plan how they'll fit together later.
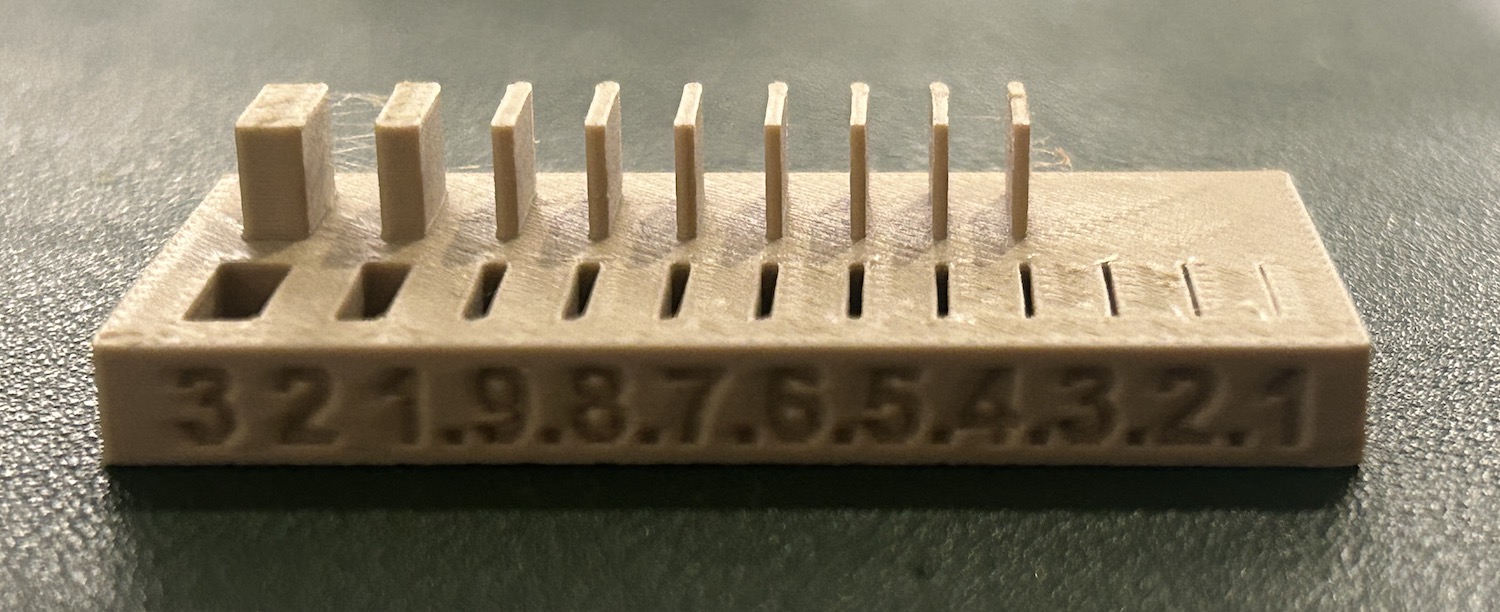
3. Detail and Precision:
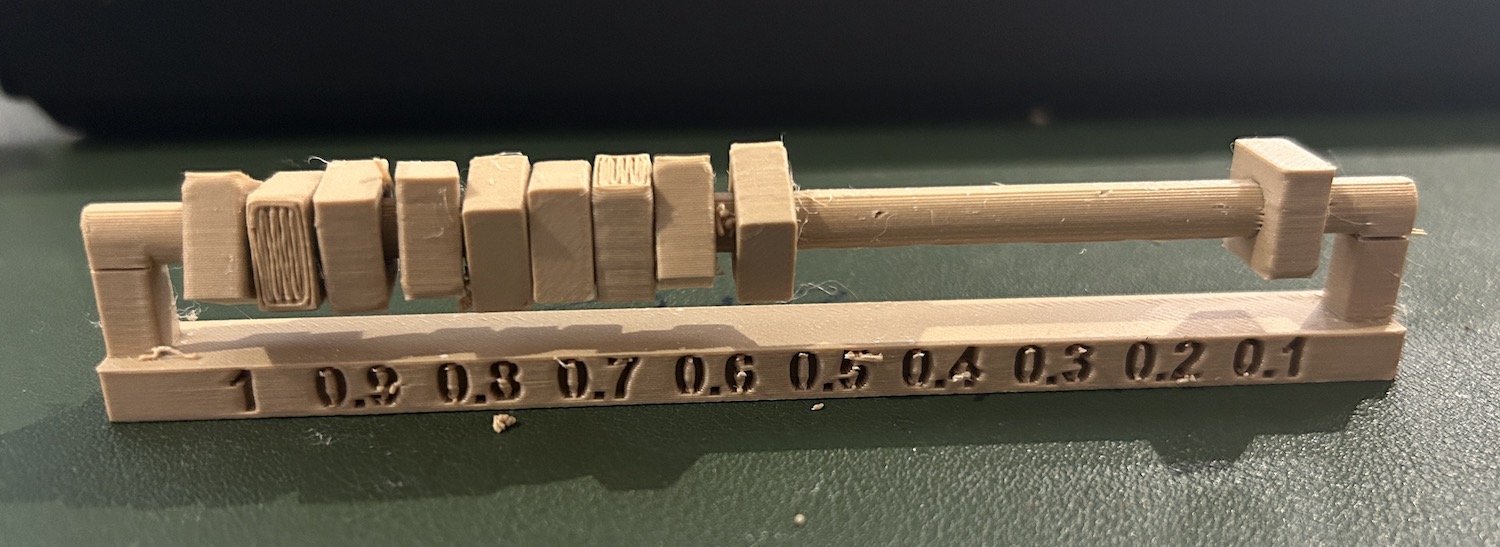
- The P1S can handle fine details - even as small as .3mm, but be careful with tiny features that might be fragile. Make sure delicate parts are sturdy enough to survive support removal.
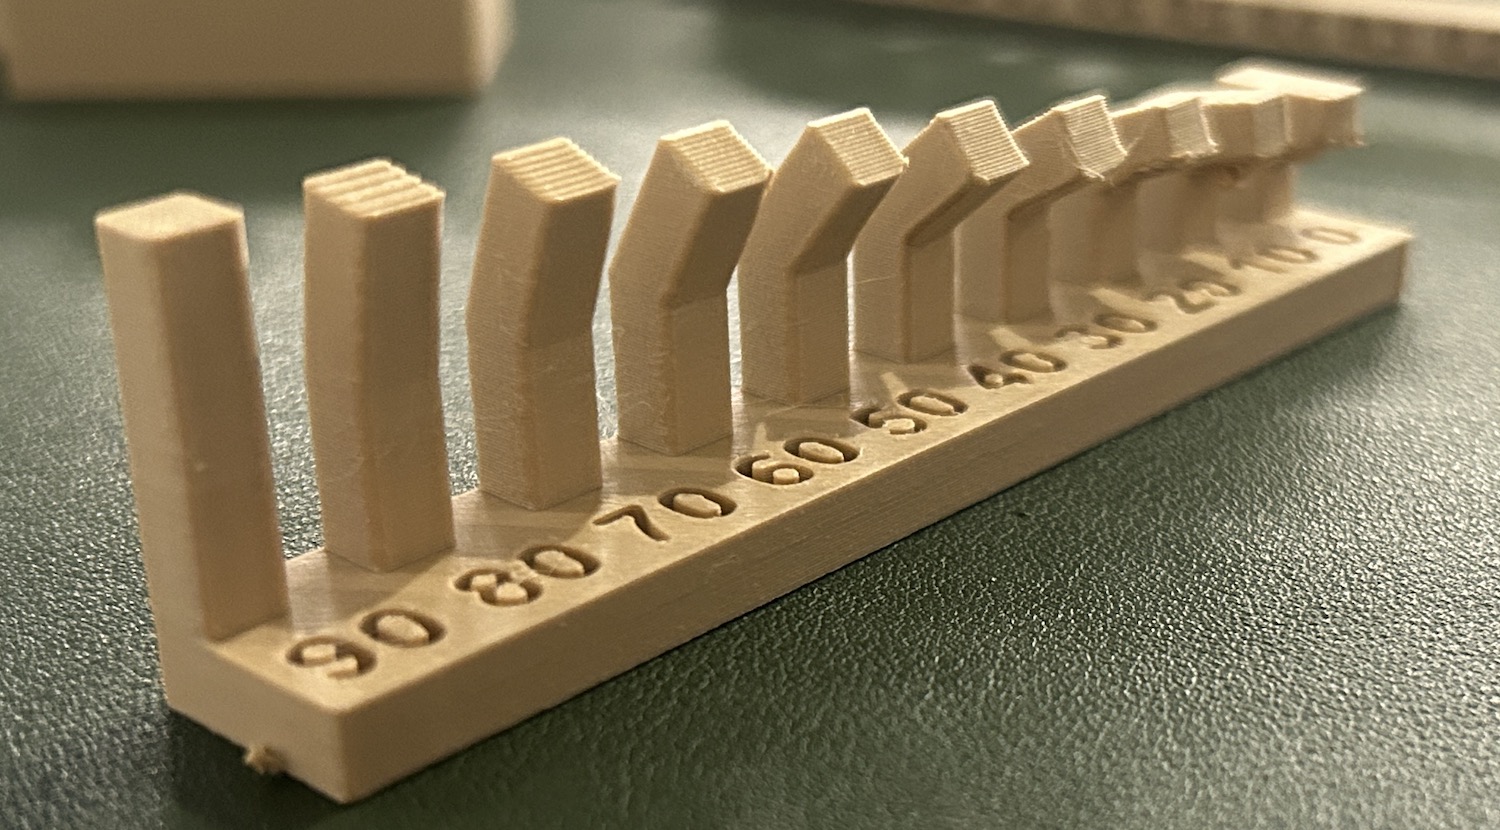
4. Support Structures:
- Design your model to minimize overhangs or plan for supports. Positioning your model to need fewer supports can save you time and material.
5. Layer Strength:
- Think about how the layers of your print will align with the stresses it will face. Orient your design to make the most of the layer adhesion for strength.
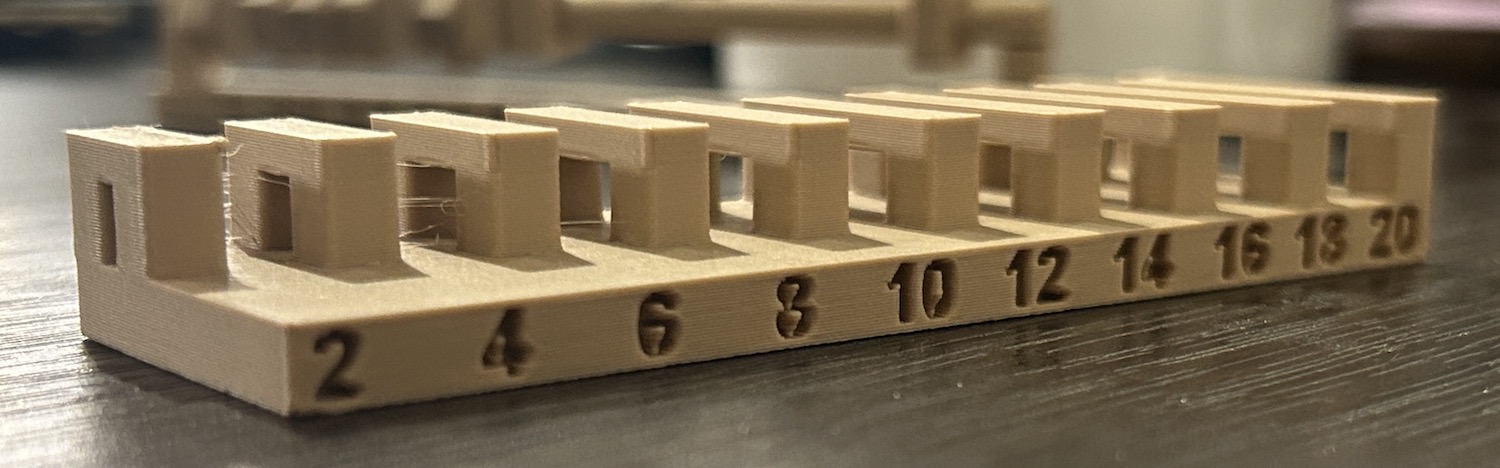
6. Tolerances and Fits:
- Factor in potential material shrinkage or expansion, especially for parts that need to fit together. It's a good idea to test small sections to check tolerances before committing to a full print.
Printing Tips
1. Bed Leveling and Adhesion:
- Proper bed leveling is key for a good first layer and overall print success. Depending on your filament, use the right bed adhesive or surface like a PEI sheet or glue stick.
2. Temperature Settings:
- Set the nozzle and bed temperatures according to the filament you're using. The P1S is ideal for temperature-sensitive materials like ABS, as it is fully enclosed and maintains chamber temperature to avoid warping.
3. Print Speed:
- Adjust the print speed based on your design's complexity and the filament type. High speeds can sometimes compromise quality and increase the risk of print failure. But the Bambulab printers are significantly faster and more accurate than most FDM printers we've used before.
4. Cooling:
- Adequate cooling is crucial for materials like PLA, but you might need to dial it back for ABS to prevent warping. Fine-tune your cooling fan settings to match the material and layer height.
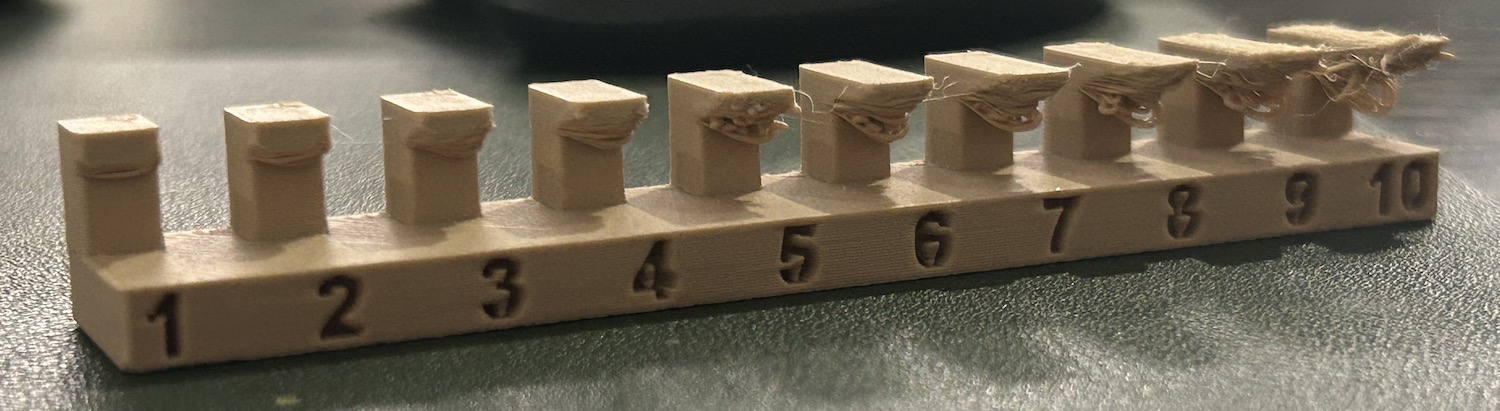
5. Supports and Brims:
- Use supports for overhangs and complex shapes, but make sure they're easy to remove without damaging your print. Brims or rafts can help with bed adhesion, especially for parts with a small footprint.
6. Infill Density and Patterns:
- Choose your infill density and pattern based on how strong and heavy you need your part to be. Higher infill means more strength but also longer print times and more material used.
7. Maintenance:
- Regularly maintain your printer—clean the nozzle, calibrate the bed, and keep the firmware updated. This helps ensure consistent print quality.
By keeping these tips in mind, you'll get the most out of your Bambulab P1S and achieve great results with your 3D prints. Happy printing!

Copyright 2024 Thomas Pupo - Creative Commons Attribution Non Commercial
Source code hosted at fabcloud/fabacademy/2024/thomas-pupo