
Week 4: Electronics Production
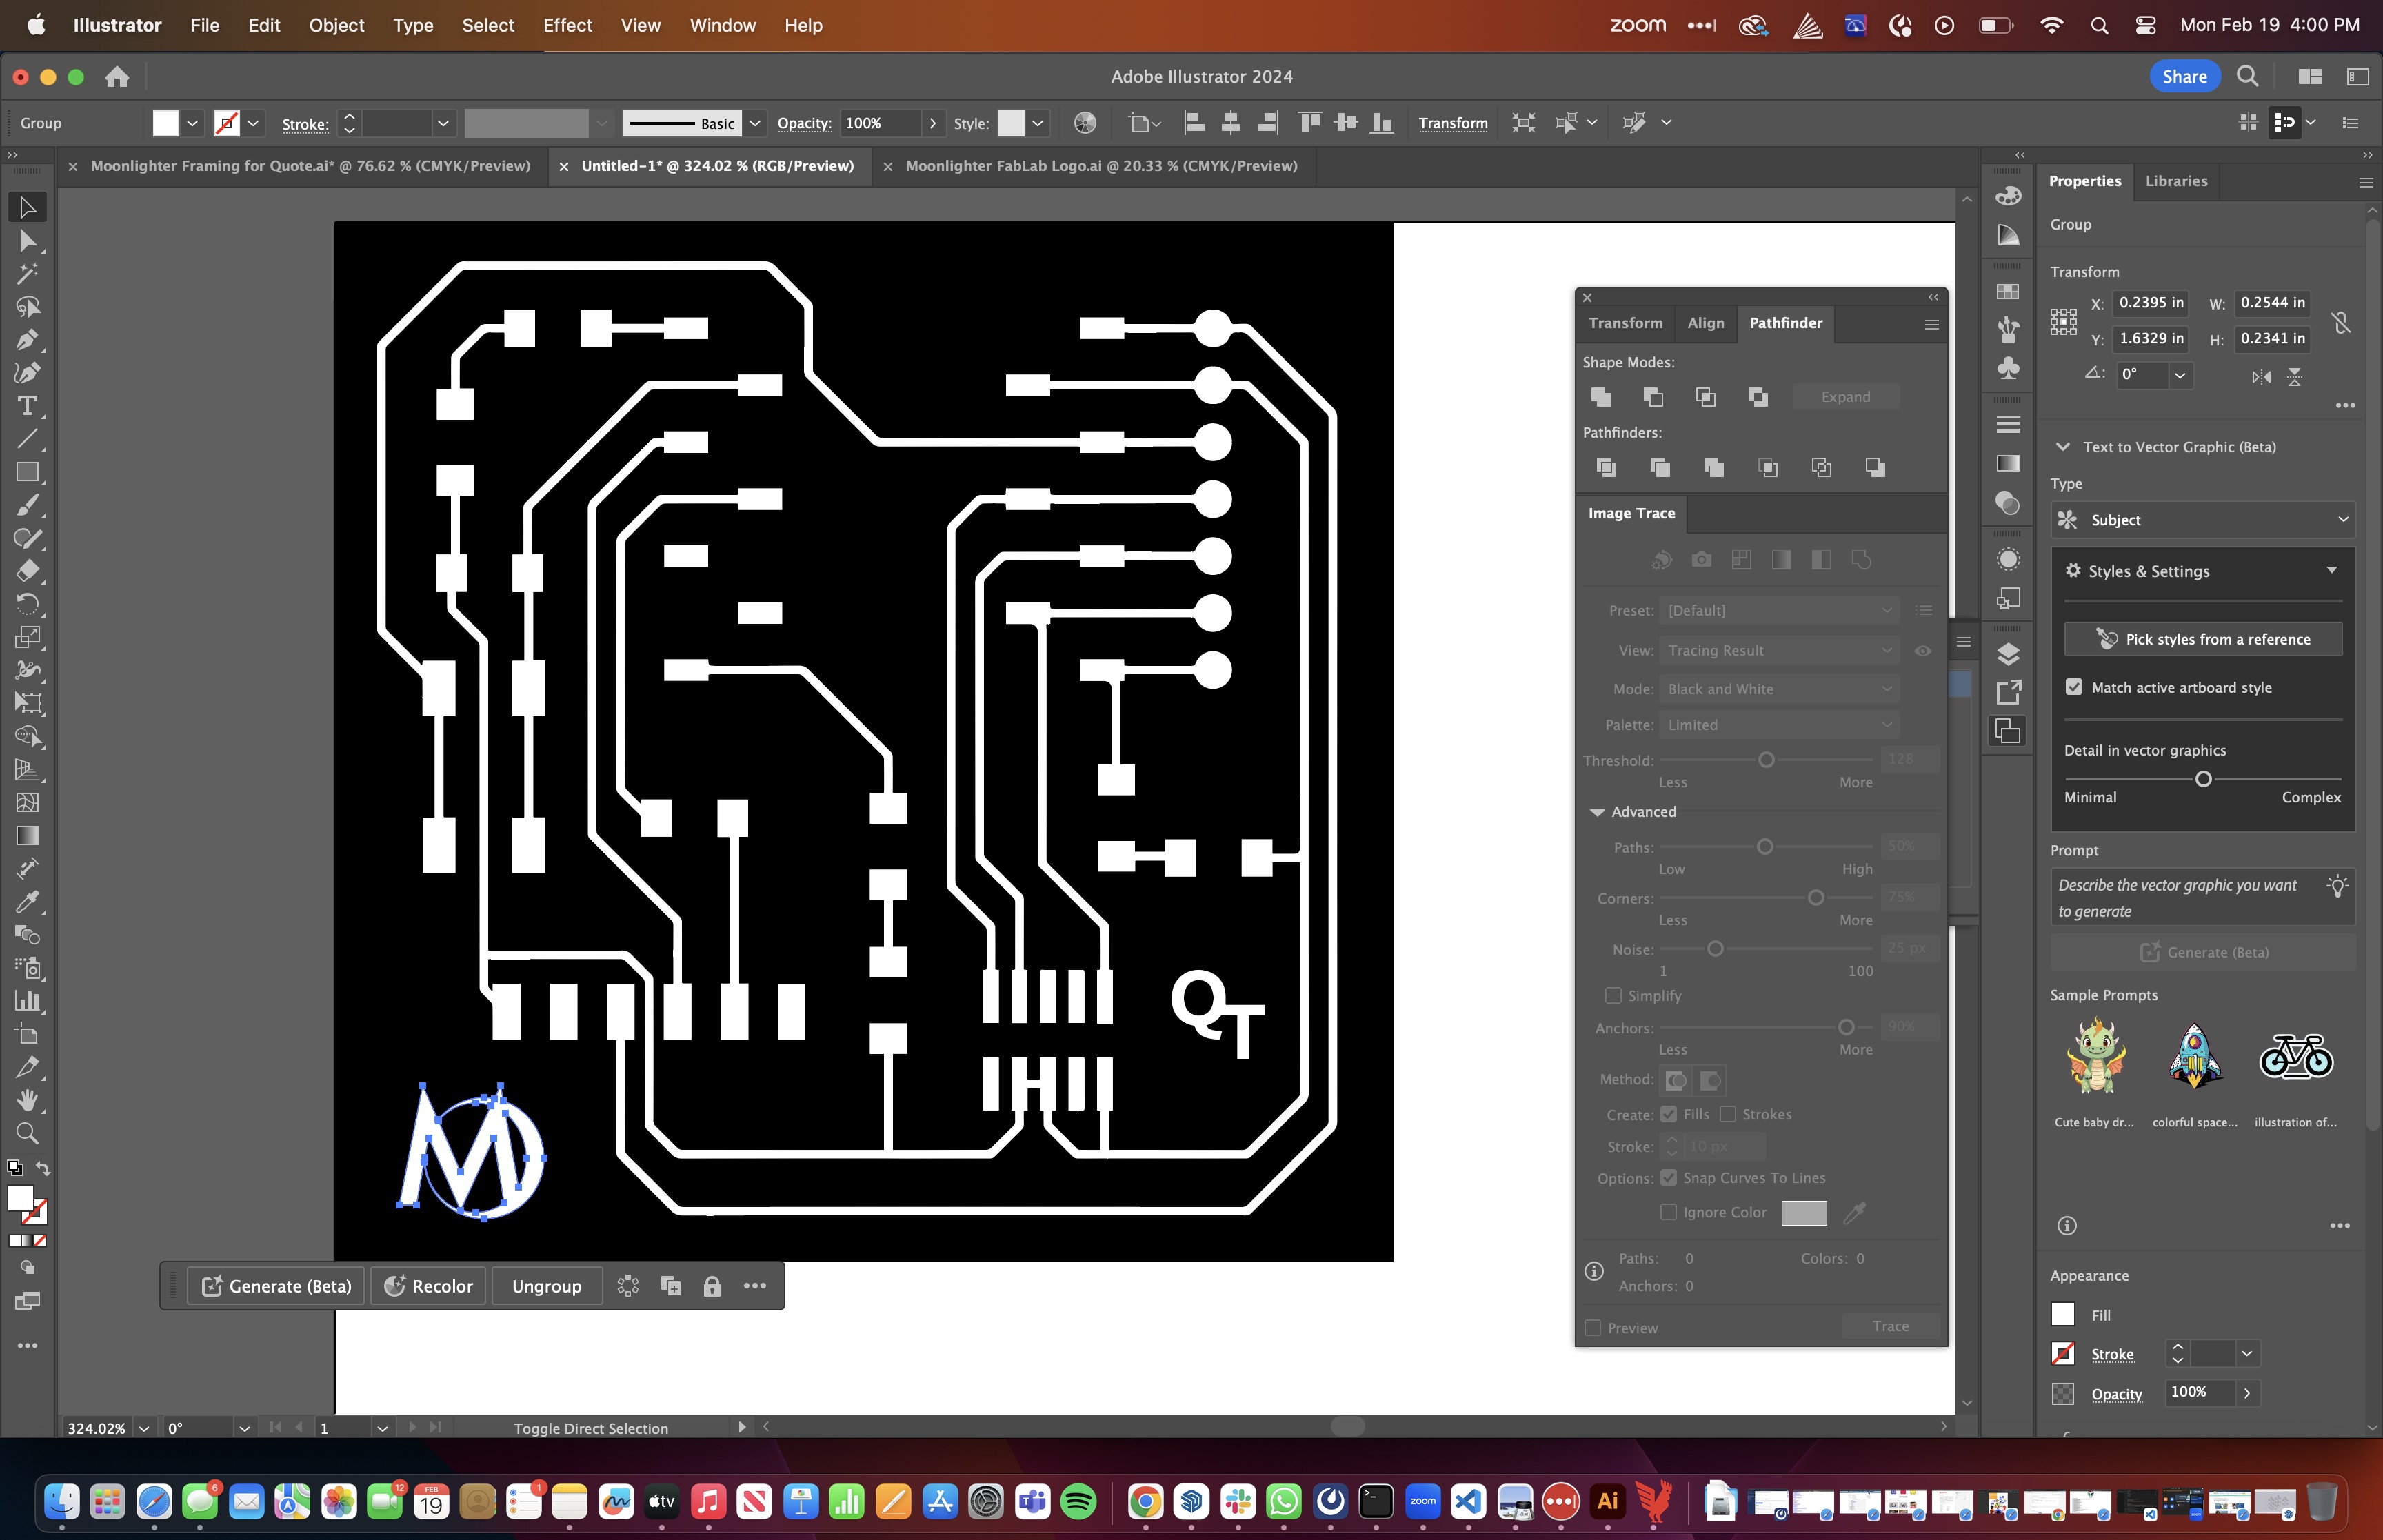
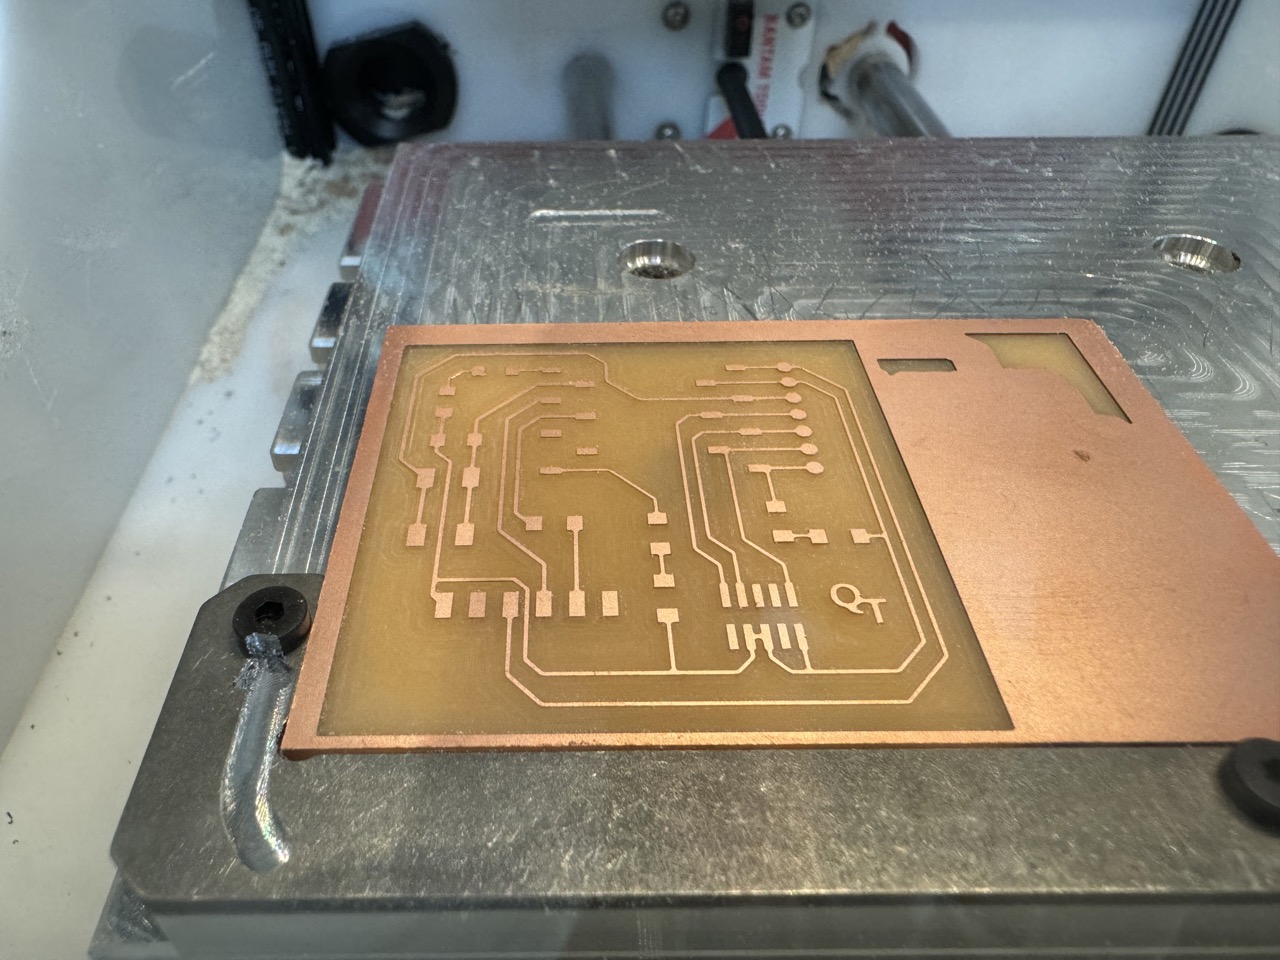
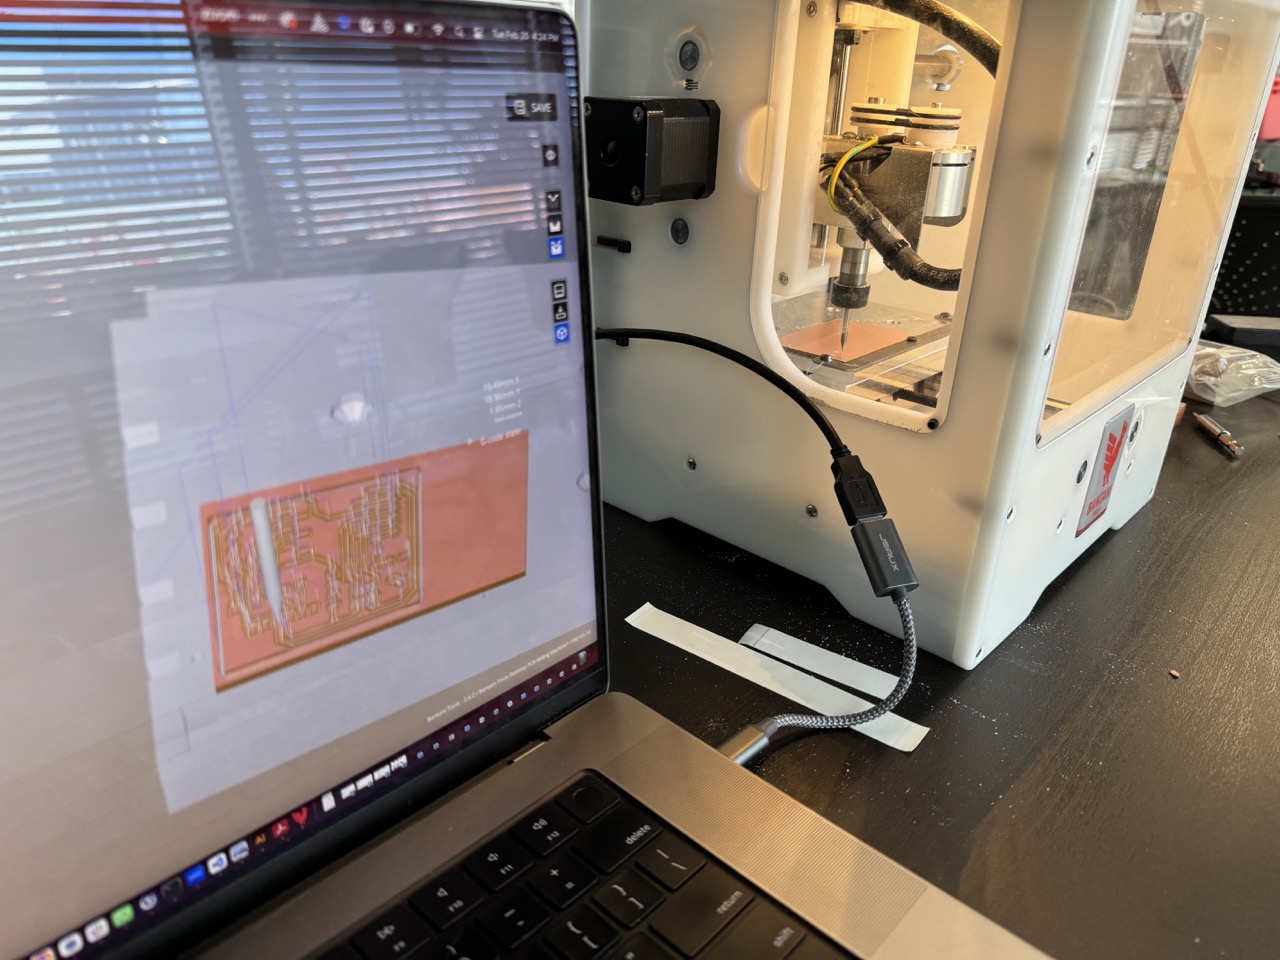
This week I explored milling a PCB board using the Quentorres Board design from the FabAcademy instructors. I tried using the png files first and was able to achieve very clean board cuts, but it would not read the file for the hole plunges. I tried to do this manually but had issues with alignment and hole size.
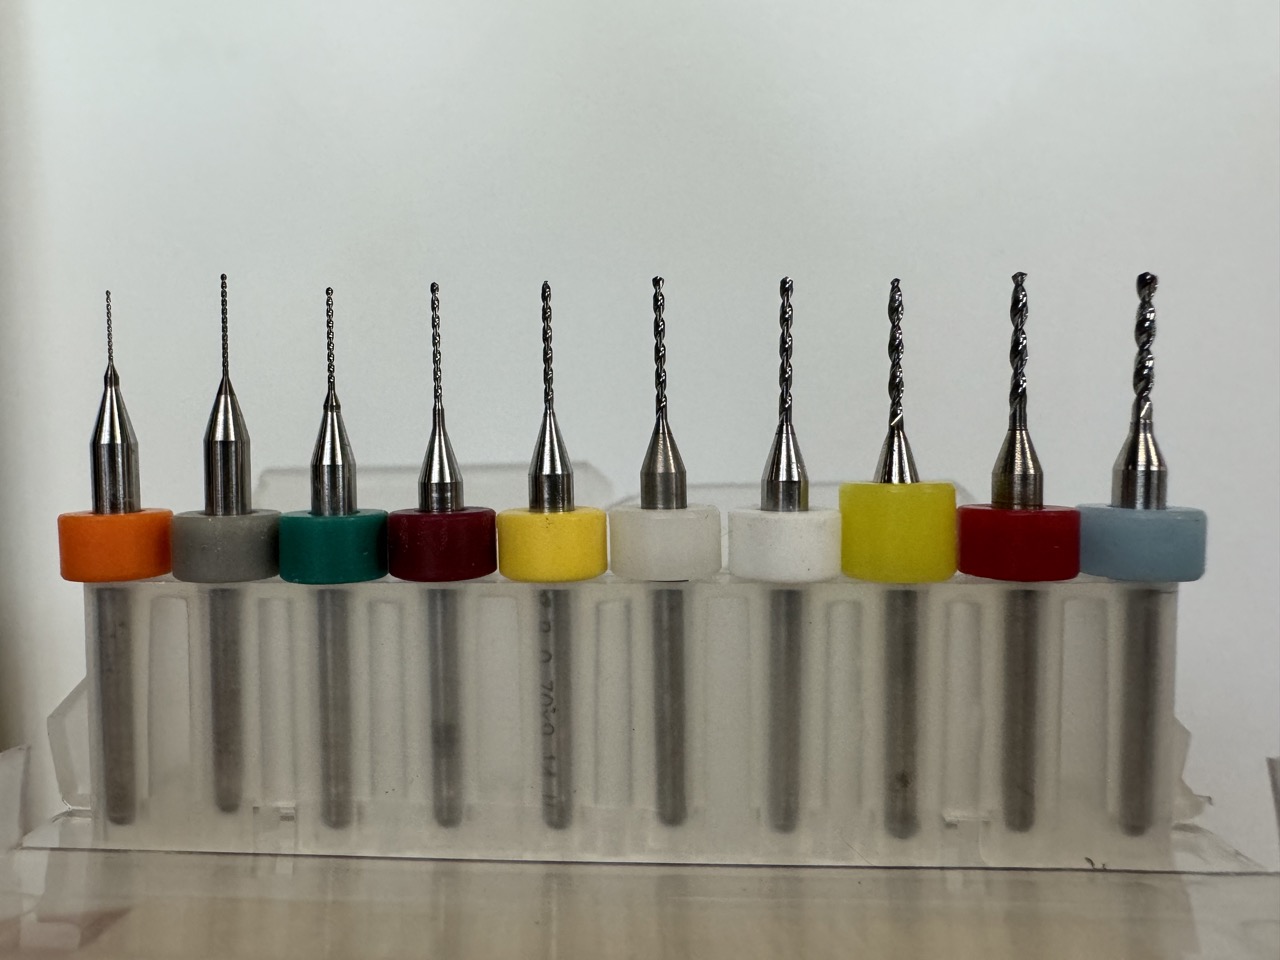
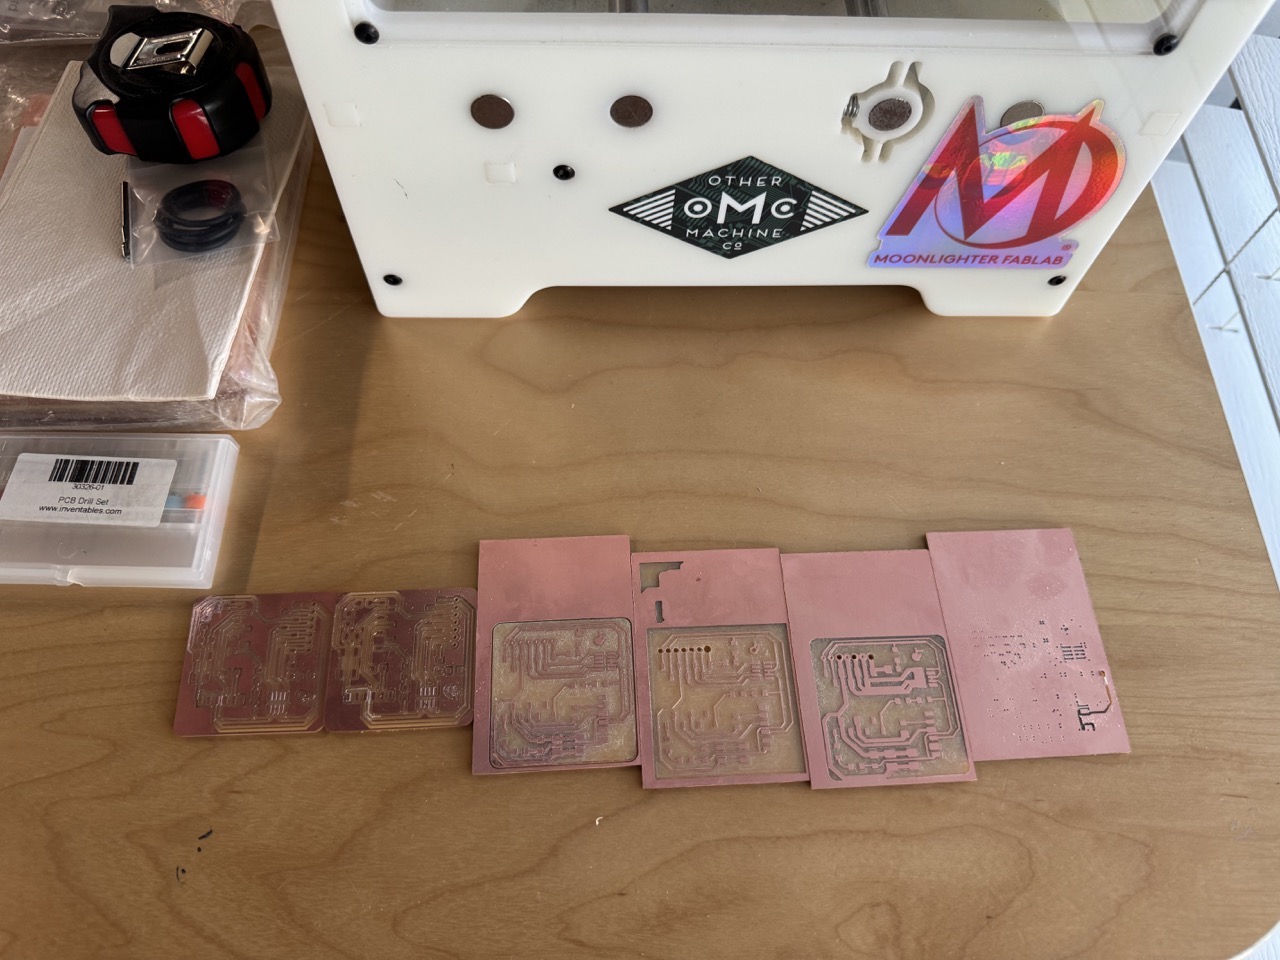
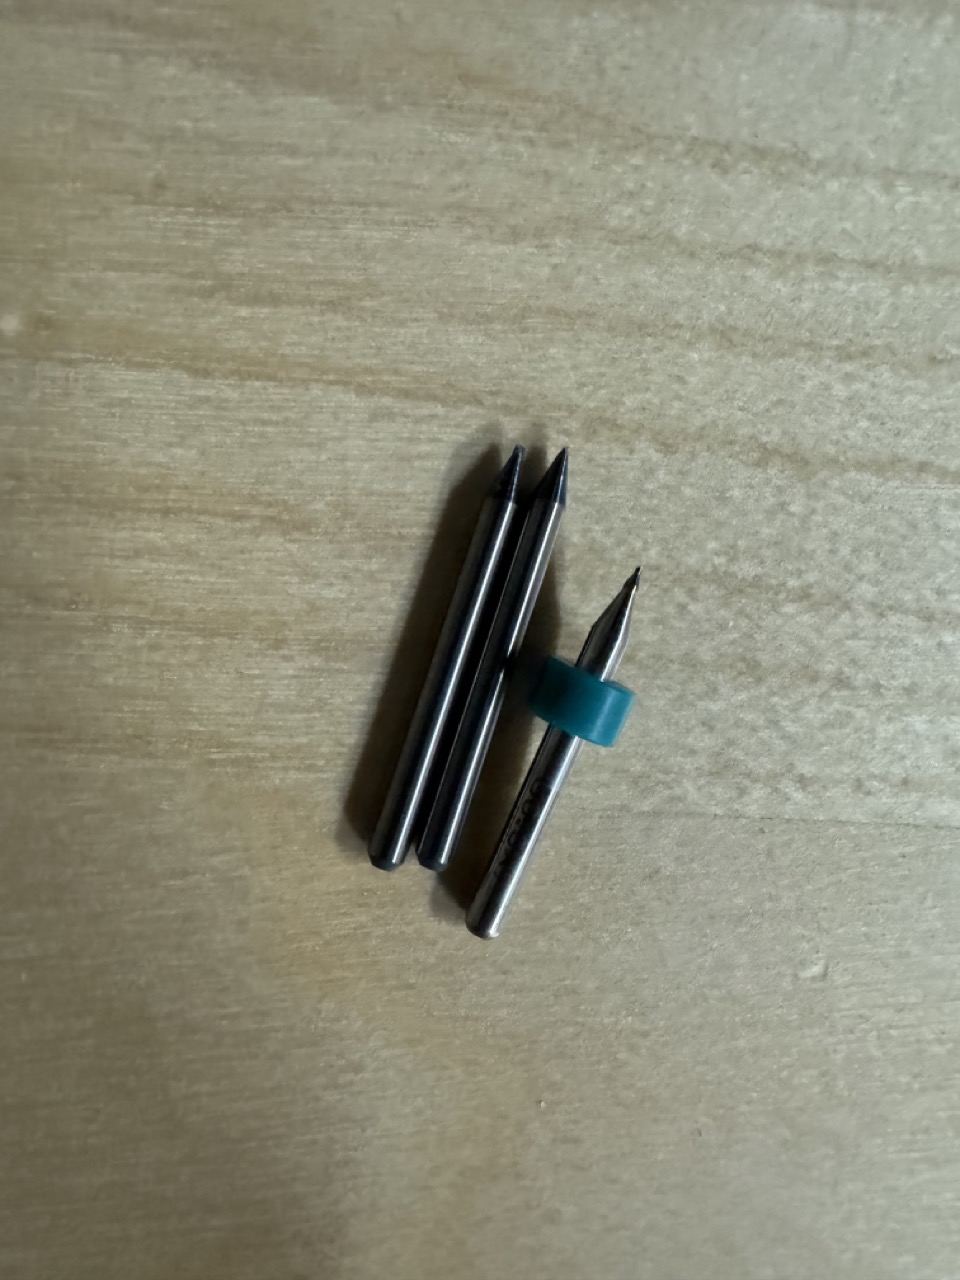
Using 1/32" and 1/64" tooling, the machine was able to cut all of the thin features, but I went through a few of the bits in the process while going through the various trials.
I decided to try using the gerber files provided in the repository instead of the pngs. To load a Gerber file into the Bantam Tools software and prepare it for milling on the Bantam Tools PCB milling machine, follow these steps:
1. Open Bantam Tools Software:
- Launch the Bantam Tools software on your computer.
2. Import Gerber File:
- Navigate to the "File" menu and select "Import".
- Choose the Gerber file you want to load into the software. The file extension is typically ".gbr" or ".ger".
3. Review Imported Design:
- Once imported, review the design in the software's workspace. Ensure that all layers and components appear as expected.
4. Set Up Milling Parameters:
- Click on the "Setup" tab or menu option to access milling parameters.
- Specify the material you'll be milling (e.g., FR-1, FR-4).
- Set the tool diameter and other milling parameters according to your design requirements.
5. Generate Toolpaths:
- After setting up milling parameters, navigate to the "Actions" or "Generate" menu.
- Choose the option to generate toolpaths based on your design and milling parameters.
- The software will calculate the toolpaths needed to mill your PCB design.
6. Preview Toolpaths:
- Some software versions may offer a preview option. Use it to visualize the toolpaths and ensure they align with your design intentions.
7. Connect to Bantam Tools PCB Milling Machine:
- Connect your computer to the Bantam Tools PCB milling machine using the appropriate interface (USB, network, etc.).
8. Send Design to Milling Machine:
- Once you're satisfied with the toolpaths, select the option to send the design to the milling machine.
- The software will transfer the milling instructions (G-code) to the machine's controller.
9. Secure Workpiece:
- Prepare your PCB material and secure it to the milling machine's bed using clamps or double-sided tape.
10. Run Milling Job:
- Start the milling process on the Bantam Tools PCB milling machine.
- Ensure proper safety precautions are followed, and supervise the milling process until completion.
11. Inspect Milled PCB:
- After milling, carefully remove the PCB from the machine.
- Inspect the milled PCB for accuracy and quality, checking for any defects or errors.
12. Cleanup:
- Clean the milling machine and workspace as needed, removing any debris or dust generated during the milling process.
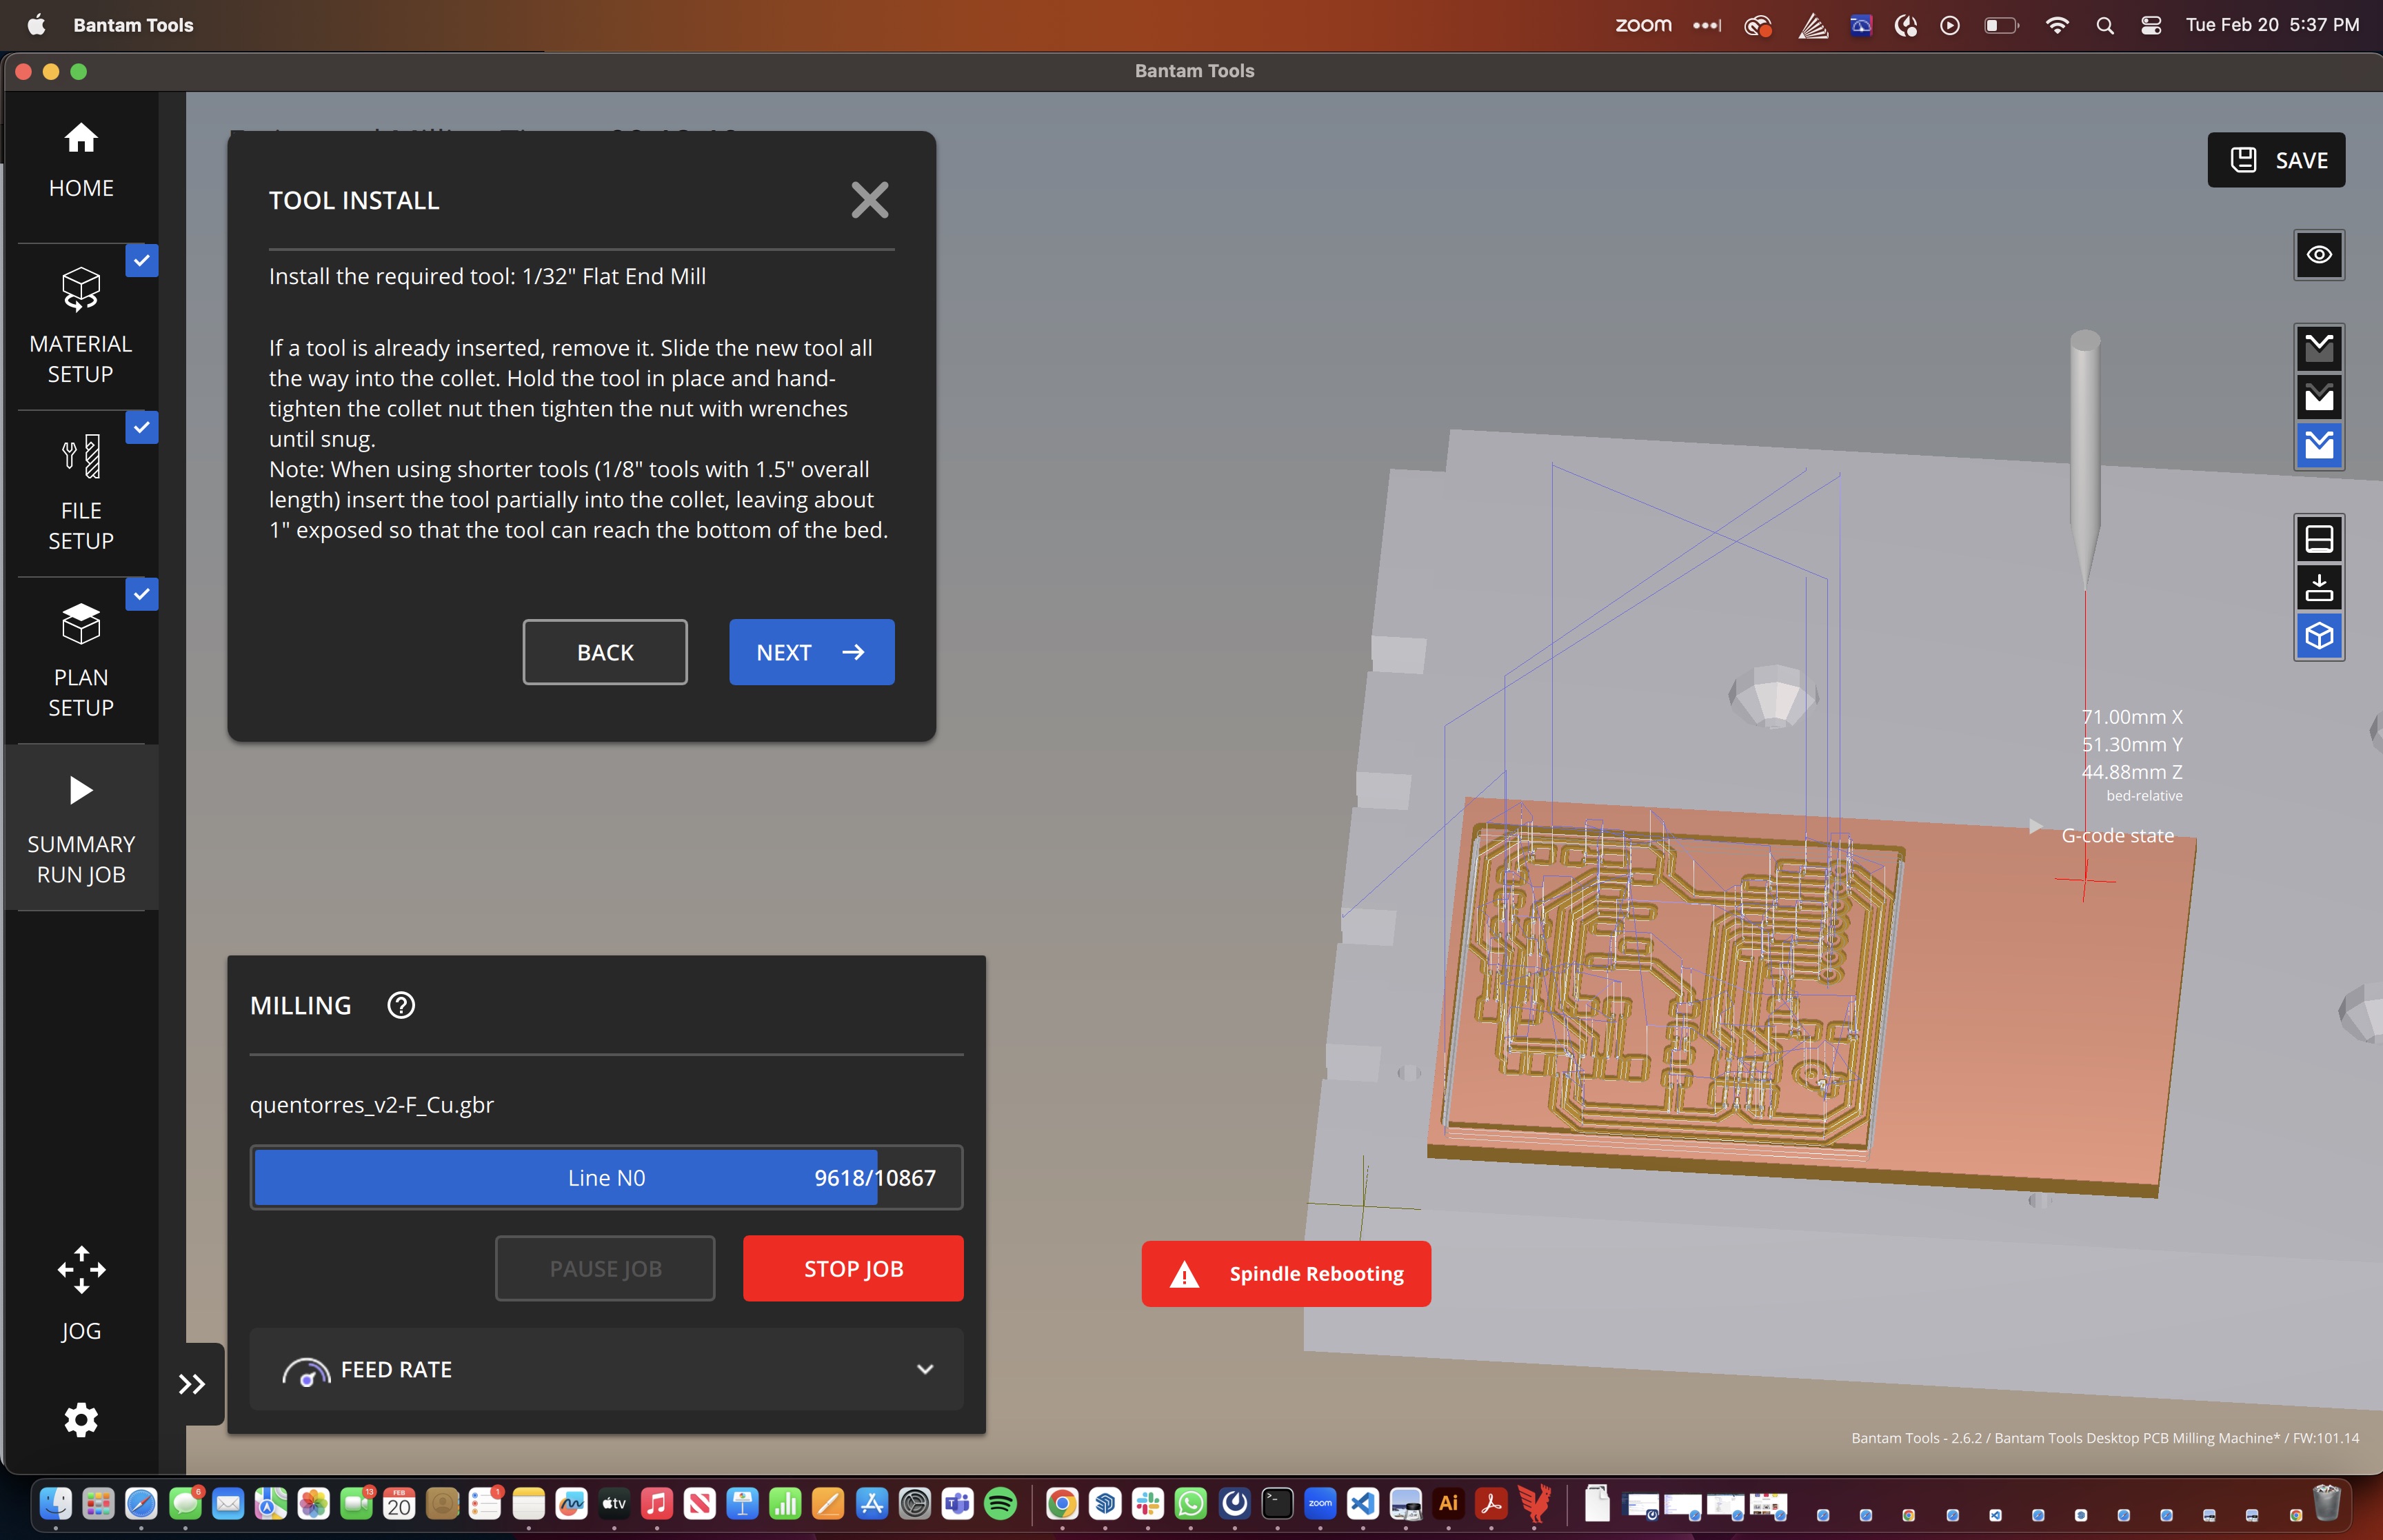
Tool Change
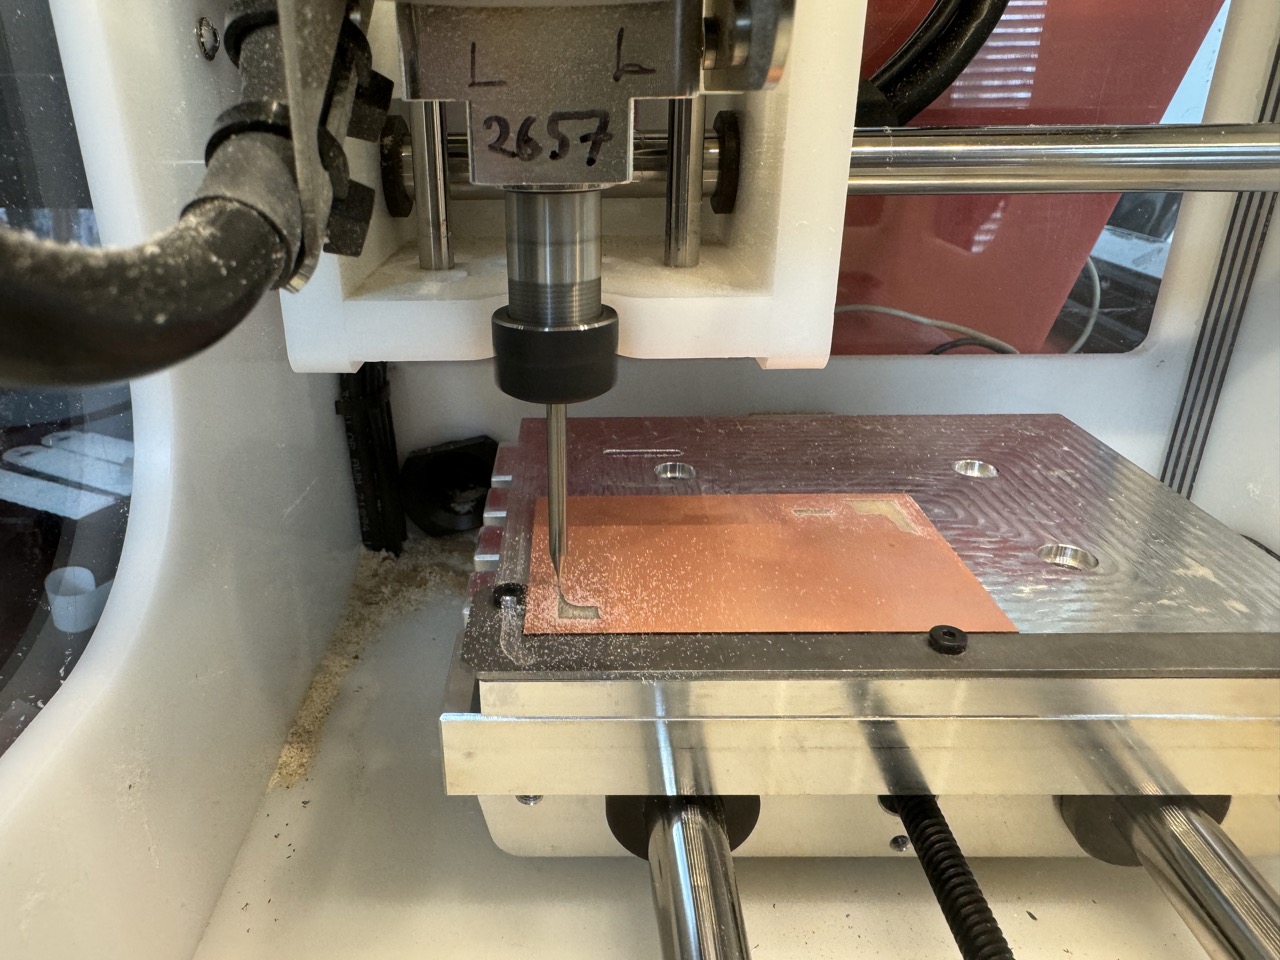
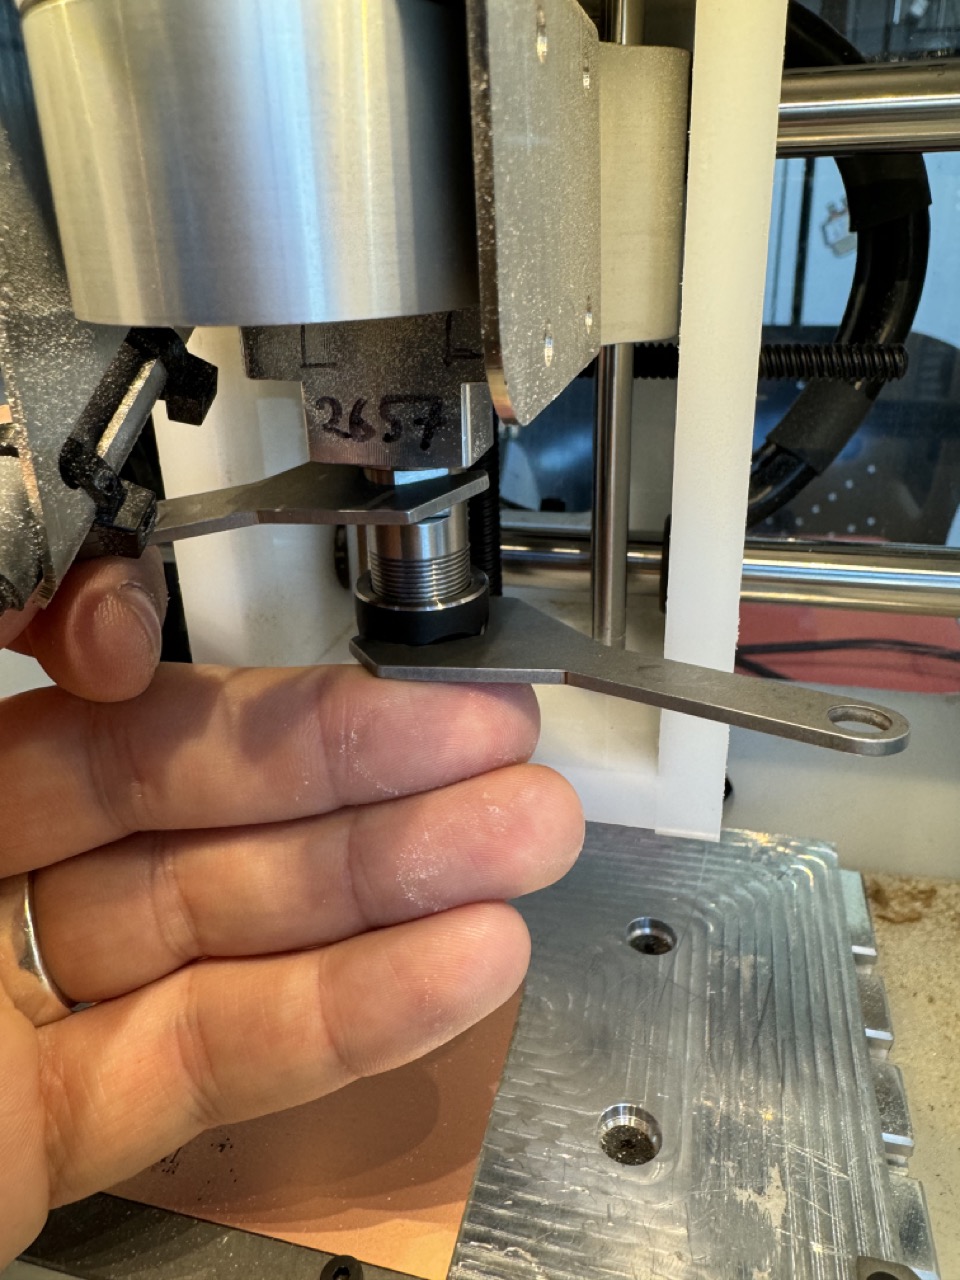
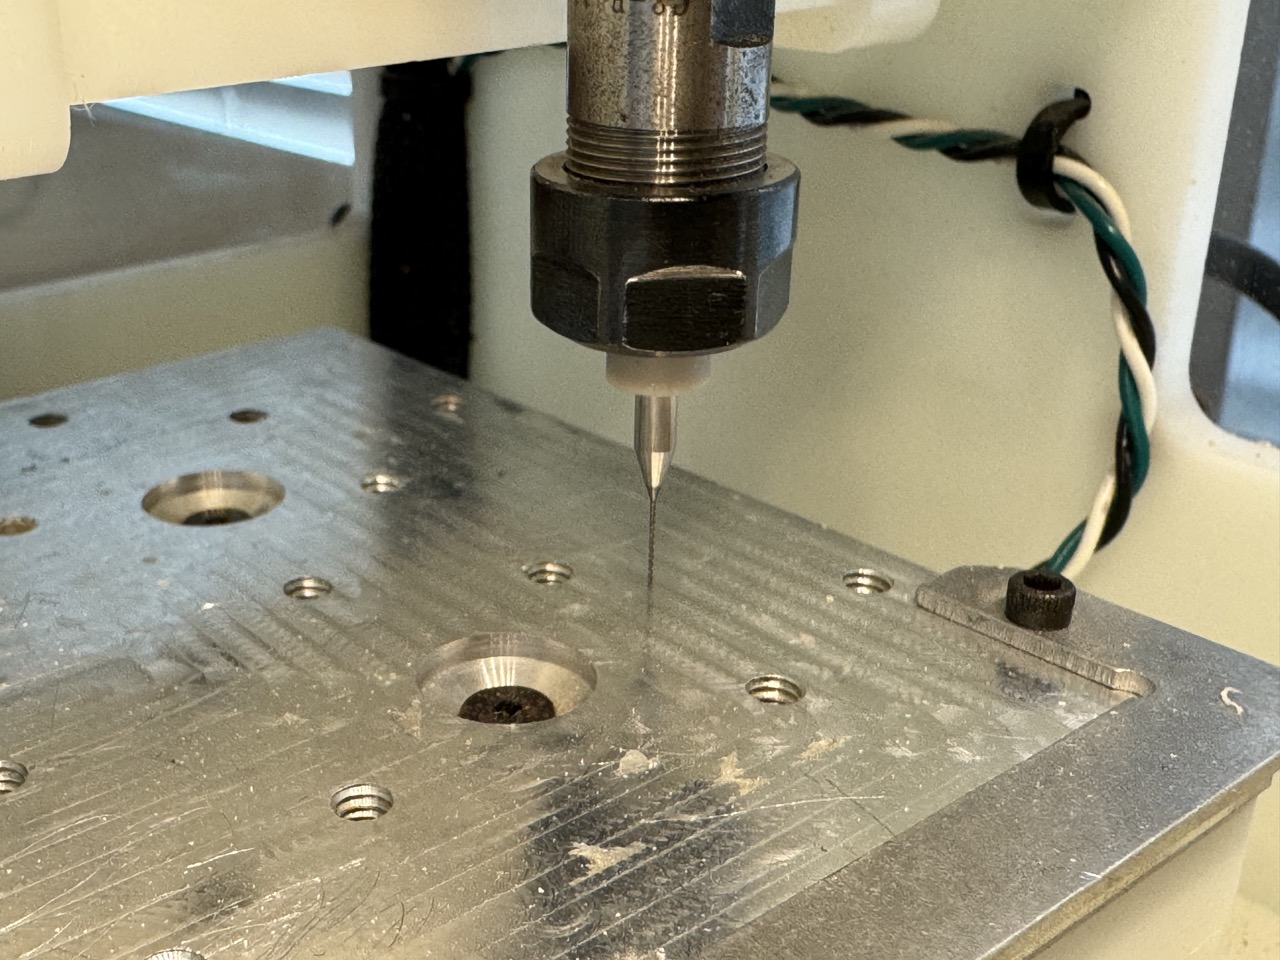
The machine will pause and ask you to switch the tool when it is finished with the 1/64" milling pass. Once you install the new bit, it will automatically run the probing operating to capture the tool height. Then you can resume the milling of the 1/32" tool paths.
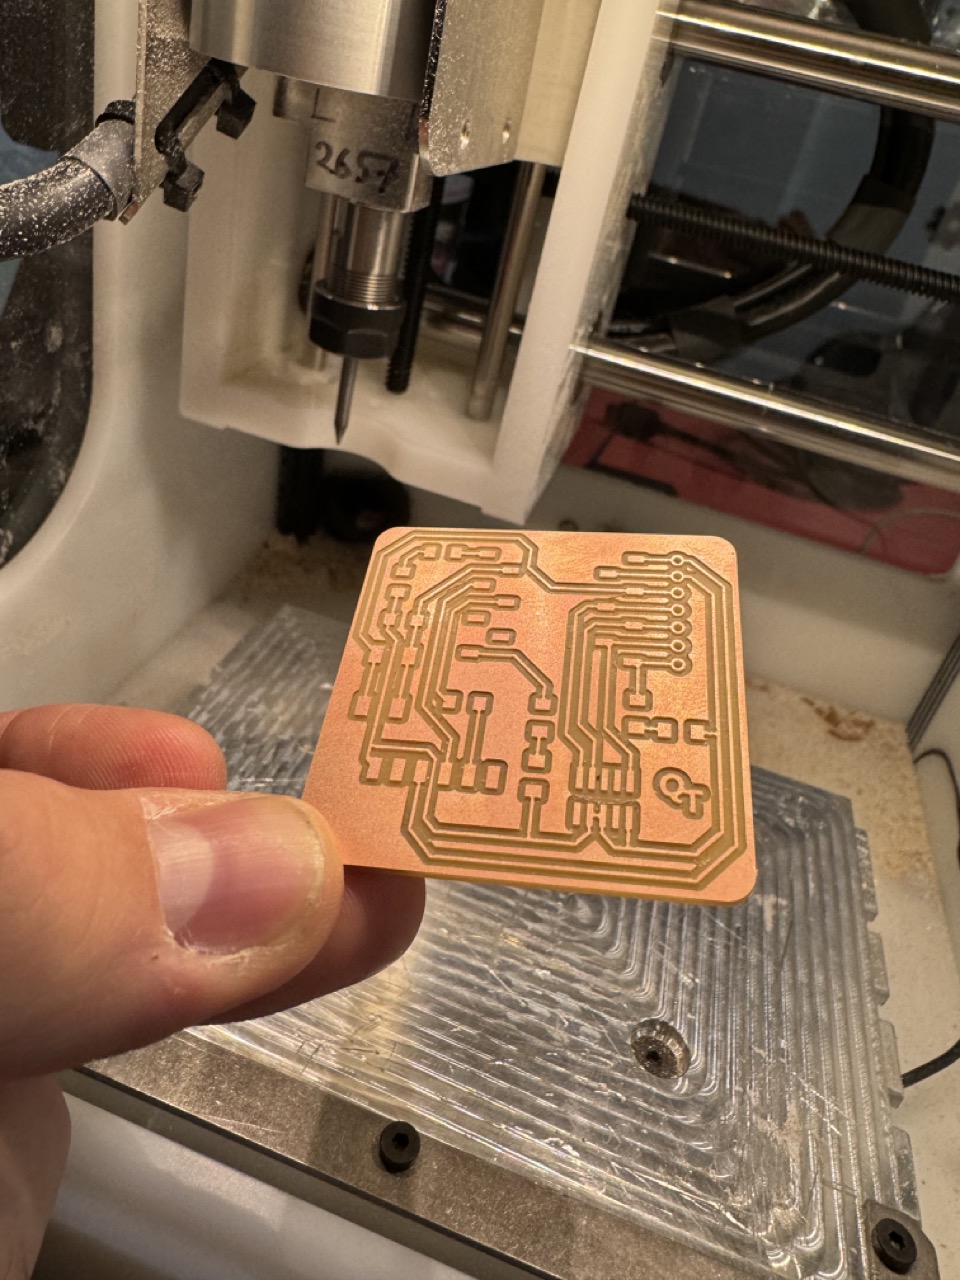
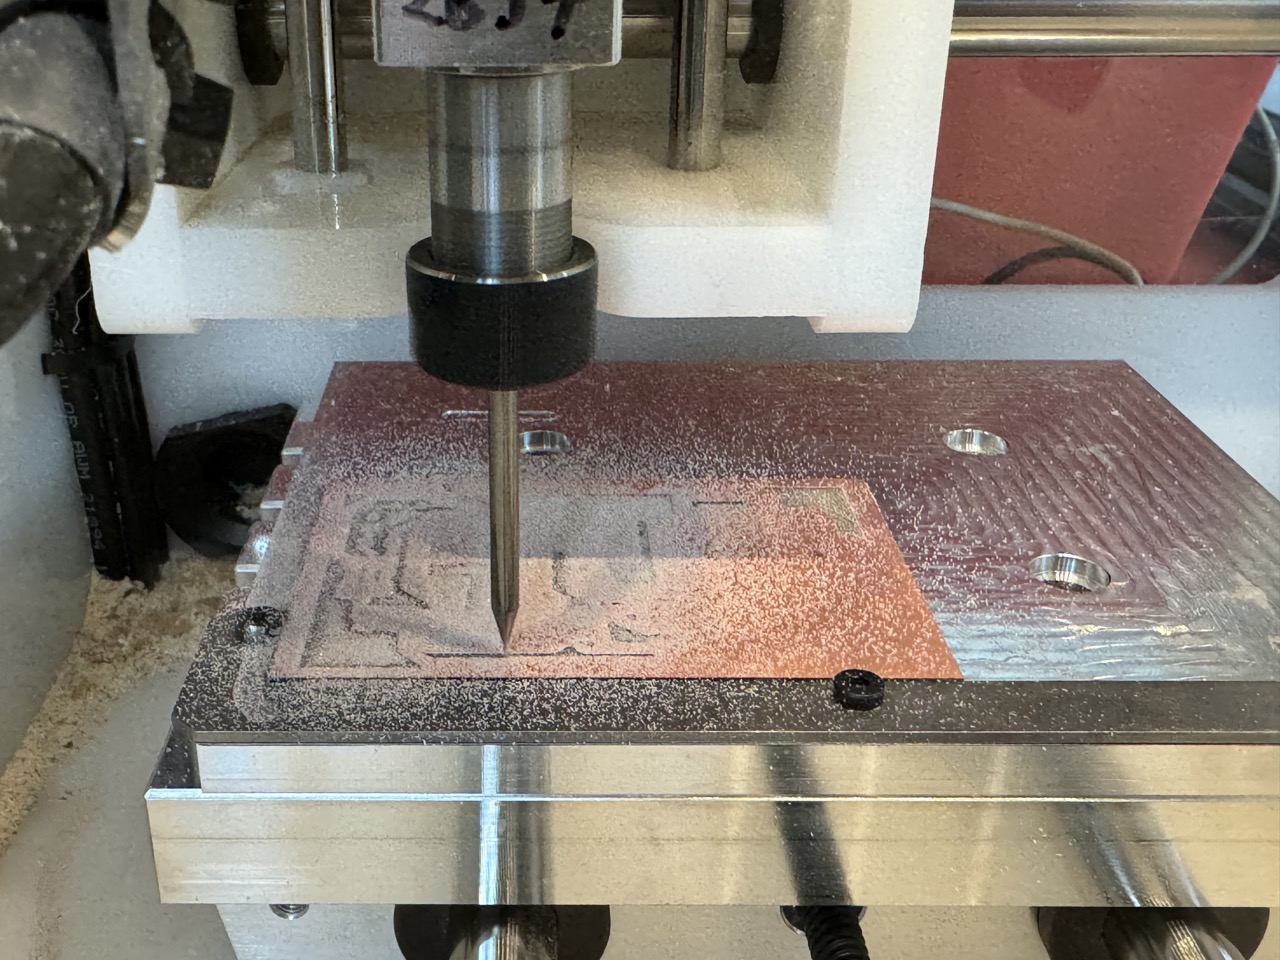
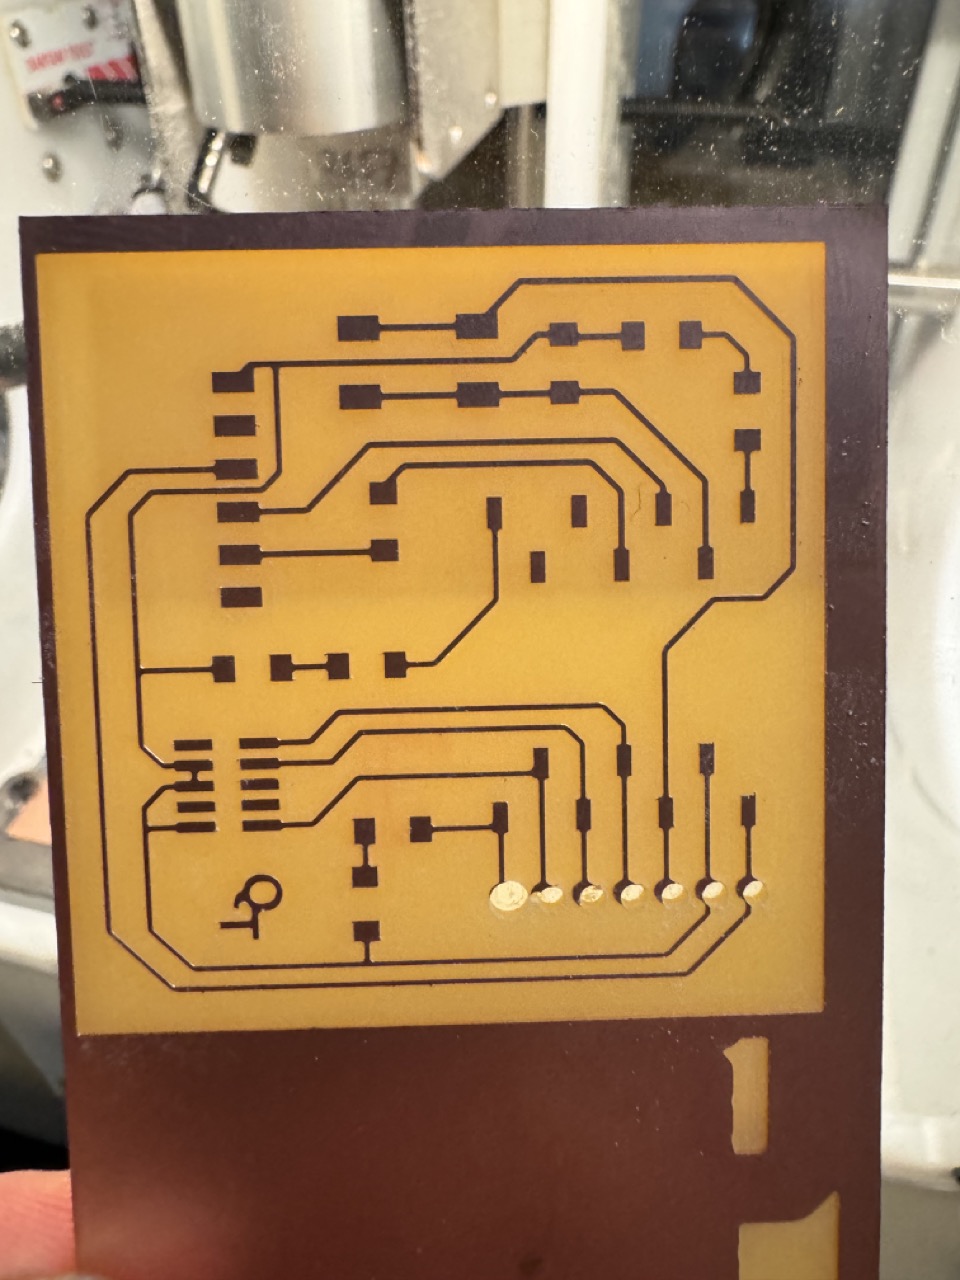
I was finally able to get a successful board with all of the features cleanly milled and the hole plunges and outline properly cut.
I proceded to solder all of the surface mount components according to the specifications in the repository.
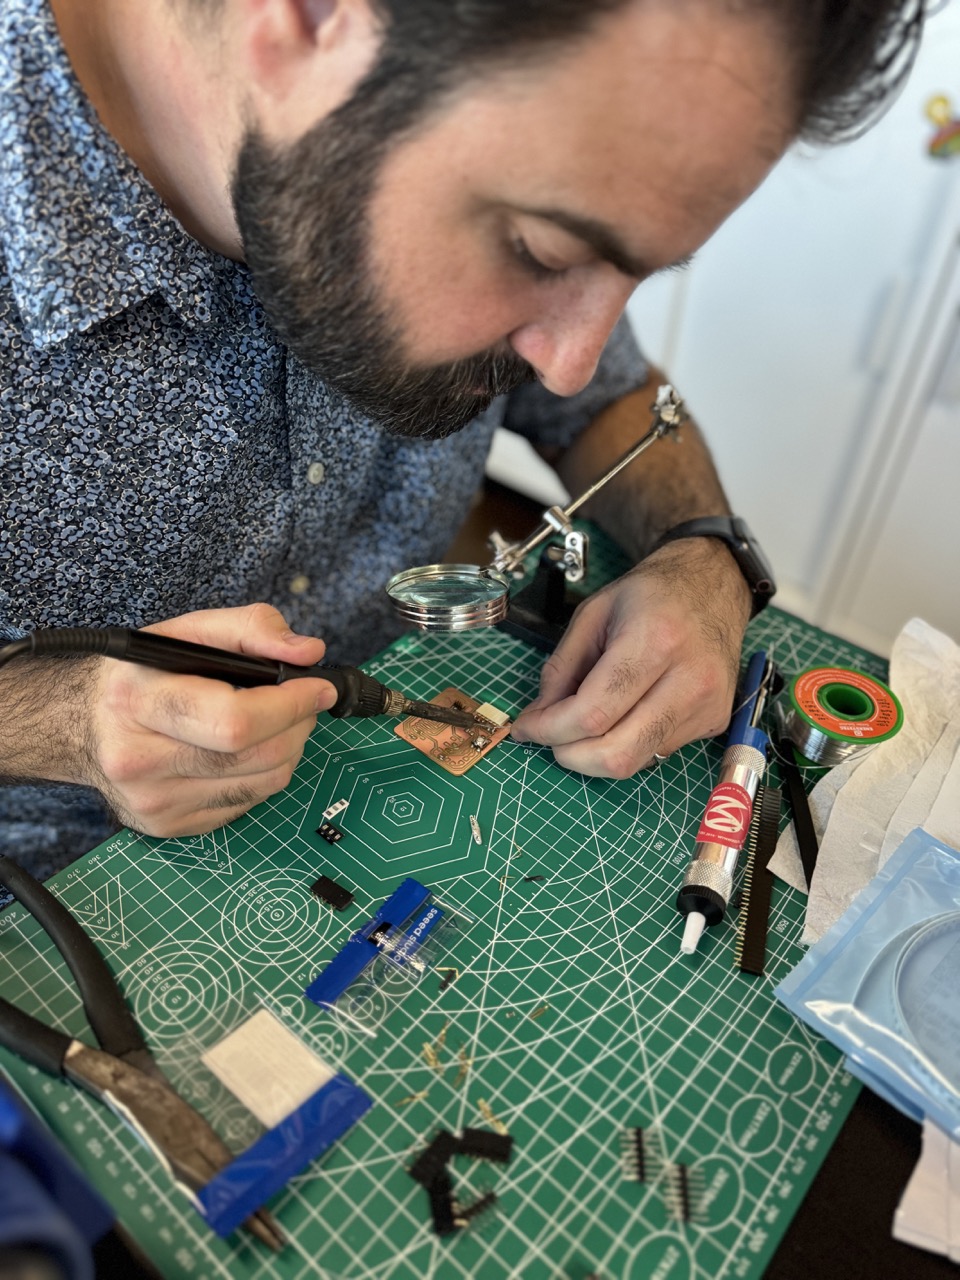
I had to cut the length of the pins on some of the headers in order for them to line up with the board leads.
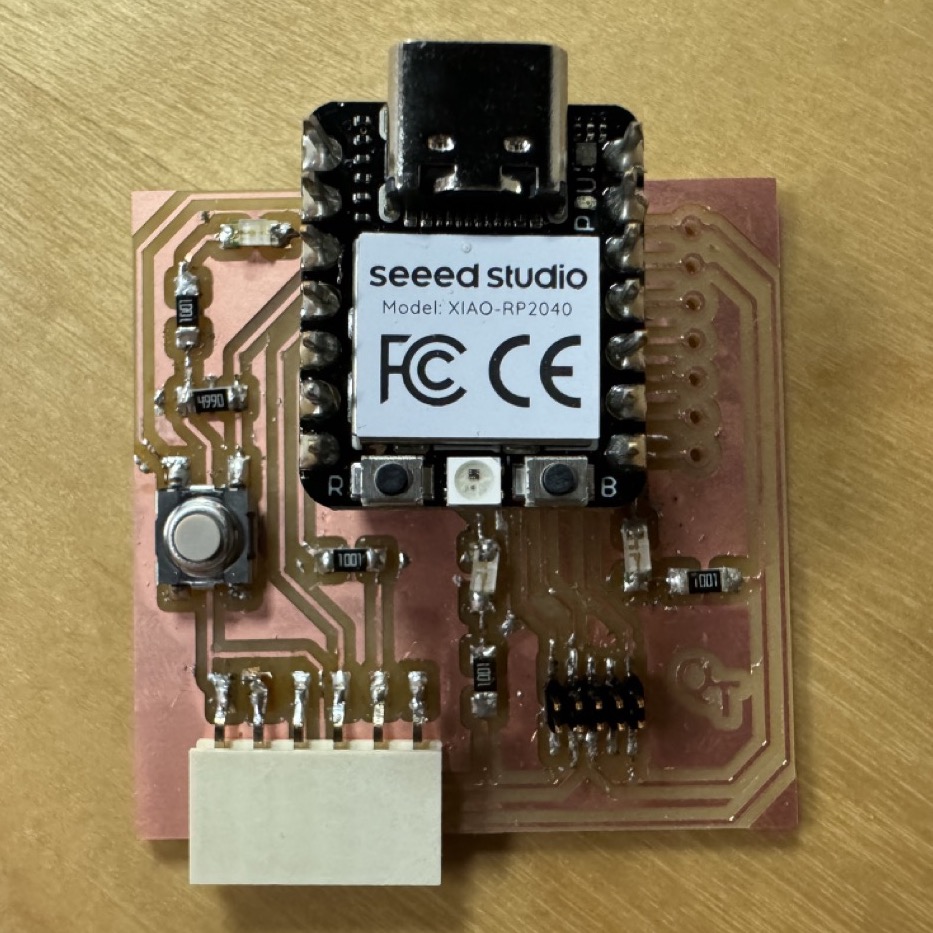
The resistors and leds were incredibly small so it required the use of tweezers to handle.
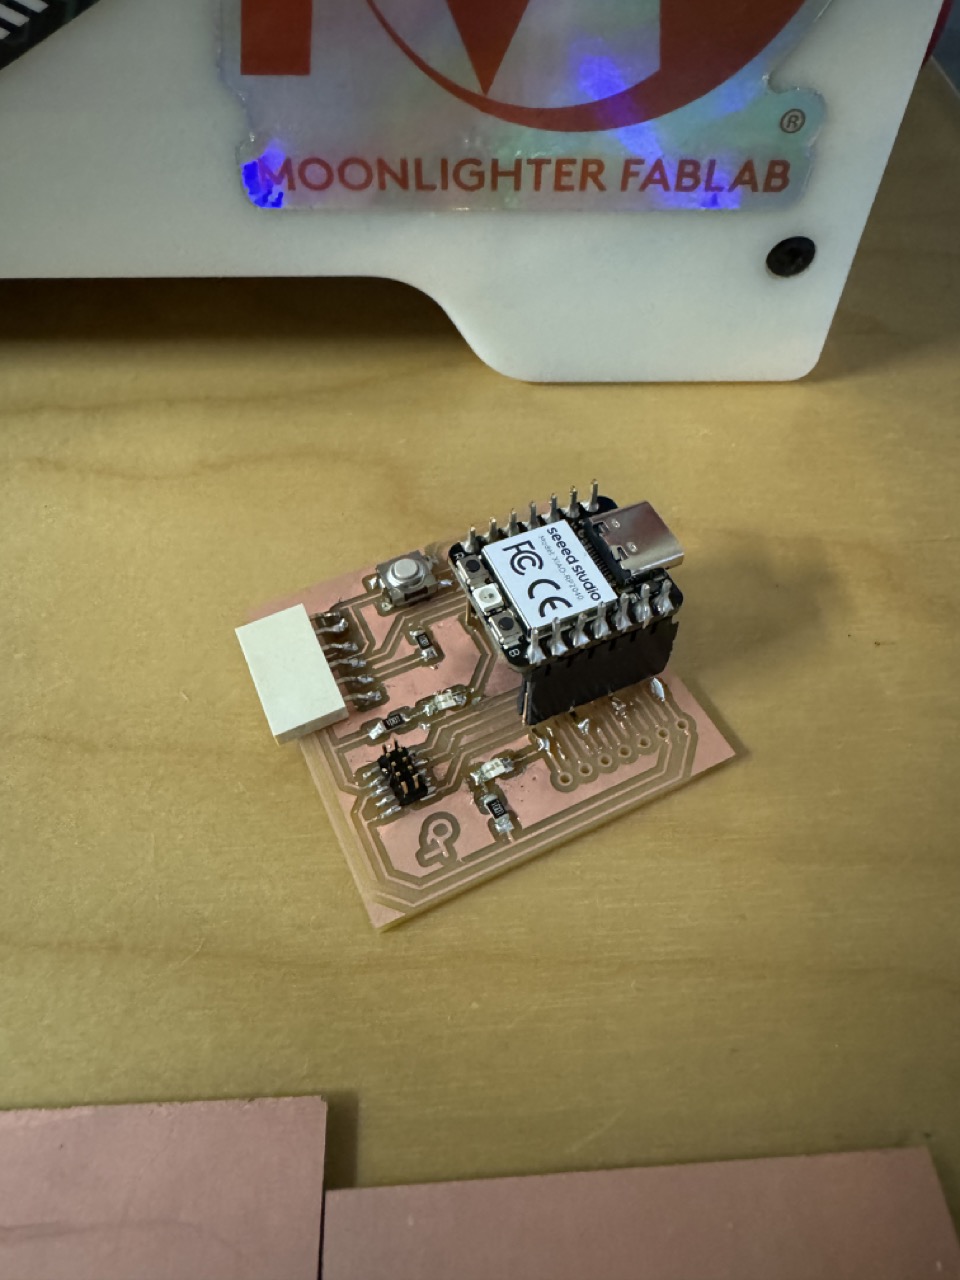
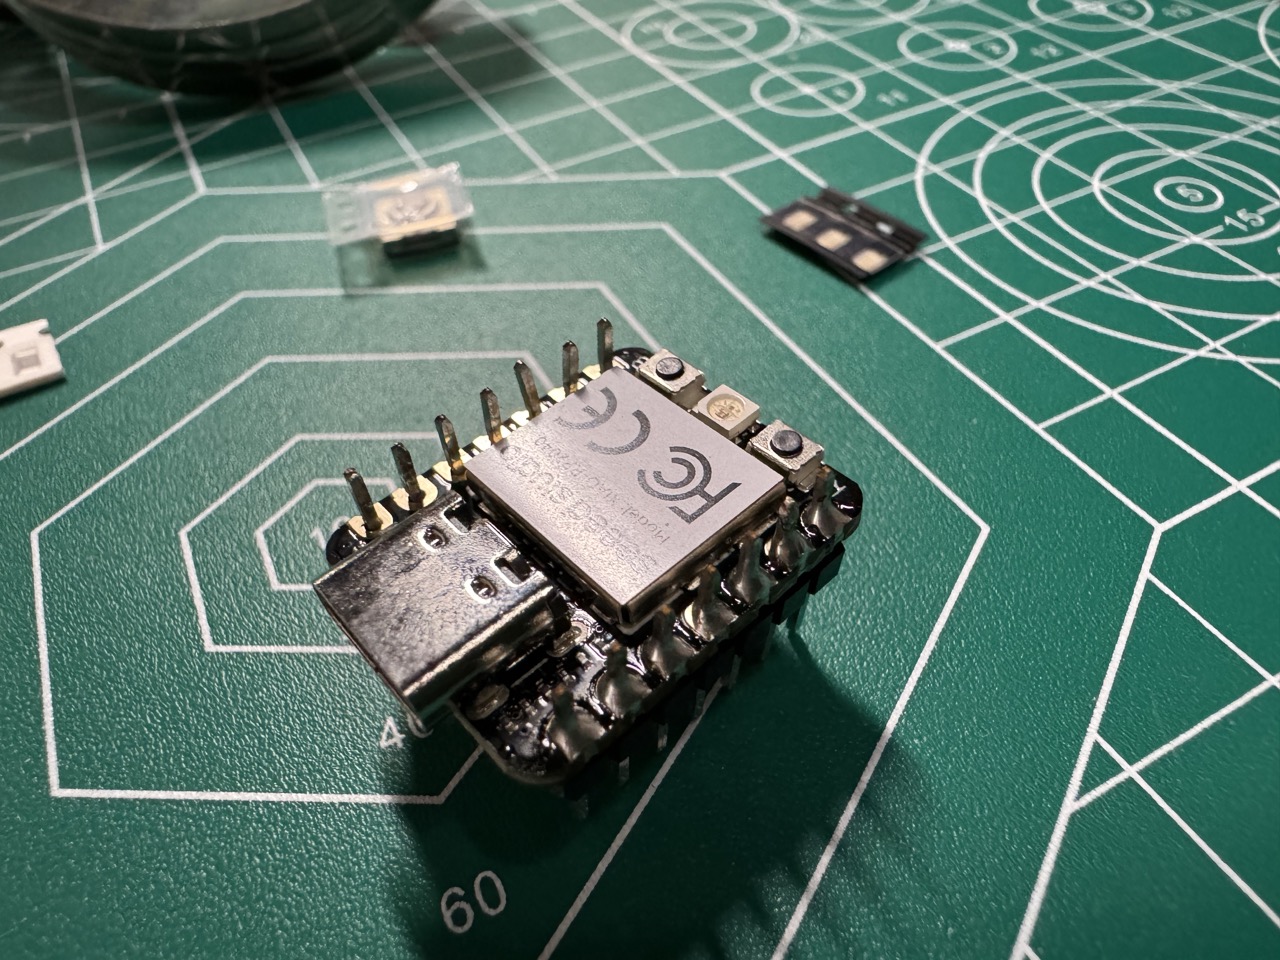
The Quentorres board is complete and ready for programming.
Files
Download Bantam Tools Milling File
Group Assignment
Sending a Board Design to a PCB Manufacturer
When you're ready to get your custom PCB design made, there are plenty of PCB milling services online that can produce your boards for just a few dollars each. If you have a well-prototyped board and some time, sending your design to one of these services can give you a great, repeatable product that's much easier to solder.
We decided to test out JLCPCB. Here's how we did it:
Download the Gerber files for your circuit: If you're using KiCAD, you'll need to export them. Since we're using QuenTorres, we simply downloaded them from the FabAcademy git site.
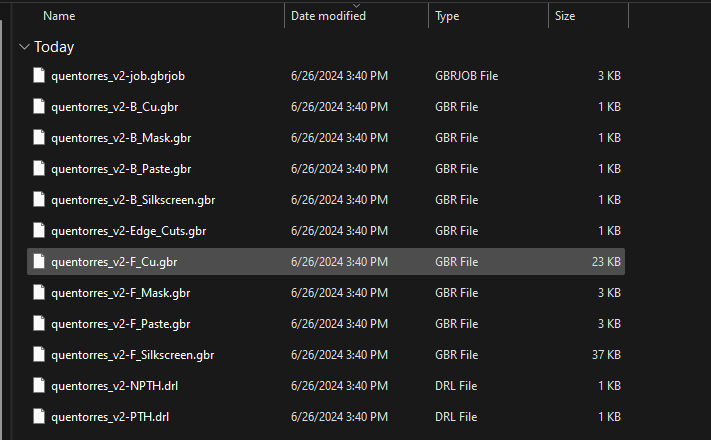
Zip the Gerber files: JLCPCB only accepts .zip files, so make sure to compress all your Gerber files into a zip folder and upload it to their website.
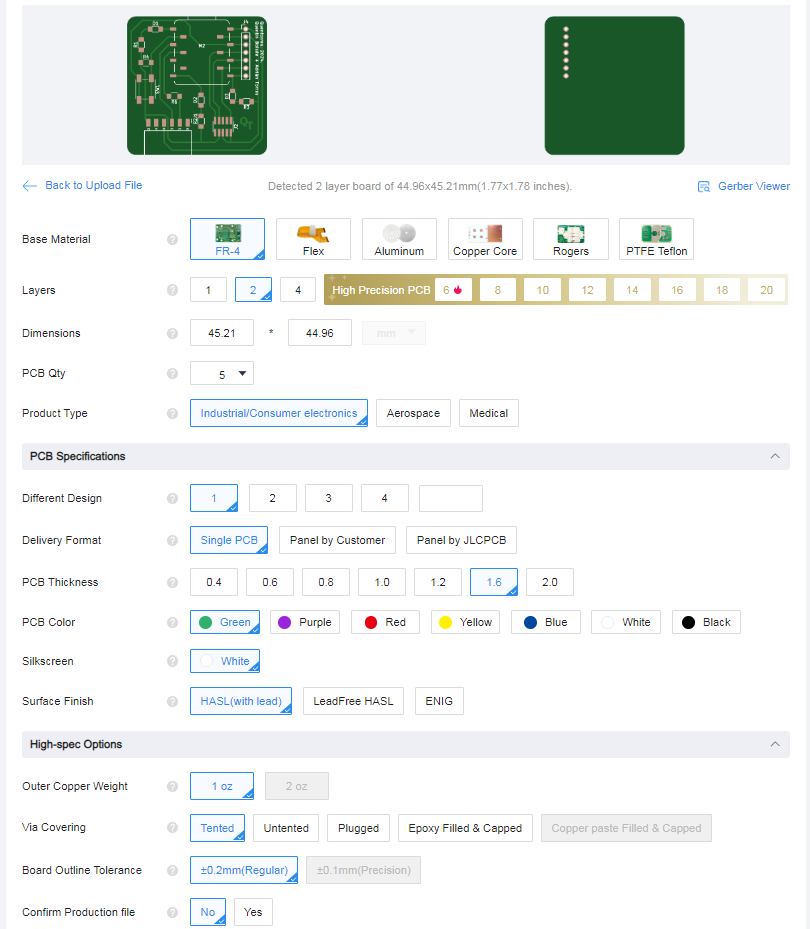
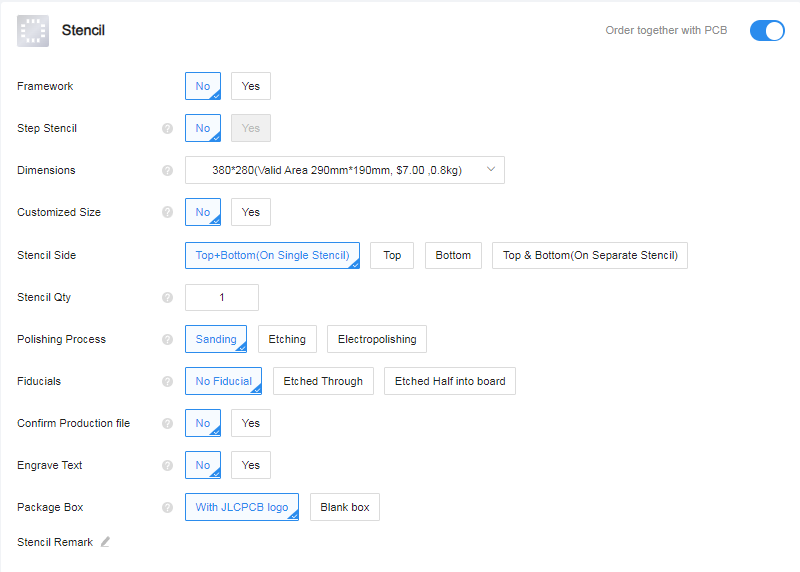
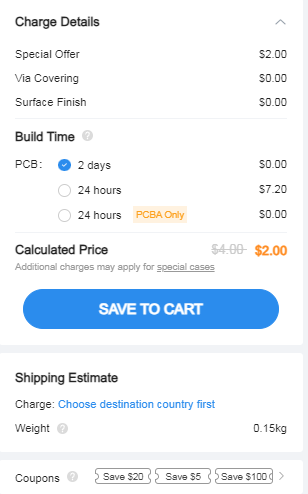
Once uploaded, you'll see a bunch of options for customization. We kept everything at the default settings. You can even order a stencil to make soldering easier. After selecting your options, choose your lead time—we went with the standard. For 5 boards, it cost us just $2, but we ordered 10.
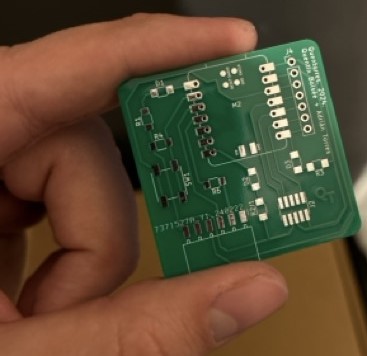
About a week later, we received our boards in the mail. The quality was much better than we expected, and we'll definitely be ordering from JLCPCB again.
Characterizing the Bantam Tools Desktop PCB Precision Mill
We used the Bantam Tools Precision PCB Mill for our PCB milling:
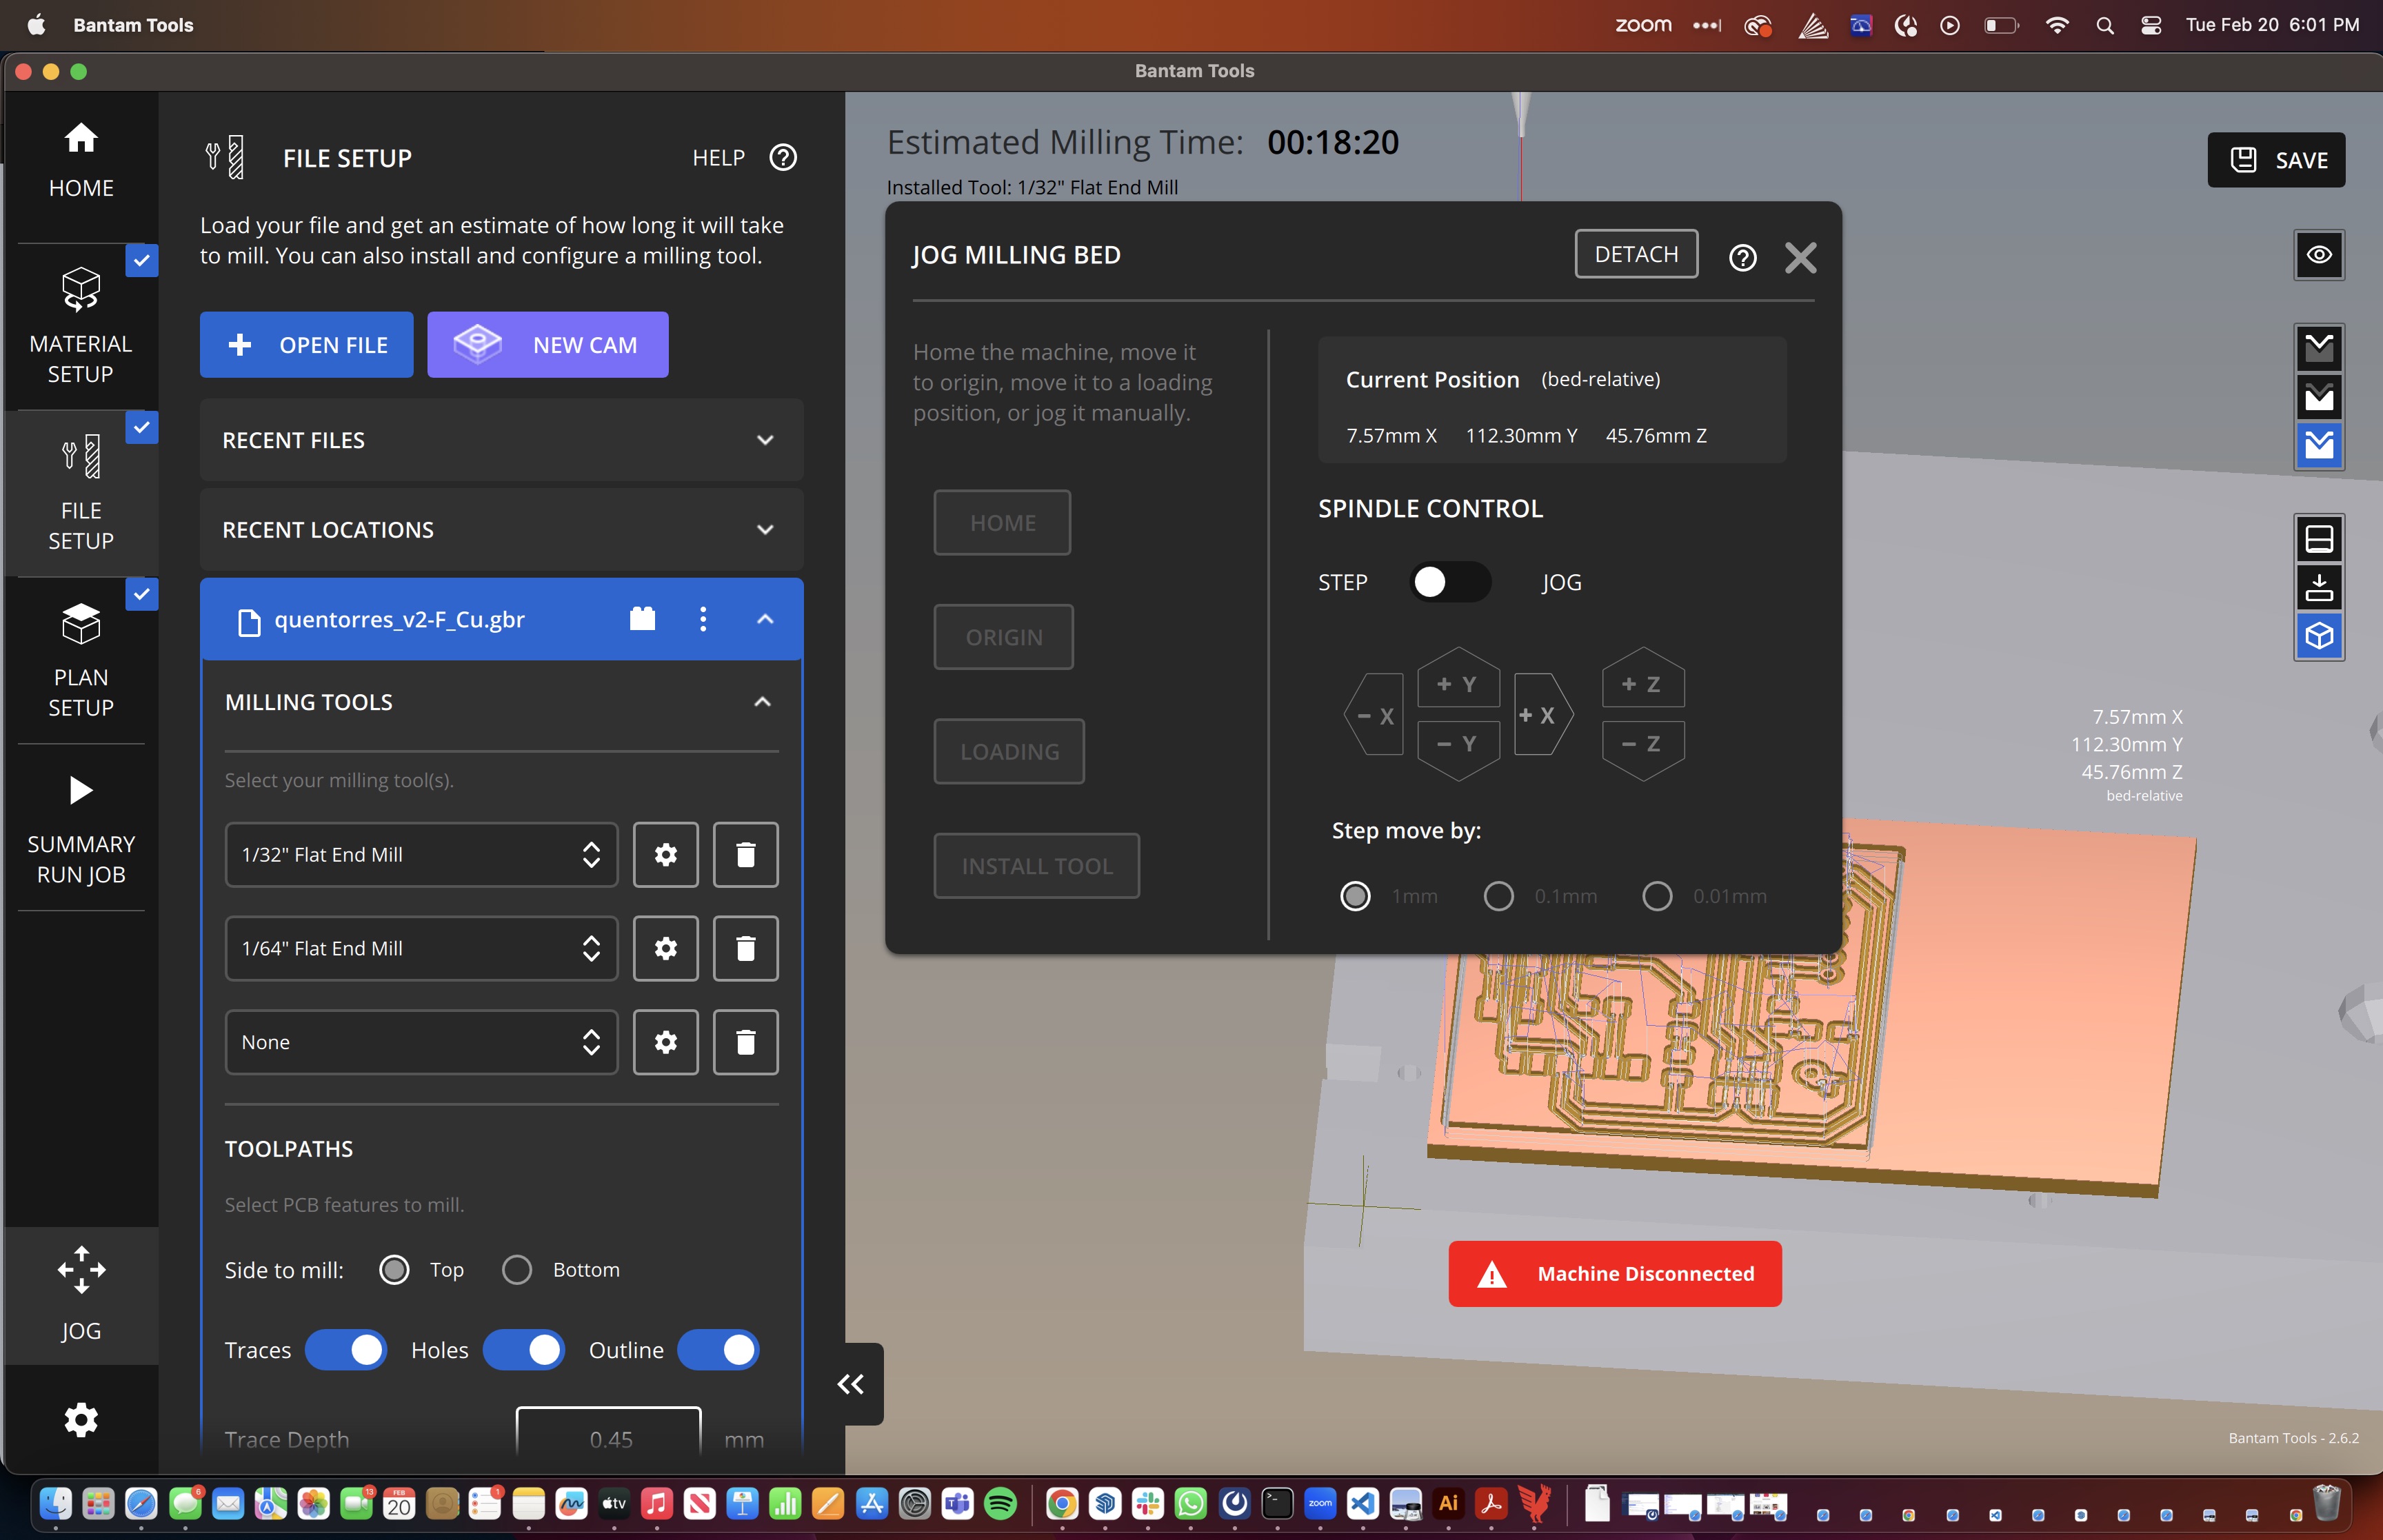
First, you need to get your Gerber files ready. When you open the Bantam Tools software, you'll need to set up the board size you're using. It's really important to measure your boards accurately since there can be manufacturing differences between each one.
Once you've set the board size, you upload the Gerber files. There are three specific files you need for a good board: the F_Cu file (front copper), the Edge_Cuts file (which defines the board's edges), and the PTH file (with all the drill holes).
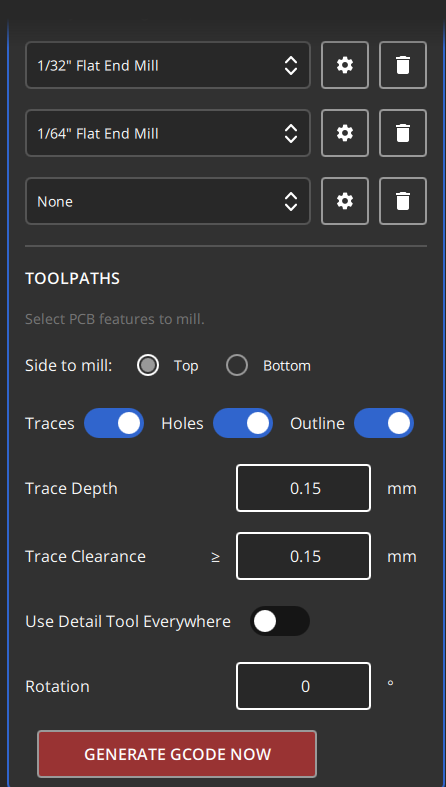
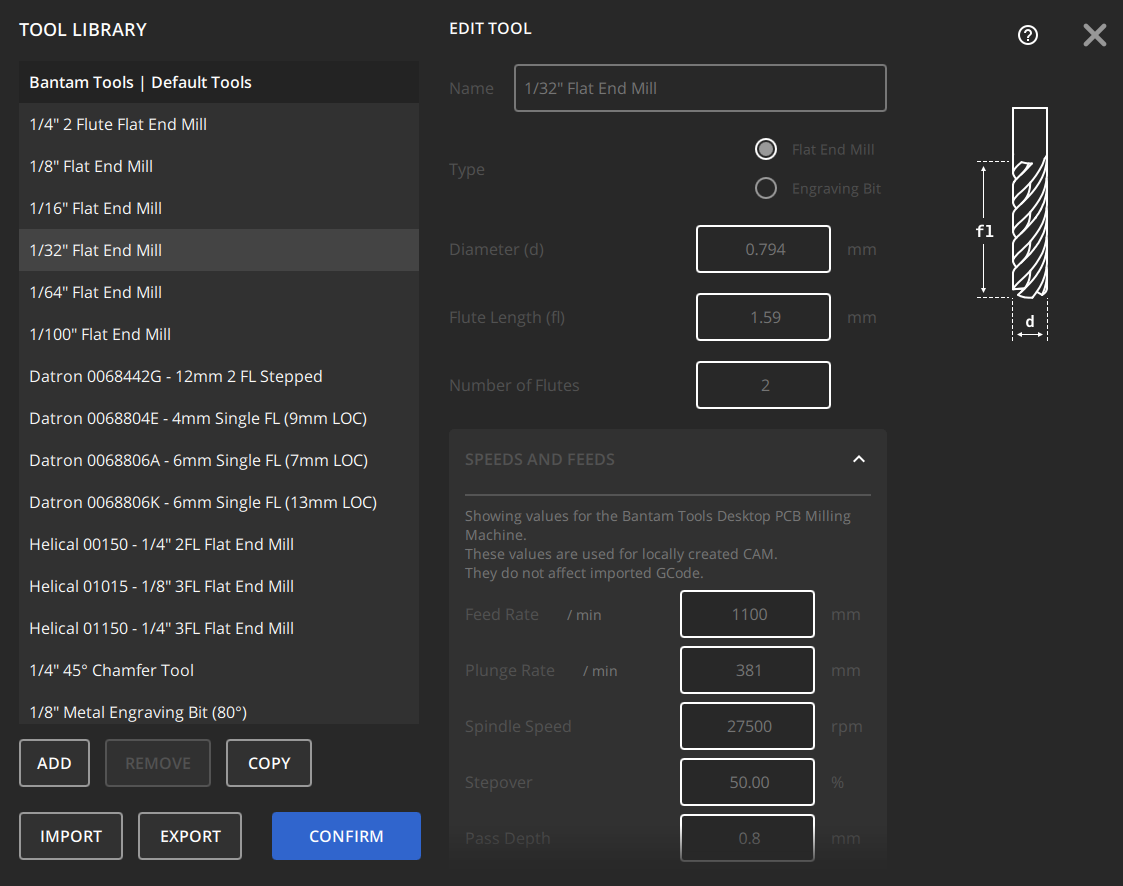
For our boards, we used two different end mills: a 1/64" flat end mill and a 1/32" flat end mill. These gave us excellent definition, even for the small gaps between parts.
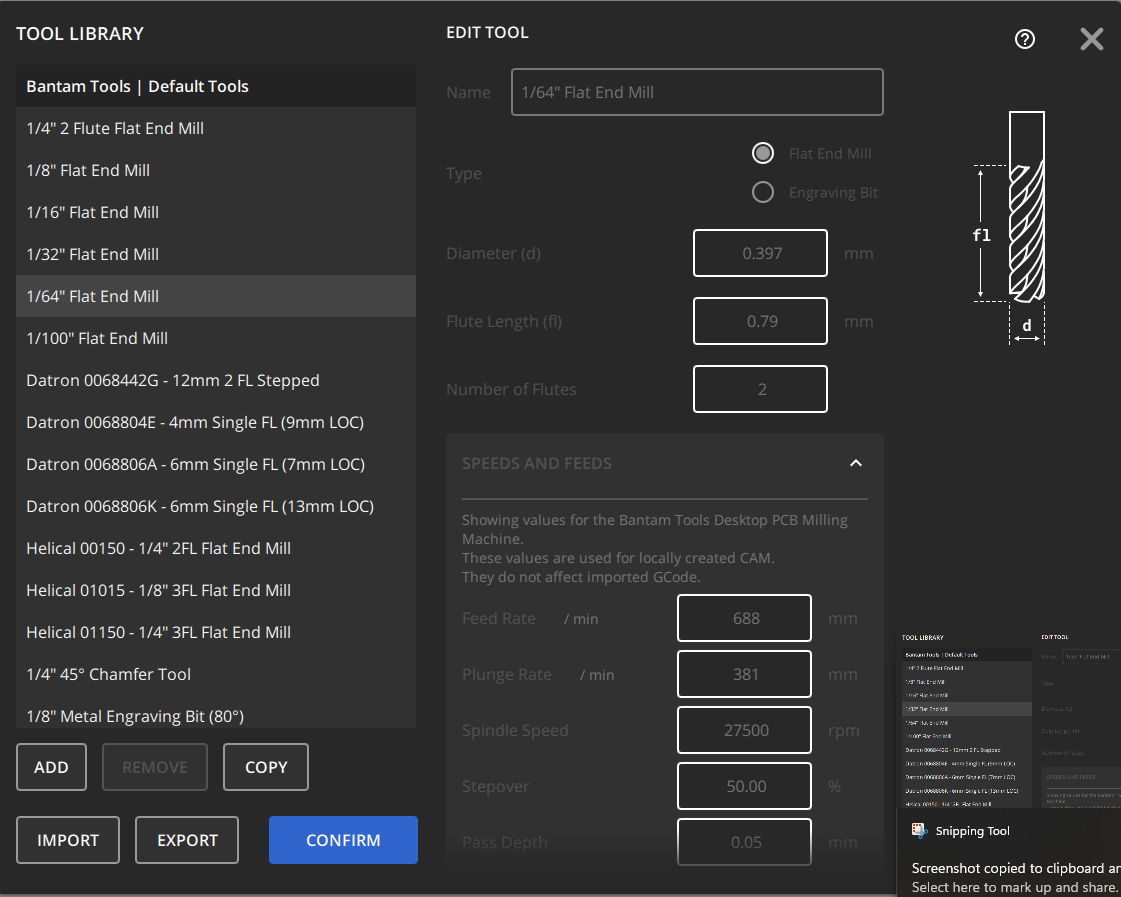
The Bantam Tools software is great because it automatically sets up all the parameters for each mill you use, including the spinning frequency, bit movement, and more. However, using small bits like these can be nerve-wracking since they're expensive and break easily.
After you've set these parameters, you can set the depth of your cuts. This was a bit tricky at first, but we found that a depth of 0.15 mm worked well for the boards we were working with.
When you are finished programming all of the parameters, you can preview how long it will take to mill. When you send the milling file, the machine automatically requests the tool for the first operation to be installed.
It will then probe the z height of the bit automatically, asking you to confirm that it is in a position over the exposed build plate. It will repeat this process each time you need to install a new bit. At the end of the milling,
it will return to a home position and stop the spindle. It will automatically ask you if you want to run a cleaning operation where it moves the bed around so you can brush or vacuum the dust out of the chamber.
You'll need to carefully use a flathead screwdriver or spatula to peel the board off the bed, making sure not to put too much force to bend or snap the board. Make sure you remove the double stick tape fixturing and voila! You have a custom milled board!
Copyright 2024 Thomas Pupo - Creative Commons Attribution Non Commercial
Source code hosted at fabcloud/fabacademy/2024/thomas-pupo