
Week 3: Computer
Controlled Cutting
Vinyl Cutting
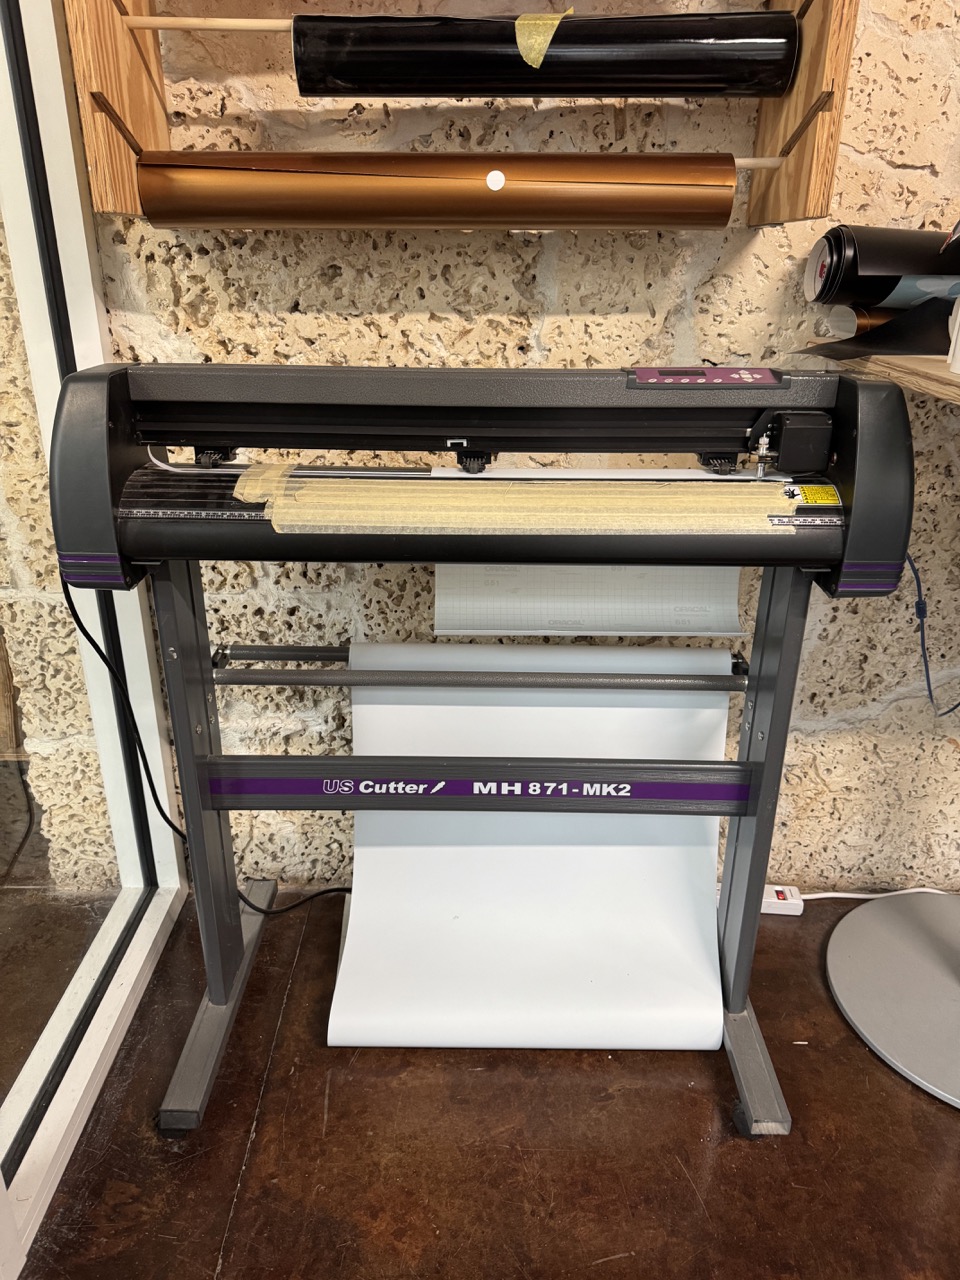
About the USCUTTER MH871-MK2
The USCUTTER MH871-MK2 vinyl cutter supports media up to 34" wide and uses Sure Cuts Alot Software to program the cutting. The machine can handle a wide variety of media from self adhesive vinyl, to heat transfer vinyl, to thin acetates and cardstocks. For this project, we used matte black oracal 651 adhesive vinyl to use as a sticker.
When using a USCUTTER MH871-MK2 vinyl cutter machine, setting adjustments for different media types are crucial to achieving precise and clean cuts. Here's an explanation of the key settings and their effects:
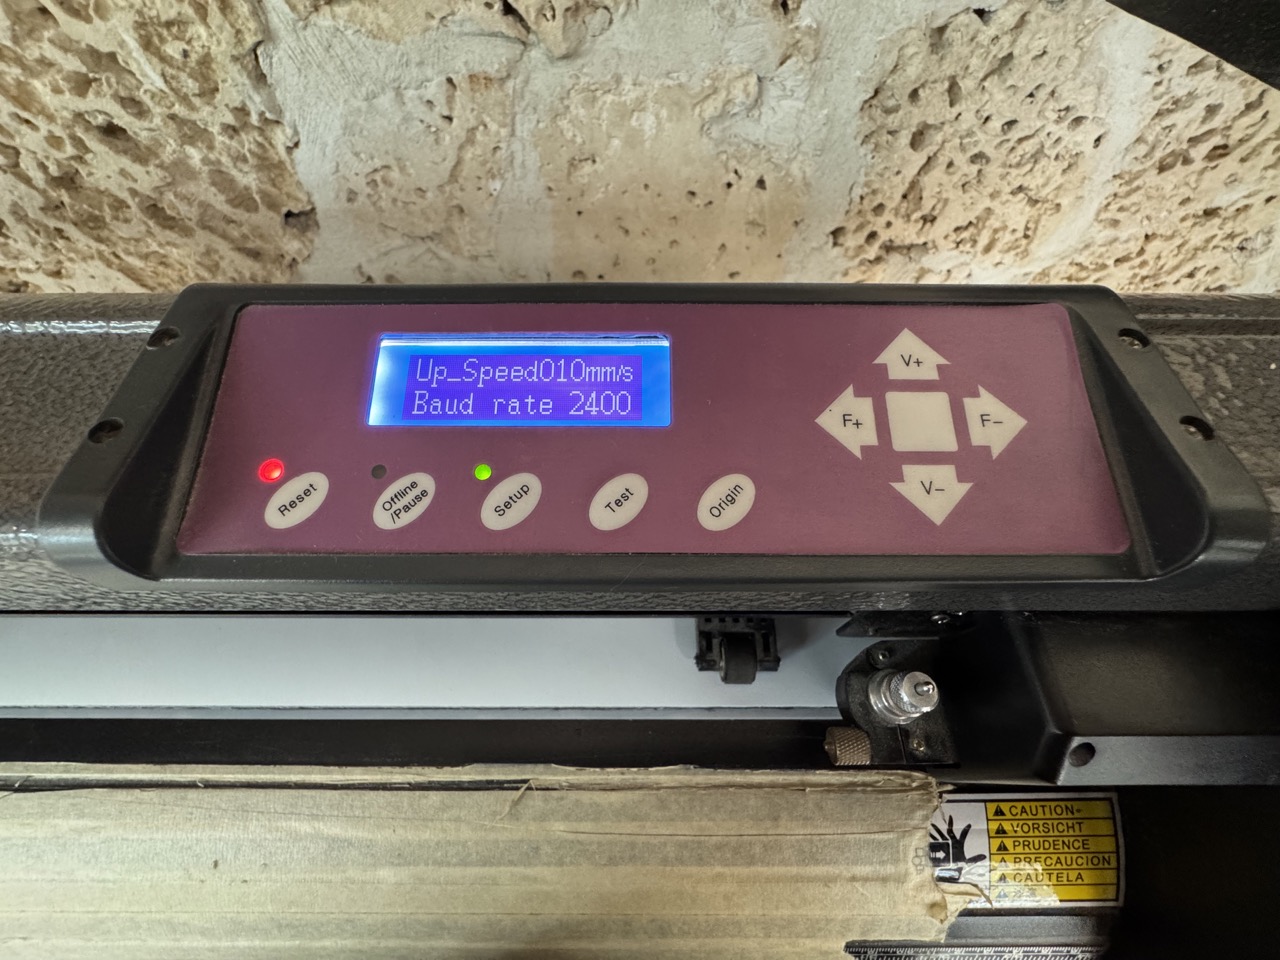
Up_Speed (measured in mm/s)
Definition: This setting determines the speed at which the cutting blade lifts and moves to the next position.
Effects: Higher Up_Speed values can speed up the cutting process but may reduce accuracy, especially on intricate designs. Lower Up_Speed values increase precision and reduce the risk of tearing delicate media but can slow down the overall cutting time.
Baud Rate
Definition: This setting refers to the communication speed between the vinyl cutter and the computer, measured in bits per second (bps).
Effects:
A higher baud rate allows for faster data transfer, which can be beneficial for complex or large files, reducing the time it takes to start and complete a cut.
A lower baud rate can ensure more stable communication, particularly with older or less reliable connections. The standard setting for most operations is 9600 bps, but it can be adjusted depending on the setup and the complexity of the job.
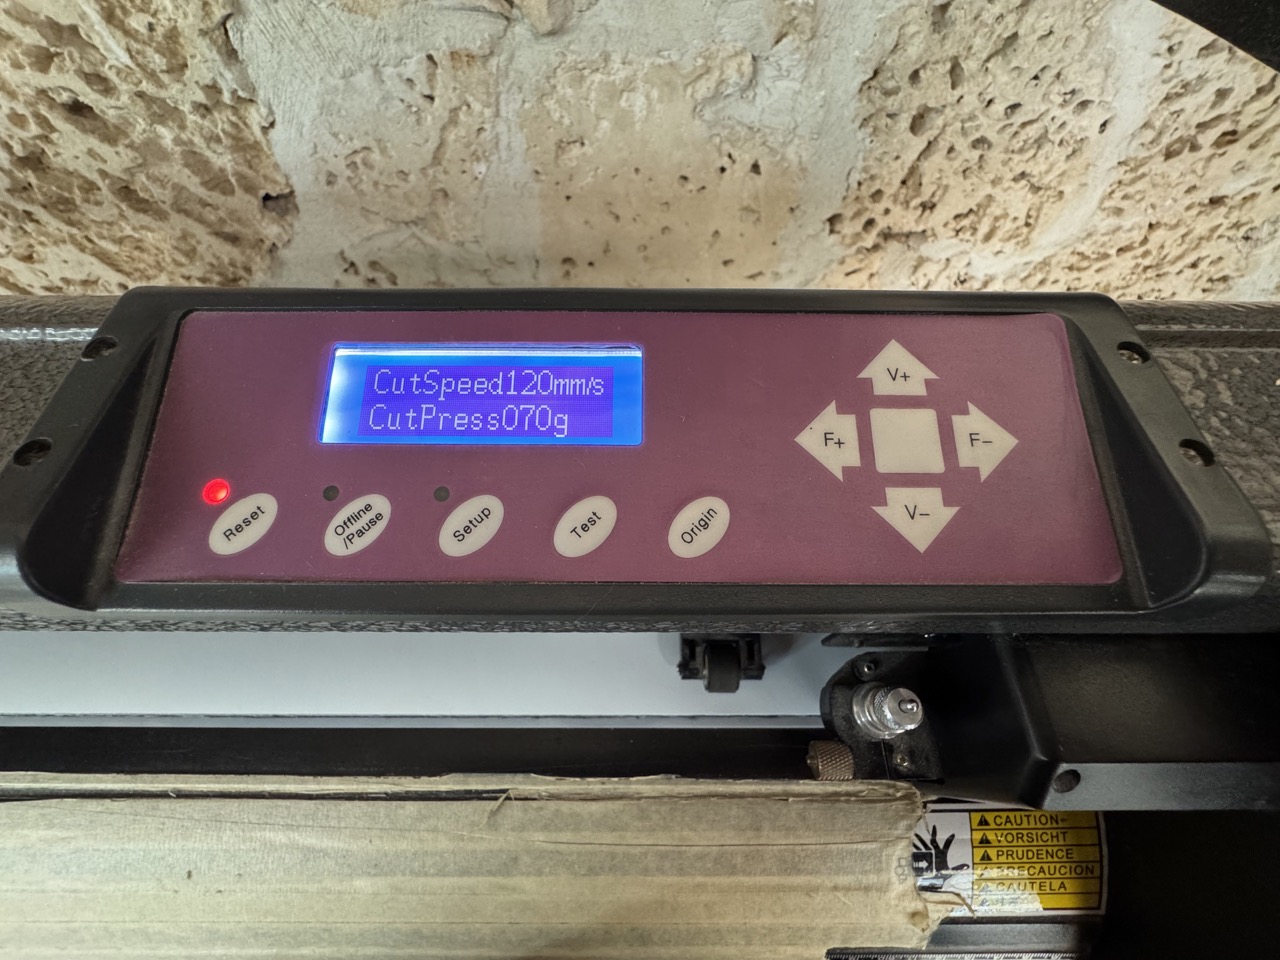
CutSpeed (measured in mm/s)
Definition: This setting controls the speed at which the cutting blade moves across the media.
Effects:
Higher CutSpeed values are suitable for simple and large designs where precision is less critical. It can speed up production time.
Lower CutSpeed values are necessary for intricate and detailed designs, ensuring that corners and fine lines are cut accurately. It is also useful for cutting thicker or tougher materials where slower speeds reduce the risk of dragging or tearing.
CutPress (measured in grams)
Definition: This setting determines the downward force exerted by the cutting blade onto the media.
Effects:
Higher CutPress values are needed for thicker or denser materials, such as heavy vinyl, reflective materials, or cardstock, ensuring the blade cuts through completely.
Lower CutPress values are ideal for thinner and more delicate materials, such as standard adhesive vinyl or heat transfer vinyl, preventing the blade from cutting too deeply and damaging the cutting mat or the media itself.
Recommended Settings for Different Media:
Standard Adhesive Vinyl:
CutSpeed: 300-500 mm/s
CutPress: 80-100 grams
Up_Speed: 400-600 mm/s
Baud Rate: 9600 bps
Heat Transfer Vinyl (HTV):
CutSpeed: 200-400 mm/s
CutPress: 100-120 grams
Up_Speed: 400-600 mm/s
Baud Rate: 9600 bps
Cardstock:
CutSpeed: 100-200 mm/s
CutPress: 150-200 grams
Up_Speed: 200-400 mm/s
Baud Rate: 9600 bps
Reflective Vinyl:
CutSpeed: 100-200 mm/s
CutPress: 120-150 grams
Up_Speed: 200-400 mm/s
Baud Rate: 9600 bps
Adjusting these settings appropriately ensures optimal performance and quality of the cuts, reducing wear on the blade and extending the life of the cutting mat and machine. Always perform a test cut when working with new materials to fine-tune the settings for the best results.
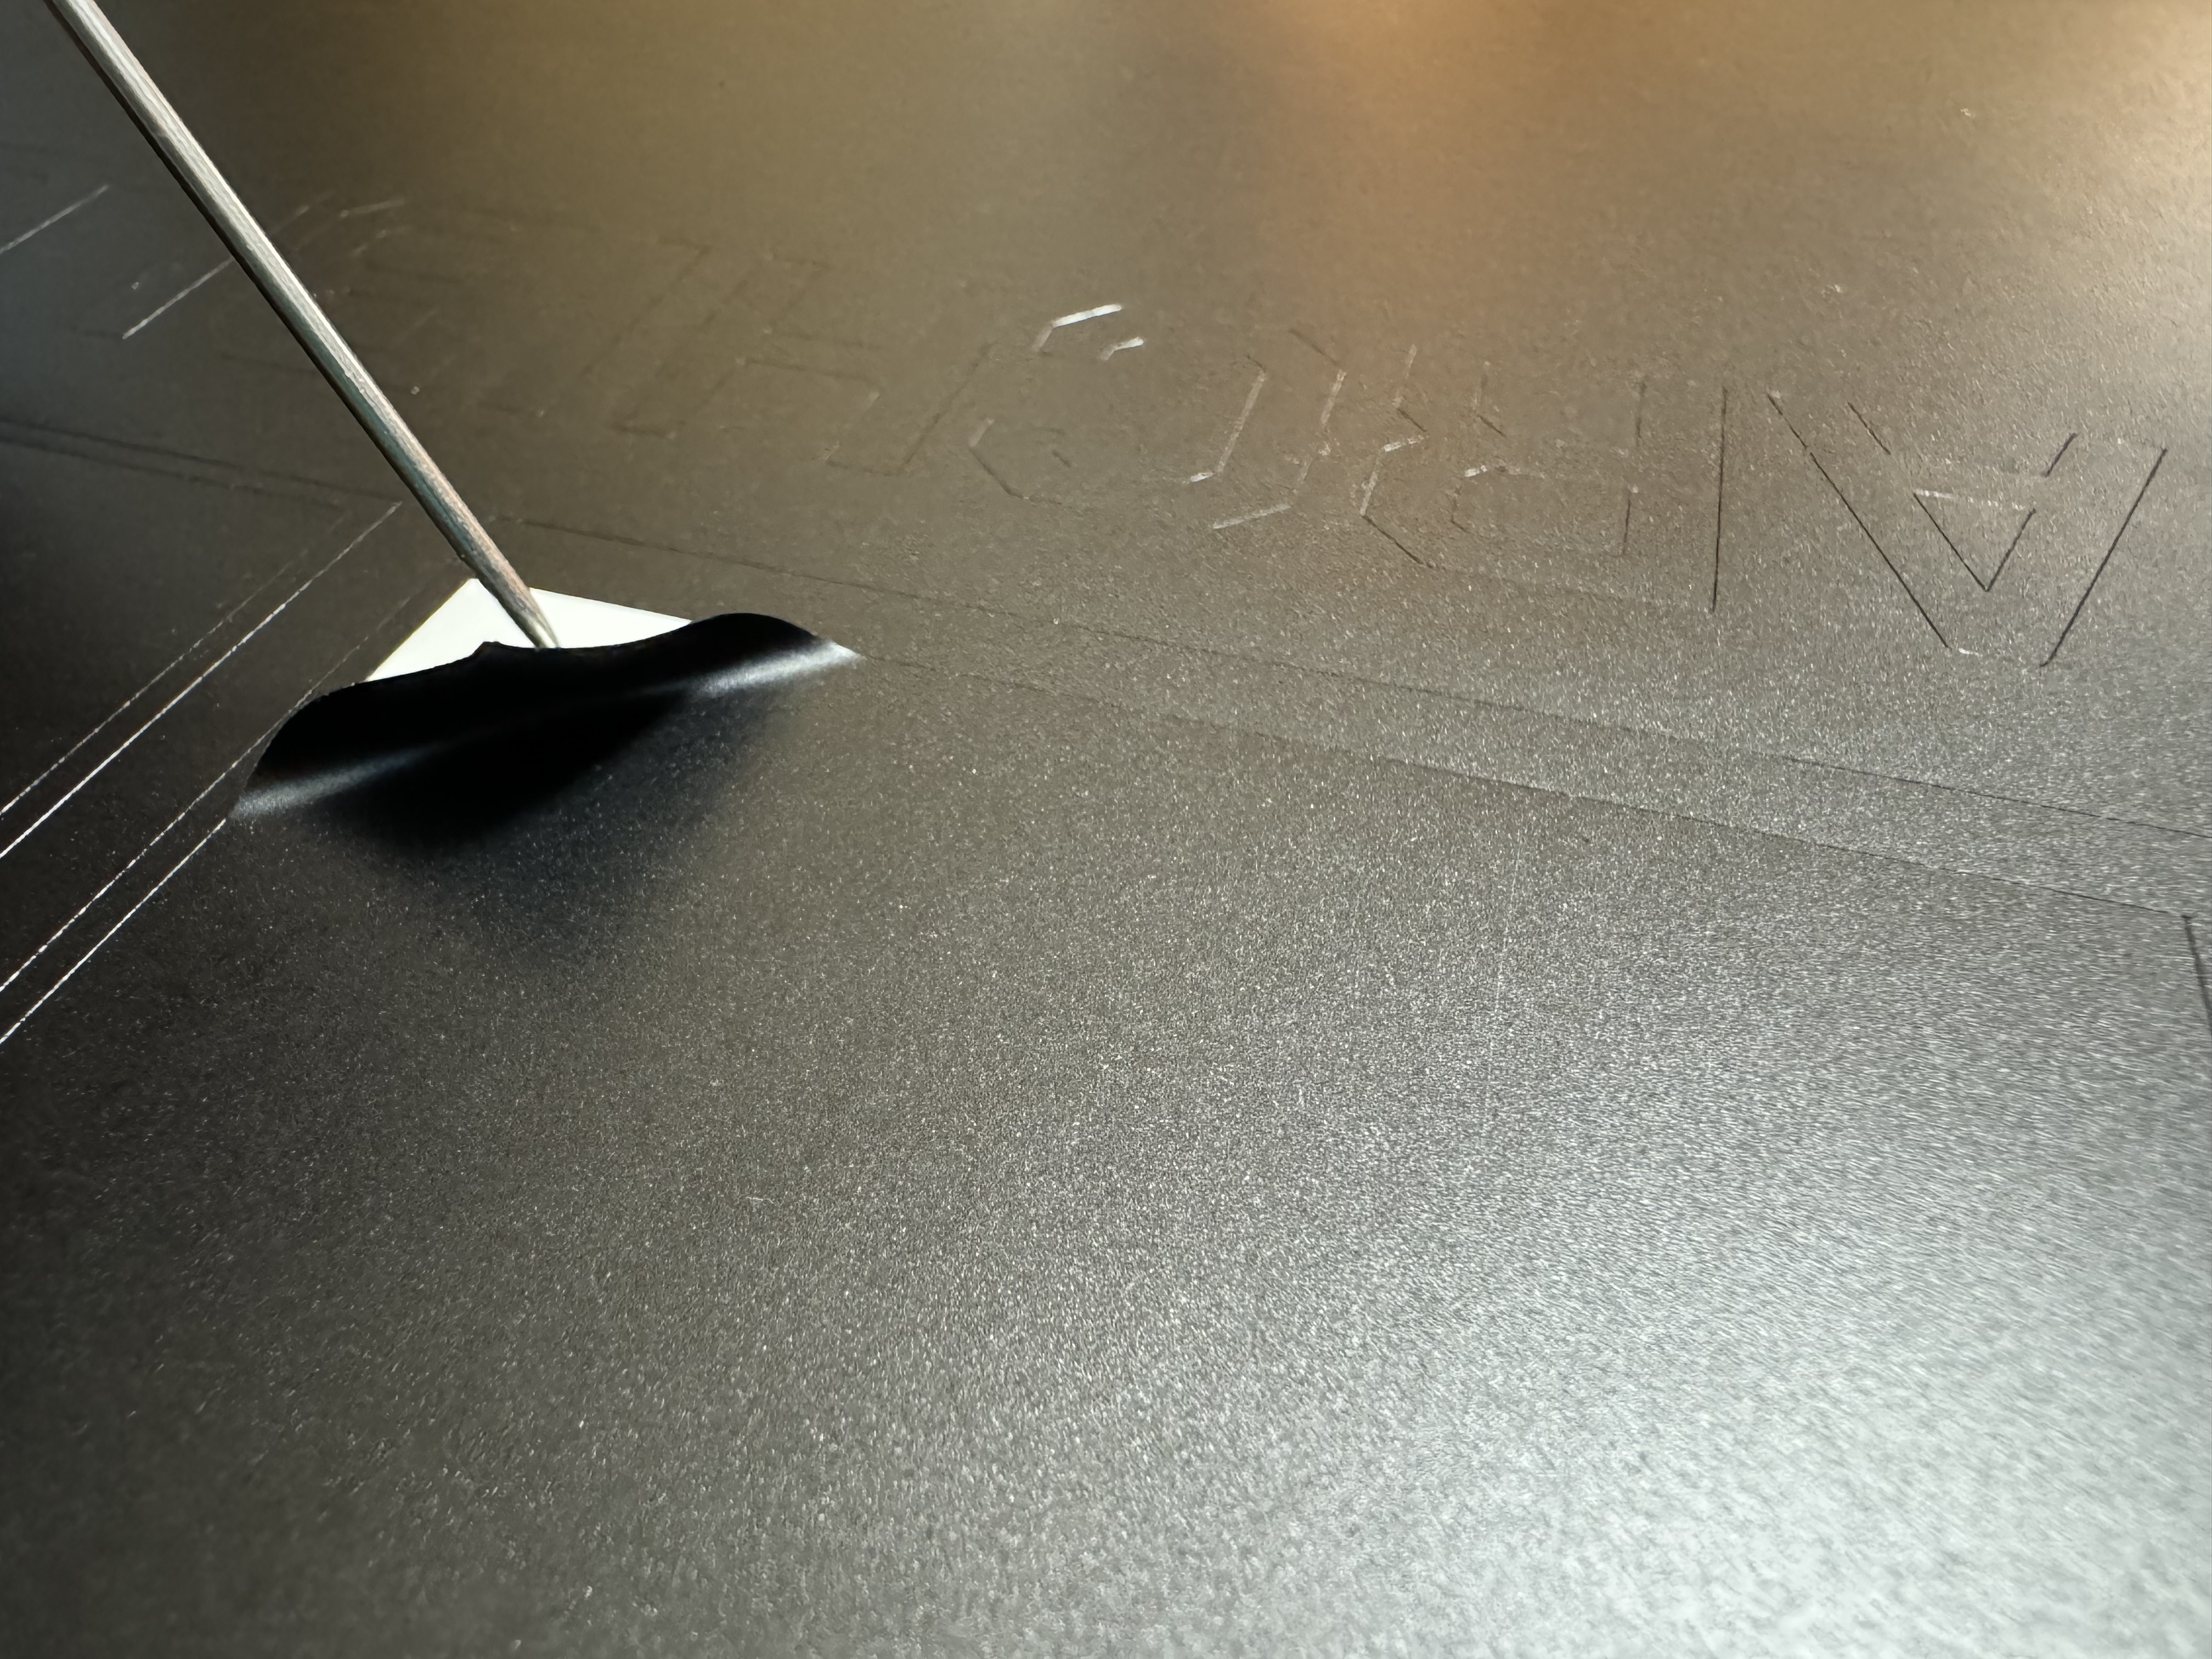
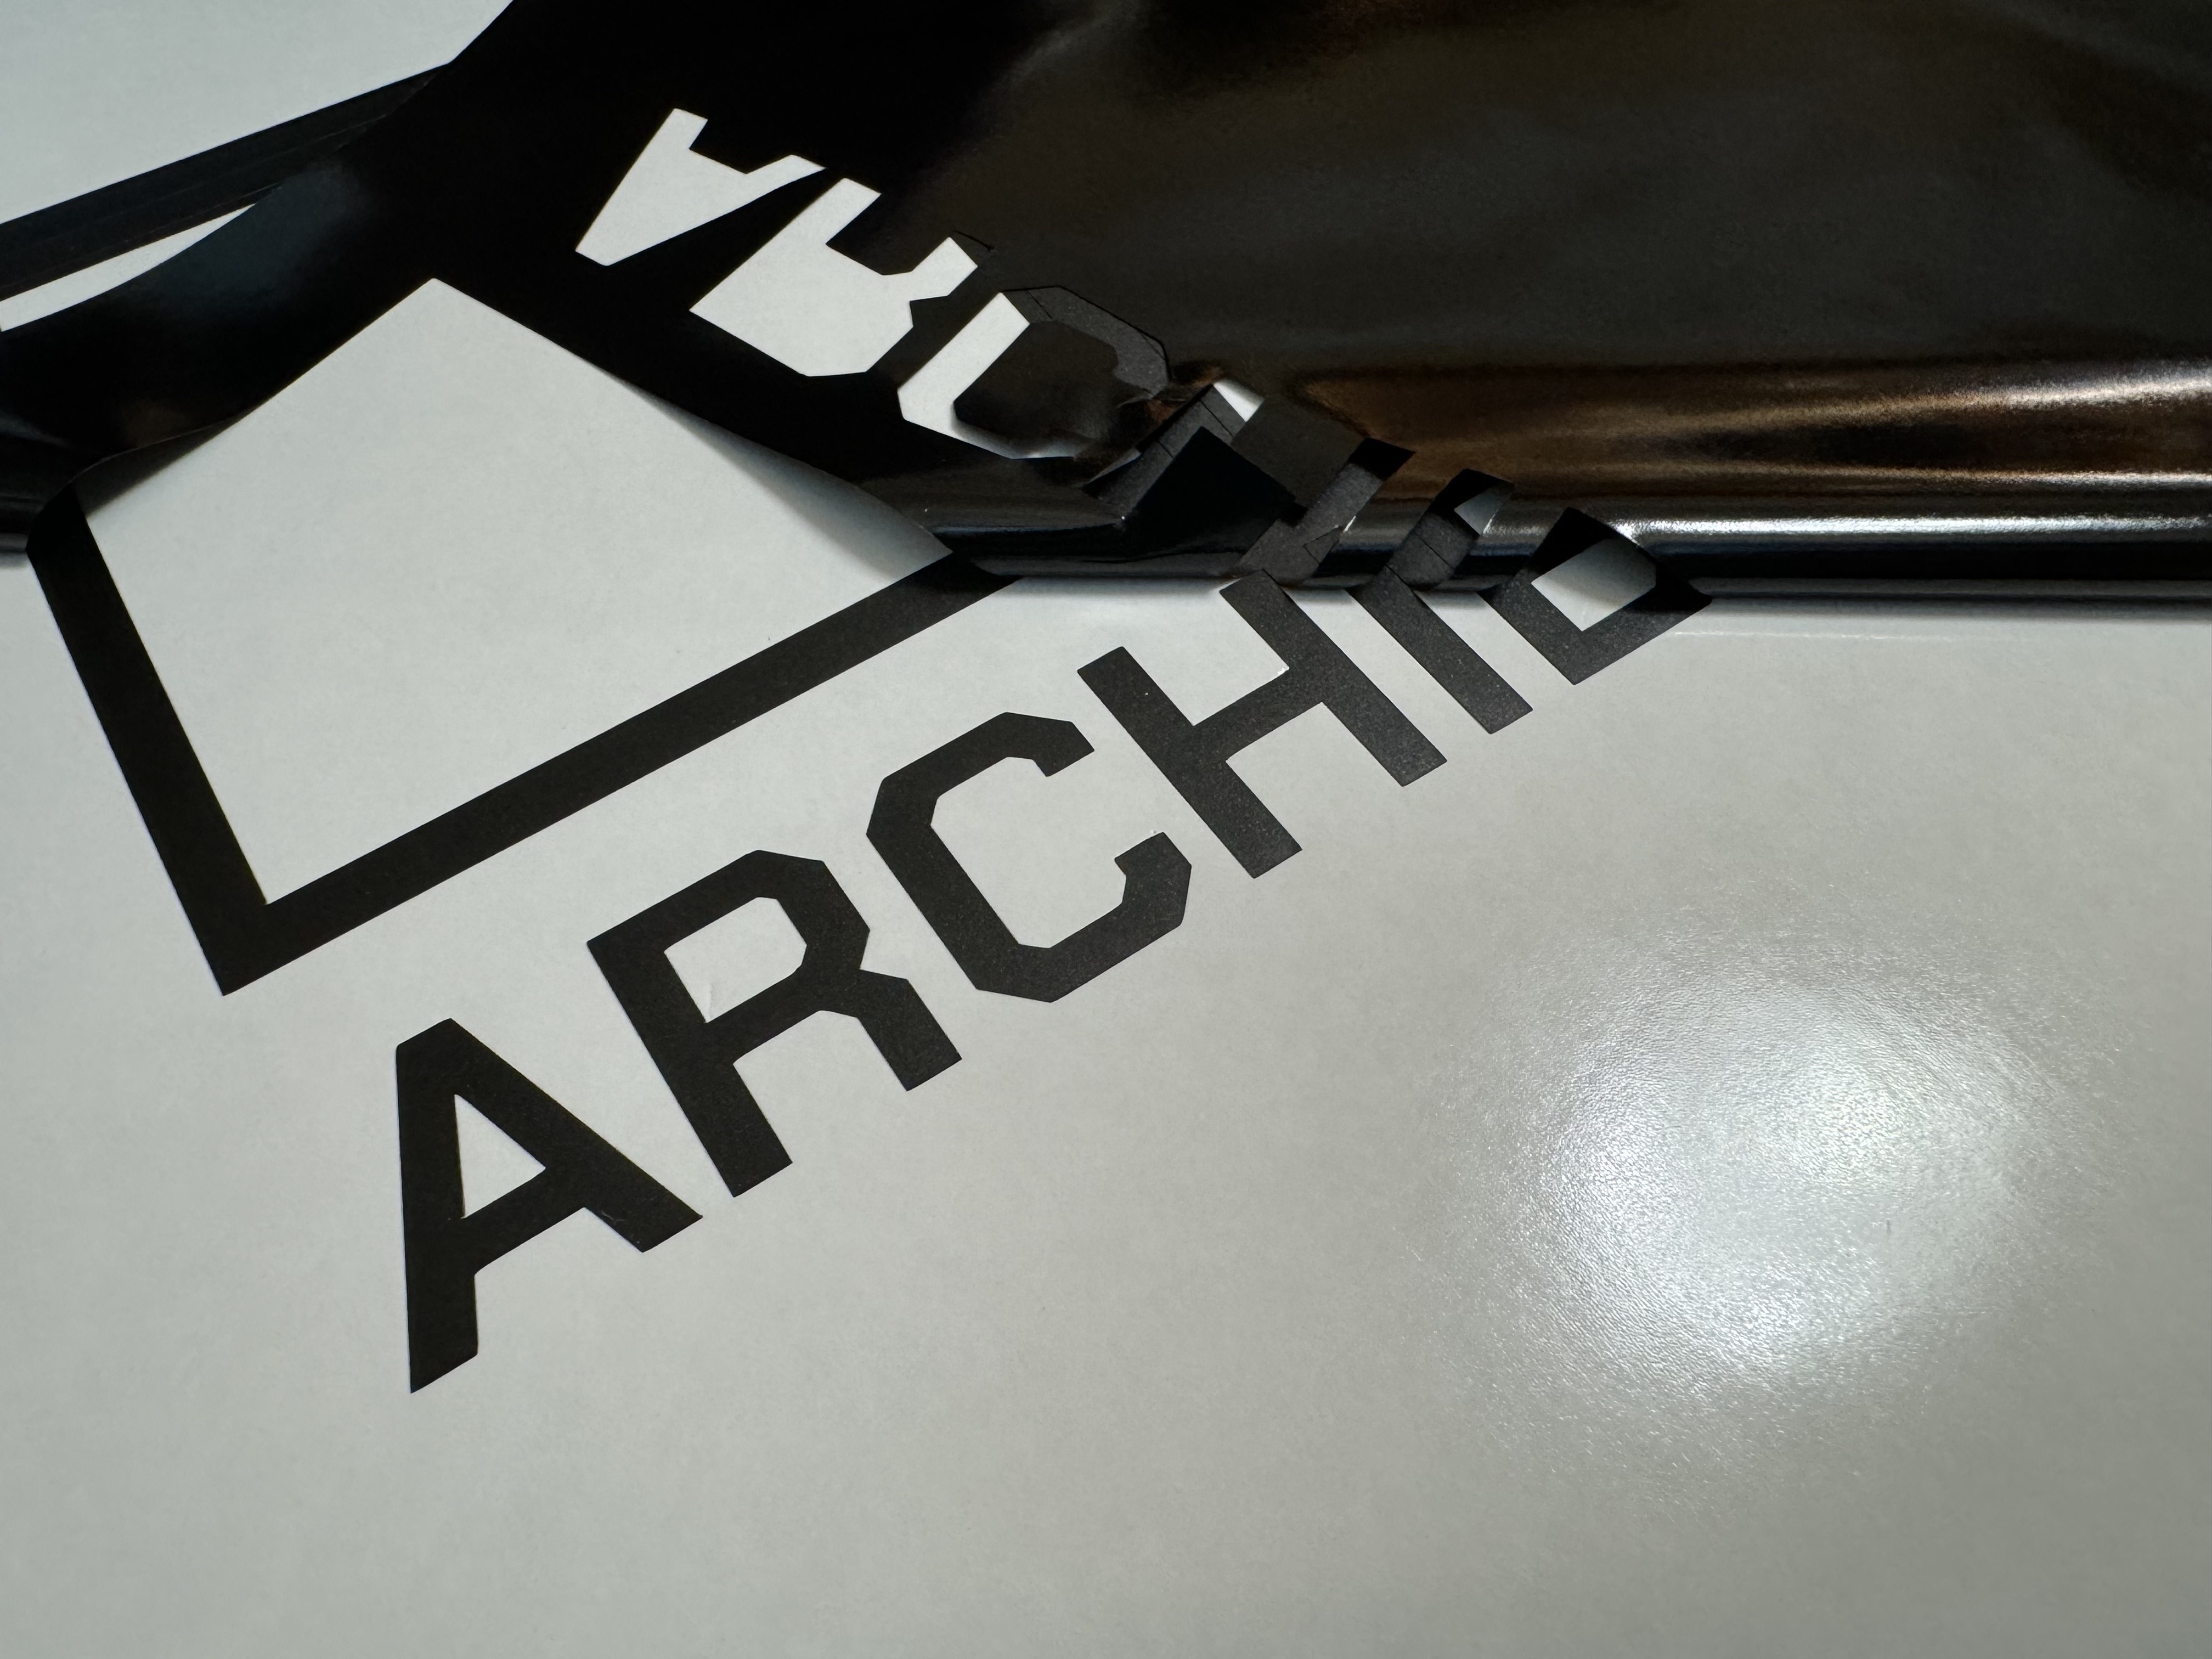
I created a draft logo for my final project, Archiblox. I exported the pdf and opened it in the Sure Cuts Alot Software. I used our USCutter vinyl cutter to cut the design on a self adhesive matte black sticker sheet. After some weeding, the vinyl sticker was ready to be placed on transfer tape and placed on its final location.
Machine Settings:
Weeding, Peeling, and Transfering

Press Fit Construction Kit
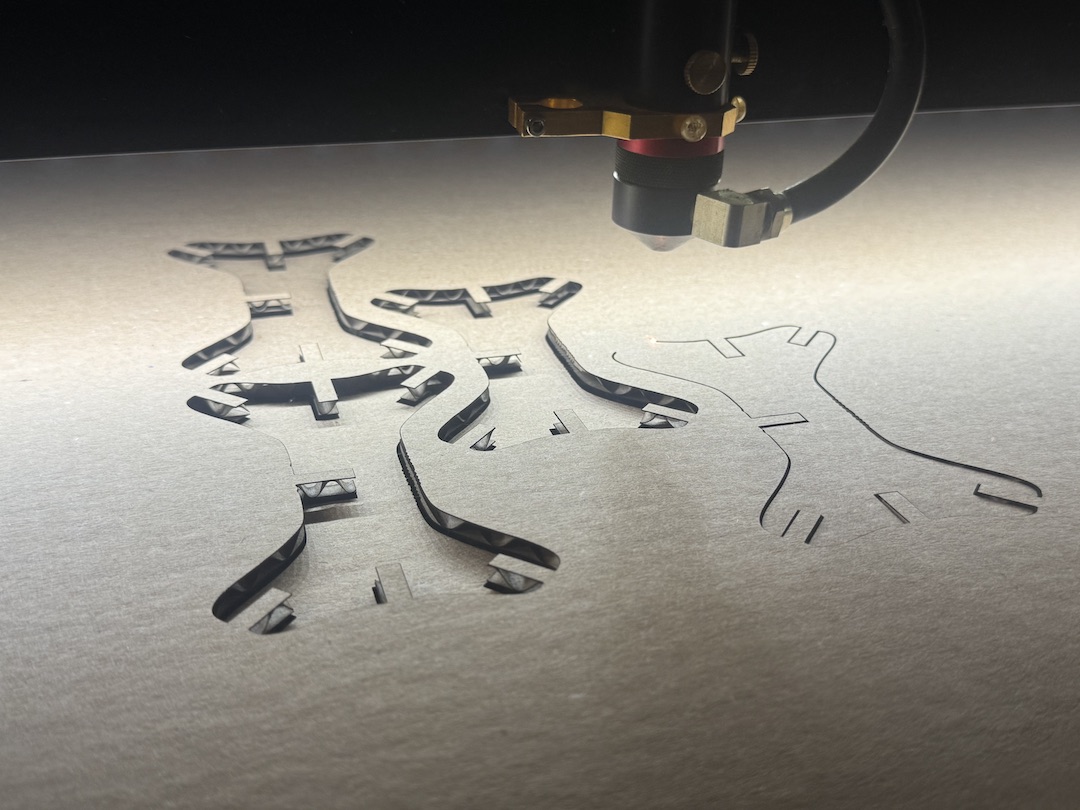
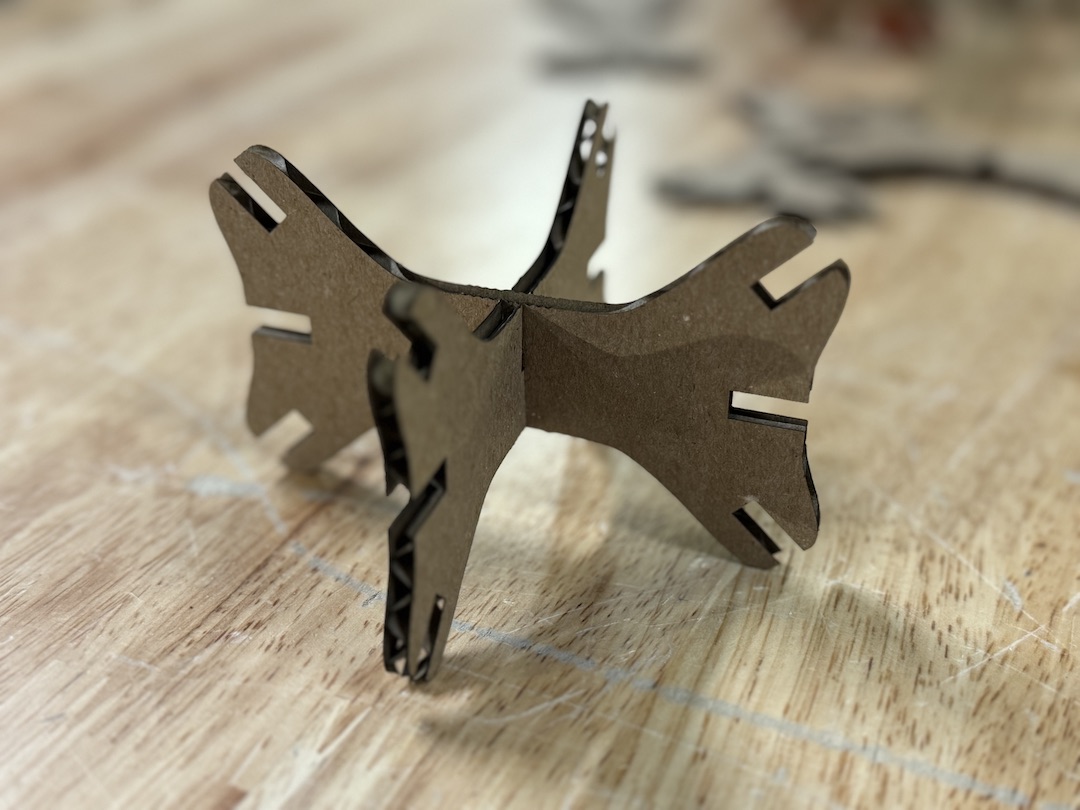
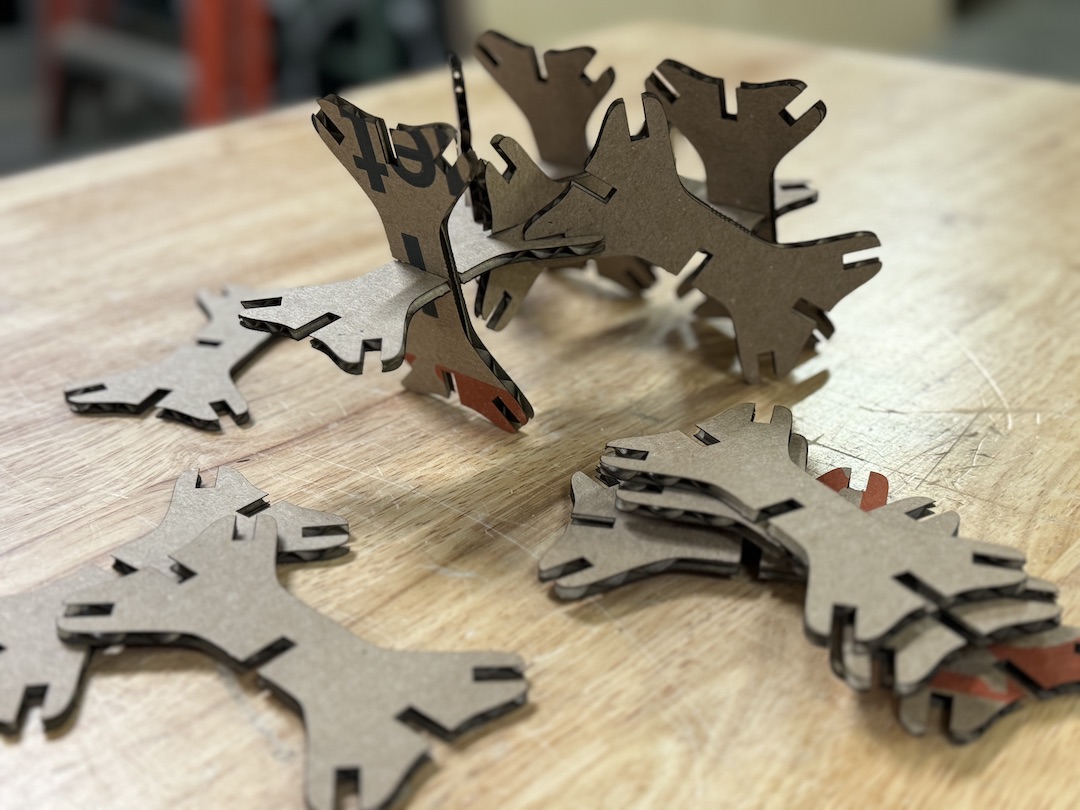
For the press fit kit, I created a bone shaped tile that allowed for 7 different connection points using 1/8" corrugated cardboard sheets. This would ensure a dynamic building tile that can create perpendicular linear connections, as well as diagonal connnections.
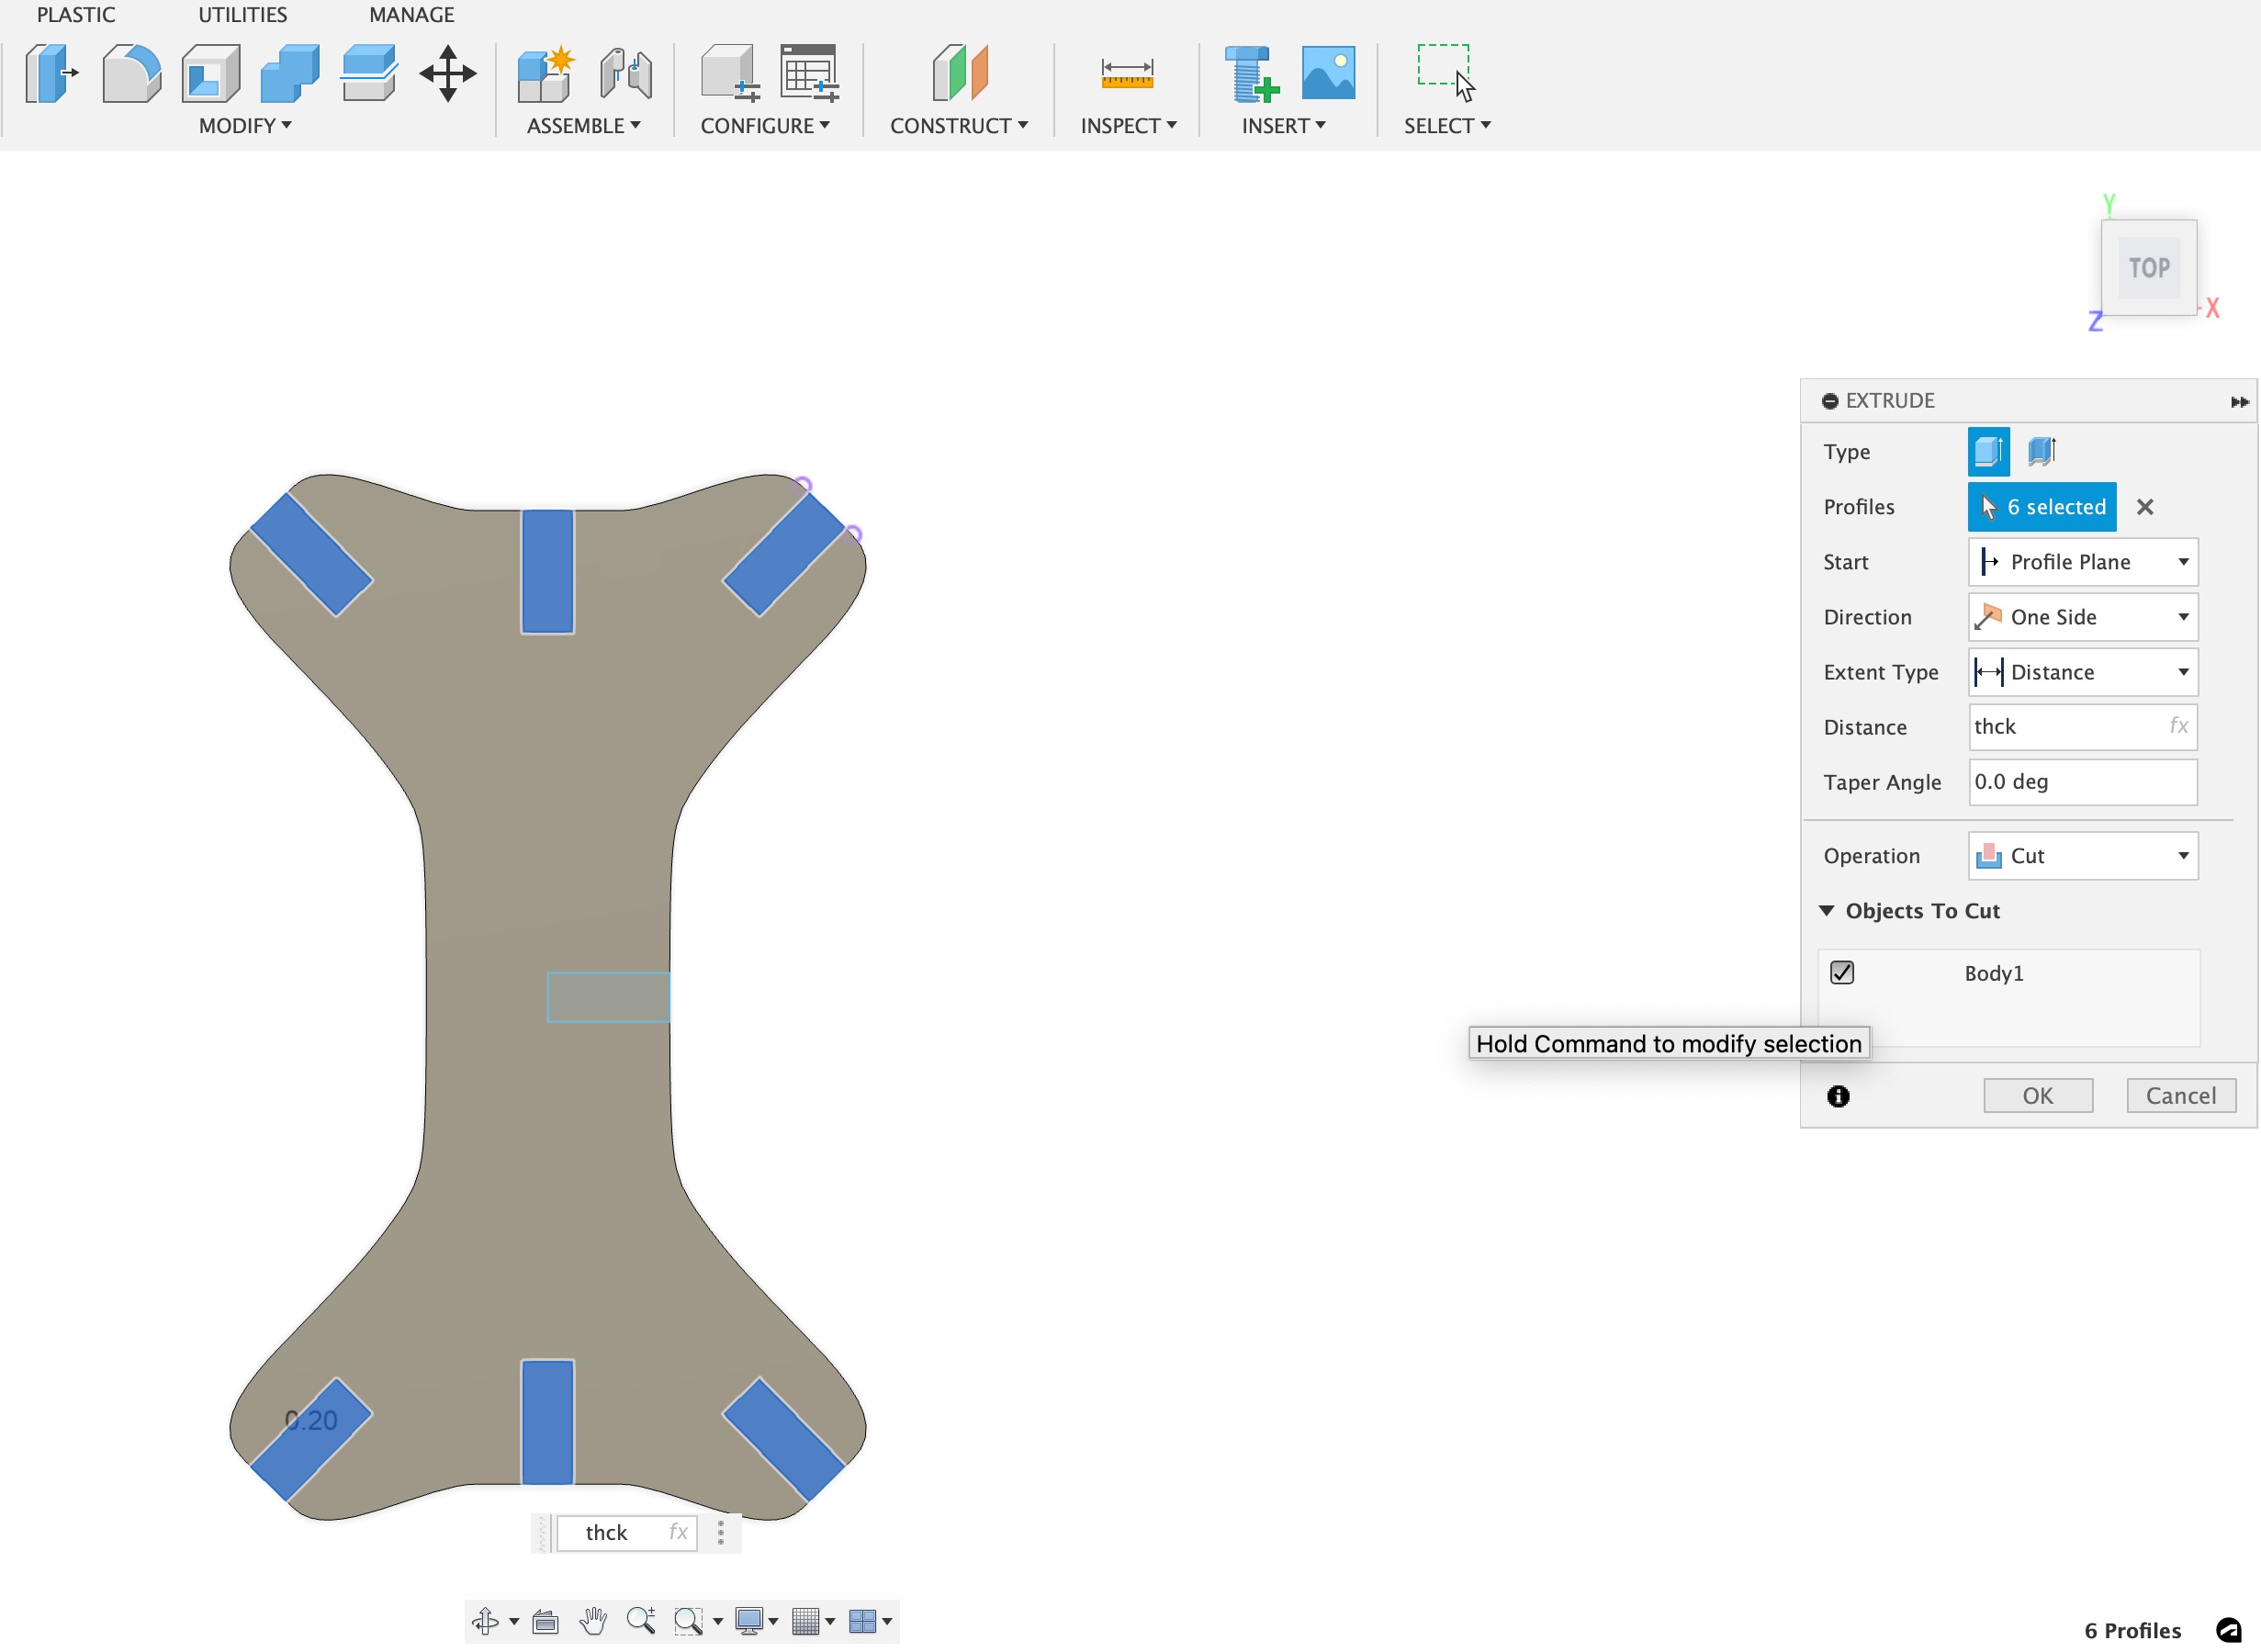
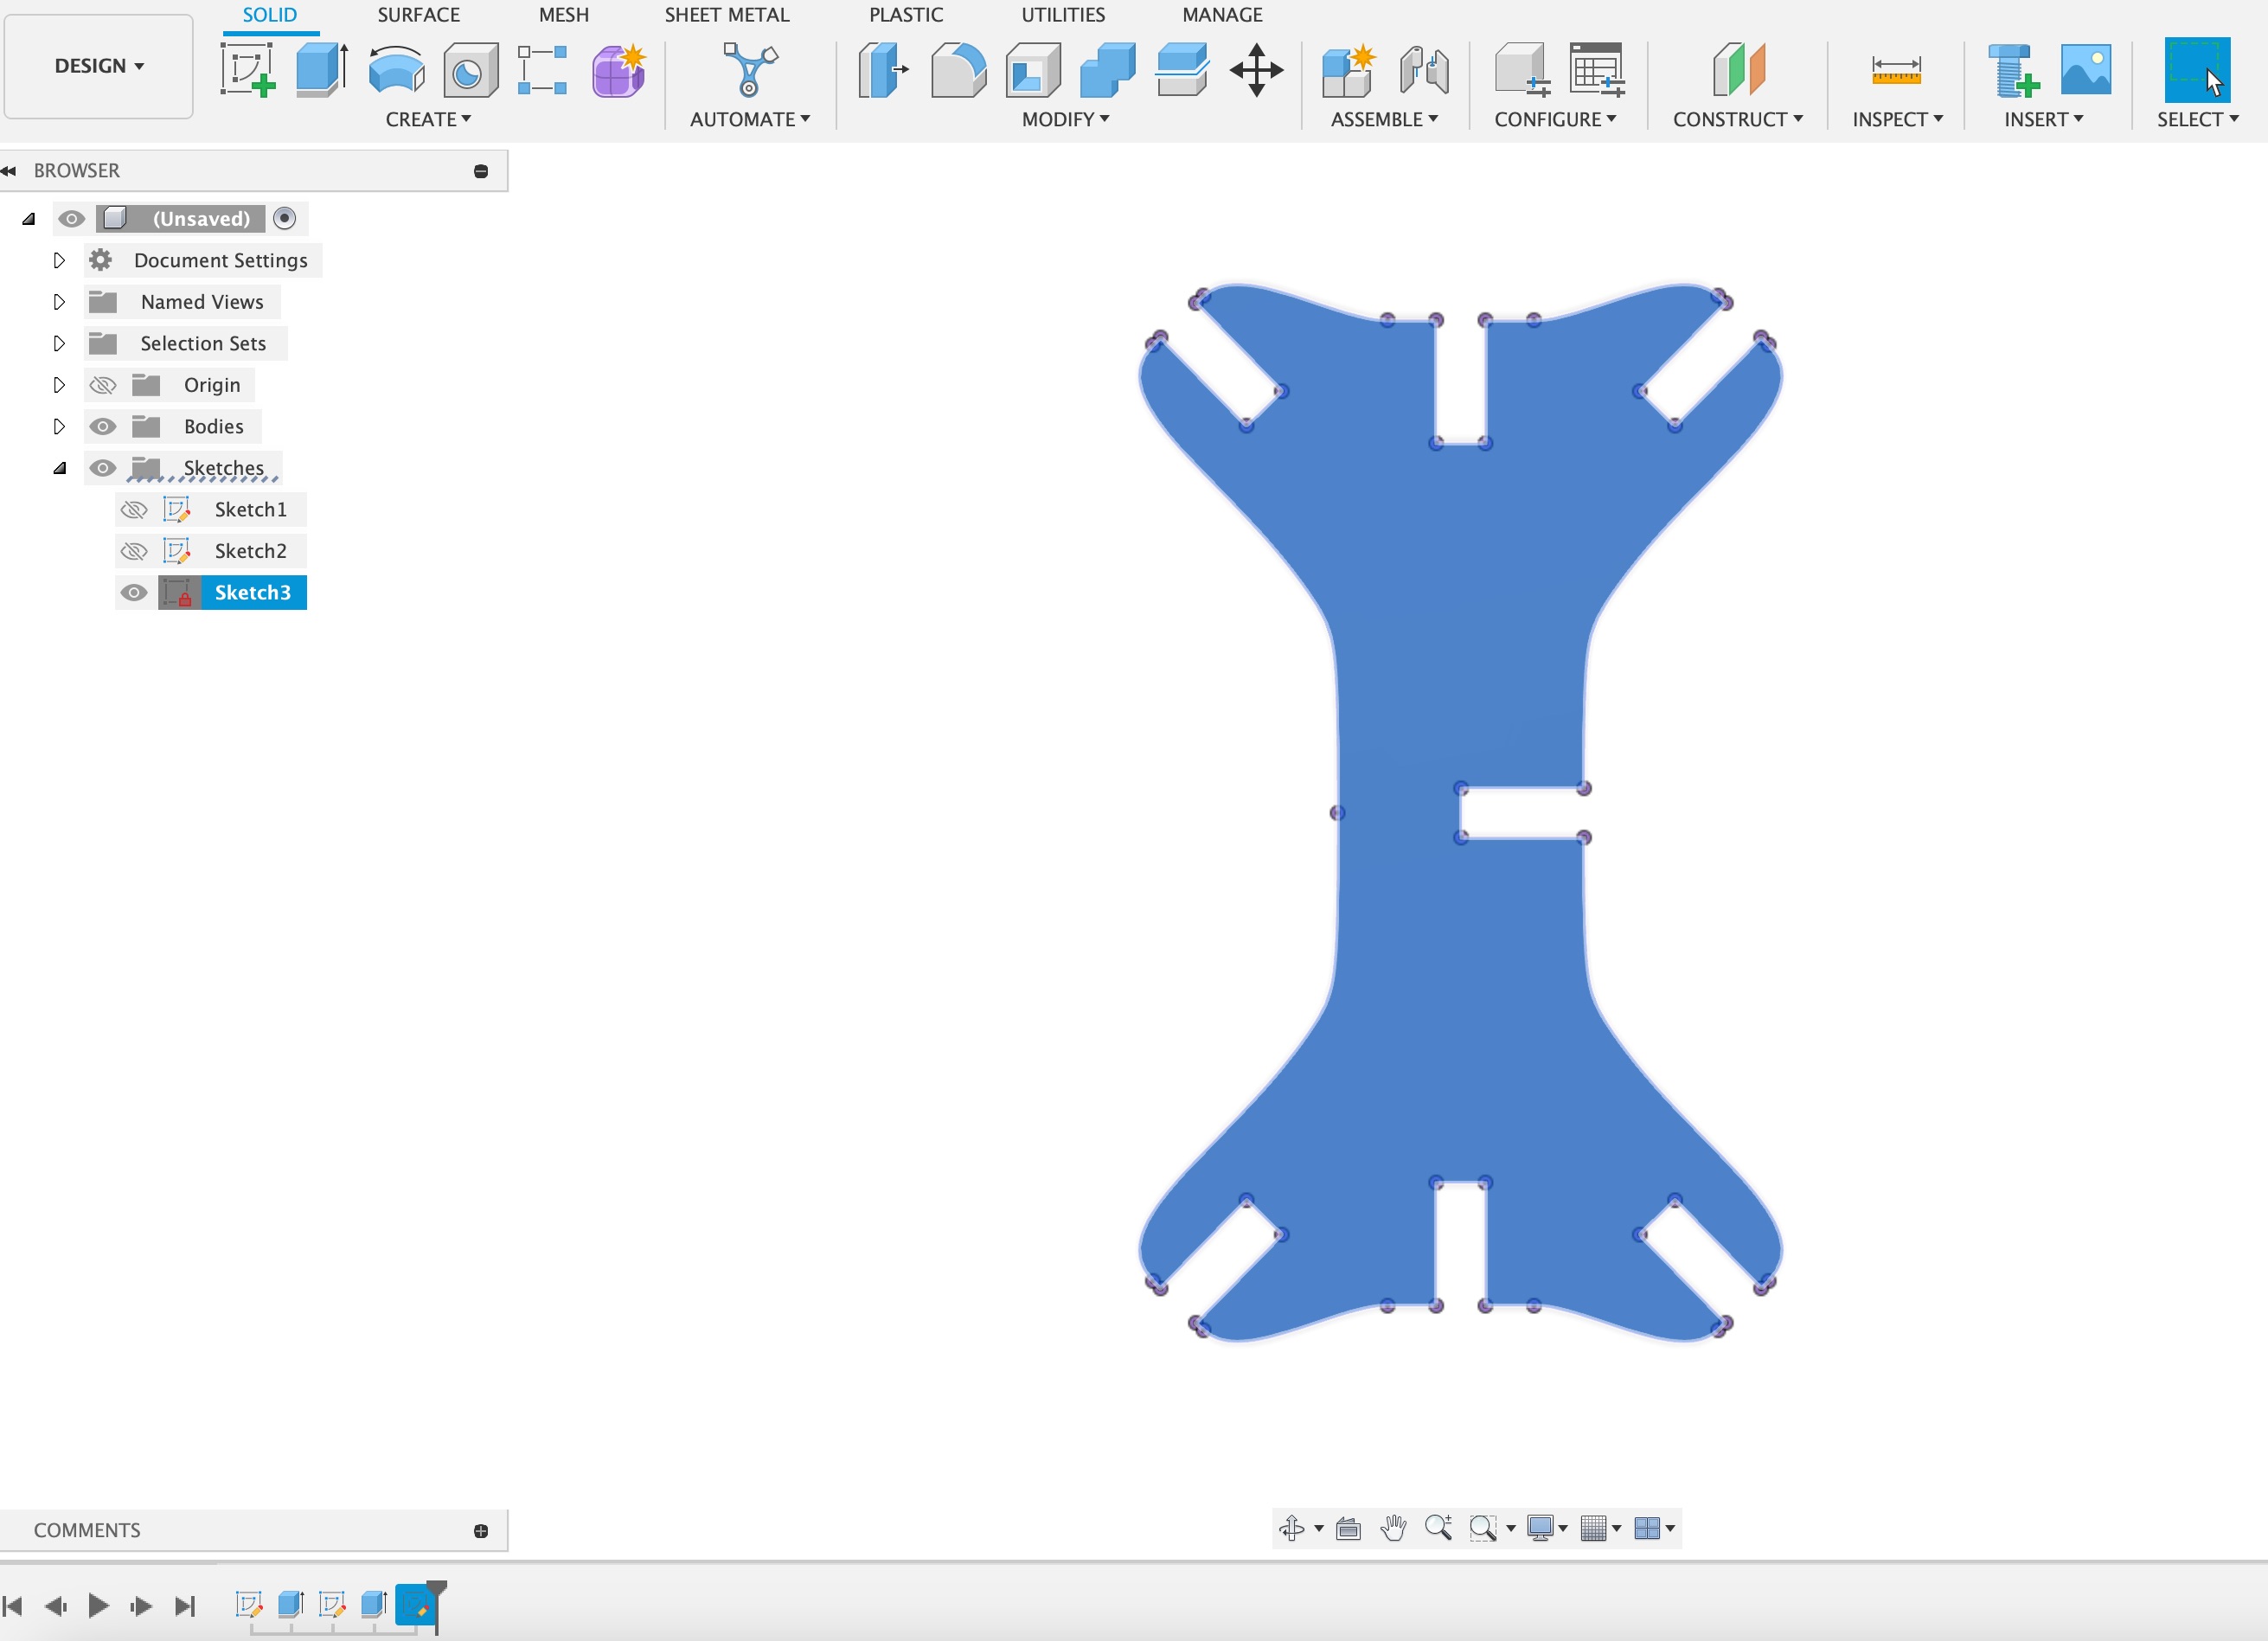
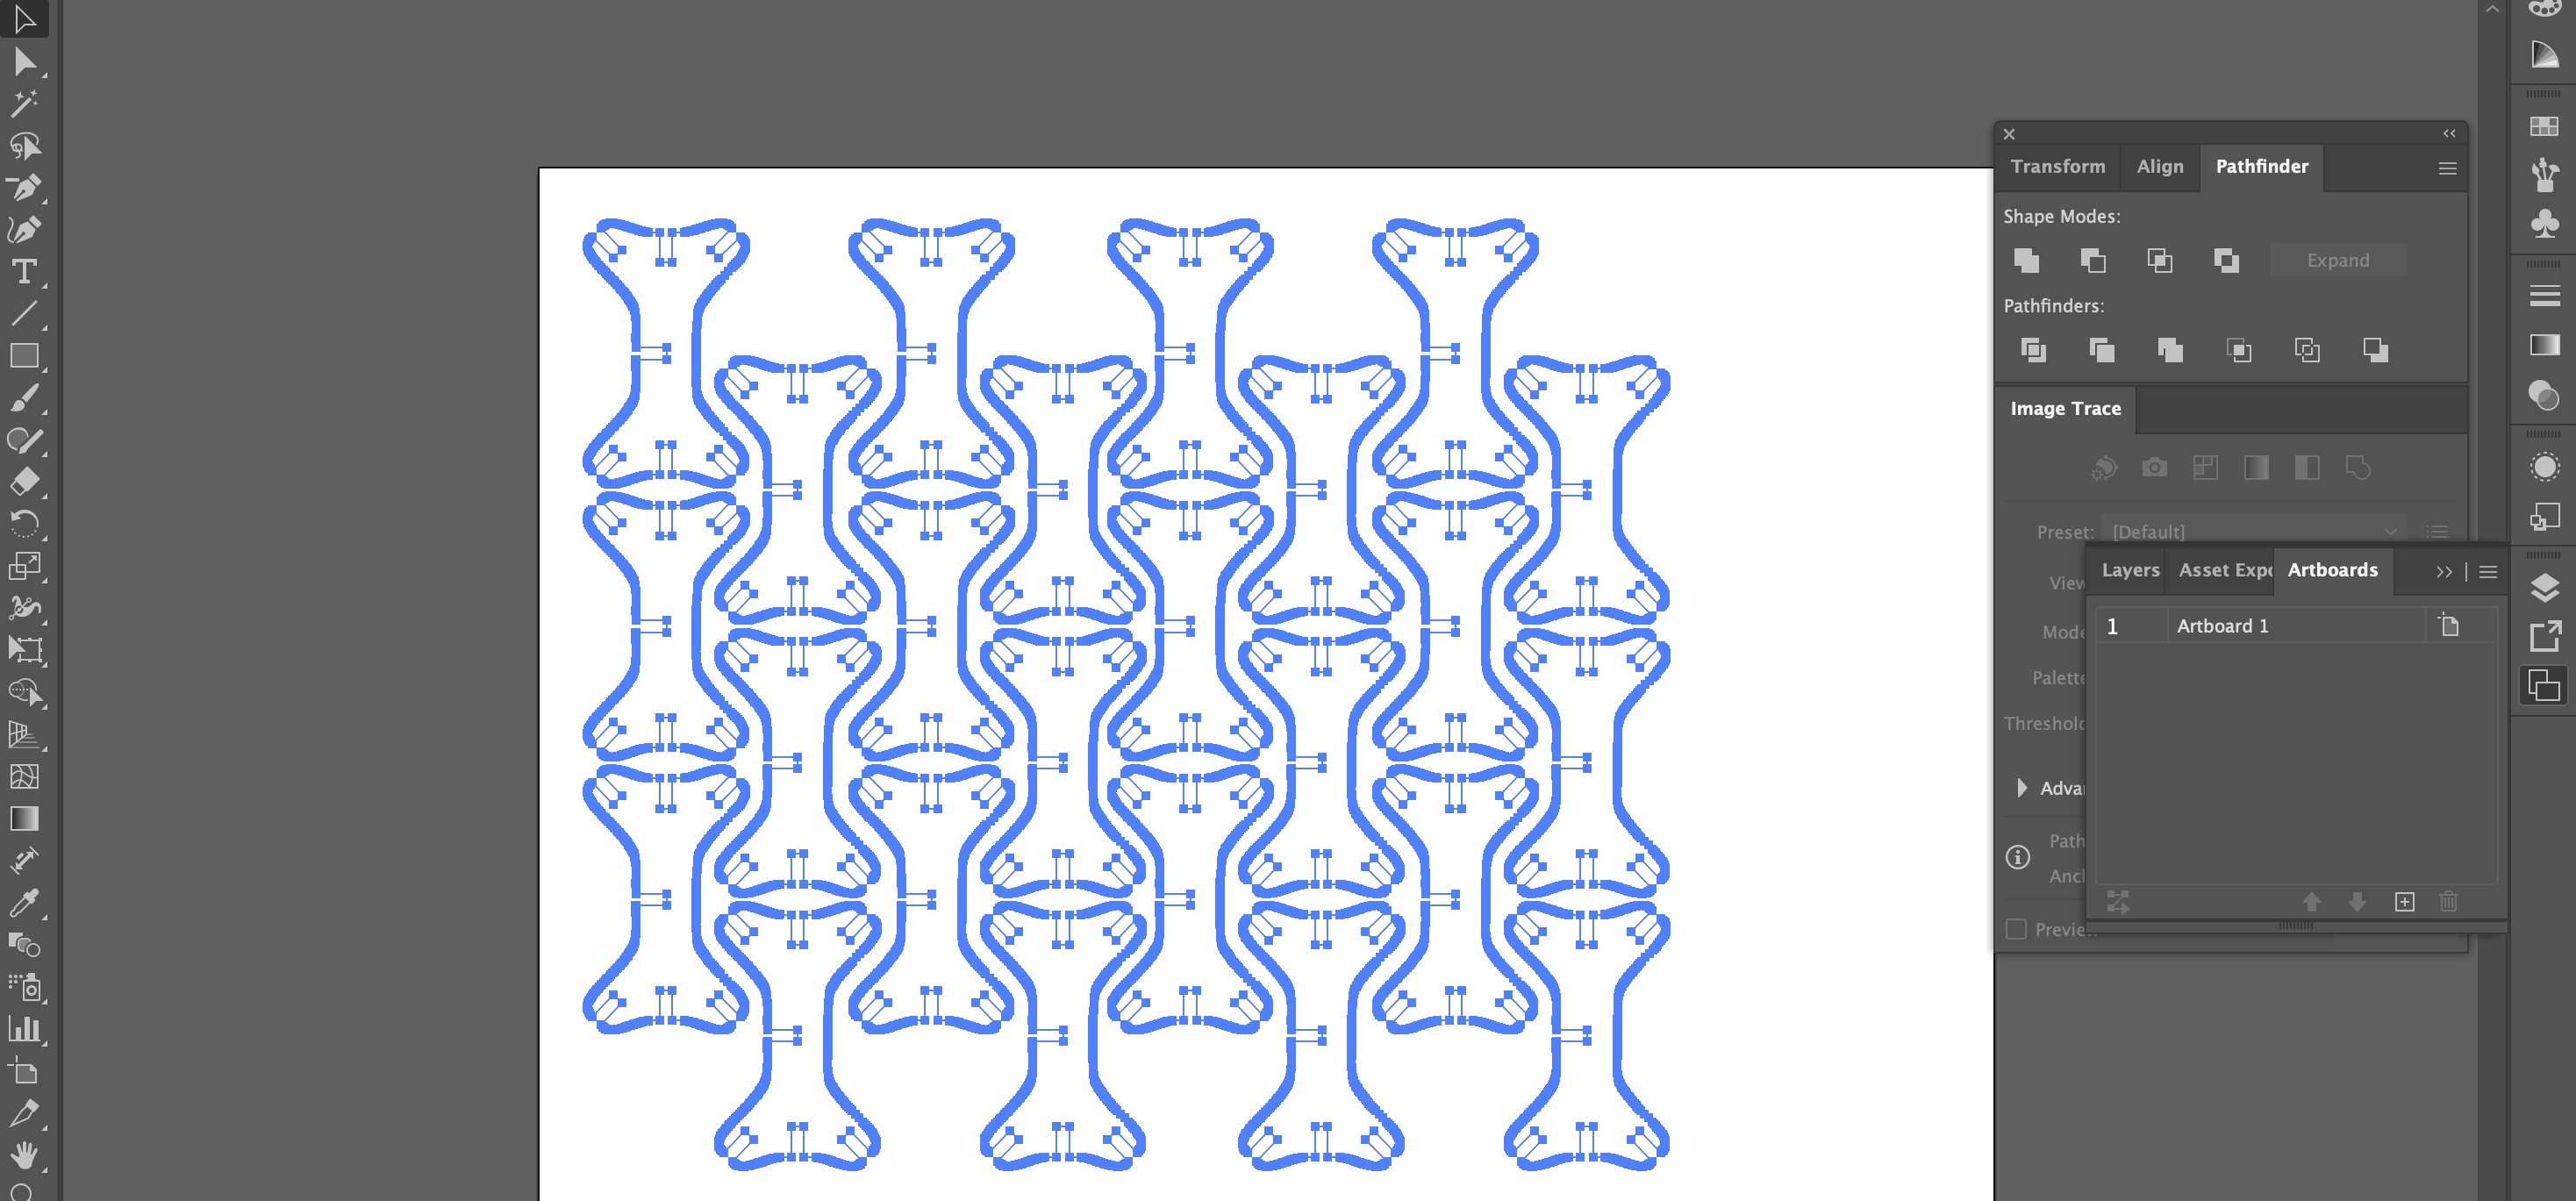
The slots were extruded with a material thickness parameter (thck) in order to make changes to the slot size quicker when making the tiles out of different materials with various thicknesses. I exported the sketch as a dxf and opened it in illustrator to make a nested file that would ensure the maximum amount of parts on the sheet material.
 Settings
I exported the nested file as a PDF and opened it in the full spectrum laser software. My intial prototypes were cut from corrugated cardboard sheet. I used 85% SPEED and 20% POWER to cut through the cardboard cleanly in one pass.
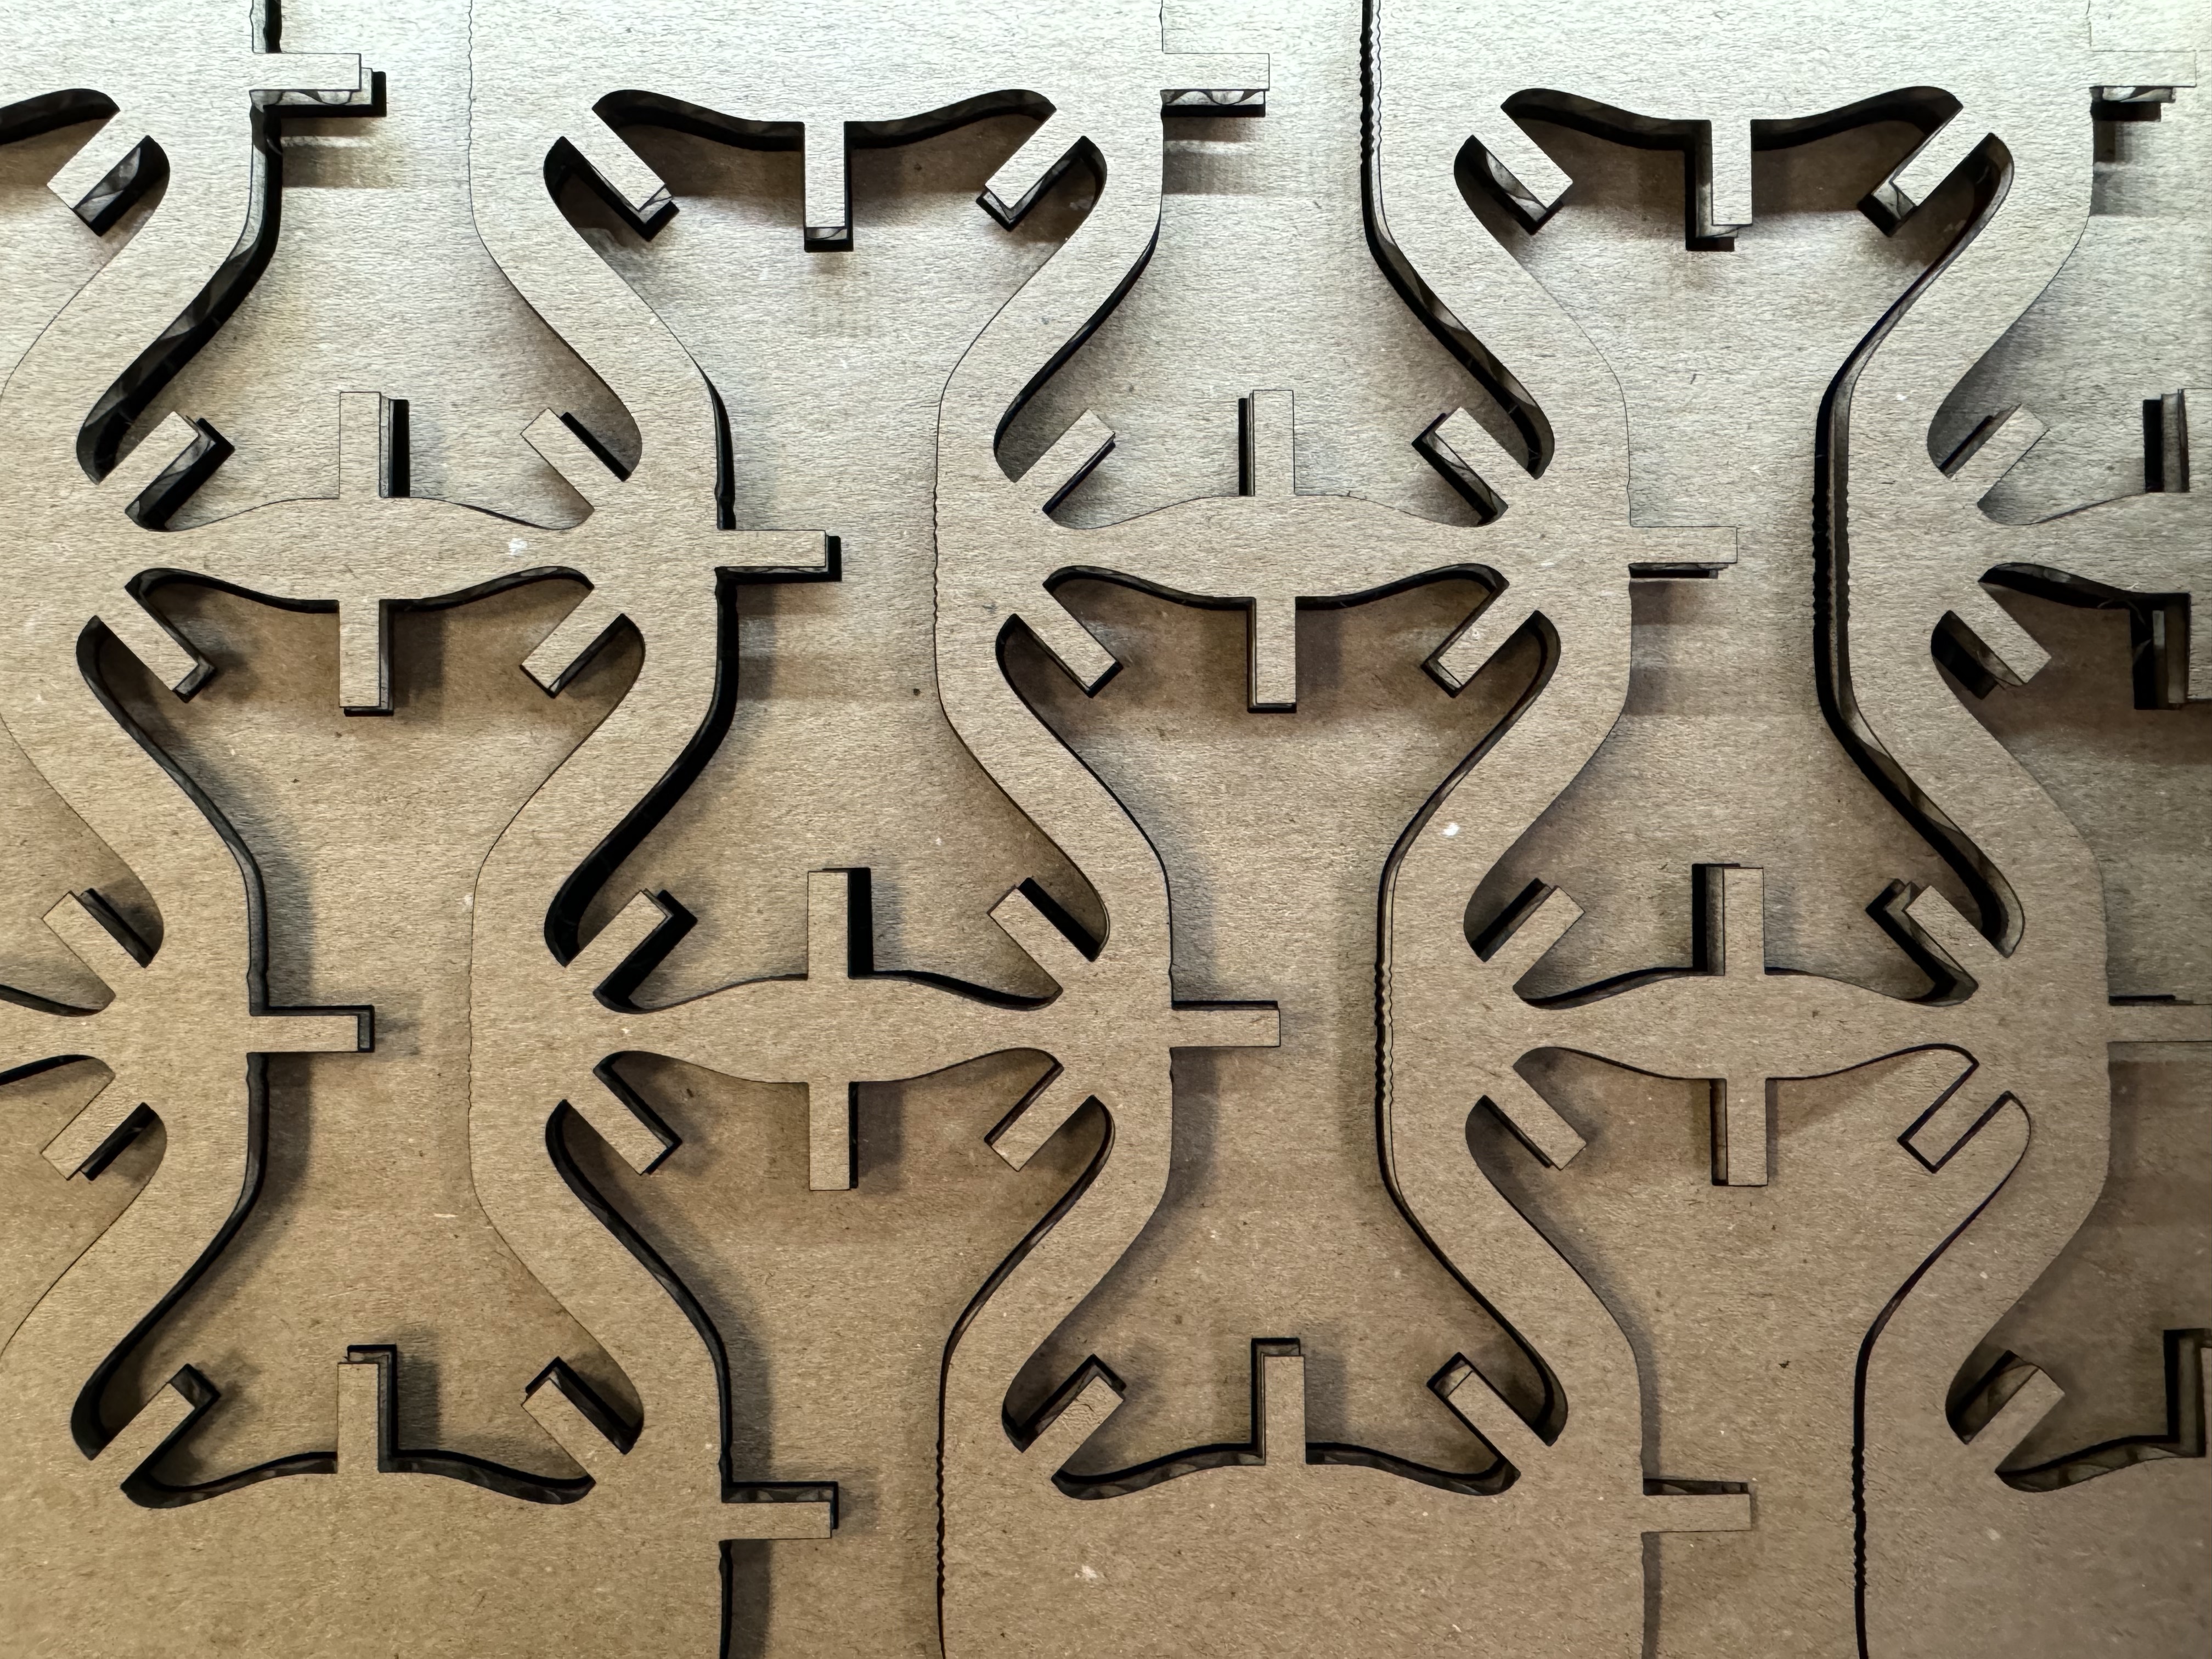
Once the parts were cut, I was able to test the various connections to reveal the types of structural forms possible with the different configurations of the same tile.
Files
Download Adobe Illustrator Vinyl Design File Download Press Fit Kit Fusion 3D File
Group Assignment
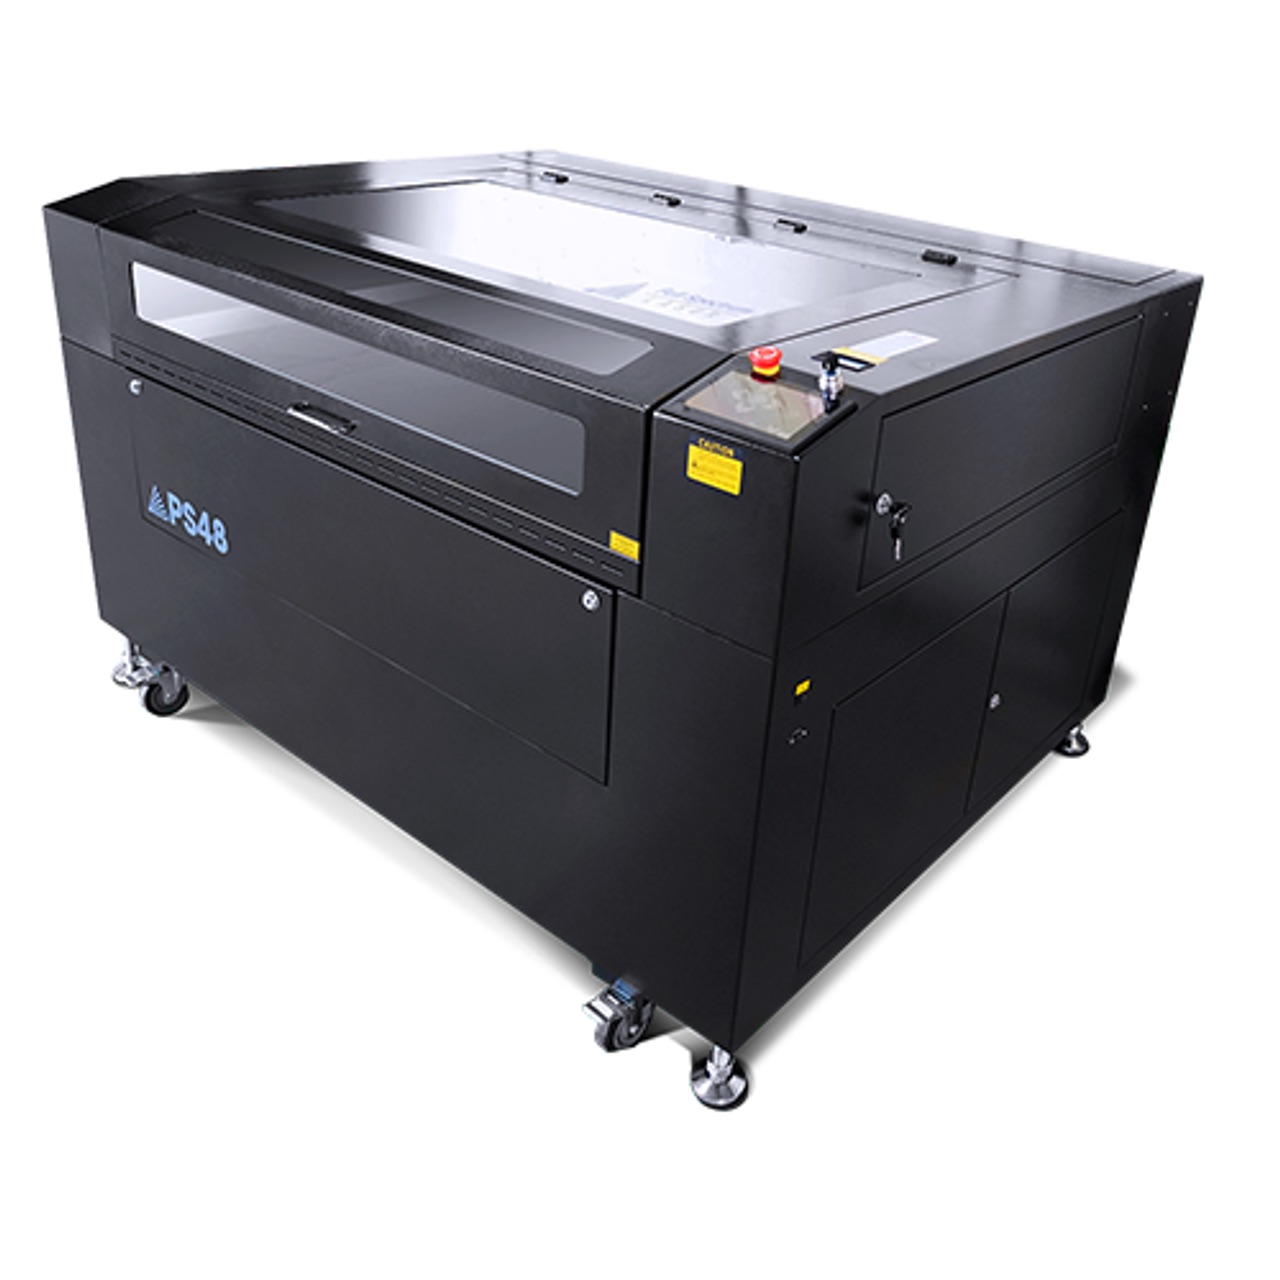
About the FSL PS48
The largest laser cutter at Moonlighter FabLab is the Full Spectrum Laser Pro Series 48 (FSL PS48).
The Cutting and Engraving bed is 36" x 48", has a pass-through for longer continuous materials, and has a adjustable z-height up to 14 inches. It can cut up to 1" acrylic.
The machine runs on RetinaEngrave software which is a web app generated by the machine and accessible through the IP Address it displays on its touch screen controls.
Getting Started with the Full Spectrum Laser PS48
Safety First:
1. Inspection: Always inspect the laser cutter for any damage before use. Don't operate if it's damaged.
2. Laser Tube: Remember, the laser tube is glass and very fragile.
3. No Modifications: Never modify or disassemble the laser system.
4. Cleanliness: Keep the laser system clean to prevent fire hazards.
5. Supervision: Never leave the laser system unattended during operation.
6. Ventilation: Always use a proper ventilation system to avoid inhaling harmful fumes.
7. Auxillary Systems: Ensure the water chiller, air compressor, and exhaust fan are all on before running a file.
Software Setup:
1. Connect to RetinaEngrave v3.0 on the browser in your computer using the ip address listed on the laser control screen.
Running Raster and Vector Tests
Raster Test:
1. Load Software: Start your laser and load RetinaEngrave v3.0.
2. Load Raster File: Select “File” then “Load Project from File...” to load the .re3 raster test file.
3. Position Material: Place your material in the laser. Use the run perimeter function in RE3 to ensure proper positioning, or use the camera if available.
4. Prepare for Job: Close the lid, ensure the water and air assist are running, and start the job. The settings are pre-programmed, so the laser will adjust as it moves between squares. Disable vector sorting in the settings.
5. Examine Results: Once completed, examine the test results to determine the best settings for your material. Log this information in the Material Test Log.
Vector Test:
1. Load Software: Start your laser and load RetinaEngrave v3.0.
2. Load Vector File: Select “File” then “Load Project from File...” to load the .re3 vector test file.
3. Position Material: Place your material in the laser. Use the run perimeter function in RE3 to ensure proper positioning, or use the camera if available.
4. Prepare for Job: Close the lid, ensure the water and air assist are running, and start the job. The settings are pre-programmed, so the laser will adjust as it moves between squares. Disable vector sorting in the settings.
5. Examine Results: Look at the front side of the material to find the setting that cuts through with minimal charring. Flip the material to check for minimal flashback. If undecided, choose the highest speed and lowest power combination.
Tips for Optimal Use
1. Safety Gear: Always wear appropriate safety gear, including safety glasses.
2. Regular Maintenance: Follow the manual's guidelines for regular maintenance to keep your laser in top shape.
3. Material Handling: Only use materials recommended for laser cutting and engraving. Avoid PVC and vinyl due to toxic fumes.
4. Fire Preparedness: Keep a CO2 fire extinguisher, and a fire blanket nearby, and never leave the machine unattended.
Kerf Test
1. After testing different materials, we found a variation of kerf width ranging from .01mm to .08mm depending on proper focus, material type, and material thickness.
By following these steps and tips, you'll ensure a safe and efficient experience with your Full Spectrum Laser PS48. Happy lasering!
Laser Cutter Tests
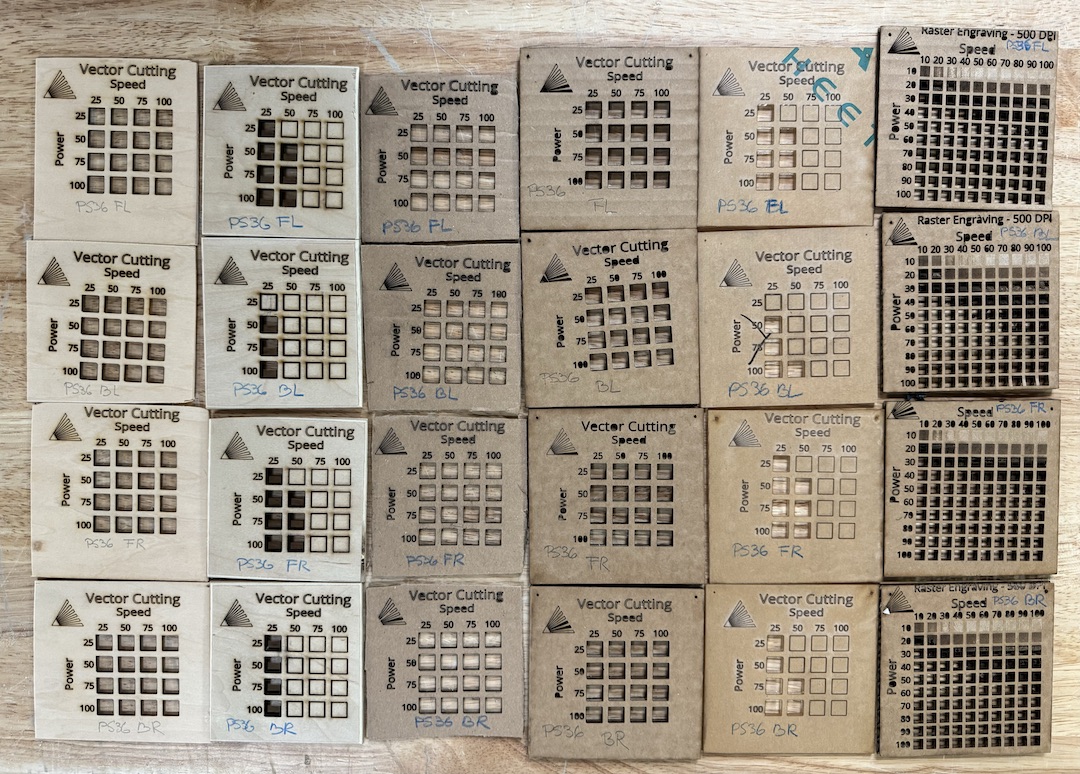
We tested the vector cutting in a grid array that varied the Power intensity from 25 to 100 in 25 percent increments in the Y axis, and the speed from 25 to 100 in 25% increments in the X axis. We ran these tests on 1/8" basswood, 1/4" plywood, 1/16" corrugated cardboard, 1/4" corrugated cardboard, and 1/4" acrylic. We then ran a raster engraving test with the same power and speed variability on the Y and X axis, but increased it to show it in increments of 10% so we had a more preceise array of intensities.
Copyright 2024 Thomas Pupo - Creative Commons Attribution Non Commercial. Source code hosted at fabcloud/fabacademy/2024/thomas-pupo