
Week 16: Wildcard Week
Concrete & Textile Composites
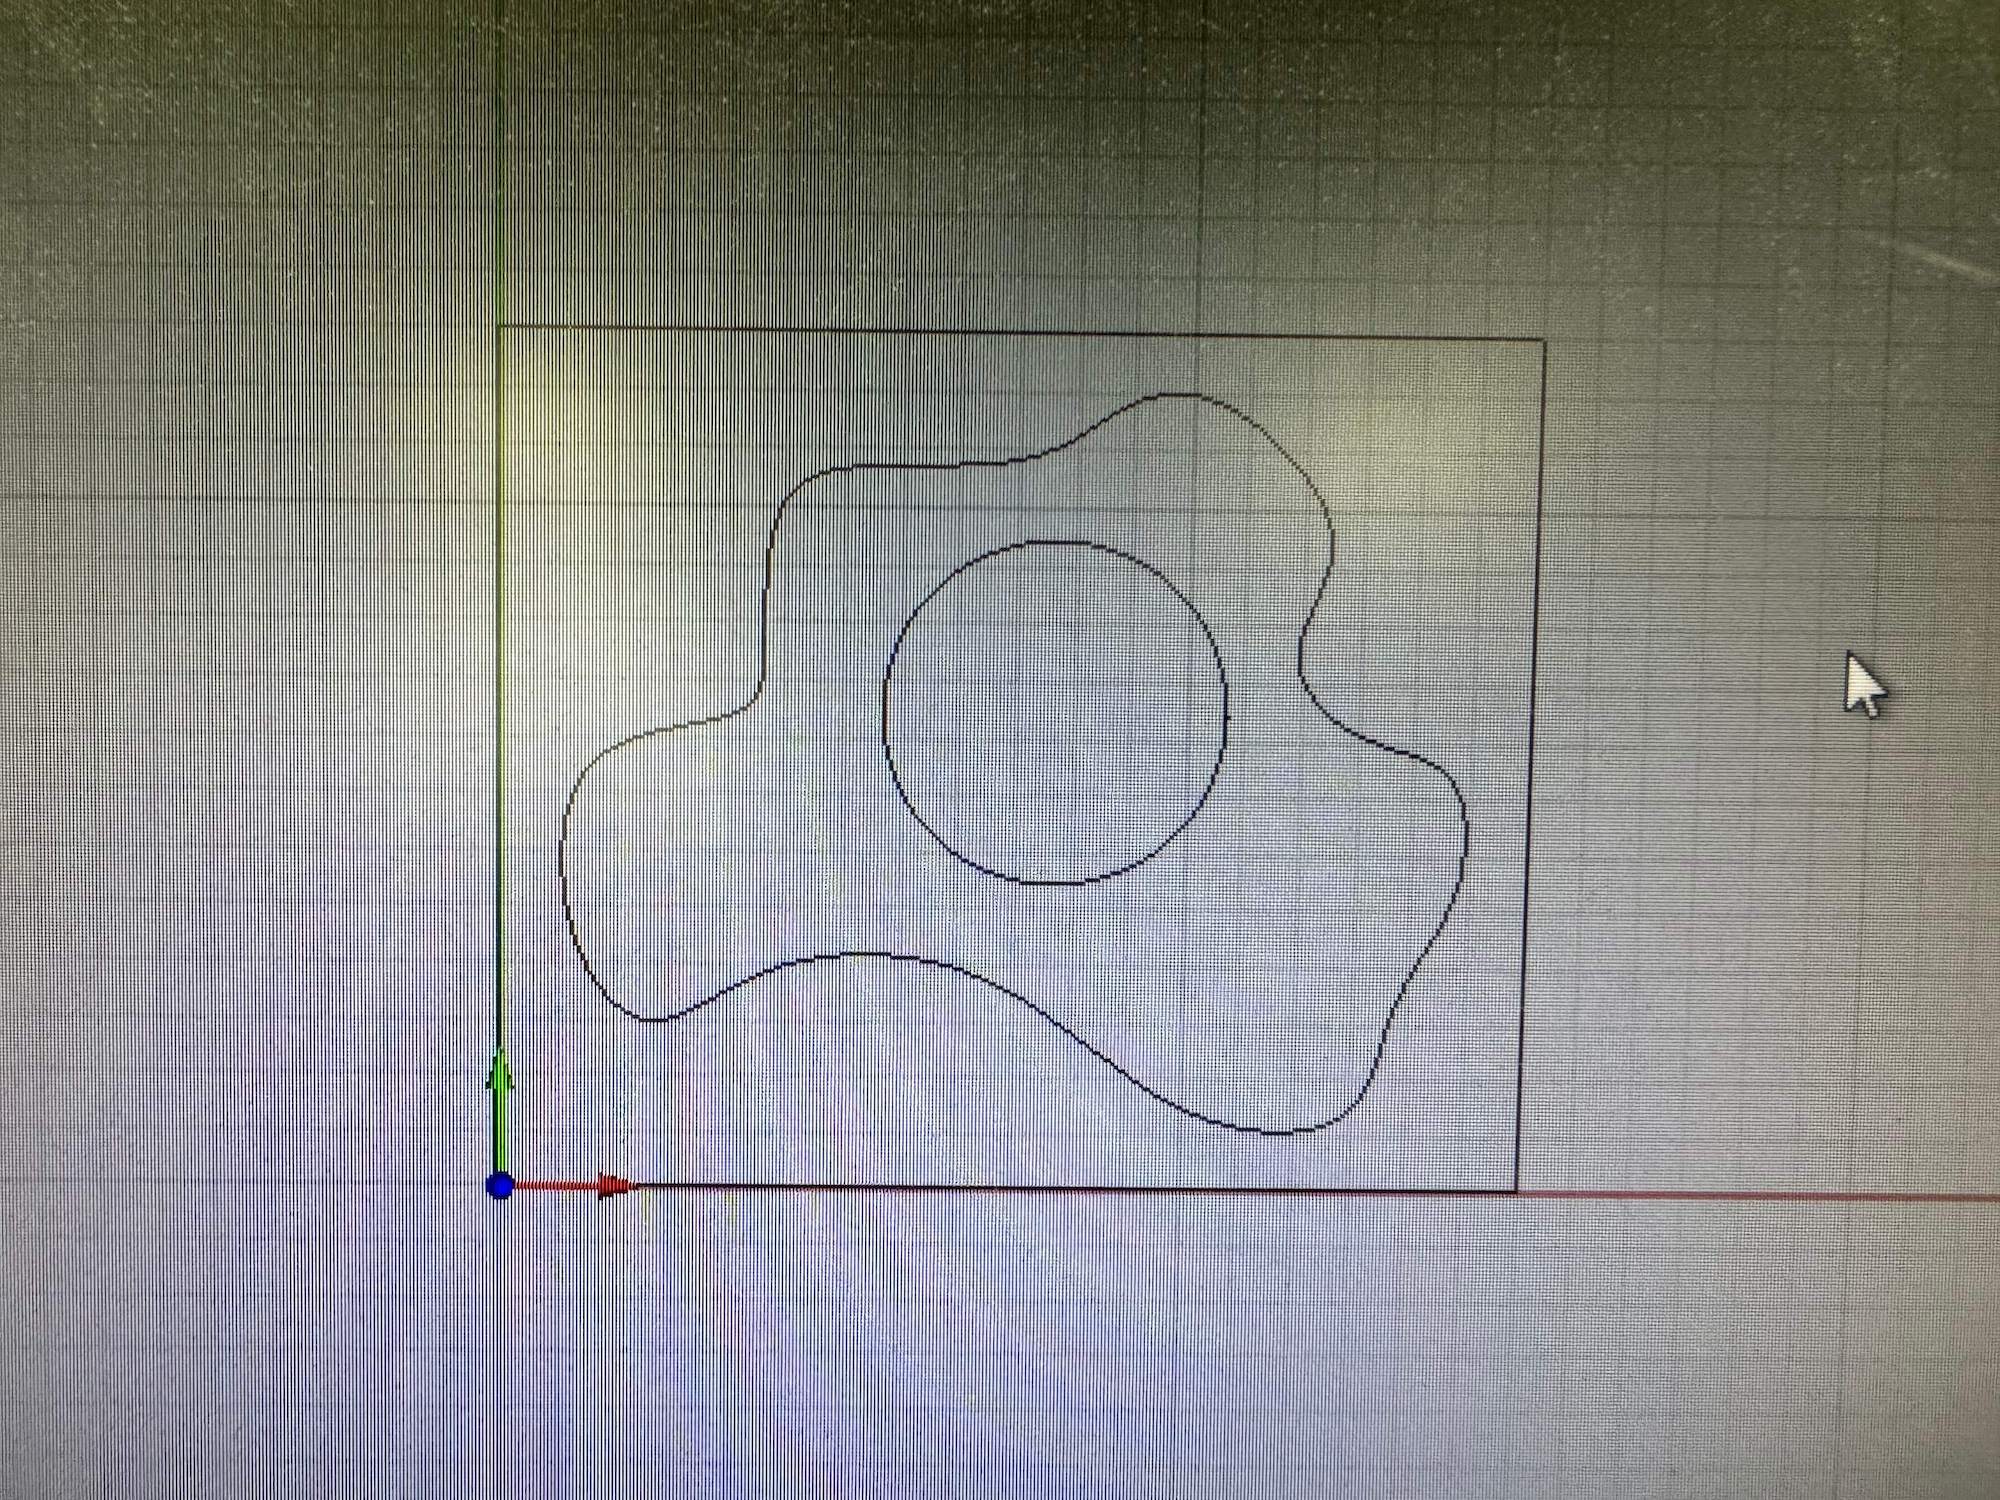
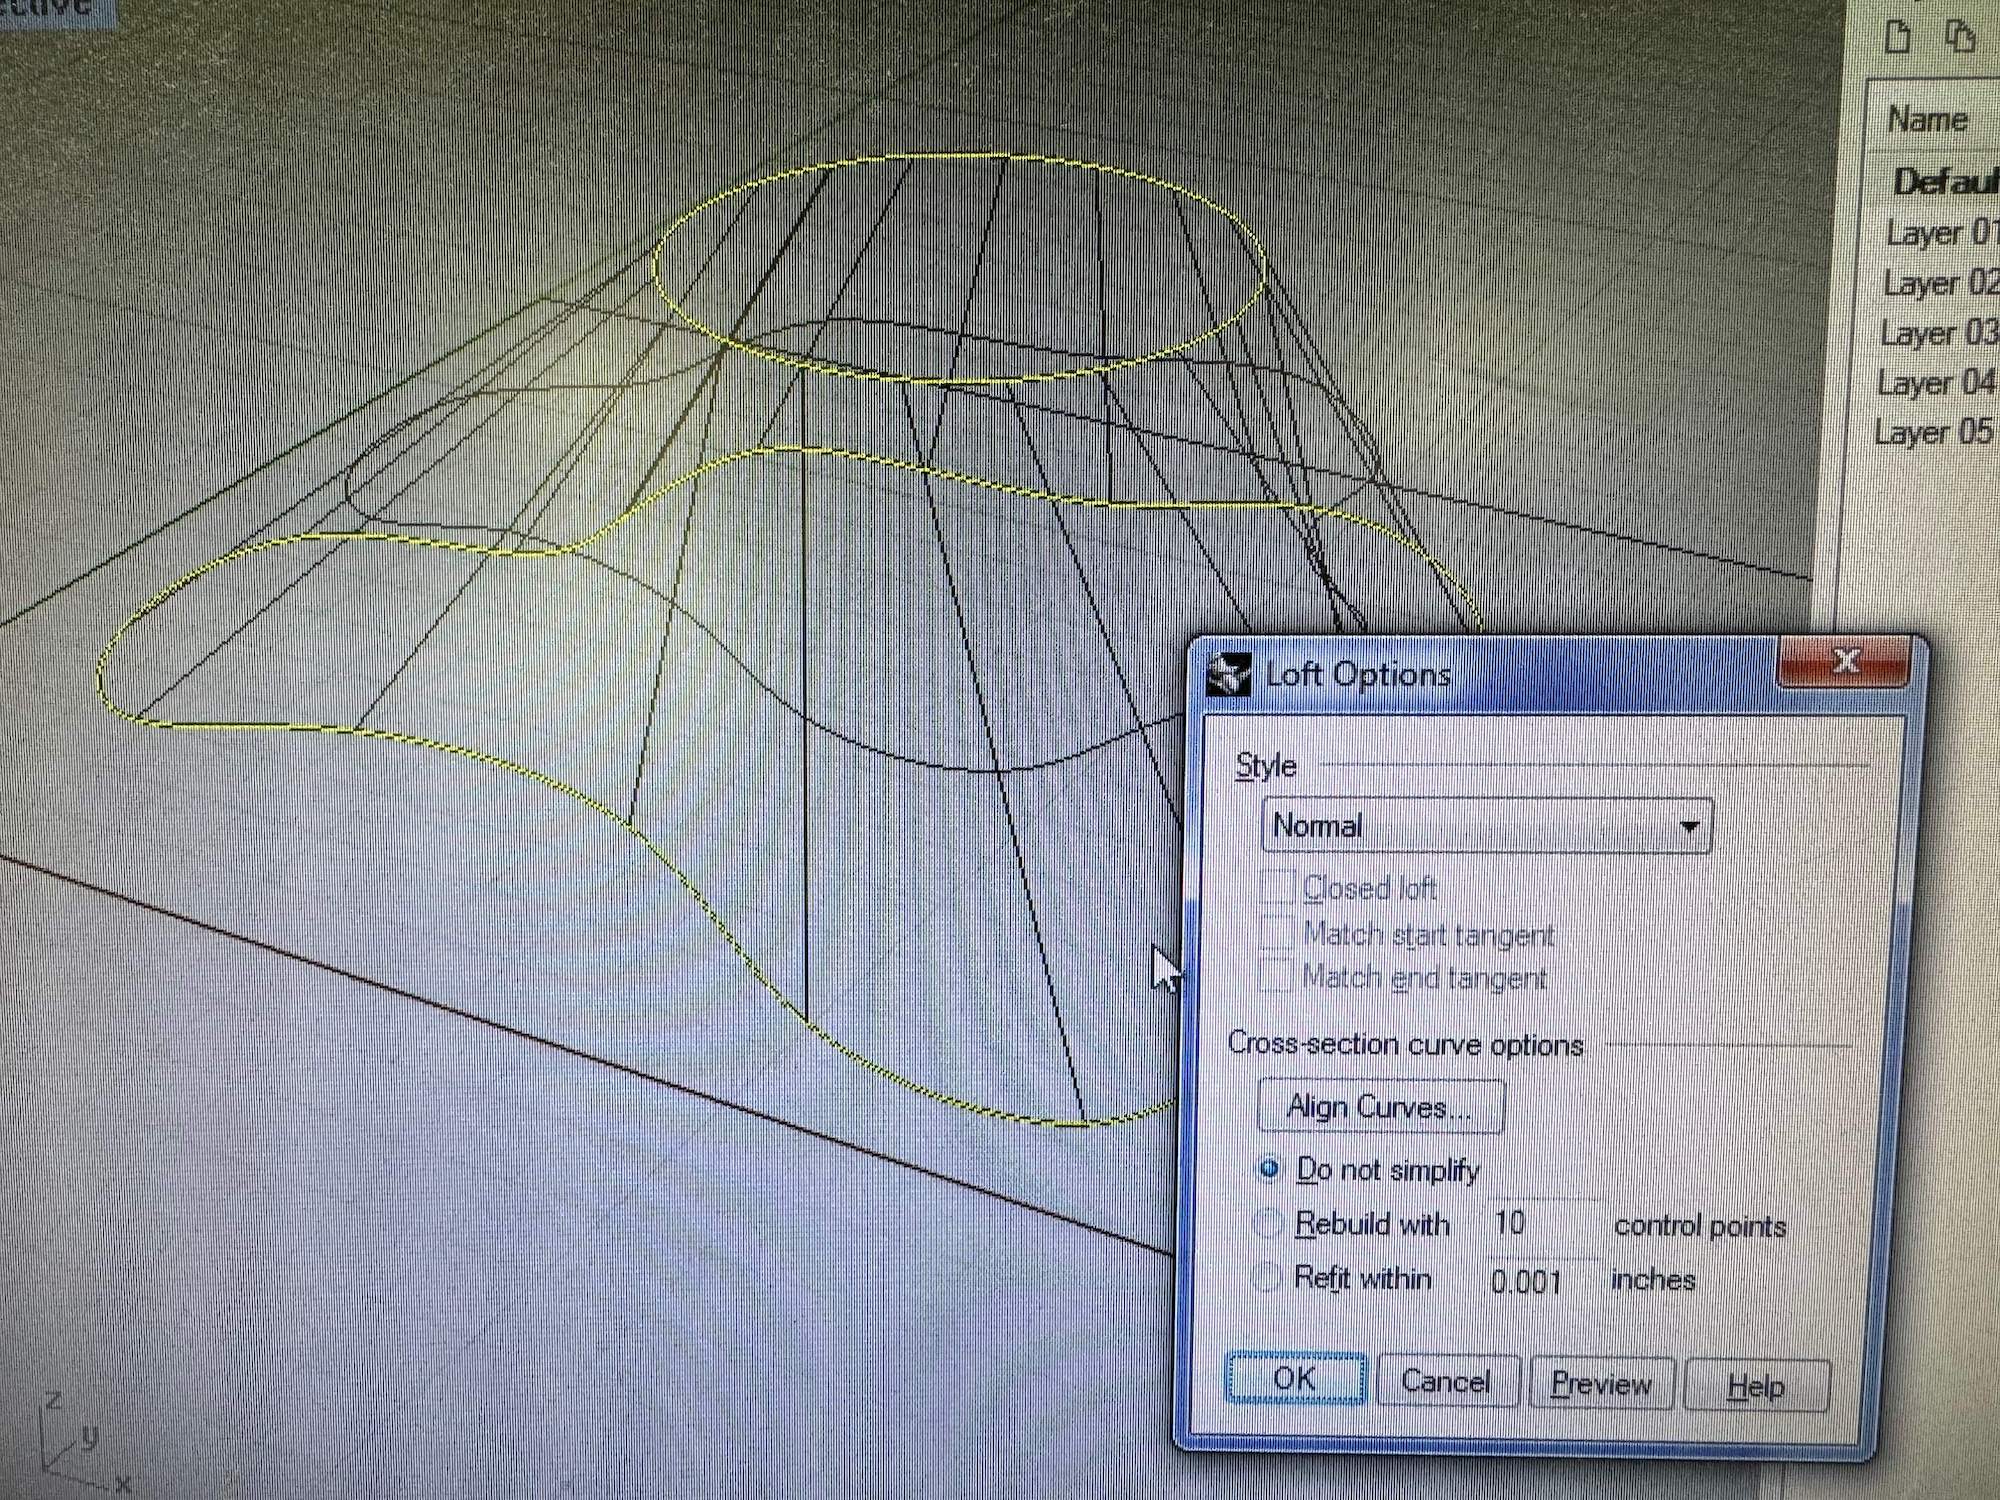
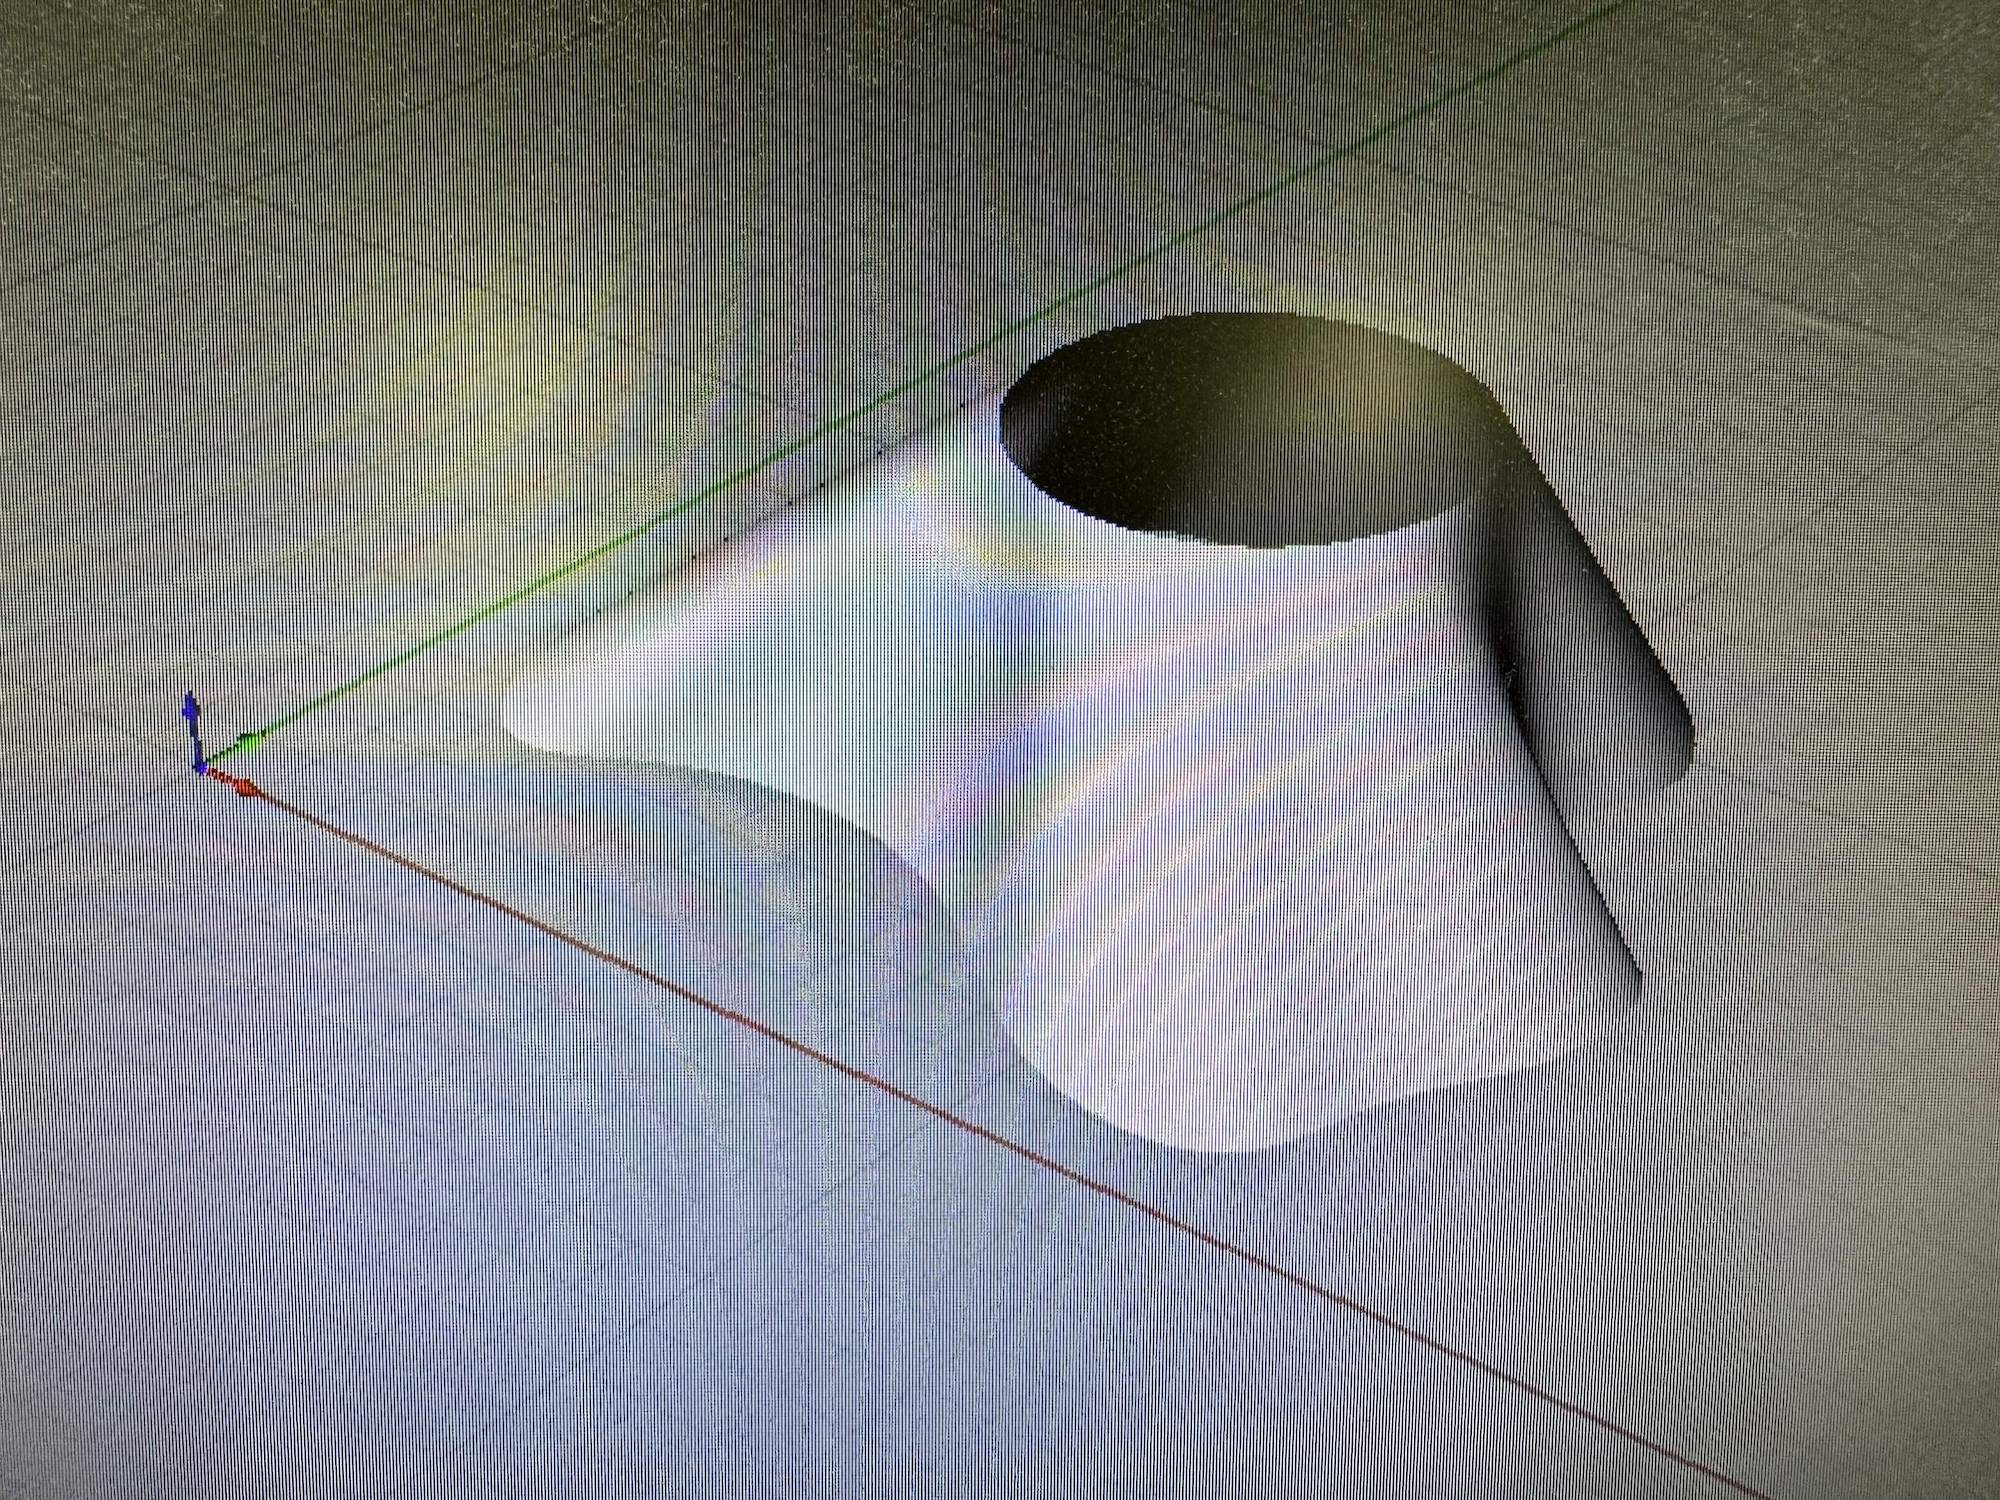
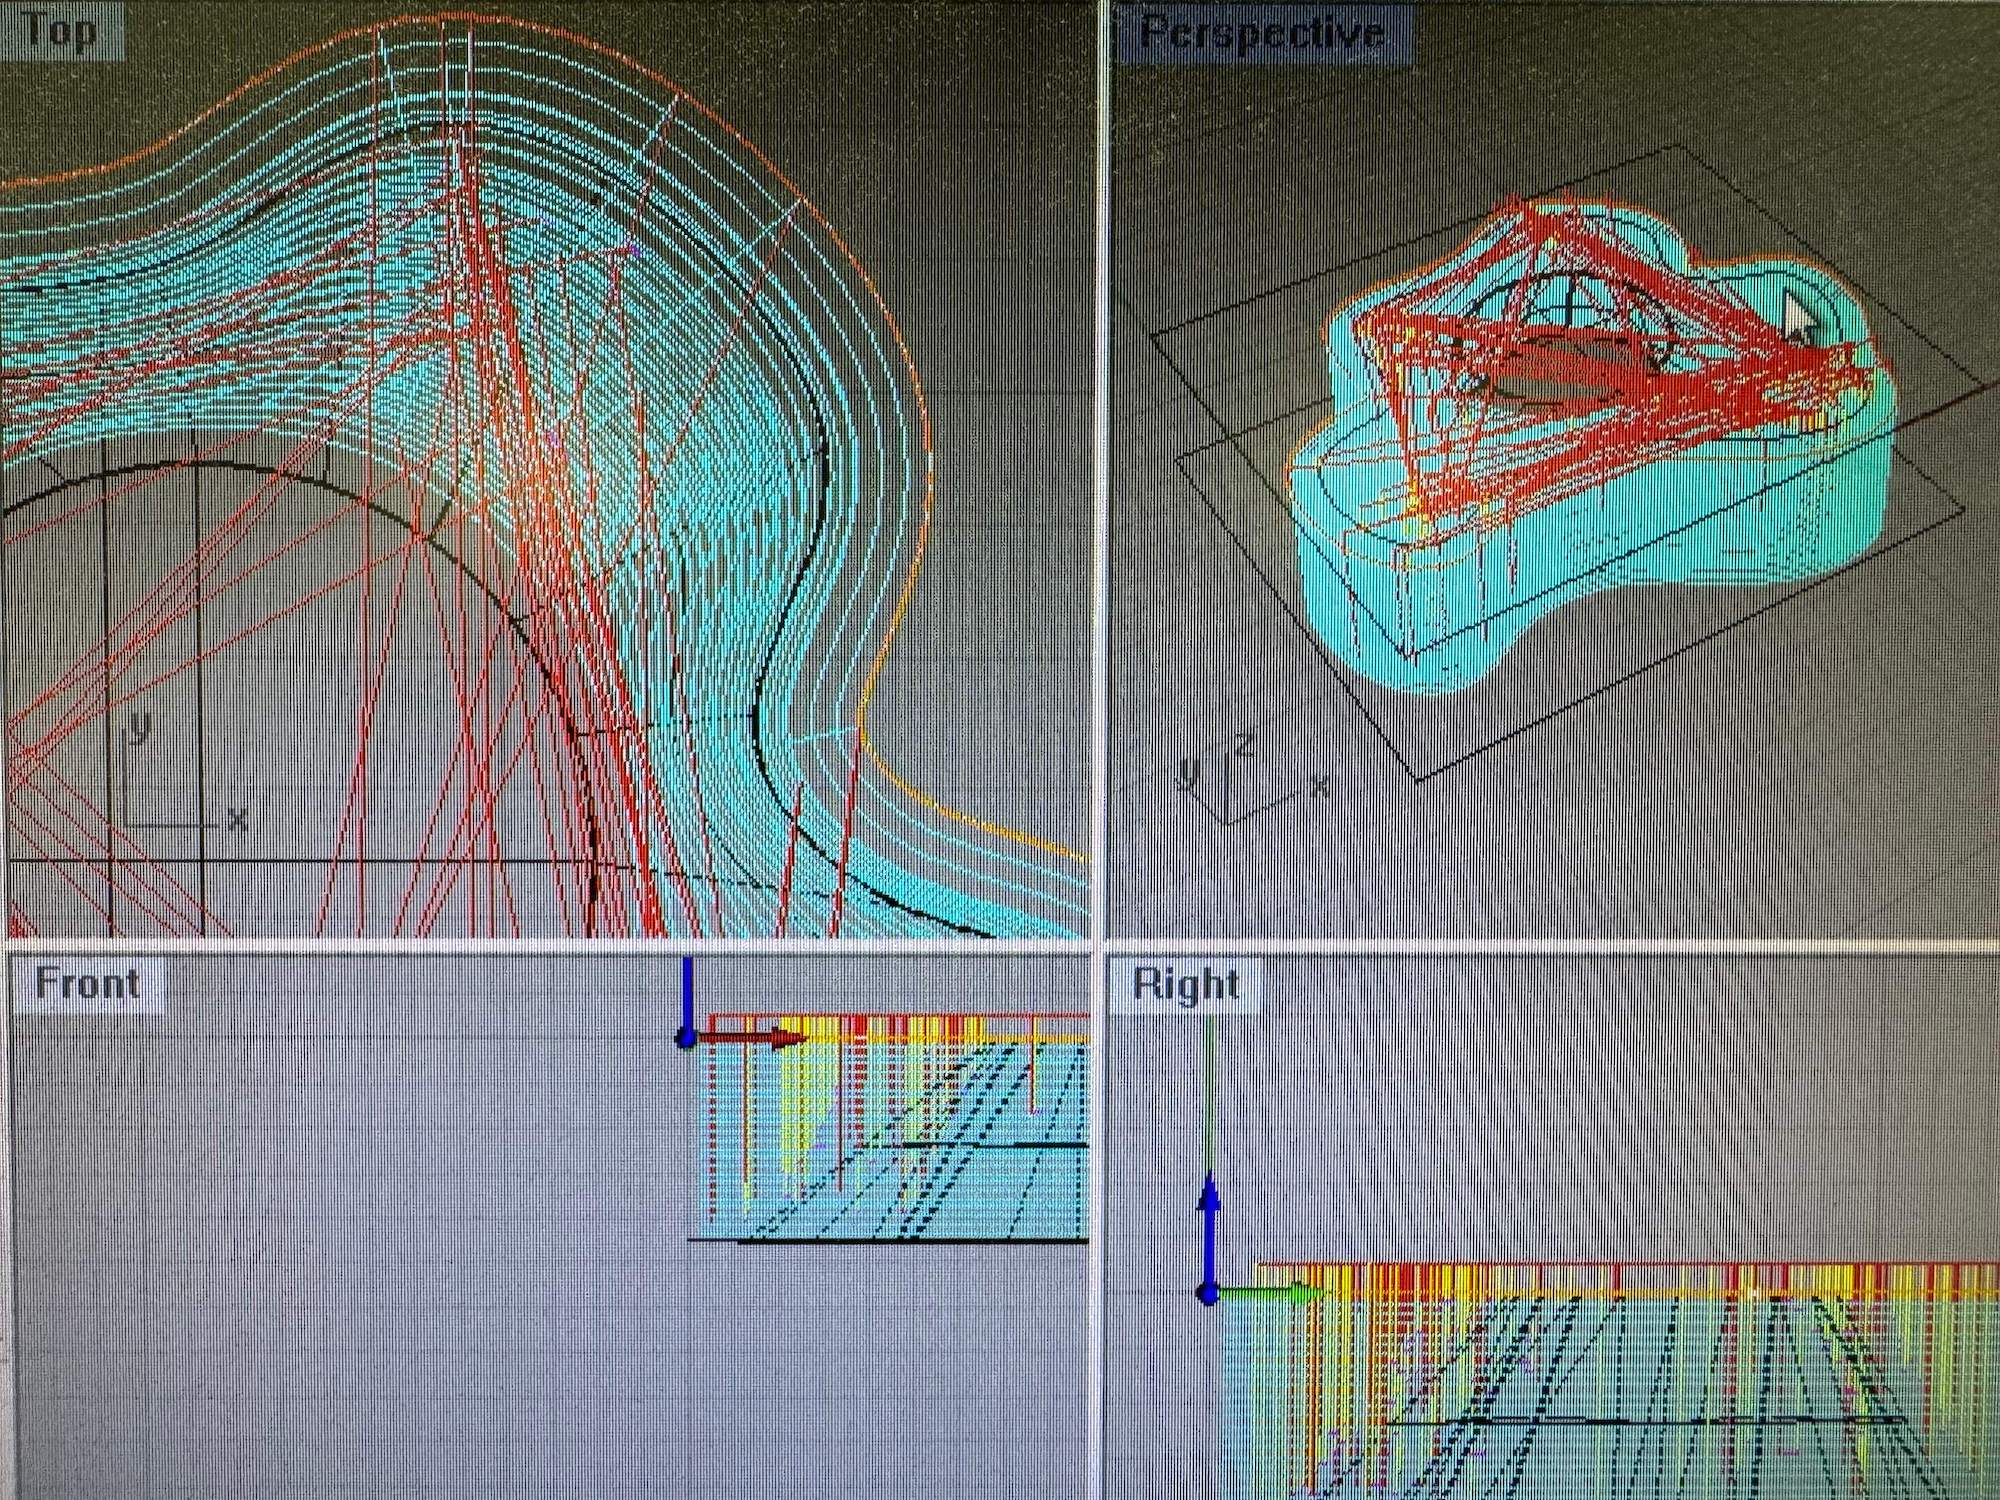
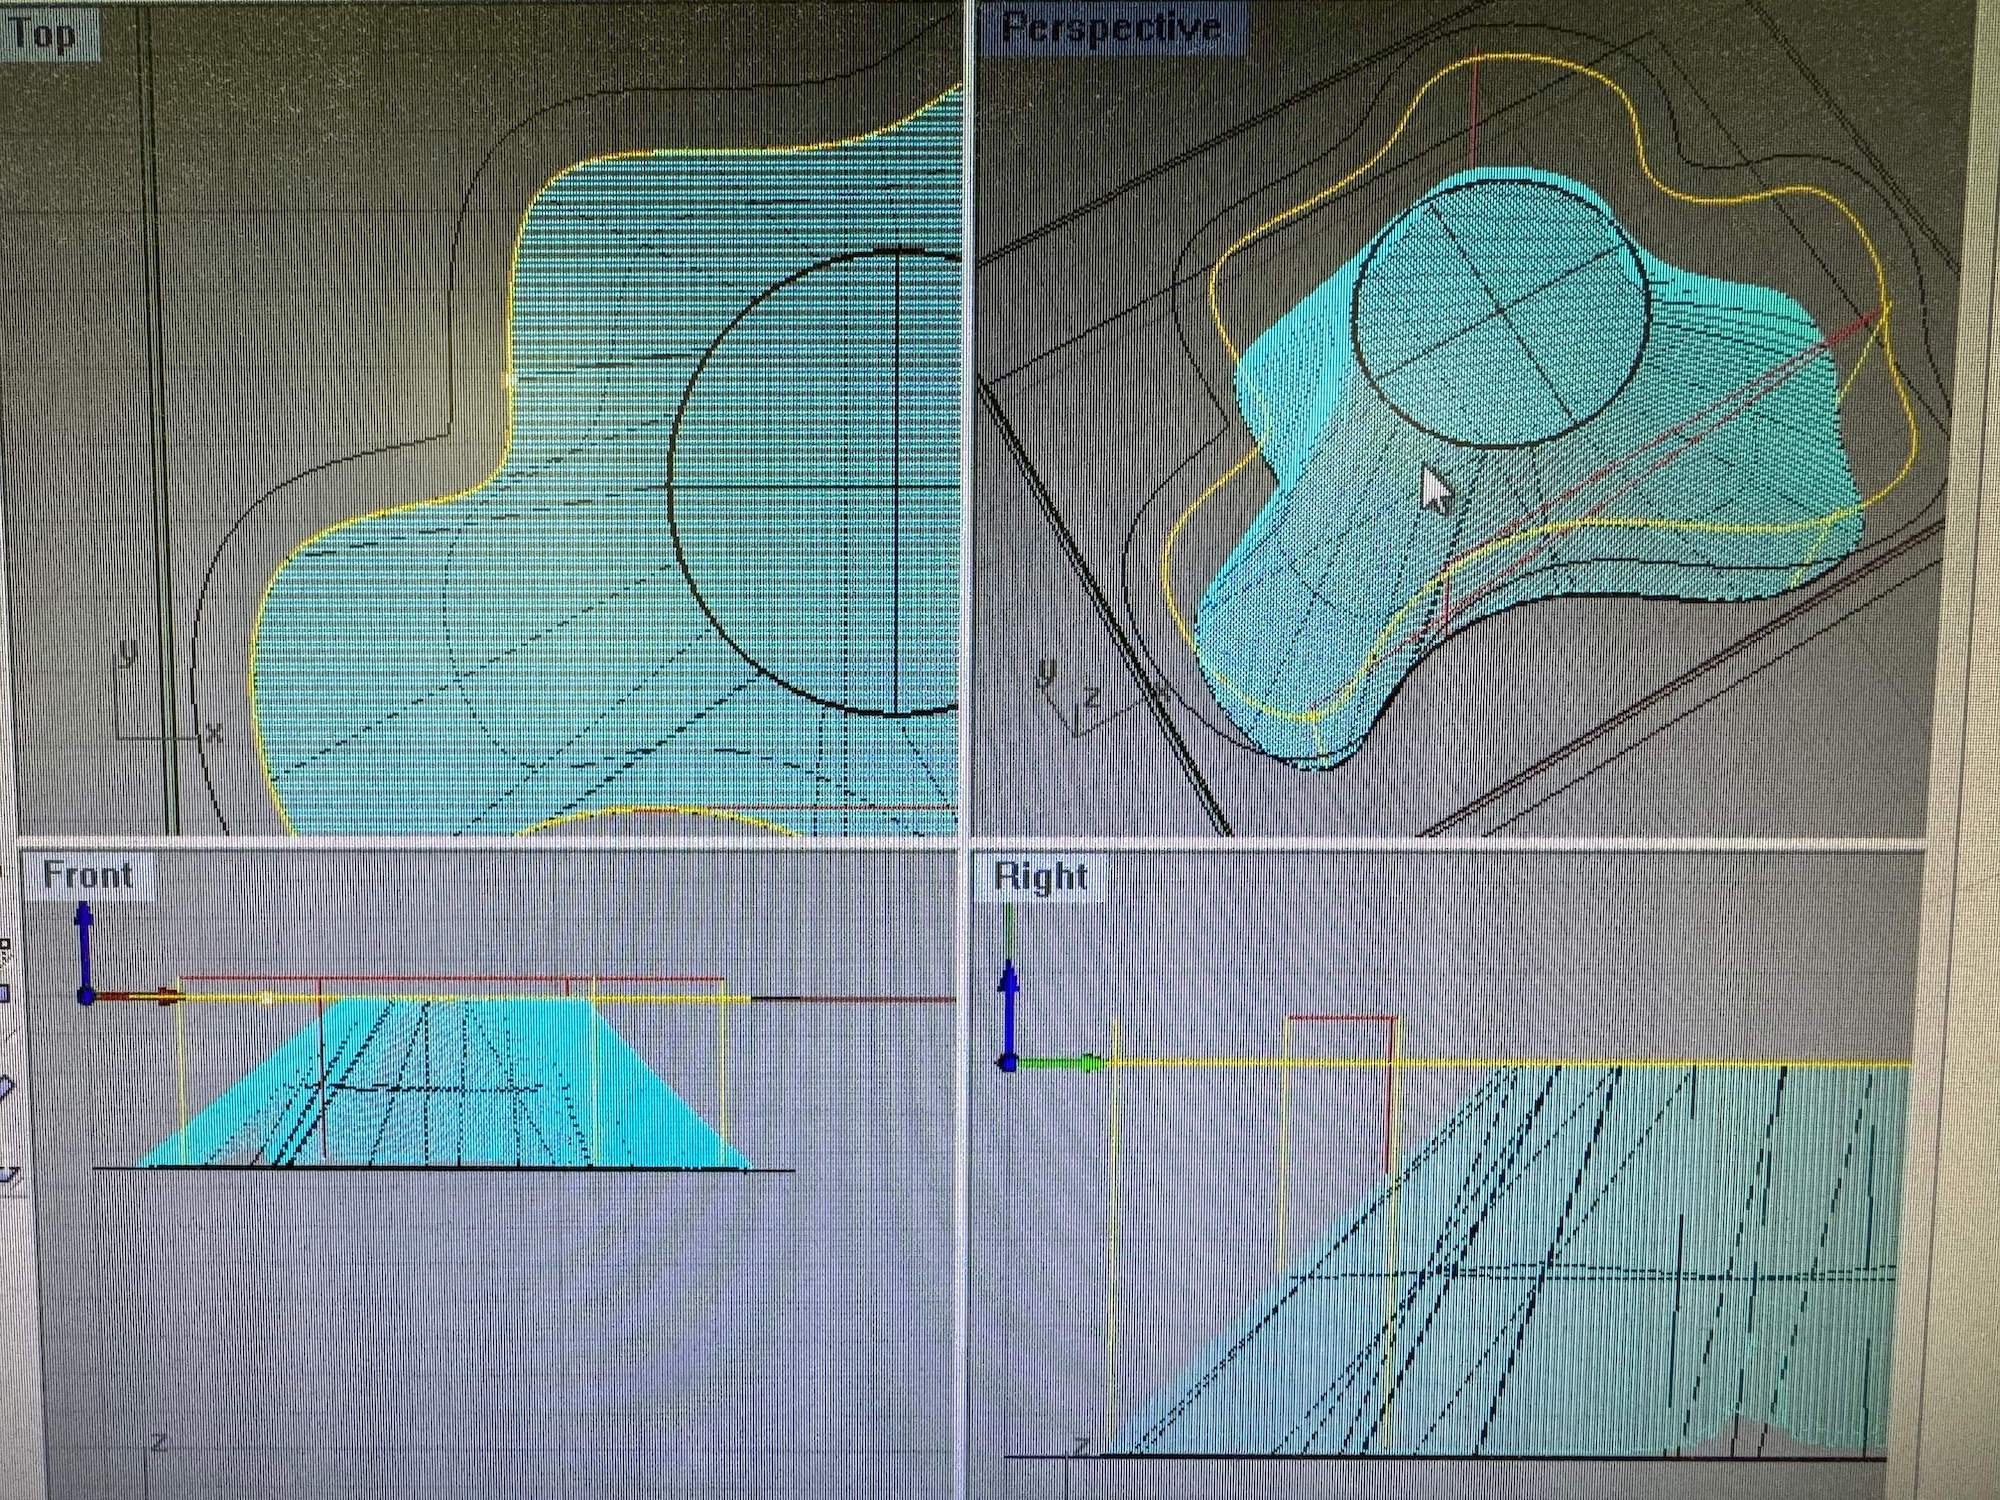
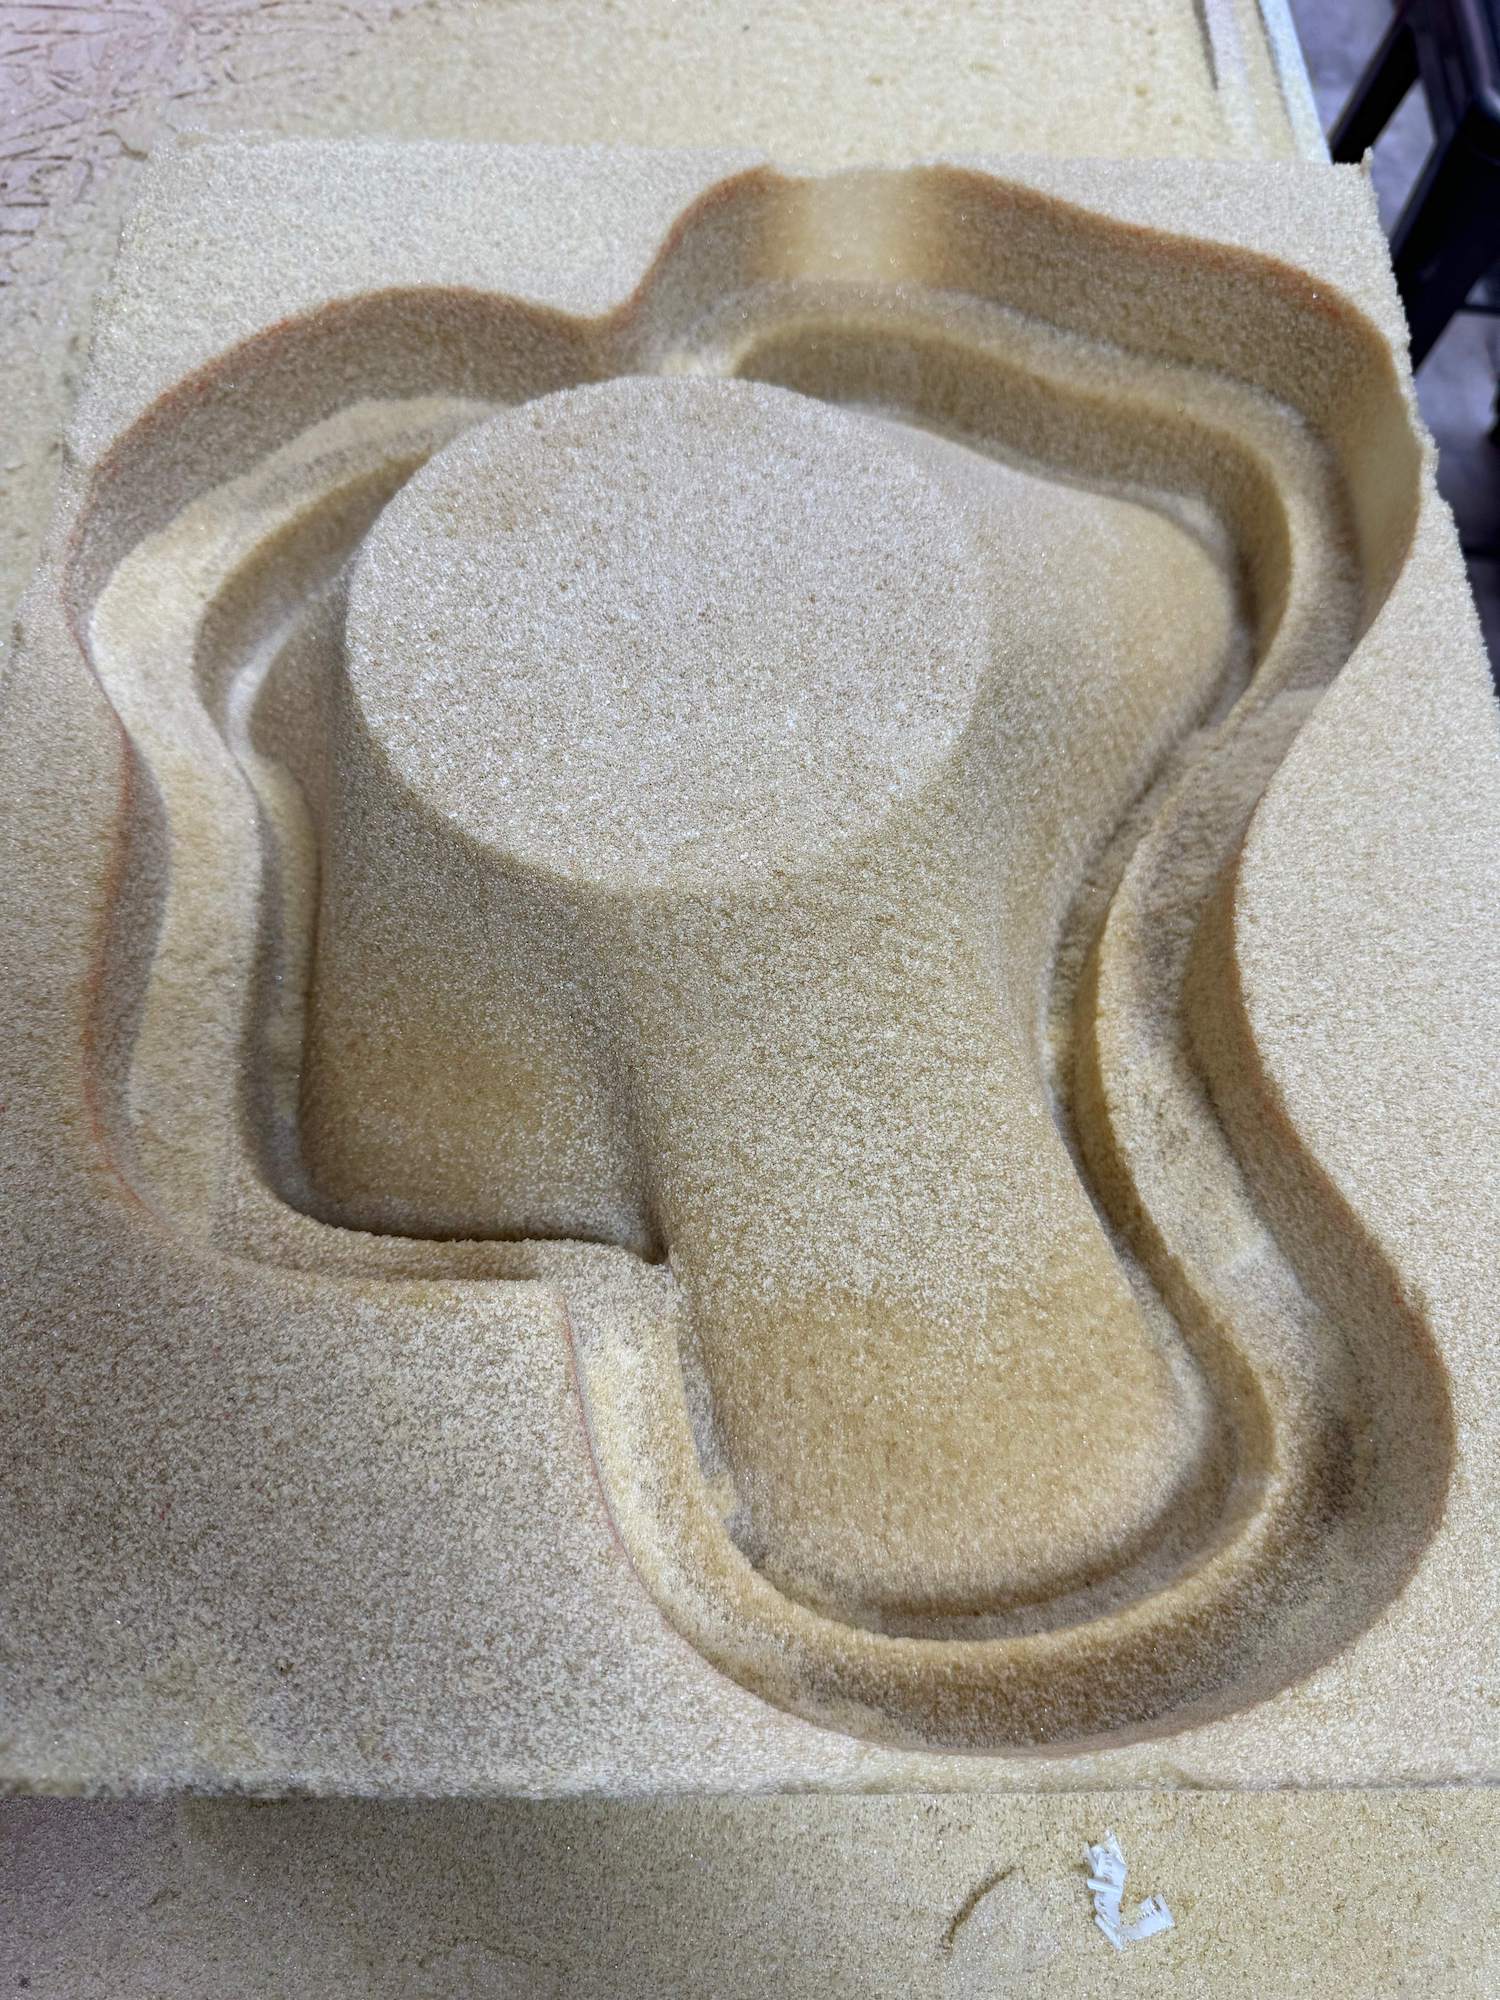
For wildcard week, I decided to investigate concrete forms using upcycled textiles as a composite substrate. Inspired by an NIH article of textile waste infused concrete - I decided to test versions with the fabric intact saturated in cement, rather than mixing textile pulp in the cement. The process began with designing a positive form that I could shape the fabric saturated in concrete on to give it shape. For the design, I took inspiration from Alvar Aalto Bowls which are made in molded glass or pressed in stainless steel. I started with a loose sketch for the outer form and lofted it to a 6" circular curve. Using 2.5axis CAM operations in RhinoCAM I created a roughing pass using a 3/8" inch endmill, and two finishing passes perpendicular to each other with a 1/8" endmill. I used a block of expanded polyeurethane foam to create the mold.
 Roughing Bit: 5/8" x 2.25" Endmill
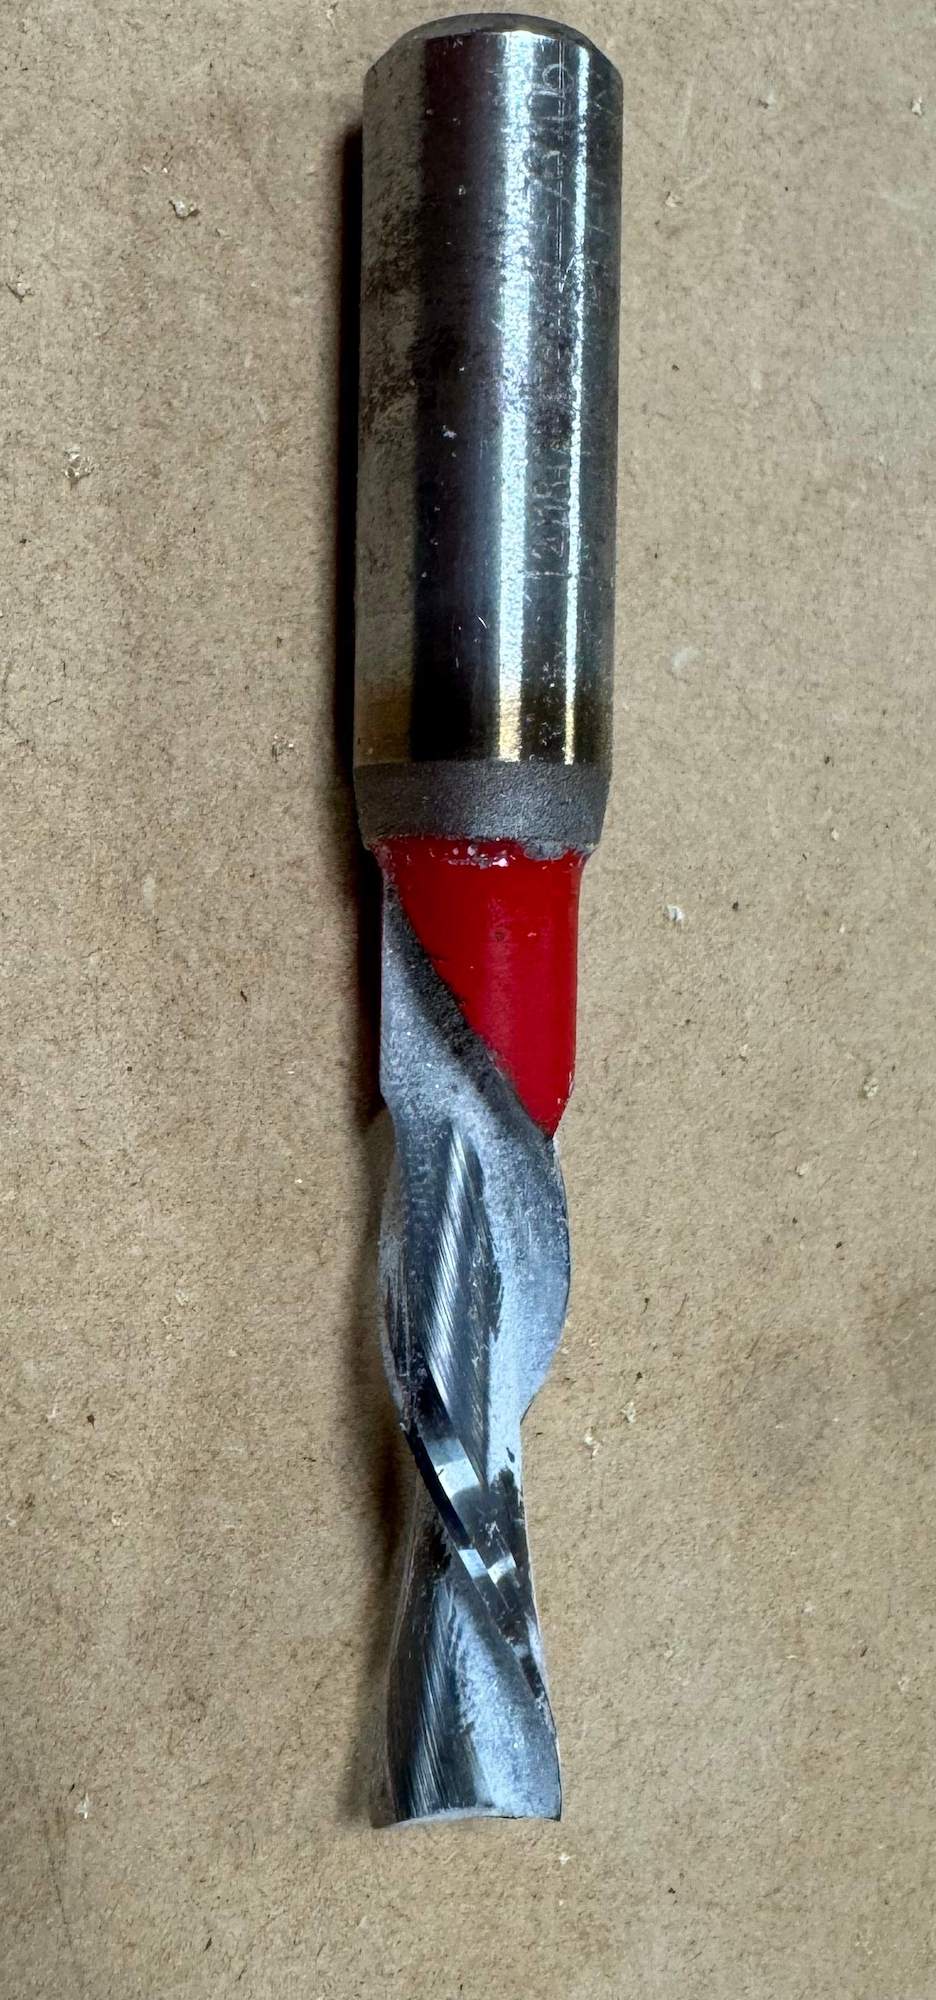 Finishing Bit: 1/8" x 3.75" Tapered Endmill
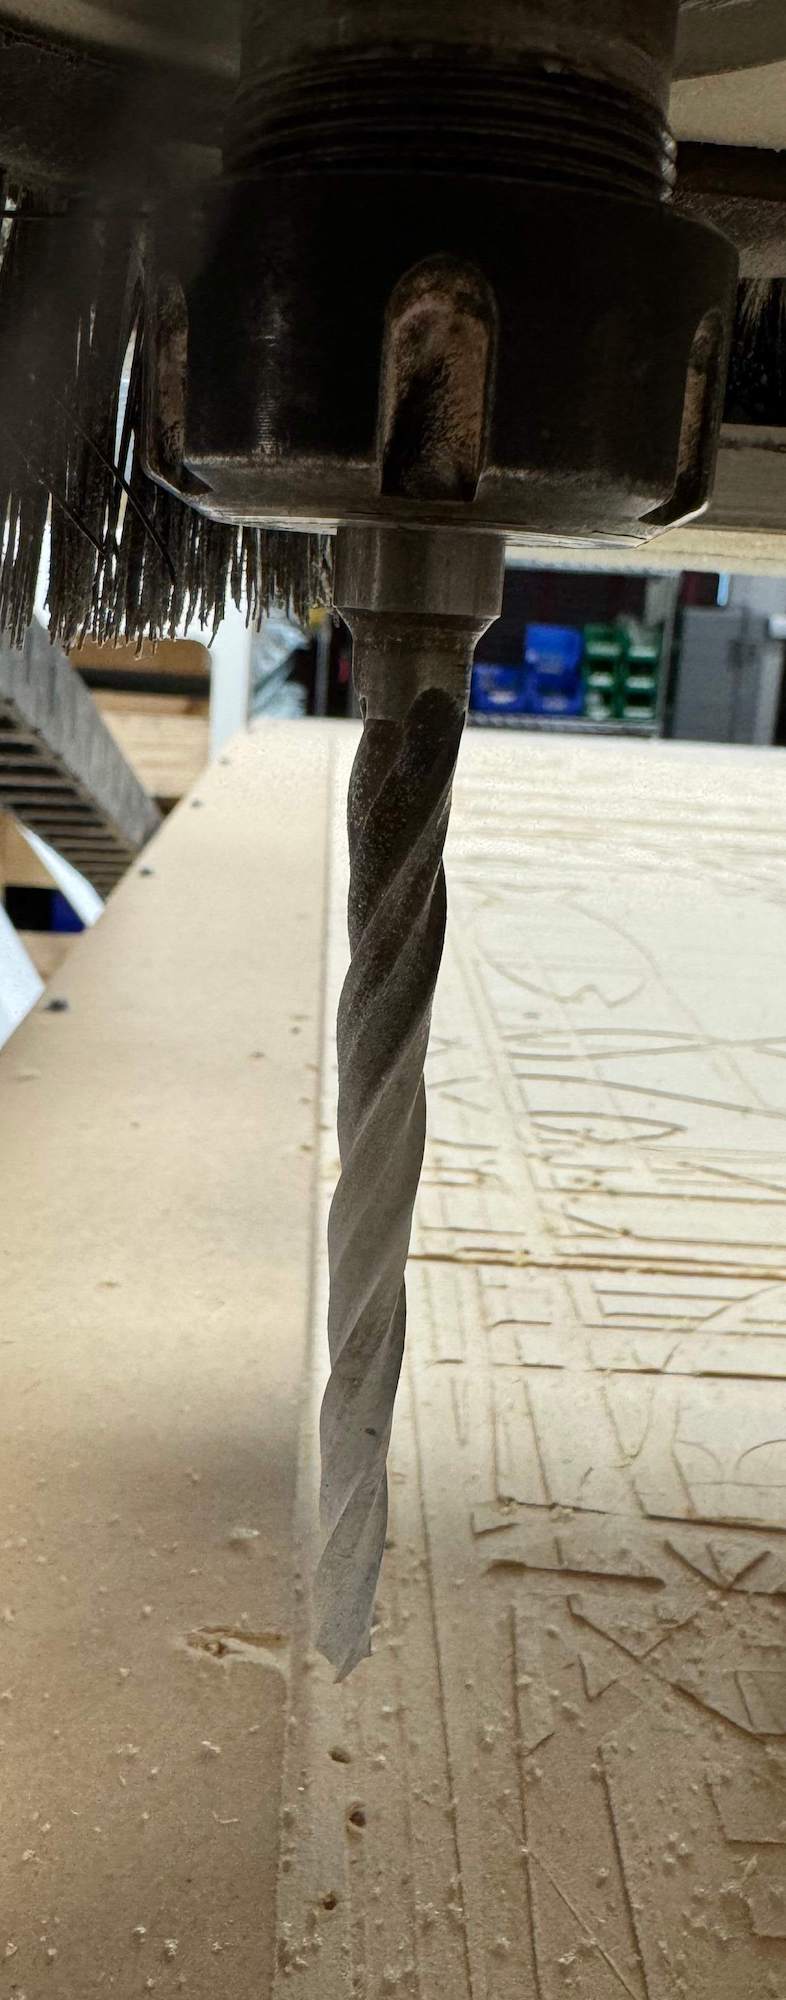
CNC Surfacing: Roughing Pass
CNC Surfacing: Finishing Passes
Finished Mold

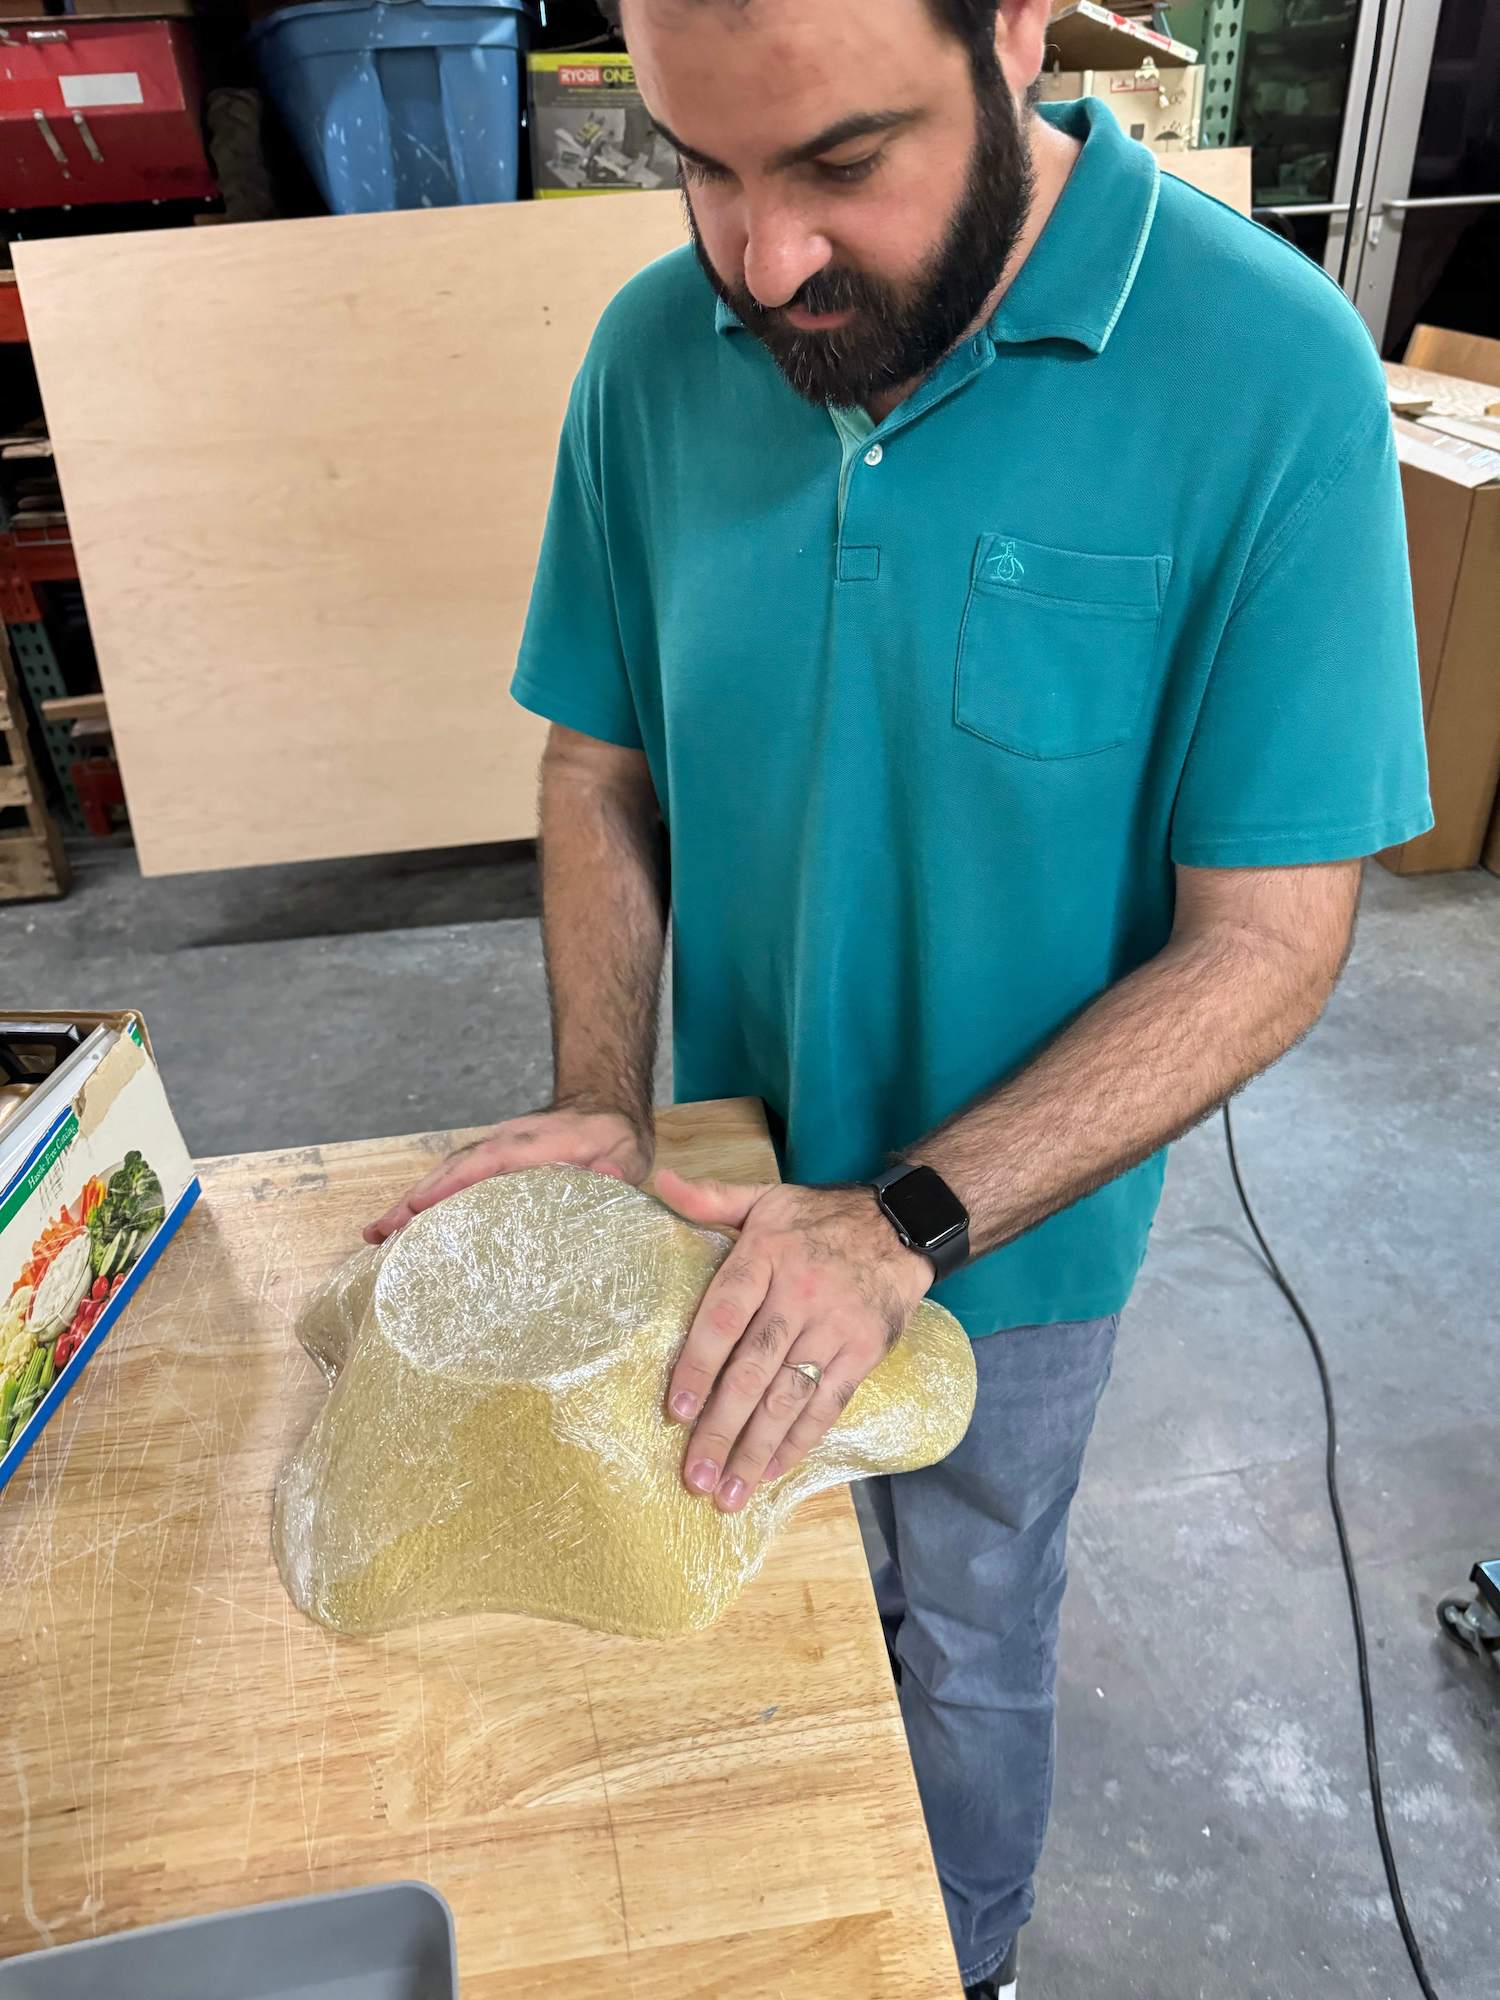
Waterproofing the Mold
I then used a thin plastic wrap to create a waterproof membrane that would protect the porous mold and serve as a means of easily removing the concrete part from the mold. In testing various scrap fabrics, I identified that towel-weave and medium thickness microfiber cloths worked best in absorbing the concrete and having enough thickness to form a structural shell with the concrete. Muslin fabric had too tight a weave and the concrete would sit more at the surface rather than absorbing into the fabric.
Understanding the Cement
characteristics:
Product Type: Portland cement-based product
Primary Use: Rapid-setting cement ideal for structural repairs on both vertical and horizontal surfaces
Setting Time: Sets hard in approximately 15 to 30 minutes
Applications:Repairing concrete pipes, sewers, and culverts, Fixing floors, steps, curbs, bridges, pavement, cold storage vaults, freezers, pre-stress panels, loading docks, tunnels, retaining walls, catch basins, and septic tanks
Yield:10 lb pail: 0.09 cubic feet (2.5 liters)
Mixing and Use:
Surface Preparation:Ensure the surface to be repaired is free of foreign matter and loose materials.
Roughen or etch smooth surfaces to enhance bonding.
Use QUIKRETE's Concrete Acrylic Fortifier (No. 8610) or Concrete Bonding Adhesive (No. 9902) for better adhesion.
If the application thickness is less than 1 inch (25 mm), use Concrete Acrylic Fortifier. If greater, use Concrete Bonding Adhesive.
Mixing: Refer to Table 2 for typical water content (6-3/4 to 8-1/4 pints for a 50 lb bag). Add just enough water to achieve the right consistency. Excess water can reduce performance. If using Concrete Acrylic Fortifier, replace half the mixing water with the fortifier. For deep patching, extend the cement with up to 25 lb of 3/8 inch maximum size aggregate per 50 lb bag. The aggregate should be of good quality and damp.Application:Fill the repair area completely and work continuously from one end to the other. Avoid partial depth fills to prevent cold joints. Consolidate the material using hand tamping or chopping with a trowel, especially around the edges of the forms or patches. After compacting and spreading the cement to fill the forms without air pockets, screed the surface and apply a trowel finish as desired. After the initial set, trim and shape the material to match the existing contours.Curing:Damp cure the repaired area for at least 48 hours to ensure proper setting and strength development.
Precautions: Mix only what can be used in approximately 10 minutes. Protect the cement from freezing when temperatures are near 40F or lower by using warm water and insulation. Use cool water for mixing in hot weather to prevent rapid drying. Do not combine QUIKRETE Concrete Acrylic Fortifier and QUIKRETE Concrete Bonding Adhesive.
Safety: Wear impervious gloves (like nitrile), a mask, and eye protection.
Read the Safety Data Sheet carefully before use.The product can cause severe skin burns and serious eye damage. Inhalation of dust may cause lung damage or cancer.
Using Quickrete, a quick-dry pre-mixed cement, I submerged the fabric and rubbed-in the cement to ensure that it completely saturated the fibers of the textile.
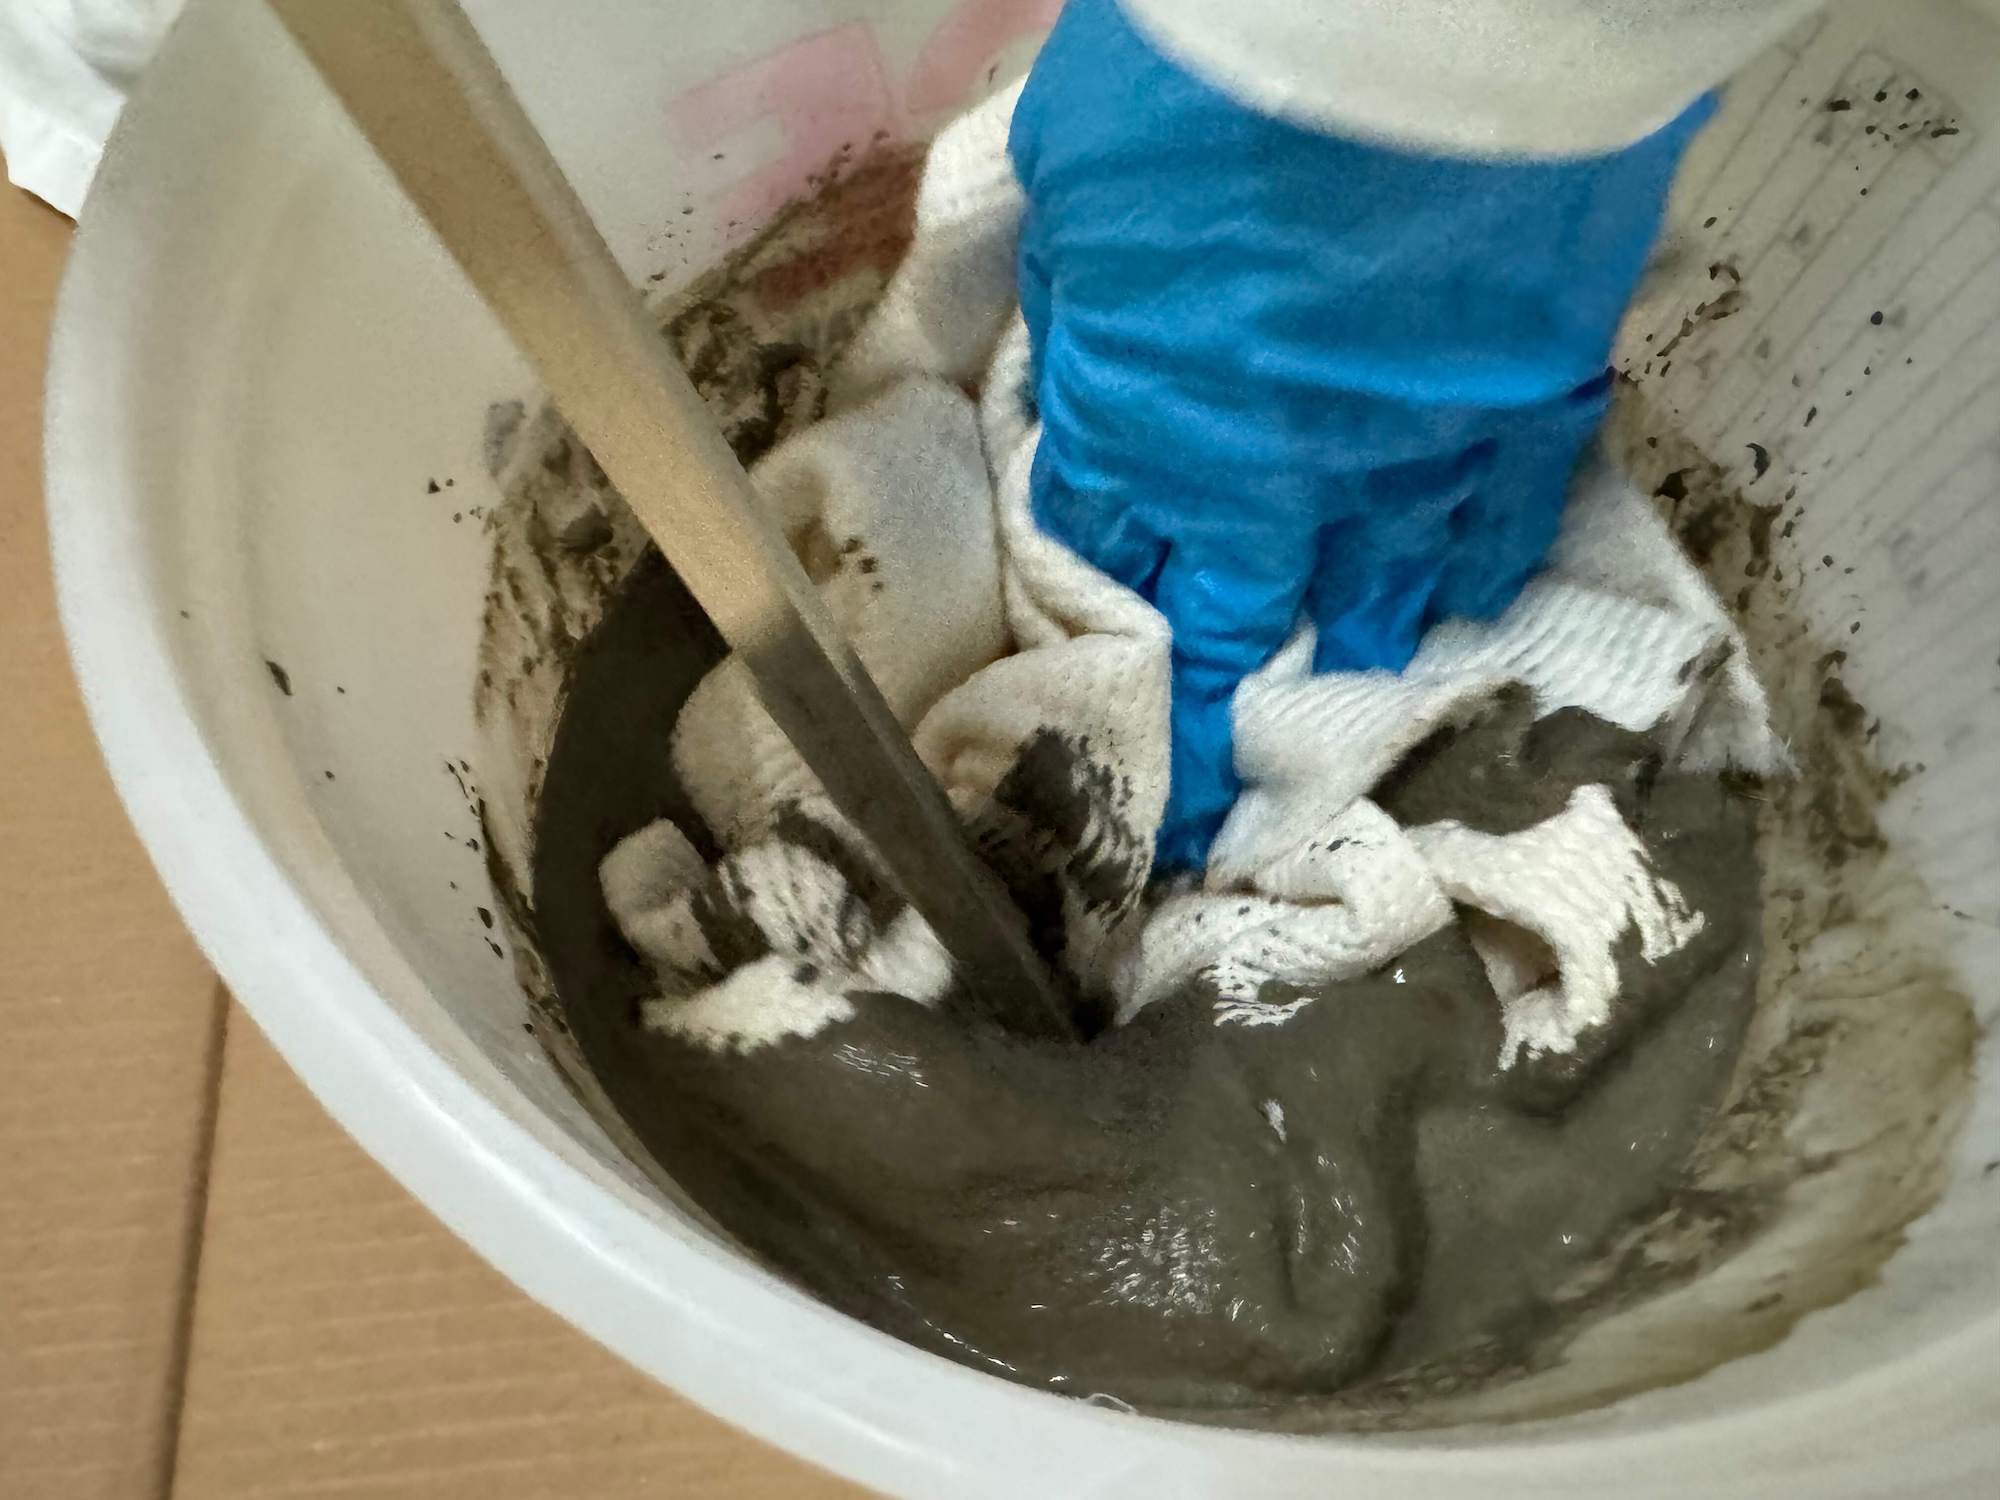
Wet-Lap Application Process
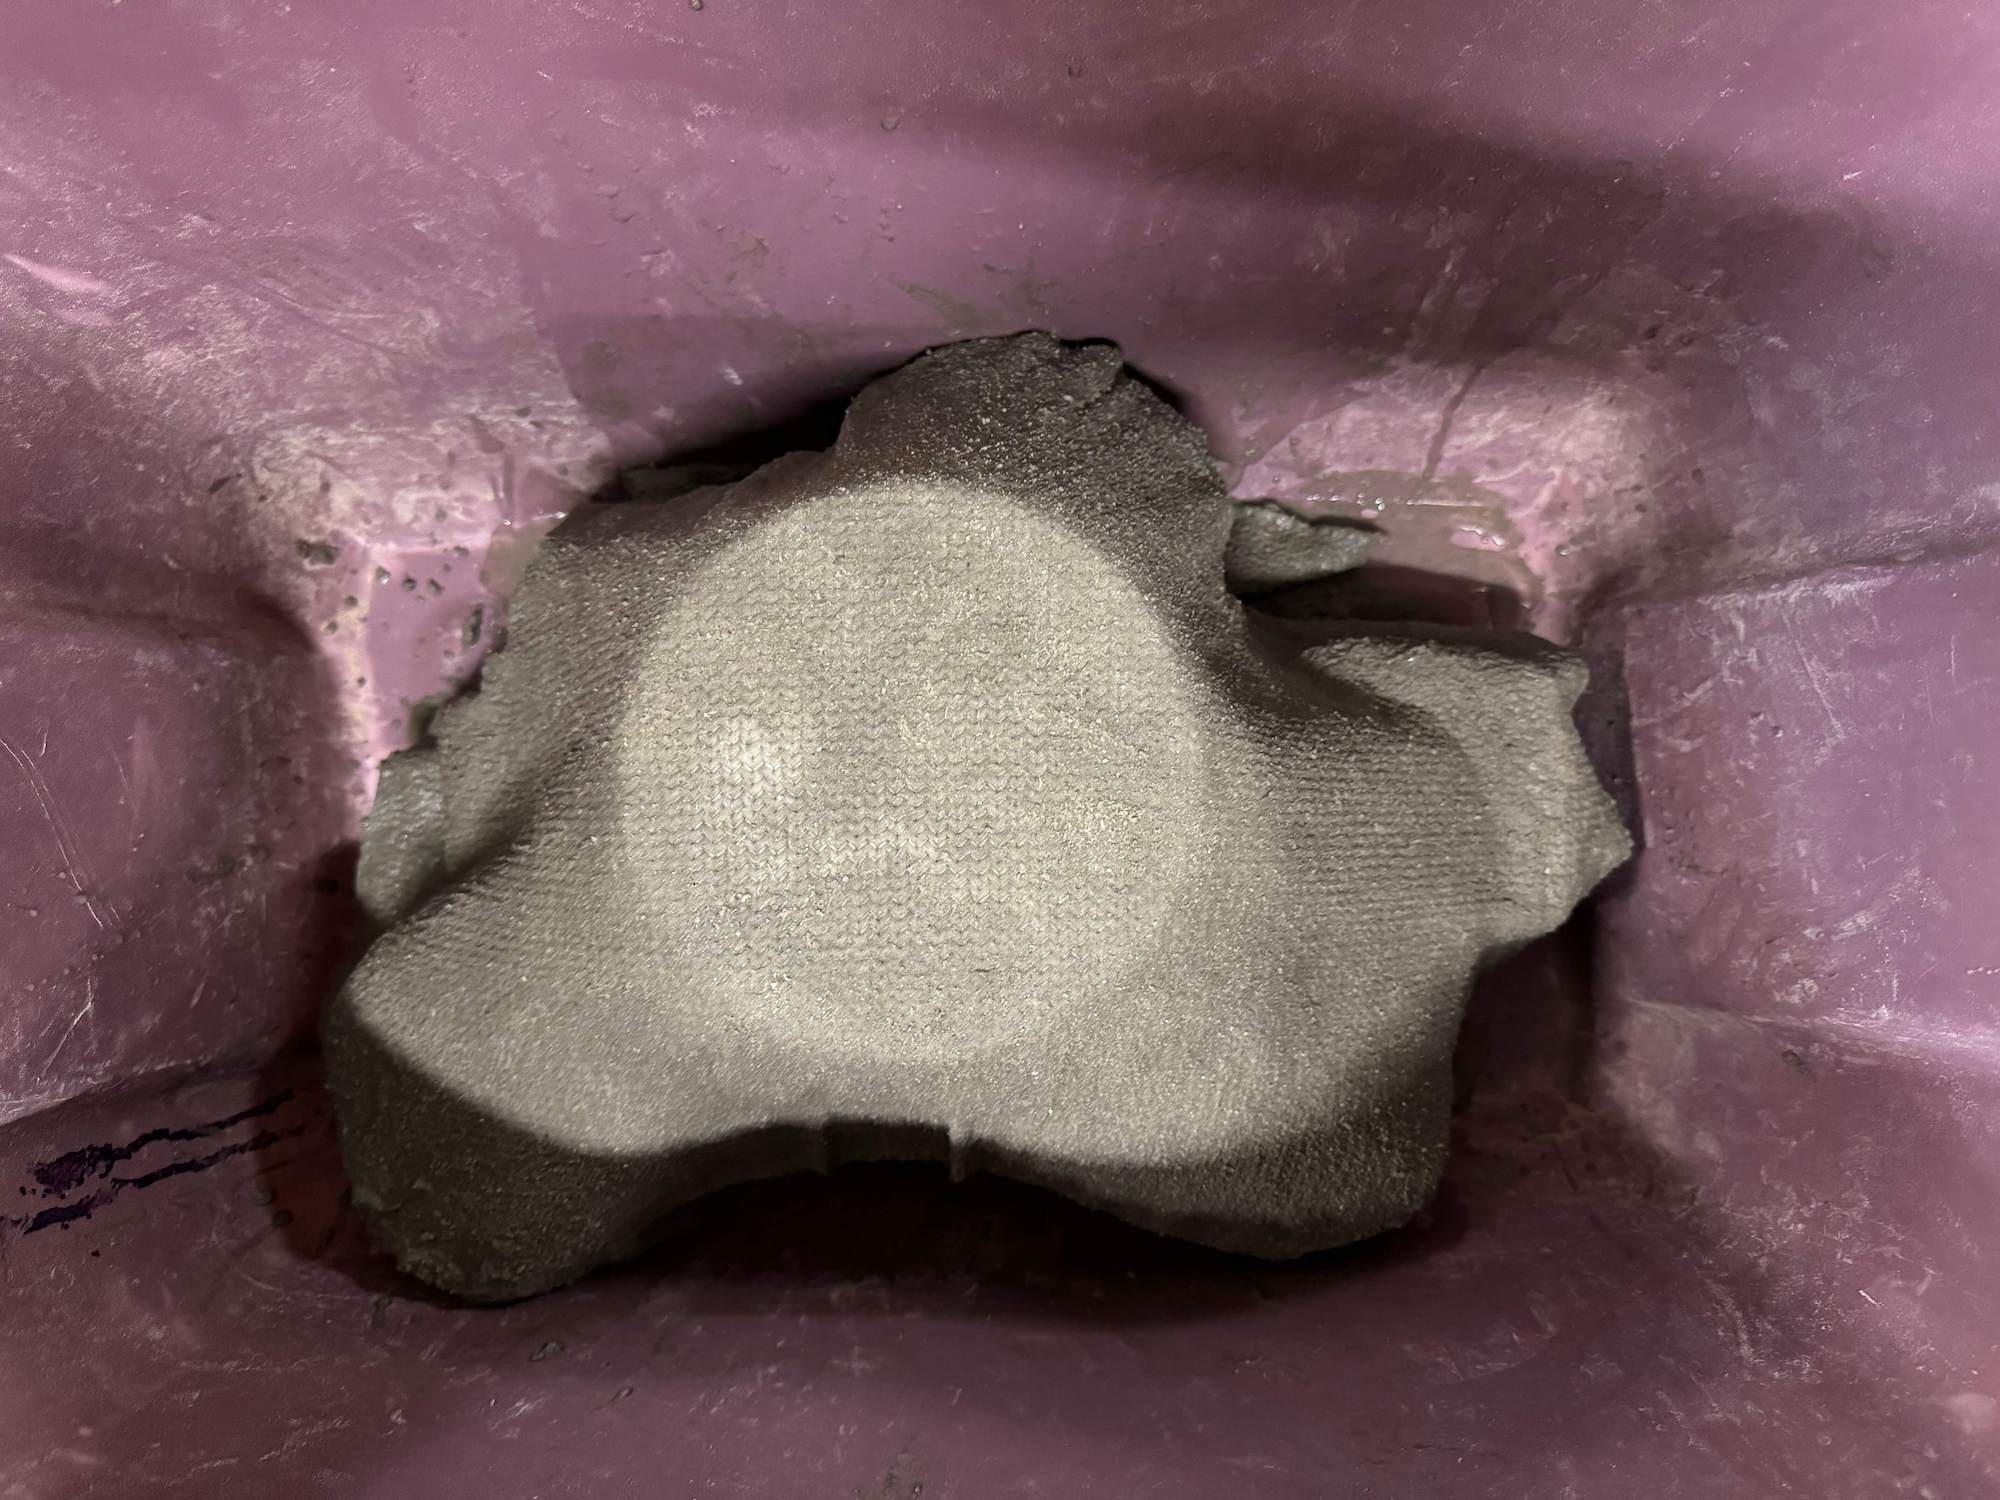
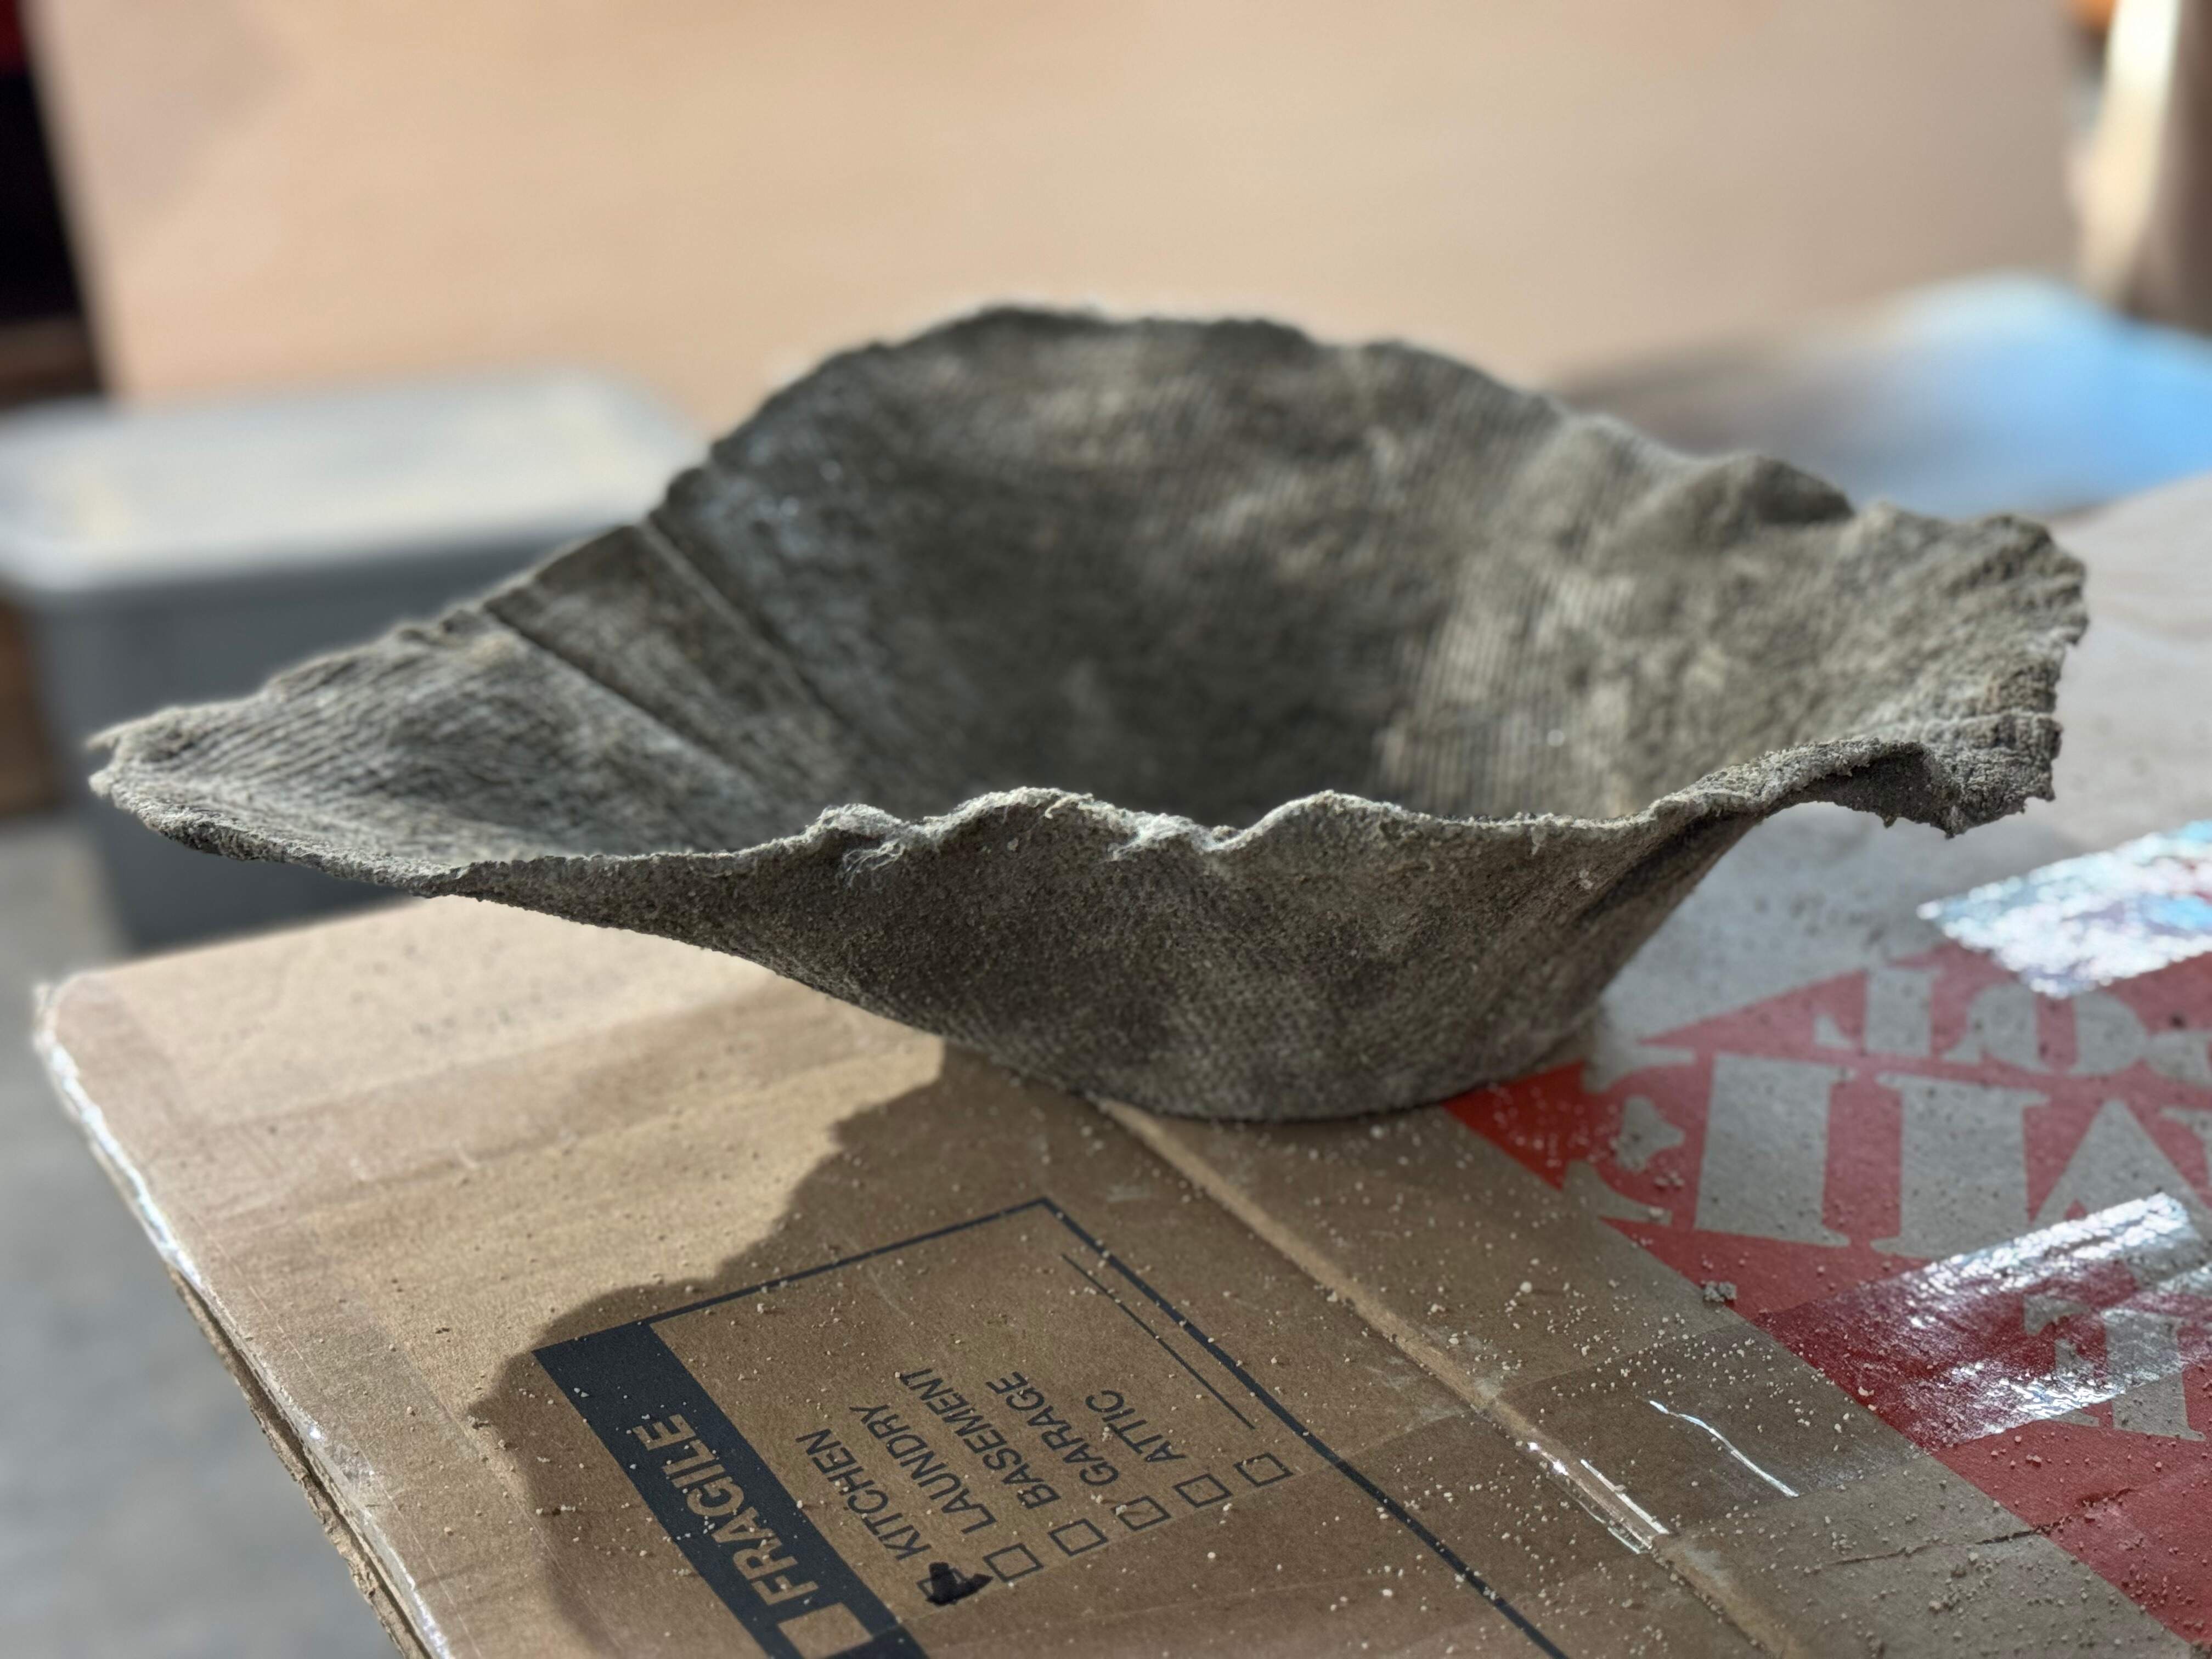
I then carefully draped the concrete-soaked cloth over the form of the mold and pressed it into shape. After it set, I removed the mold and allowed the shell to air dry and fully cure over 24 hours. While the experiment worked - the concrete and textile composite created a rigid form that was structurally sound, the surface finish left a bit to be desired. As a next step, I can layer more cement, and add additional layers of concrete-saturated fabric, and smooth it out a bit for a more aesthetic finish, or continue experiementing with different textiles to find one that achieves a desirable texture.
Trimming the Edges
Once the shell dried and I carefully trimmed the excess fabric composite that extended beyond the form's shape.

Removal from the Mold
This was a little bit tricky as some of the concrete hardened in between folds of the plastic liner I used to waterproof the mold. Luckily it was limited to one area and I was able to get it loose. In future versions I will ensure a smoother application of plastic lining.
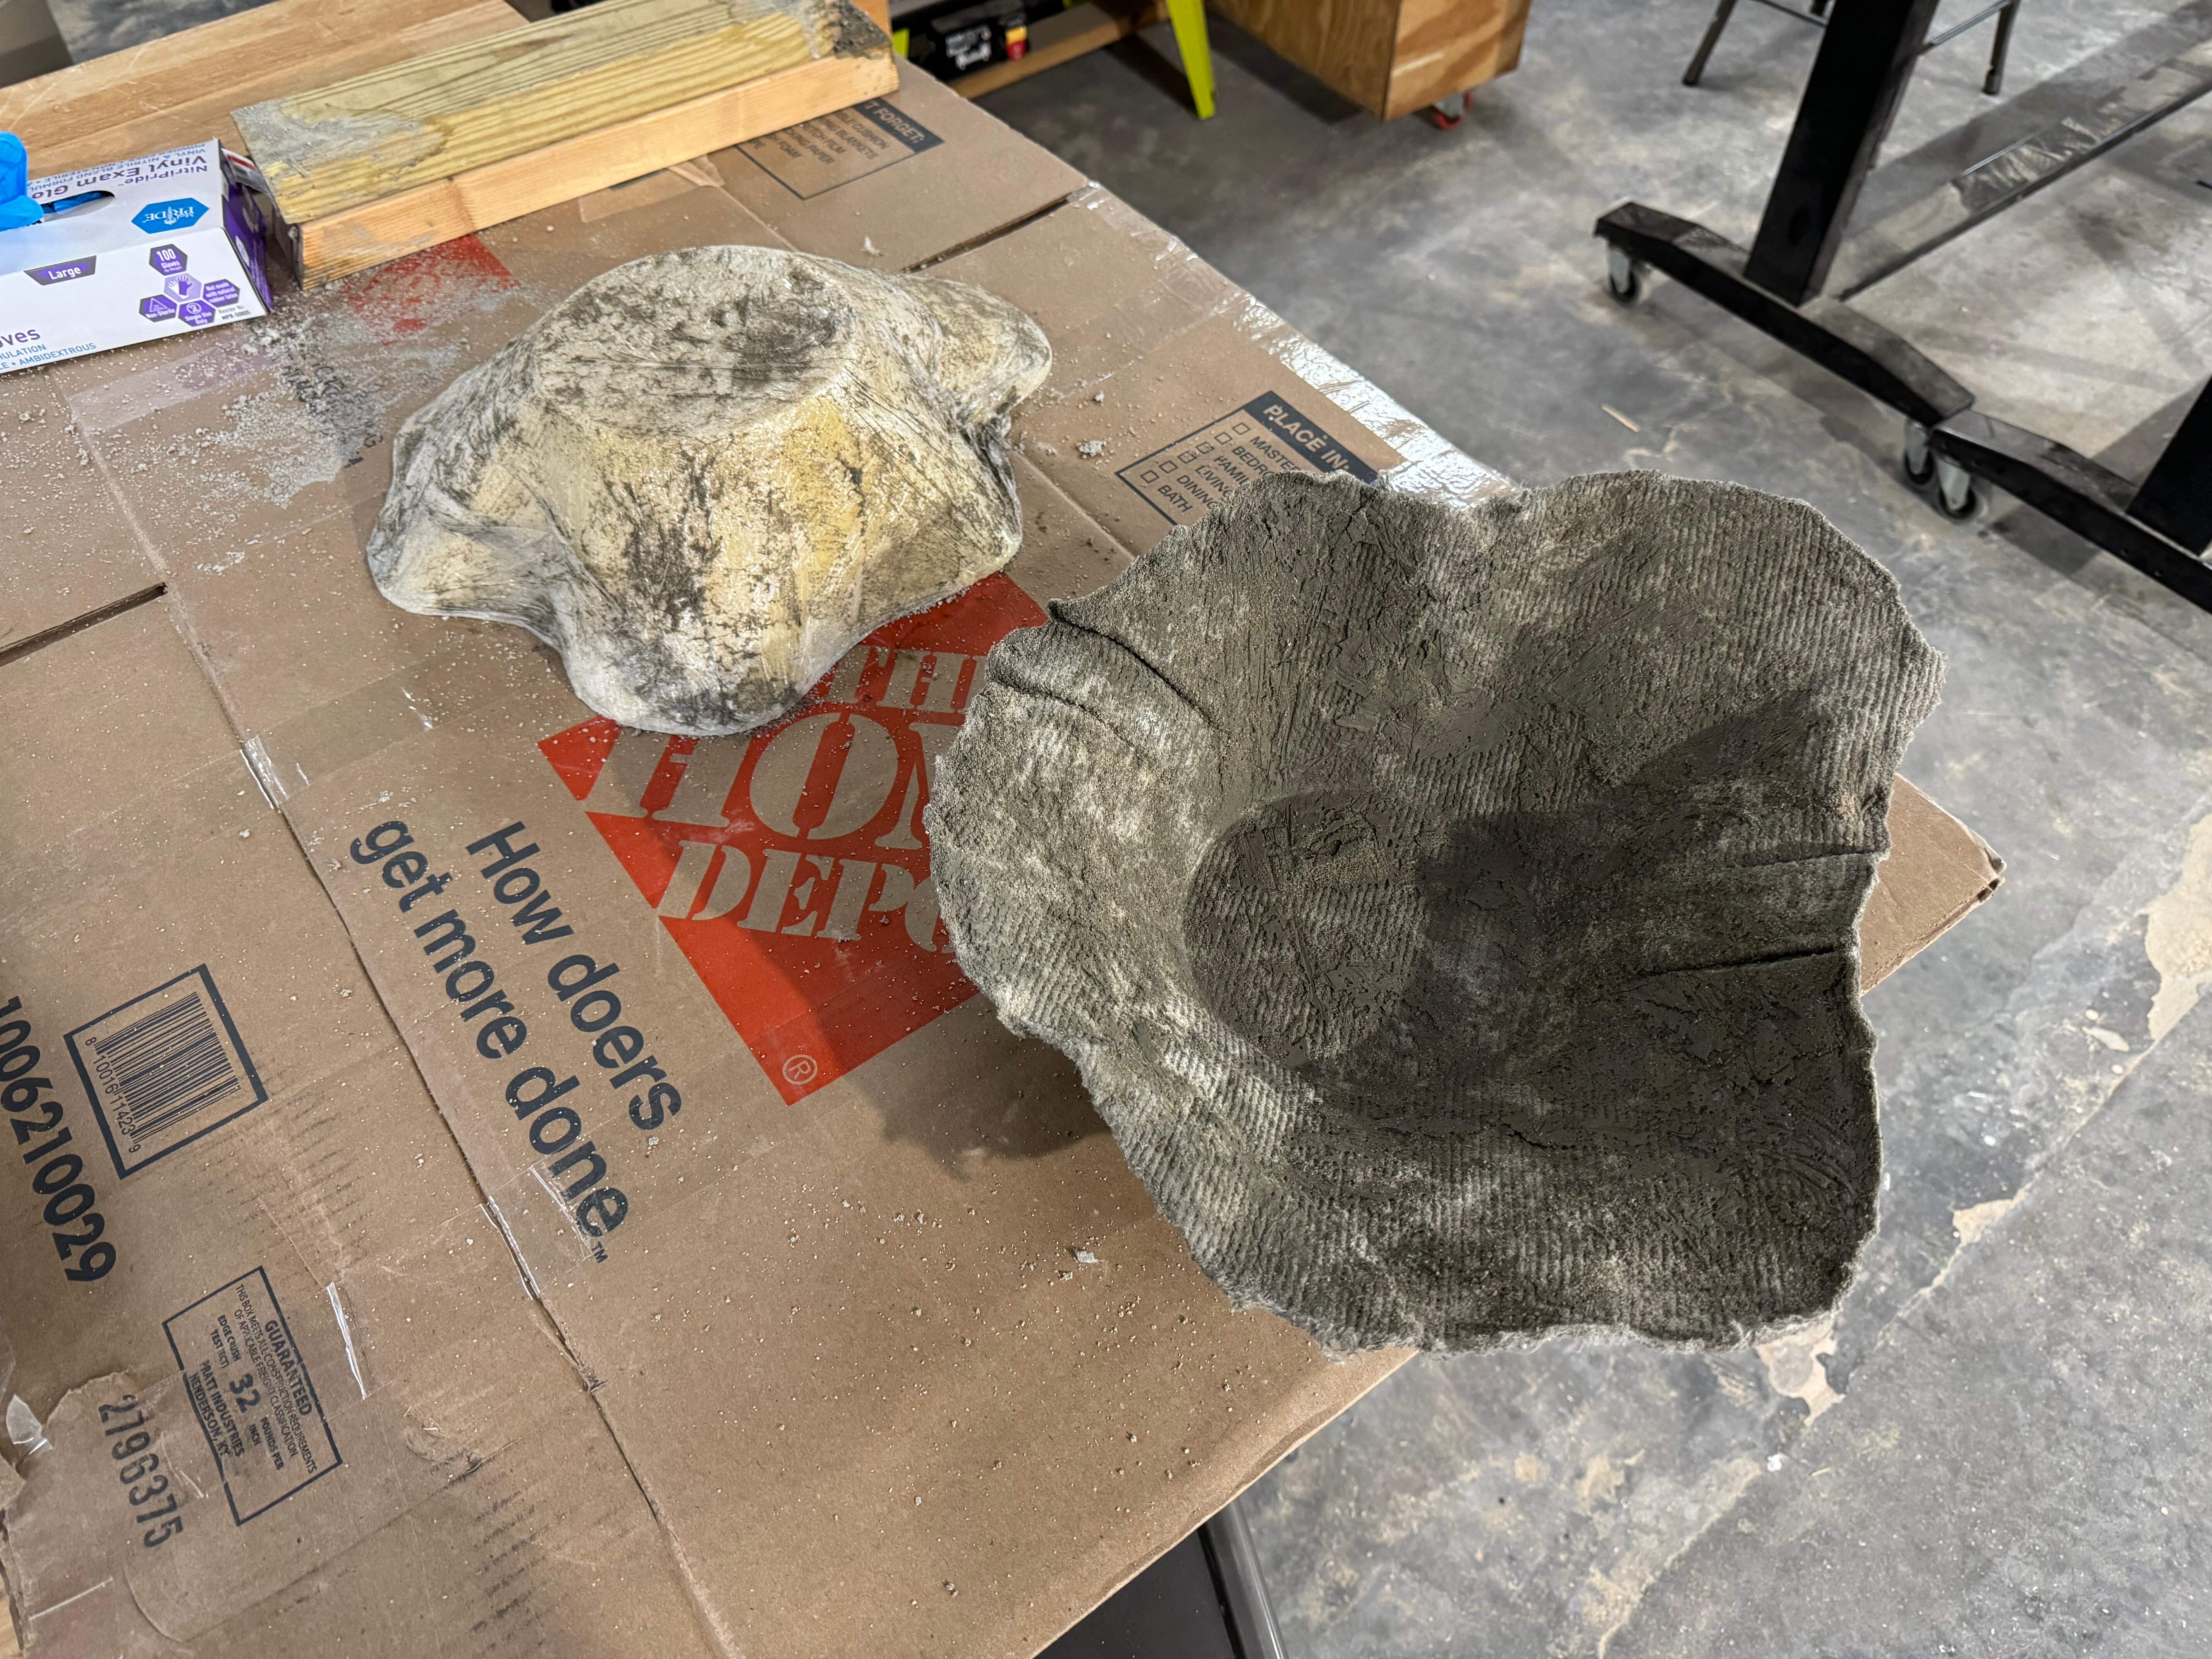
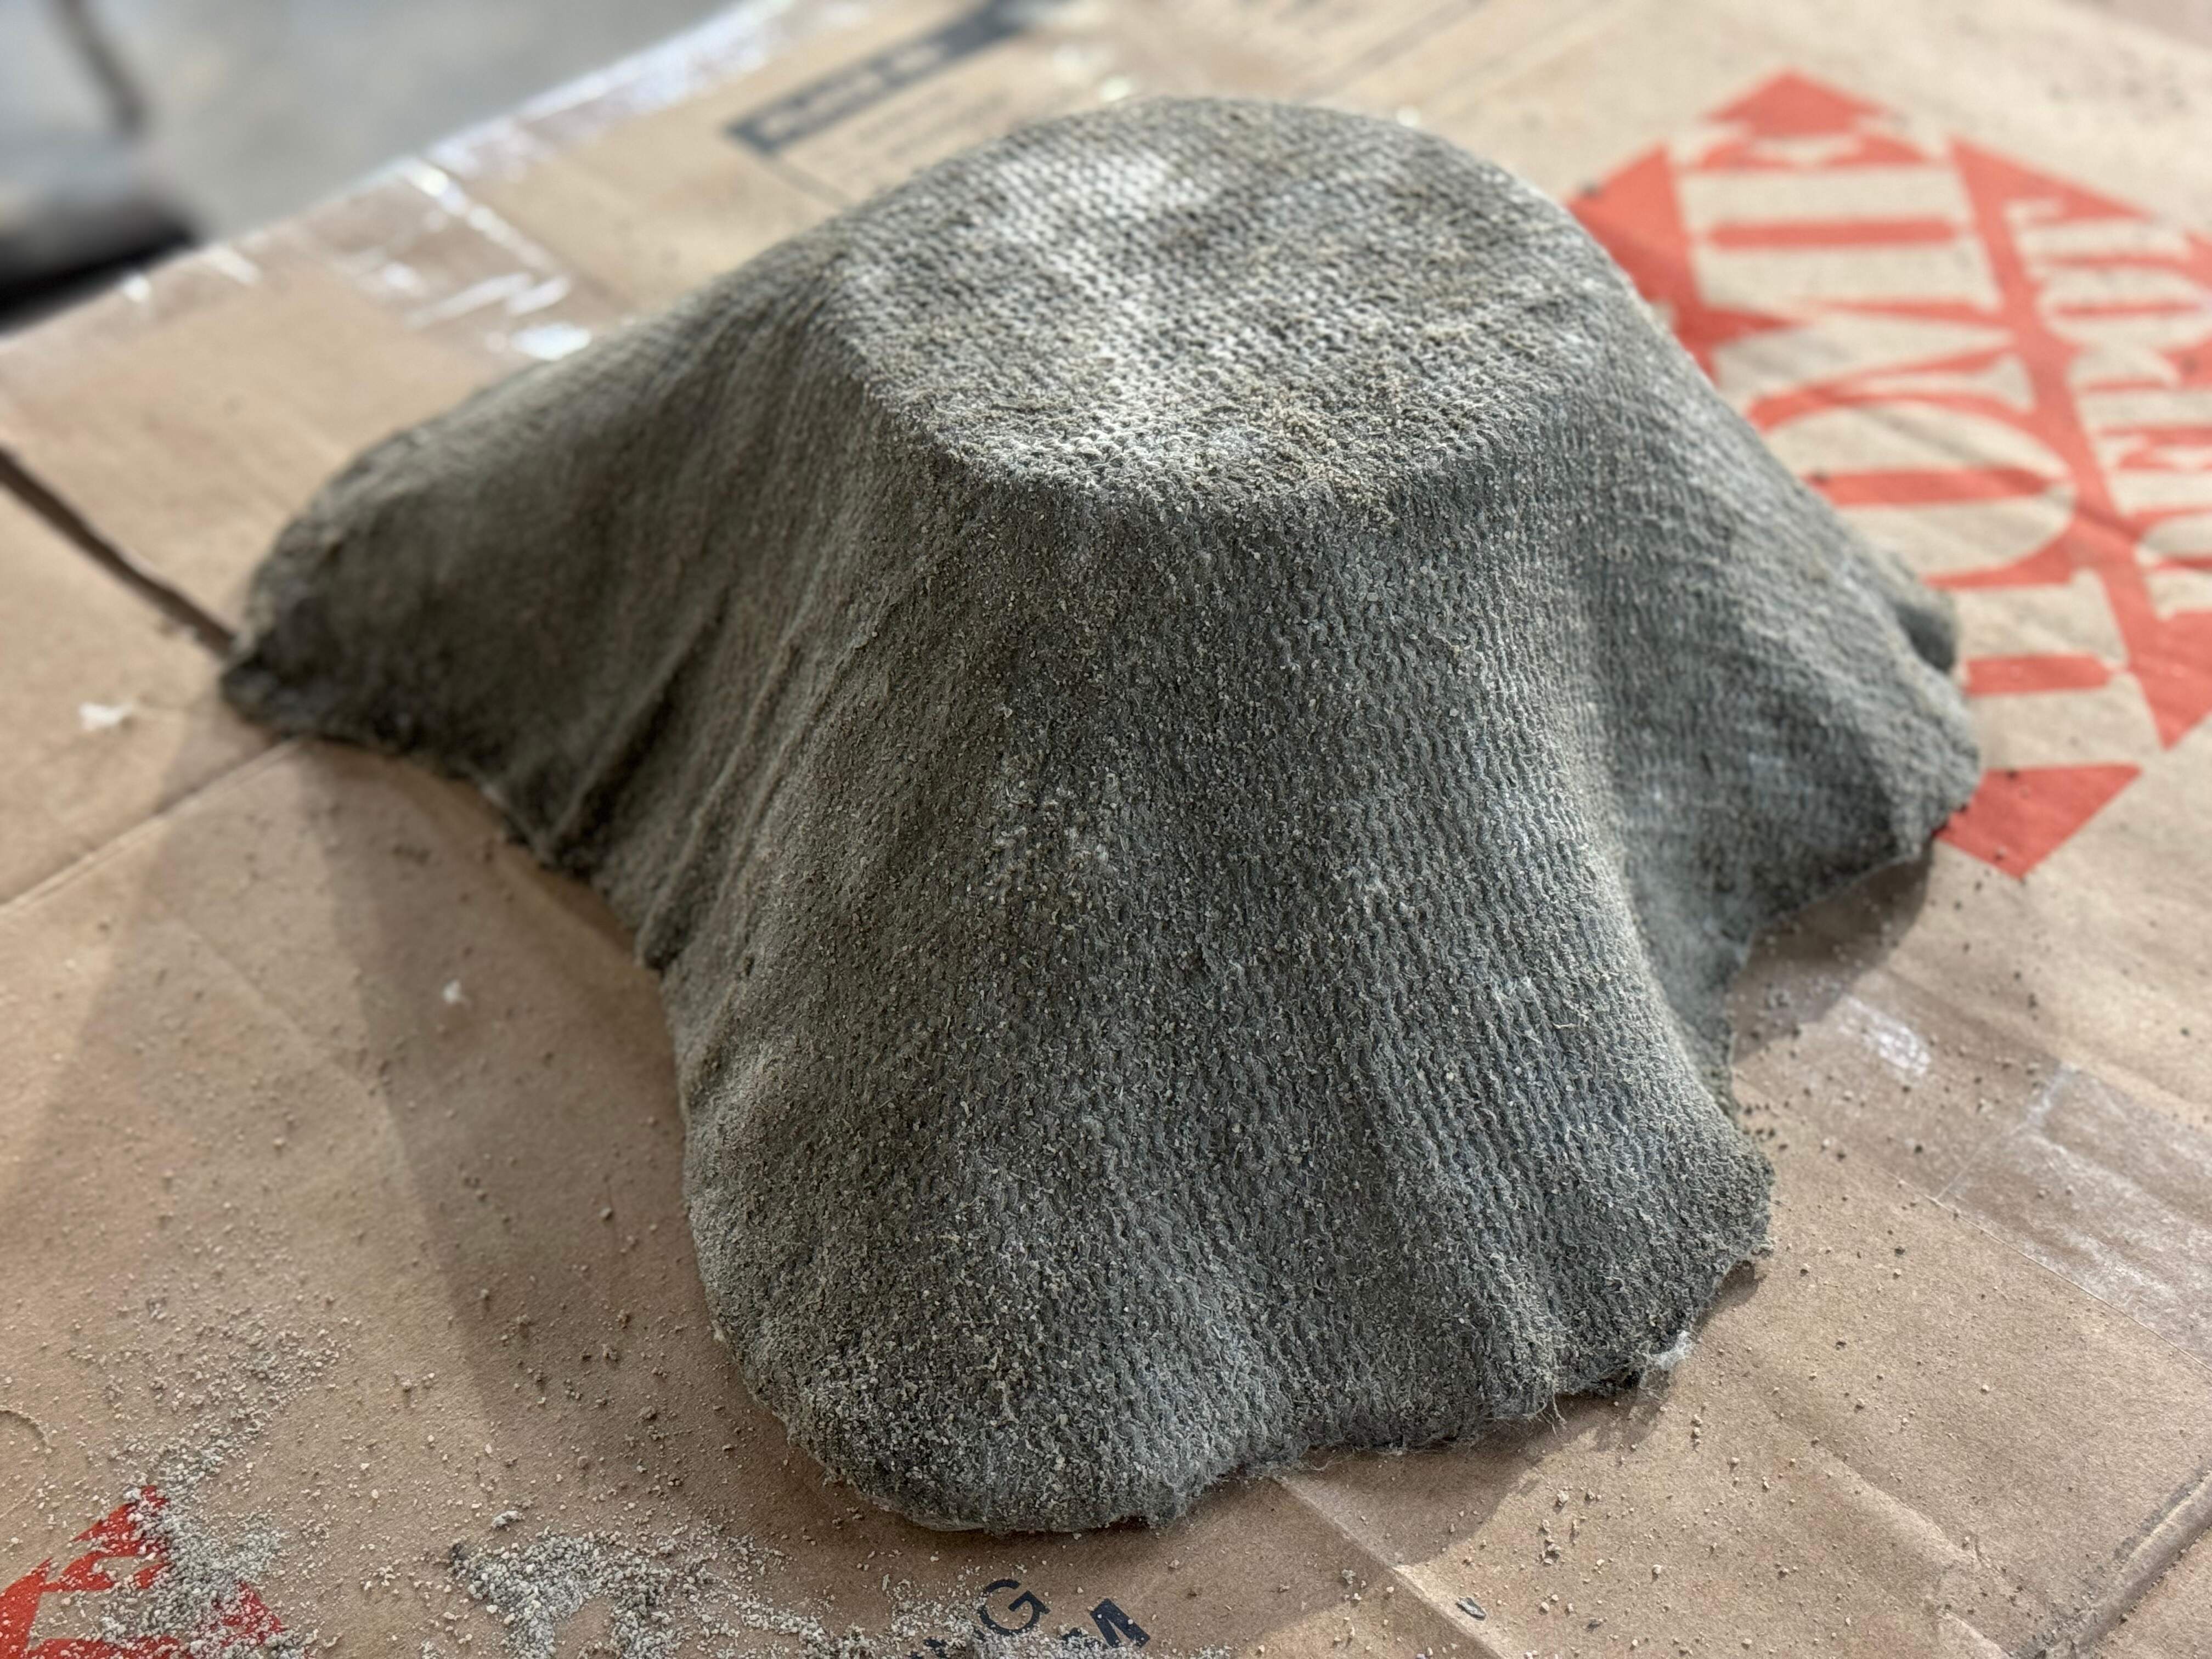
The Finished Piece
The finshed piece is a bit rough but it holds its form. It appears that some parts of the fabric had more cement saturation than others. The surface finish not as consistent as I'd like, but it proved that a saturated fabric could serve as a composite to make concrete shell molds.
Key Lessons Learned
For future projects using this technique, I would use a larger mixing bin for the cement so I could spread the fabric and endure even coating of the cement.
I would use multiple layers of cement-saturated fabric in the wet-lap process to have a stronger shell.
I would ensure the mold has a smooth surface of plastic lining on all surfaces in contact with the cemented fiber sheets.
I would trim the edges of the fabric while it was still wet so it would be easier to cut.
I would add a finishing layer to create a sandable smooth surface on the form.
Files
Download 3D Model Download Rough Surfacing NC File Download Finishing 1 Surfacing NC File Download Finishing 2 Surfacing NC File Download Profile Cut NC File Download Quickrete Data Sheet Download Quickrete MSDS
Copyright 2024 Thomas Pupo - Creative Commons Attribution Non Commercial
Source code hosted at fabcloud/fabacademy/2024/thomas-pupo