
Week 10: Mechanical Design
Vertical Pen Plotter Machine
Because our group works a lot in education, we felt that a pen plotter project would be a captivating tool to inspire our students to learn how to code different art projects. We searched online and found many different open source projects that we could remix for our attempt. After an exhaustive process, we settled on basing our project off of a project by DORKMODE with primary contibutions from ZANEDRYS. We chose this as a template because it has a full video tutorial and many different versions documented that we can remix from.
Original Project Git
Original Project Video Tutotial
We began building the project using many of the original hardware components just to start with a baseline before making major modifications. We sourced all of the hardware and began designing and printing all of the components according to the original dimensions and specifications.
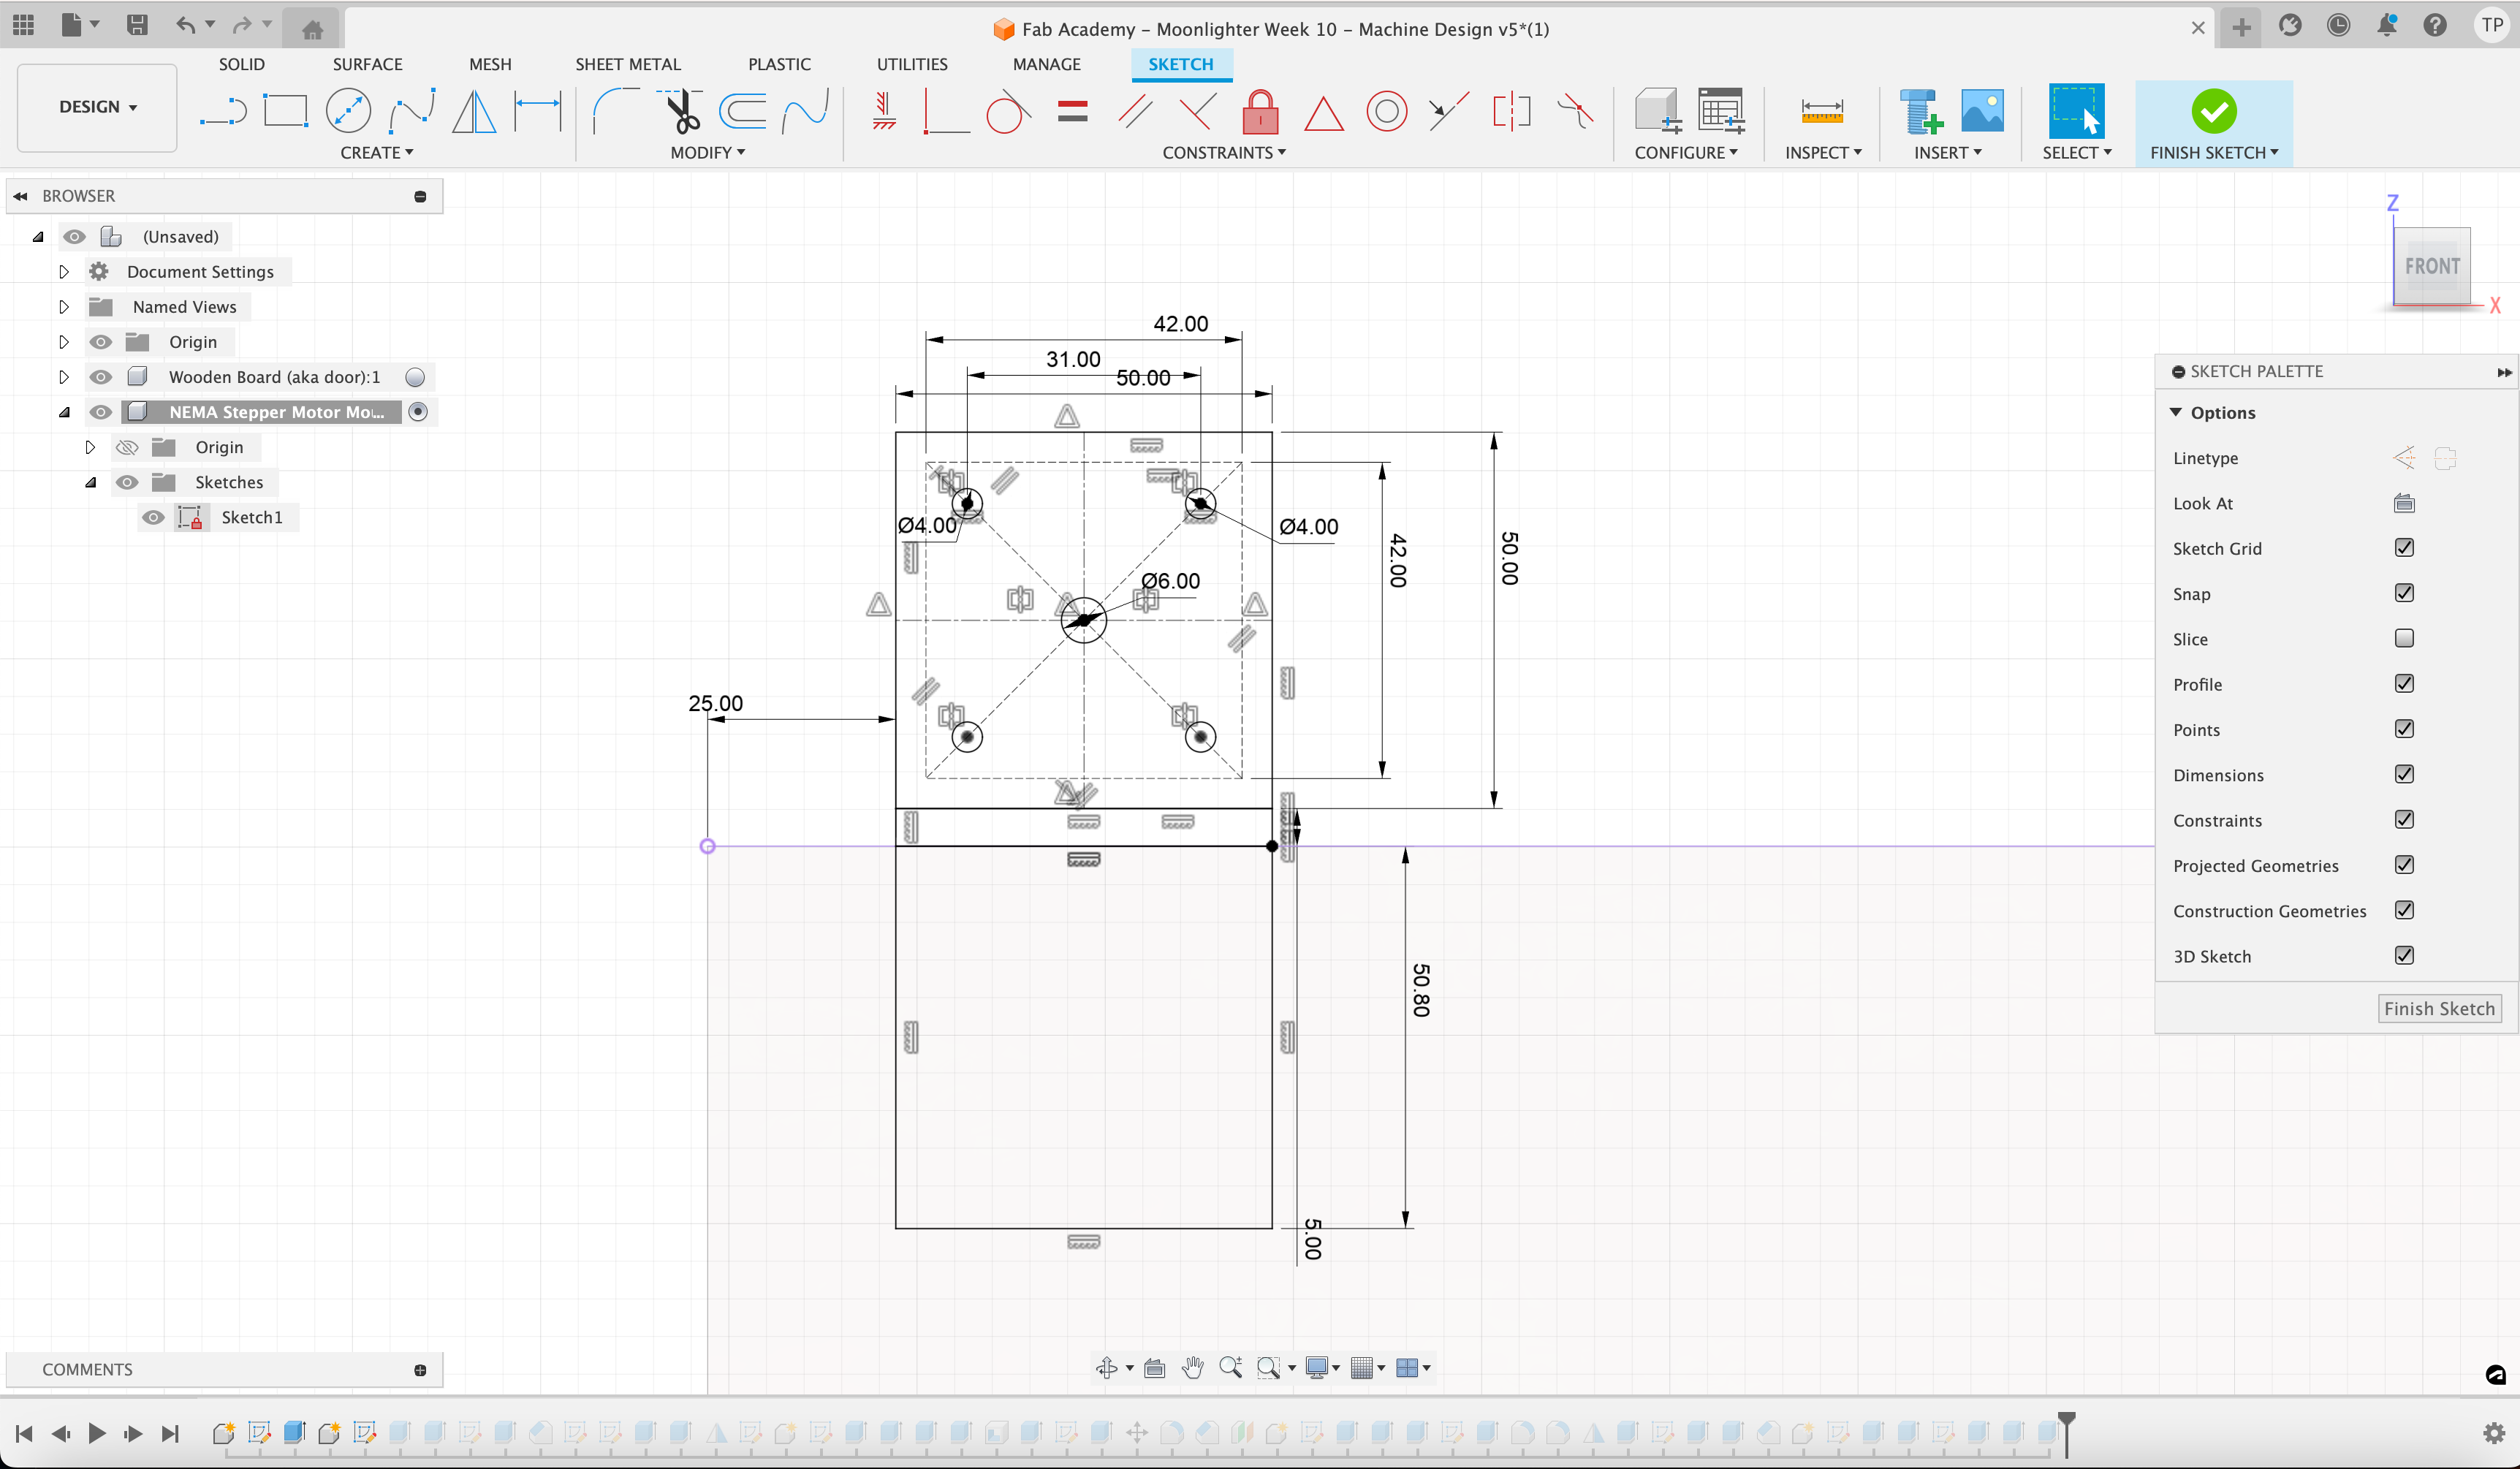
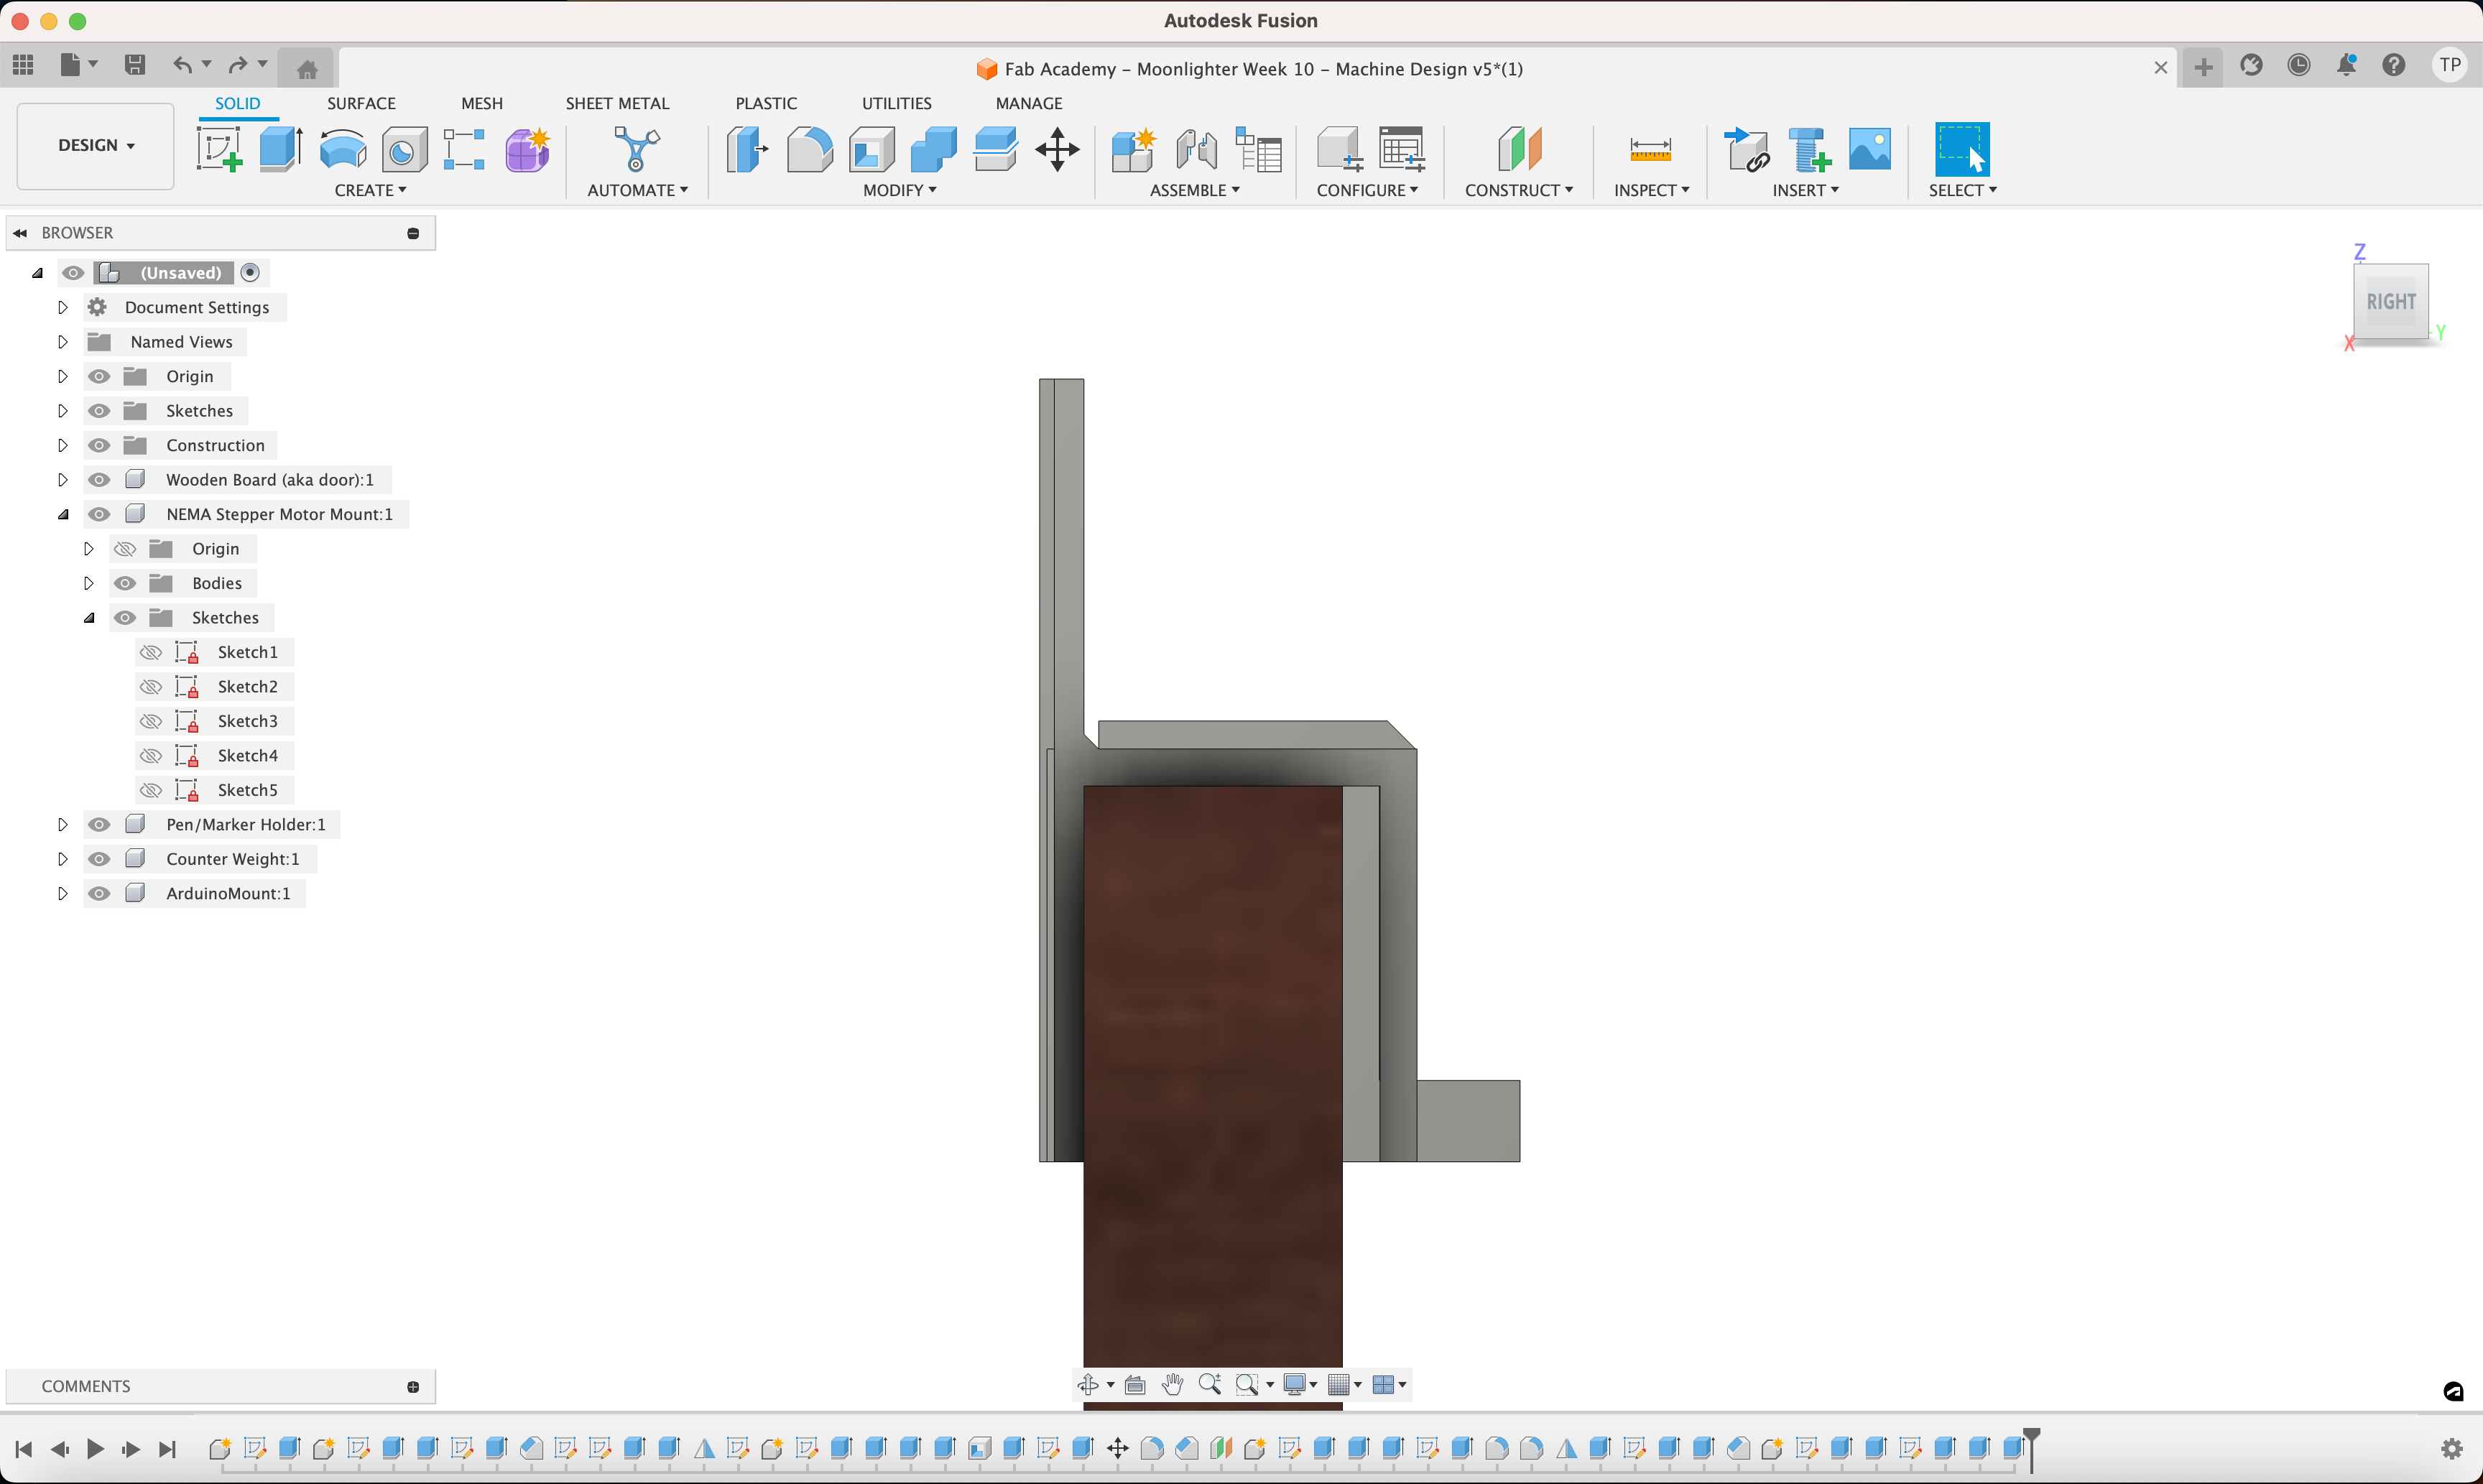
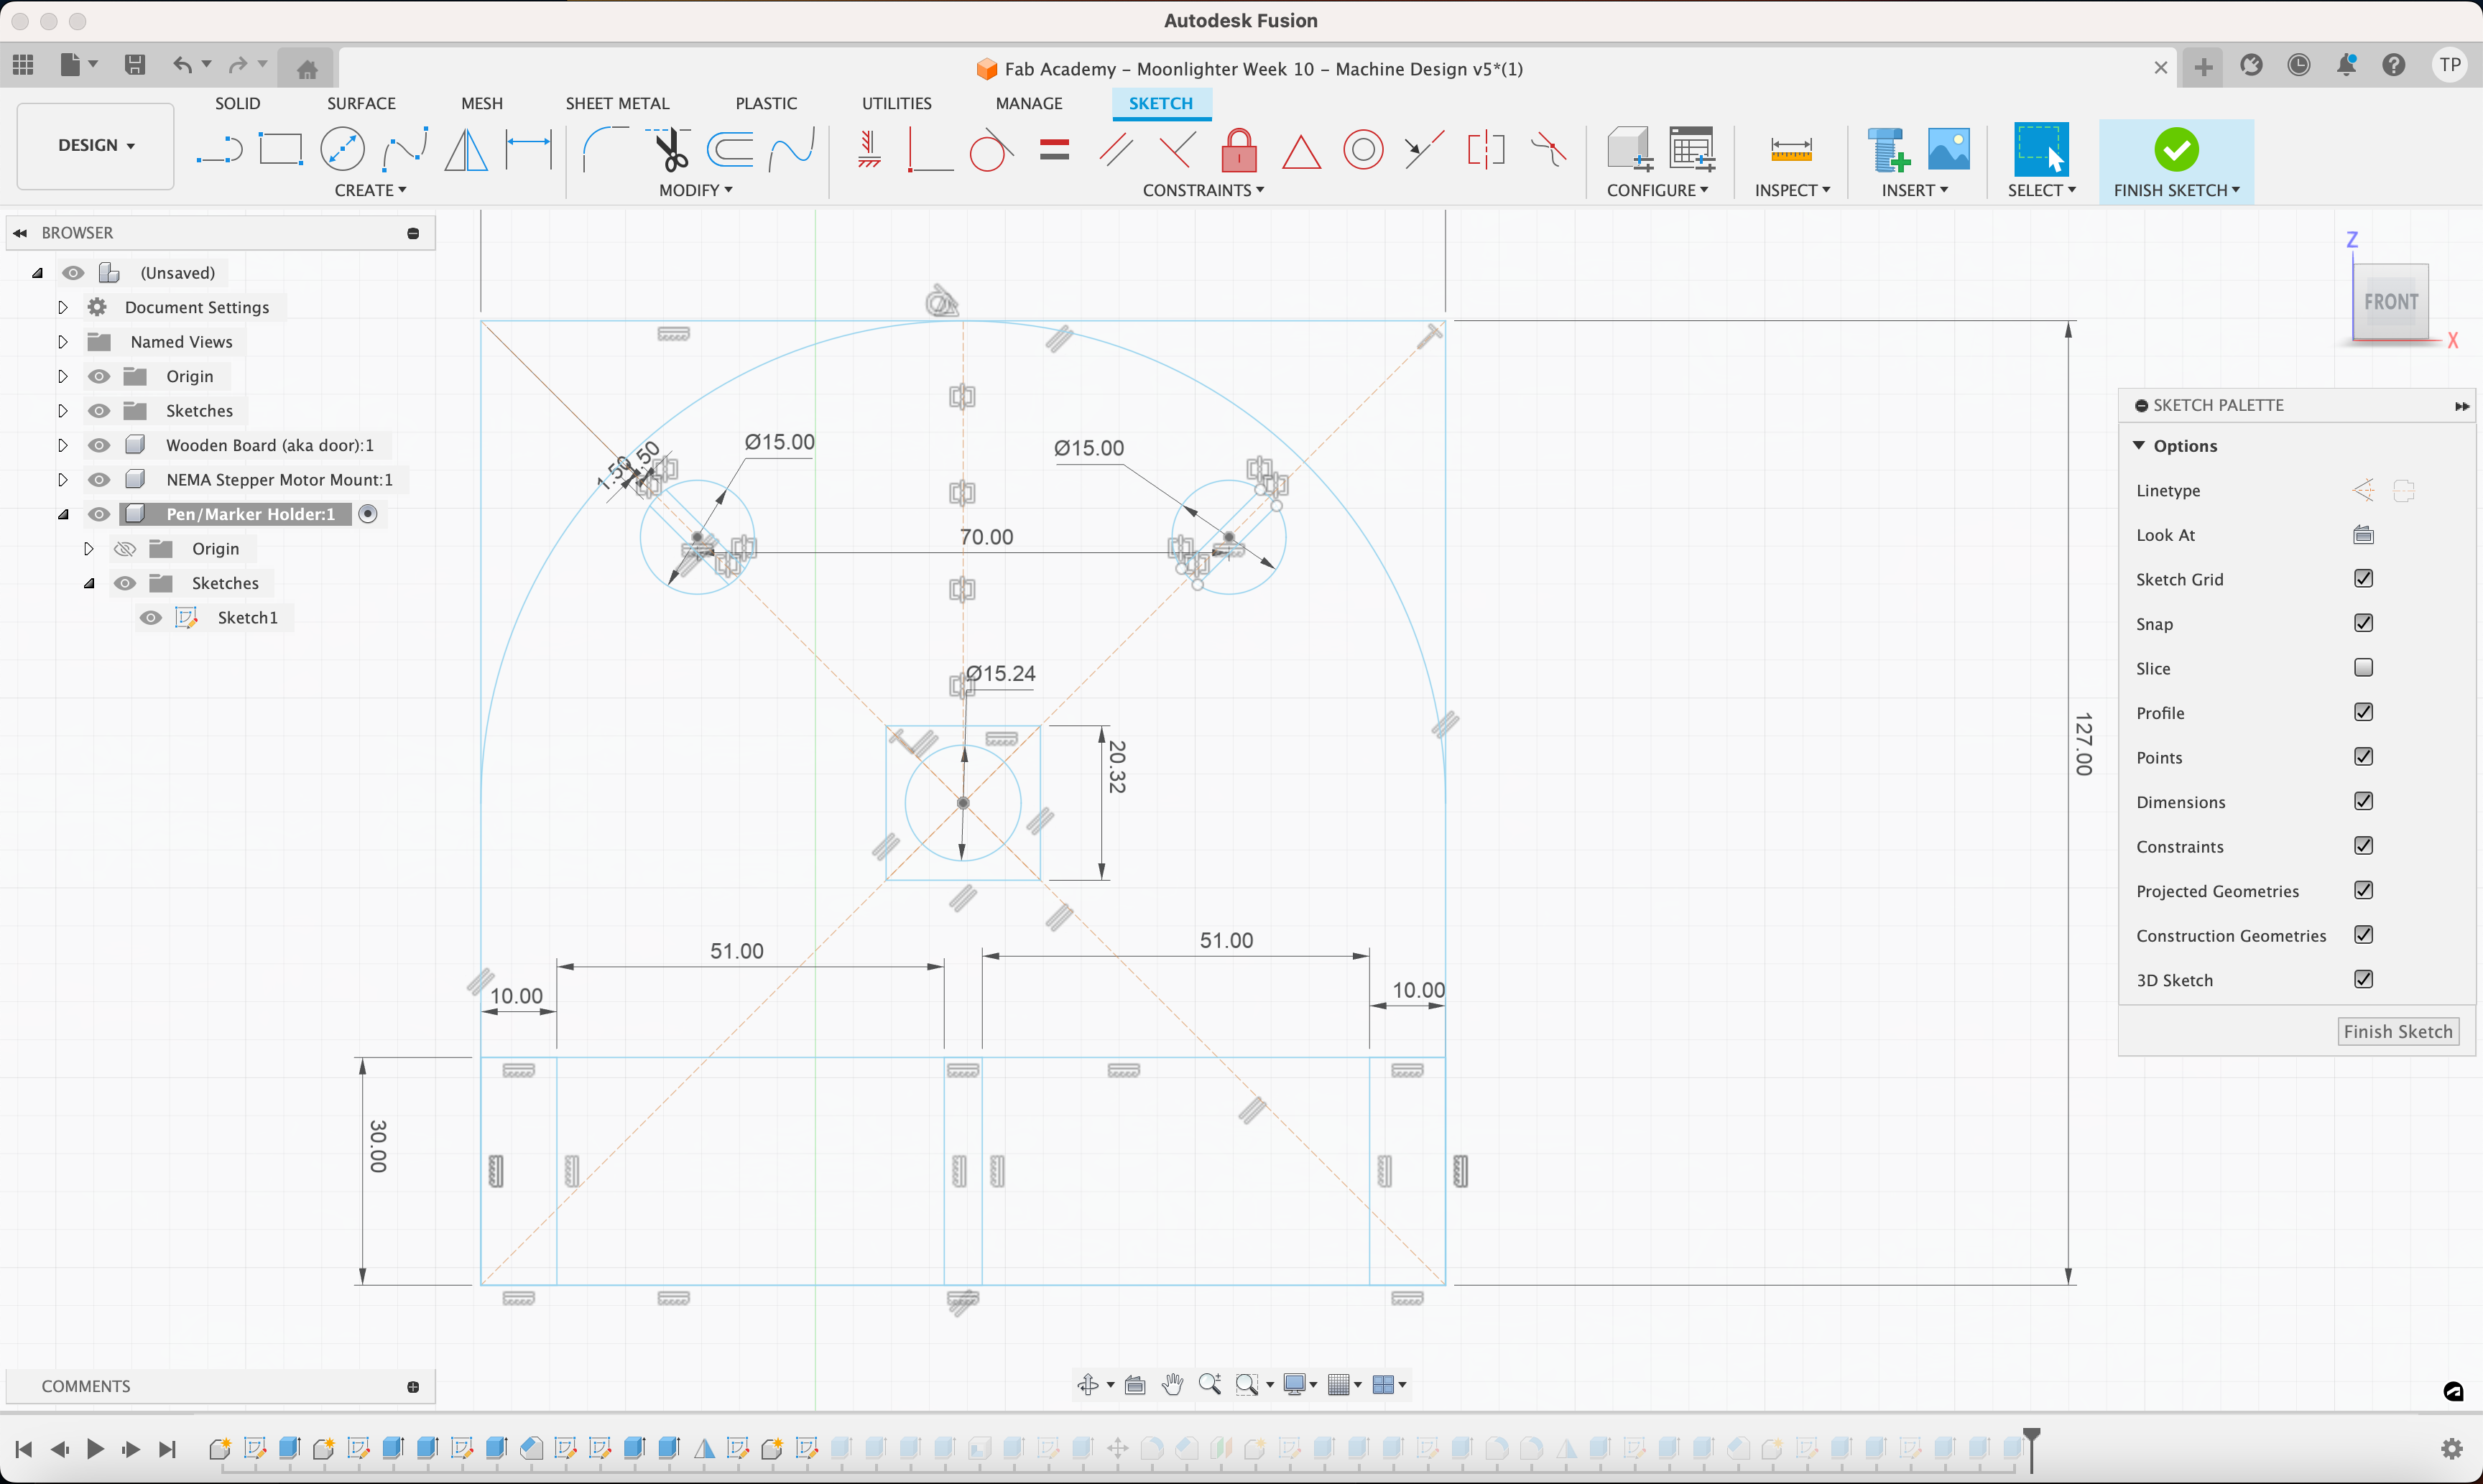
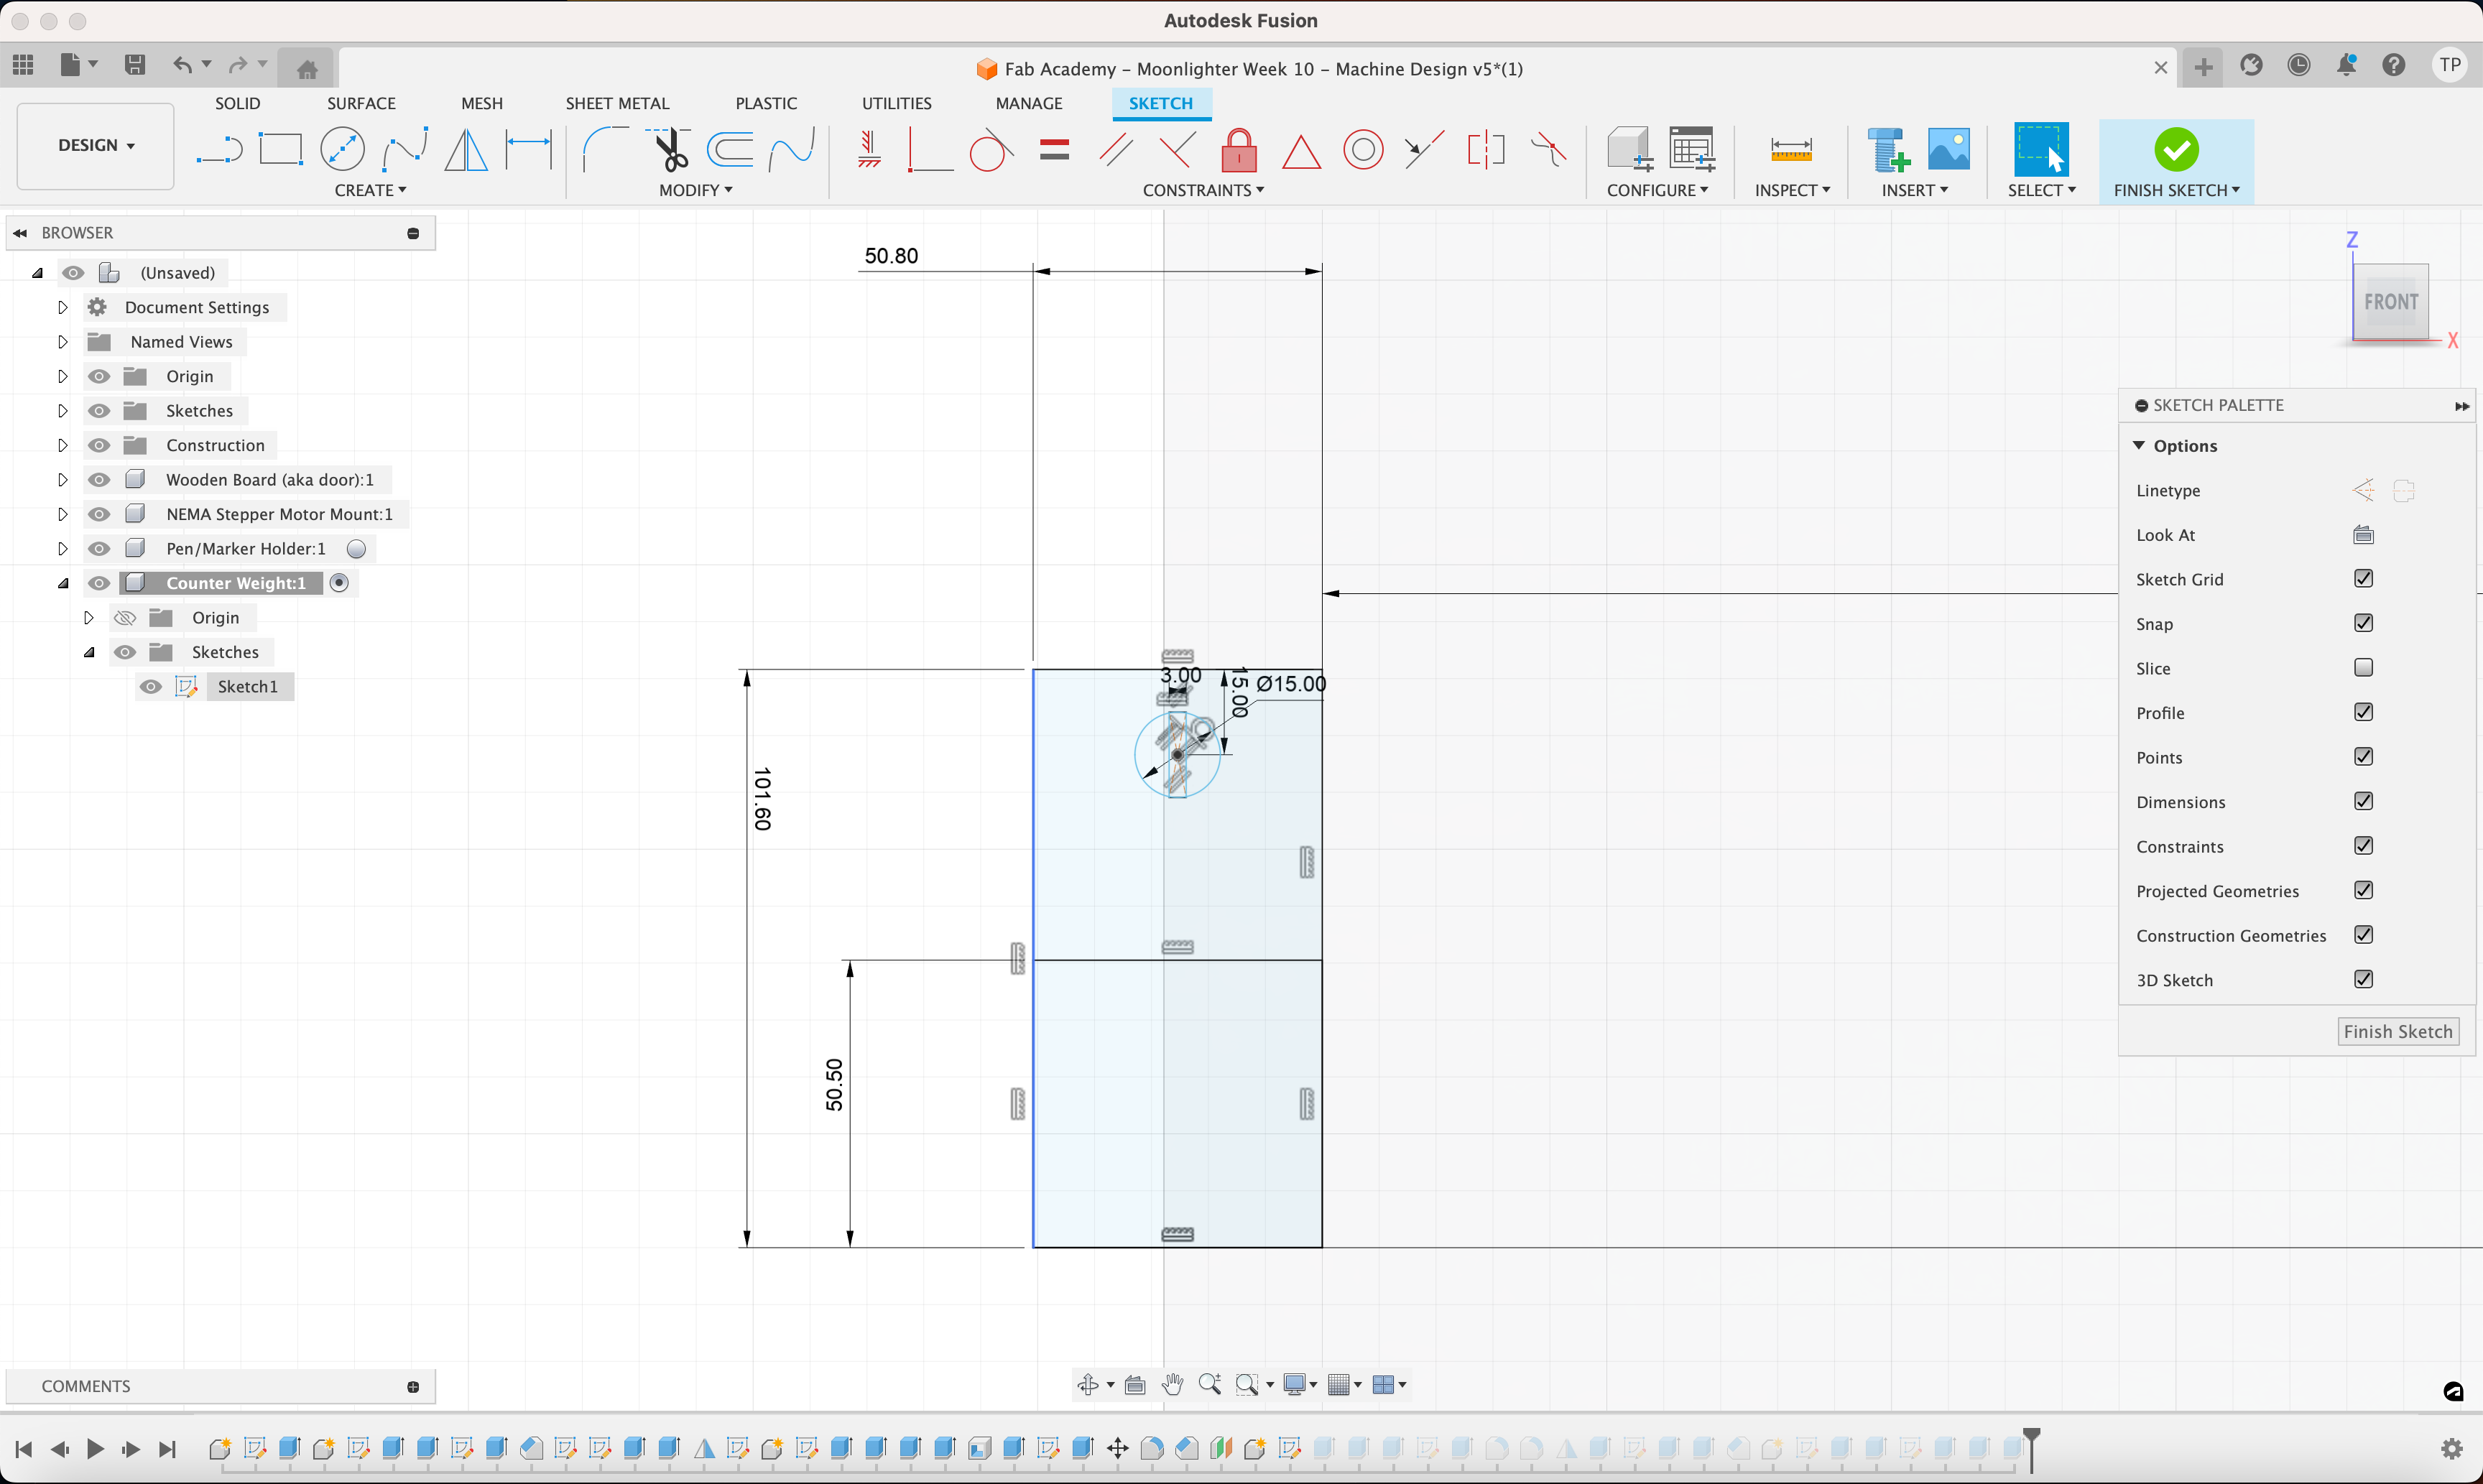
3D Modeling the Designs
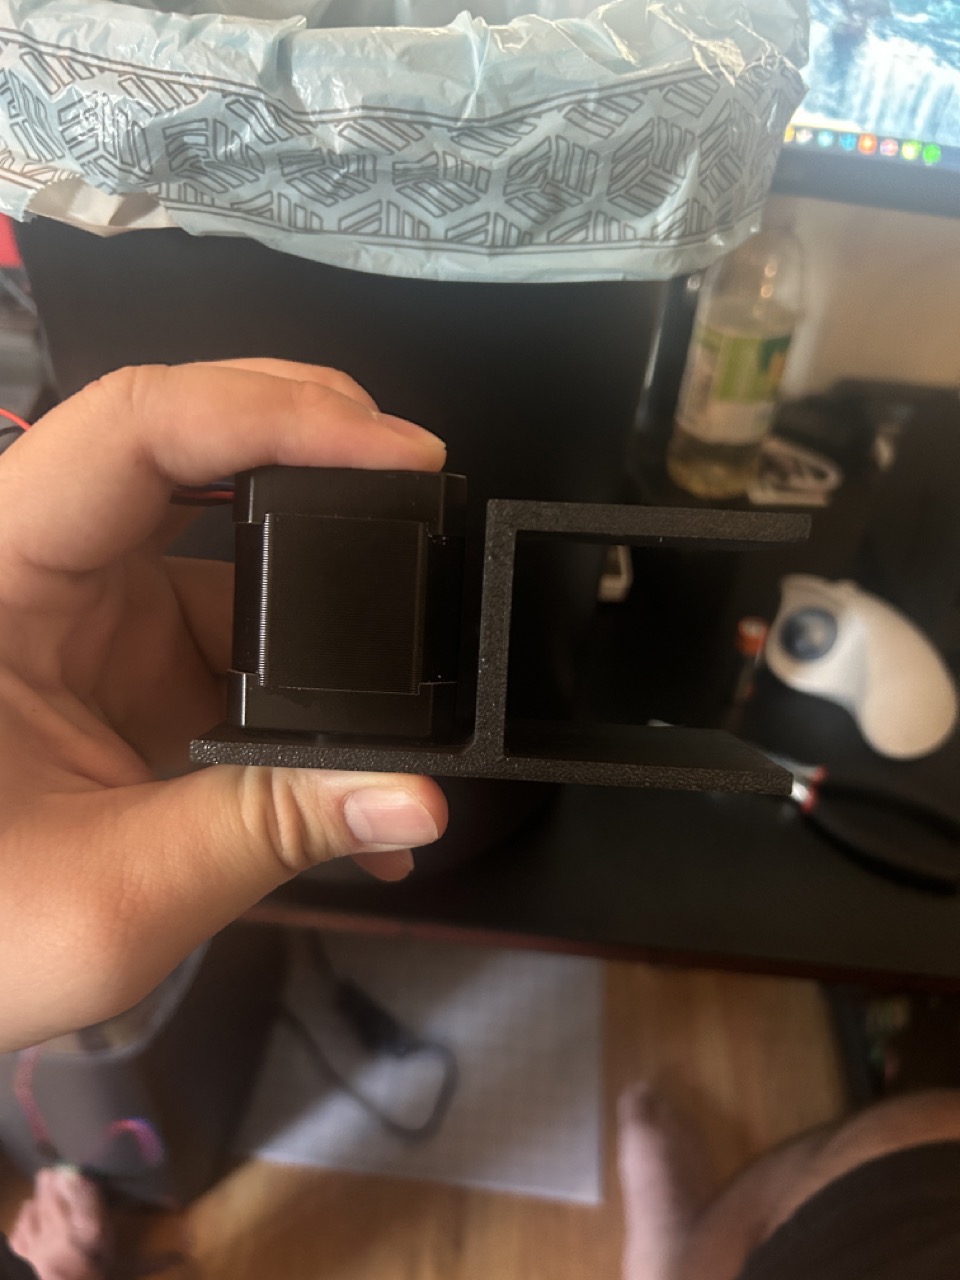
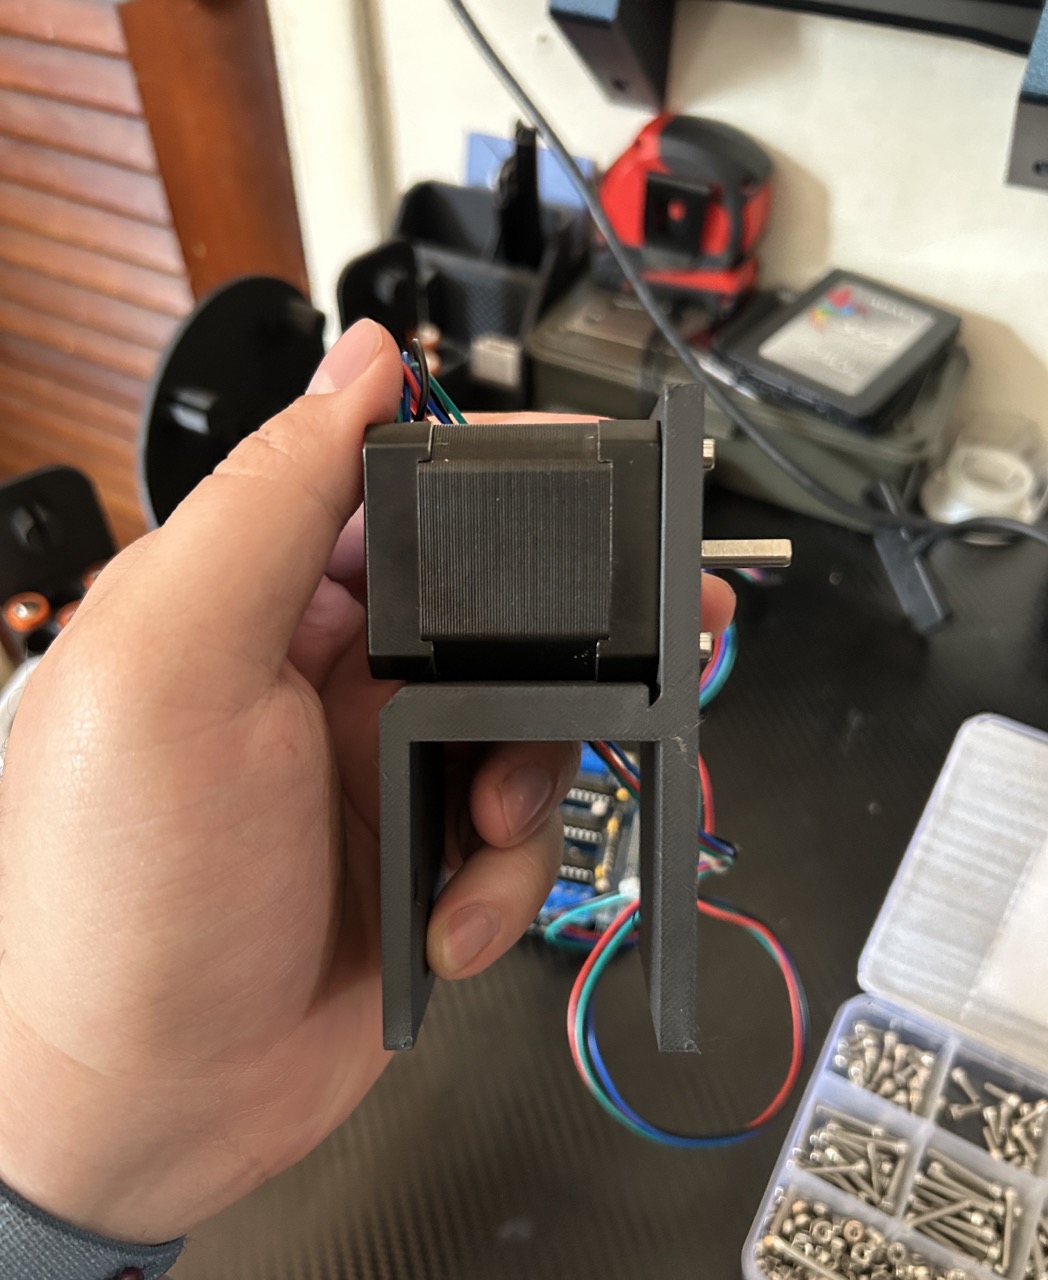
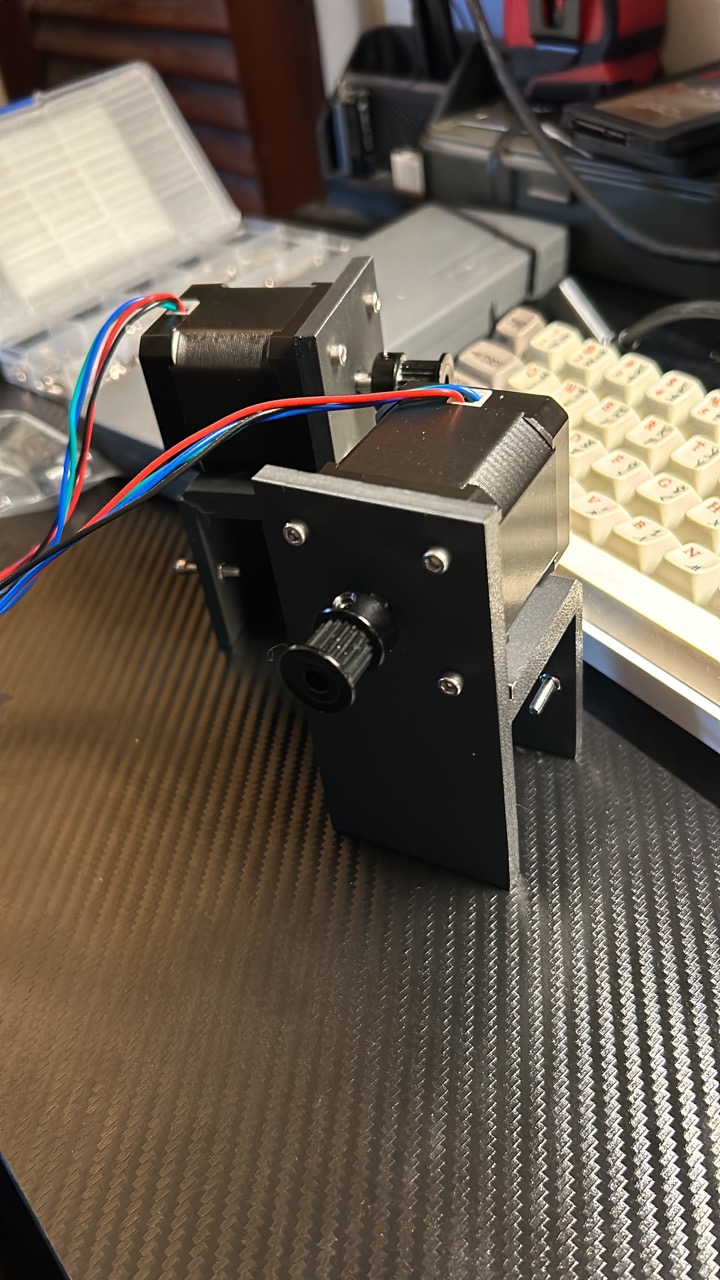
Motor Mount (Quantity x2)
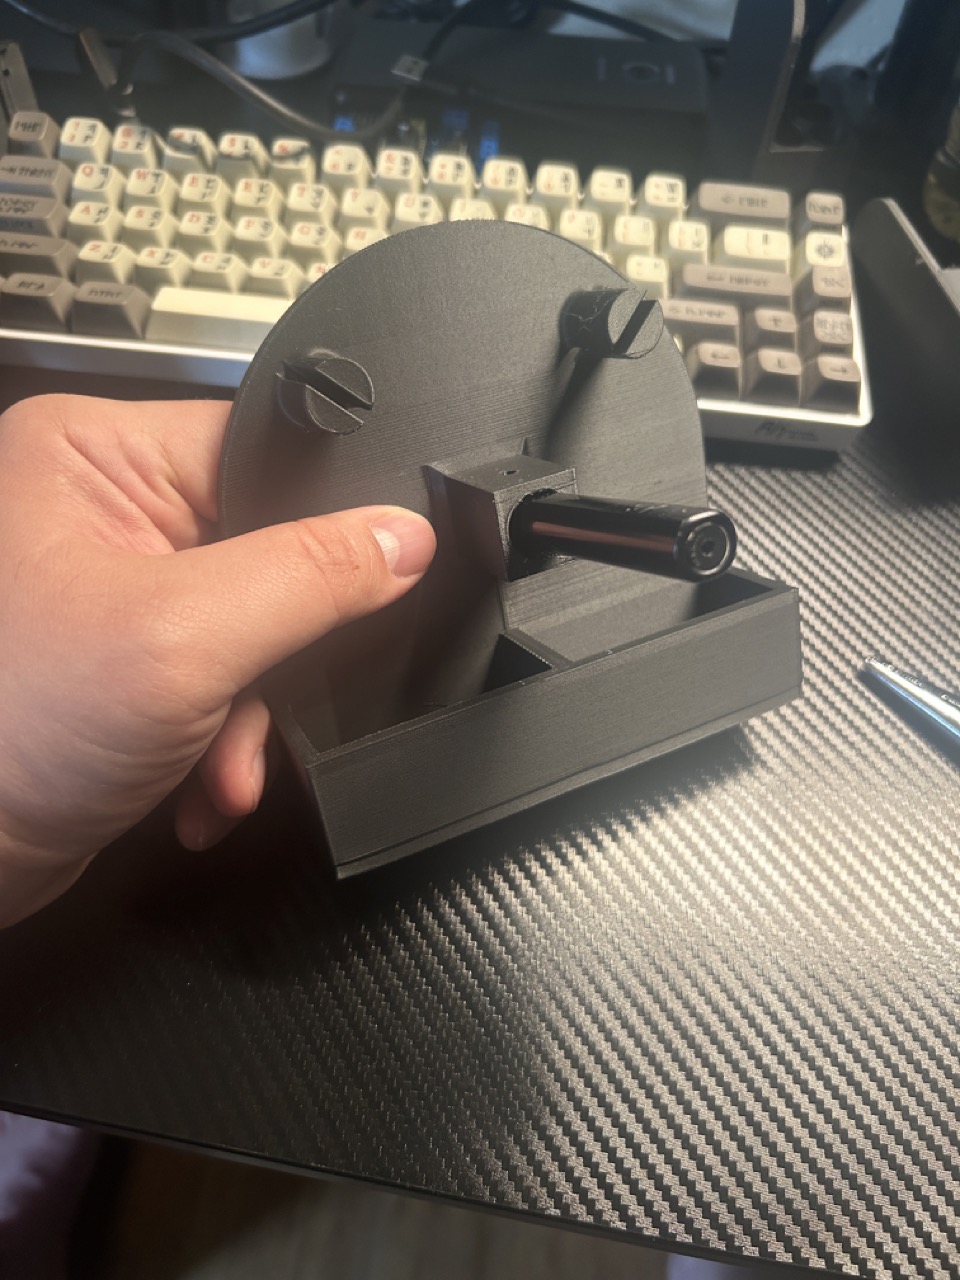
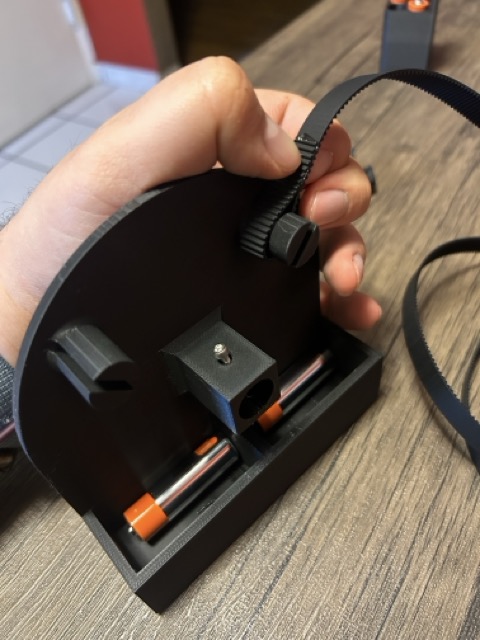
Pen Holder (Quantity x1)
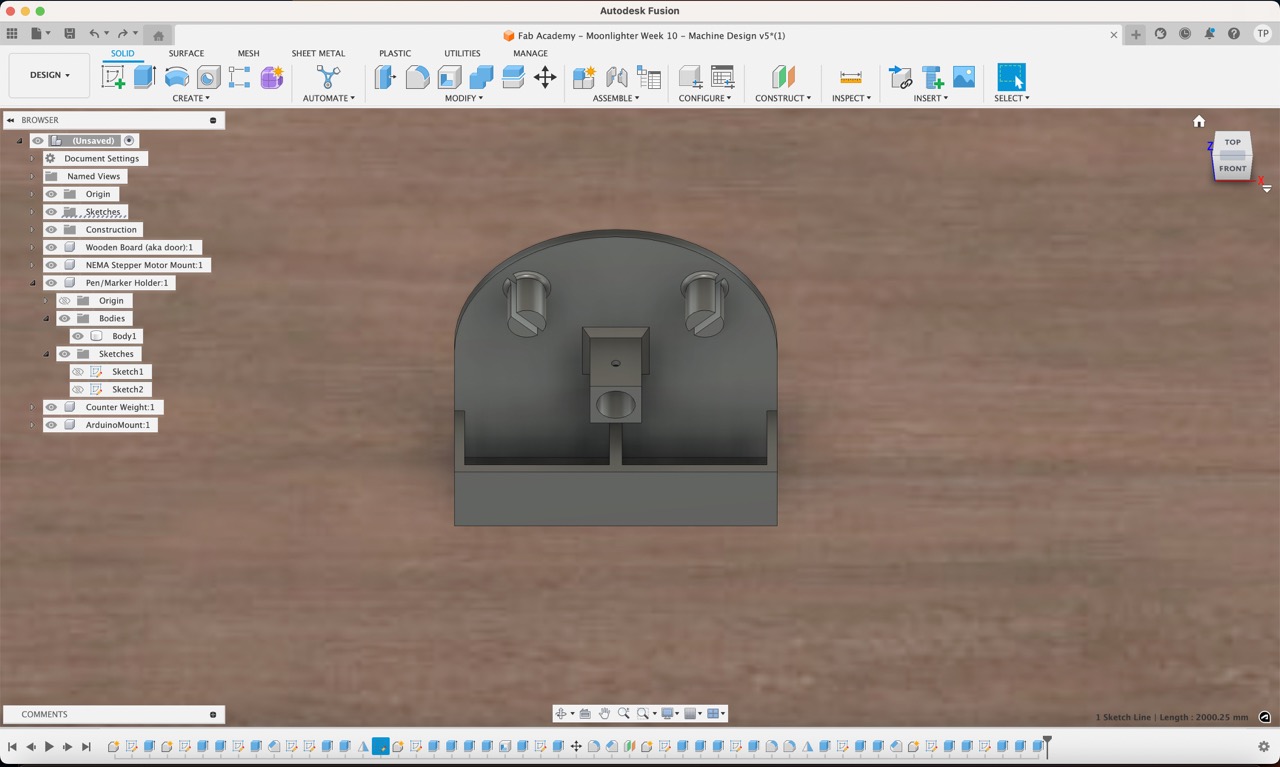
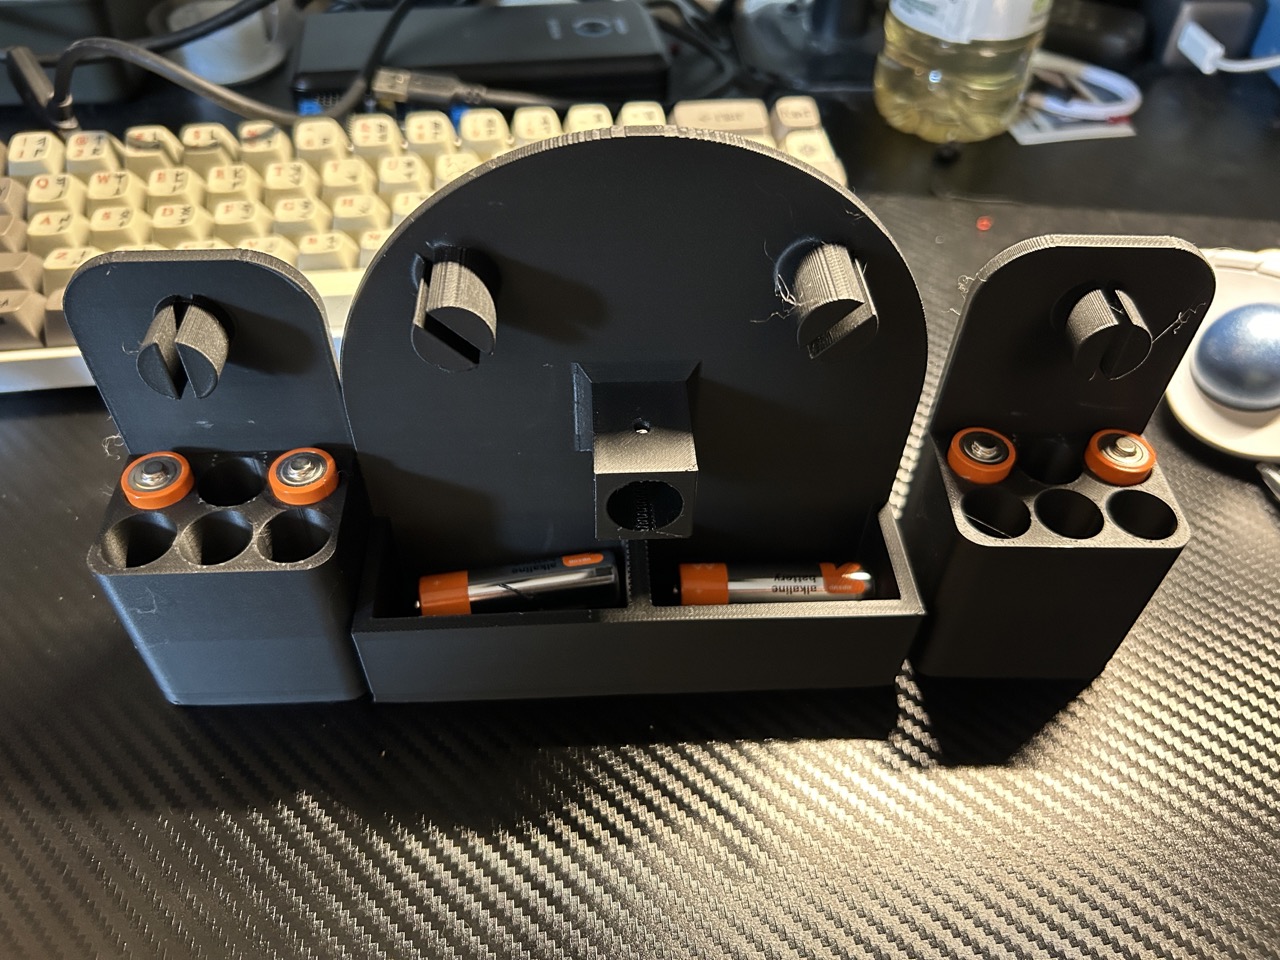
Counter Weight (Quantity x2)

3D Printing The Parts

Hardware Components
The pen plotter device, referred to as a V Plotter, requires the following hardware components:
Machine Surface: The overall surface where the motors are mounted.
Writing Surface: The surface on which the pen will draw.
2 NEMA Stepper Motors: Motors with 200 steps per revolution.
Arduino UNO: Loaded with modified Polargraph firmware.
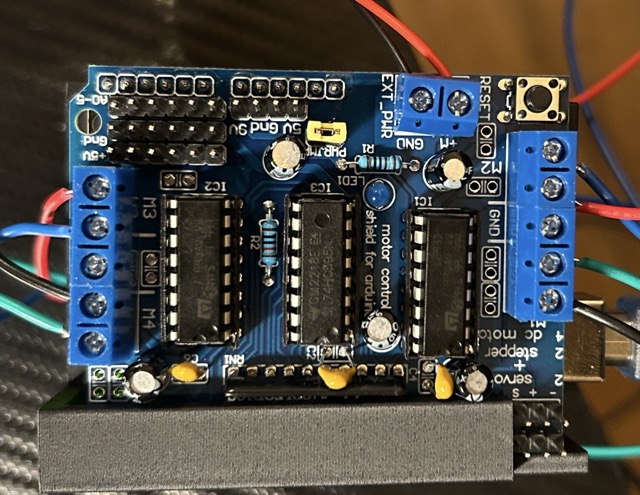
Stepper Motor Controller: Specifically the Protoneer CNC Shield V3.
12V 1 Amp DC Power Supply: Provides power to the stepper motor controller.
Belts and Gears: Toothed and spindled for movement.
Windows-based Computer: Running the Polargraph software.
3D Printed Motor Mounts: For mounting the motors.
Associated Wiring: For connecting the motors and other components.
3D Printed Parts
The parts that are 3D printed include the motor mounts that secure the stepper motors to the machine surface, the gongola, pen holder, and counterweights.
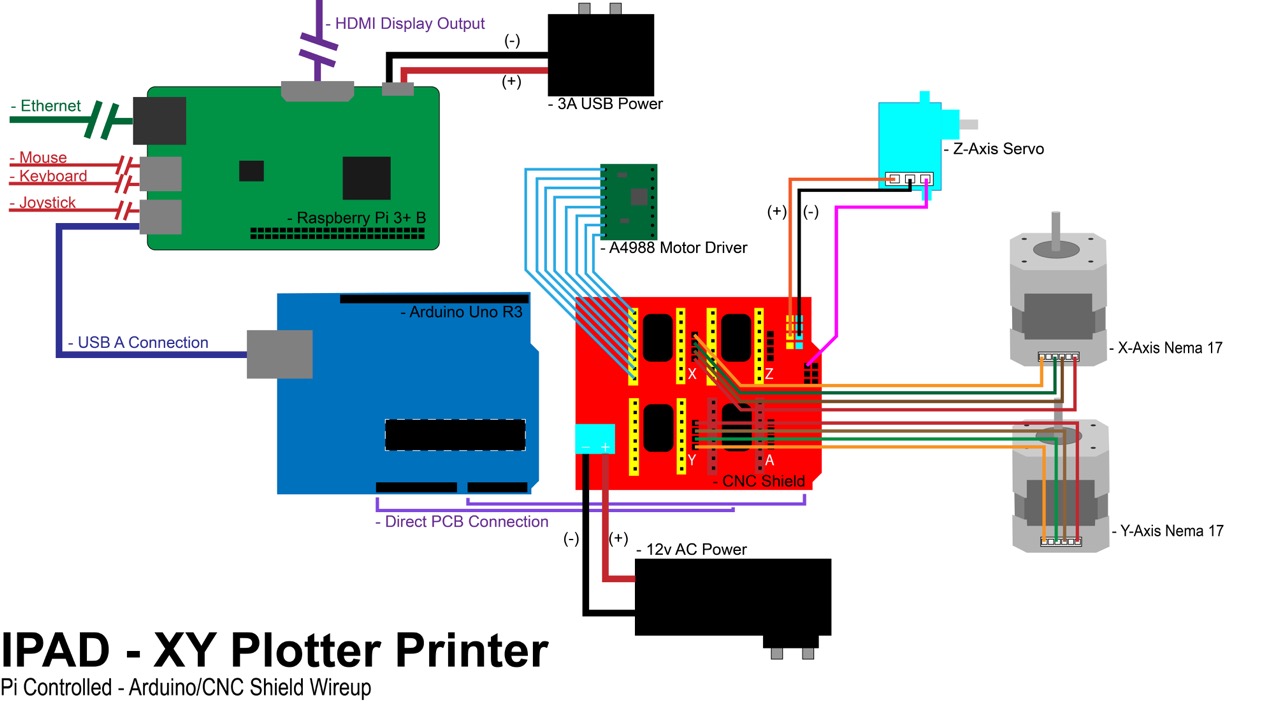
Wiring all the Components
Following the wiring diagram by Franklin Von Moon:
Assembly
Writing Head:
Place the pen in the center of the writing head and secure it.
Affix the belts around the mounts on the corners of the writing head.
Mount the servo motor into the top of the writing head.
Stepper Motors:
Bolt the motors to their mounts and then to the machine surface.
Connect the motor-end of the wiring to the motors.
Run the belt atop the gear to form the V shape and attach weights to the end of the belt.
Servo Motor:
Connect the servo motor to the stepper motor controller using specific wiring instructions (red to +5V, brown to ground, orange to signal).
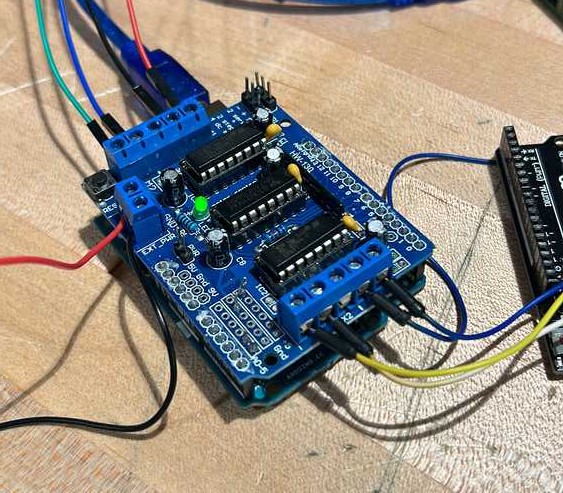
Arduino and Stepper Motor Controller:
Mount the Protoneer stepper motor controller on top of the Arduino.
Connect the motor wires to the X and Y outputs on the controller.
Power Supply:
Plug the power supply into the Arduino.
Programming
Firmware Installation:
Install the Arduino IDE and download the modified firmware from GitHub.
Copy required libraries to the Arduino Sketch directory.
Open the firmware sketch in the Arduino IDE, verify, and upload it to the Arduino.
Modifying Firmware:
Download the source Polargraph firmware if modifications are needed.
Modify the firmware to work with the Protoneer stepper motor controller.
Change specific configuration settings in the code to match the hardware setup.
Operation
Software Installation:
Download and install the Polargraph software on a compatible computer (Windows, Linux, Mac).
Ensure the Java Runtime Environment is installed.
Running the Software:
Run the pre-compiled version of the Polargraph application or compile it from source if necessary.
Configuration:
Set up the physical attributes and COM configuration in the Polargraph application.
Follow a pre-flight checklist to ensure all connections and components are properly set up.
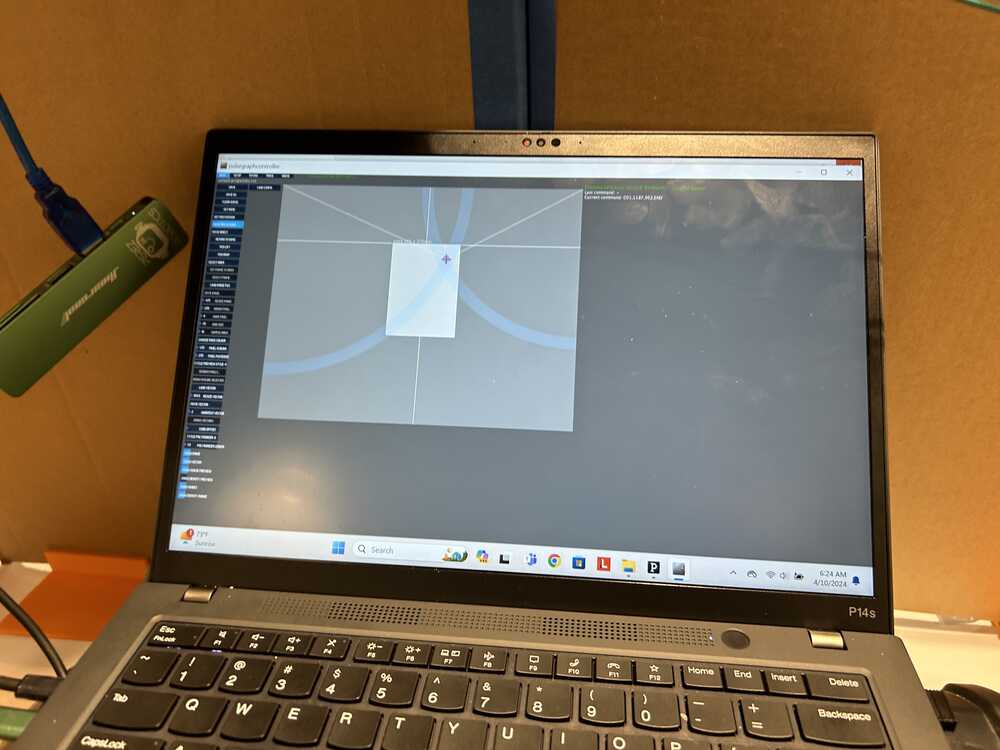
Using the Application:
Navigate the application to input images, set up the drawing parameters, trace, and queue the drawings.
Control the plotter to draw vectors, bitmaps, shaded pixels, or trace lines from images.
Instructions:
1. Plug in necessary hardware, uno on arduino, 12v to cnc, steppers to cnc etc (See wiring diagram)
2. Download and install Arduino IDE https://www.arduino.cc/en/main/software
2a. You will need to revert to Arduino 1.6 for Polargraph to work. This can be found at: Arduino Old Releases Site
3. Download GRBL https://github.com/gnea/grbl/releases
4. Download XLoader http://www.hobbytronics.co.uk/arduino-xloader
5. Follow instructions to get GRBL on the Arduino/cnc
6. Download Universal Gcode Sender https://winder.github.io/ugs_website/
7. UGS should detect the CNC shield and any connected motors
8. Begin Making Art!
Stepper Motor Test
Assembling The Components

Processing Software
Testing Motion Control
Running Test Drawing
Machine is Drawing!
Key Learnings
V-Plotters are a fun but challenging project to learn machine design
Troubleshooting stepper motors is difficult and tedius
Make sure your steppers are connected correctly!
Motor Shields overheat, quickly, and be careful when holding them!
Having better hardware available will allow you to construct a system that provides better control. Though we used polar graph, GRBL, and Makelangelo are much more stable control.
Watch your machine with testing. We launched the gondola up in the air about 3 times!
Teamwork can mitigate the stress while building these projects.
While I focused on the 3D design of the new components in Fusion, Peter focused on the programming of the motor control. And collaboratively we built and tested the system.
Files
Download Arduino Mount 3D File
Download Pen Holder 3D File
Download Counter Weight 3D File
Download Motor Mount 3D File
Download Fusion File
Download Processing
Download Polargraph
Copyright 2024 Thomas Pupo - Creative Commons Attribution Non Commercial
Source code hosted at fabcloud/fabacademy/2024/thomas-pupo