Week 2: Computer Aided Design
This week marked the initiation of our exploration into the realm of 3D and 2D modeling, a journey facilitated by Rhino, a potent computer-aided design (CAD) software developed by Robert McNeel & Associates. Rhino stands out for its prowess in 3D modeling, rendering, and analysis, boasting versatility and precision in handling intricate geometries.
Anticipating further learning, I eagerly await delving into Grasshopper, a plugin for Rhino, which promises to expand our capabilities and broaden our understanding of computational design.
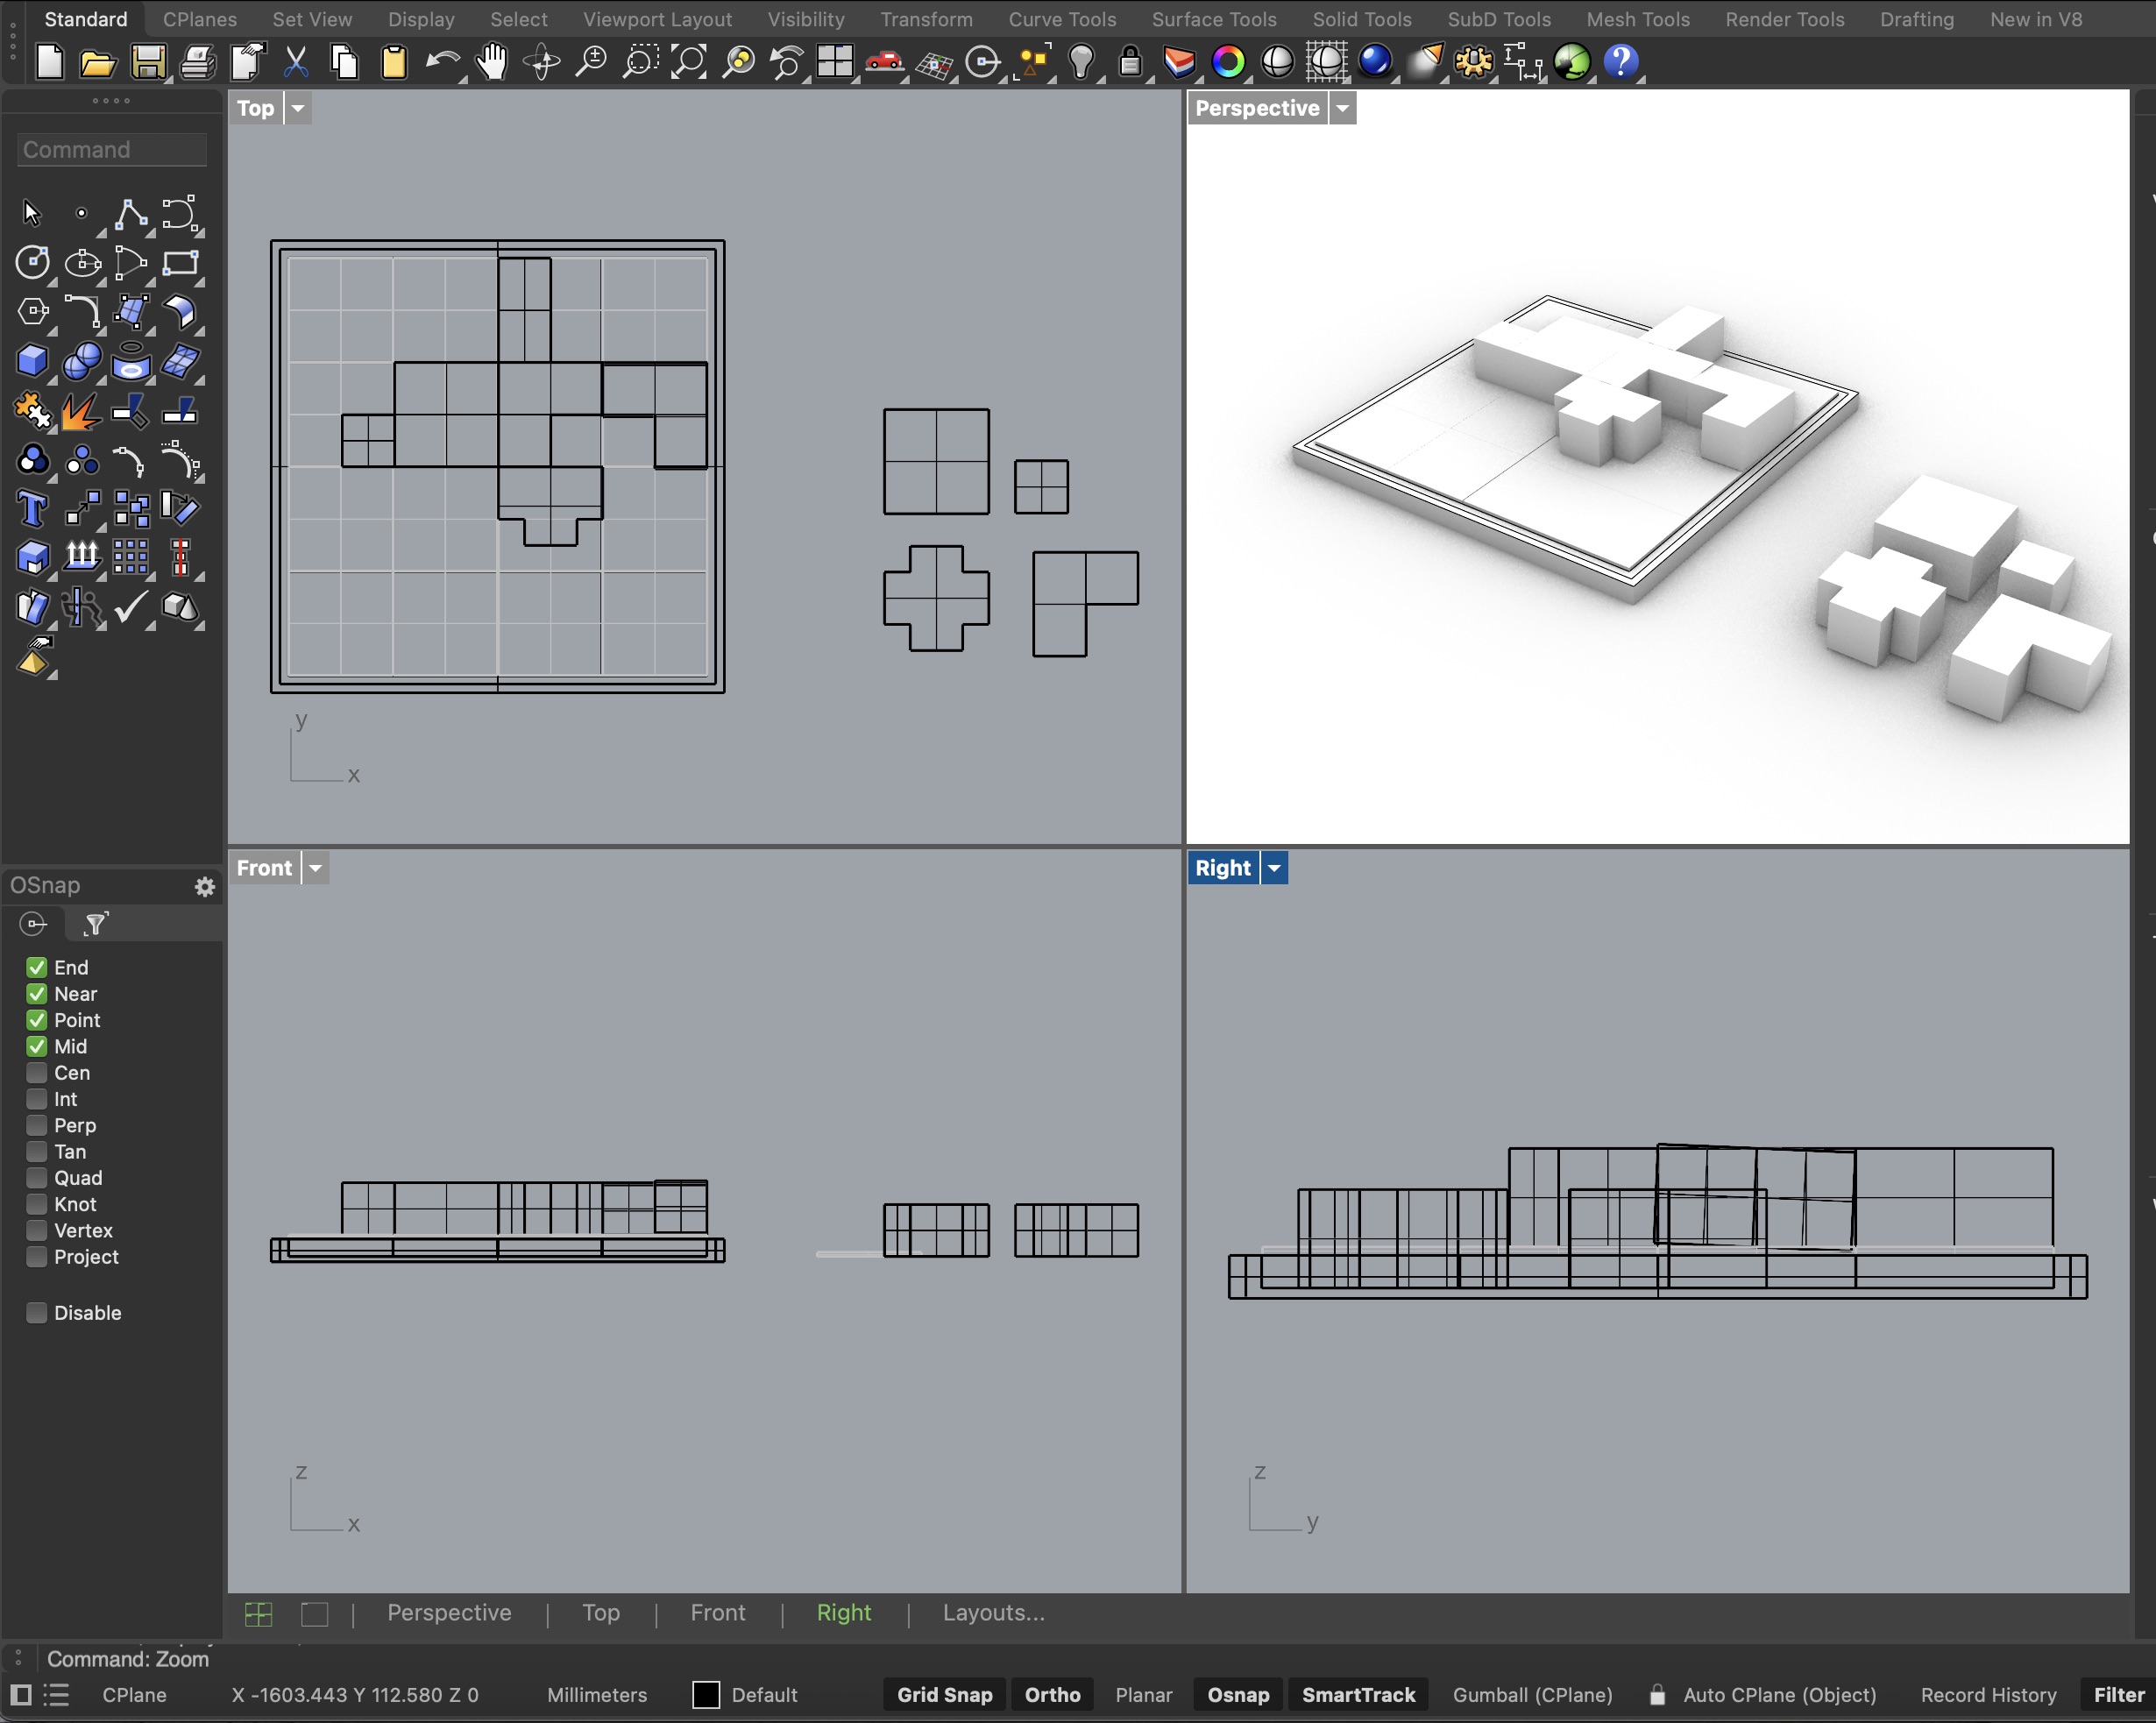
In navigating Rhino's user interface, I found it to be intuitive and user-friendly, facilitating efficient navigation, creation, and manipulation of 3D models.


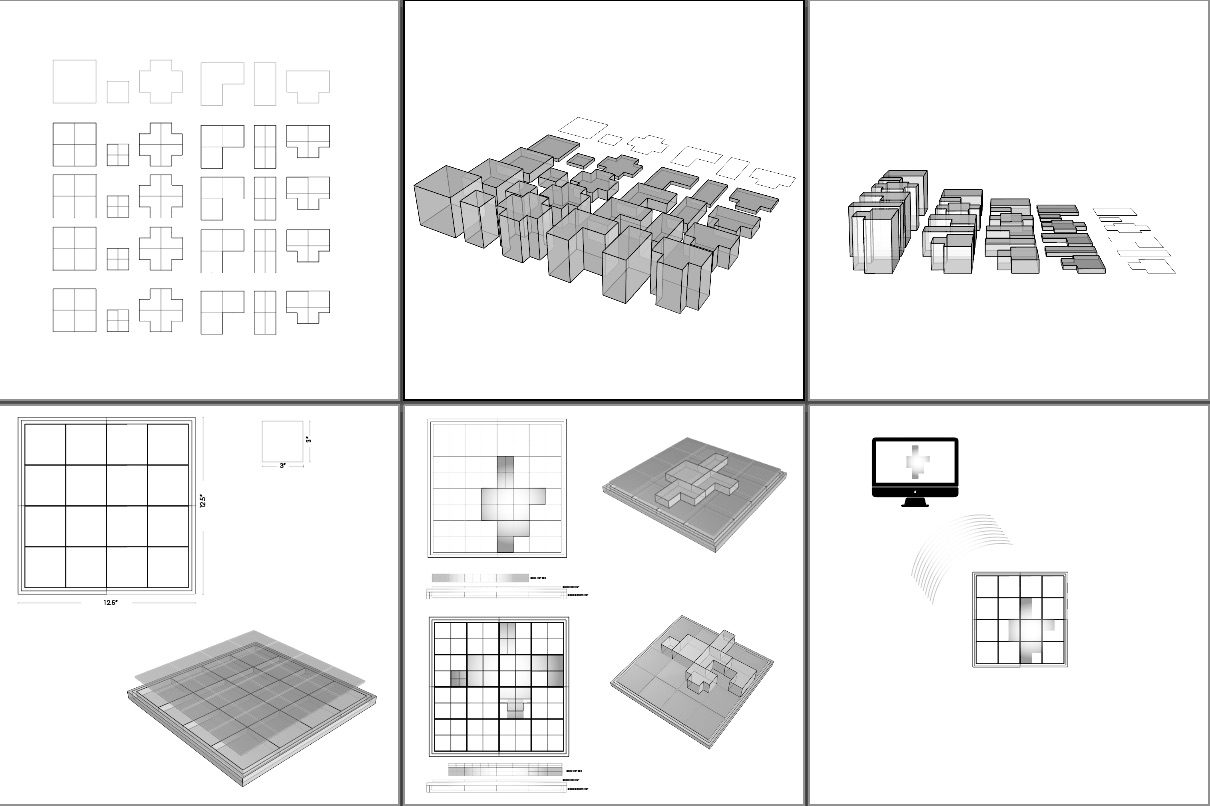
This week's focus was on exploring the visualization of my final model concept, envisaging its aesthetics and considering user perceptions of varying sizes. Using Rhino's extrusion capabilities, I experimented with different variations and sizes of blocks, envisioning how they would integrate into the overall design.
Rhino's rich array of modeling tools proved invaluable in this exploration. From extrusion to lofting, sweeping, and Boolean operations, these tools empowered me to craft complex shapes, surfaces, and solids with ease.

 To streamline the design process, I organized the project into distinct layers. Each layer represents a component of the board design, including individual tiles atop the board, a framed division to house electronic components, and the foundational base of the board. This segmentation enables efficient editing and refinement, ensuring cohesion and functionality in the design elements.
As we delve deeper into the world of 3D modeling and explore the intricacies of Rhino and Grasshopper, I anticipate further discoveries and opportunities for creativity and innovation in our projects..
To streamline the design process, I organized the project into distinct layers. Each layer represents a component of the board design, including individual tiles atop the board, a framed division to house electronic components, and the foundational base of the board. This segmentation enables efficient editing and refinement, ensuring cohesion and functionality in the design elements.
As we delve deeper into the world of 3D modeling and explore the intricacies of Rhino and Grasshopper, I anticipate further discoveries and opportunities for creativity and innovation in our projects..
In Rhino, converting a 3D model into a 2D representation and exporting it to a DWG (Drawing) file format is a straightforward process that involves utilizing Rhino's powerful tools for generating 2D drawings. Here's a step-by-step guide: Prepare Your 3D Model: Ensure that your 3D model is well-organized and ready for conversion to 2D. This includes organizing layers, grouping objects, and ensuring that your model is clean and accurate. Switch to Top View: Before creating 2D drawings, switch your viewport to the top view (or any desired view) to ensure that you're generating the 2D representation from the appropriate perspective. Use the Make2D Command: In Rhino, the Make2D command generates 2D drawings from a 3D model. You can access this command by typing "Make2D" into the command line or by navigating to the "Curve" menu and selecting "Curve from Objects" > "Make2D." Adjust Make2D Options: After initiating the Make2D command, you'll be prompted to adjust various options. These options include settings for hidden line removal, projection direction, and other parameters that affect the appearance and accuracy of the generated 2D drawings. Take some time to experiment with these options to achieve the desired results. Review and Modify 2D Drawings: Once the Make2D command completes, Rhino will generate 2D curves based on the 3D model. Review the generated curves and make any necessary modifications or adjustments to ensure accuracy and completeness. Export to DWG Format: After finalizing the 2D drawings, you can export them to the DWG file format. To do this, navigate to the "File" menu, select "Export Selected" or "Export" (depending on your preference), and choose "AutoCAD Drawing (*.dwg)" as the file format. Specify the file name and location, and click "Save" to export the 2D drawings to the DWG format.