1. Project management
This week I started making changes to the provided website template through Gitlab, Terminal and Sublime Text.
Process
While I find coding to be a struggle, I genuinely love it. The challenge makes it feel that much rewarding, even if I have a hard time understanding the structure and language that it takes to communicate through HTML.
I started the process of changing my website template using the helpful link provided by Fab Academy, the Git Simple Cheat Sheet.I already had Git installed on my Mac, so I configured my username and email on my Macbook thorugh Terminal. To add my username, I typed git config --global user.name "dara-yanoff". To add my email address for uploading, I types into Terminal, git config --global user.email "yanoff_dara@wheatoncollege.edu". I then needed to find out if I already had an SSH KEY by typing cat ~/.ssh/id_rsa.pub, Terminal genreated a failure response, which told me I need to genreate it myself, by coding ssh-keygen -t rsa -C "$yanoff_dara@wheatoncollege.edu", and re-entering the previous command, cat ~/.ssh/id_rsa.pub. A long string of characters appeared, aka my SSH Key. I copied it and applied it to my Git account. I learned that this key is how Git understands which admin it is communicating with, and from where. I set the new SSH Key as the key for my laptop. I then transfered my Git Lab Repository onto my laptop by cloning it from my personal page on Git. Then, in terminal I added the command git clone git@git......my repo. Once the repo was cloned and downloaded onto my computer within the folder I designated to it, I opened the html files using Sublime Text. Now, I could alter and add new code to change my website, and push to git through Terminal to apply the changes publicly.
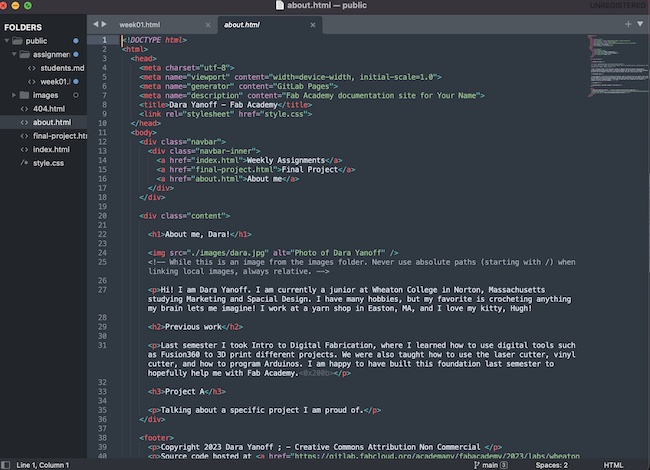
My first change to my Fab Academy website was on the About page. To change the avatar picture to a picture of myself, I adjusted a picture of me by 70%, so it was only around 400KB. Then, I saved the JPEG into the images folder of my repo. Next, in Sublime Text and within the coding of about.html, I changed the code of the picture from "./image/avatar-photo.jpeg" to "./image/dara.jpeg". Then, in the same process that I am currently using to write this, I highlighted the template text under the imaging code to display my own words instead. I repeated this process for the Previous Work section, but I left the Project A section as the predetermined template, because I have yet to complete a project relevant to Fab Academy that I am proud of.
Next, I focused on the design of the site. Using the style.css file, I decided to change the color way by changing the navbar color to #a8325c, or a shade of fuscia. I then added code beneath the body grouping, I typed color: #ffffff to change the text color to white, then I added background color: #111111 to change the background color to an off-black. At my professors recommendation I chose an off-black rather than pure black because of the way that pure black presents on computer screens. I am ultimately very happy with the change.
I cleaned up the rest of the template by going through the about.html and index.html and finding all of the < your name > entries and changing them to my own.
To submit these changes, I first saved the in Sublime Text. Then in Terminal, making sure I was in the my repo's public folder, I entered cd to get out of the previous folder. I then entered cd desktop, enter, then cd fabacademy, enter, then cd dara-yanoff, enter, then cd public, enter, to navigate my way to my repo withing terminal. After that, I typed git add . to begin the process of pushing all of my repo files to git. After this step, I enter git commit -m "final changes" to label the changes I have made during this session. Then, lastly I typed git push into terminal to submit my changes to gitlab to be published.
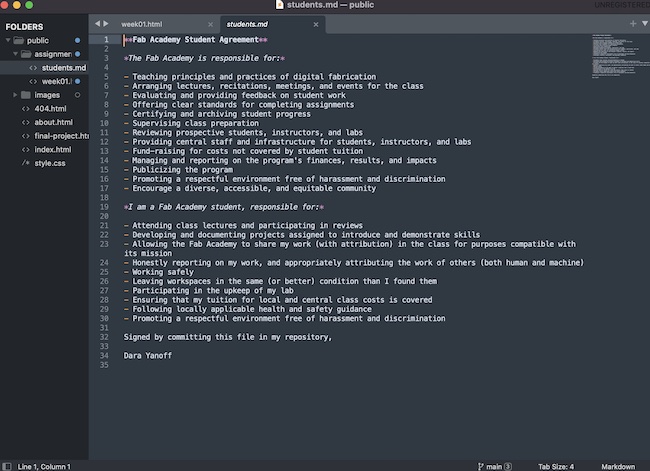
This week I was also required to complete the student agreement, which I downloaded into my repo, signed in Sublime, then pushed and commited to Git.
Useful links
Gallery