Week 4: Embedded Programming
Group Assignment(s) for this week
- Compare the performance and development workflows for other architectures
- Document your work to the group work page and reflect on your individual page what you learned
Getting Started
For our group work, we compared the performance and development workflows for two architectures using the Arduino development environment: The classic Arduino Uno using the Atmega328 processor, and the Seeed Studios Xiao ESP32, using the Espressif ESP32C processor.
Processor Specifications and Performance
By reviewing the datasheets for these processors [link], [link], we learned the following vital statistics:
| Processor Speed (Mhz) | SRAM (working memory), kB | Flash memory (for programs), MB | Number of GPIO Pins | Operating Voltage (V) | Special Features | |
|---|---|---|---|---|---|---|
| Arduino Uno (ATmega328P) | 20 Mhz | 2 kB | 0.032 MB | 14 | 5 V | Slow, expensive :( |
| Seeed Xiao ESP32C3 (Espressif ESP32C) | 160 Mhz | 400 kB | 4 MB | 34 | 3.3 V | Connect to WiFi, Small, Connect to Bluetooth, inexpensive :) |
Installation and Development Workflow for ESP32
We got the Seeed Xiao ESP32 up and running with a basic “blink an LED” code via the following steps:
- Plug the Xiao ESP32 into the computer using a USB-C cable.
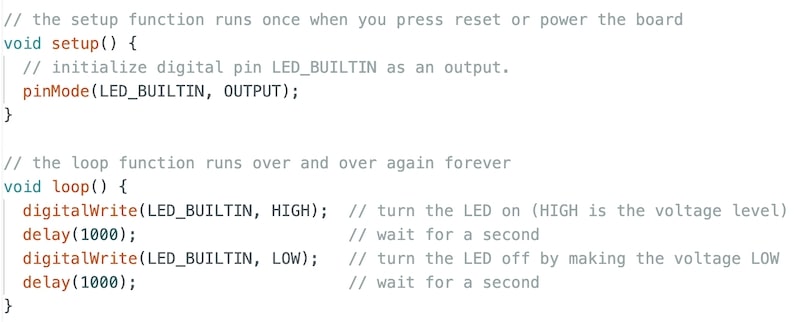
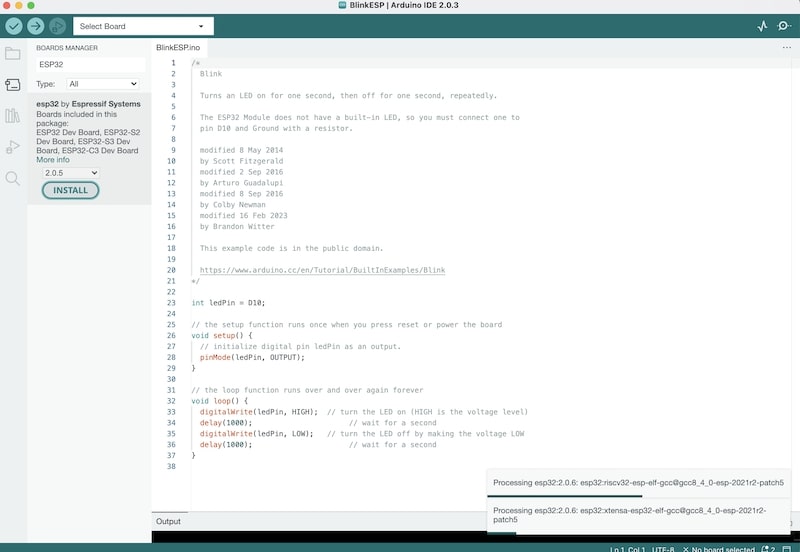
- Download and open a Blink sketch for the ESP32. This was provided by our instructor; the code we used is:
- Install the ESP32 Board Package to Arduino (this only needs to be done once) In Arduino IDE → Settings, Paste the following URL into Additional Boards Manager URL
- Install support for ESP32 boards: From the Tools / Board / Boards Manger… menu, Search for ESP32 and install the package from Espressif Systems.
- Select the specific board we will use: Tools / Board / esp32 / XIAO_ESP32C3
- Select the ESP32’s serial port from Tools → Port → [ESP32 Port]
The port will differ depending on operating system and USB port, on our Mac it looked like /dev/cu.usbmodem[###]. For some reason it was recognized with a weird board type, but it still worked.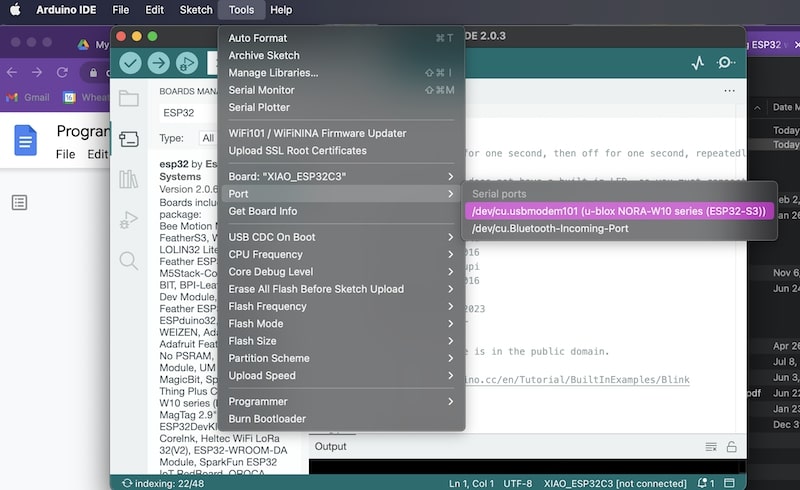
- Hit the “upload” button (-->) to send the code to the Arduino.
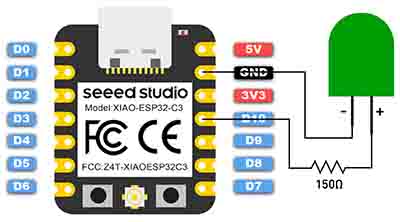
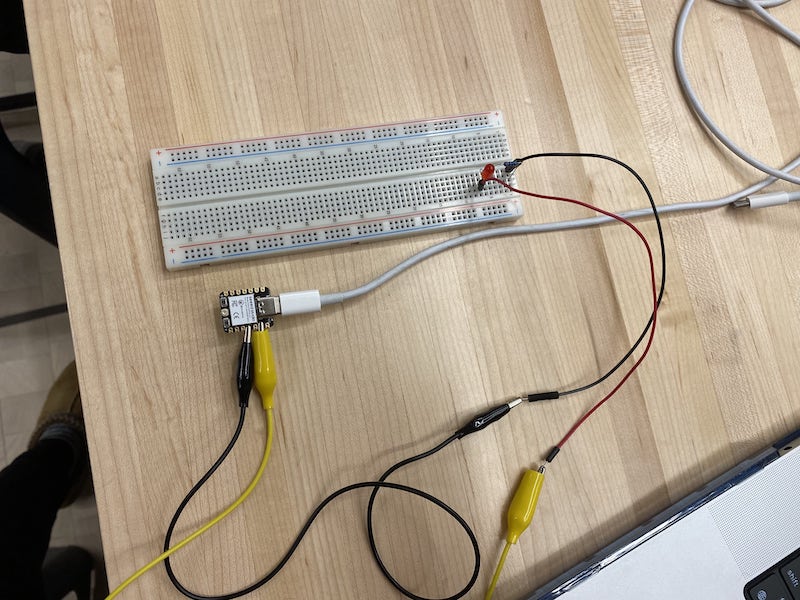
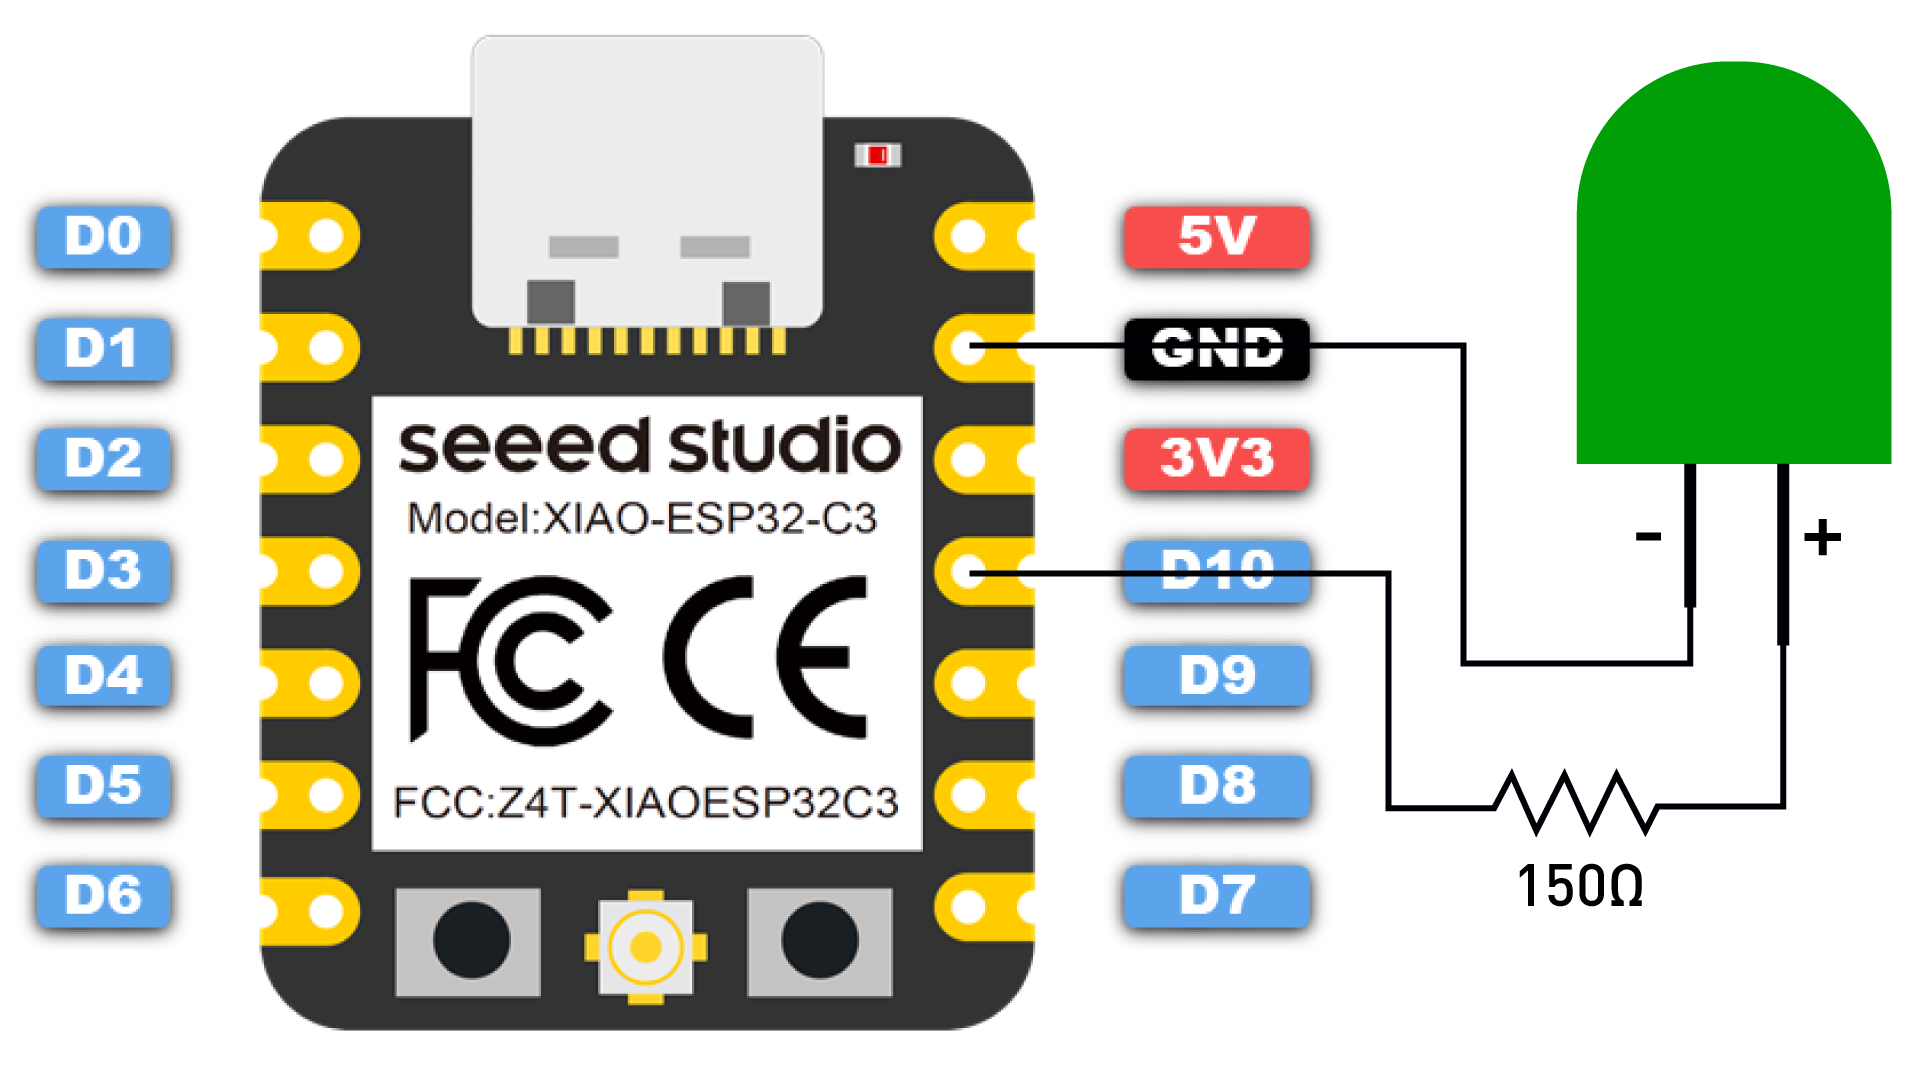
- Wiring it up: the ESP32 doesn’t have an internal LED that can be blinked, so we must connect one to Pin 10, to match the code.
We used a breadboard to create a circuit that matched the Seeed Studios recommendation in their Getting Started Guide
(Direct link to the URL for this link.)
Our final circut board looked like this:
- Plug the board back into your computer to power it up.
- The LED on the Arduino should start to blink once per second.
int ledPin = D10;
// the setup function runs once when you press reset or power the board
void setup() {
// initialize digital pin ledPin as an output.
pinMode(ledPin, OUTPUT);
}
// the loop function runs over and over again forever
void loop() {
digitalWrite(ledPin, HIGH); // turn the LED on (HIGH is the voltage level)
delay(1000); // wait for a second
digitalWrite(ledPin, LOW); // turn the LED off by making the voltage LOW
delay(1000); // wait for a second
}

Installation and Development Workflow for Arduino Uno
We got the Arduino Uno up and running with a basic “blink an LED” code via the following steps, as outlined by our instructor in this document:
Specifically, our steps were:
- Plug the Arduino Uno into the USB port.
- Download, install, and start the Arduino IDE
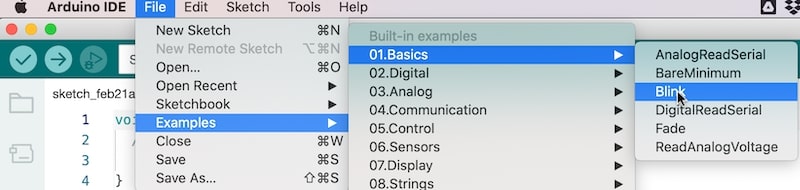
- From File / Examples / 01. Basics, open the “Blink” sketch.
- Select Tools / Board / Arduino AVR Boards / Arduino Uno
- Select the Arduino’s serial port from Tools / Port / [Arduino Uno Port] The port will differ depending on operating system and USB port, on our Mac it looked like /dev/cu.usbmodem[###]
- Hit the “upload” button (-->) to send the code to the Arduino.
- The built-in LED on the Arduino should start to blink once per second.