Lecture Interface and Application Programming
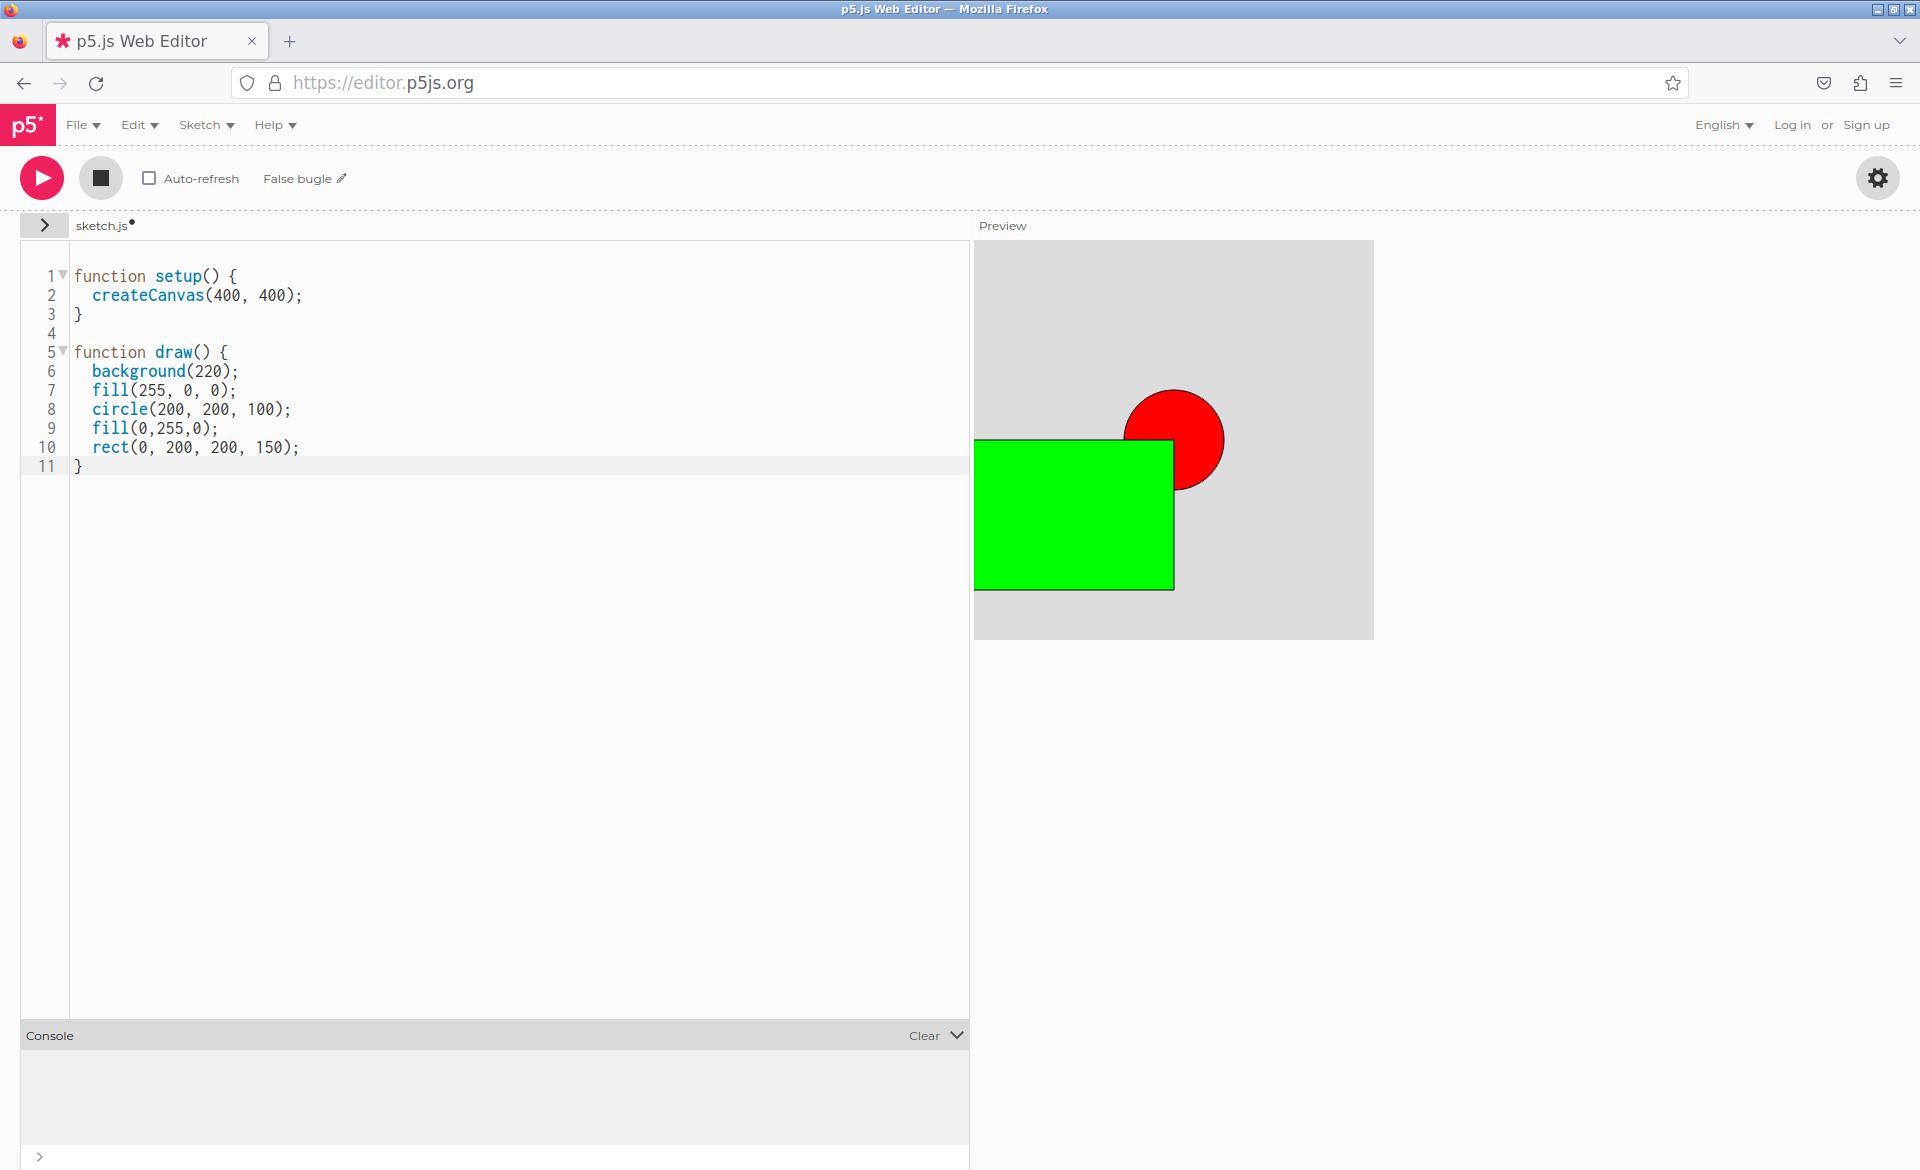
We talked about Processing and P5.js. Bas showed us an example:
He also showed us using CoPilot which was really impressive.
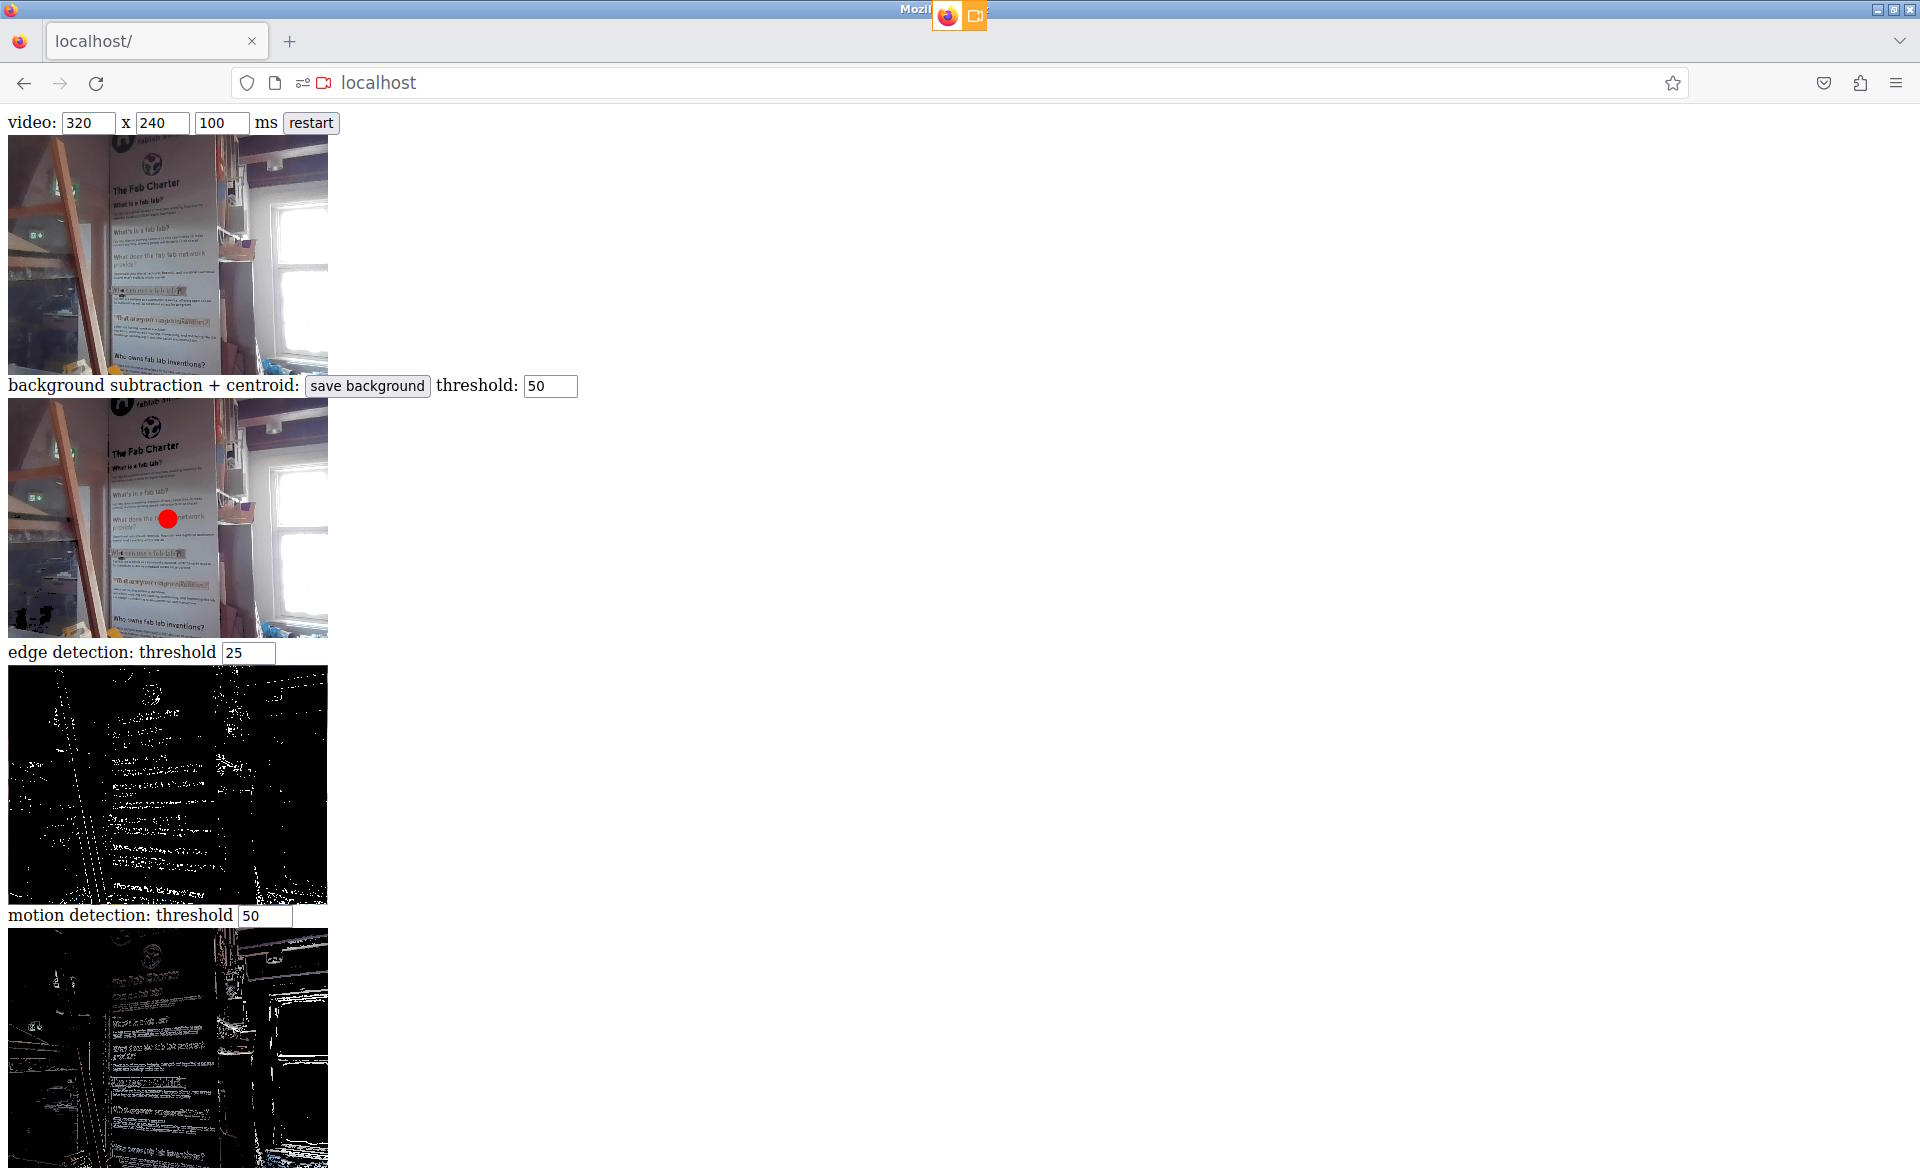
For the group assignment, I tested Neil's code on WebRTC and HTML video because this may be very useful for me. Running Neil's example during the lecture yesterday didn't work for me, so I executed in on a local webserver and there I could capture video:
I wanted to figure out what the URL of the stream was, so I added a log statement to the console:
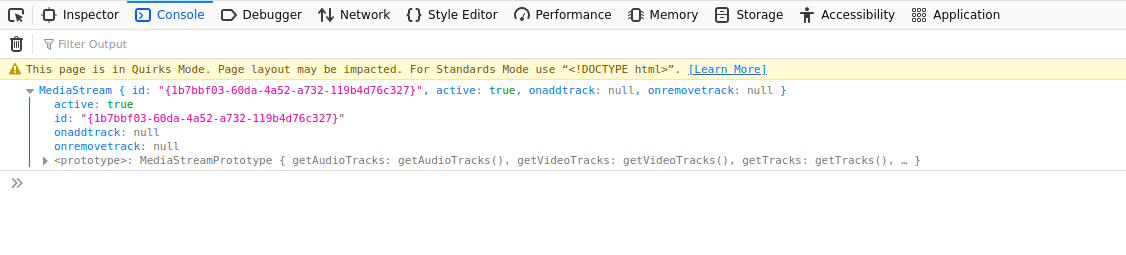
This is not super useful information, but it is a good frame of reference if I want to include video in a web page myself.
I also tried Neil's audio example and this worked for me.
Bas showed us using Chromium-based browsers with WebSerial in P5. For me it is a bit different because I don't use Visual Studio Code what Michelle and Samson are using.
A video of my code working, edited in Emacs and simply executed on the local web server:
Video Streaming Application
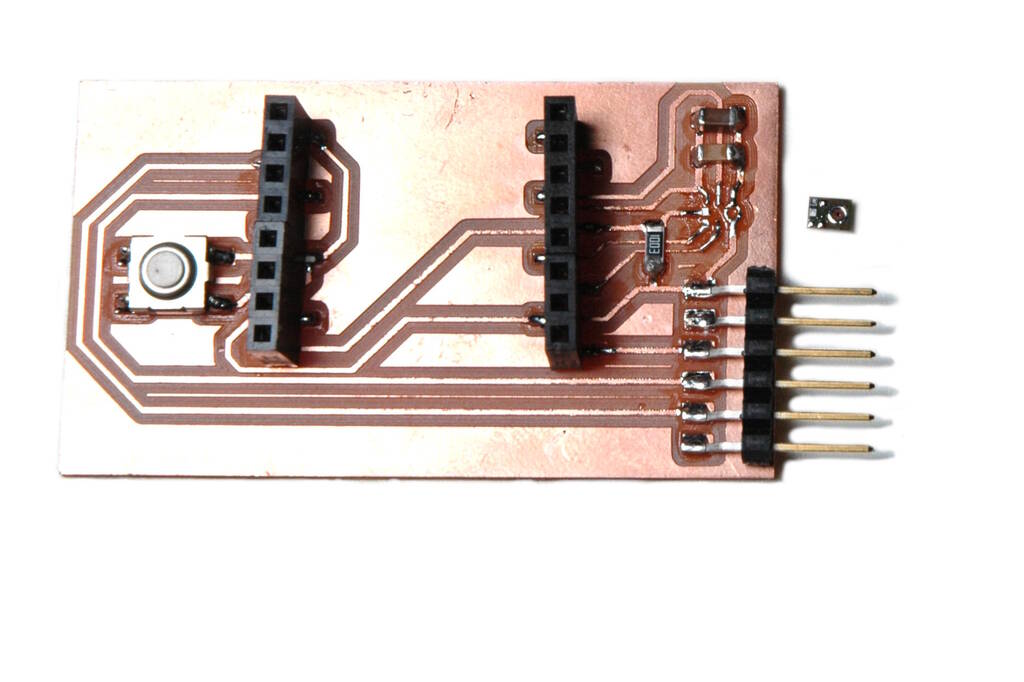
My idea is to create a website that shows a stream and recorded videos of two ESP32-CAM boards connected through Wifi. The stream and the recorded videos will automatically switch between the two cameras based on some input device. The microphones on the board are currently giving sensor data back, so it would be nice to have audio in the stream as well.
Challenges
Compared to what I already had, this may not sound too challenging, but if you take into account all that has to be solved, it is actually a very challenging project. In the previous week I showed a streaming webserver running on the ESP32. I now want my computer to be the server and the ESP32-CAM boards to be the clients.
In addition, the ESP32-CAM webserver is a sequence of JPG images that are
"streamed" through an HTML
<img>
tag, which is not really a stream and
has no support for audio. Incorporating audio may also be very challenging.
Firstly, the ESP32 needs to somehow handle the audio data and video data and
send it to my computer. It needs to be able to sync the audio and video data
as well.
To send the data from the client to the server, I need a protocol to get the data there, so I have to design a protocol or make use of an existing one. Since I have already designed network protocols in the past, also for streaming audio, I'm inclined to extend one of such protocols.
Finally, the microphone is not working, so I would like to try to fix that. My idea is to resolder it and analyze the signals with a logic analyzer.
Spirals
To complete the assignment and to reduce complexity, it would be wise to think in spirals:
- Stream 1 camera, create a website with a download link to the video.
- Stream 2 cameras, switch between them.
- Add audio to the stream.
- Create a live stream.
In the next sections I will discuss the progress.
Working on the Microphones
I have two boards for the ESP32-CAM board. I soldered microphones onto those
boards, but with one I had the lid blown off because I applied too much heat
and with the other one I used the correct temperature, but it still didn't
work. I would only get
0xffff
as values.
Attempt 1: Soldering the Microphone
Henk showed me some true mastery by resoldering the microphone such that I had a signal. For me the task to replicate and document what I learned, so here we go:
First, I grabbed the microphone with a pair of tweezers, lifted it slightly and applied heat with the heat gun until it came off.
The solder underneath looked like this:
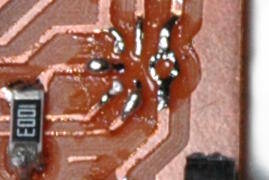
From this image it is clear that the solder has not spread well and with this kind of solder it is likely that not all pads of the microphone made contact. So, the first thing to do is to spread the solder and make it as even as possible. This is the result:
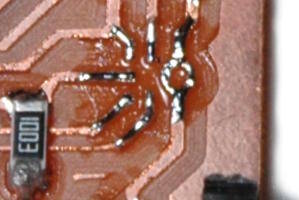
Then for the pads of the microphone, I used the following technique, taught by Henk: add a very small droplet of reflow to the underside of the microphone. One little droplet is likely enough for the whole microphone. Then hold solder close to a pad and then bring in the soldering iron. As soon as the solder melts, remove both the iron and the solder. This is what it looks like afterwards:
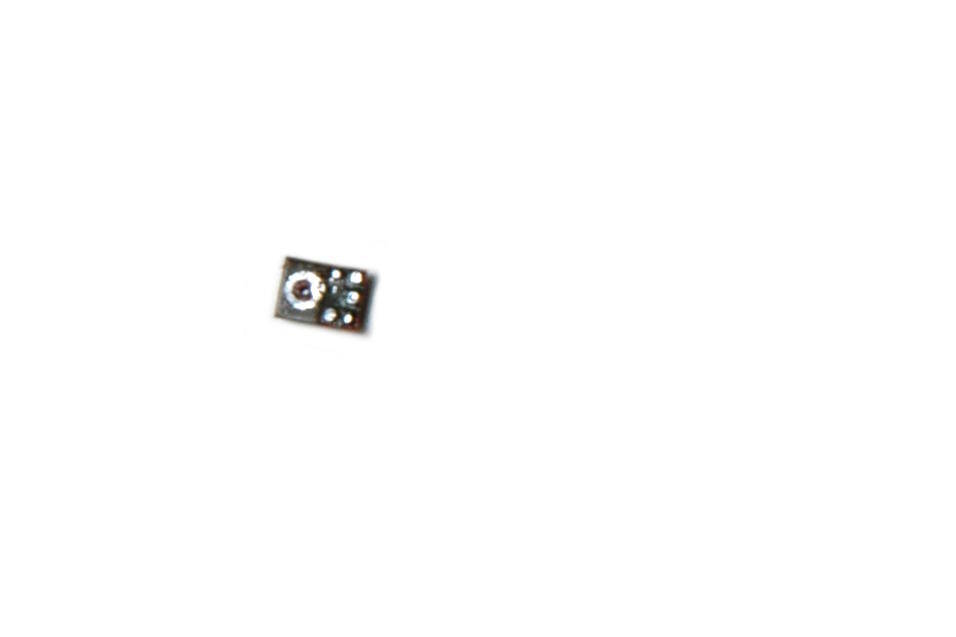
Then, we carefully move the microphone in place and heat it to 280° C. I saw it settle, but the position didn't look right, so I had to reheat and move it a bit. The resulting image is:
Analyzing the Signal
I still got a high signal and analyzed it with a logic analyzer (for an explanation on how to set up the logic analyzer, see last week ). This worked beautifully and I could see that there was one issue that was not according to the datasheet of the microphone: There is a pin for the clock signal and there is a pin for choosing the left or right channel, the WS or Word Select channel. The data sheet states that the length of one cycle of WS should be 64 clock signals, whereas I can see that it is 32 clock signals.
At first I didn't know how to get to 64 clock signals, but I could fix this
by making sure that one sample is not 16 bits, but 32 bits. In the
following code I changed
i2s_bits_per_sample_t(16)
to
i2s_bits_per_sample_t(32)
:
void i2s_install() {
  // Set up I2S Processor configuration
  const i2s_config_t i2s_config = {
    .mode = i2s_mode_t(I2S_MODE_MASTER | I2S_MODE_RX),
    .sample_rate = 44100,
    .bits_per_sample = i2s_bits_per_sample_t(32),
    .channel_format = I2S_CHANNEL_FMT_RIGHT_LEFT,
    .communication_format = i2s_comm_format_t(I2S_COMM_FORMAT_STAND_I2S),
    .intr_alloc_flags = 0,
    .dma_buf_count = 8,
    .dma_buf_len = bufferLen,
    .use_apll = false
  };

	check(i2s_driver_install(I2S_PORT, &i2s_config, 0, NULL));
}
I had hopes that this would resolve the issue, but unfortunately, I still
got
0xffff
(but now
0xffffffff
because a sample was 32 bits).
Below is a screenshot of the output of the logic analyzer. Channel 0 is
the clock signal, channel 3 is the WS channel with 32 pulses for a high WS
and 32 pulses for a low WS, in accordance with the data sheet. Channel 2
is the data channel that remains high. In the I2S decoder we can see that
we only read
0xffffffff
.

Attempt 2: Soldering the Microphone
I desoldered the microphone again and some pads were very square while others were round.
According to Henk, this means that some were heated more than others. The solder on the PCB are not flat anymore and I took quite some time to make sure that it was really, really flat using some flux. I noticed that it is difficult to see whether everything is flat, but with rubbing the tweezers over a trace or pad, you can feel how flat it is. Additionally, you can place the microphone and feel with the tweezers to what extent it wobbles.
After I convinced myself that the pads were very flat on the PCB, I heated the board and mic with hot air and I noticed the microphone to settle beautifully. This was much more apparent than the first attempt and it seemed more similar to what Henk described, namely the microphone kind of sinking into position. I was now pretty sure that the microphone was soldered correctly and after plugging in the ESP32-CAM, I measured a signal from the microphone!
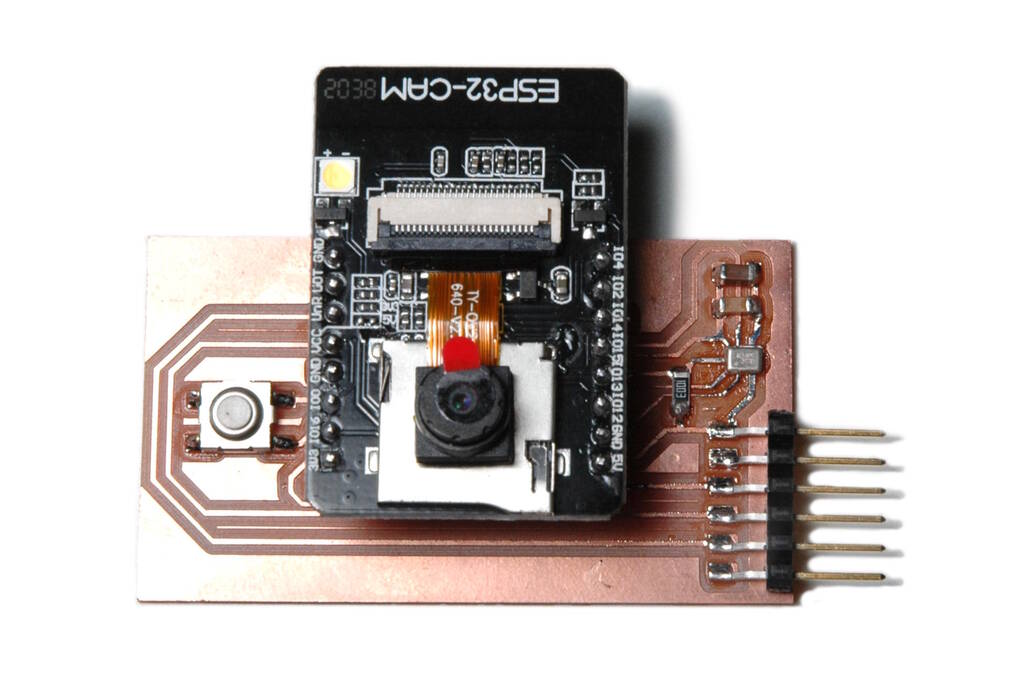
The challenge is now to write the streaming video/audio server.
Using ESP IDF
Although I understand the benefits of Arduino, especially the fact that microcontrollers have a standardized programming environment, I dislike working in Arduino. It disrupts the workflow I'm used to and all kinds of software is included that I don't understand. So, I consider it good for prototyping but if you want to develop a more challenging application, I prefer to switch to native tools. Therefore, I decided to install ESP-IDF to use that to program the ESP32-CAM.
I used the
ESP-IDF
page to choose the
ESP32-S3 to arrive at the
Getting
Started
page, which was very helpful even containing Arch Linux commands. I
essentially followed all the instruction up to adding the
get_idf
alias that enables all the required environment variables for building code
for the ESP32.
When compiling the first program, it turned out that the ESP32-CAM does not have an ESP32-S3, but an ESP32, so I installed the wrong target. This was solved by rerunning the installation script for the correct target:
./install.sh esp32
The common workflow for any of the projects is:
    get_idf  # set up the environment
    idf.py set-target esp32
    idf.py menuconfig # configure application/hardware-specific variables
    idf.py build
    idf.py /dev/ttyACM0 flash
    idf.py /dev/ttyACM0 monitor # watch the terminal output
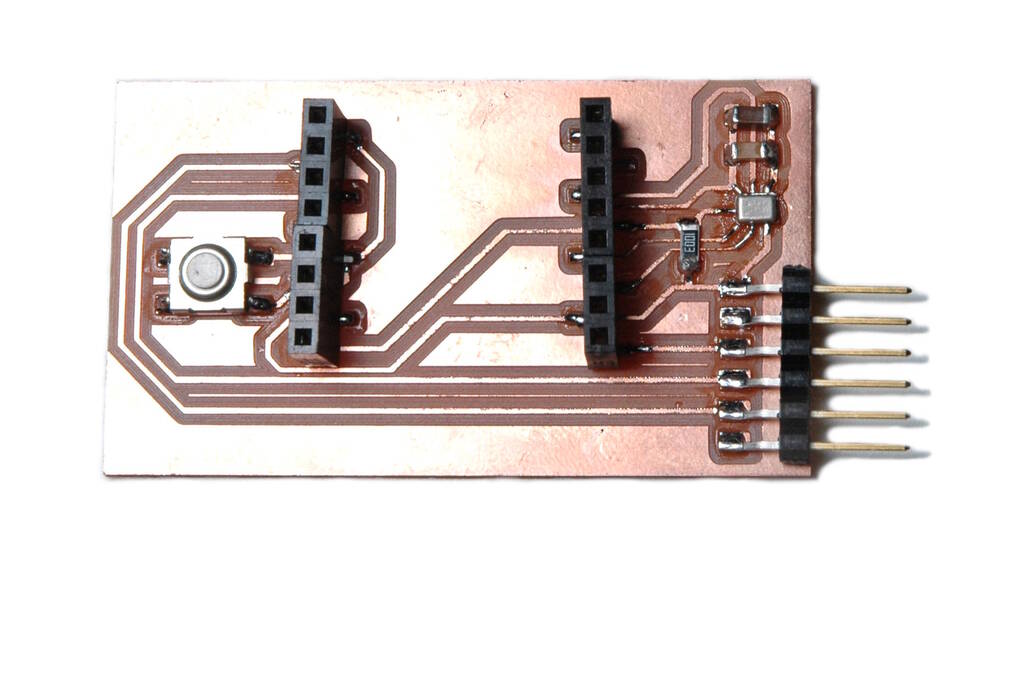
Before flashing, we need to press the Boot button that I added to my boards while resetting the board. The reset button is on the downside of the pins, which is a bit annoying because it is difficult to find.
After I got this to work, I ported the Arduino example
CameraWebServer
to ESP IDF and called it
camera-webserver
. After confirming that this
worked as expected, I can focus on the protocol.
Designing the Protocol
It had already been many years, but at some point I designed a fairly sophisticated audio streaming protocol over UDP that allowed ordering, retransmission of messages, and plugins for compression and audio filters. I initially thought of using this, especially because it would be easy to switch seamlessly between different clients. However, adapting this to both audio and video appeared to be more complex than I thought, and because the ESP32 uses wireless communication, I preferred to use TCP. So, I designed a protocol from scratch that is very simple and does not require to copy the image frame buffer or the audio buffer for marshalling data.
Protocol Details
The protocol makes a distinction between a streaming server and multiple clients . The server waits for clients to connect and will request image or audio data from the clients. Unfortunately, I haven't been able to implement the audio side of it, so the rest of the documentation will only discuss video.
There are two types of messages,
data messages
and
control
messages
. We use the
SOCK_STREAM
type of messages for our TCP
messages, ensuring that we can send a stream of bytes between nodes across
various messages.
There are several types of control messages: The
FRAMES
control
message is sent by the server to a client requesting a certain number of
frames. The client will acquire a frame from its buffer and will reply
with a
NEW_FRAME
message with the size of the frame such that the
server can allocate a buffer of the right size and knows how many bytes
will follow. The control messages are small messages of 64 bytes (two
uint32_t
).
The client then simply follows up this message with a number of data messages with a maximum size of 1 KB which is generally smaller than the MTU of the network. The size of the messages is determined by the TCP or underlying networking drivers, and we simply make sure to check how many bytes were sent, continuing where we left off:
void send_data(int fd, unsigned char *buffer, size_t len) {
  size_t total_bytes_sent = 0;
  while (total_bytes_sent < len) {
    size_t bytes_to_sent = LEN_DATA;
    if (len - total_bytes_sent < LEN_DATA) {
      bytes_to_sent = len - total_bytes_sent;
    }
    ssize_t bytes_sent = send(fd, buffer + total_bytes_sent, bytes_to_sent, 0);
    if (bytes_sent == -1) {
      fatal("Failed to send data to server");
    }
    total_bytes_sent += bytes_sent;
  }
}
Receiving the data is similar code to this.
The main loop for the client is the code below. Note that we add a delay
to get to
FRAME_MS
ms which is currently set to 40 ms, aiming for a
frame rate of 25 fps. It would be better to start a timer that fires every
40 ms, but for this exercise, this suffices.
void start_camera_client(int client_fd) {
  while (1) {
    uint32_t nr_frames = expect(client_fd, FRAMES);

    for (int i = 0; i < nr_frames; i++) {
      int64_t start = esp_timer_get_time();

      camera_fb_t *fb = esp_camera_fb_get();

      send_ctrl(client_fd, NEW_FRAME, (uint32_t) fb->len);

      send_data(client_fd, fb->buf, (uint32_t) fb->len);

      if (fb) {
	esp_camera_fb_return(fb);
      }

      int64_t end = esp_timer_get_time();

      int duration = (int) ((end - start)/ 1000);
      int time_to_wait = FRAME_MS - duration;
      if (time_to_wait > 0) {
	vTaskDelay(pdMS_TO_TICKS(time_to_wait));
      }
    }
  }
}
The streaming server's main loop then calls the following function repeatedly:
void get_frames(int id, int nr_frames) {
  int cam_fd = cam_fds[id]; // my connection
  send_ctrl(cam_fd, FRAMES, nr_frames);

  for (int i = 0; i < nr_frames; i++) {
    uint32_t len_buffer = expect(cam_fd, NEW_FRAME);
    unsigned char *buffer = (unsigned char *) malloc(len_buffer);

    receive_data(cam_fd, buffer, len_buffer);

    // hand it over to the video stream
    video_st.jpg_packet->data = buffer;
    video_st.jpg_packet->size = len_buffer;
    write_video_frame(oc, &video_st);

    free(buffer);
  }
}
Approach
To design the protocol, I investigated how the ESP32-CAM boards create the
video data, and it turned out that the frame buffer is simply a JPG. I
experimented with sending this data in its entirety to the streaming server
and saving this data in a JPG file. I could then simply use a JPG viewer
to watch the frame. The streaming server is in software package
stream-server
.
Knowing this, I took some video and extracted each frame as a JPG. I then
wrote a test client that reads in this sequence of JPGs to simulate
acquiring frames from the camera. Having this
test-client
allowed
me to develop the protocol on my computer without developing it directly on
the ESP32-CAM boards, having to flash the device each time I made a little
mistake.
After I was satisfied with the communication between the test client and
the streaming server, I created the software package
camera-client
that would mimick what the
test-client
was doing only with the real
images from the camera.
After this, I spend much, much time on trying to improve the performance. The network was too slow, but more importantly acquiring a frame was too slow. I wanted to have a frame rate of 24 fps with a resolution of 1280x720. I investigated whether I could speed things up by means of DMA but it turned out that the camera driver is already using these things.
I should have read the data sheet of the camera and then I could have known that the camera is already 18 years old and that the maximum frame rate is 15 fps for the higher resolutions. I guess, I was confused because the camera capture looked fine to me in the example code of last week also on higher resolutions. I checked and it also had low frame rates...
Given this, I decided not to improve the protocol further. I noticed that sending the messages was a bit too slow as well, but that could simply be a case of being to far away from my wireless access point in combination with the antennas on the ESP32-CAM boards.
The Webserver
With the protocol completed, it was time to work on the webserver. I made
use of the
Libmicrohttpd
C library
that allows you to embed a webserver into your application. I experimented
with streaming a video but I'm not very familiar with this technology, so I
opted for download links and later video tags that actually show a video file
that you can play immediately. The software package is
webserver
.
The webpage that the webserver shows contains three buttons that have each an
event listener attached to it. These event listeners send
XMLHttpRequests
allowing the webserver to update the content of the
webpage on the fly.
The served webpage is the following:
<button id="create">Create</button>
<div id="content"></div>
<script>
  document.getElementById('create').addEventListener('click', function() {
    var xhr = new XMLHttpRequest();
    xhr.onload = function() {
      document.getElementById('content').innerHTML = xhr.responseText;
    };
    xhr.open('GET', '/create');
    xhr.send();
  });
</script>
In this code, the Javascript adds an event listener to the HTML tag
identified by "create", the button. It creates an
XMLHttpRequest
that
will replace the HTML of the
div
tag identified with "content" with
the response from the webserver. The Javascript code then sends the
"GET"
command with URL "/create".
The corresponding code on the webserver stops the cameras, creates the video HTML (see below) and creates a response from this to be send to the client (the web browser):
if (strcmp(method, "GET") == 0 && strcmp(url, "/create") == 0) {
  stop_cams();
  char content[SZ_RESPONSE];
  create_video_part(content);

  struct MHD_Response *response = MHD_create_response_from_buffer(strlen(content), (void *) content, MHD_RESPMEM_MUST_COPY);
  MHD_add_response_header(response, "Content-Type", "text/html");
  int ret = MHD_queue_response(connection, MHD_HTTP_OK, response);
  MHD_destroy_response(response);
  return ret;
}
To create the video part, we have the following code that simply constructs a
HTML
div
with a
video
tag with the video file:
void create_video_part(int nr_vids, char *response) {
    int nr_chars = snprintf(response, SZ_RESPONSE, "<div>\n");
    for (int i = 0; i < nr_vids; i++) {
      nr_chars += snprintf(response + nr_chars, SZ_RESPONSE - nr_chars,
	"<video controls><source src=\"vid%d.mp4\" type=\"video/mp4\"></video>", i);
    }
    nr_chars += snprintf(response + nr_chars, SZ_RESPONSE - nr_chars, "</div>\n");
}
Creating an MP4 from a Sequence of JPG Images
It was always an option to simply call the command line version of FFmpeg to create an MP4 out of a sequence of JPG images. However, this would involve storing the frames in temporary files and hand them over to FFmpeg. A better approach would be to call the FFmpeg library directly as soon as an image came in. This was the focus of this development.
Experience with ChatGPT
I started following various examples from the internet, but the FFmpeg API is very complex. I used ChatGPT to help me out and this was very useful to a certain extent: I would not have to find the API calls myself, but ChatGPT would provide me with them. In principle this is a very good help, but FFmpeg has various versions and in follow-up questions, ChatGPT would forget what it suggested before and would provide me with answers that contradicted the answers before, confusing different versions of FFmpeg.
I found that ChatGPT is very useful for simple things, such as making suggestions for the CMake configuration files. This was actually very impressive, but for calling a very complex library such as FFmpeg, it was unable to provide me with answers that could really solve the problems that I had. More on this below.
FFmpeg Distribution Examples
In the end, it turned out that FFmpeg has a very good example in its
distribution for what I wanted to do and by following this example I was
able to develop the
create-mp4
software package that reads in a
sequence of JPG images and creates an MP4 out of it.
I initially used the
encode_video.c
example and this was a great
resource but this encoded video had a problem that I could not solve and
was also too complex for ChatGPT to give meaningful answers.
The problem that I had was that I decode a JPG into what FFmpeg calls a "frame". This frame is handed over to the H264 (MP4) encoder and the encoder returns a "packet" with the encoded MP4 frame. I would then write these packets into a file successively. However, playing the file, I received errors that there were wrong PTS values (Presentation Time Stamp values).
The problem was that the packets that I received from the encoder would not be ordered, so I would first receive a packet with PTS 2 and then packet with PTS 1 for example and I would write them to the file as soon as I received them resulting in a wrong ordering.
I tried to solve this by queuing the packets and ensuring I could write them in the right order, but this would still lead to the same error. It seemed that the PTS values were simply not there in the file.
ChatGPT was unable to give me any good suggestions on how to solve this, maintaining that I should provide FFmpeg with frames in the correct order, which I already did. To actually solve this, it was necessary to make use of yet another FFmpeg API and to make this connection was a bridge too far for ChatGPT.
The example
mux.c
from the FFmpeg examples showed how to solve this
by using the muxing API. This example also shows how to use audio if I
have ever time to incorporate that. After I could generate a proper MP4
file with the muxing API, it was time to integrate everything.
Integrating the software
Essentially, I have now the following software packages:
stream-server
,
test-client
, and
camera-client
, that
stream video between them. Then there is the
webserver
that generates
a page and receives user input. And finally, there is the
create-mp4
package that turns a sequence of JPG images into an MP4 file. Now, it is
time to integrate it into the
webserver
and the
camera-client
.
(There is also the software package
camera-webserver
but this is a
port of the Arduino example for ESP IDF.)
Integrating for the Review
I didn't have time to integrate everything for the local, regional, and
global review, but I managed to integrate the
streaming-server
with
the
webserver
communicating with the
test-client
. Instead of
integrating the
create-mp4
program I simply called the commandline
version of FFmpeg, making use of first storing the files temporarily. This
is how I called FFmpeg:
system("ffmpeg -y -framerate 30 -i output_%04d.jpg vid0.mp4");
I also had to make the webserver multithreaded to keep track of multiple
connections to the camera clients. By means of condition variables, the
threads react to the variable
running[id]
and if that is set to true
for thread with identifier
id
, they start acquiring frames.
So, if the users presses the "Camera 1", the webserver will receive the request "cam1" from the Javascript code on the web page. This will activate the following code on the webserver:
void stream_cam(int me) {
  int other = me == 0 ? 1 : 0;

  pthread_mutex_lock(&mutex);
  running[other] = 0;
  running[me] = 1;
  pthread_cond_broadcast(&cond);
  pthread_mutex_unlock(&mutex);
}

// in handle_request()
  if (strcmp(method, "GET") == 0 && strcmp(url, "/cam1") == 0) {
    stream_cam(0);
    return empty_response(connection);
  }
Simulating the Operation with the Test Clients
As said before, at the time of local and regional review, I had not completed everything yet and a summary of what I did so far is below:
- Designed a protocol between Camera clients and streaming server
- Developed test clients that simulate the ESP32 CAM boards
- Made the streaming work on the ESP32 CAM boards
- A lot of performance debugging on ESP32 CAM boards (they're simply not fast enough)
- Created a muxer to create an MP4 from frames sent by the ESP32 CAM boards
- Developed the webserver
- Integrate the webserver and streaming server
A video of this software working:
Inbetween the regional and global review, I managed to integrate the muxer in the webserver as well. This means that as soon as a frame from the ESP32 comes in, it starts encoding the frame into an MP4 stream.
This version sets us up to stream the two ESP32 Cameras into one live video stream, allowing us to switch between the cameras.
I also solved a small synchronization issue with a very dirty busy waiting loop. This synchronization issue resulted in frames from the two cameras being mixed in with each other leading to flickering and sometimes I would have an empty buffer because of race conditions between the threads:
void *handle_cam(void *id) {
  int i = *(int *) id;

  while (1) {
    pthread_mutex_lock(&mutex);
    while (!running[i]) {
      pthread_cond_wait(&cond, &mutex);
    }
    pthread_mutex_unlock(&mutex);
    // other thread may still be running, so a race condition
    get_frames(i, 10);
  }
  return NULL;
}
The function
get_frames
is not protected with a mutex, so in
principle multiple threads can be active in this function, leading to race
conditions. I can in principle solve this by moving it into the code
protected by mutexes, but this led to delays because then this "critical
section" as we call it has the (relatively) time consuming function
get_frames
which prevents other requests to modify the
running
array to fall through. We can solve this by making the
mutex fair, but I think it is better to recognize that a thread needs to
have mutually exclusive access to this function regardsless of how the
running
array is set.
Since we are on a microcontroller anyway and I had a severe lack of time, I solved it with a dirty hack, with a busy-waiting loop that I put as close as possible to the part where data is received:
void get_frames(int i, int nr_frames) {
  int cam_fd = cam_fds[i];
  send_ctrl(cam_fd, FRAMES, nr_frames);

  // spin as long as someone is busy
  // assumes that there are only 2 threads.
  // Incorrect for more than 2 threads!
  while (someone_busy);
  someone_busy = 1;

  for (int i = 0; i < nr_frames; i++) {
    uint32_t len_buffer = expect(cam_fd, NEW_FRAME);
    unsigned char *buffer = (unsigned char *) malloc(len_buffer);

    receive_data(cam_fd, buffer, len_buffer);

    video_st.jpg_packet->data = buffer;
    video_st.jpg_packet->size = len_buffer;
    write_video_frame(oc, &video_st);

    free(buffer);
  }
  someone_busy = 0;
}
This can be easily solved without spinning, but for now it is fine. Note that the code assumes that there are only two threads. For more than two threads, the code is incorrect because multiple threads can come to the conclusion that someone is not busy, all of which set the flag to true at the same time, resulting in a situation where multiple threads think they have exclusive access.
Streaming with the ESP32-CAM Boards
To really bring it all together, I wanted to use the ESP32-CAM boards to
stream video over Wifi. The ESP32-CAM boards do exactly what the
test-client
is doing, so it should more or less work out of the box.
Below a video and note that the programmer only provides power and ground to
the boards.
Switching between the cameras can be controlled from the web page but there is a bit of a delay in switching, resulting in the video starting to run behind. This can be solved in various ways. Firstly, the code may still have some delays built in that can be removed. Secondly, there is a delay of ten frames, because the server makes request for ten frames each time. Most importantly, when switching between cameras, one stops, then turning on the second one. It would be better to overlap the cameras sending frames and then switch at once, then stopping the other one.
Tasks
Fab Academy
- Compare as many tool options as possible.
- Write an application that interfaces a user with input and/or output devices on a board that you made.
- Implement a GUI using programming.
- Explore protocols to communicate with an MCU board.
- Document the process.
- Explain the GUI and how you made it.
- Explain how the application communicates with the MCU.
- Explain any problems encountered and how you fixed them.
Personal
- Stream the audio data as well.
- Find a better camera/microcontroller solution for 30 fps and 720p.
Files
The archive contains the following software packages that were mentioned
above:
camera-webserver
,
stream-server
,
test-client
,
camera-client
,
webserver
,
create-mp4
. It also contains
the software package
mic
for acquiring a signal from the microphone.