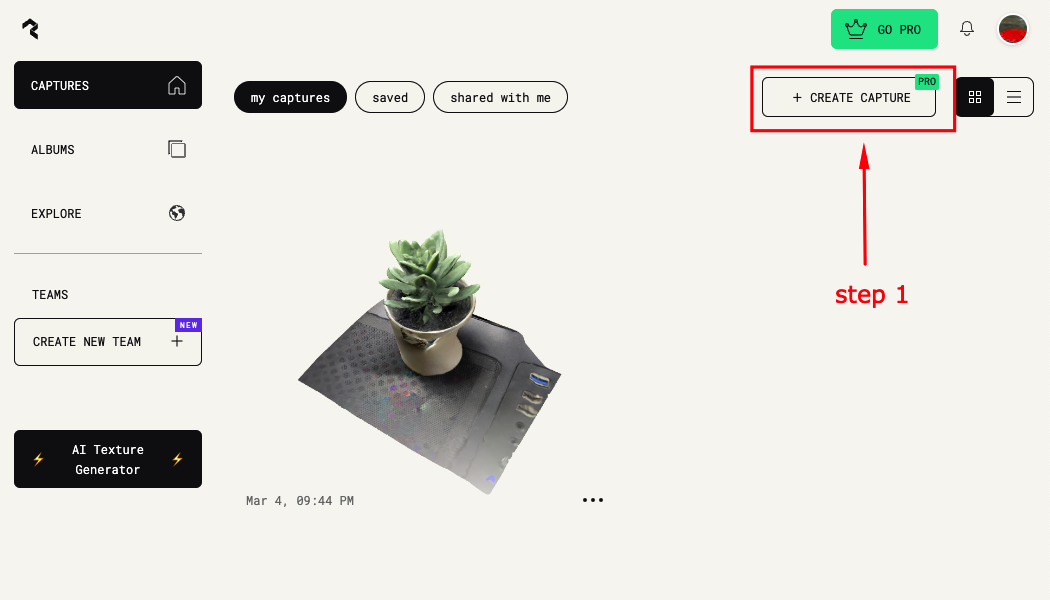
Design and 3D print an object that could not be easily made subtractively.
3D scan an object.
Test the design rules for your printer(s), for the group assignment please visit our group page.
Document your work and explain what are the limits of your printer(s) (in a group or individually)
Identify the advantages and limitations of 3D printing
Apply design methods and production processes to show your understanding of 3D printing.
Demonstrate how scanning technology can be used to digitize object(s)
First I downloaded UltiMaker Cura the world’s most popular 3D printing software. Prepare prints with a few clicks, integrate with CAD software for an easier workflow, or dive into custom settings for in-depth control.
I design my custom 3D Printable Gears in Fusion 360
why this design is hard to make using traditional fabrication techniques?
Because, it is 3D so it have 3 axis (x,y,z) not only two (x,y) and Because it's a moving part so using other fabrication techniques like lazzer cutter it will be hard to make it move since we have only 2 axis is that fabrication techniques.
why the design is challenging to make using traditional fabrication techniques:
Limited access to internal features.
Challenges in achieving complex geometry.
Complexity in assembly of moving parts.
Material limitations.
Traditional techniques often operate in two dimensions (x, y) rather than three dimensions (x, y, z).
Difficulty in creating intricate internal structures.
Struggles with complex shapes, curved surfaces, and undercuts.
Labor-intensive and time-consuming assembly processes.
Limited choice of materials suitable for complex moving parts.
3D printing offers design freedom and flexibility.
Integration of moving parts can be achieved in a single component.
Customization and rapid prototyping are possible with 3D printing.
Wide range of materials available for 3D printing, including plastics, metals, ceramics, and composites.
These points highlight the advantages of 3D printing over traditional fabrication techniques when it comes to creating designs with complex moving parts.
Next, I used Ultimaker 3 extended printer, to print my "Gears".
Material | Print core |
---|---|
Extruder 1 - PLA | AA 0.4 |
Extruder 2 - PVA | BB 0.4 |
In slice step was I used Cura . that open ".stl" files and silce it, The general values I used are the following:
Material AA = PLA 0.4 mm
Material BB = PVA 0.4 mm
Layer Height = 0.2 mm
Wall thickness = 0.8 mm
Infill = 20% Triangles.
PLA (Polylactic Acid) and PVA (Polyvinyl Alcohol) are both popular materials used in 3D printing, but they have distinct characteristics and are typically used for different purposes. Here are the key differences between PLA and PVA:
Material Composition
PLA: PLA is a biodegradable thermoplastic polymer made from renewable resources such as cornstarch or sugarcane. It is derived from natural materials and is considered to be more environmentally friendly.
PVA: PVA is a synthetic polymer derived from petroleum or natural gas. It is water-soluble and typically used as a support material for 3D printing.
Printing Properties:
PLA: PLA is known for its ease of printing and is one of the most beginner-friendly materials. It has a lower printing temperature compared to other materials, which makes it compatible with a wide range of 3D printers. PLA has minimal warping and produces less odor during printing. It is available in various colors and finishes, including transparent, matte, and metallic.
PVA: PVA is primarily used as a support material for printing complex models with overhangs or intricate designs. It is water-soluble, meaning it can be dissolved in water after printing, leaving behind the main printed object. PVA is often used in conjunction with another primary material such as PLA. It requires a dual-extrusion 3D printer, as it needs to be printed simultaneously with the primary material.
Application:
PLA: PLA is commonly used for a wide range of 3D printing applications, including prototypes, consumer products, toys, decorations, and artistic models. It is not suitable for functional parts that require high strength or heat resistance.
PVA: PVA is specifically used as a support material to create intricate designs and complex geometries that would be difficult to print otherwise. It dissolves easily in water, making it ideal for support structures that can be easily removed without damaging the main printed object.
Mechanical Properties:
PLA: PLA is a rigid material with moderate strength. It is more brittle compared to some other filaments and may crack under high stress. PLA has a relatively low glass transition temperature (around 60-65°C), limiting its heat resistance.
PVA: PVA is not known for its mechanical strength and is generally weaker compared to PLA. It is a soft and flexible material that doesn't have high tensile or impact strength.
In summary, PLA is a versatile and easy-to-use filament suitable for a wide range of 3D printing applications, while PVA is primarily used as a water-soluble support material for printing complex designs.
Test the design rules for your printer(s).
Document your work and explain what are the limits of your printer(s) (in a group or individually)
This design rule test aims to explore the minimal clearance or tolerance of the 3D printer. The test is done by fitting boxes with a hole in the middle , on a shaft, each hole is decreased in diameter by 0.1 mm. The boxes are expected to rotate around the shaft if the clearance distance allows.
I downloaded the STL file directly from the 3D scanning and printing page of the Fab Academy website.
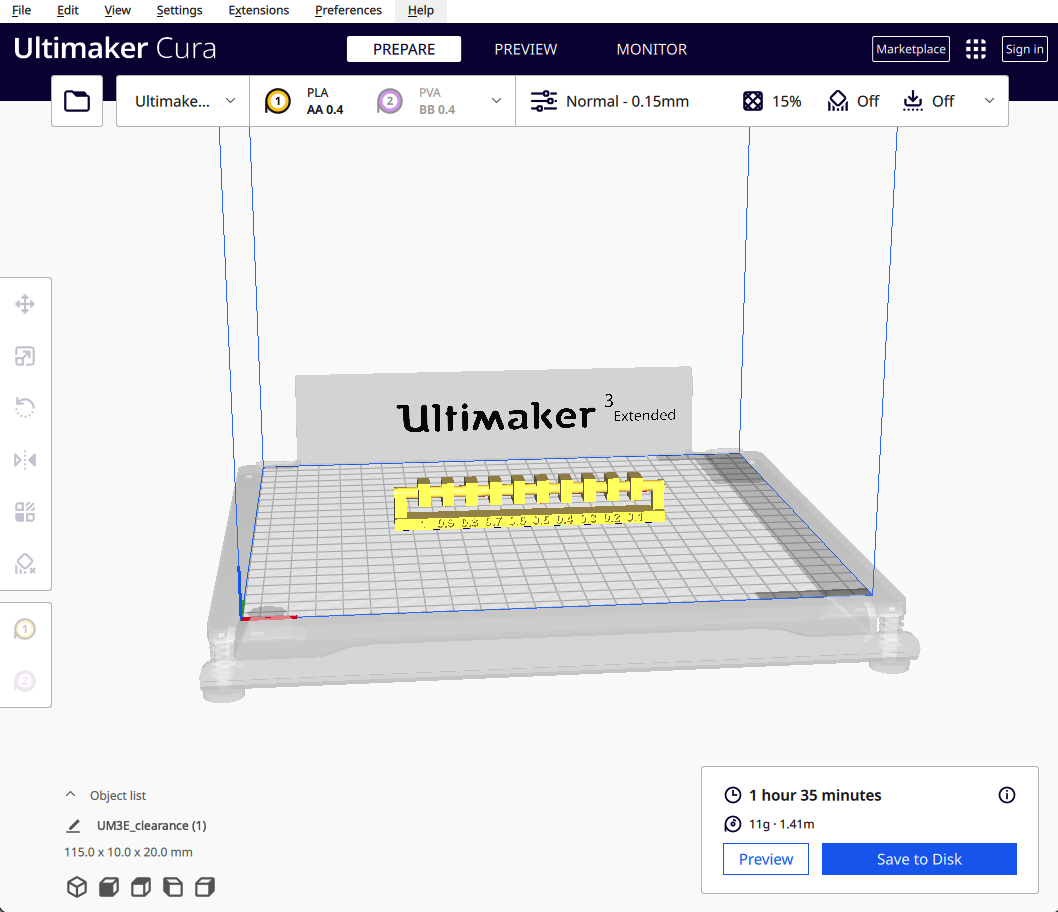
The next step was to slice it using Cura . The general values I used are the following:
Material = PLA 0.4 mm.
Layer Height = 0.15 mm (normal).
Wall thickness = 1 mm.
Infill = 15% Triangles.
The print duration was calculated to be 1 hour 35 minutes.
After saving the file on my flash drive, I headed to the Ultimaker 3D printer extended to start printing. I loaded the material I am using, calibrated the build plate, and then inserted the flash drive and initiated the printing process.
On the first attempt for the test, I forgot to add support to the design.Consequently, aborting the print midway and ending up with this:
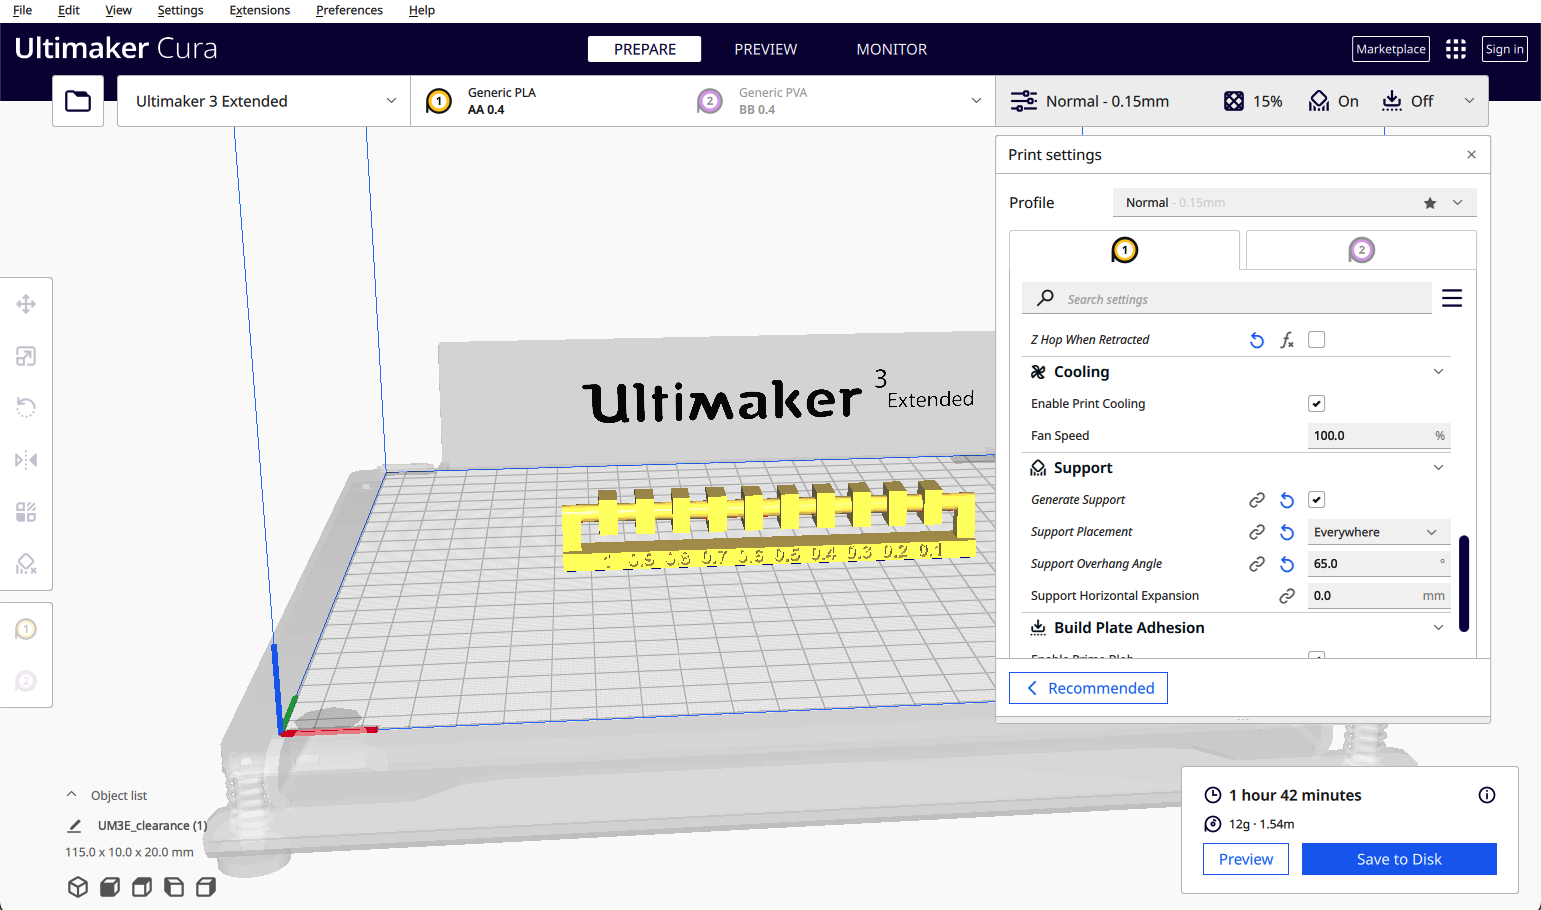
For my second attempt, I kept the general values the same as the previous attempt and added support.
The support values I used are the following:
Support placement = everywhere.
Support overhang angle = 65.
The print duration was calculated to be 1 hour 42 minutes.
The clearance test was a challenge for the printer so at the end we have. Almost all the pieces rotated except for last two pieces with a tolerance of 0.2mm,0.1mm.