Due to the limited time we have now. I wanted to create something that was easy to design, create a mold of, and cast. And so I went with a simple Chess "Pawn" using Fusion 360
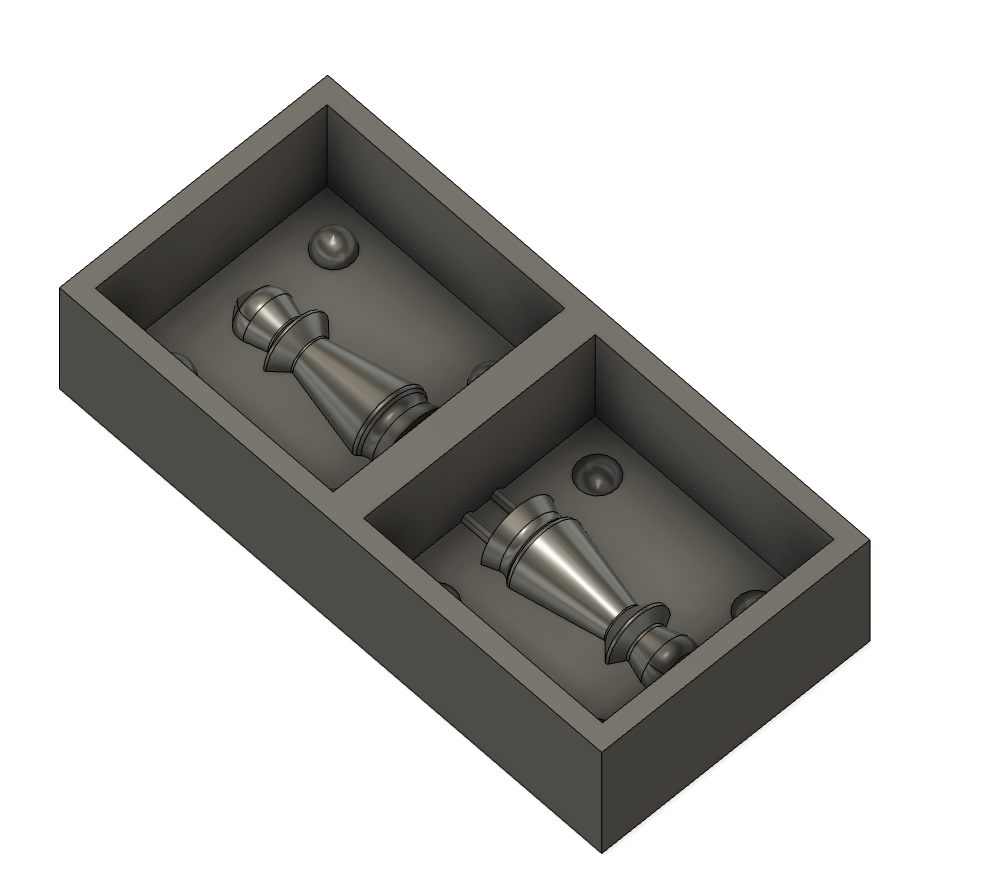
I also created a box which would serve as the stock for the mold. The dimensions I used for the stock are the following:
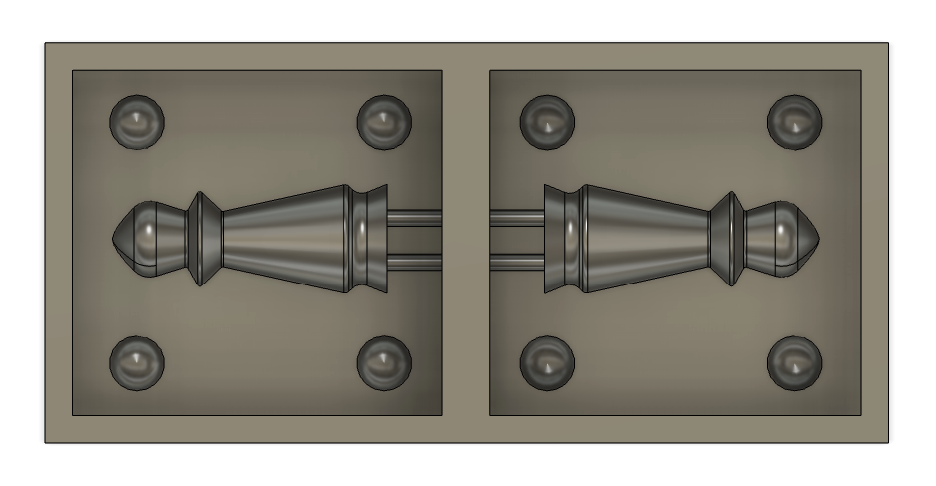
Then made 30 mm-deep pockets in the stock to put my design object in. To make the design symmetrical, I divided it in half, put one half in the pocket, and then turned the other half around.
I added registration spheres, so the mold would align perfectly when I am casting later, and two cylinders; one to pour the cast , and one for the air to emerge.
The final crucial step is to combine all bodies into a single component in order to correctly complete the cam/manufacture process.
Next, is generating the toolpath using Fusion 360 Cam/manufacture workspace.
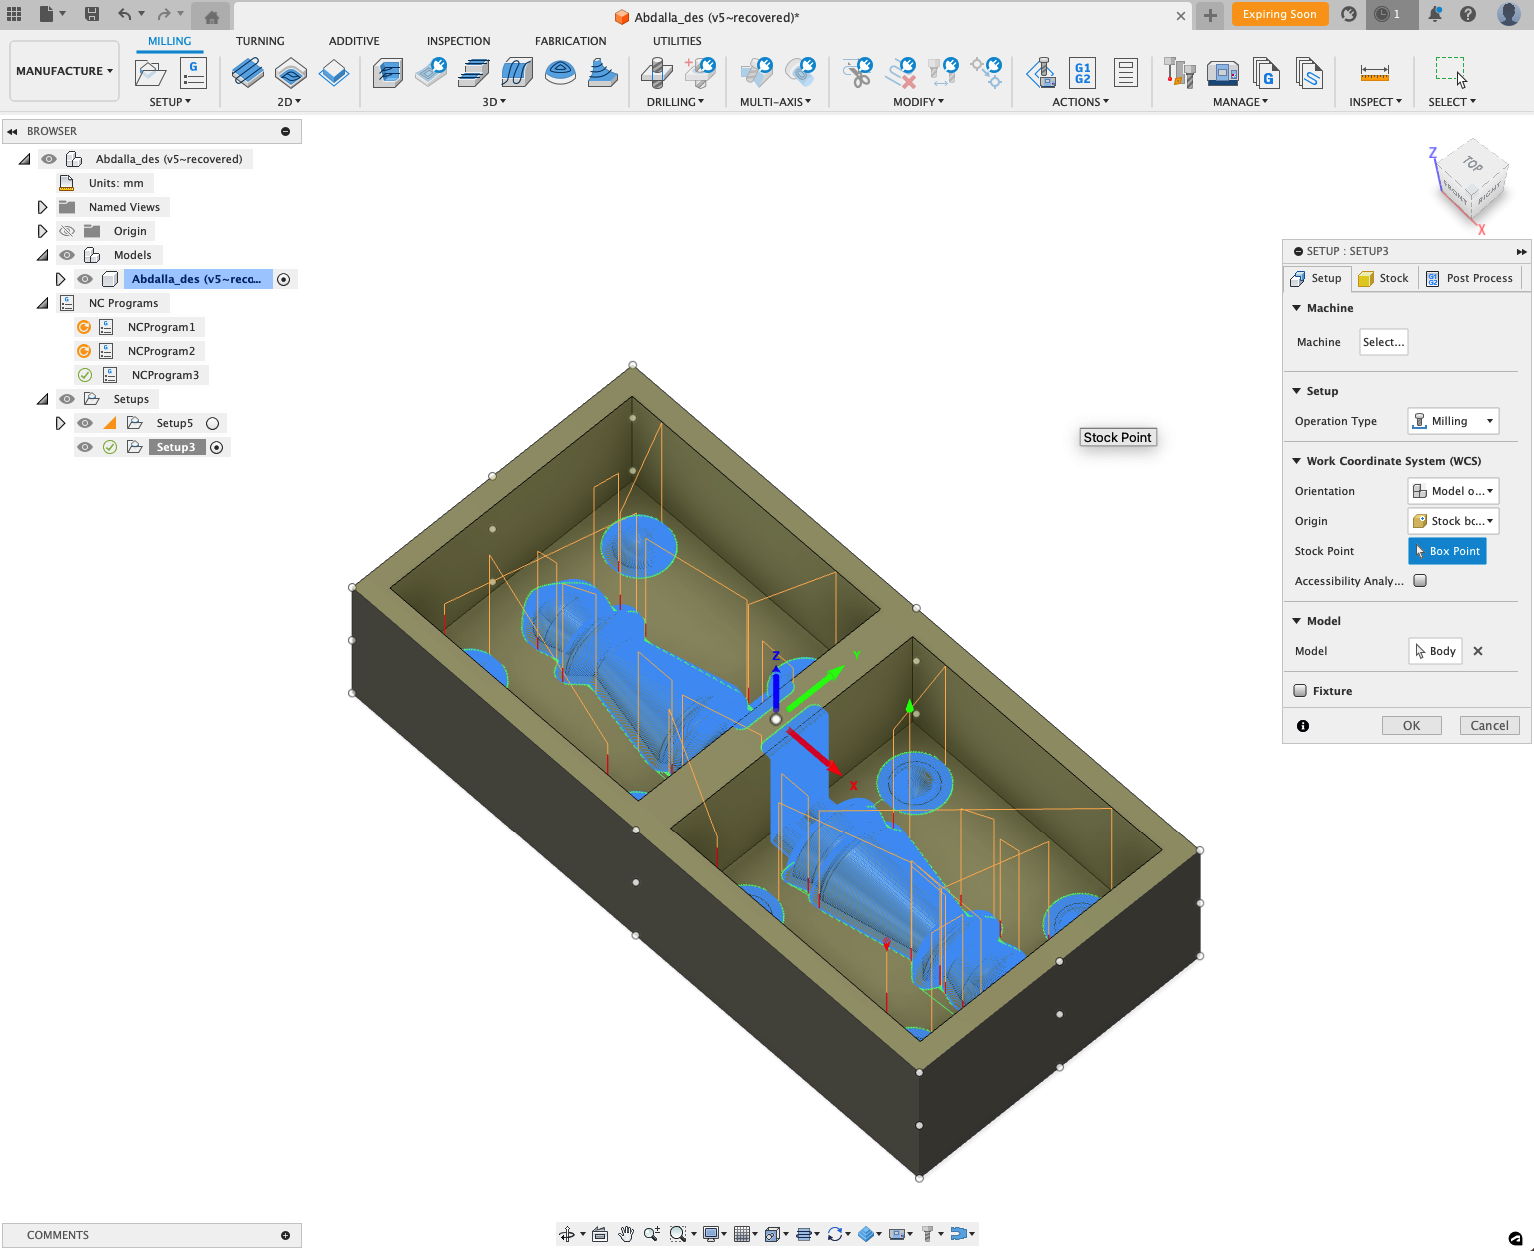
Creating the setup:
We must first define the model we're working on before we can begin the manufacturing process. By selecting setup > new setup, I created the setup. As my origin point, I chose the lower-left corner of the stock component as my model.
The only thing I had to do to ensure an accurate measurement was to remove the offset because when choosing a model, it automatically adjusts the stock's dimensions to match the model's size.
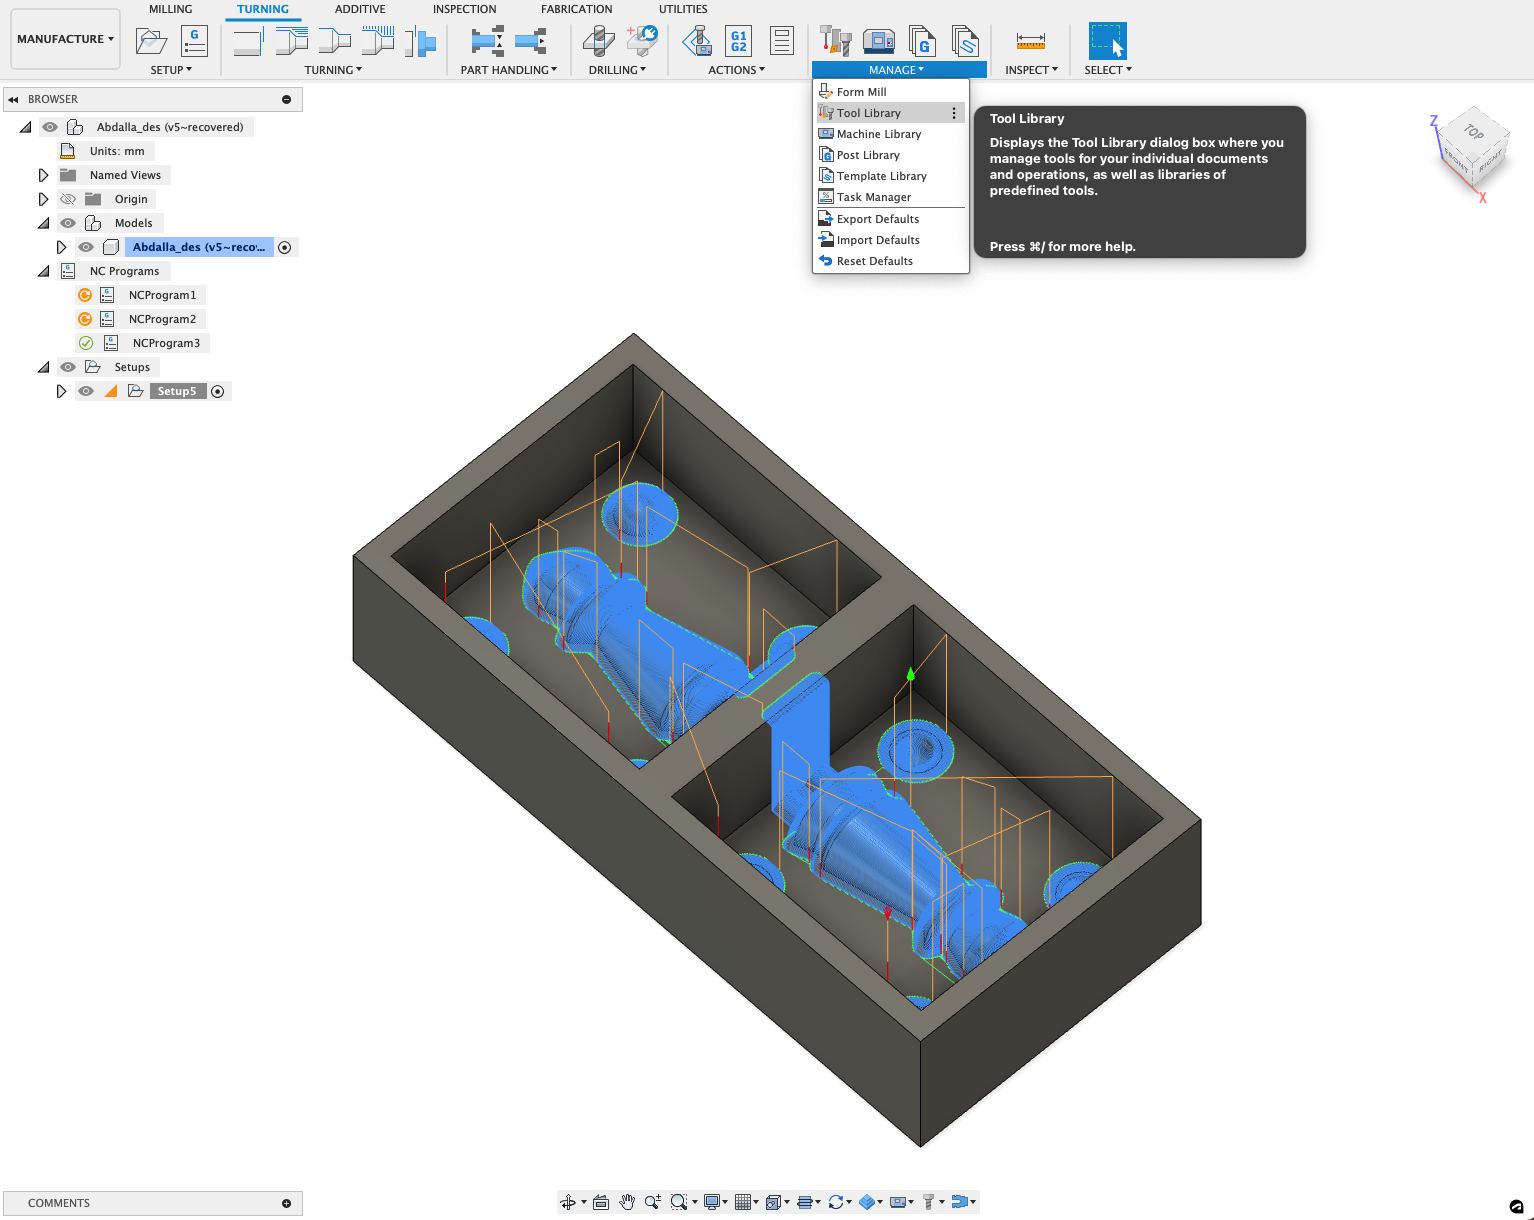
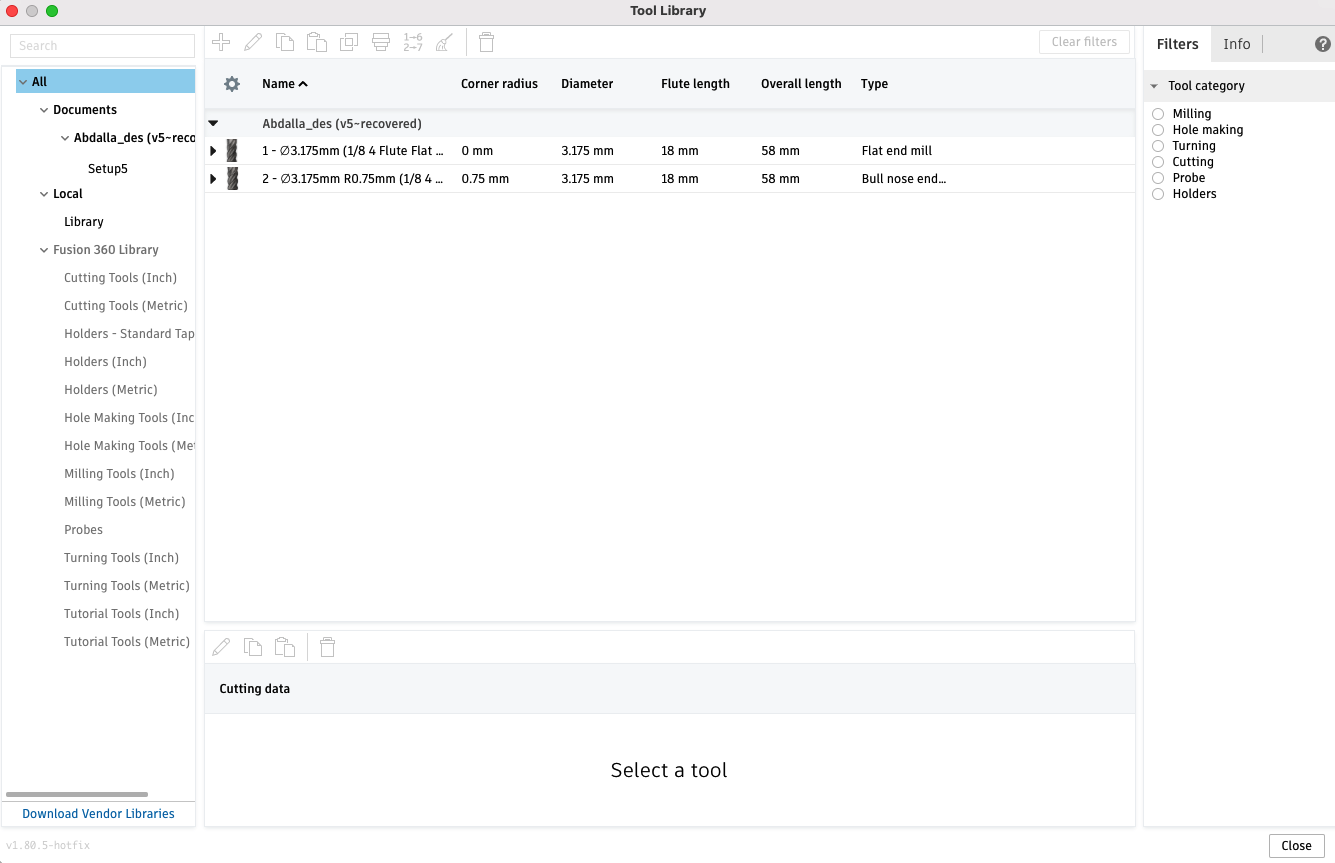
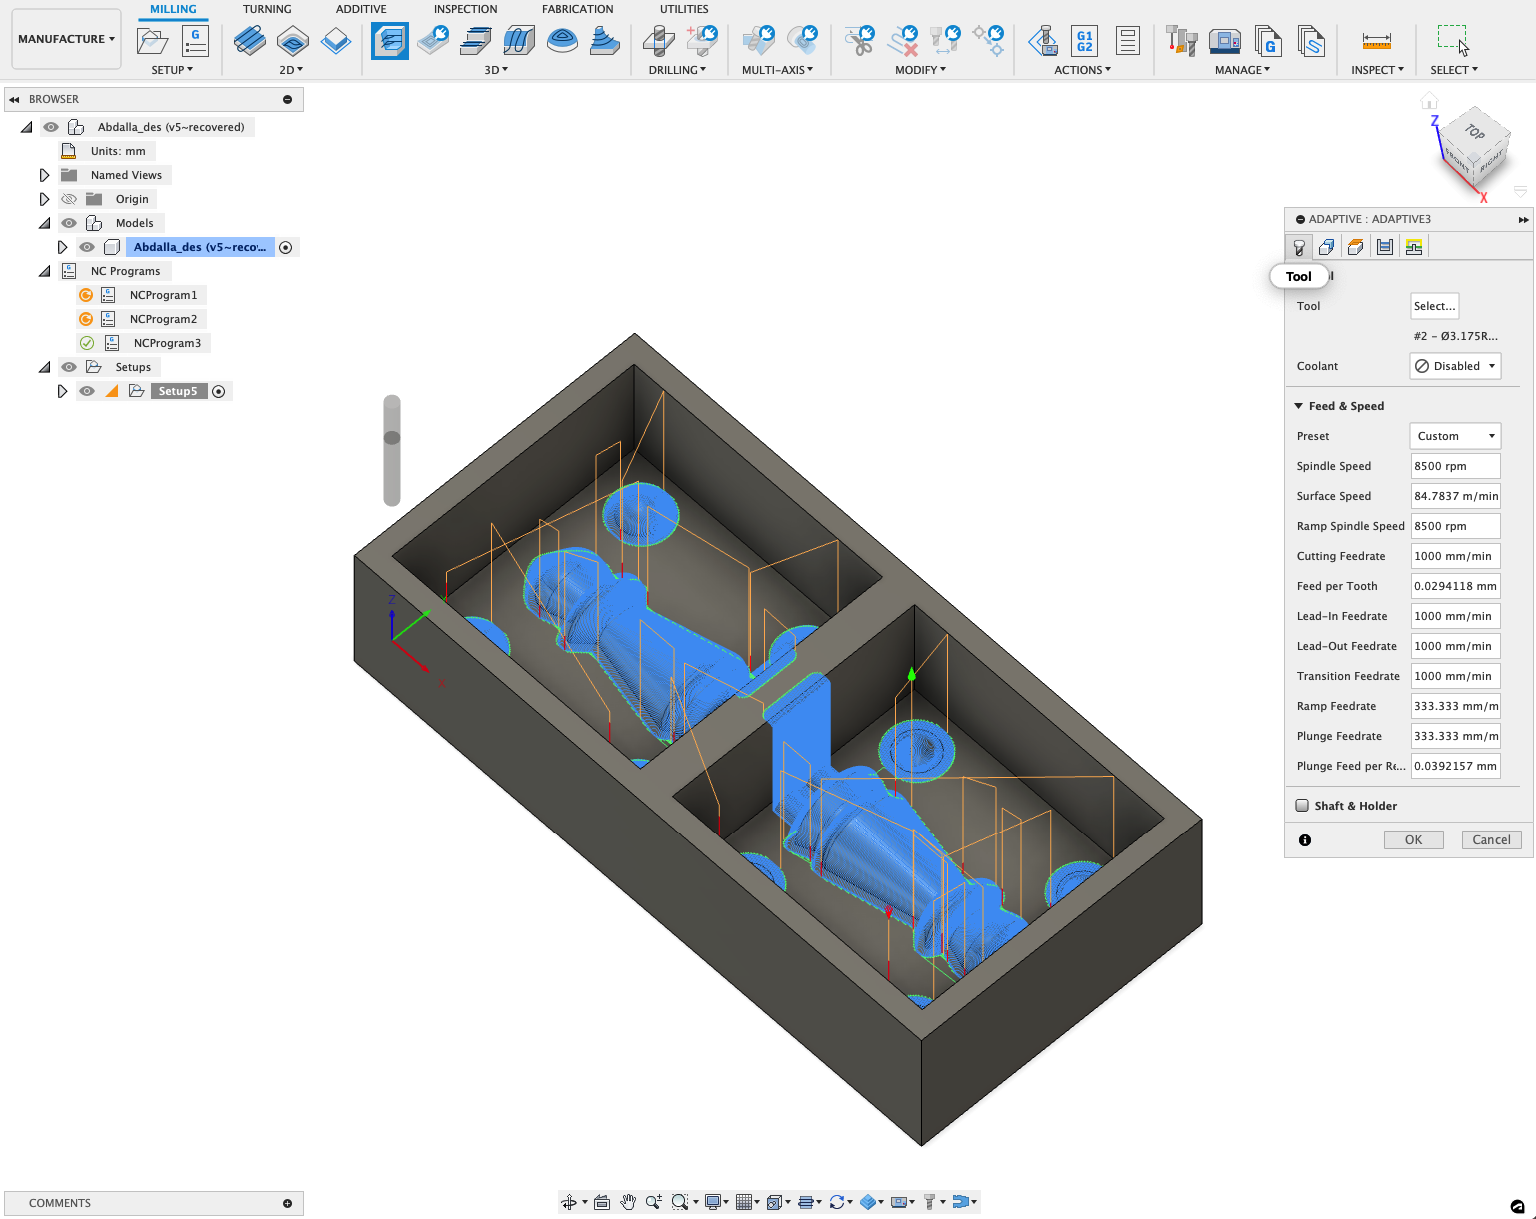
Adding tools:
Next is adding the tools by heading to manage > tool library > add new tool. I added 2 tools to use, The 1/8 inch flat end mill and the 1/8 inch bull nose end mill.
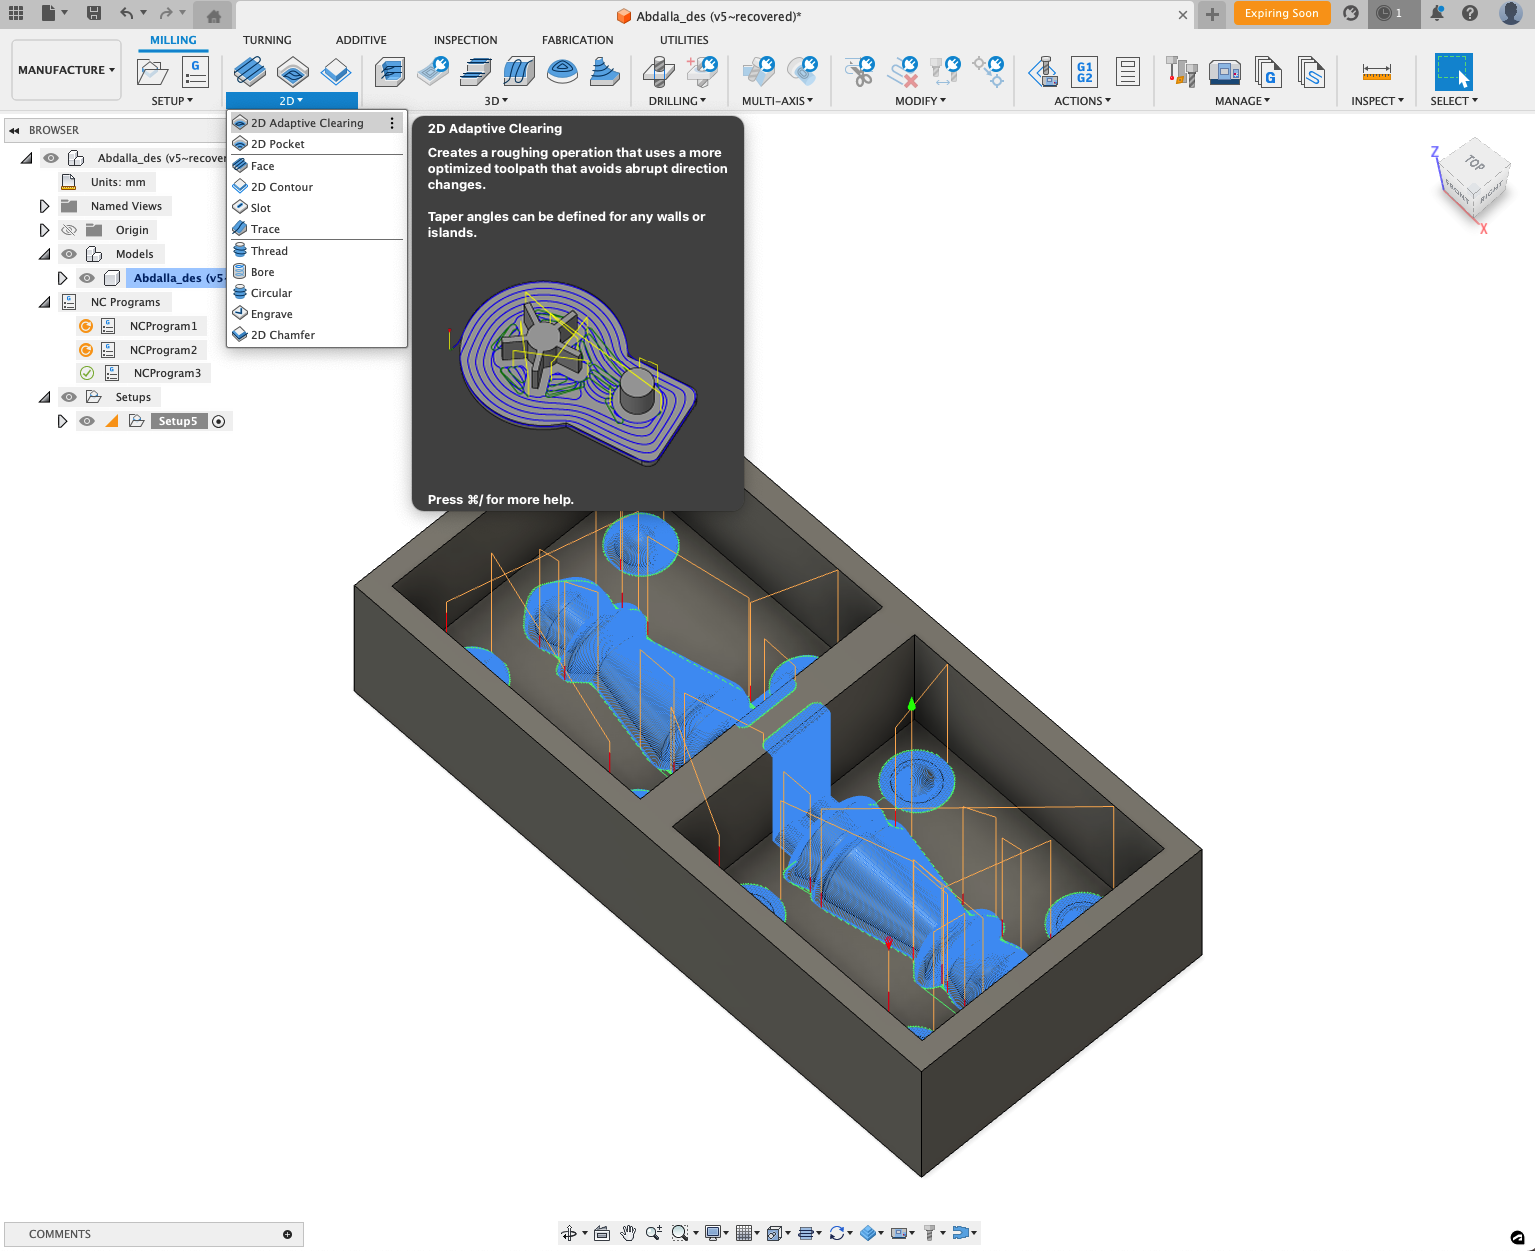
The step:
I must first trim the extra material from the step's tapered edge. I'm using the 2D adaptive clearing operation for this, which can be found by selecting the 2D tab > adaptive clearing.
For this operation, I'm clearing the horizontal space with a flat end mill while only cutting the step's outline.
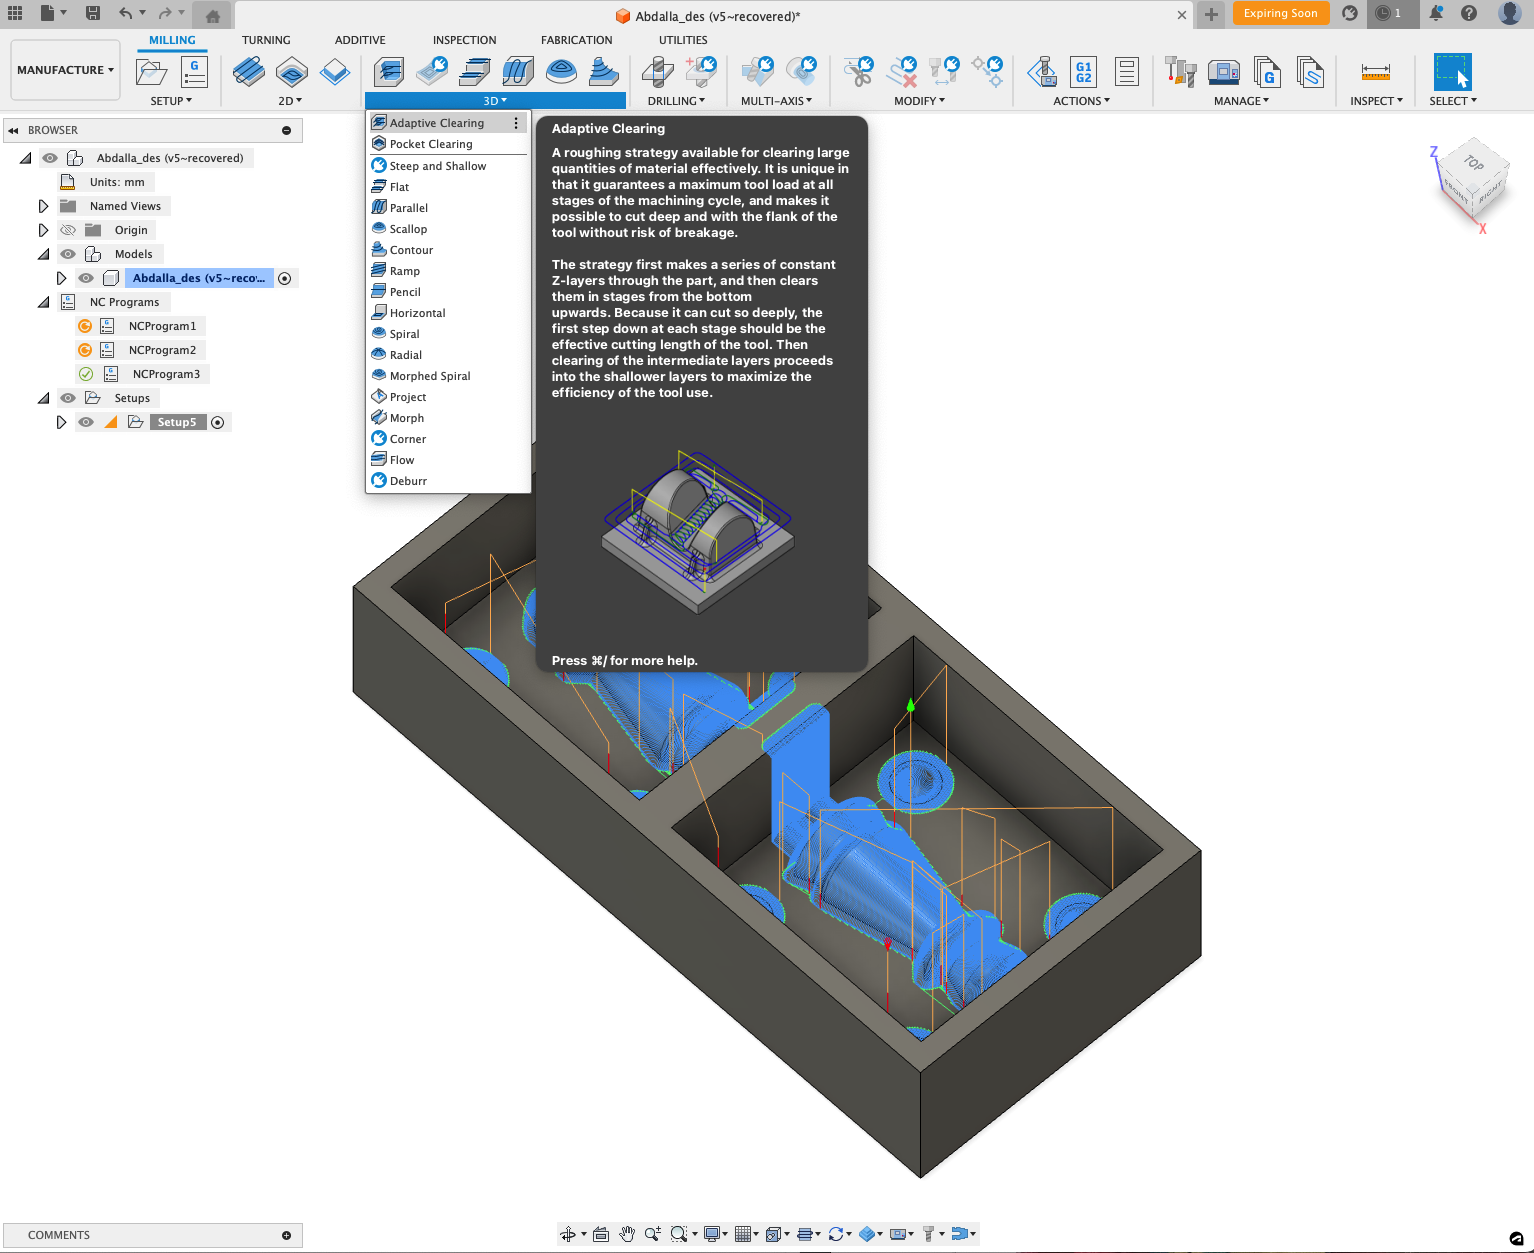
The rough cut:
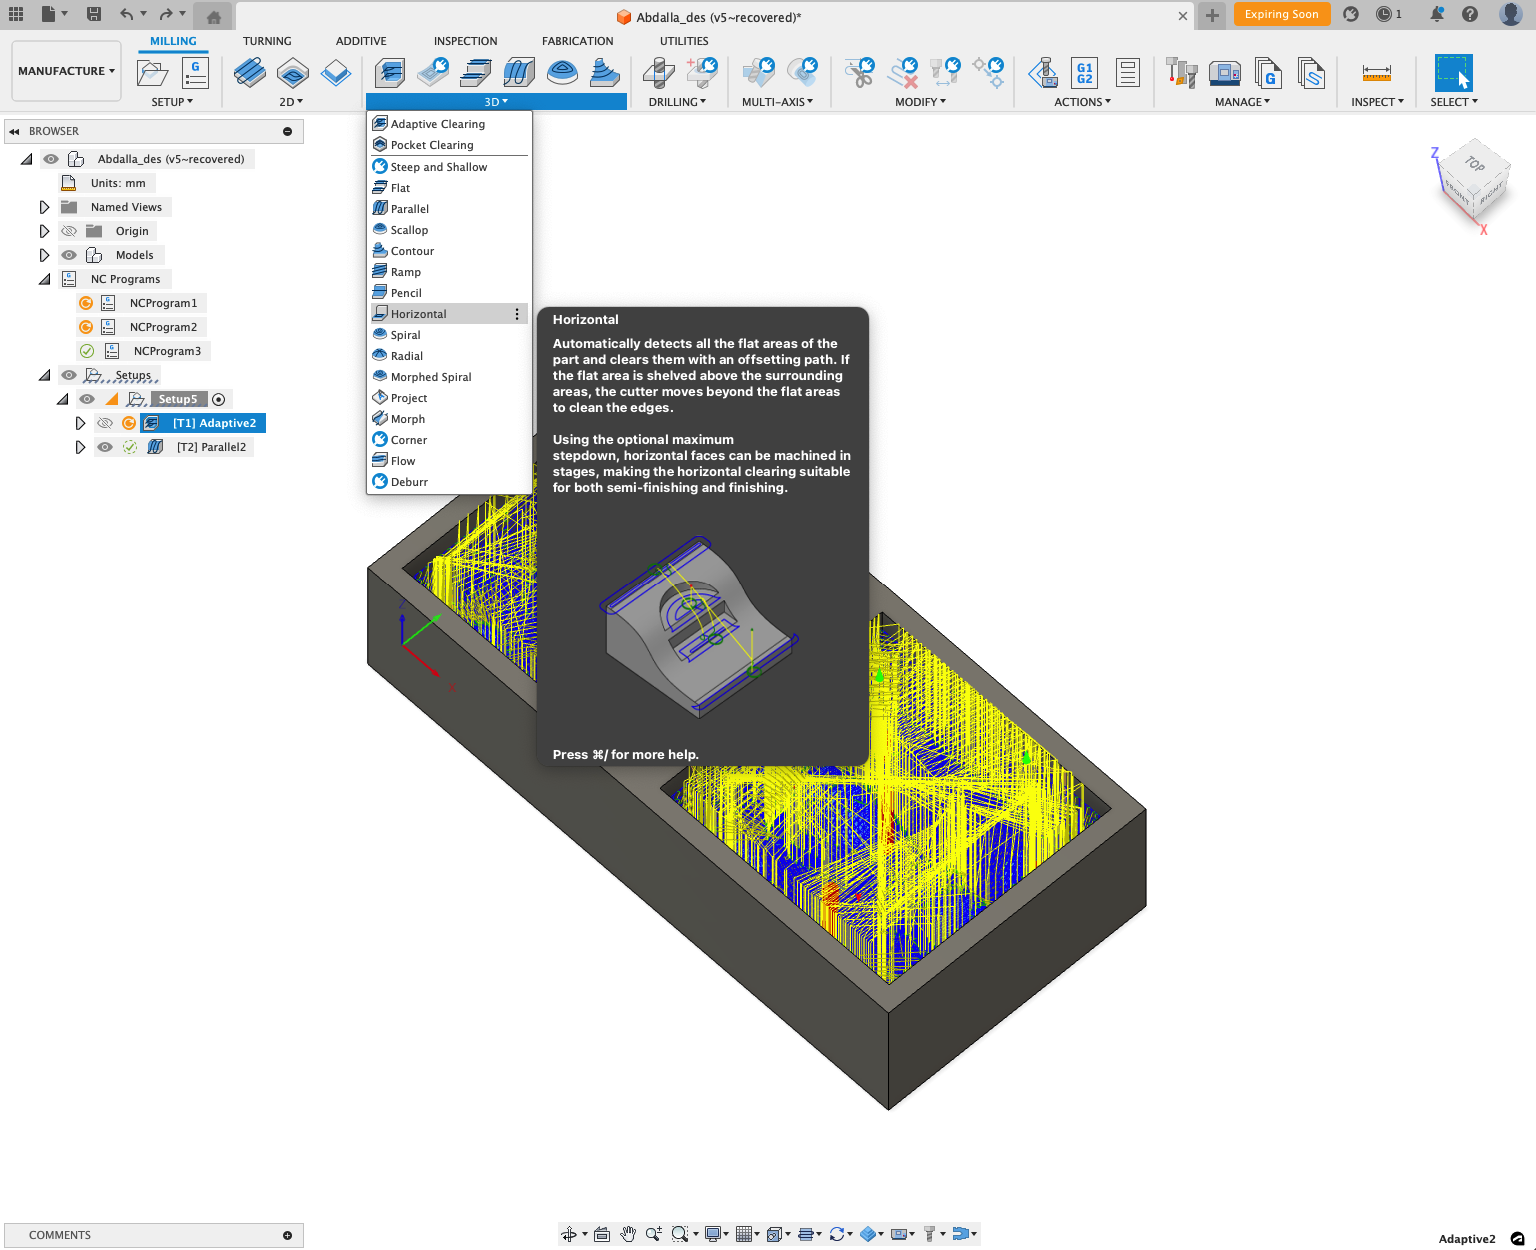
For the rough cut, I am using 3D adaptive clearing which would remove large quantities of material and give me a rough shape of the design.
The 3D tab > adaptive clearing is where you do this. Once more, the flat end mill is what I've chosen for this operation because it will remove the extra material the easiest. My goal is to remove all of the material from the pocket, so I've chosen to work on the bottom boundary and changed the stepover (under the passes tab) to 4 mm and the fine step over to 1.87 mm, which is roughly half the diameter of the tool I'm using. The load on the tool will be reduced as a result of the end mill traveling in fewer passes and steps.
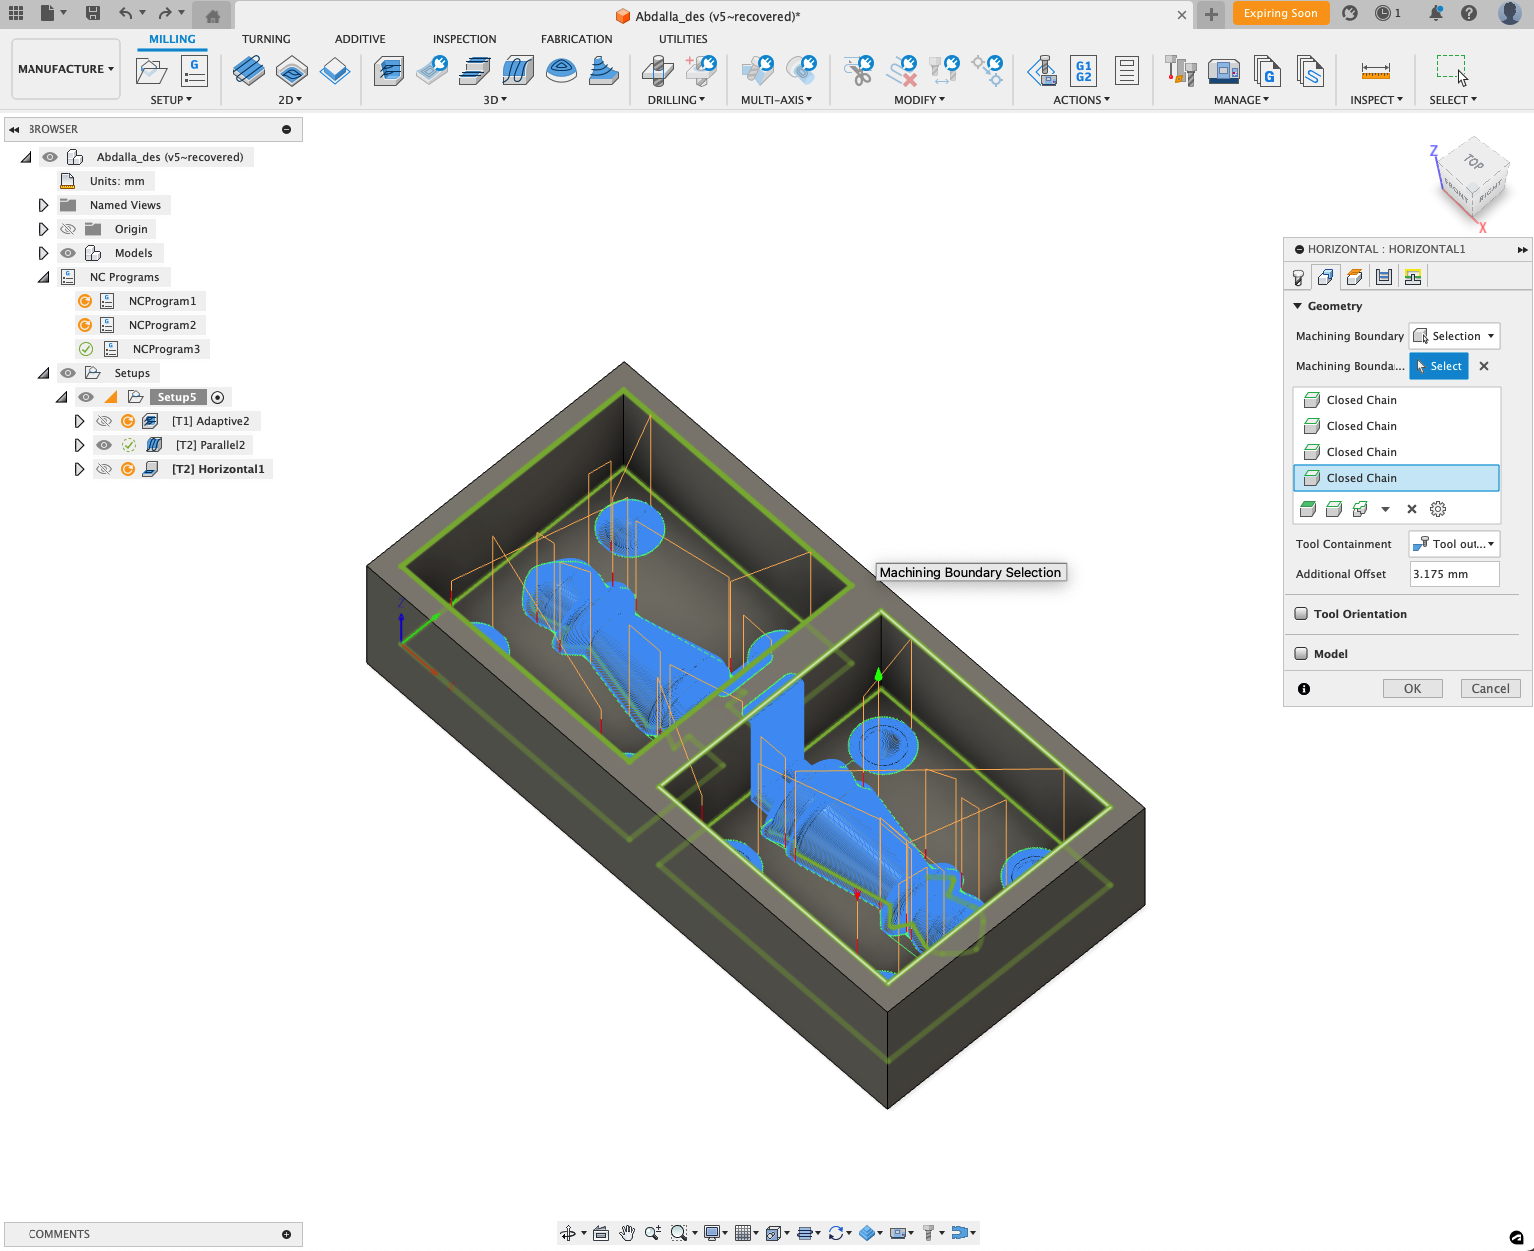
The horizontal surface:
When experimenting with various operations, I found that moving directly from the adaptive clearing to the finishing operation did not produce the desired outcome.
I can see from the simulation that the spheres were not properly shaped and that the bottom surface of the pocket was not flat. In order to use the horizontal operation, I chose the bull nose end mill from the 3D tab > Horizontal. This process automatically recognizes horizontal or flat surfaces and evens them out.
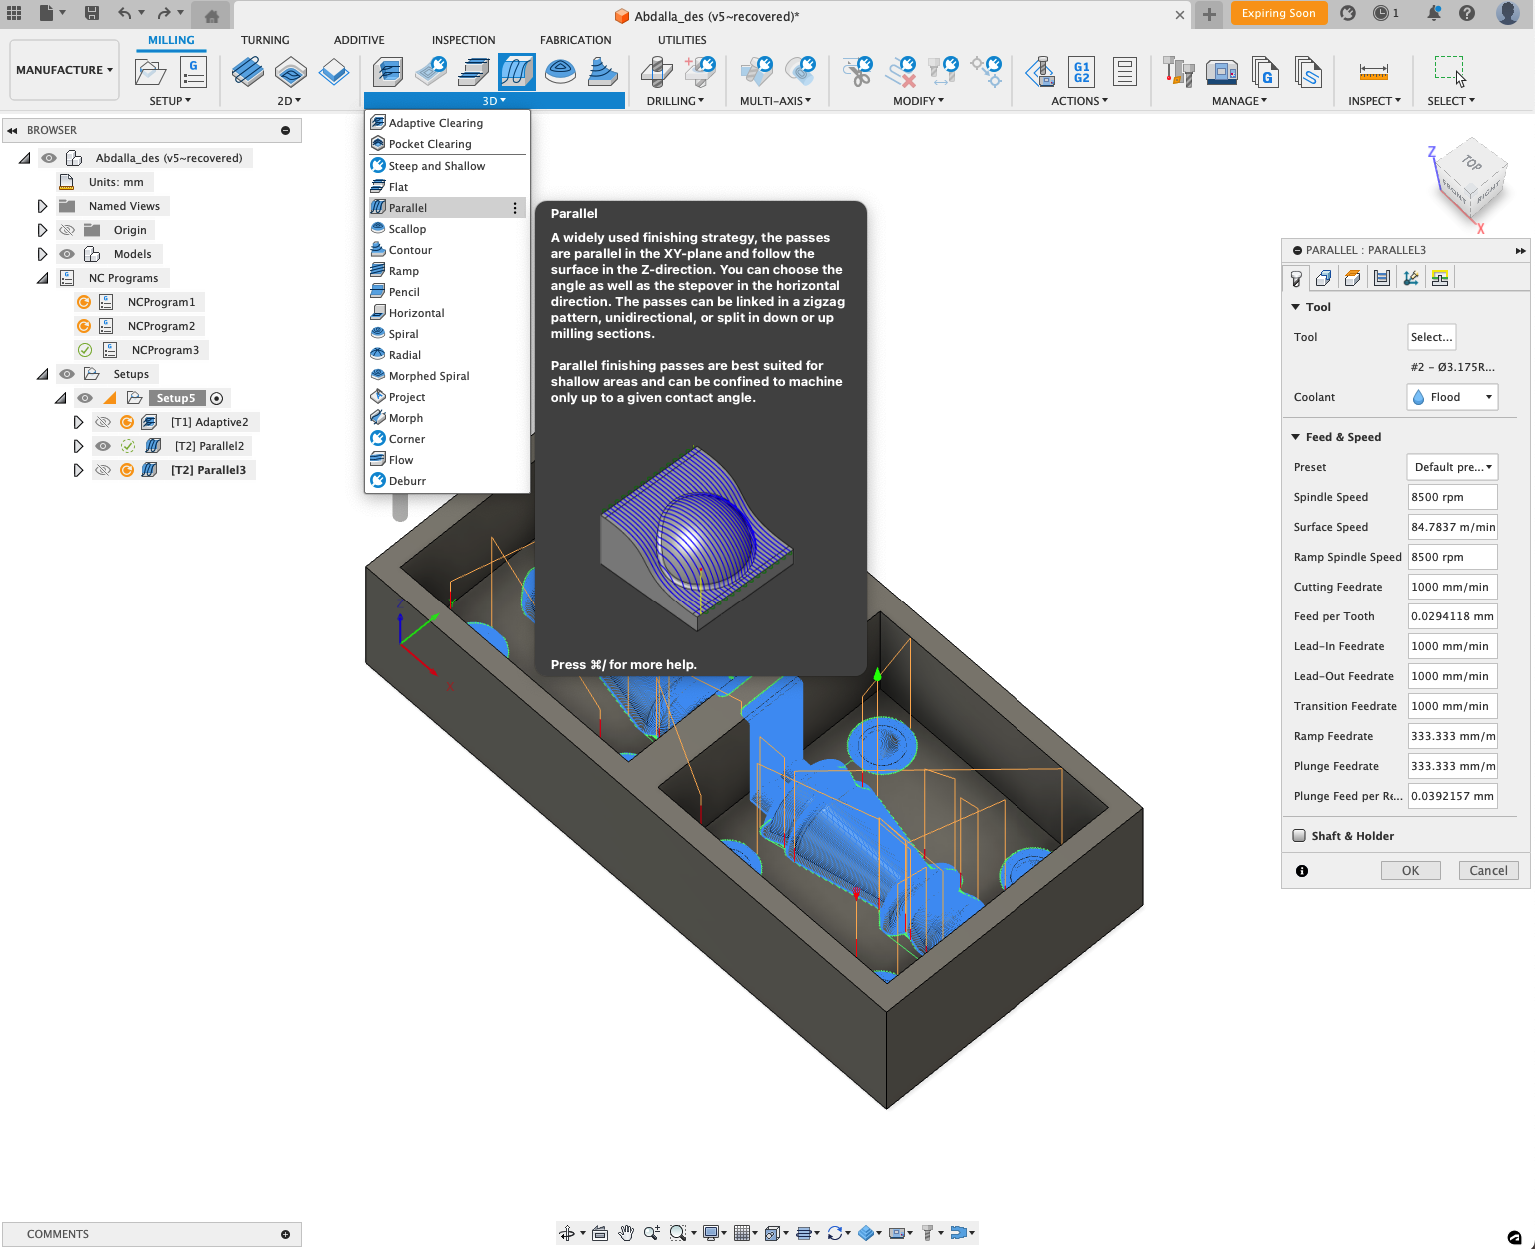
The finishing:
The parallel processing gives the model a fine finishing touch so it can display the final, intricate shape.
Go to the 3D tab and select Parallel. For this operation, I'm going to use the bull nose end mill once more because it will give the surface a smooth finish. In order to make sure that the tool would travel along all of the diamond's surfaces, I added an additional offset of 2.5 mm while choosing the features I need to work on. For the best result, I set the stepover to 0.1 under the passes tab.
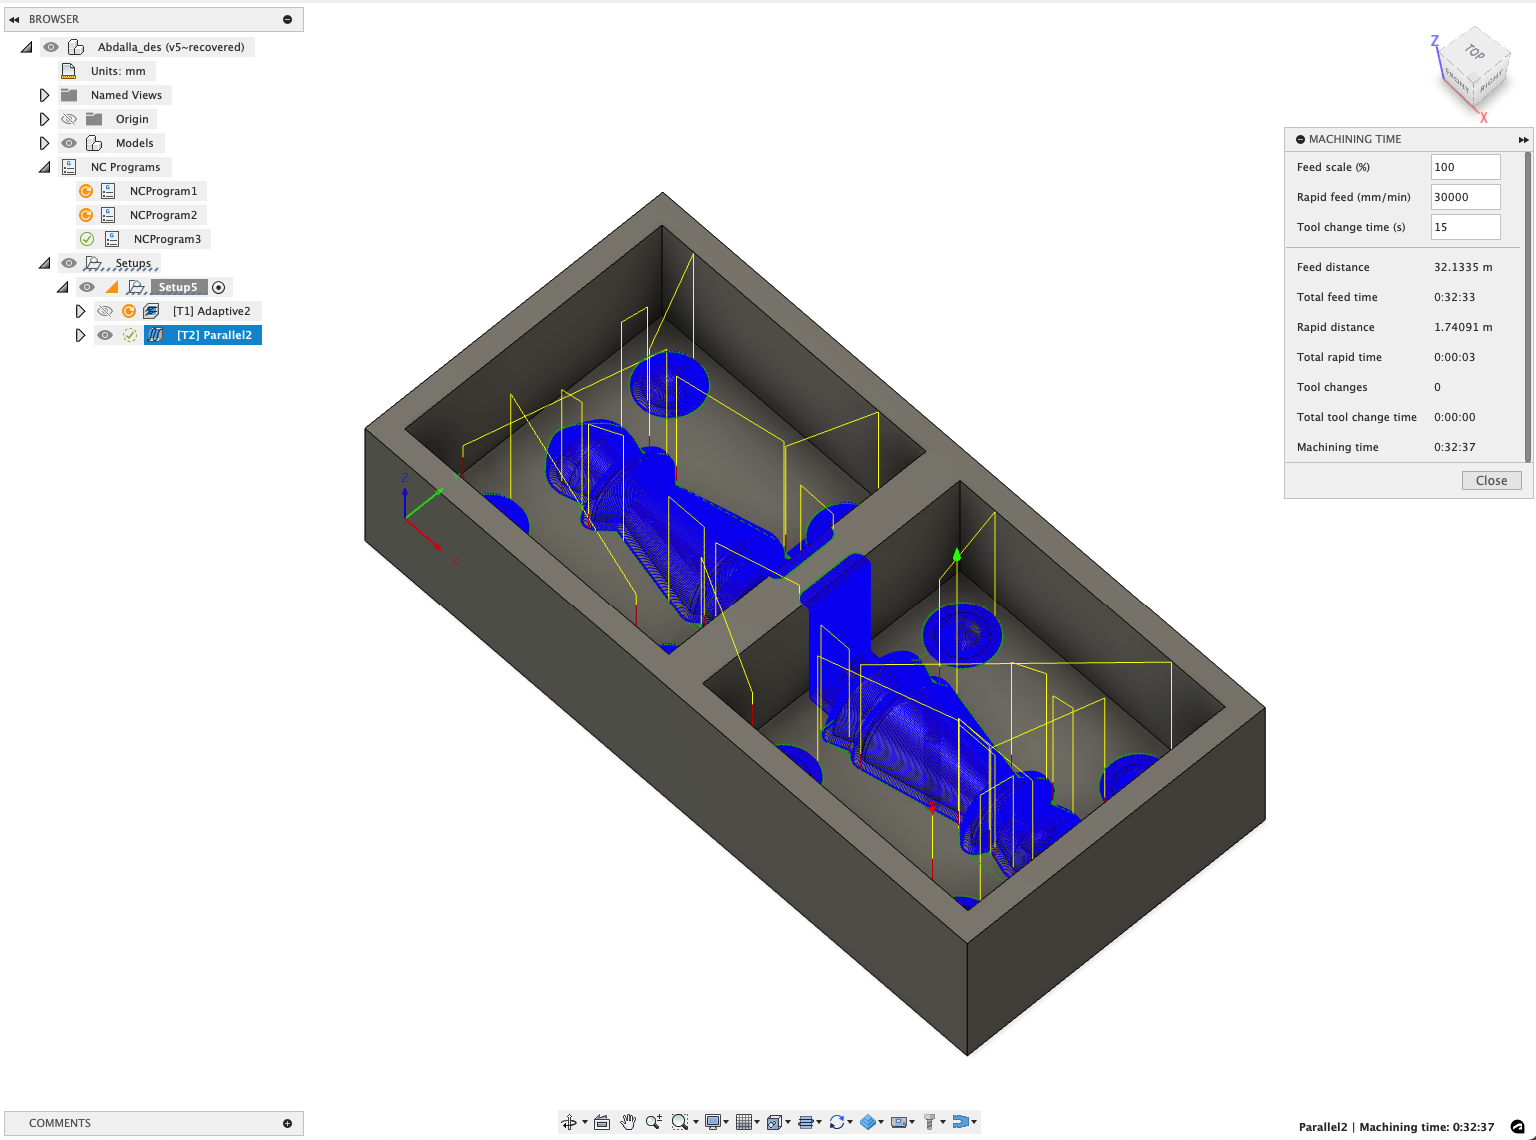
The machining time, and exporting the files:
I right-clicked the setup and chose "machining time" to view the total machining time. It took me 32 minutes, and 37 seconds.
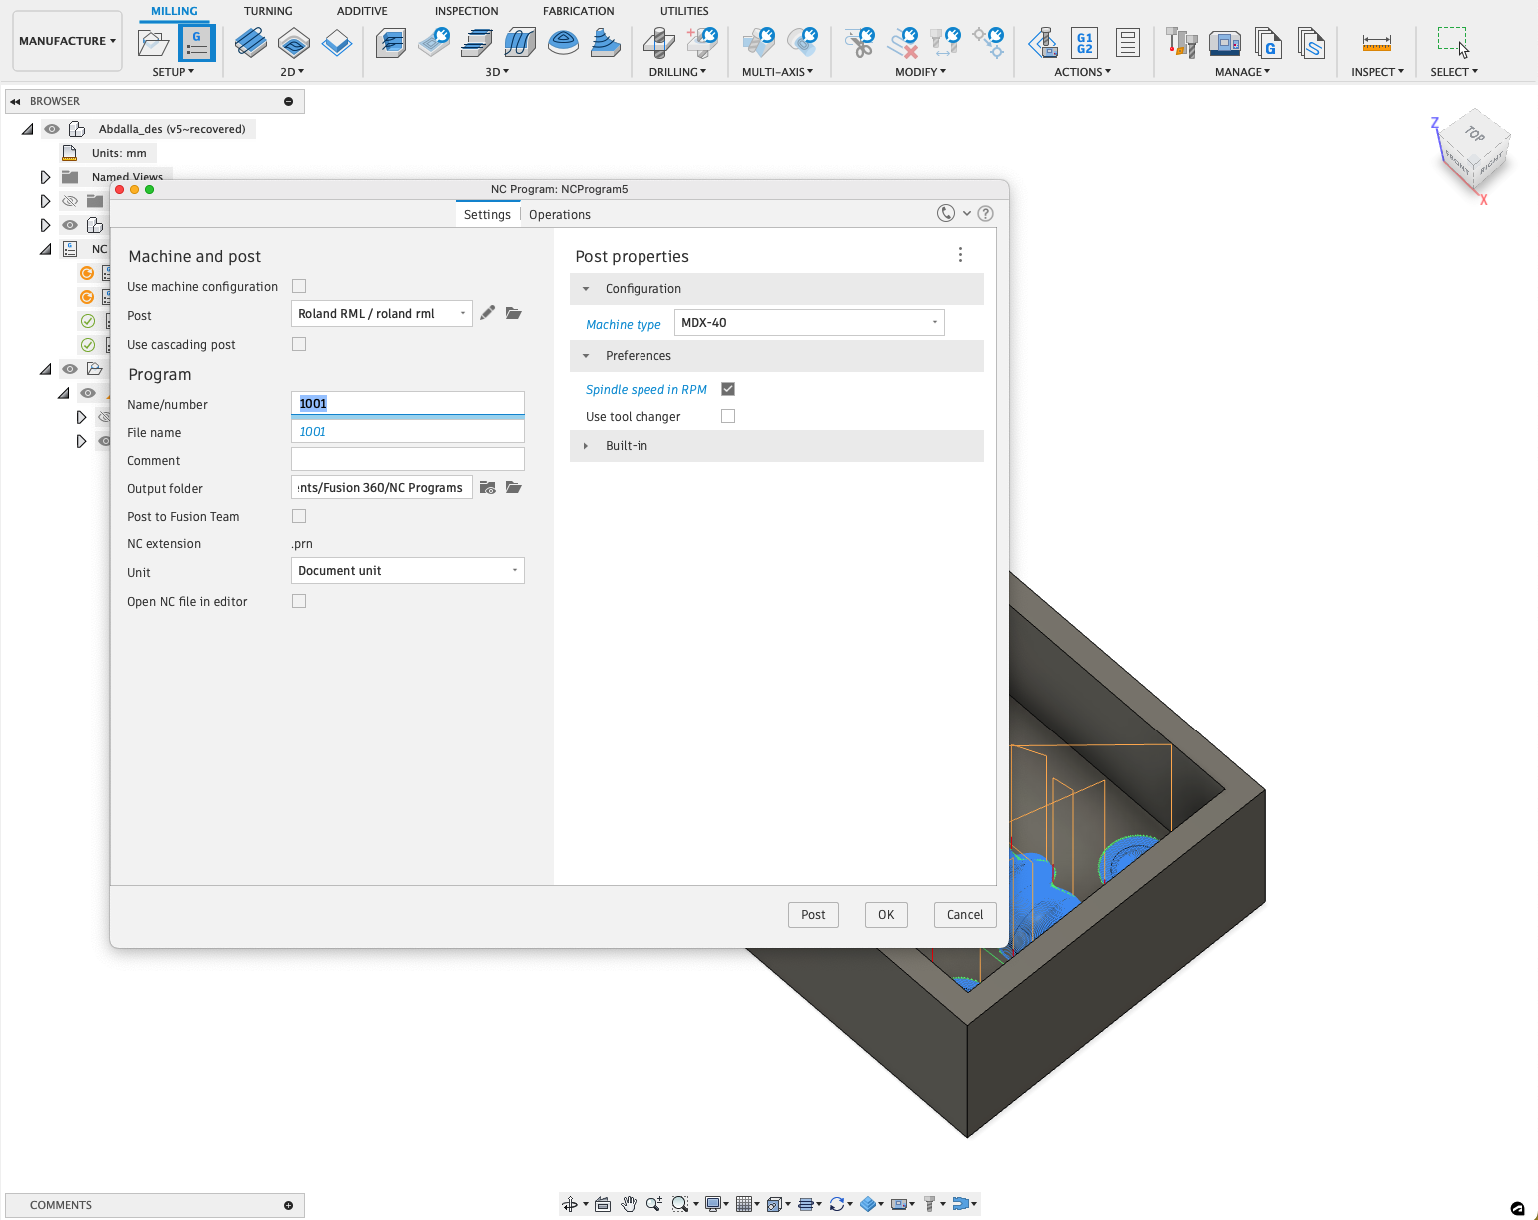
To export the cam files, I selected each process at a time, right-clicked on it, and selected Post process. This operation generates the Gerber files for the milling machine to read. The things I need to modify are the following:
In post configuration under all vendors, I selected the ROLAND DG.
Select Roland RML.
Under program settings, select the machine type as MDX-40.
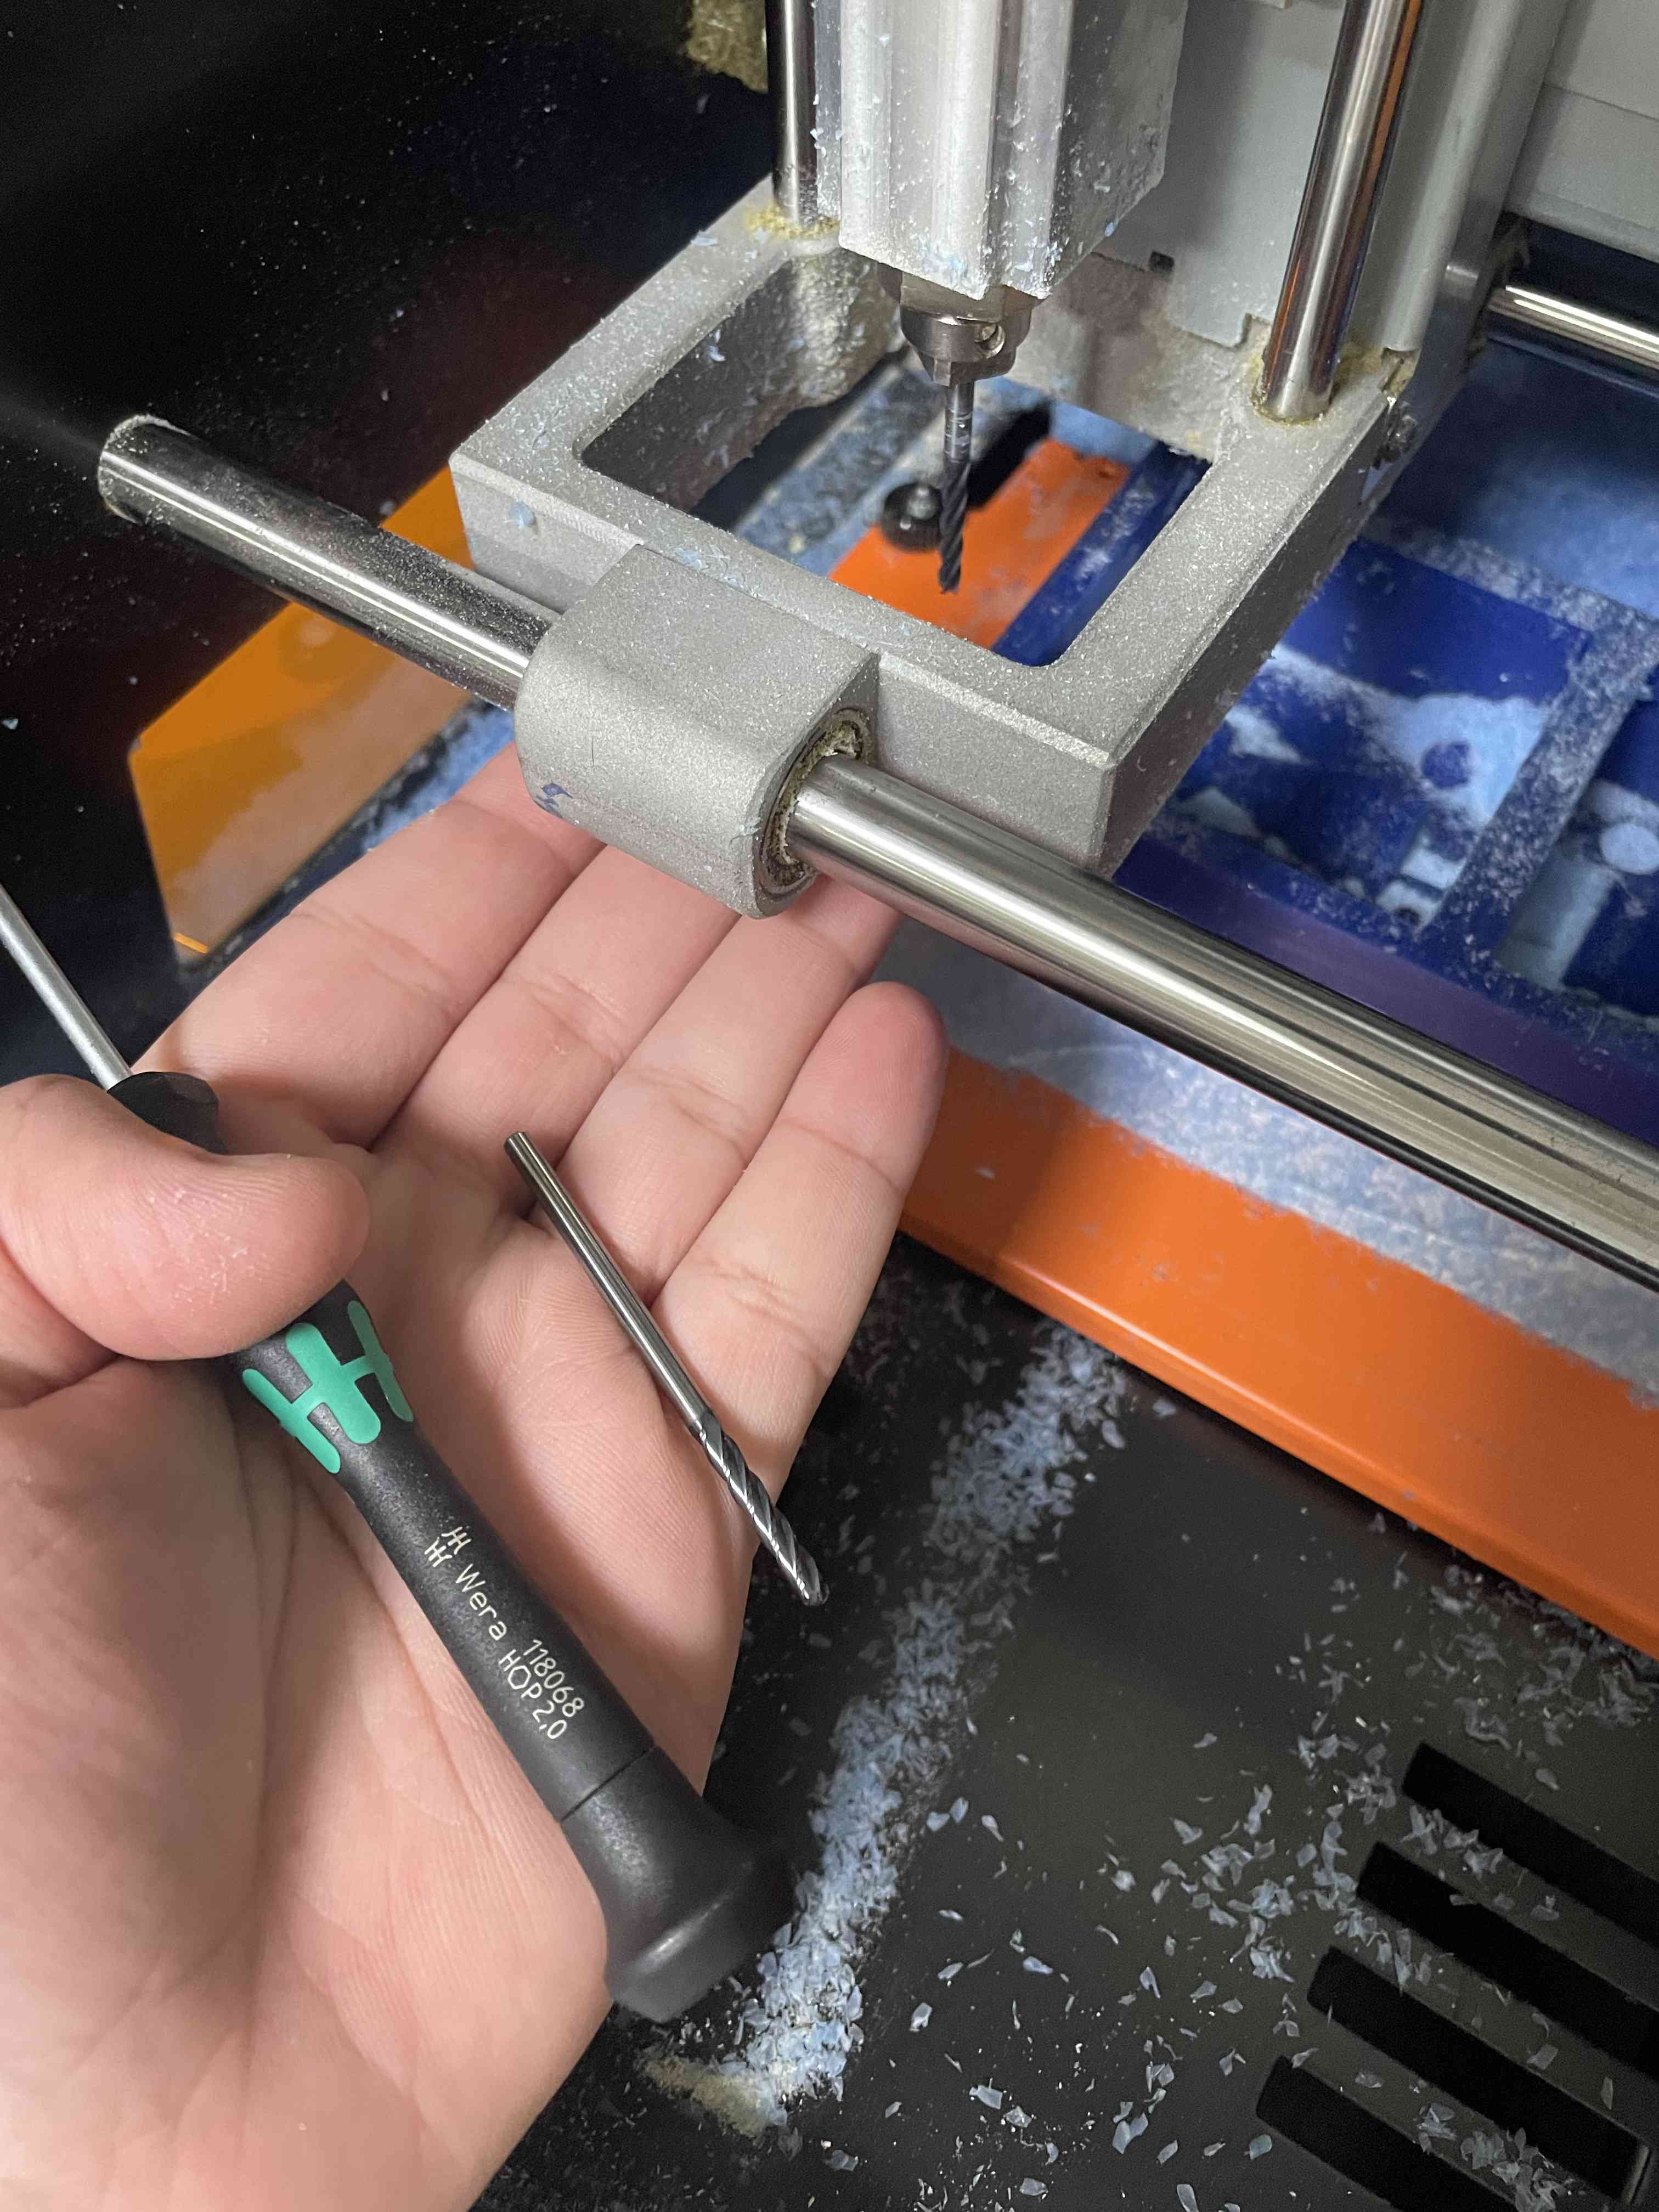
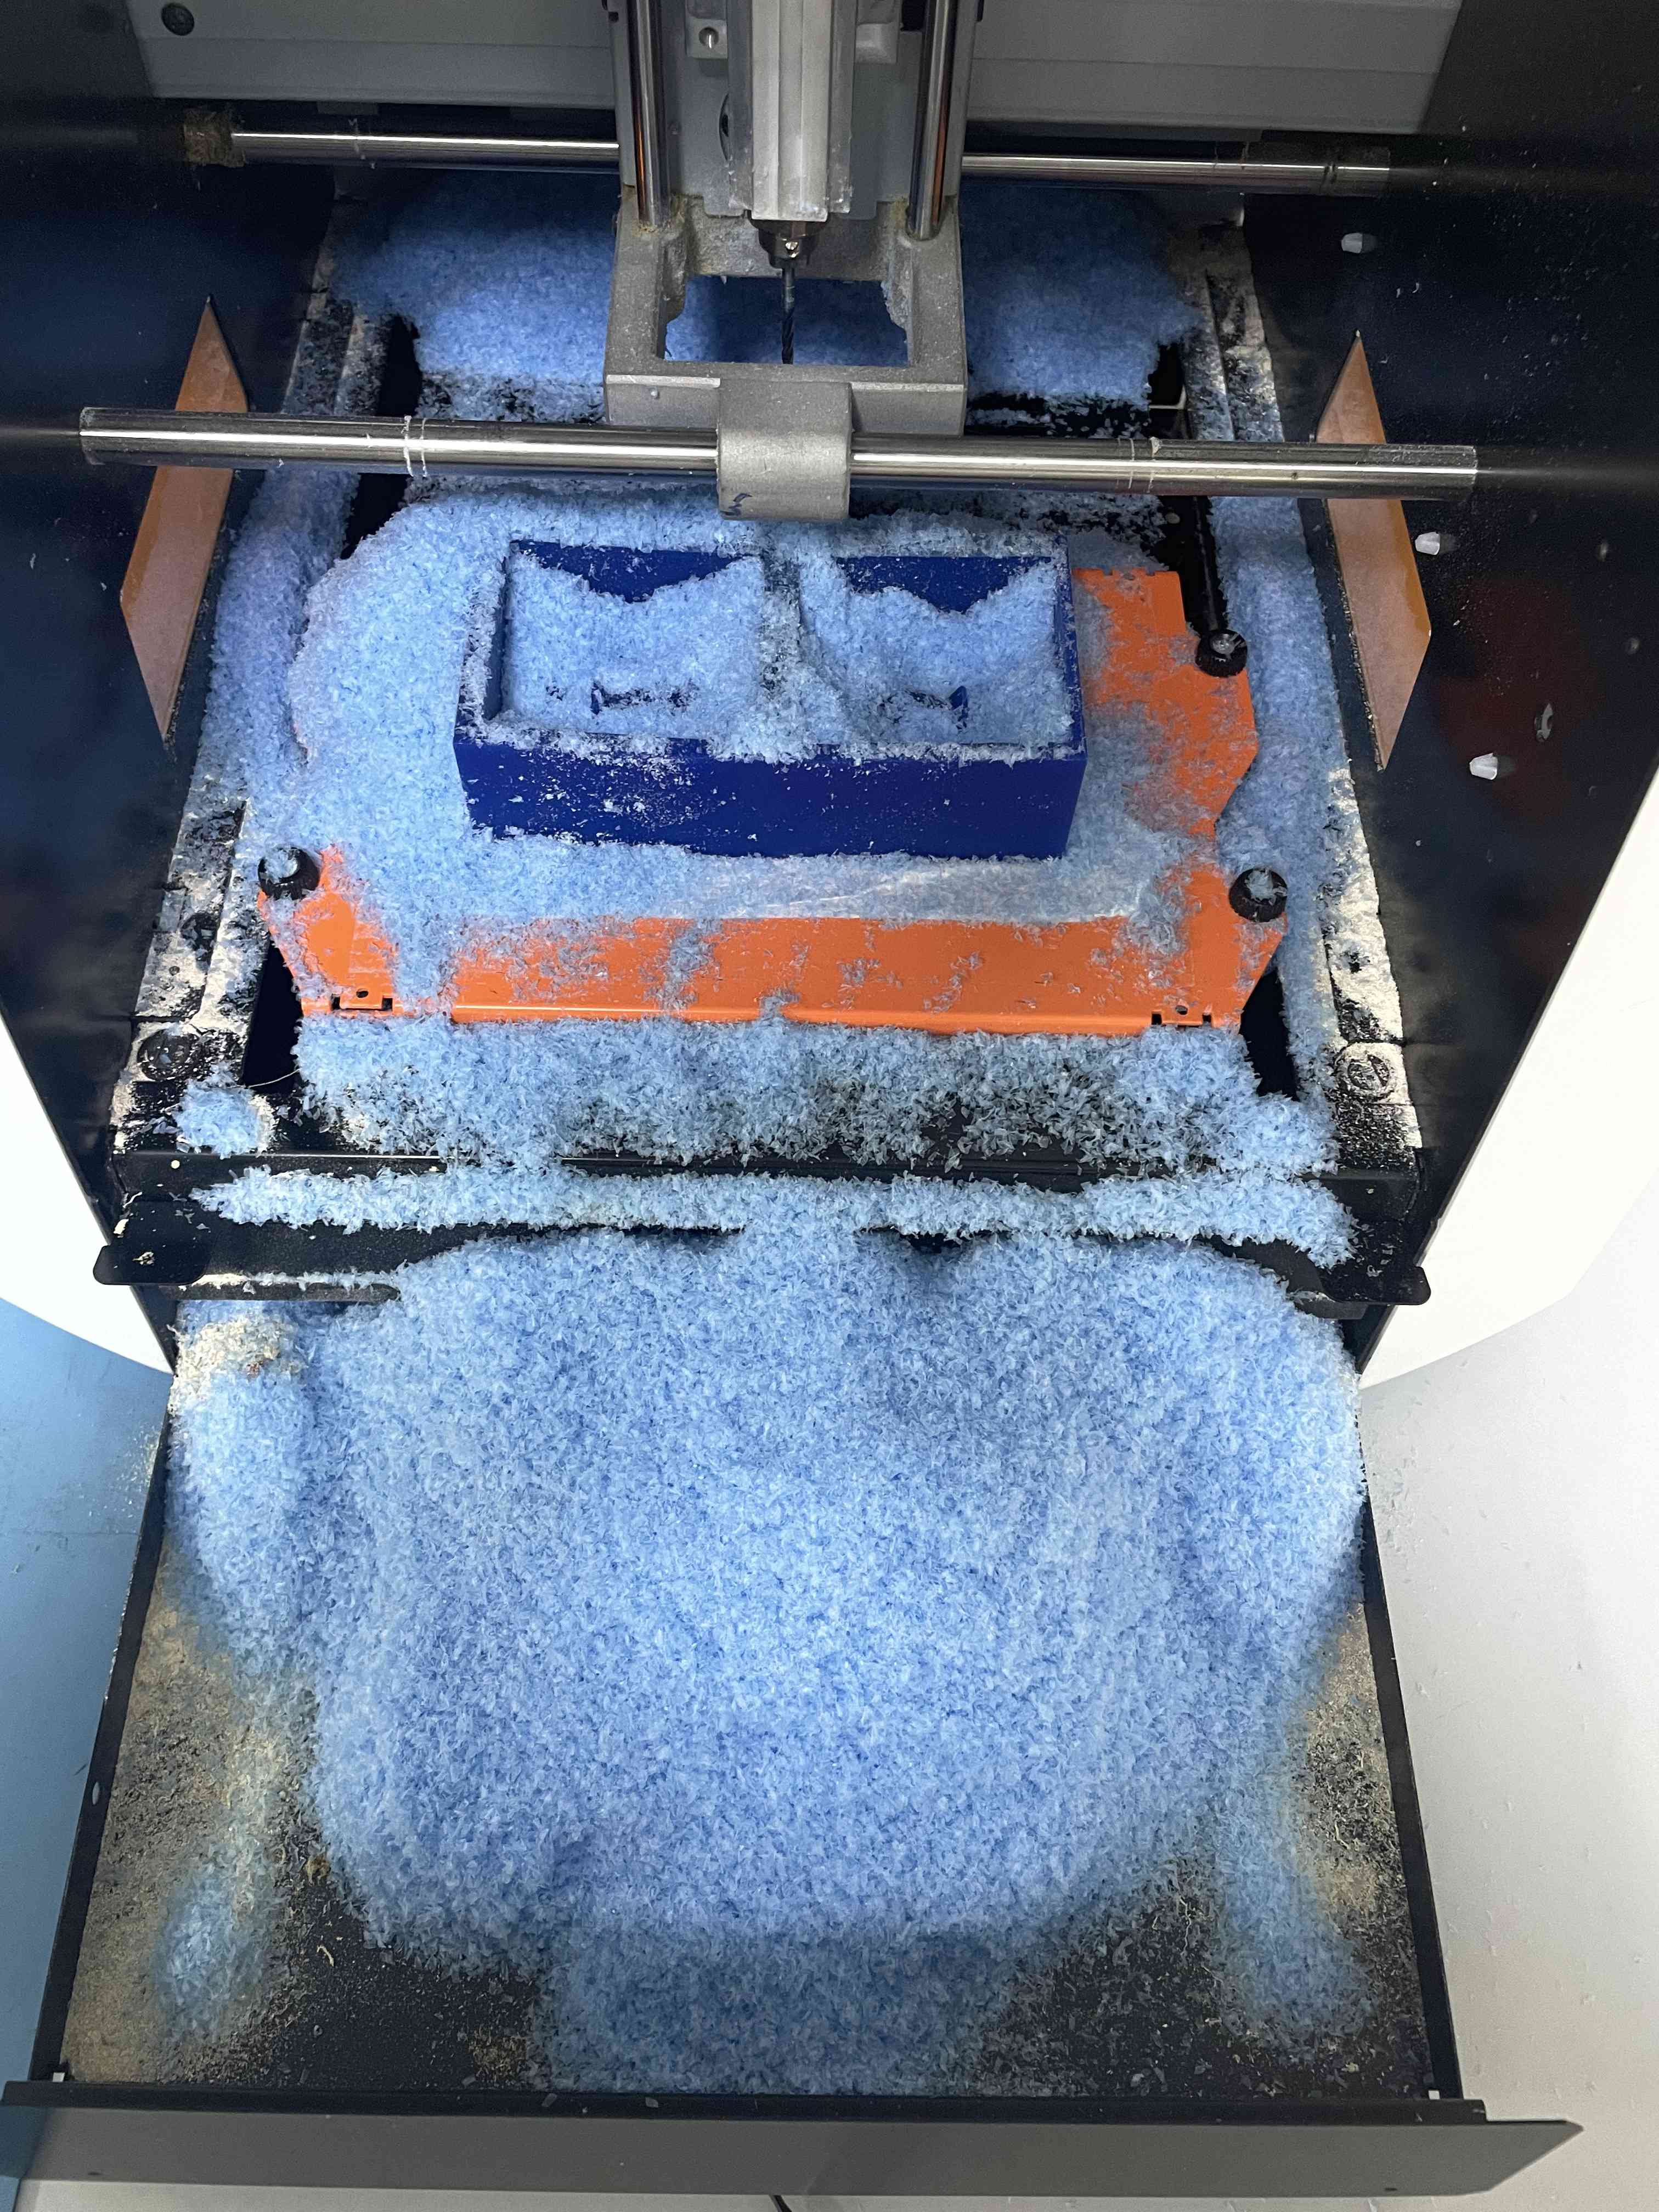
I prepared the machinable wax stock I'm using for milling. I attached it to the milling machine holder using double-sided tape on the back.
I set up the XY origin points, Zeroed the Z and start milling with (1/8 Long nose).
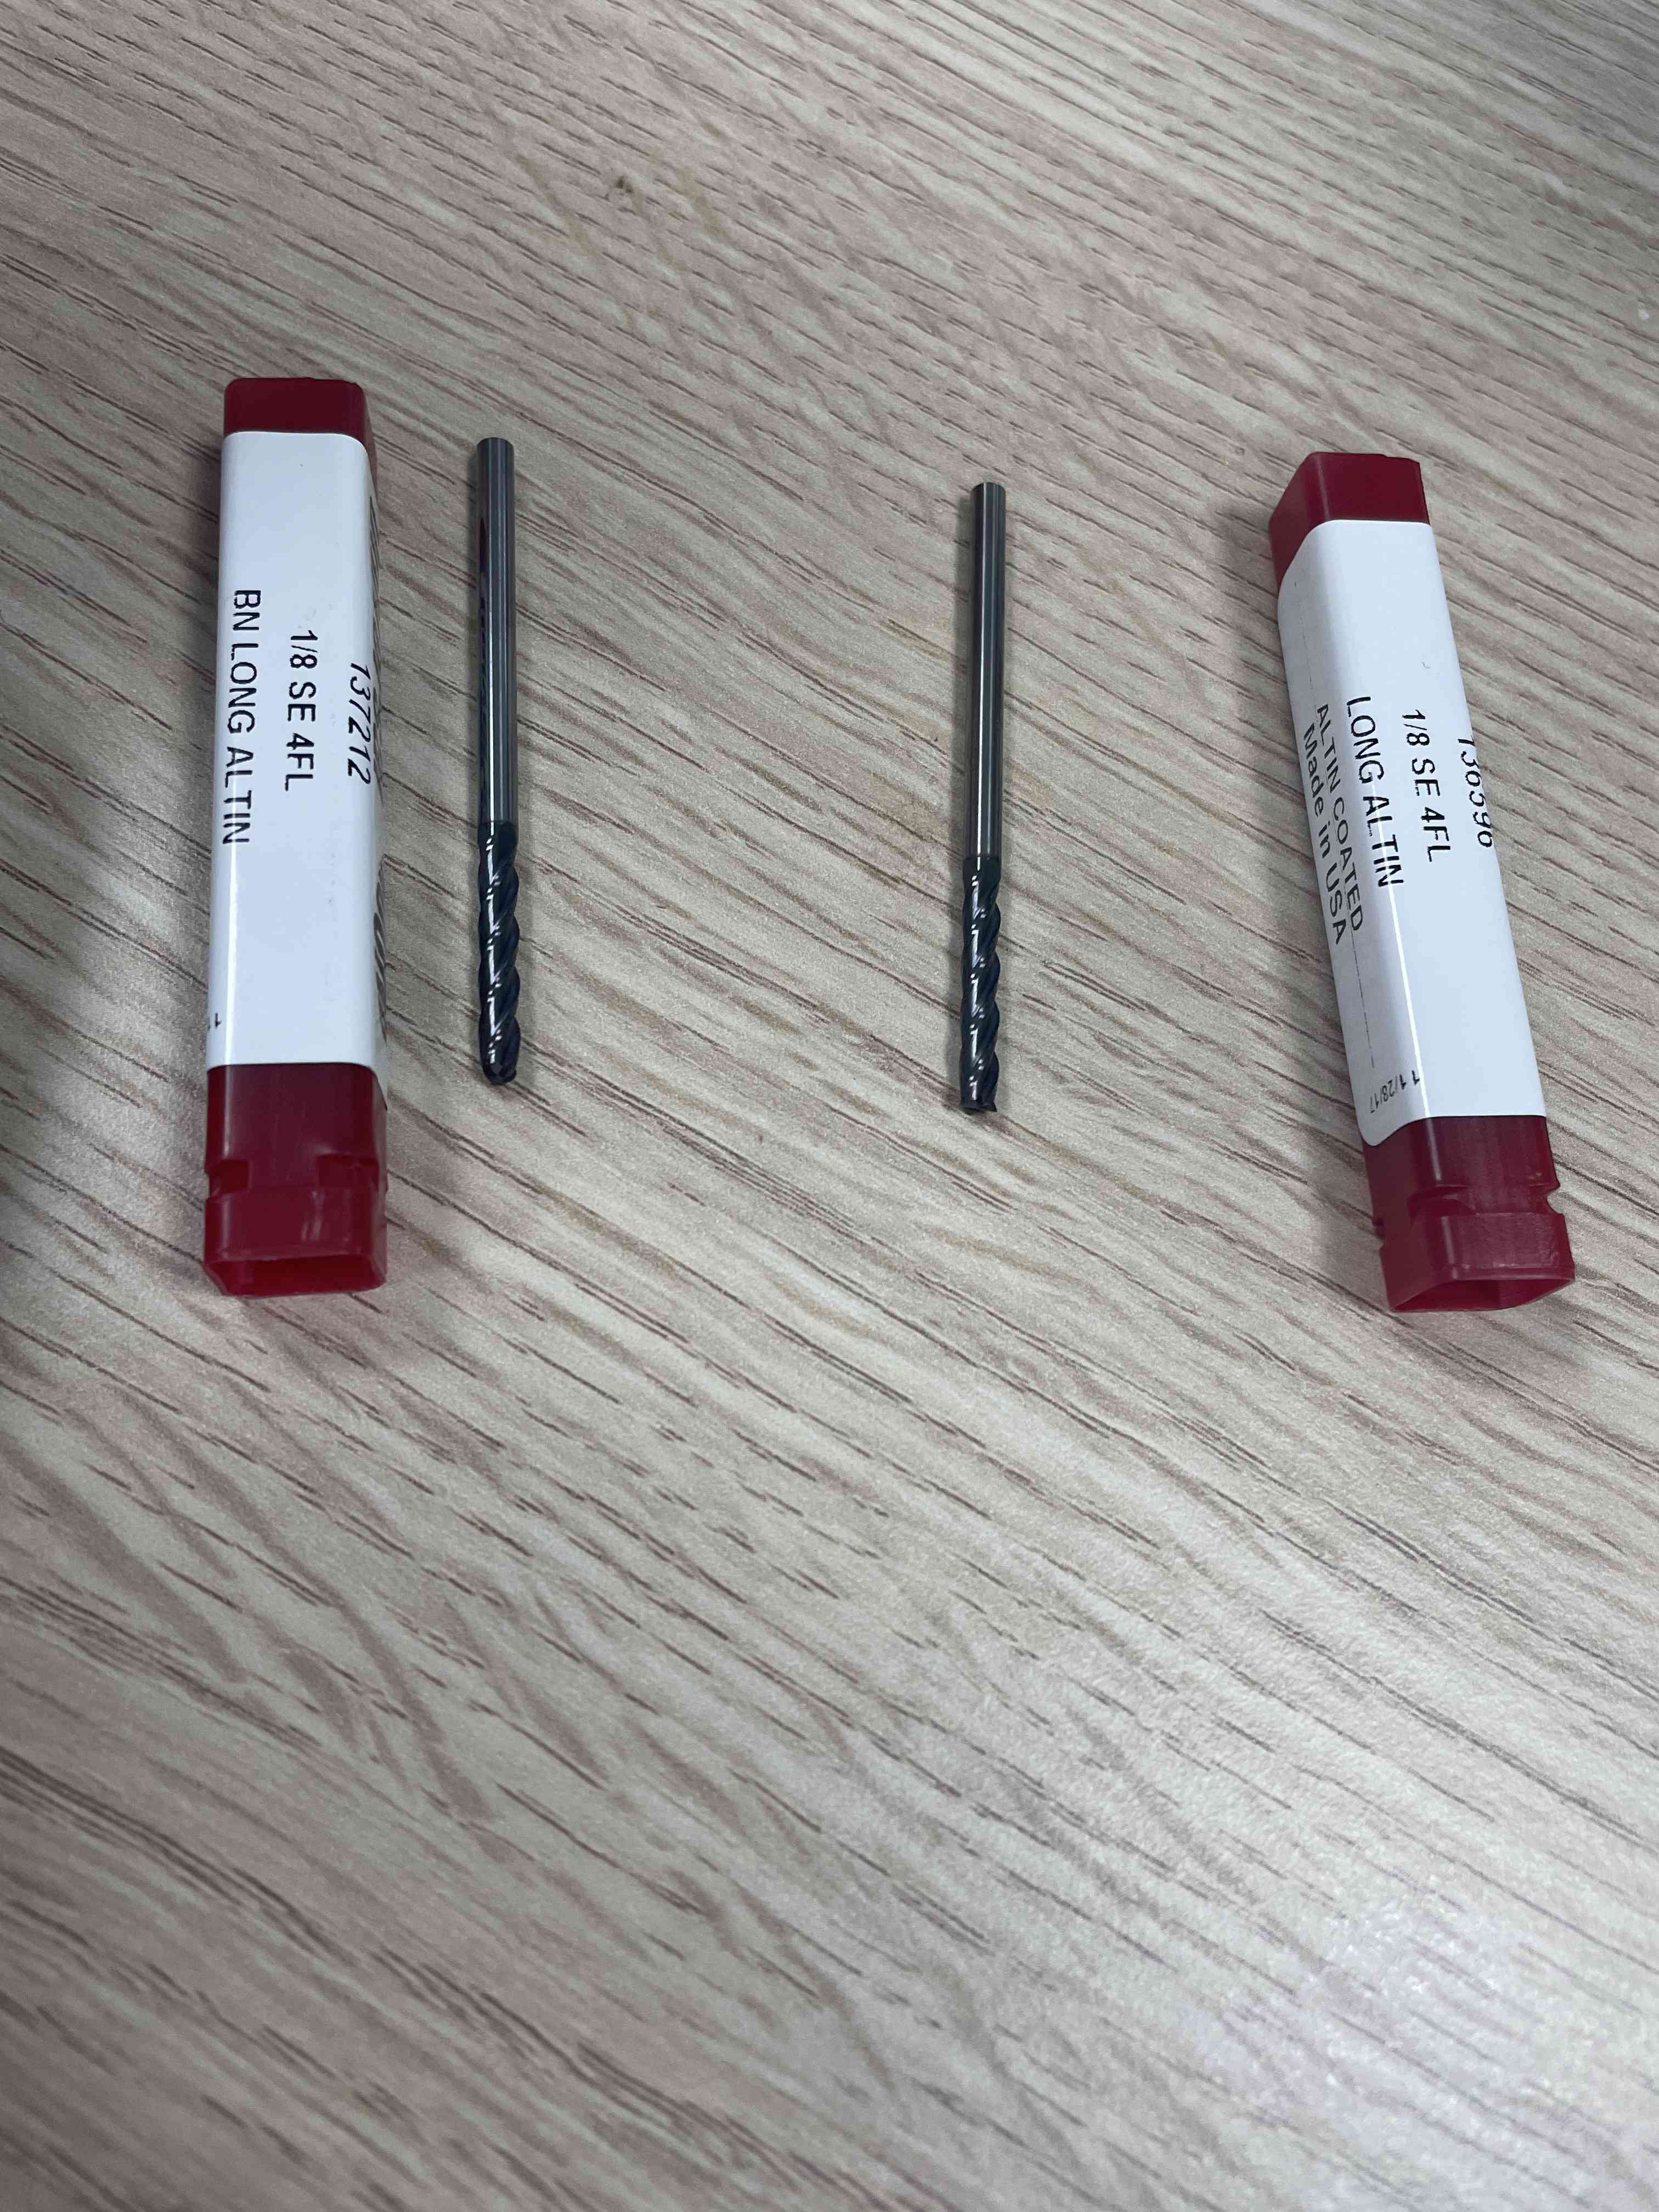
Then I change the milling tool to smooth the surface (1/8 bull nose)
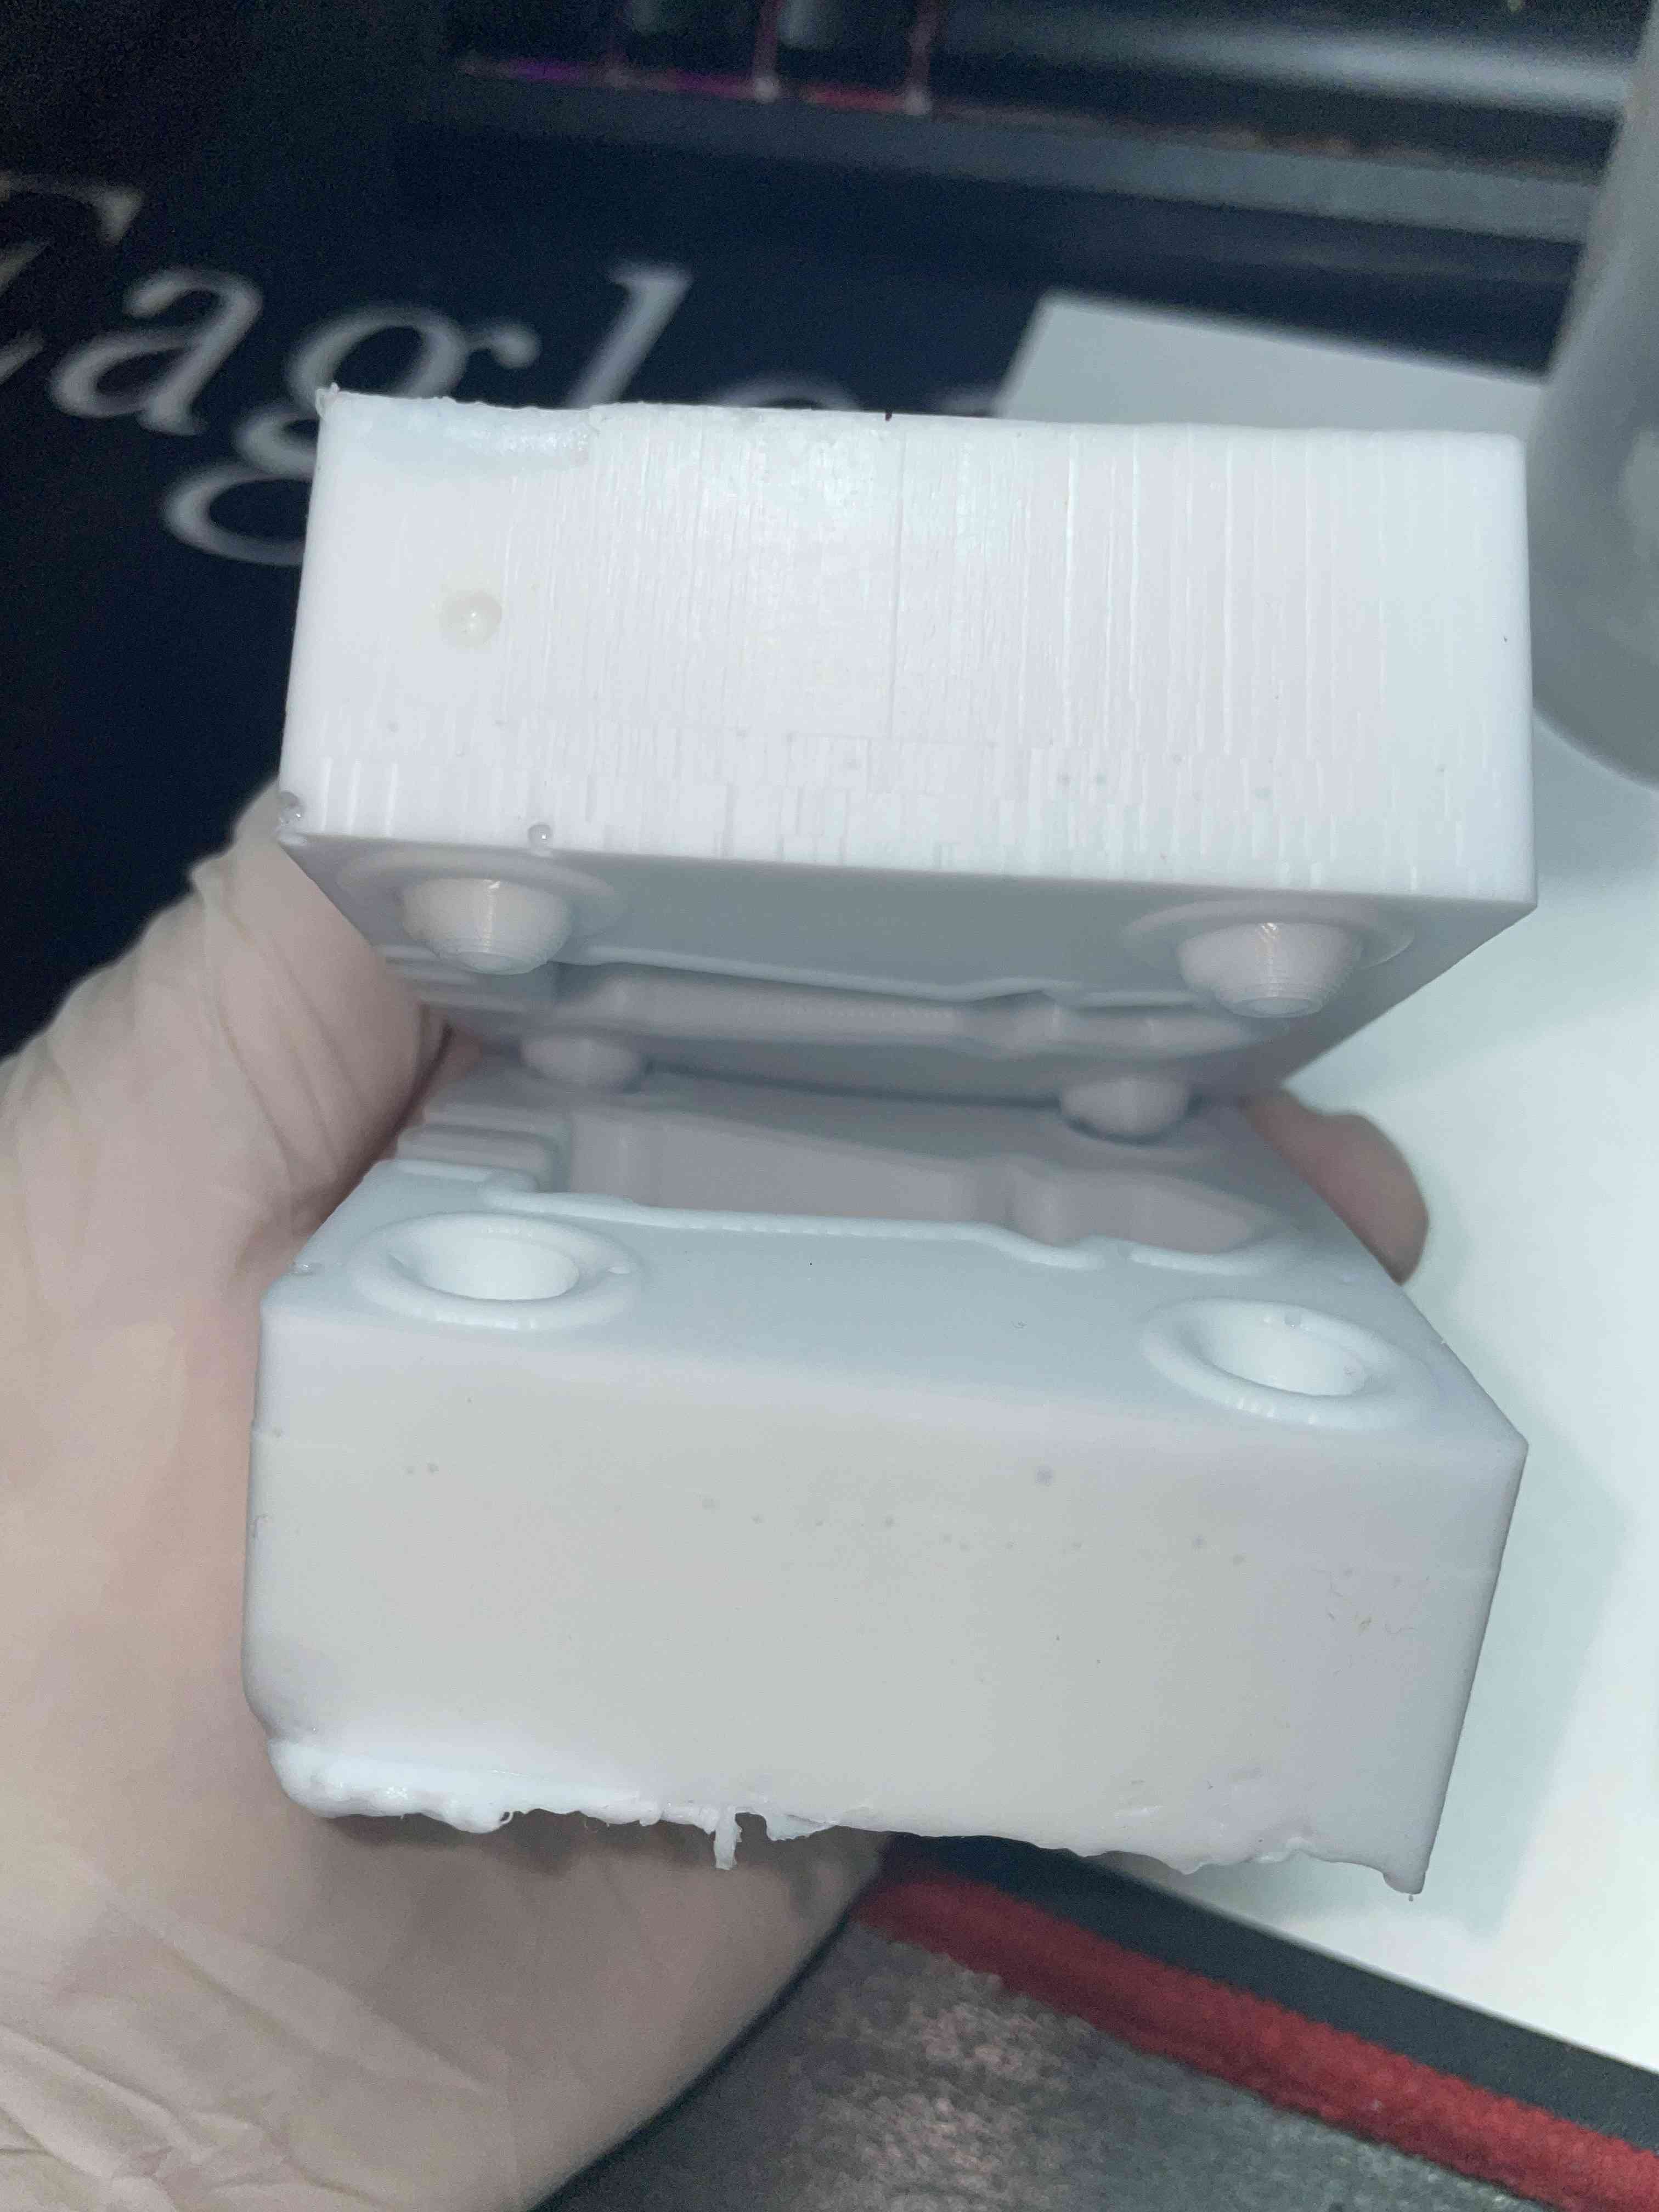
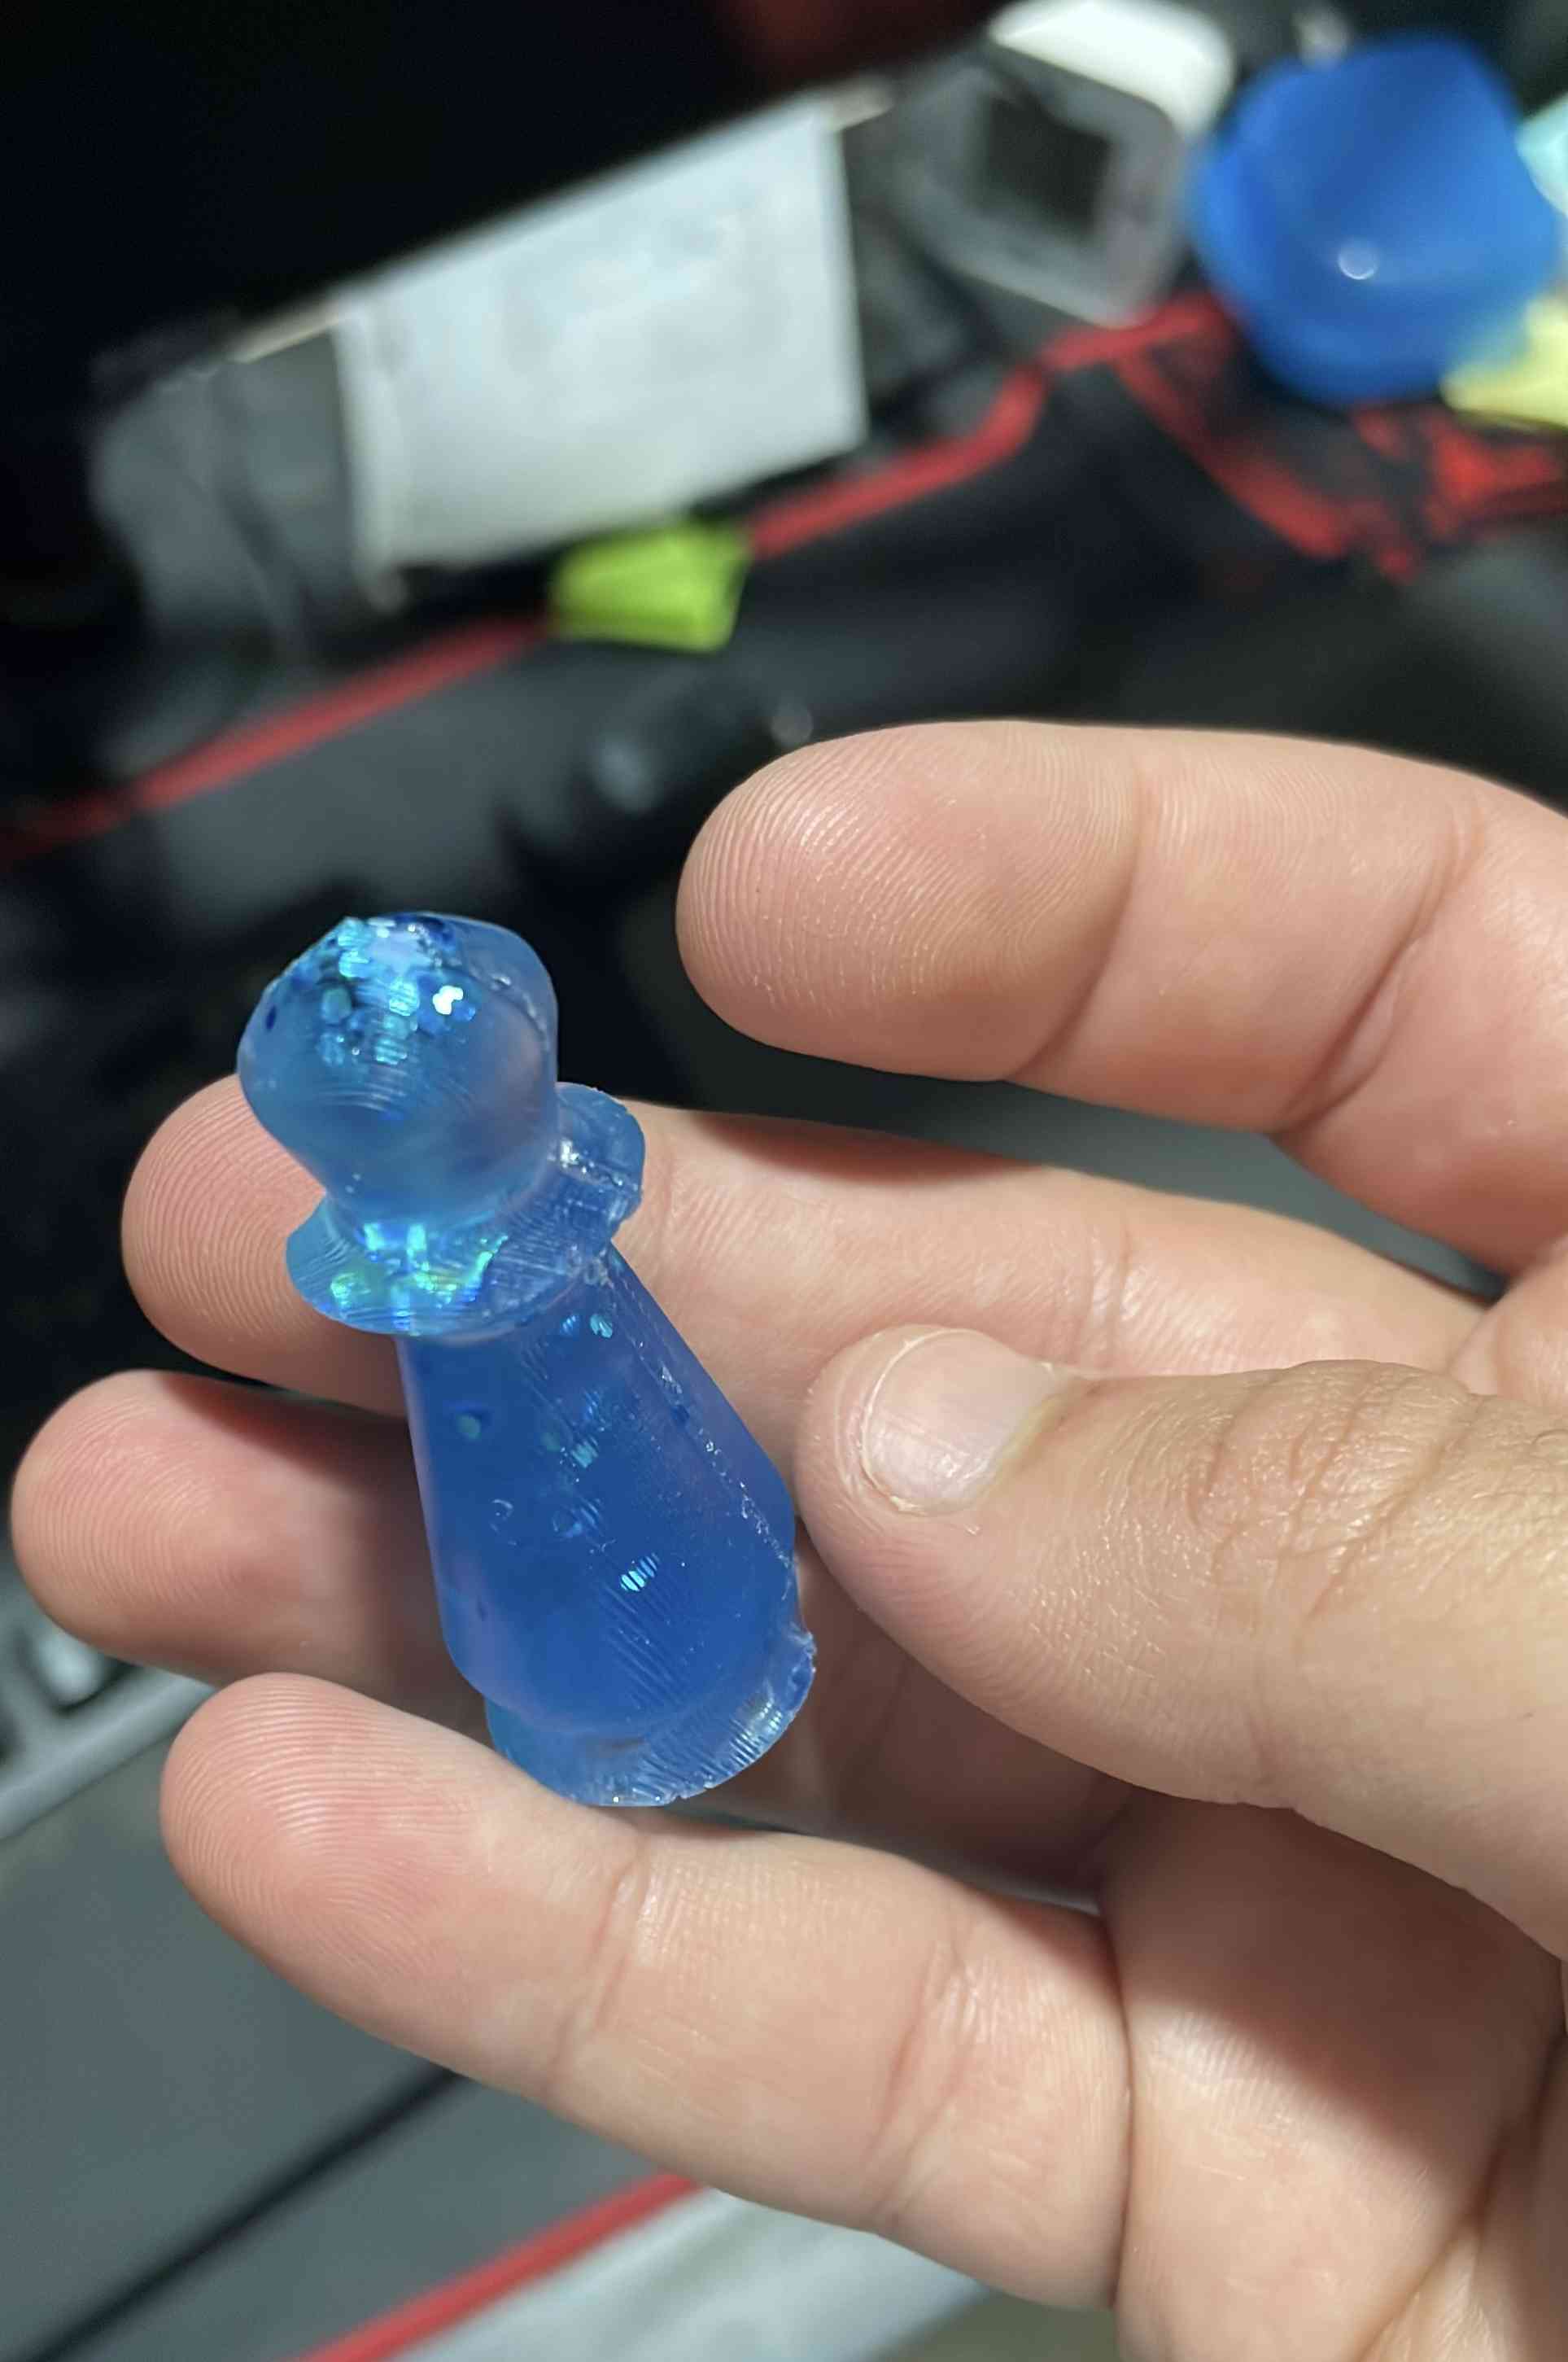
Finl result, after cleaning
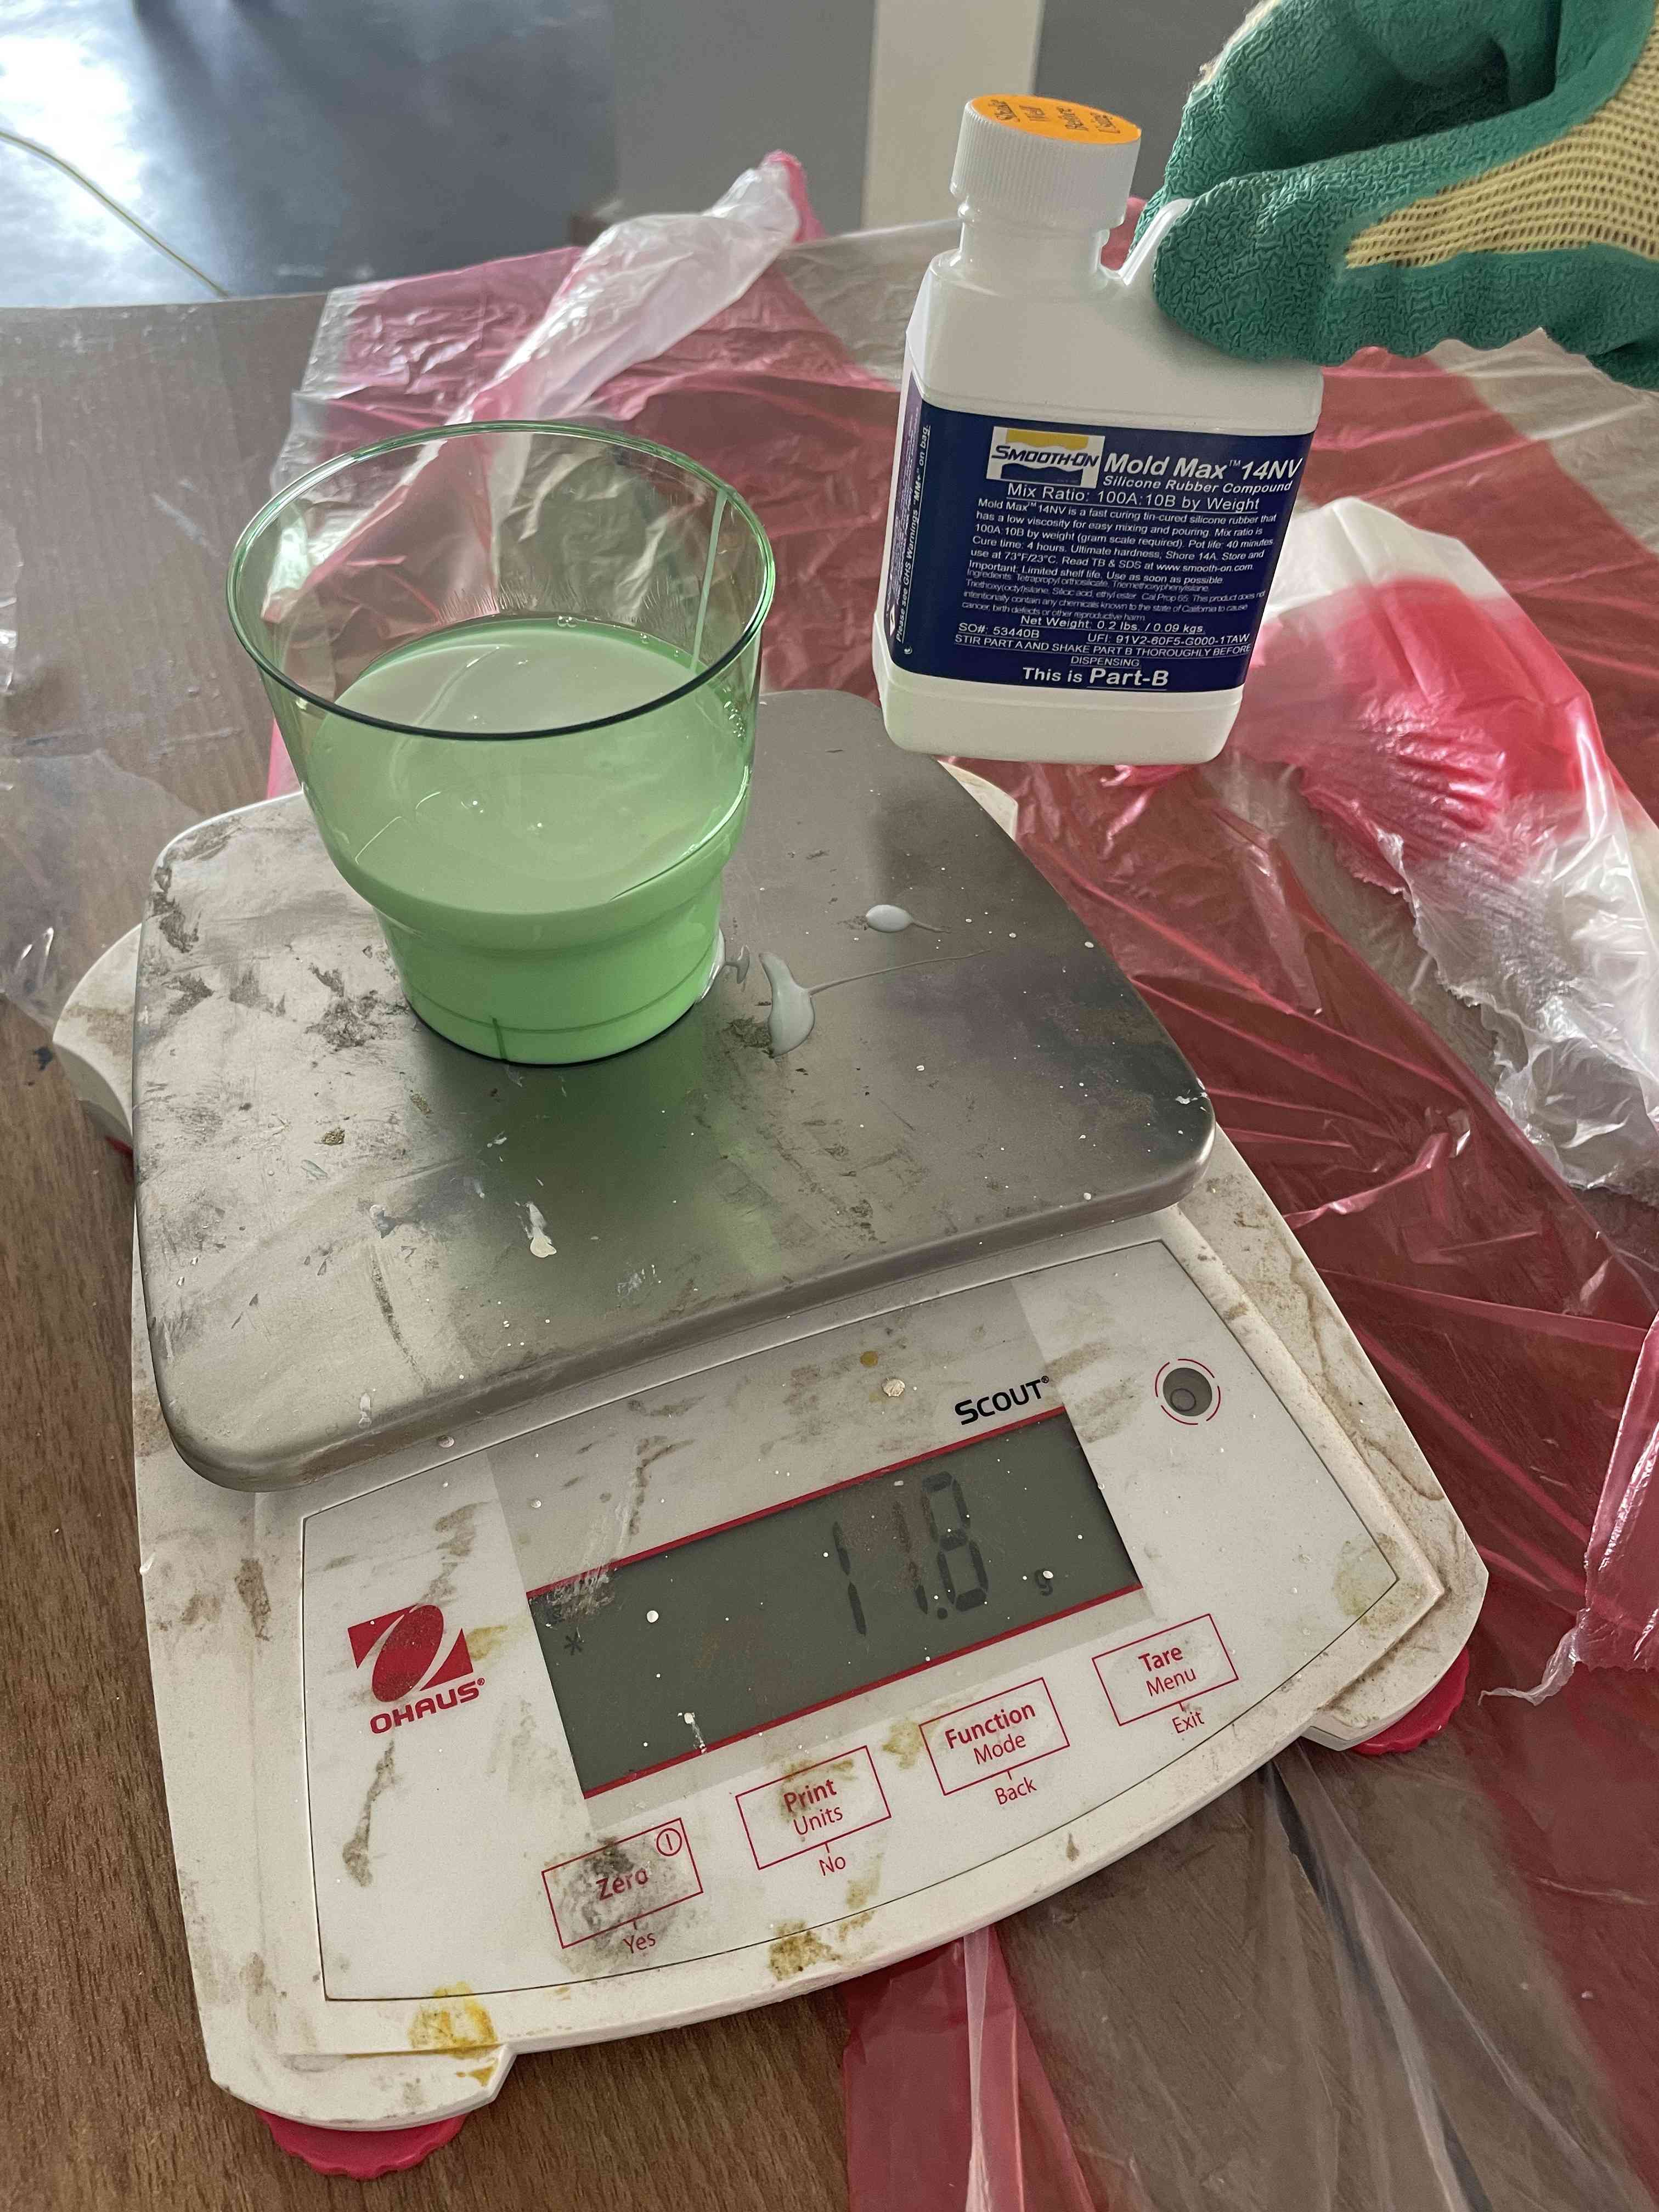
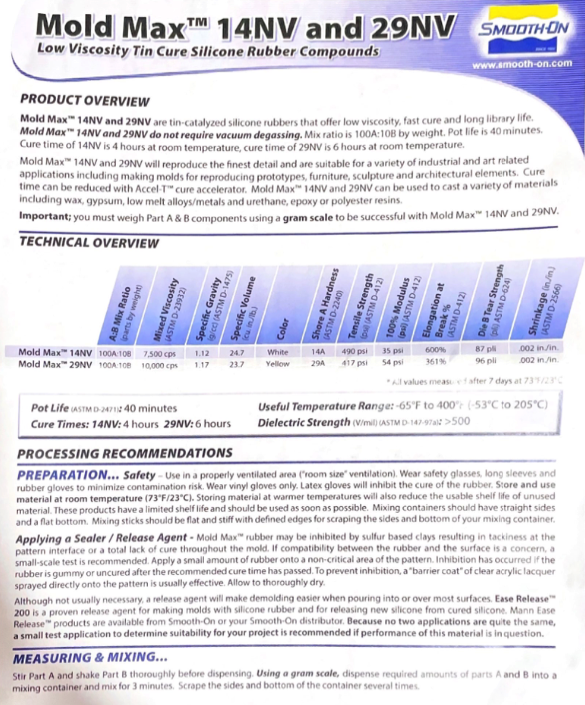
I will be using Mold Max™ 14NV. so then I can cast my resin in the Silicone mold
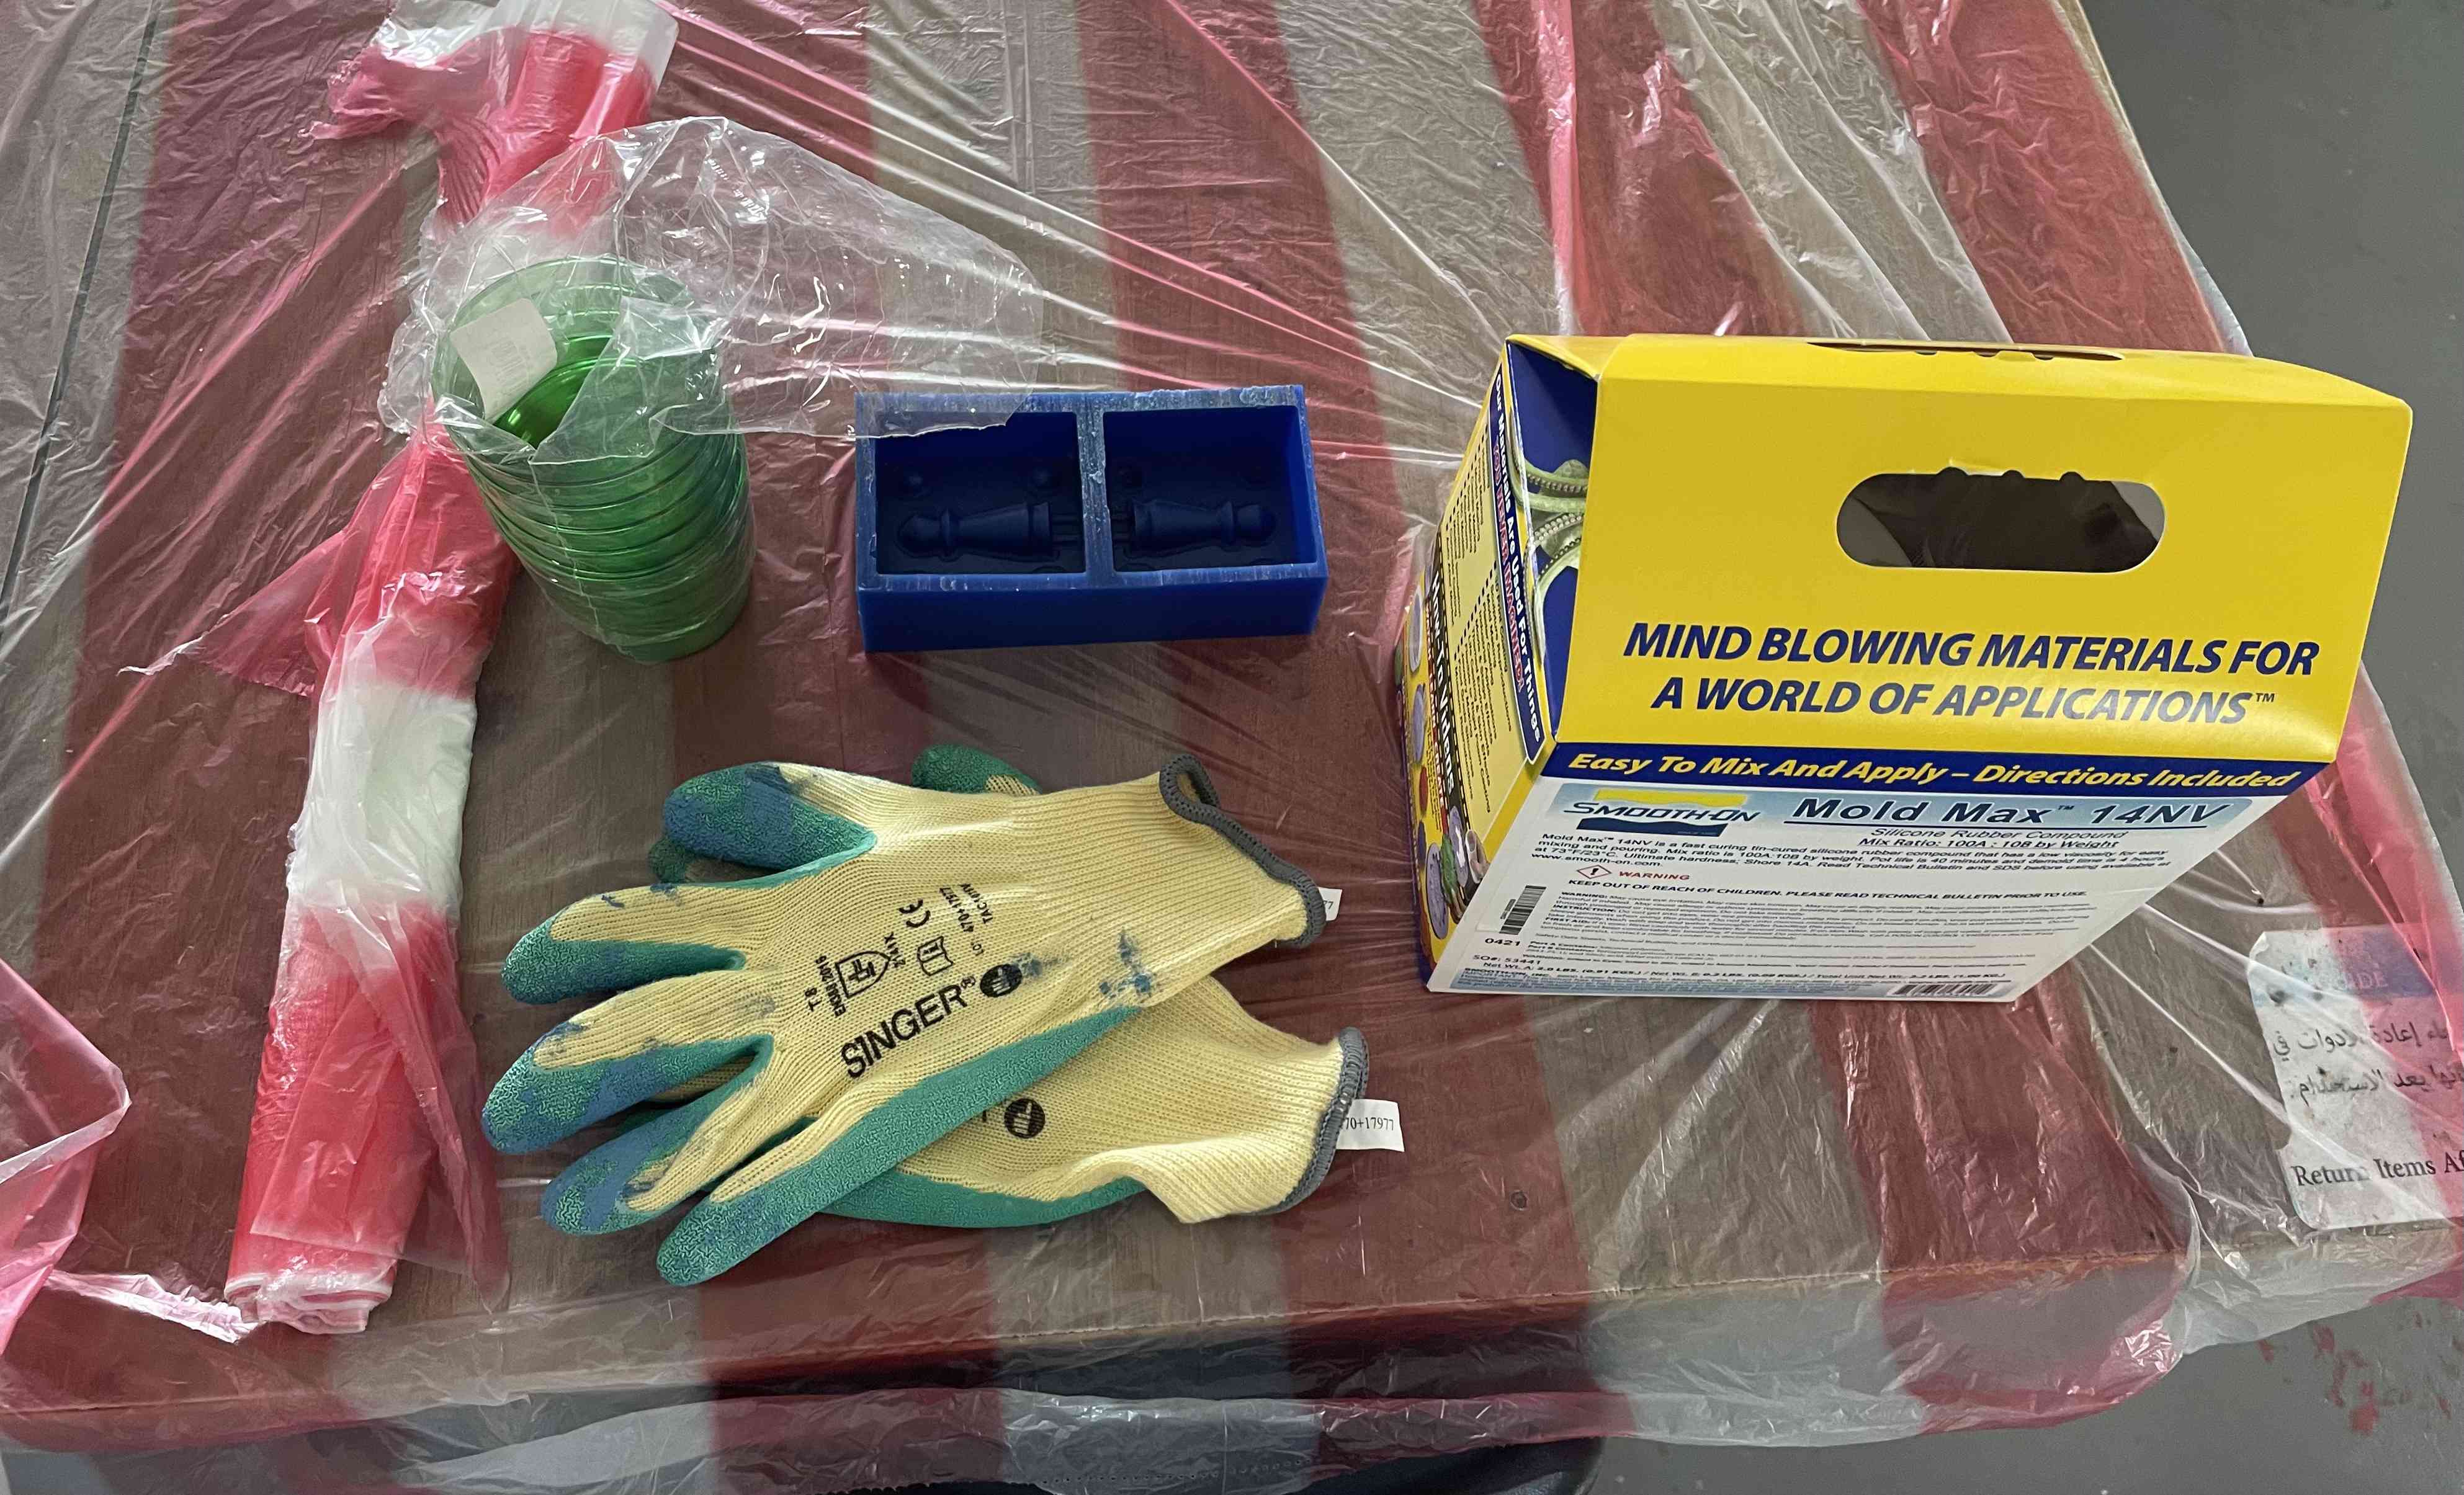
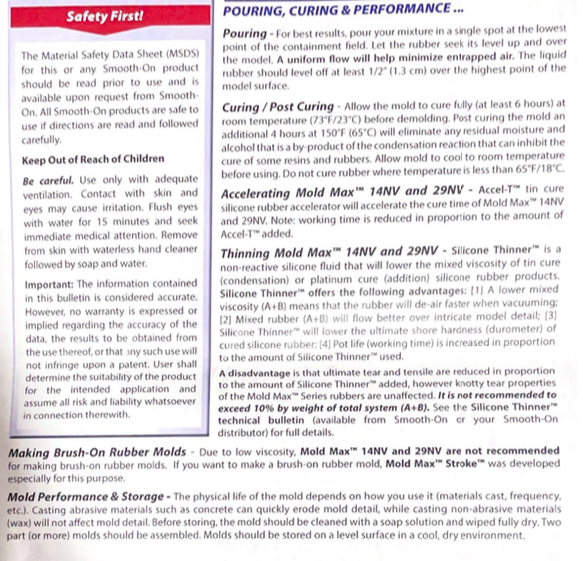
I read the technical datasheet which highlighted the key features of the material, the safety precautions against it, and the periods of time to use it.
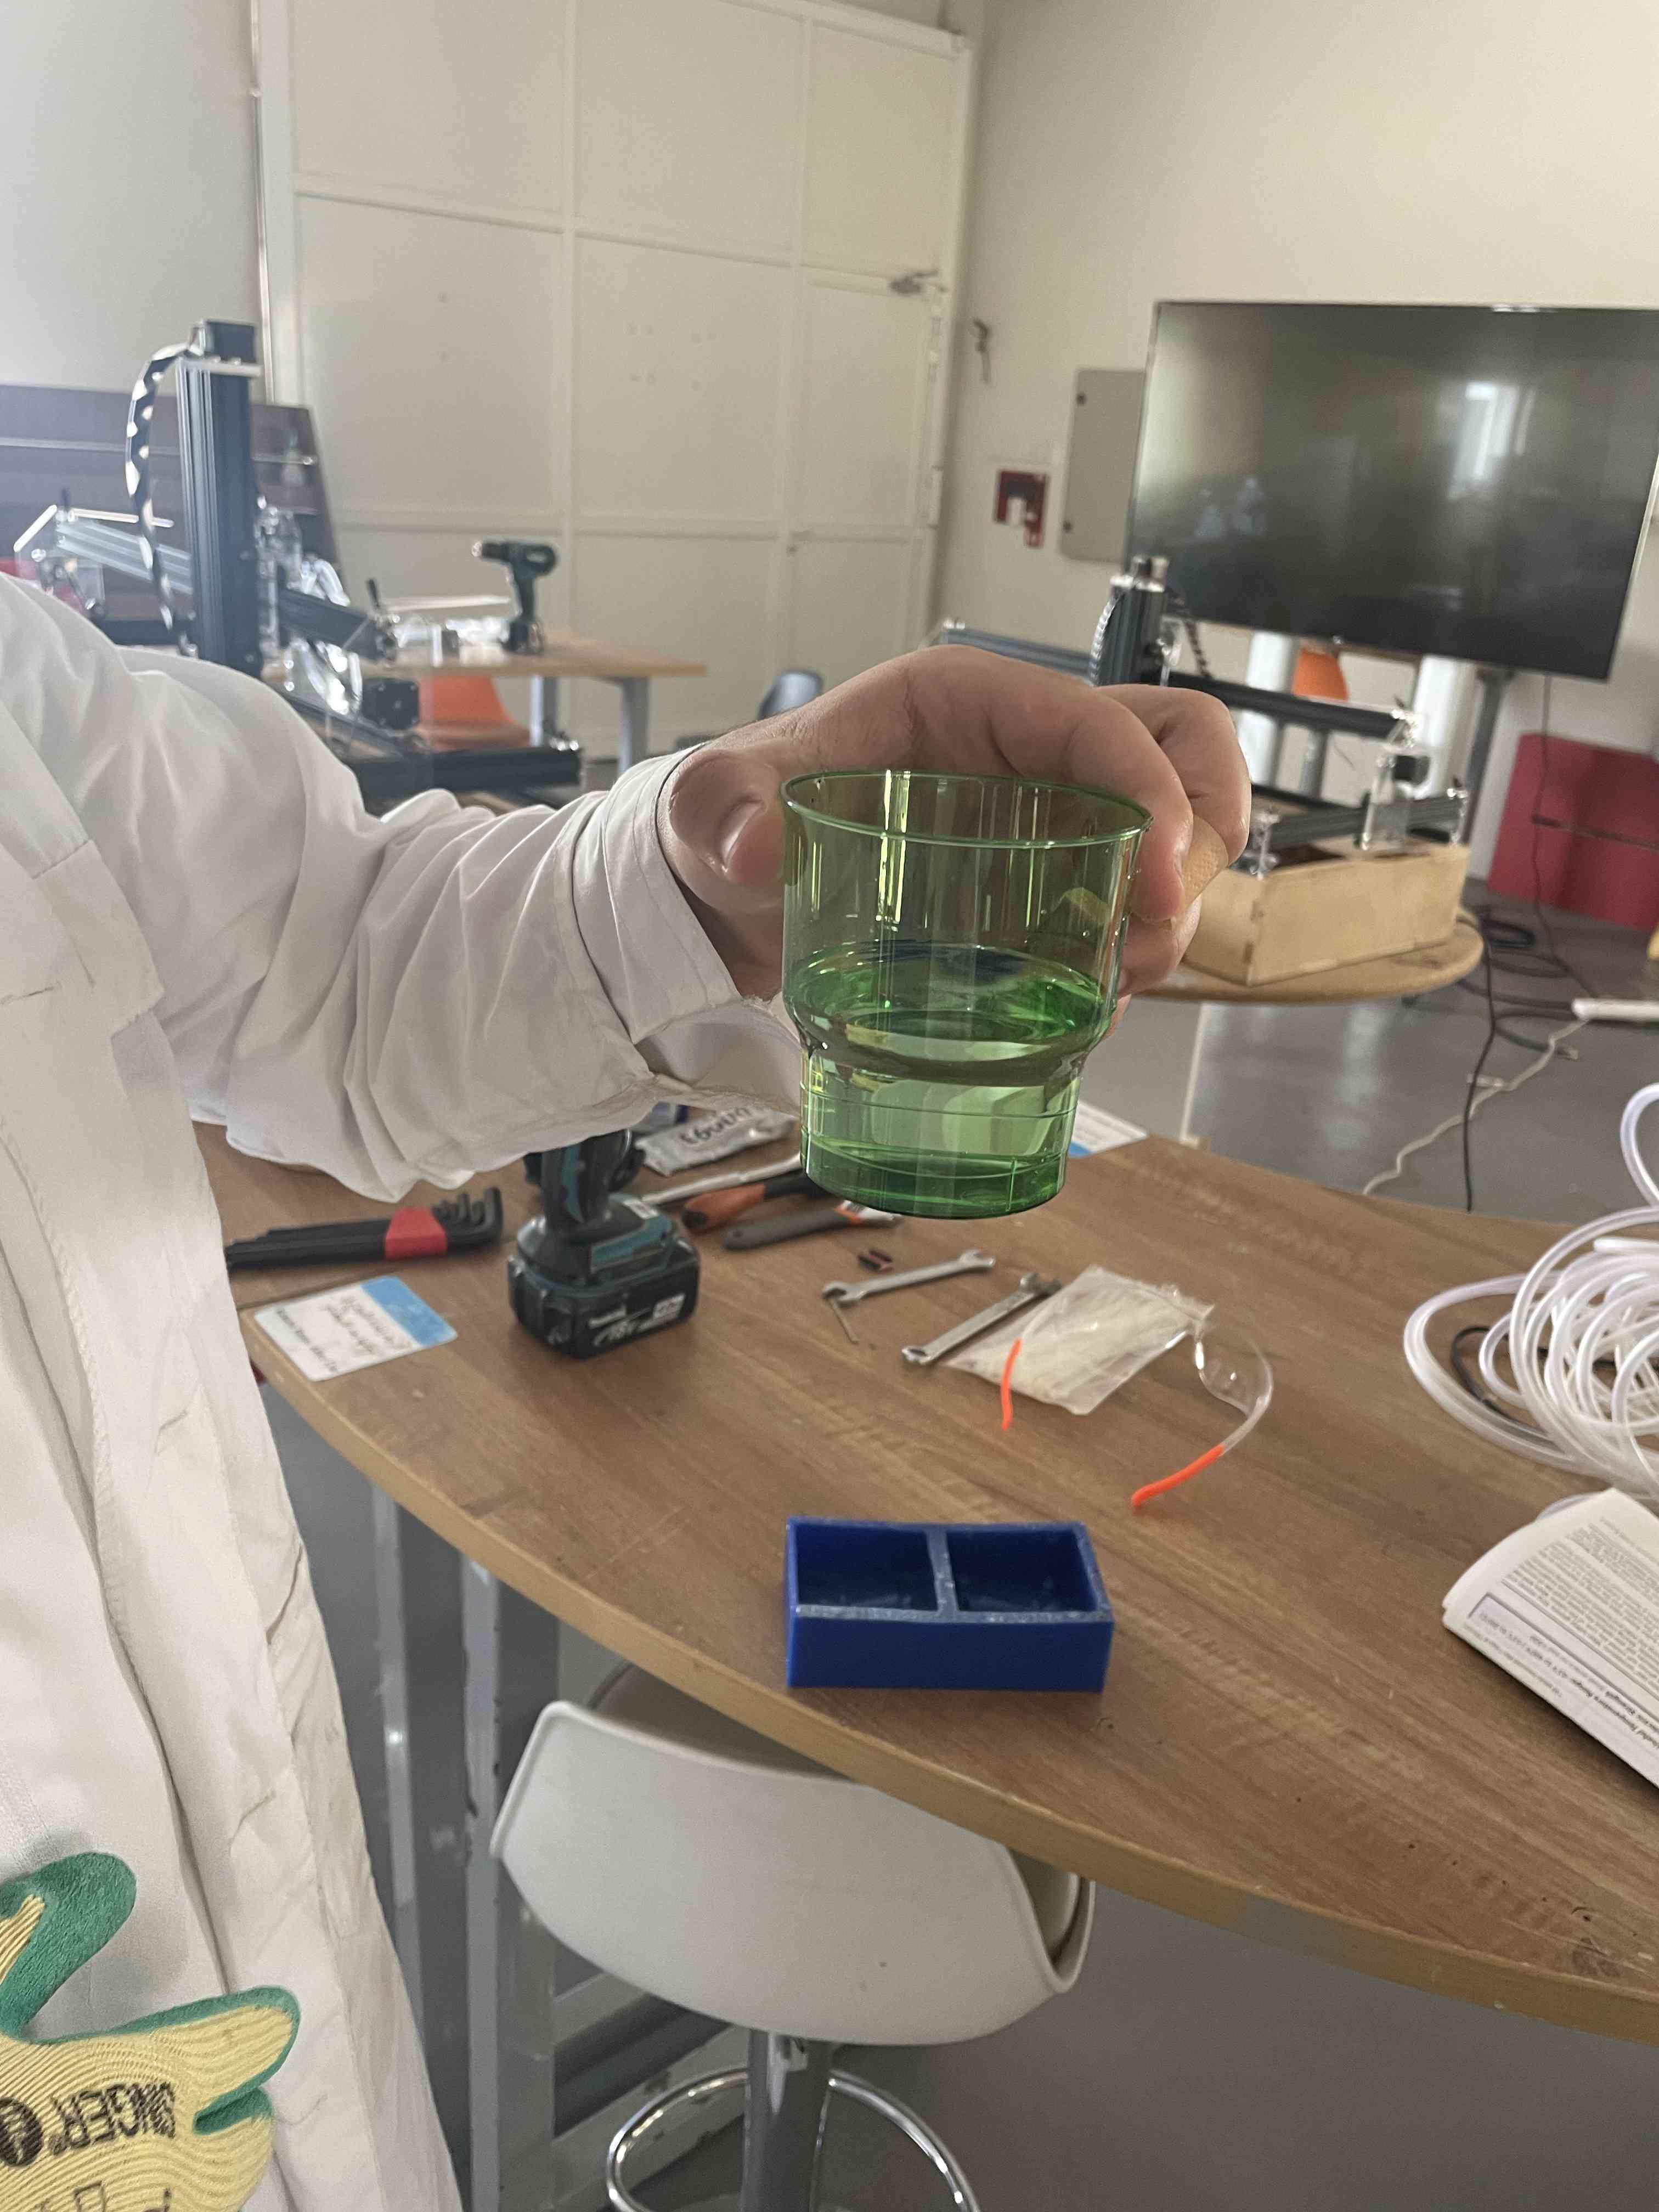
The first step in making the mold is measuring the amount of material required. I did this by filling both sides of my wax with water, then transfer the water into a cup, and mark the level of water as the level of the material required. I did this a couple of times to confirm the amount I needed.
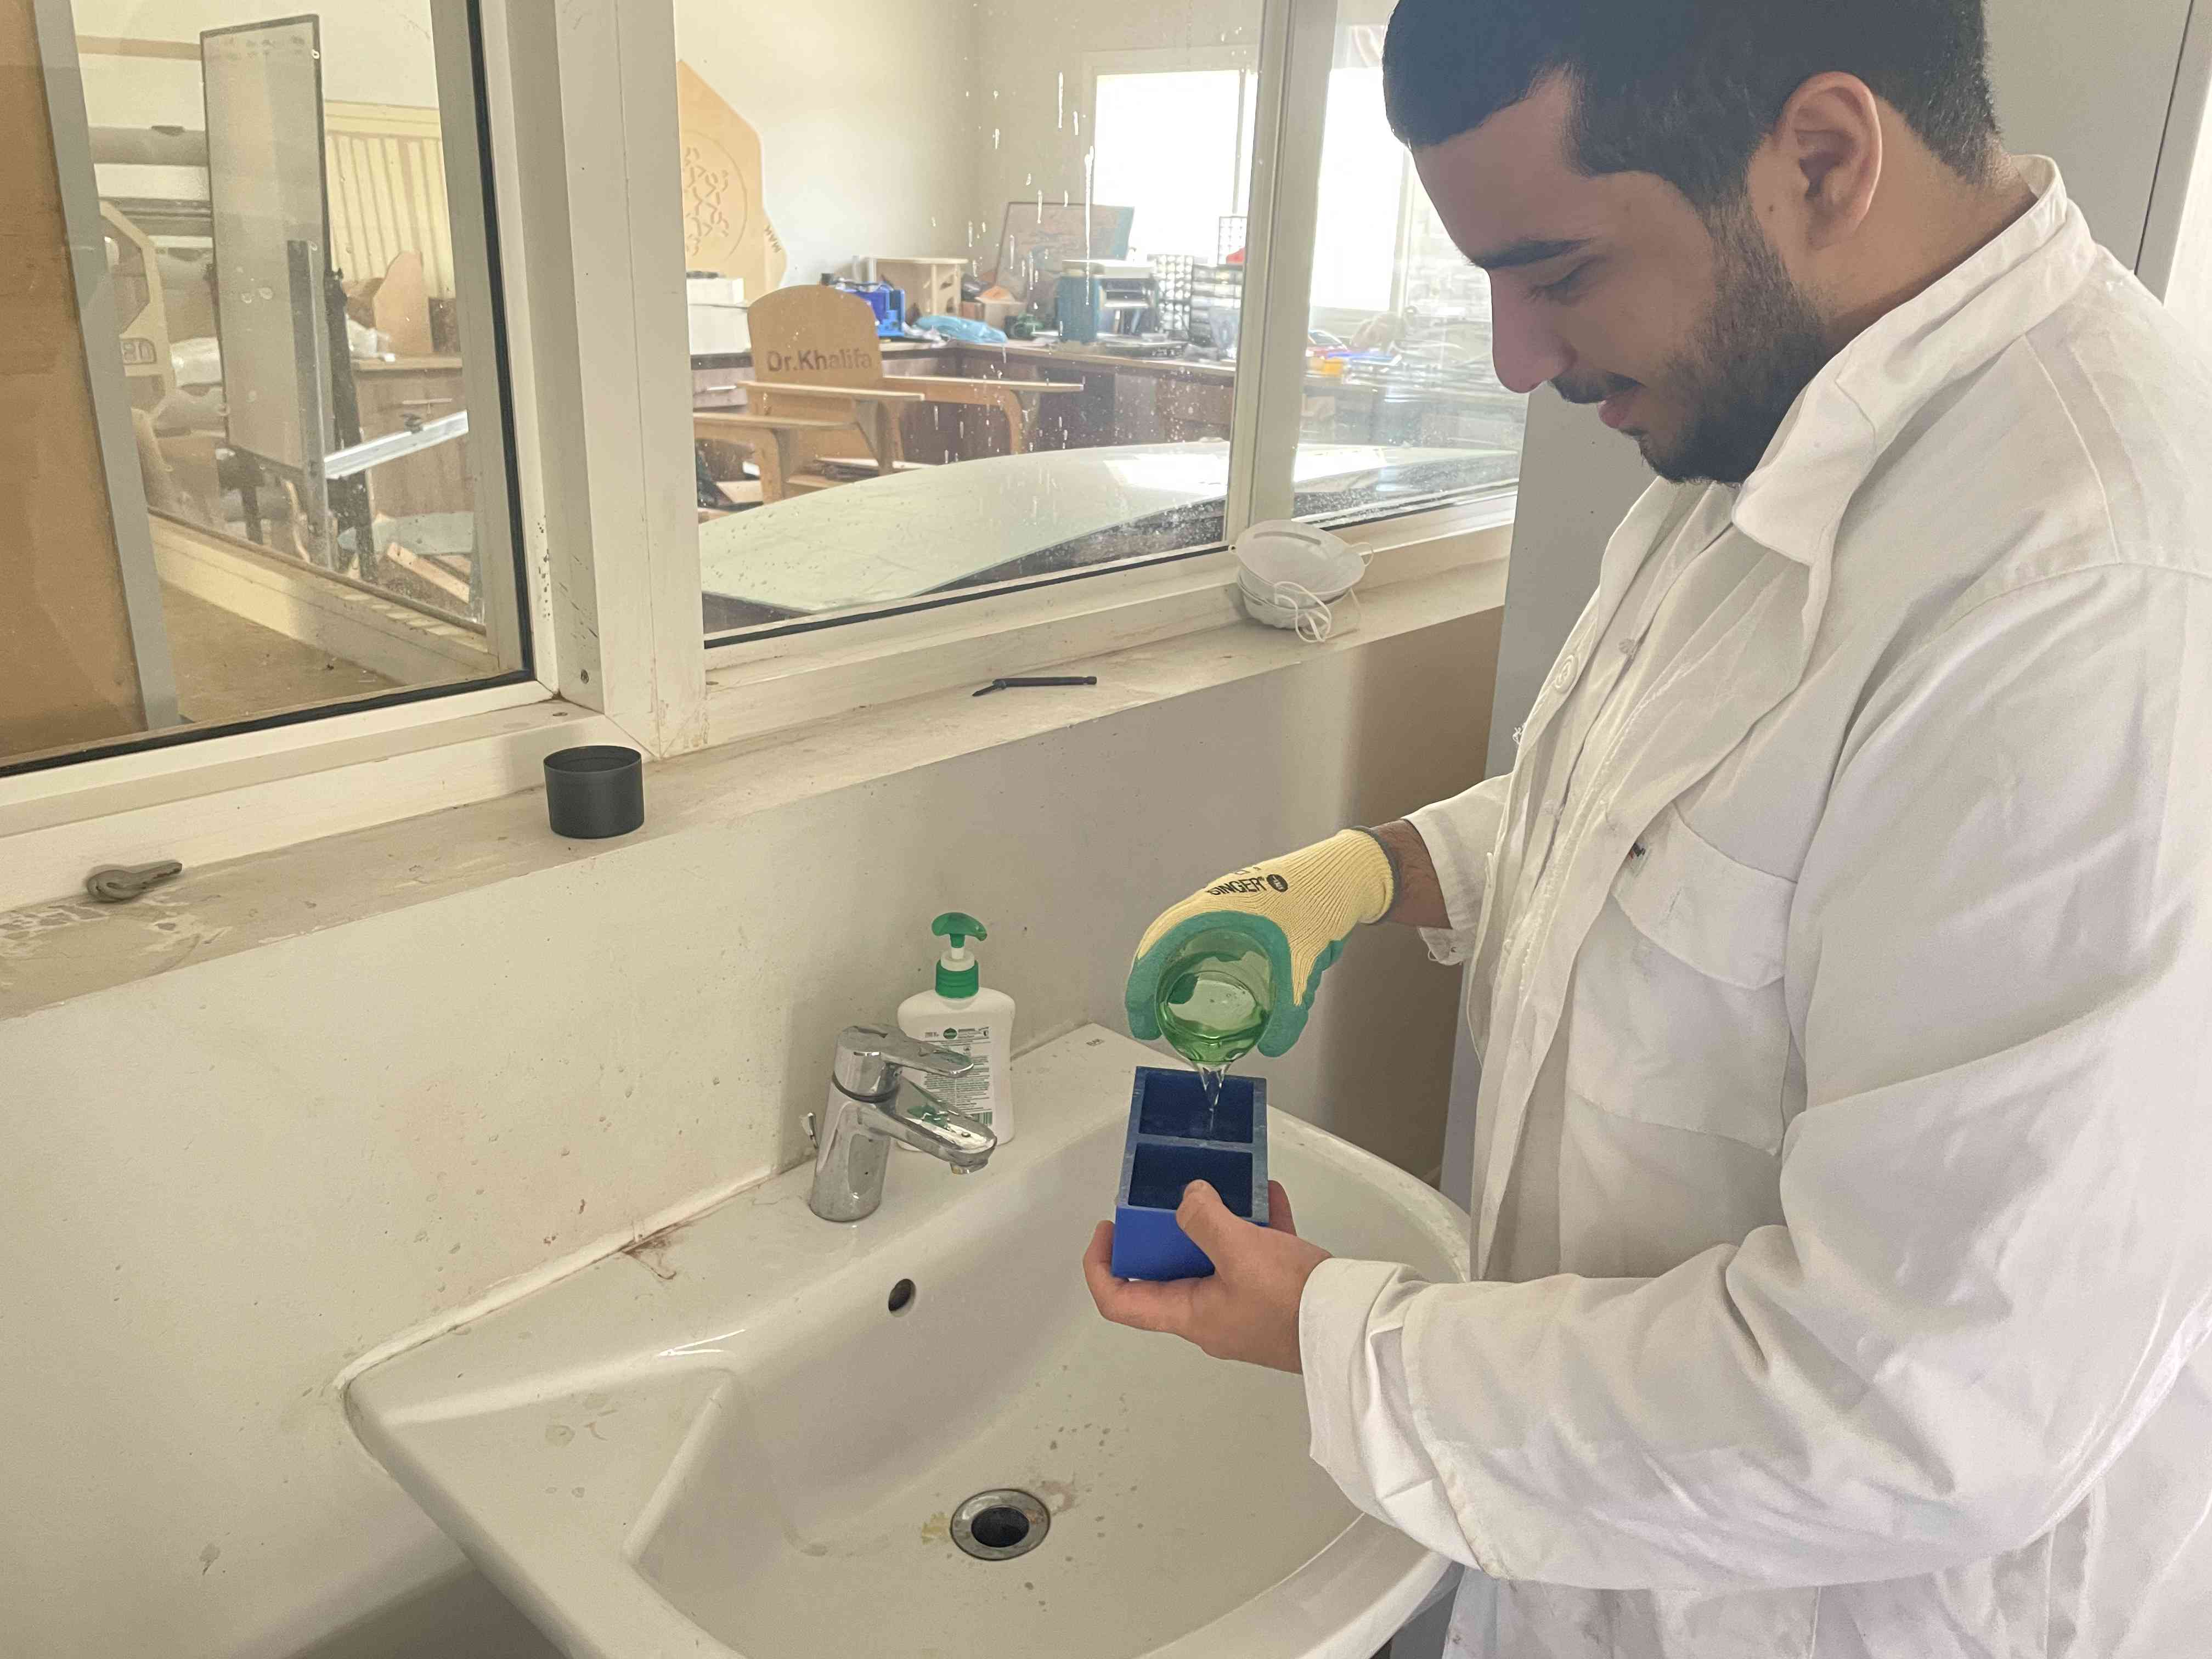
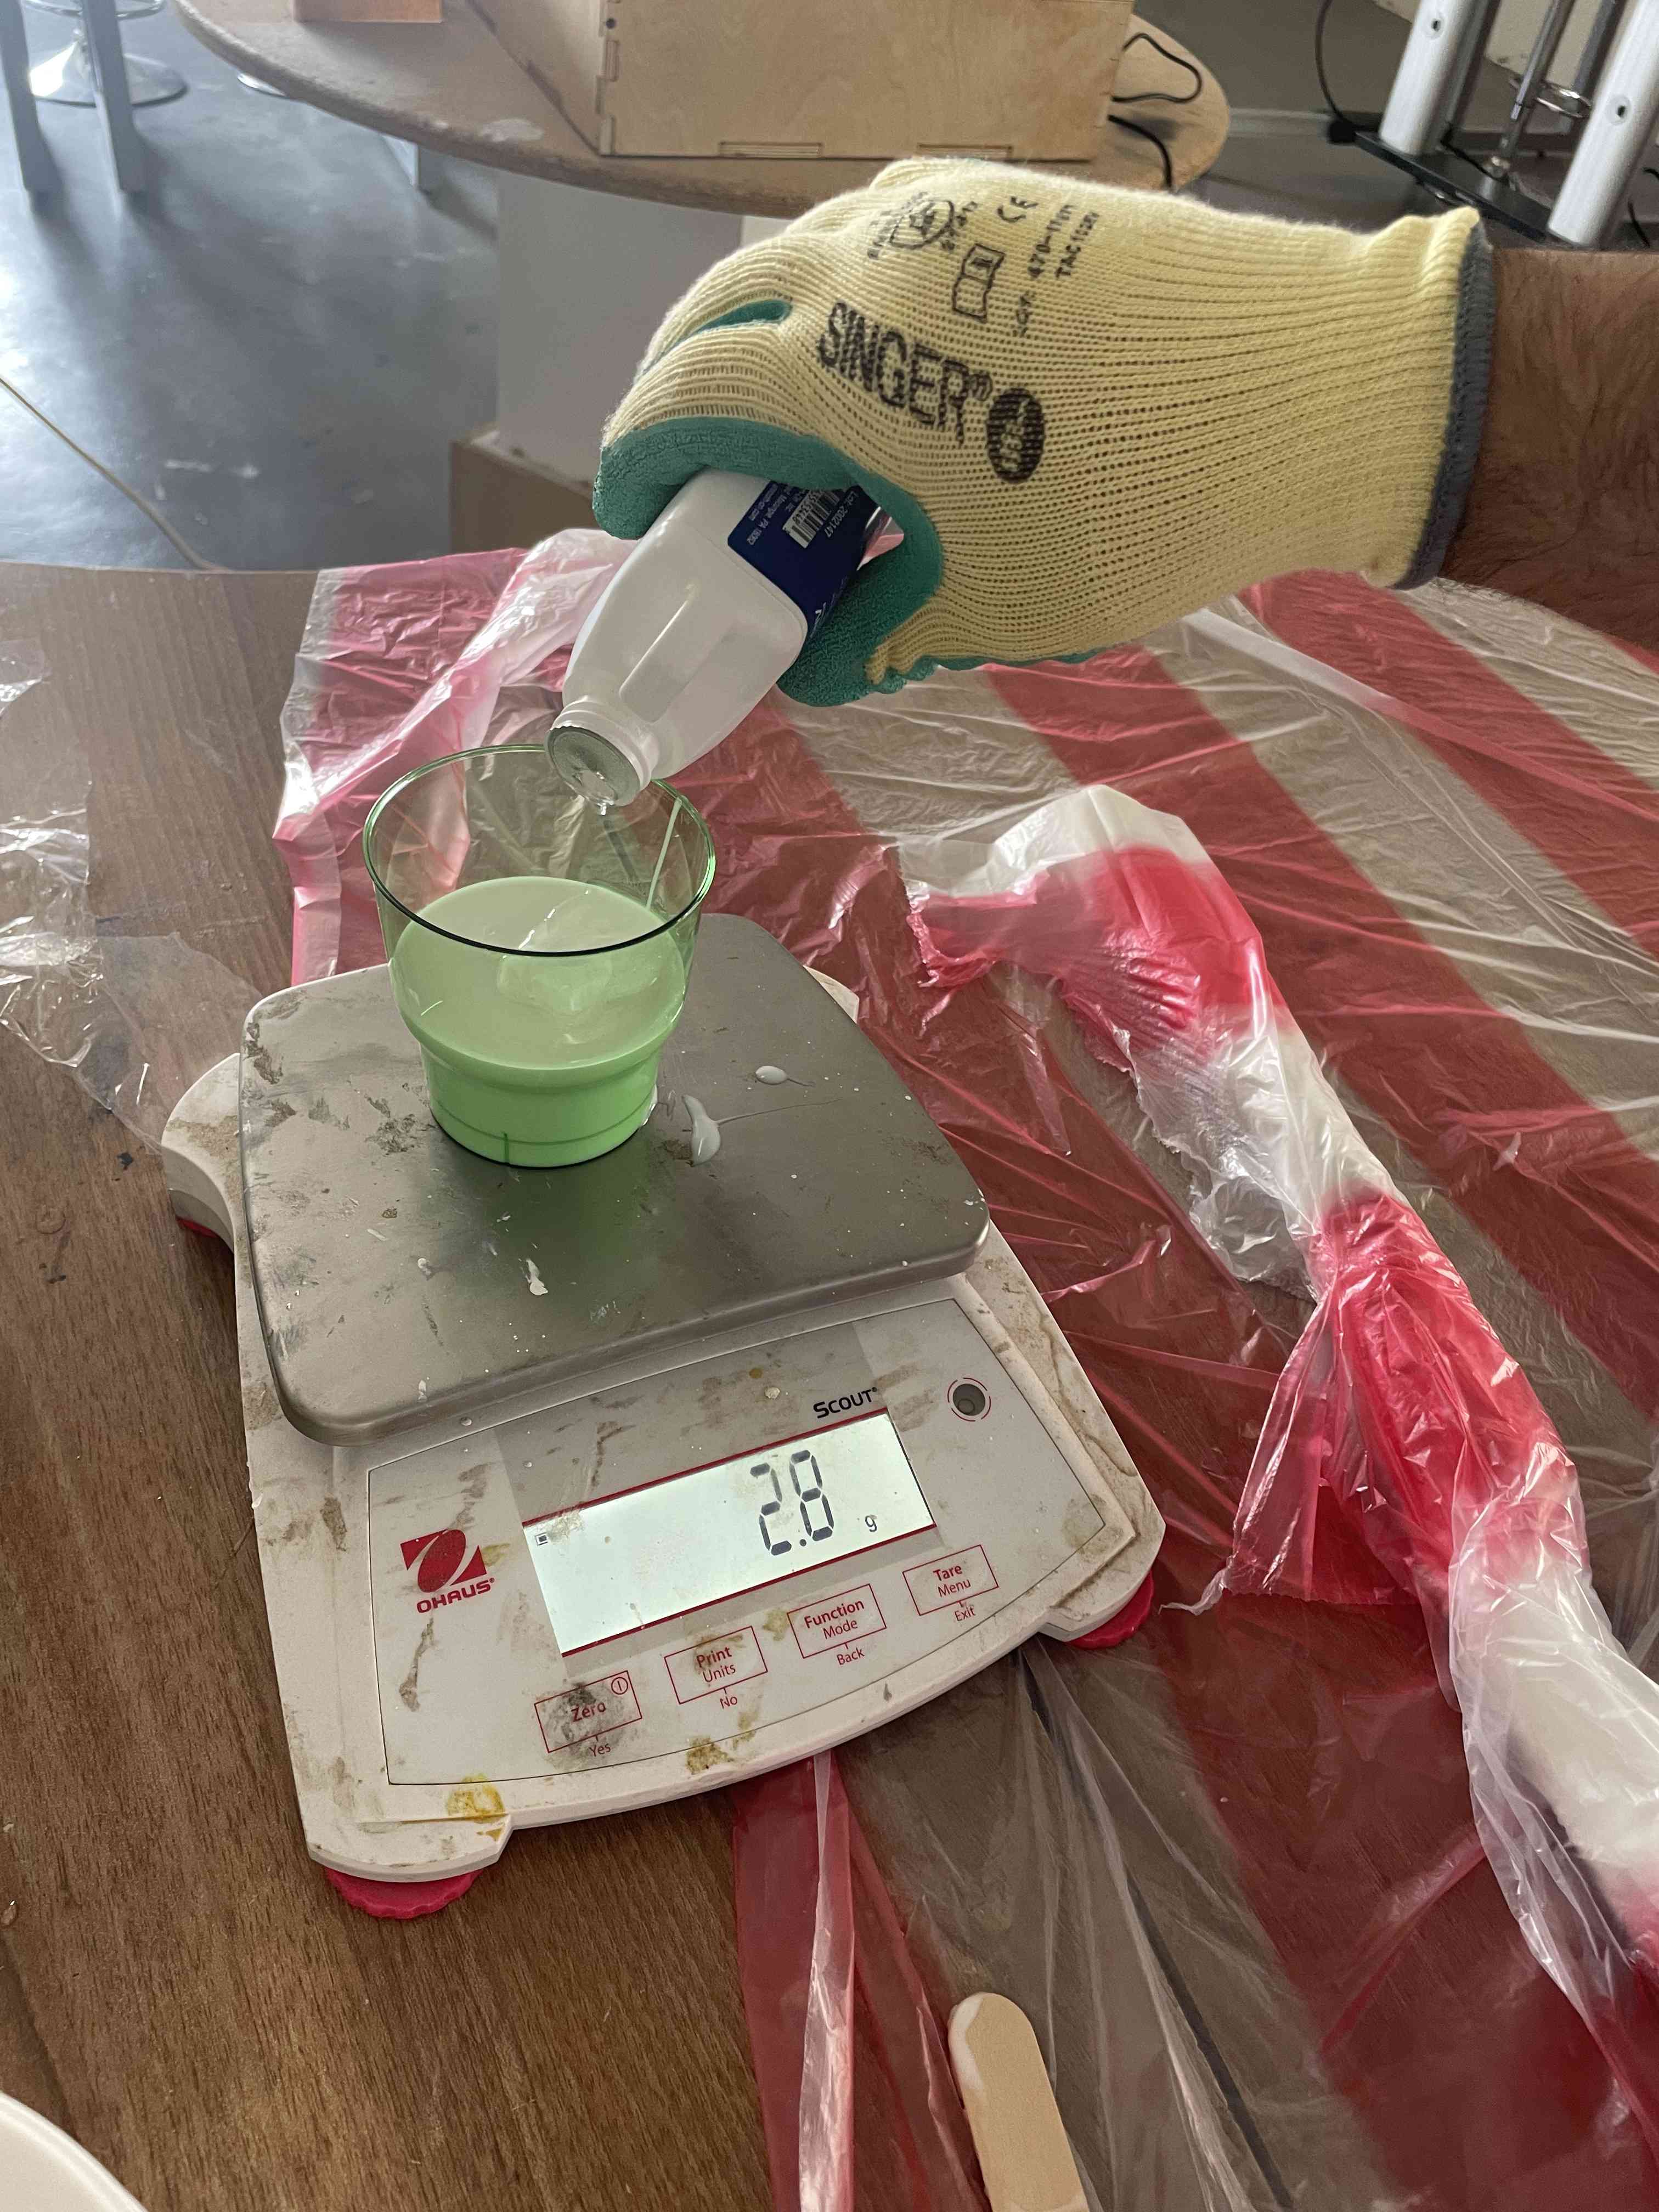
I made sure to dry the cup and the wax thoroughly, then I started mixing the part A and part B as the instruction suggests in the following order:
Ratio 10:1 by weightMix part A in its container for 1 minute using a wooden stick, also , shake part B for one minute. This step helps re-disperse the fillers that may have settled in the bottom of the containers.
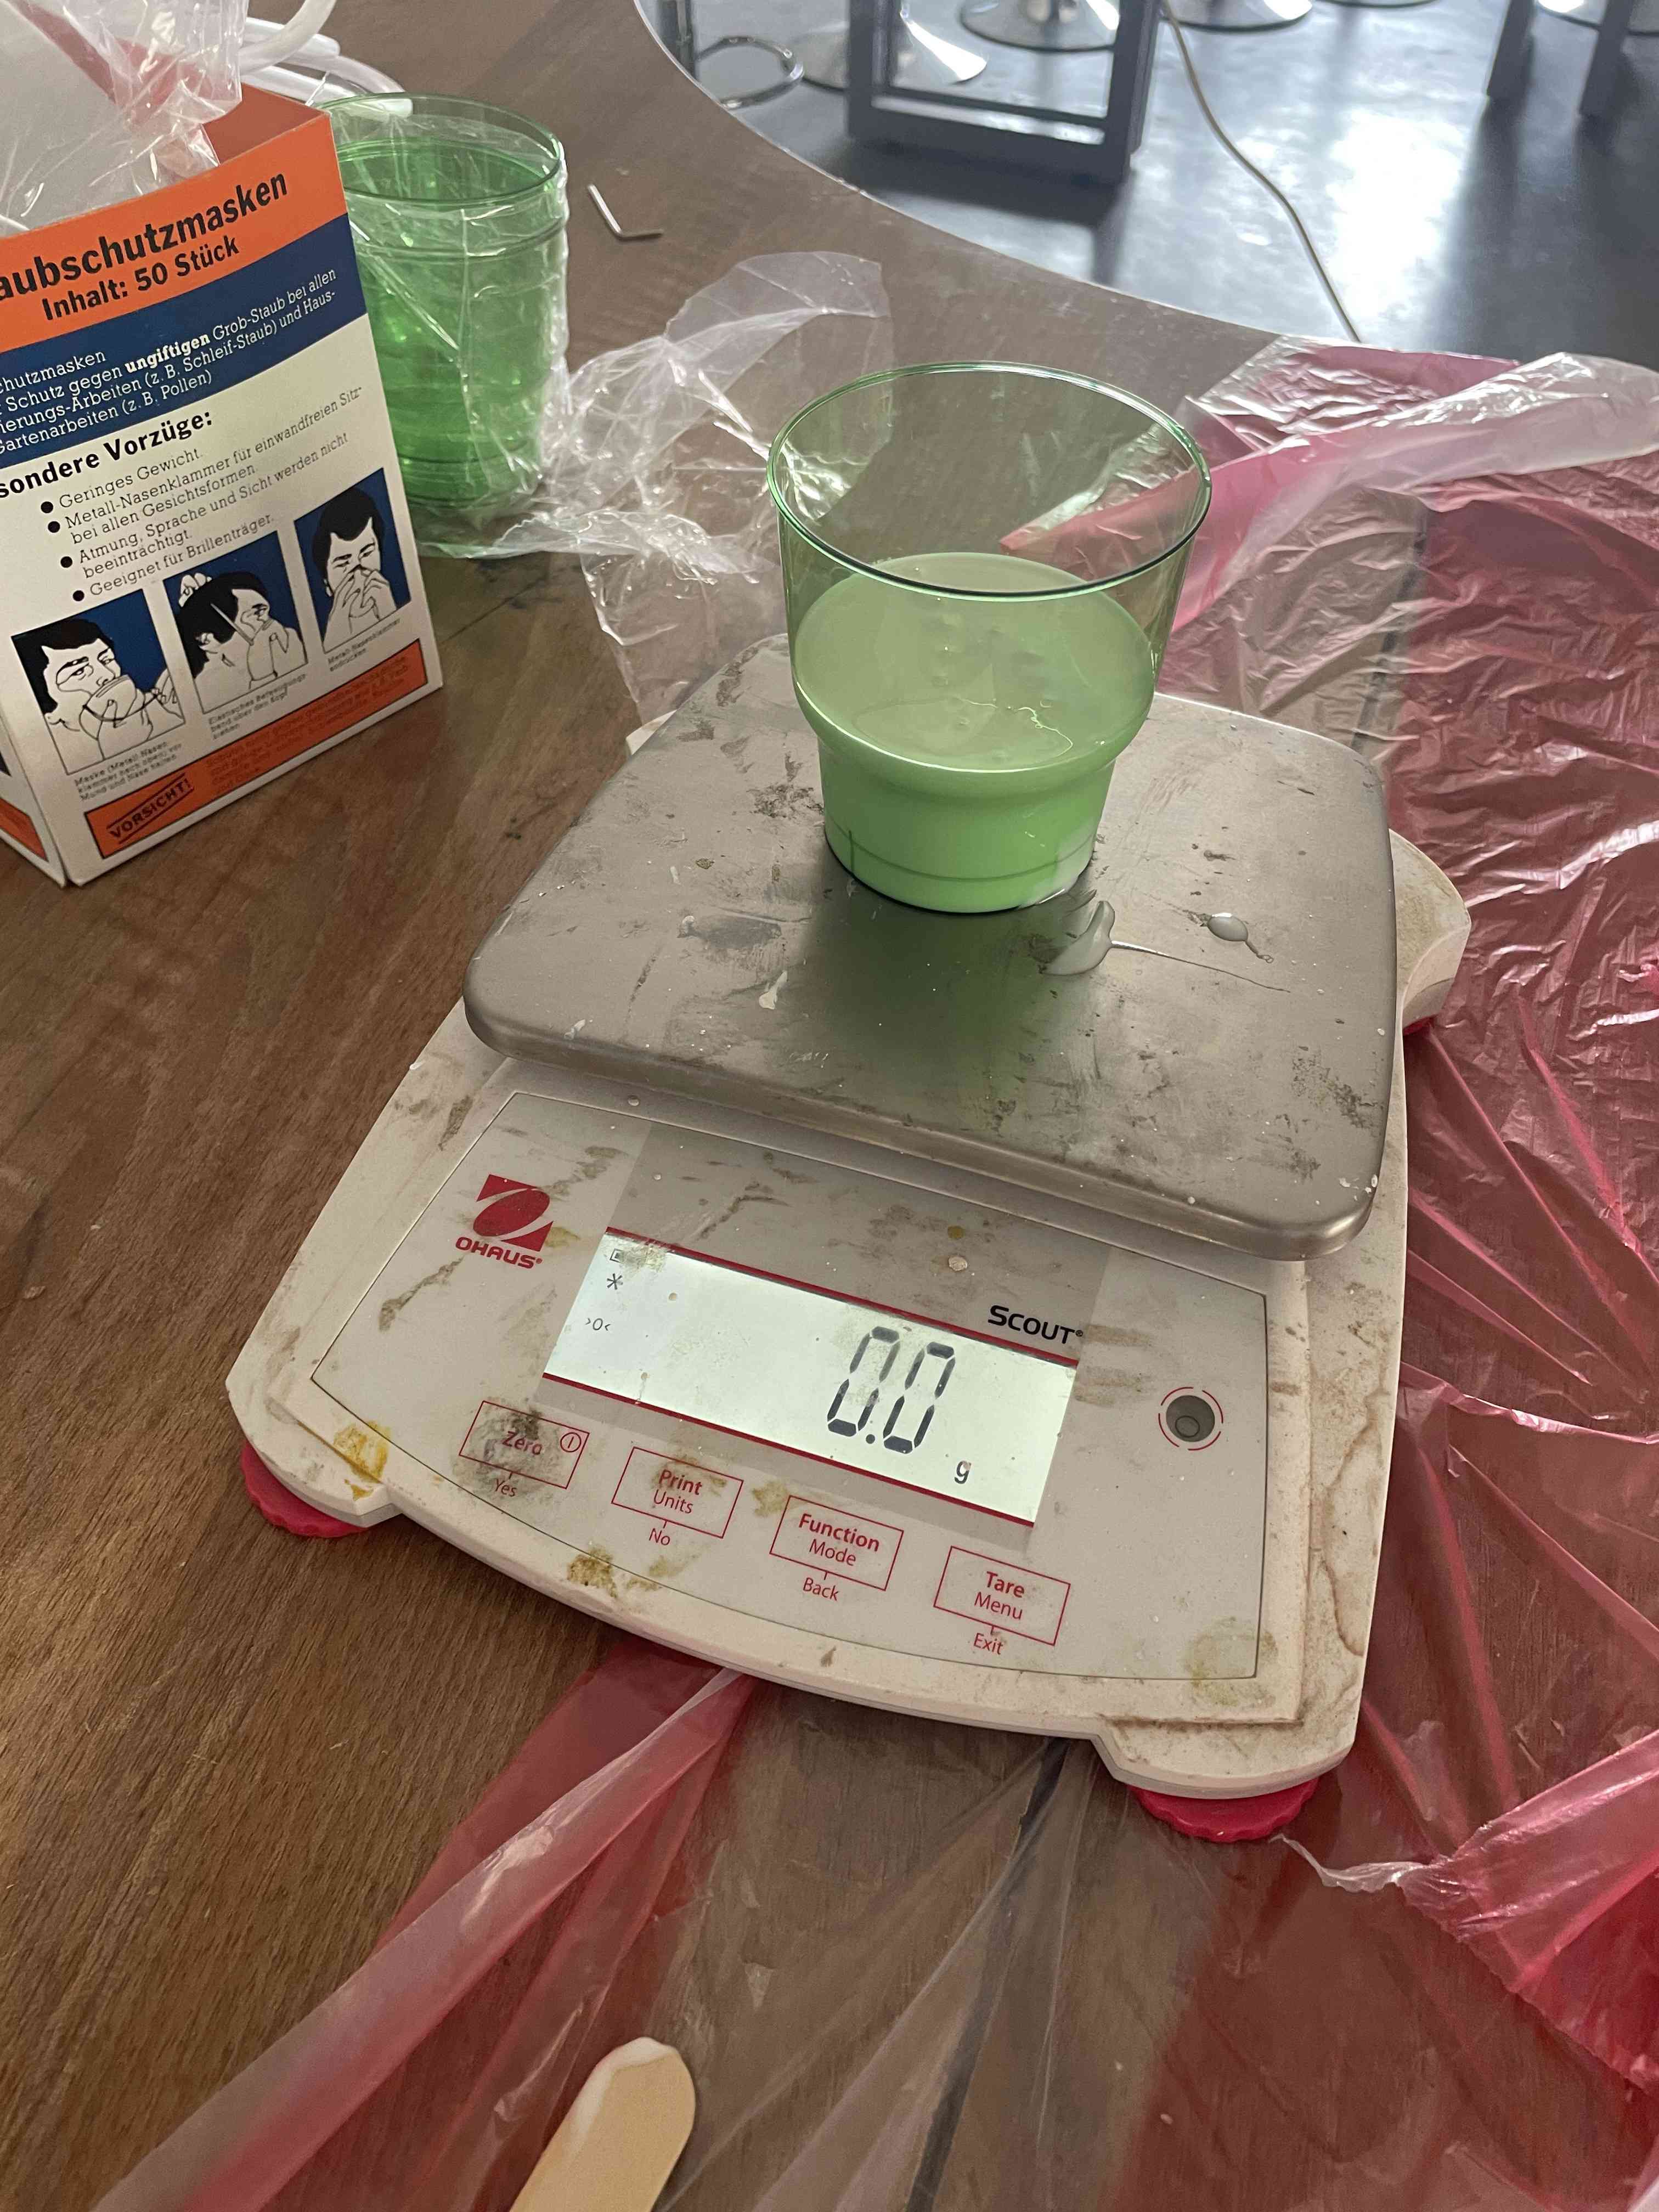
Zero the scale with the empty cup on to eliminate the weight of the cup, then pour Part A into the cup until the mark and take note of the weight.

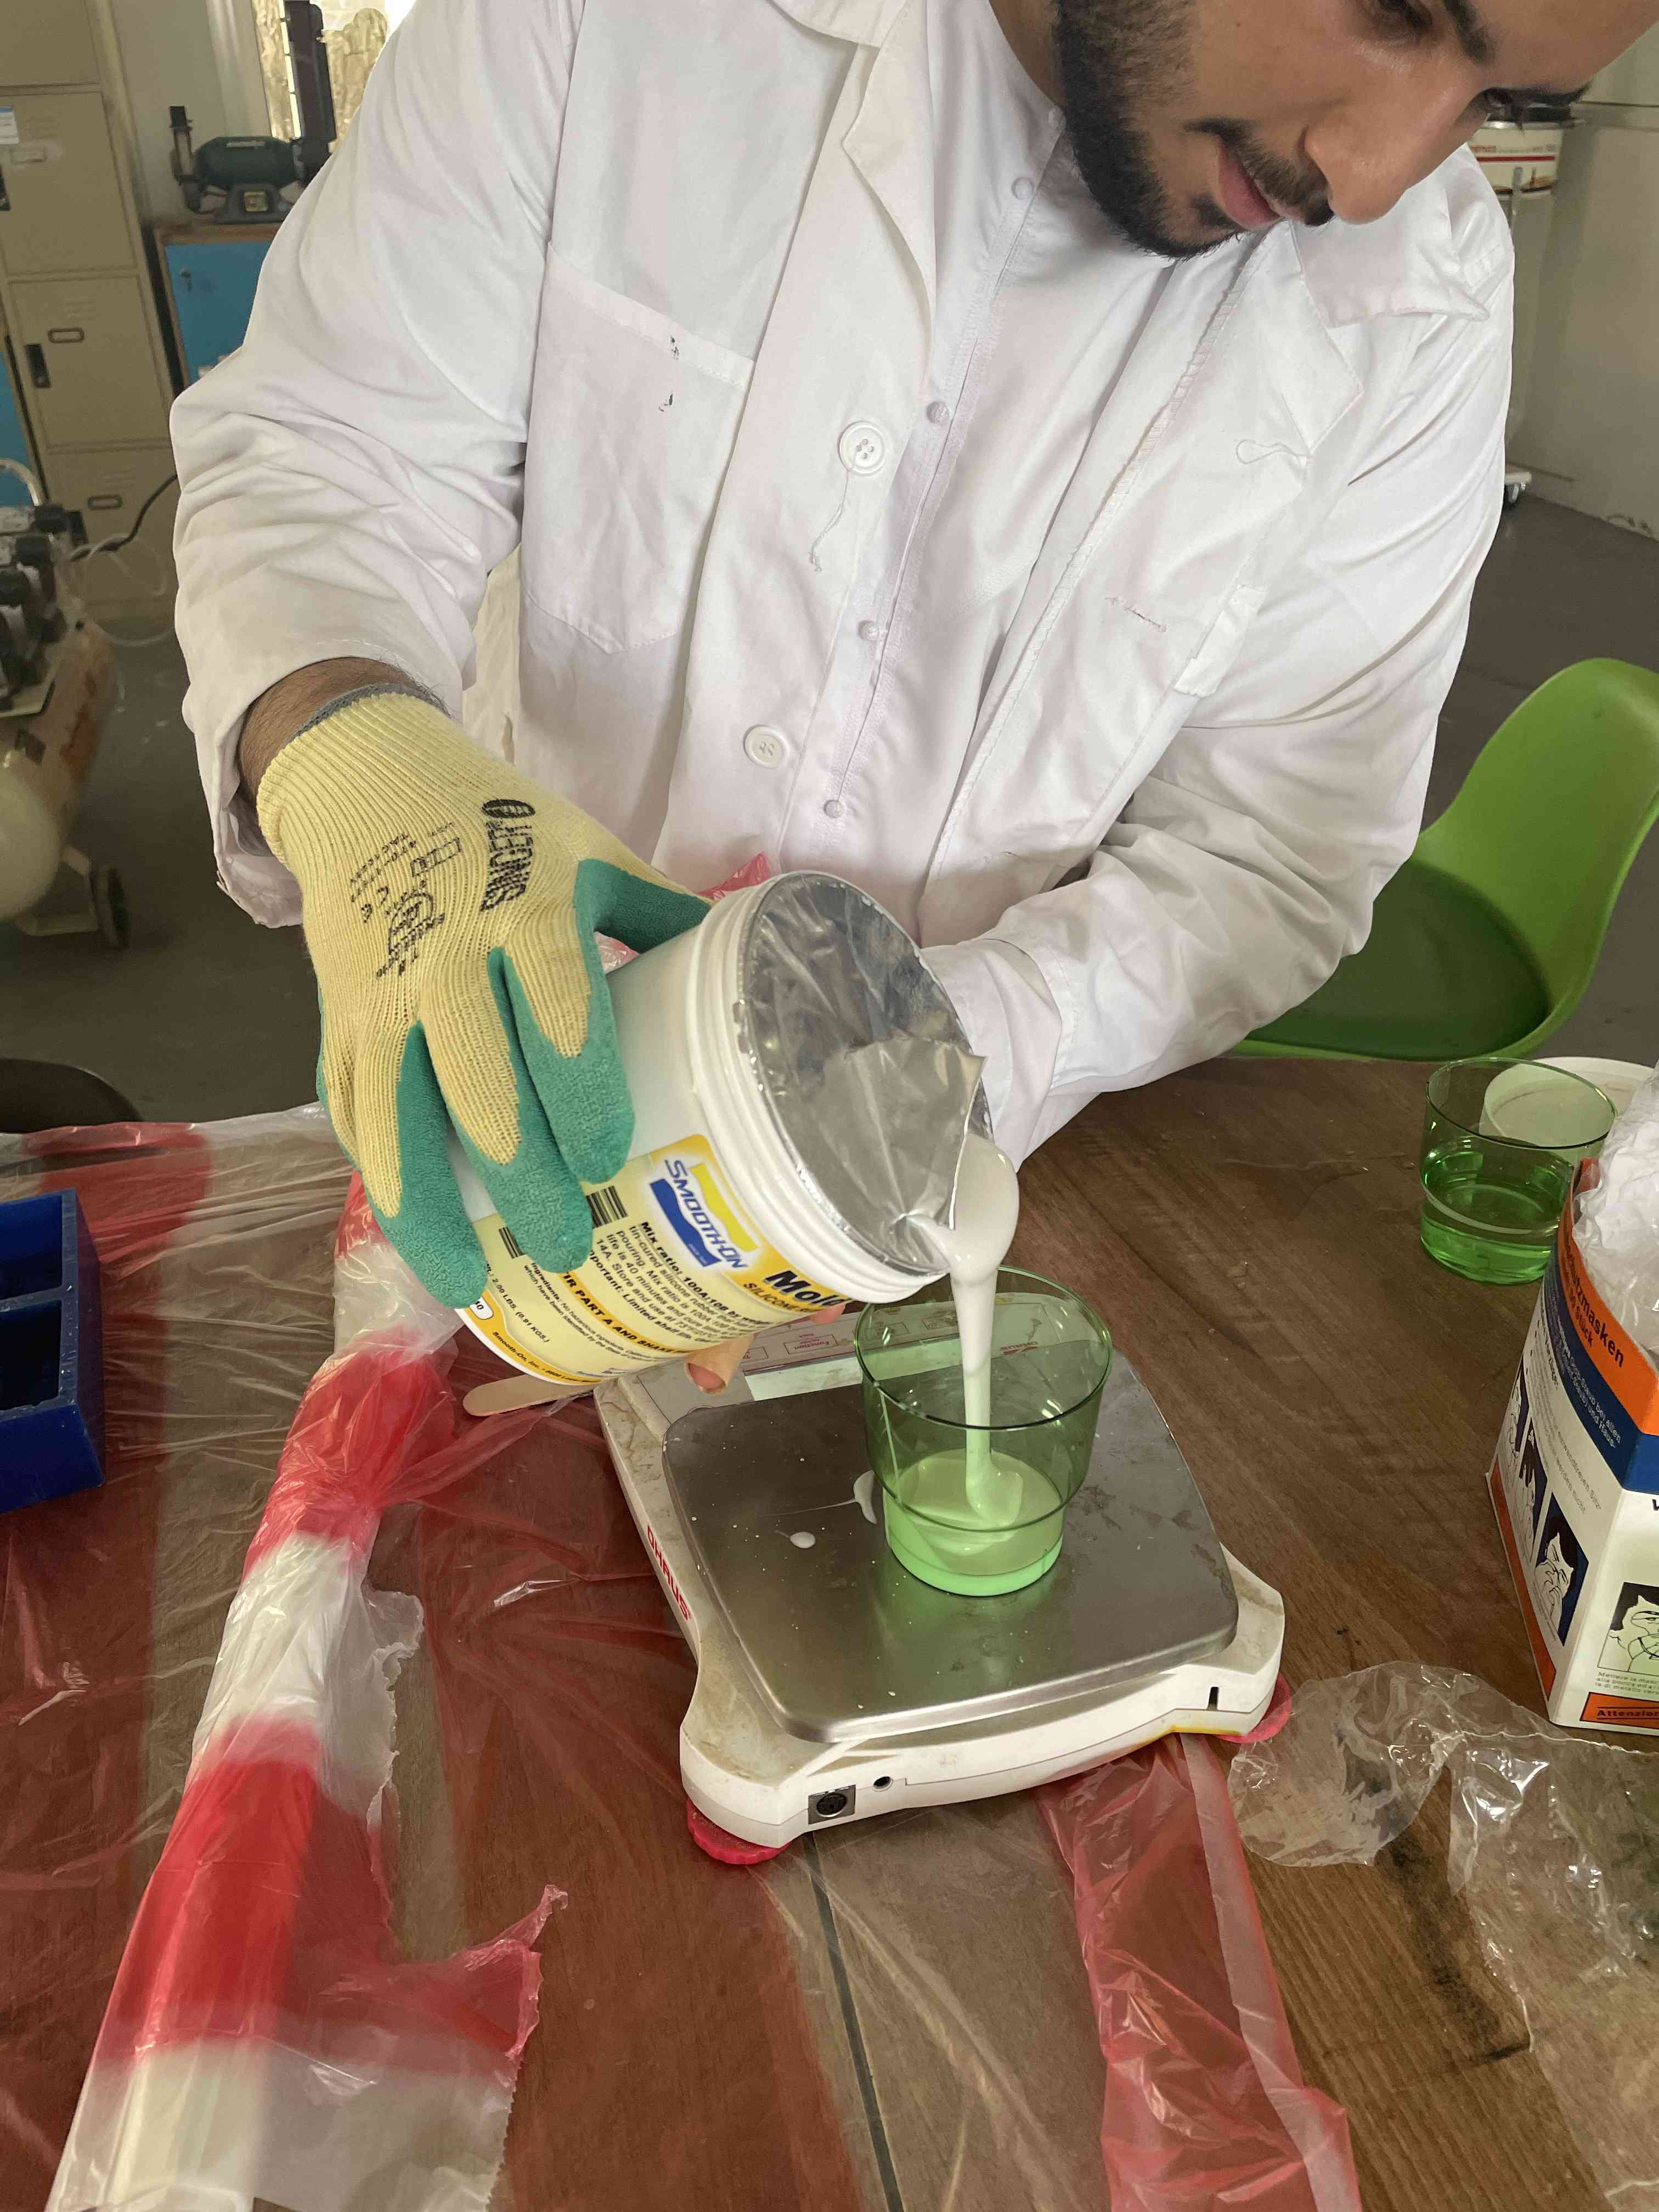

The ratio of Part A to Part B is 10:1, So measure 10% of the weight of Part A measured previously, and add this amount of part B to the cup.
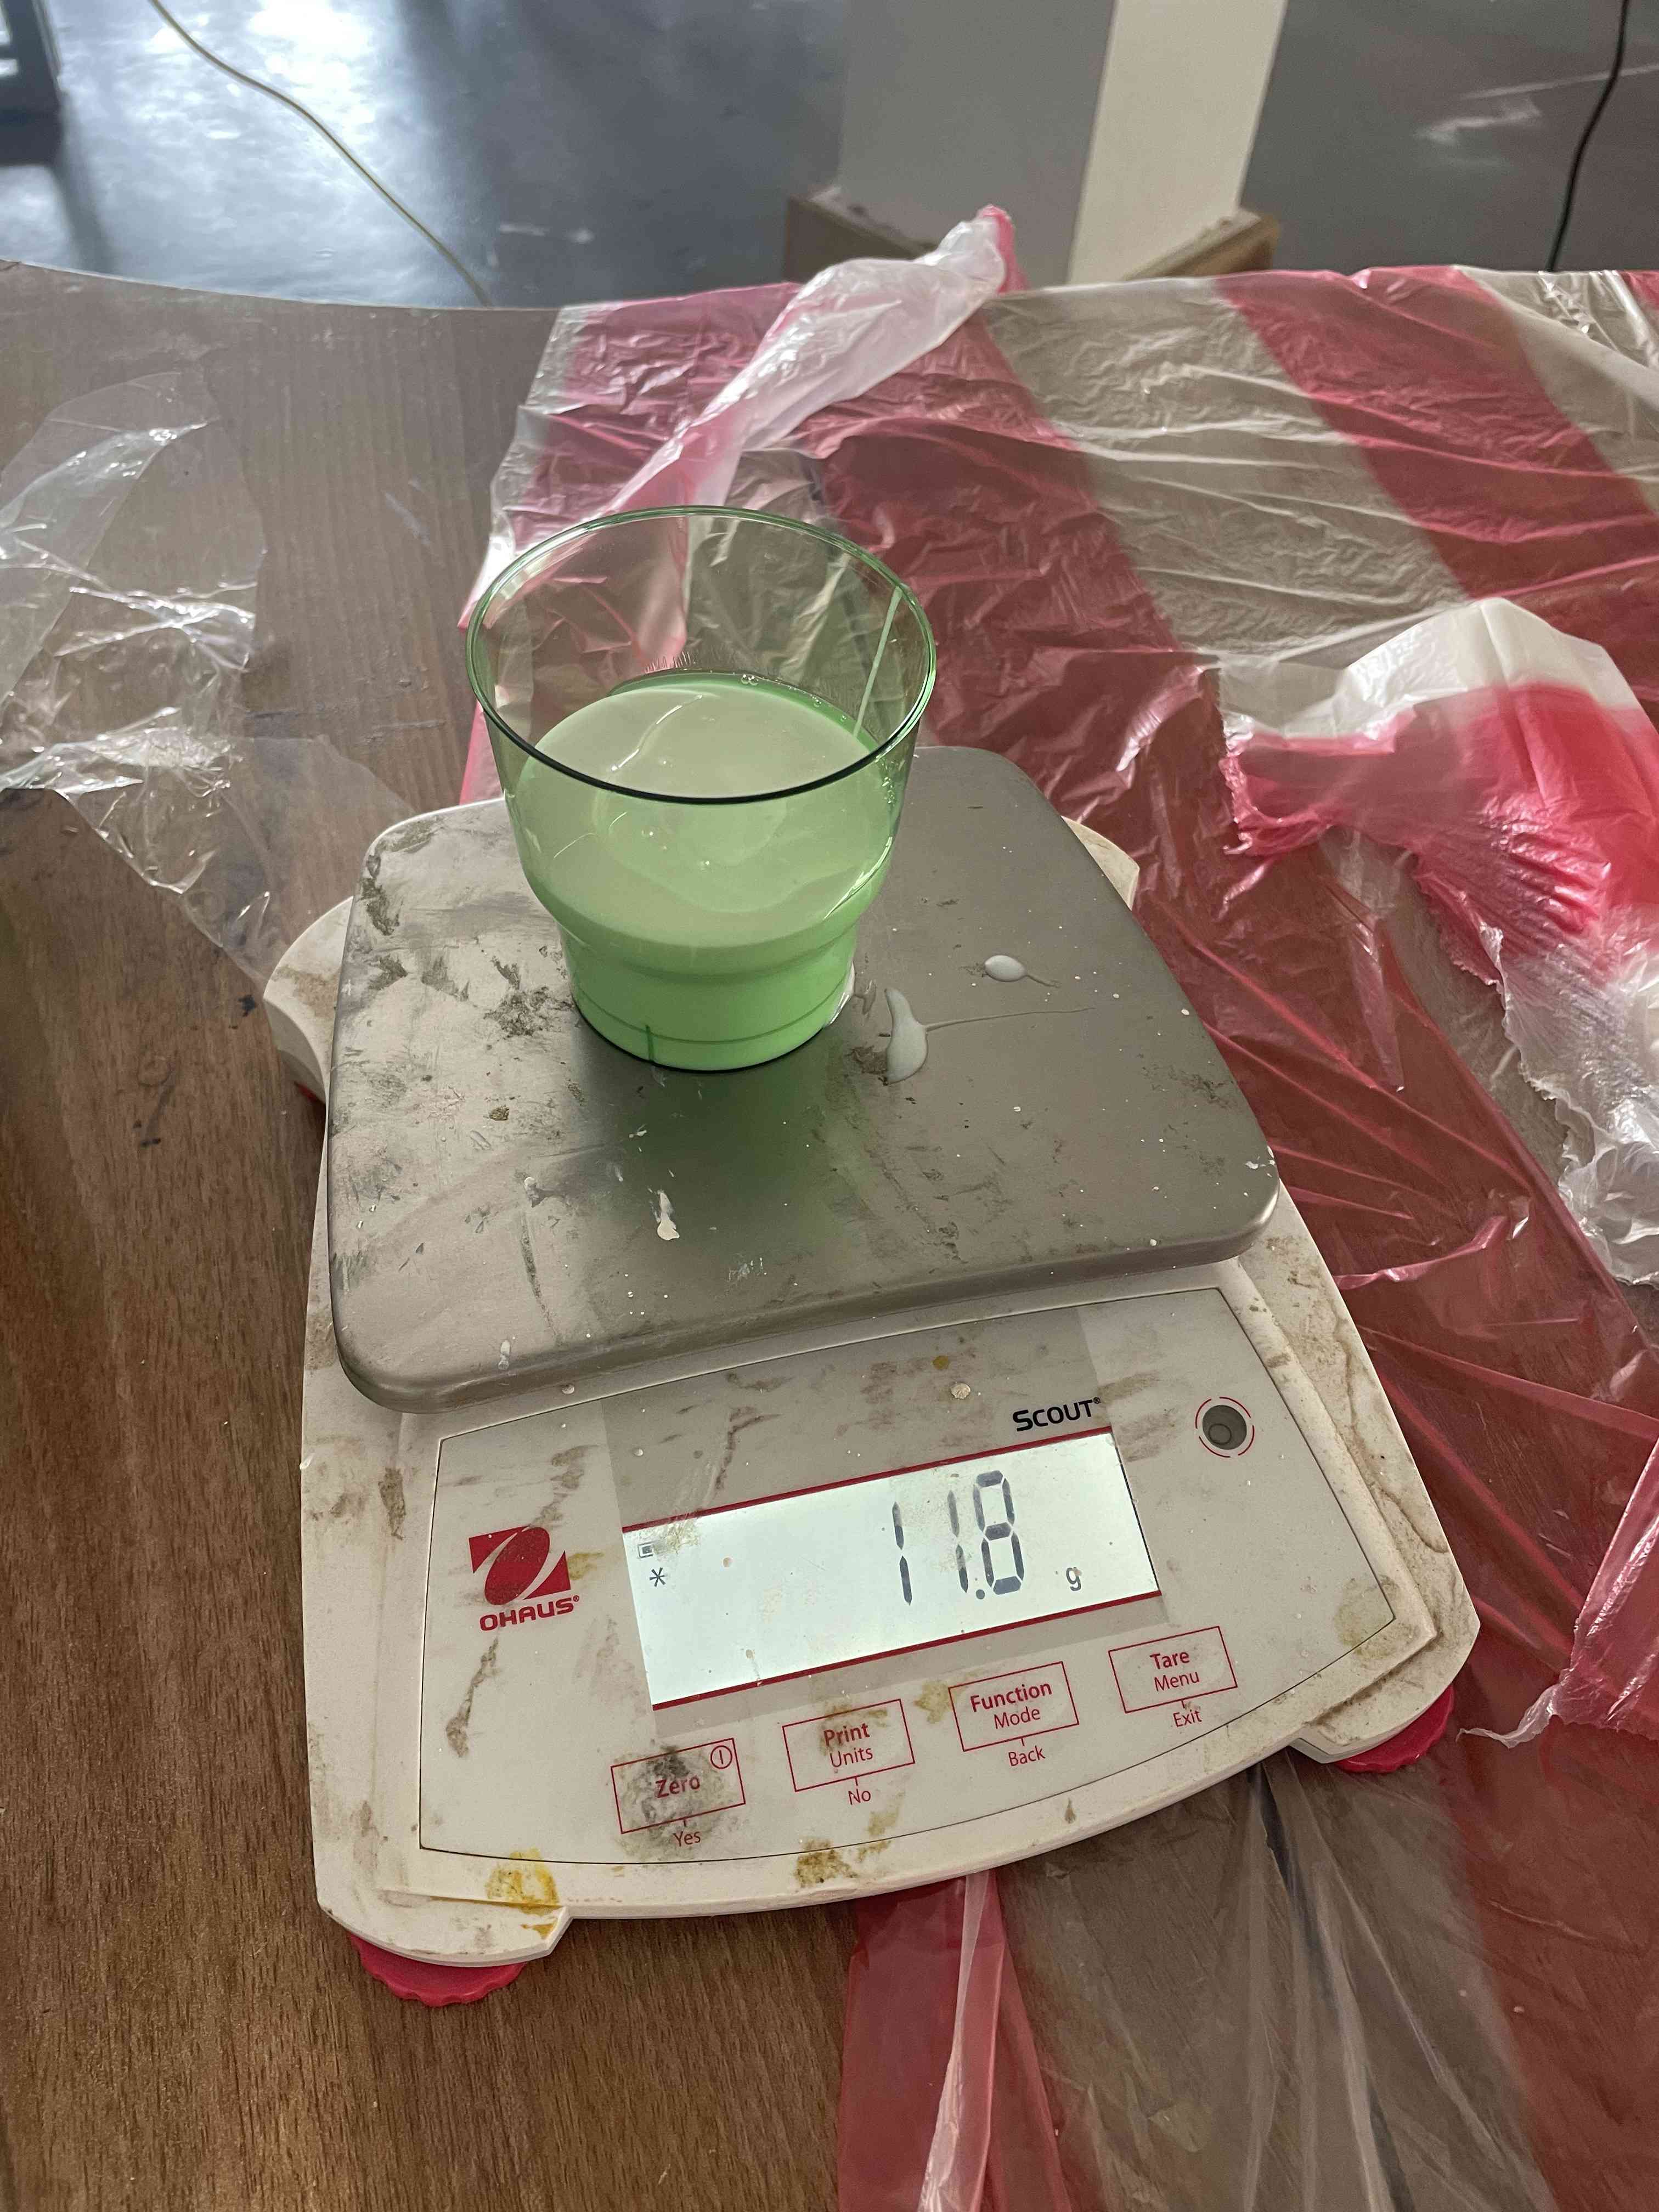
Mix for 1 minute with a wooden stick making sure to scrape the sides and the bottom, then pour the mixture into another cup, and mix for another minute.
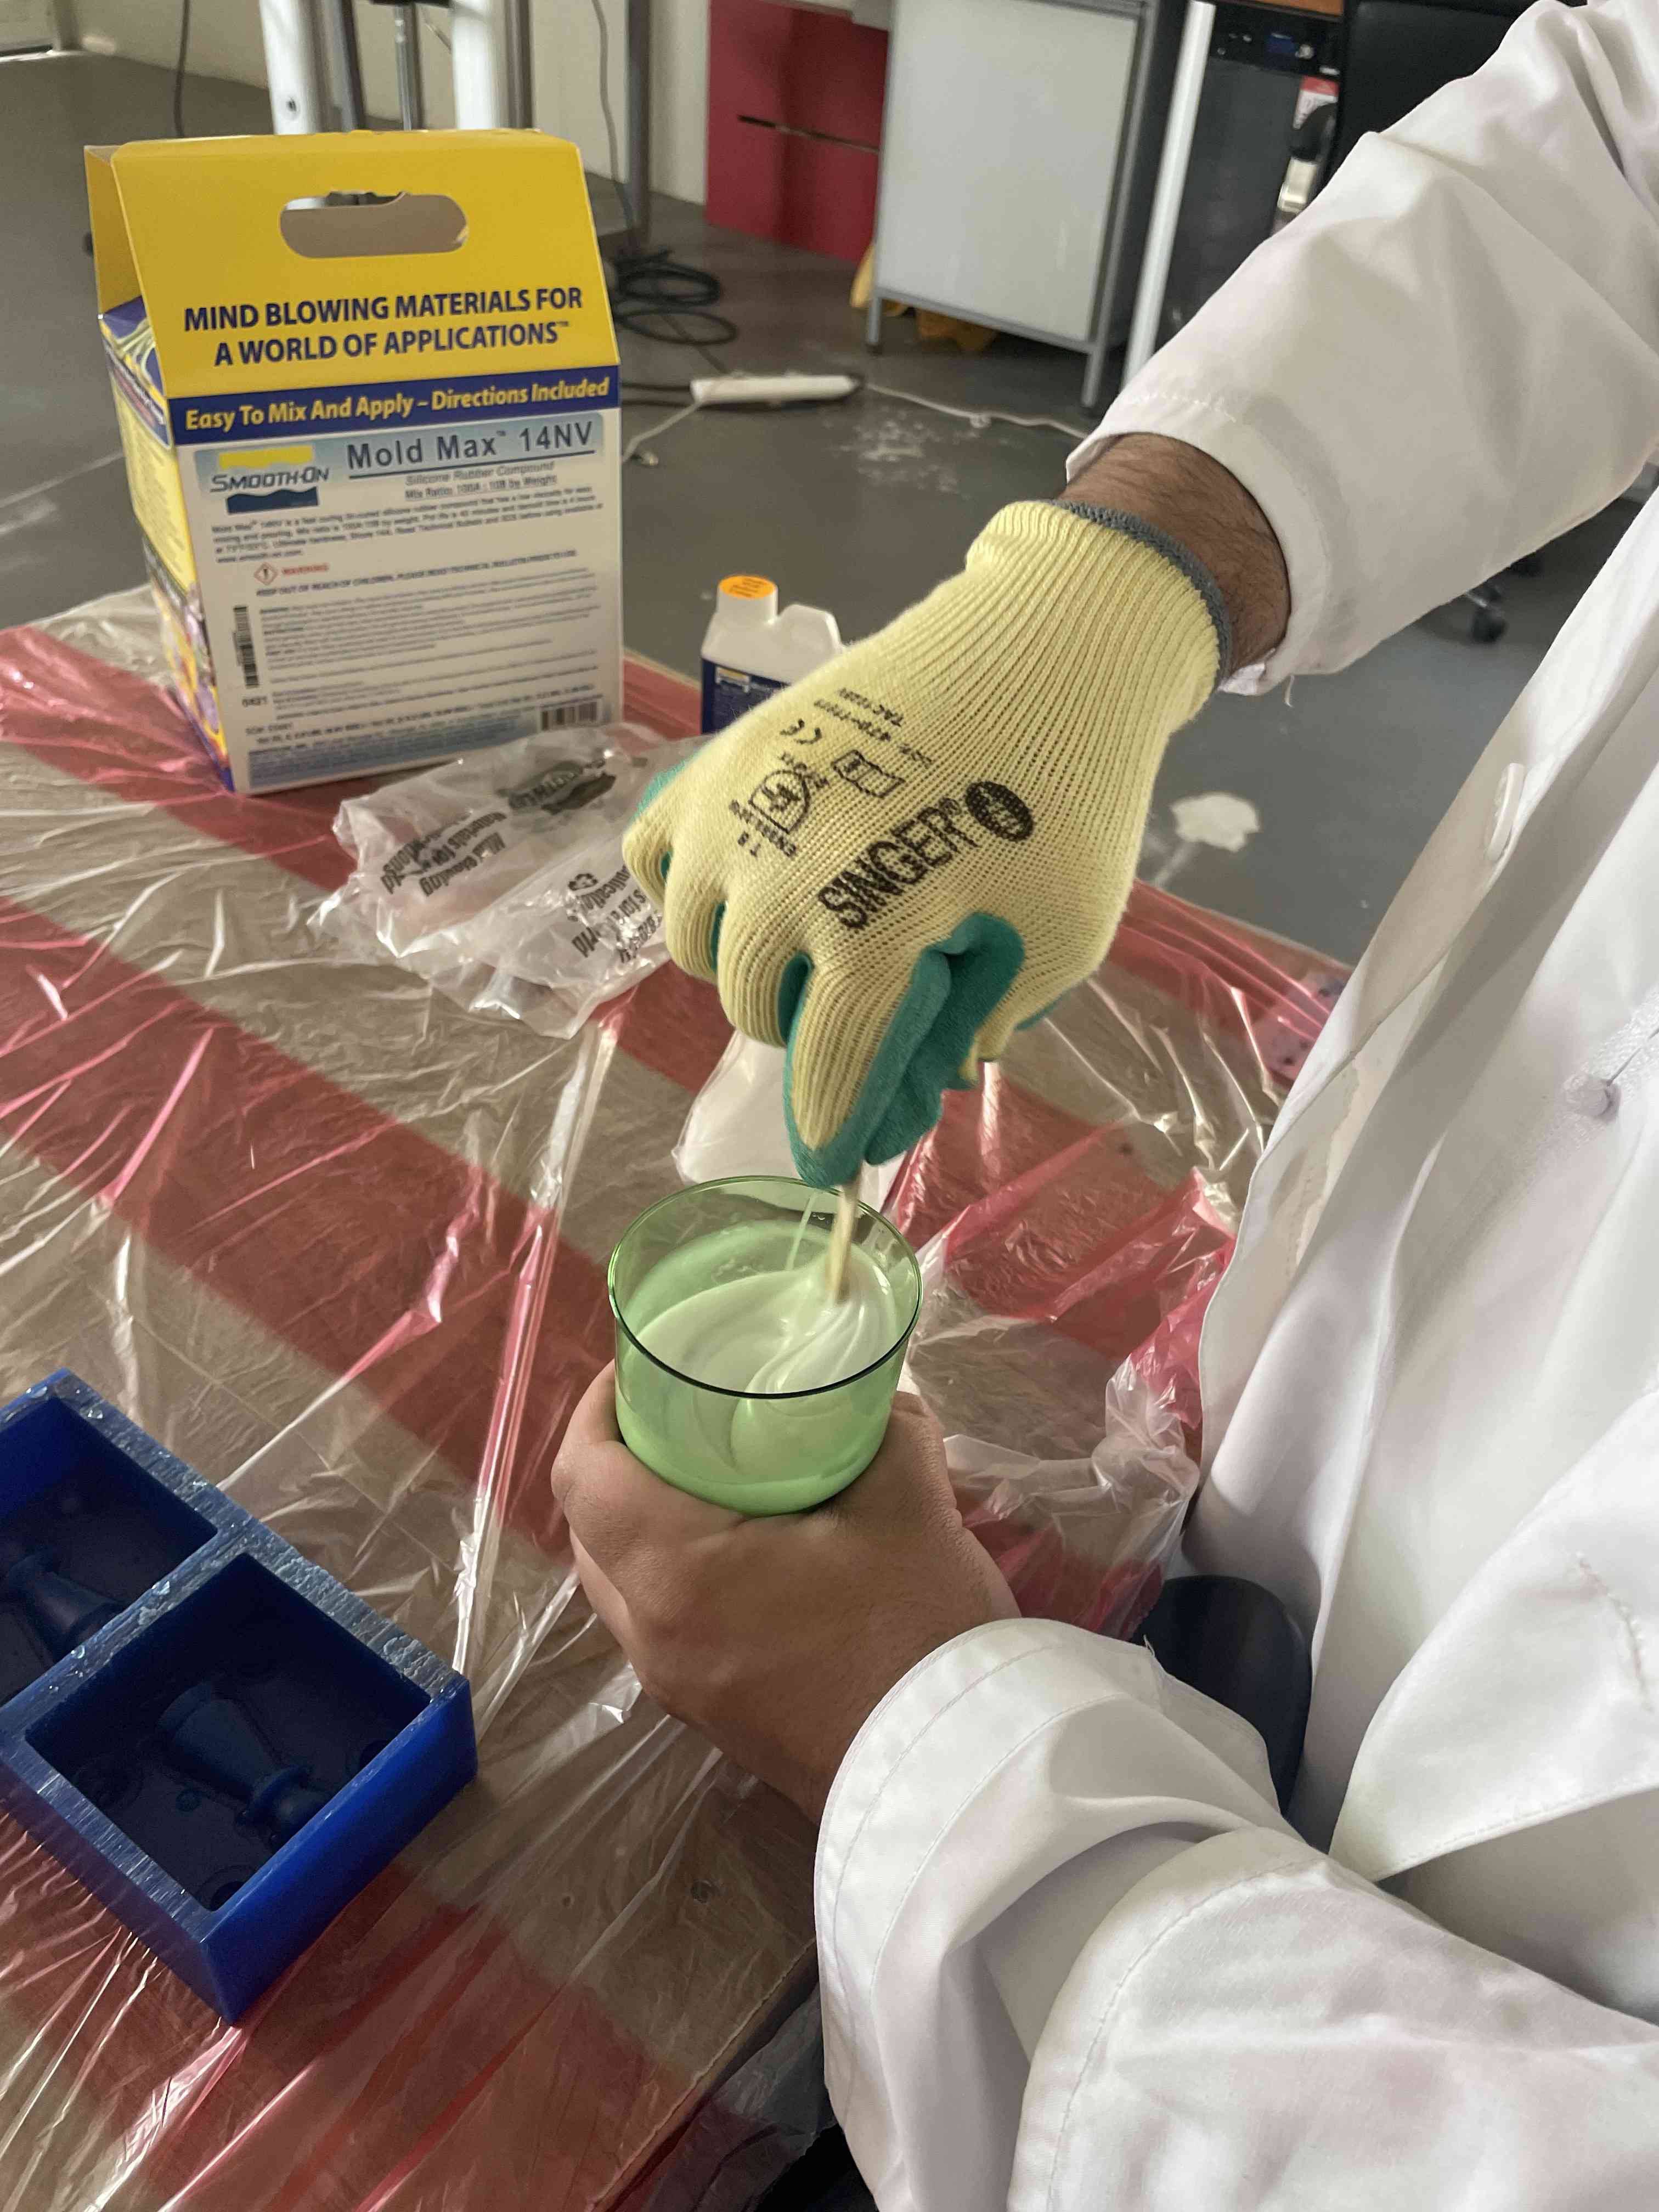
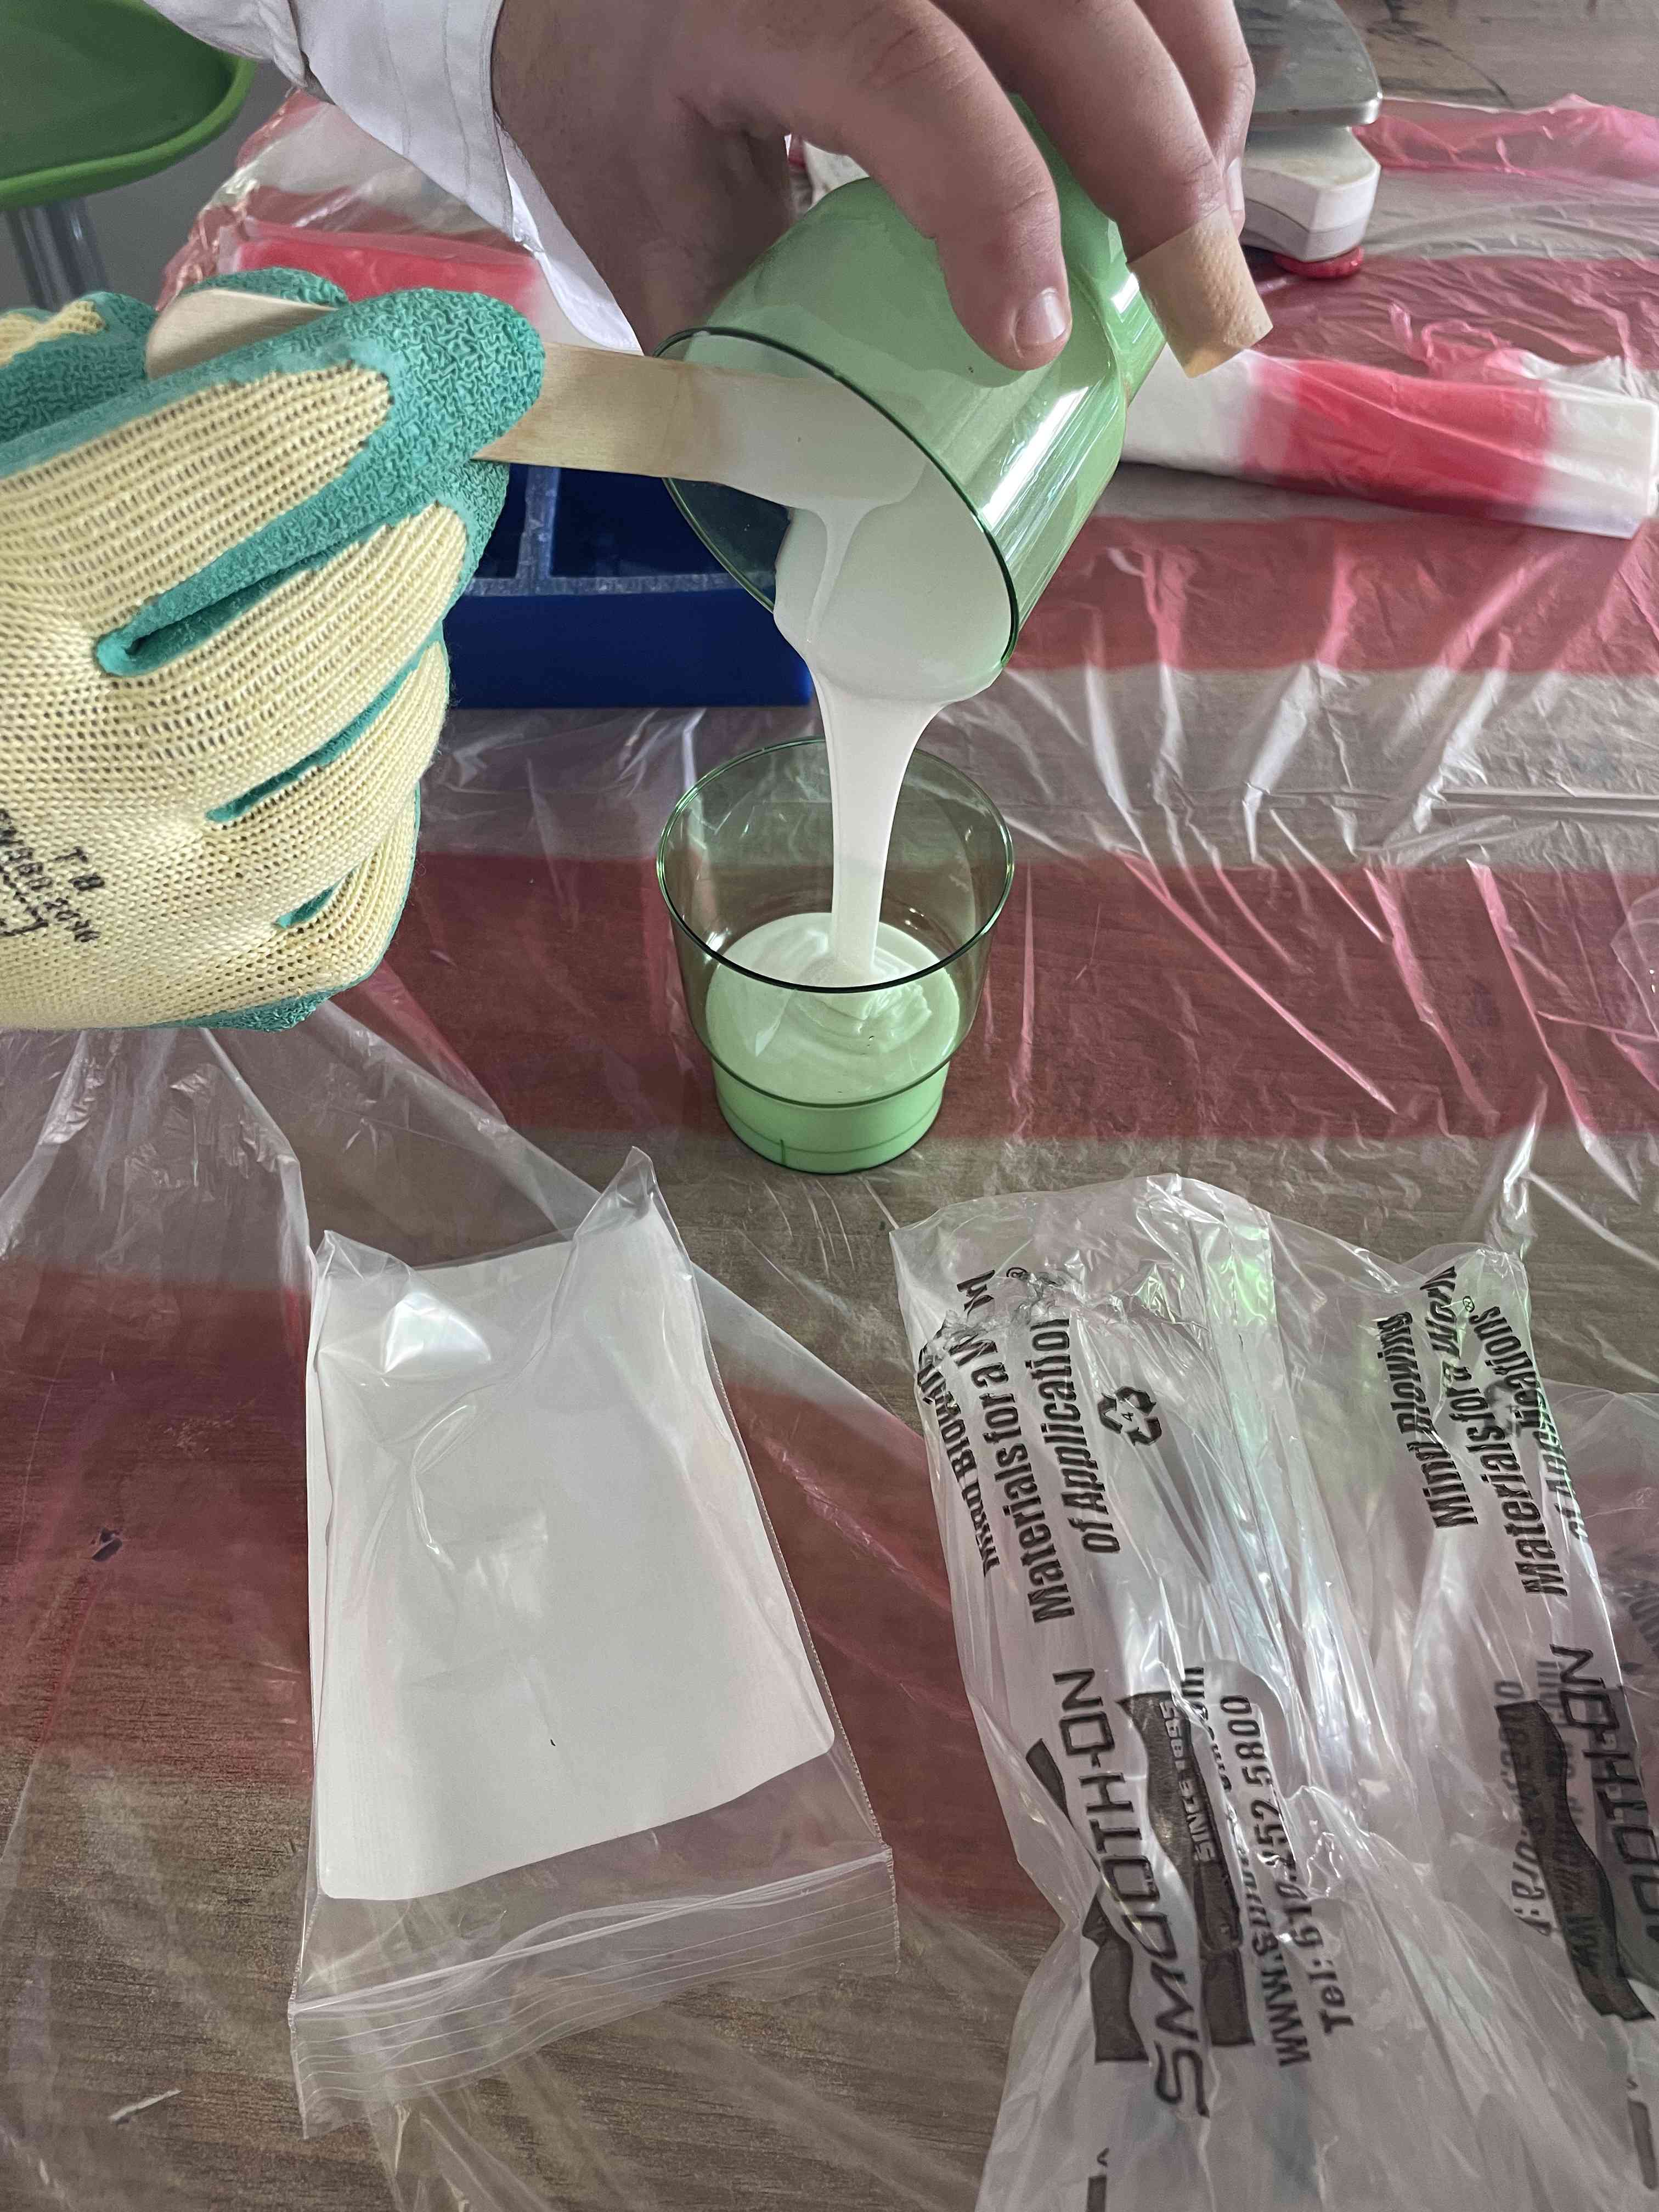
Pour the mixture in the wax starting from the lowest point keeping the flow as uniform as humanly possible to minimize entrapped air.
Set the wax in a shaded area , and wait for 4 hours to cure, we came back to it after 24 hours.
Clean the area used from any spillage, or contaminated tools.
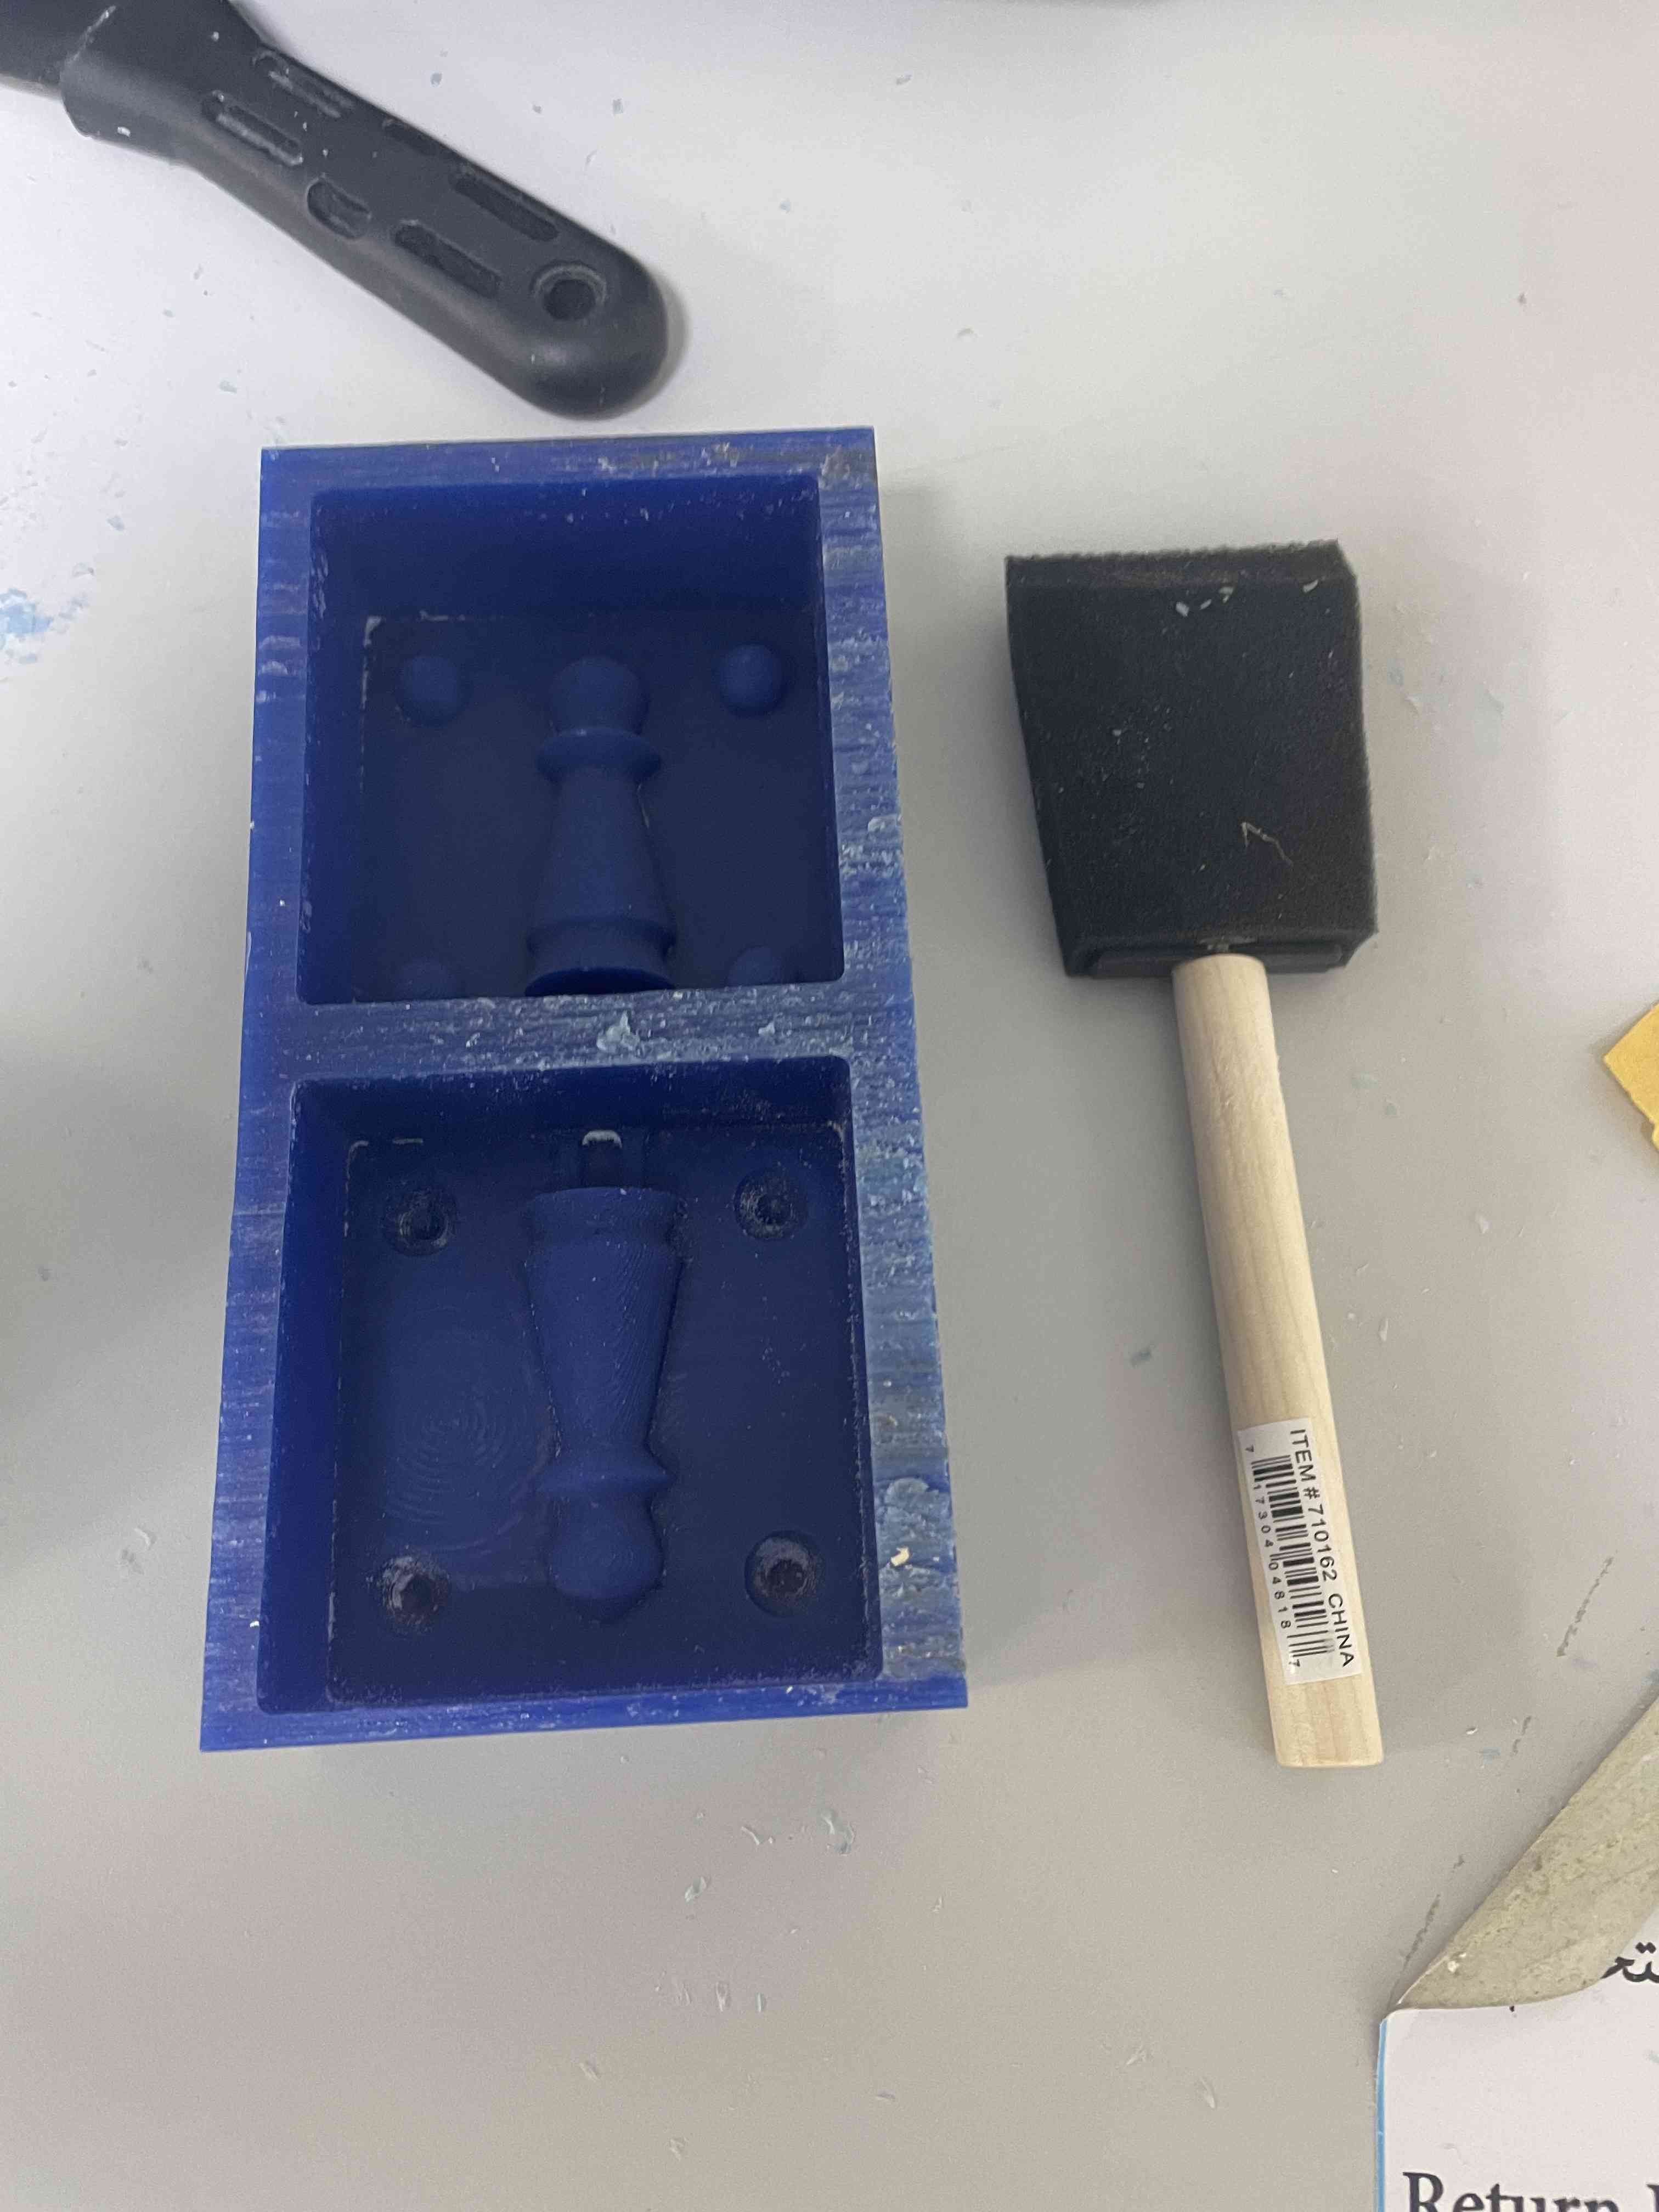
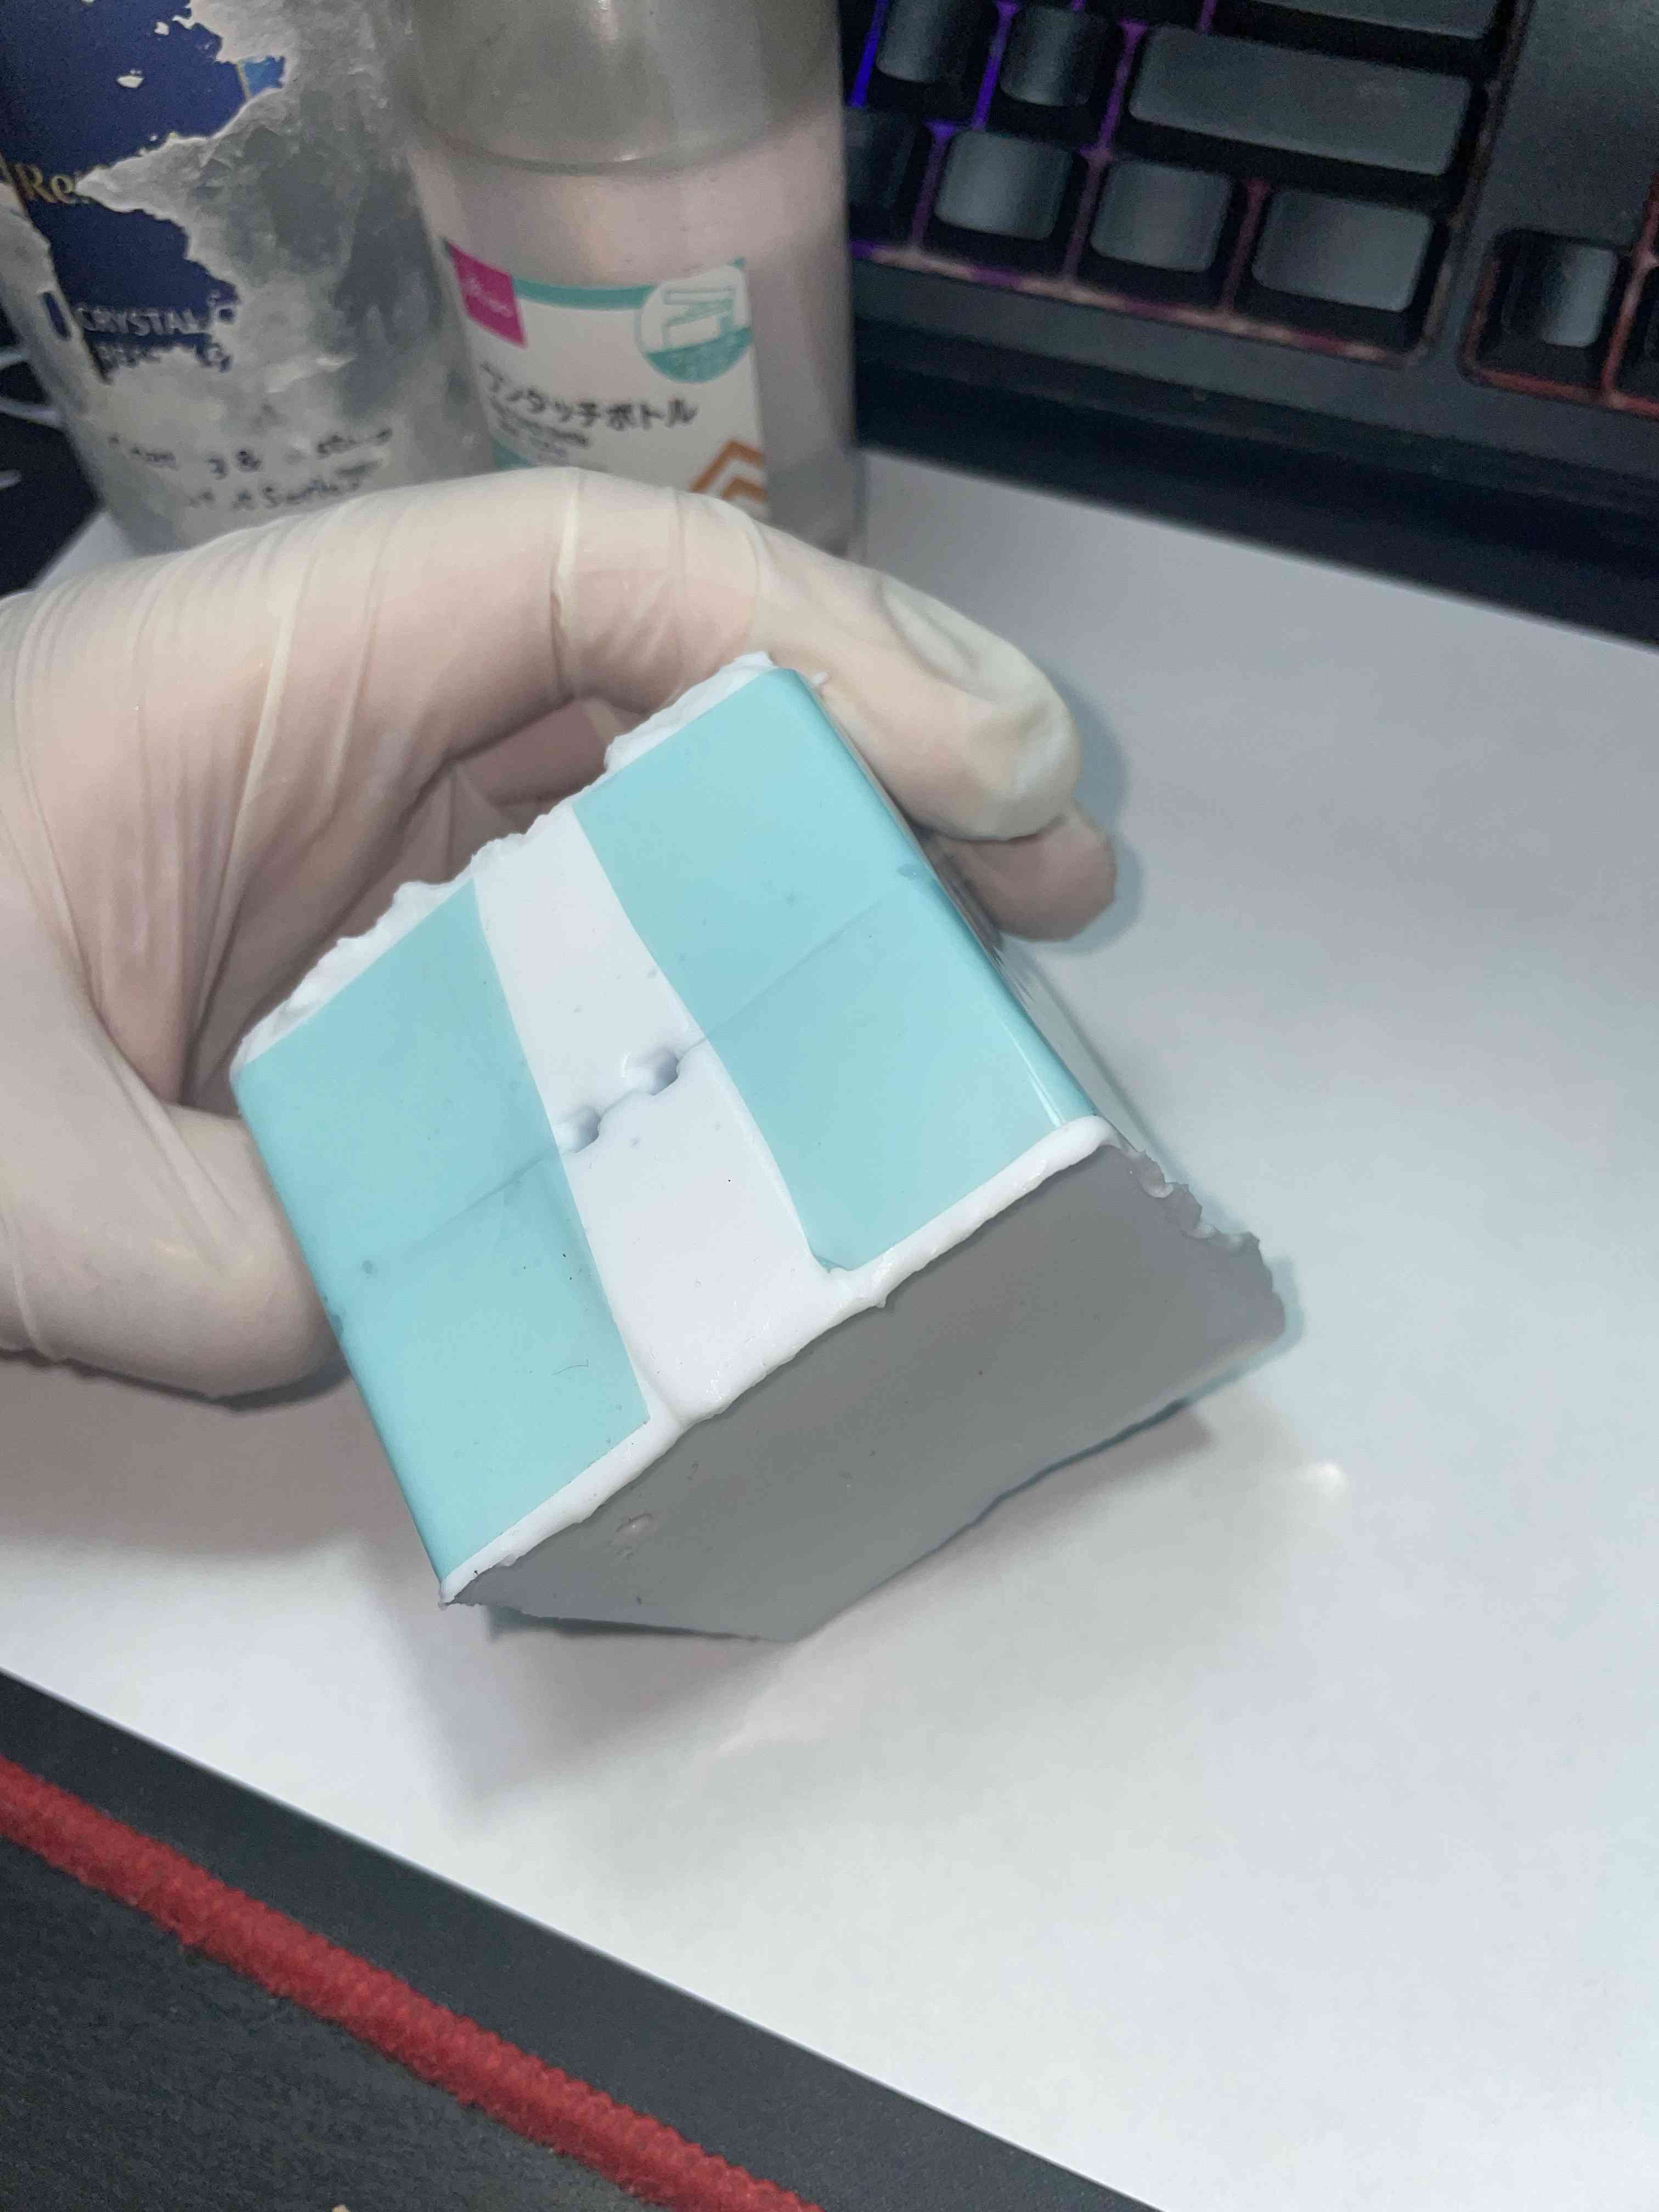
Final mold:

For casting I am using EpoxAcast™ 690 epoxy resin and hardener.
The steps in casting are very similar to the steps in molding. We made sure to cover the workspace with plastic, and read the technical datasheet meticulously.
Ratio 10:3 by weight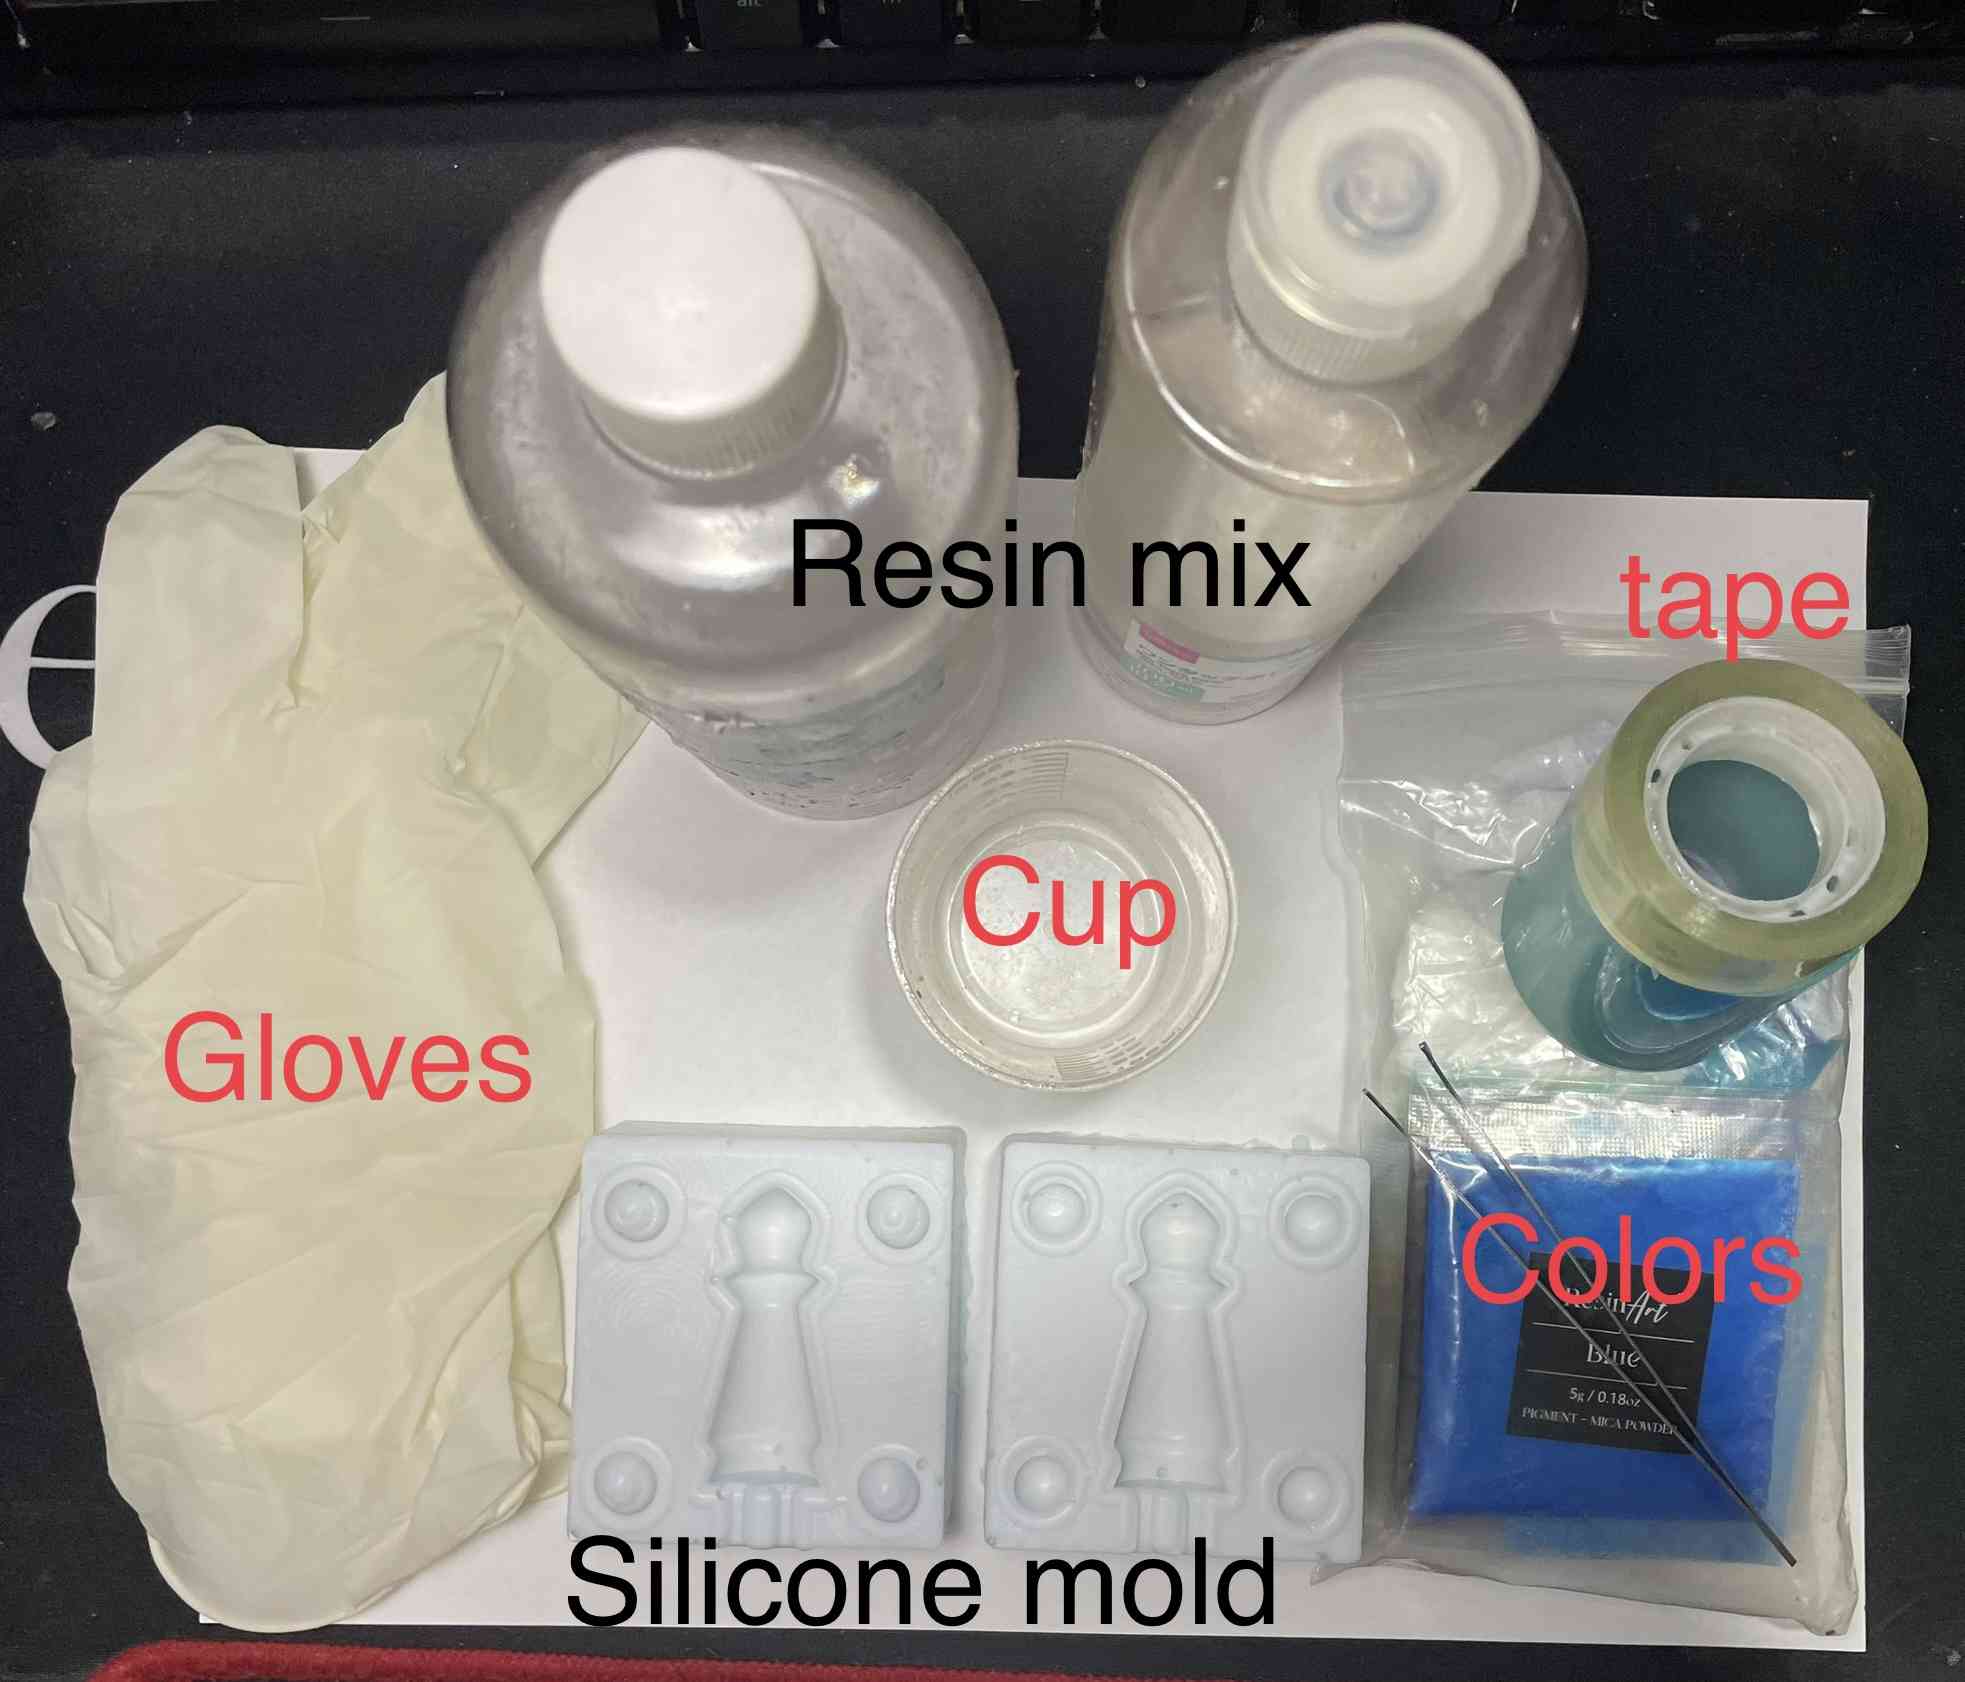
Shake PART A and PART B of the mix for a minute to re-disperse the fillers.
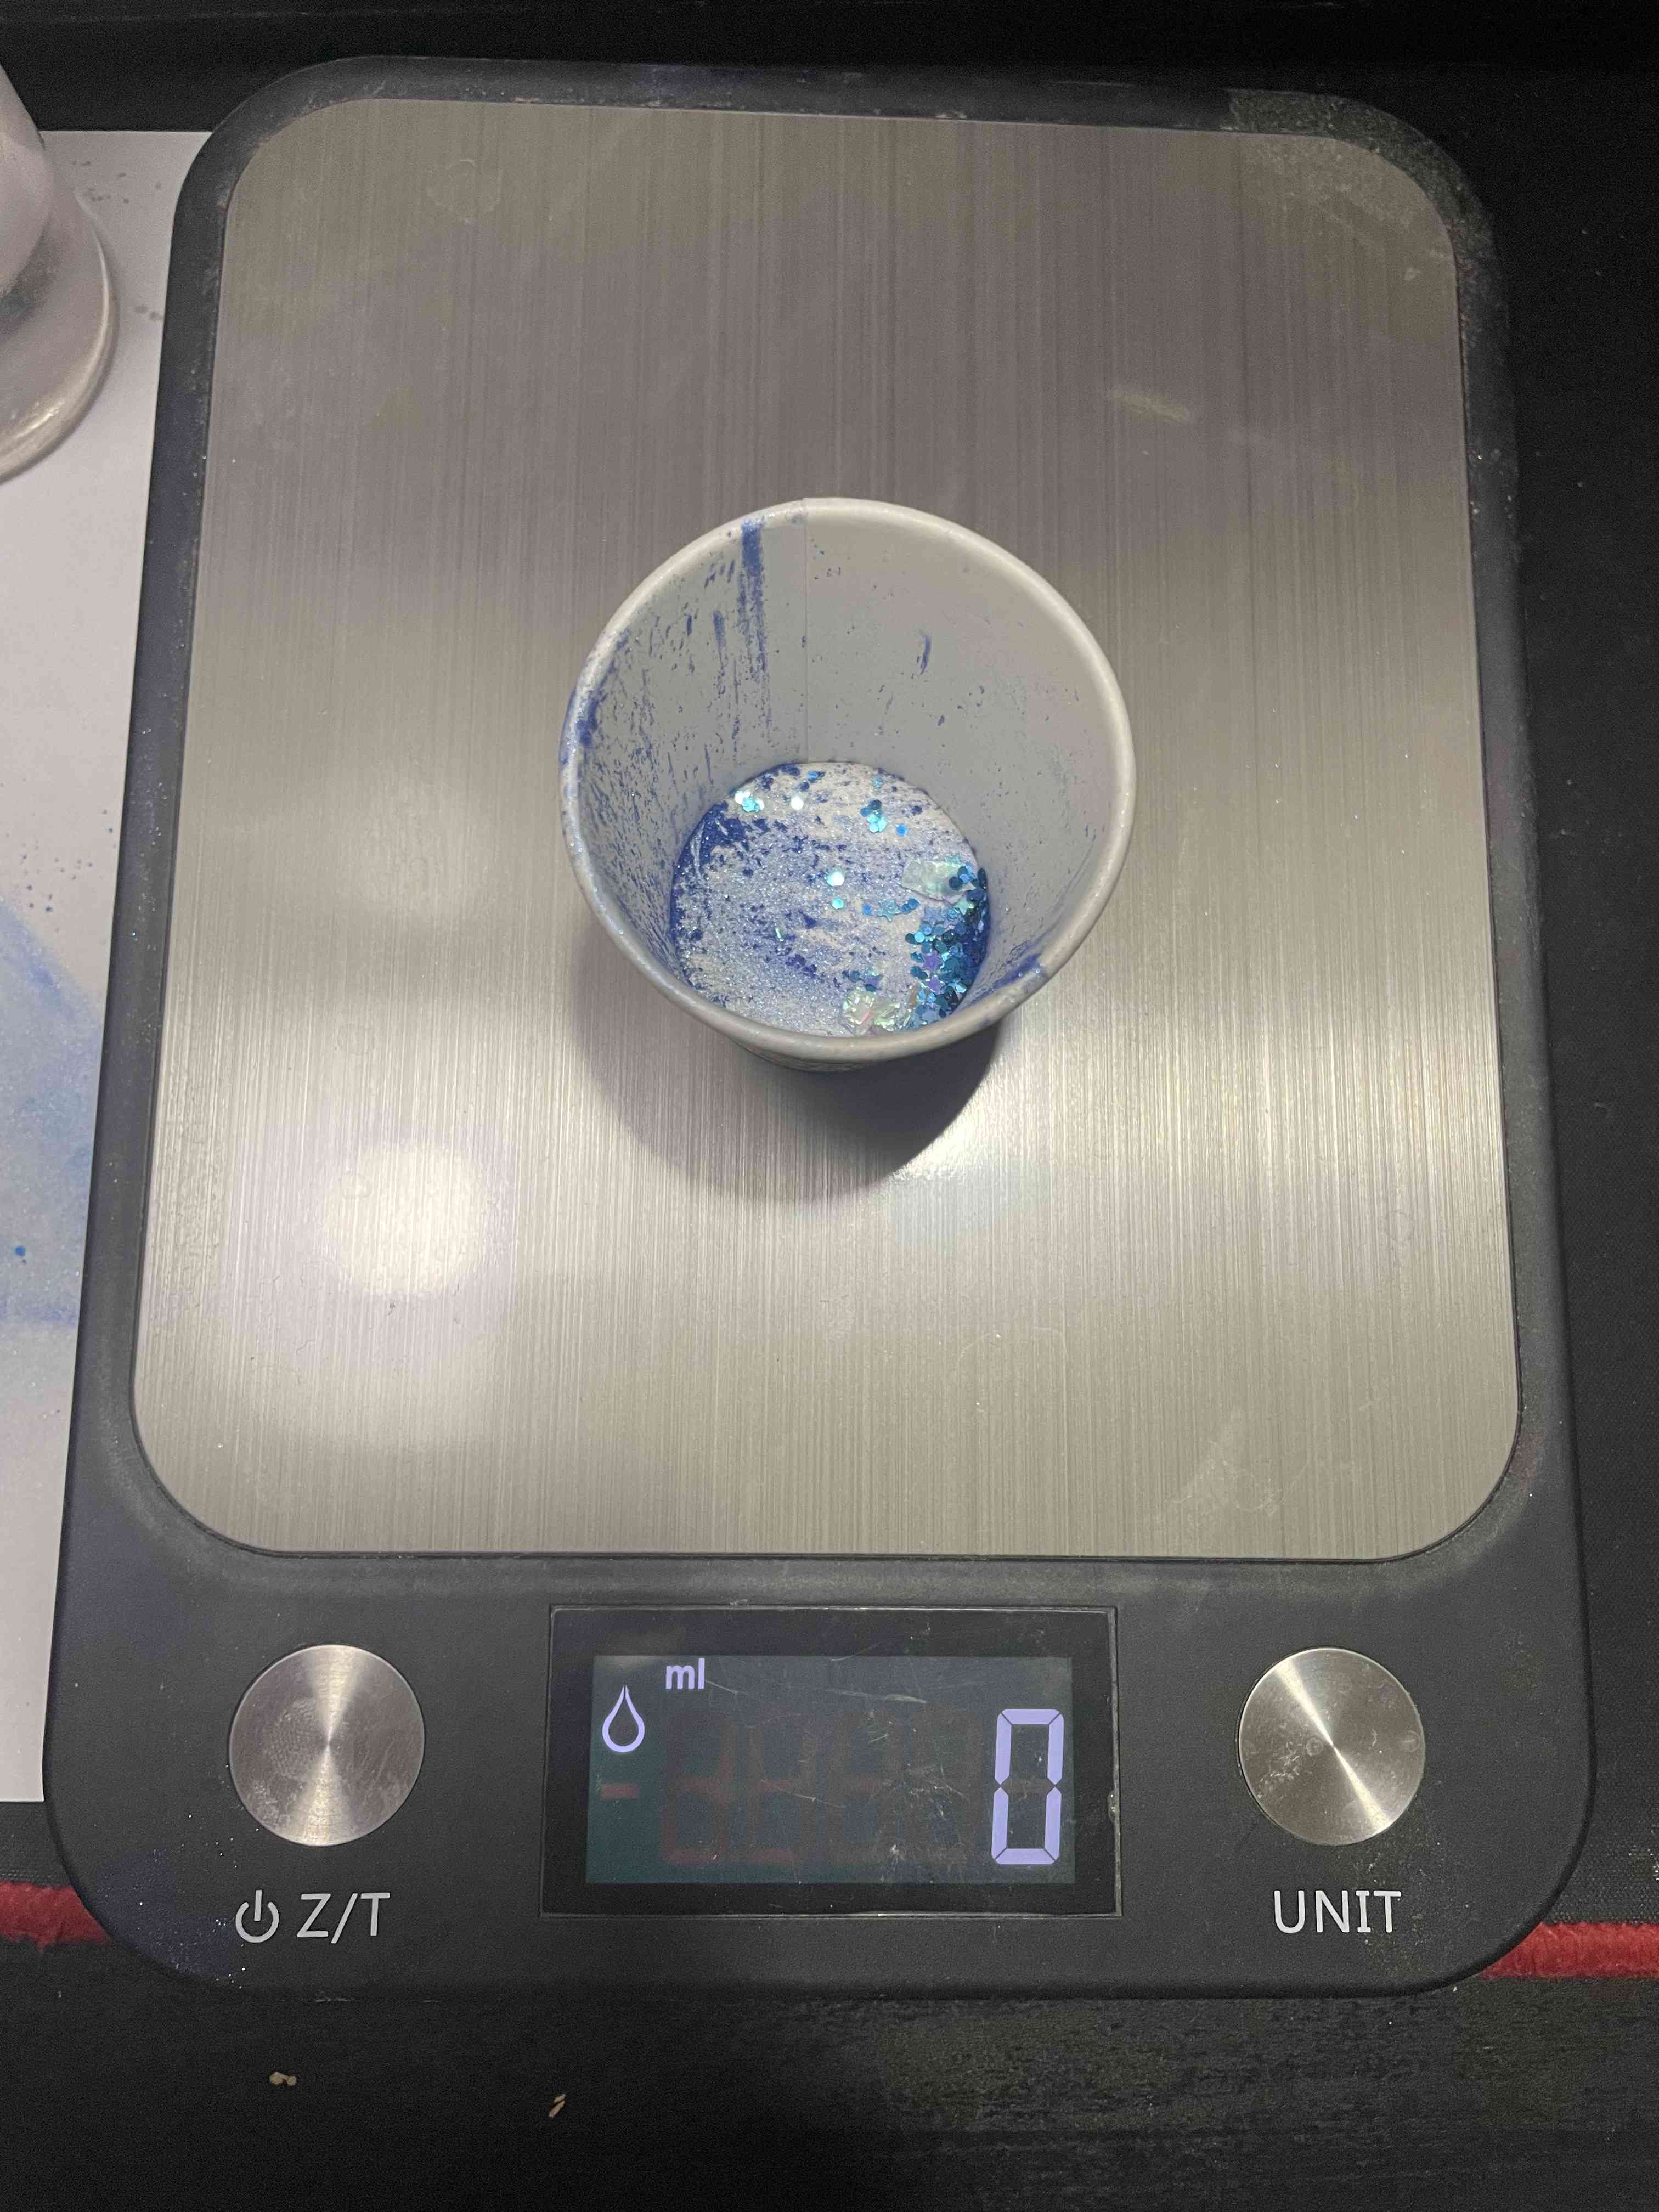
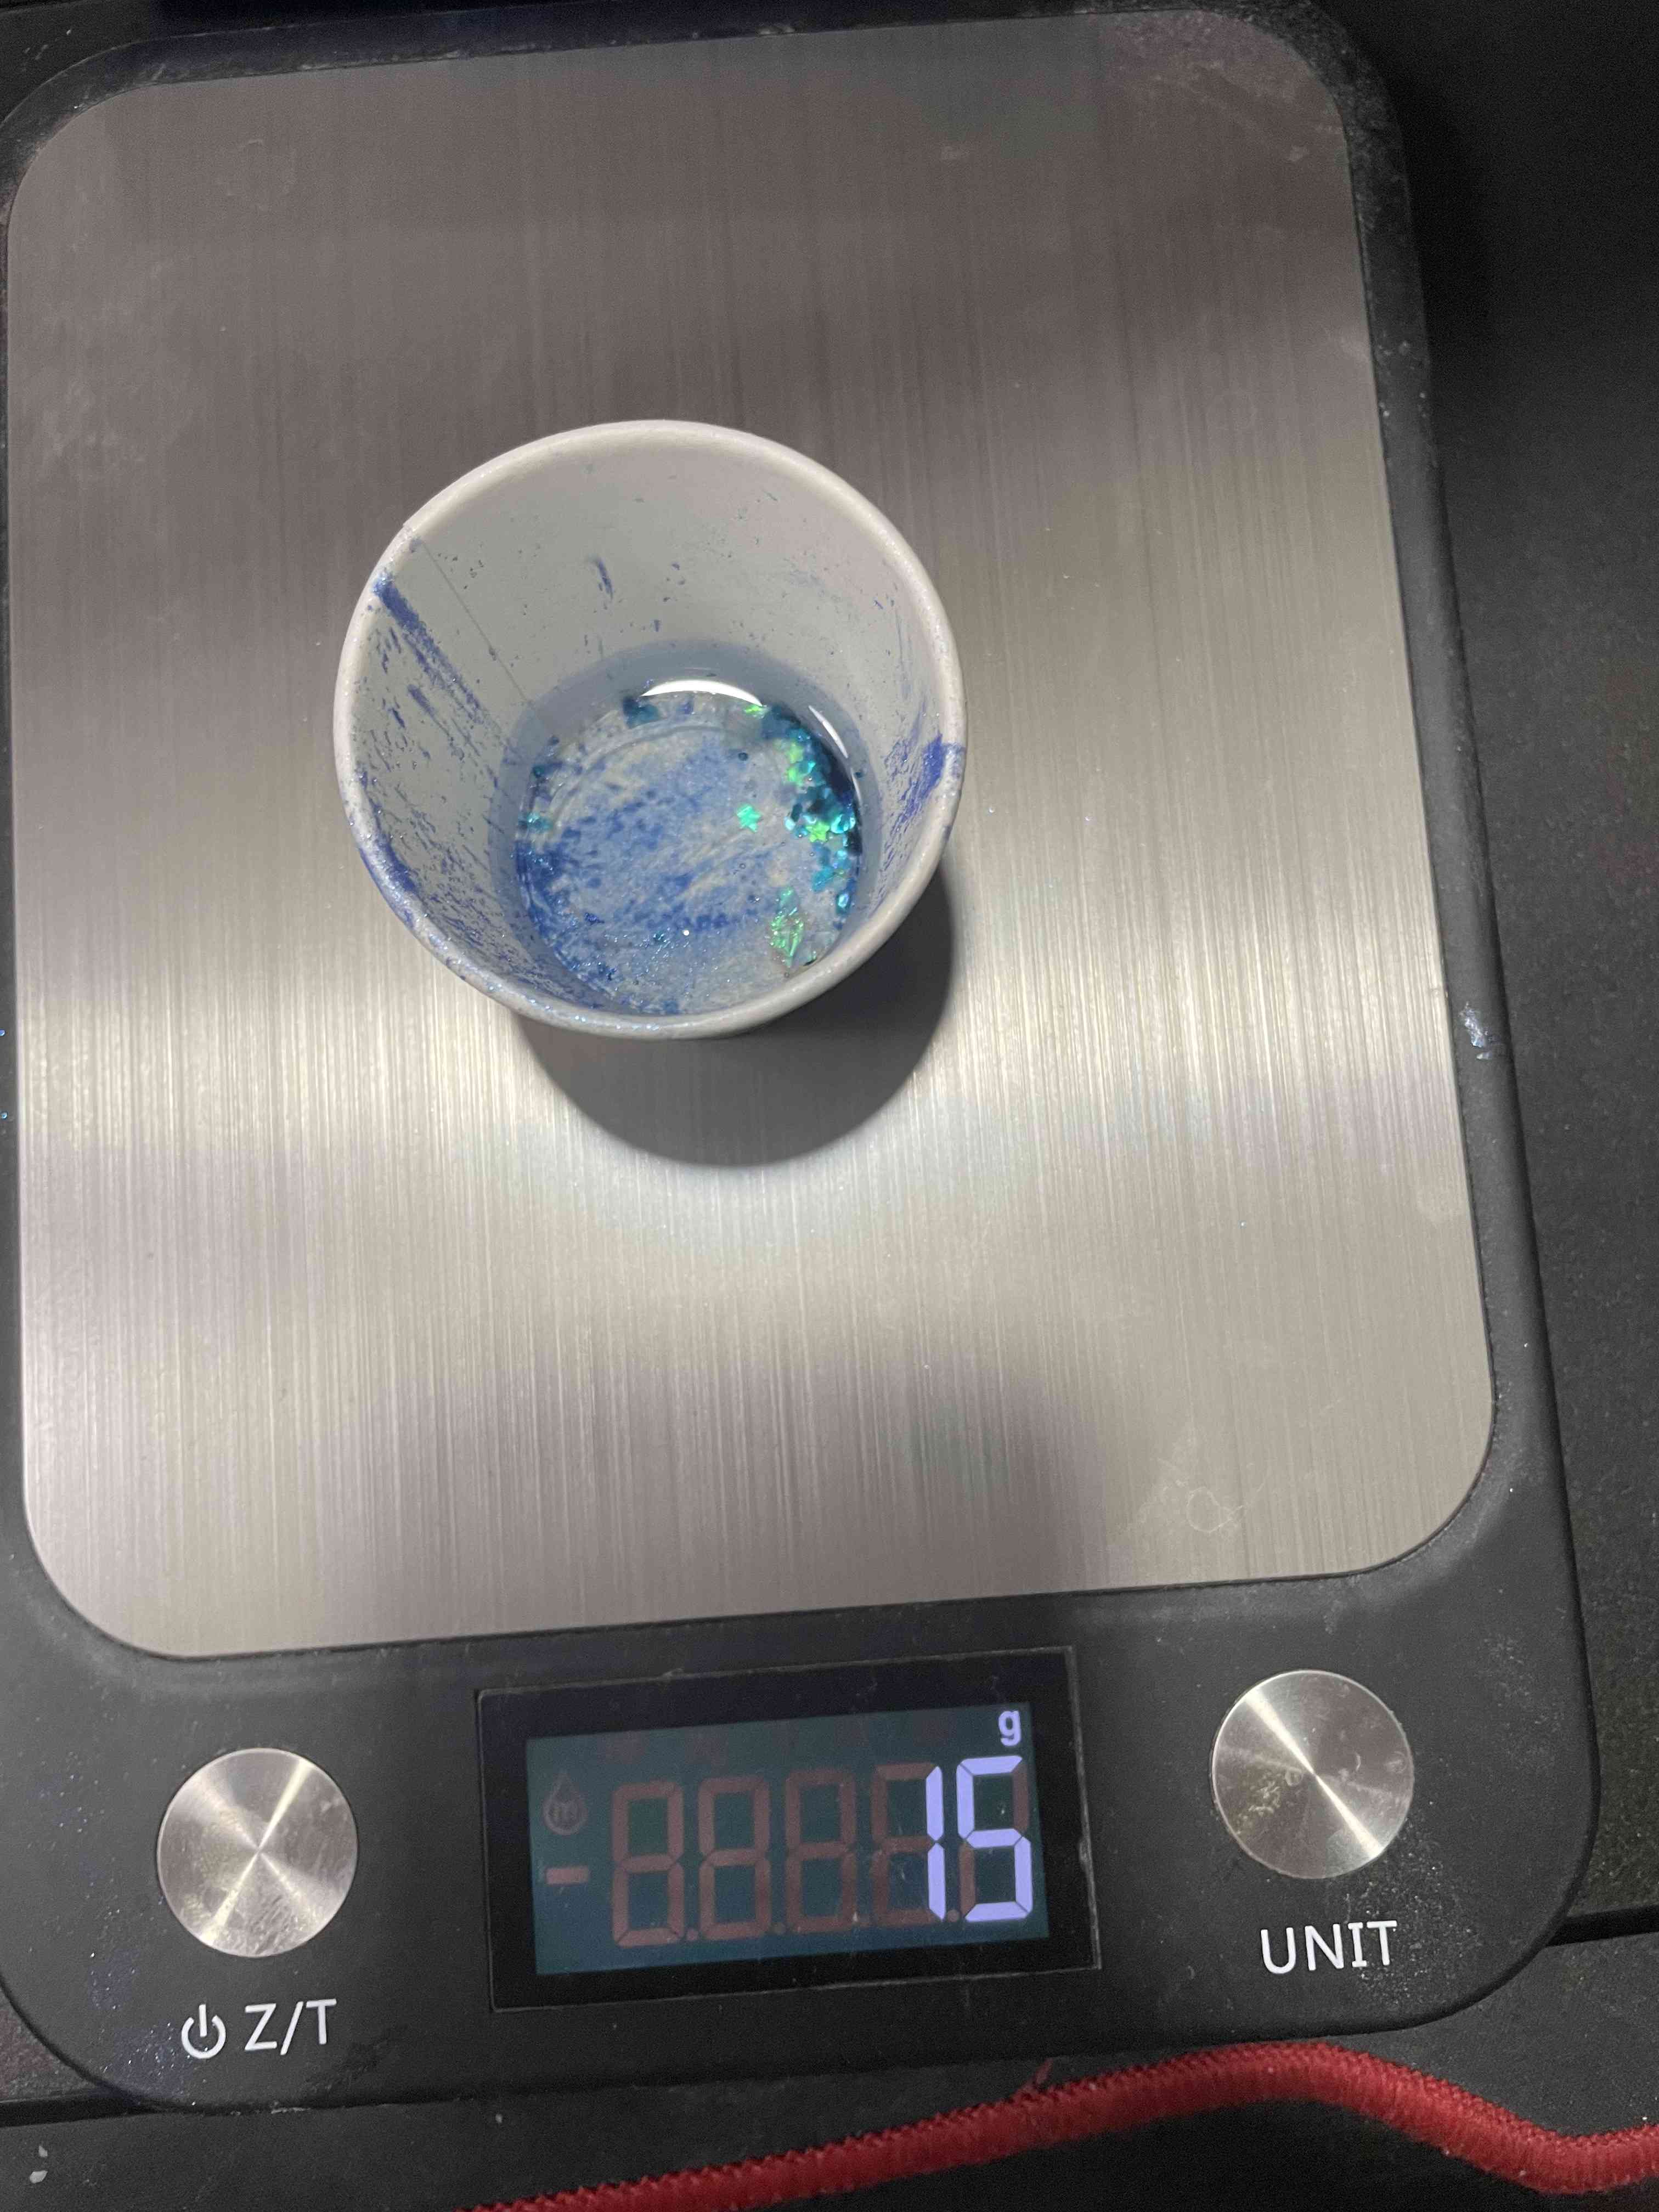
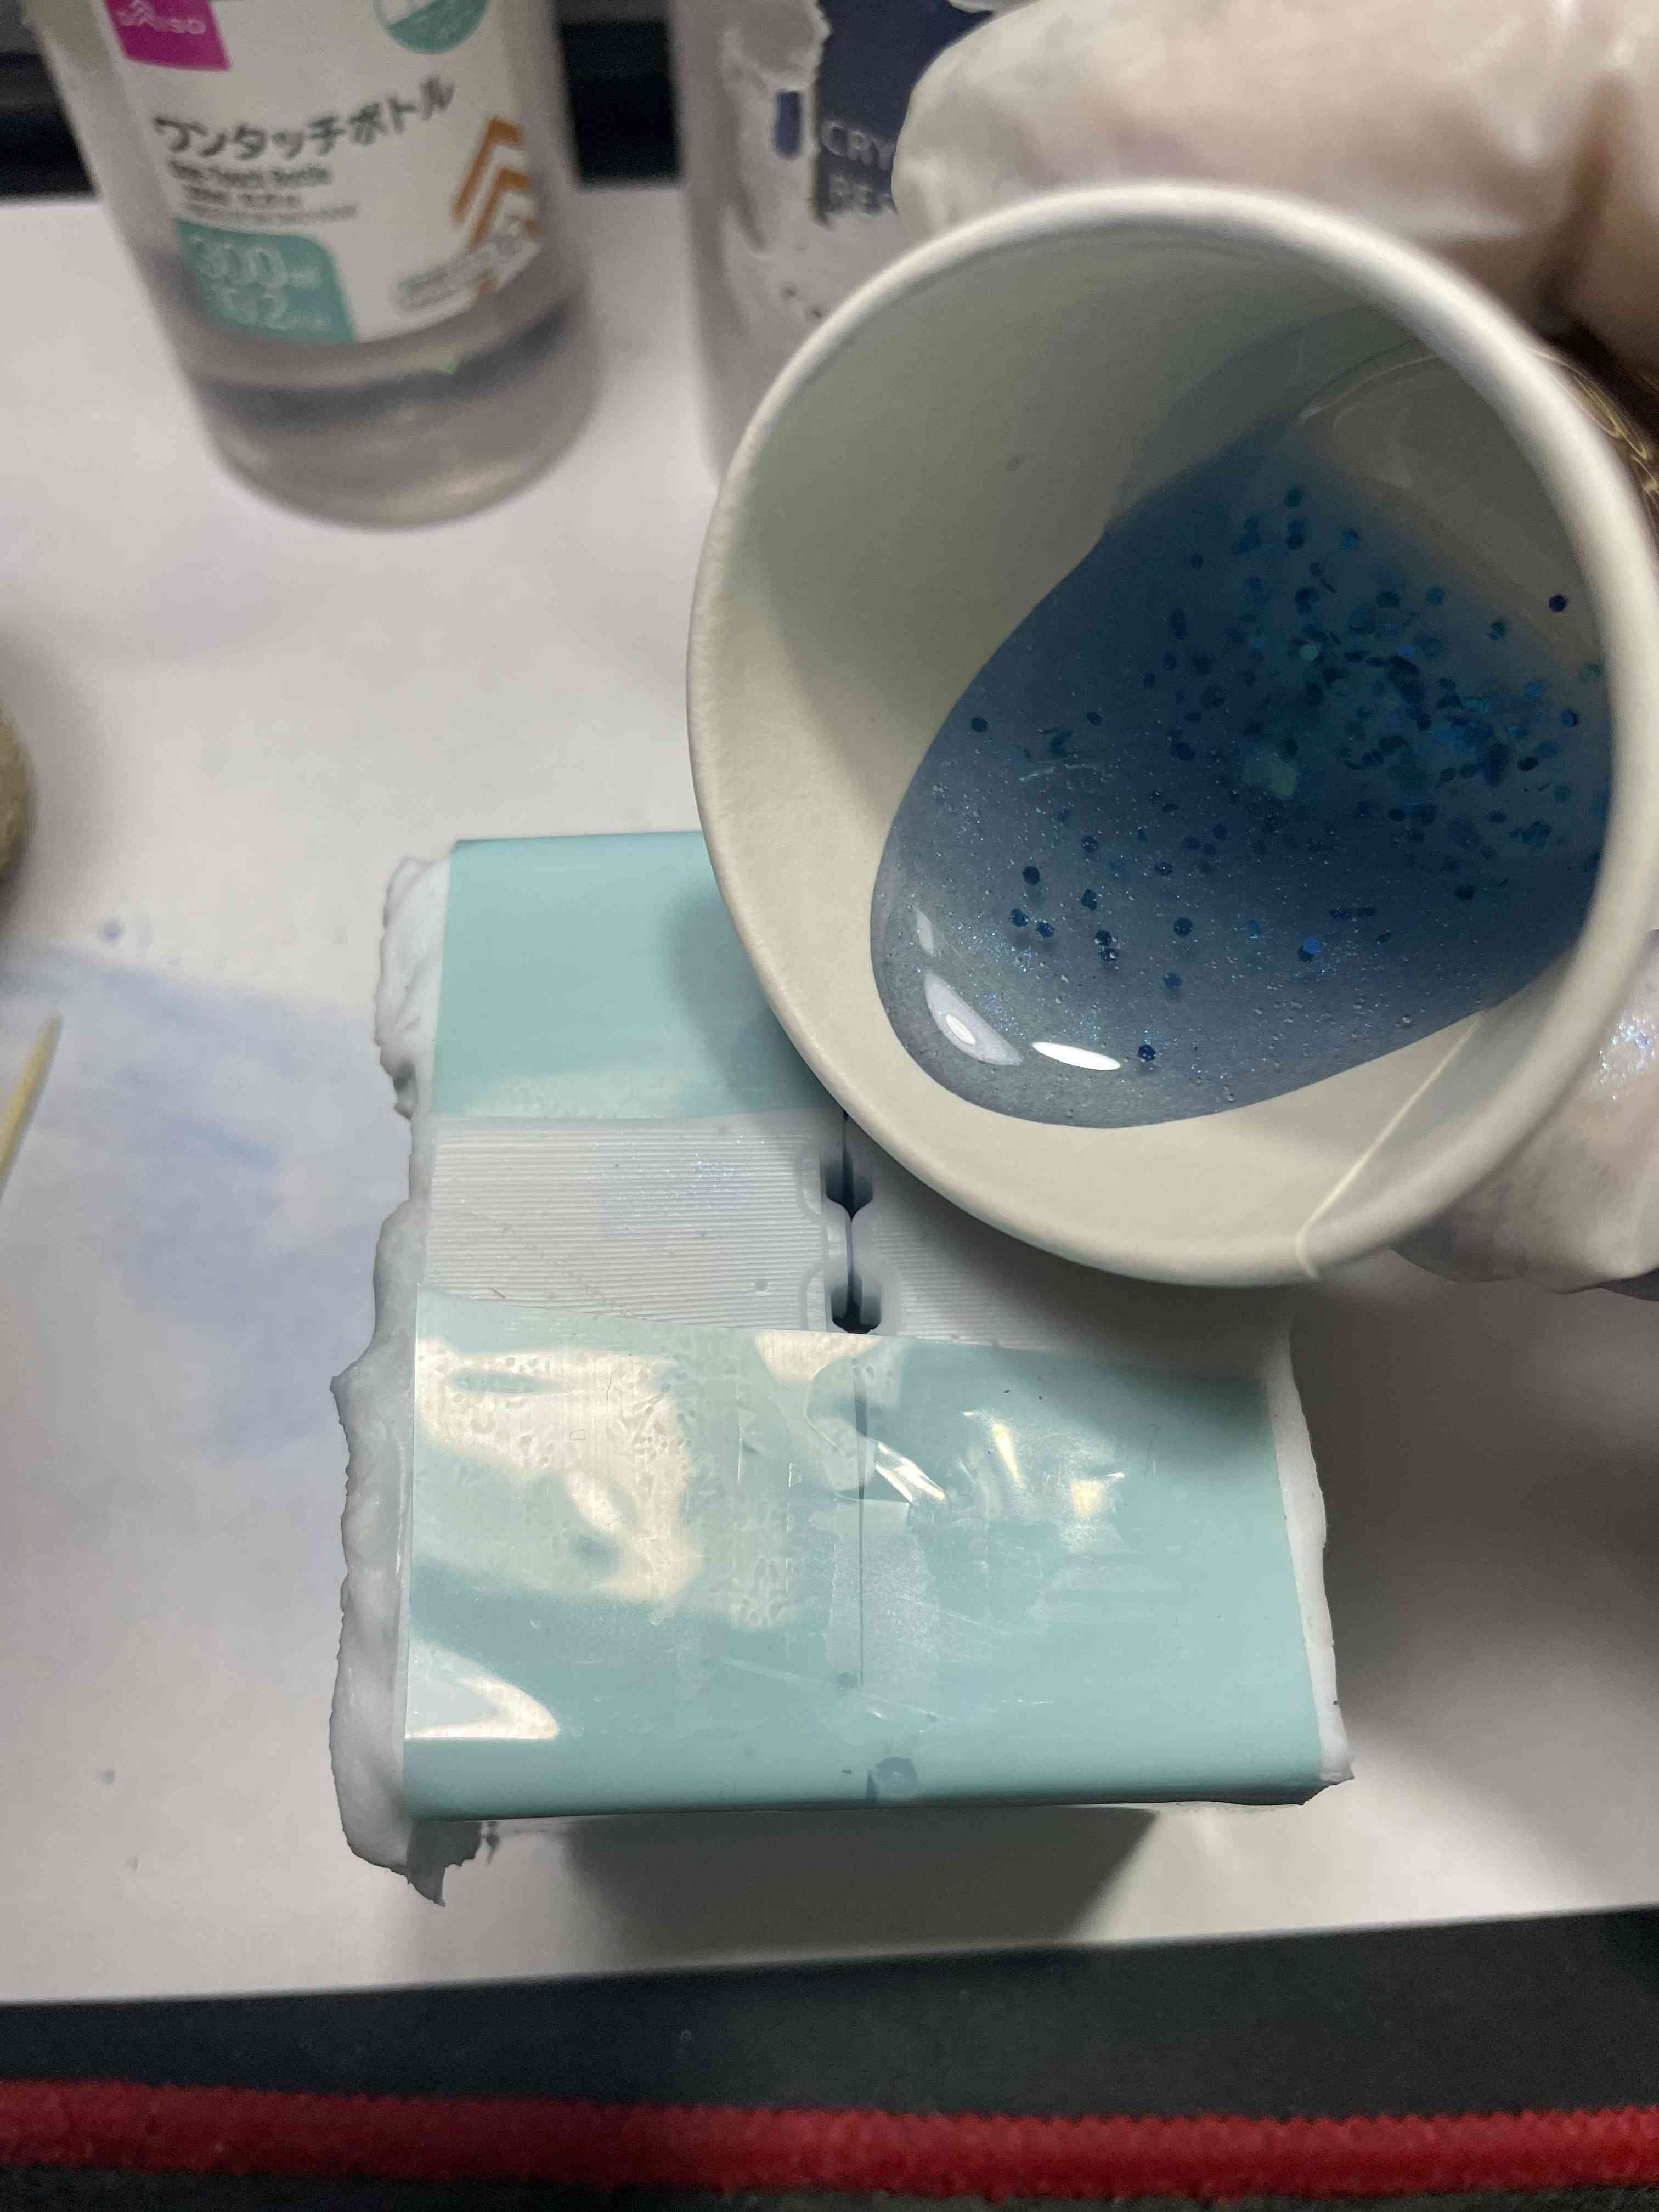
Zero the scale with the empty cup on, and pour the PART A until mark, before that I add color and glitter
The ratio of PART A to PART B is 10:3, so measure 30% of the PART A, and add this amount of PART B to the cup.
Mix for 1.5 mins with a wooden stick, making sure to scrape the sides and the bottom.
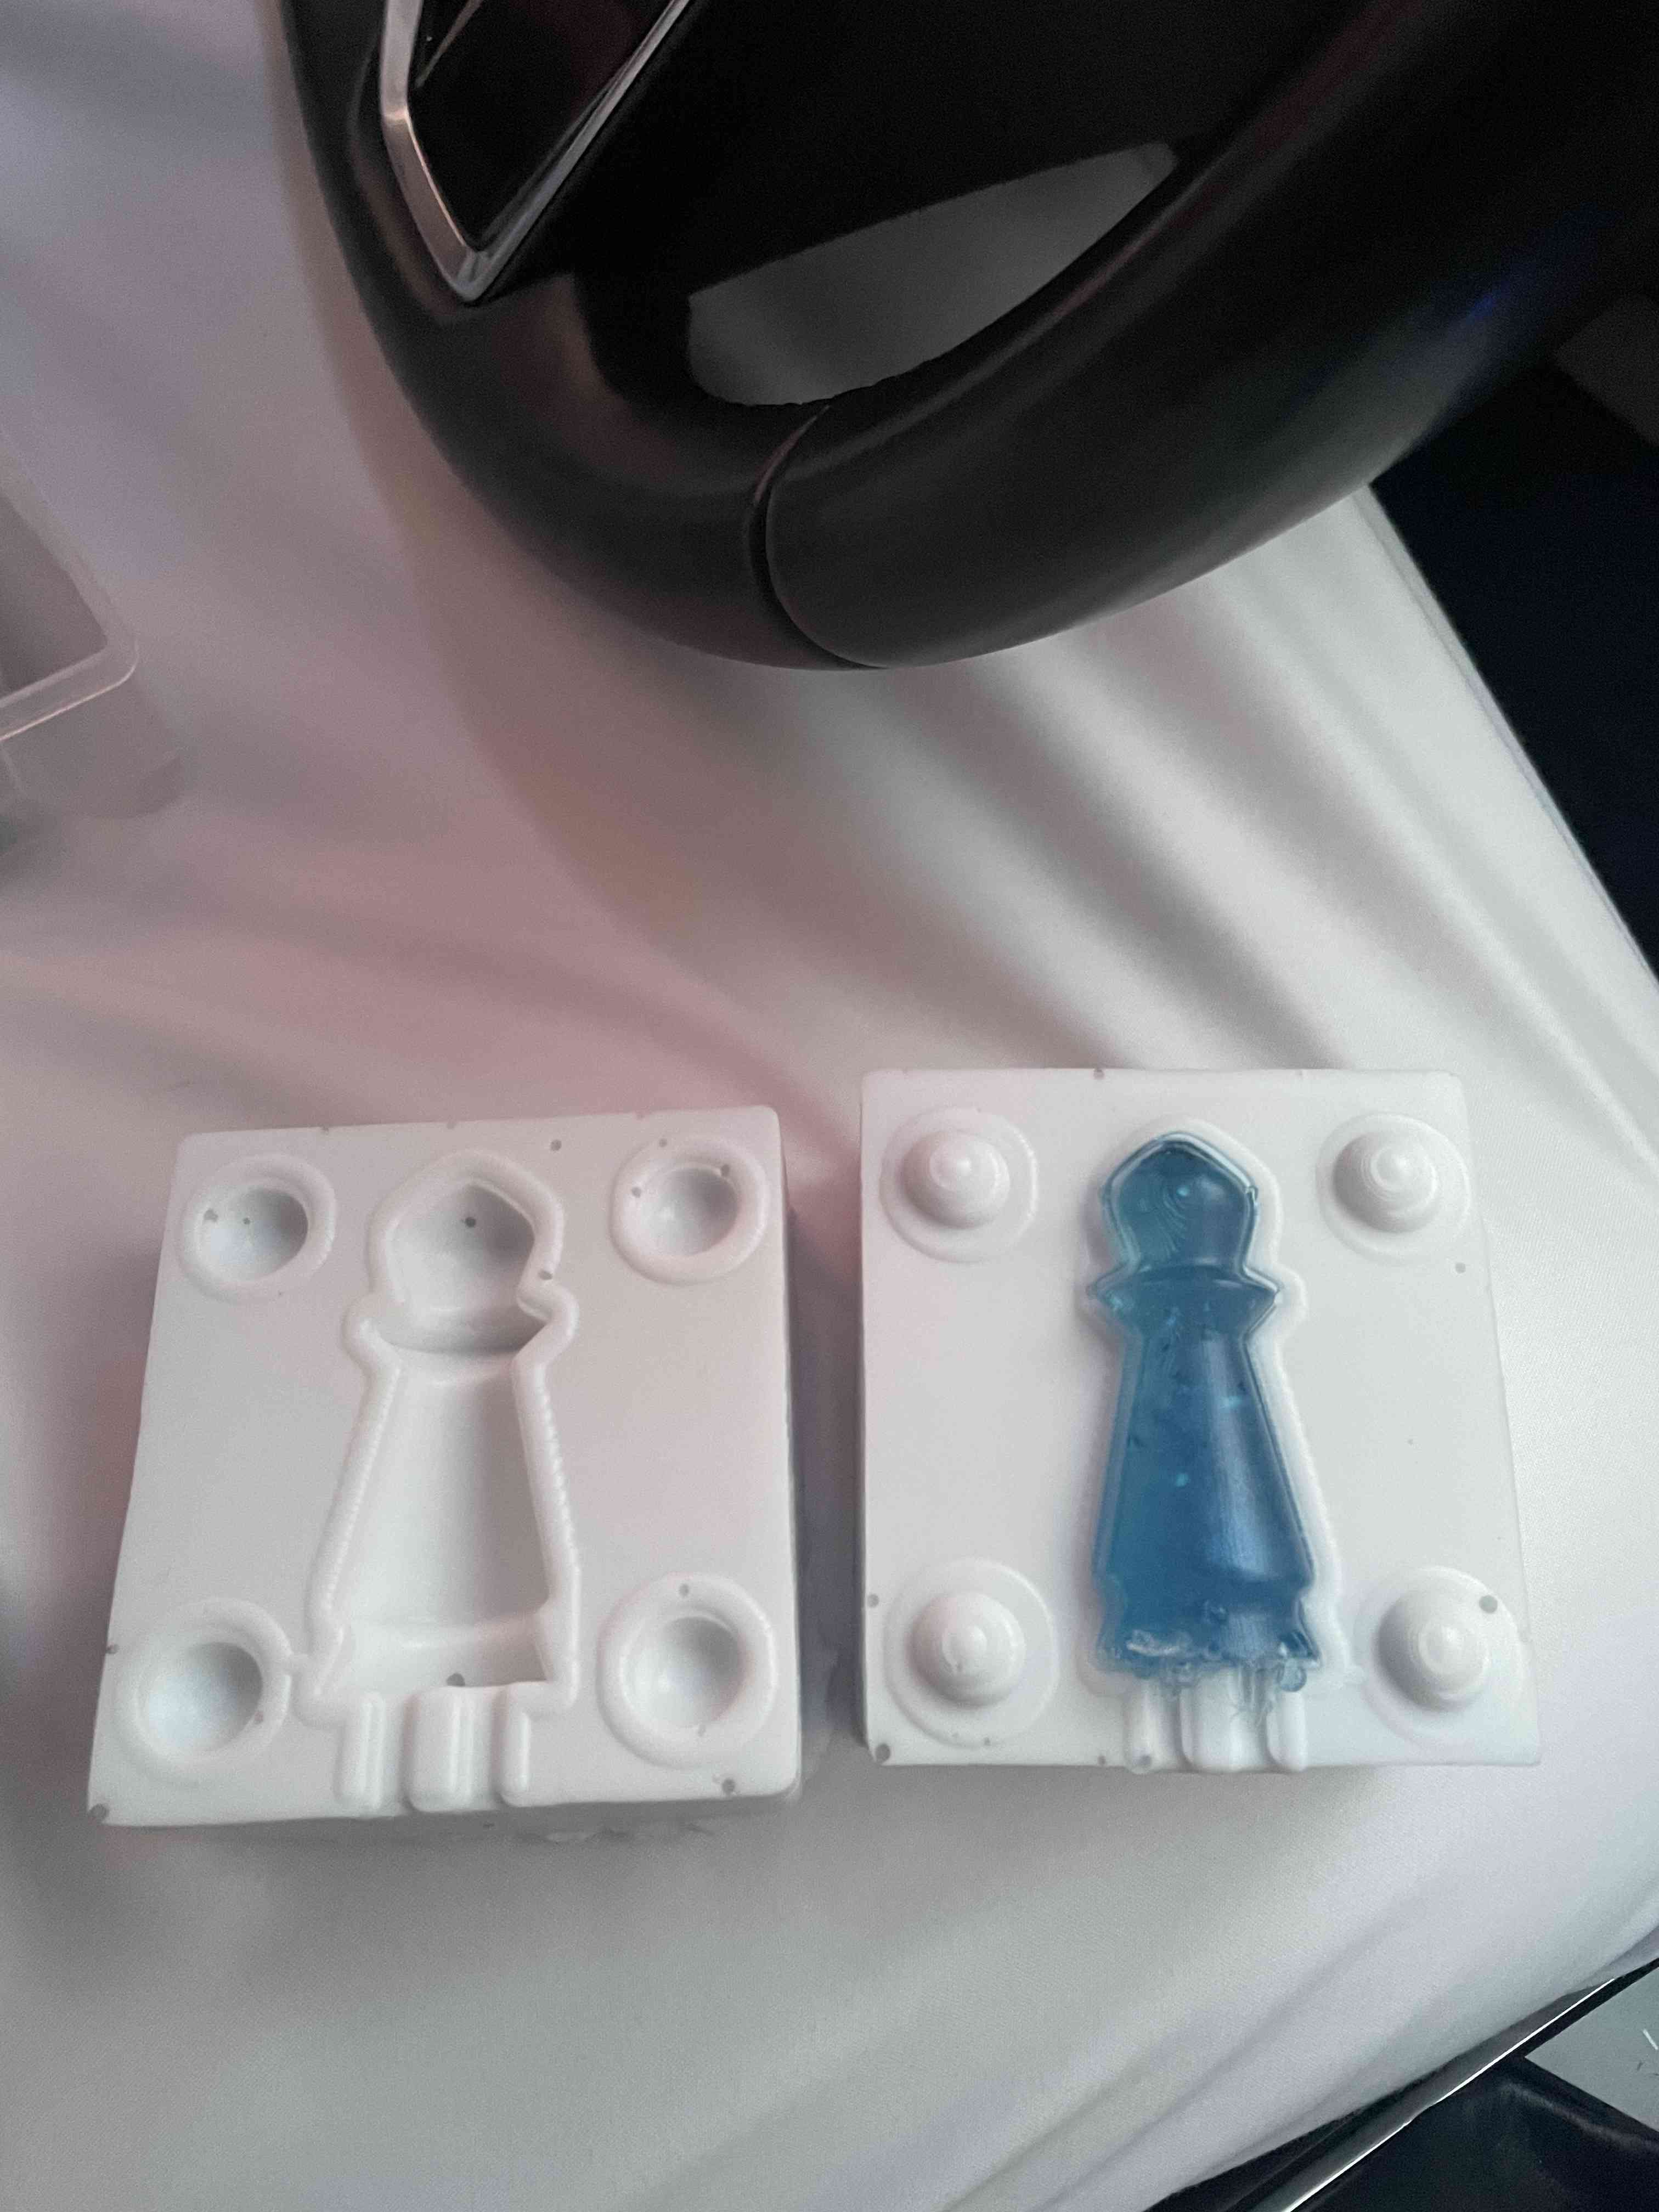
Tape the two sides of the mold together so that the epoxy won’t spill, then pour the mix into the mold slowly and steadily.
Let it cure for 24 hours
after 24 hours open the tap and the mold
Finaly, Clean it:
Since all of us were sharing the same working table (large decent one for safety!), while working on different materials, we took the same safety precautions even if some of the martials were safer than others, to reduce the risk of accidental contamination. We read the safety precautions in the datasheet and followed it to ensure everyone is safe while working and handling the material. We wore two sets of vinyl gloves on top of each other, tied any loose clothing with tape, wore plastic aprons, a set of goggles, and an industrial mask on top of our existing masks.
Mold Max 14NV:

Advantages:
Doesn’t require vacuum degassing
Has low viscosity for easy mixing and pouring
Disadvantages:
Not safe to touch skin
Has limited shelf life
Safety:
requires a lot of safety measures as it is dangerous to touch the skin and to inhale.
Safety datasheet:
EpoxAcast™ 690
Advantages:
Rigid if done properly
Pure and crystal look
Disadvantages:
Ratio 100:30 by weight which means that we need to be careful while taking the measurements
Result is full of bubbles if heat/vacuum is not used
Safety:
requires a lot of safety measures as it is dangerous to touch the skin and to inhale.
Safety datasheet: