WEEK05. 3D scanning and printing
This week I have worked on the 3D printers and scanners that are present in the Santa Chiara Lab.
Assignments
- Group: Test the design rules for your printer(s)
- Individual: Design and 3D print an object (small, few cm3) that could not be made subtractively
- Individual: 3D scan an object (and optionally print it)
3D Printing
My 3D Printer
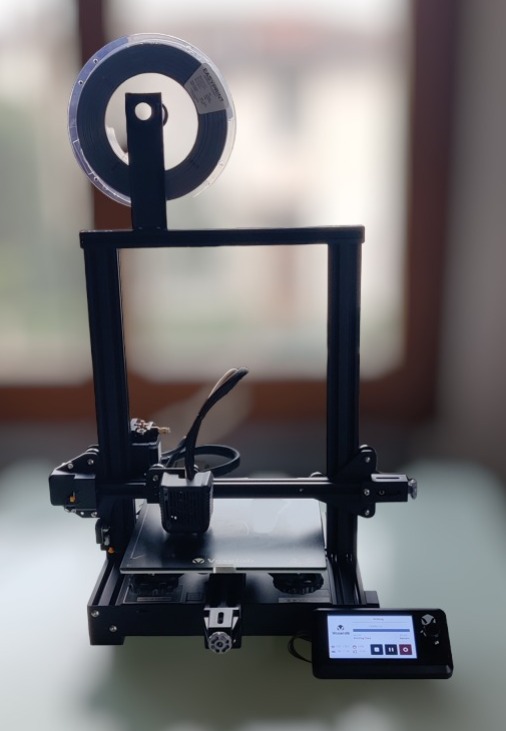
Last year, some special friends of mine gifted me a 3D printer for my birthday so I could work on my projects and future dreams. I started the week in my home lab, trying to print a few small things. Then, I went to the Santa Chiara Lab to try different printers, helped by my instructor Simone. My home 3D printer is a filament-based one, the Voxelab Aquila, which is easy to assemble and install.
Preparing the Printer for the First Print after Months
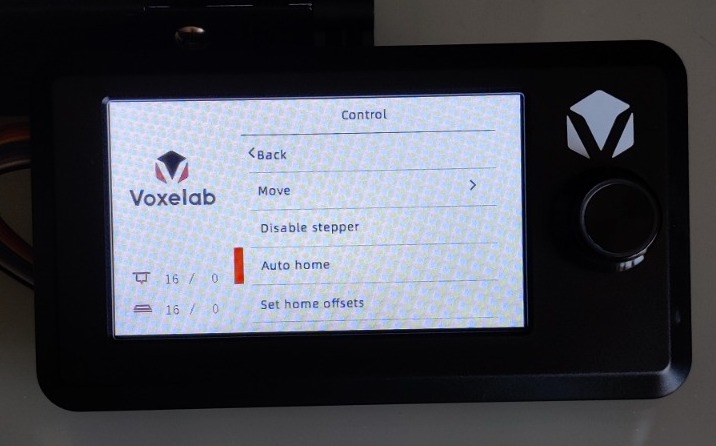
I turned on the printer and began as usual by giving an autohome command to set the extruder and bed plate in position. However, I saw that the printer had become blocked and was not responding to any command. Feeling a little scared, I shut off the printer using the main button. I then repeated the same commands, but still got the same results, getting more scared each time that I might have broken my new printer. A few minutes after contacting my instructor, I started inspecting the printer and saw that the bed belt was completely loose. Fortunately, after setting the belt in position, the printer started working normally again.
LESSON LEARNED: Before starting to print after months of inactivity, check that all the components of the printer are in the right position.
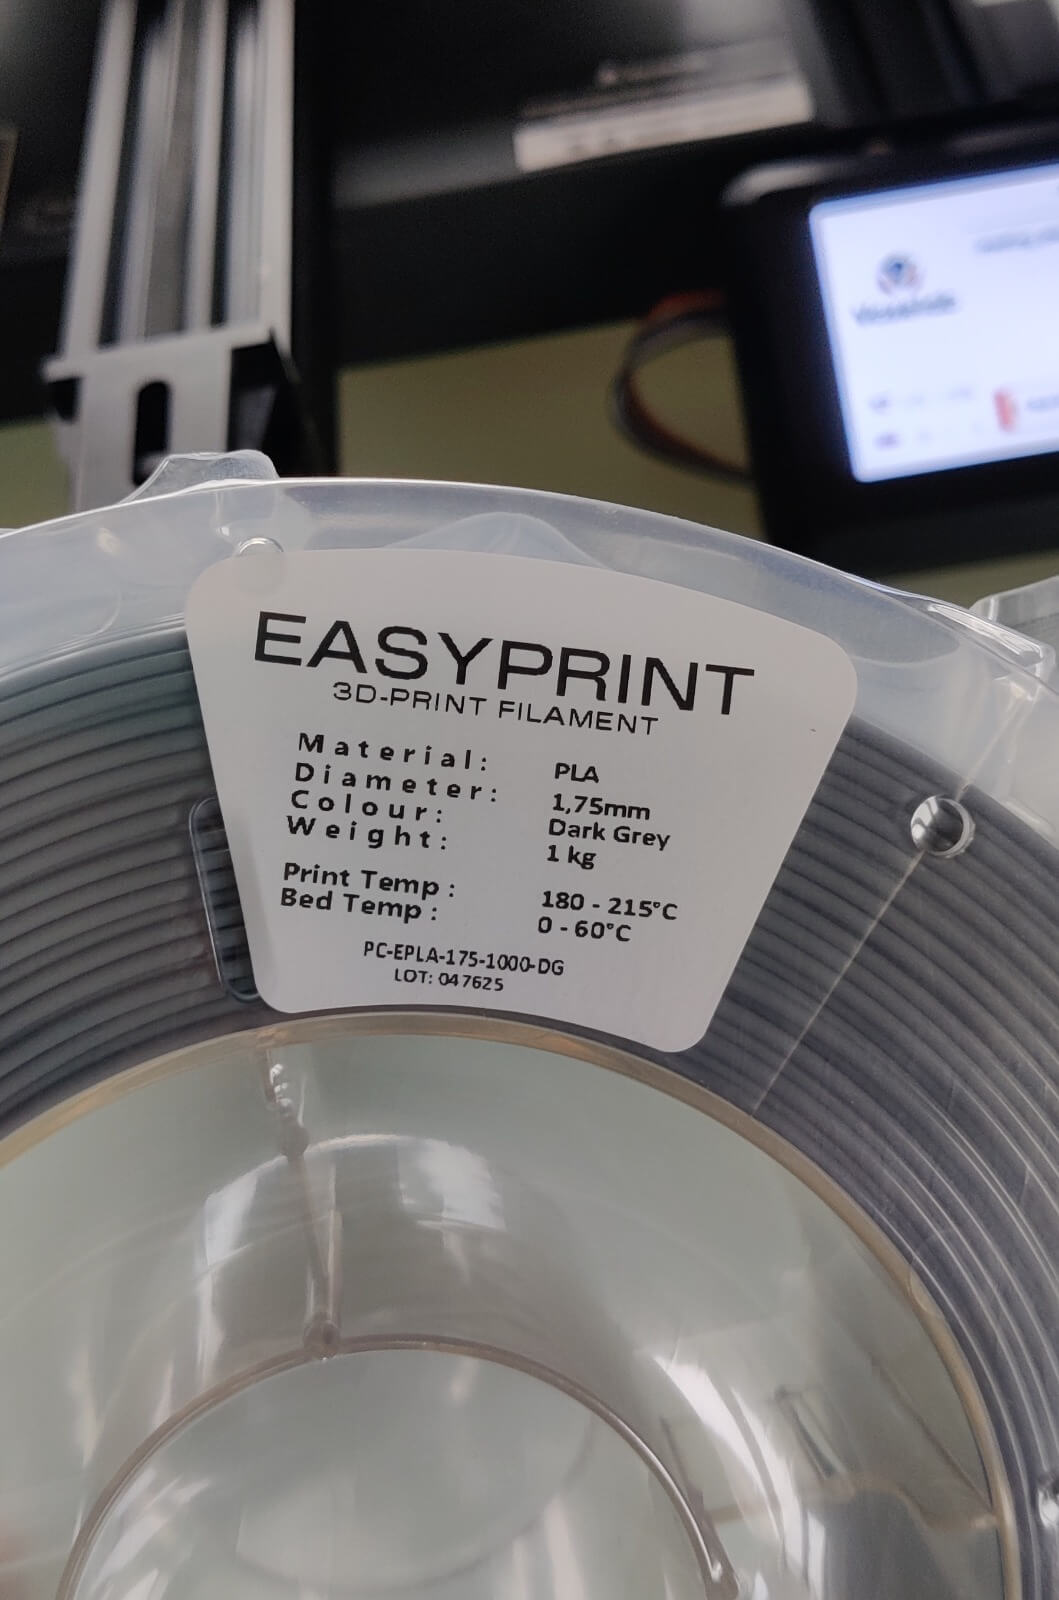
The PLA Filament
The Voxelab Aquila uses a filament with a diameter of 1.75 mm. This week, I used a PLA filament. In the picture below, you can see the technical specifications of the filament. The suggested print temperature for this filament is 200 °C, and the bed temperature is 60 °C.
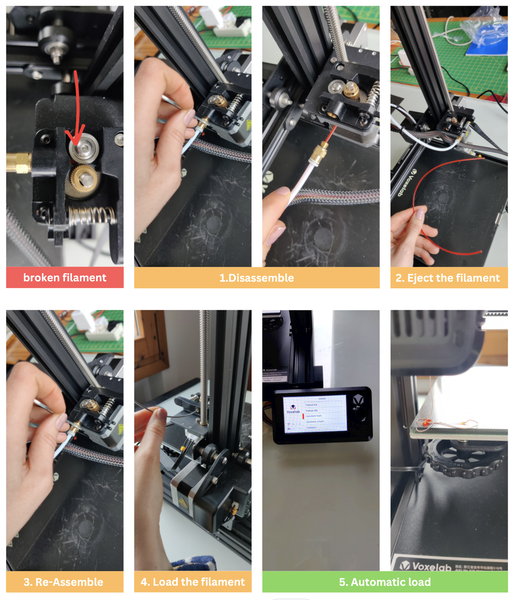
Changing the broken filament
Unfortunately, I broke the filament exactly in correspondence of the filament load components, so the former was no more able to load or unload the filament. As solution to replace the broken filament I decided to disassemble the connector using the printer tools kit. Then, I eject manually the filament, I reassemble the connector an then the printer it is ready for the automatic load command. The new filament is then loaded and the printer is ready to print the new object.
1. Slicing with Ultimaker Cura
I printed different objects, some designed by me using Fusion 360, and others downloaded from Thingiverse. For slicing, I used the open-source software, Ultimaker Cura.
1. Voxelab Aquila: Machine Setting
The first time you use the Cura software, it is important to set the right parameters of the printer you will be using.

2. Import of .stl file
The .stl file of the object that will be printed is sliced using Cura. Infill of the infill density suggested is in the range 17% - 30%, additionally other slicing settings are chosen.
3. Export the .gcode file and save it to the removable disk
The output of the slicing process is a .gcode file that collects the path that the extruder has to follow layer-by-layer to build the imported object. Save the file on a removable disk, especially on the SD card, so you can plug it into the appropriate printer input. Check the support that are projected to print accurately the object.
2. Printing
1. Autohome
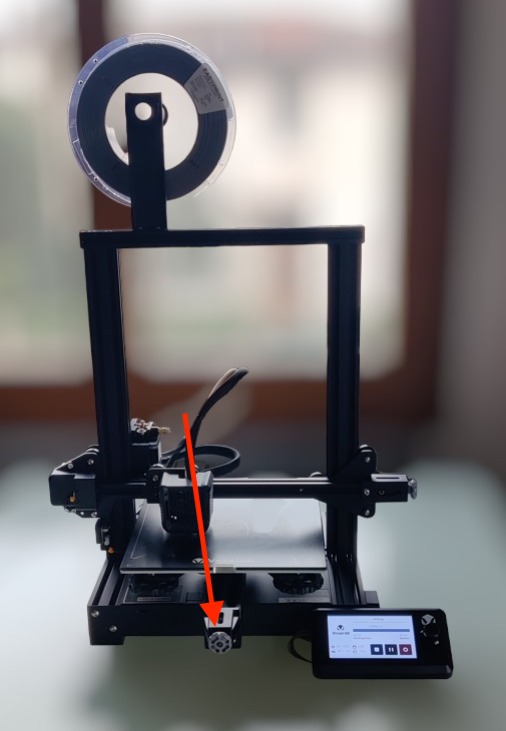
Firstly, the autohome command is given to the printer to set the extruder and the bed plate in the right position.
2. Preheat PLA
To optimize the printing procedure, usually, just after turning on the printer, I select the preheat PLA command. In the meanwhile, I finish exporting the .gcode file from my PC.
3. Print the .gcode file
From the main menu, select "print," then the name of the file to print, and the printer starts to print.
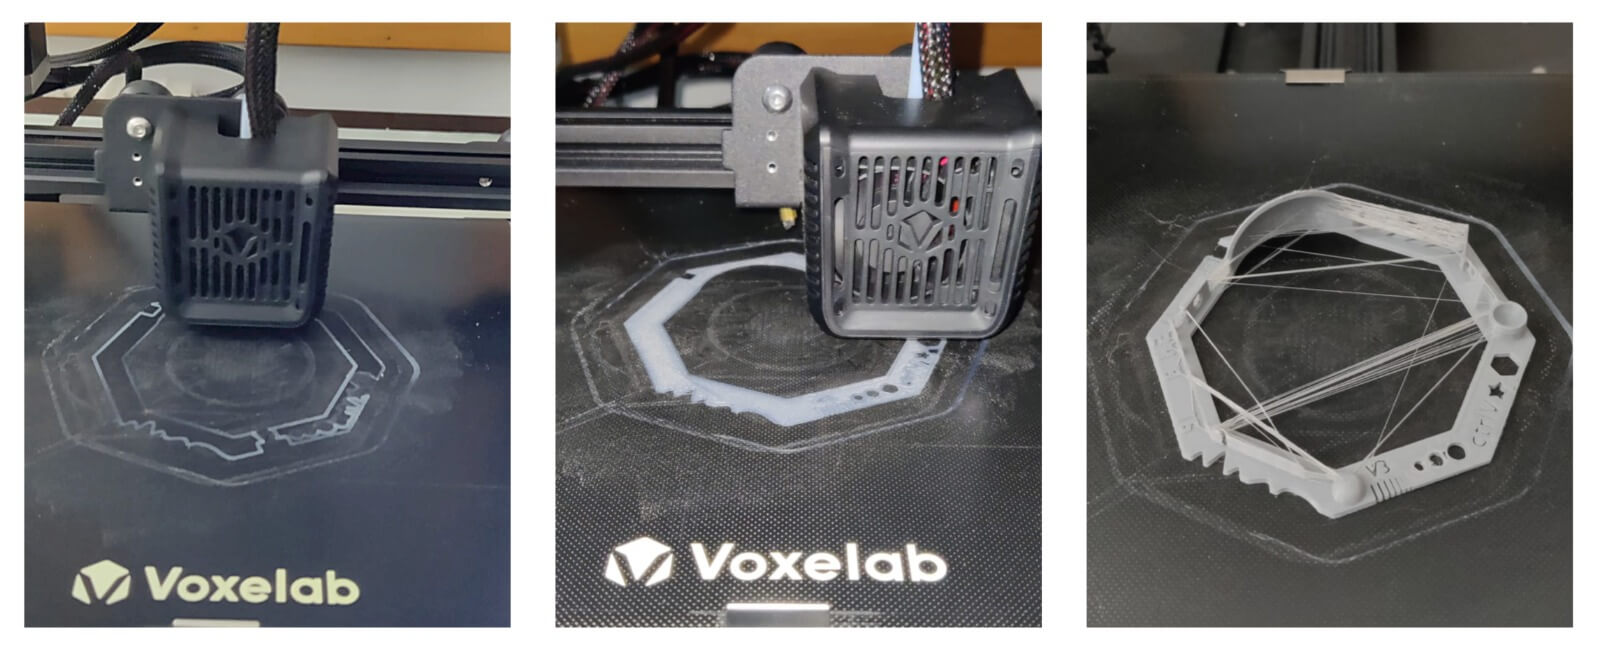
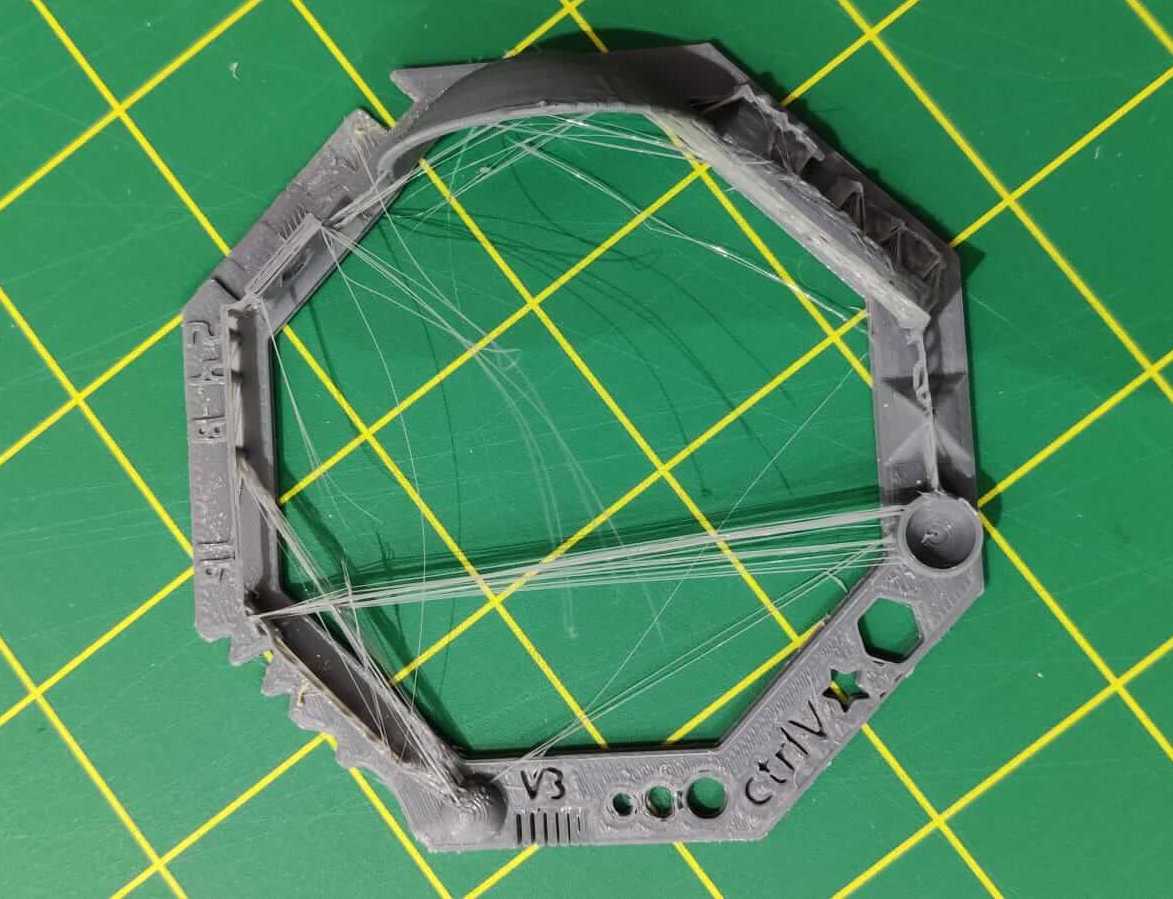
3D printer test
I downloaded the Control V test from Thingiverse, then then I followed the pre-printing and printing processes described above. The room temperature is about 14 °C The printed test has lots of stringing.
Printed objects
For each printed object, I followed the steps described above.
1. Campingaz knob
Firstly, I printed the knob for the Campingaz fire in the kitchen of my minivan.

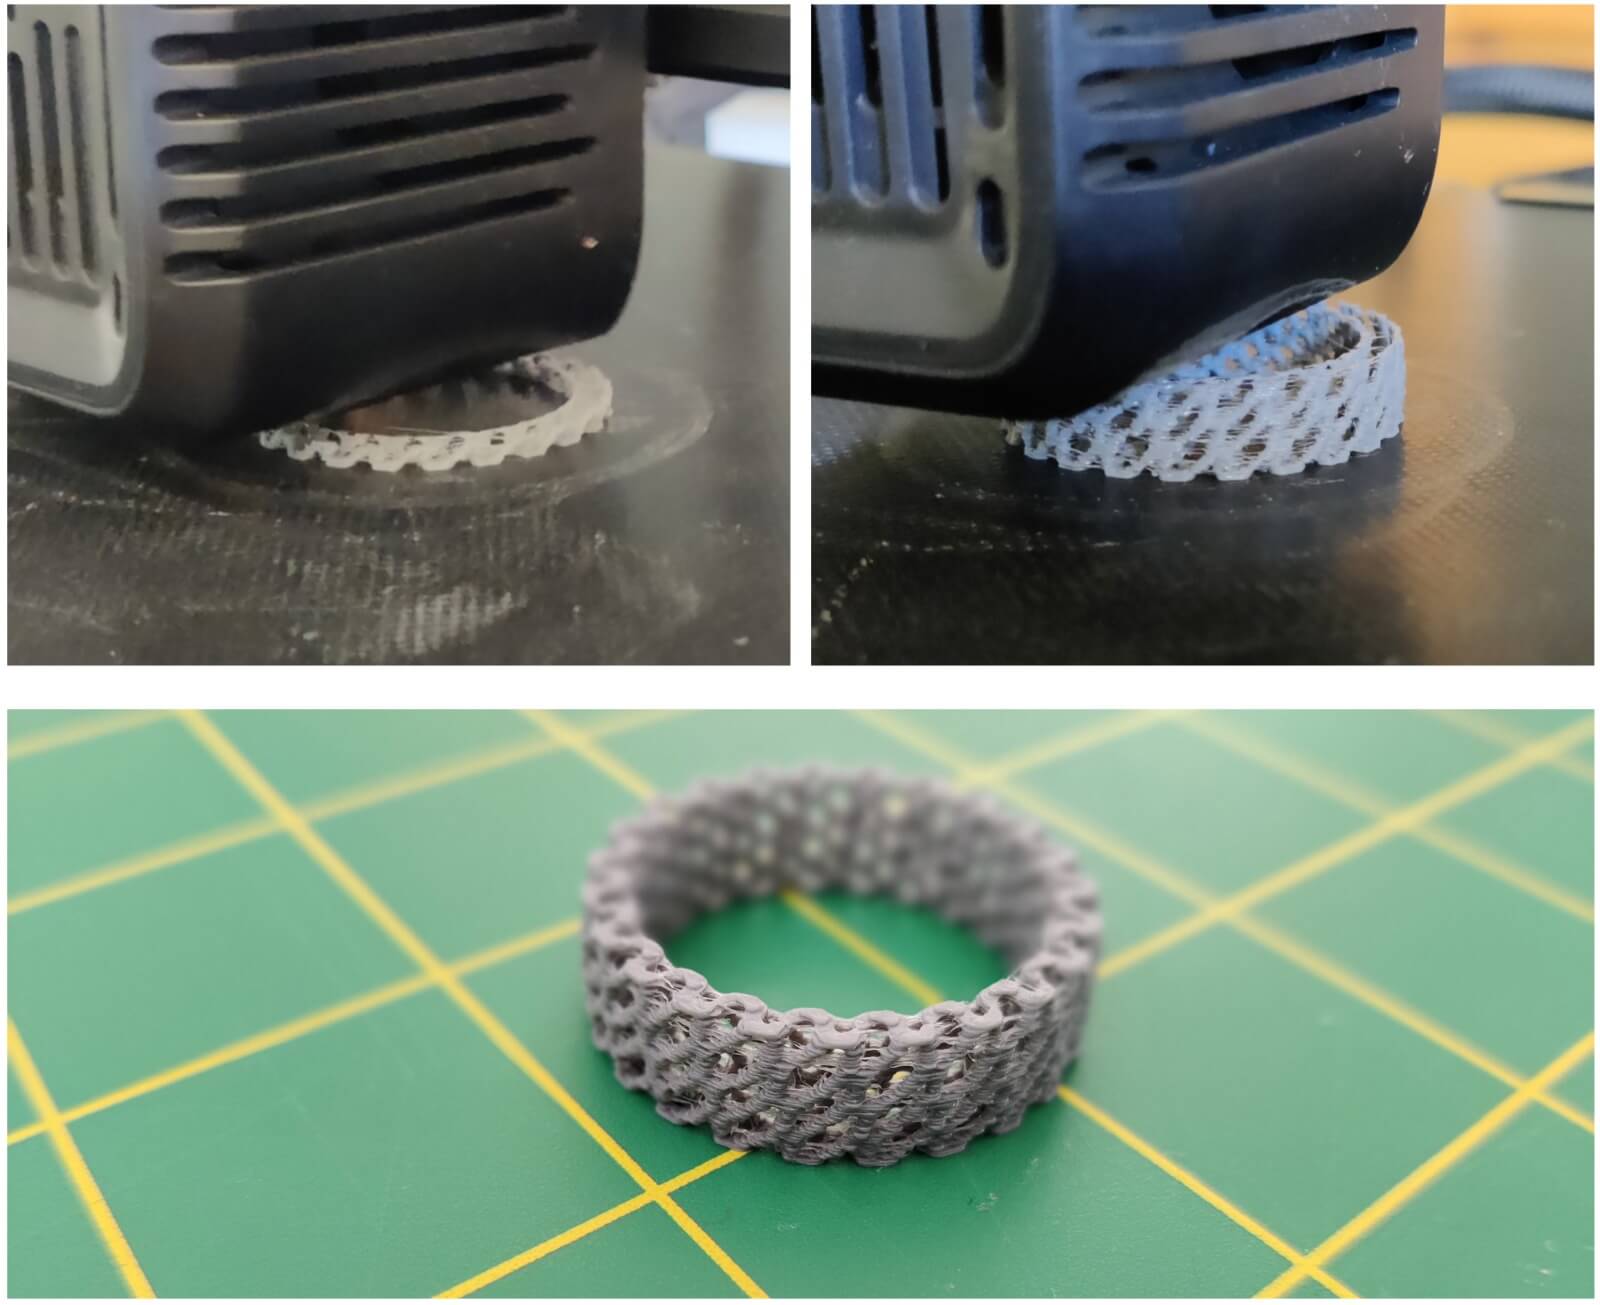
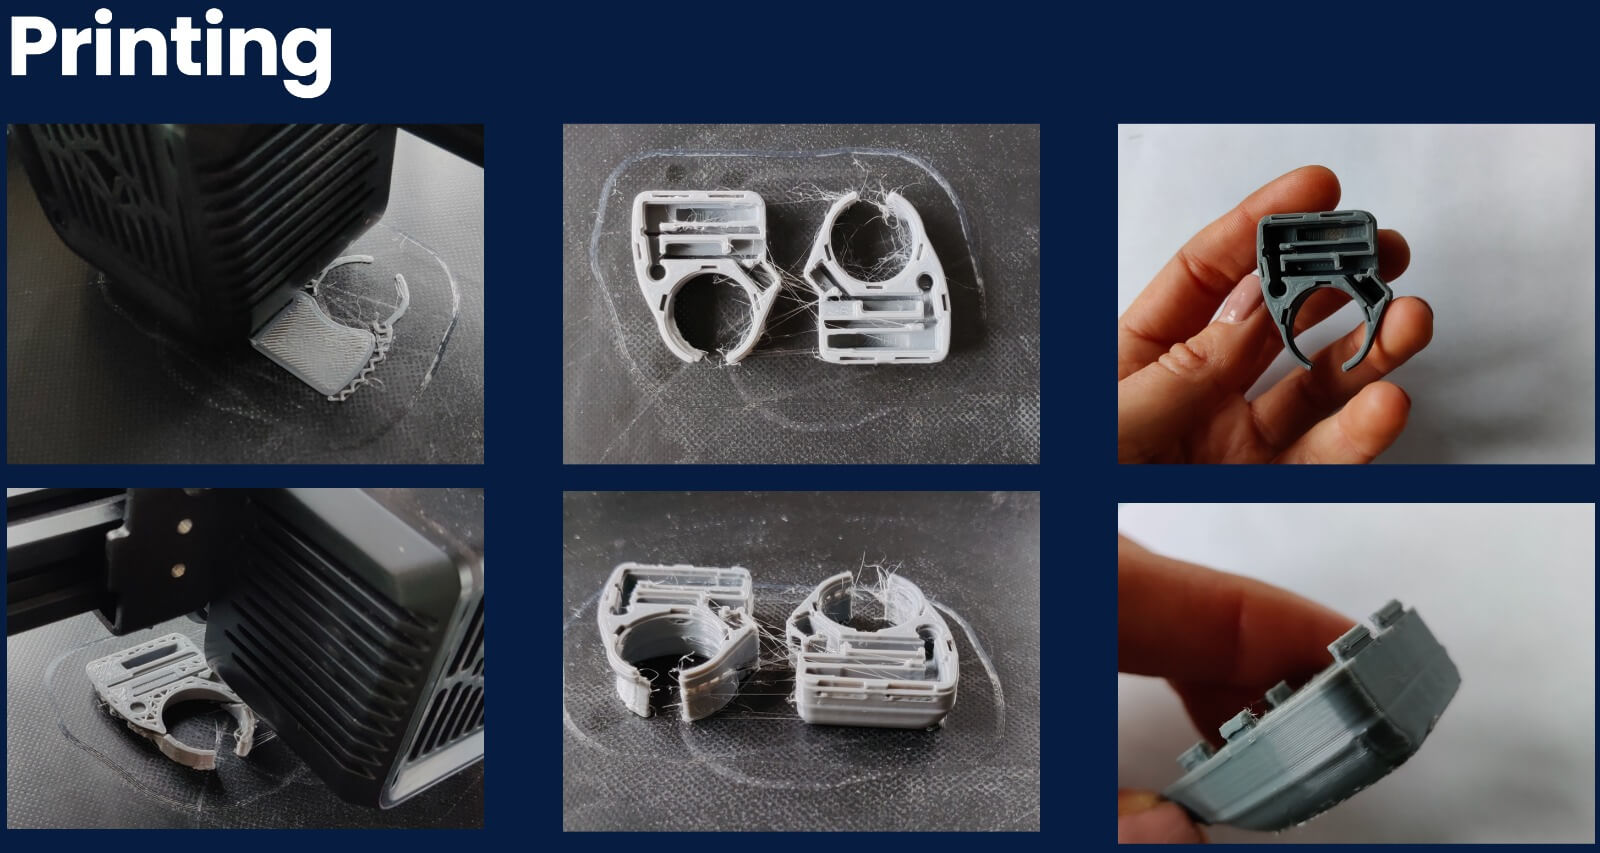
2. Ring
Next, I printed a ring found on Thingiverse.
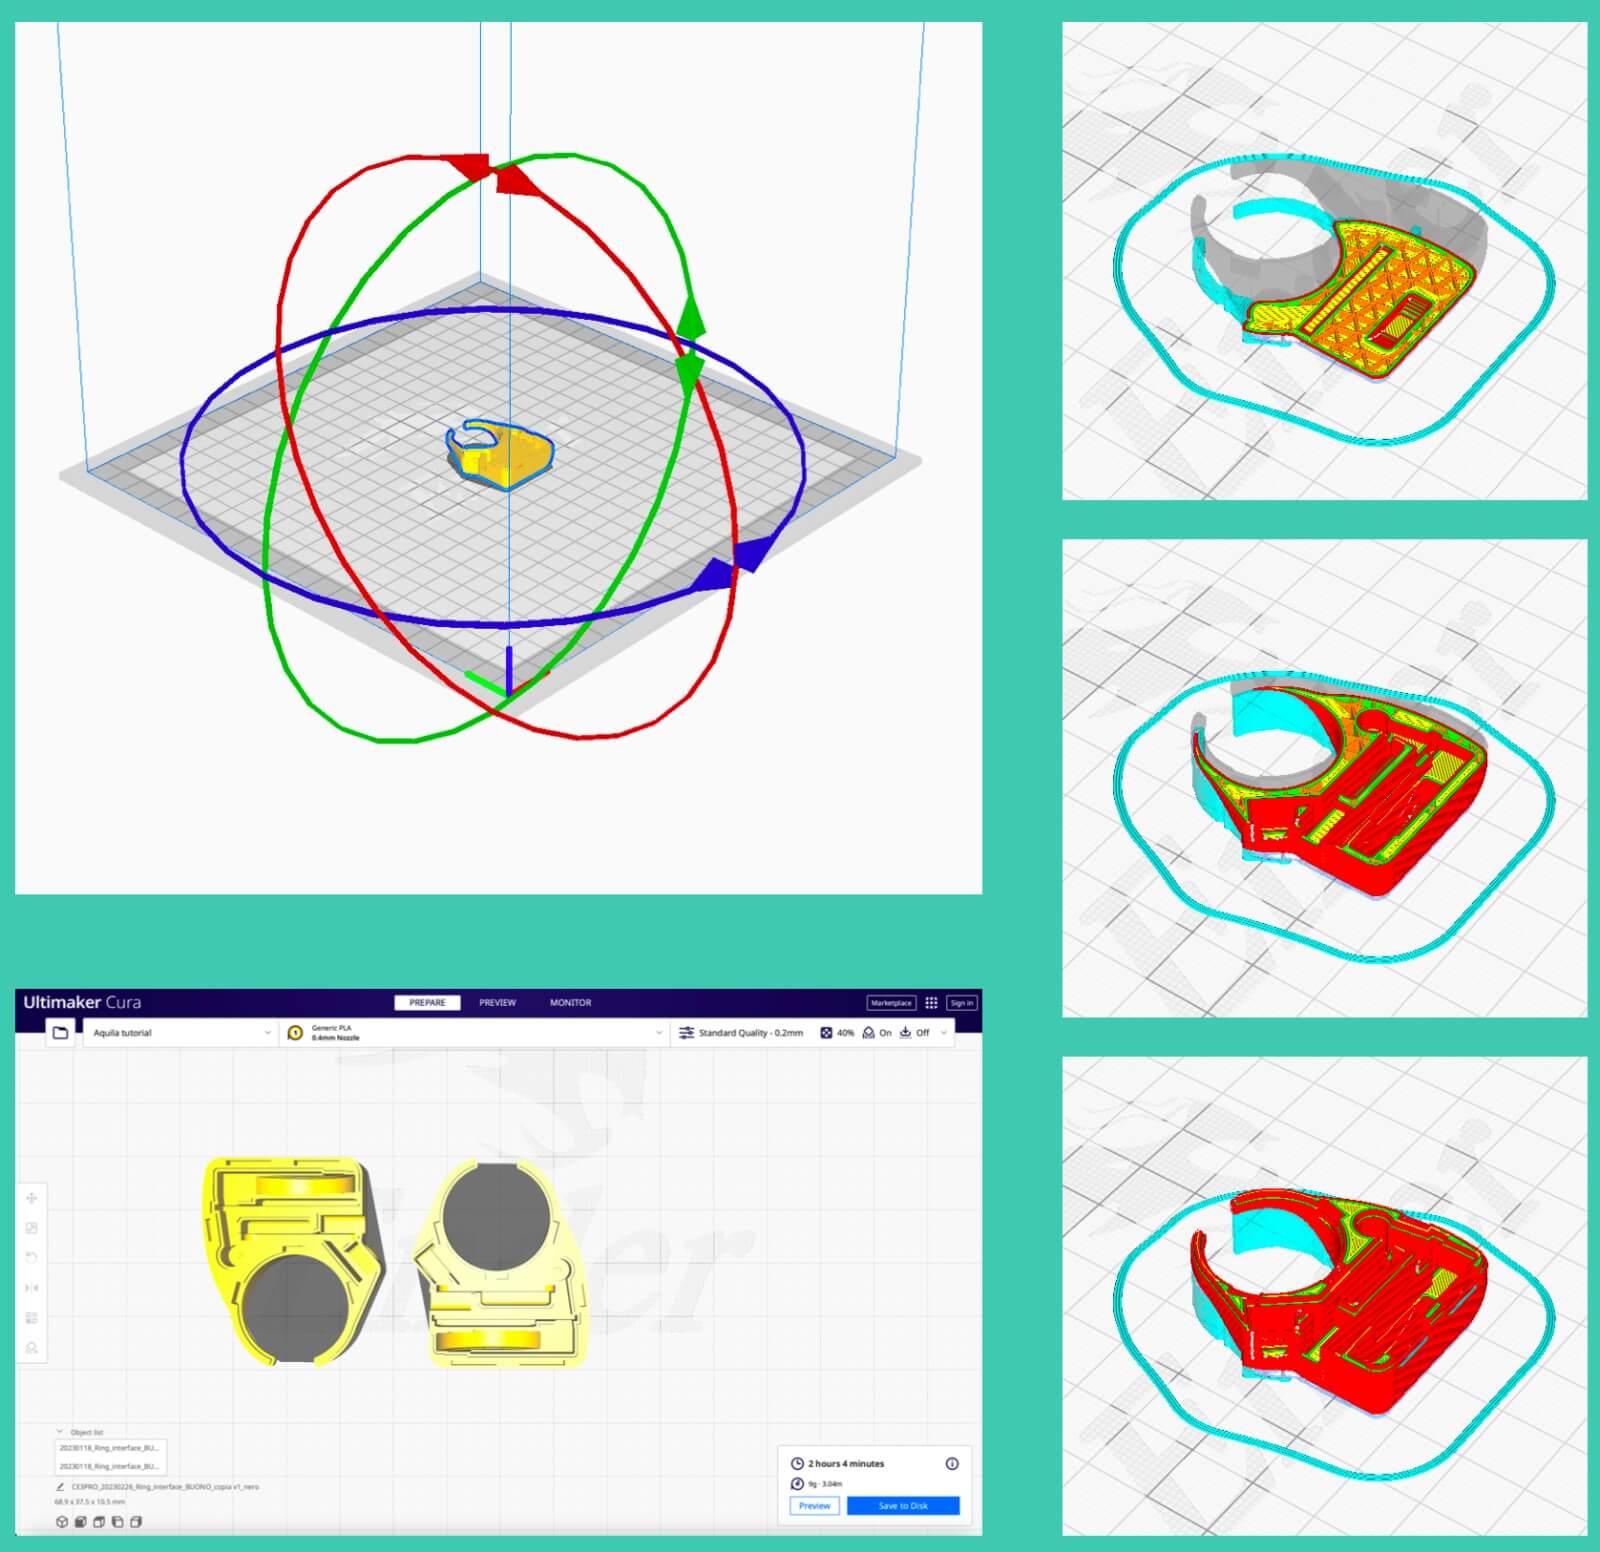
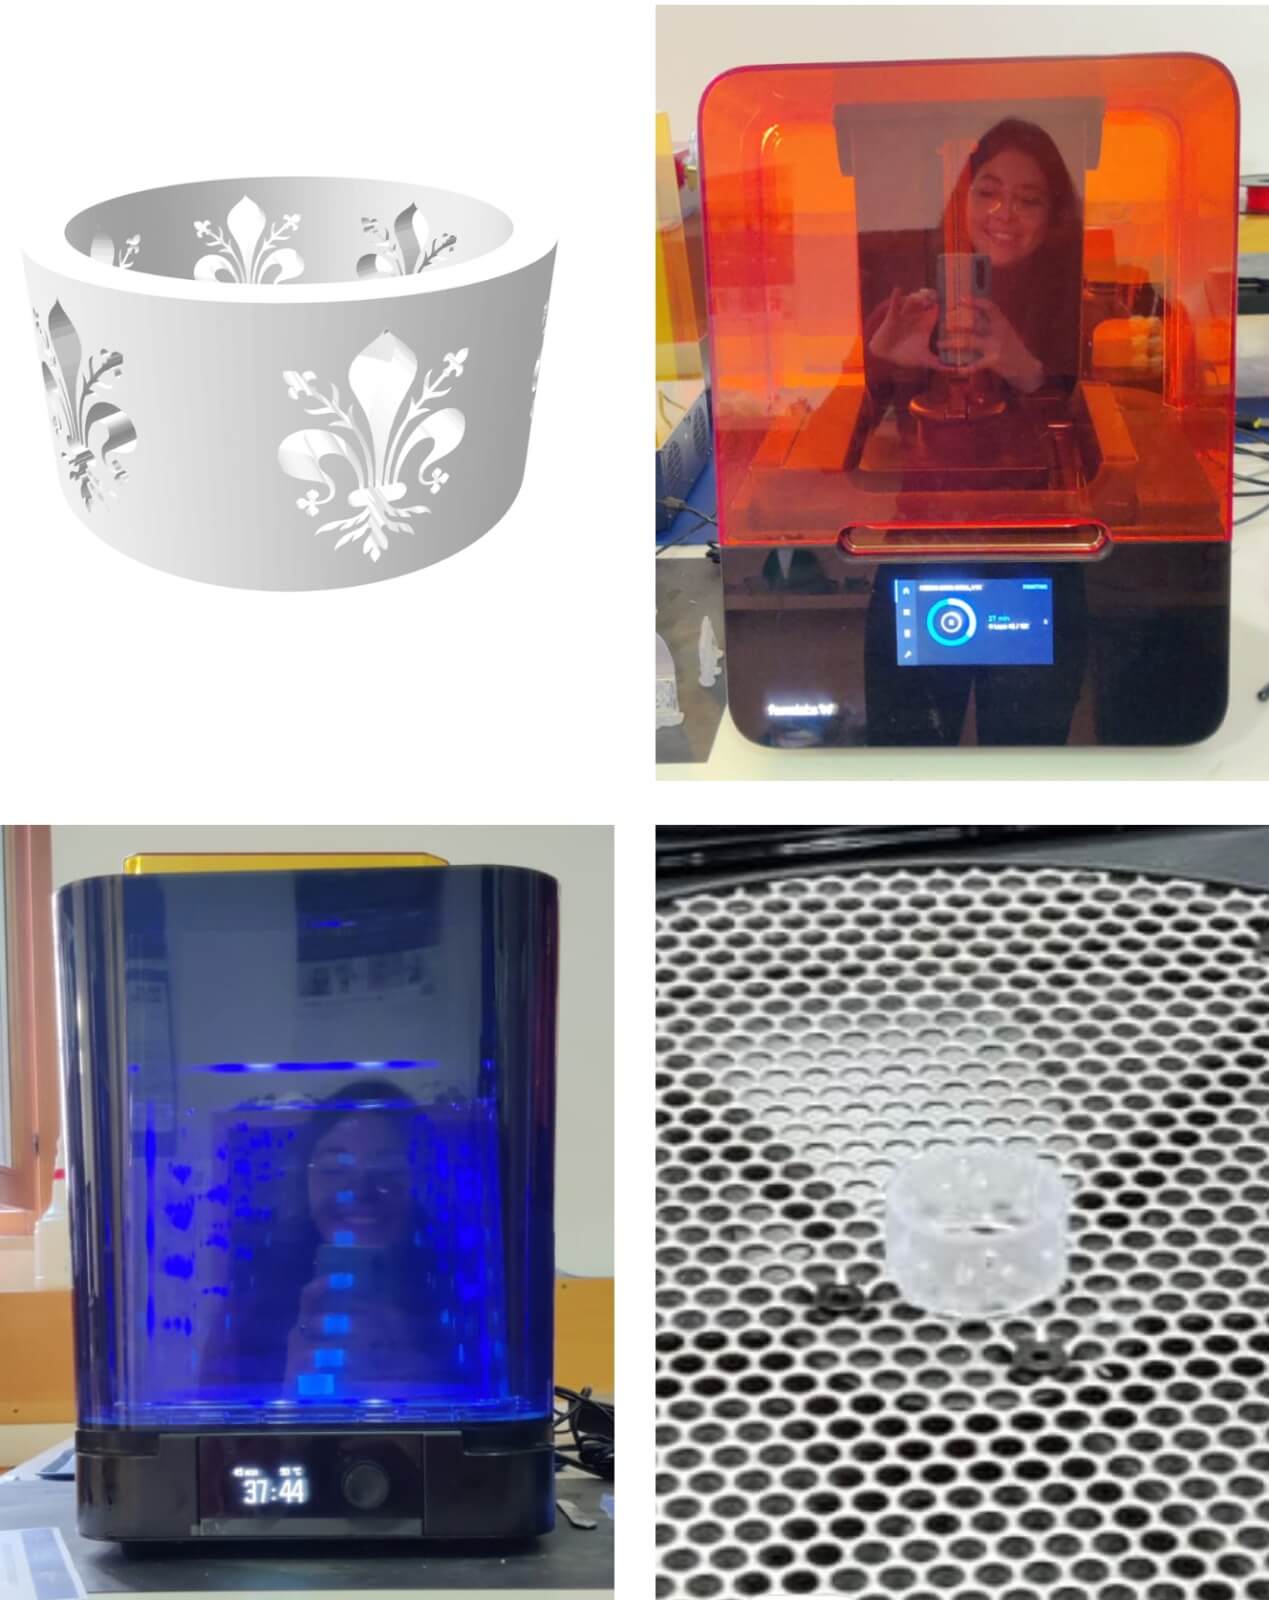
3. Ring project
I decided to print the ring that I designed for my university exam. I was curious about the results.
Conclusions
My printer is an entry-level model, so the results are not extremely accurate, but I'm really impressed by how fast the technology evolves, allowing me to have a home printer at an accessible price. Moreover, the ring project that I decided to print is more suitable for resin printers.
3D scanning
Used software
- Metashape: for the mesh creation through pothos
- Meshmixer: for the adjustments of the mesh model
- Ultimaker Cura: for the slicing and the export of the gcode file
The procedure consists in creating a digital mesh representing a real 3D object using as input photos of it. In order to have a good scanned object it is crucial to good photos, so you must to pay attention to:
- The light should be diffuse ad possible, in order to have an homogeneous light situation as mush as possible. It is better to avoid the direct light rays on the object or on part of it
- 3 round and half: to catch the whole object shape and surface details, you have to rotate around the object; once at zero-level, then onclined at plus and minus 45°. Finally more photos are requested to build details like the top and the bottom of the object. More photos are also suggested to details that form undercuts in the real object.
- Objects with surfaces that reflexts the light are not siutable for this technique, since the software cannot build a good mesh.
- Insert particular symbols might help the software in identifying reference posints to align the photos in the right position.
- In order to increase the accuracy of the mesh can be useful to use as background mono-color layer, in contrast respect to the scanned object.
- It is suggested to use fast frame-rate shooting, in order to have focused photos.
- During the shooting phase the object must be motionless as much as possible
- Decide a photo shoot set in order to work comfortable and to be able to take picture to the object maintaing an equal distance.
- The object must be the main element of each picture and must be positioned at the picture center as center as possible. Also bigger as possible, but paying attention to some useful reference points.
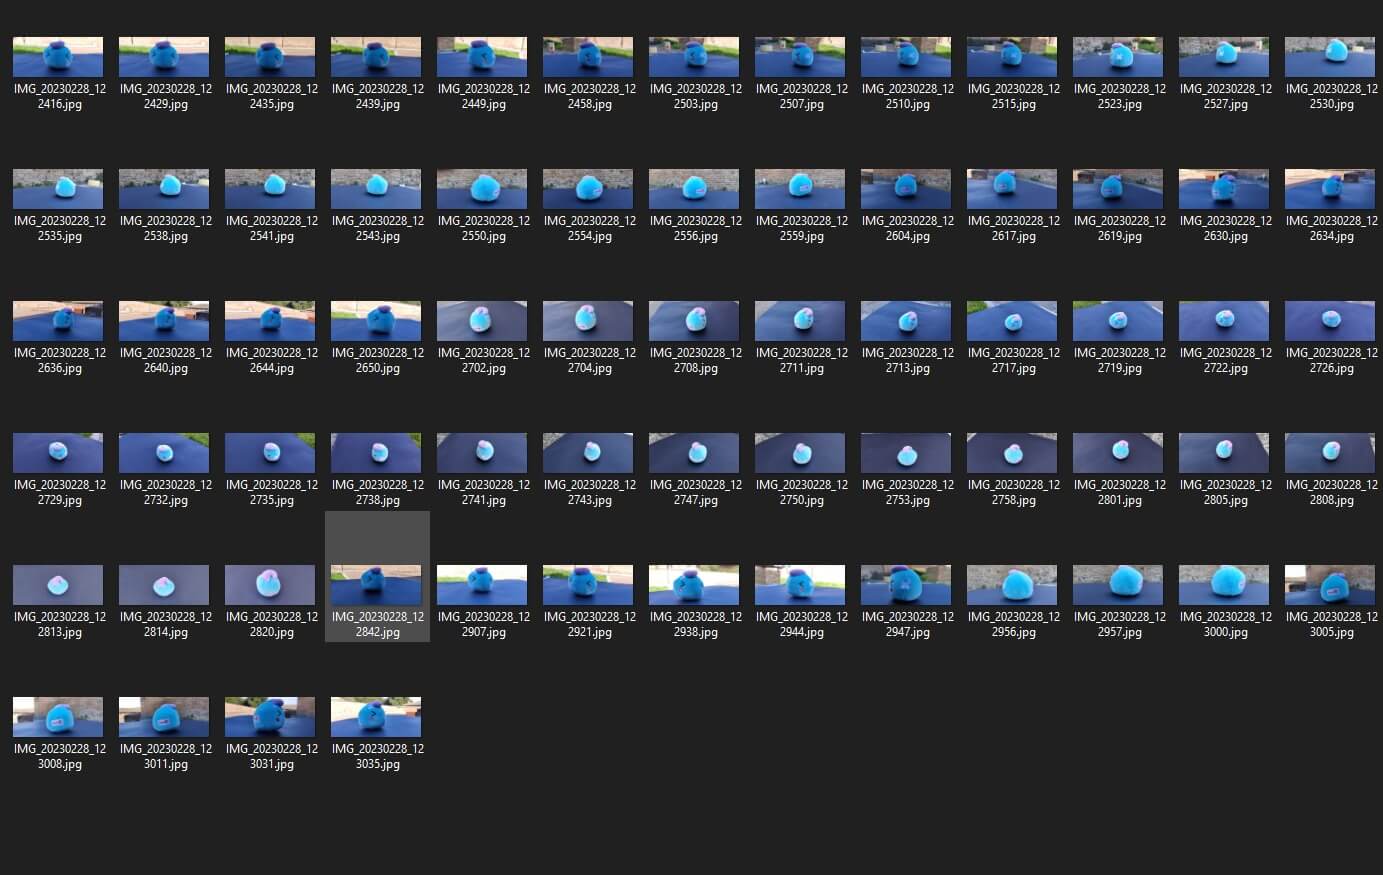
0. Create the input photos
I chose a suitable and random object to be scanned and I prepared the photo shoot, then i started with the three round and half to my real object. It was windy outside, so I fixed the object to the floor using the tape.
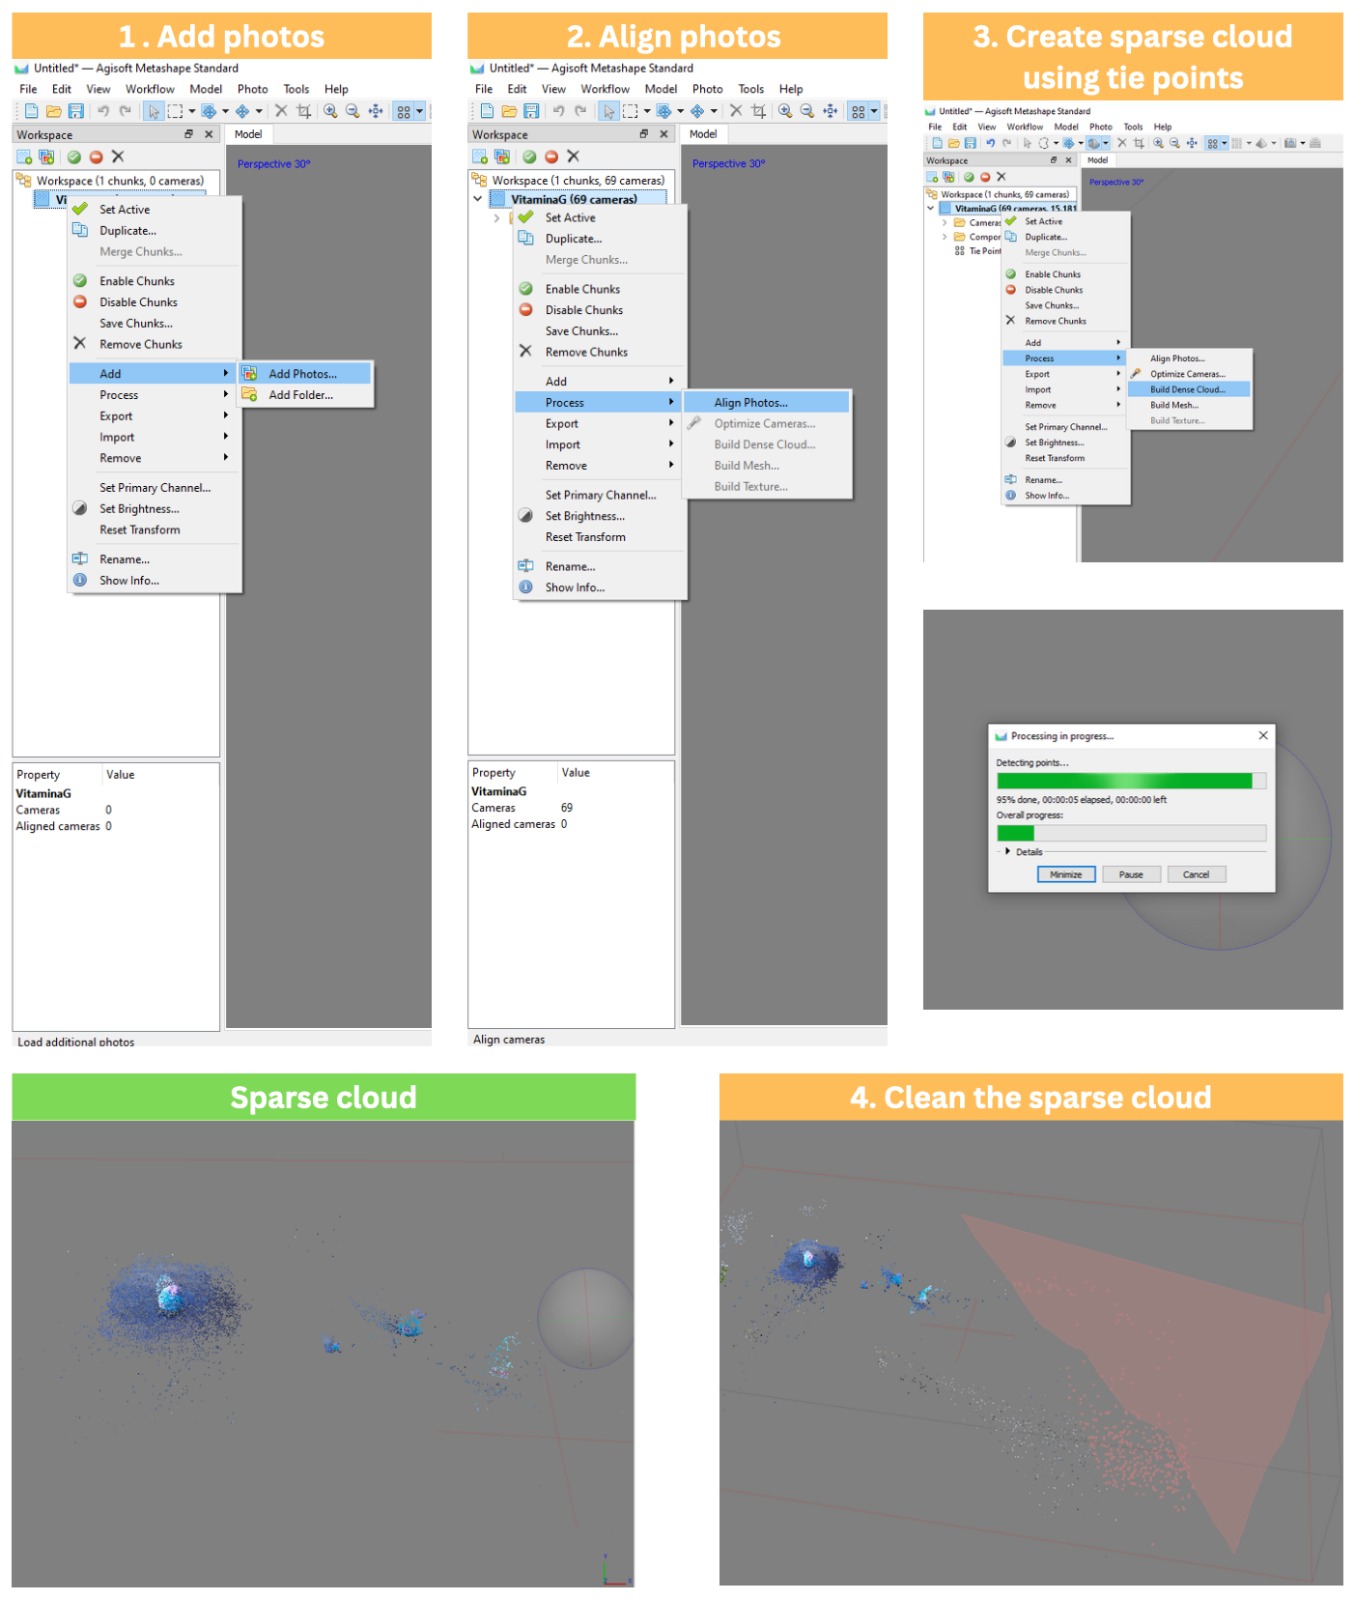
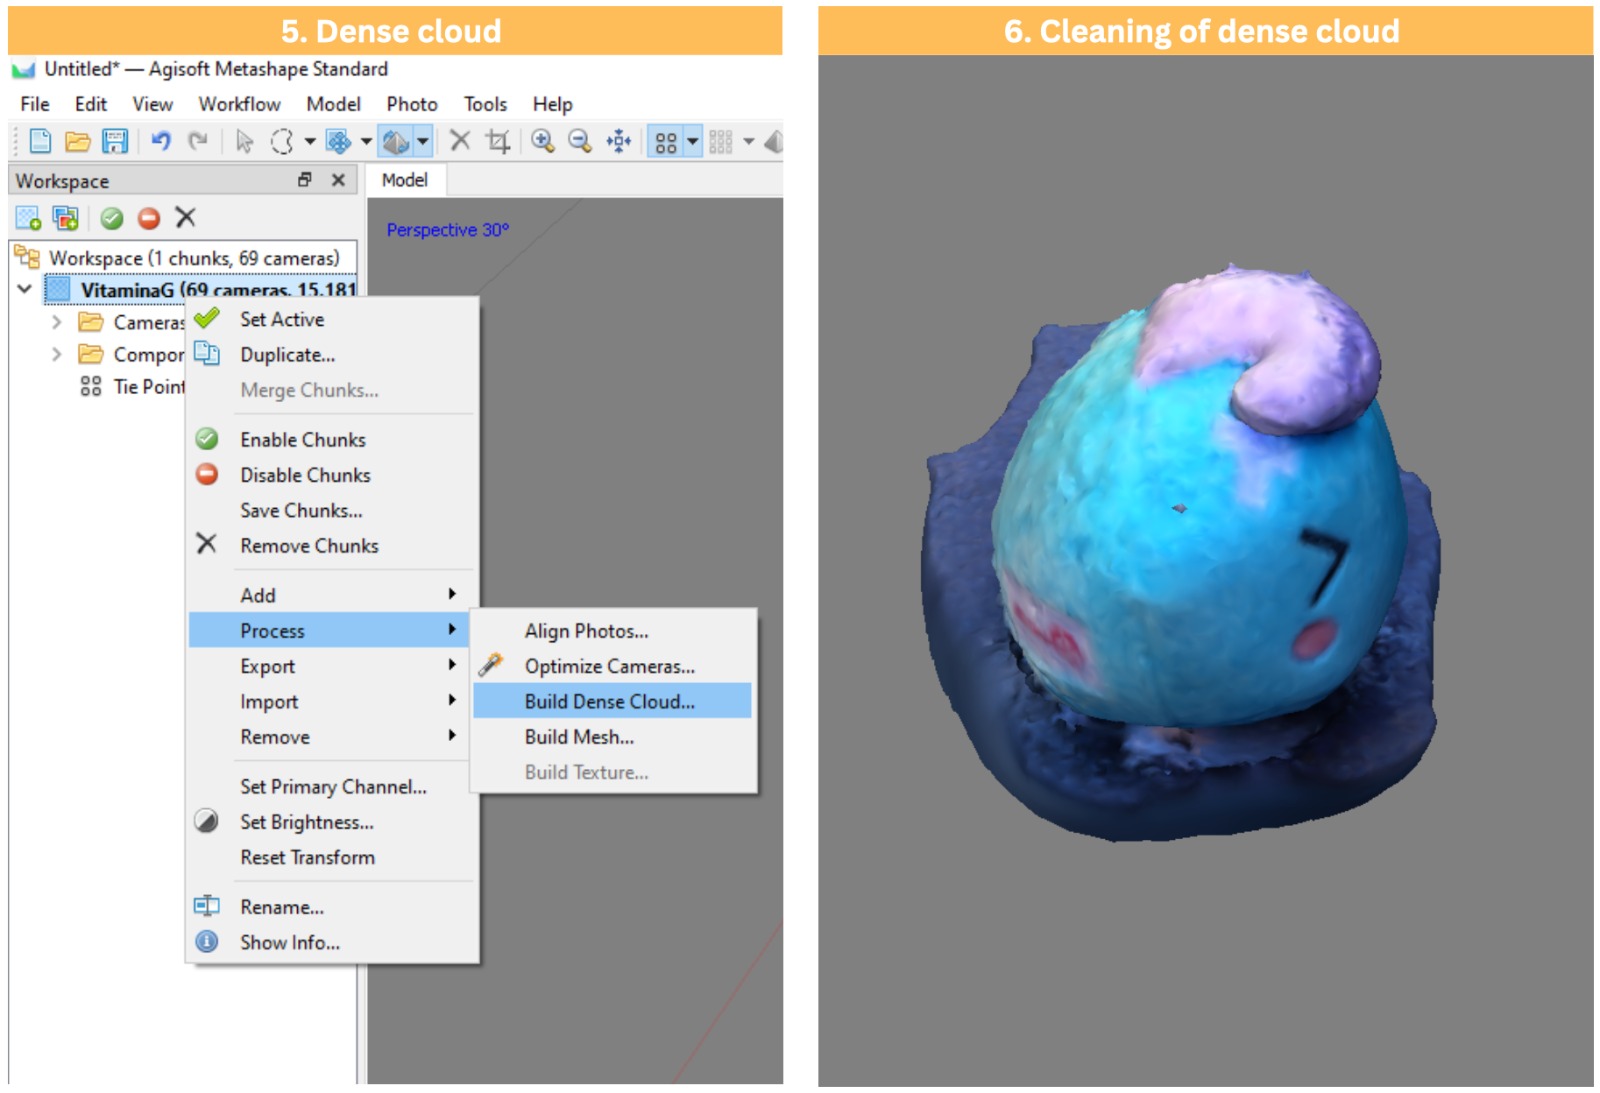
1. Metashape
Now it is the Metashape turn:
- The chunck was renamed and the photos are imported, right click on the chunck > add > impot photos.
- The sparse cloud it is build using the tie points. The sparse cloud is then cleaned by tie points thet are not relevant for the mesh building.
- Then the dense cloud it is build and cleaned.
- The object it is exported in .stl
- Finally the mesh has been built.
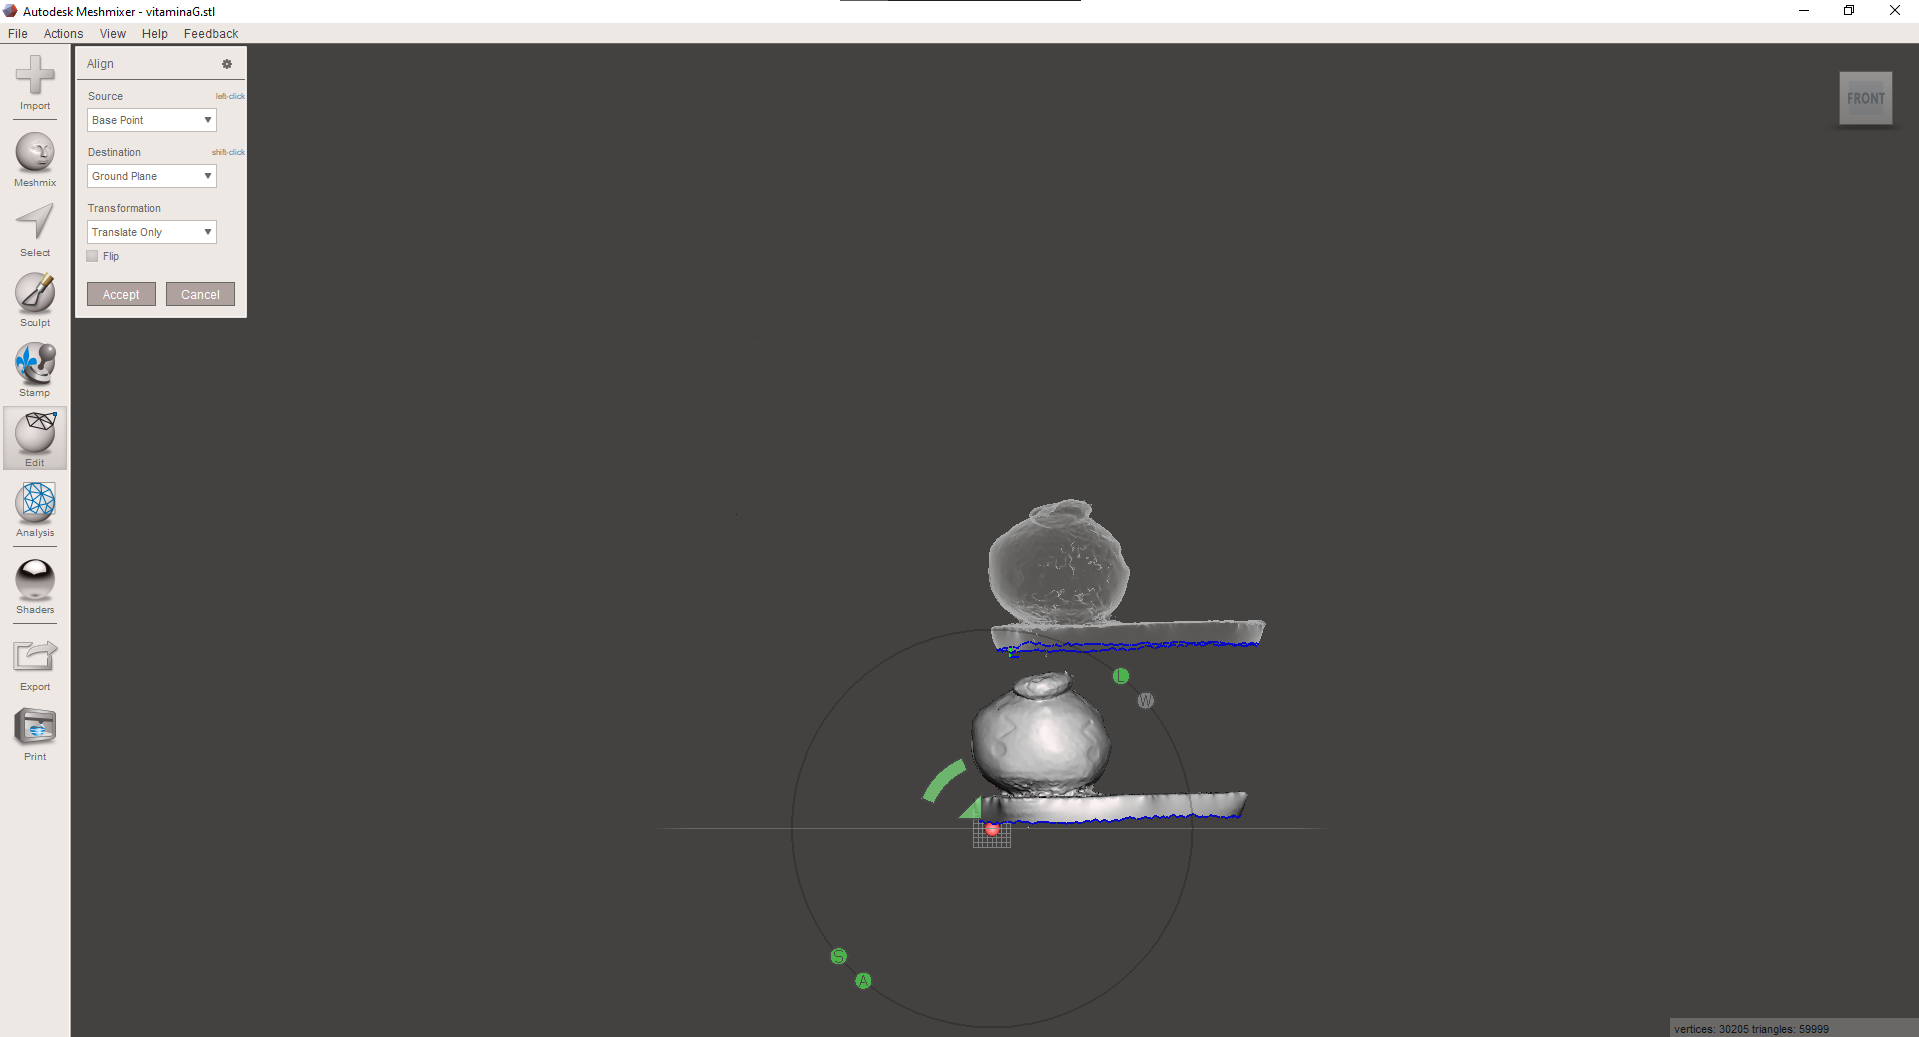
2. Meshmixer
Using Meshmixer the object it is scaled, closed on the bottom area and aligned to the main plane, the matte figure represent where the object will be positioned.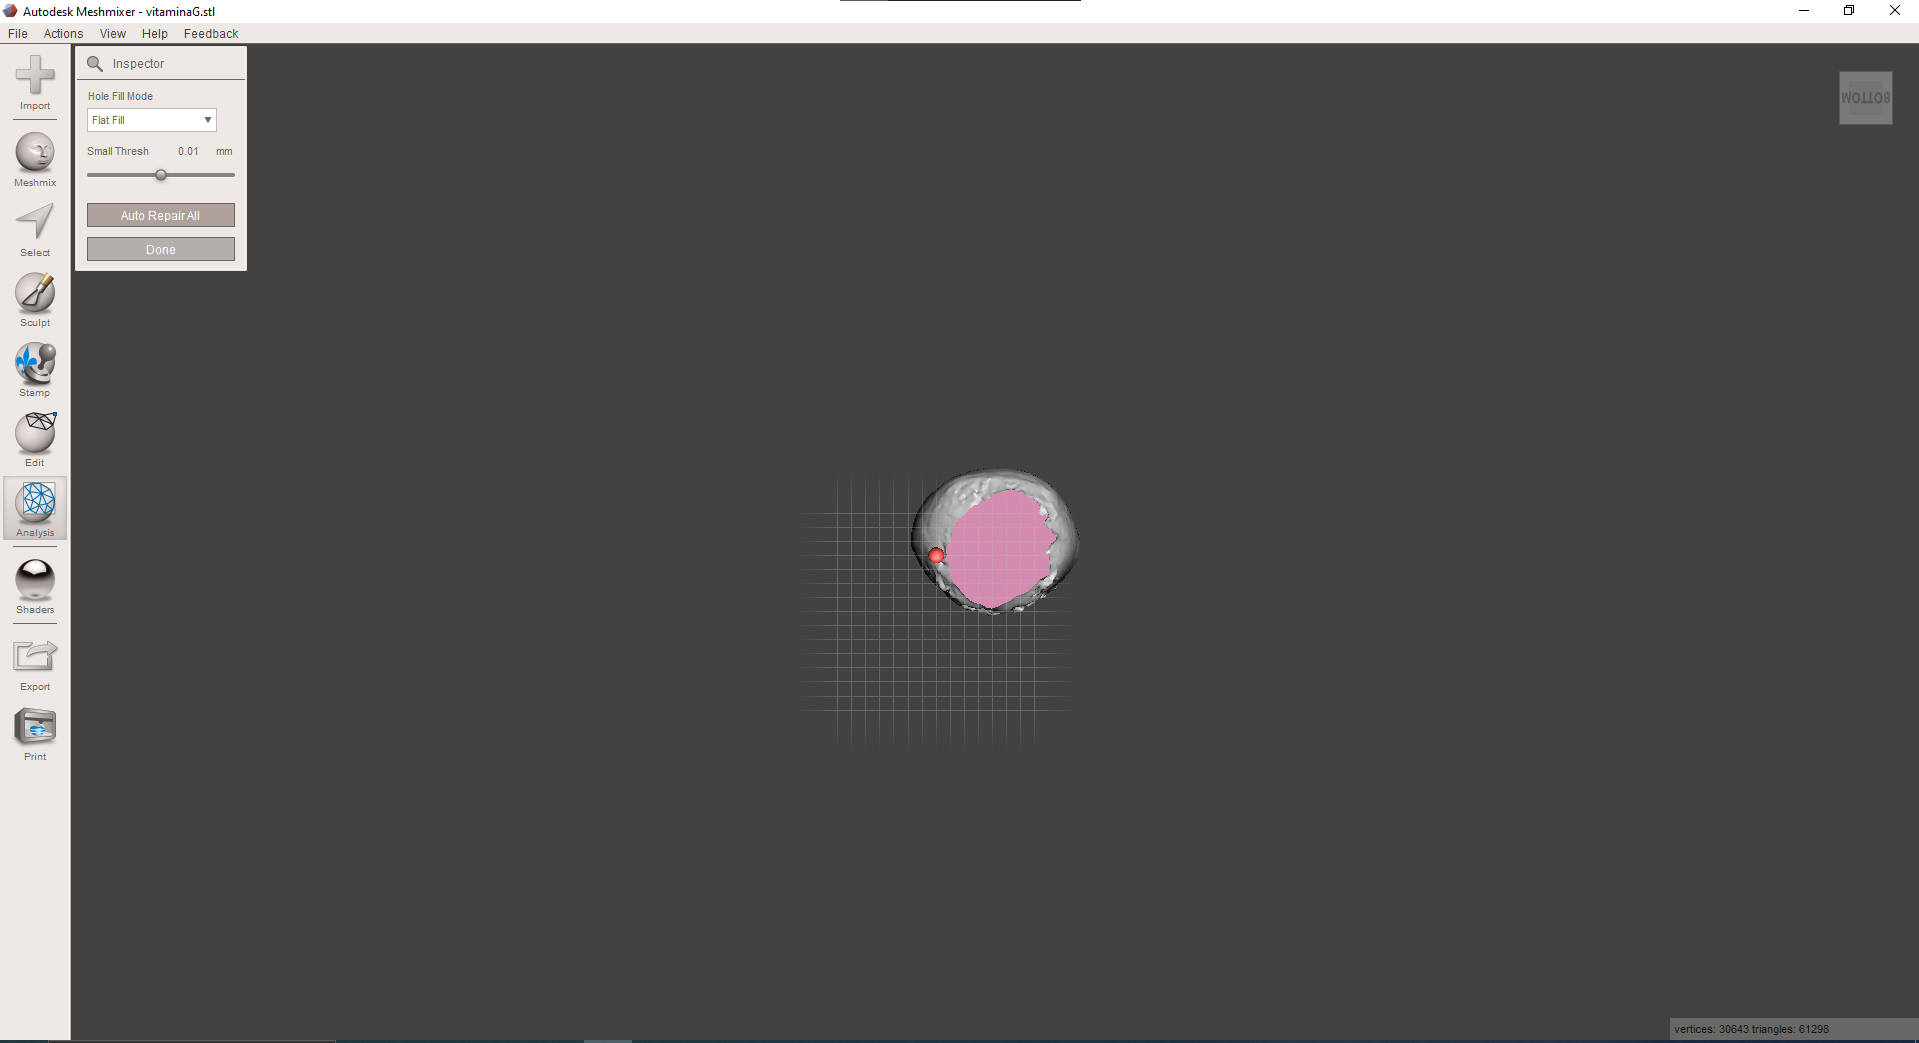
3. Ultimaker Cura
The object is then sliced using the Ultimaker Cura, the .gcode file it is exported and the scanned object it is printed using the printer Ultimaker 3.4. Printing the object
The object is printed using the Ultimaker 3. The printer setting are shown in the GIF below.
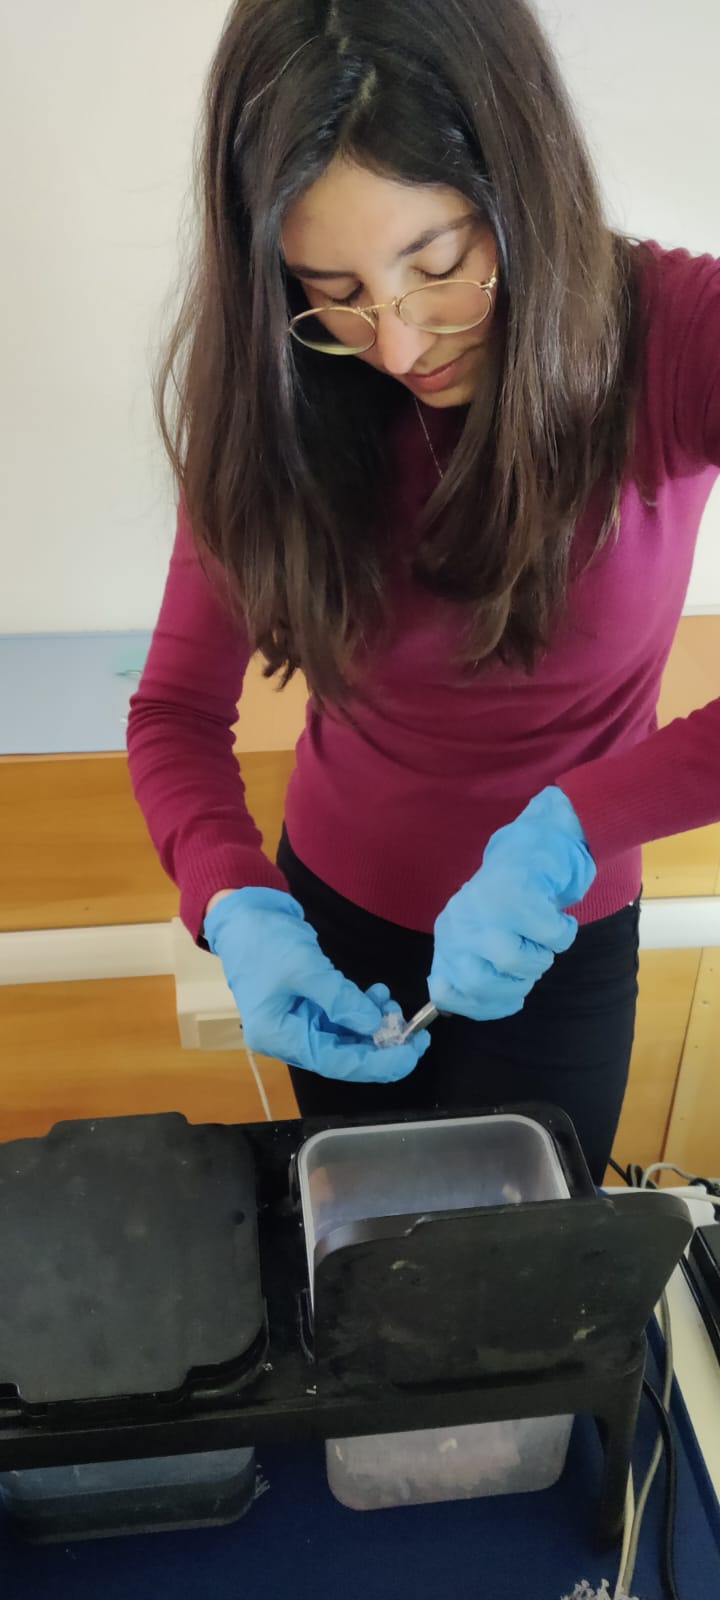
Resin 3D printer
In the Santa Chiara Lab there is the Form 3D printer and the whole kit for the postprinting phase. I printed an other ring that I designed. I printed it both with Voxelab Aquila and the professional Form 3. In the pictures above are shown the For 3 result.
Useful links
All3dp Tutorials Print Quality Guide