WEEK04. Embedded programming
This week concerned about the the electroincs design, for me was an intense week, due to no previous knowledge about the topic.
Assignments
- individual assignment: browse through the data sheet for your microcontroller
- write program for a microcontroller development board to interact (with local input &/or output) and communicate (remotely)
- extra credit: use different languages &/or development environments
- extra credit: connect external components to the board
- group assignment: compare the performance and development workflows for other architectures
Tomato Timer with Seeeduino Xiao RP2040
As individual project I projected a Pomodoro timer, in order to manage efficiently my work flow. I decide to organize my time in cycle of 50 minutes of work and 10 minutes of pause. This method help me to focus on my objectives.
It was my first time in programming microcontrollers, so I started with blinking the embedded RGB led. Connect the RP2040 to the computer using the USB-C cable, pressing the boot mode button. To program a microcontroller it is used MicroPython, a lighter ptogramming language in term of weight. To code and interact with the embededd microprocessor it is used the Thonny IDE, it is possible to run the code from on your pc or upload it on the microprocessor.
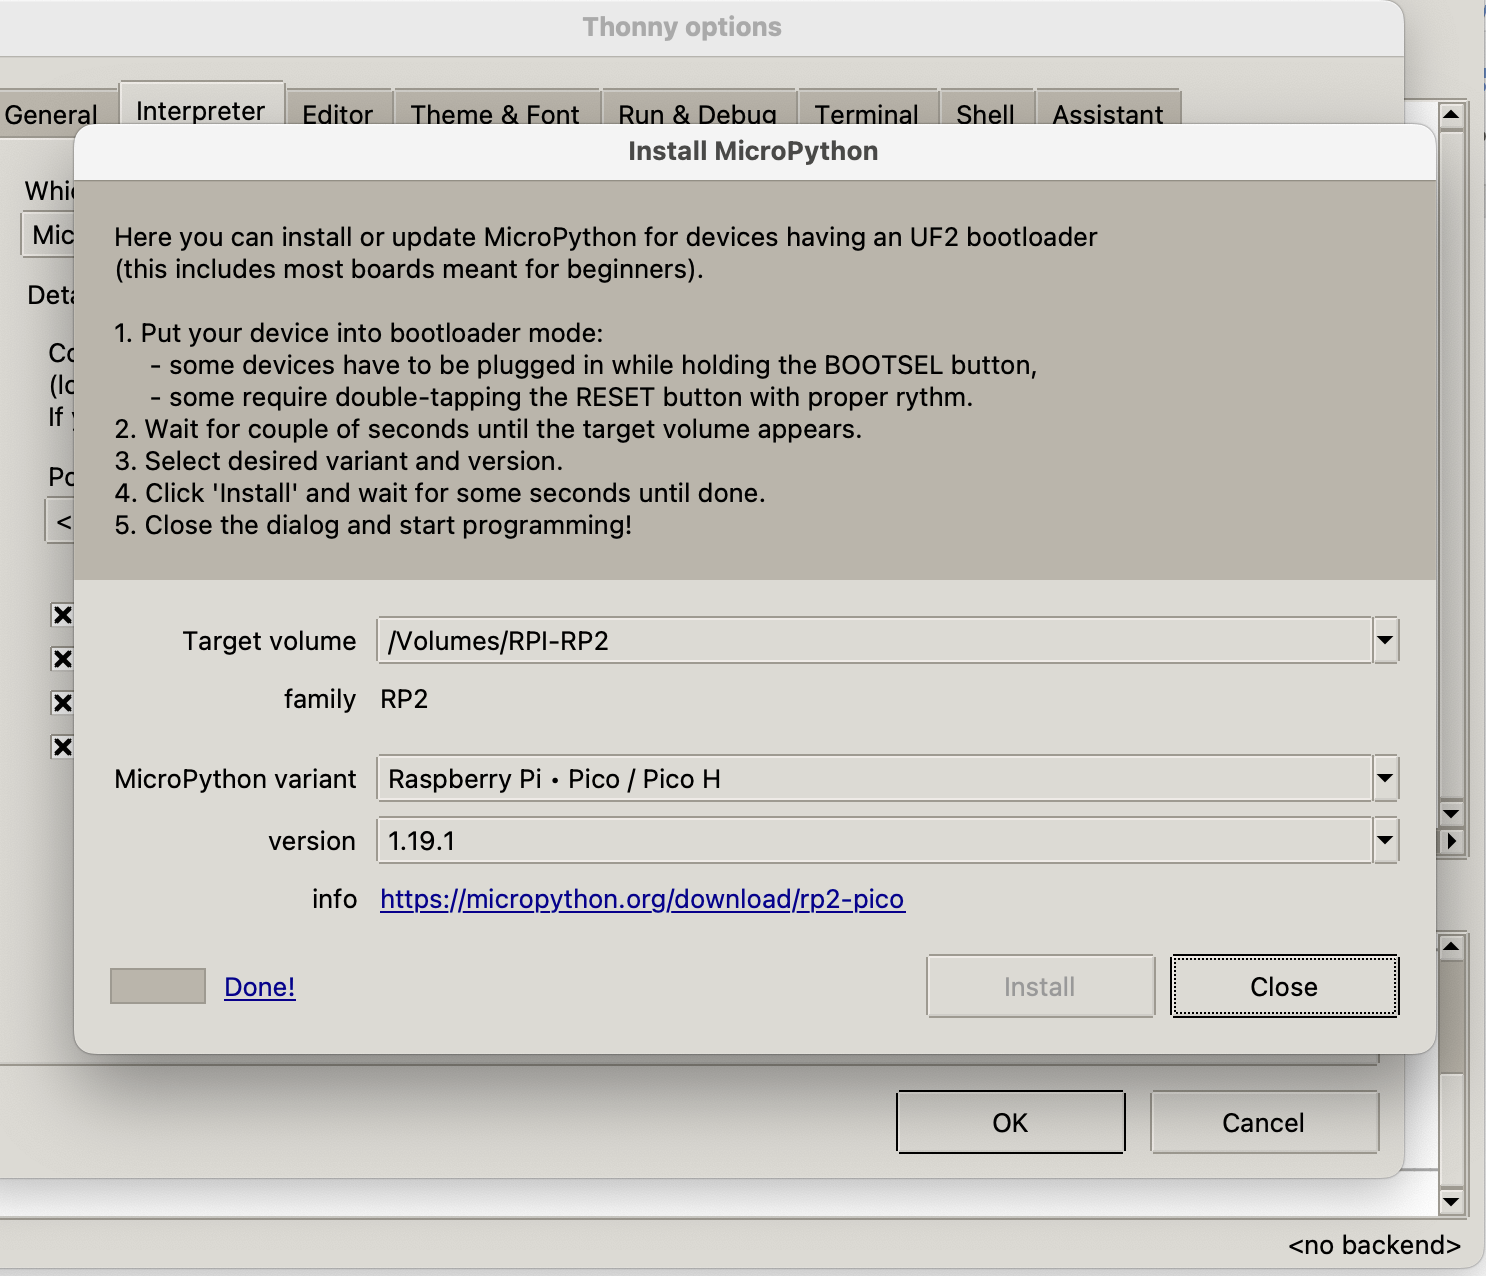
First of all you have to install the MicroPython interpreter on the microcontroller.
Click on the Thonny preferences, in the interpreter window, select from the drop-down menù the option MicroPython (Raspberry Pi Pico).
 Then, click on install or update MicroPyrhon. In the just opened window select the options as in the picture below.
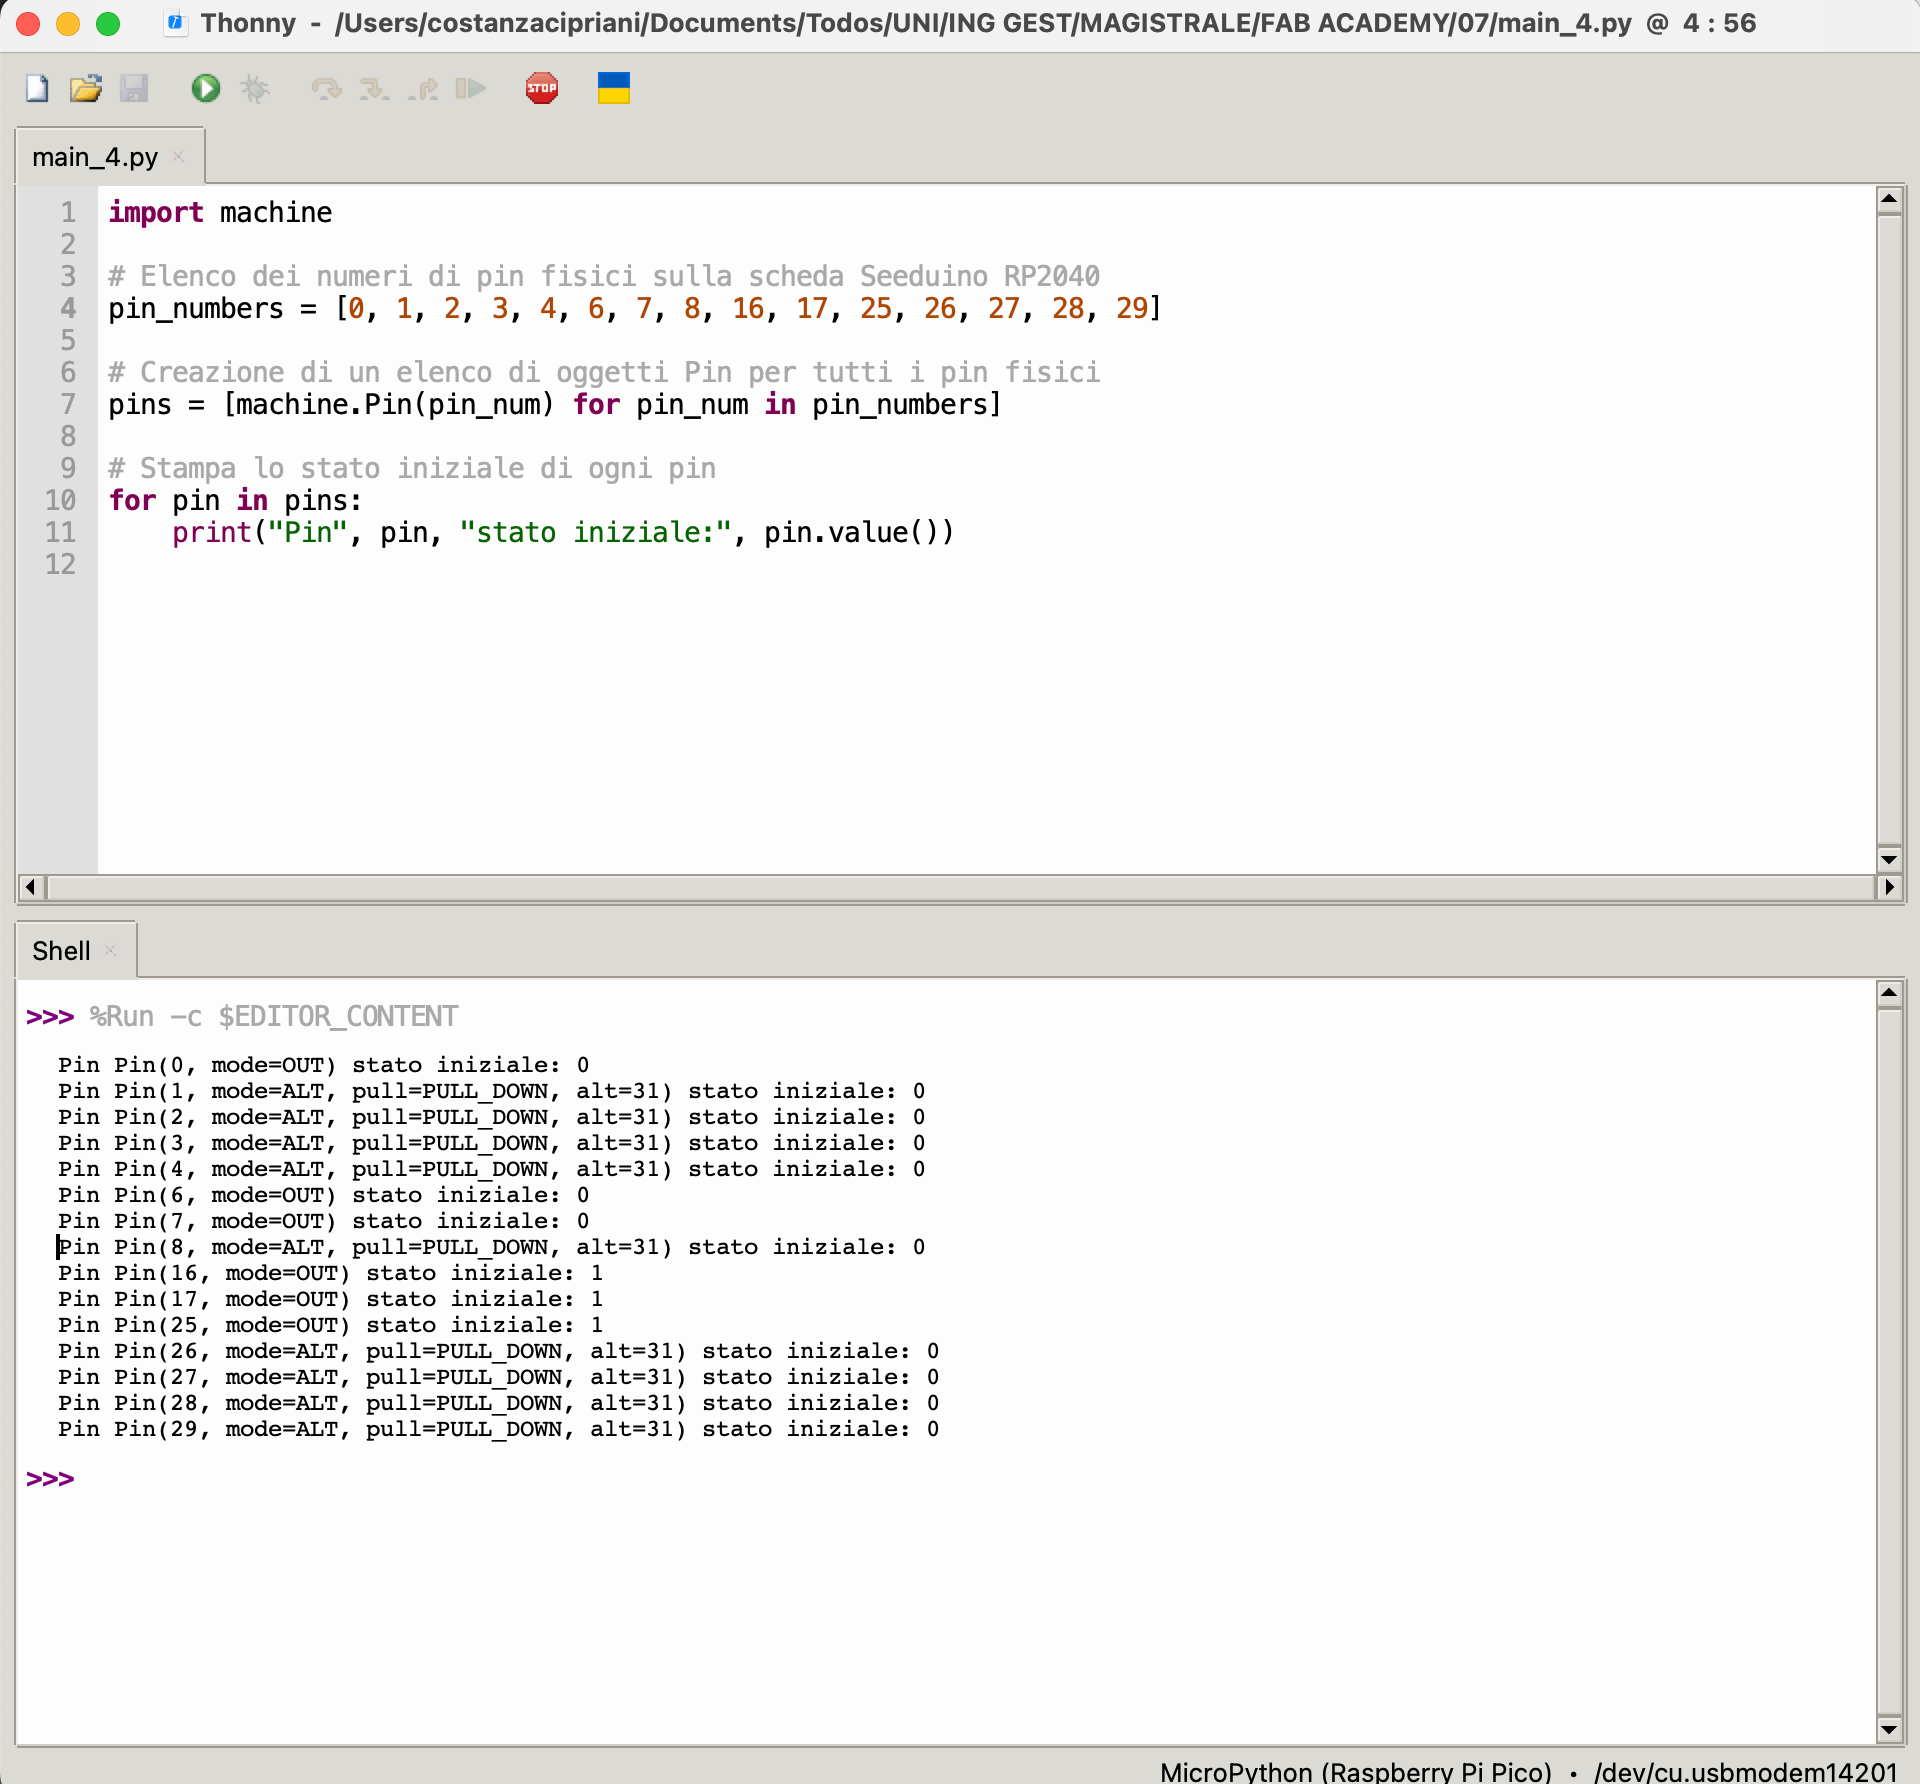
 As PCB I used a Seeeduino Xiao RP2040, with some exposed pins as explained in the figure below. In particular, to program the pins you have to use the numbers in the gray boxes, because these are the numbers associated to each pin of the embedded microcontroller RP2040 in the Seeeduino Xiao PCB.
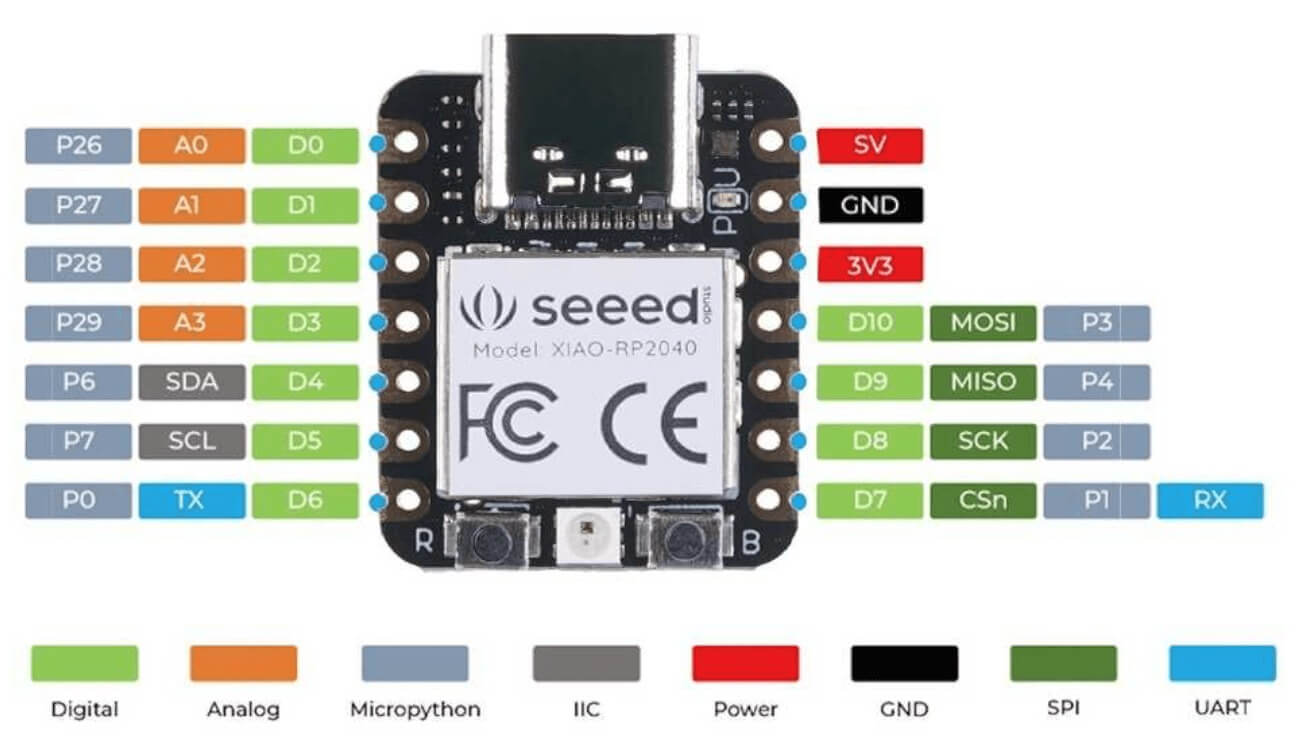 Additionally to the exposed pins is it possible also to program the pins connected to the RGB led.
Especially, the number of pins for the red channel is 17, for the green is 16 and for the blue is 25.
The polarity of the RGB led is oriented through the positive pole, so to have potential difference, it is necessary to reverse the polarity using the function .toggle() or it is necessary to use the function that work on the potential difference, in the reversed way.
It is useful and possible to know the initial state of the pins using the function .value(). As is it possible to see from the output in console the status of RGB led is 1.
Additionally to the exposed pins is it possible also to program the pins connected to the RGB led.
Especially, the number of pins for the red channel is 17, for the green is 16 and for the blue is 25.
The polarity of the RGB led is oriented through the positive pole, so to have potential difference, it is necessary to reverse the polarity using the function .toggle() or it is necessary to use the function that work on the potential difference, in the reversed way.
It is useful and possible to know the initial state of the pins using the function .value(). As is it possible to see from the output in console the status of RGB led is 1.
Useful MicroPython libraries, class, functions and method
- Libraries: machine, time, utime
- Class: the class to program the pins is Pin
- .toggle(): to change the polarity of the pins
- .value(): to know the pins stutus
- .sleep(sec): maintain the current status express in seconds
- .on(): to activate the pin
- .on(): to deactivate the pin
- .high(): change the potential of the pin in high
- .low(): change the potential of the pin in low
Infinite loop
Usually, the codes of a microcontroller has infinite loops that allow the system to run a code perpetually, and the system may change behaviour according to pre-programmed specific conditions. An initial way to implement an infinite loop might be to use an while True loop.Blink the RGB embedded led
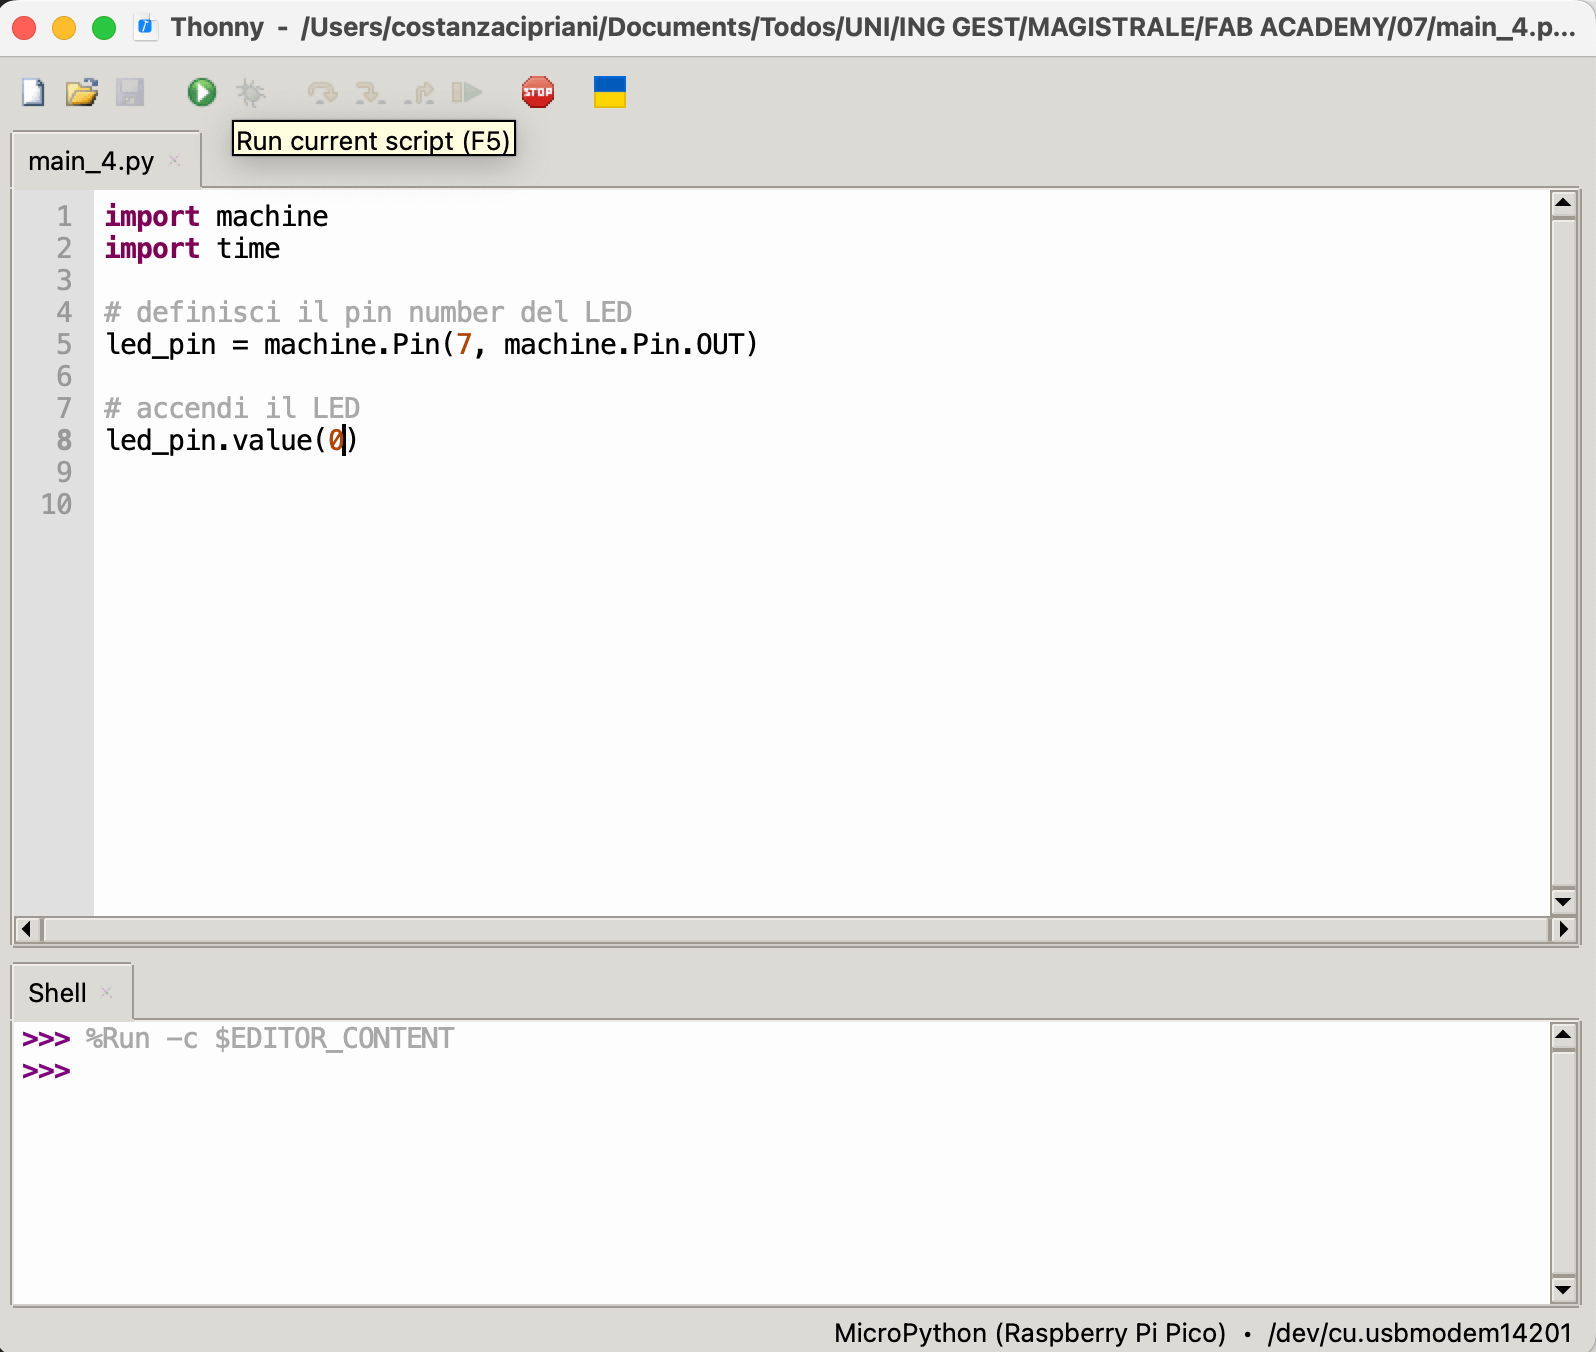
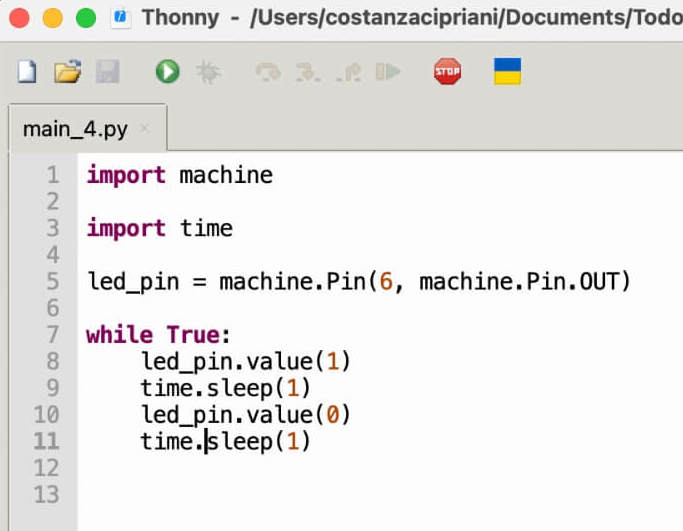
The following code allow to blink the RGB led. The number of seconds are setted inside the parenthesis.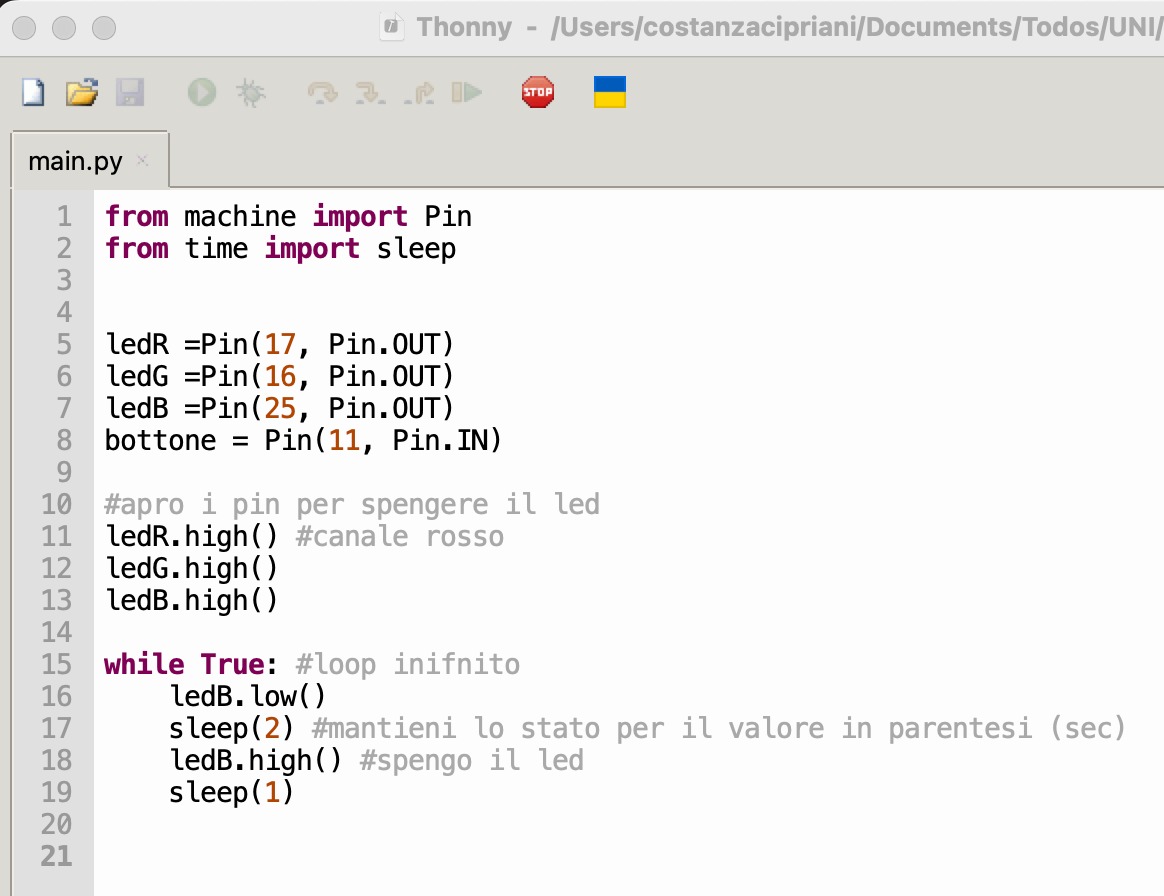
Implemented led
I started turning on a red led, implemented using the breadboard.
 Then, I make it blinking.
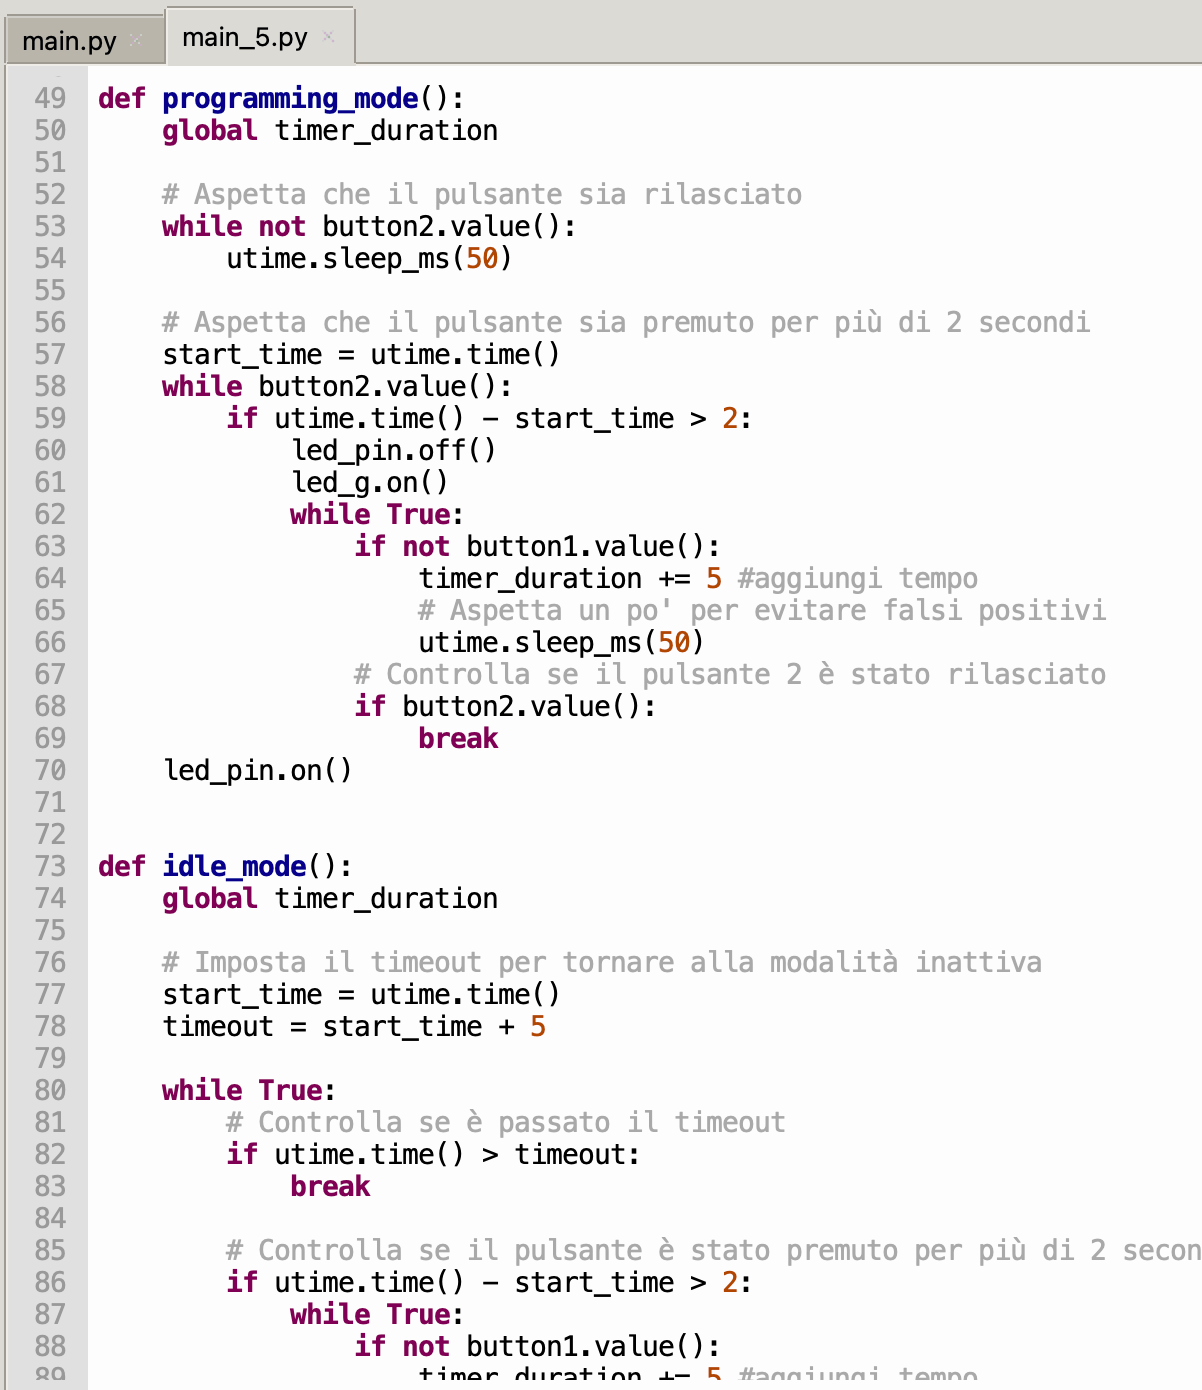
Pomodoro timer code
After some trials, my confidence in programming rises and I started to program a Tomato timer. I started sketching with pen and paper the flow, then I started to program in Thonny. Unfortunately, at today I was not able to finish it, due to my limited knowledge in Python.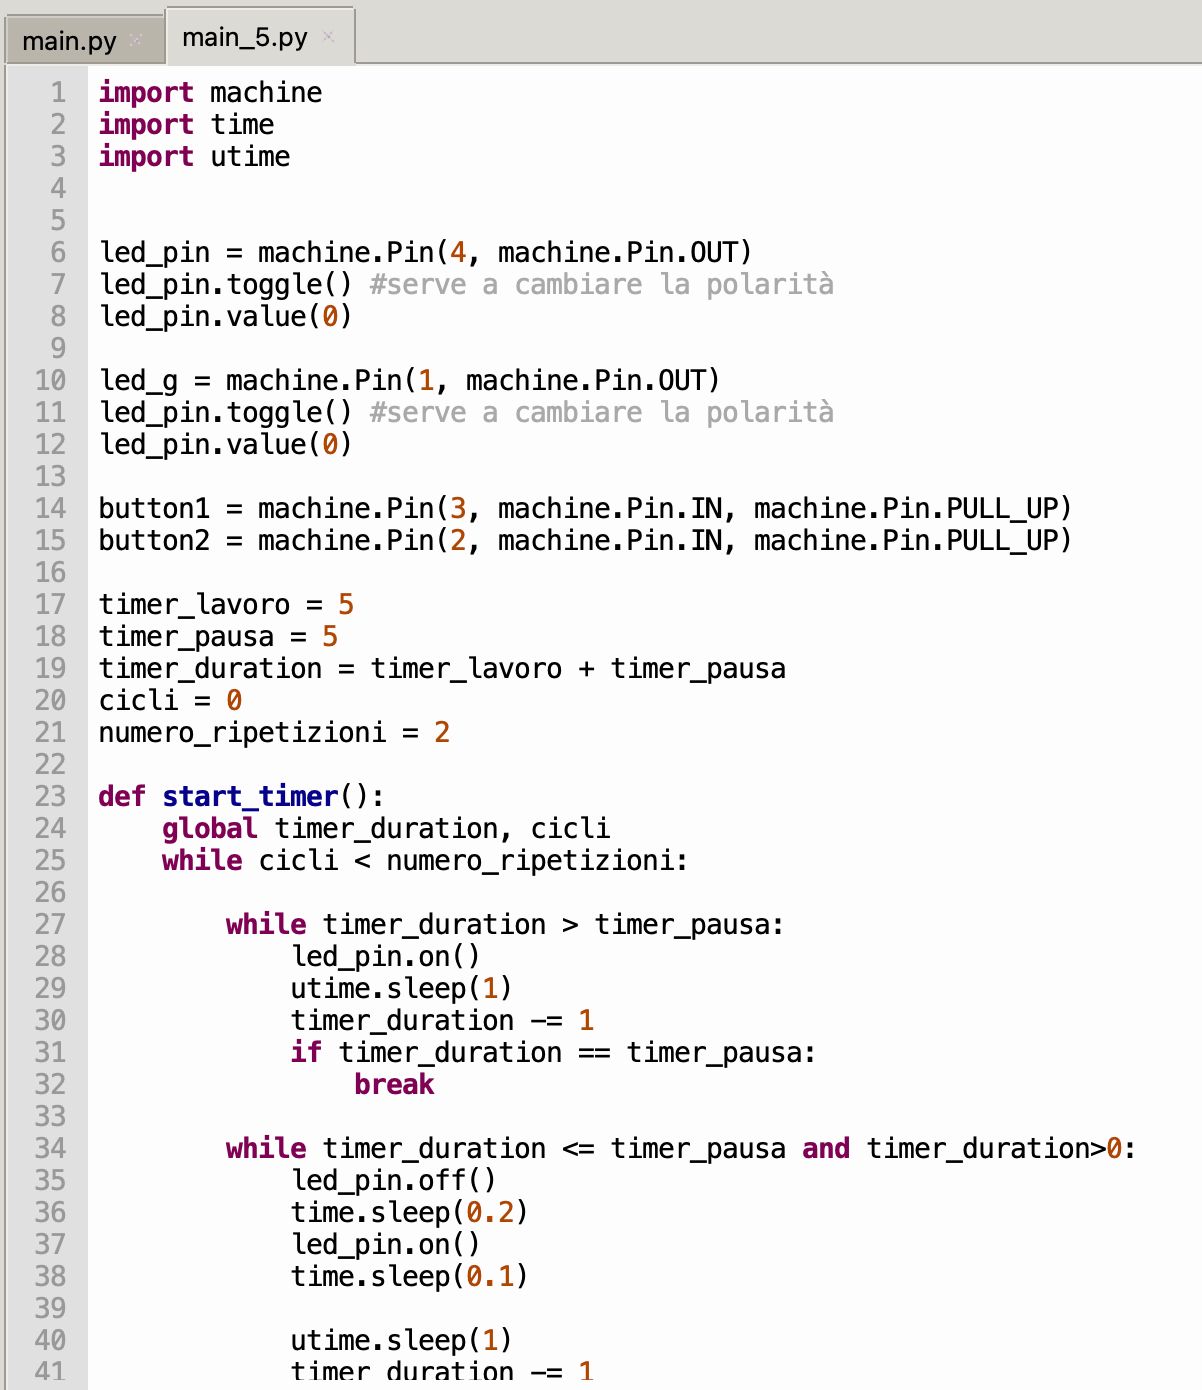
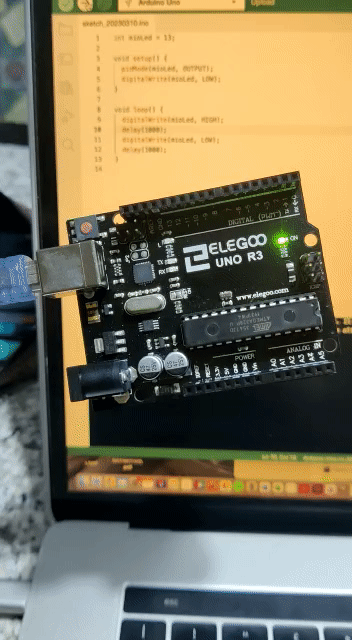
Arduino UNO
To code an Arduino UNO you have to code in Arduino, similar to C++, using the Arduino IDE that you can dowload freely on the offical web site. Moreover, on the official website you can find some intersting projects and educational materials. Since I prefer to code in Python, my goal is only to learn the Arduino IDE and the programming flow process. So, I programmed the Arduino UNO to blink the main led.
First of all you have to able Arduino IDE to interact with the board through the board manager options and install the necessary drivers.
 Start creating a new sketch to build the code; as default the code has a setup function, that is runned once at the beginning, then there is the main loop.
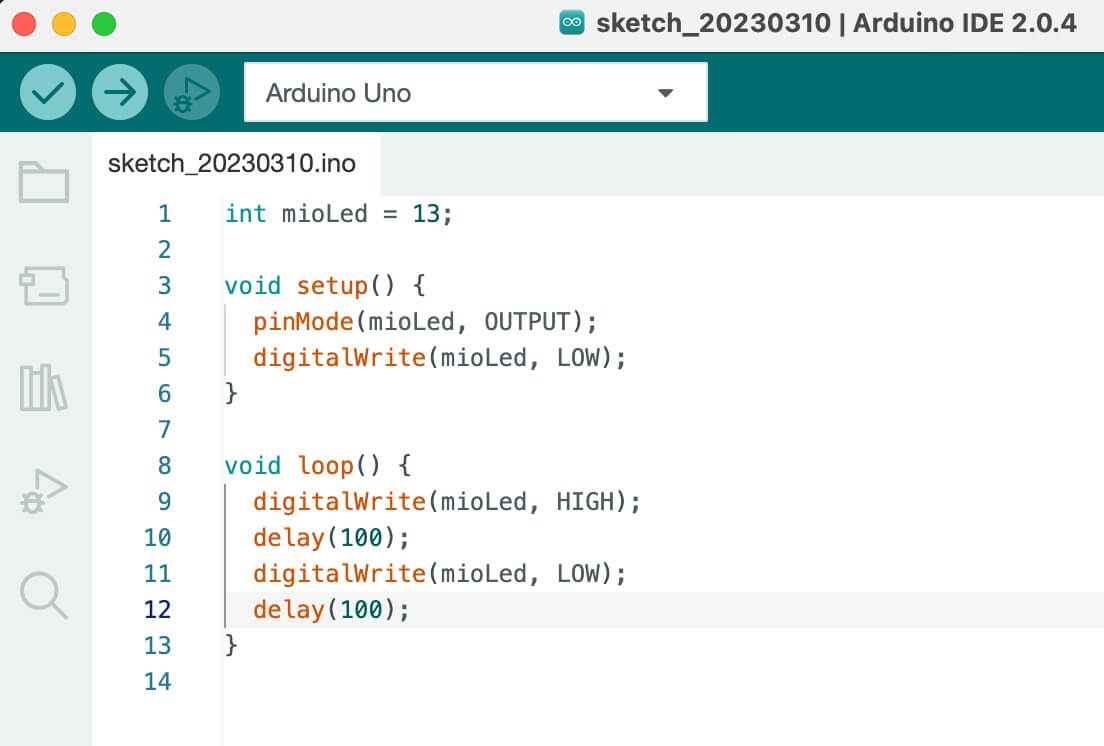
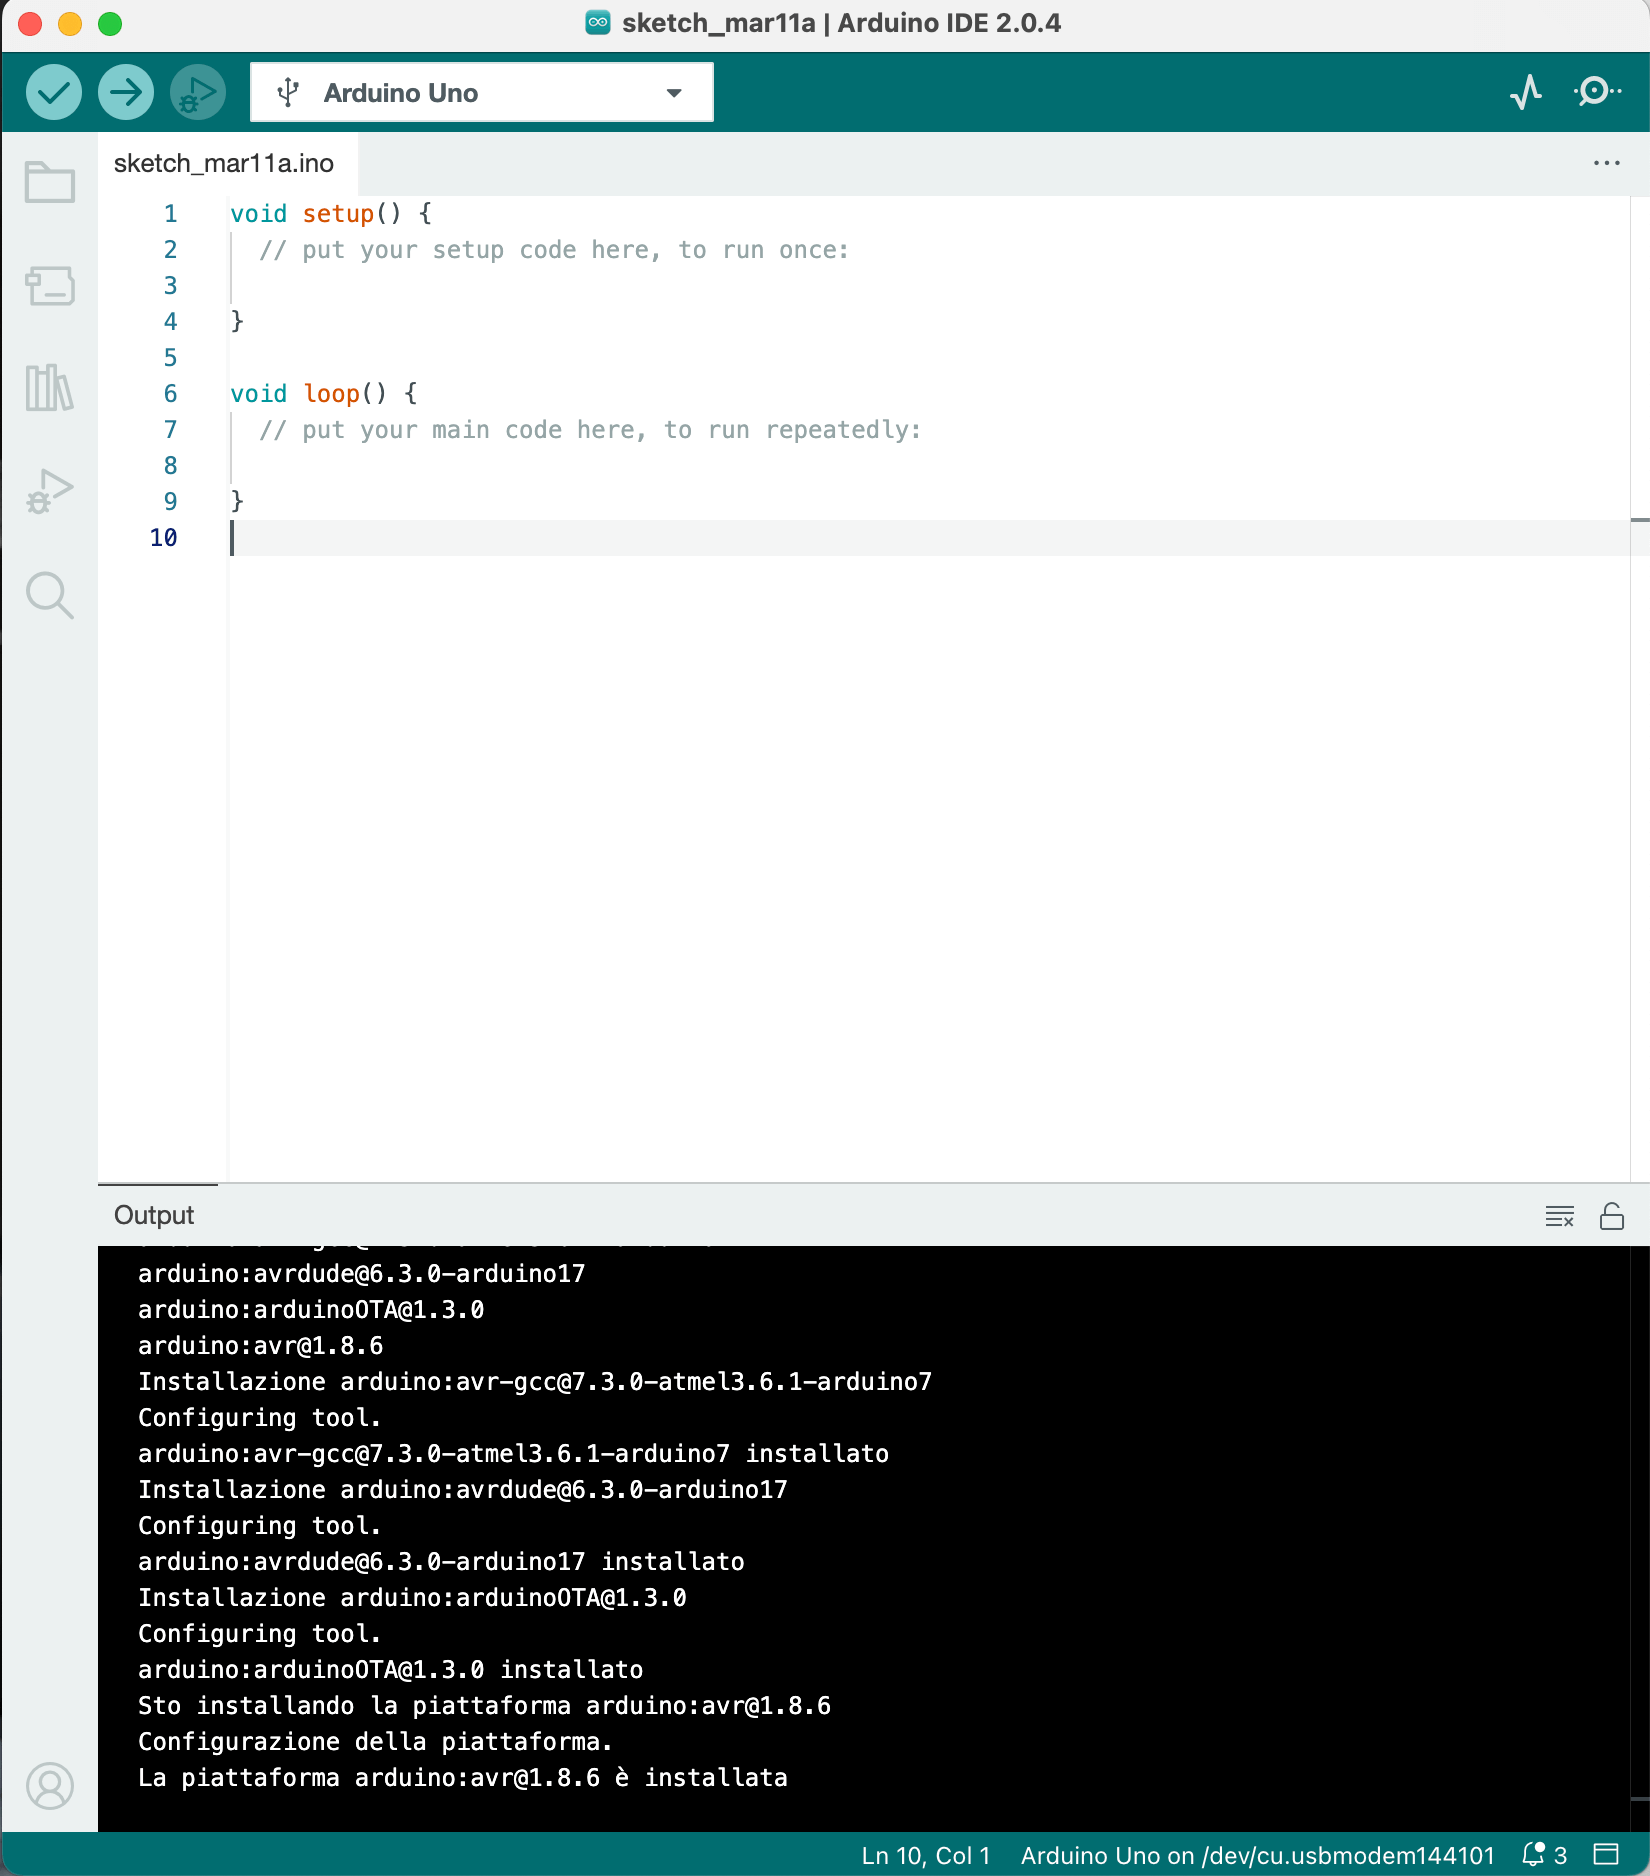 In the picture below there is the code to blink the embedded yellow led. Note that in Arduino you have to make the casting of the variables and the sleeping time are expressed in milliseconds.