Computer Aided Design
| Week | 2 |
|---|---|
| Lecture Notes | Week 2 - Computer-aided design |
| Progress | 70% |
In Fusion, I start with a sketch, draw some things, then figure out how I’m gonna build it.
—Nate B.
So this week I swung the project management pendulum in the opposite direction and parallel developed… myself into next week, before I was completely finished with this week. The makerspace I’m a member in requires authorization to use the laser cutters, so I began the process this week, taking the lesson and completing the first half of authorization now, so that by next week I’ll be able to use it for class. Then about five minutes later I finally completed joining the makerspace and got my keys.
Construction on my house also began the same day, so it’s been a wild week. There’s a hole in my wall now!
I started off distracted though and feeling behind from the previous subject, and overwhelmed from the combination of the first two weeks’ content. I watched Episode 2 of Surviving Fab Academy and it actually made me feel a lot better than I expected, and a lot more like it’s ok to be here for now. I mention all the life stuff and mindset to offer my future self some explanation of how I got the product I did for this week. Or for posterity, who may need to know they’re not the only ones who’ve felt this way.
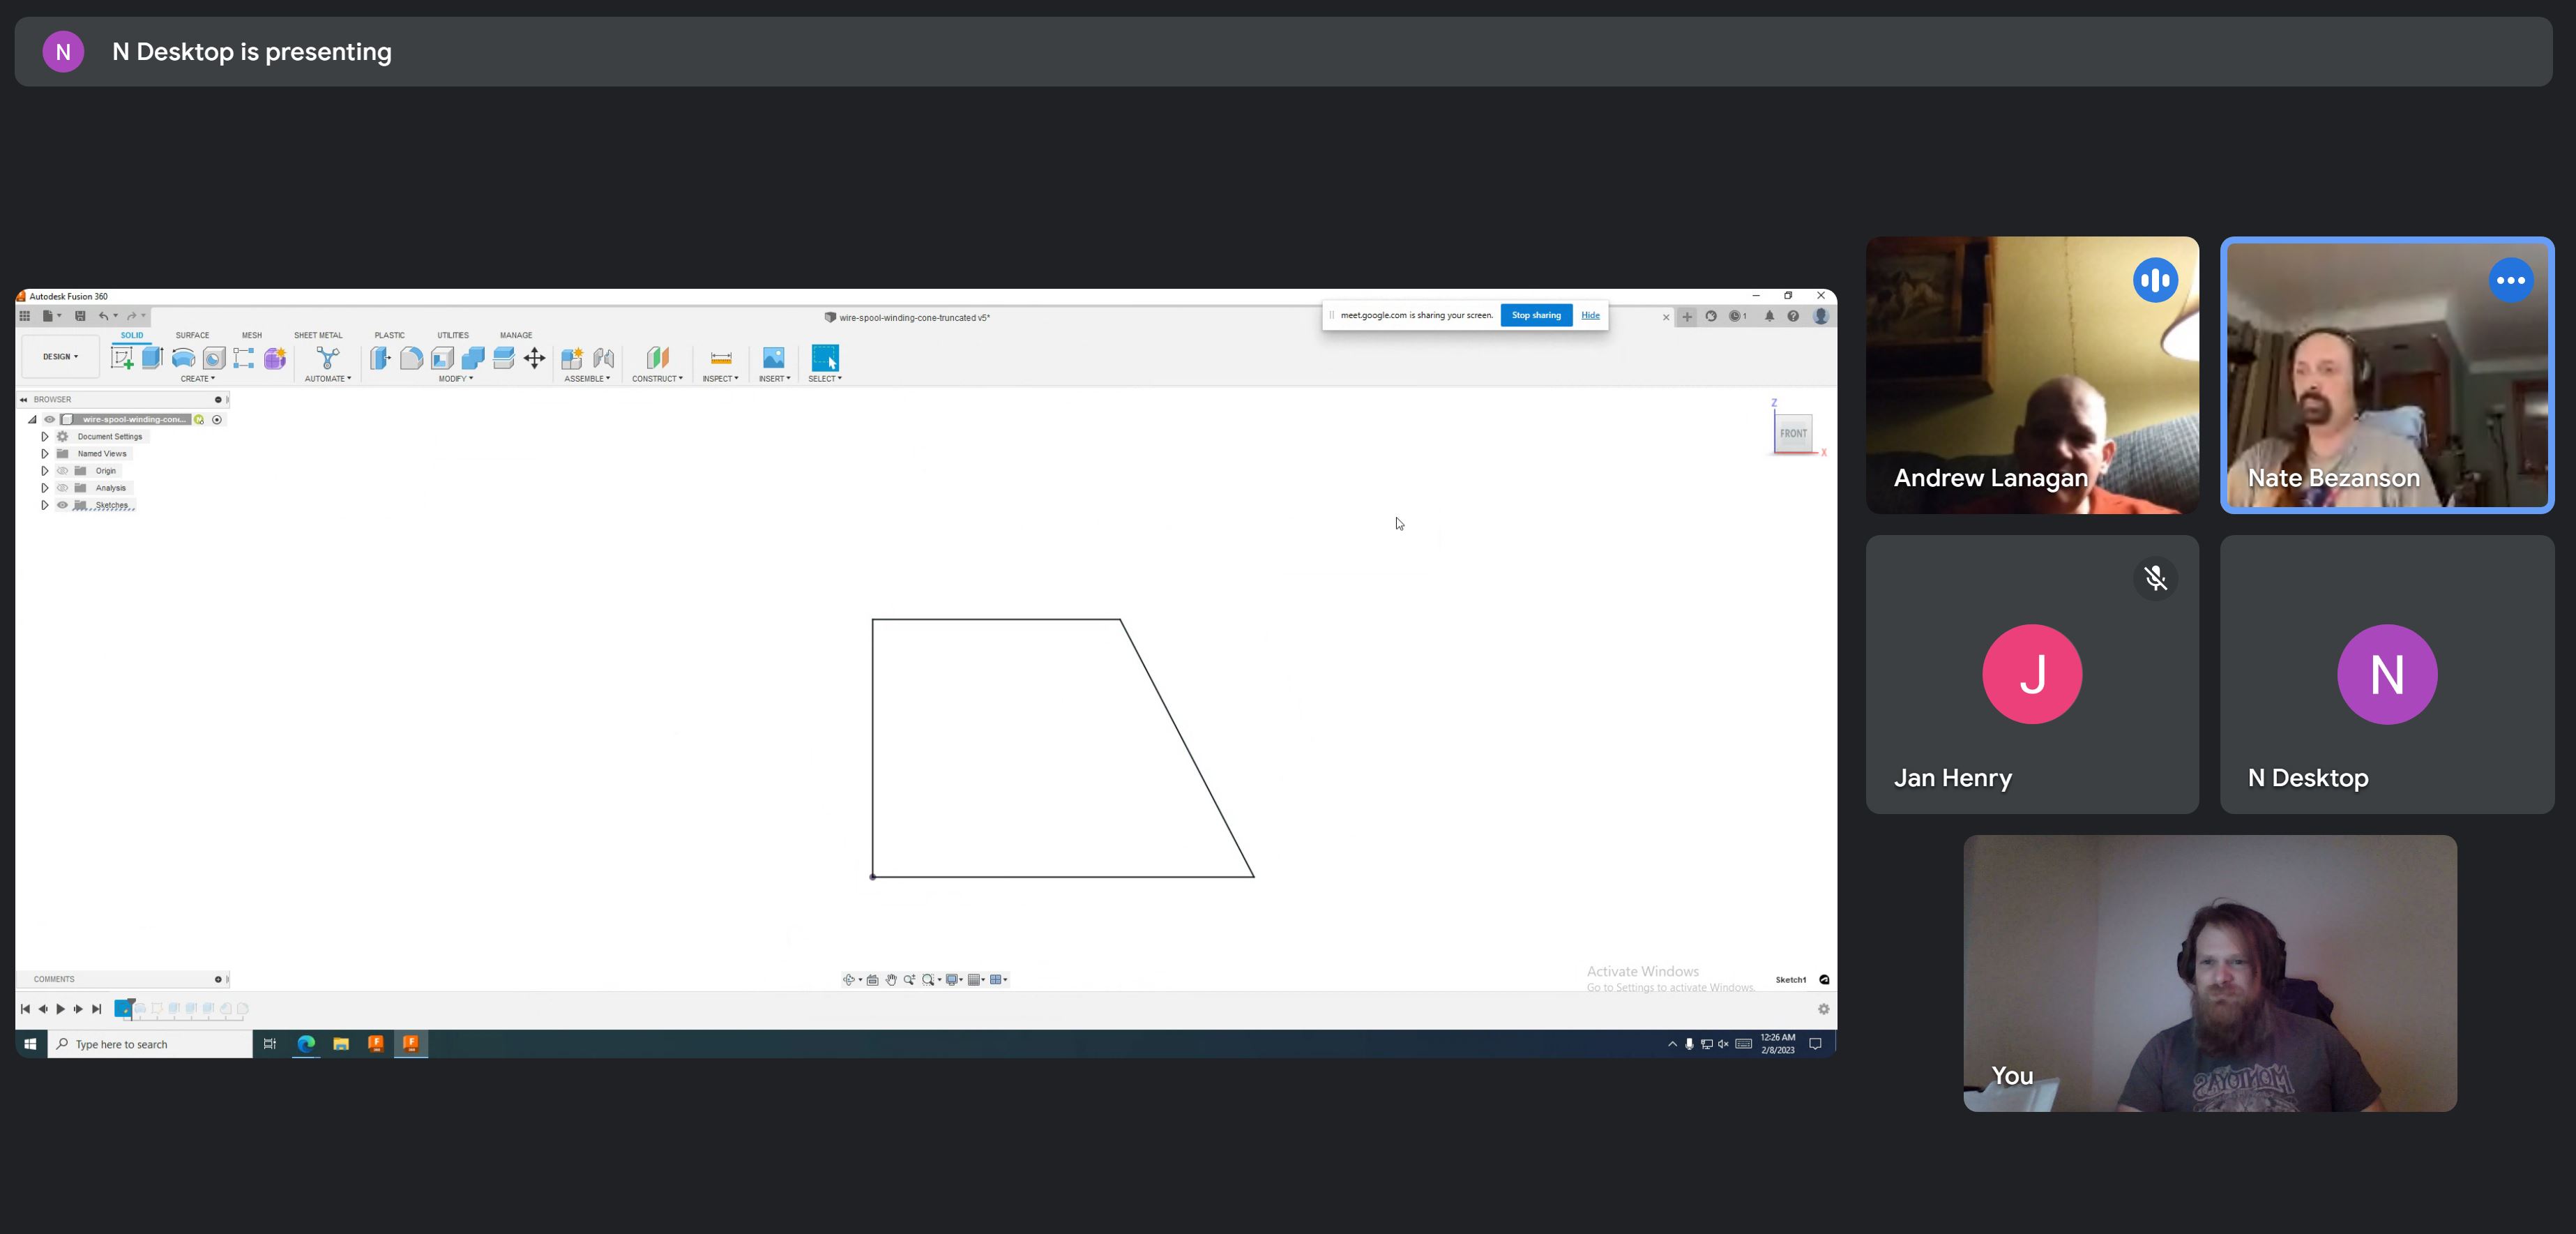
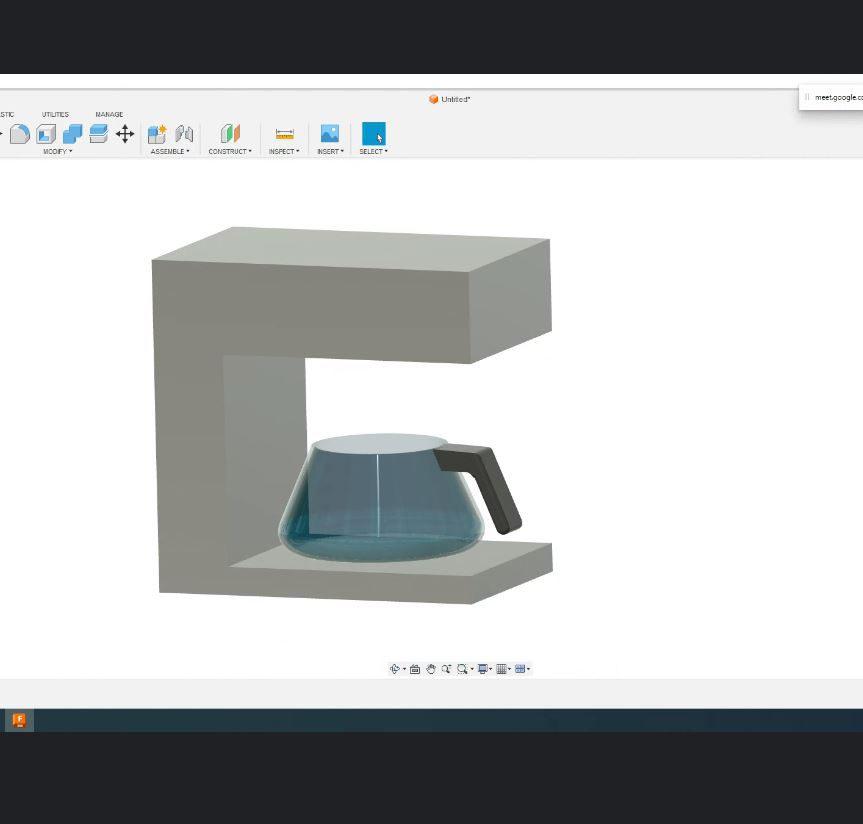
I was very fortunate to be able to lean on some of the more experienced members in my makerspace, very specifically Nate Bezanson who was extremely gracious in giving me a late night tutorial in Fusion 360, walking me through and screen sharing how he would approach drafting a simple coffee maker. I am extremely grateful, not least for which because it means I can actually sleep tonight instead of pulling an allnighter trying to figure out how Fusion works, right before the Week 3 lecture. Drew Lanagan provided additional support and perspective during the session, and the Henry’s provided the humor to keep us smiling despite the late hour.

It’s hard to give adequate credit to the wealth of info Nate packed into one drafting, but some of the standouts for me:
- Part history is an incredibly powerful tool, and you can edit geometries, with the rest of your part adapting accordingly
- Components can be turned off instead of deleted, to not lose their net effect or dependencies on the whole
- Sometimes Fusion can be more like Back To The Future, where you’re constantly trying to fix the result of what you last fixed in the timeline. It’s cool, just don’t get fully erased.
- Find your McMaster-Carr parts in the browser, then cut/paste the part number into the Fusion extension, to avoid a lot of pain points.
Feeling confident (and sleepy) coming out of that, I started hacking away at my coffee maker in Fusion. First I played around with the sketch feature to get a basic shape I wanted. I decided I was going to approach this face by face, and extrude to a standard depth to form the shell. I also determined earlier in the week that I was only going to model the shell of the coffee maker, as I felt my skills would not be up to par to render the internals yet, and they were going to be more of a push goal.
One issue I kept running into was measurements. I can approximate in inches in my head, but I had to google conversions repeatedly, and then had to go back and edit parts to remember the extrusion depth. I also got a little ahead of myself and decided to use a -45 degree taper on the extrusions to make everything flush fit a little more, as I’m not sure yet which components will be fabbed by which methods.
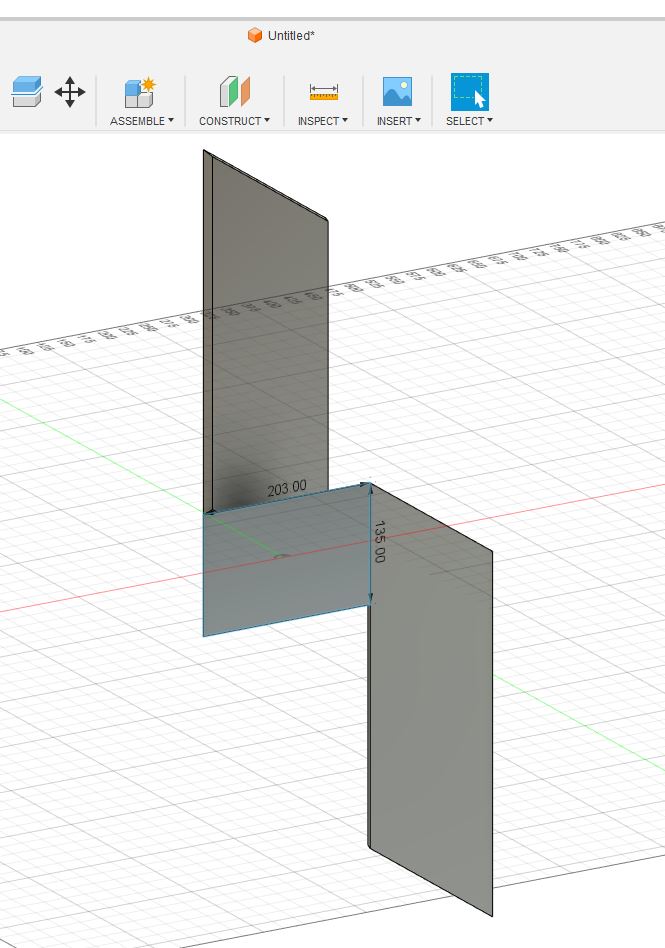
My measurements came out to roughly, 16” or 406mm tall, 10” / 254mm deep, and 8” / 203mm wide. The upper face is about 5.3” / 135mm tall until the recess. After typing all this up to use for reference, I learned I could just left click on my sketches and check “show dimensions”.
My foolproofplan plan of duplicating my outer walls wasn’t not built for my industrial grade foolish attempts.