
Interface and application programming
WEEK 14
This week’s assignment:
- To write an application that interfaces a user with an input &/or output device that you made
The Idea
- The idea is to create an app to control the esp wroom 02d board that i previously made, It had an i2c port a serial connector and wifi
- So for this assignment, I am using the WIFI to connect
- The initial idea is to display the distance on an app using an ultra-sonic sensor HC-SR-04 also to control that sensor
Creating the plan
- using by board to control the
- creating the app in mit app inventor
- programing the board
- sending signal
Creating the app
For making the APP I am using the MIT App Inventor, as I’m weak in coding and the MIT app Inventor is the best method for those who are new to programming and coding,
There is also an alternative to MIT app Inventor “KODULAR” which is built on top of the app inventor and has more modern UI designs than the app inventor
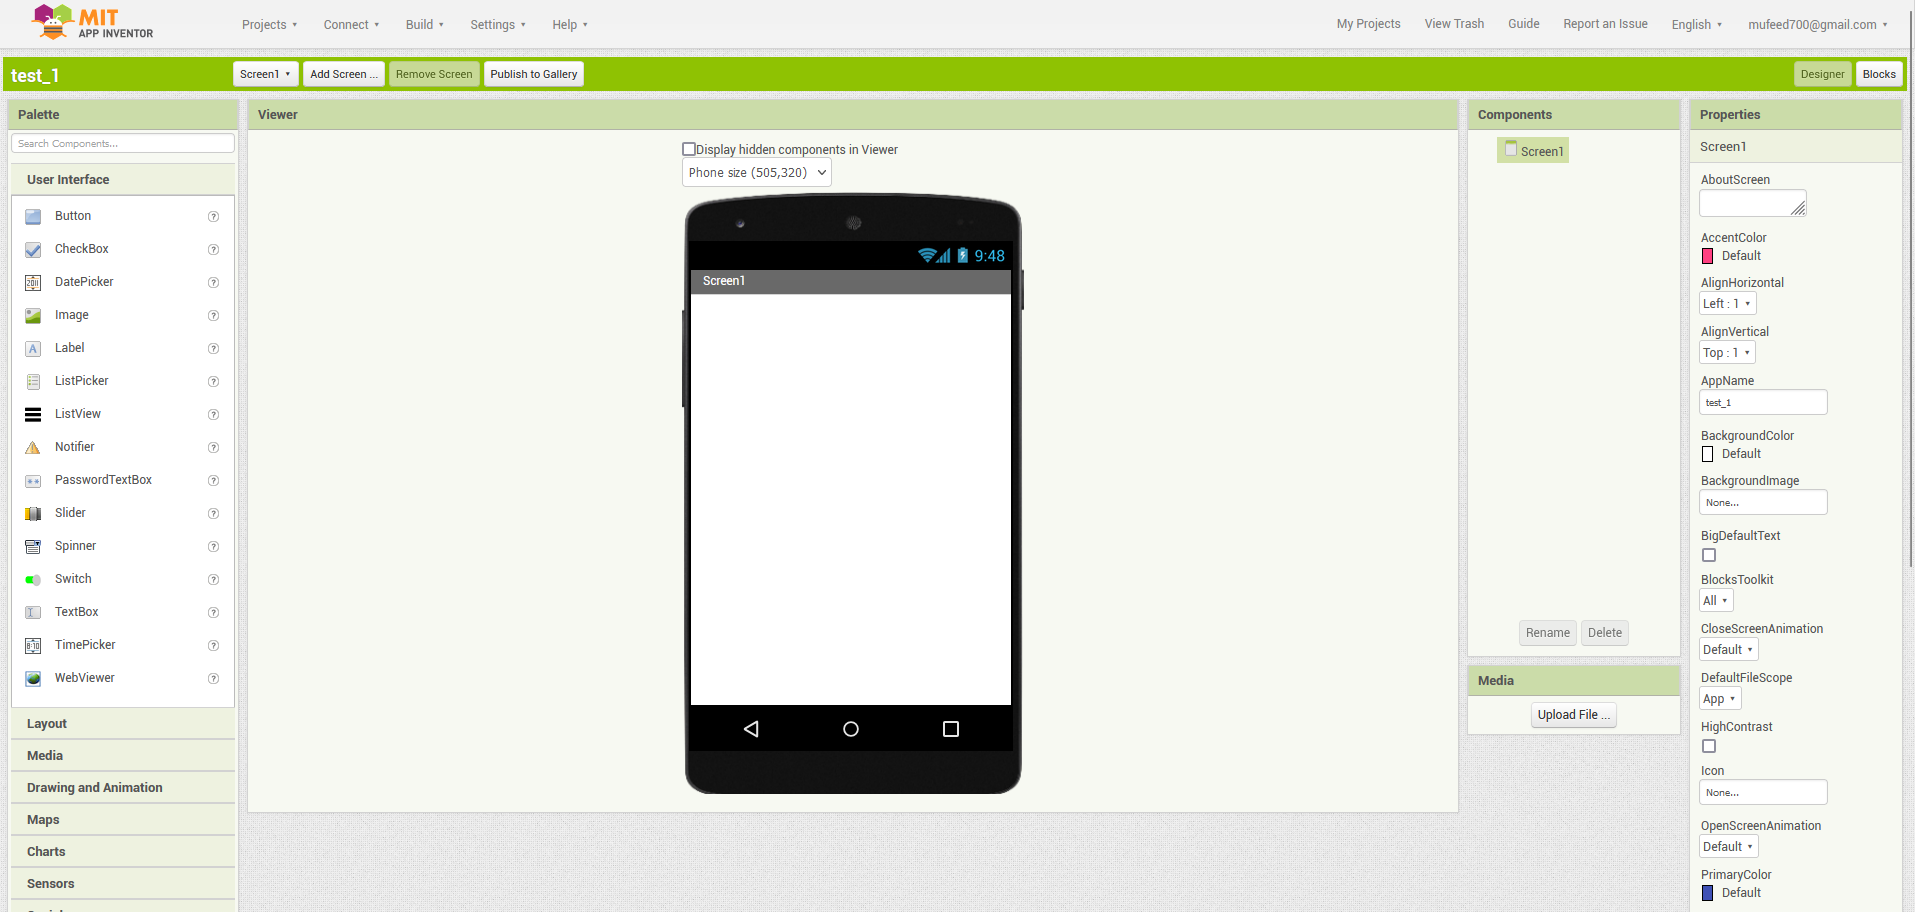
MIT App inventor
MIT App Inventor is a web-based platform that allows users to create mobile applications for Android devices without needing to know how to write code. It uses a visual drag-and-drop interface to create the app's user interface and a block-based programming language to define the app's behavior.
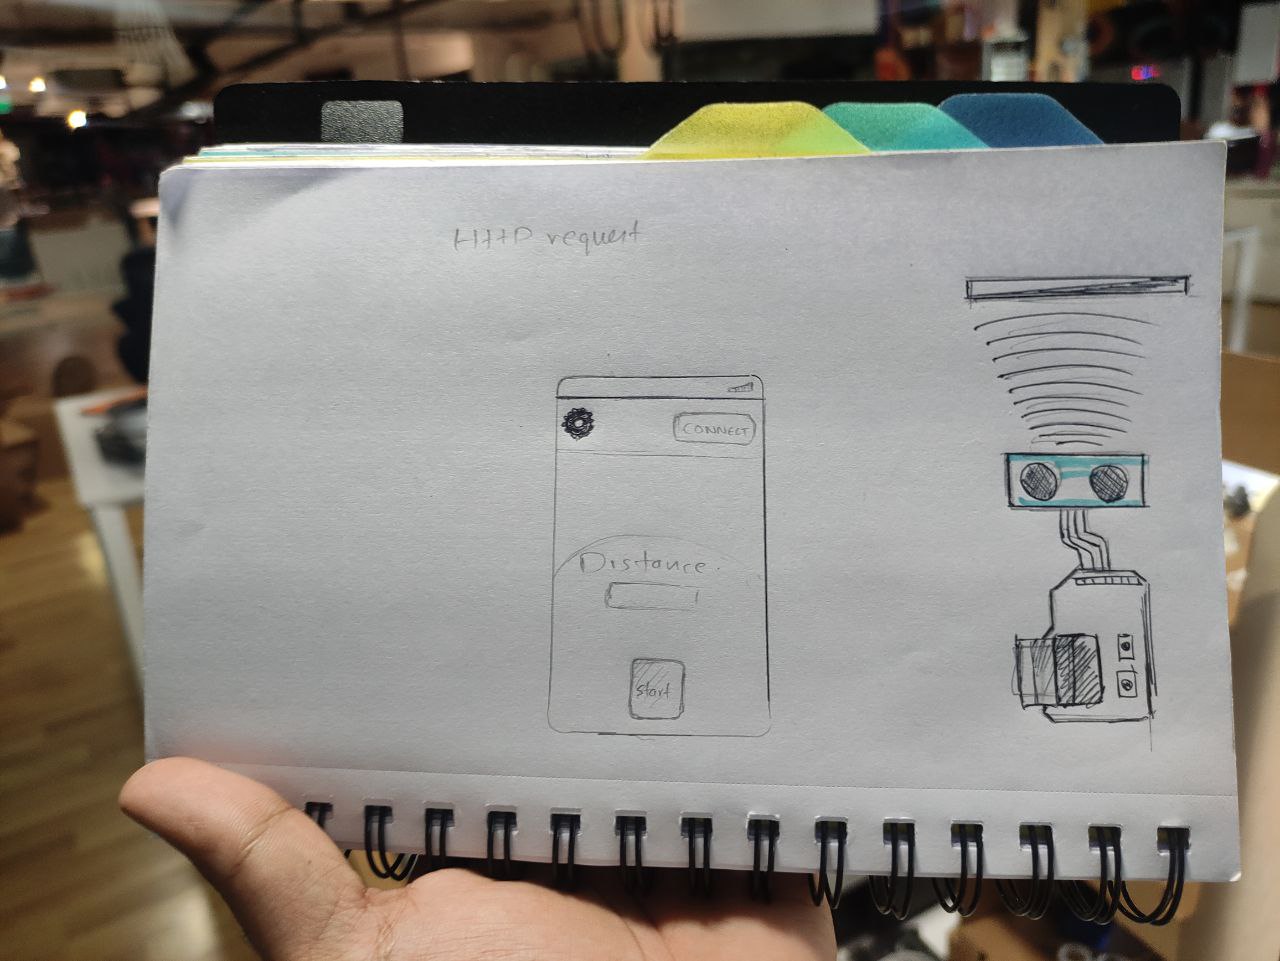
The layout of the app that im going to make
insert the drawing here”
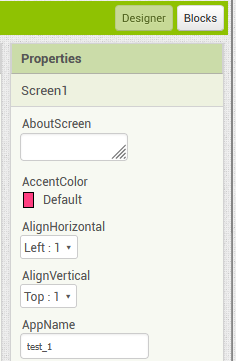
Designing the app
there are mainly two windows here the block and designer, The block editor in MIT App Inventor is used to define the behavior and functionality of an app, While the designer is used to create the app's user interface.
The interface / Designer section
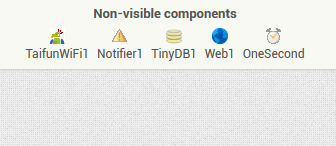
- We need all these components that is non-visible on the designer page
- these are the components that we need to make the user interface of the app

- The interface now looks like this
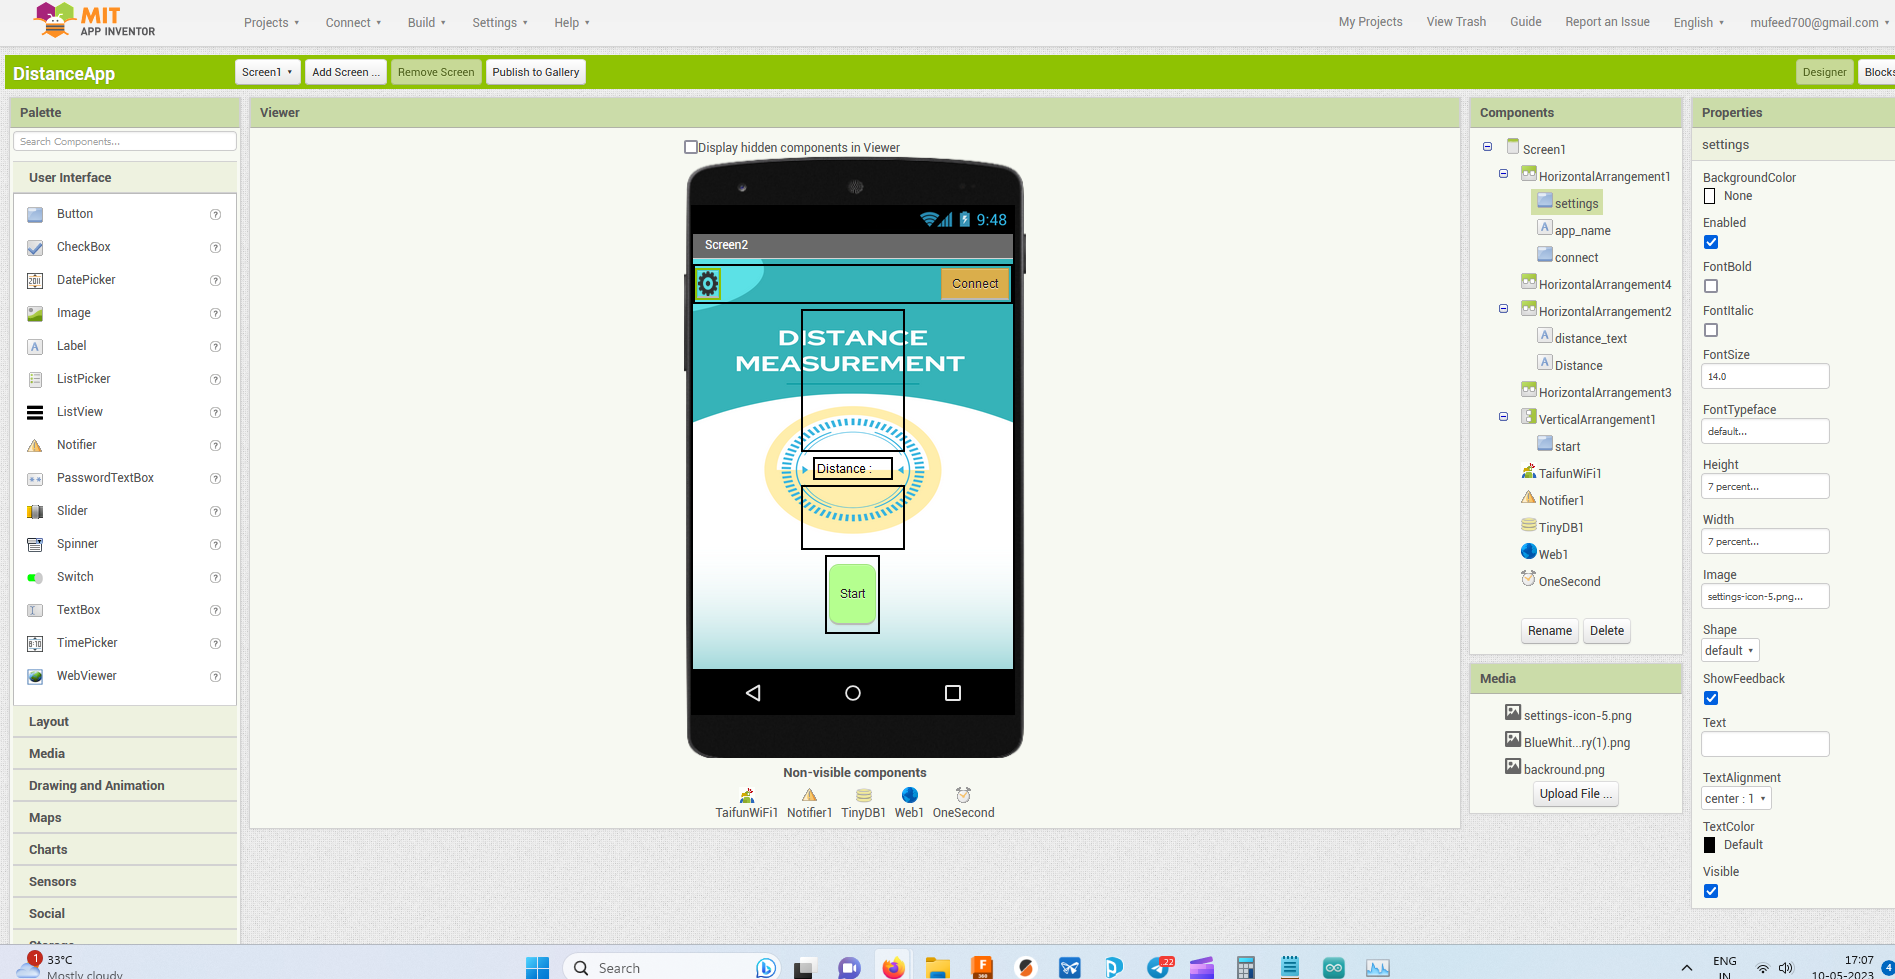
- I designed the background layout in Canva, to make the app a bit cooler
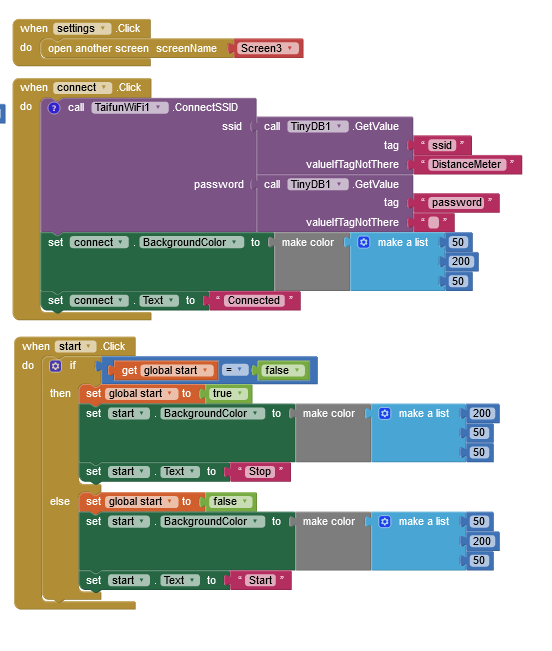
Blocks / behavior and functionality
- There are two screens here
- The first screen is the main page and
- the second one is the settings page called Screen 3
Screen 3
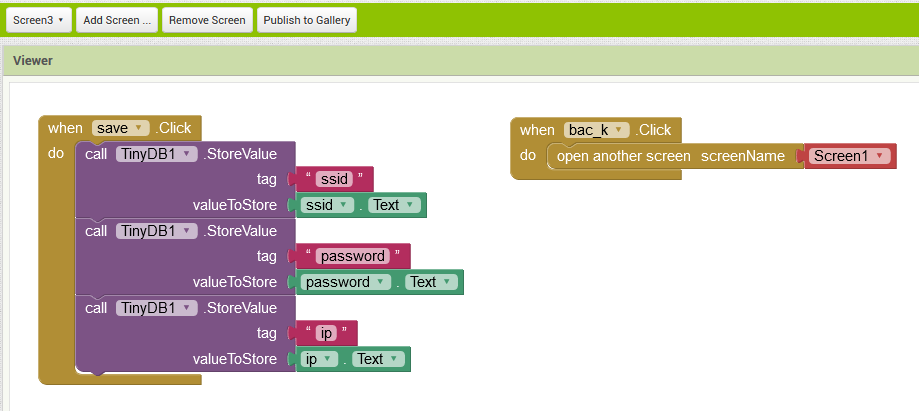
- These blocks are to store the ssid and the IP address
- The next block for the button to go to the previous page
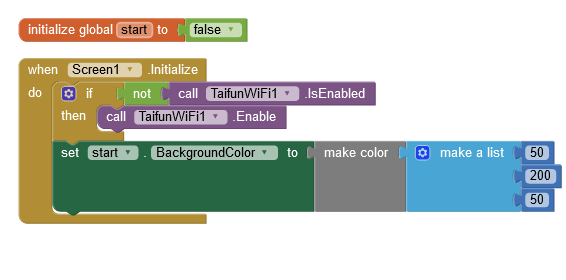
Screen 1
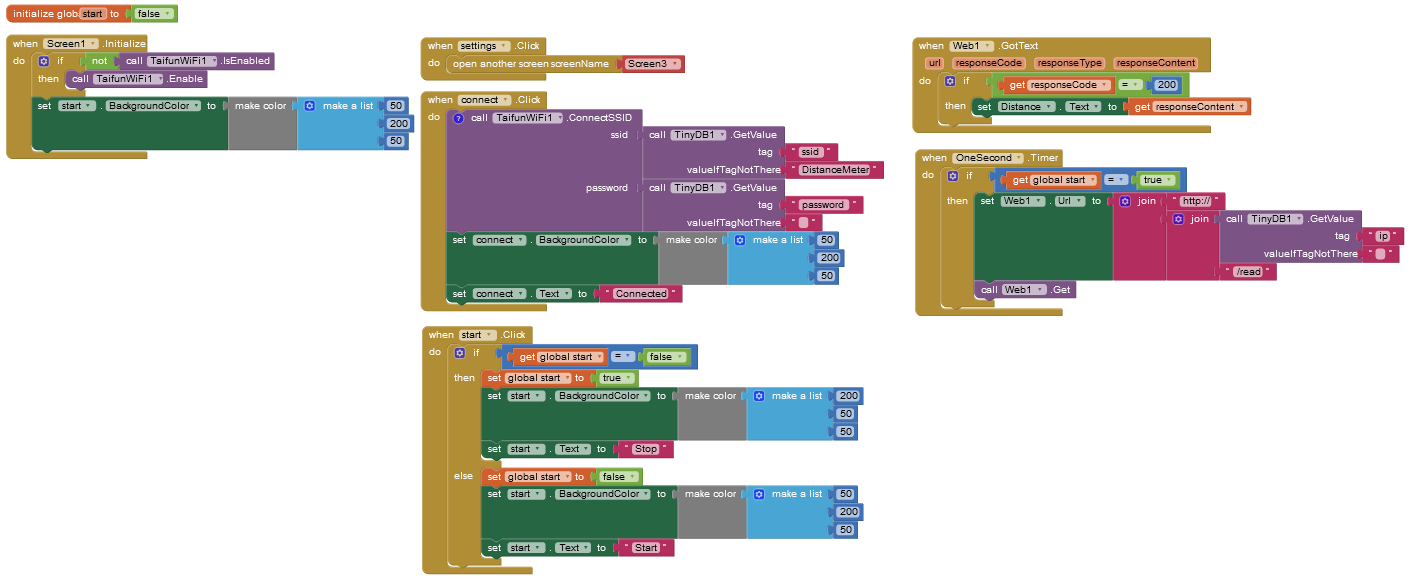
- these are the blocks for connecting the http server sending requests and recieving the values

now the app is complete.
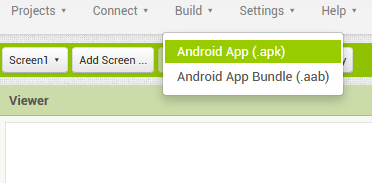
- you can download the apk here >>>
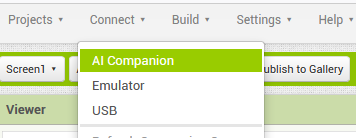
- or we can scan the QR code to use it on MIT A12 companion for live testing of the app

Programming the board
- The board that I am using is the one that i made on the previous week “click here for details”
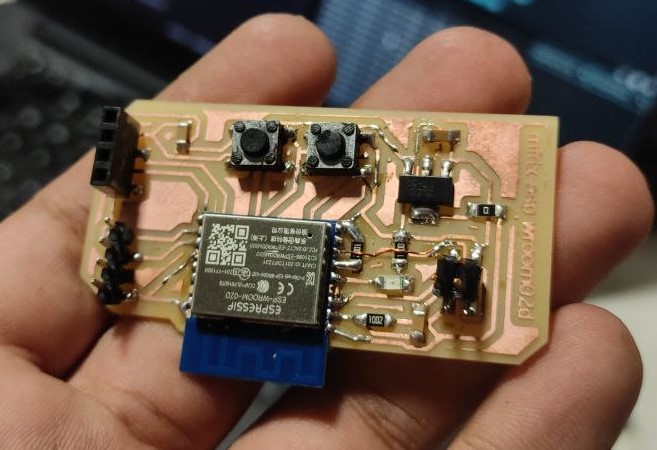
This is a custom board with ESP WROOM 02D chip
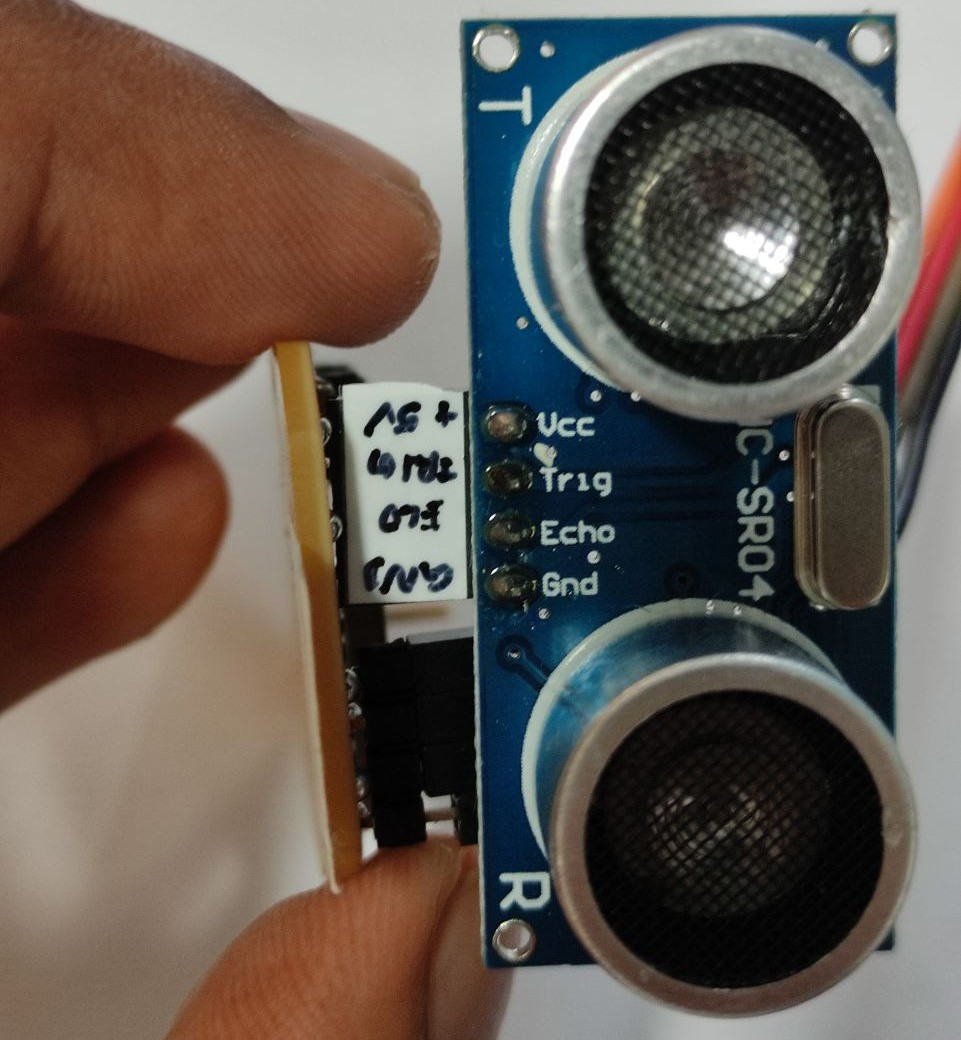
- the idea is to connect ultra-sonic sensor HC-SR-04 to this board
Circuit connection
Connect the Echo pin to PIN 05 of the board and the Trigger pin to PIN 04
- now we have to program it using a FTDI programmer, which we had laying around in our lab made by our previous batches

Code
//*********************Wifi AP Settings******************************
#include <ESP8266WiFi.h>
#include <ESP8266WebServer.h>
/* Set these to your desired credentials. */
const char *ssid = "DistanceMeter";
const char *password = "";
ESP8266WebServer server(80);
// Pins
const int trigPin = 4;
const int echoPin = 5;
void setup() {
Serial.begin(115200);
pinMode(trigPin, OUTPUT);
pinMode(echoPin, INPUT);
//********************Access Point Setup******************************
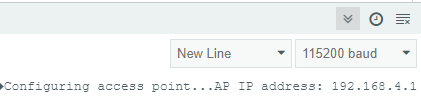
Serial.print("Configuring access point...");
WiFi.softAP(ssid, password);
IPAddress myIP = WiFi.softAPIP();
Serial.print("AP IP address: ");
Serial.println(myIP);
//****************** Server Setting **********************************
server.on("/read", handleRooto); // call "handleRooto" if request is "/read"
server.begin(); // Start server
Serial.println("HTTP server started");
}
void loop() {
server.handleClient(); //HandleClient Request
}
void handleRooto() {
int distance = readDistance();
server.send(200, "text/plane", String(distance));
Serial.println(distance);
}
int readDistance() {
int duration, distance;
digitalWrite(trigPin, LOW);
delayMicroseconds(2);
digitalWrite(trigPin, HIGH);
delayMicroseconds(10);
digitalWrite(trigPin, LOW);
duration = pulseIn(echoPin, HIGH);
distance = duration * 0.034 / 2;
return distance;
}
- upload this program to the board
- and now when opening the serial monitor we get
- now conform the server in on by searching for the wifi named “DistanceMeter” on your phone
Configuring the App
- Open the app previously made on the phone
unfortunately, the last update of the app didn’t work on my phone, so here’s the video from the previous testing phase, the function is the same there’s only a change in the background, you can also see the values changing in the serial monitor.