
Molding and Casting
WEEK - 12
Objectives
- To review the safety data sheets for each of your molding and casting materials, then make and compare test casts with each of them
(Group Assignment added HERE)
- To design a mold around the stock and tooling that you’ll be using, mill it (rough cut + three-axis finish cut), and use it to cast parts
CONTENTS
The idea
In this week I want to explore different ways to make a silicone mold.
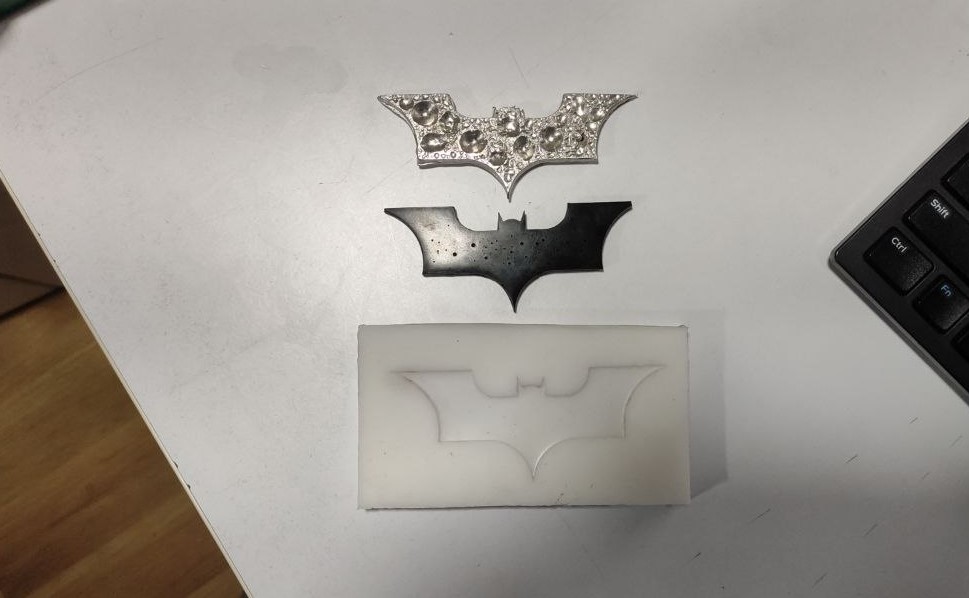
- for the first mold, I am going to try out making a mold by using a “Batarang” that we made from an aluminum sheet using a water jet cutter, this is the easiest method to make a mold, since it is the 2D shape it will be way simpler, also with this I will be able to get a quick experience in making mold, so that i will get to explore more when making the actual mold.
- For the second one I will be making a mold that has a 3d shape with some curves,
1. First mold, duplicating a “Batarang”
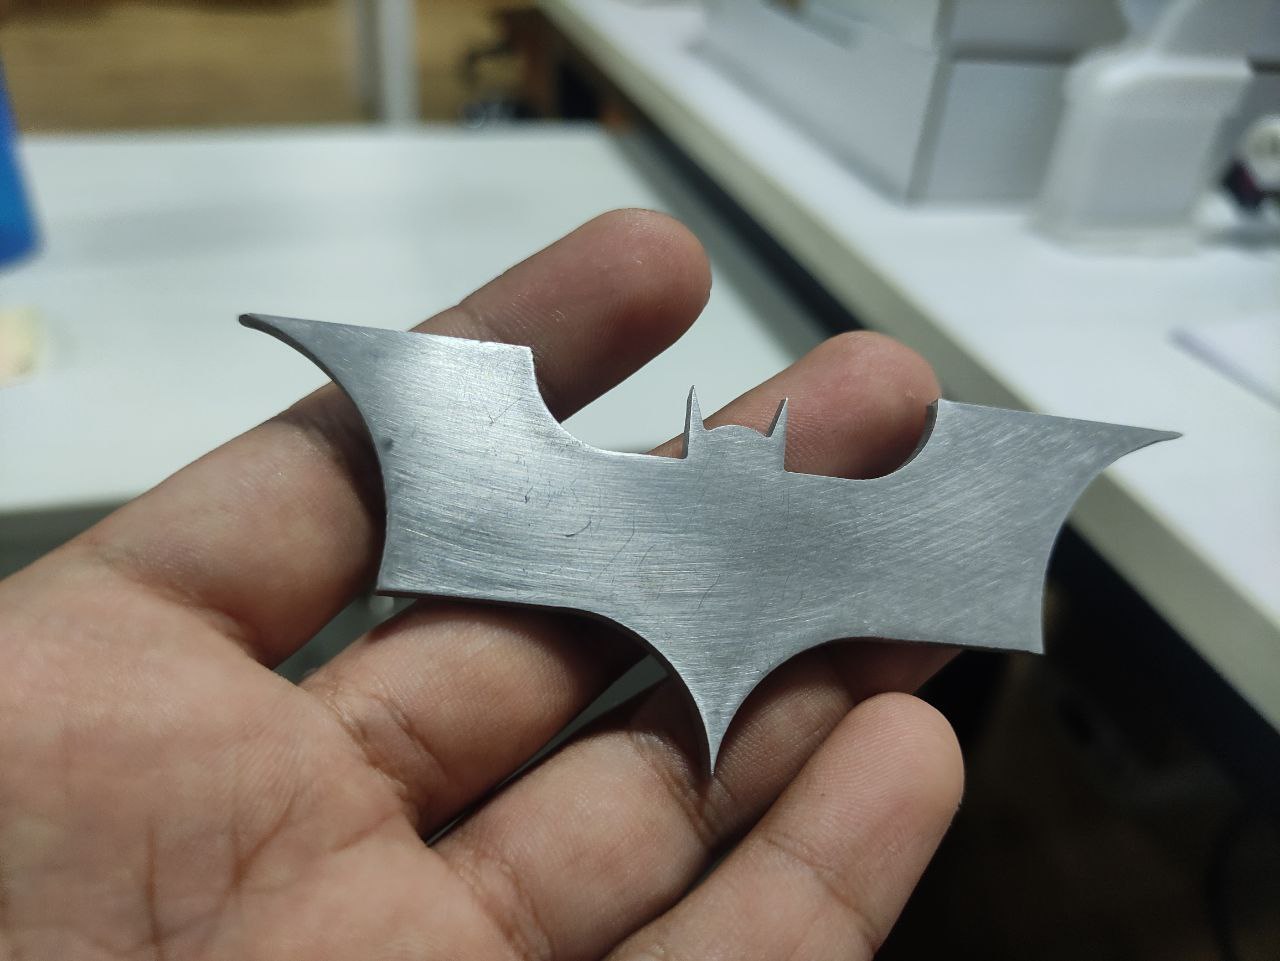
This is the batarang that we made using an aluminum sheet by cutting it with the waterjet cutter
Preparing the mold
- I used a foam board to make the mold
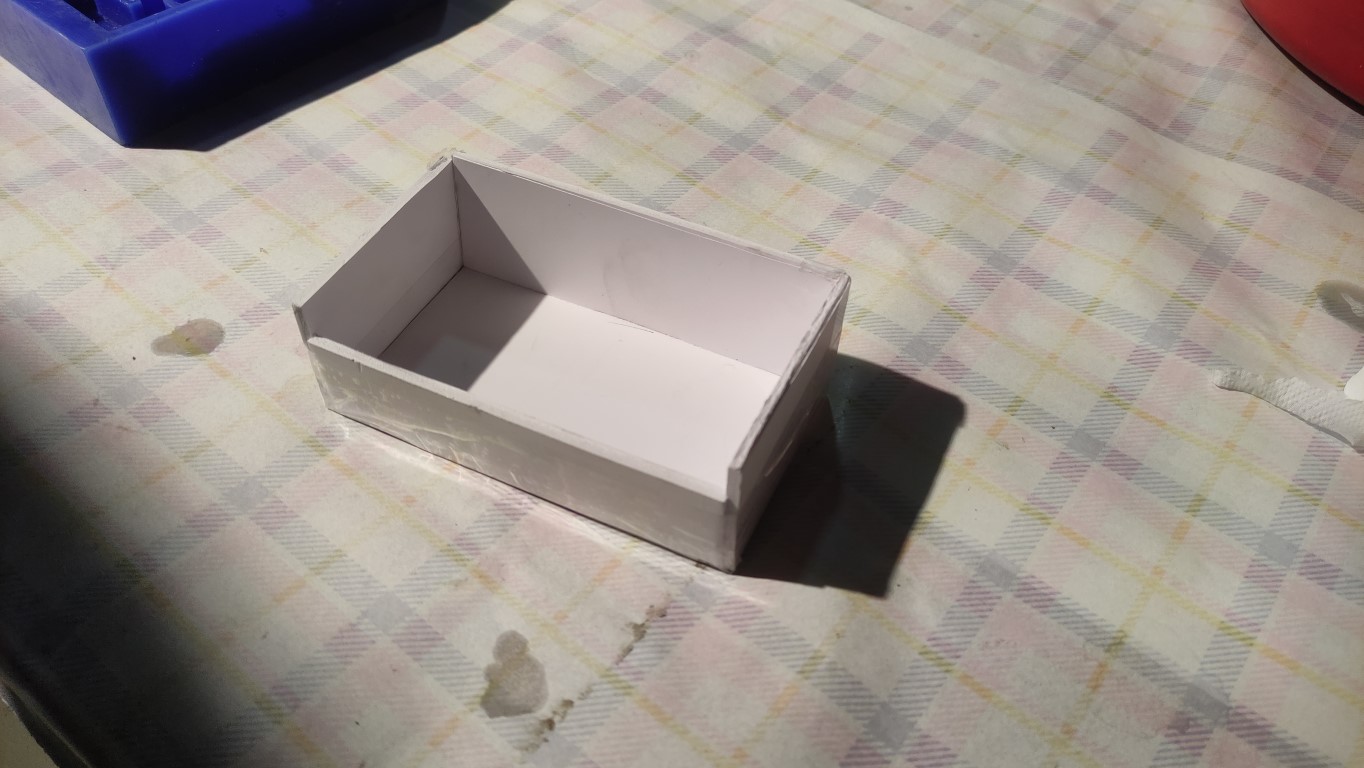
foam sheet was cut into a box shape covering the batarang completely
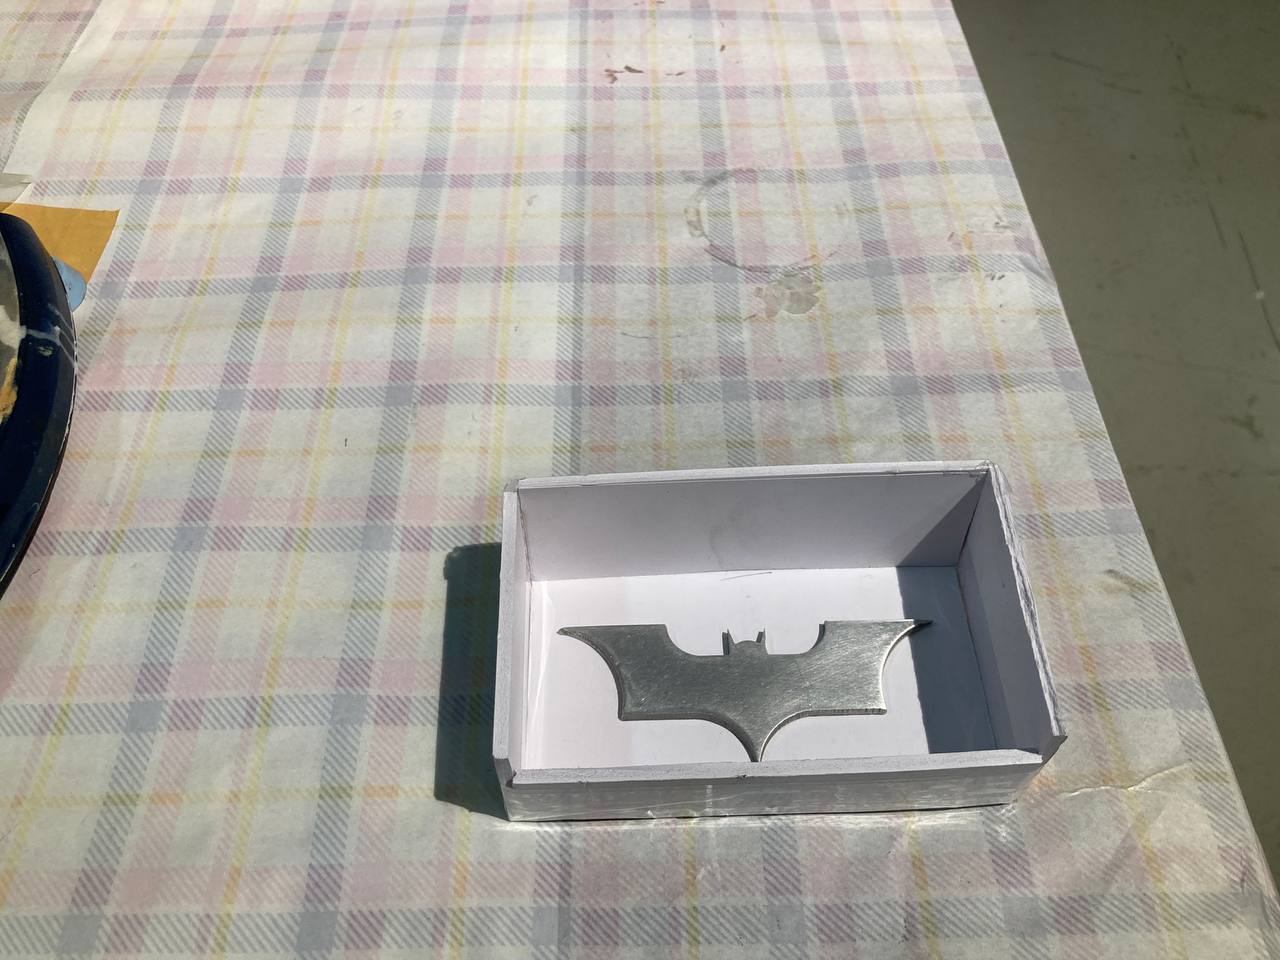
- this was a simple process all I had to do was mix the resin in the given concentration
the ratio for mixing=
- And pour the resin evenly, since the volume here dost need to be precise, I just poured it to a level where the part is completely submerged and poured some more to get some thickness at the base of the mold
poring the resin evenly into the mold
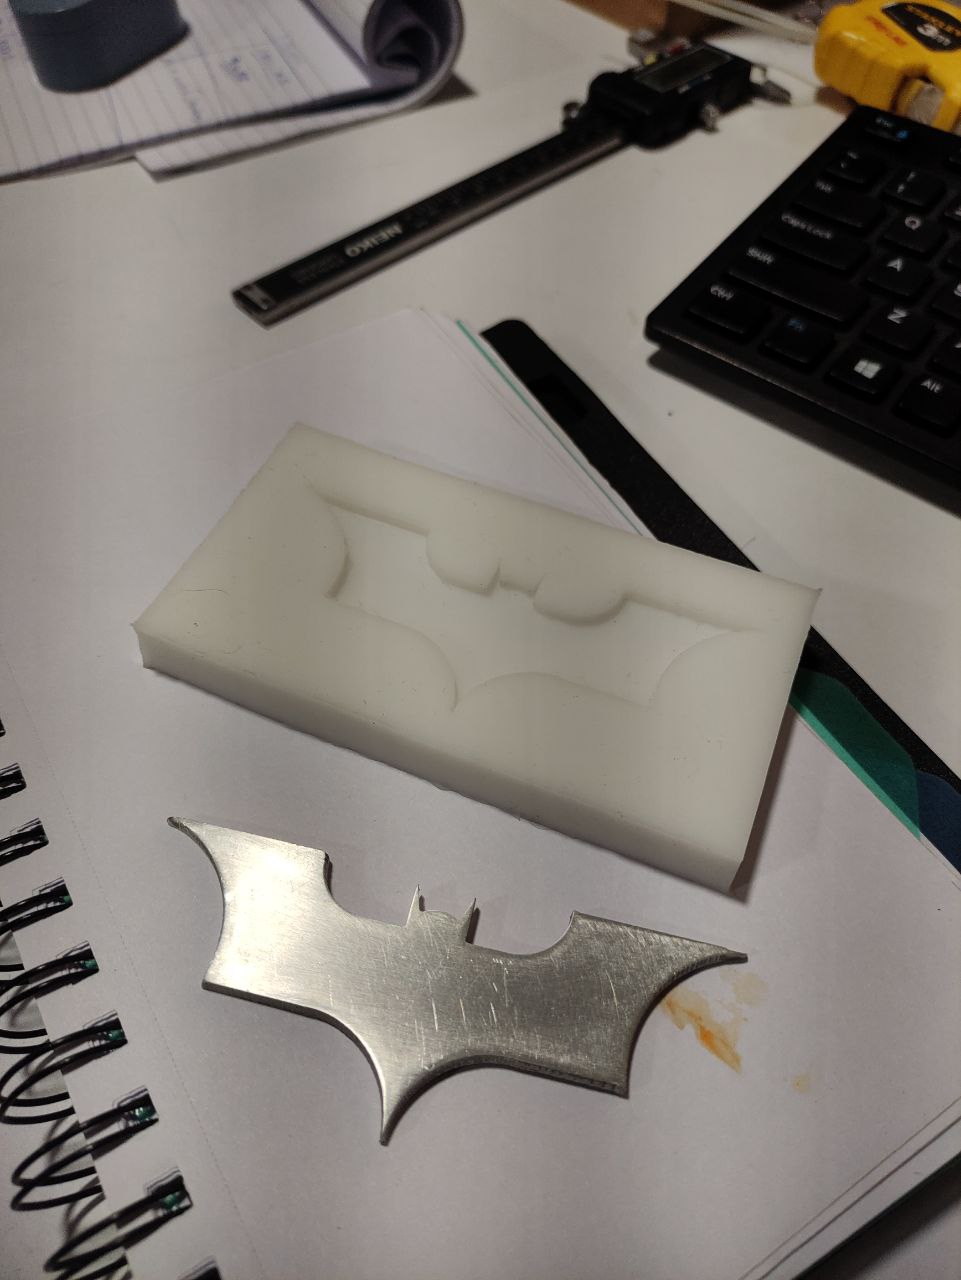
- the mold is ready and now we can pour resin or bismuth to cast in that material
Pouring Bismuth
Bismuth is often used for casting because of its low melting point, which makes it easy to melt and pour into molds. It also has relatively low toxicity compared to other metals, Also bismuth has a unique property of expanding slightly as it solidifies, which can make it useful for creating intricate and detailed molds.
- the melting point of bismuth is 271.4°C (520.5°F)
- I used a hot pot for melting the bismuth metal, it is a handheld device and works on 110v so I had to use a step-up transformer.
- checking the temperature using a thermal imaging camera
- melting the bismuth metal in the hot pot
- pouring the melted bismuth into the silicone mold
these are the parts made out of the silicon mold. one with bismuth metal and a resin
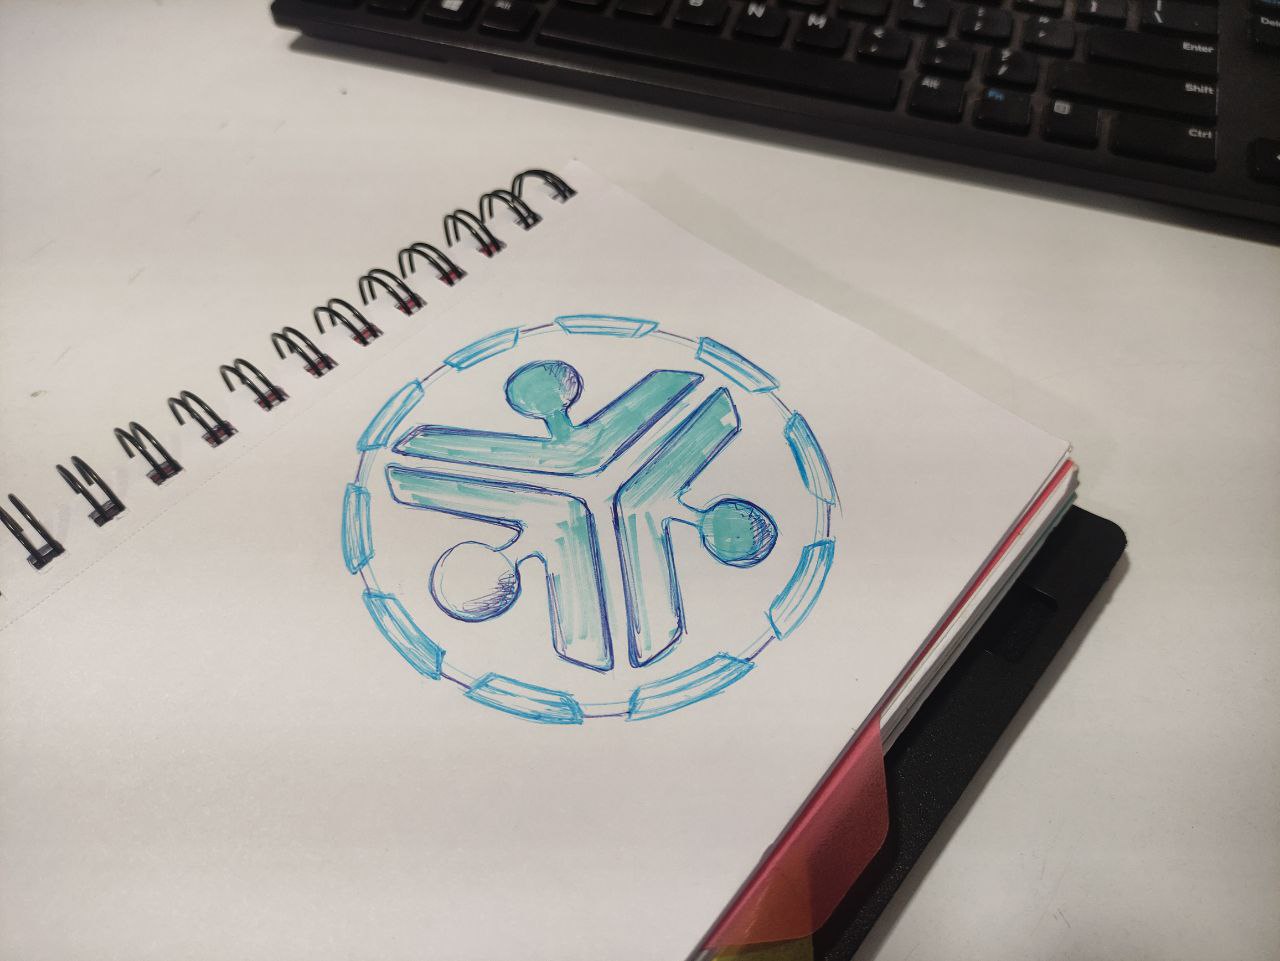
Second mold
- Initially, I sketched some designs to get an idea of what to model
CAD design in Fusion 36
- this was the final design
CAM in Fusion 360
CAM: stands for "Computer-Aided Manufacturing." It refers to the use of computer software and hardware to control and automate the manufacturing process, it can be used to generate toolpaths and instructions for machines such as CNC, lathes, mills, and other manufacturing equipment. it is also used to automate manufacturing processes like cutting, drilling, milling, turning, and grinding
- this is the workpiece that I got, it is a machinable wax block
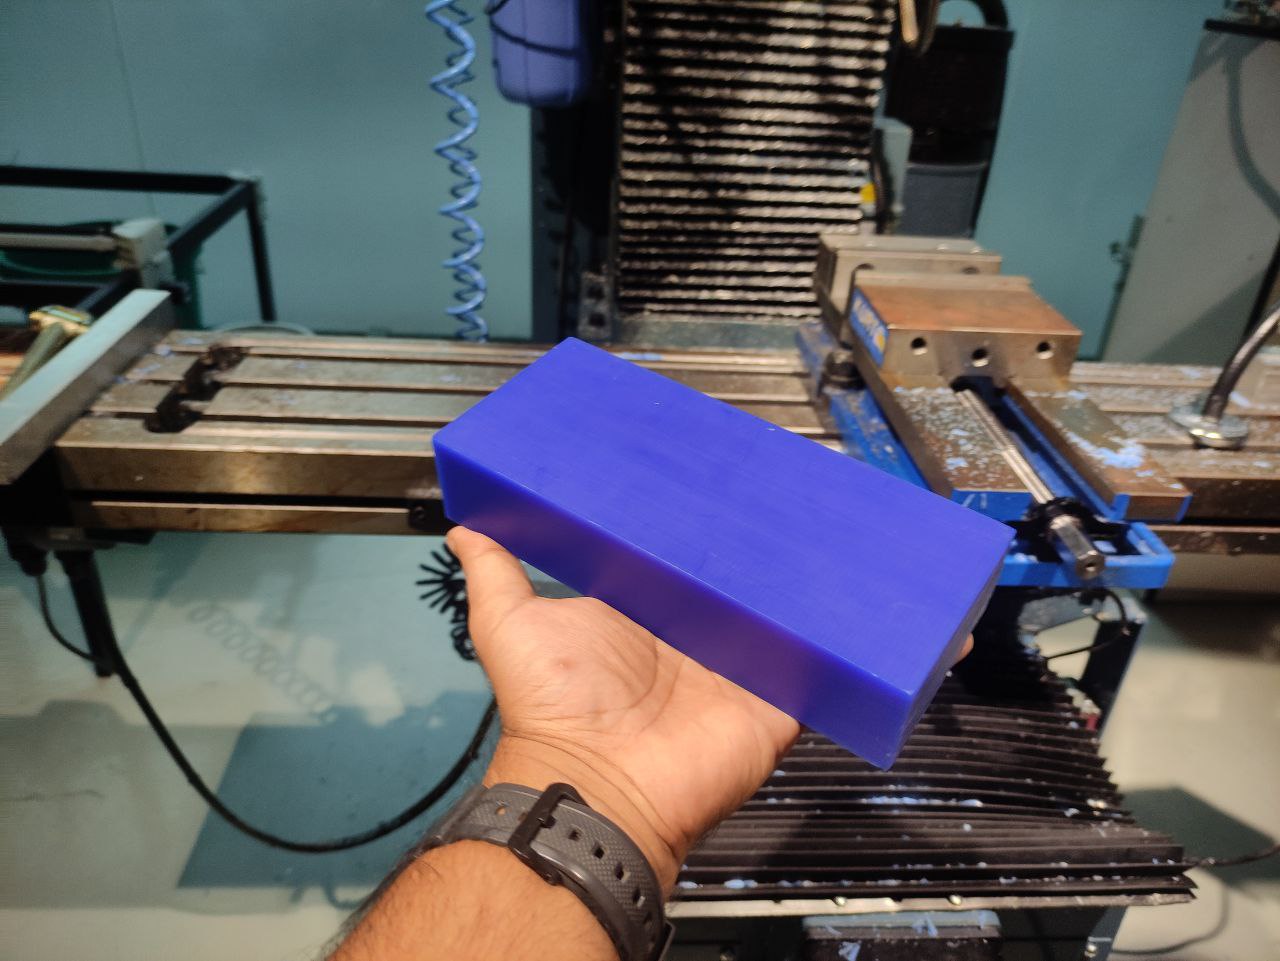
- by considering the material I got, I had to optimize the design accordingly
.gif)
- I changed the design to how the mold is actually going to be, carved out of the wax block
- since the 3D model is complete now I have to make the CAM for this
CAM in Fusion 360
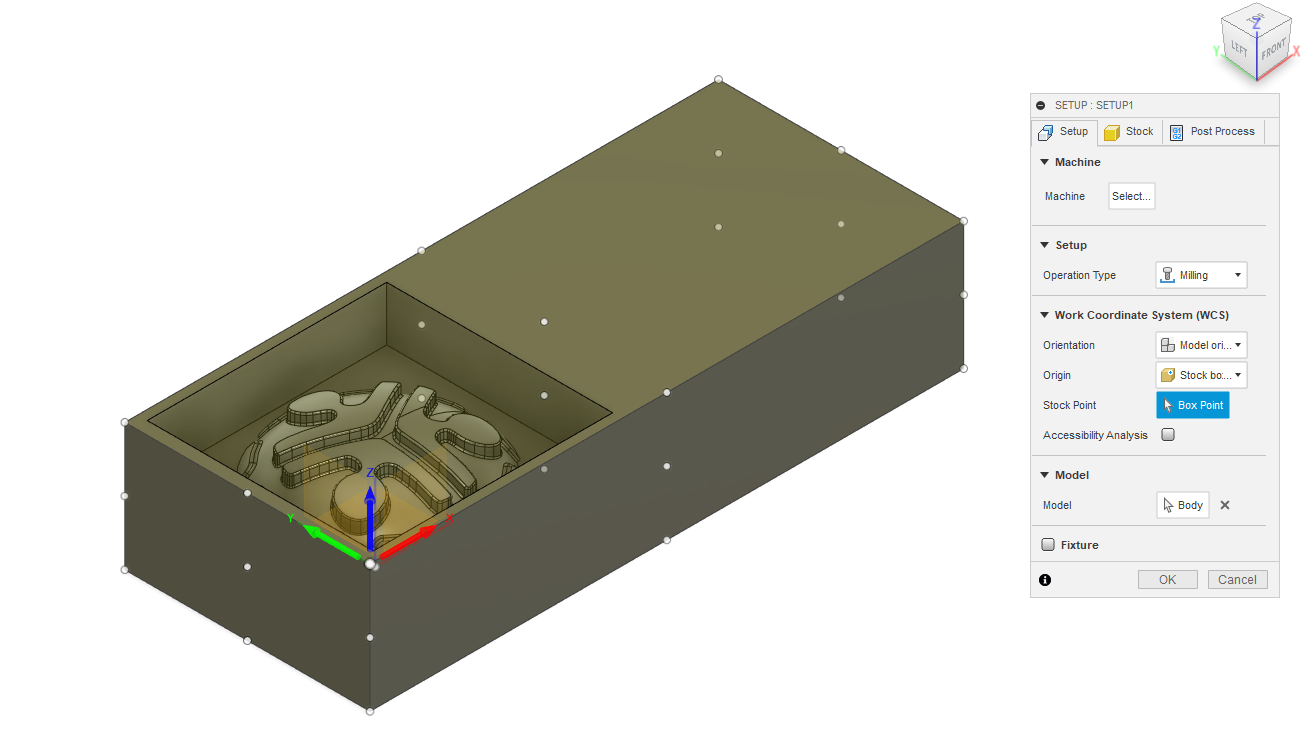
- Setting up the stock
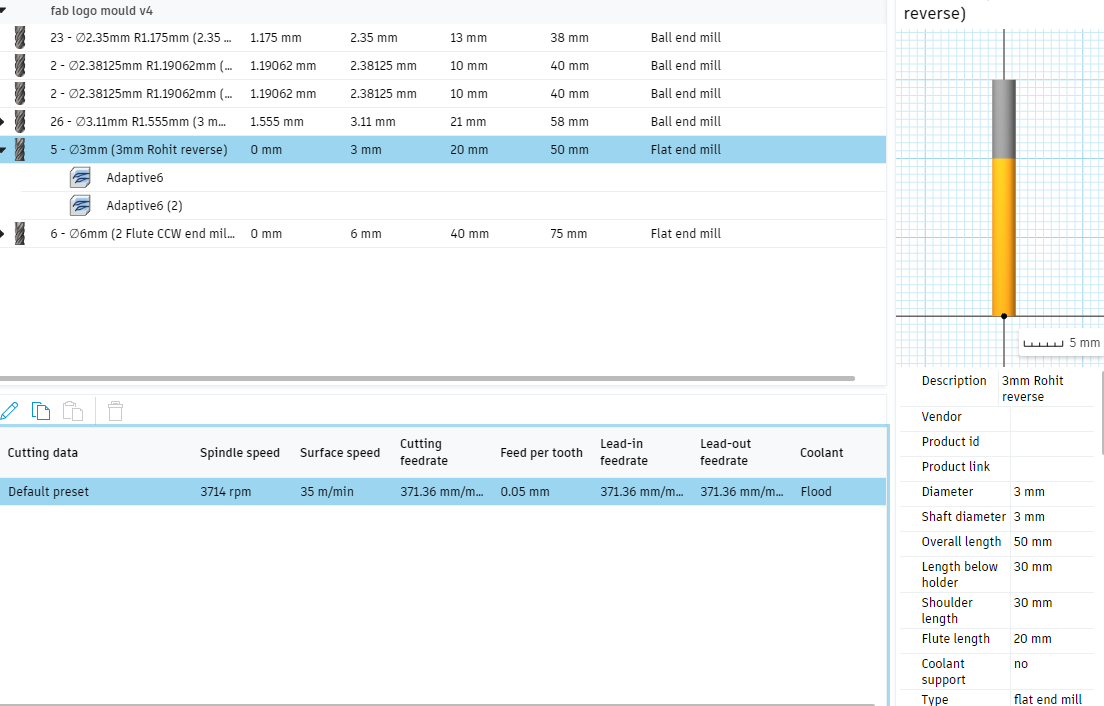
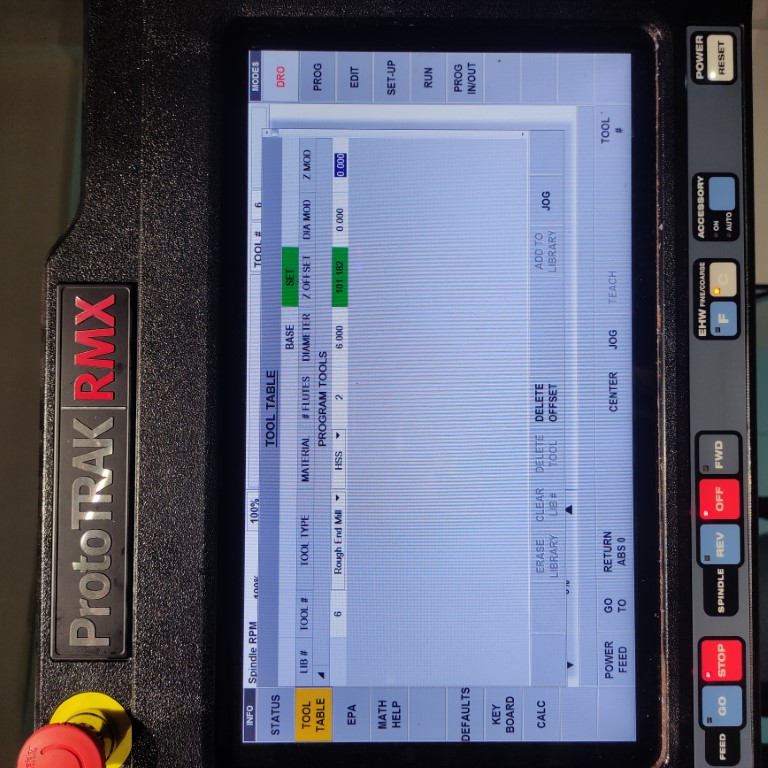
- before that, we have to set up the tool library with the tools we had in the lab, fortunately, our technical officer Rahul had already made a detailed library with all the tools available in the Lab, I just had to import it into my fusion 360
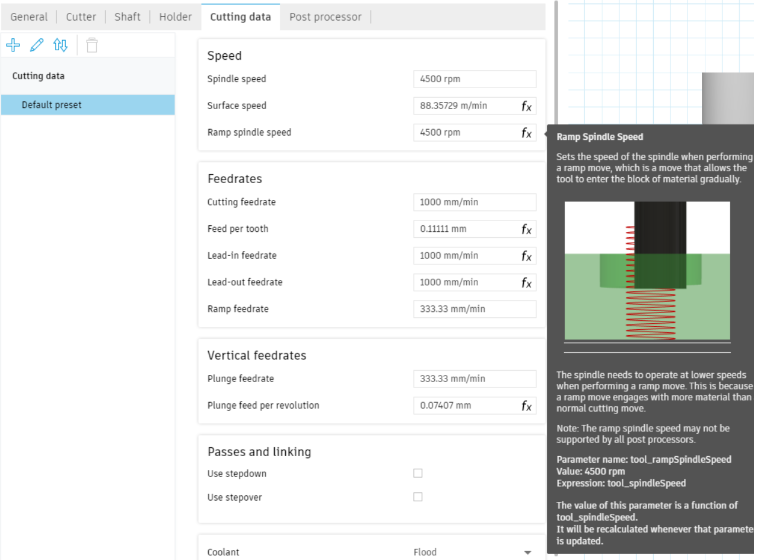
- setting the tool speed and feed,
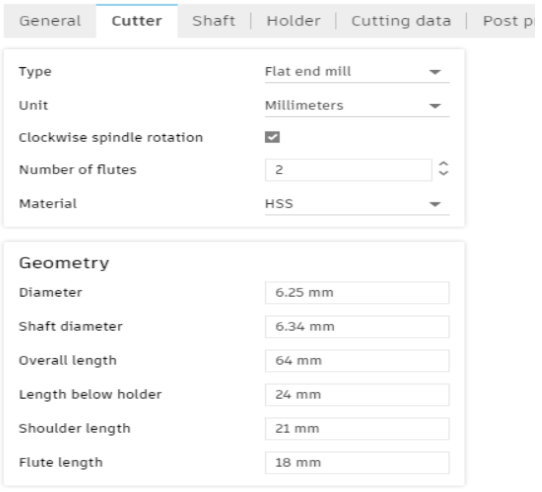
- Selecting the tool for the first machining operation
For this, I used a 6mm end mill to remove the maximum material at this operation
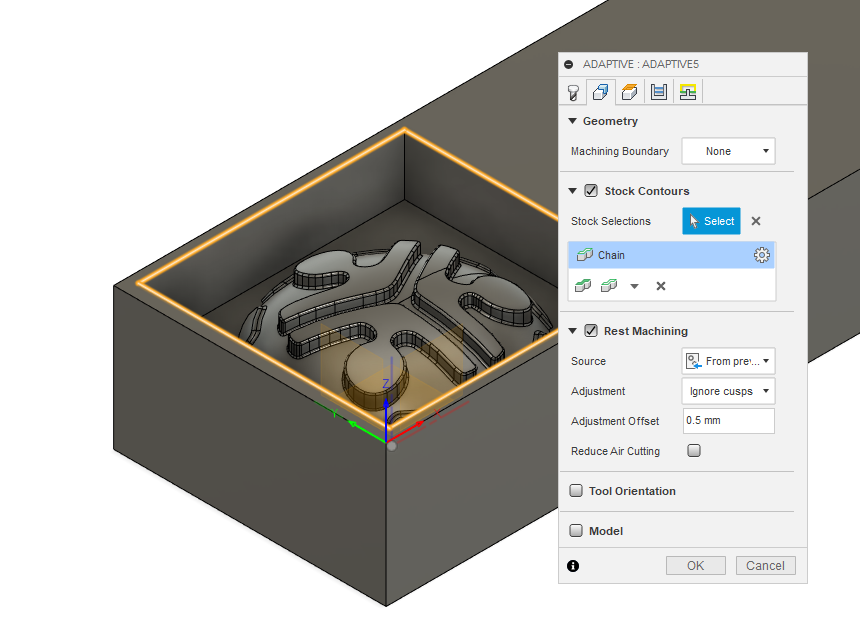
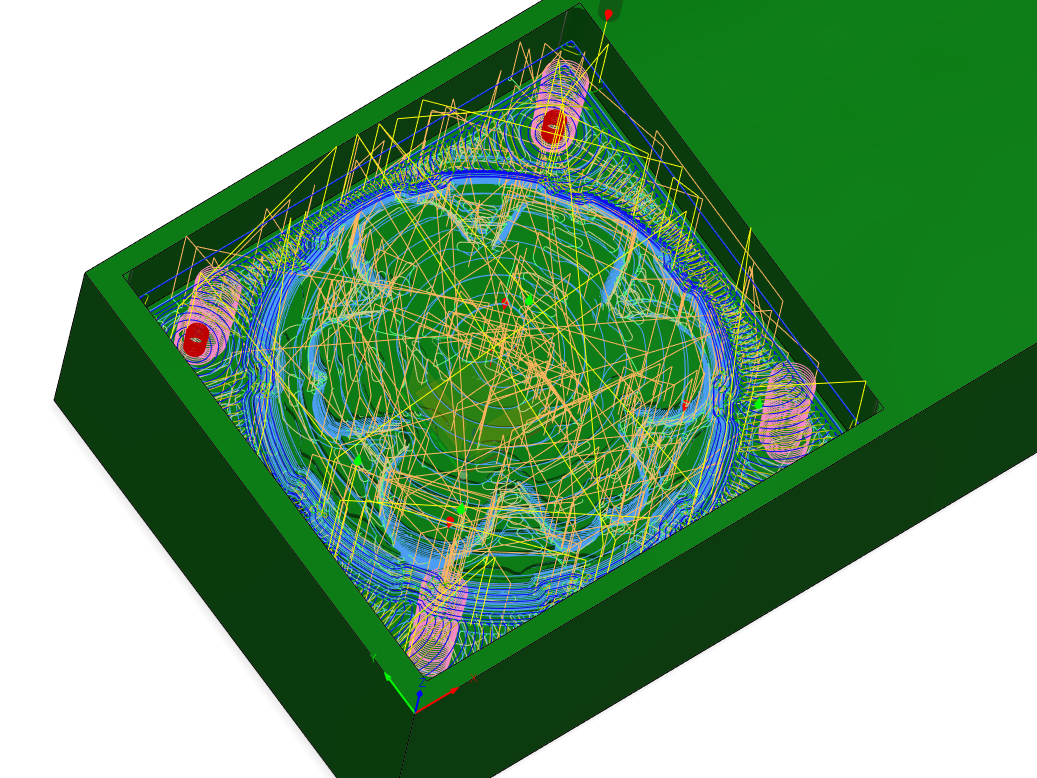
- chose 3D adaptive clearing for removing a large quantities of material

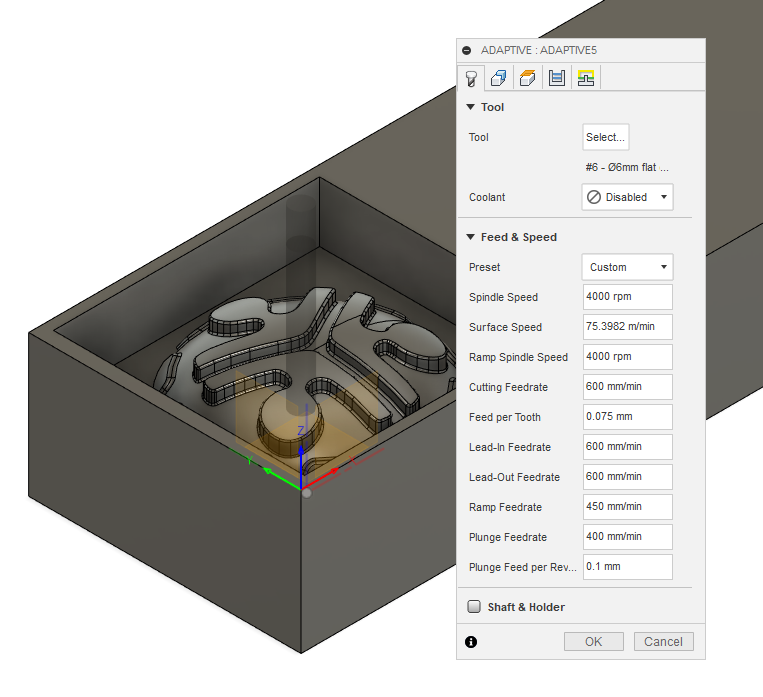
- select the contour where the operation is to be done
- this is the view of the first machining process, here we can see how and where the material is going to be removed.

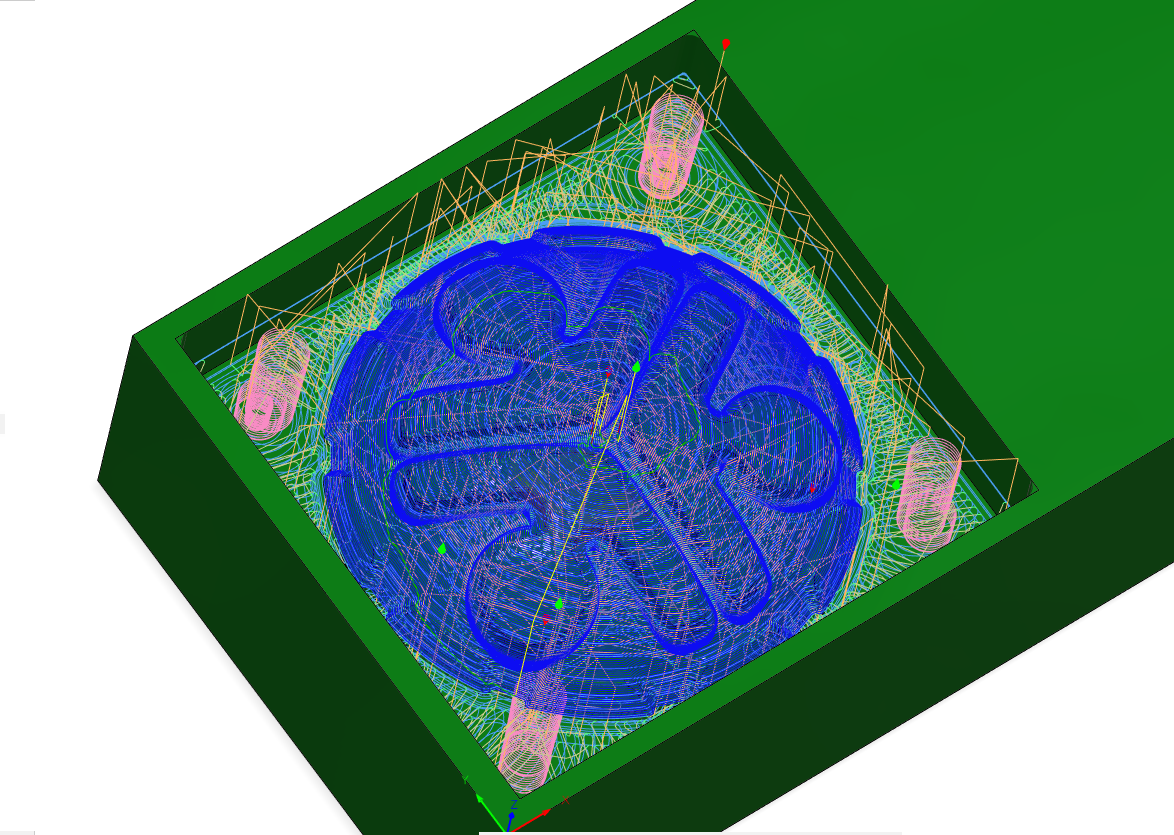
- for the second process, I choose a 3mm flat-end mill to remove material from where a bit more details are there. this process will be taking more time since the material is removed delicately.
and this is a 3D Flat operation that finishes the flat areas.
- selecting the 3mm flat-end mill from the library
- For the 3rd and final process, i chose a 3mm ball end bit, for the finishing of the mold, in this process not much material is removed, but we will be getting a good finishing, scallops operation for finishing the curved area.
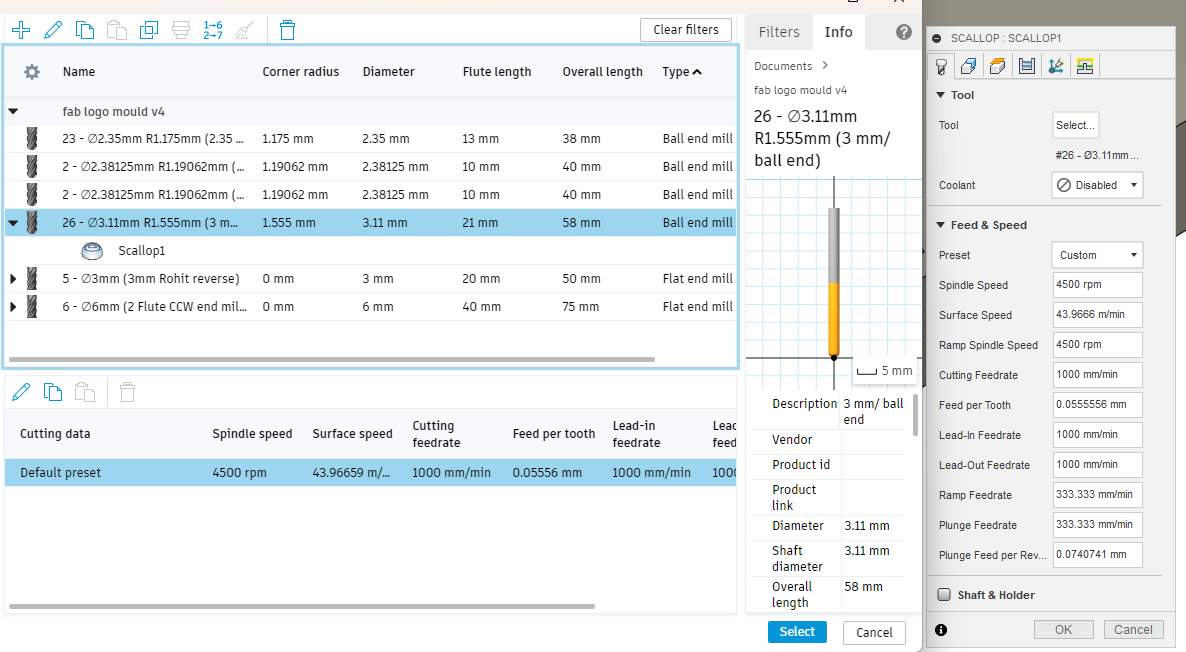
- this will be the output of the finishing pass, we can see that it is what exactly we needed, in some cases the tool will not be able to carve out all the design details, and for that we will be needing a finer tool.
Milling the mold
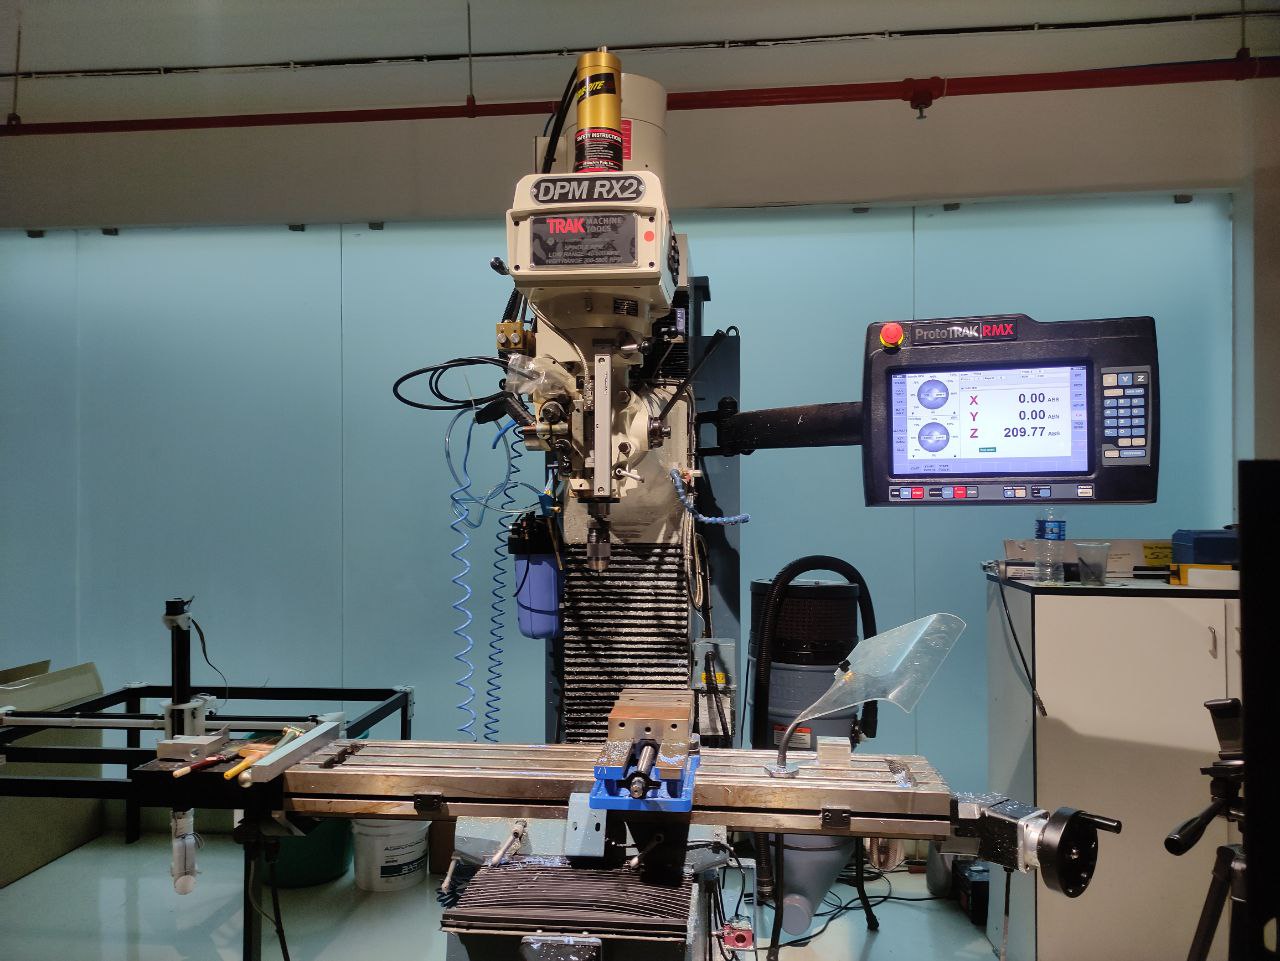
The milling machine: TRAK DPM RX2
- But first safety
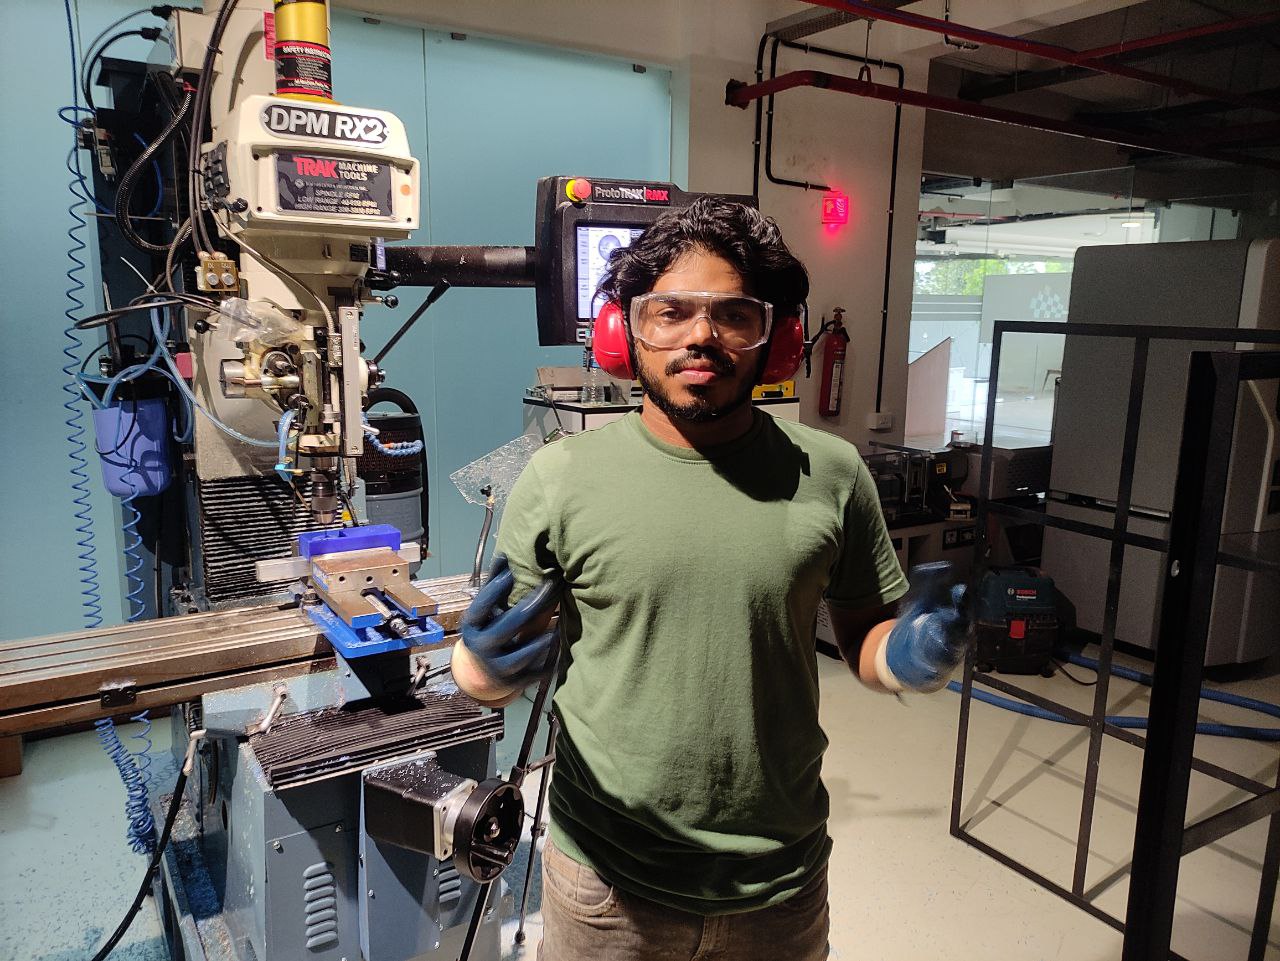
this is me all geared up for the process, with safety glasses, hearing protection, and gloves
- Setting up the workpiece
I uploaded the G code to the machine using a pen drive
Setting up the machine
- Turn on the MCB and wait for the machine to boot up.
- Long-press the reset button on the DRO to enable the controller.
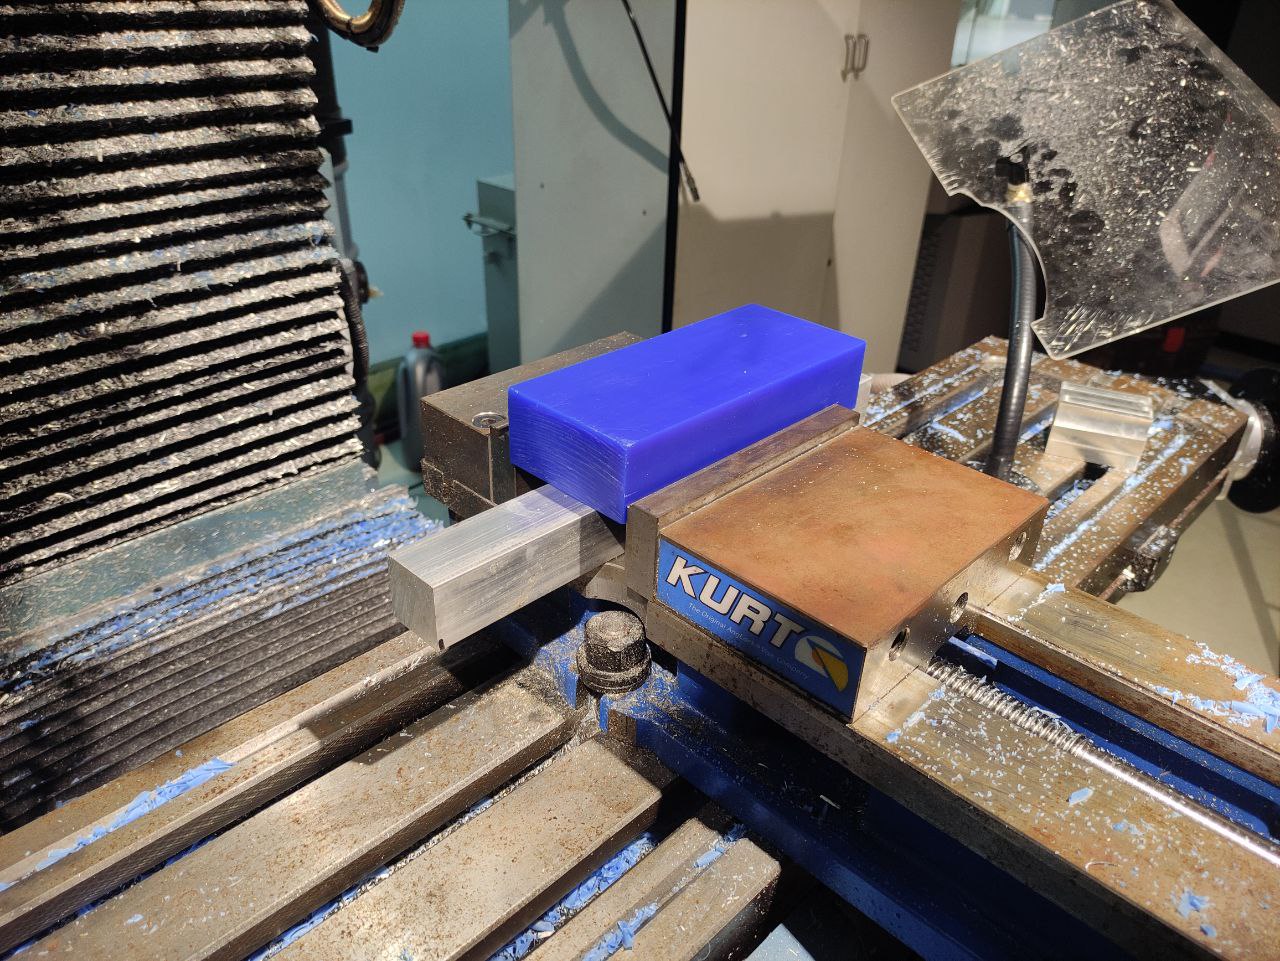
- Secure the wax block on the vise, as shown above
- Set the X and Y origin at the corner of the wax block.
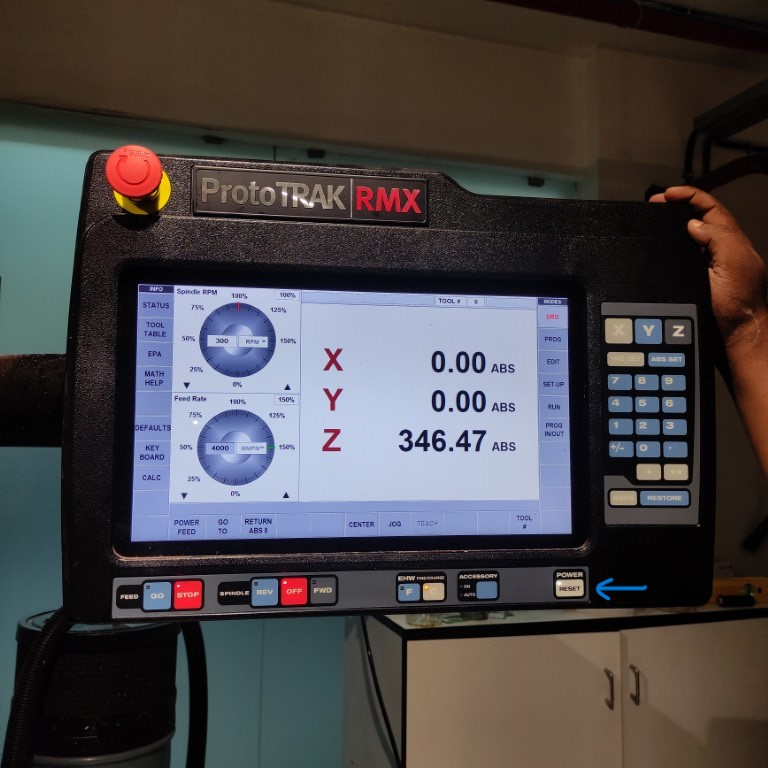
- Go to the DRO and select JOG mode.
- Make sure there's no tool in the spindle, then insert the R8 drill chuck and start the spindle at 800 rpm.


- Zero the X-axis and approach the wax block from X+ to X- until the edge finder becomes concentric.
this is the edge finder probe, it is a mechanical probe.

- Move the tool about 10 mm into the material and make sure the edge finder dislocates at the edge.
- Move the tool 10 mm back to the original point, then exit JOG mode by pressing the X button and setting the current position as 2 (edge finder dia/2). Press the "set absolute" button.
- now zero the Y-axis and approach the wax block from Y- to Y+ until the edge finder becomes concentric.
- Move the tool about 10 um into the material and make sure the edge finder dislocates at the edge.
- Press "program In/Out" and select the first GCODE file.
- Go to "Tool Table" and remove any tool holder/tool in the spindle. Press JOG and move the spindle close to the base point (back of vise).
- Exit JOG mode, release the quill, and press it against the base. Select "base" and press "set absolute" to set the base point.
- Select the tool for the operation. If it doesn't exist, create a new one by specifying the type and diameter. Insert the tool holder and
tool in the spindle. If it's a newly created tool, press the tool
against the base, select "Z offset" and press "set absolute" to set the
tool offset.
selecting the tool
- Set the Z origin by moving to the DRO and selecting JOG mode. Jog the tool just above the wax block, release the quill, and press it against the wax. Exit JOG mode, select Z, and press "set absolute" to set the Z origin.
- Set the safe retract by moving the tool away from the wax block. Go to setup, select the Z to retract status button, and press "set absolute" to set the Z safe retract height.
- For safety reasons, it's recommended to start GCODE manual feed.
manual feed can be done by turning the spindle
- Go to "RUN", select "Start" and "Tracking", press spindle "REV" and press "FEED GO".
- Rotate the jog wheel clockwise to advance in GCODE and anticlockwise to travel backward in GCODE. If everything is okay, press "FEED STOP".
once everything is clear, make sure that it's only removing material as per the design
- Press "CNC Run" and then "FEED GO".
- to start the milling press the run button
- To verify the tool path, click on the "Toolpath" button.
To monitor the G-code, click the "Track" button. The X spindle is used for coarse adjustments, while the Y spindle is used for precise tuning.

this is the toolpath shown from the GCODE
- time-lapse of the milling process
- after the first pass with a 6mm end mill, this is the result 👇🏼

- After the second pass with a 3mm end mill 👇🏼
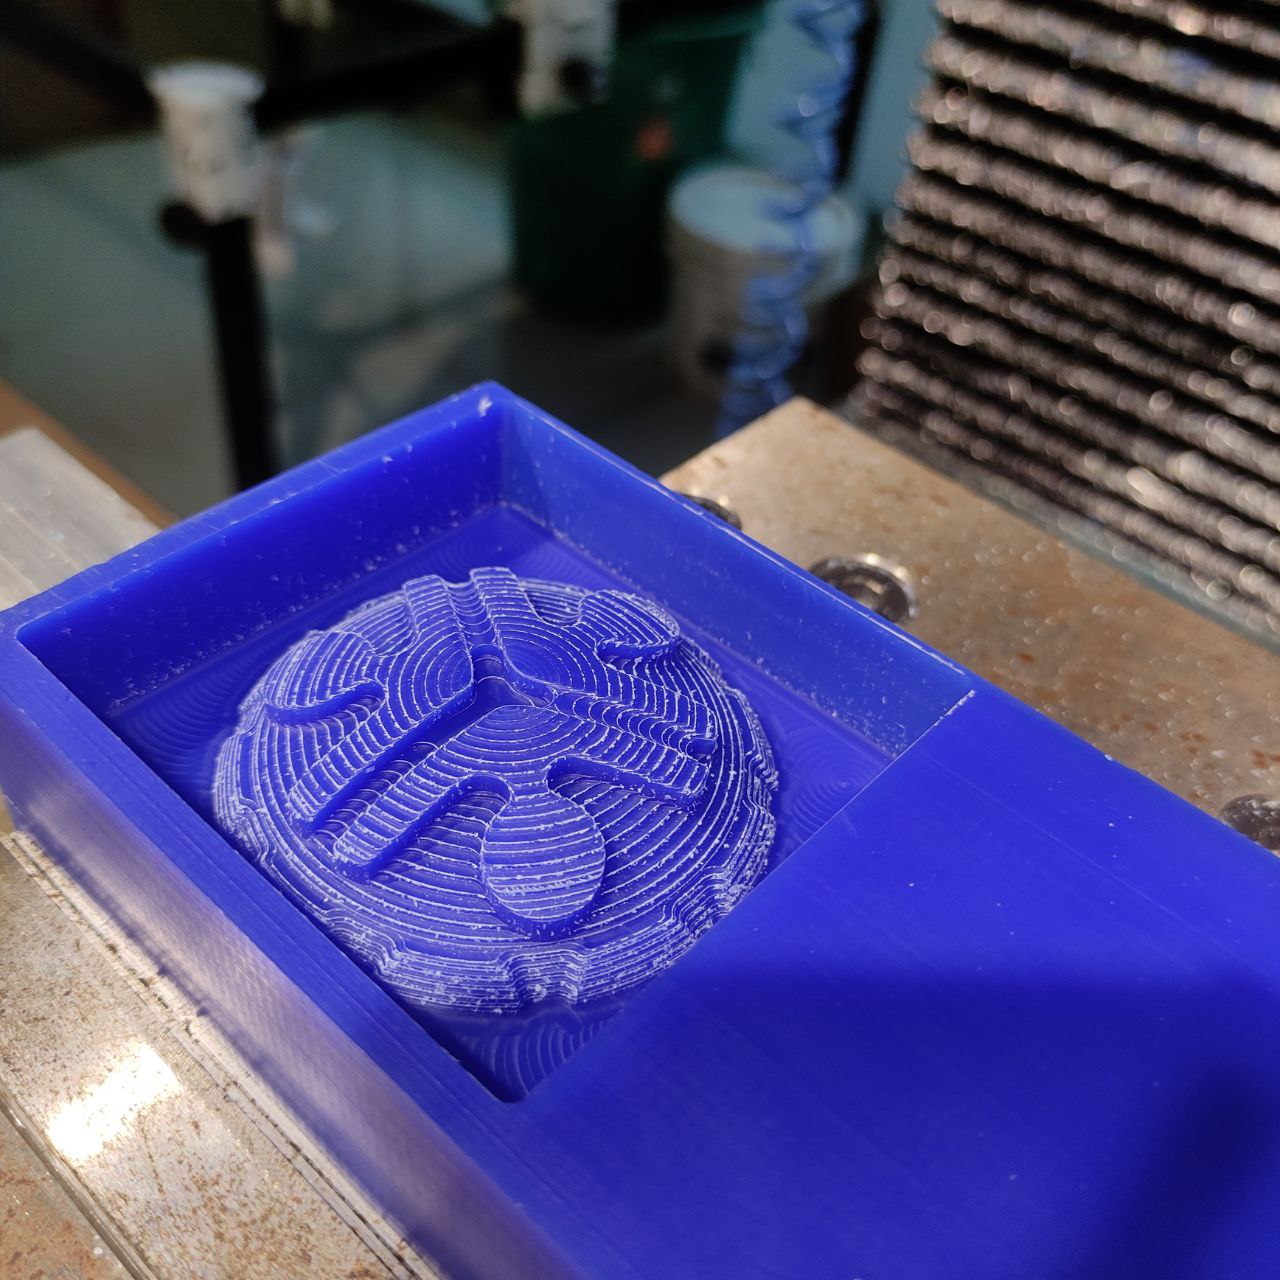
- The final fining pass with a 3mm Ball end bit
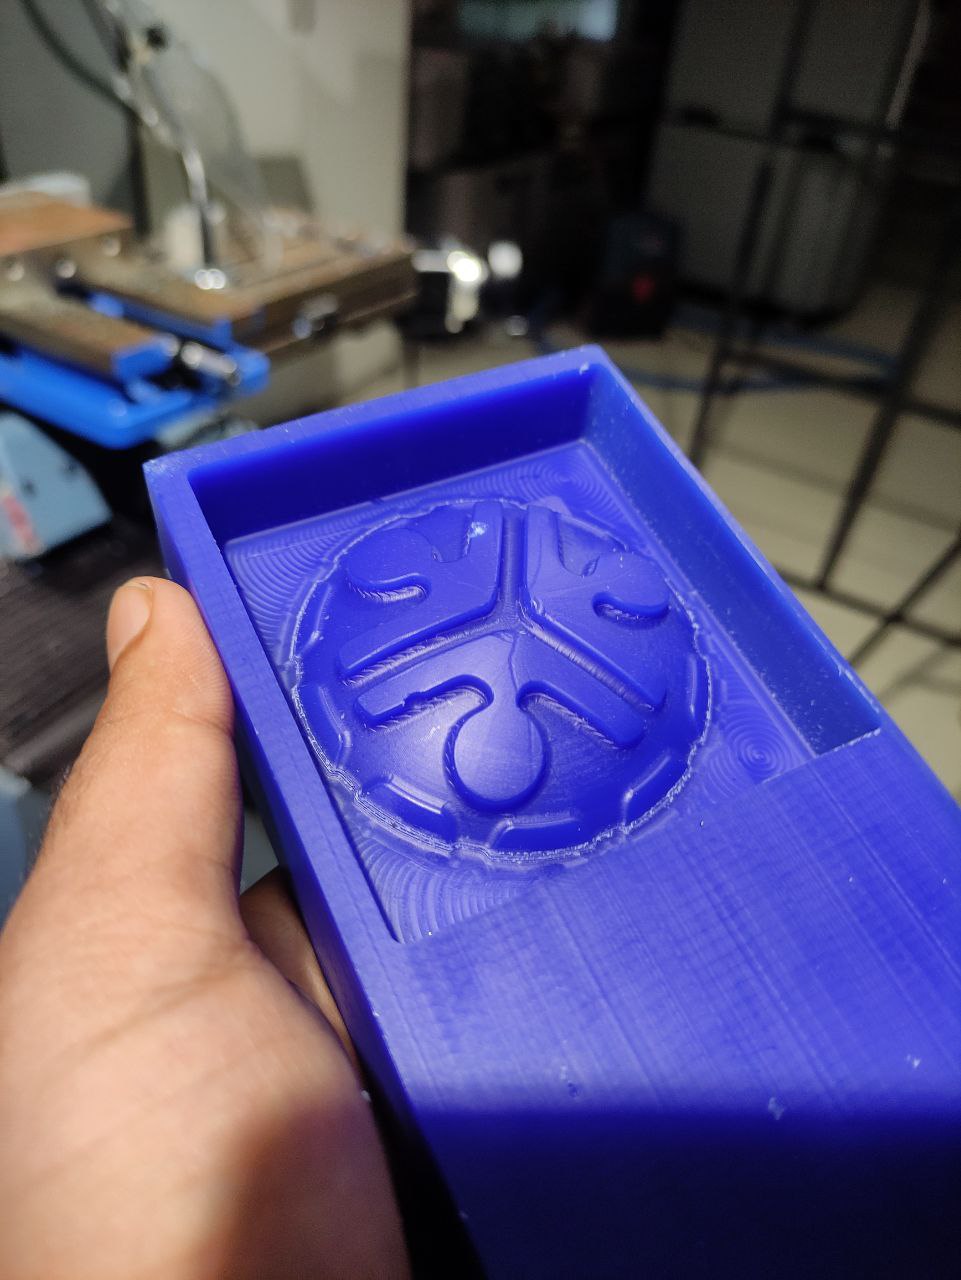
Molding
It is now time to create a positive mold. To do this,
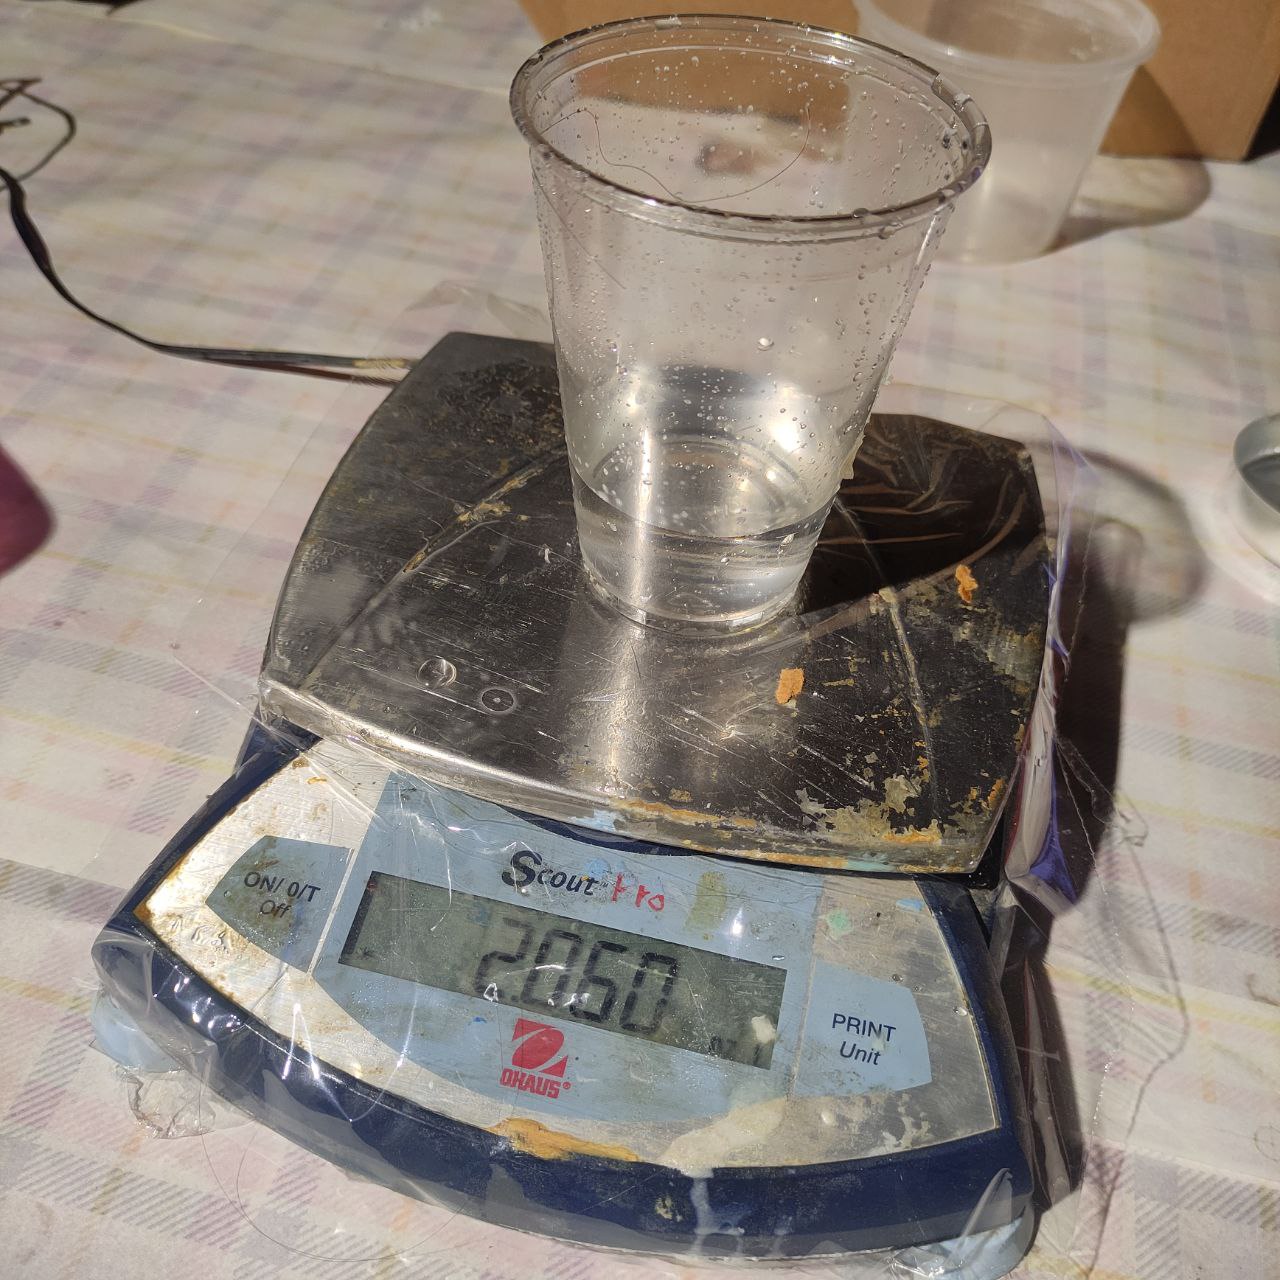
- we need to determine the volume of the positive mold.
- To measure the total volume of the negative side of the wax mold, I filled the mold with water and marked the volume on a glass surface using a marker.
- Then, I weighed the water-filled mold using a weighing machine. After this step, I used high-pressure air to clean the wax mold and remove any remaining water particles.
- calculating the volume to know how much resin will be needed.
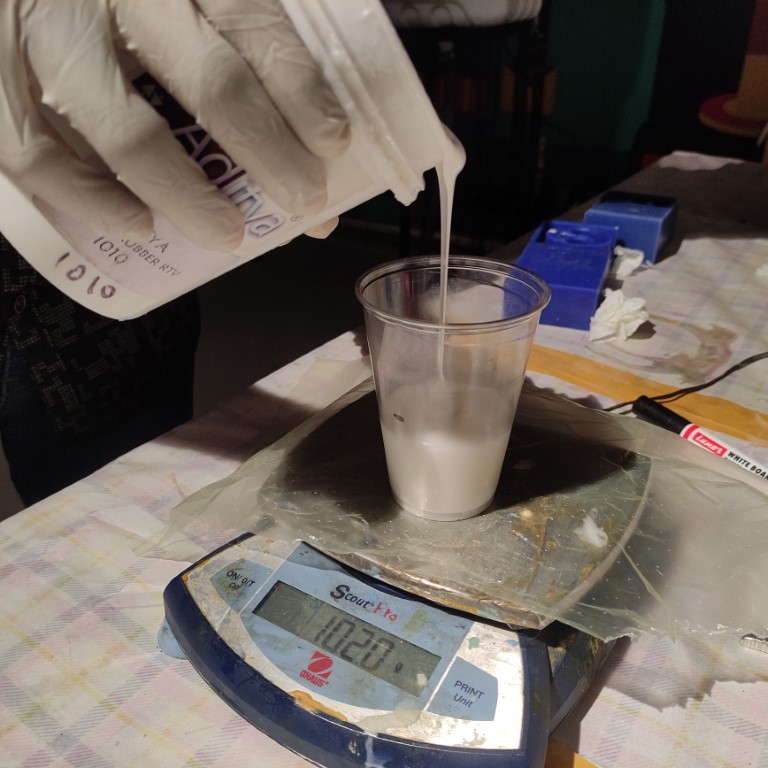
In this process, I used Adithy brand Silicon rubber rtv 1010, and curing agent.
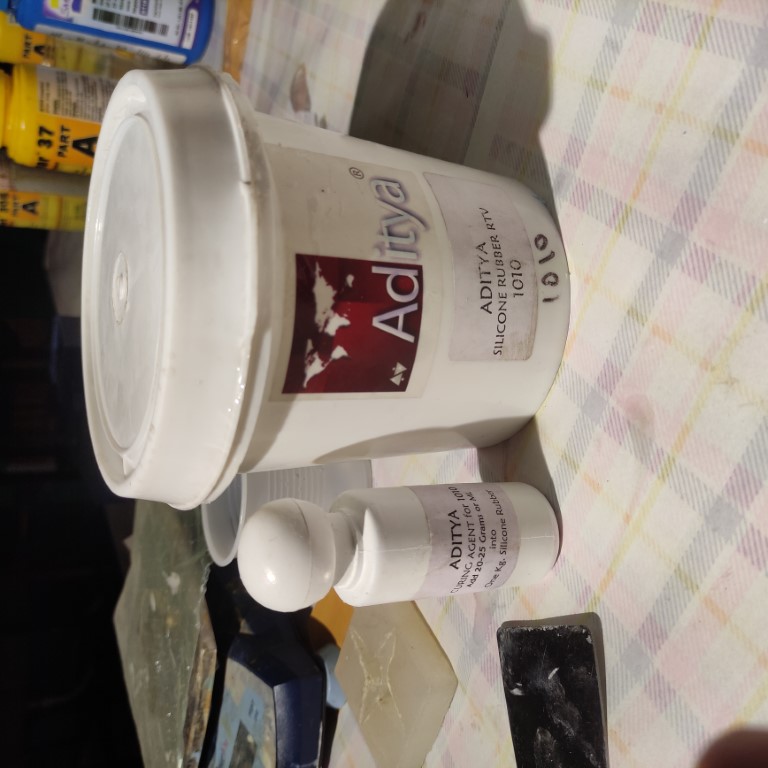
- The recommended composition is Silicone Rubber 1000 grams + 25 grams curing agent.
with a ratio of 50:1
- the curing time is 24 hours
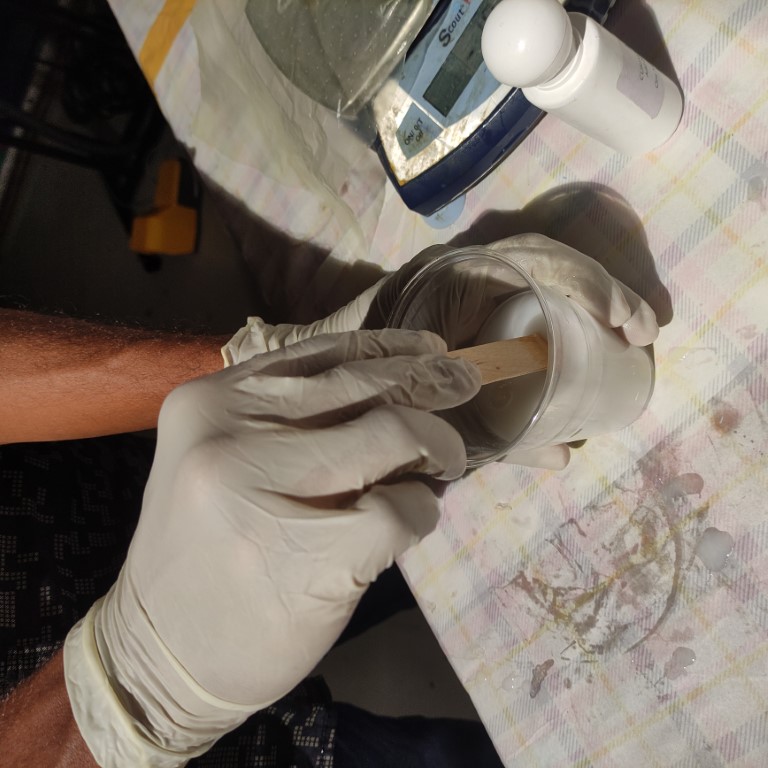
- For my application, I used 20 gm of Silicon rubber and 1 gm of curing agent. To ensure the mixture was free of air bubbles, I mixed it slowly and thoroughly.

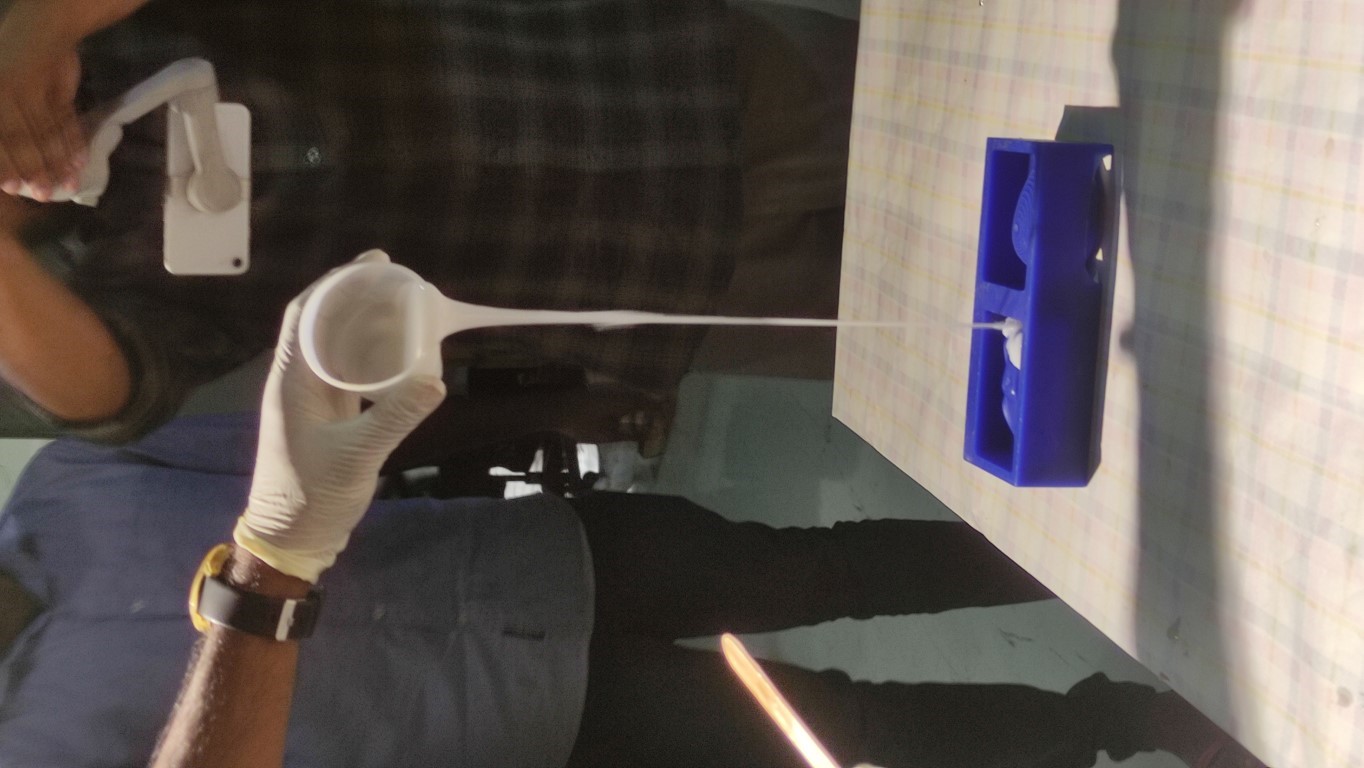
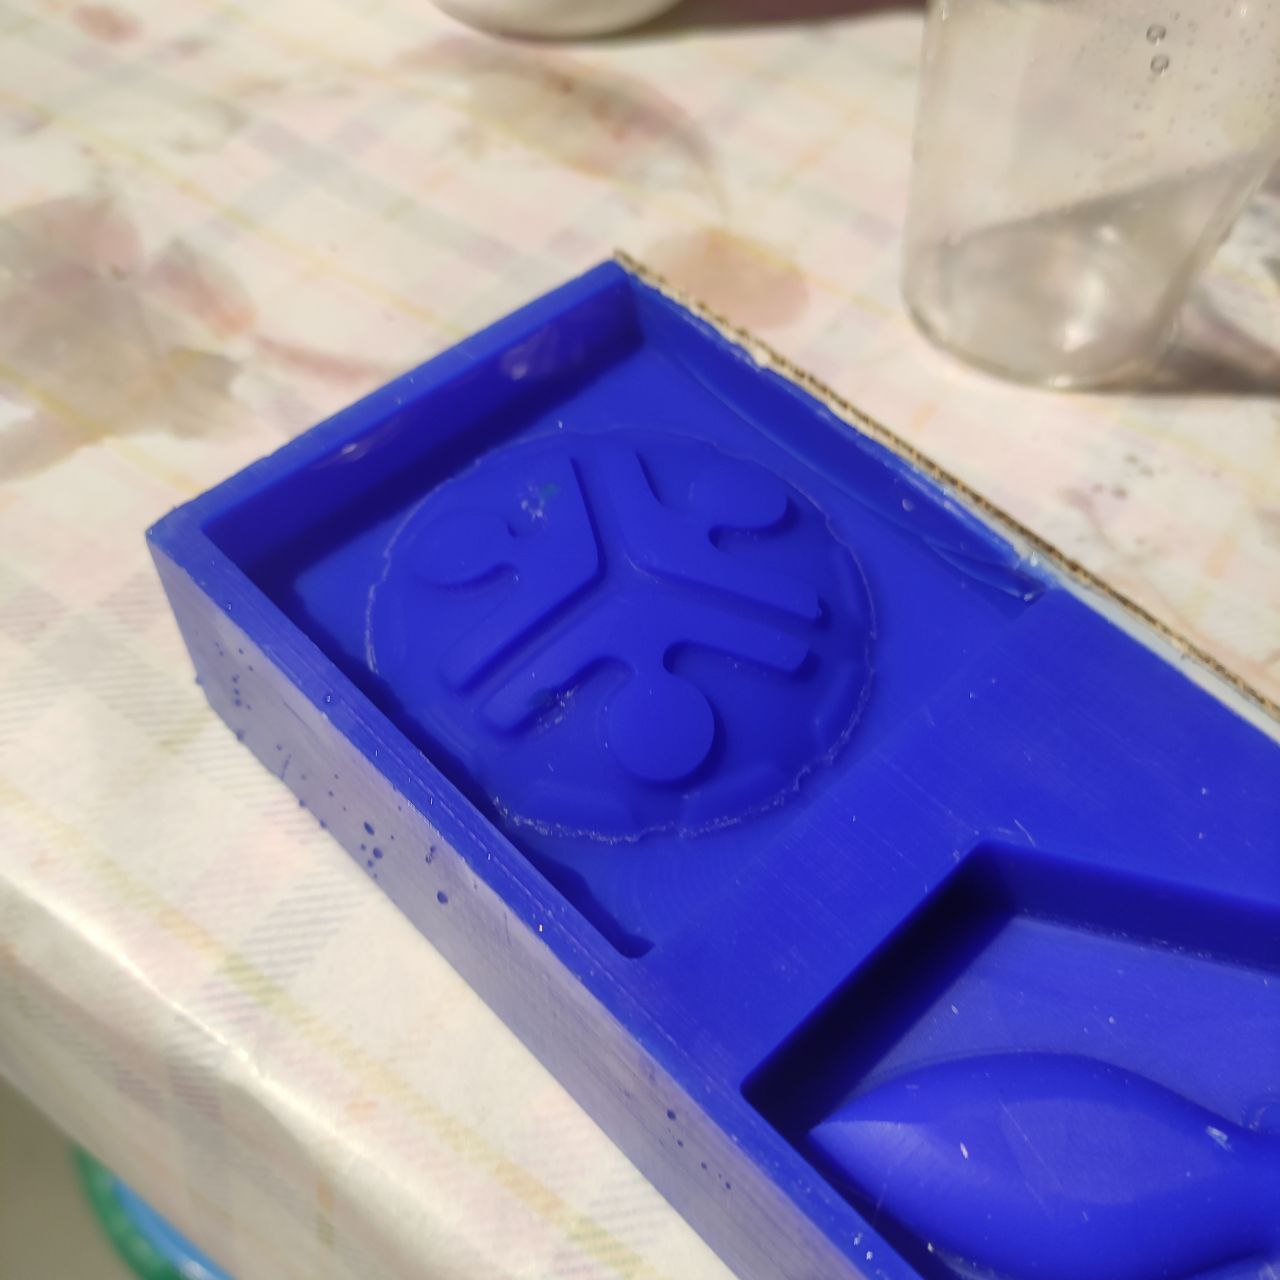
- now the silicone mixture is poured slowly into the mold, we need to pour in such a way that there should be no bubbles formed, the best practice is to pour it from a height so that a continuous uniform flow can be maintained.
- before that, i just sprayed the inside of the mold with a part remover spray.
- and left it to cure overnight
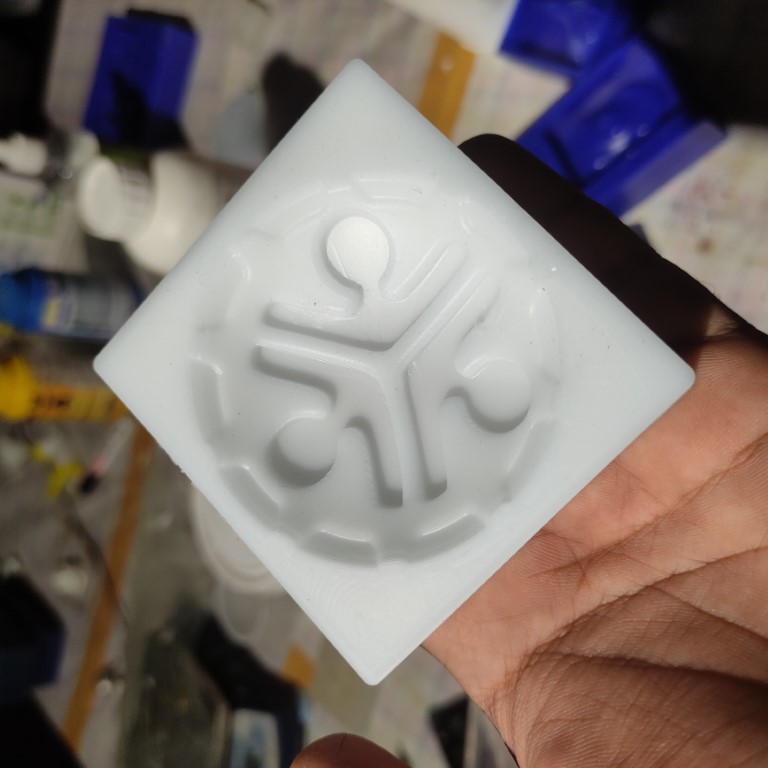
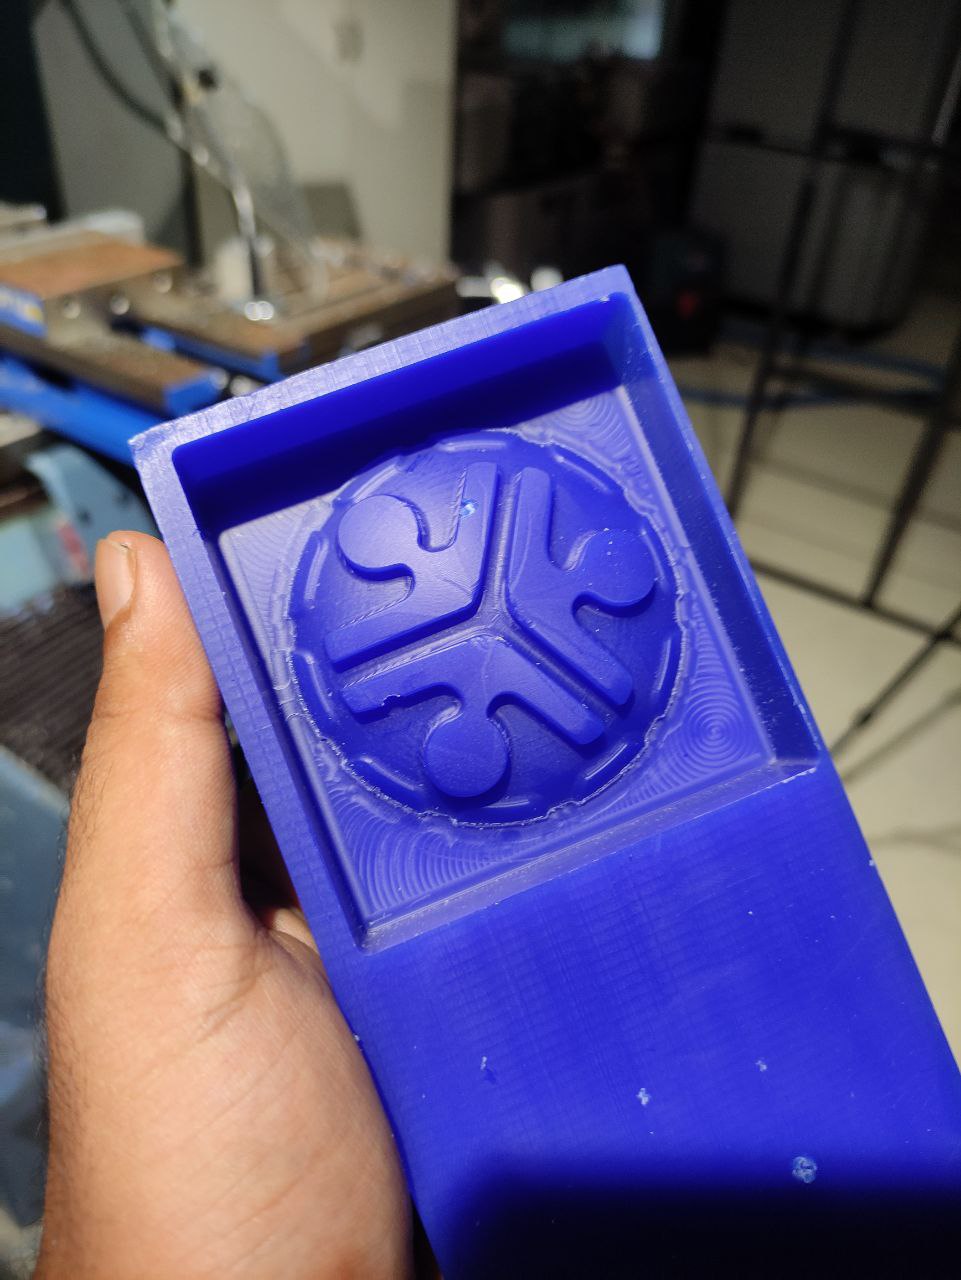
This was the output it came pretty neatly.
Casting
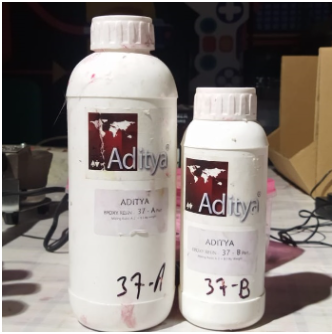
- for casting, I'm going to use the Adithy brand resin
- the composition is that Part B must be half the quantity of Part A
- Similarly, in this step, I need to determine the volume of the cast and mark it as previously done in the silicon mold. Then, I weighed it as described earlier.
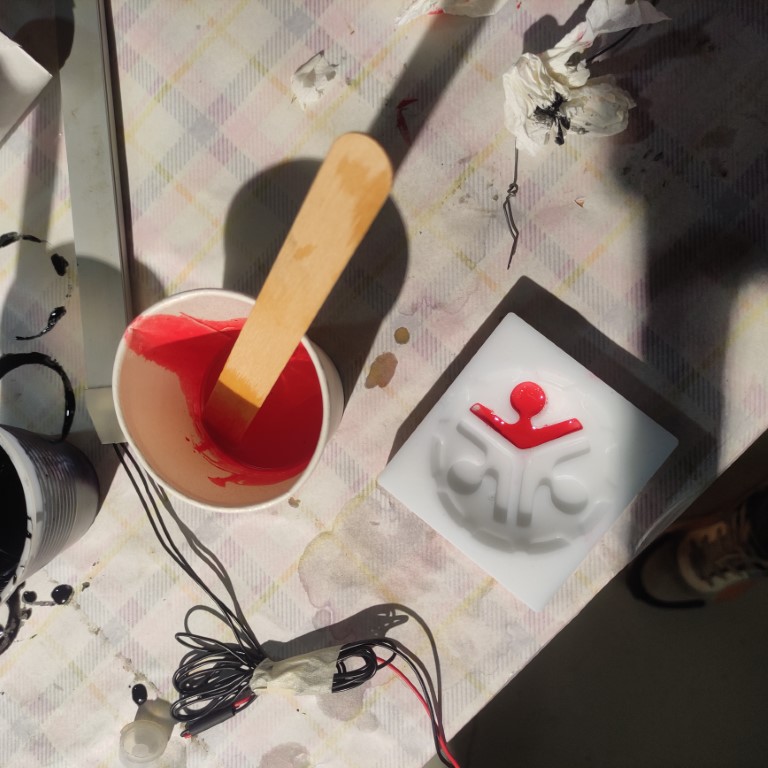
- To create the positive mold, part A and part B of the Silicon rubber are mixed thoroughly, and they should be mixed together slowly to prevent the formation of air bubbles in the mix.
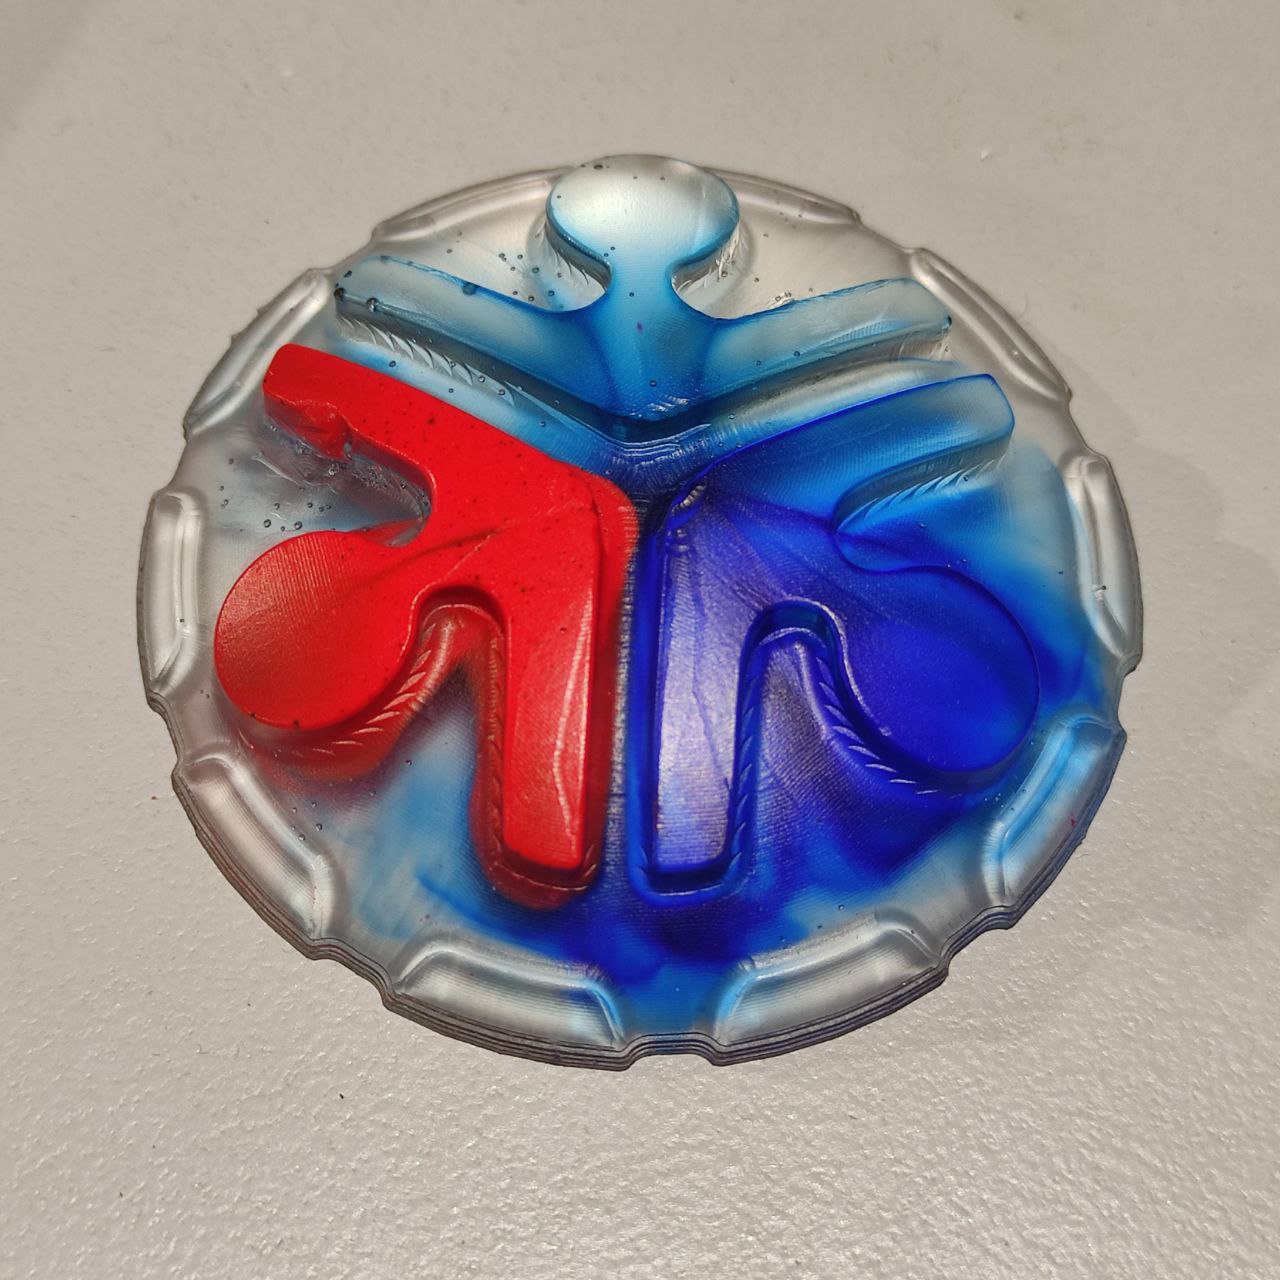
- I also added some colors to make it look cooler, I chose 3 colors blue, green, and red which are the colors in the logo of our fab lab. the addition of color was a bit hideous process I had to mix it carefully without spreading it all over with a sharp pin using just a drop of color.
.jpg)
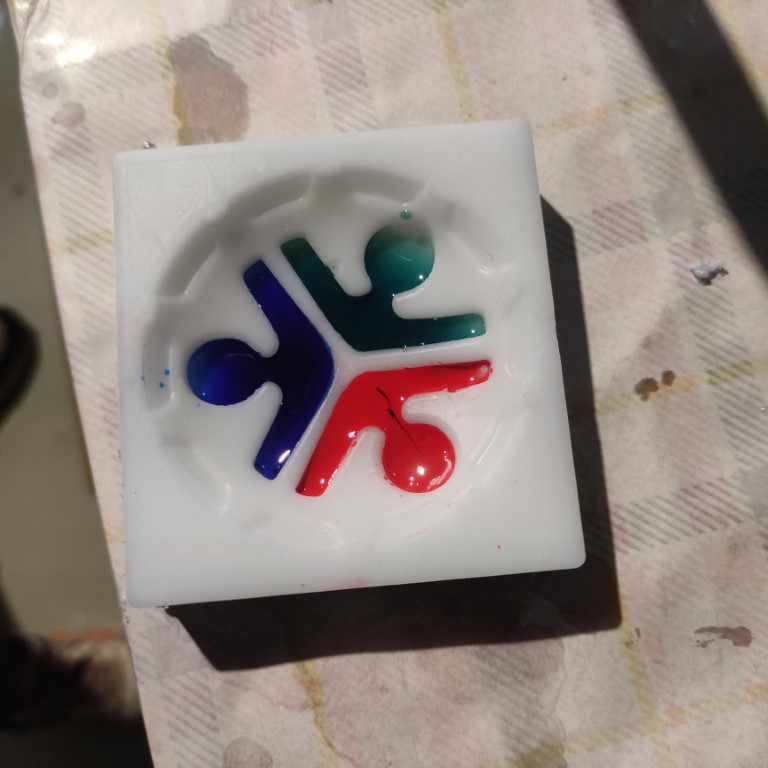
- and now finally, I poured the mixed resin into the mold cavity and kept it overnight for solidifying.
after pouring the resin it gave a cool effect as the color spread across the resin,
But the disadvantage of this cool effect was that red and green mixed up and became blue, so the color green became blue
what I learned here is that it is better to add the resin after the colored layer has cured a bit.
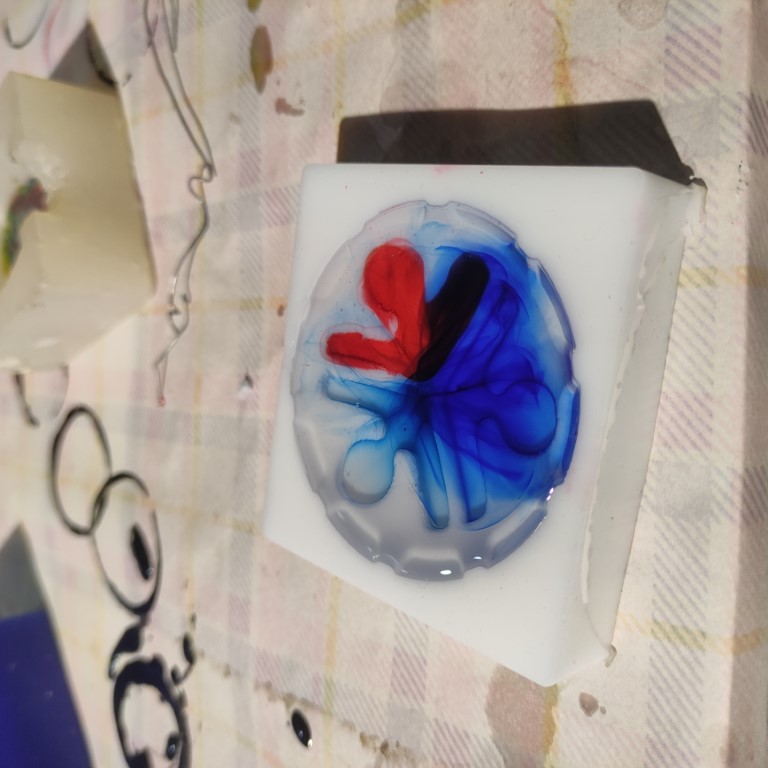
- The final output / hero shot

Design files
Fusion 360 file with CAM:
- since the file is larger than 10 MB, this link can be used to download the file
— the password is “1223334444——