Week 2: Computer Aided Design
Tasks For This Week
- Model (raster, vector, 2D, 3D, render, animate, simulate, ...) a possible final project, compress your images and videos, and post it on your class page
2D Design
Raster vs Vector
My general understanding of the difference between raster vs vector images is that a raster image is made of lots of little squares (pixels) and a vector image is made using maths. Vector images are able to be made bigger or smaller without impacting quality, whereas if you were to do the same with a raster image, it will pixelate, negatively impacting quality.
I found the following further detailed description from Adobe on the difference between raster vs vector images.
Extract form Adobe's Raster vs Vector Comparison
What is a raster file?
Raster files are images built from pixels — tiny colour squares that, in great quantity, can form highly detailed images such as photographs. The more pixels an image has, the higher quality it will be, and vice versa. The number of pixels in an image depends on the file type (for example, JPEG, GIF, or PNG).
What is a vector file?
Vector files use mathematical equations, lines and curves with fixed points on a grid to produce an image. There are no pixels in a vector file. A vector file’s mathematical formulas capture shape, border, and fill colour to build an image. Because the mathematical formula recalibrates to any size, you can scale a vector image up or down without affecting its quality.
What is the difference between raster and vector files?
Resolution
One of the main differences between raster and vector files is their resolution. The resolution of a raster file is referred to in DPI (dots per inch) or PPI (pixels per inch). If you zoom in or expand the size of a raster image, you start to see the individual pixels.
Raster files display a wider array of colours, permit greater colour editing, and show finer light and shading than vectors — but they lose image quality when resized. An easy way to tell if an image is raster or vector is to increase its size. If the image becomes blurred or pixelated, it’s most likely a raster file.
With vector image files, resolution is not an issue. You can resize, rescale, and reshape vectors infinitely without losing any image quality. Vector files are popular for images that need to appear in a wide variety of sizes, like a logo that needs to fit on both a business card and a billboard.
Uses
Digital photographs are usually raster files. Many digital cameras automatically shoot and save photos as raster files — and the images you see online are often rasters, too. Raster files are also commonly used for editing images, photos, and graphics.
Vector files work better for digital illustrations, complex graphics, and logos. That’s because the resolution of vectors remains the same when resized, making them suitable for a wide variety of printed formats.
Some projects combine both raster and vector images. For example, a brochure may use vector graphics for the company logo but raster files for photography.
File sizes
Raster files are generally larger than vector files. They can contain millions of pixels and incredibly high levels of detail. Their large size can impact device storage space and slow down page loading speeds on the web. However, you can compress raster files for storage and web optimisation to make sharing faster and easier.
Vector files are much more lightweight than raster files, containing only the mathematical formulas that determine the design.
Compatibility and conversion
You can open raster files in many different apps and web browsers, making them easy to view, edit and share. Vector files aren’t as accessible — many vector file types require specialised software to open and edit the files. Though it can present some challenges, it’s possible to convert vector files to raster or raster files to vector when needed.
How do you know if an image is a vector?
You can see if an image is a vector by checking for a vector file extension like those listed above. Another method is to resize the image. If it maintains the same resolution when you increase its size, it’s most likely a vector file. If the image gets pixelated, it’s most likely a raster file.
Source: https://www.adobe.com/au/creativecloud/file-types/image/comparison/raster-vs-vector.html
Photoshop (Raster Image)
Photoshop is a proprietary software from Adobe, it is a commonly used tool in the art, photography and design industry. It creates raster based 2D images.
I used Photoshop Creative Cloud 24.0.1 Release to create the following.
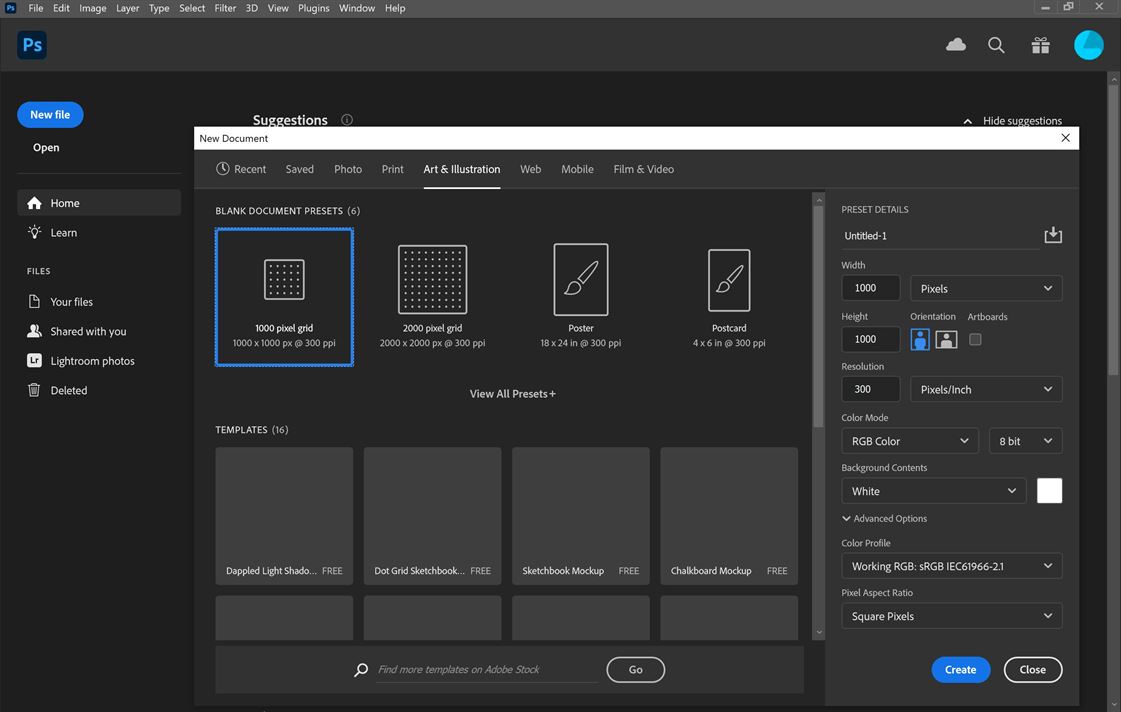
I selected a 1000px x 1000px canvas size.
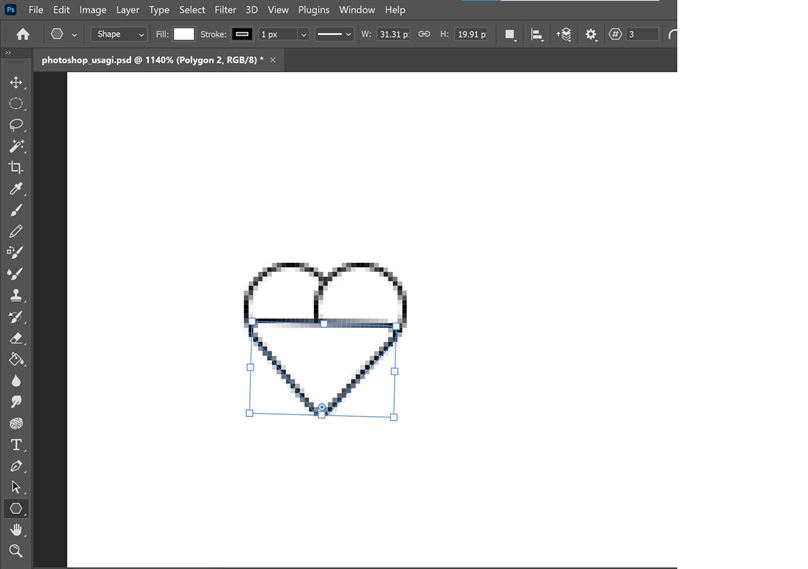
Using the ellipse tool I made outlines for my drawing. Note: If you hold down shift while drawing the width and height will be made equal to each other. You can also see that blue lines are provided to align items when you move them.
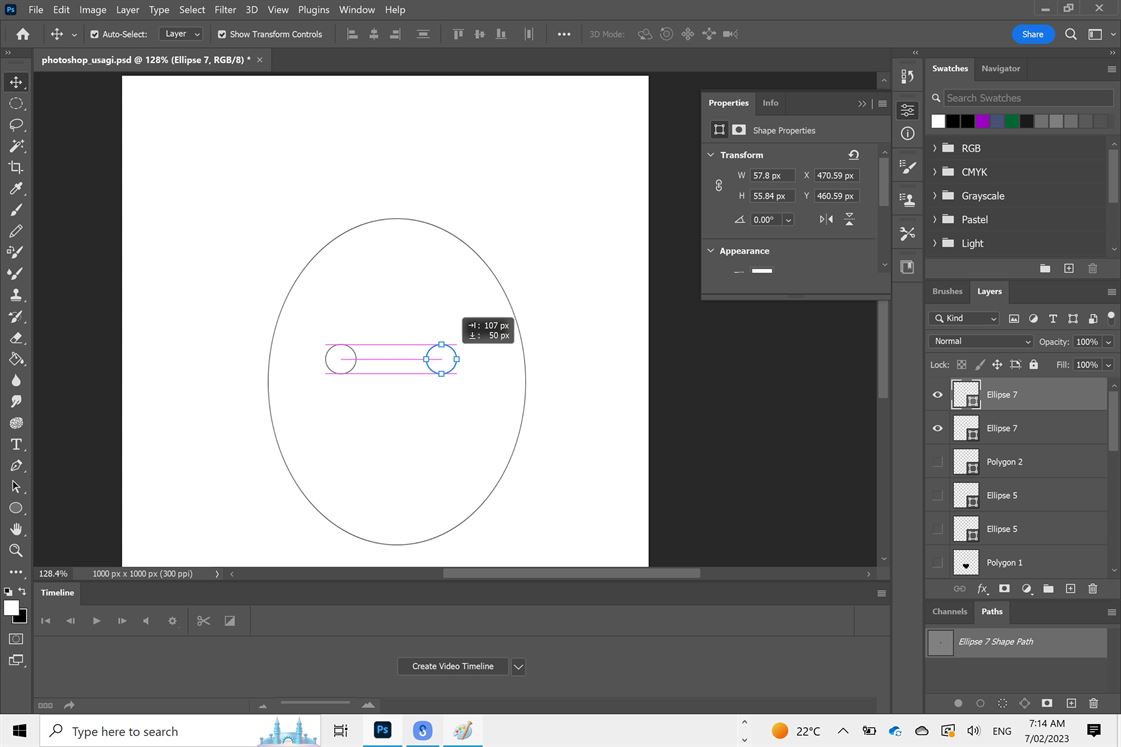
Shapes in Photoshop are each put on their own layer, making it easier to continue to edit them after drawing.
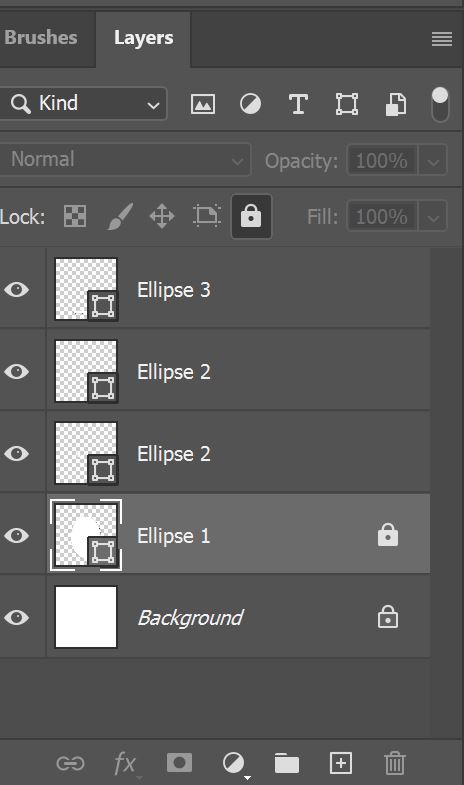
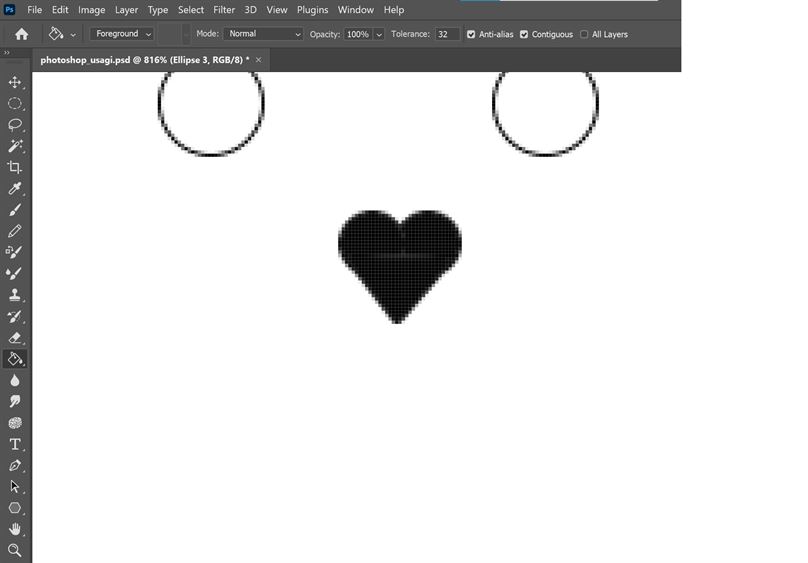
To create a heart shape guide, I drew two ellipse and a 3 sided polygon.
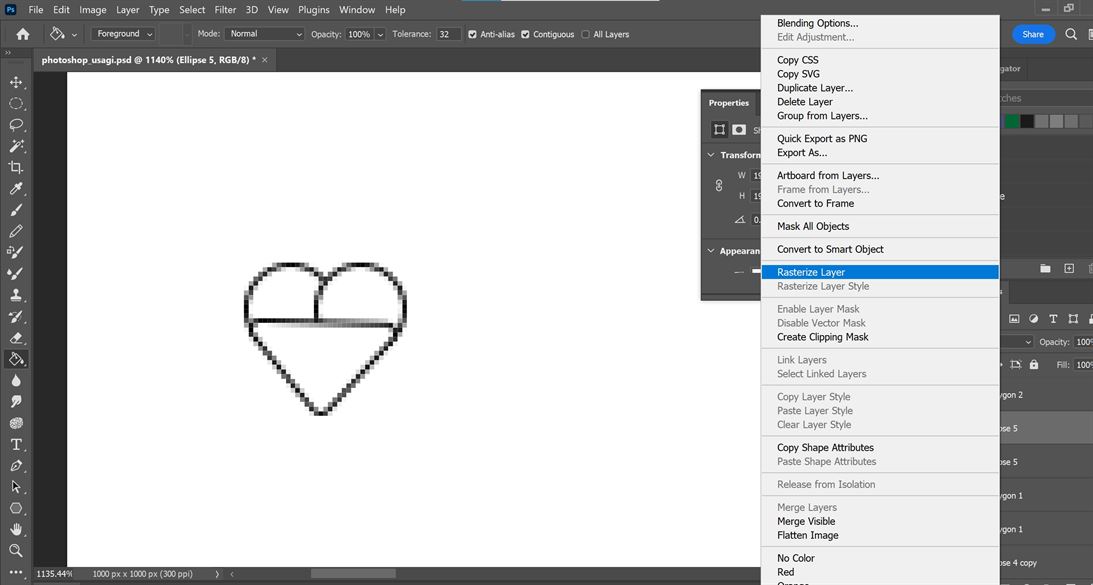
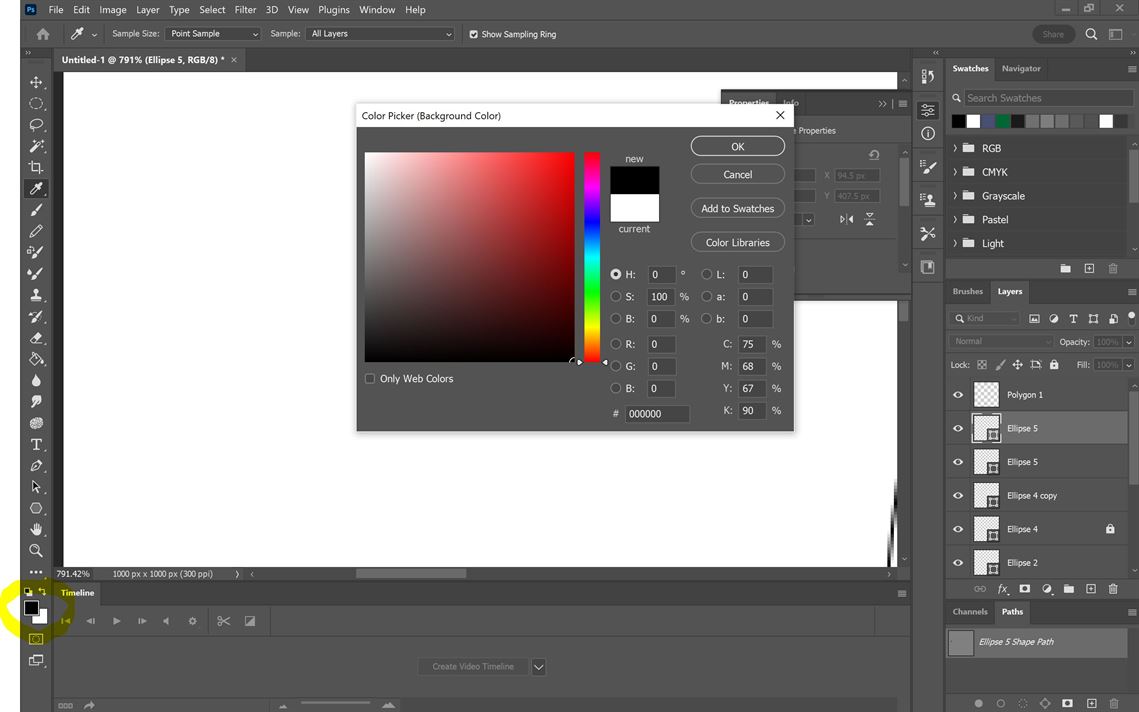
I used the fill tool (paint bucket) on the shapes to make them more coherent. Note: To use the fill tool I needed to rasterize the shapes first. Selecting the colour square on the lower left side of the screen allows you to change colours.
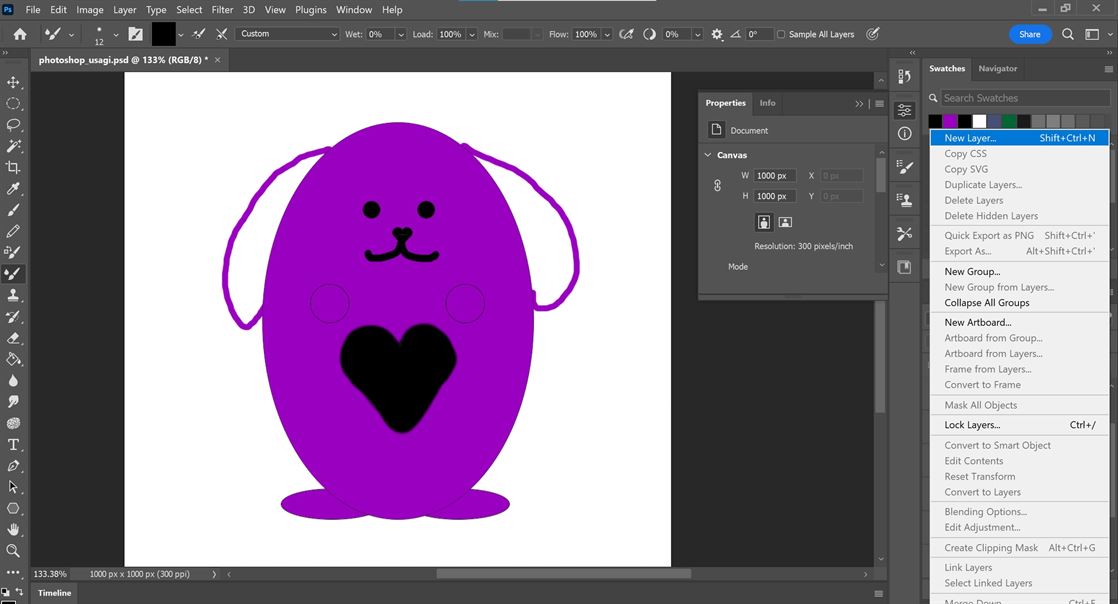
I continued to fill my shape and then it was time to draw/paint. I suggest to make it easier to edit in the future to put drawing/painting on a new layer (use either the hamburger menu in layers to do this of click Shift+Ctrl+N).
I used the brush tool to draw/paint. You can change the size and texture of the brush.
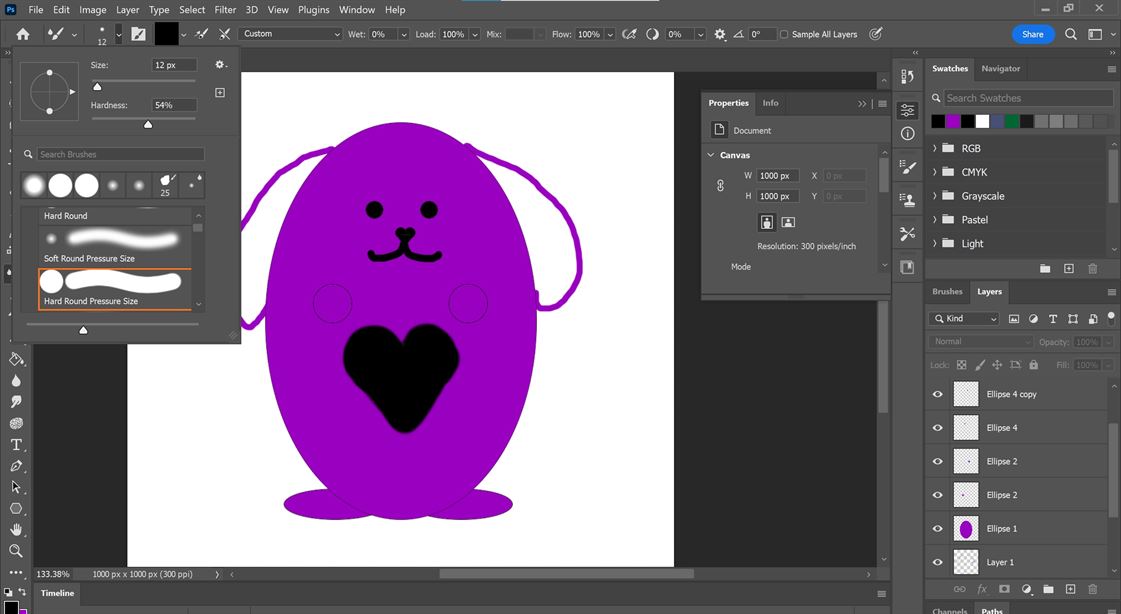
I decided I wanted to change the size of my drawing so I selected all the layers and then stretched the drawing.
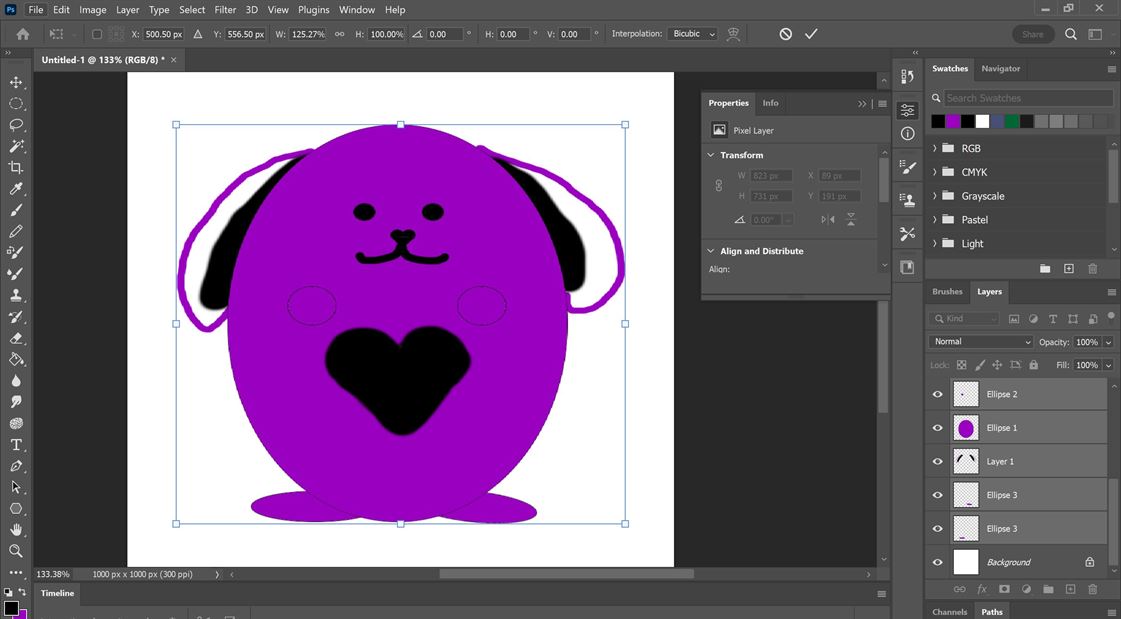
Final image

Photoshop is good for sketching, however the image produced is pixelated when you zoom in, this is one of the downsides of raster based images. I find the tools in Photoshop easy to use and prefer to use it for sketching, digital painting and photo editing.
Illustrator (Vector Image)
Illustrator is a proprietary software from Adobe, it is commonly used in the art and design industry. It creates vector based images.
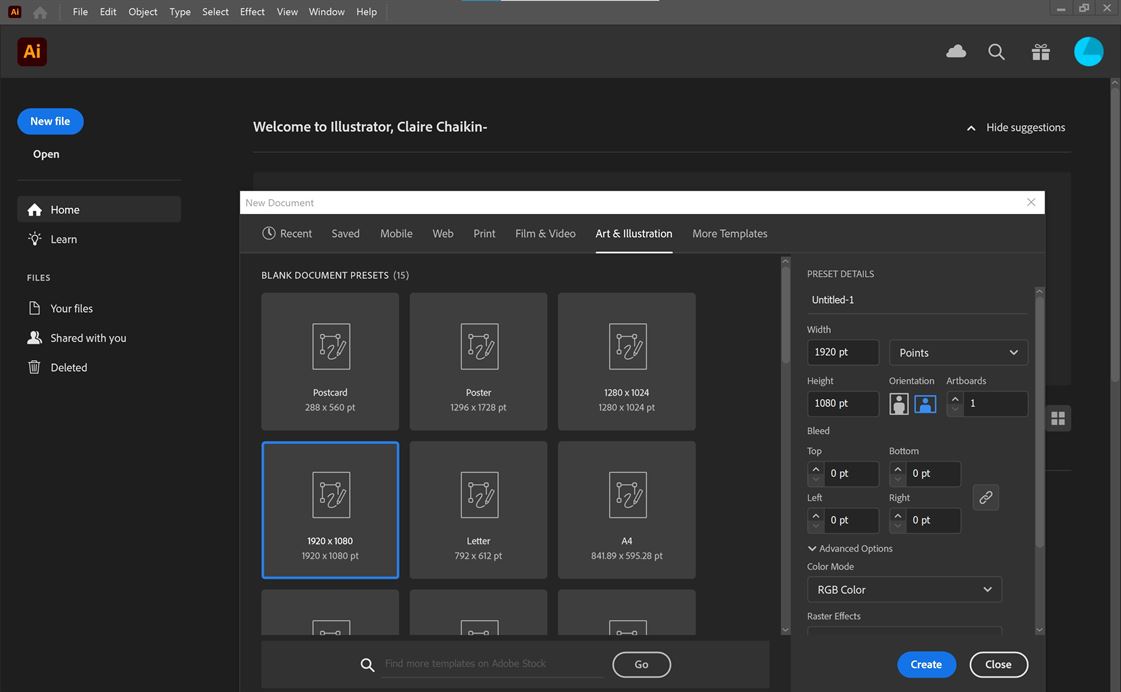
I used Illustrator Creative Cloud 27.1 Release to create the following.
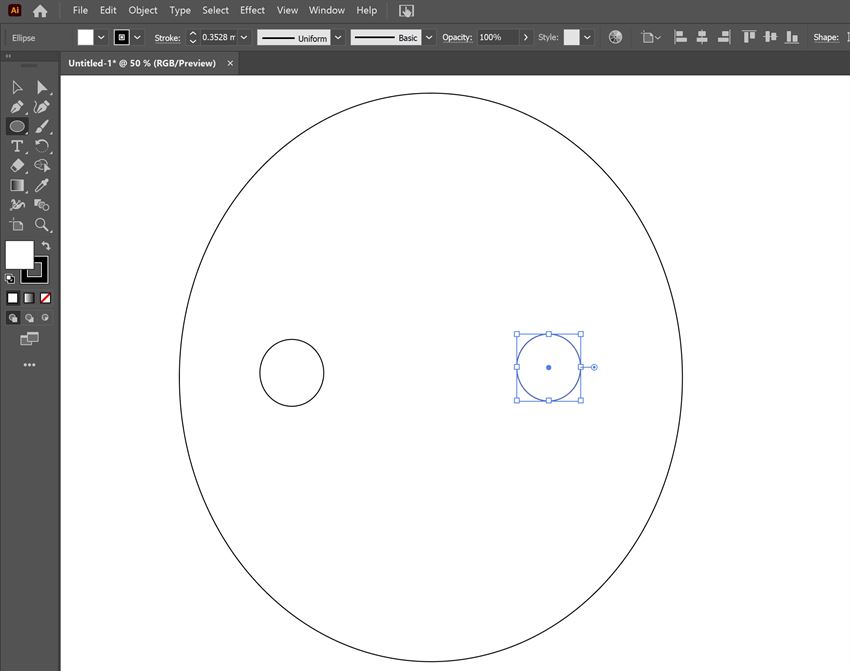
I started drawing using the ellipse tool. Note: If you hold down shift while drawing the width and height will be made equal to each other.
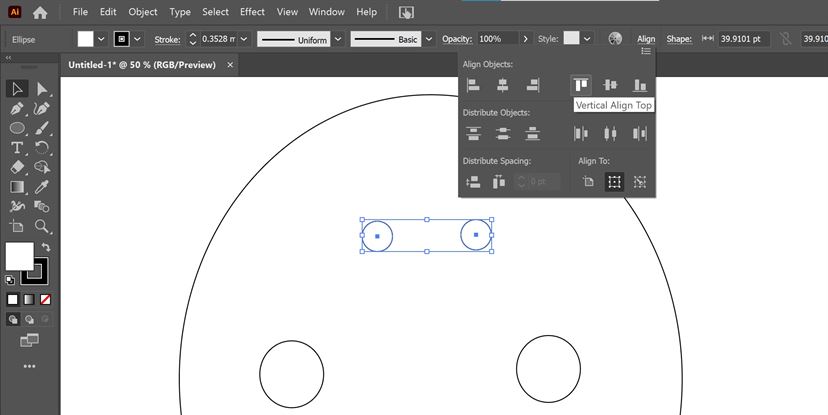
Alignment can be done using the tool bar at the top of the screen when the object(s) are selected.
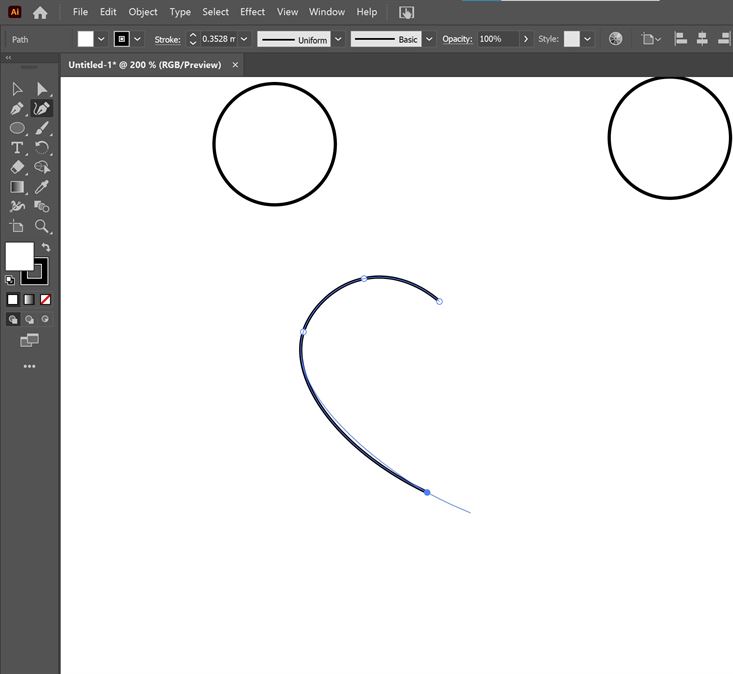
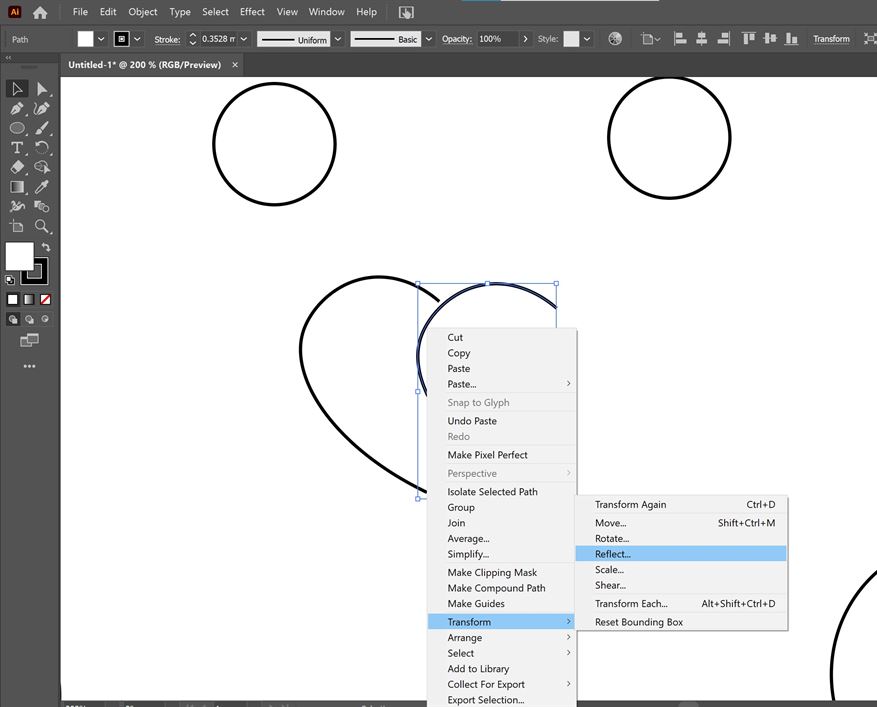
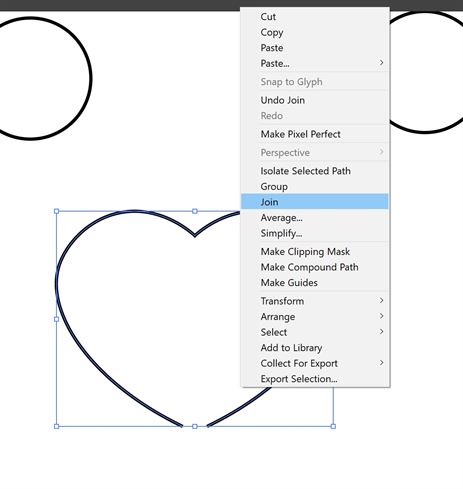
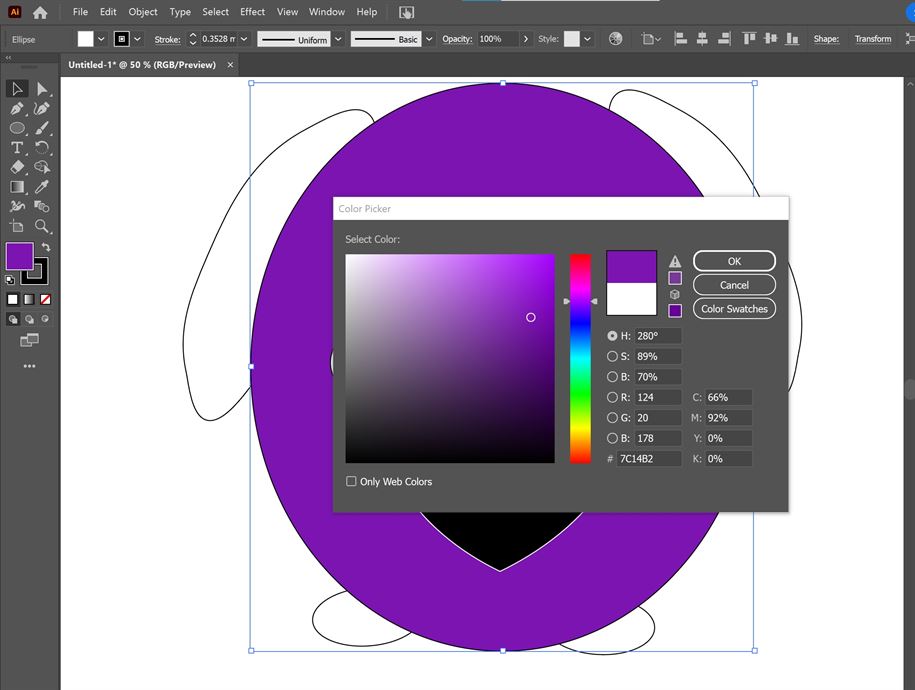
I then created the heart shape using the pen tool. I made one side then duplicated and reflected it. I then joined the two sides together and used the direct selection tool to move and then join the points at the bottom of the heart to make it a complete shape.

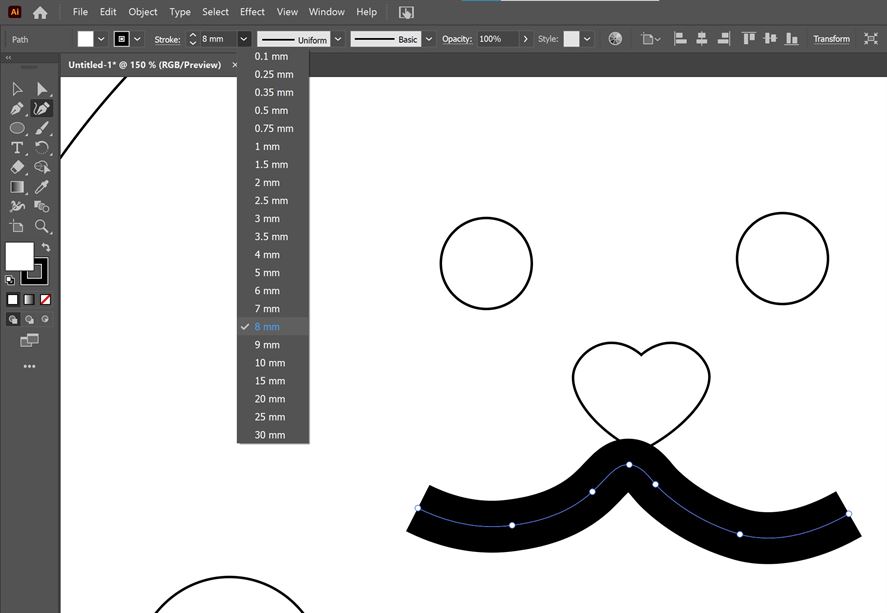
I used the pen tool to also create the mouth shape. I was able to change the width by changing the stroke of the line.
To fill my shapes I needed to select the colour squares on the lower left side of the screen, this allows you to change or remove colour.
Final image

I found Illustrator easy to use and I was able to produce an image quickly. If I wanted to do more shading and more organic lines I would use Photoshop or another raster based program. I can see the advantage with creating a vector based image, it is able to be resized without pixelating and the shapes are stored as actual lines, which is useful if you are going to use it for things like laser cutting.
3D Design
Parametric Model vs Mesh Model
My understanding is that a mesh model is made up of essentially a digital net. Most tools that make these mesh models are more for artistic/visualisation purposes like making models for games, they are not millimeter accurate. However, you can use these models to make 3D prints. Parametric models are based in mathematical equations and can be millimeter accurate. They are also able to be accurately scaled and are often used for engineering, architecture and manufacturing.
I found the following blog post from Imension, which provides a further overview of the difference between mesh and parametric models.
Extract from Imension Blog Post on What is the difference between mesh models and parametric 3D models?
What is CAD?
CAD is an abbreviation of Computer Aided Design, and simply means 3D design on a computer. It is the general term for 3D modeling. But there are two quite different types of CAD or 3D modeling: parametric 3D modeling and mesh based 3D modeling.
To understand the difference between the two types of 3D modeling, one can compare them with the 2D world. Here, many will know that you have two kinds of 2D graphics, namely vectors and raster graphics - what we know as images.
An image (raster graphics) consists of a lot of pixels that form an image. If you zoom in on what looks like a circle in an image, you will be able to see the pixels and that it is not really a perfect circle.
With vector graphics, on the other hand, you can create a "perfect circle". Here, the circle does not consist of pixels but of a mathematical instruction to the computer to draw some curves which form a circle.
Mesh based 3D modeling
With this analogy, mesh based 3D models correspond to the raster graphics - the images. A mesh does not have "infinite resolution". If you zoom in on e.g. a 3D mesh sphere, you will see that it consists of thousands or millions of points (vertices), edges and faces. Depending on what the 3D model is to be used for, you will then adjust the resolution to not be able to see the individual faces.
Parametric 3D modeling
With the same analogy, parametric 3D modeling corresponds to vector graphics. If one has drawn a cylinder in parametric CAD, it will actually be a cylinder with "infinite resolution".
Use
Mesh-based 3D models are used for many things. They are, for instance, used for CGI in movies and for computer games.
Parametric 3D models are typically used in engineering, construction and production – CNC machines etc. However, there is one exception where mesh based 3D models are used for production: 3D printing.
Modeling
Because the two types of 3D modeling are so different, they is also quite different to work with.
The two types of 3D modeling software are similar on the surface, because there are typically a 3D view of the work and some tools around it. But where parametric 3D modeling software will have tools to manipulate the mathematical "instructions" of the 3D model, there will be tools to manipulate the individual vertices in mesh modeling software.
Fusion 360 (Parametric Model)
Fusion 360 is proprietary software from Autodesk, it is a commonly used tool for parametric 3D modelling.
I used Fusion 360 2.0.15050 x86_64 to create the following.
I started by creating a sketch using splines to make a heart shape.

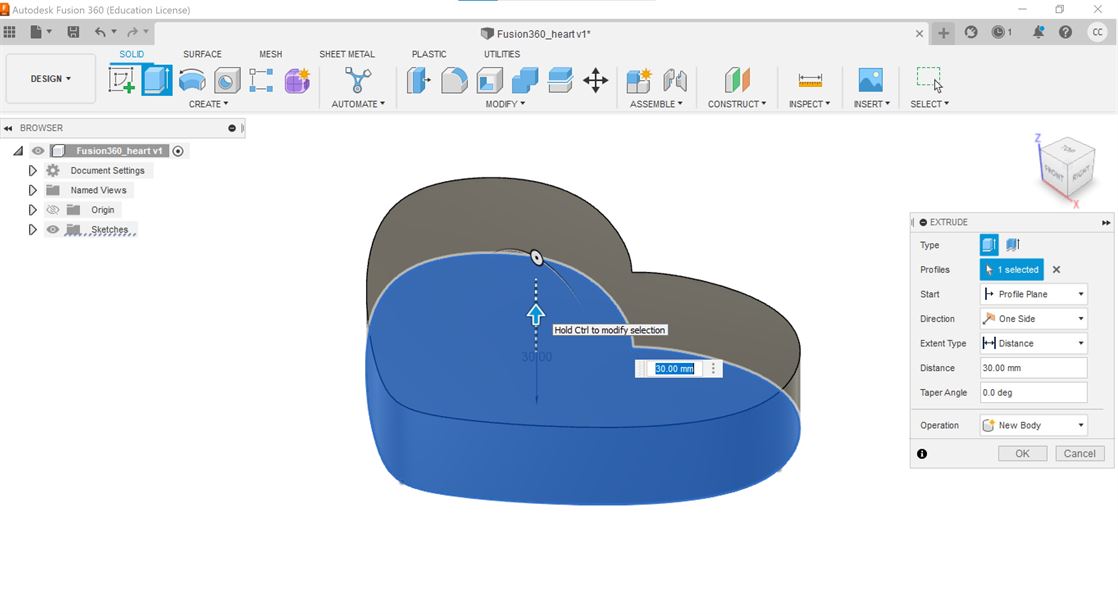
I then exited sketch and used extrude to made the sketch into a 3D model.
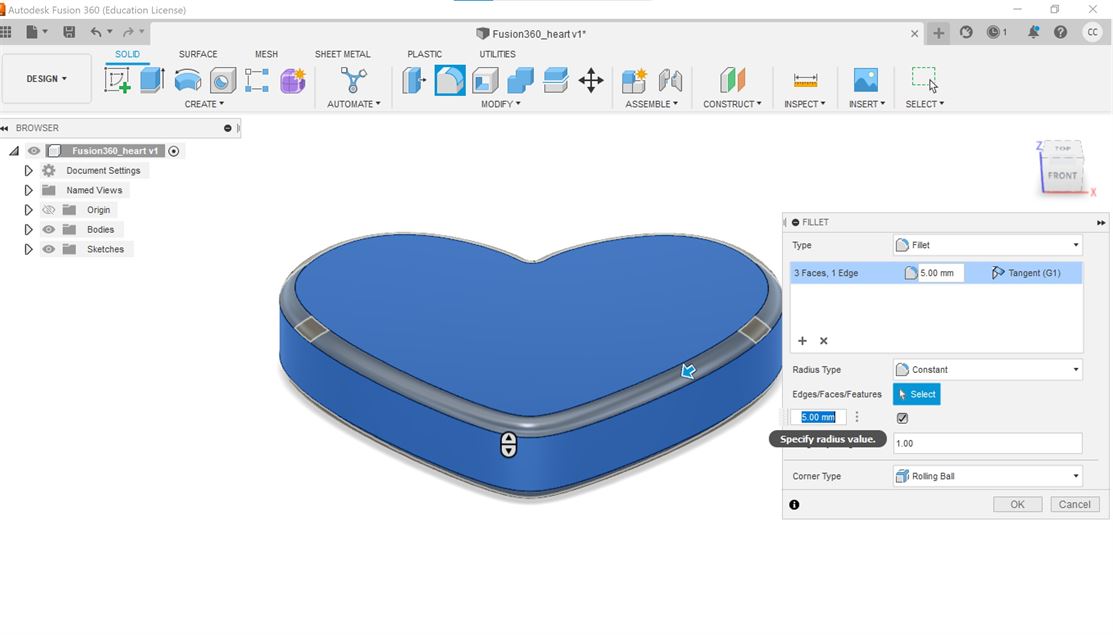
I wanted to smooth the edges, so I used the fillet tool on the model.
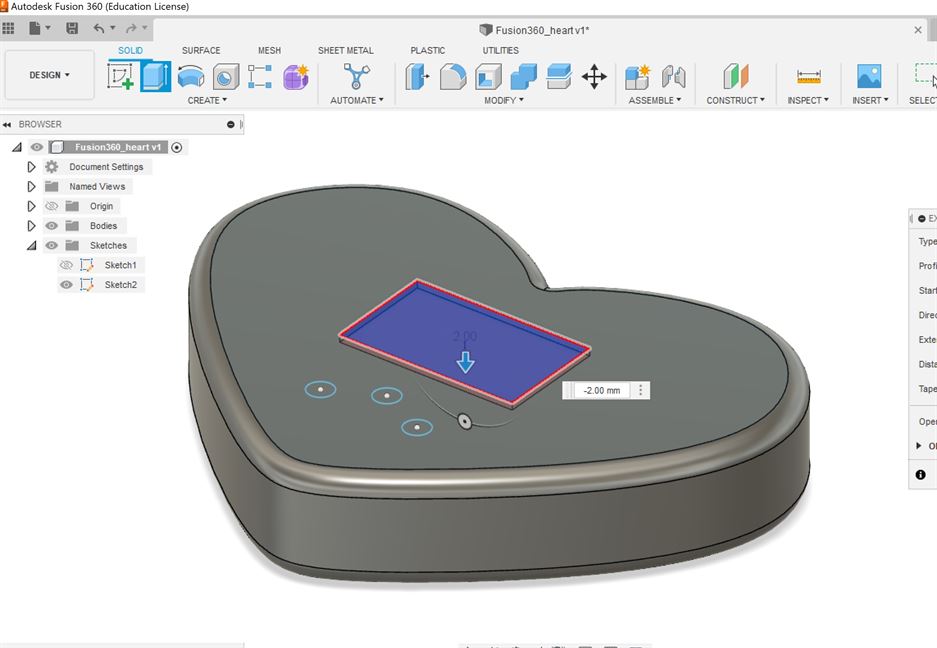
I wanted to create a screen and buttons representation, so I created another sketch, making sure to select the top of the model as the plane for the sketch when the sketch was created.
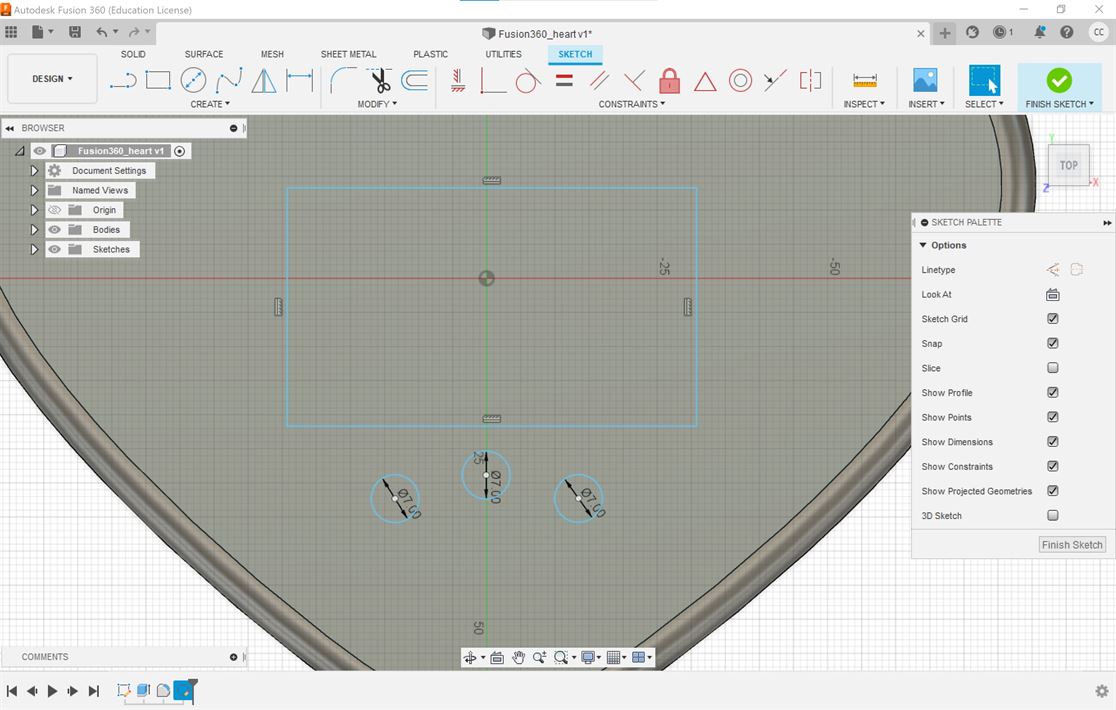
I then extruded the second sketch in the negative direction to create the screen indent and the positive direction to make the buttons.
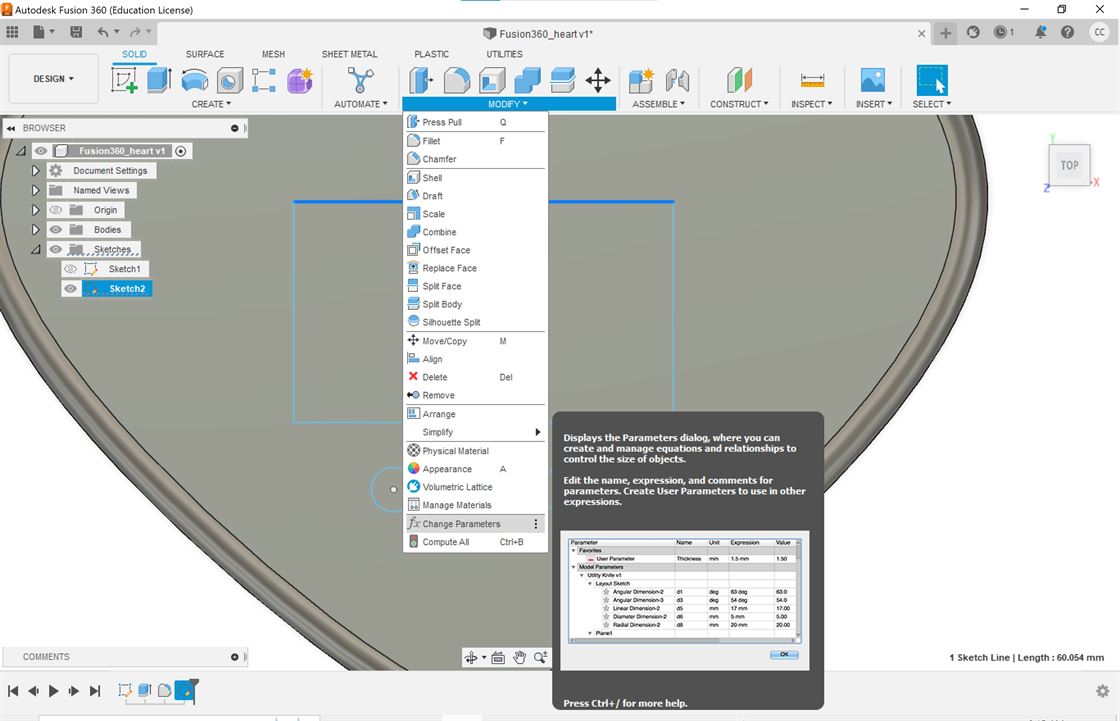
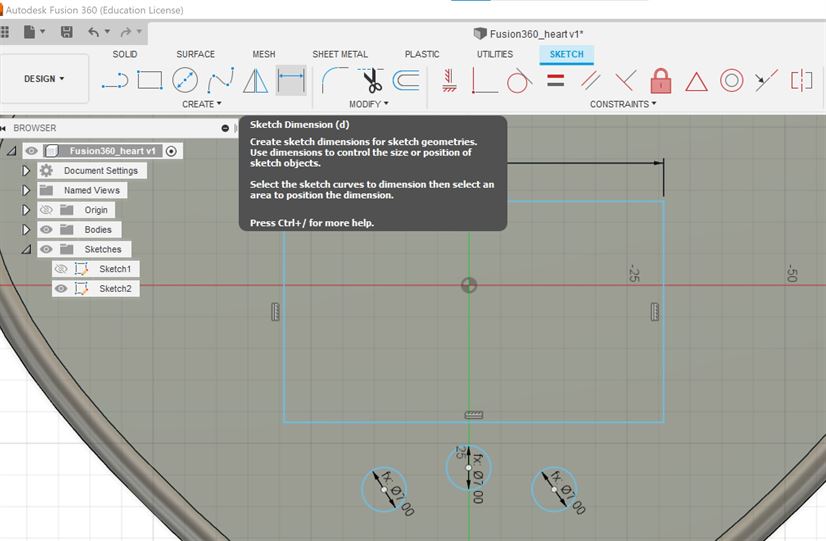
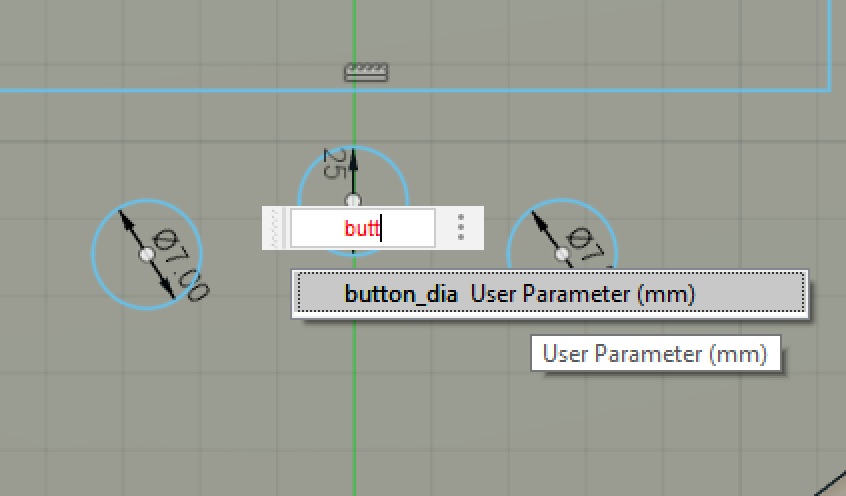
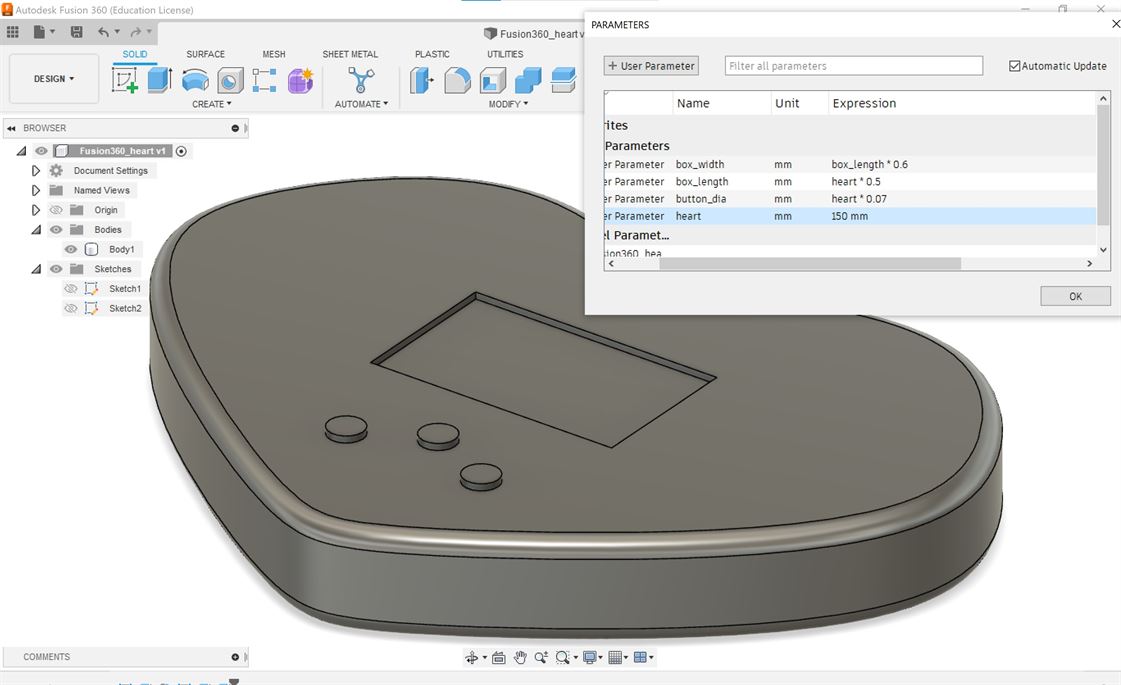
To make my model able to be parametrically adjustable using variable parameters. I went into Modify>Change Parameters and created user parameters.
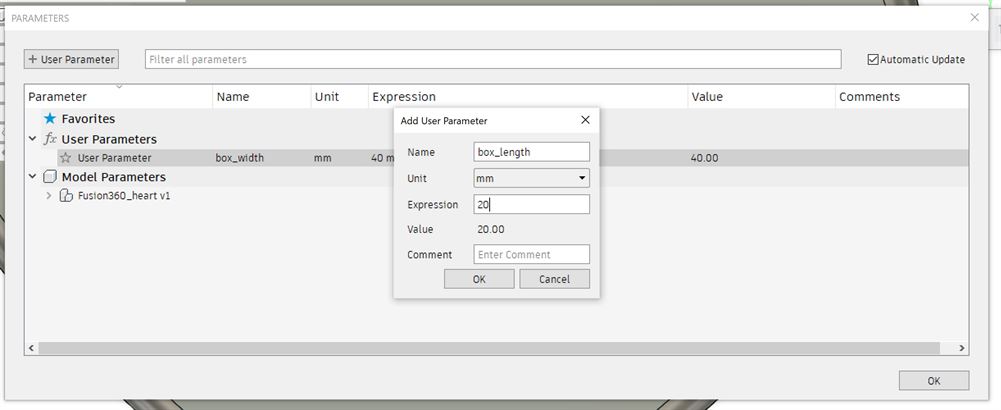
I then edited both sketches to use the parameters by creating dimensions and setting them to either a parameter or a formula using a parameter. I also made sure to constrain the center point of both sketches so they would maintain the same origin when resizing.

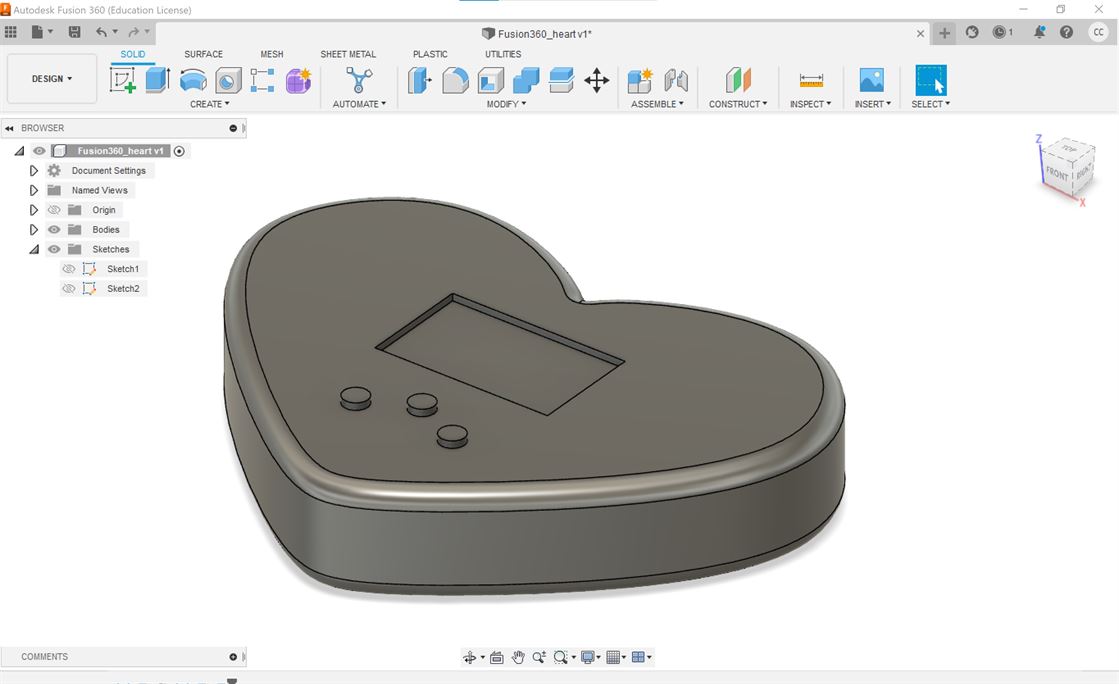
The model now resizes when the "heart" parameter changes.
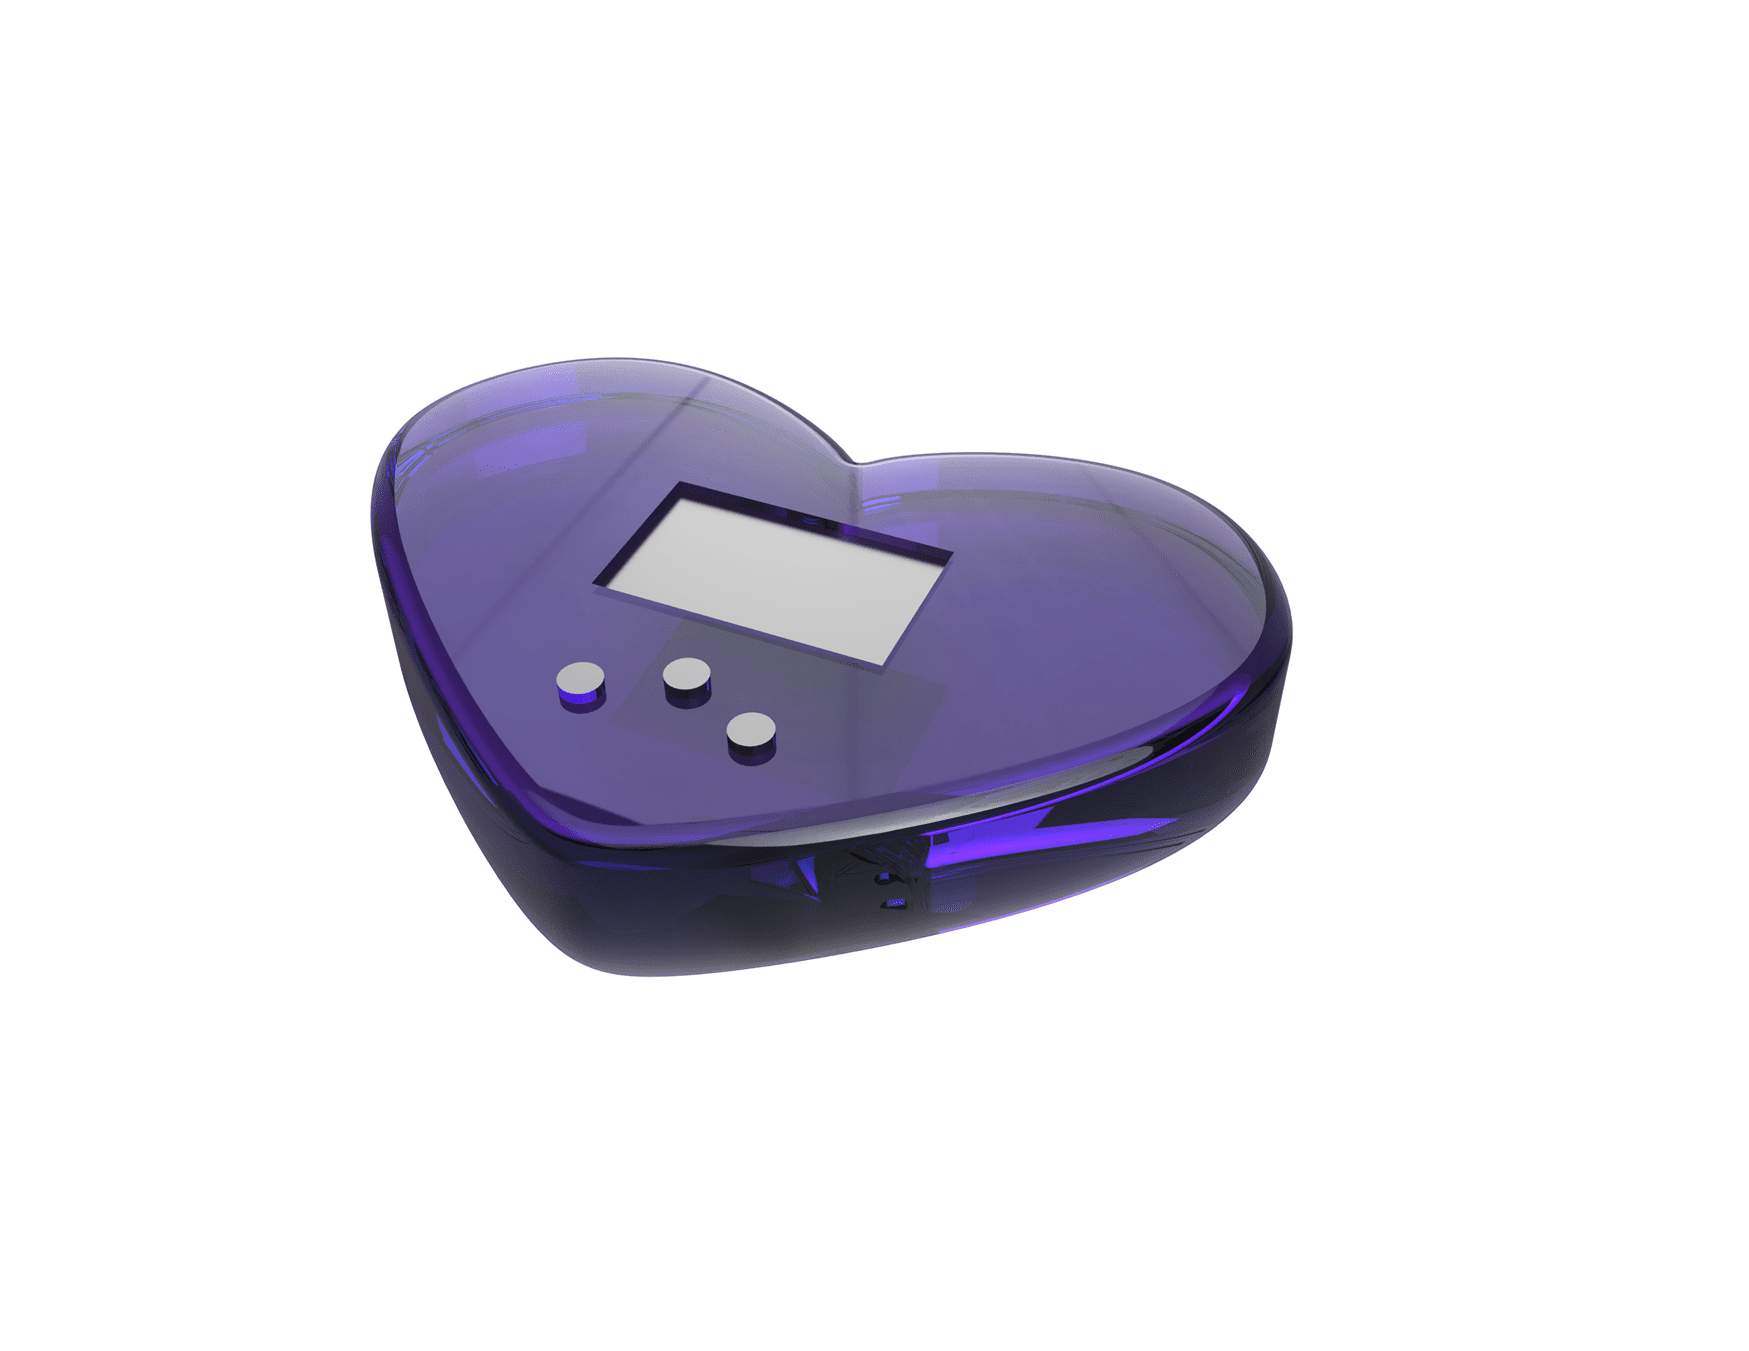
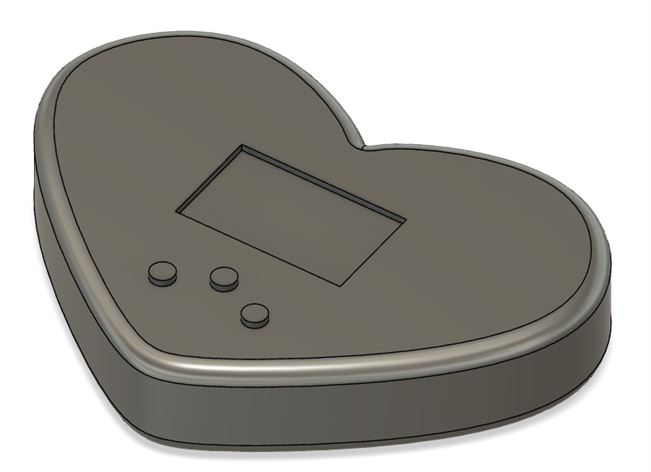
Resulting model
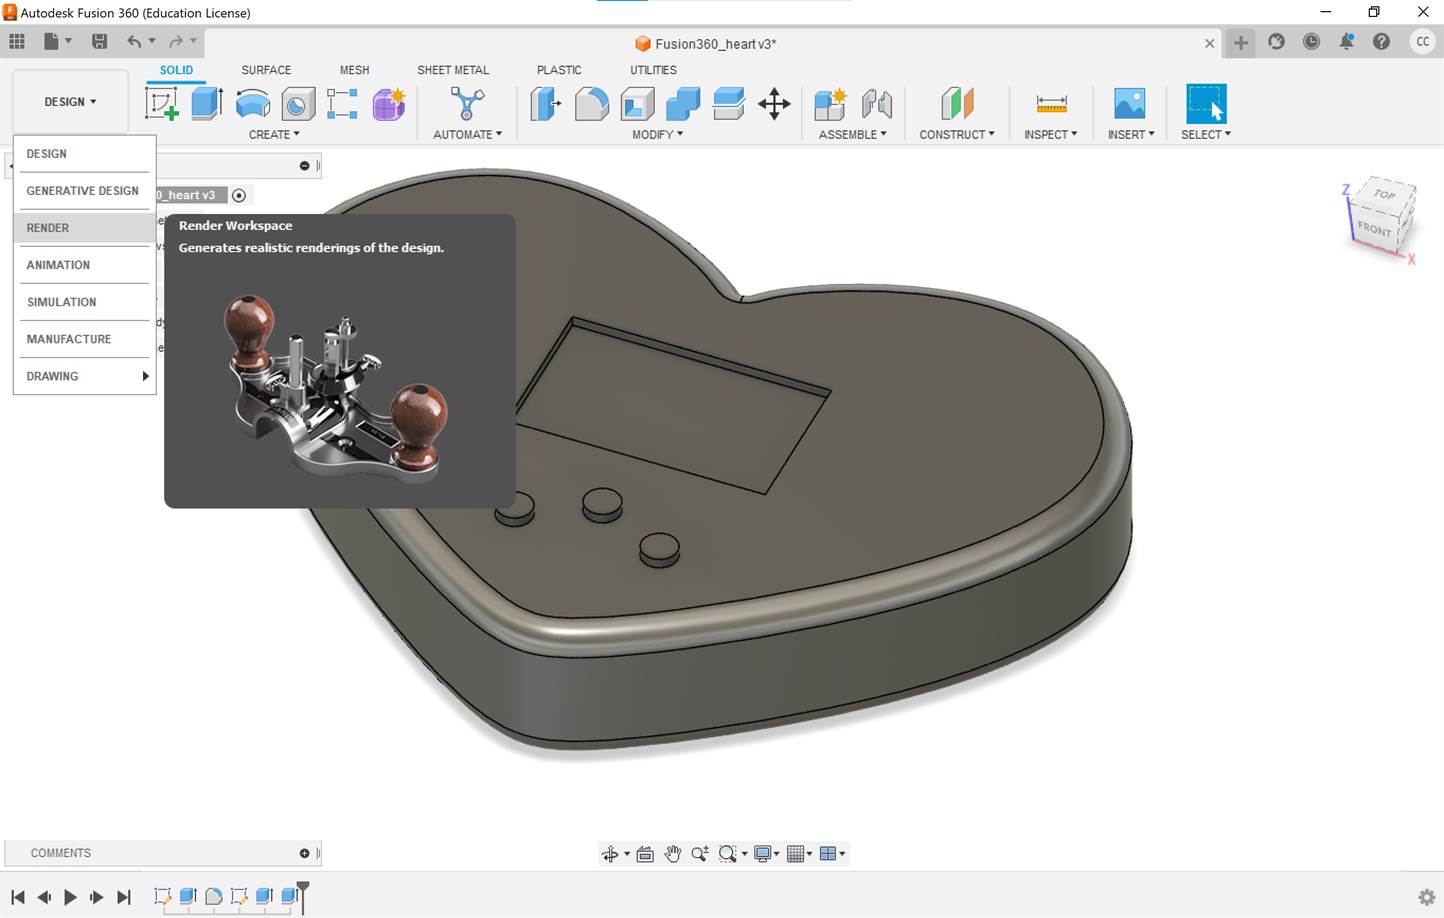
I then rendered the model by going to the render workspace.
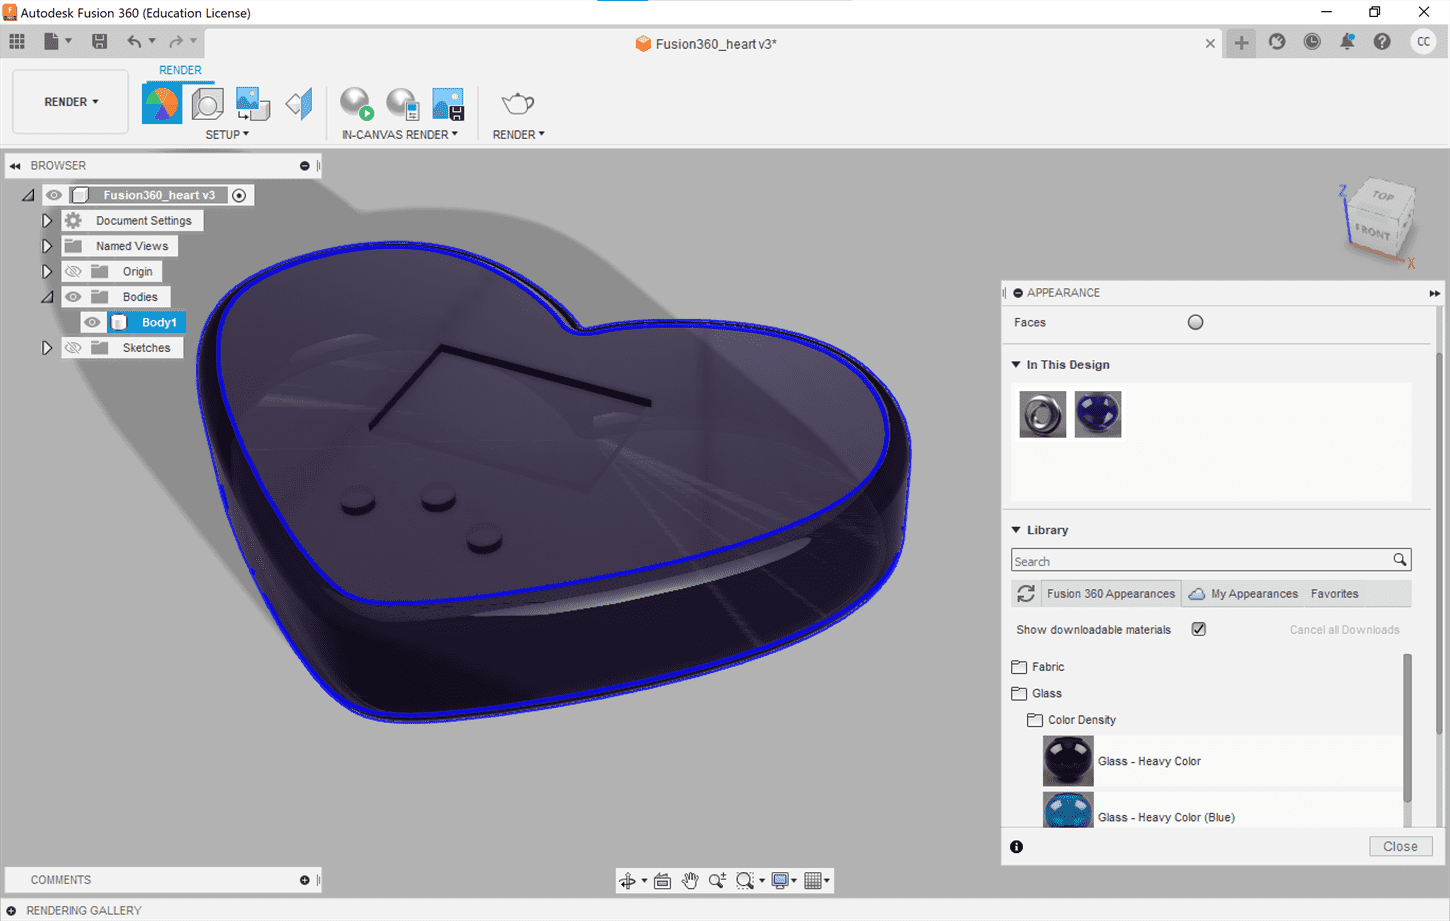
To apply materials go to the appearance menu.
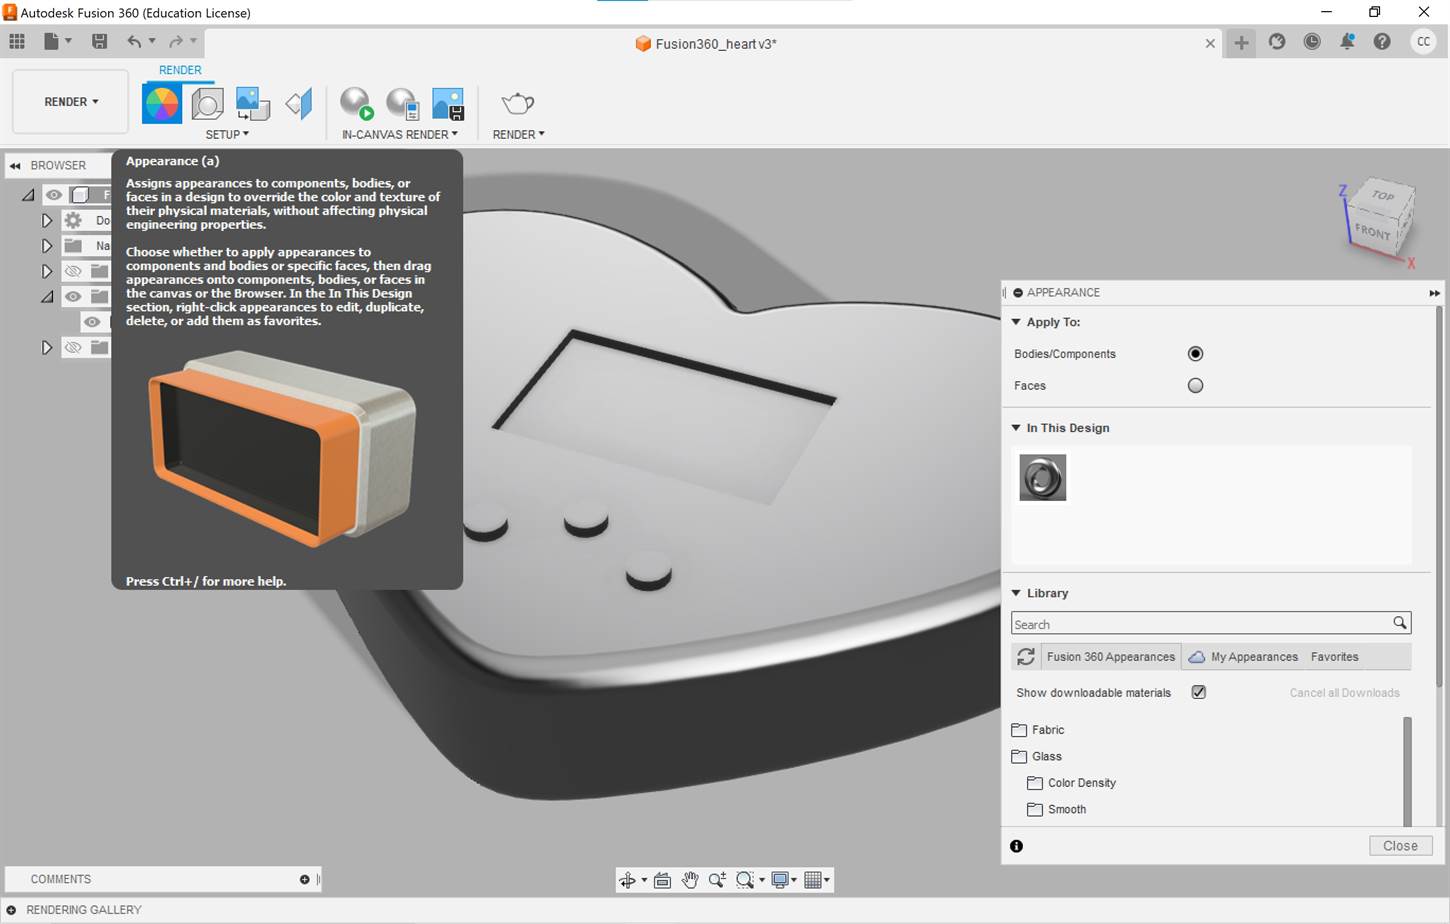
Materials are preloaded and can be dragged and dropped into the "In this design" area to add them to your design.
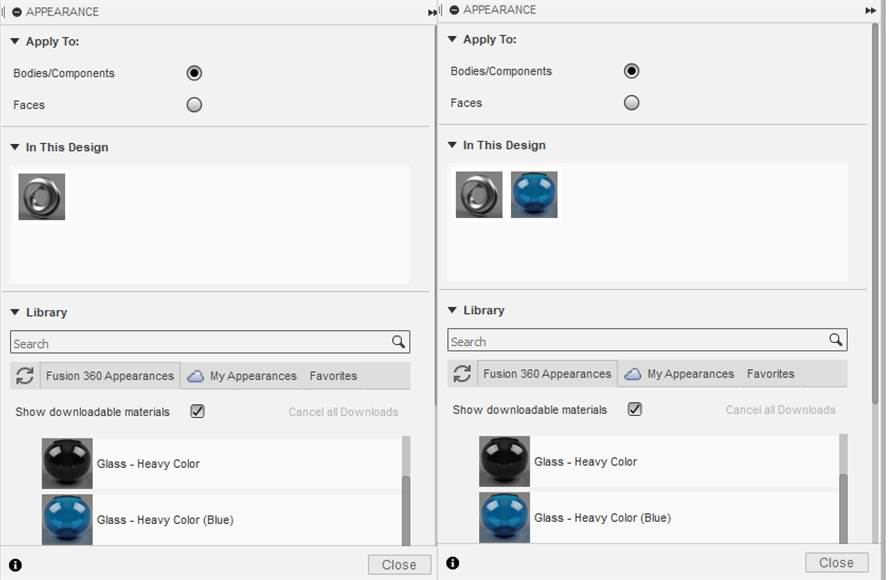
Clicking on a material you can modify it.
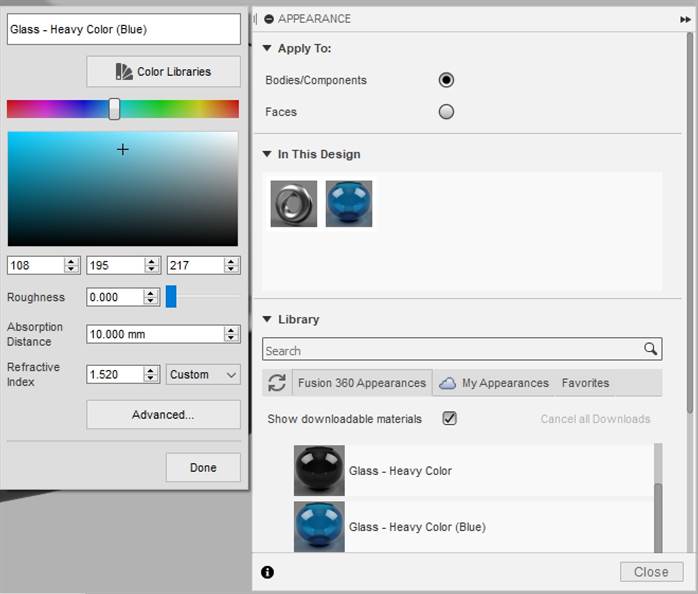
Drag and drop the material onto the part of the model that you want it applied to and you can then render it. I have included a video of this process below.
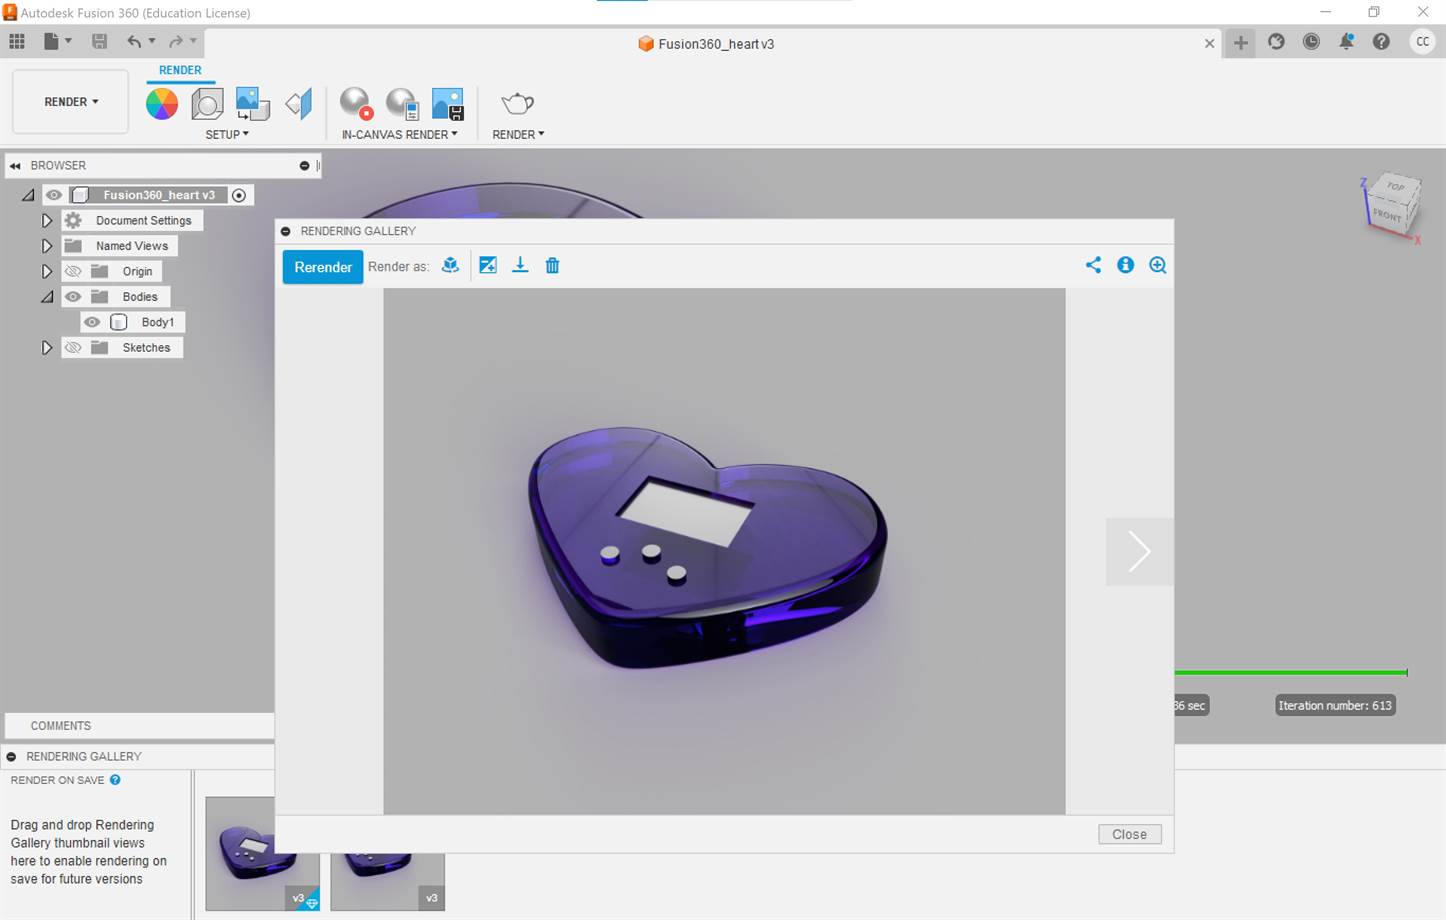
Final result
I found Fusion not too difficult to use as I have previous experience with Revit and the tools in Fusion are similar to those for making components in Revit. I can see that tool like this are useful for making mm accurate models that you are for example going to 3D print.
Blender (Mesh Model)
Blender is a free open source tool for making 3D mesh models, animations and renders.
I used Blender 3.2.0 to create the following.
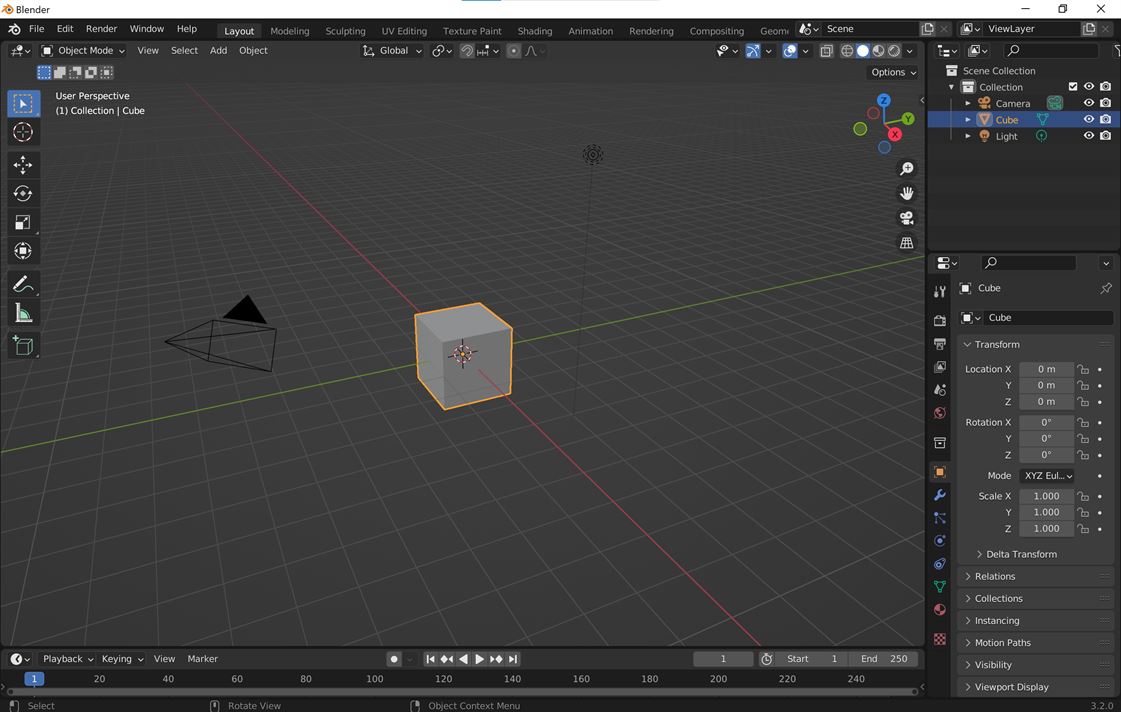
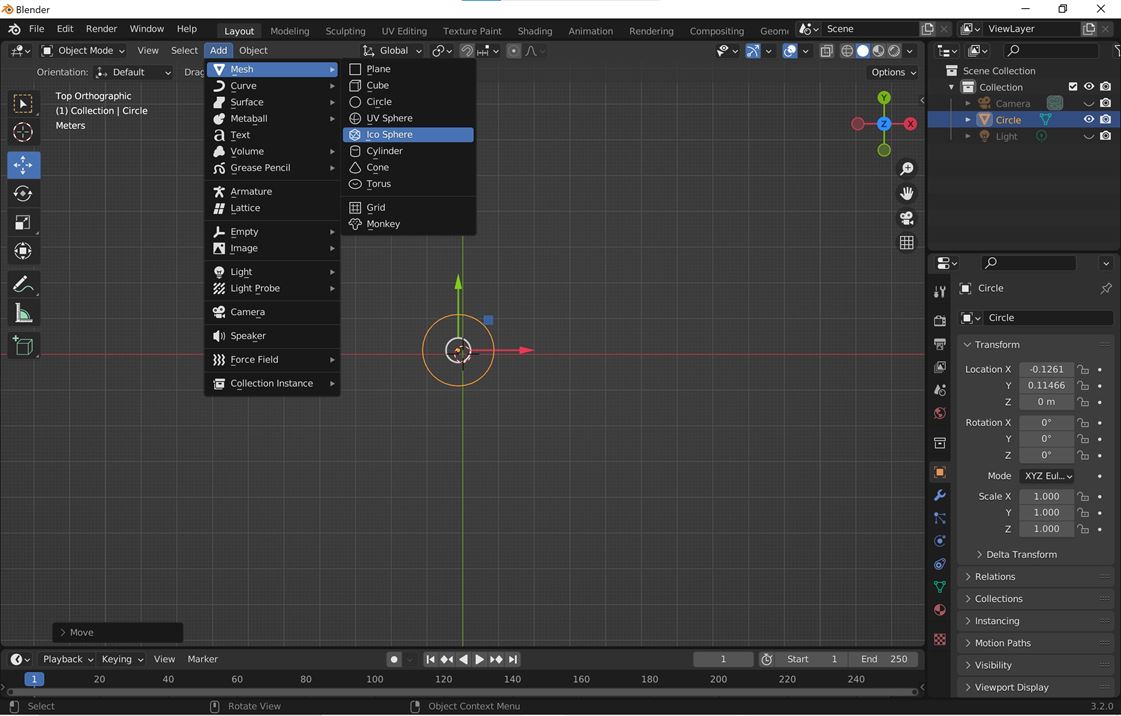
I started by adding a circle.
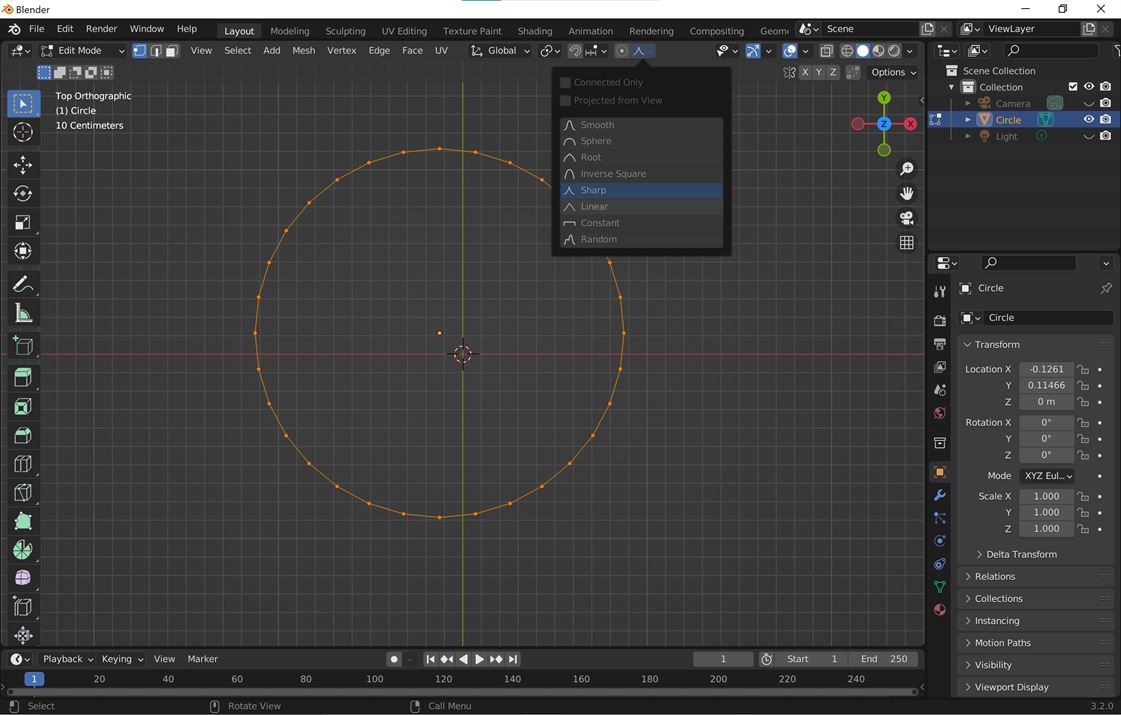
I then went into edit mode to edit the verticies of the circle. I made sure I was on vertex select for selection mode and that proportional editing was on.

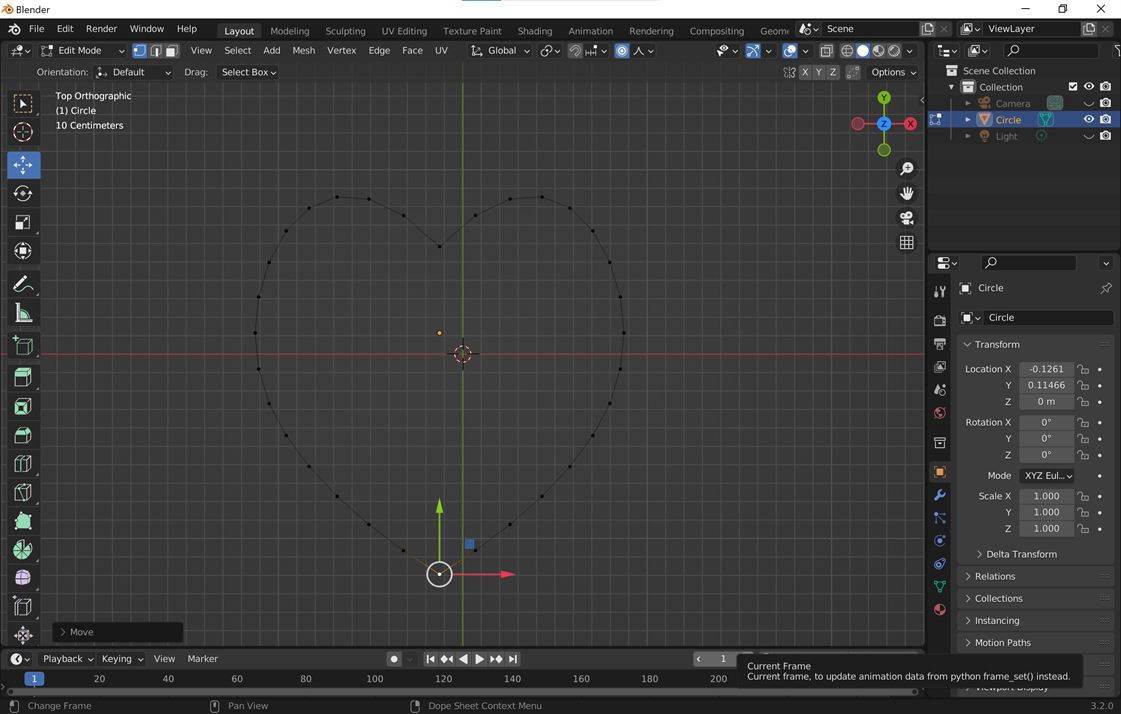
I selected sharp and moved the vertexes at the top and bottom of the circle.
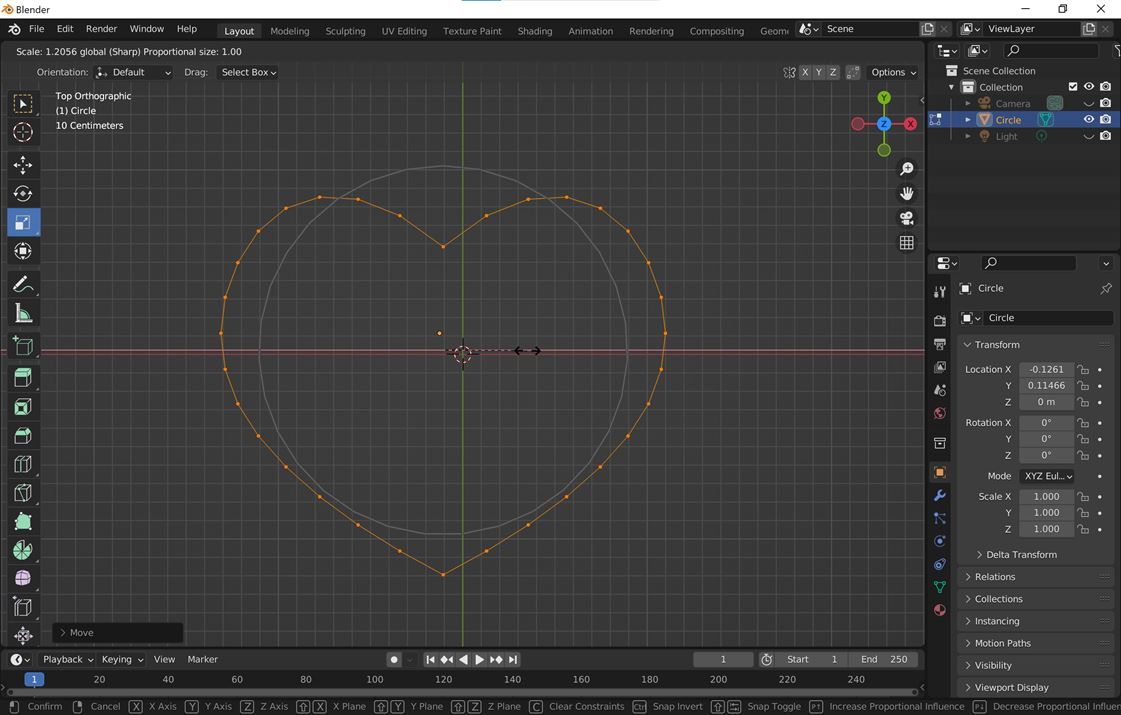
I then selected all and used scaling in the x direction to stretch the shape out.
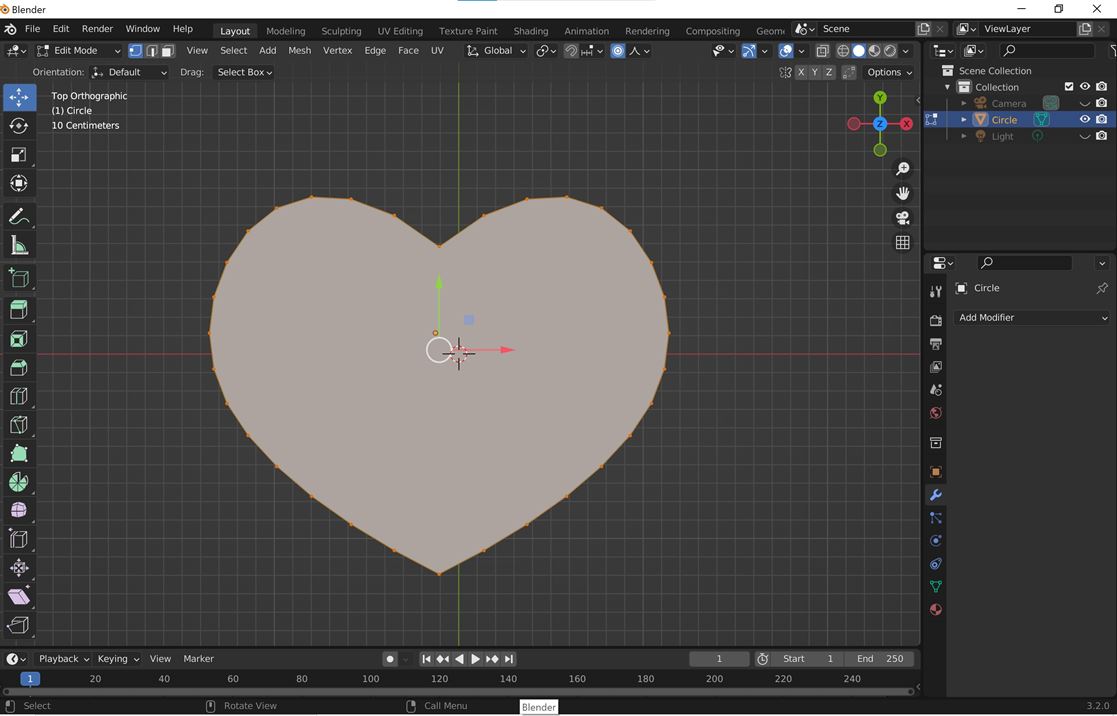
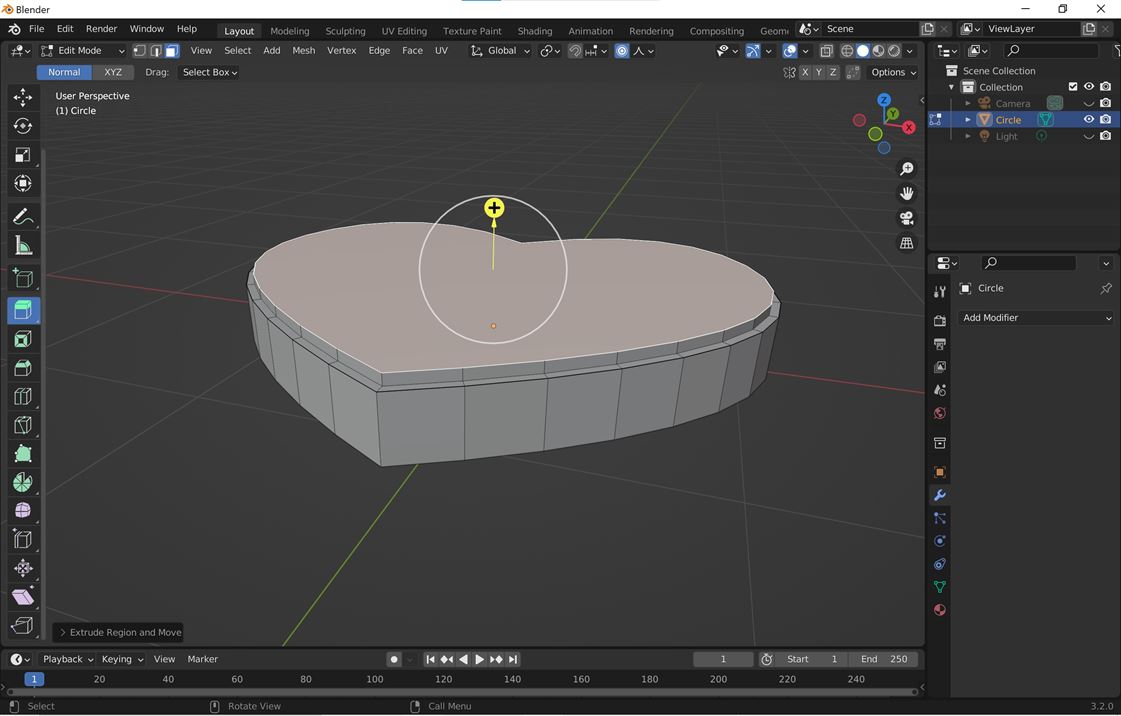
While the shape was selected I typed F and this created a face. I was then able to extrude this face to make a 3D model.

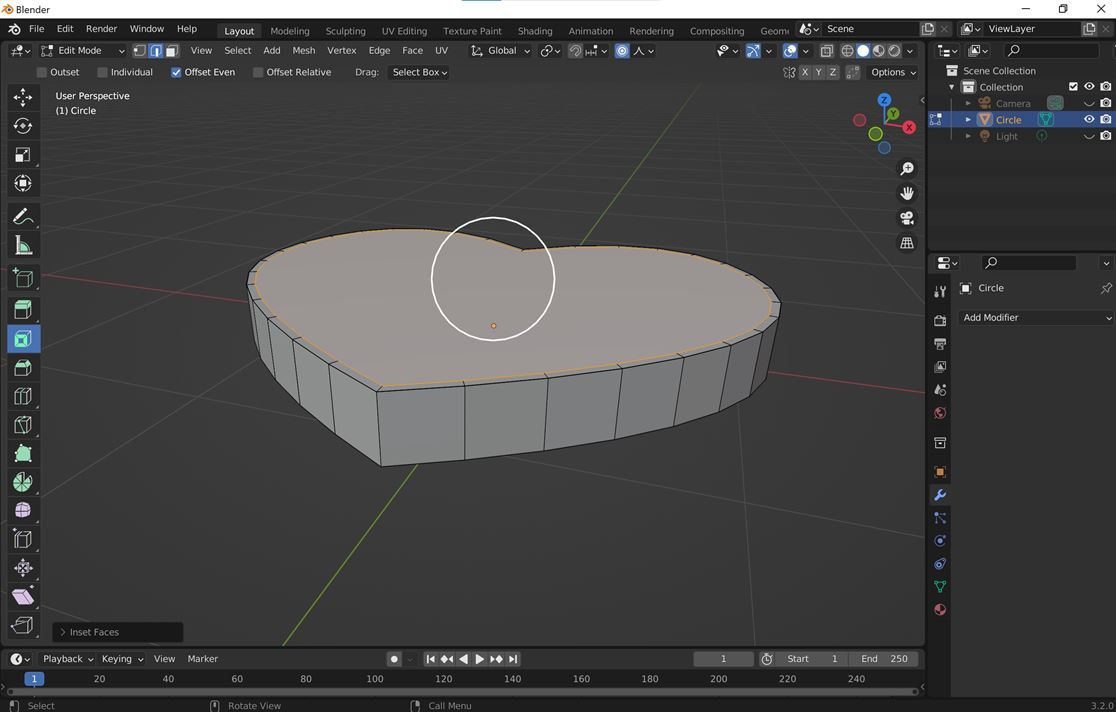
To make a stepped bevel edge I selected edges, used the insert faces tool, then selected face, extruded the face and then used the bevel tool.
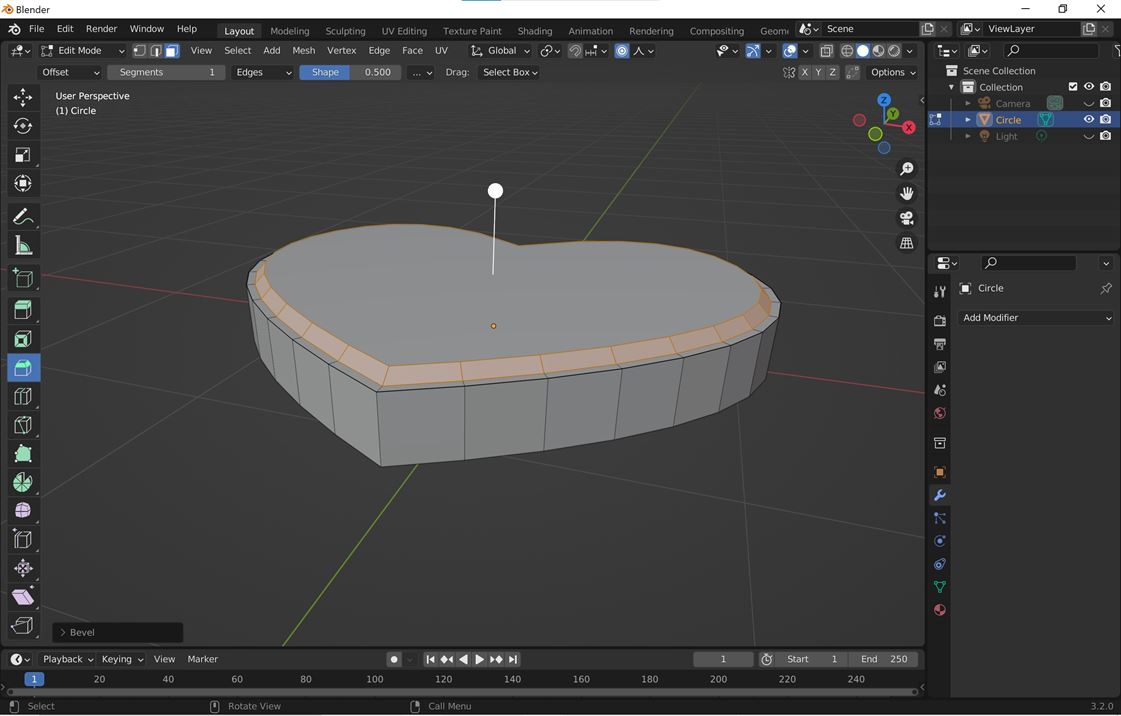
Final model
I could not get to where I wanted to with this model in the time. I am used to tools like 3DS Max for this type of modelling and so I still have a bit to learn about navigating and using Blender. Overall I think it is a good free tool with lots of functions.
Image Compression
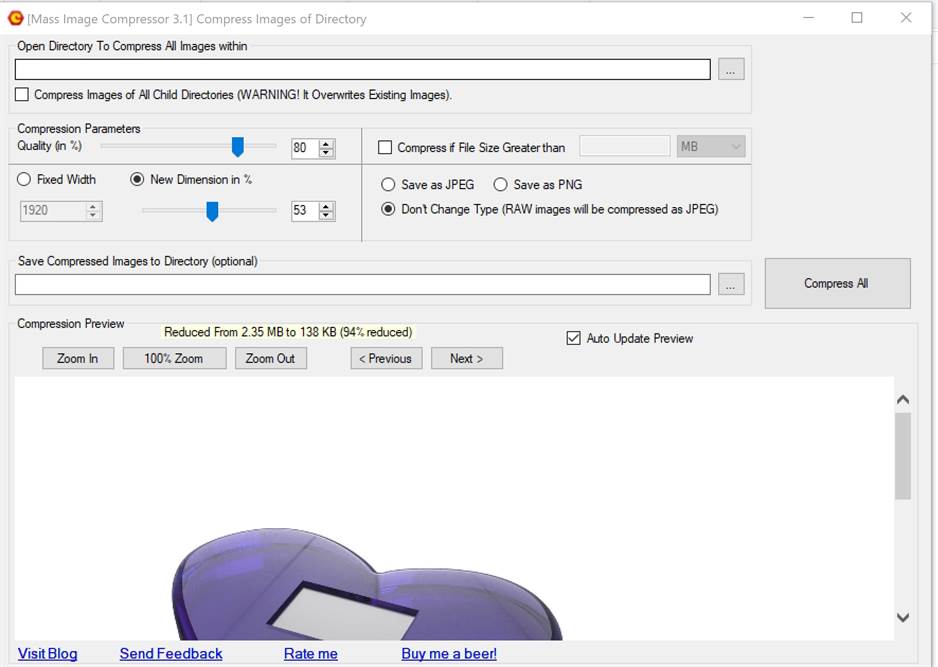
Like last week I needed to compress my image files.
I used Mass Image Compressor 3.1, a free Windows desktop software, to help me compress the images.
It allowed me to batch process compressing my images. I find it fast and easy to use.
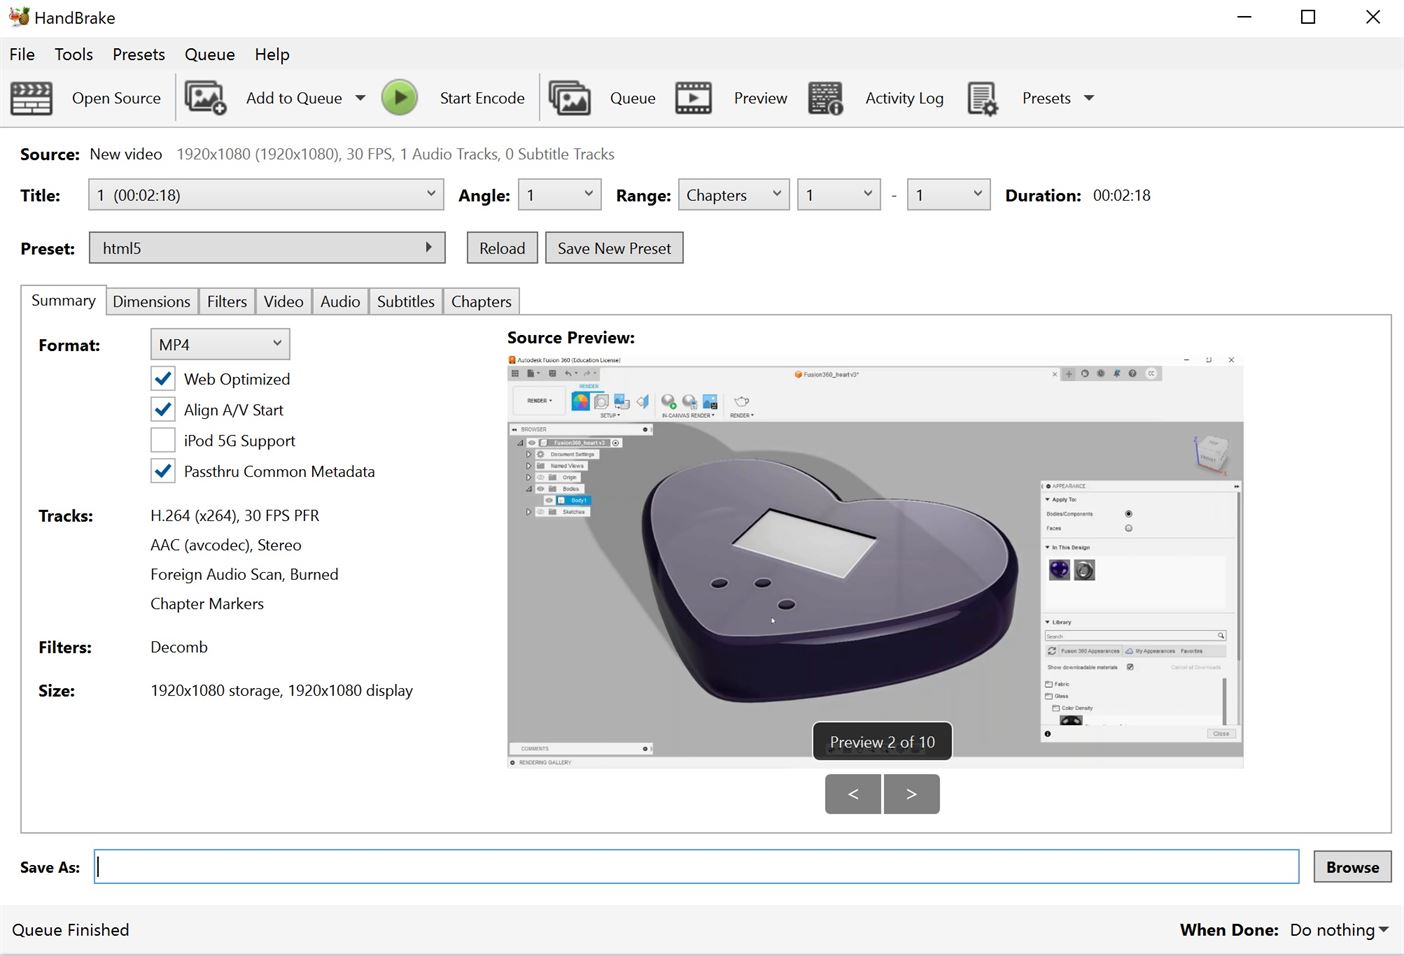
Video Compression
For video compression I used HandBreak, a free desktop software.
Adding Videos to MkDocs
To embed videos in MkDocs you need to install the video plugin by running the following code in command.
pip install mkdocs-video
Add the following into the mkdocs.yml file
plugins:
    - mkdocs-video
mkdocs-video