Week 12: Molding and Casting
Tasks for this week
Group assignment
- Review the safety data sheets for each of your molding and casting materials
- Make and compare test casts with each of them
Individual assignment
- Design a mold around the stock and tooling that you'll be using, mill it (rough cut + (at least) three-axis finish cut), and use it to cast parts.
Group Assignment
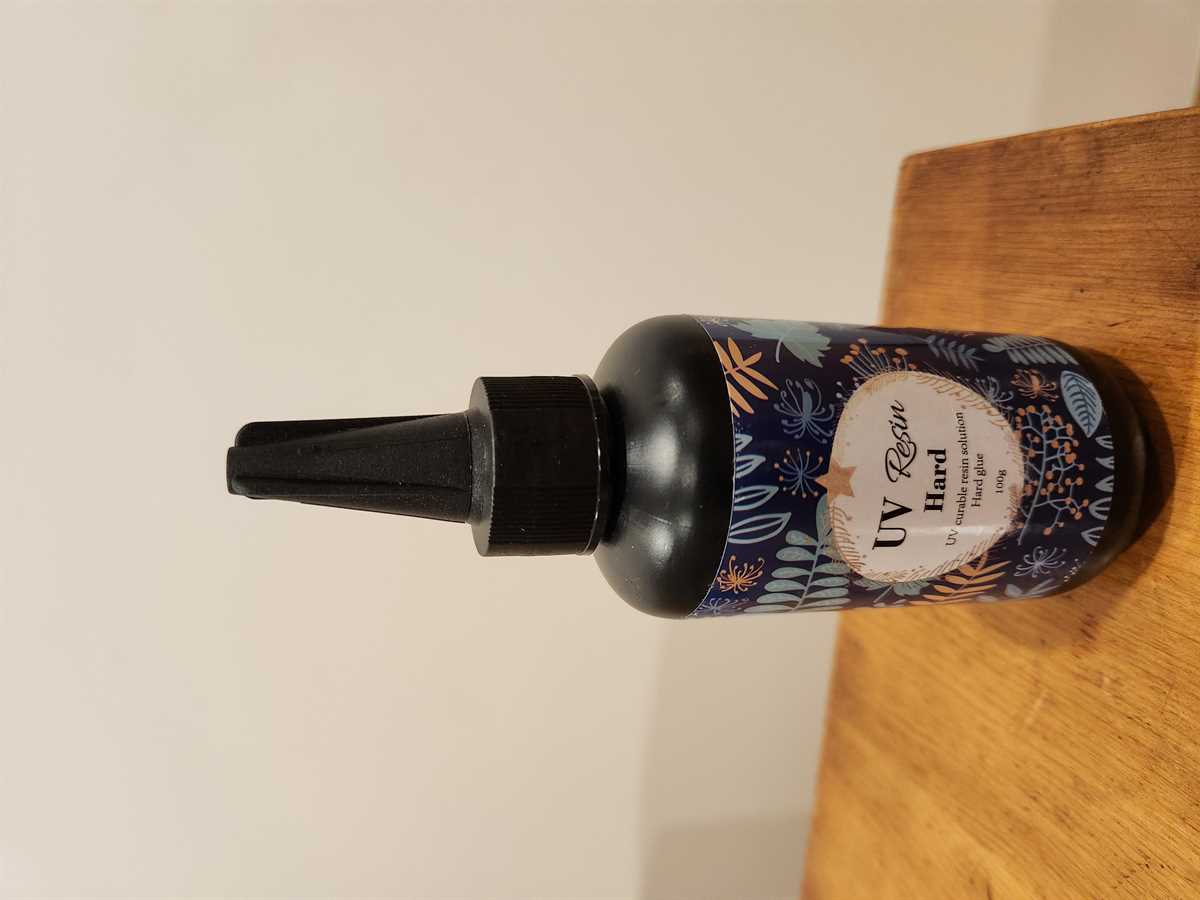
I did a test with UV Resin for the group assignment.
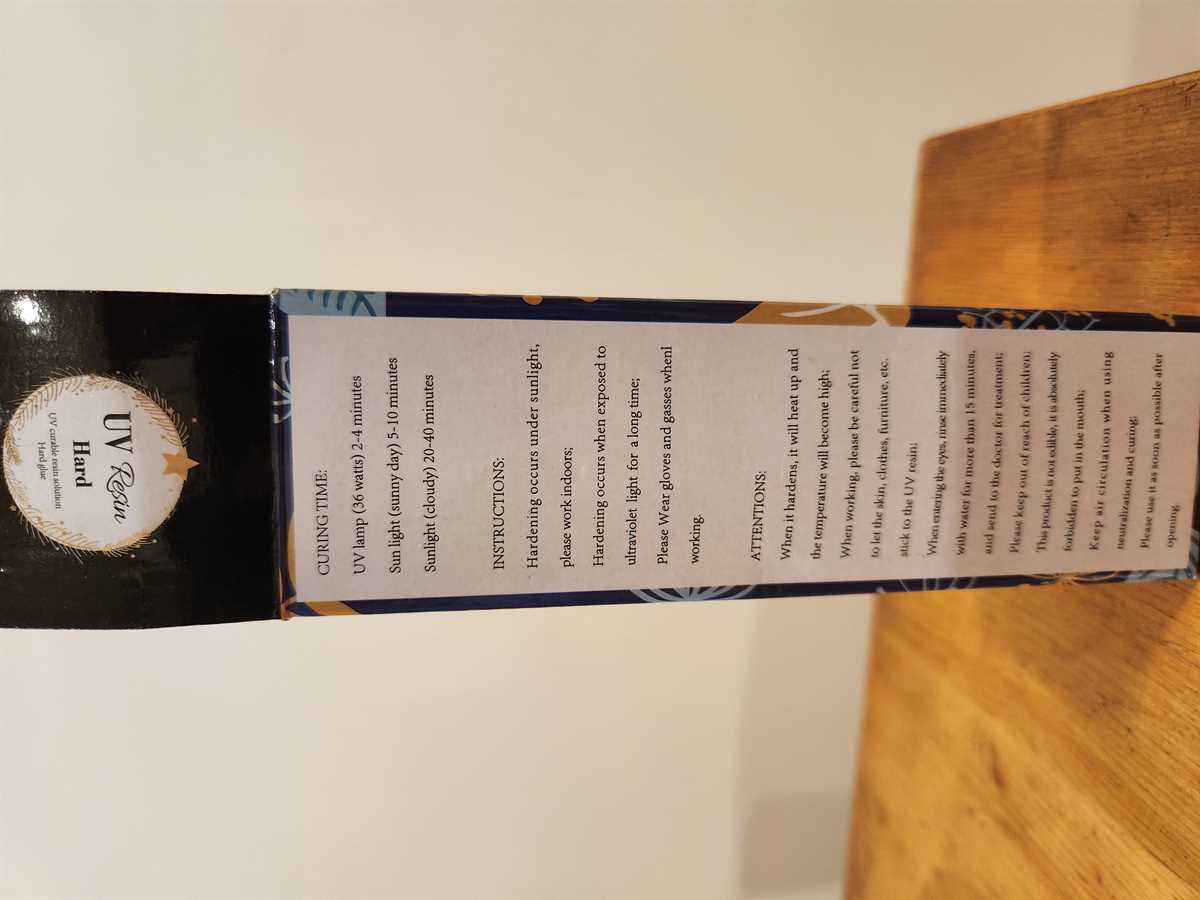
I found it quick and easy to use and there was also no noticeable fumes/odours, however I did make sure to cast it in a well ventilated area.
Given that the resin doesn't set until it is exposed to UV, it opens up opportunities for creativity beyond simple casting, you could use it for painting for example. This is really exciting and something I will look into having available for people to use at my Fab Lab.
Concept
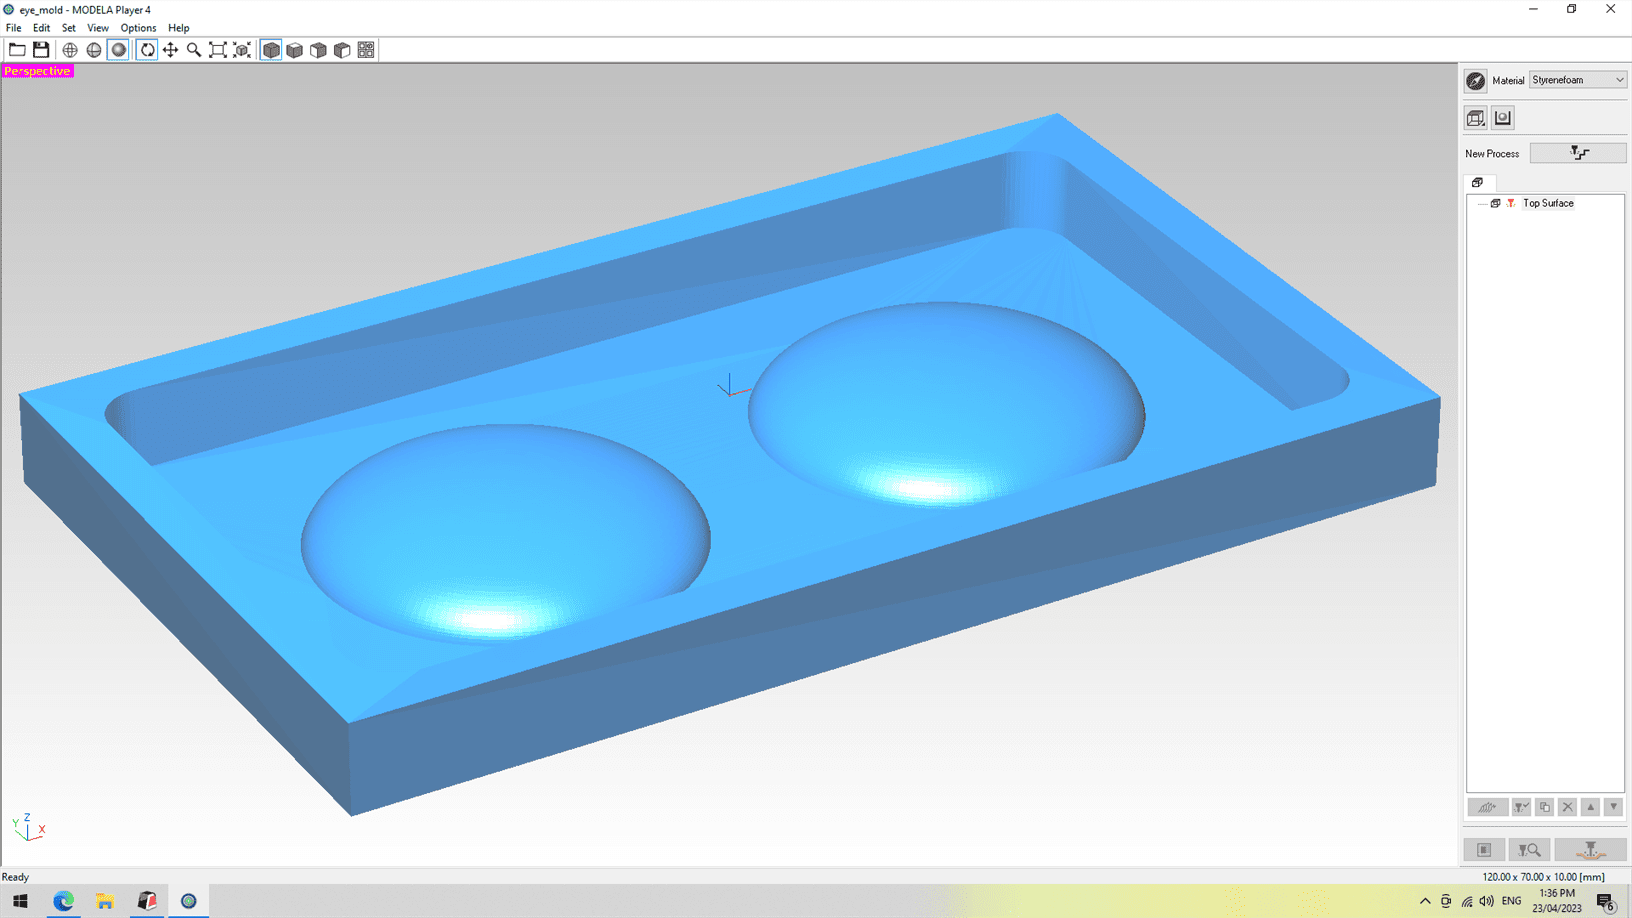
This week I have decided to create a mold and cast eyes to be used for my final project toy.
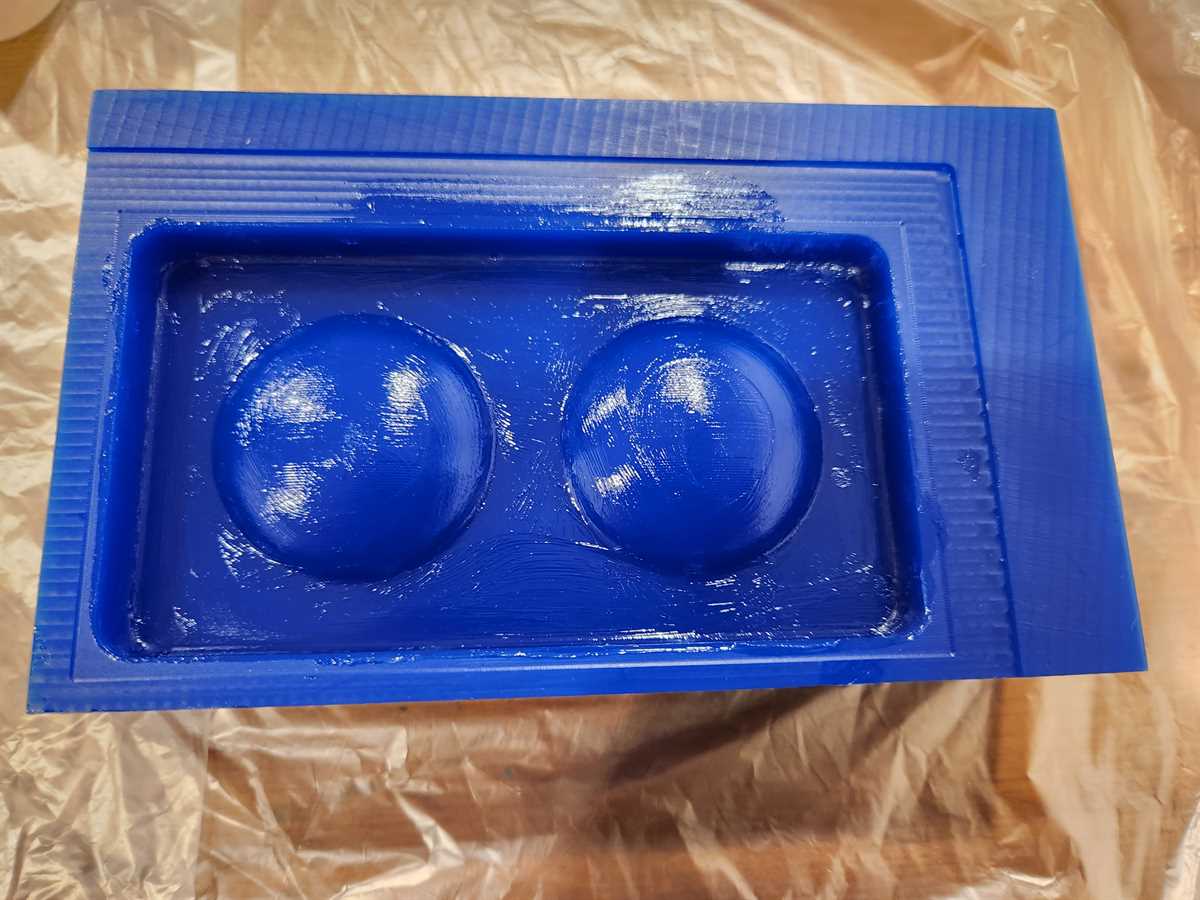
I will need to mill a wax mold to then make a silicon mold to then cast different coloured resin in the shape of a half sphere.
The mold will need to be open to allow for accurate placement of resin colours to create the eye.
3D Modelling of Mold
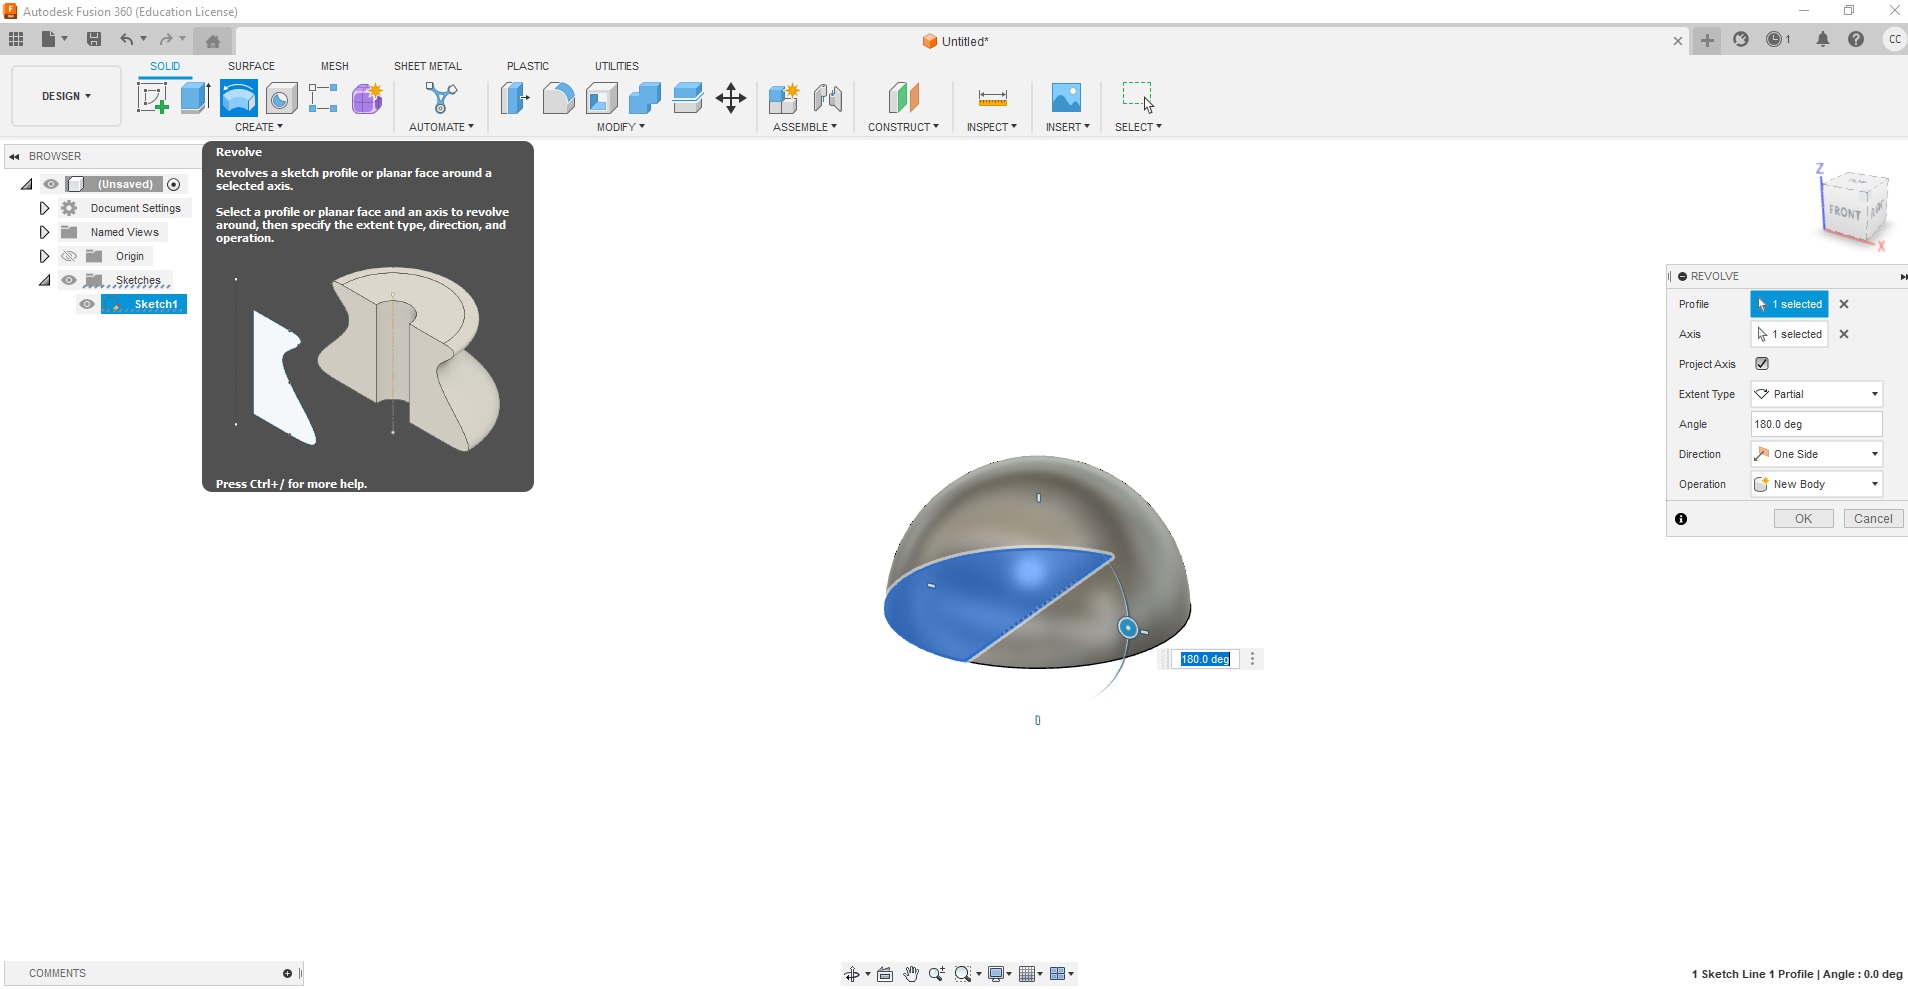
I used Fusion 360 to make the 3D model.
I started by drawing a 40mm semi-circle.
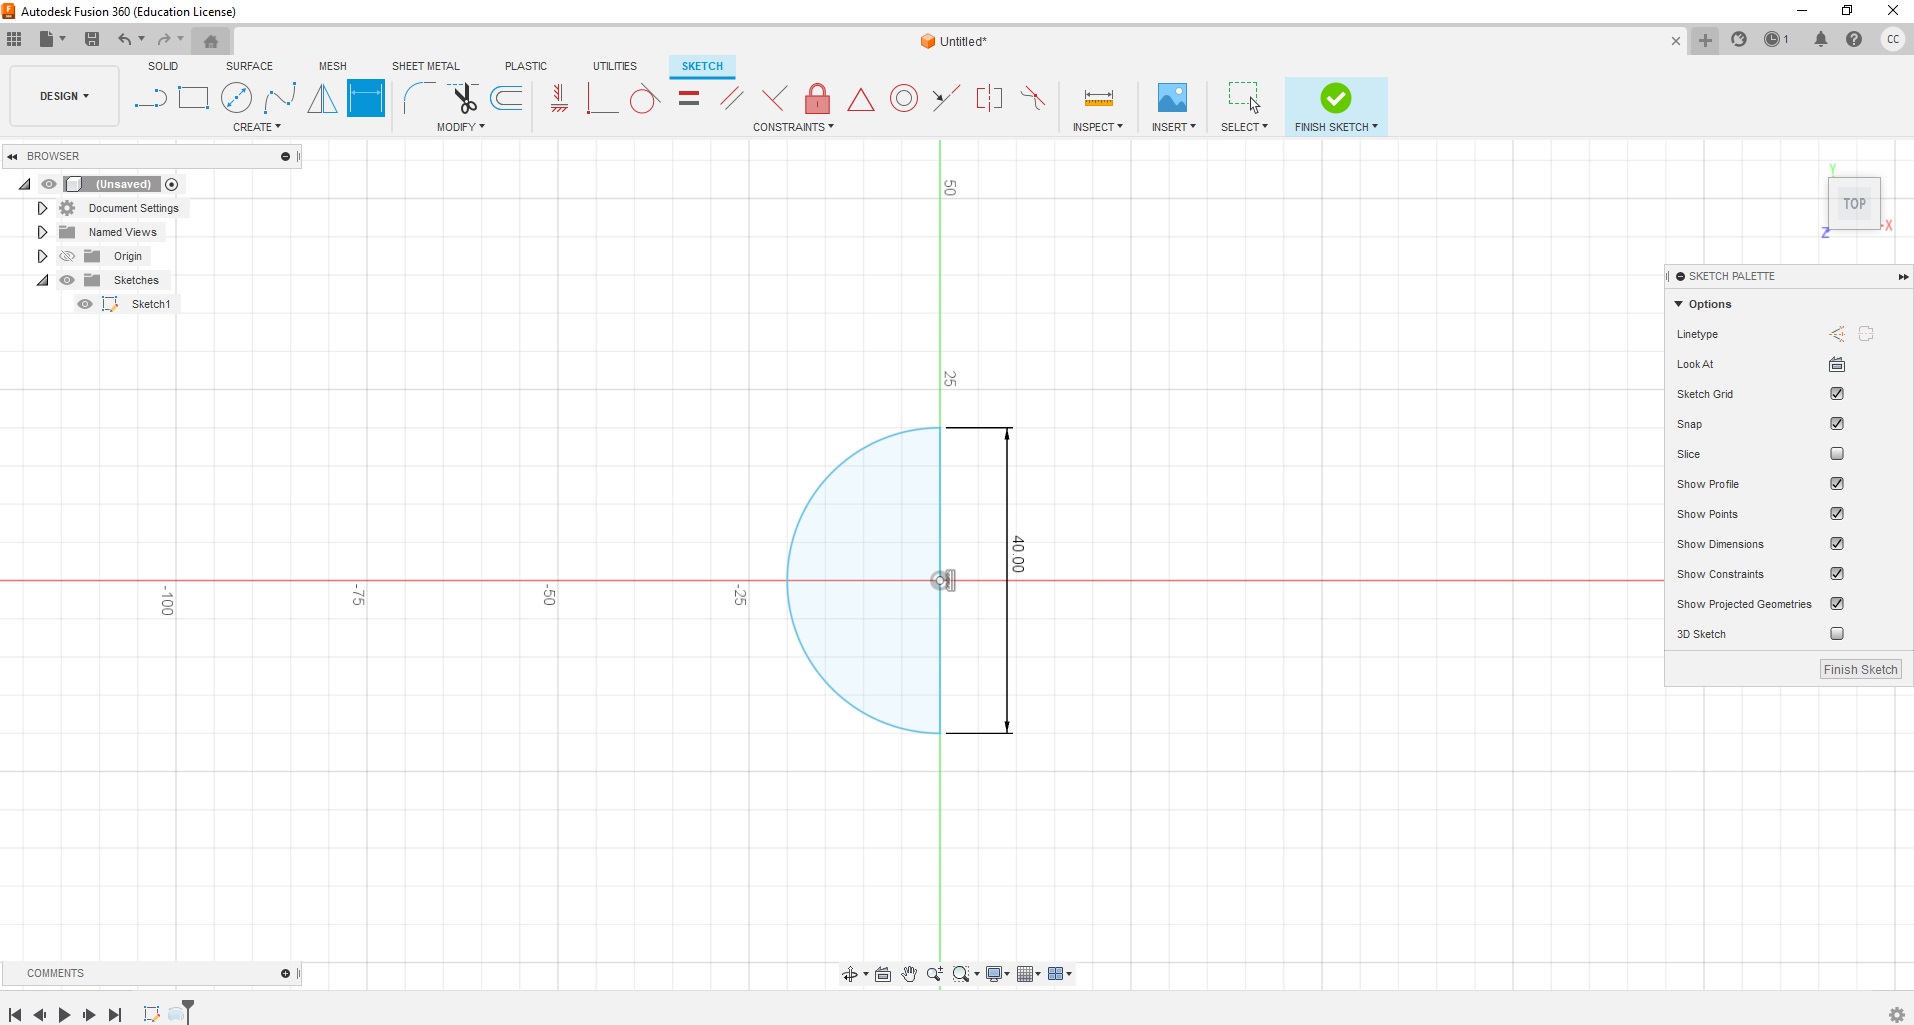
I used the revolve tool to make the sketch into 3D.
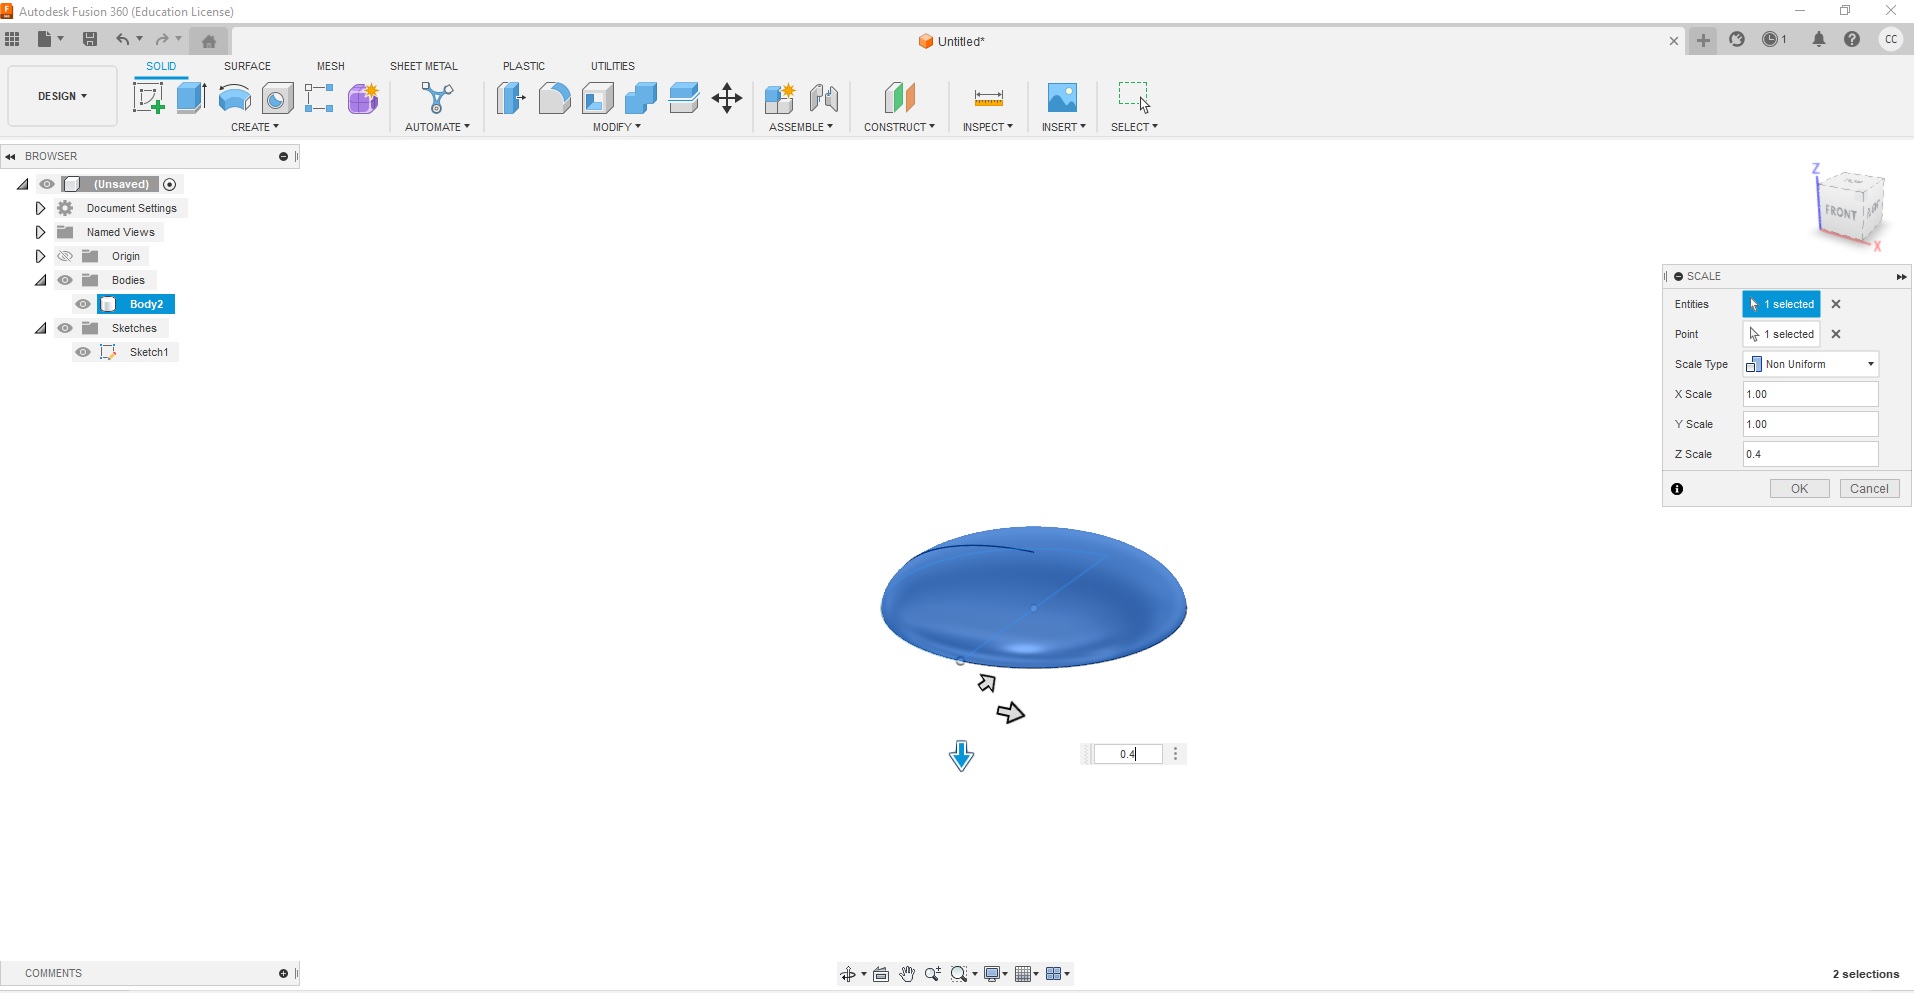
I used the scale tool to flatten the model.
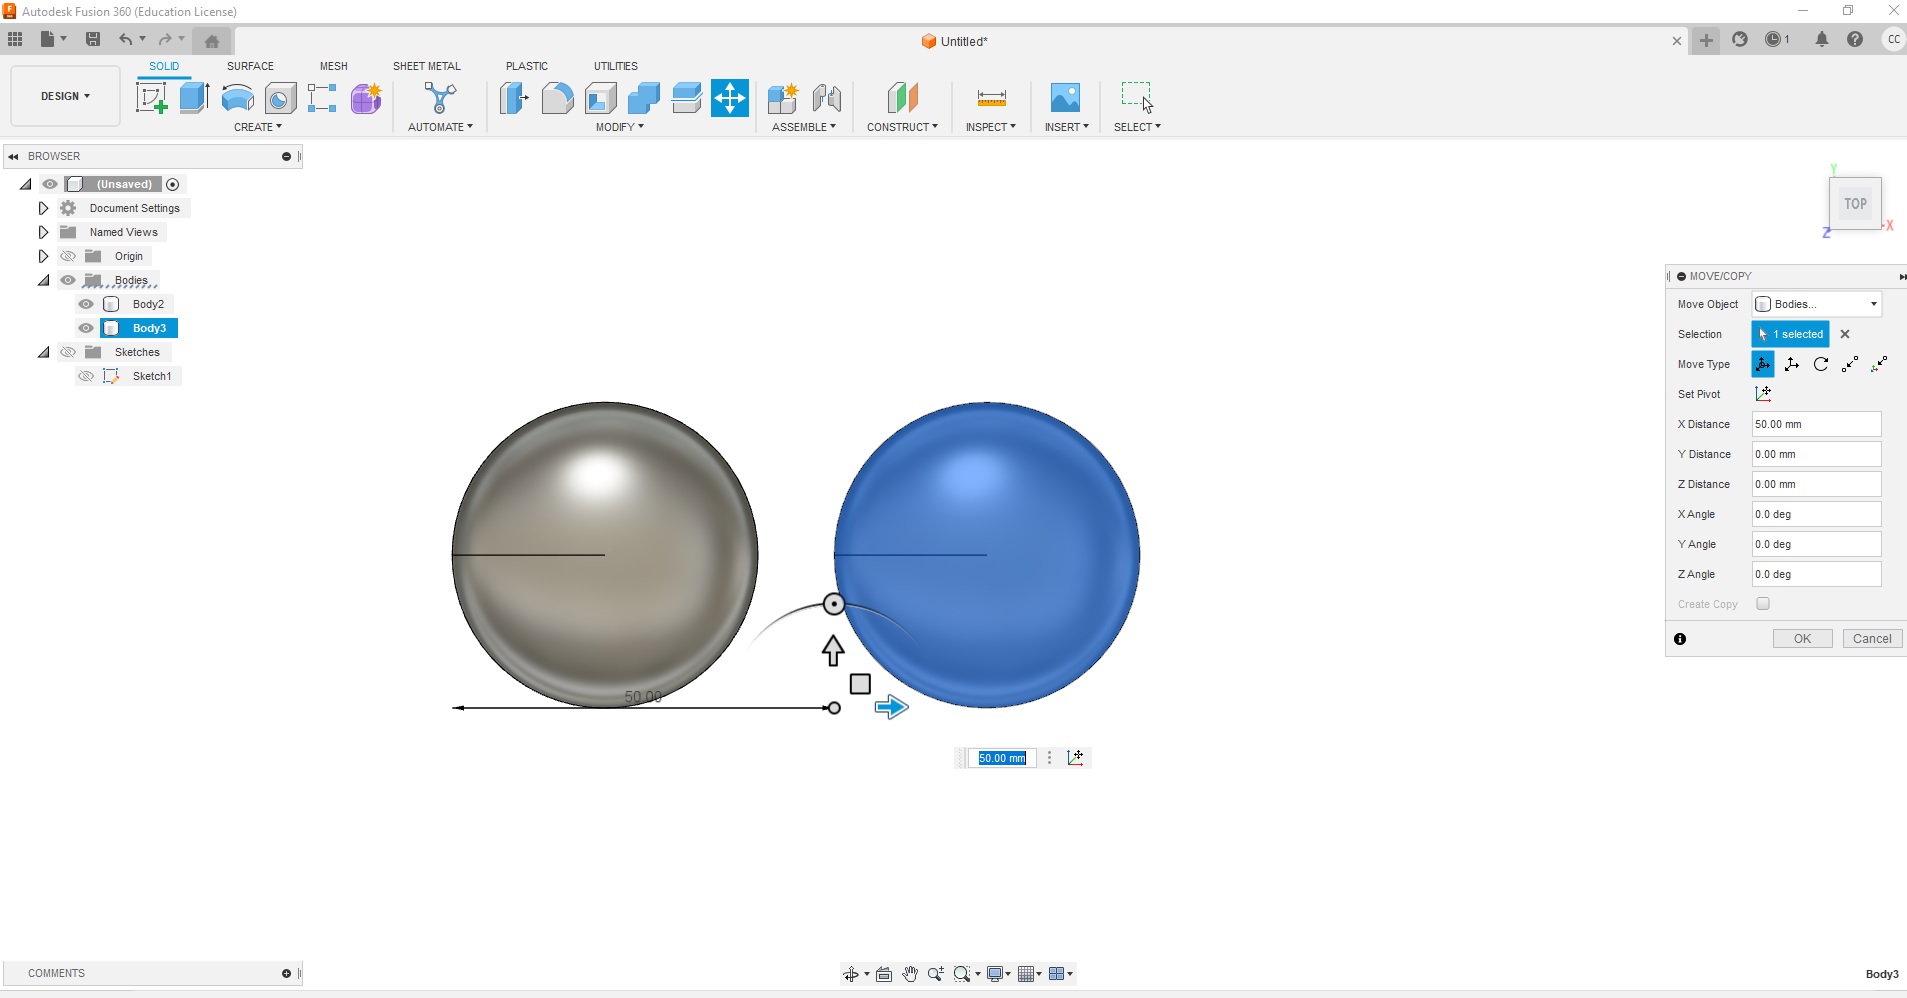
I duplicated the model.
I sketched a rectangular box around the model to act as the edge for the mold.
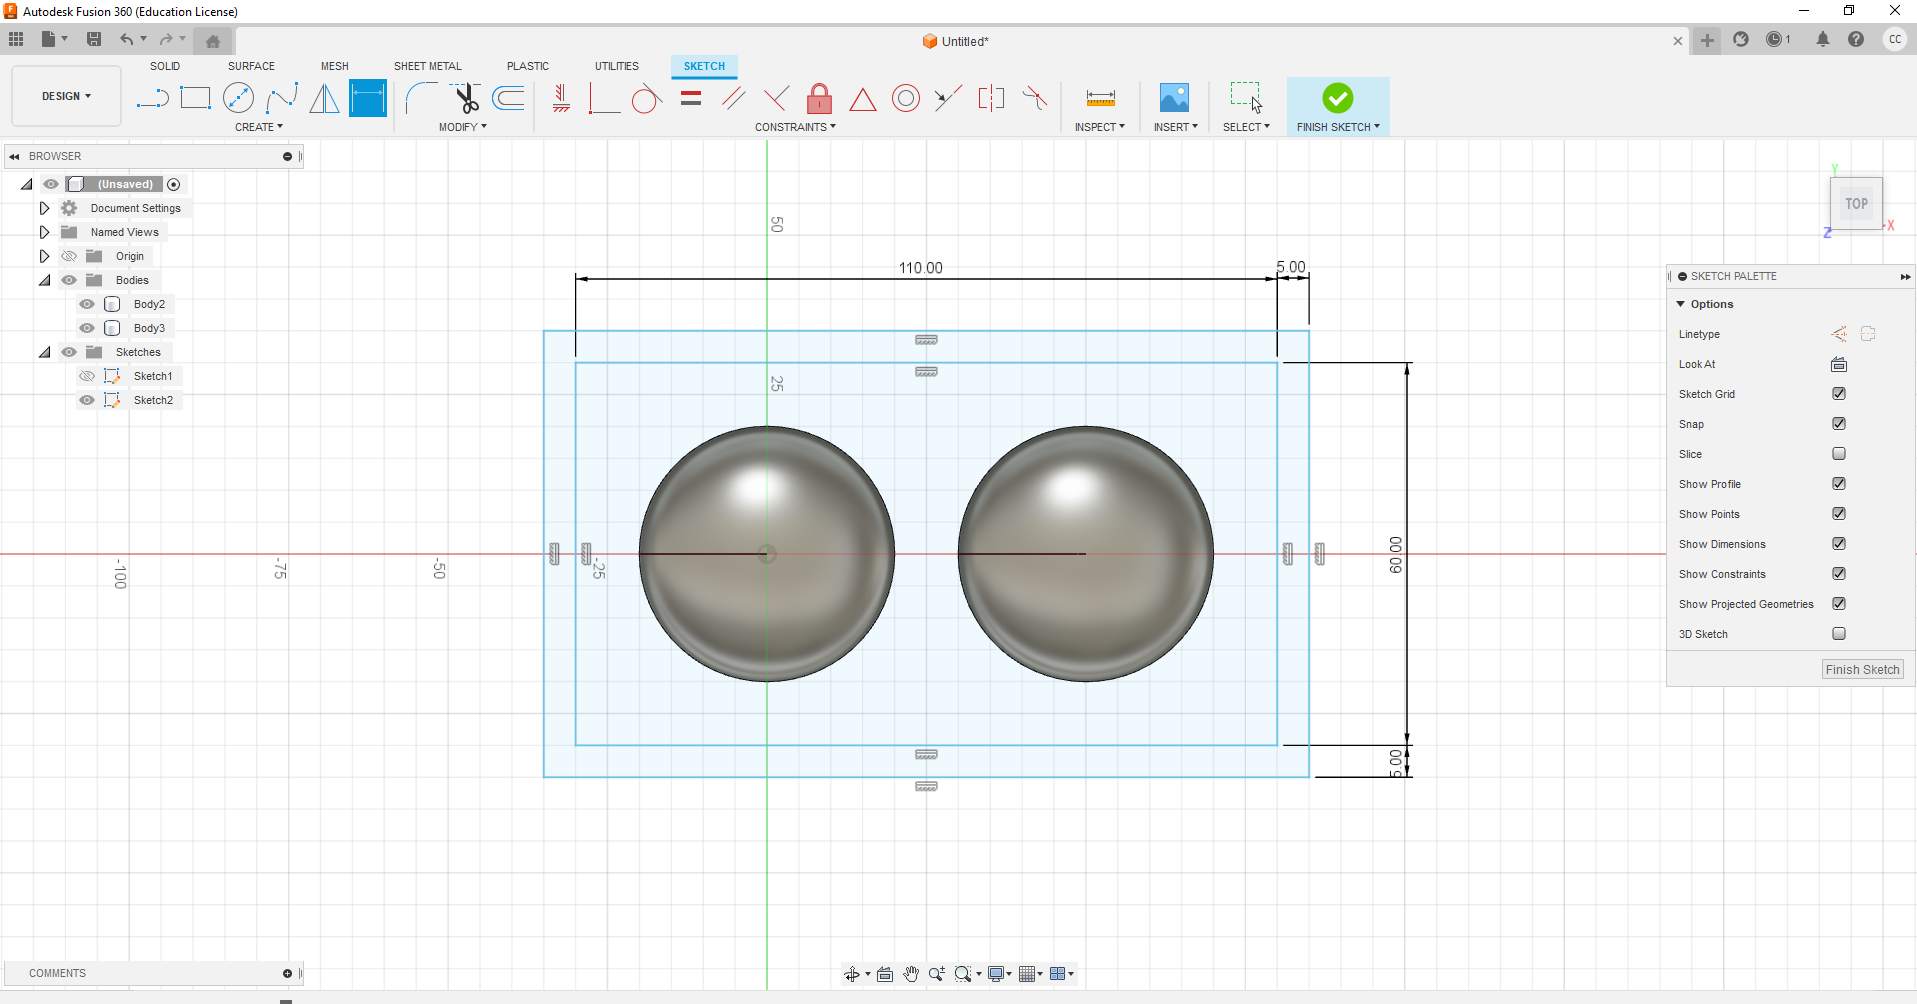
I extruded the box and made sure that it was above the eye models to ensure that I would have enough depth created when I cast the silicone.
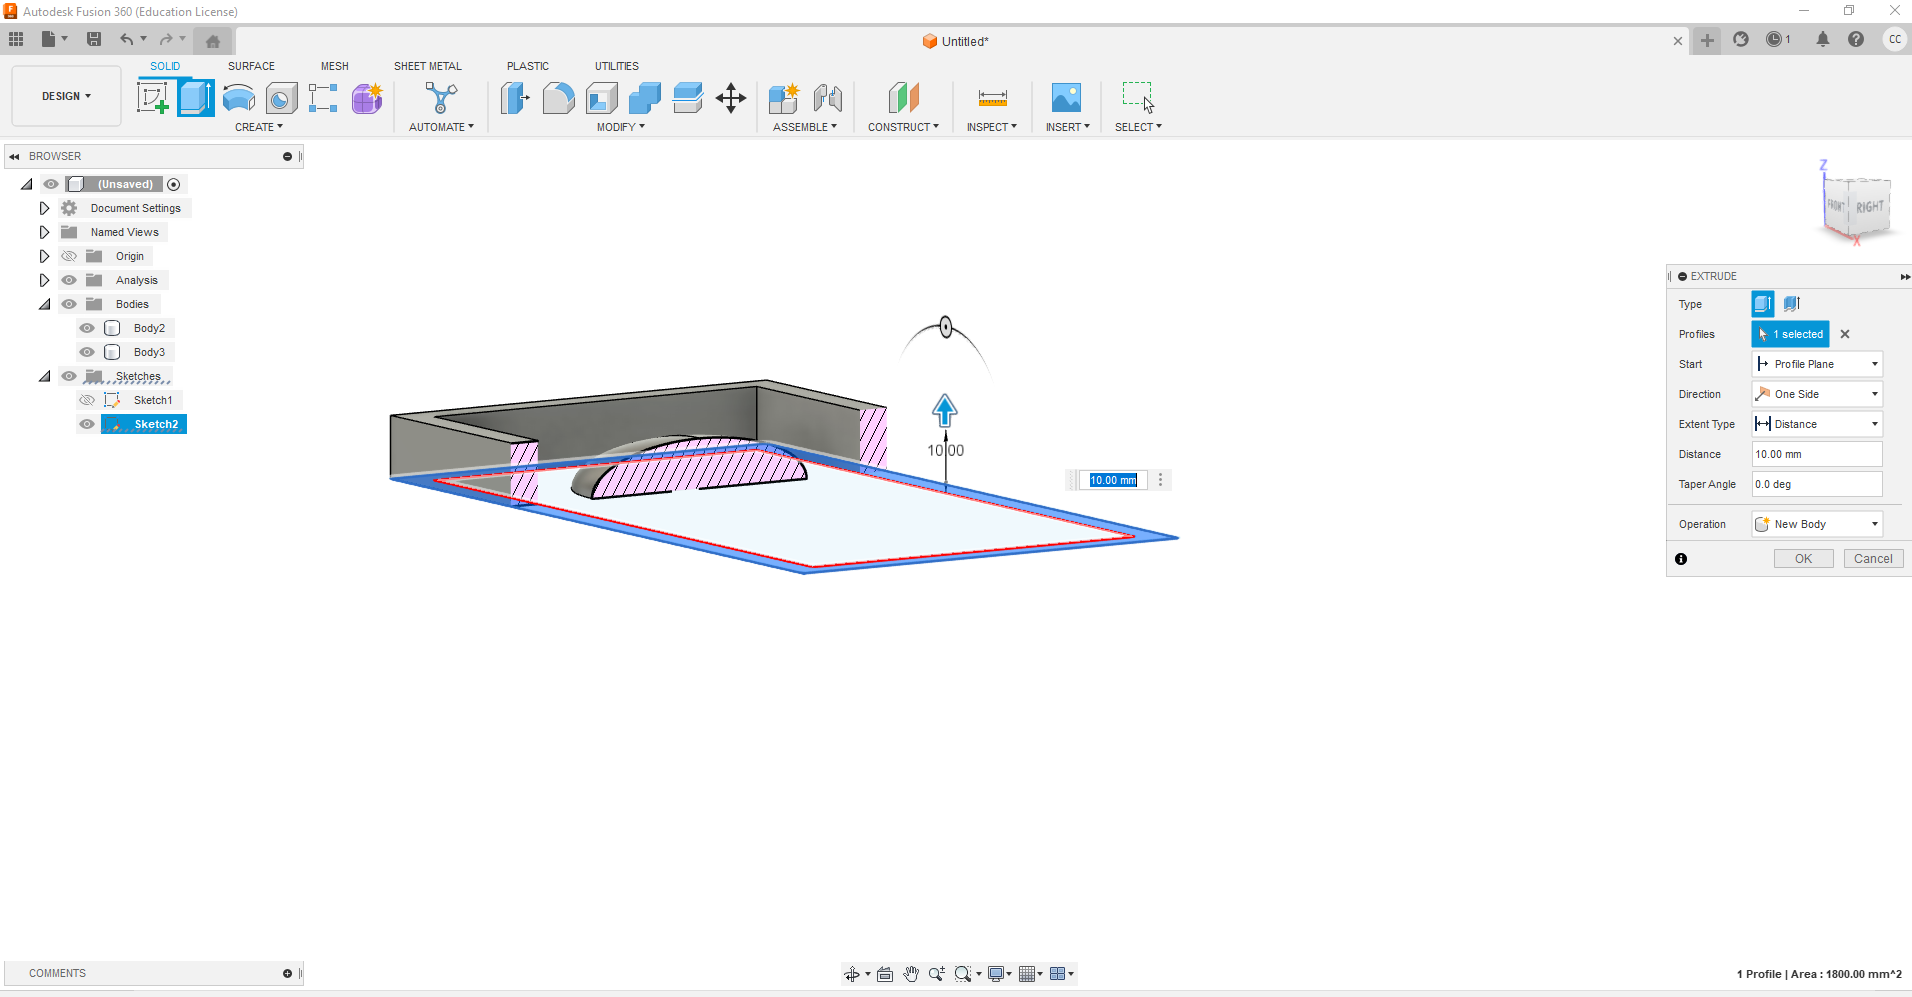
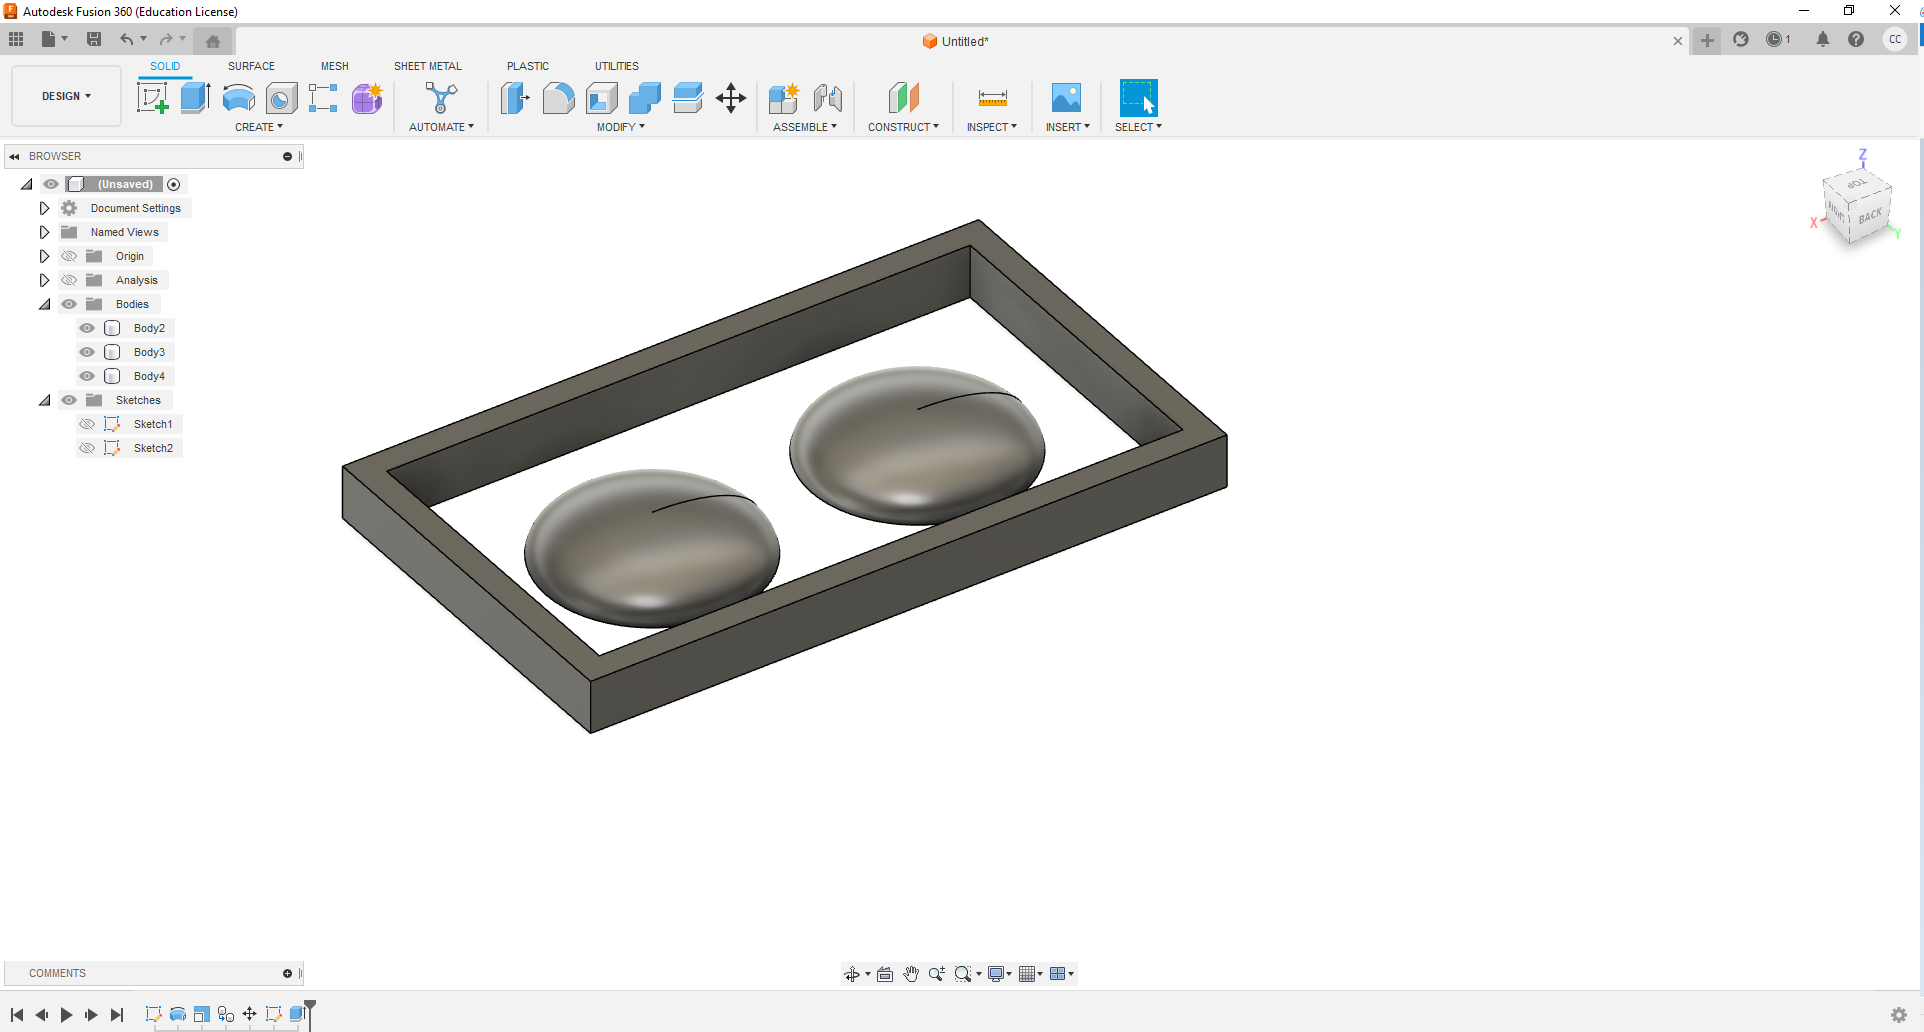
I also added a base using the extrude tool.
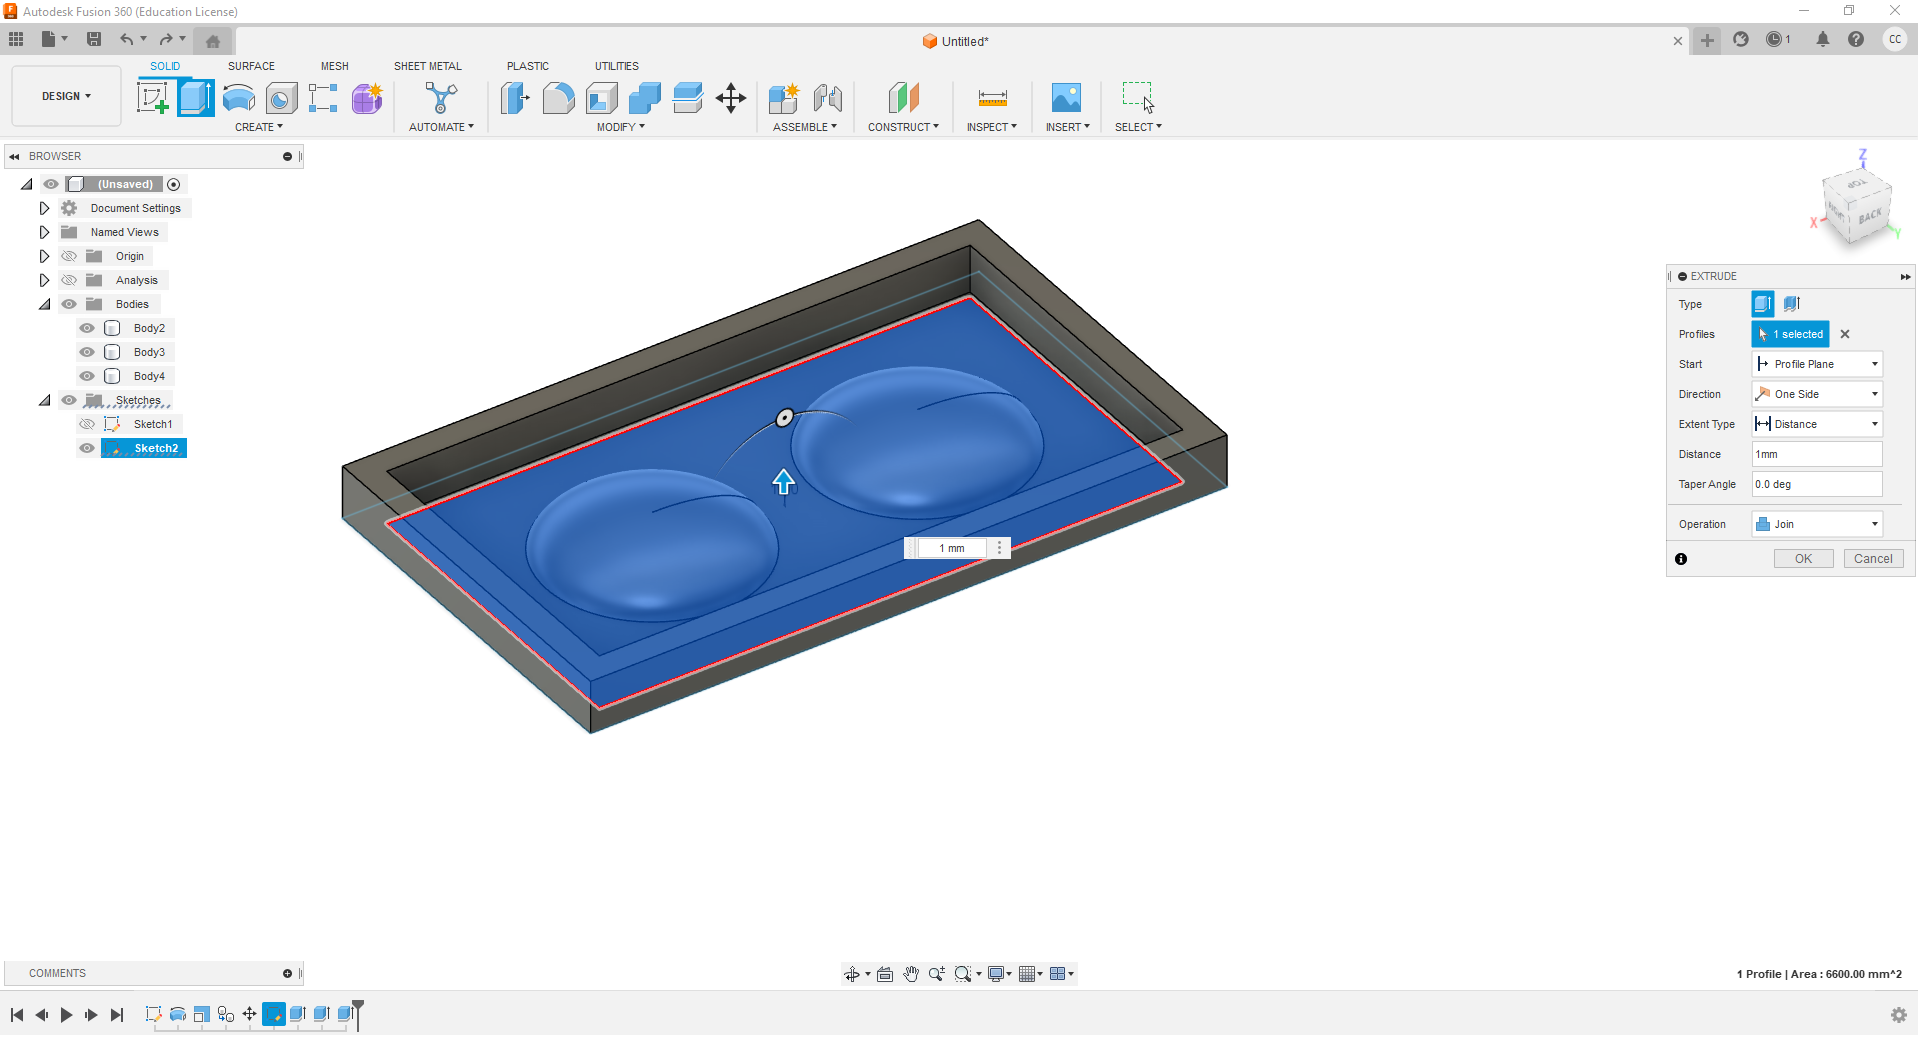
I decided to make a change to the box and fillet the corners so that it would be easier to get the silicon out once cast.
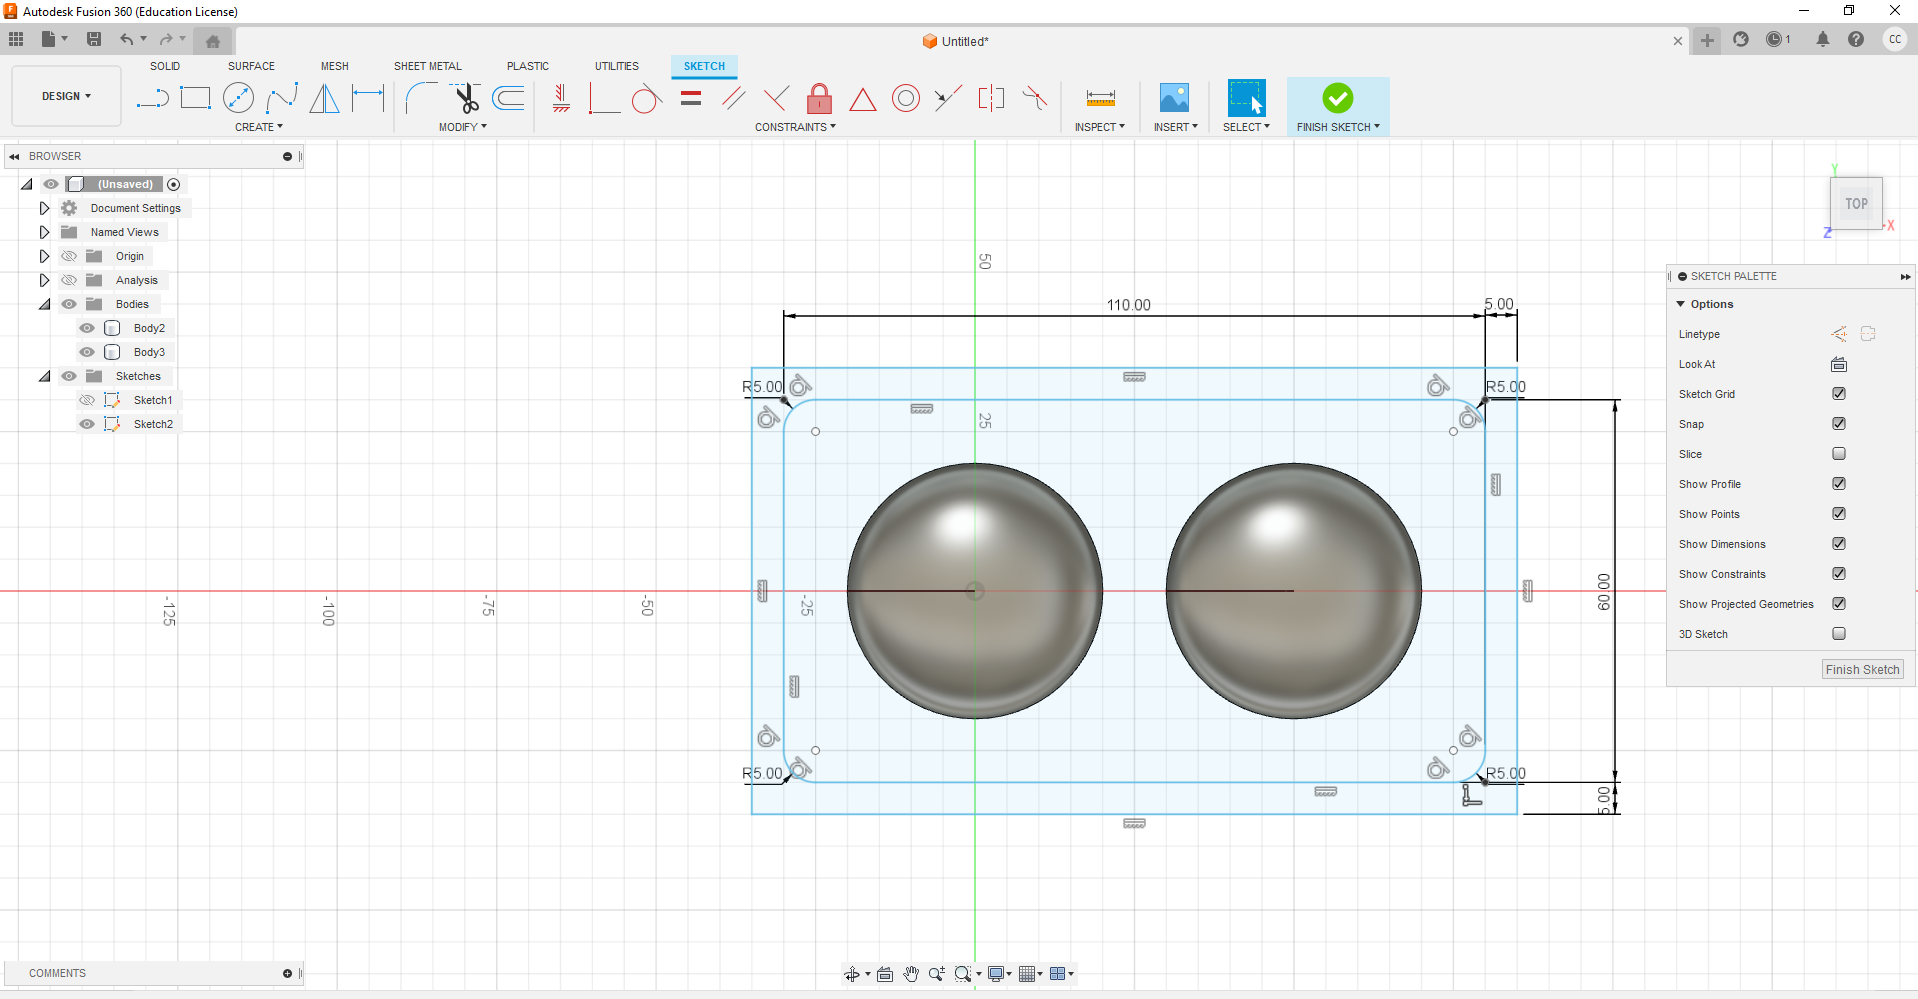
Final 3D model.
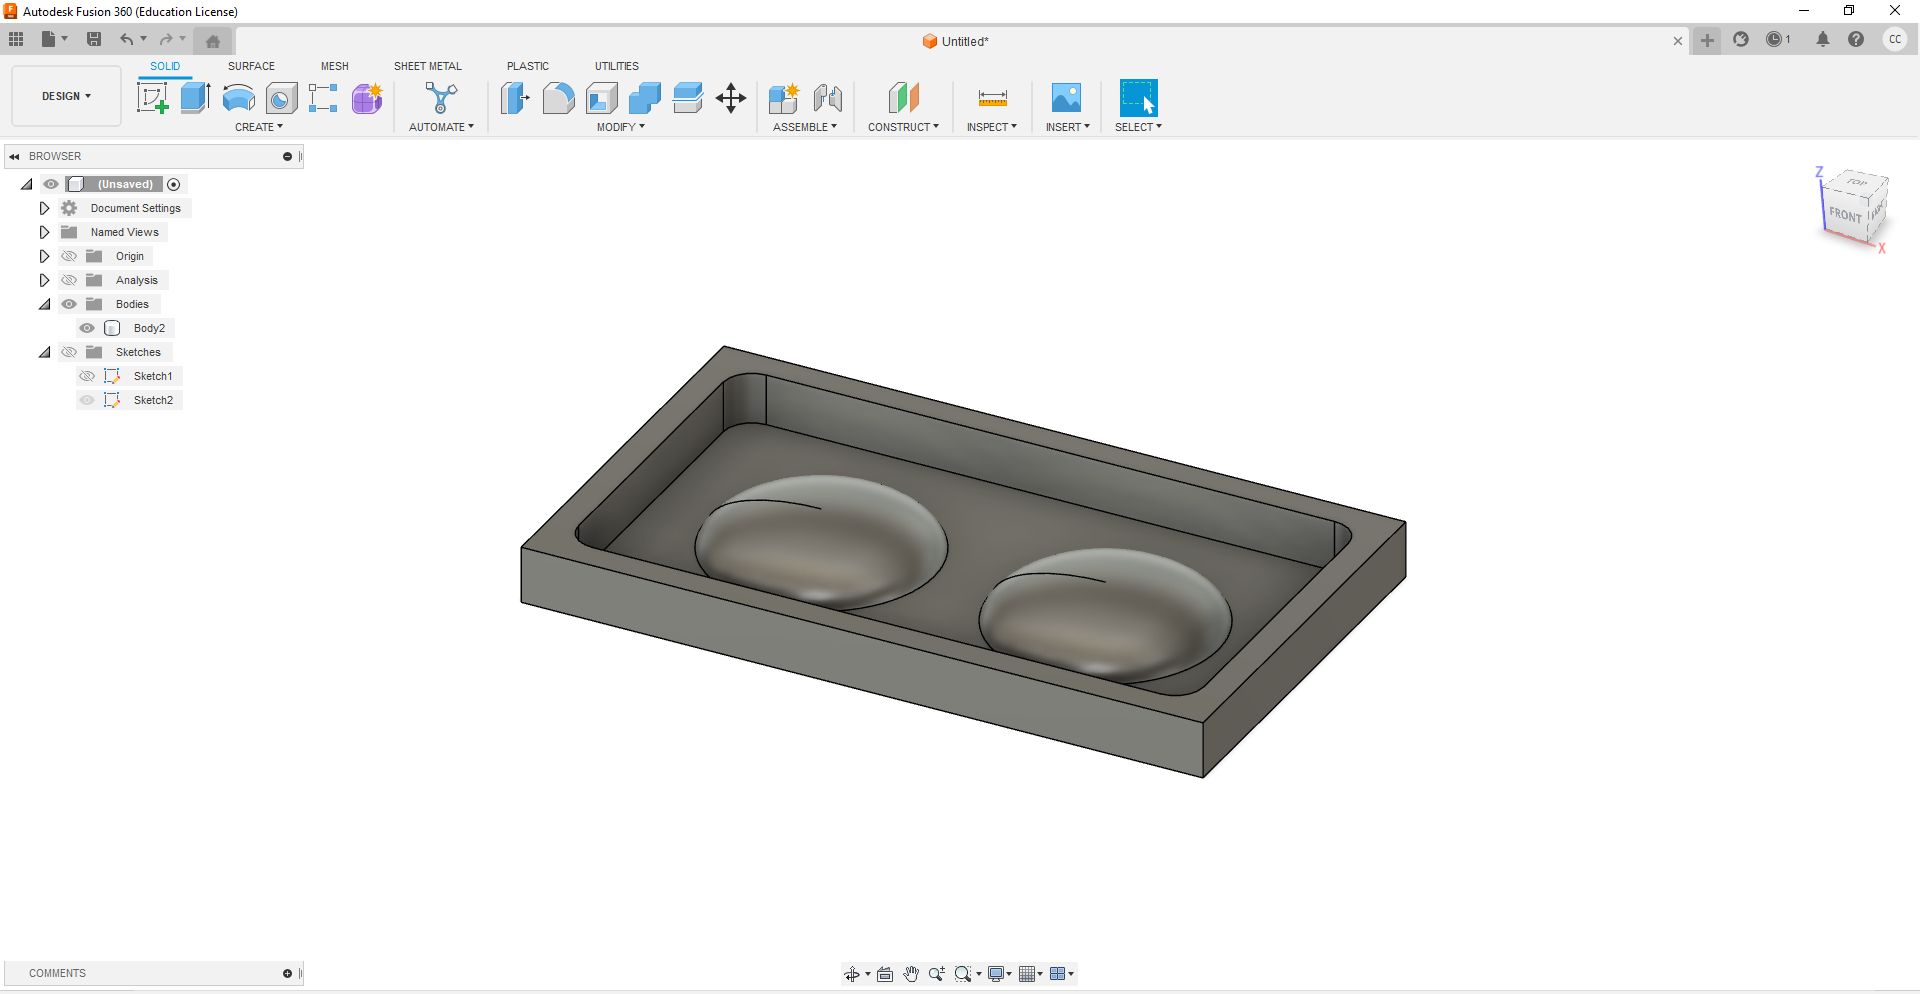
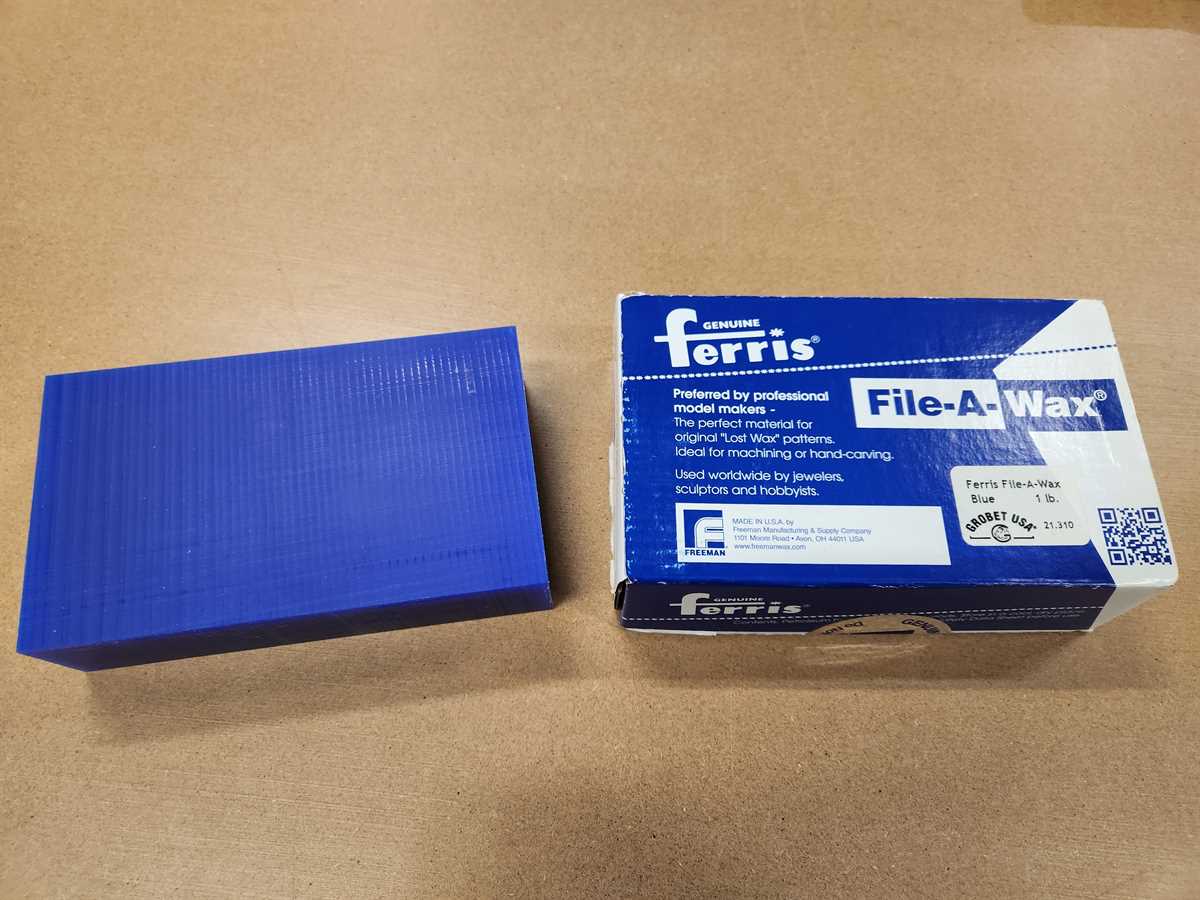
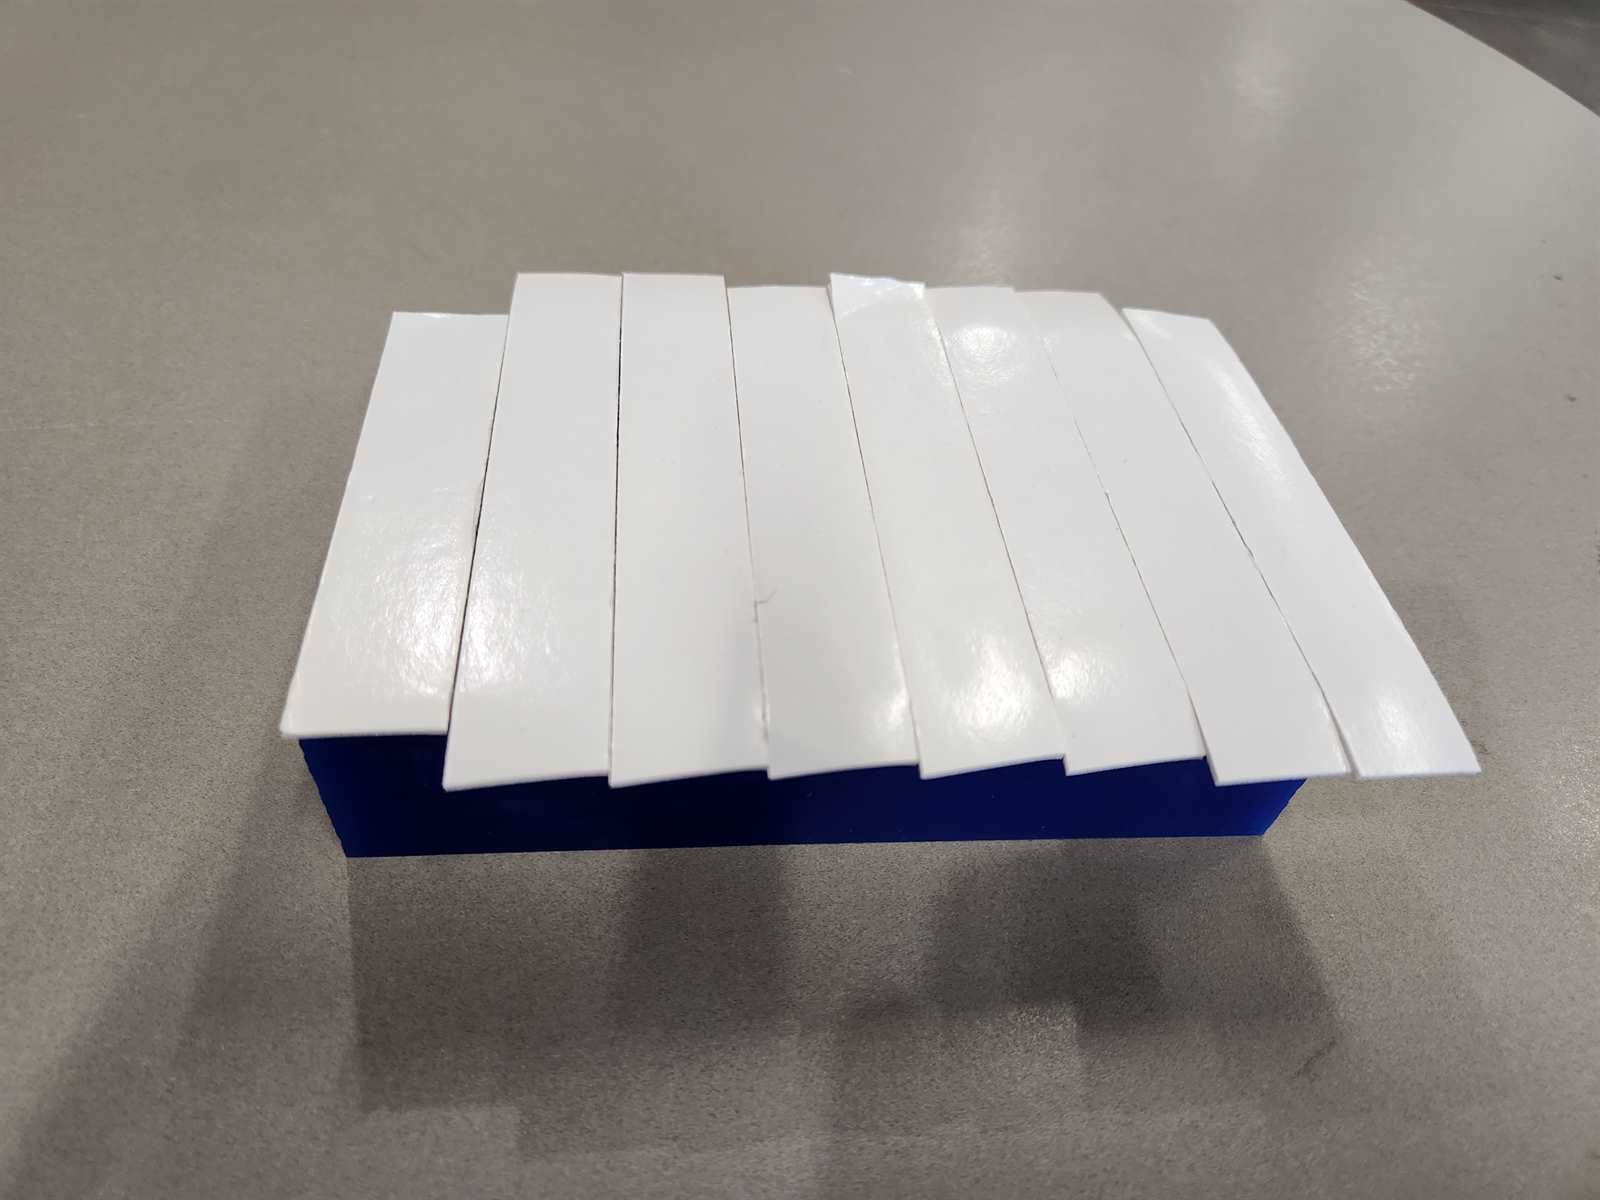
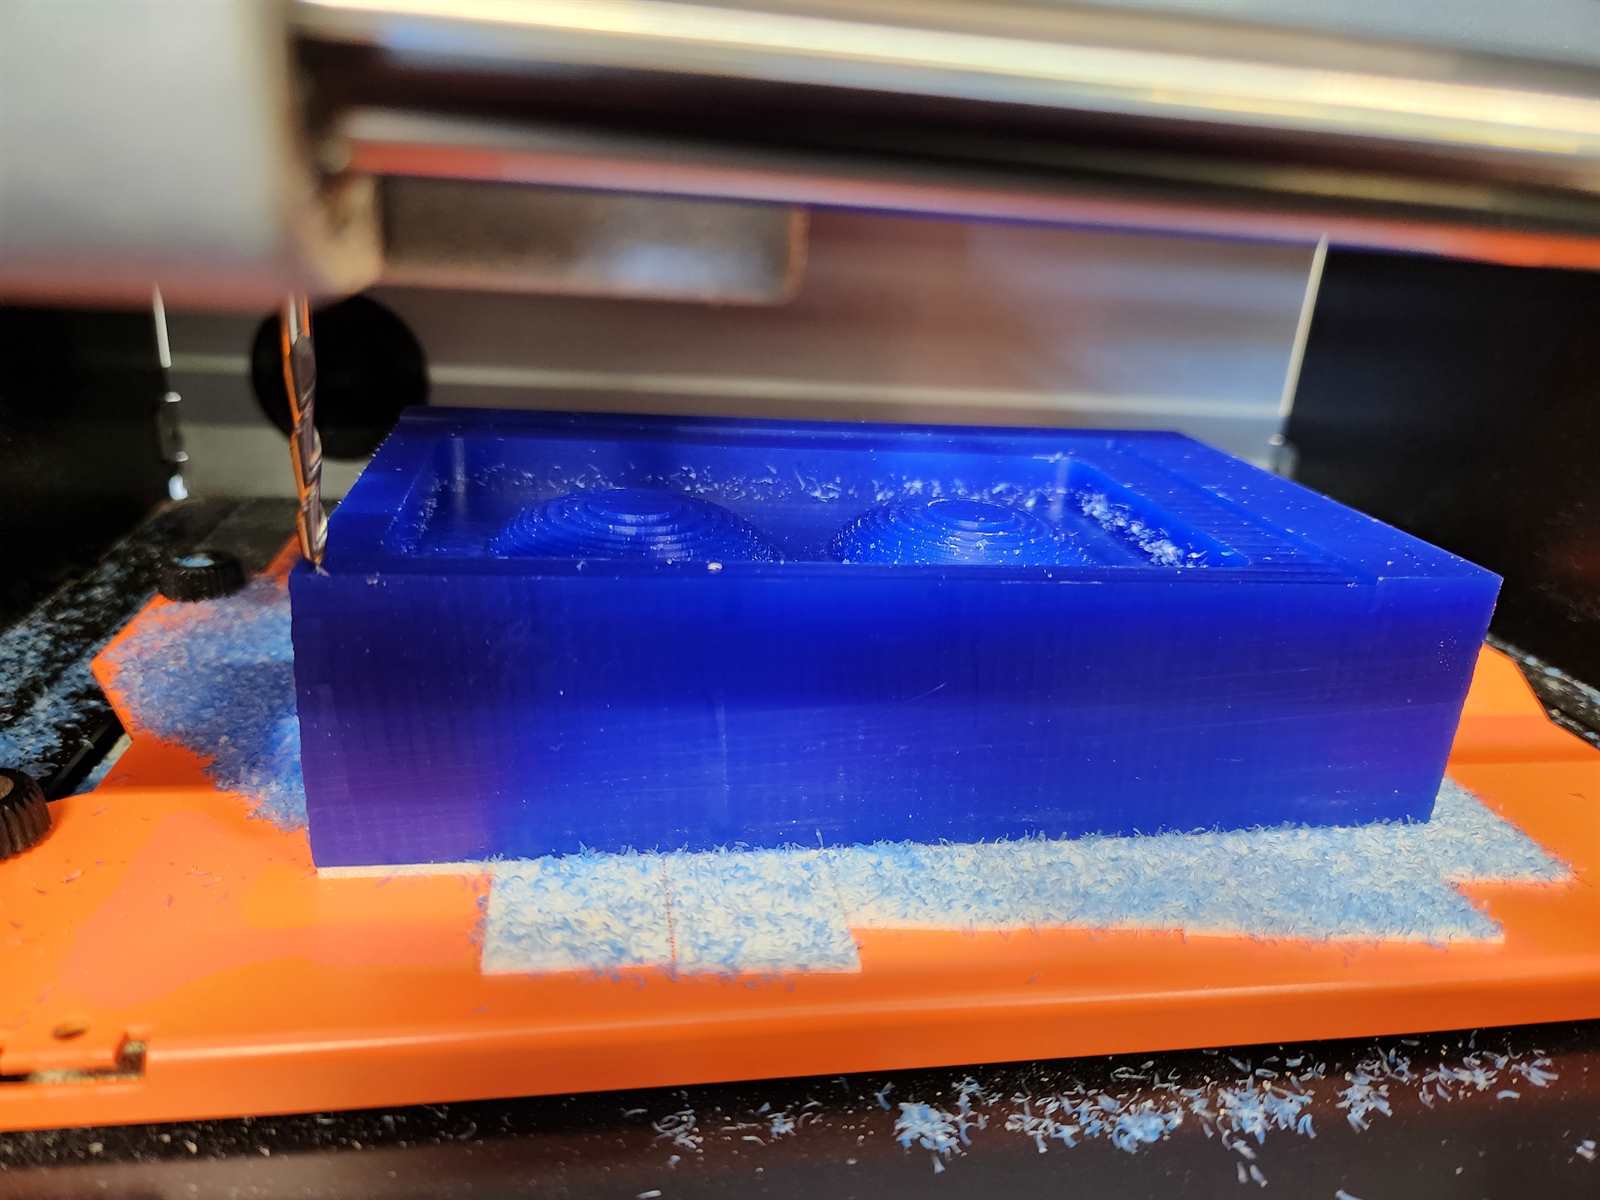
Mold Milling
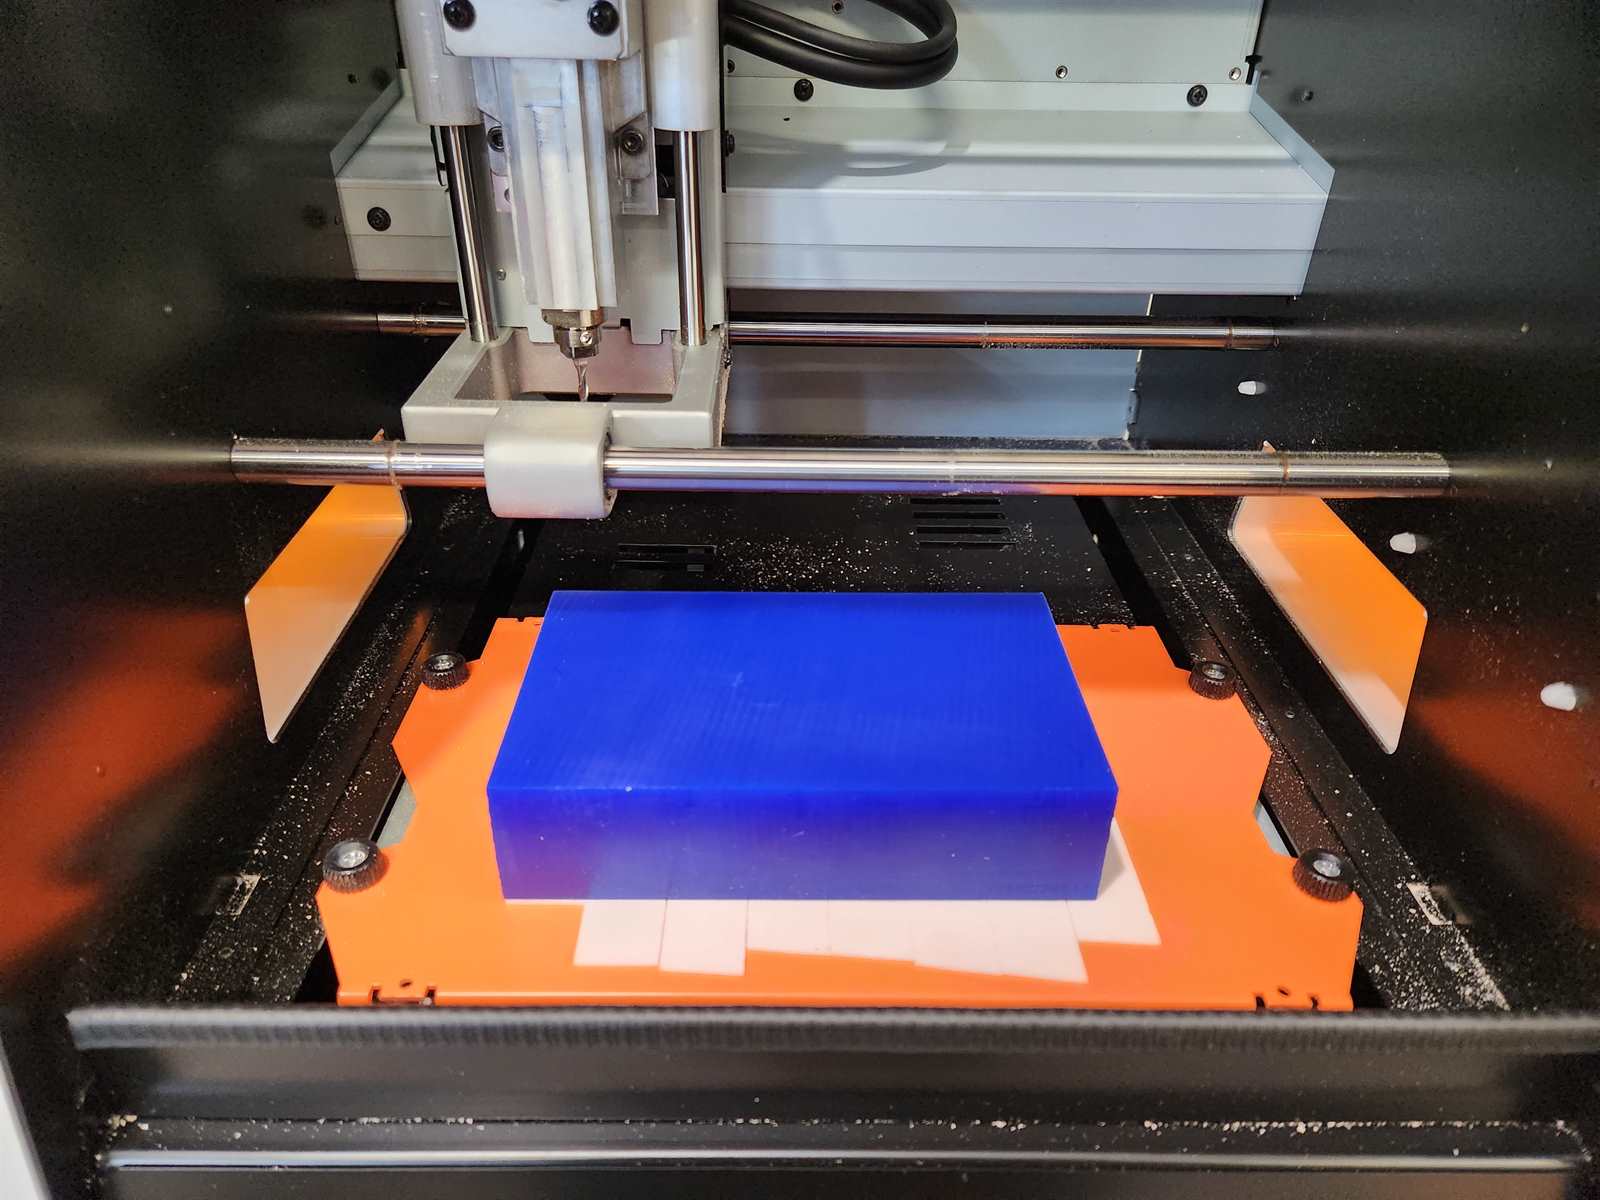
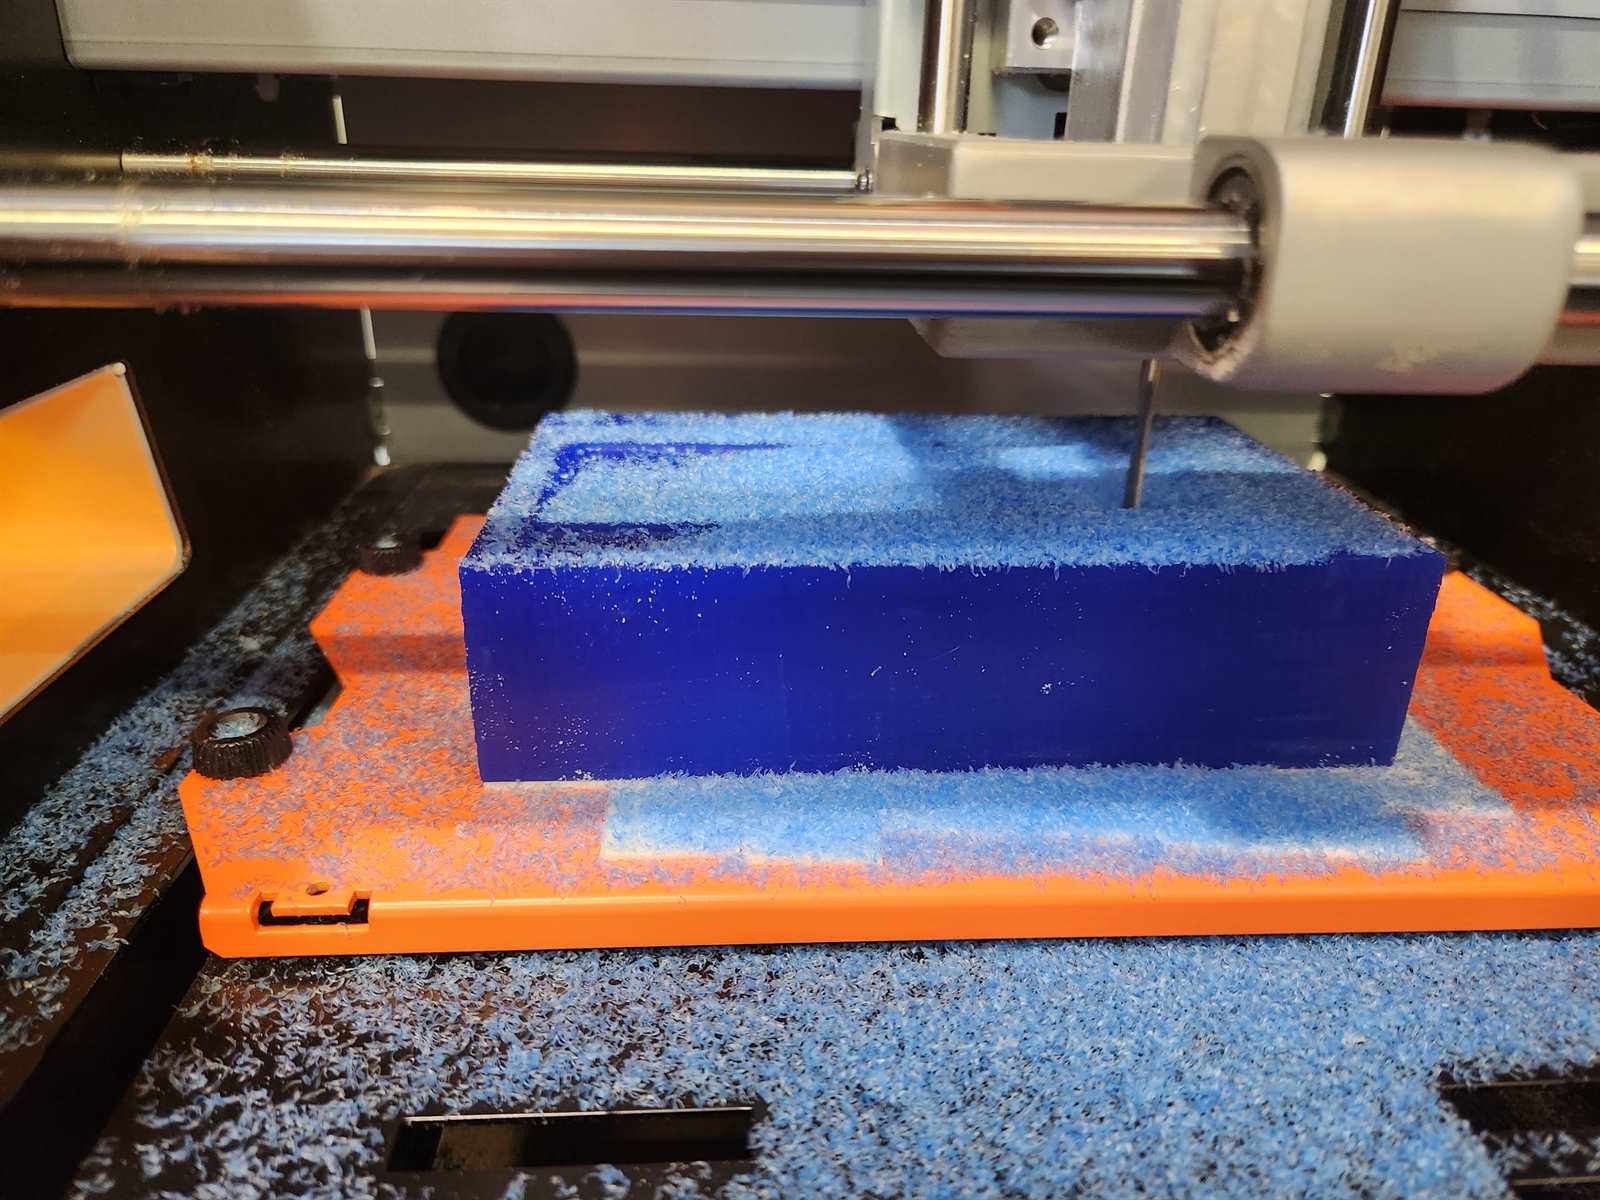
Using Ferris Blue File-A-Wax I created the mold on the Roland SRM-20.
SRM-20 Setup
I added double sided tape to the bottom of the wax.
I zeroed the x, y and z axis to the bottom left hand corner of the block.
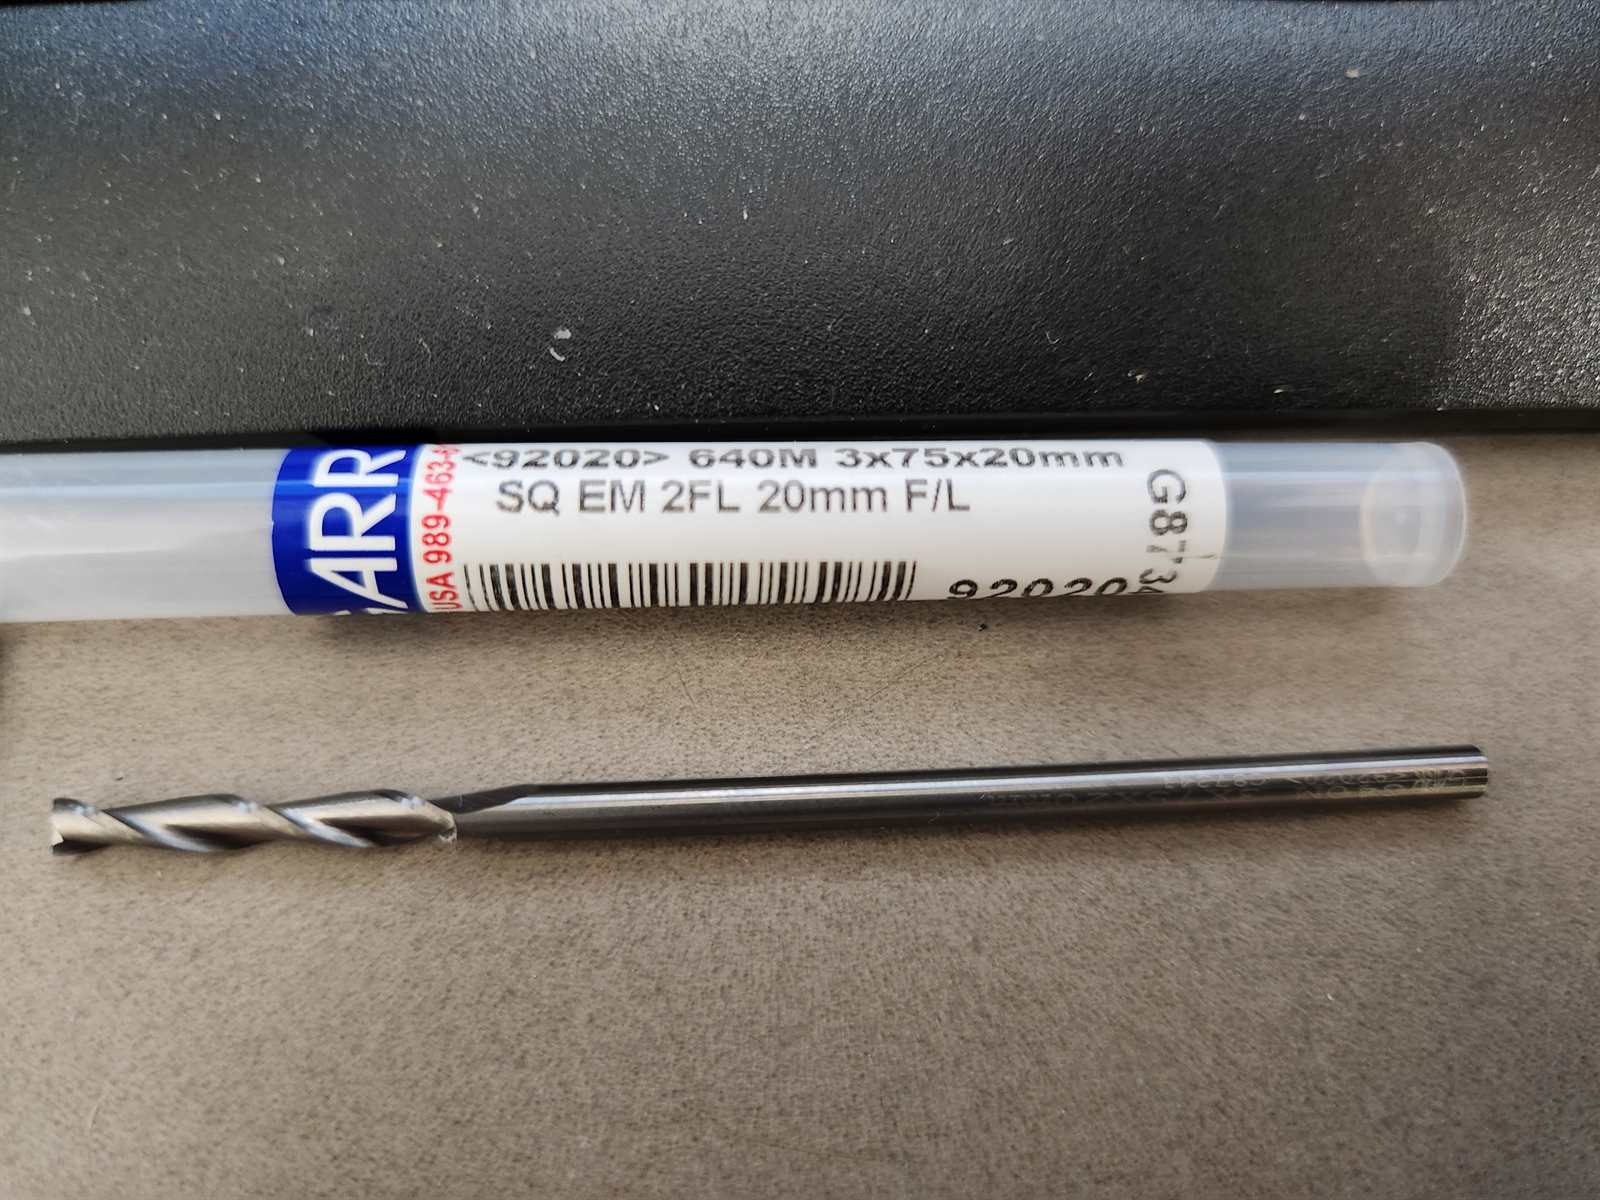
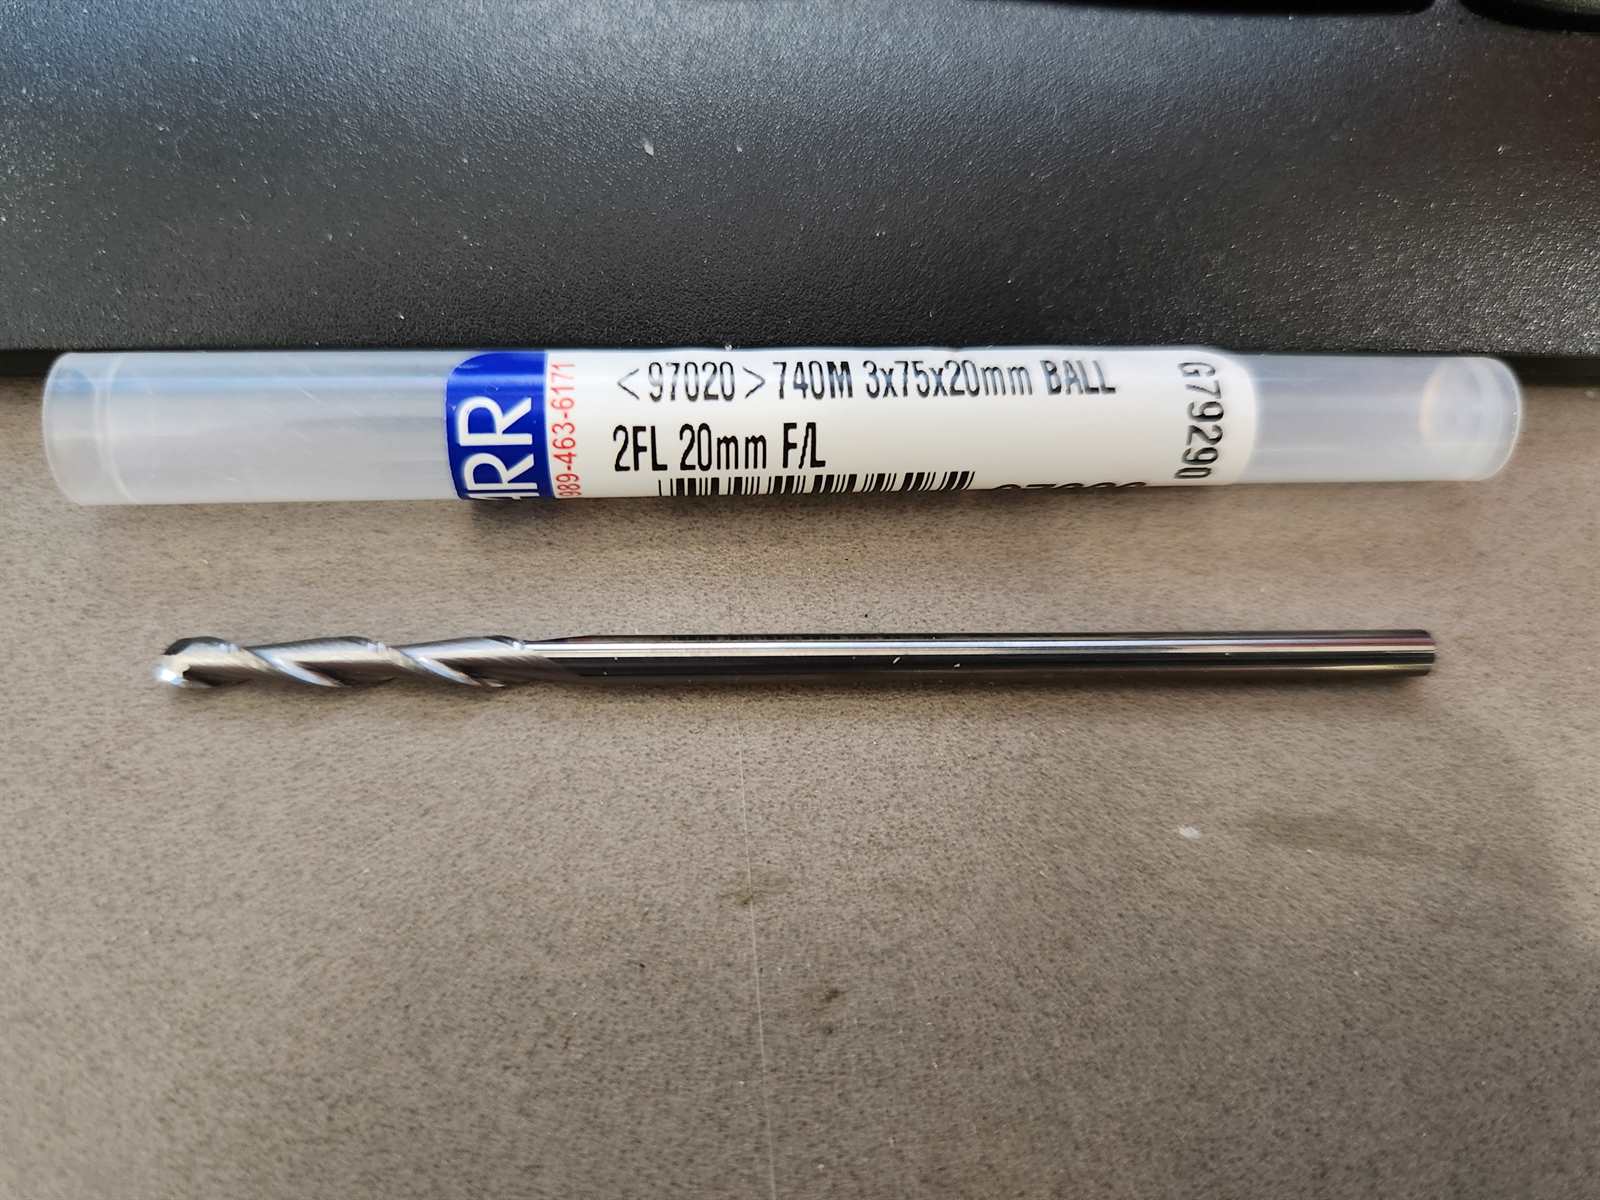
For leveling and rough cutting I will use a square end bit.
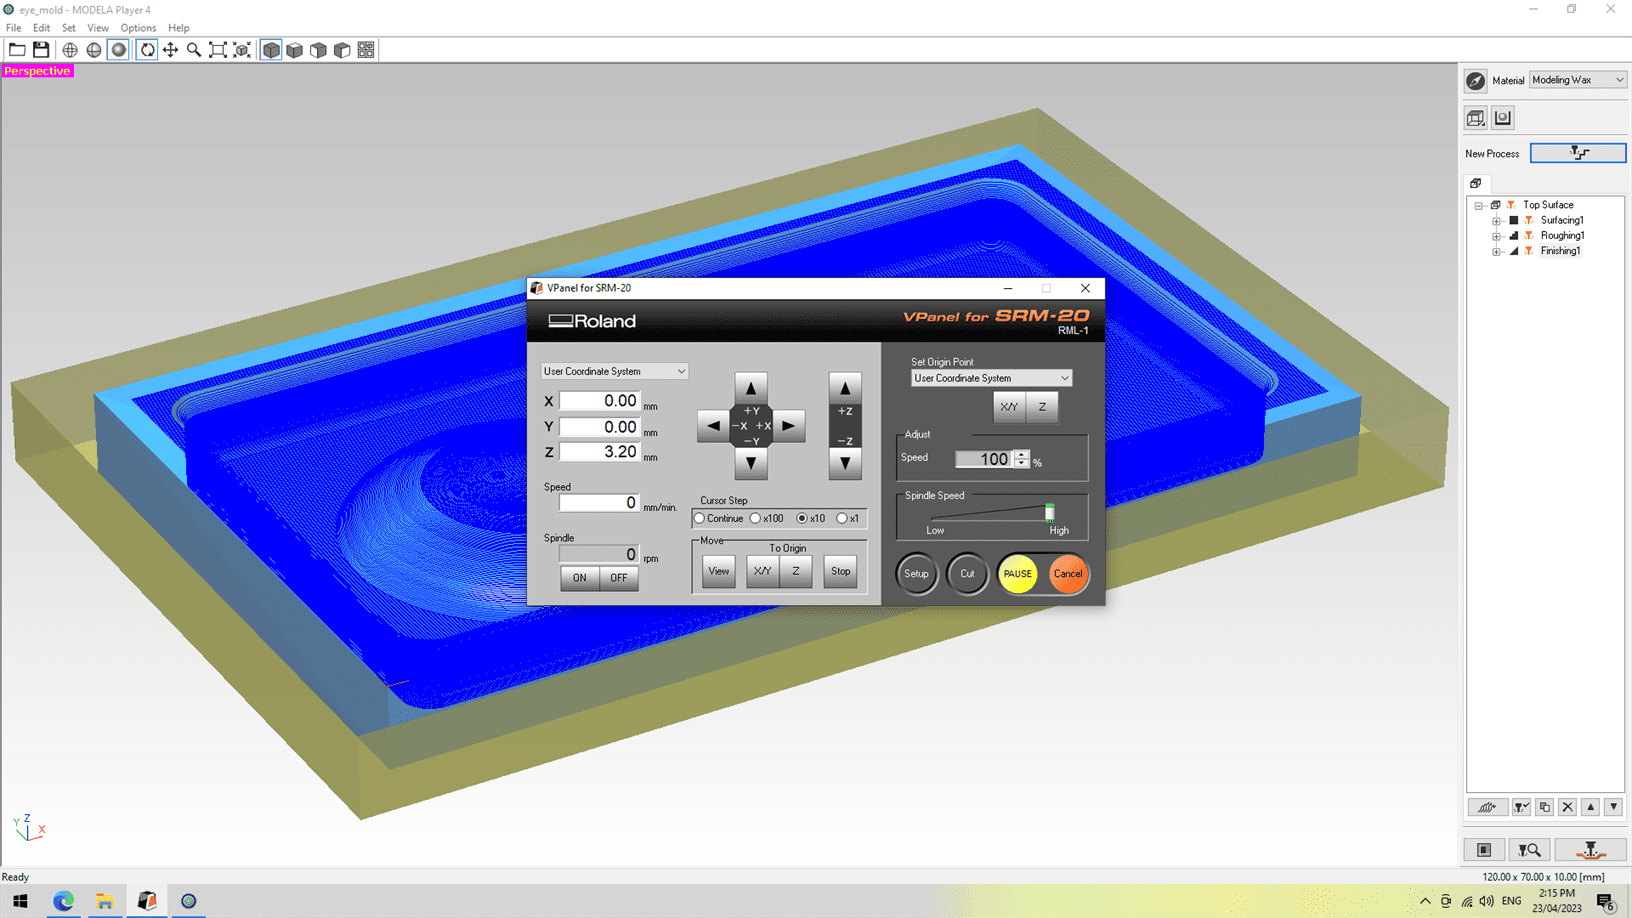
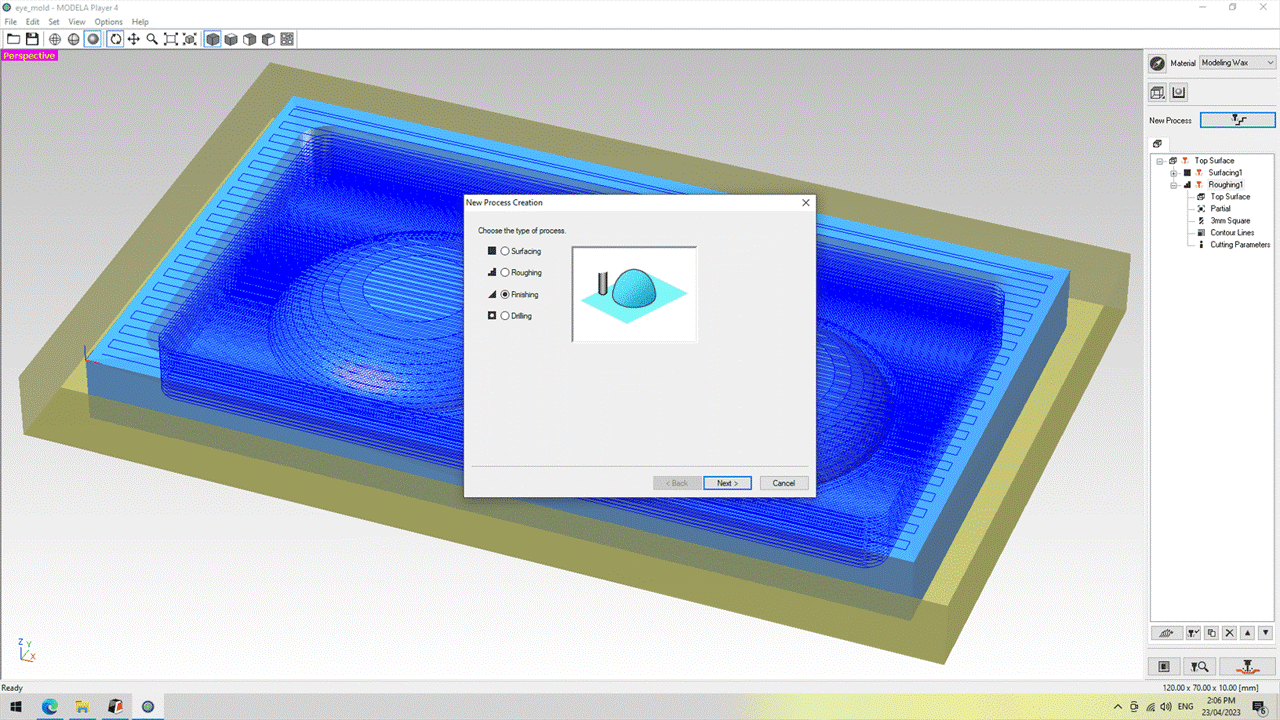
I opened the 3D model in Modela Player 4
Under Model -> Origin -> Set to bottom left hand corner

Under Model -> Size and Dimension -> Check size and and leave selected top surface as default
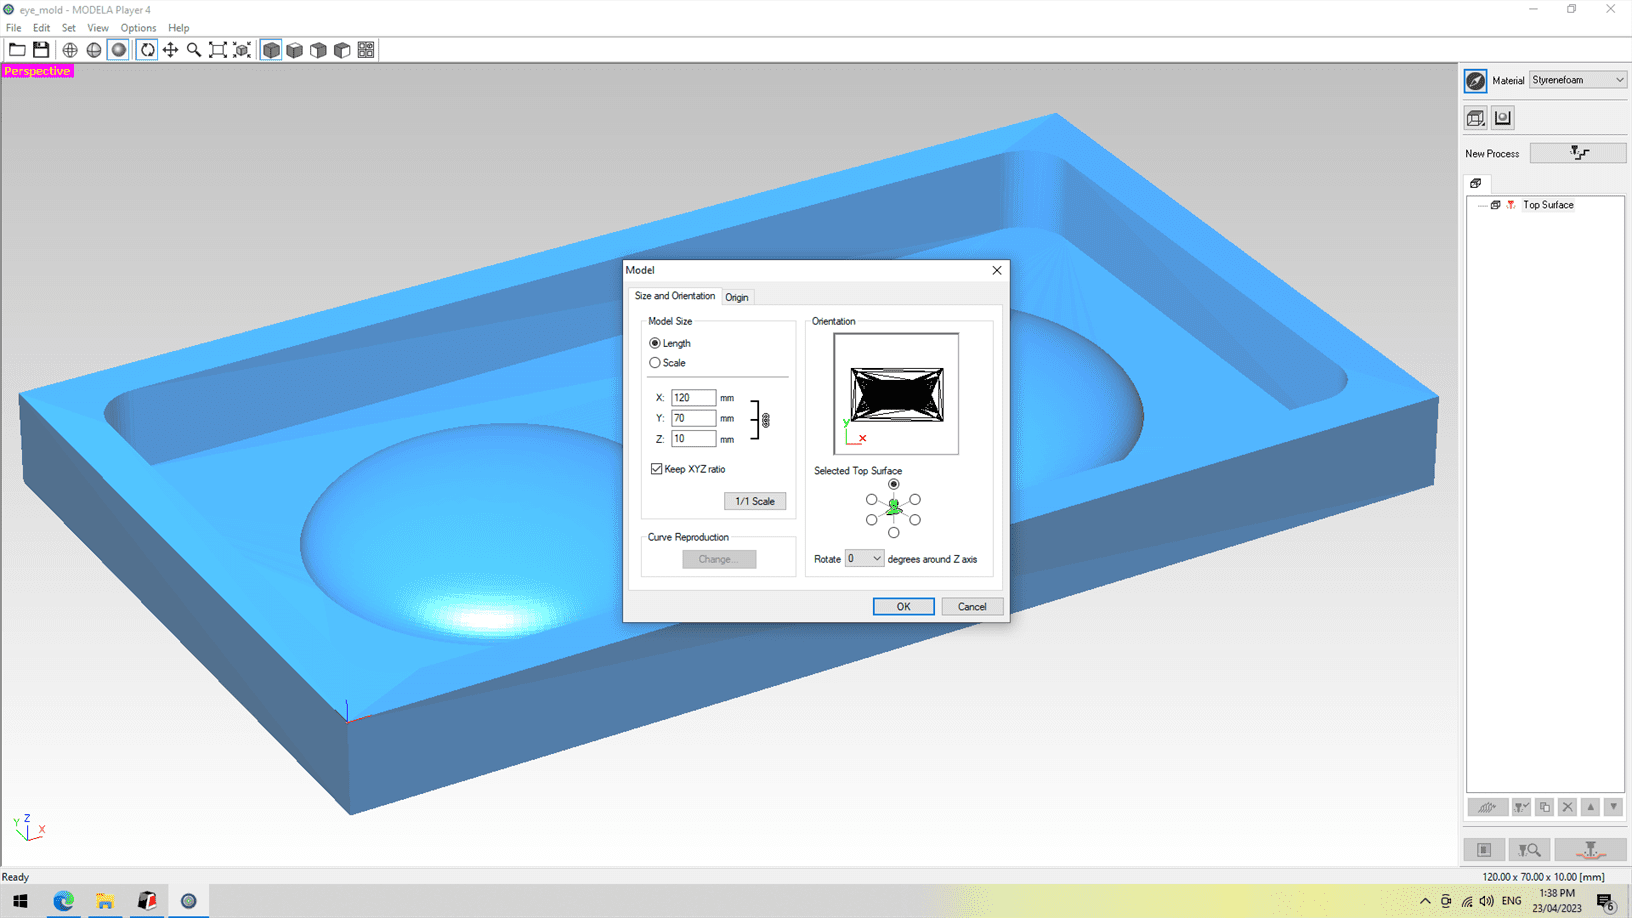
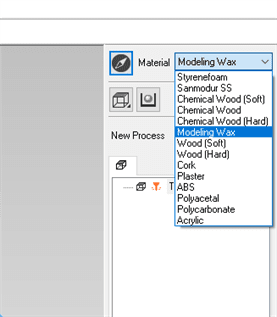
Set the Material as Modelling Wax
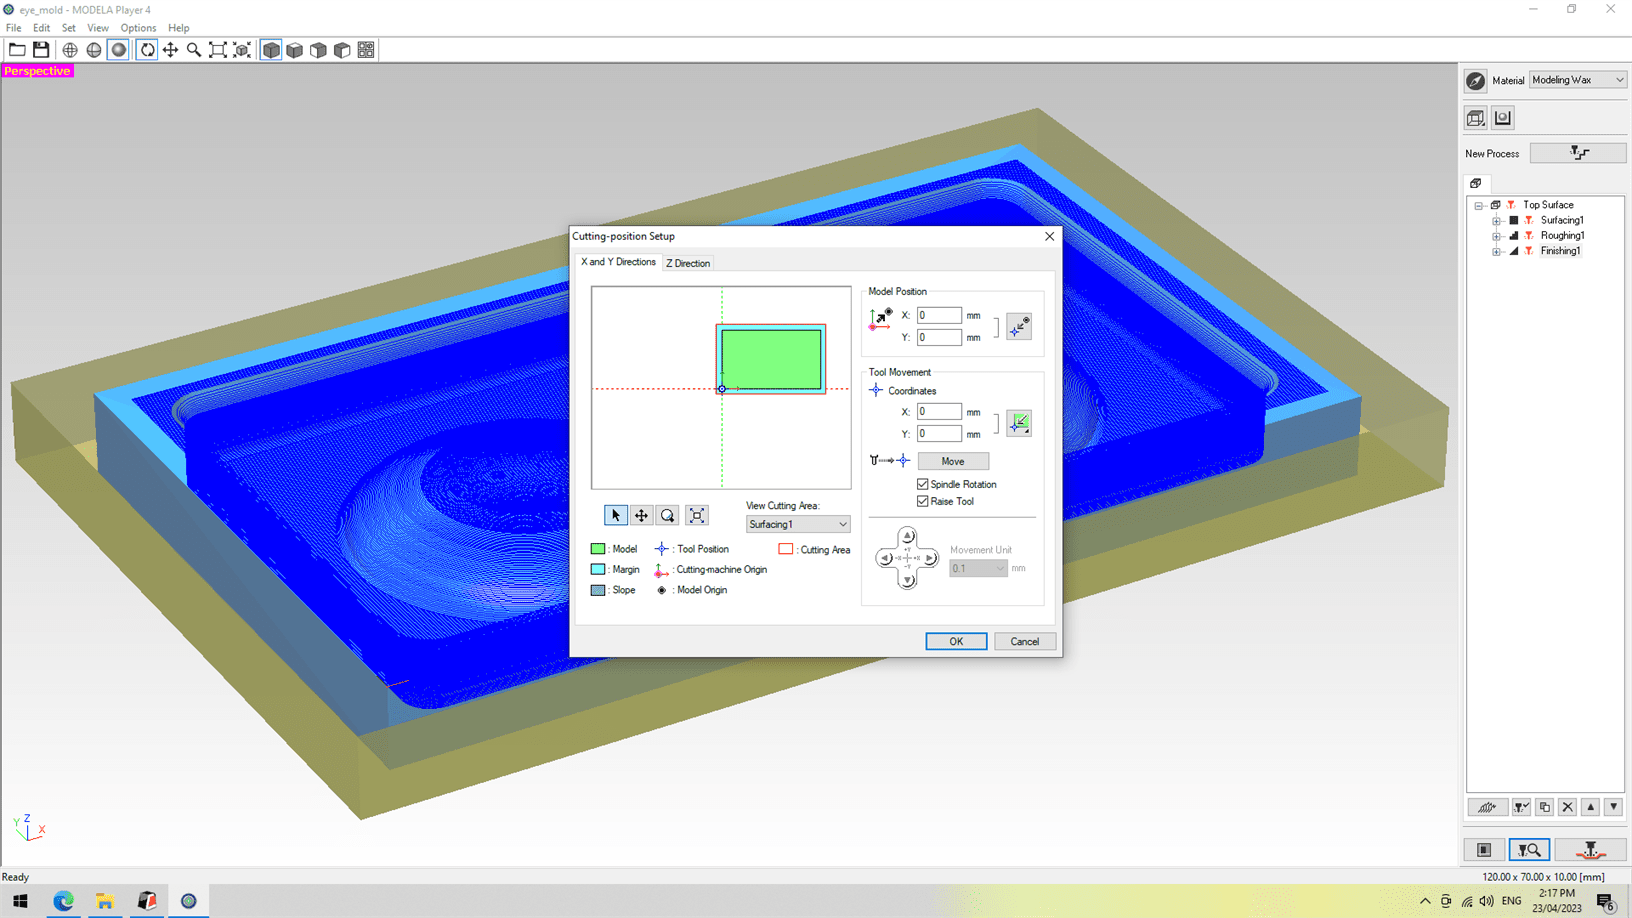
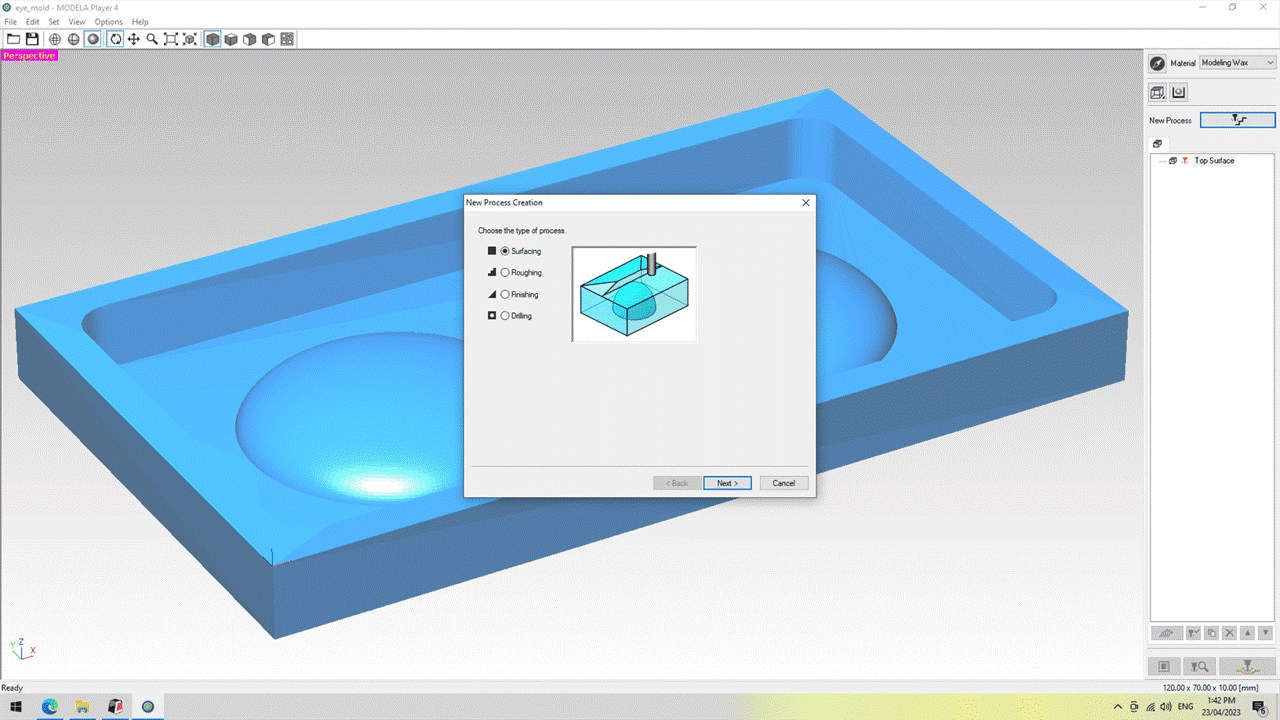
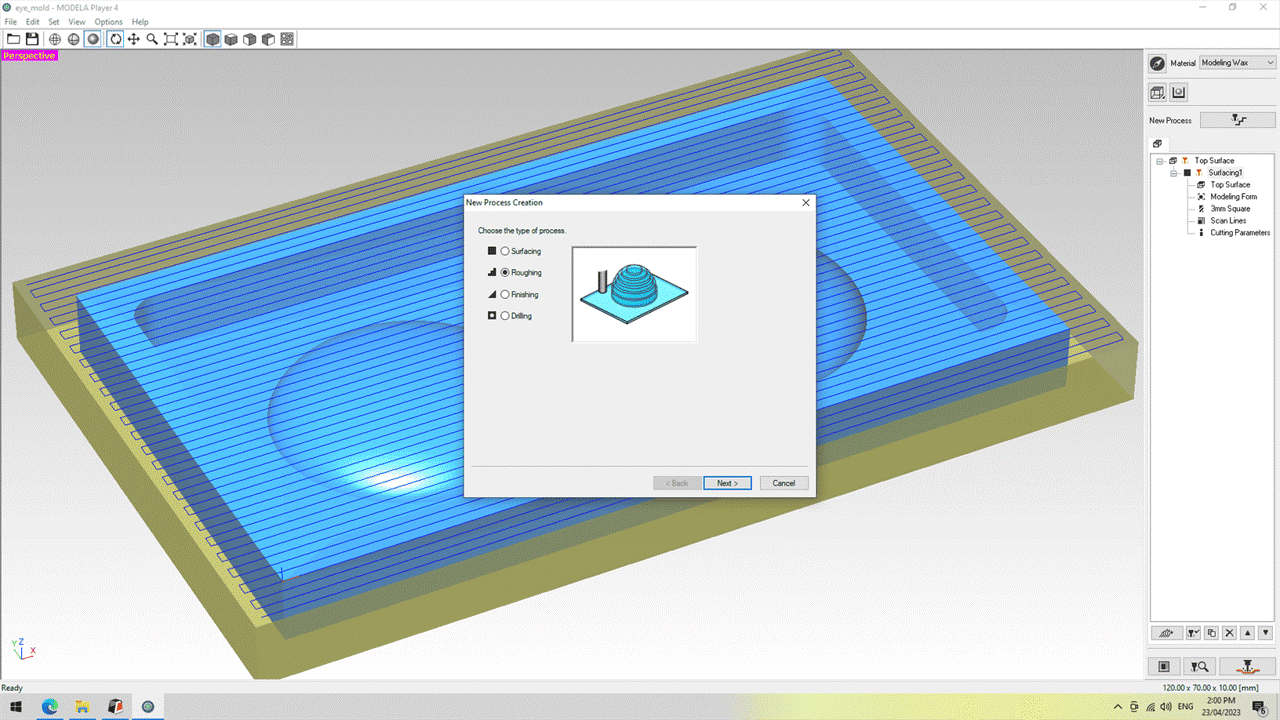
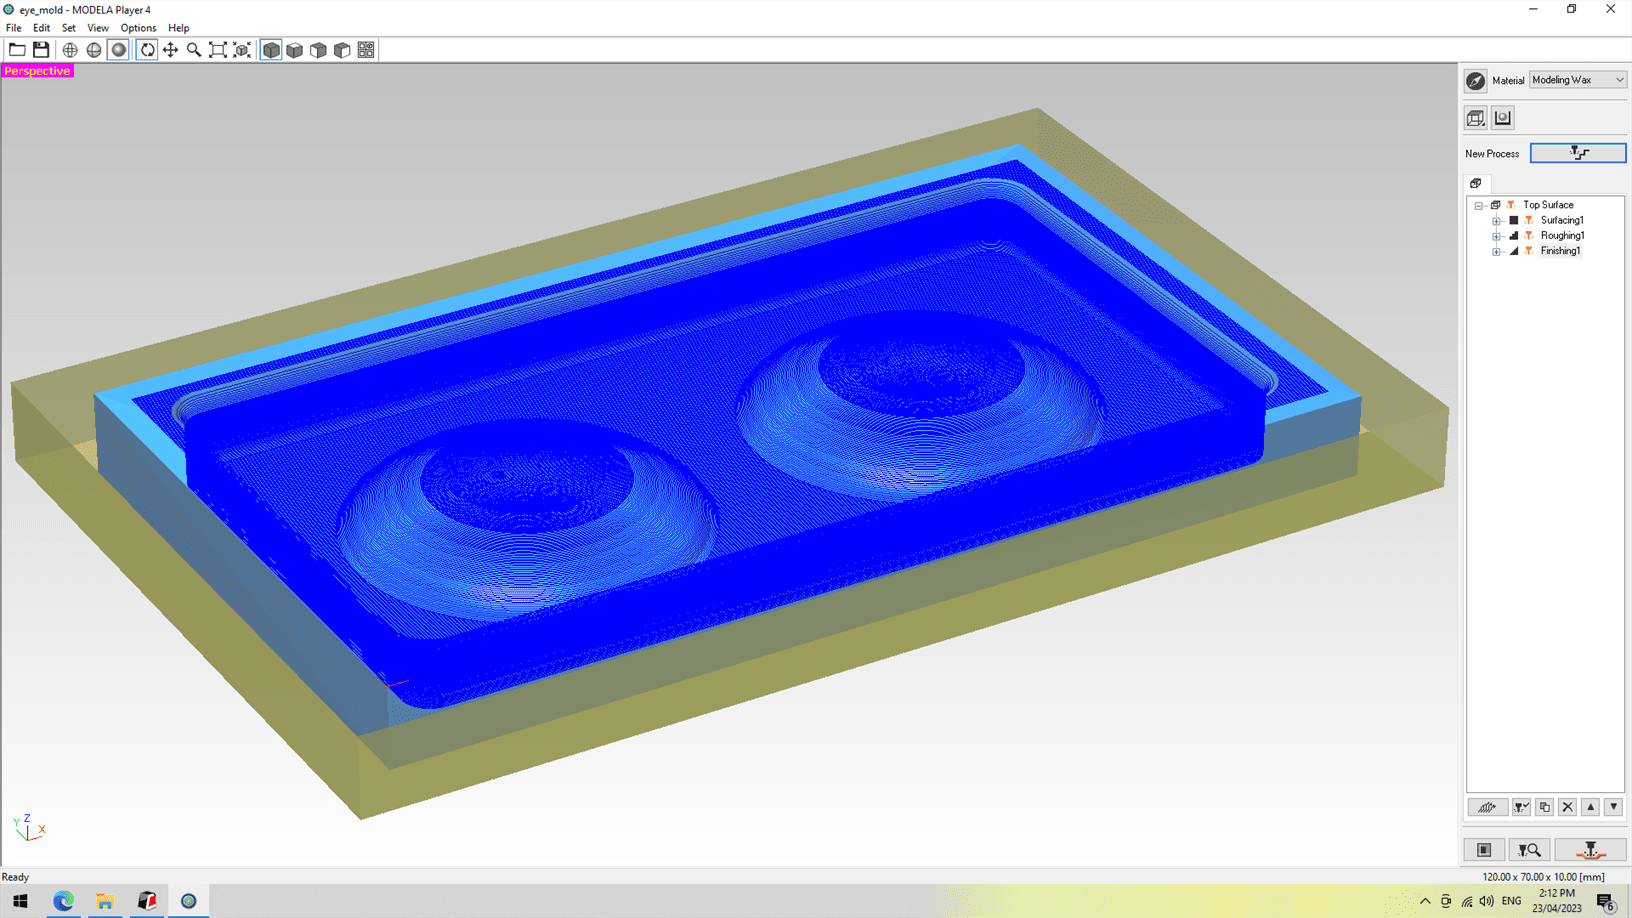
After this setup you can create the tool paths by creating a new process. See below Leveling, Rough Cut and Finishing.
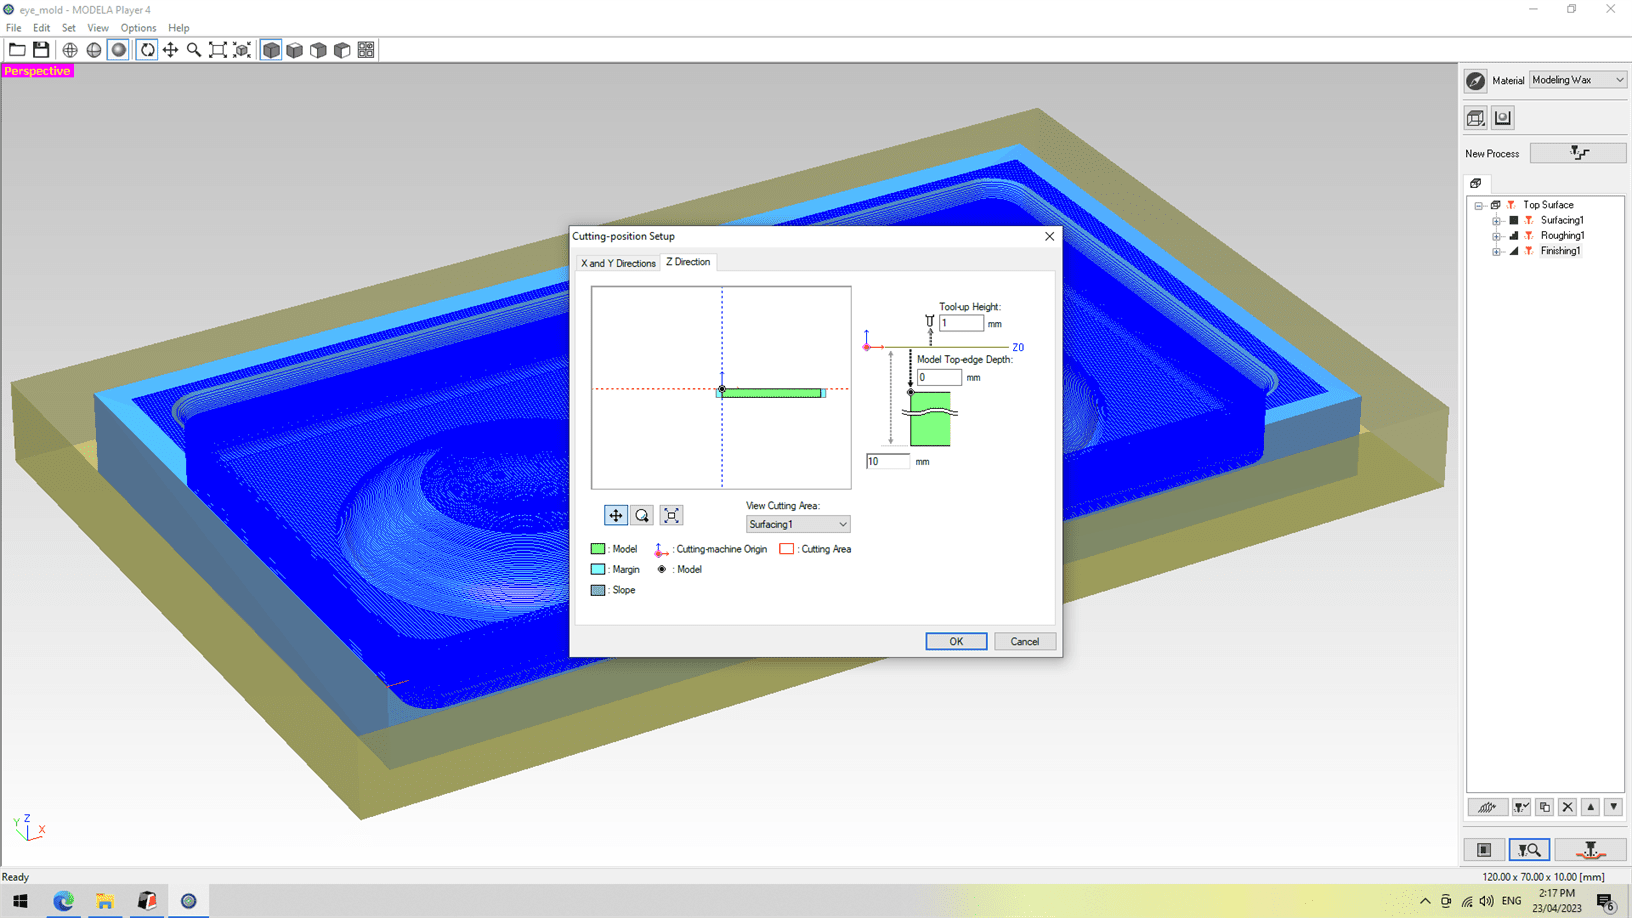
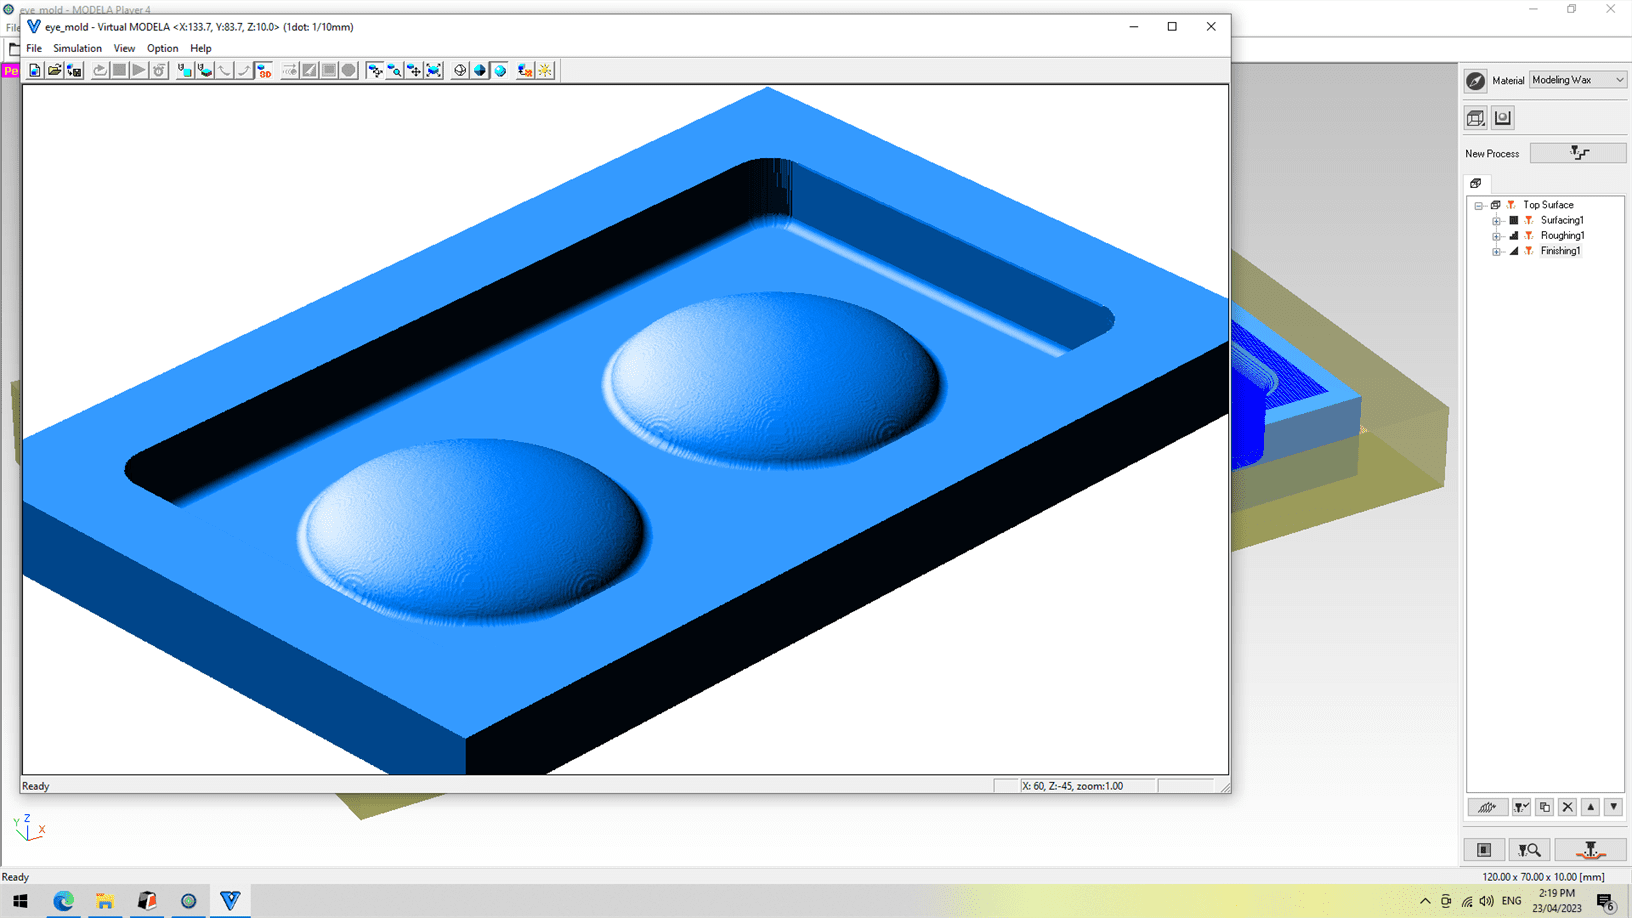
Before milling run Cutting Position Setup. Here you can check the origin is correct and the depth of your cuts. You can then see a visualisation of the result in Virtual Modela Player 4.
Leveling
The first thing I needed to do was level the wax, to make sure that I got the most accurate result.
I created a tool path in Modela 4 for leveling.

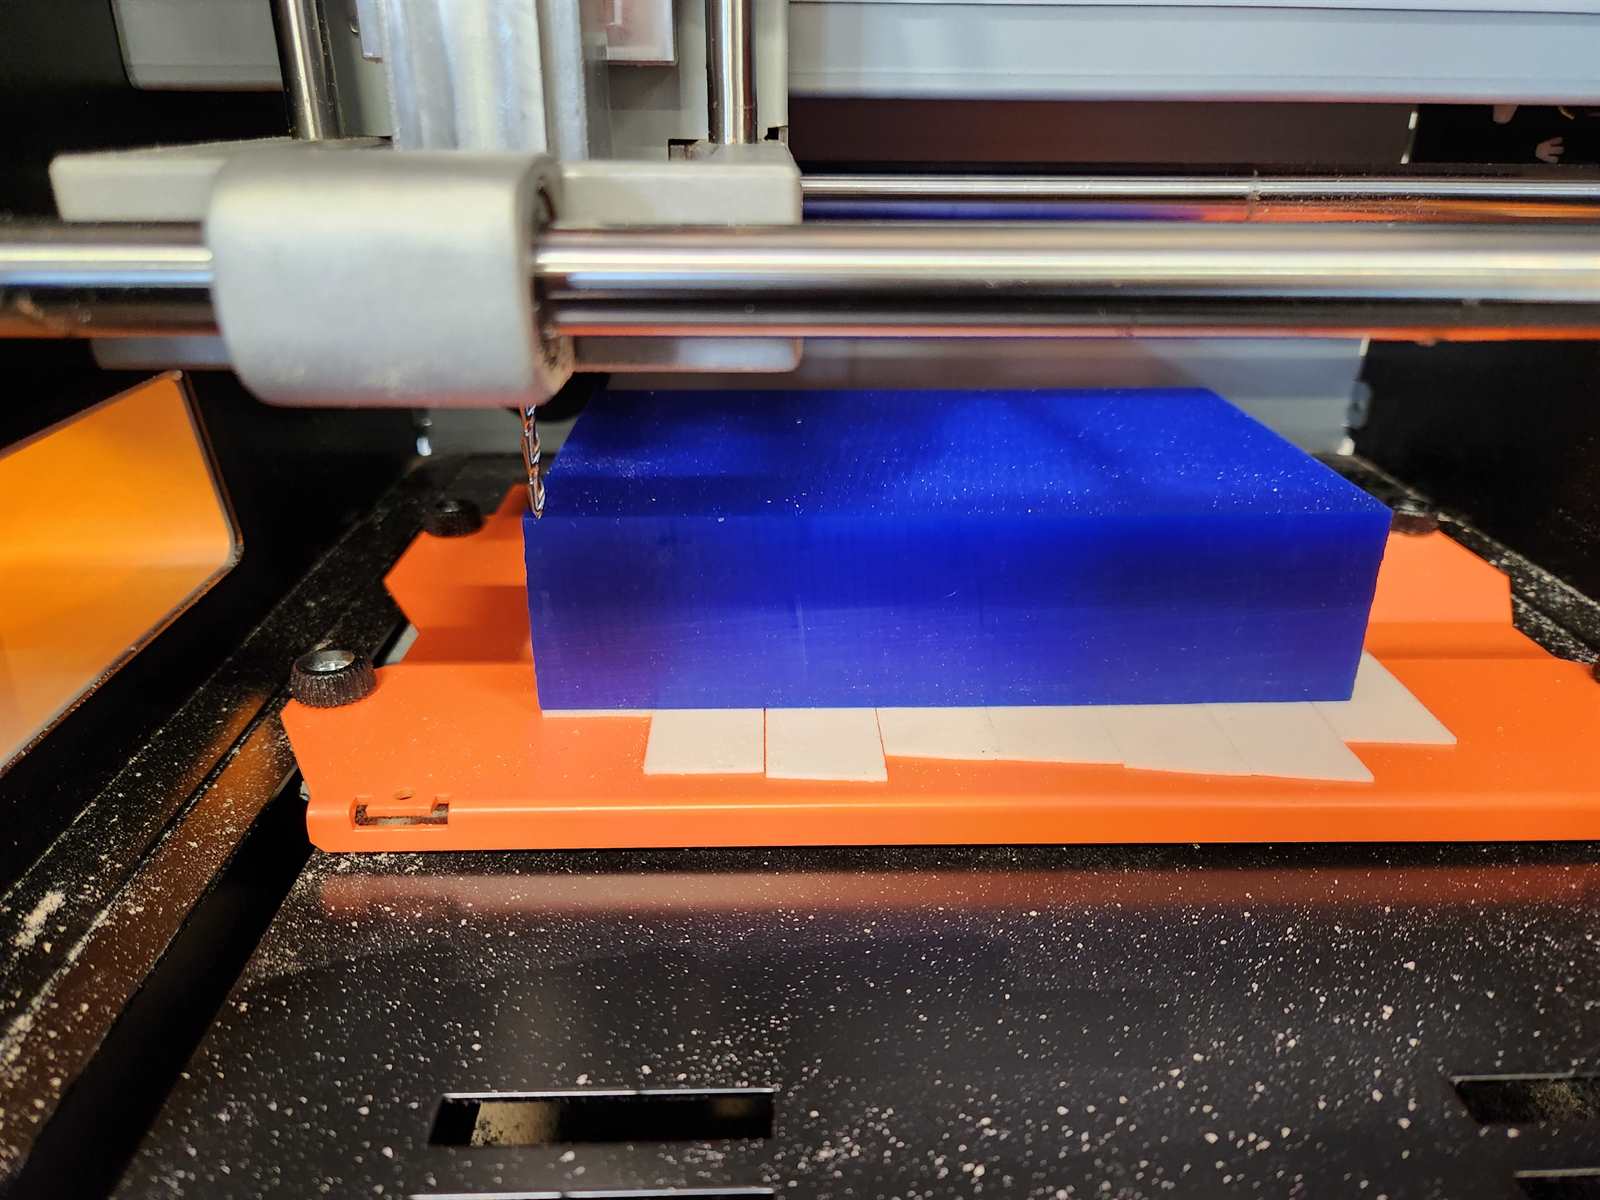
Rough Cut
I created a tool path in Modela 4 for rough cutting out the design.
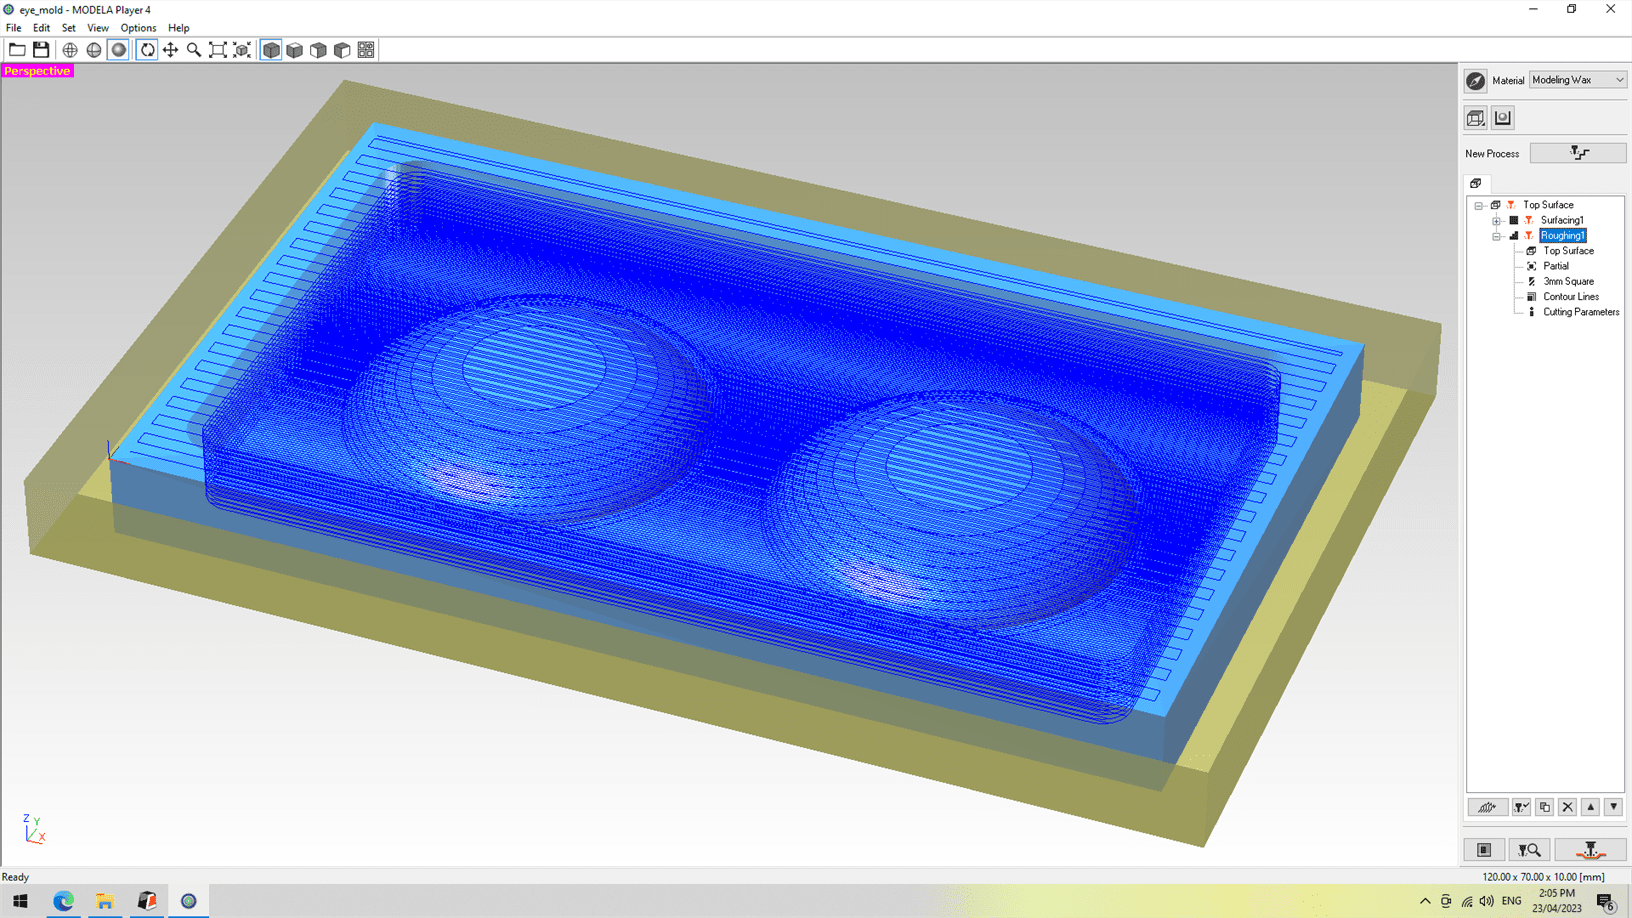
Finishing
I changed the tool in mill to a ball end bit and reset my z origin.
I created a tool path in Modela 4 for finishing the design.
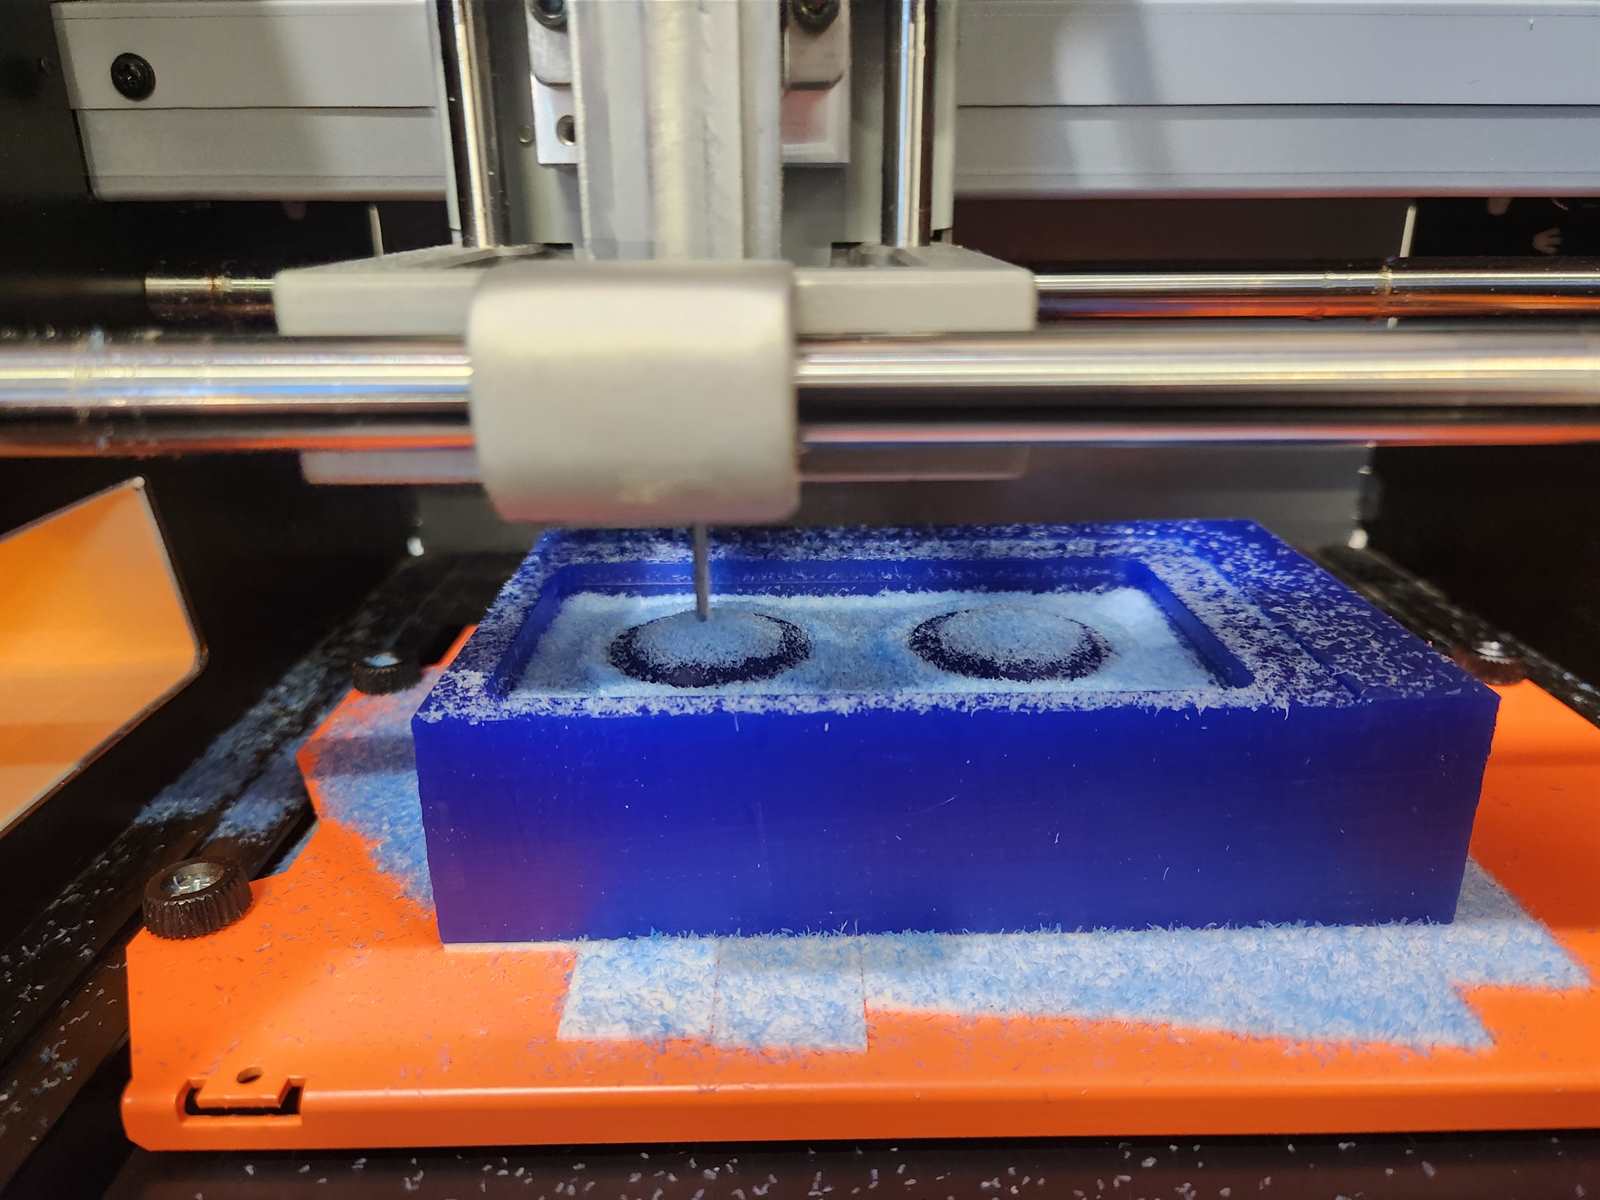
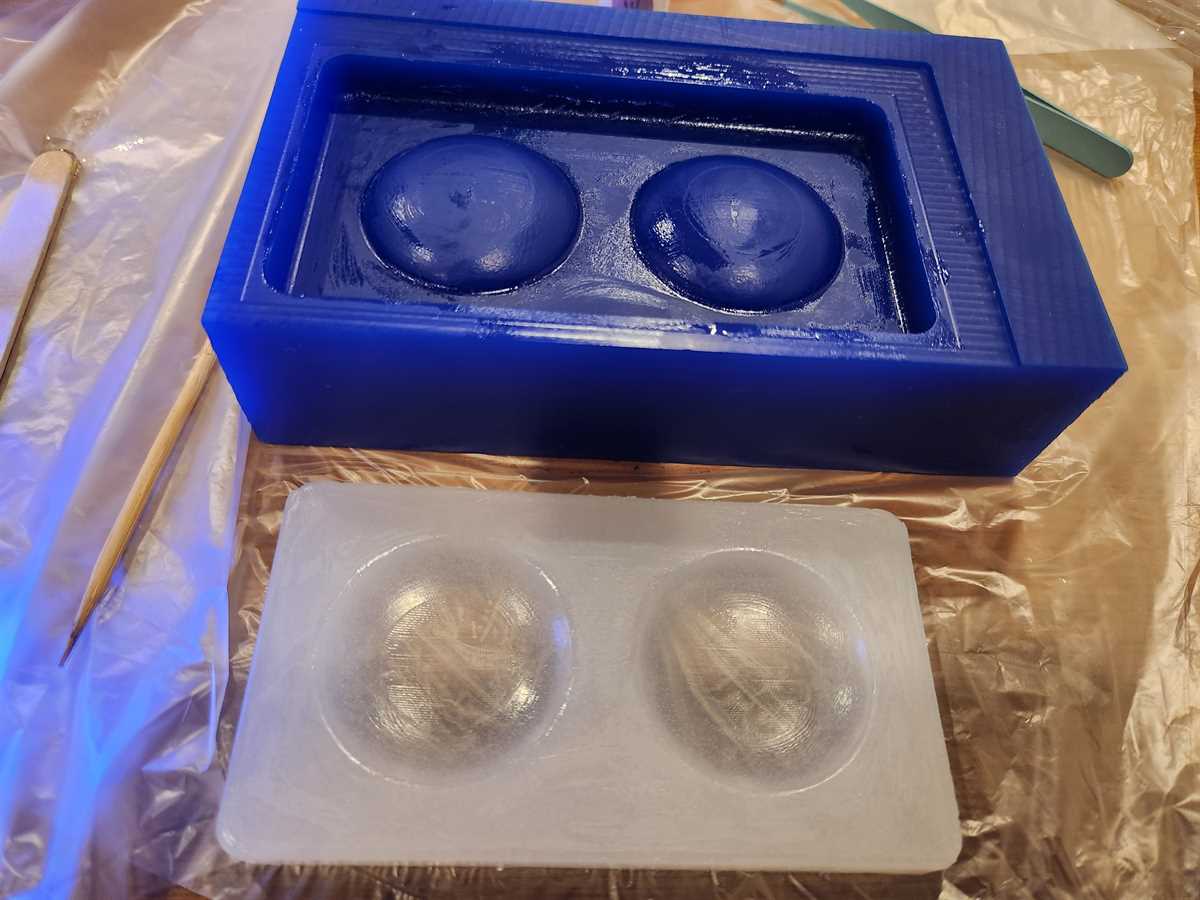
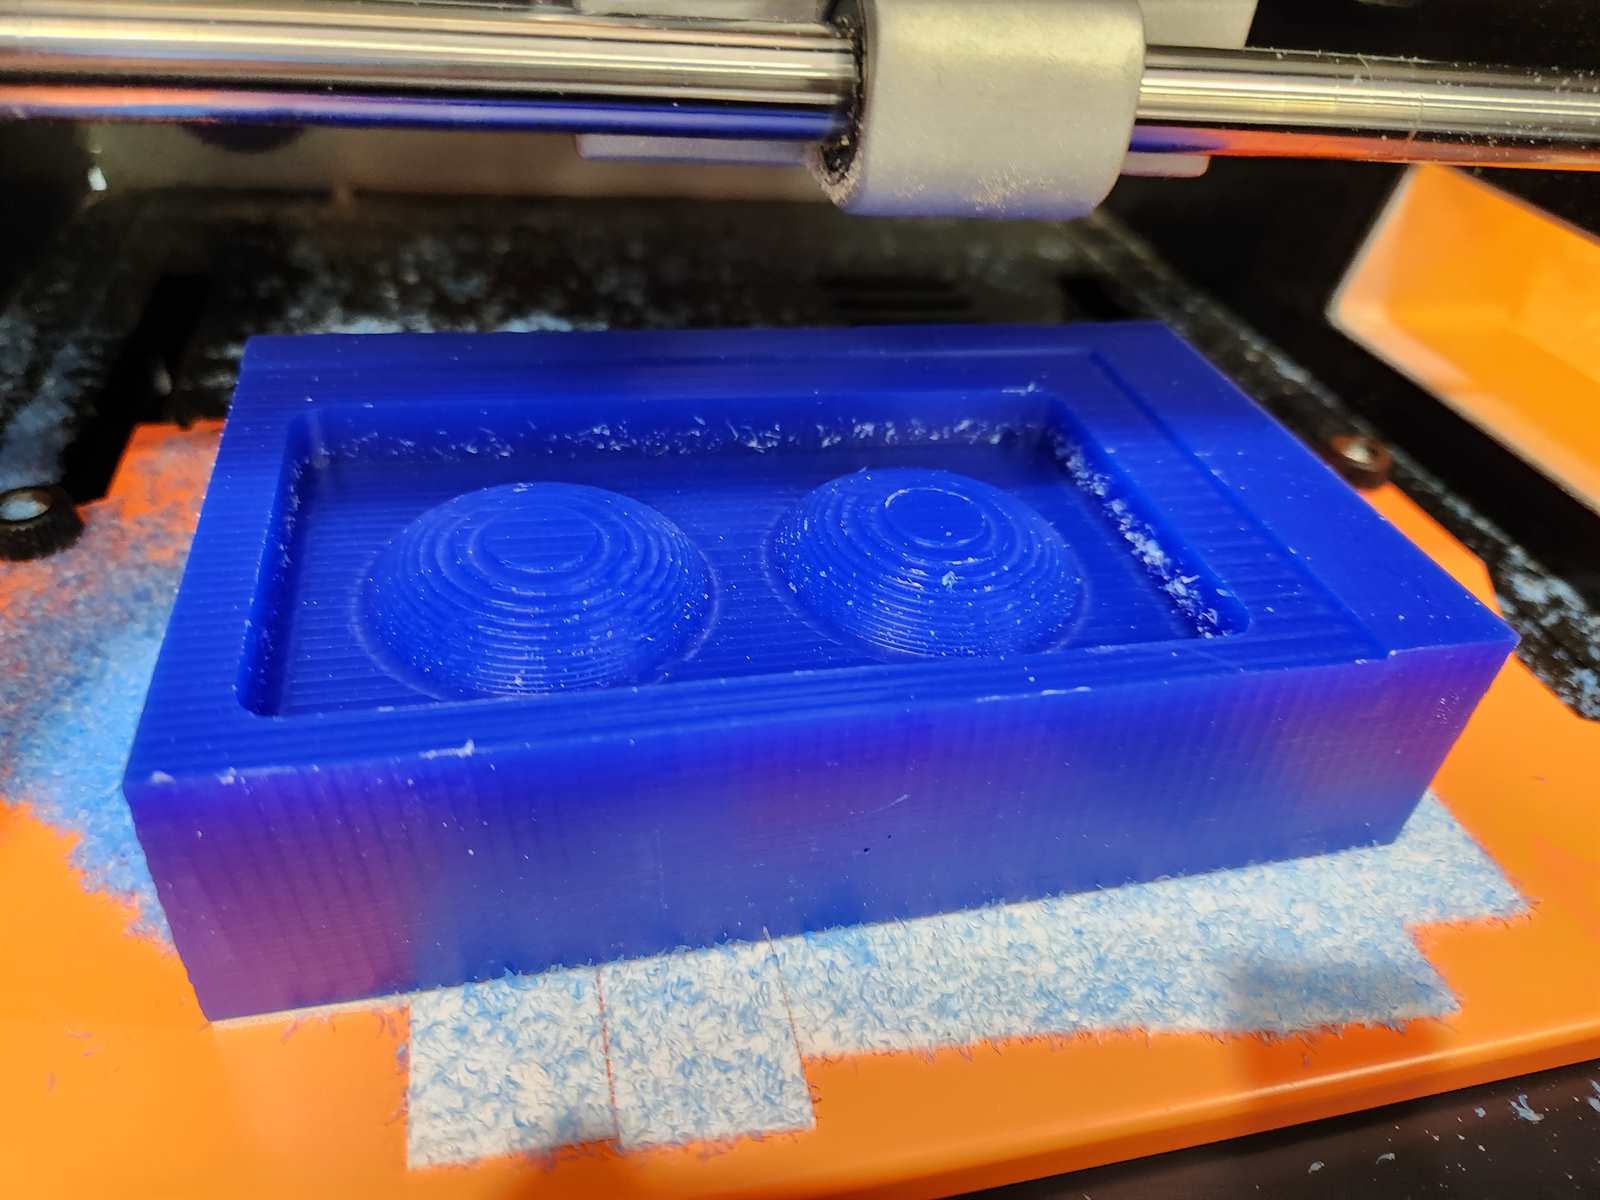
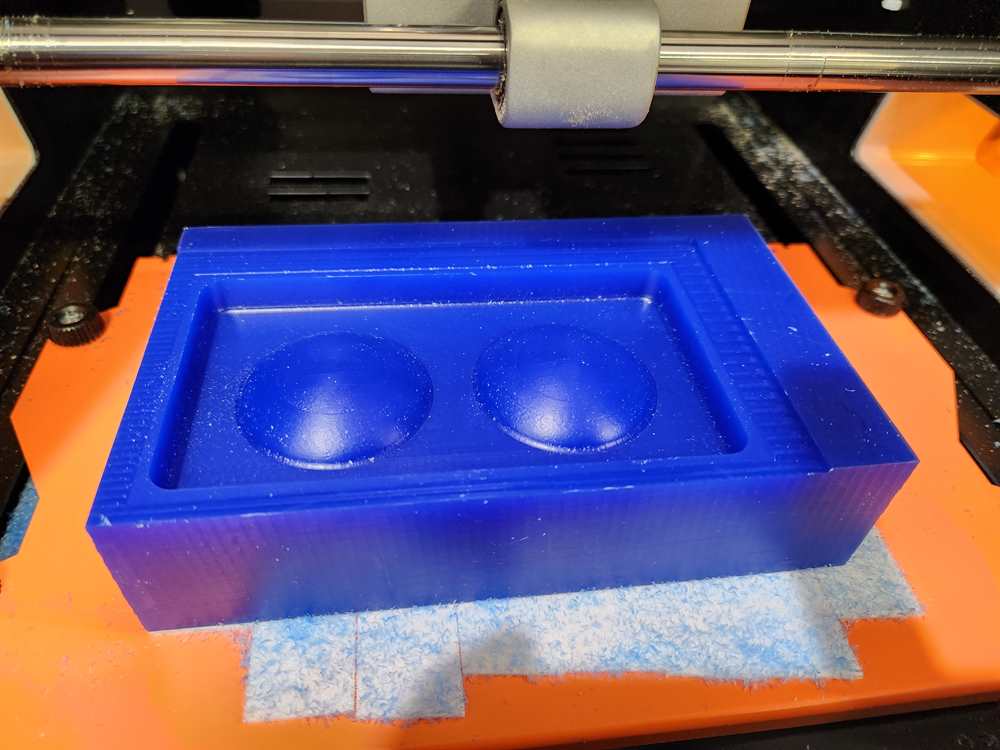
Final Wax Mold
Casting Silicone
I used 2 part fast setting silicone that you use in a 1:1 ratio by weight.
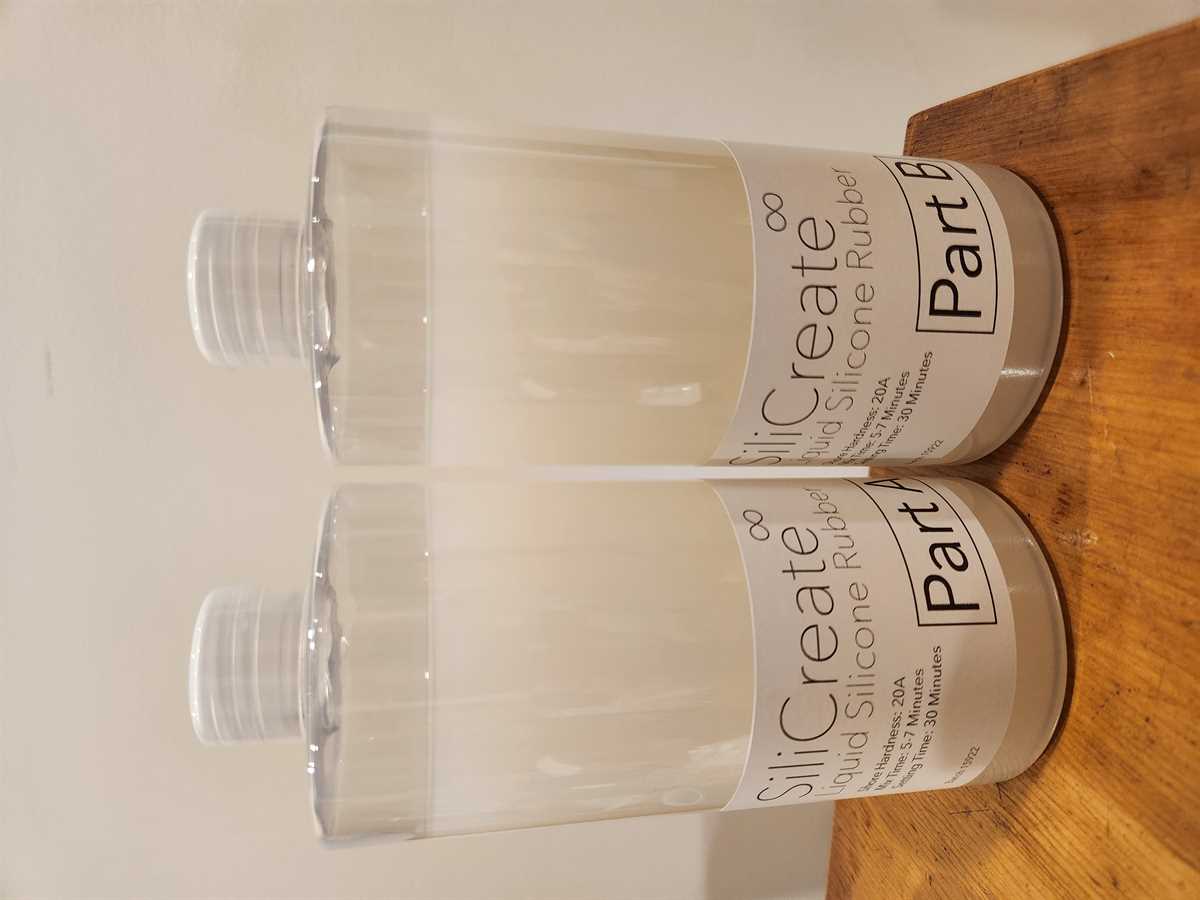
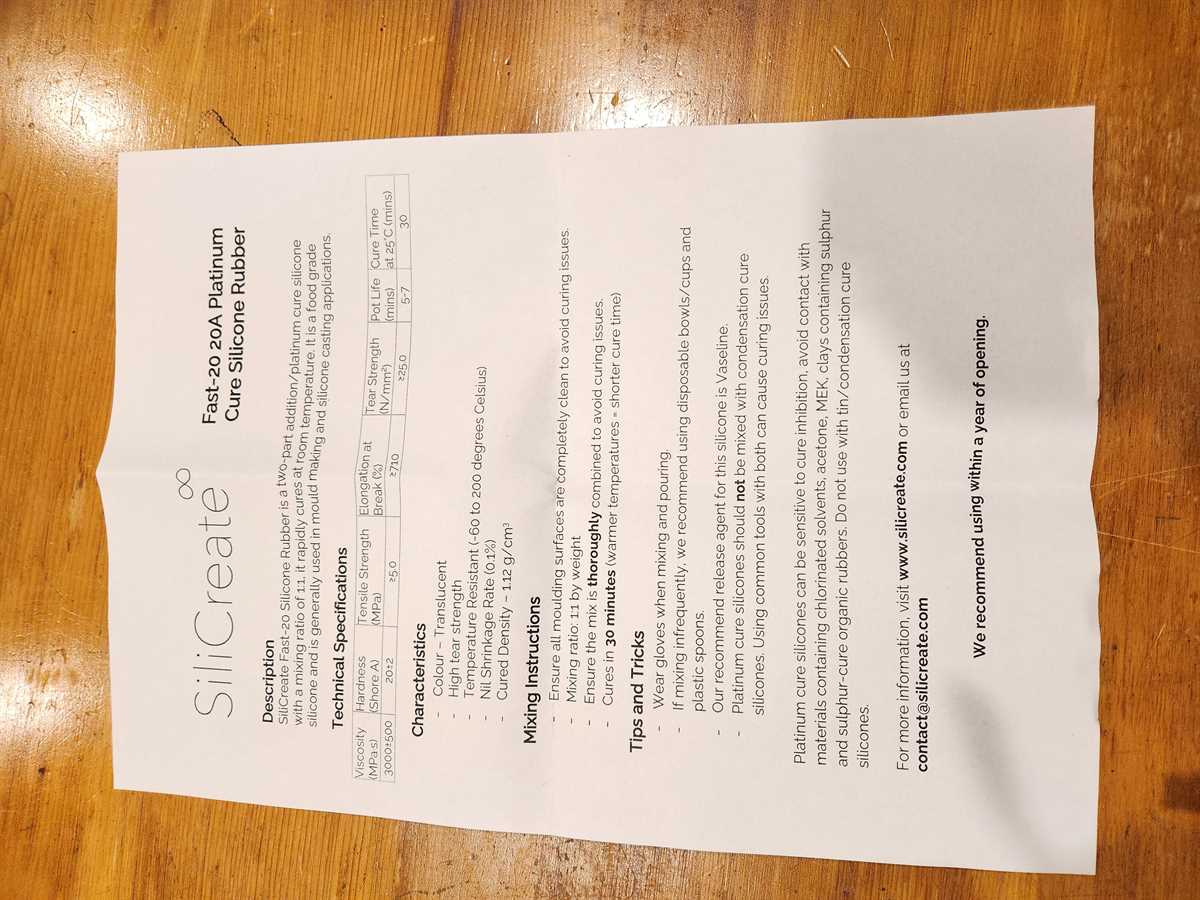
I used vaseline as the mold release. I also used gloves when handling the silicone as noted on the datasheet.
Final result Silicone
After 30 minutes the silicone was set and ready to be de-molded.
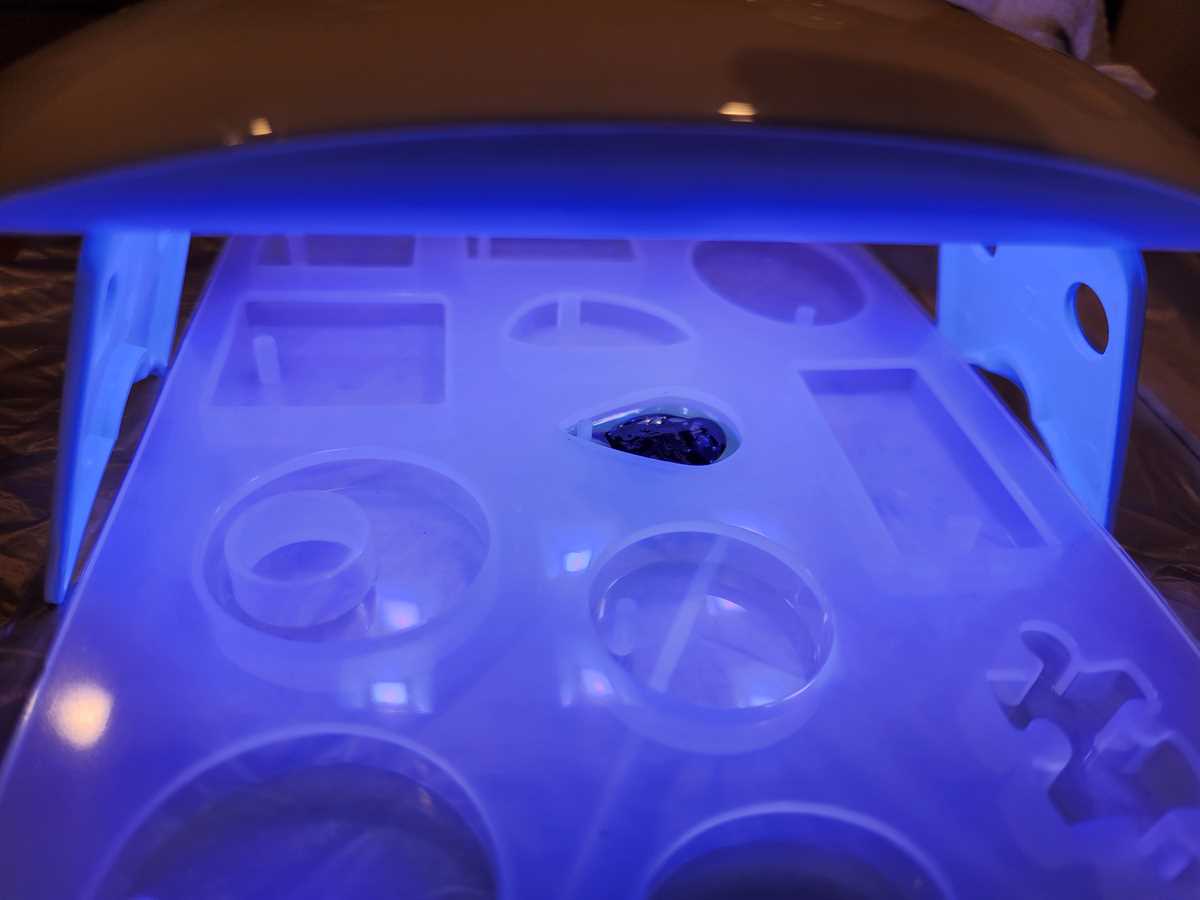
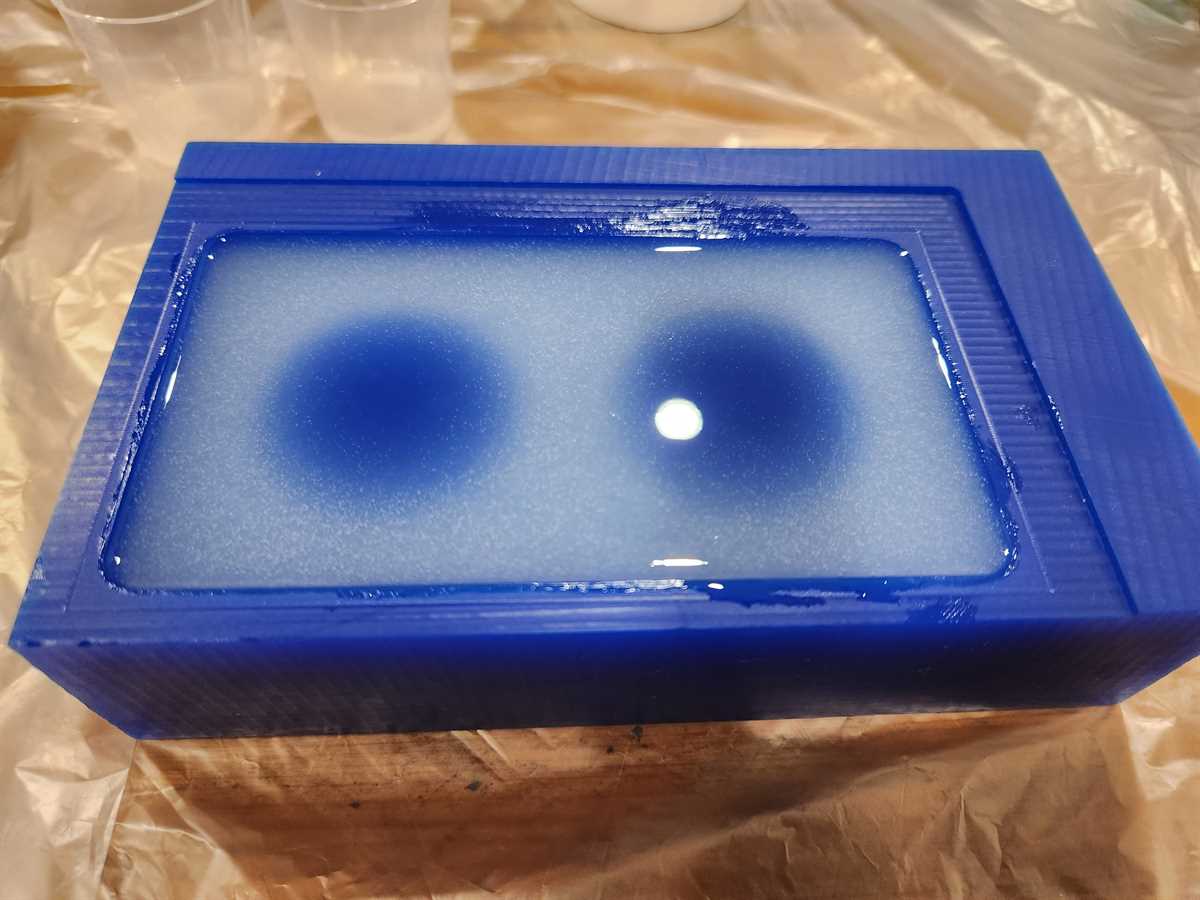
Casting UV Resin
I decided to use UV resin as you can pre-mix pigment with it, it remains stable for a long time, you paint with it and set it quickly, making it ideal for making something with layers. The UV Resin I was using sets in 2-4minutes under a UV LED lamp.
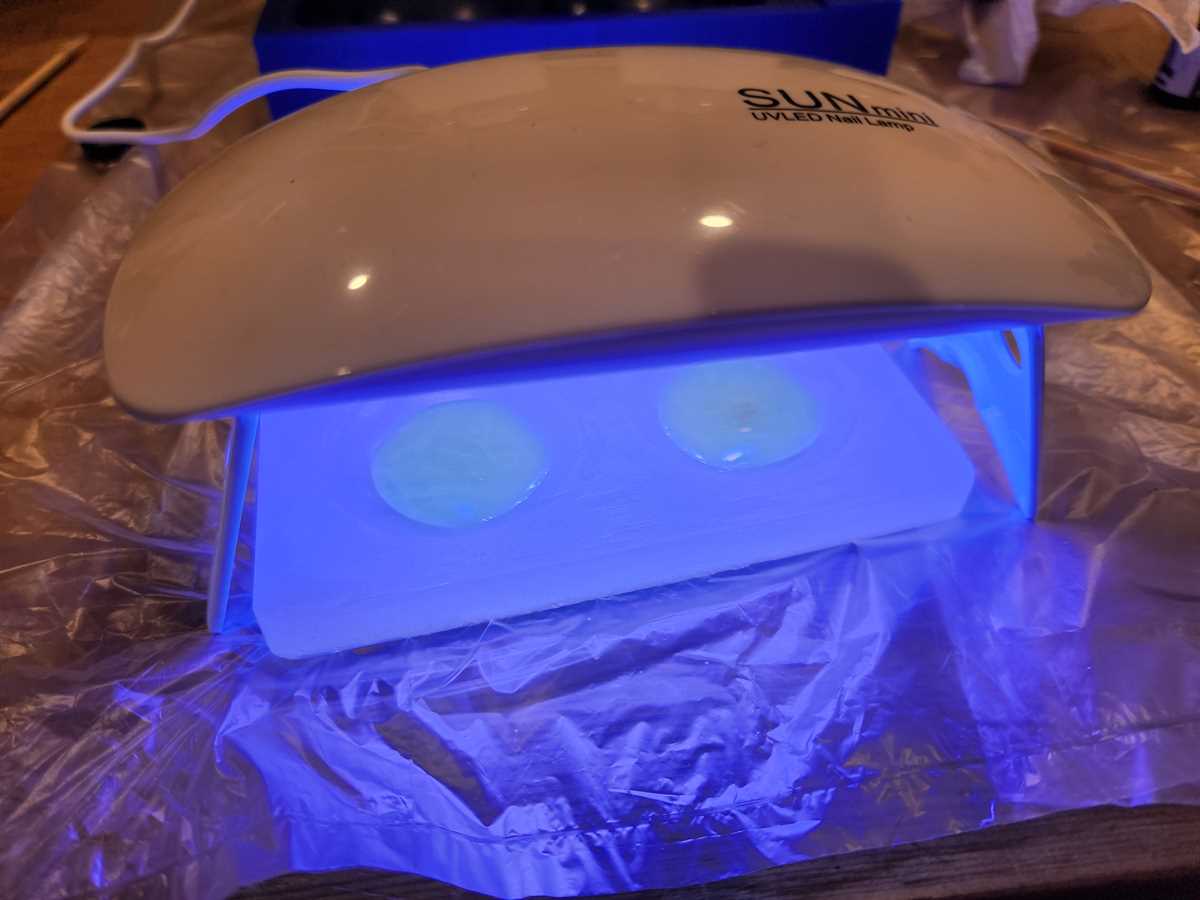
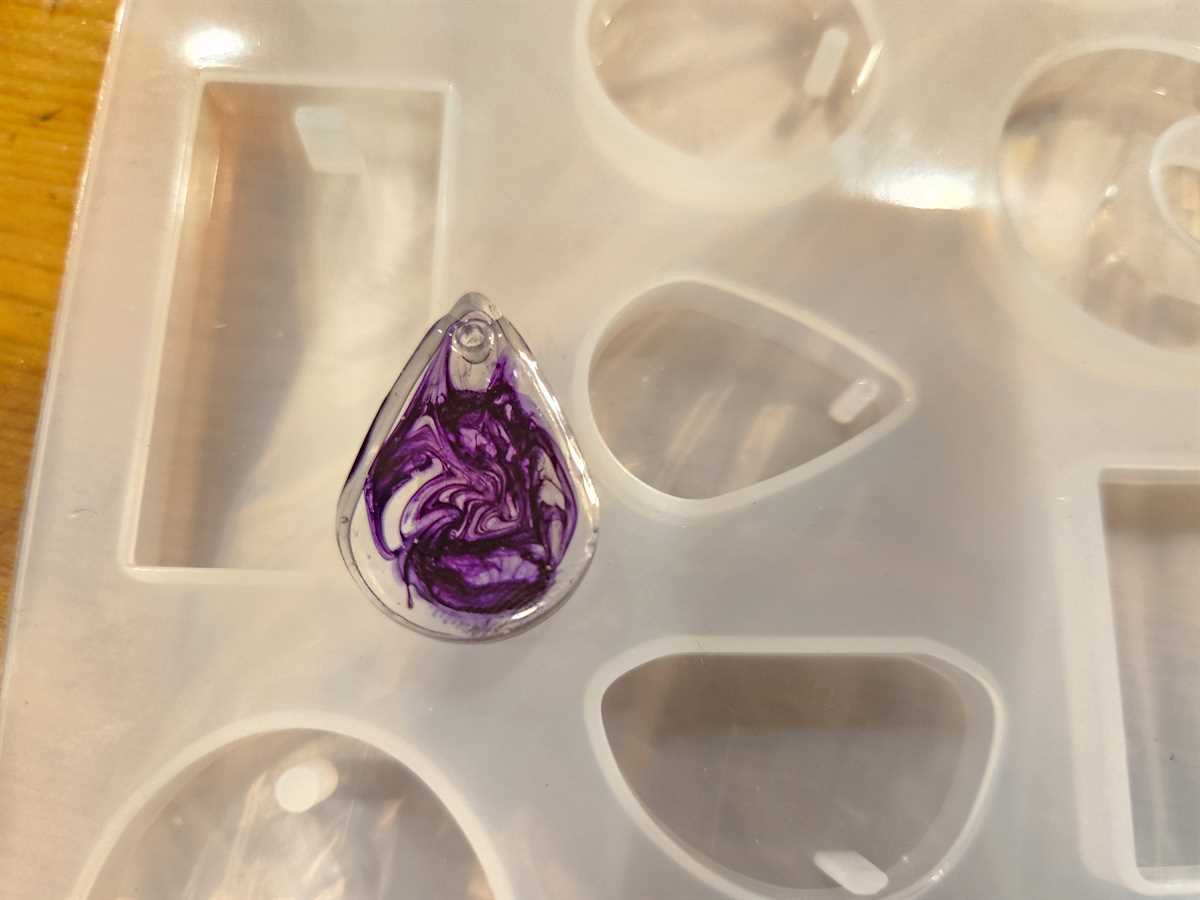
I cast layers of UV resin:
- Layer of clear
- Small dot of white pigment
- Dark purple pigment pupil
- Dark purple pigment pupil surrounds
- Light purple pigment x2 layers
- Clear layer
- Thin layer of white pigment
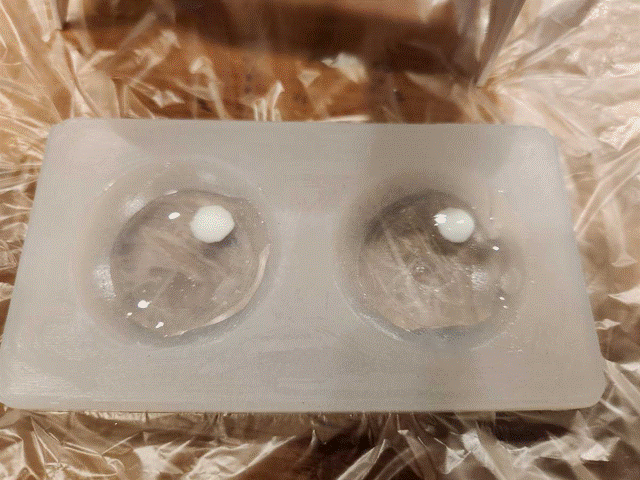
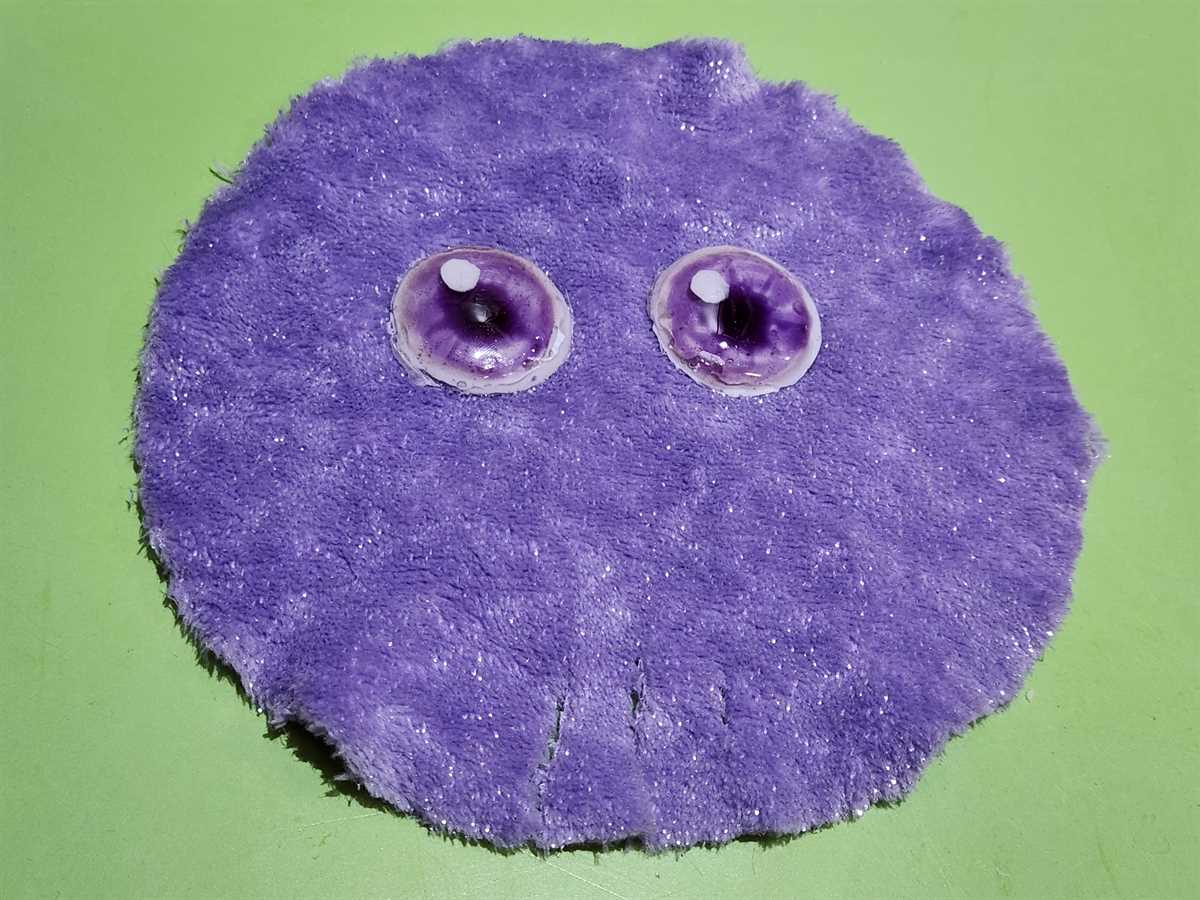
When I turned out the eyes from the mold they were cloudy, this could be from not getting all the vaseline off of the silicone. As such I poured another layer over the top of the eyes.
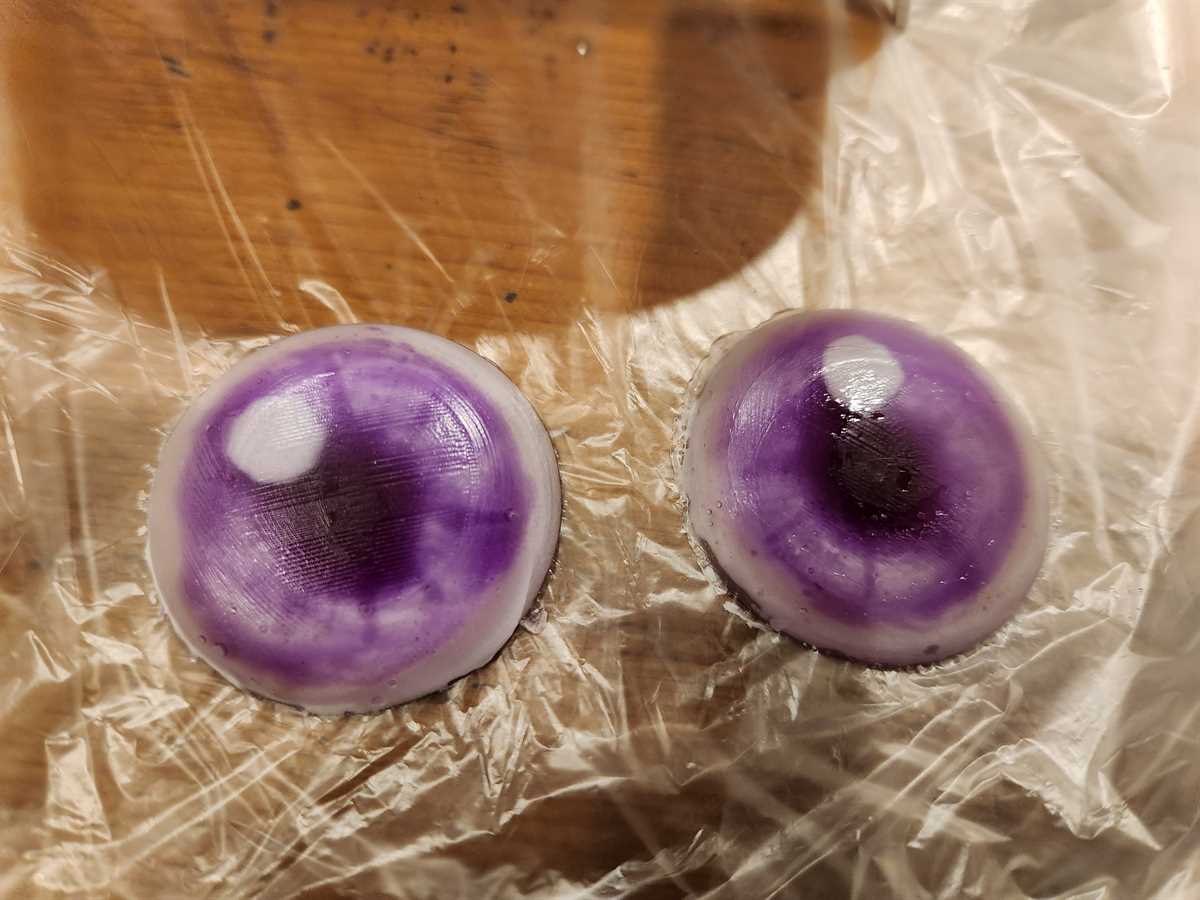
Final Result UV Resin
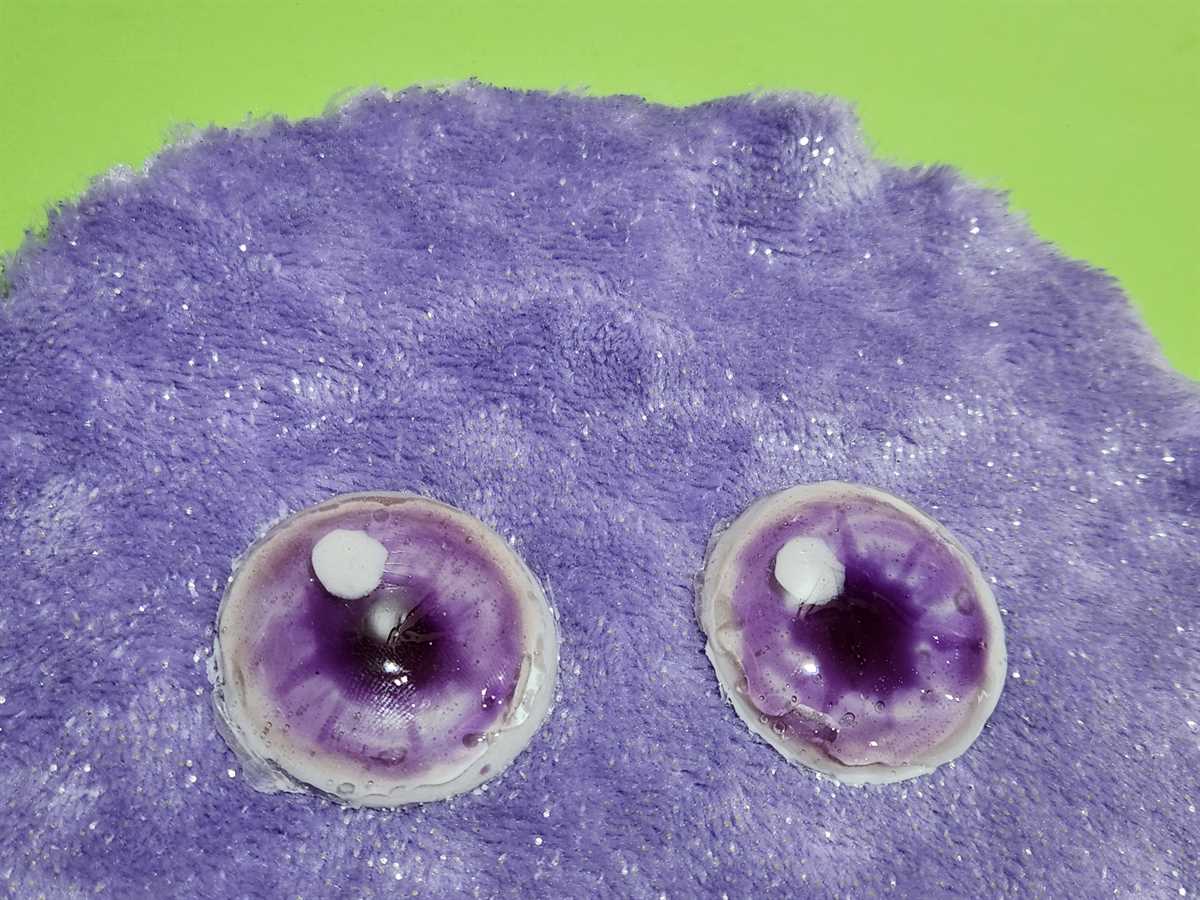
I am happy with the results, but it could be neater and with less bubbles. I think with practice I can improve this.