It's been a pretty fun week to me.I had a bit experience with embedded programming,so that I cloud play with the seeduino XIAO rp2040 version which I haven't used before. And I build a cooling install to my prusa enclousure.
We tried to use Handpy,Arduino Uno, Mirco-Bit and Seeeduino Xiao. Here is the documentation.
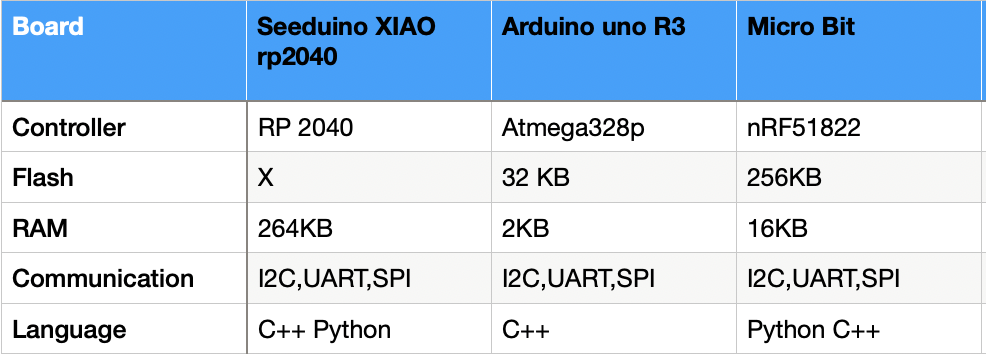
We explore the the boards by trying basic projects.
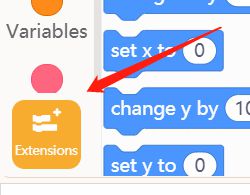
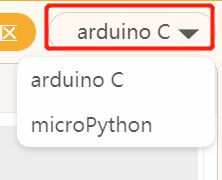
We use mind+ as the IDE to code the boad.Open the interface of the app, the bot left corner has the EXTENSIONS botton, click it to find our borad.
On the extension page we choose Handpy which is our board.
Connecet the board with an typeC wire physically,and choose the port in the Mind PLUS.
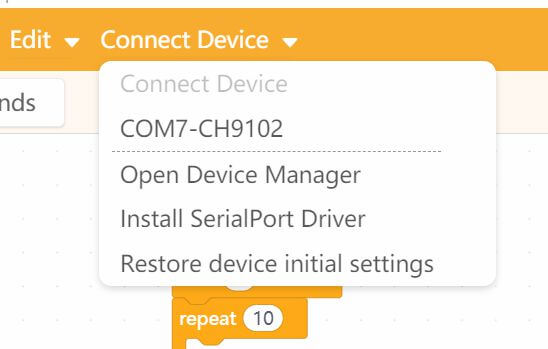

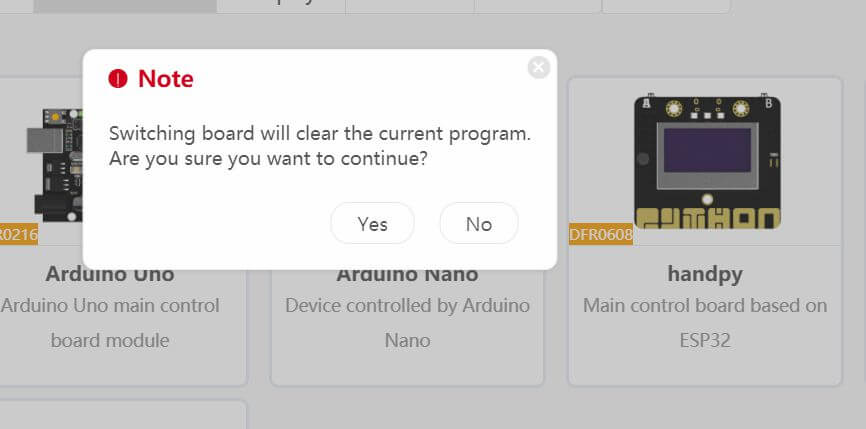
If you havent found your port you might need install the port driver like I do.
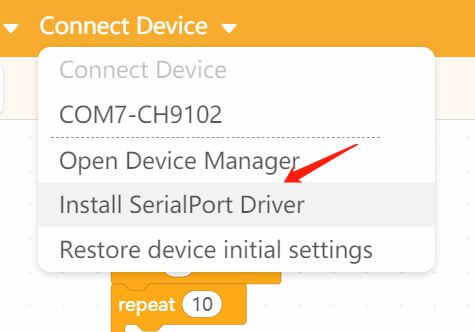

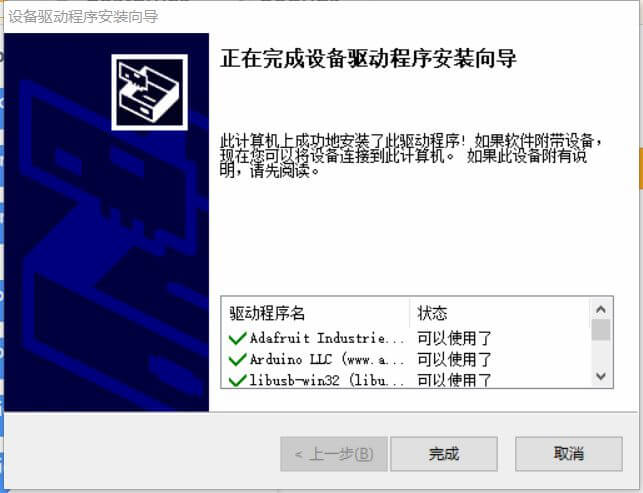
Now I have it .
After the ports done, here are the projects hands on.
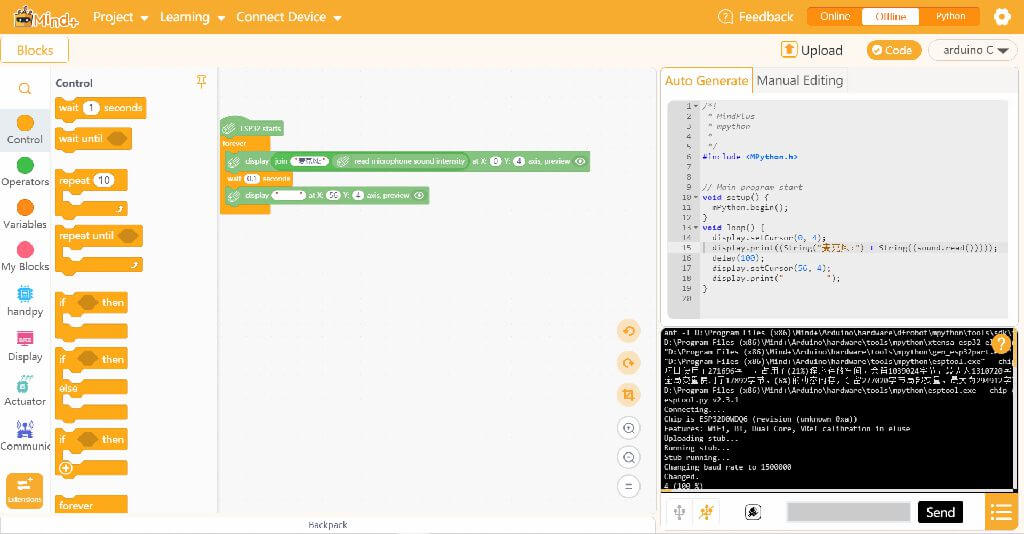
This is a noise alarm
Code

This is music controler


the most popular borad among the world, we did a led project to hands on.
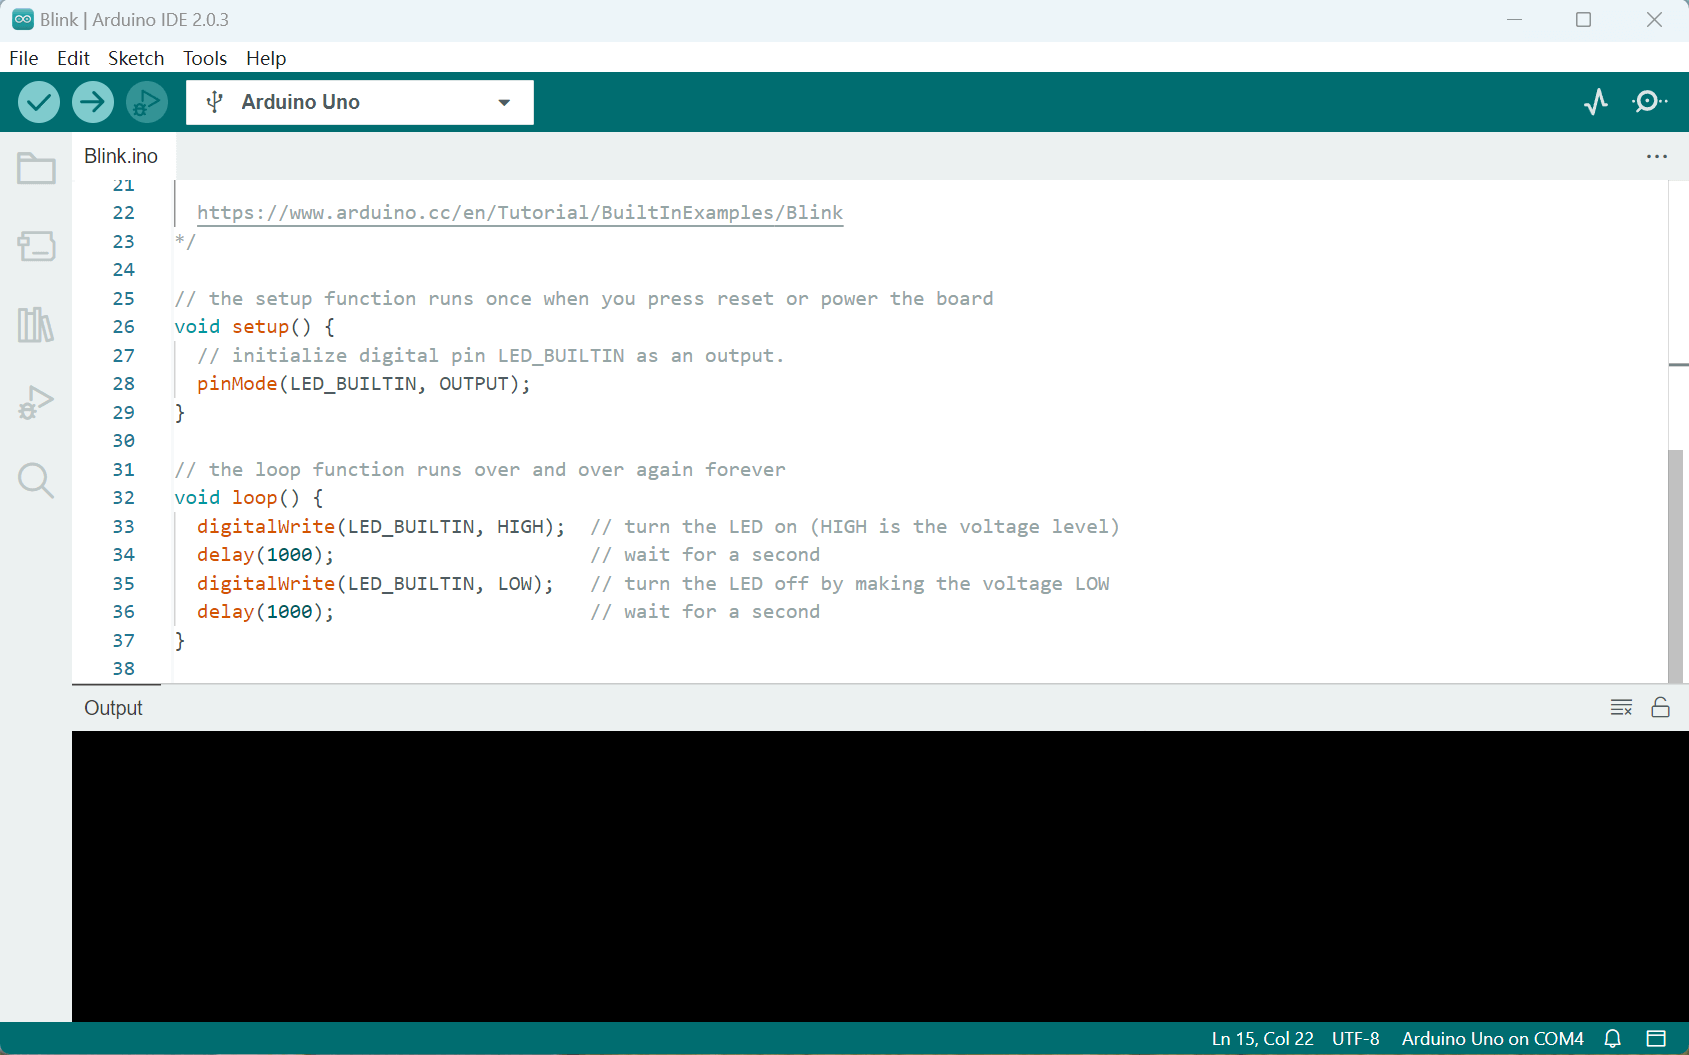
Install the ide downloaded via arduino.cc .
    float sinVal;
    int toneVal;
    unsigned long tepTimer ;

    void setup(){
        pinMode(8, OUTPUT);
        Serial.begin(9600);
    }

    void loop(){
        int val;
        double data;
        val=analogRead(0);
        data = (double) val * (5/10.24);

        if(data>23){
              for(int x=0; x<180; x++){
                sinVal = (sin(x*(3.1412/180)));
                toneVal = 2000+(int(sinVal*1000));
                tone(8, toneVal);
                delay(2);
              }
         } else {
               noTone(8);
         }

        if(millis() - tepTimer > 500){
                 tepTimer = millis();
                 Serial.print("temperature: ");
                 Serial.print(data);
                 Serial.println("C");
           }
    }
Firstly we use arduino IDE to code Xiao, it required install the lirary for Xiao.As We read the Datasheet from Seeed studio, we found it is different way to download library between Chinese homepage and English homepage.
When I use windows laptop I can use the Chinese website jason link to find this one. It works well with the blink example.
And when we use Mac laptops it's just can't be found.
So we use the way from English page(https://wiki.seeedstudio.com/XIAO-RP2040-with-Arduino/), use the Raspberry 2040 famiy url to install the settings.
https://github.com/earlephilhower/arduino-pico/releases/download/global/package_rp2040_index.json
      void setup() {
        // initialize digital pin LED_BUILTIN as an output.
        pinMode(LED_BUILTIN, OUTPUT);
      }

      // the loop function runs over and over again forever
      void loop() {
        digitalWrite(LED_BUILTIN, HIGH);  // turn the LED on (HIGH is the voltage level)
        delay(1000);                      // wait for a second
        digitalWrite(LED_BUILTIN, LOW);   // turn the LED off by making the voltage LOW
        delay(1000);                      // wait for a second
      }
             }
      }
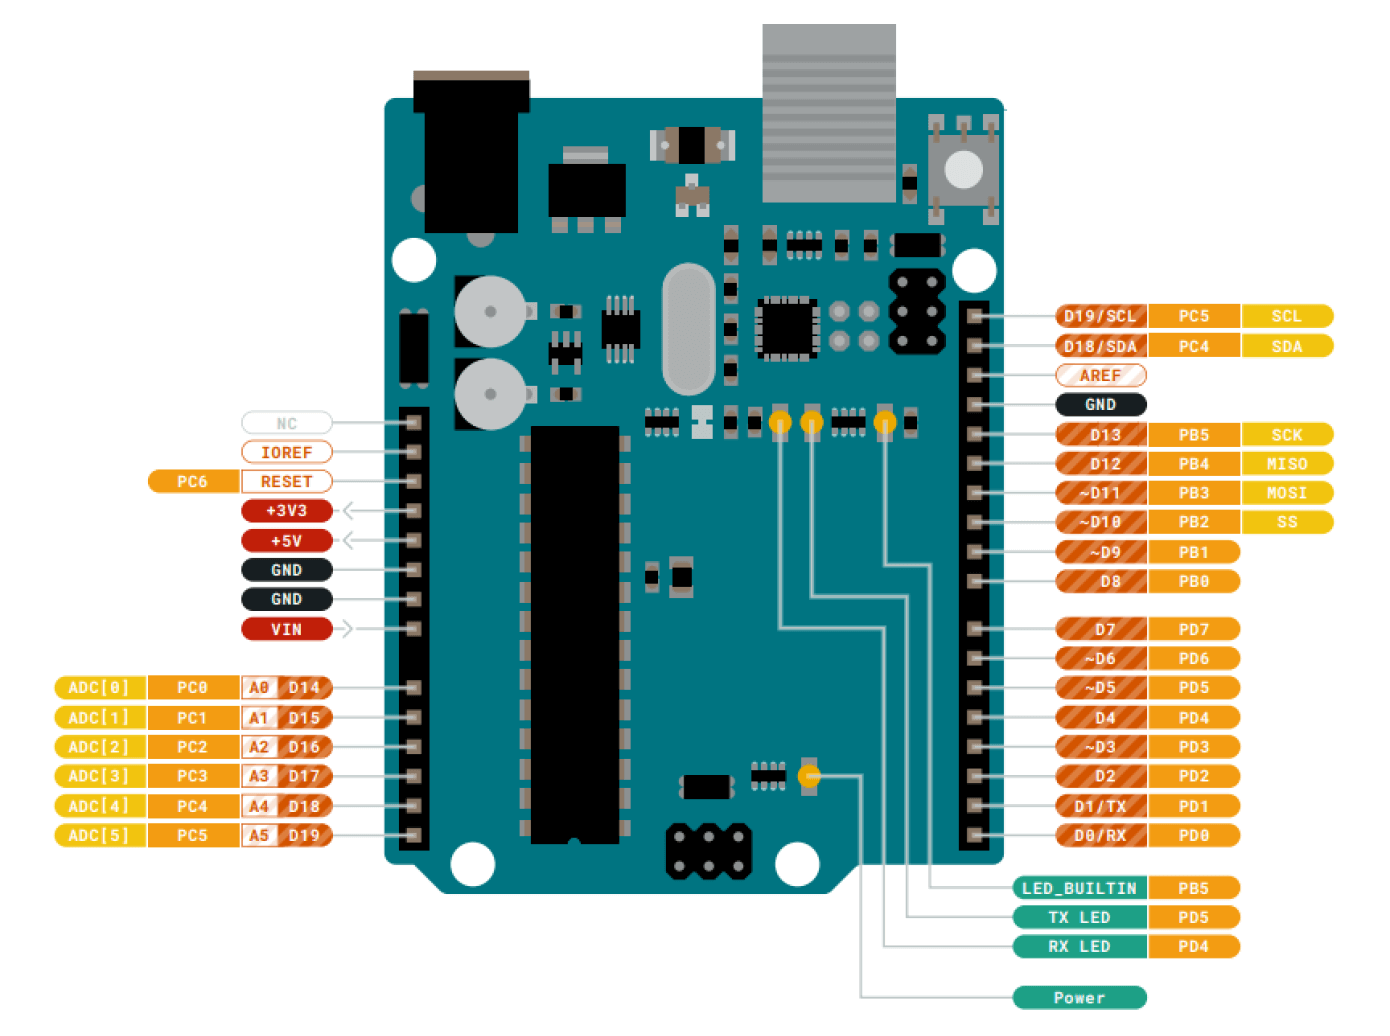
It's the favourate one from our group. It's very easy to start with. It comes up with stable and powerful IDE,just intall and start.
Secondly it's big enough so that we can clearly see the pin names, the leds, compoments ect. And becasue it's spacy we have 13 digital pins, multipul power pin options as well.
Thirdly it has the largest amount of the touturial you can just learn. We learn by looking at other people's code.
It's easy to reach.I mean you can buy it anywhere,you go to a shop, you find a UNO R3.
Last one,it has many accessores.I go to Thingiverse I can find tons of case, mugs,snap-ons.
It's beautifully made. Small, compact, powerfull. When I have a protype to build, I denfinatly go for this to save space.
Not that much info you can get as an Uno R3 does. For expalme I can't find any resource explained why i can't install the cheap library on my mac. I jsut did the install over and over agin till it success.
It' powerful engouth to run tinyML,which i would like to give a try later.
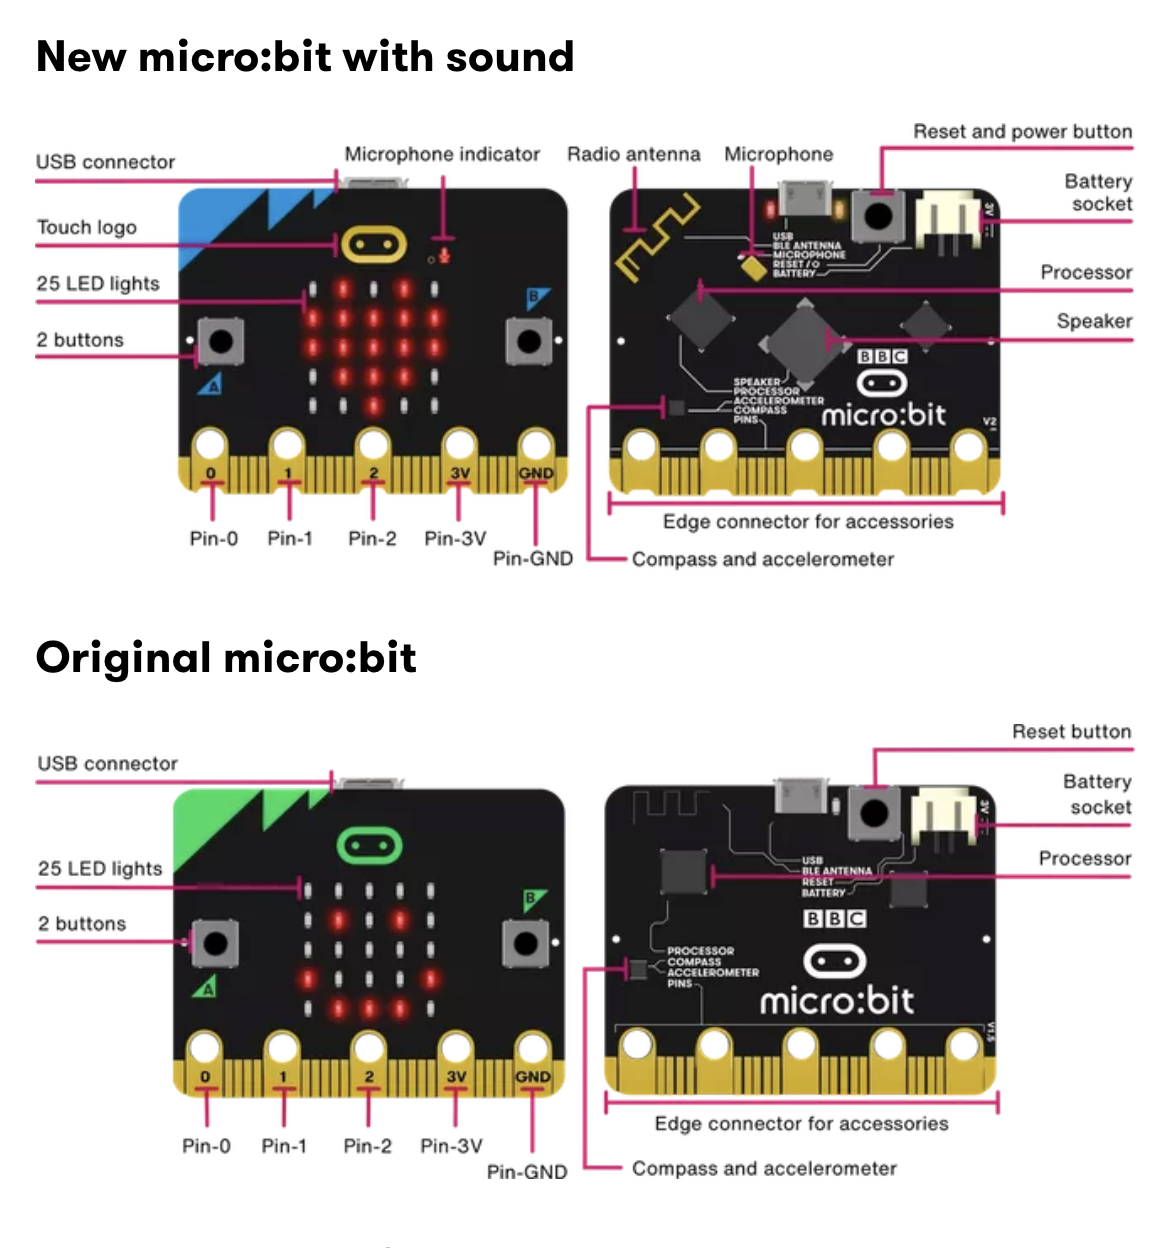
Actually I got not much to say about it.It's a great tool for steam educaton,and it's popluar in China Steam Education filed.It has Wi-Fi moudle which is good, you can build IOT stuff.
It has many stuff built in like buzzer, screen, wifi, bluetooth.Good for kids to hands on.
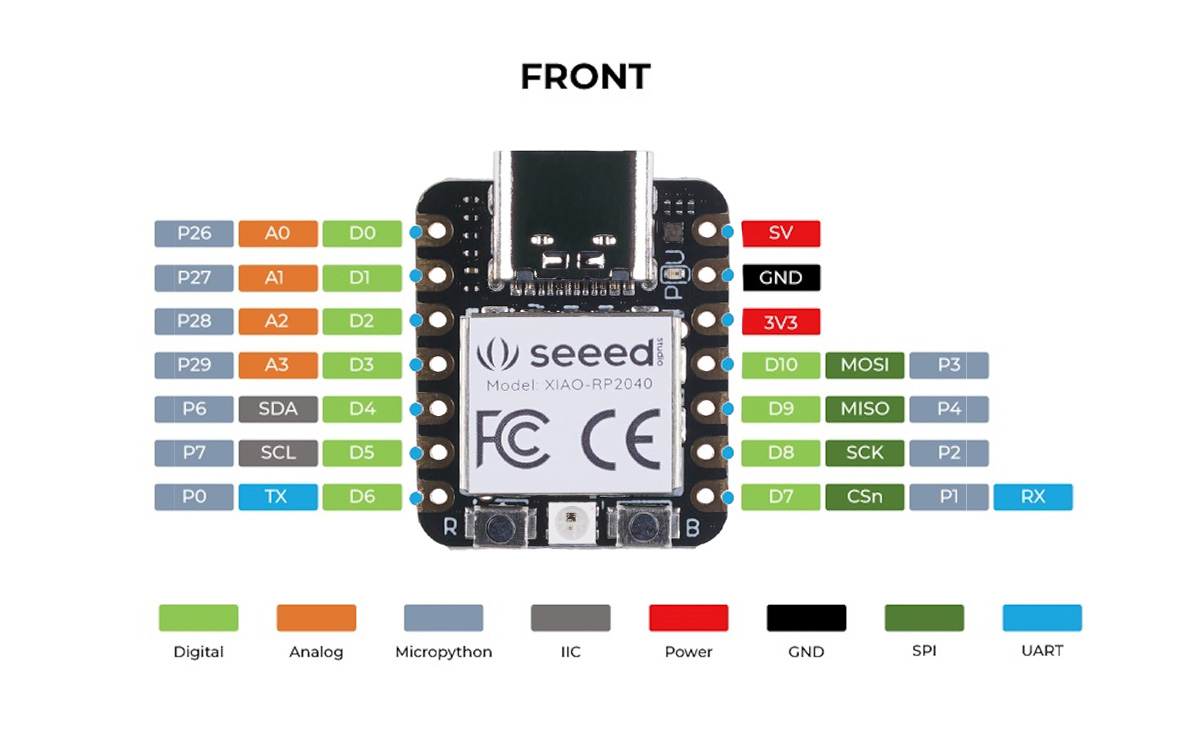
I choose to explore seeduino Seeduino Xiao,it's small compact and powerfull in the same time.
Seeduino Xiao RP 2040 documentation
Key features:
Dual ARM Cortex-M0+ @ 133MHz
264kB on-chip SRAM in six independent banks
Support for up to 16MB of off-chip Flash memory via dedicated QSPI bus
DMA controller
Fully-connected AHB crossbar
Interpolator and integer divider peripherals
On-chip programmable LDO to generate core voltage
2 on-chip PLLs to generate USB and core clocks
30 GPIO pins, 4 of which can be used as analogue inputs
Peripherals
2 UARTs
2 SPI controllers
2 I2C controllers
16 PWM channels
USB 1.1 controller and PHY, with host and device support
8 PIO state machines
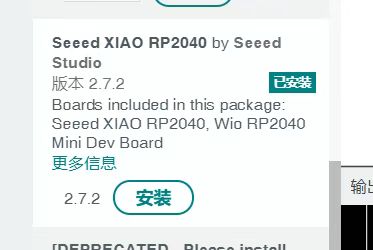
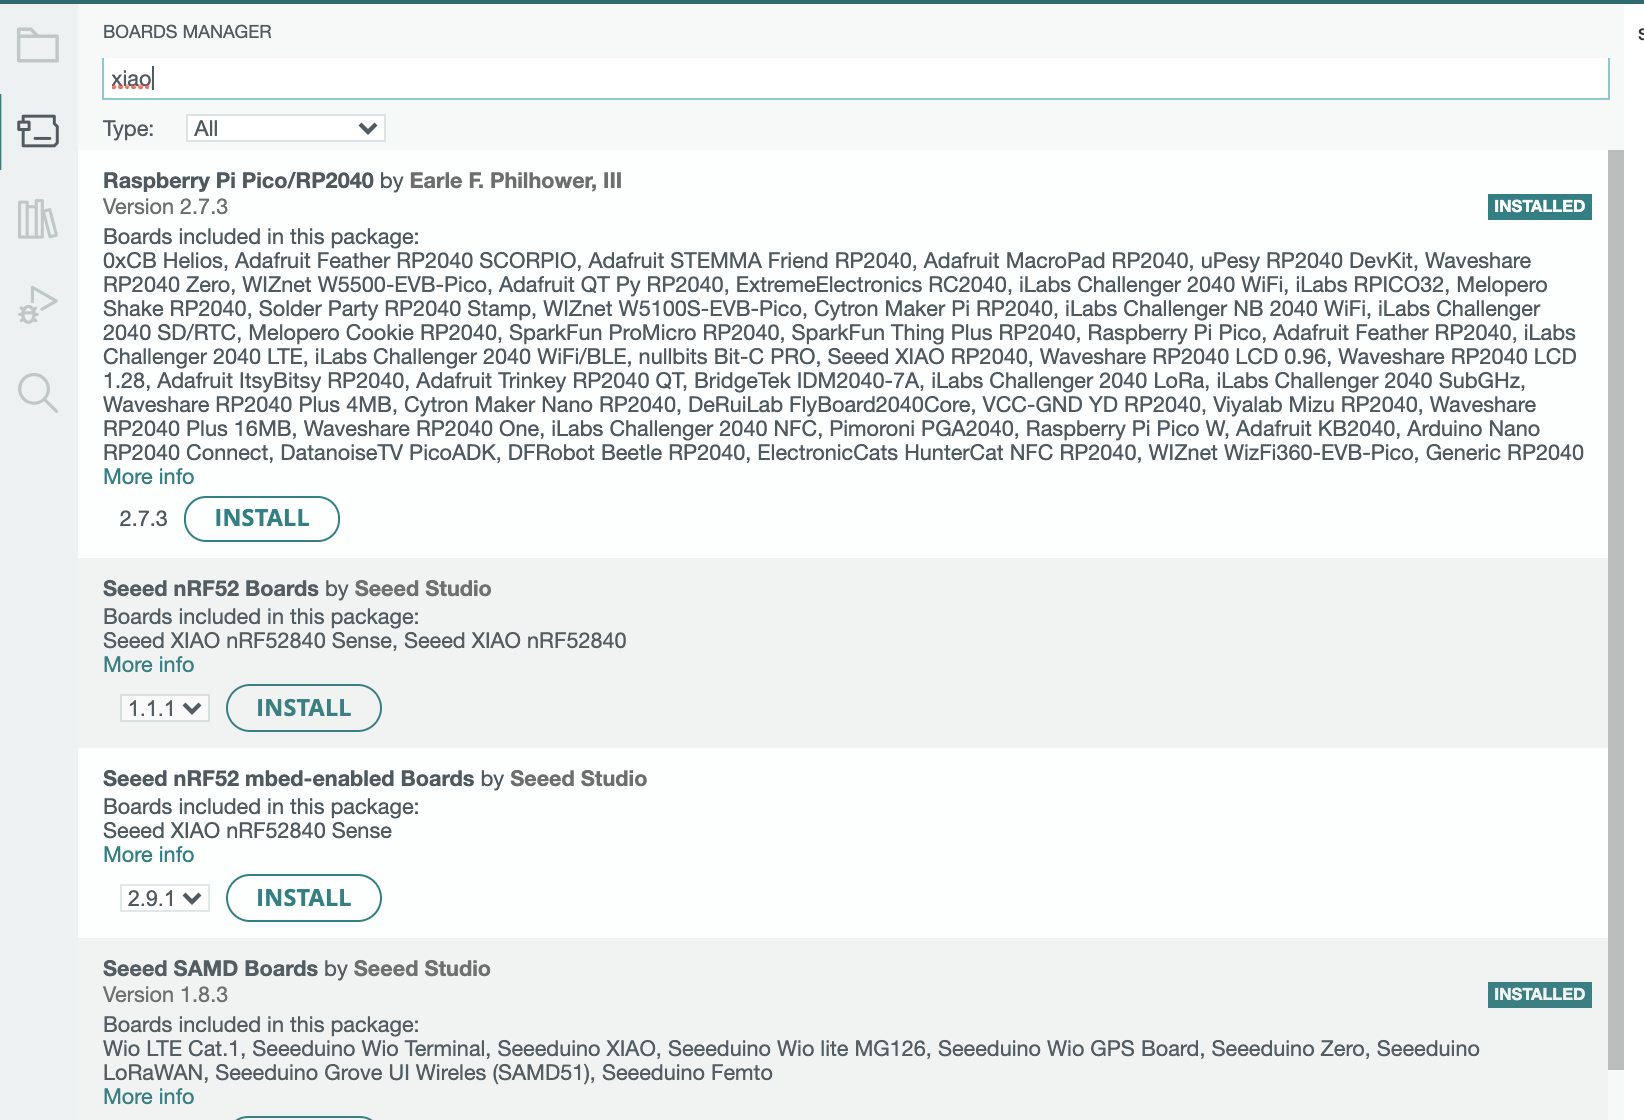
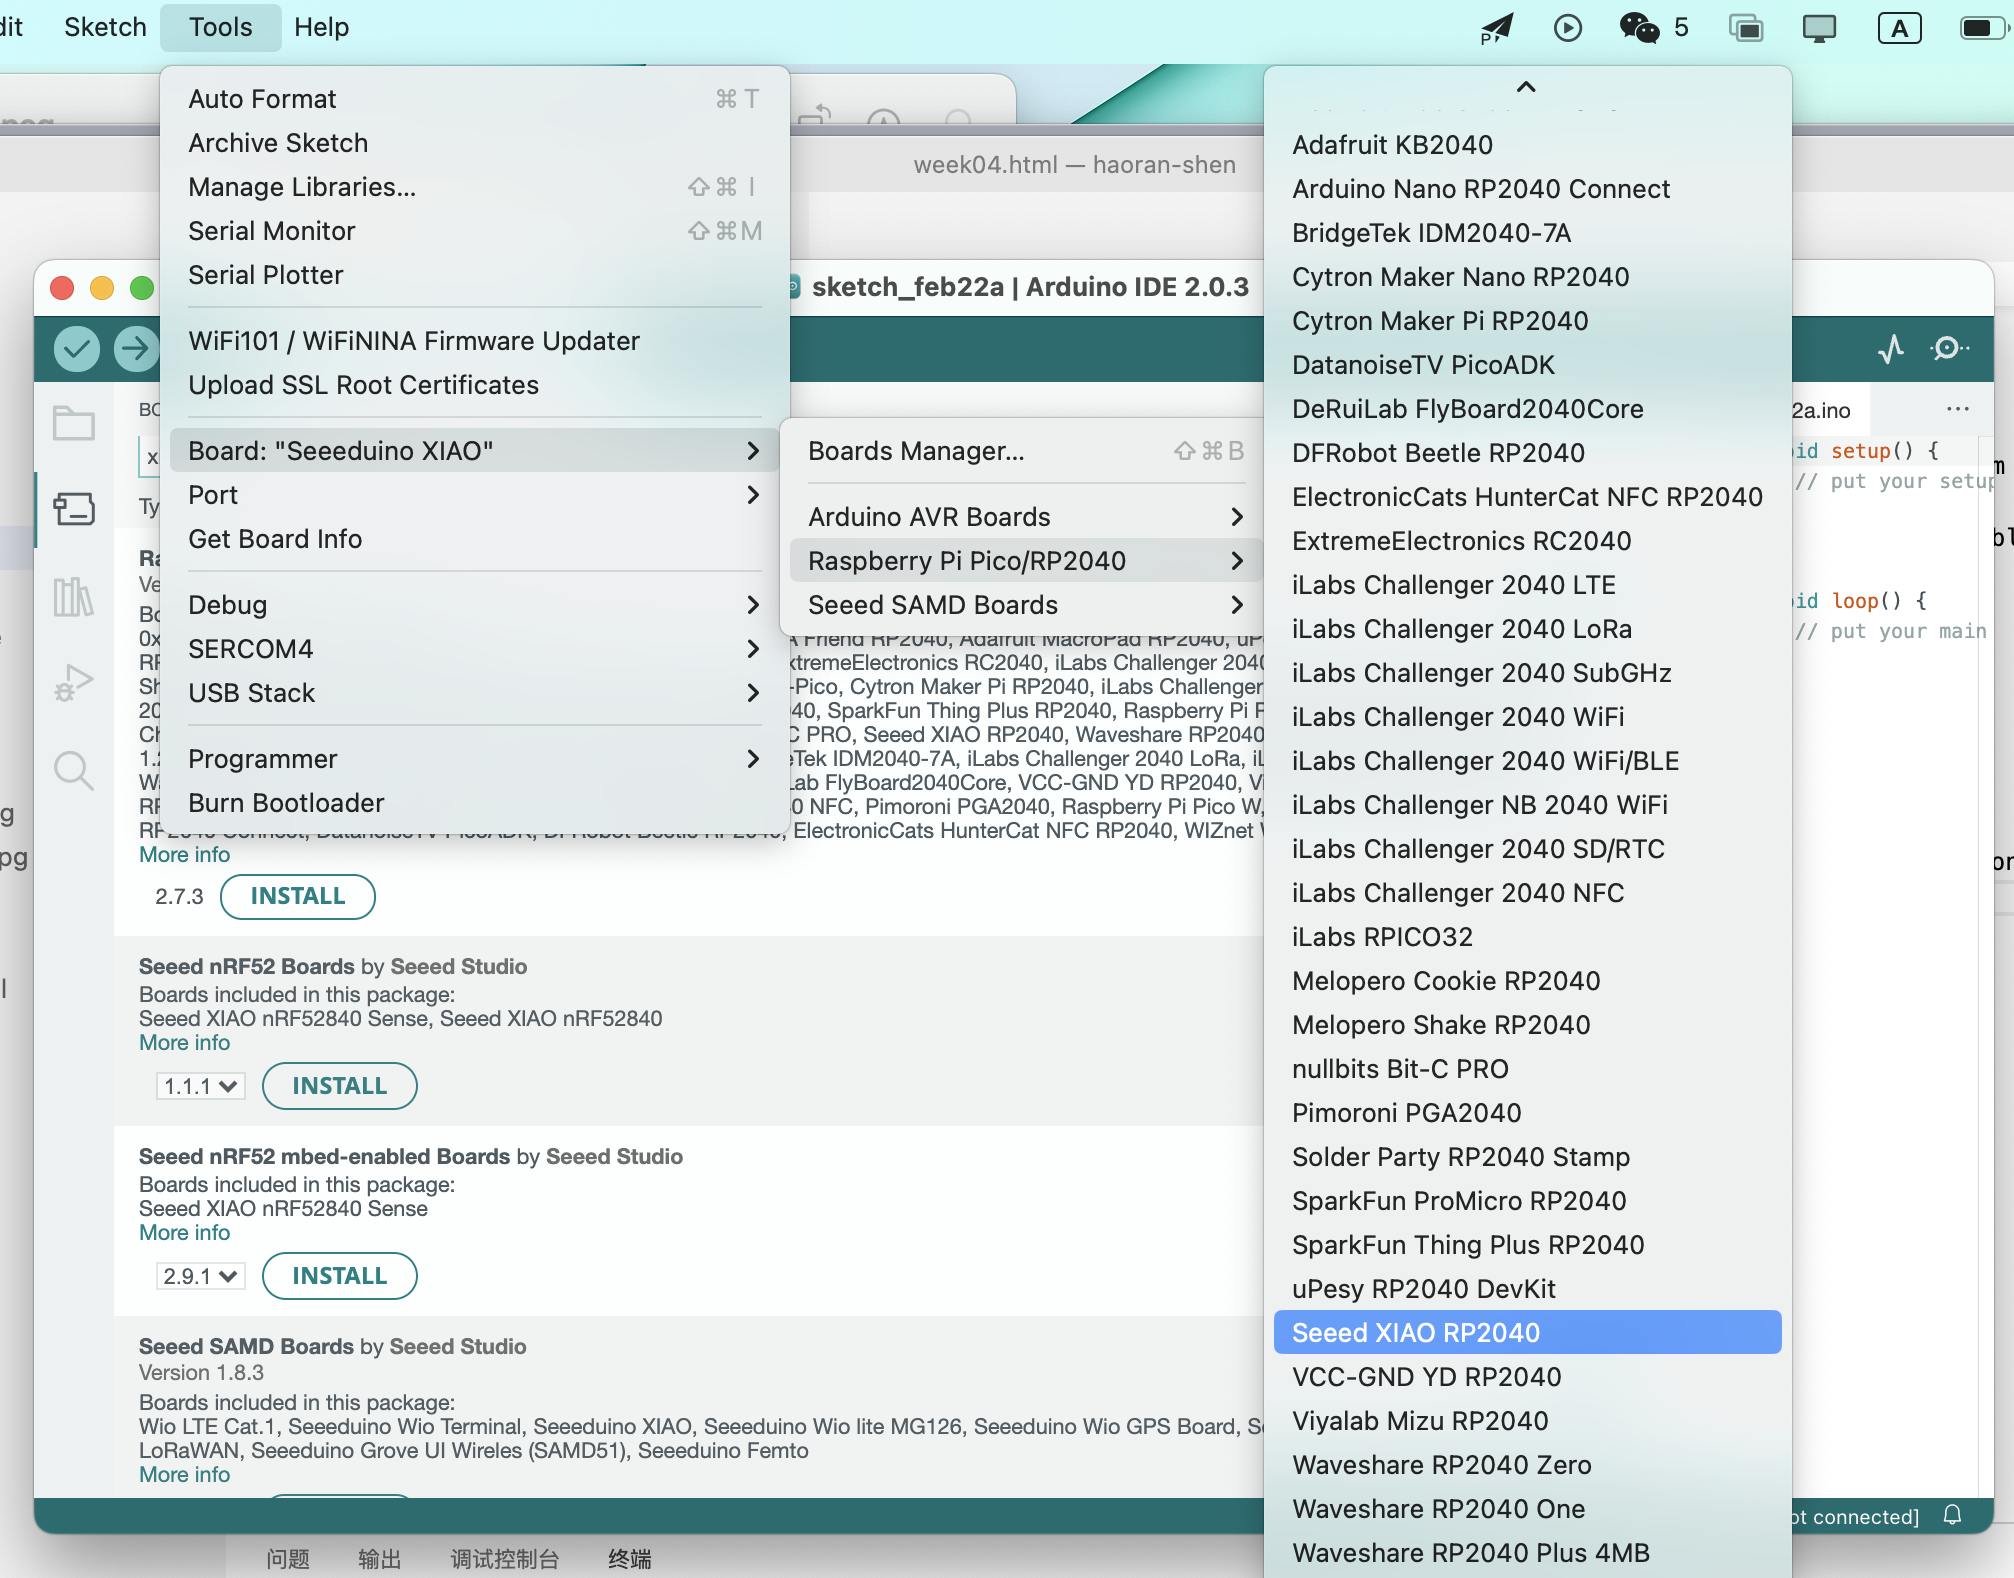
Firstly I use arduino IDE to code Xiao, it required install the lirary for Xiao.As We read the Datasheet from Seeed studio, we found it is different way to download library between Chinese homepage and English homepage.
When I use windows laptop I can use the Chinese website jason link to find this one. It works well with the blink example.
And when we use Mac laptops it's just can't be found.
So we use the way from English page(https://wiki.seeedstudio.com/XIAO-RP2040-with-Arduino/), use the Raspberry 2040 famiy url to install the settings.
https://github.com/earlephilhower/arduino-pico/releases/download/global/package_rp2040_index.json
The failures mainly happened when I already downloaded the cheap library, it said failed to install. I still dont know why, but I did the install many timnes it finally sucees.
For God sake I finally have it.
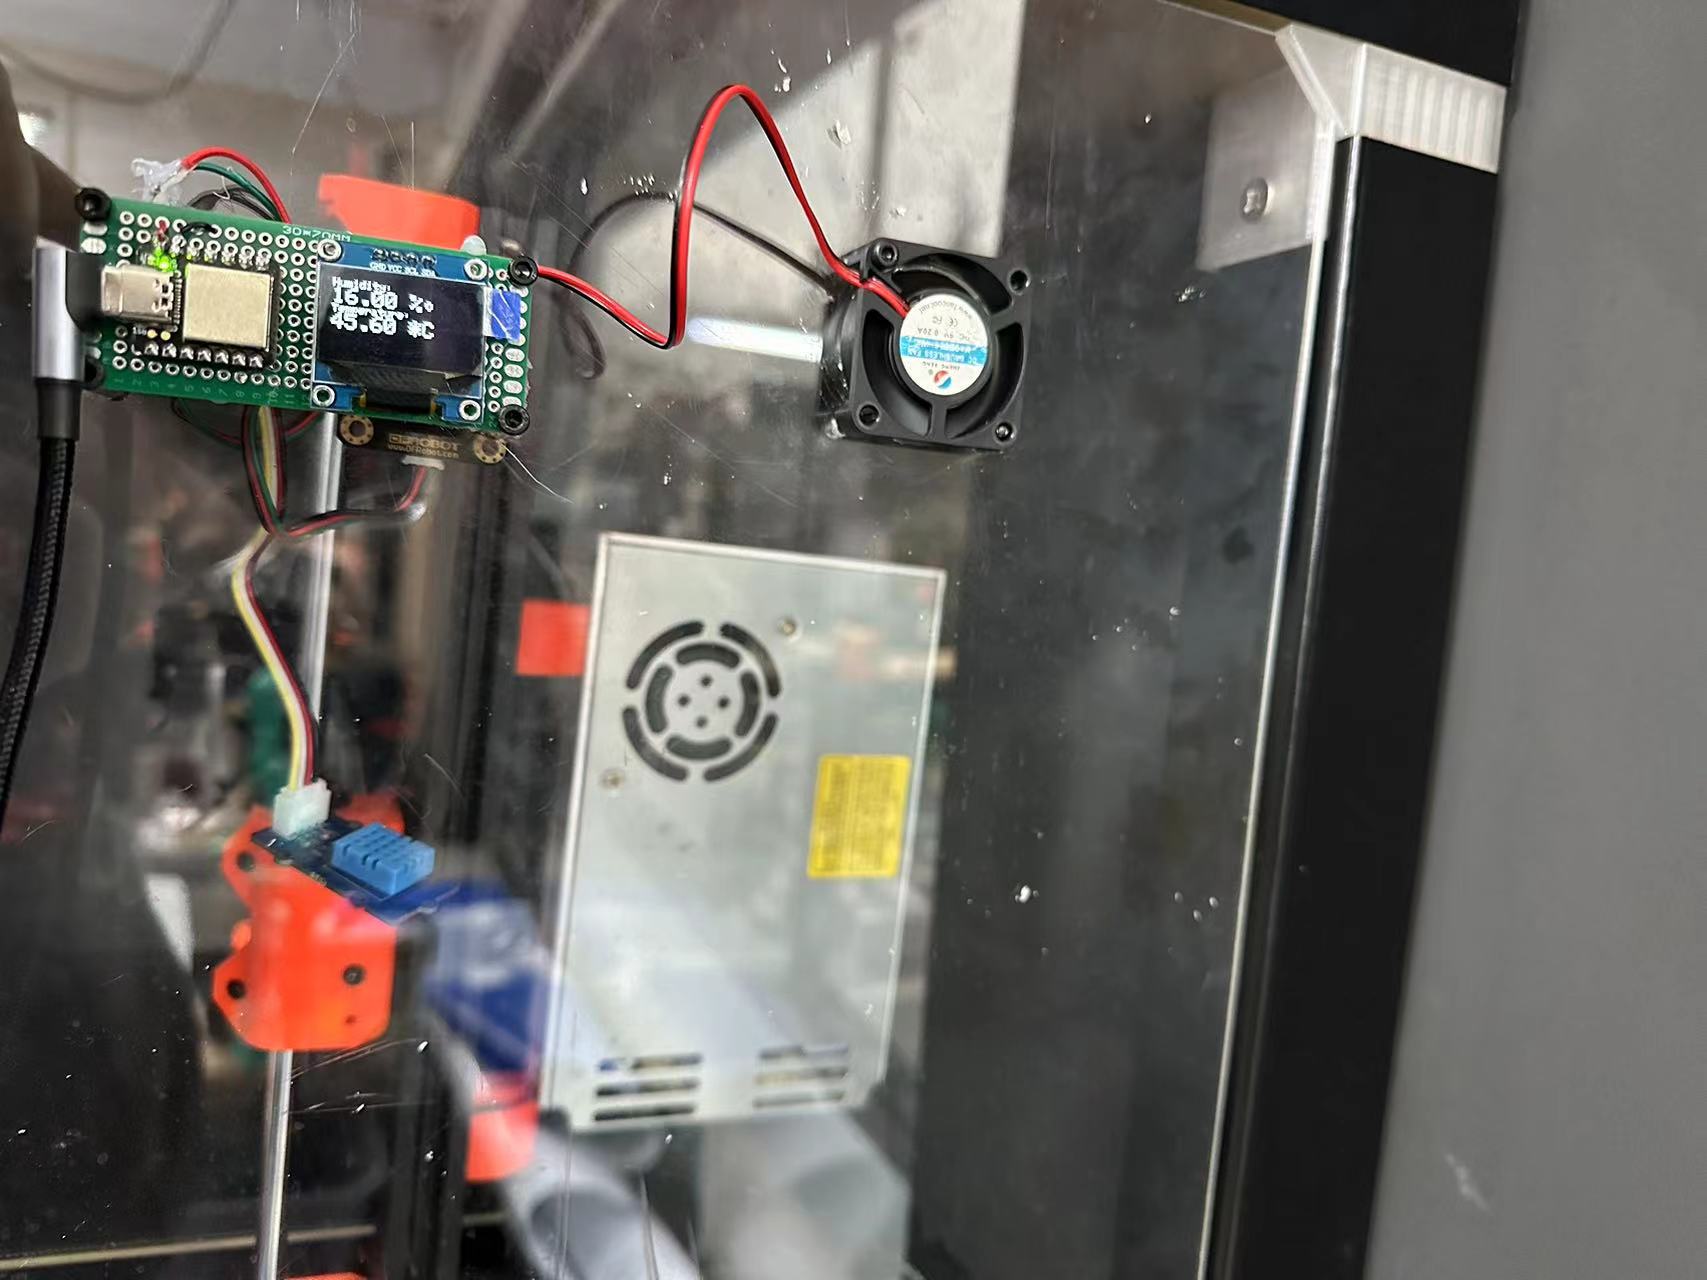
With a bit experience of coding with arduino, I deciede to make a 3d printer enclpousre system by using DHT11 snesor , 0.96 inch SSD1306 OLED, a Realy,and a 5V fan.
I already have the DHT11 sensor lirary, if you dont have, use the library maneger and search for DHT11. I'm using seeed's grove sensor, do I choose the seeed's lirary.
Connect the sensor physically and use example from the DHT11 library,upload ,and check from the Serial Monitor.
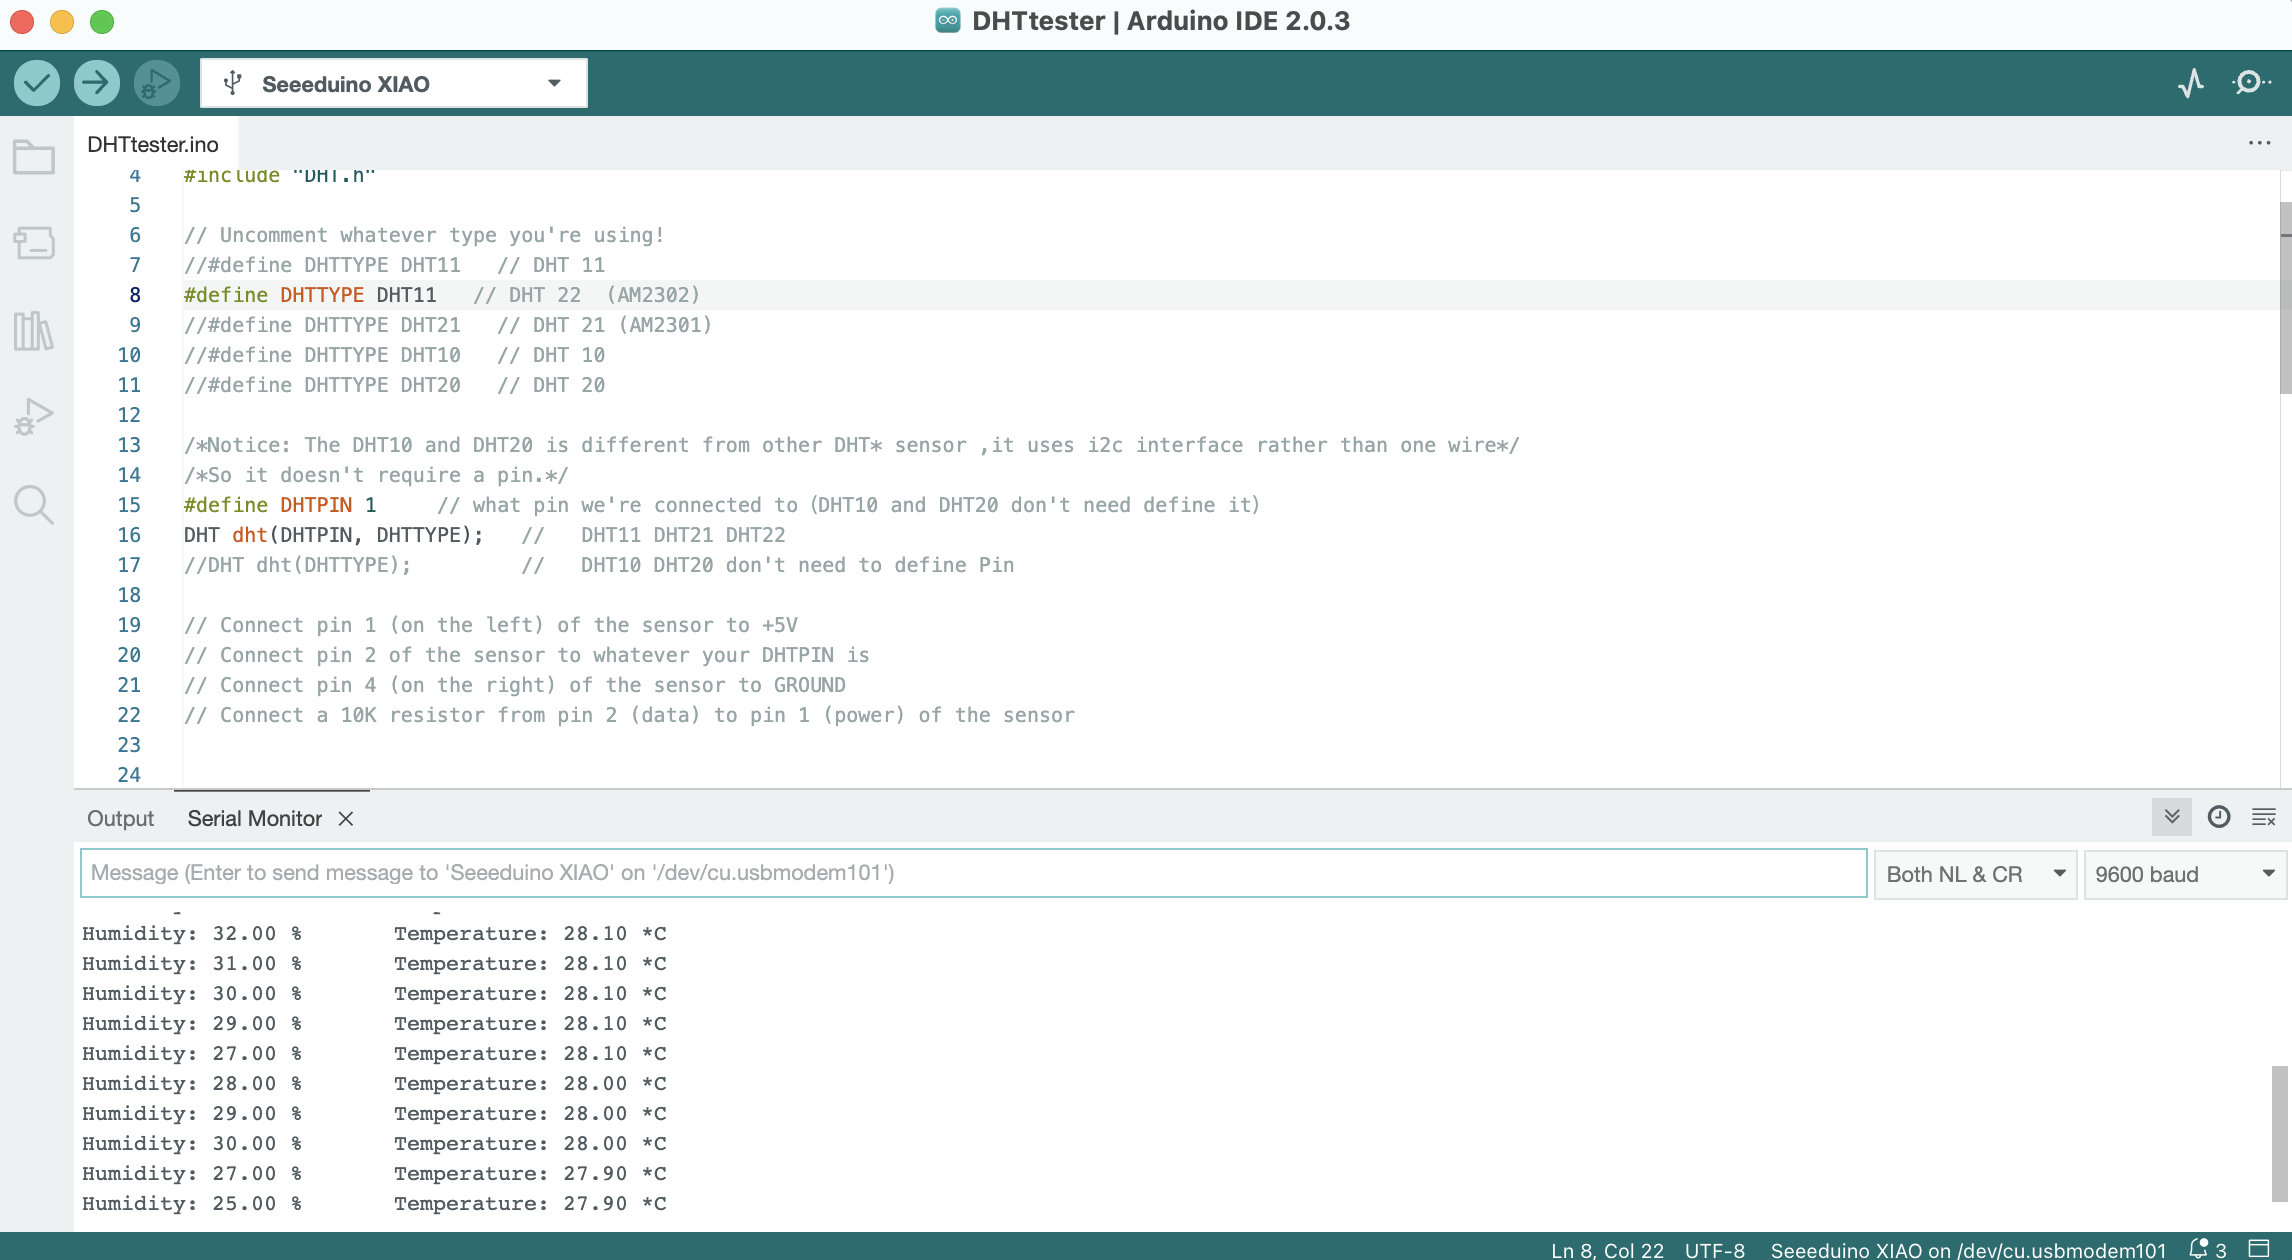
Connect the rest and give a try.
The Whole codes.
    // Example testing sketch for various DHT humidity/temperature sensors
    // Written by ladyada, public domain

    #include "DHT.h"
    #include
    #include
    #include
    #include

    #define SCREEN_WIDTH 128 // OLED display width, in pixels
    #define SCREEN_HEIGHT 64 // OLED display height, in pixels
    // Uncomment whatever type you're using!
    //#define DHTTYPE DHT11   // DHT 11
    #define DHTTYPE DHT11   // DHT 22  (AM2302)
    //#define DHTTYPE DHT21   // DHT 21 (AM2301)
    //#define DHTTYPE DHT10   // DHT 10
    //#define DHTTYPE DHT20   // DHT 20
    #define OLED_RESET     0 // Reset pin # (or -1 if sharing Arduino reset pin)
    #define SCREEN_ADDRESS 0x3c ///< See datasheet for Address; 0x3D for 128x64, 0x3C for 128x32
    Adafruit_SSD1306 display(SCREEN_WIDTH, SCREEN_HEIGHT, &Wire, OLED_RESET);

    /*Notice: The DHT10 and DHT20 is different from other DHT* sensor ,it uses i2c interface rather than one wire*/
    /*So it doesn't require a pin.*/
    #define DHTPIN 8     // what pin we're connected to(DHT10 and DHT20 don't need define it)
    DHT dht(DHTPIN, DHTTYPE);   //   DHT11 DHT21 DHT22
    //DHT dht(DHTTYPE);         //   DHT10 DHT20 don't need to define Pin

    // Connect pin 1 (on the left) of the sensor to +5V
    // Connect pin 2 of the sensor to whatever your DHTPIN is
    // Connect pin 4 (on the right) of the sensor to GROUND
    // Connect a 10K resistor from pin 2 (data) to pin 1 (power) of the sensor


    #if defined(ARDUINO_ARCH_AVR)
        #define debug  Serial

    #elif defined(ARDUINO_ARCH_SAMD) ||  defined(ARDUINO_ARCH_SAM)
        #define debug  SerialUSB
    #else
        #define debug  Serial
    #endif

    void setup() {

        debug.begin(115200);
        Serial.begin(115200);

      // SSD1306_SWITCHCAPVCC = generate display voltage from 3.3V internally
      if(!display.begin(SSD1306_SWITCHCAPVCC, SCREEN_ADDRESS)) {
        Serial.println(F("SSD1306 allocation failed"));
        for(;;); // Don't proceed, loop forever
      }

      // Show initial display buffer contents on the screen --
      // the library initializes this with an Adafruit splash screen.
      display.display();
      delay(2000); // Pause for 2
        debug.println("DHTxx test!");
        Wire.begin();

        /*if using WIO link,must pull up the power pin.*/
        // pinMode(PIN_GROVE_POWER, OUTPUT);
        // digitalWrite(PIN_GROVE_POWER, 1);
      display.clearDisplay();

        dht.begin();
    }

    void loop() {
        float temp_hum_val[2] = {0};
        // Reading temperature or humidity takes about 250 milliseconds!
        // Sensor readings may also be up to 2 seconds 'old' (its a very slow sensor)


        if (!dht.readTempAndHumidity(temp_hum_val)) {
            debug.print("Humidity: ");
            debug.print(temp_hum_val[0]);
            debug.print(" %\t");
            debug.print("Temperature: ");
            debug.print(temp_hum_val[1]);
            debug.println(" *C");
        } else {
            debug.println("Failed to get temprature and humidity value.");
        }

        delay(1500);
        display.clearDisplay();

      display.setTextSize(1);             // Normal 1:1 pixel scale
      display.setTextColor(SSD1306_WHITE);        // Draw white text
      display.setCursor(0,0);
               // Start at top-left corner
      display.println("Humidity: ");
        display.setTextSize(2);
      display.print(temp_hum_val[0]);

      display.println(" %\t");
        display.setTextSize(1);
      display.println("Temperature: ");
        display.setTextSize(2);
      display.print(temp_hum_val[1]);
    display.println(" *C");
    display.display();
    if(temp_hum_val[1]>30){
    digitalWrite(0,HIGH);
    }else{
    digitalWrite(0,LOW);
    }
    }


           }
    }
After the protype is done, I install on the enclousure with laser cut out the wholes for screw in.

After cut just install back and give a try.
After cut just install back and give a try.
I forgot to try to test all the compoments first(only a few of them),it makes falure make me wield 2 times.Bad work flow.

The problem of can't install the the cheap library is still unknow. Also why Windiws can find a pulic library but a mac can't even see it with the same json URL.