Interface and Application Programming
Assignment
- Group Assignment:
- Compare as many tool options as possible.
- Document your work on the group work page and reflect on your individual page what you learned.
- Individual Assignment:
- Write an application that interfaces a user with input and/or output device(s) on a board that you made.
Evaluation Standards
- Linked to the group assignment page.
- Documented your process.
- Explained the GUI that you made and how you did it.
- Explained how your application communicates with your MCU board.
- Explained any problems you encountered and how you fixed them.
- Included original source code (or a screenshot of the app code if that's not possible).
- Included a 'hero shot' of your application running & communicating with your board.
Output Preview
Group Assignment
Processing
Processing is a free graphical library and
integrated development environment
built for the electronic arts, new media art, and visual design communities with the purpose of teaching
non-programmers the fundamentals of computer programming in a visual context.
So We used Processing to make as simple GUI we could communicate with Xiao RP2040 via serial port.
We made an ON/OFF switch to control the LED in the Xiao board that had been fabricated in a previous
week.
Processing Code
//--- define variable and constant
import processing.serial.*;
ImageButtons Button1;
PImage Lamp_On, Lamp_Off;
Serial myPort;
char recievedData;
String mytext;

void setup() {
  size(350, 150);

  println(Serial.list());
  myPort = new Serial(this, "COM20", 9600);

  smooth();
  background(255);   // Set the background to white
  // Define and create image button
  PImage sw_on = loadImage("on.jpg");
  PImage sw_off = loadImage("off.jpg");


  int x = 20;
  int y = 20;
  int w = sw_on.width;
  int h = sw_on.height;

  Button1 = new ImageButtons(x, y, w, h, sw_on, sw_off, "0", "1");

  stroke(000); // Set stroke color to white
  println("Connected");
  textSize(14);
  fill(0, 0, 0) ;
  mytext="";
}

void draw()
{
  recievedData = char(myPort.read());
  isPressed();
  text(mytext, 10, 10);
  Button1.update();
  Button1.display();

}

class Button
{
  int x, y;
  int w, h;
  boolean over = false;
  boolean pressed = false;

  void pressed() {
    if (over && mousePressed) {
      pressed = true;
    } else {
      pressed = false;
    }
  }

  boolean overRect(int x, int y, int width, int height) {
    if (mouseX >= x && mouseX <= x+width &&
      mouseY >= y && mouseY <= y+height) {
      return true;
    } else {
      return false;
    }
  }
}
//-------------------------------------------------------
class ImageButtons extends Button
{
  PImage img_on;
  PImage img_off;
  PImage down;
  PImage currentimage;
  String ledoff;
  String ledon;

  ImageButtons(int ix, int iy, int iw, int ih, PImage button_on, PImage button_off, String l_off, String l_on)
  {
    x = ix;
    y = iy;
    w = iw;
    h = ih;
    img_on = button_on;
    img_off = button_off;
    currentimage = img_off;
    ledoff = l_off;
    ledon = l_on;
  }

  void update() {
    textSize(14);
    fill(0, 0, 0) ;
    over();
    pressed();
    if (pressed)
    {
      if (currentimage==img_on)
      {
        currentimage=img_off;
        println(ledoff);
        myPort.write(ledoff);
      } else
      {
        currentimage=img_on;
        println(ledon);
        myPort.write(ledon);
      }
      delay(200);
    }
  }

  void over() {
    if ( overRect(x, y, w, h) ) {
      over = true;
    } else {
      over = false;
    }
  }

  void display() {
    image(currentimage, x, y);
  }
}

void isPressed() {
  if ( myPort.available() > 0) {
    if (recievedData == '2') {
      mytext="Pressed";
    }else{
      mytext="";
      mytext="Not Pressed";
    }
  }
}
Arduino Code
#define led 26
char incomingdata;

void setup() {
  pinMode(led, OUTPUT);
  Serial.begin(9600);
}

void loop() {
  if (Serial.available()) {
    incomingdata = Serial.read();
    if (incomingdata == '1') {
      digitalWriteFast(led, HIGH);
    } else if (incomingdata == '0')
      digitalWriteFast(led, LOW);
  }
}
Check our
Group assignment page to see more of our assignment.
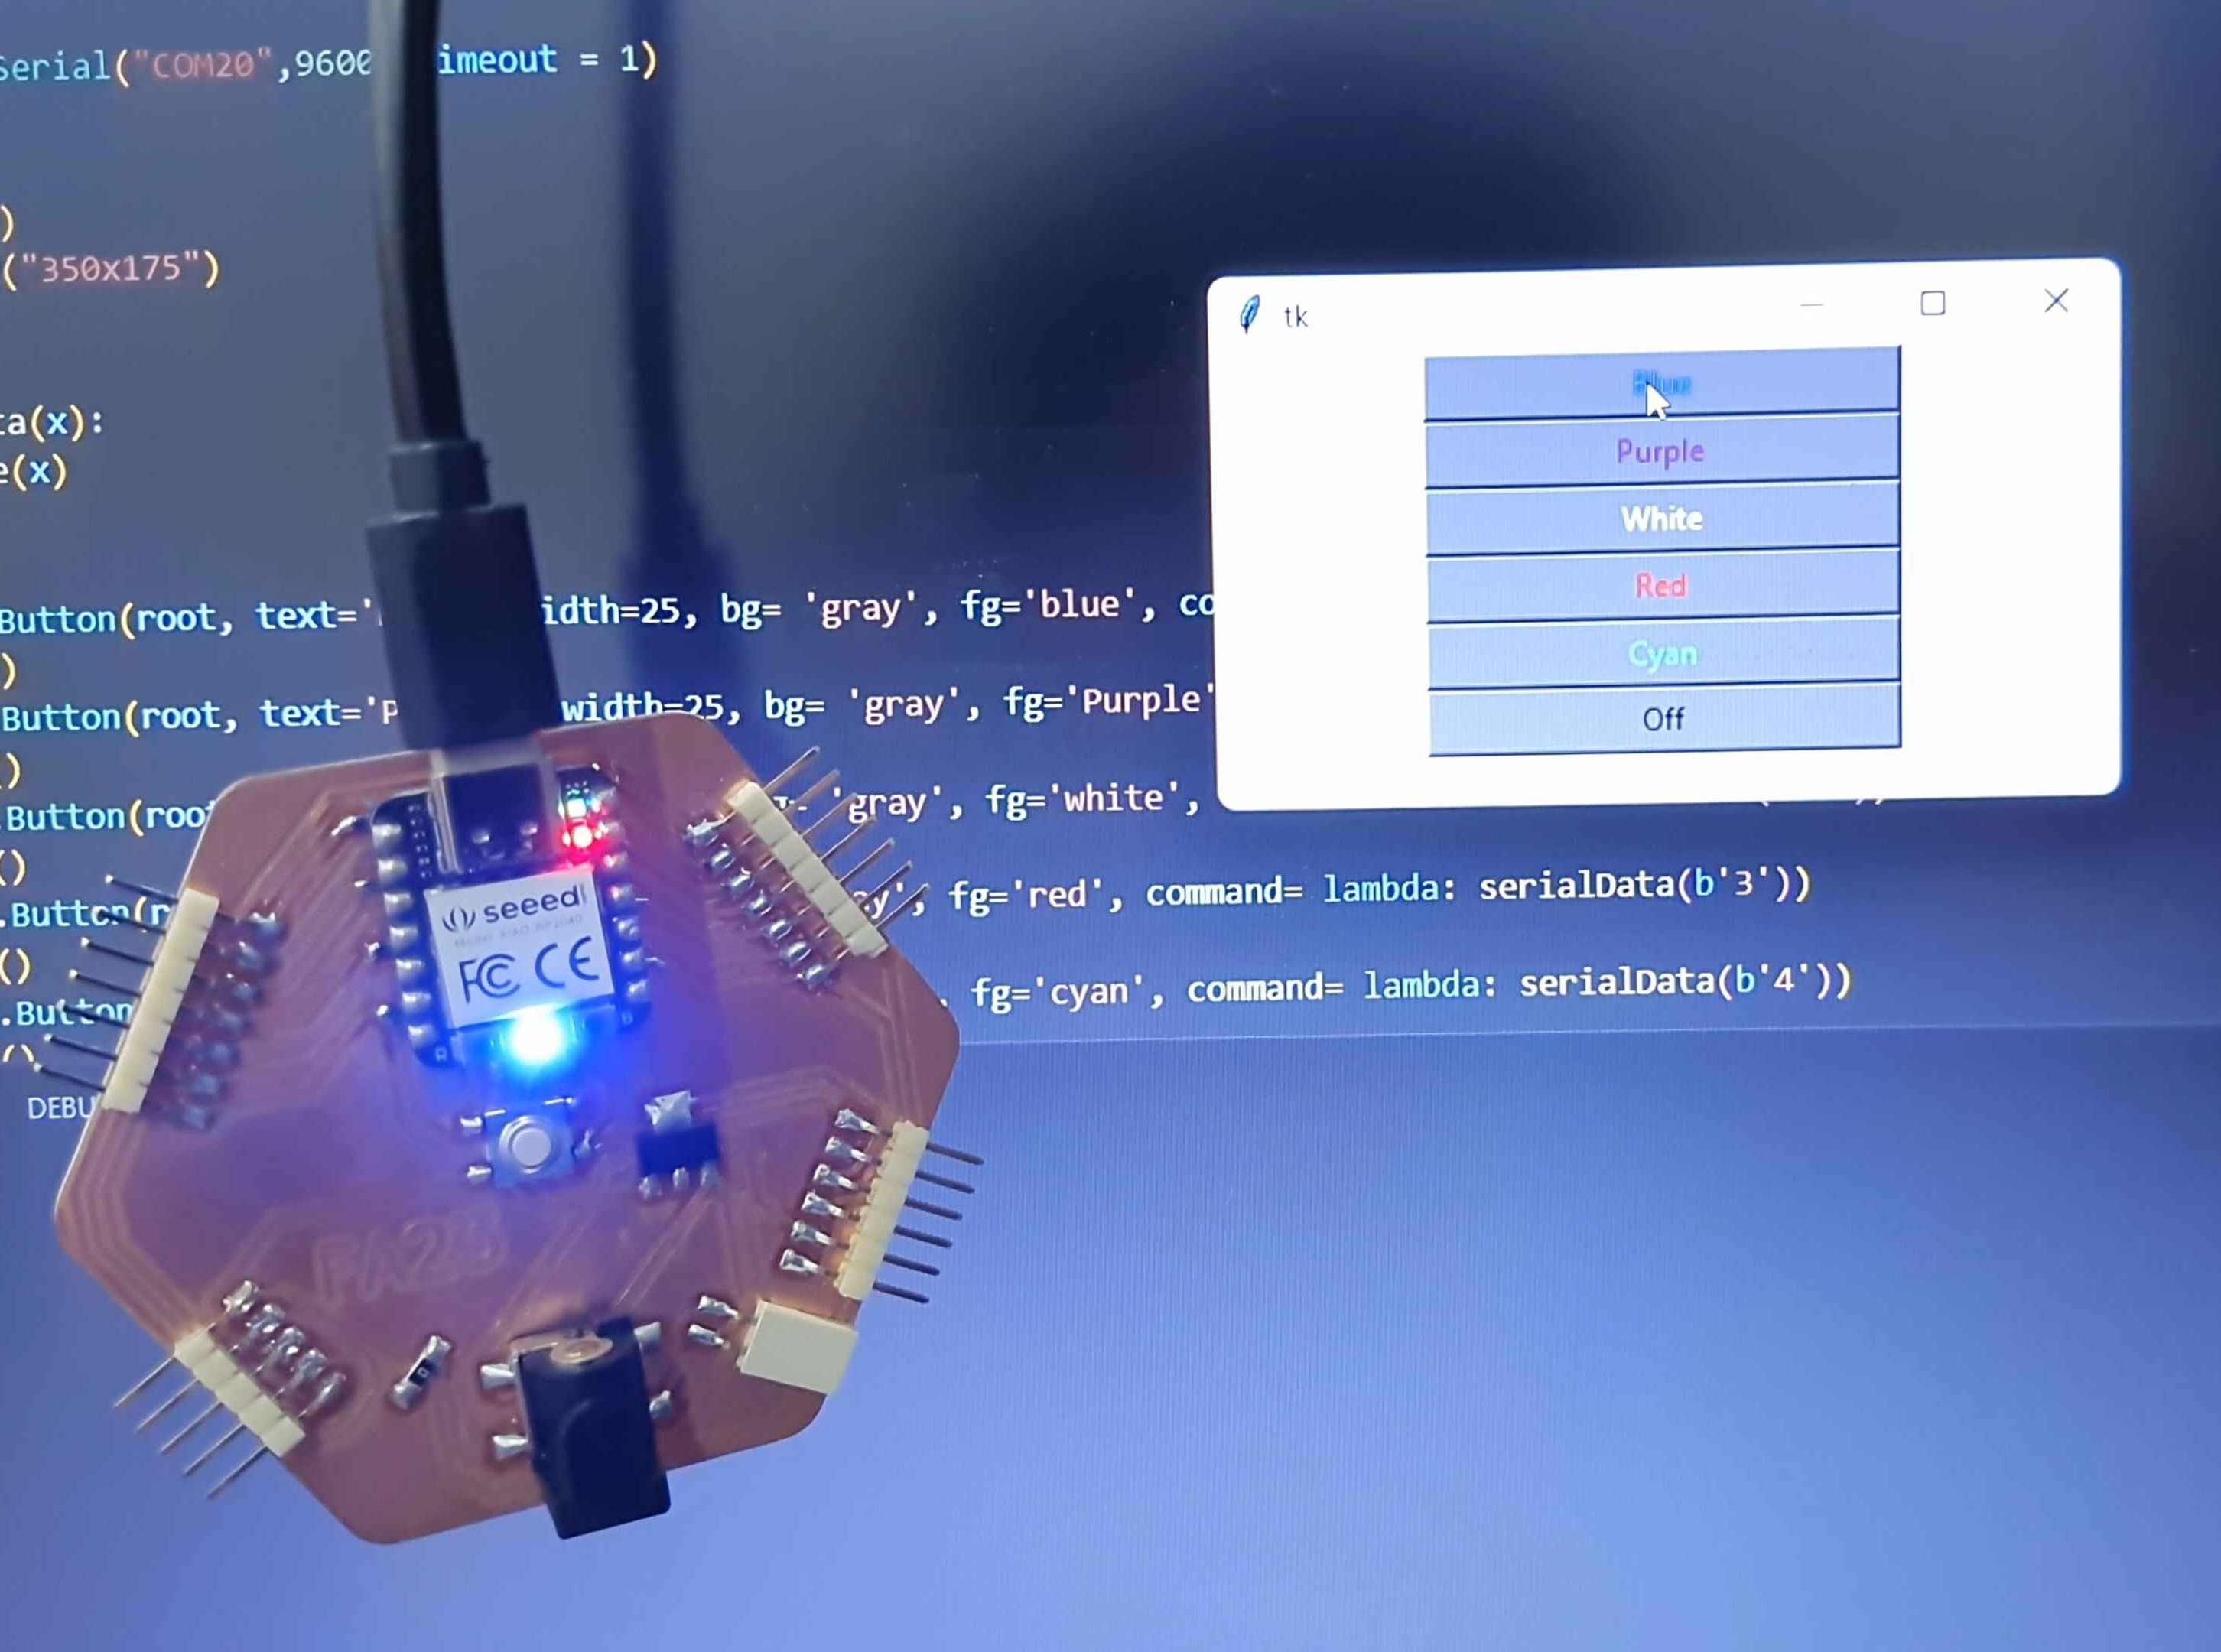
GUI
Tkinter
I write my interface using pythonwith the help of tkinter library.
I made my app that it communicates with my MCU using usb port it send different characters and the MCU
receives the characters and act according to the code I uploaded on it.
Python Code
import tkinter as tk
import serial

#change Change-Me to the port you are connected to
ser = serial.Serial("Change-Me",9600, timeout = 1)


root = tk.Tk()
root.geometry("350x175")


def serialData(x):
    ser.write(x)
    print(x)

button = tk.Button(root, text='Blue', width=25, bg= 'gray', fg='blue', command= lambda: serialData(b'0'))
button.pack()
button = tk.Button(root, text='Purple', width=25, bg= 'gray', fg='Purple', command= lambda: serialData(b'1'))
button.pack()
button = tk.Button(root, text='White', width=25, bg= 'gray', fg='white', command= lambda: serialData(b'2'))
button.pack()
button = tk.Button(root, text='Red', width=25, bg= 'gray', fg='red', command= lambda: serialData(b'3'))
button.pack()
button = tk.Button(root, text='Cyan', width=25, bg= 'gray', fg='cyan', command= lambda: serialData(b'4'))
button.pack()
button = tk.Button(root, text='Off', width=25, bg= 'gray', fg='black', command= lambda: serialData(b'5'))
button.pack()
root.mainloop()
Arduino Code
#include <Adafruit_NeoPixel.h>
#define NUMPIXELS 1
int Power = 11;
int PIN = 12;

char incomingdata;

Adafruit_NeoPixel pixels(NUMPIXELS, PIN, NEO_GRB + NEO_KHZ800);

void setup() {
  Serial.begin(9600);
  pixels.begin();
  pinMode(Power, OUTPUT);
  digitalWrite(Power, HIGH);
}

void loop() {
  if (Serial.available()) {
    incomingdata = Serial.read();
    if (incomingdata == '0') {
    pixels.clear();
    pixels.setPixelColor(0, pixels.Color(15, 25, 205));
    pixels.show();
    }else if (incomingdata == '1') {
    pixels.clear();
    pixels.setPixelColor(0, pixels.Color(103, 25, 205));
    pixels.show();
    }else if (incomingdata == '2') {
    pixels.clear();
    pixels.setPixelColor(0, pixels.Color(255, 255, 255));
    pixels.show();
    }else if (incomingdata == '3') {
    pixels.clear();
    pixels.setPixelColor(0, pixels.Color(255, 0, 0));
    pixels.show();
    }else if (incomingdata == '4') {
    pixels.clear();
    pixels.setPixelColor(0, pixels.Color(12, 66, 101));
    pixels.show();
    }else {
    pixels.clear();
    pixels.setPixelColor(0, pixels.Color(0, 0, 0));
    pixels.show();
    }
  }
}