Recitation: https://vimeo.com/801380639 Review: https://vimeo.com/803635712 Slides: http://academy.cba.mit.edu/classes/scanning_printing/index.html
- Group assignment:
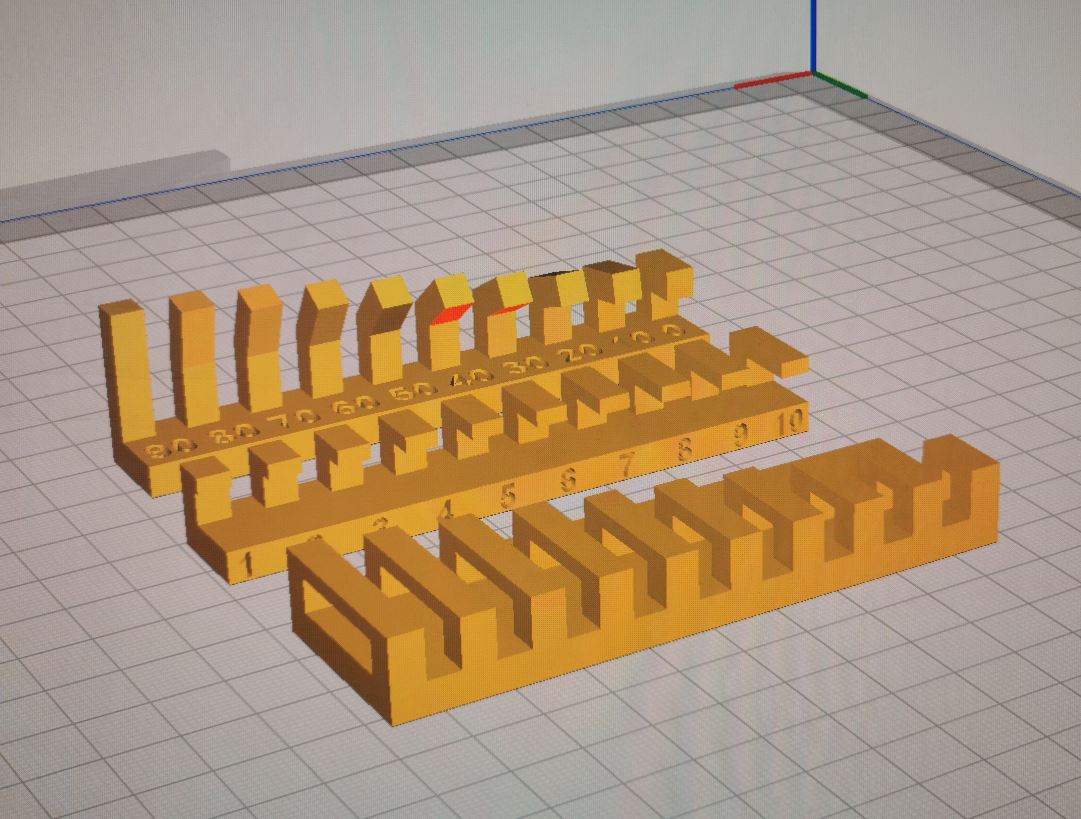
- Test the design rules for your 3D printer(s)
- Document your work on the group work page and reflect on your individual page what you learned about characteristics of your printer(s)
- Individual assignment:
- Design and 3D print an object (small, few cm3, limited by printer time) that could not be easily made subtractively
- 3D scan an object (and optionally print it)
Files
pebble base stl pebble ring stl pebble button stl
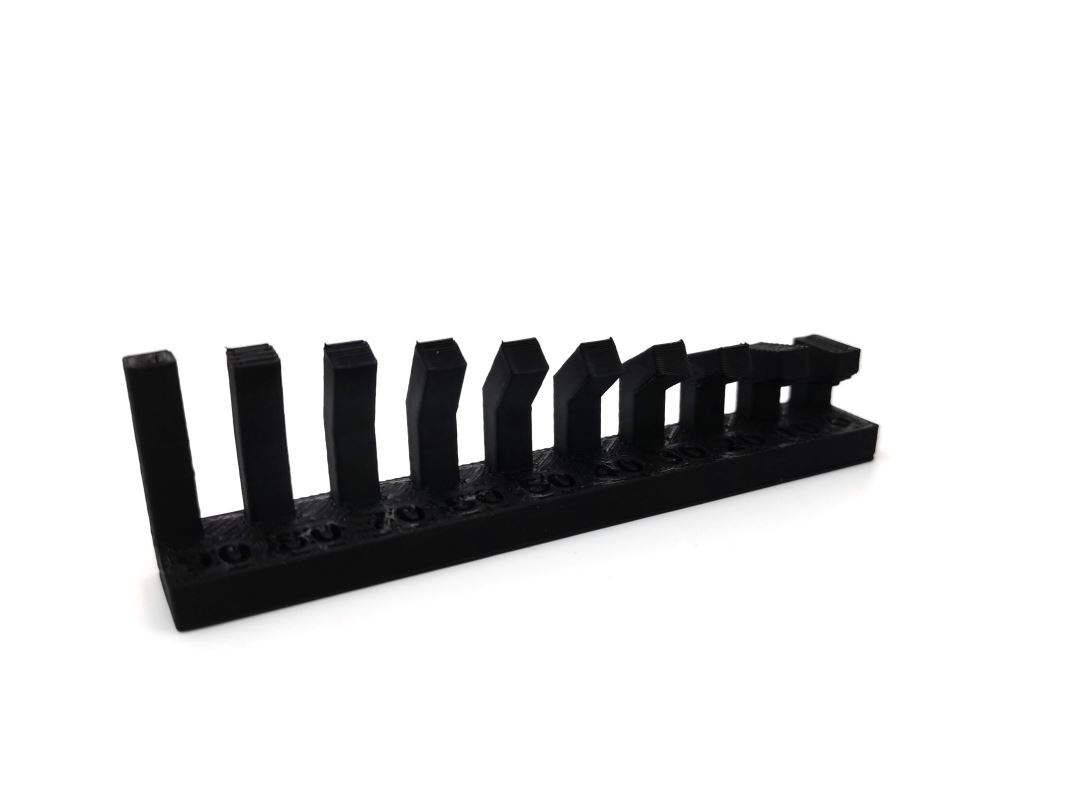
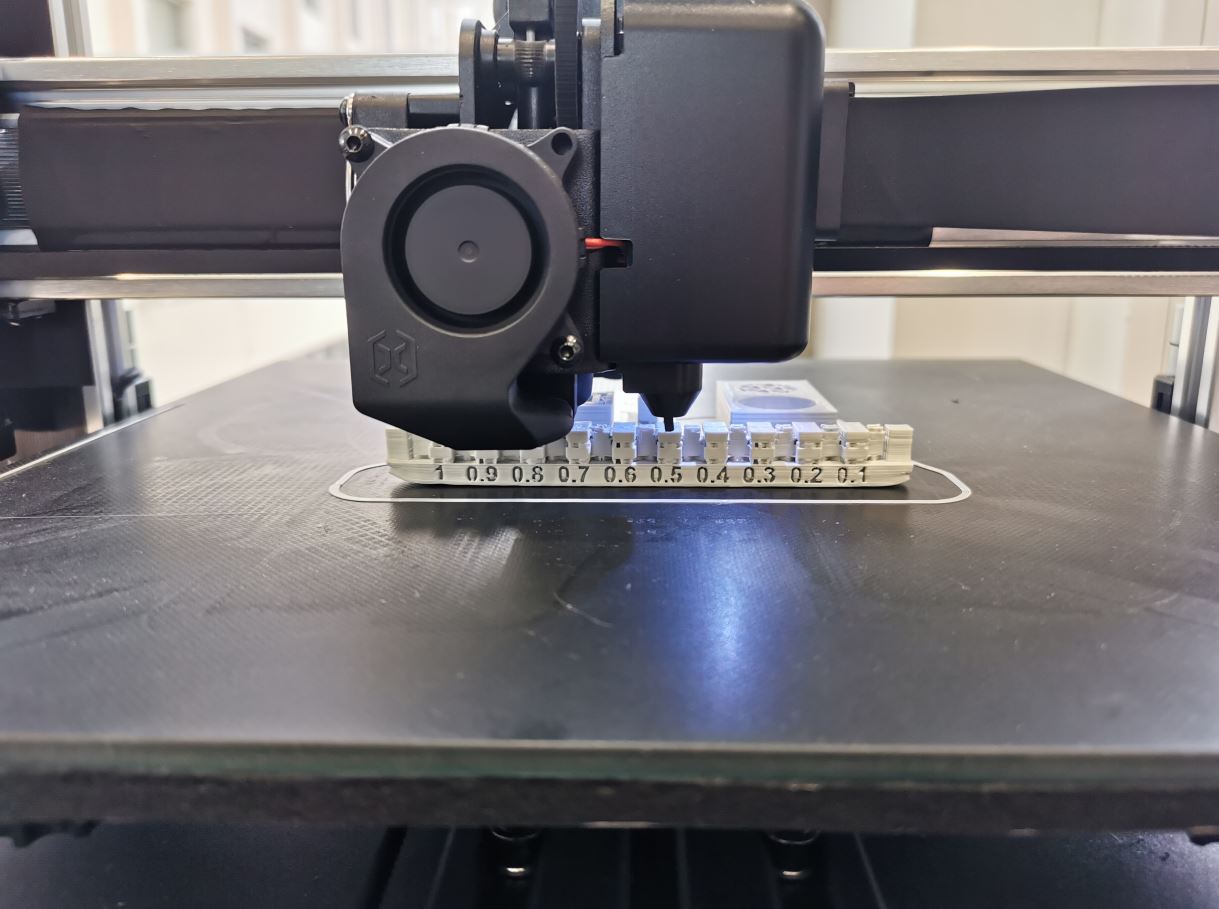
Test the degin rules for your 3D printer(s)
I print some of the test parts created by Neil and described during his course.
Prints without supports
Models can be found here: overhang test stl angle test stl bridging test stl
| 1 | 2 |
|---|---|
 |
 |
Closeup on longer overhangs
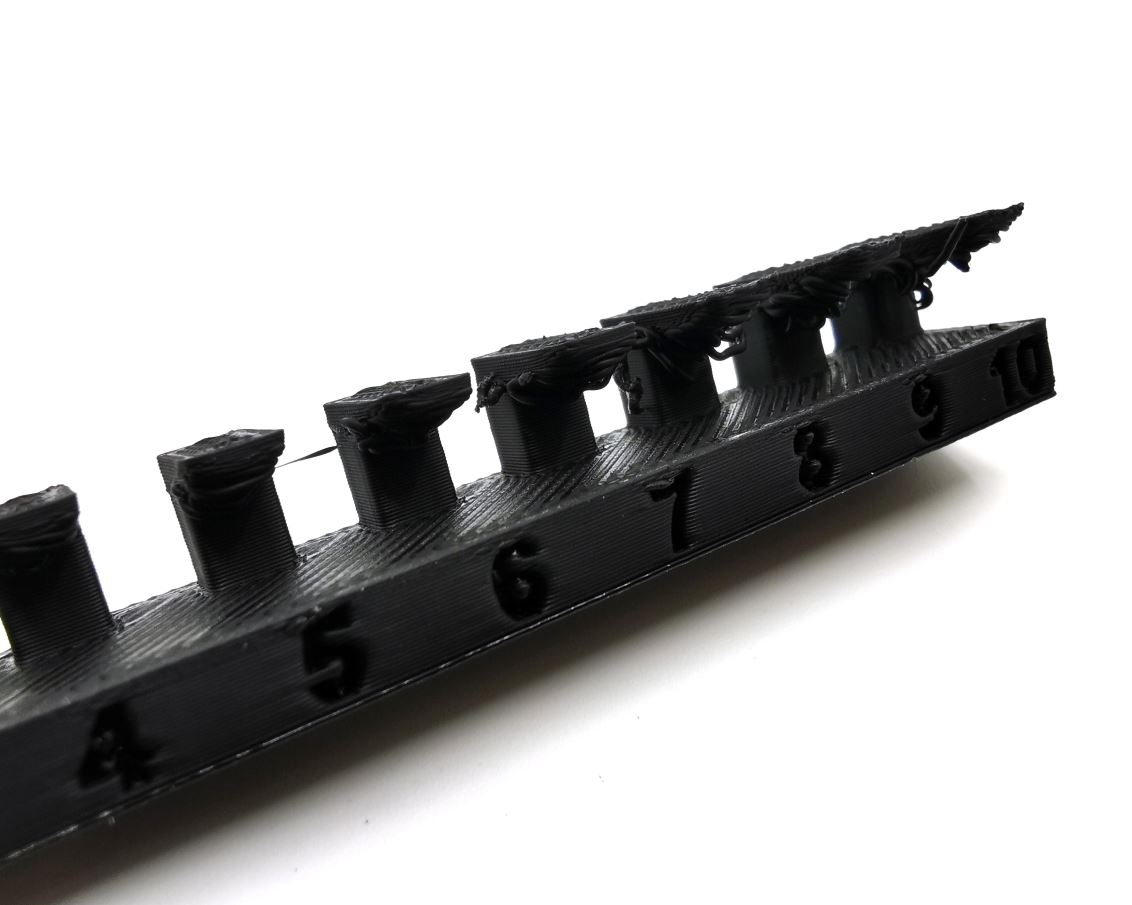
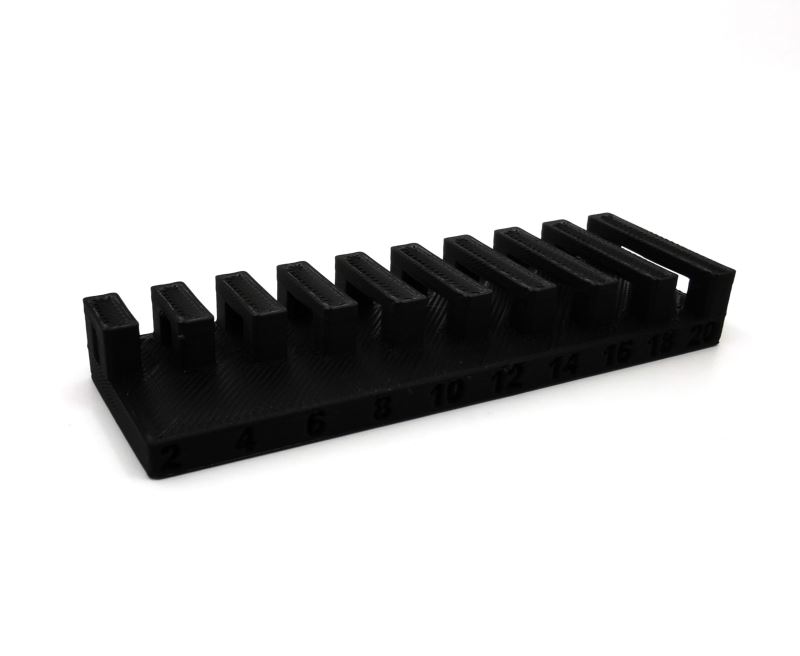
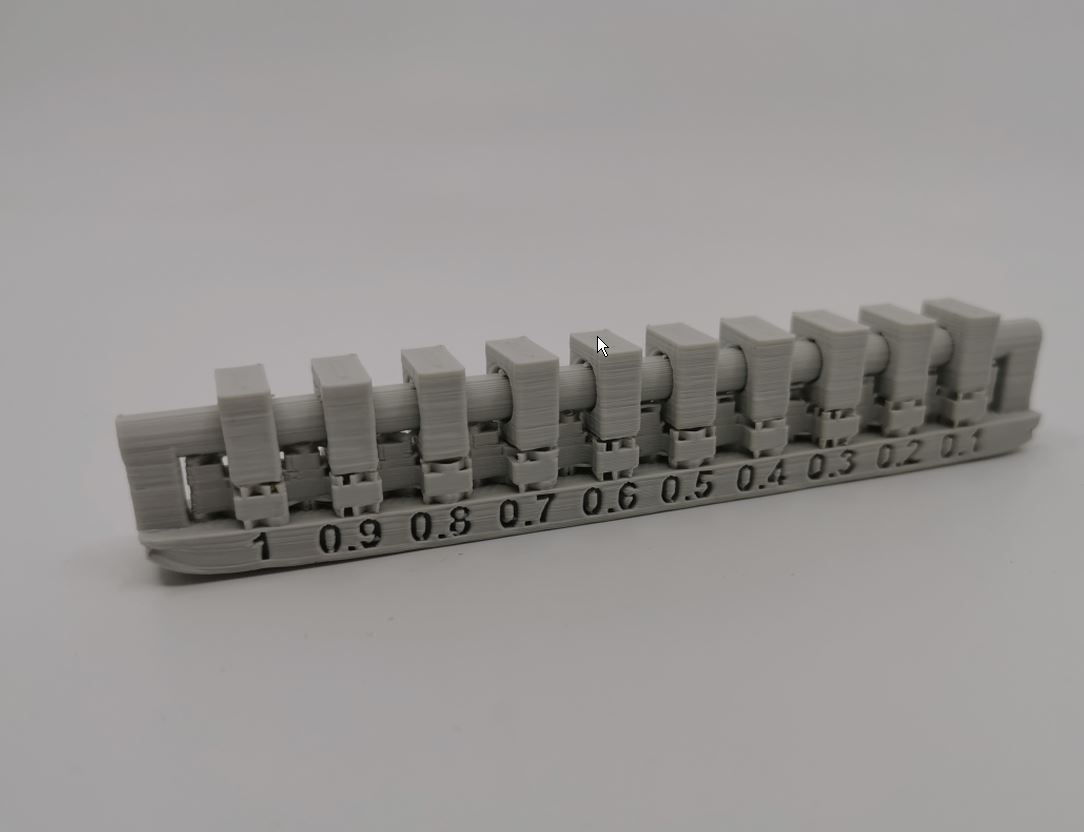
Prints with supports
Clearance test
Models can be found here: clearance test stl overhang test stl TODO
| 1 | 2 |
|---|---|
 |
 |
Design and 3D print an object that could not be easily made subtractively
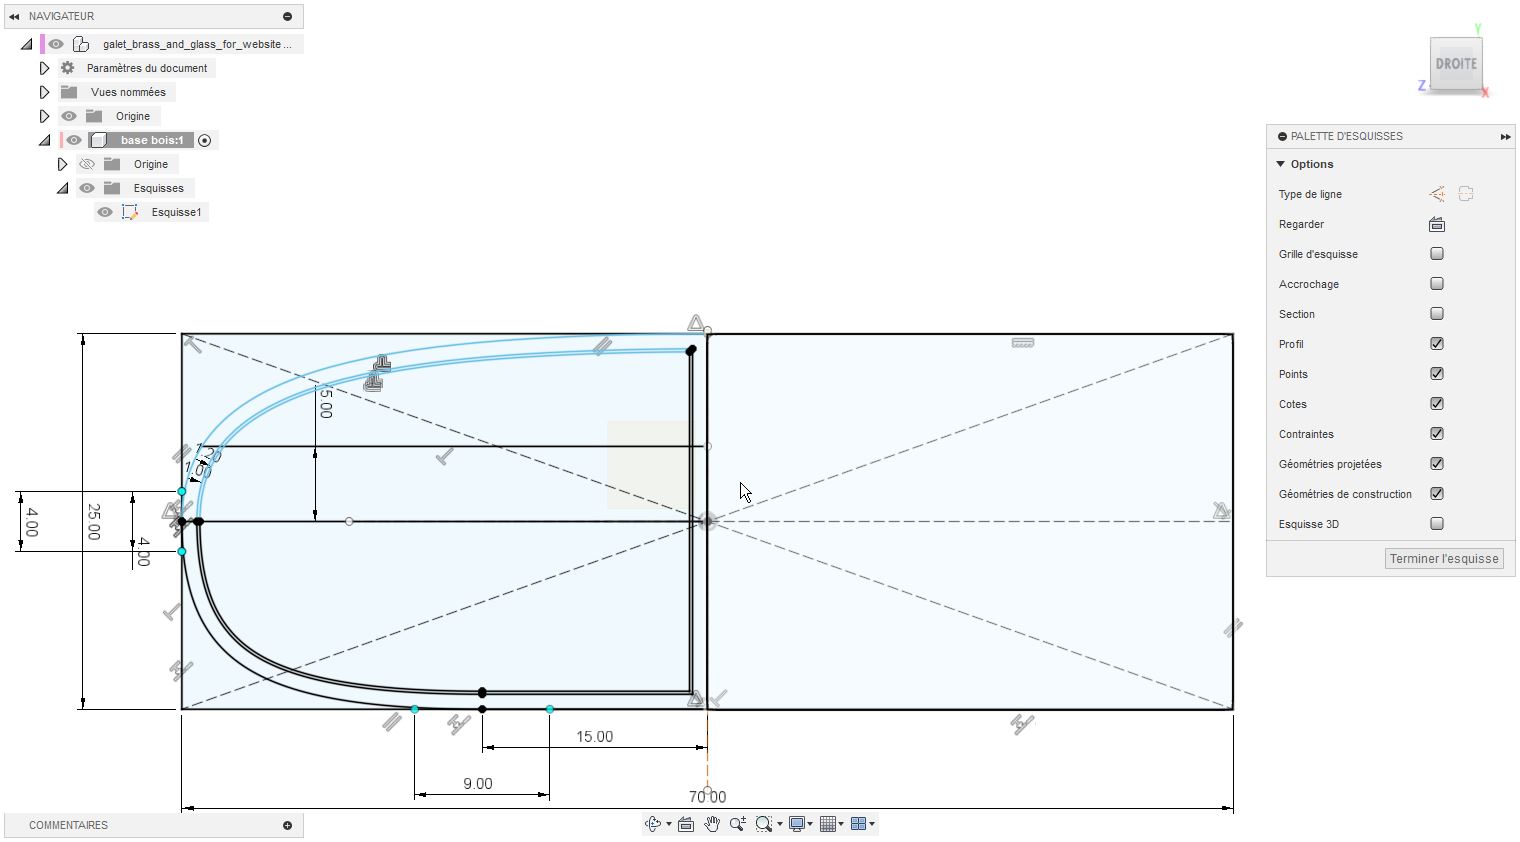
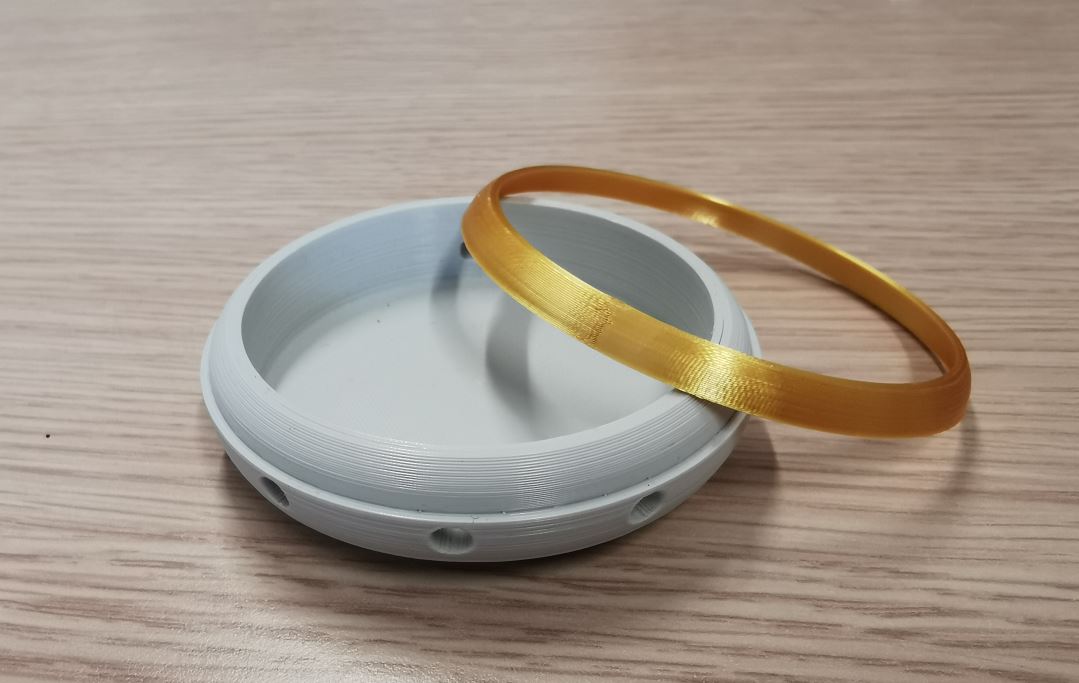
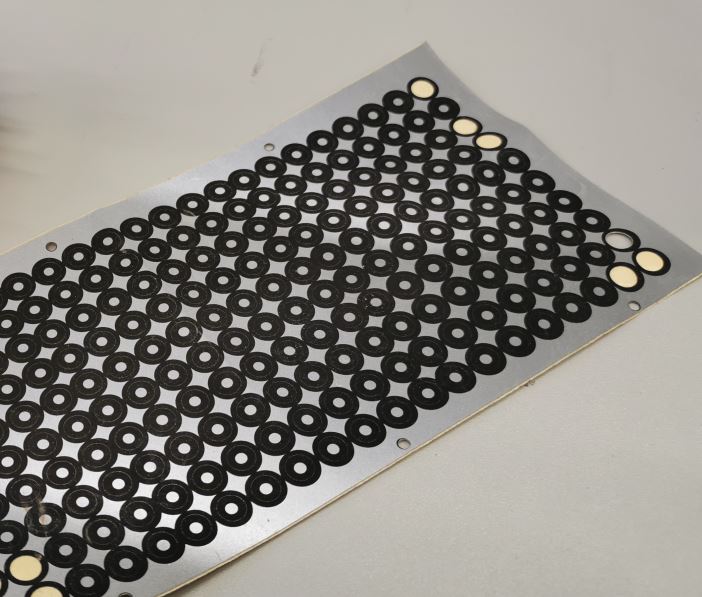
For this assignement, I made a 3D printed version of the base and the “ring” of my final project.
CAD in Fusion 360
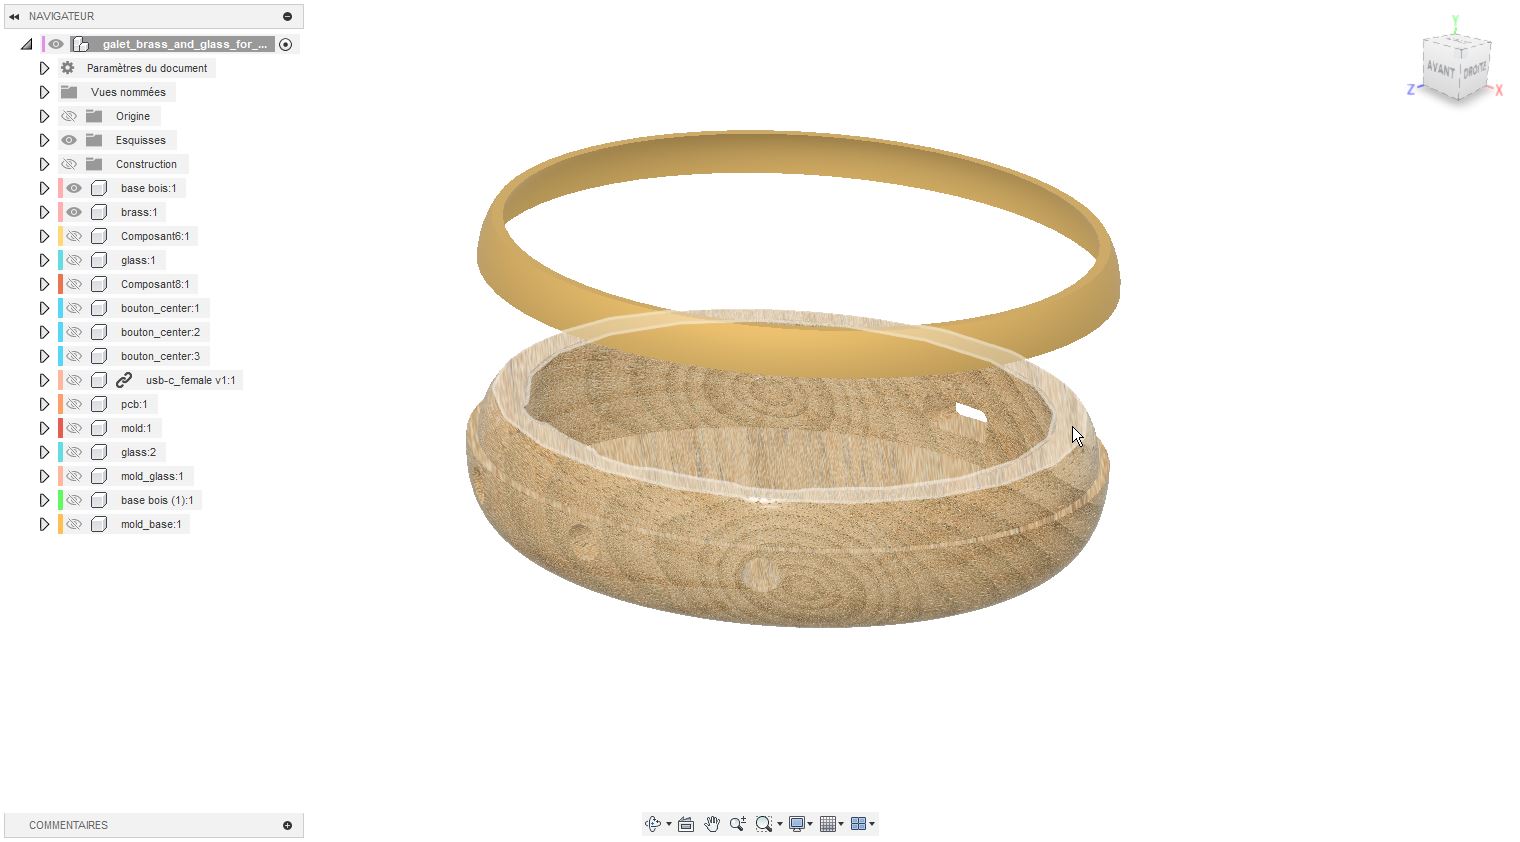
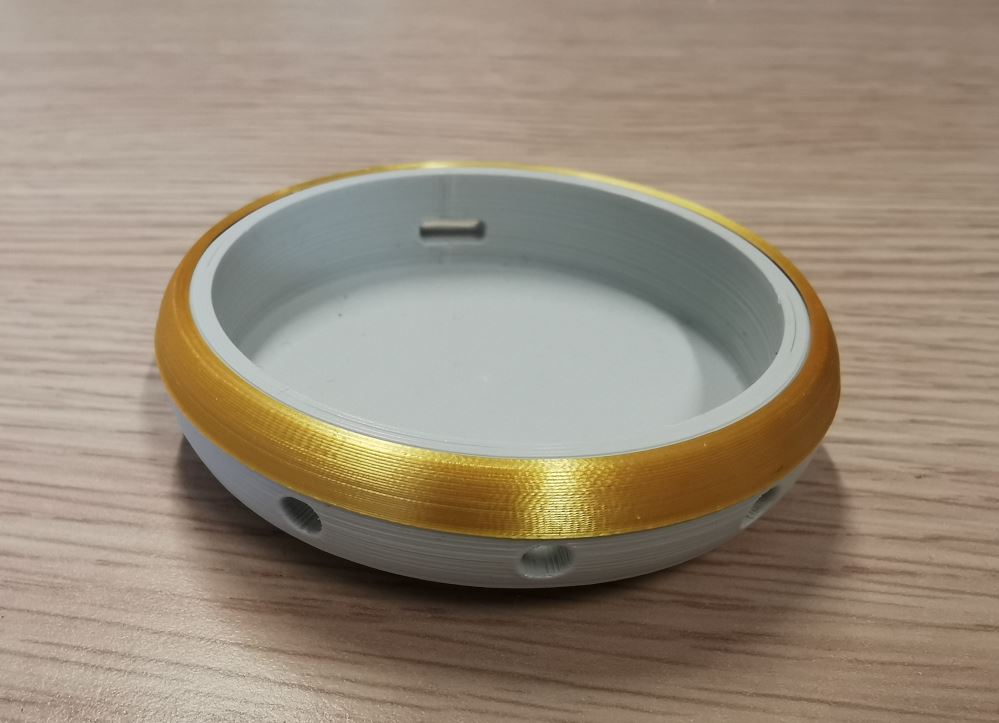
3D print
To print this model I use a light grey and gold PLA on a FLSun V400 FDM 3D printer. I choose a 0.2mm layer height with initial layer height at 0.15mm with no supports, extruder and bed temperature respectively at 220°C and 60°C.
| 1 | 2 |
|---|---|
 |
 |
3D scanning
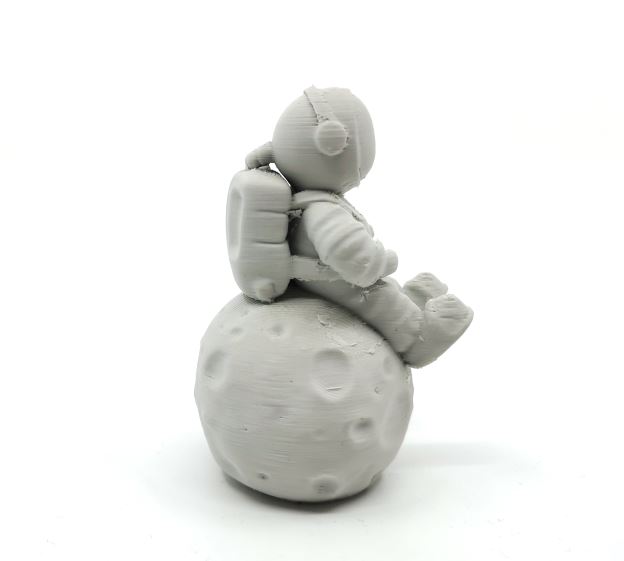
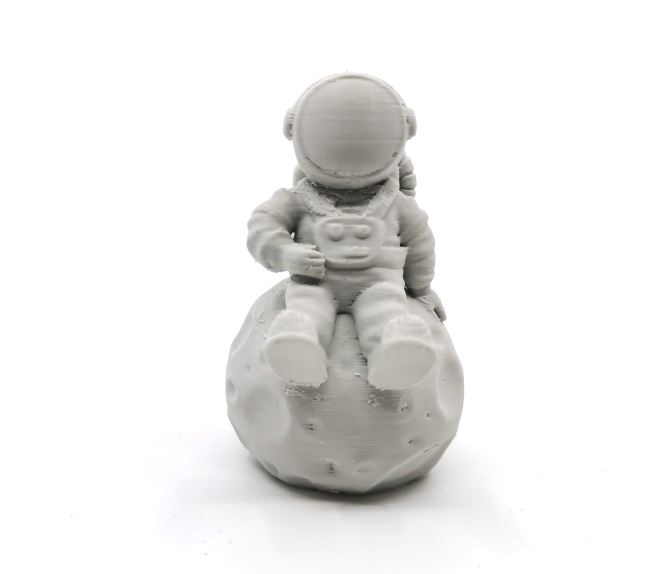
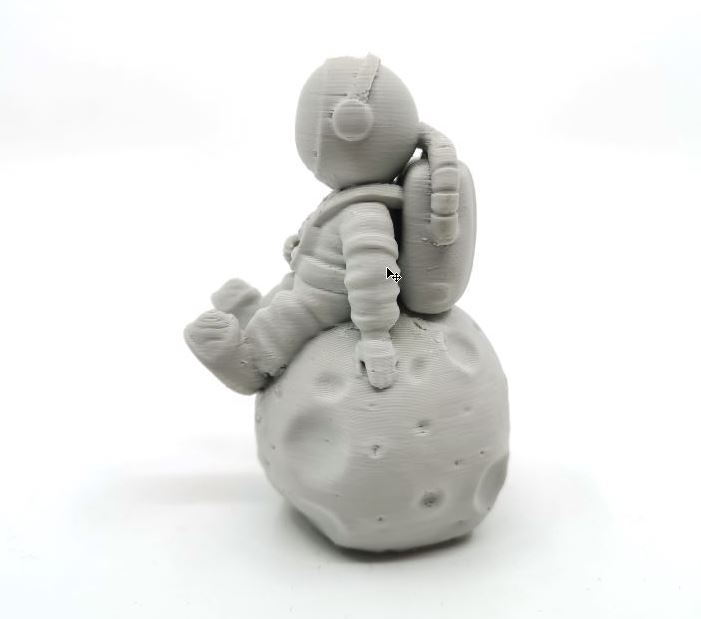
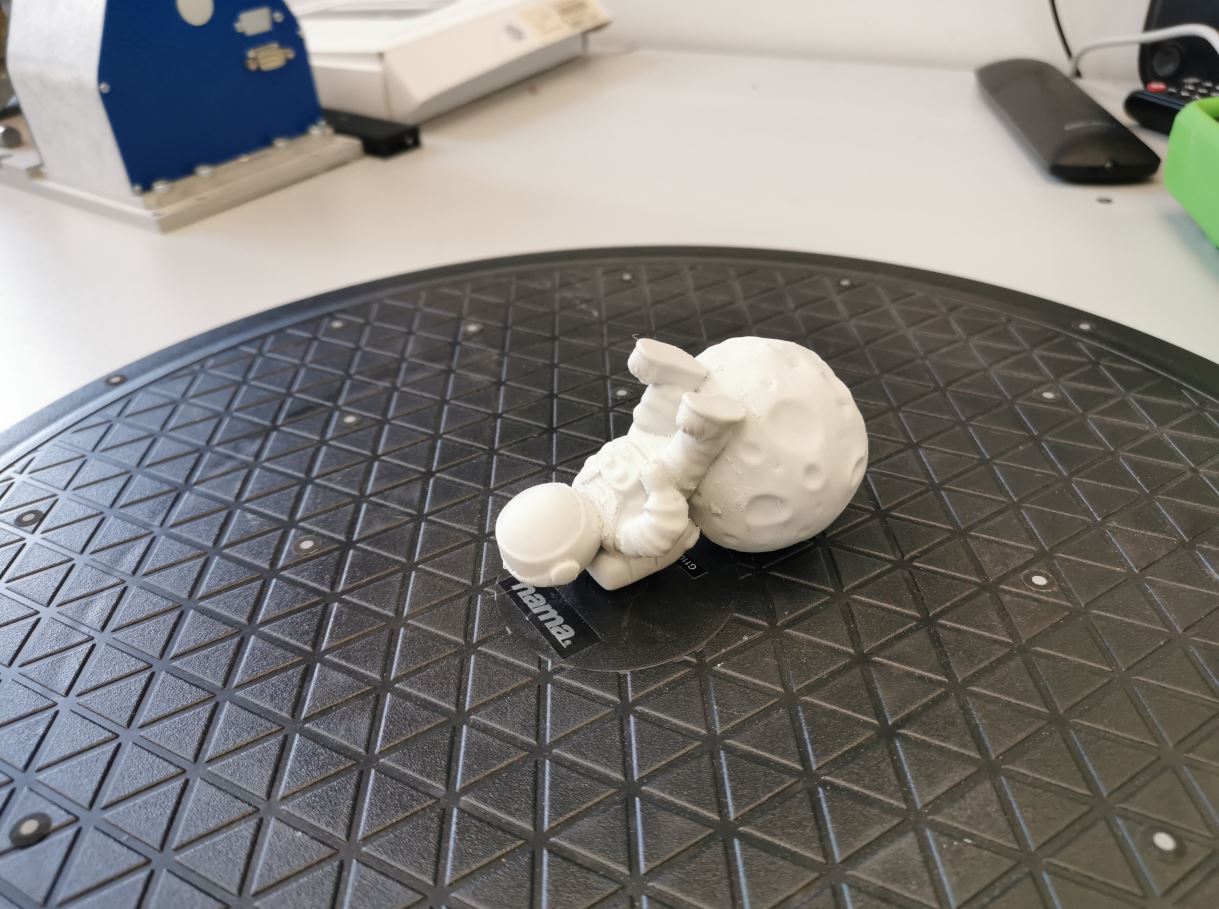
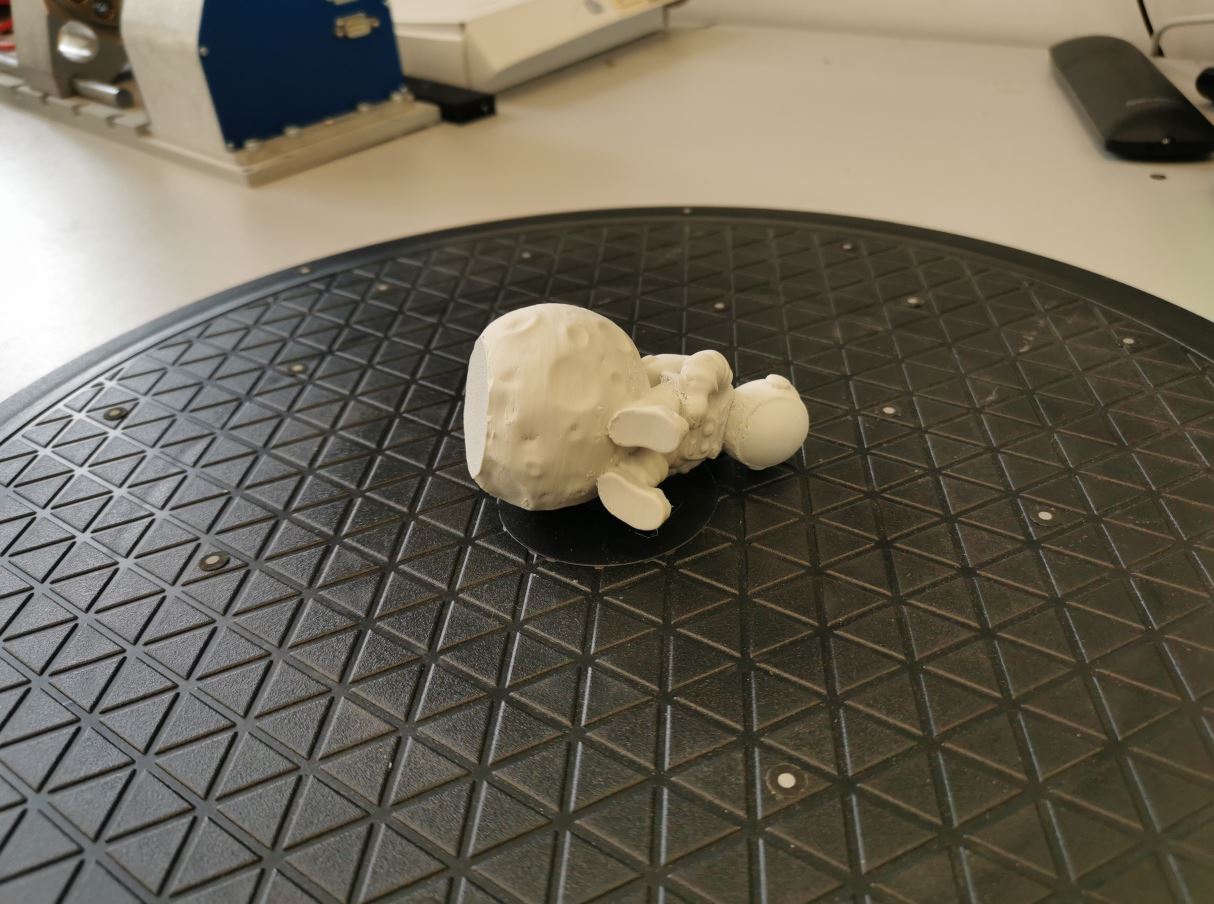
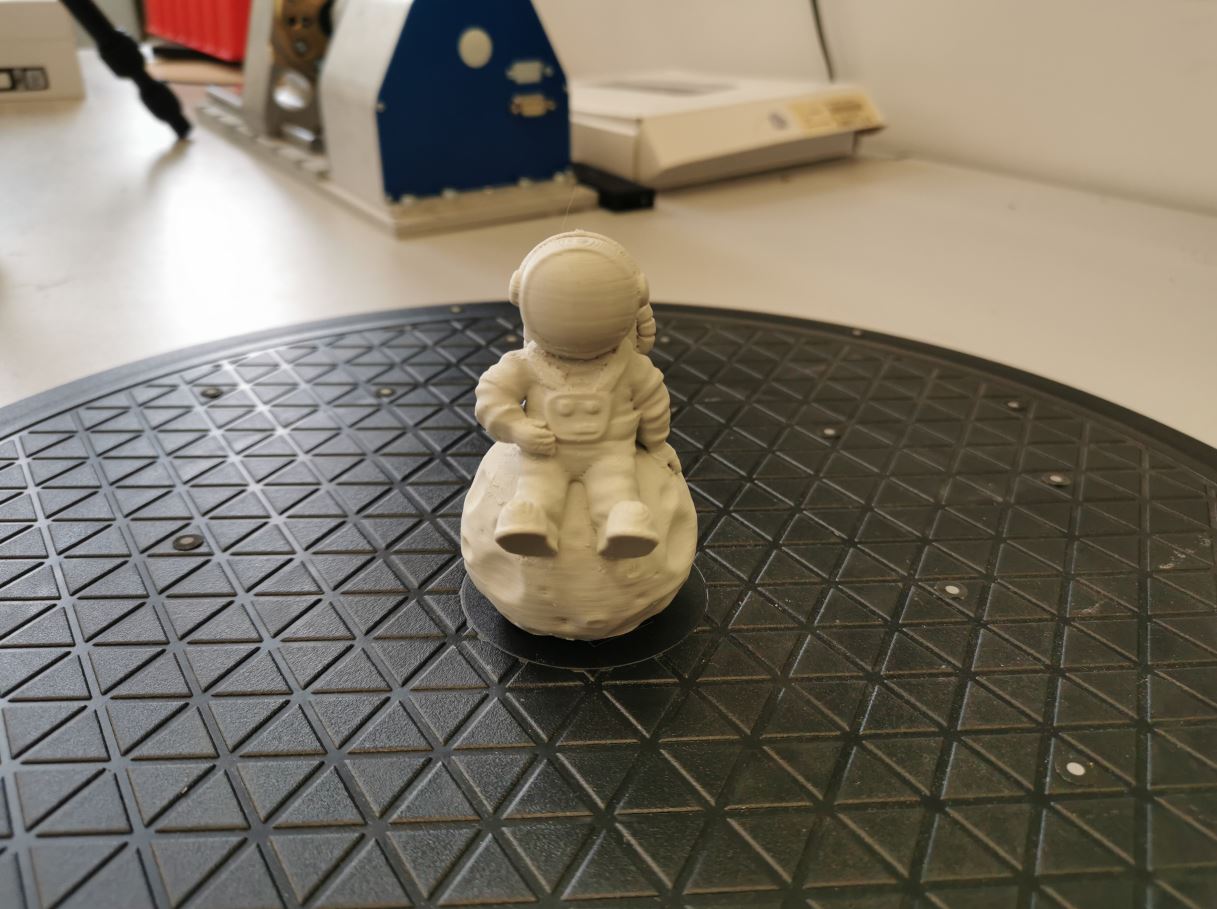
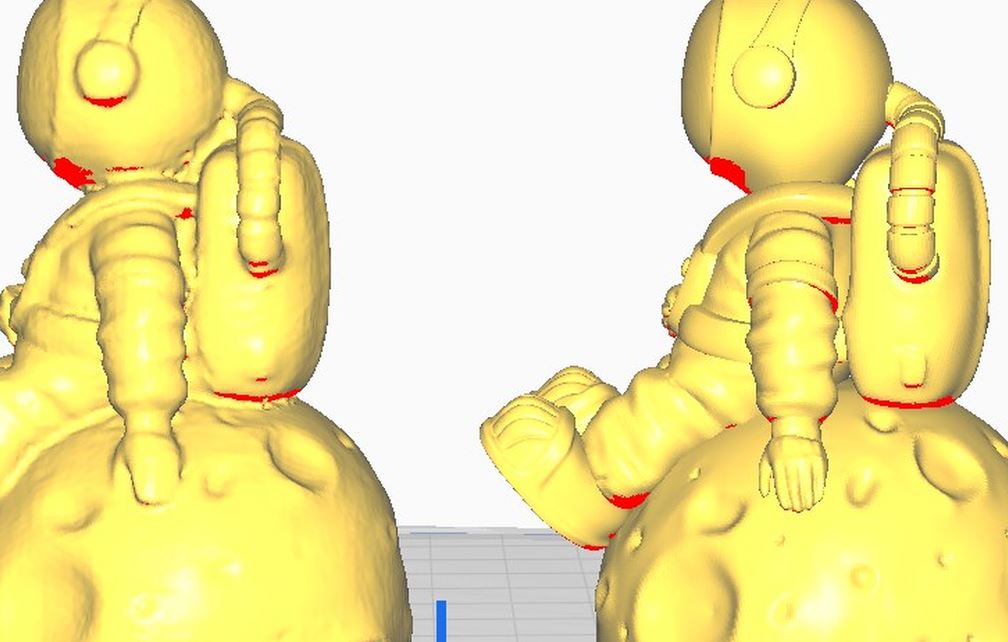
Astronaut 3D scanning
Of course, scanning a 3D print it is not a very usefull thing to do when you already have the stl file of the model, but at least we will be able to compare original and scanned stl files!
Some pictures of the 3D printed model (found on thingiverse)
| 1 | 2 | 3 |
|---|---|---|
 |
 |
 |
I scan in 3 steps to allow the scanner to reach each face of the model
| 1 | 2 | 3 |
|---|---|---|
 |
 |
 |
Aligning
Our 3 scans need to be aligned in order to combine them
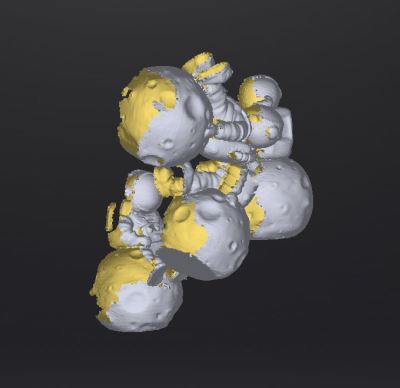
Inside Shining3D software, we put one of the scan on the left. It will act as reference. Then we put the other scan one after each other and align them with the reference.
On the bottom, we see the aligned points clouds.
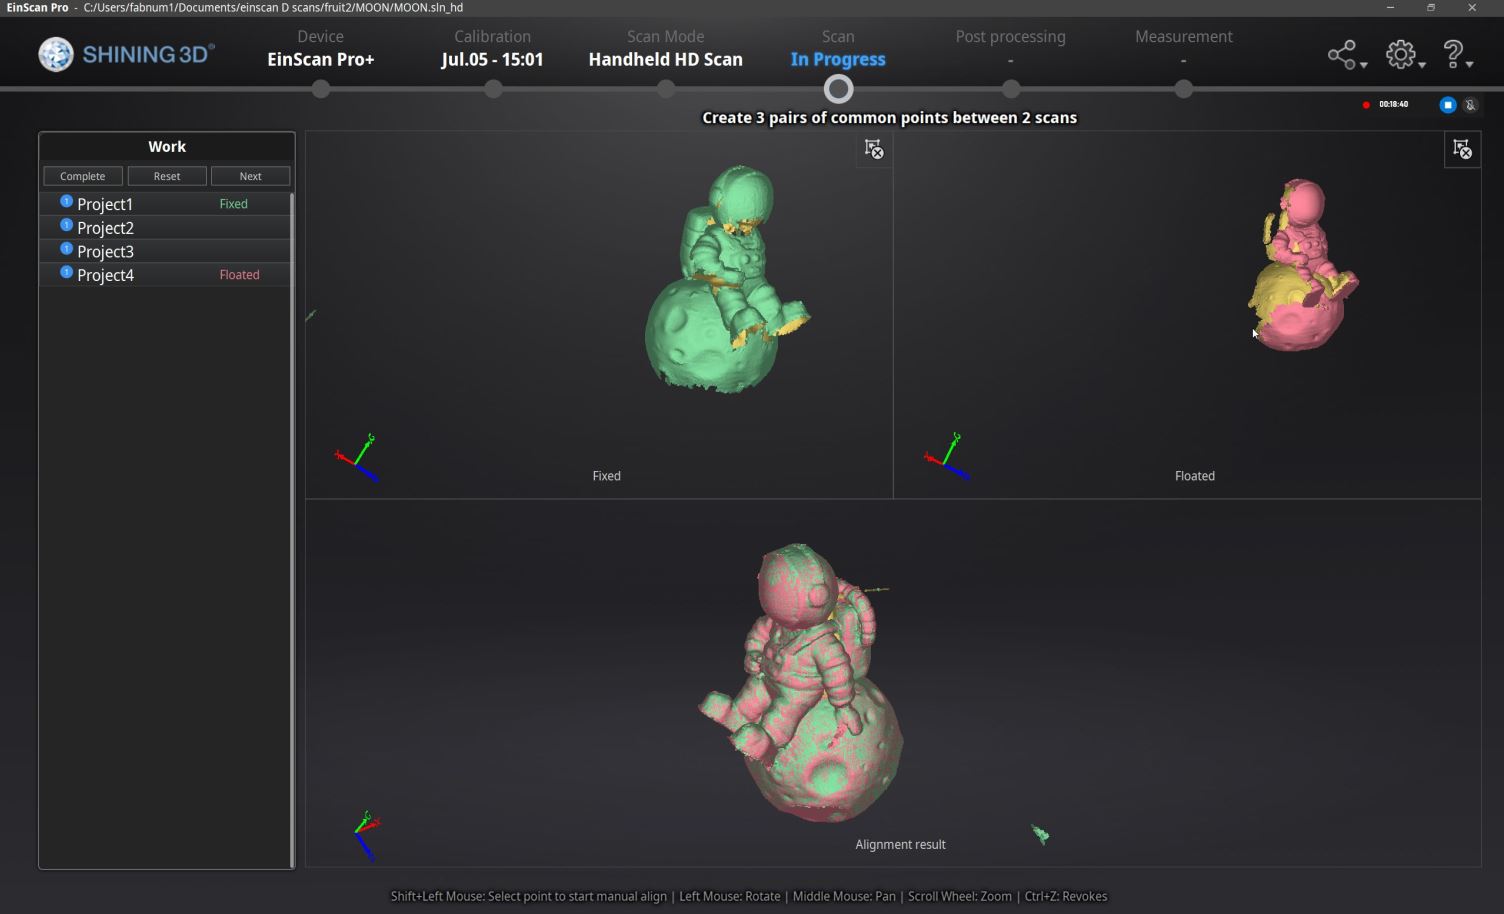
When alignment is done, we can create of mesh with the global points cloud. We choose to create a watertight mesh, it will automaticaly close holes on the model. Then we export is as an stl file.
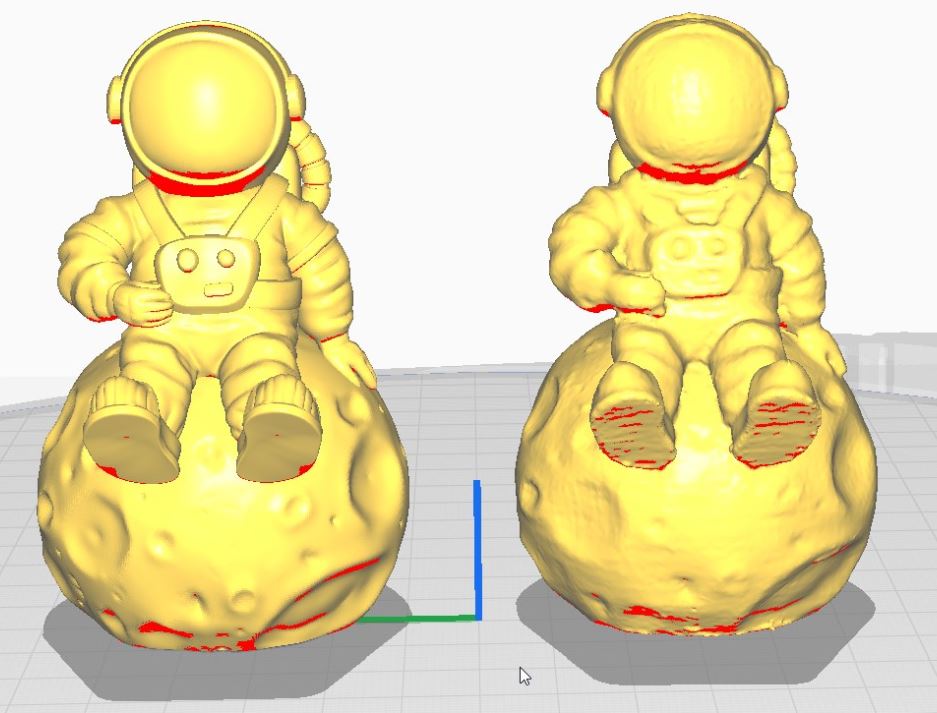
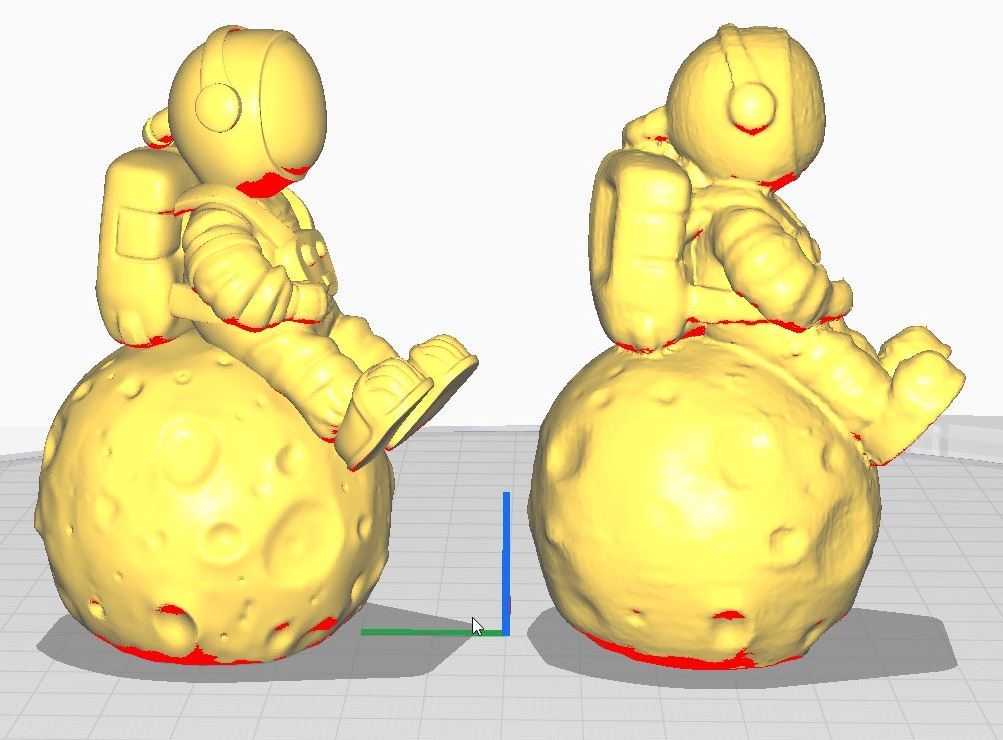
We import it into cura for visualisation, by the way, we can compare our scanned model with the original one (on the left for the front comparison).
| 1 | 2 | 3 |
|---|---|---|
 |
 |
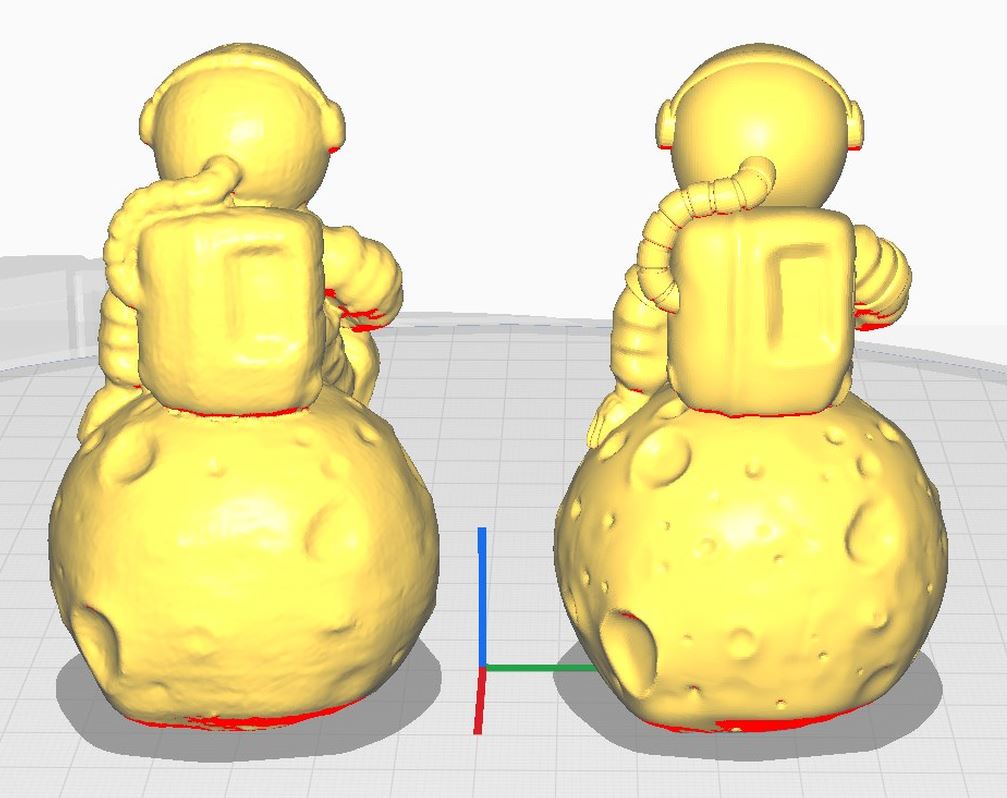 |
Closeup comparison
Video of the whole process bellow. Video is speedup from 21 to 2 minutes.
Note: using ffmpeg, the command for a 10x speedup is below, note that sound is speedup by 10 while framerate is divided by 10.
|
|
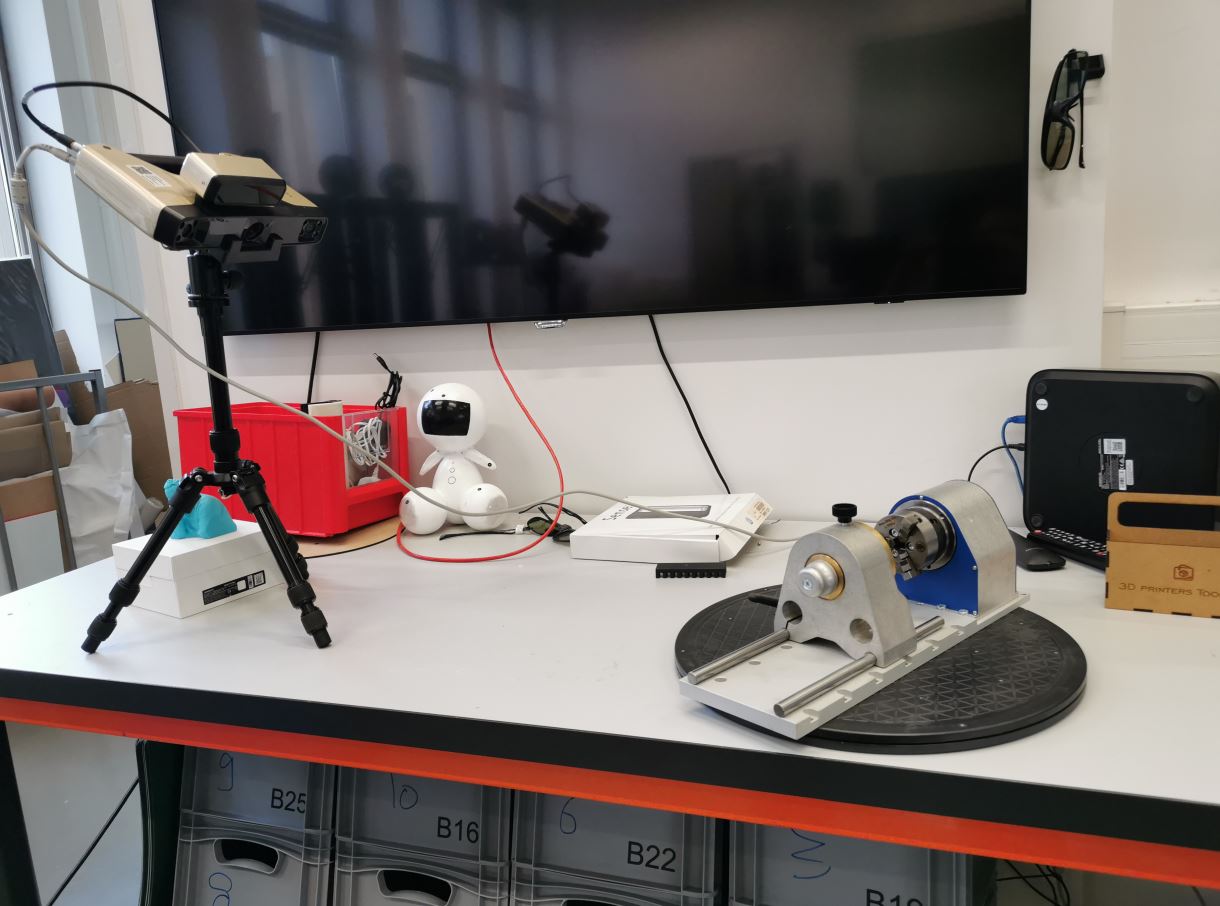
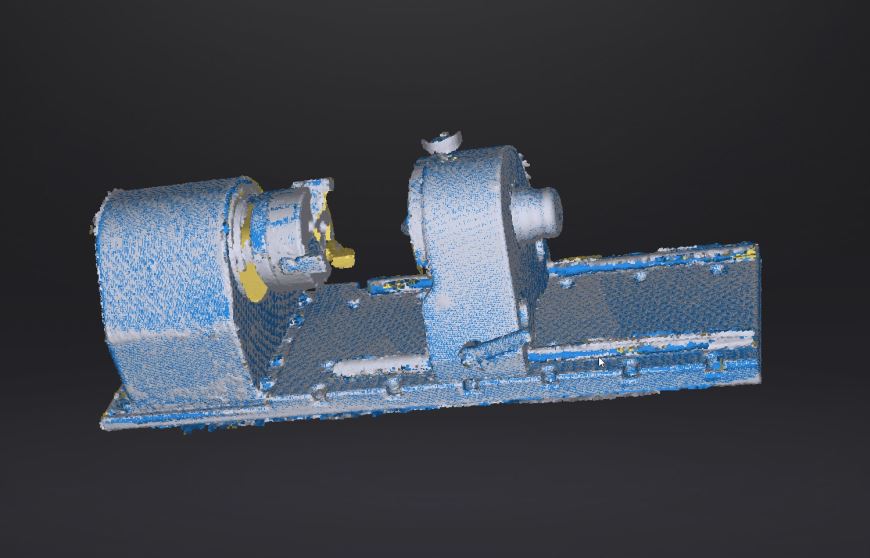
Scanning a CNC 4th axis
To increase difficulty, I choose to scan the 4th axis of our cnc mill. It is a big and heavy piece of aluminium that barely fit on our manual turntable. We apply small reflective dot sticker randomly on the surface of the turntable to create fixed reference during scan.
As the object is large, we also add those sticker on it to help keep tracking during scanning. We launch the scan several time with the model in different position to acquire all faces of it.
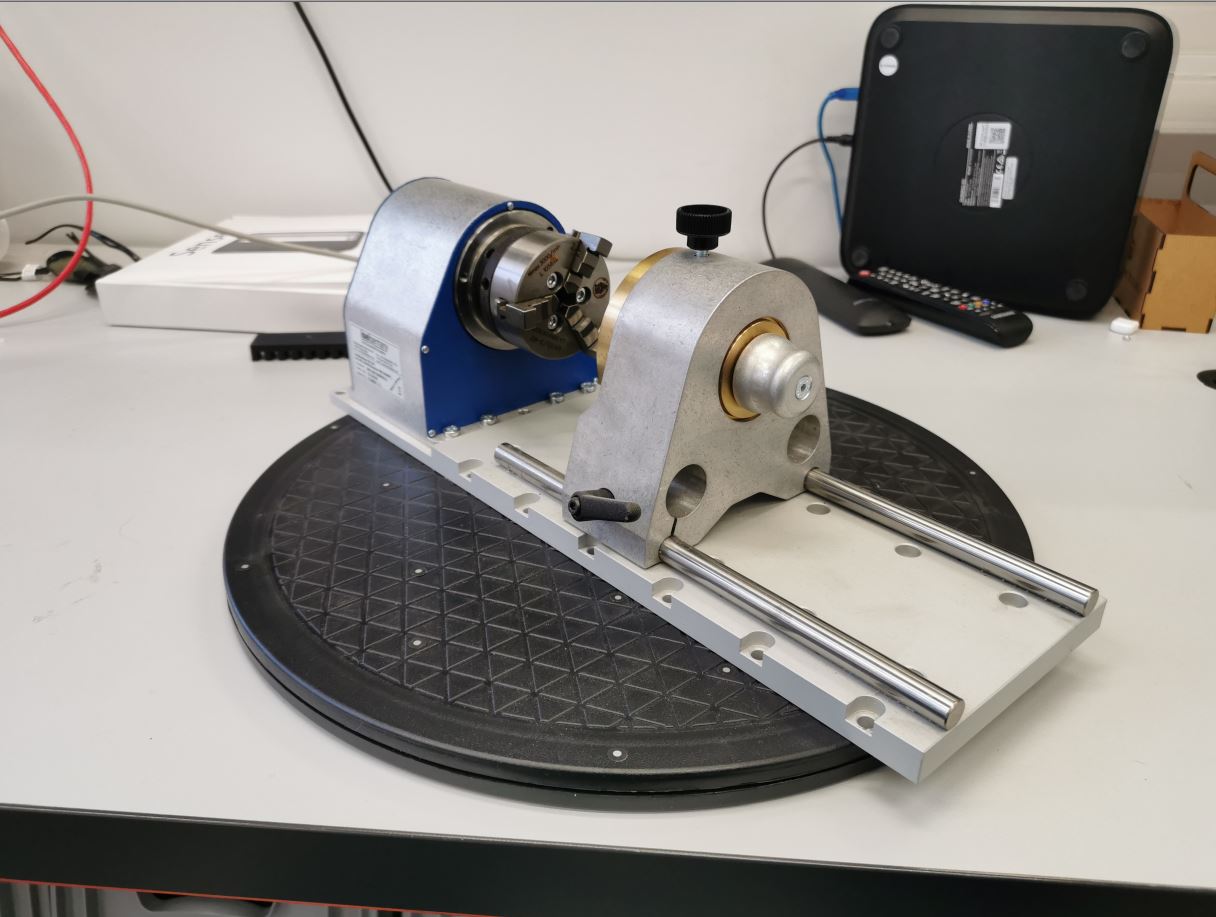
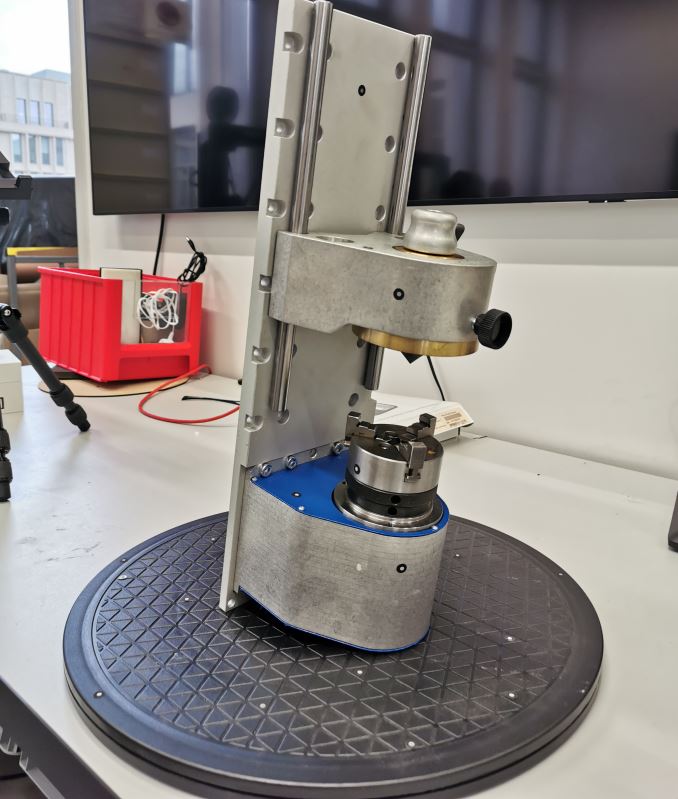
Below, we can see the scanning setup. I put the scanner on the tripod when possible, and move it oaround the object by hand when it is not.
In the video below we see a part of the scanning process, I slowly turn the turn-table will scanner is acquiring
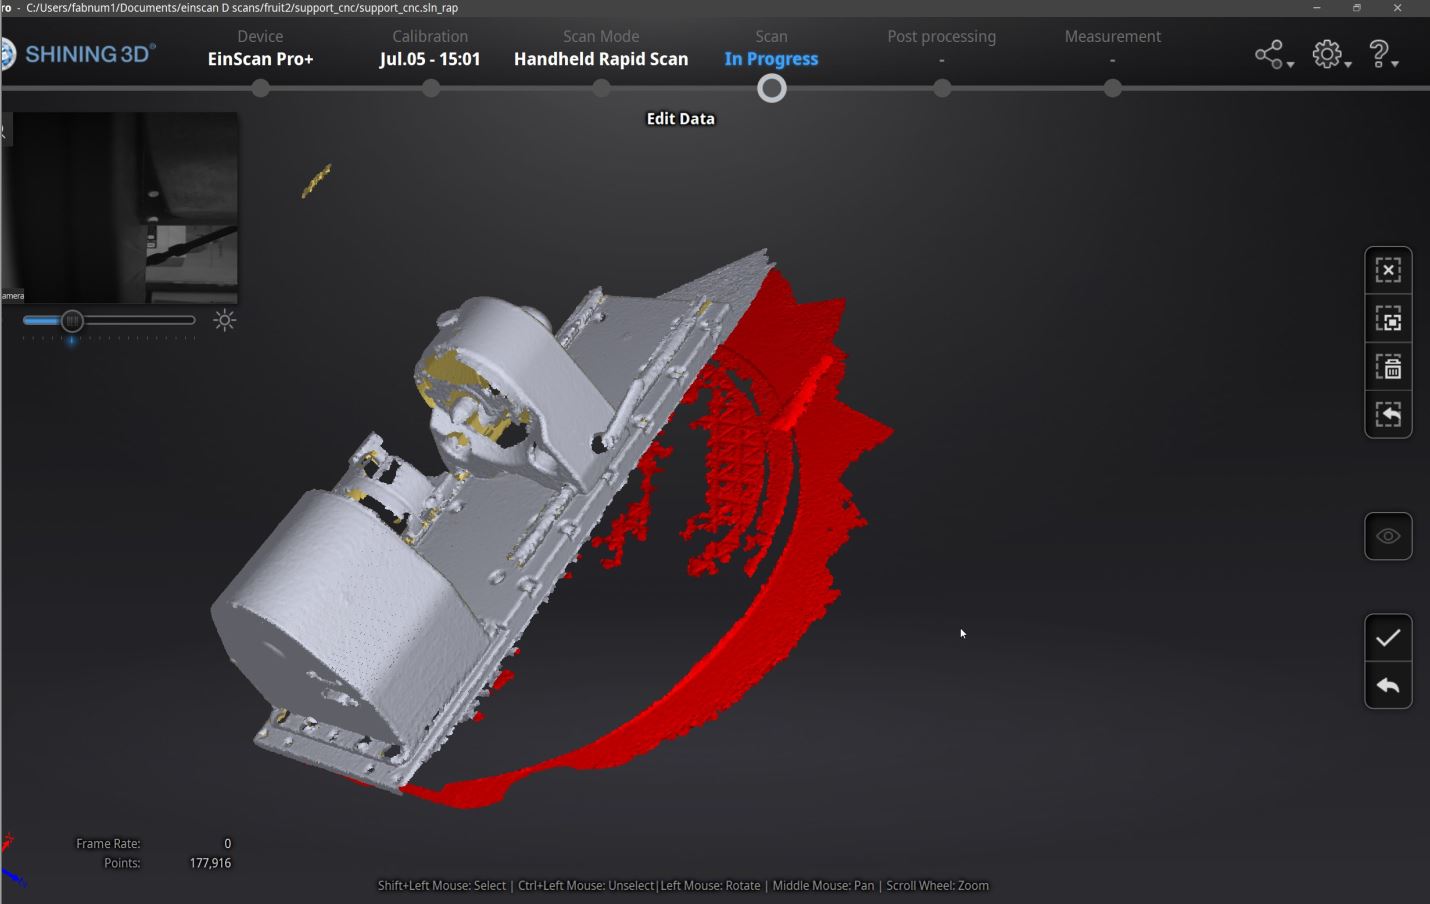
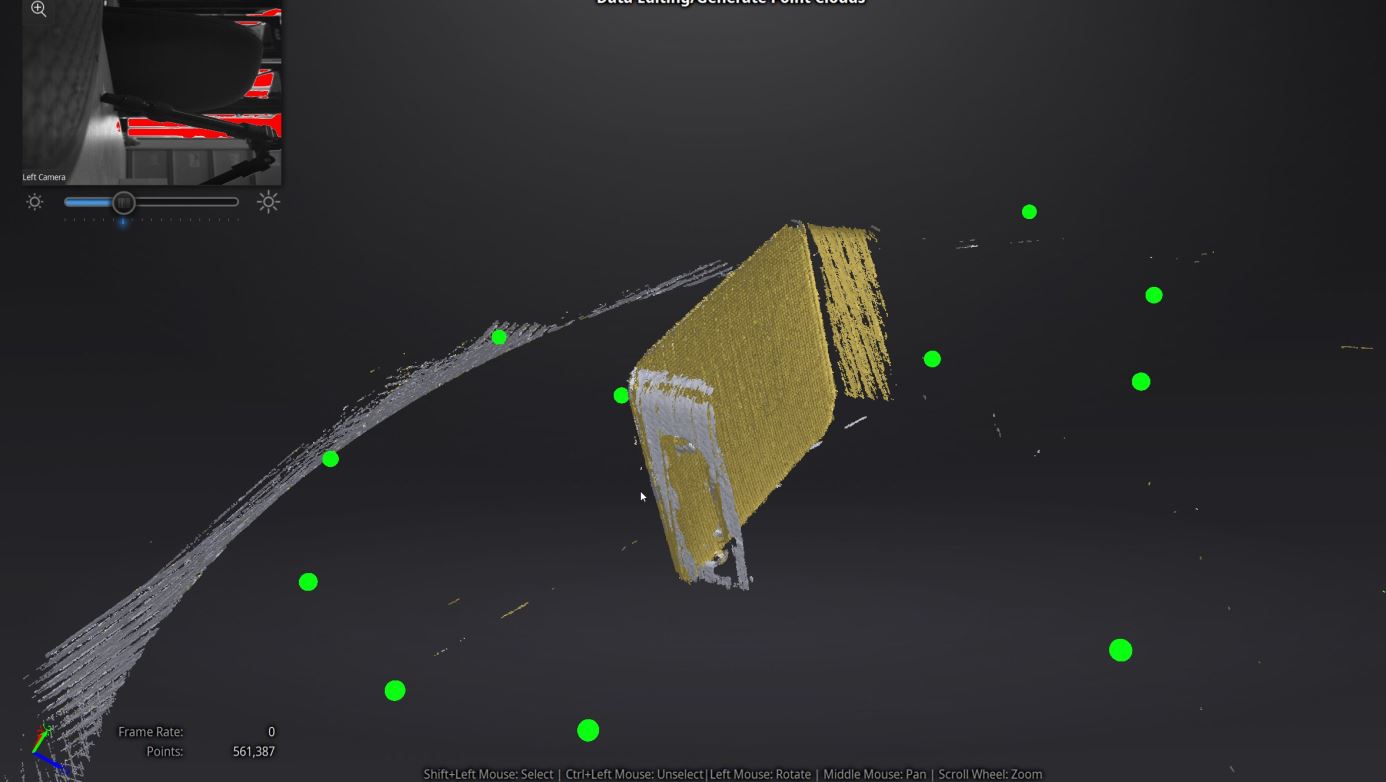
Below, we can see the cloud of points acquired during one scan session.
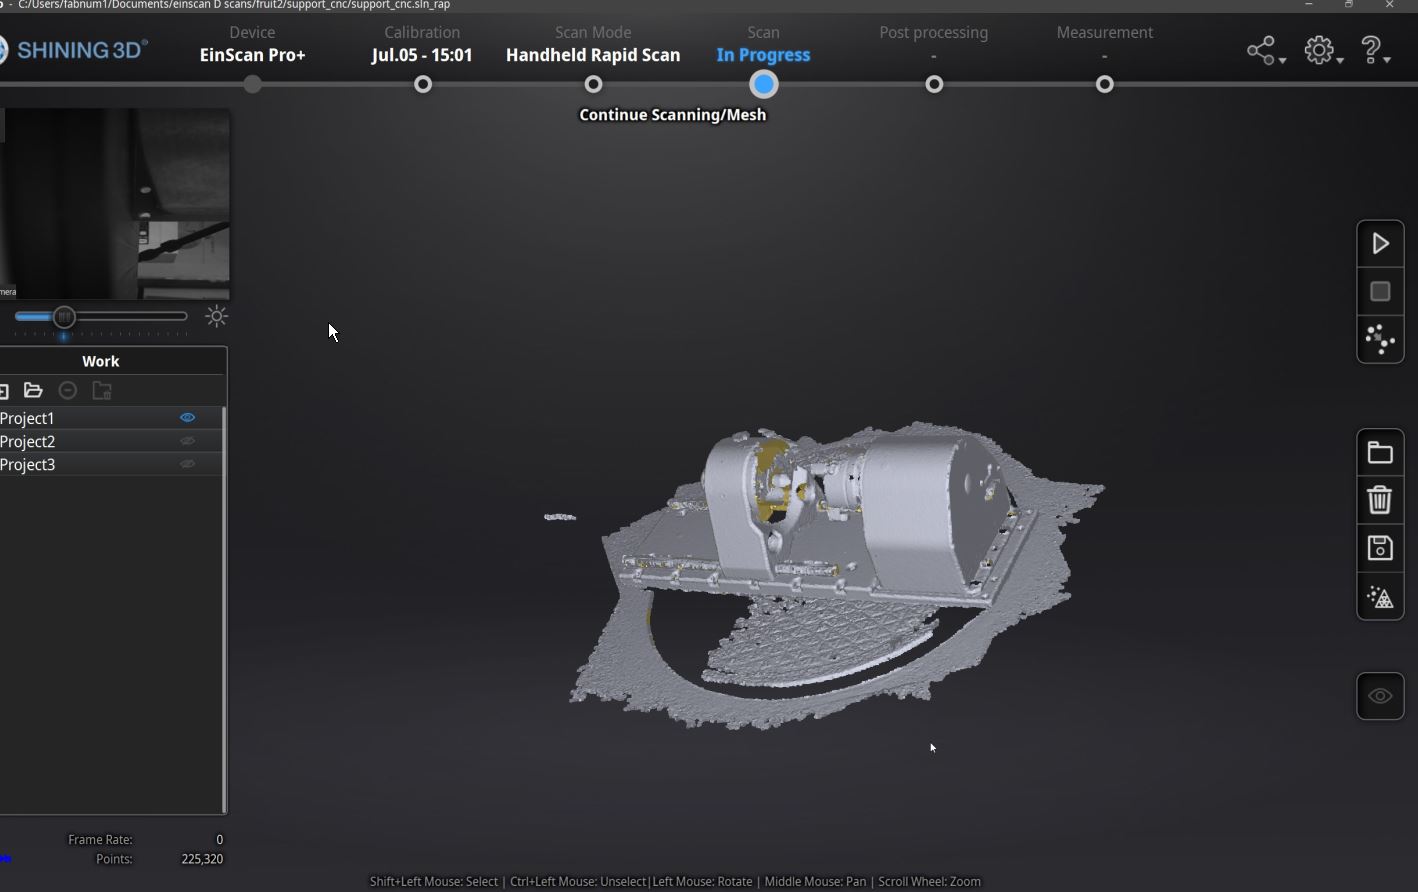
Now we select (Shift+left click) parts to remove with the mouse.
| Scan 1 | Scan 2 | Scan 3 |
|---|---|---|
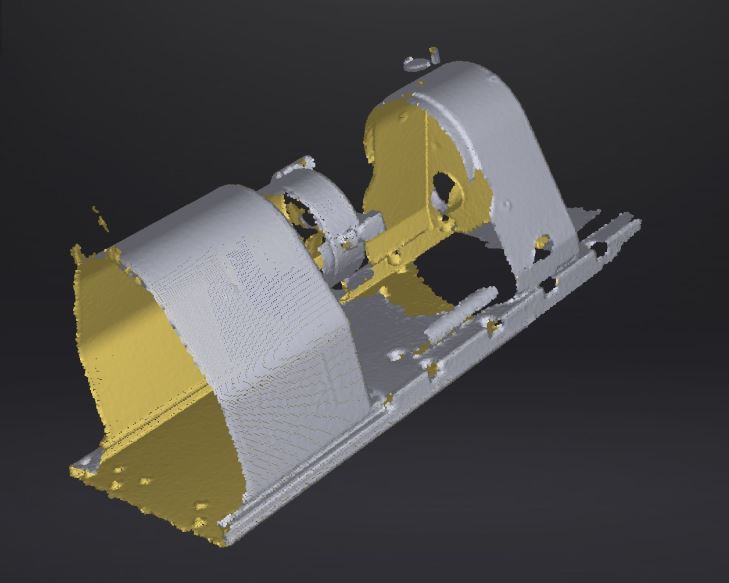 |
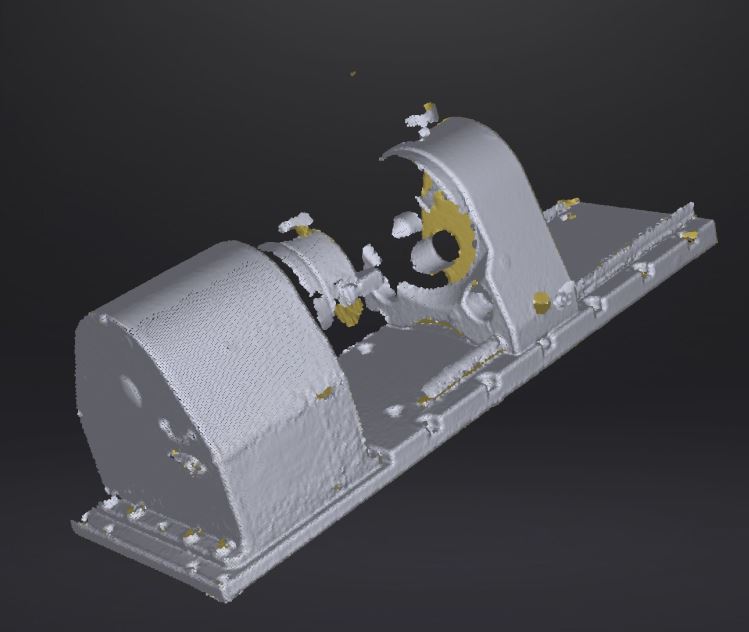 |
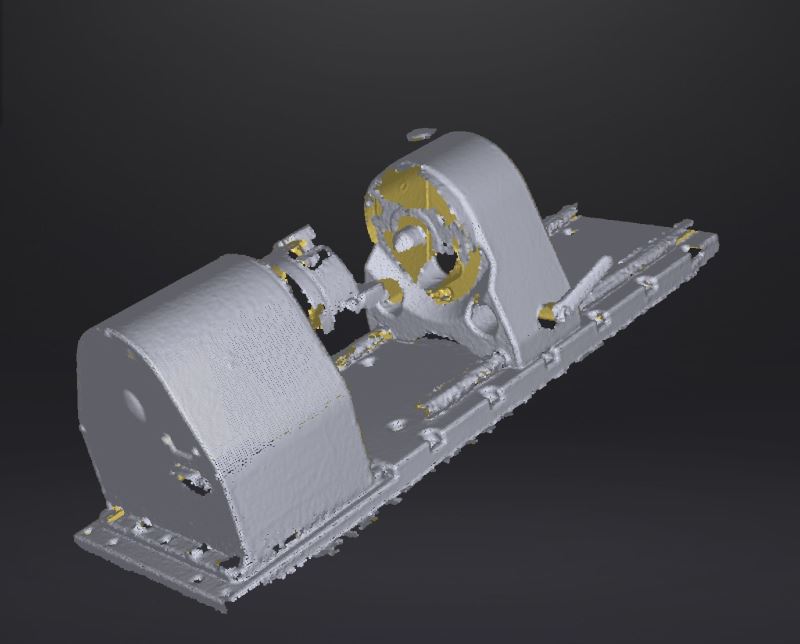 |
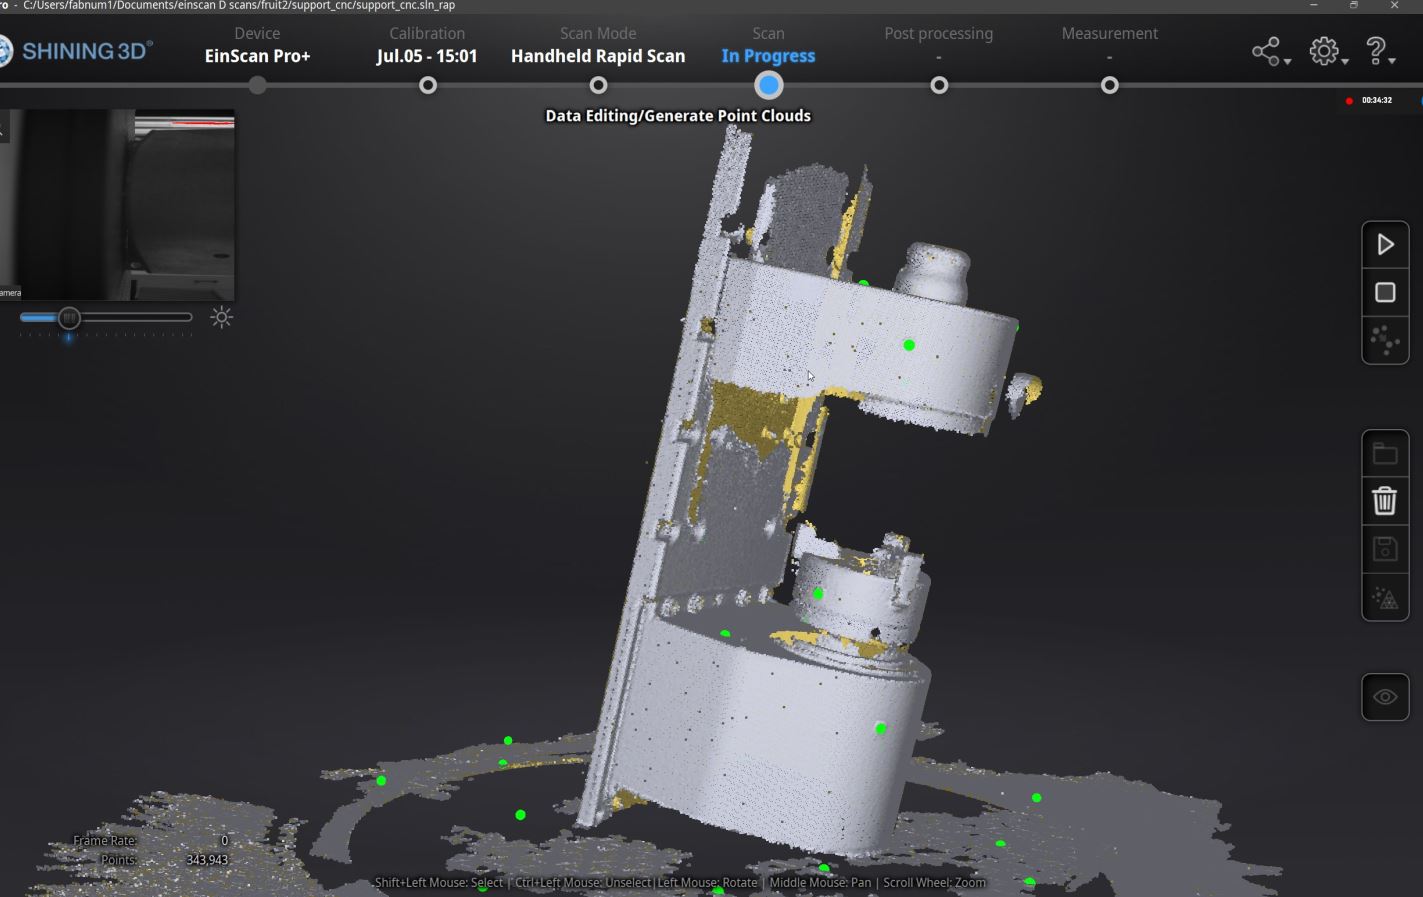
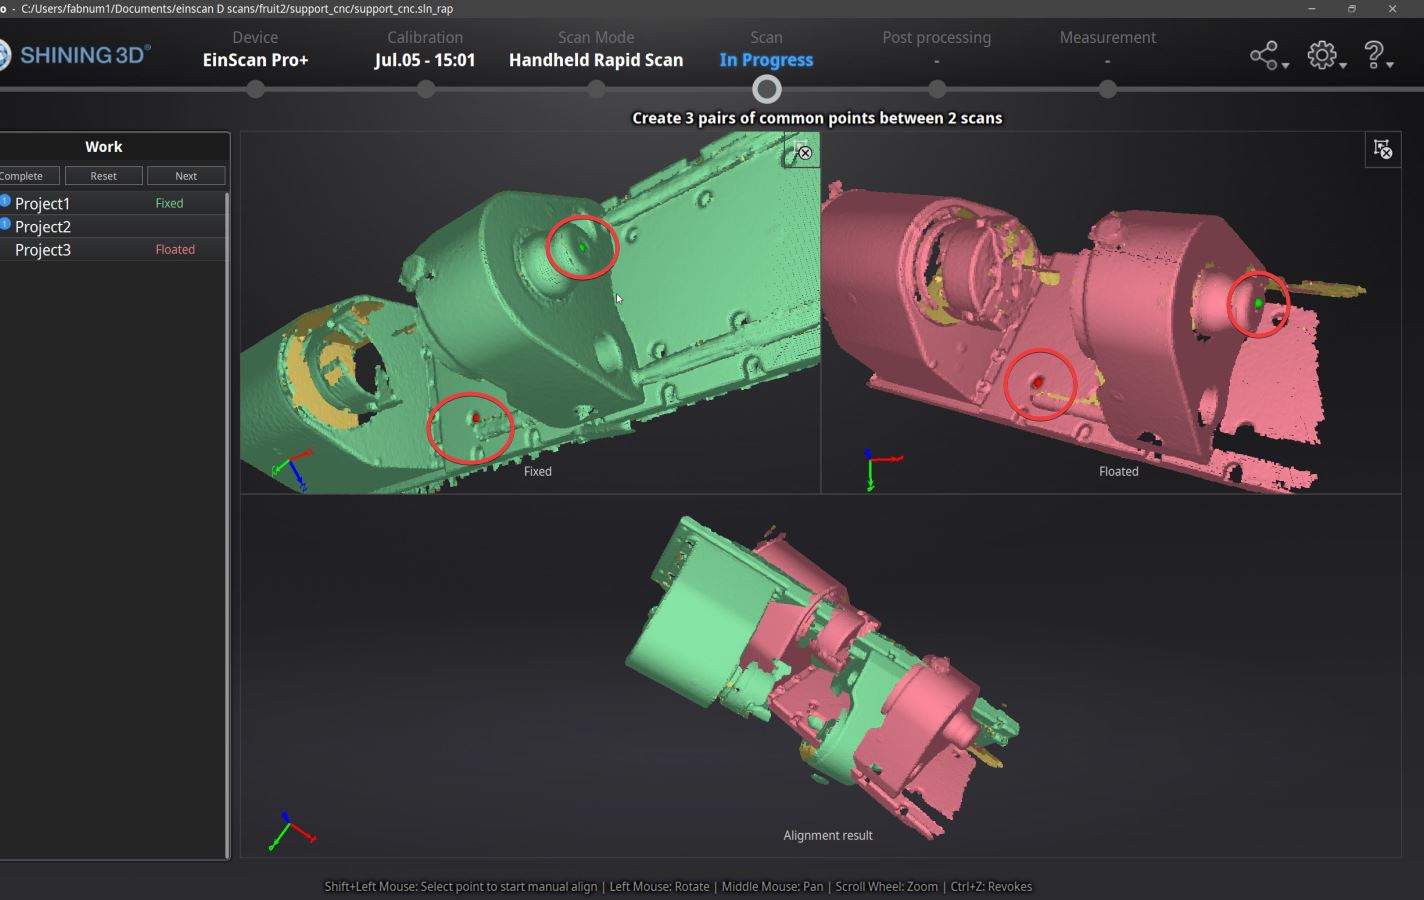
Now we need to align them. We select a pair of scan, then Shift-click on a point that can be found on both scan. Repeat this on left and right scan for 3 differents points for all scans.
Points clouds after alignement.
Result after “meshing” the points clouds.
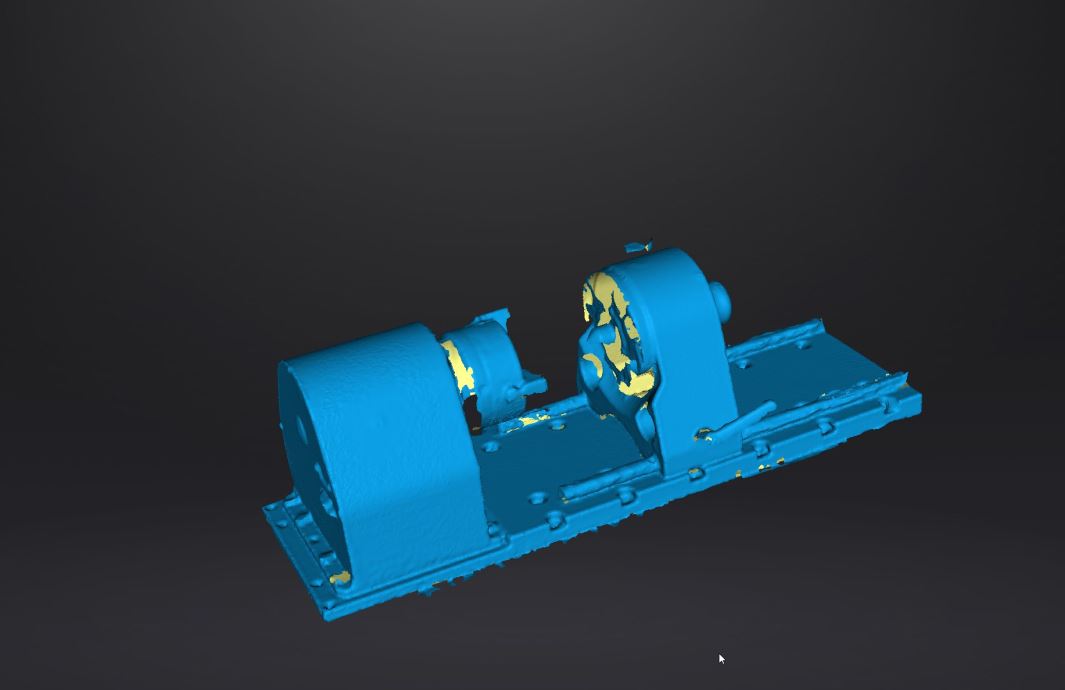
We can see that the result miss some parts, especially shiny part. But this scan is a good starting point if we want to recreate a 3D model in fusion 360 for example.
Speaker 3D scanning
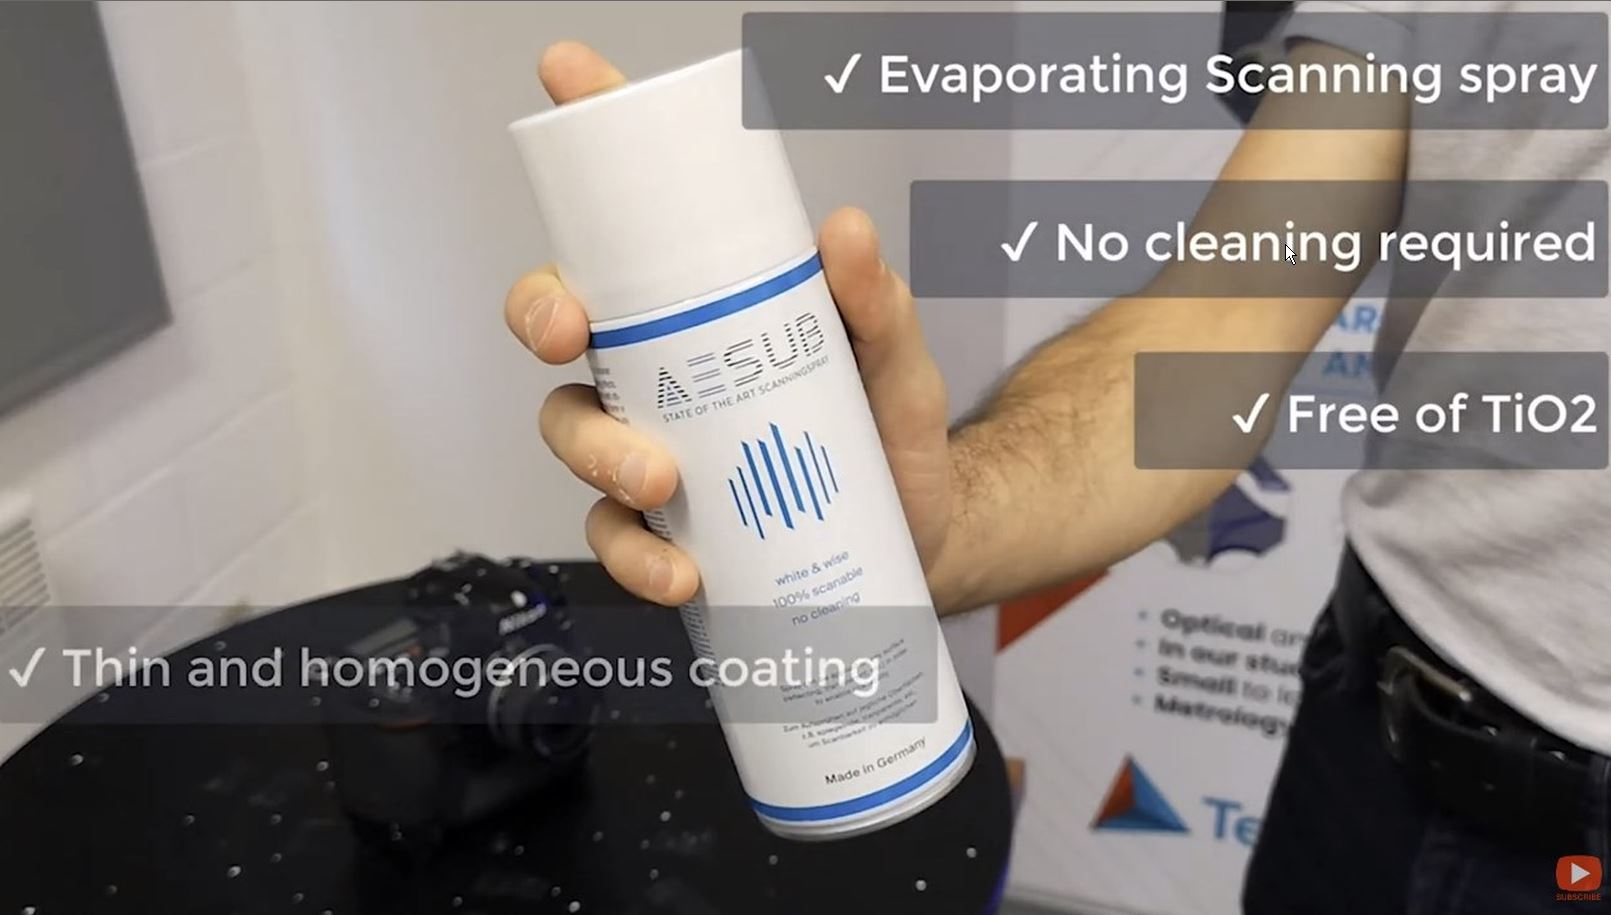
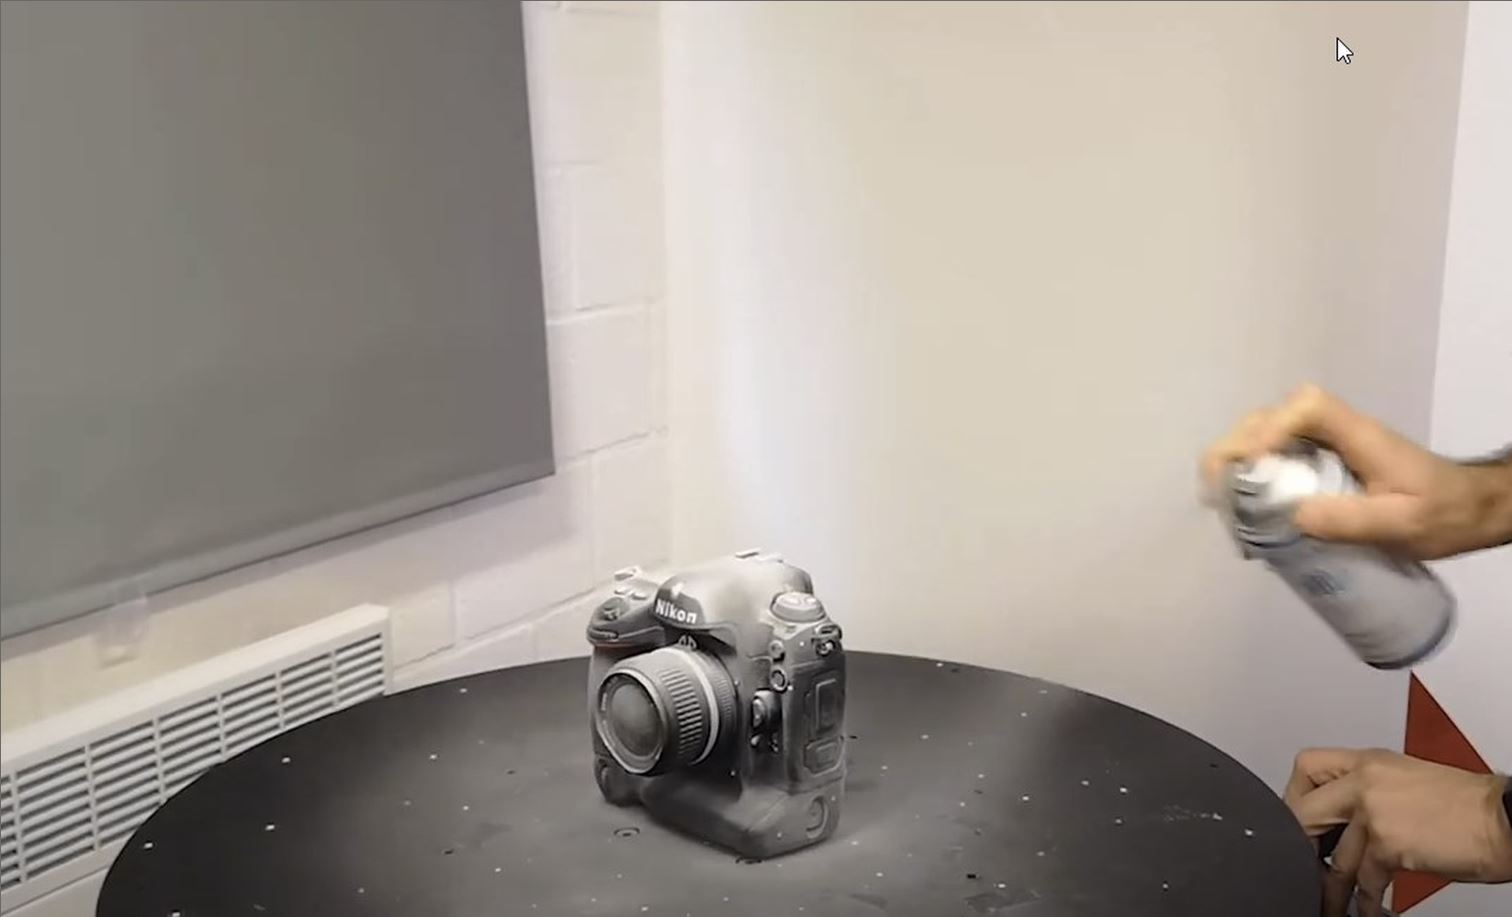
As our 3D scanner use structured projected light to acquire cloud point, it is sensitive to the color, reflectivity and transparency of the model. I realise it on this model where some parts was impossible to acquire.

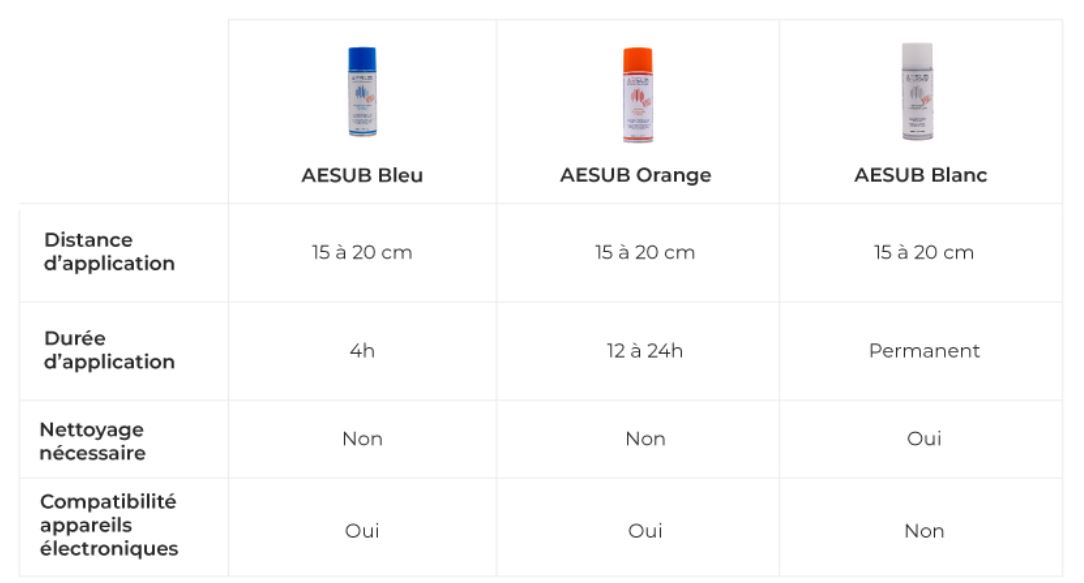
We need to prepare this kind of model for prper scan. We can use this kind of “magic paint”. After pulverisation, It make the object white and mat, it can cover black, shinny or transparent object. After 4 to 24h hour depending of the choosen spray, the covering will desapear, leaving the object as before.
I just discovered that this kind of product exists, I will not have time to order it, so for know we will stay with white model to scan!
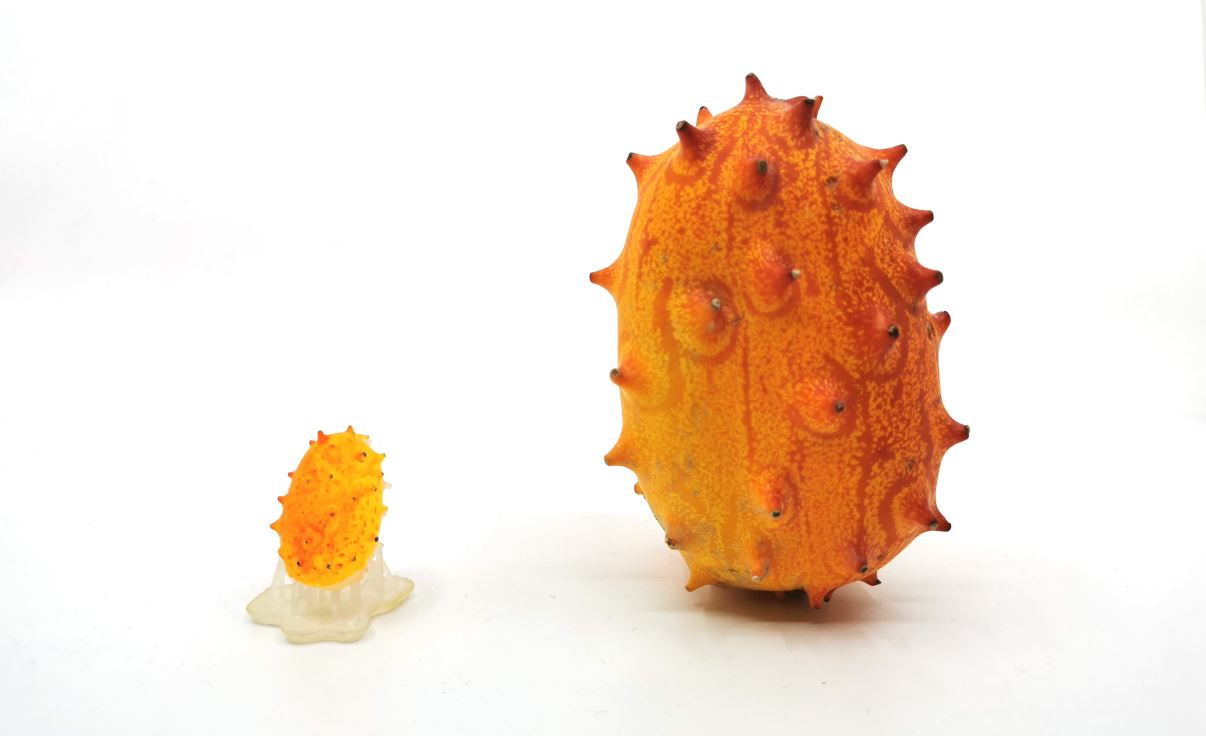
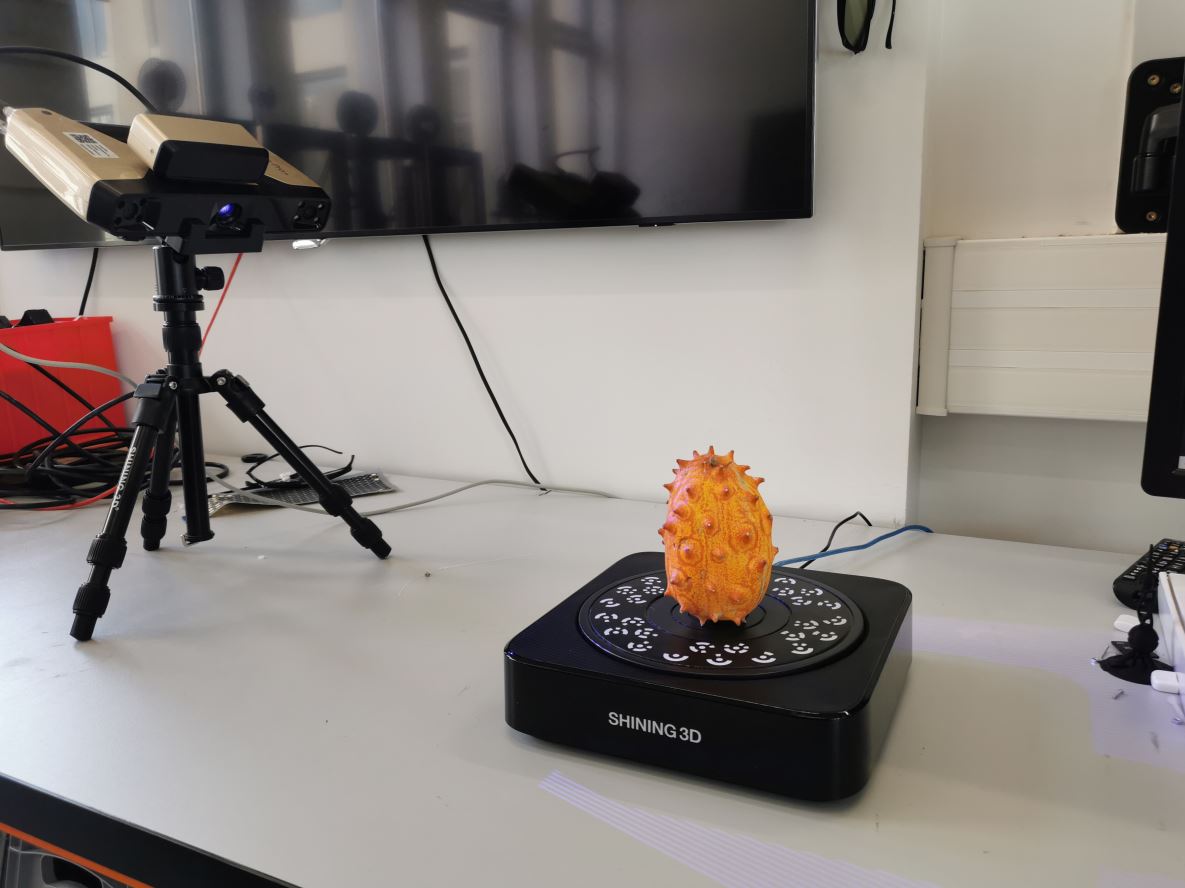
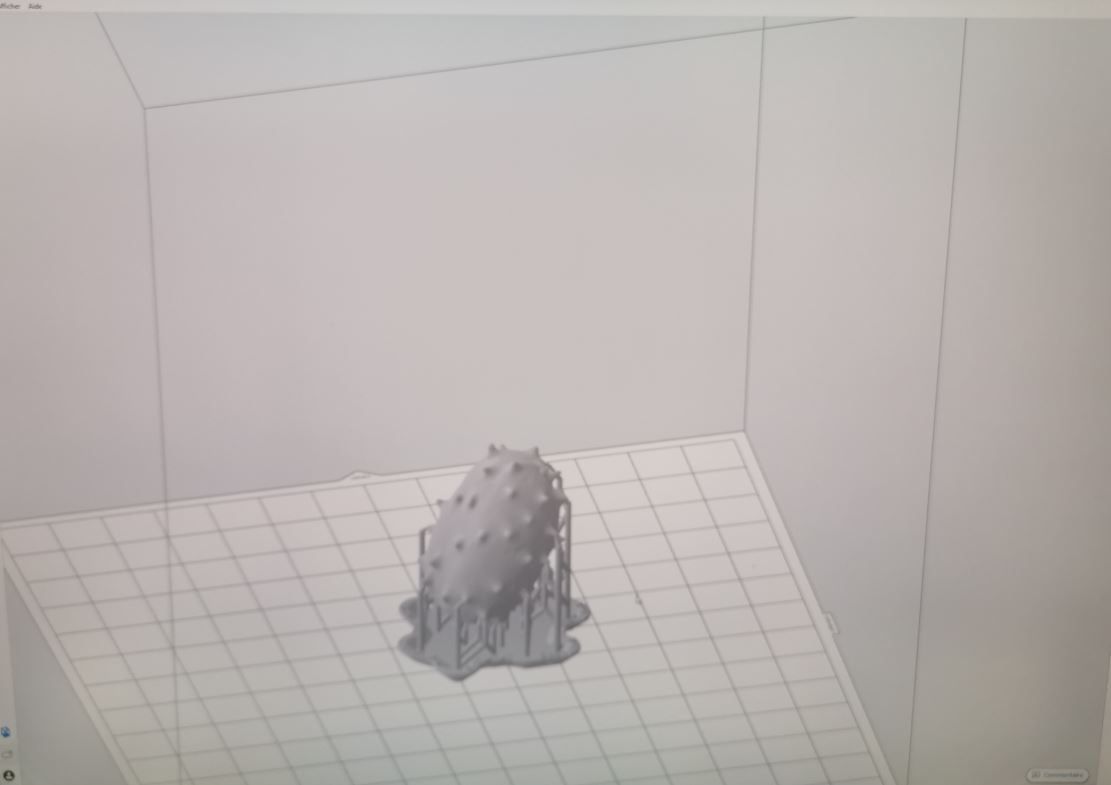
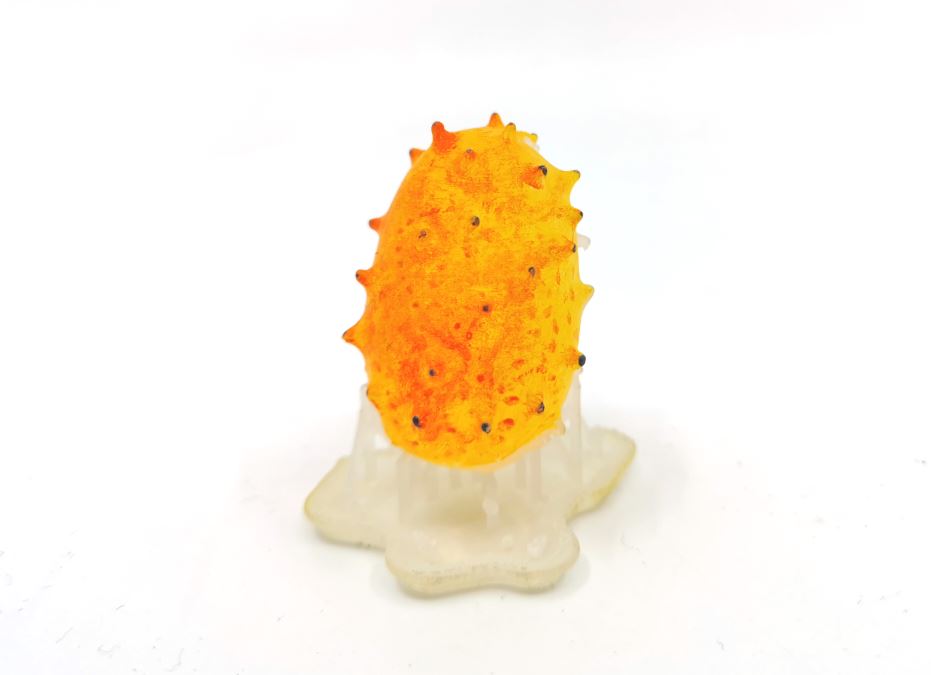
Kiwano Scan
I scan a kiwano fruit. I use an Eiscan Pro+ 3D scanner combined with a turntable. I choose a scan sequence with 20 stops of the table during a complete rotation. To scan the whole surface of the fruit, we have to scan it in different positions. Then if there is enough feature to track, the einscan software will align and combine them automaticaly. This step can also be done manually.
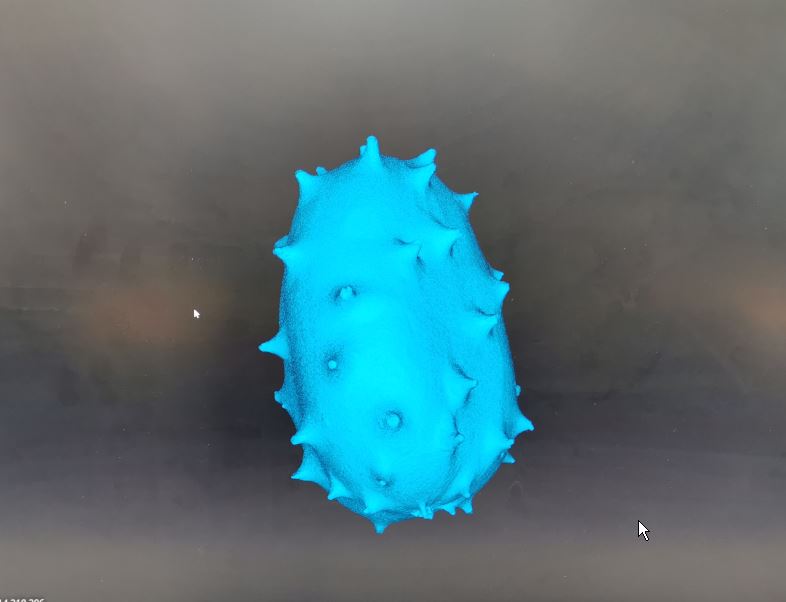 We can export the scan as an stl file.
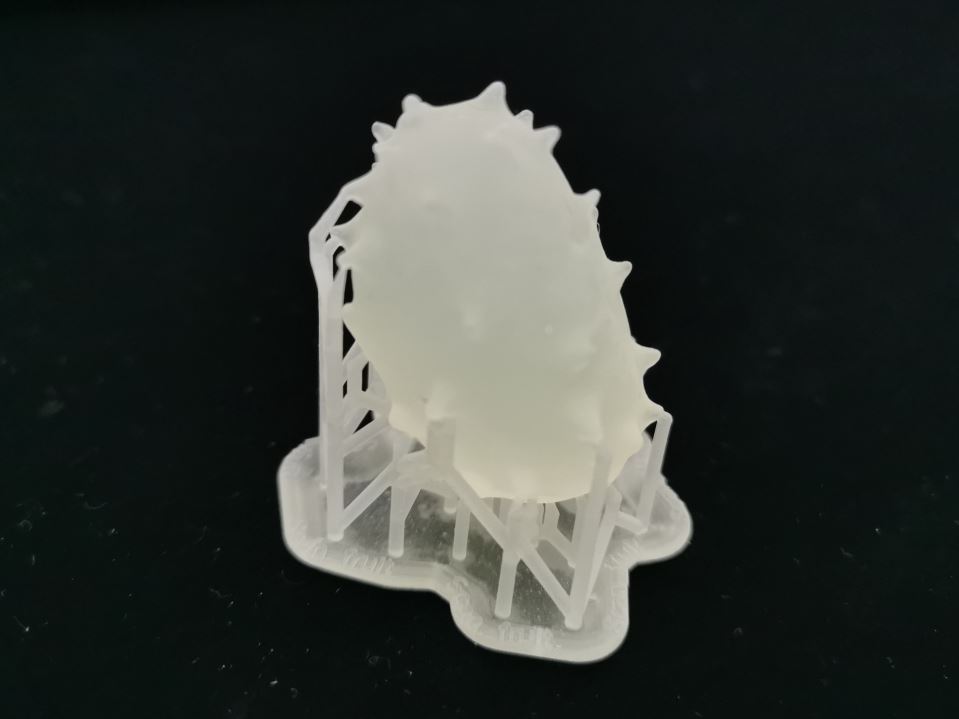
3D printing
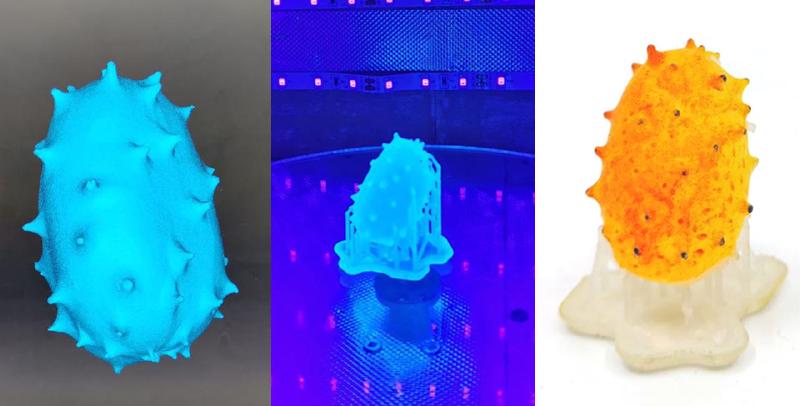
I rescale the Kiwino model and print it with ou Form2 resin printer with clear v4 resin and 0.1mm layer height.
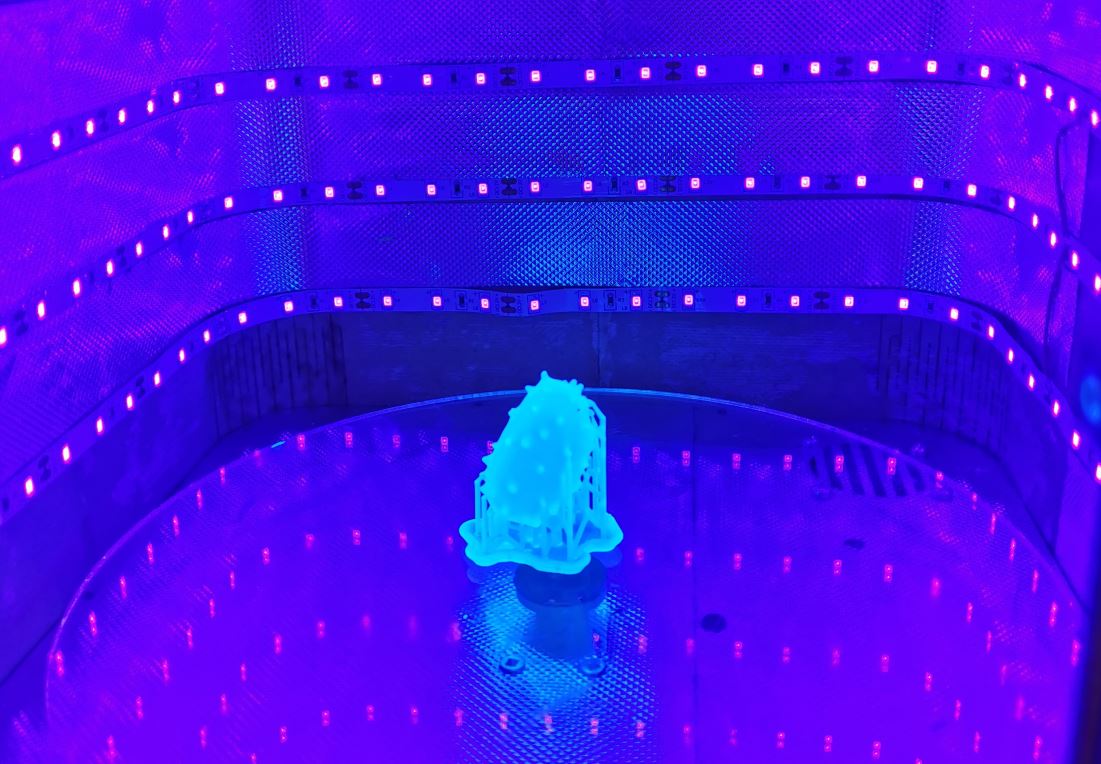
Postreatment
We clean the model into Isopropylic alcohol (IPA) using a Form Wash machine

Then we expose it to UV light for a few minutes to
Painting
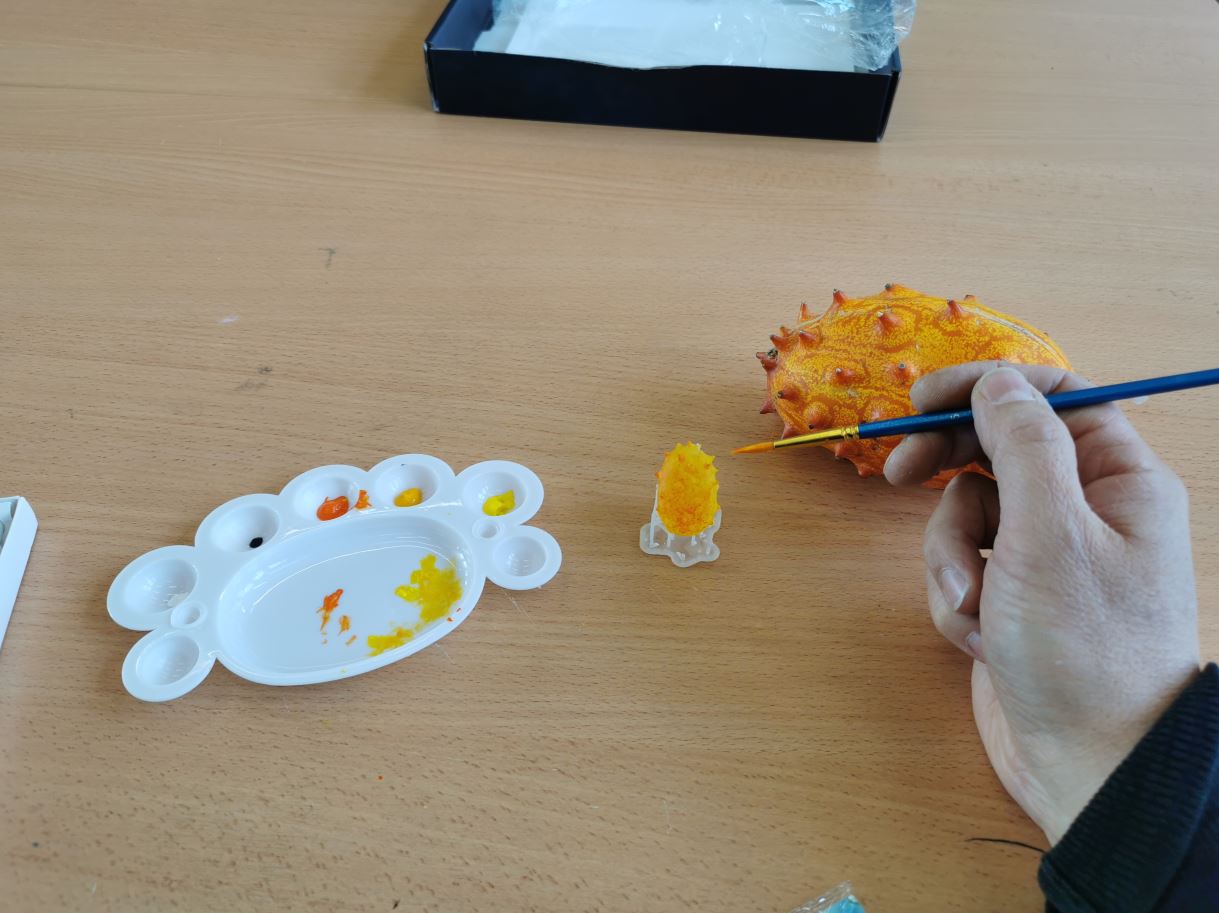
Now we can compare original and the copy