3D Scanning and printing
Task for Week 5
Group Assignment
-Test the design rules for 3D printers.
-Documenting the work to the group work page and reflecting on our individual page what we learned about characteristics of our printer.
Individual Assignment
- Designing and 3D printing an object (small, few cm3, limited by printer time) that could not be easily made subtractively.
- 3D scan an object (and optionally print it).
This week, Due to high fever and cuff and cold I cant join with my class friends to discuss and go on wotk with group assignment. So I have asked Mrs. Yeshi (group learder) how they have work on group and how to design 3D design and compare with each sketch and shapes.
Link to the group Assignment is here
Individual Assignment
• design and 3D print an object that could not made it subtractively.
• 3D scan an object(and optionally print it)
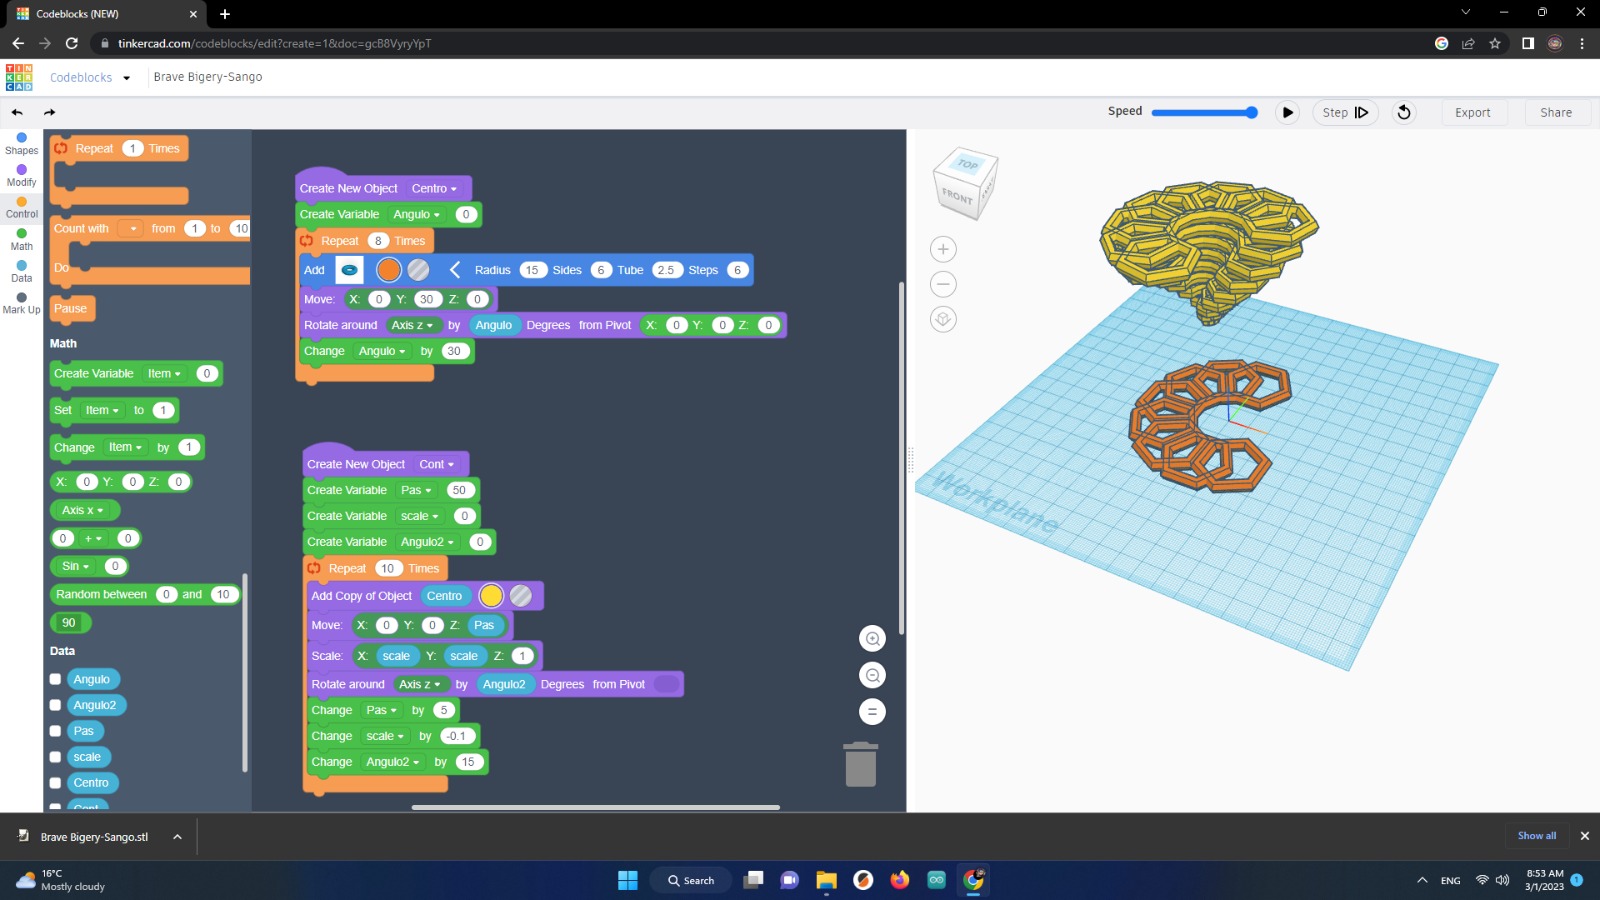
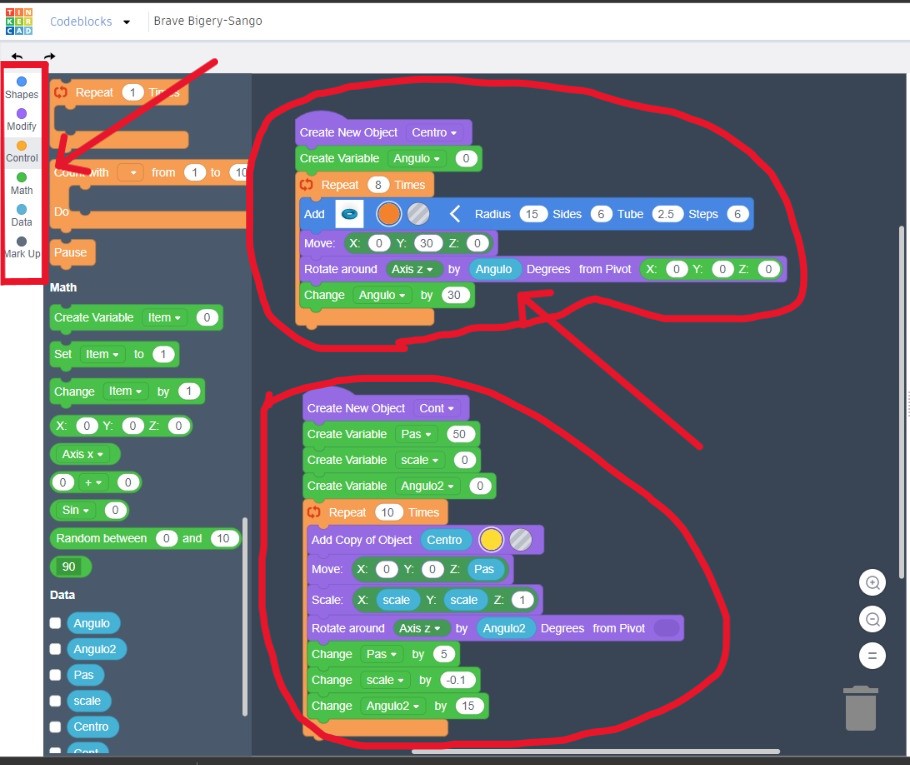
3D Design and Printing
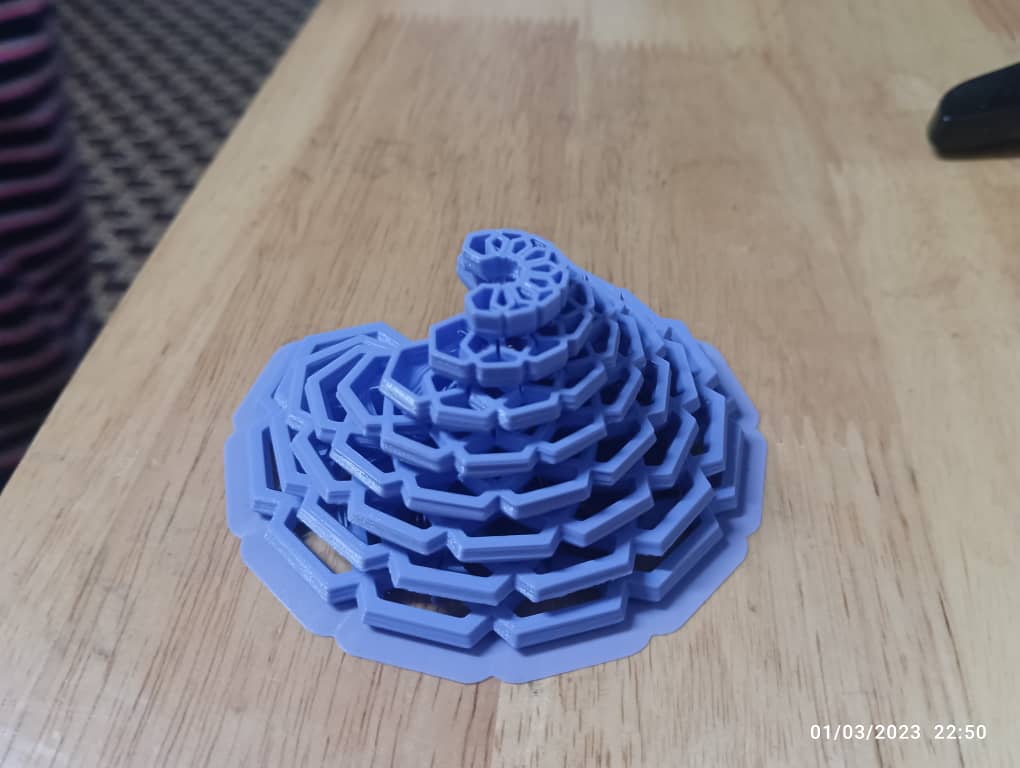
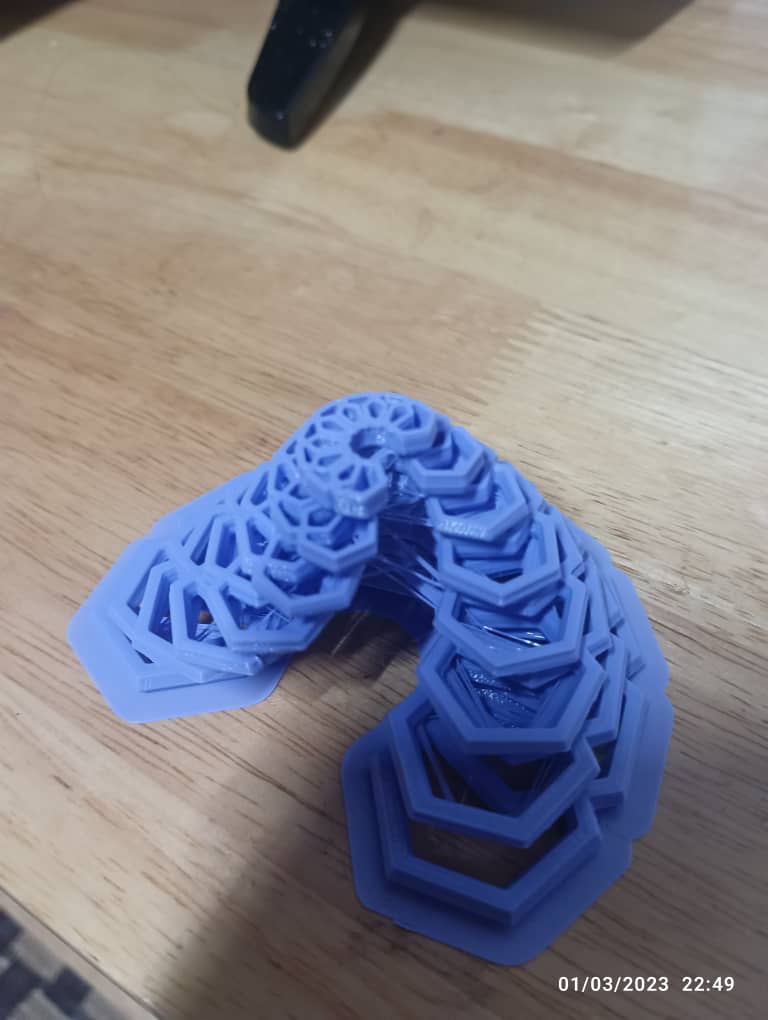
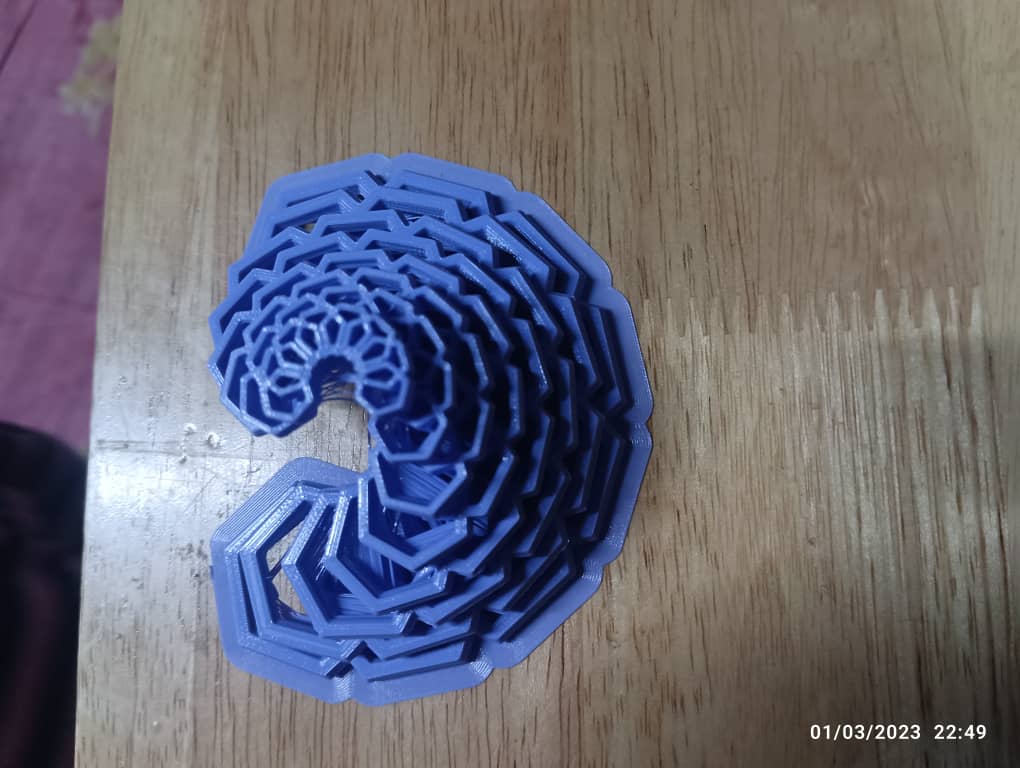
This week, for individual assignment i have made something that could not be made subtractively in 3D design. So i decided to make a tube shape like steps/tower.
To module my design, I have used thinkercad. Here i have created one and then patterned it with playing different option like control,modify and etc... which is located at left side.
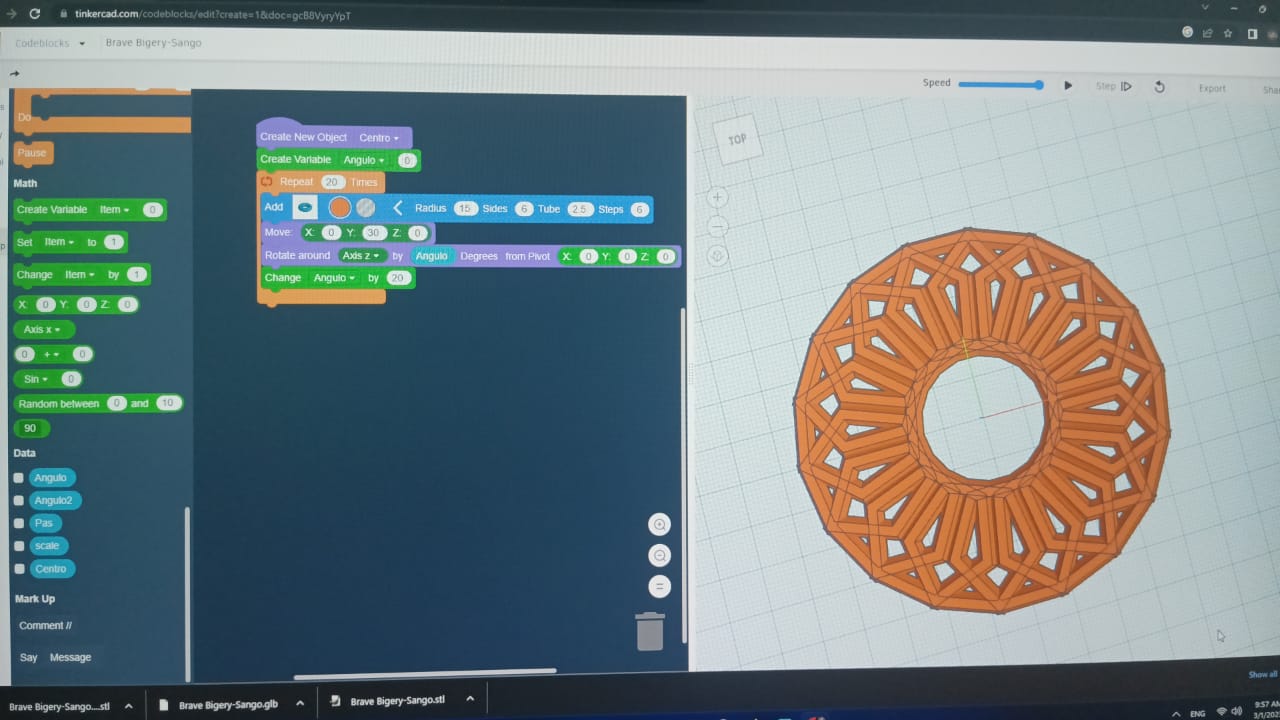
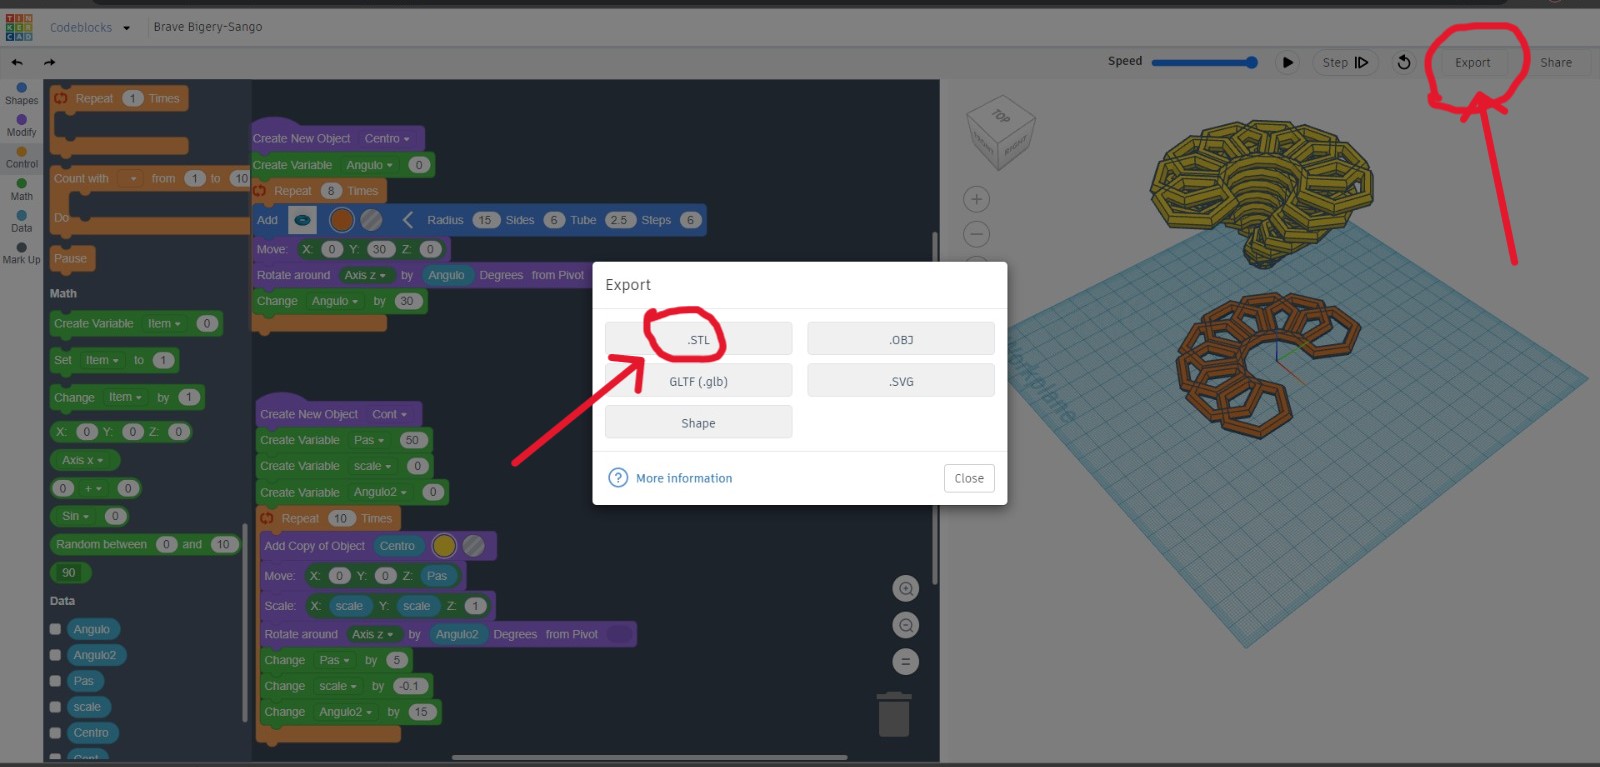
After your design is done, make sure to save your design in .stl file formate from thinkercad so that can be read in PRUSA SLICER.. As I have done here:
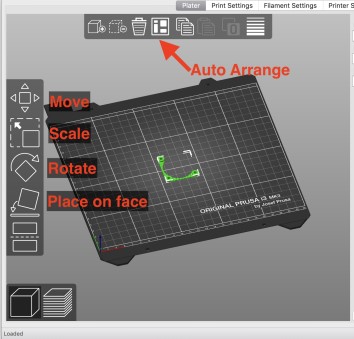
Using Prusa Slicer
An open-source, feature-rich, frequently updated tool that contains everything you need to export the perfect print files for your 3D printing.
 Some default features of the Prusa slicer.
 Then i imported my design file in slicer. As i have rotate my design at 90 degree and deleted my lower part.
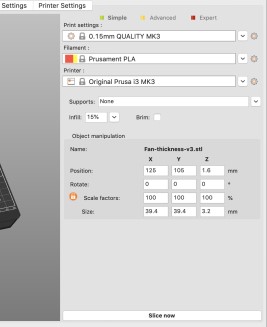
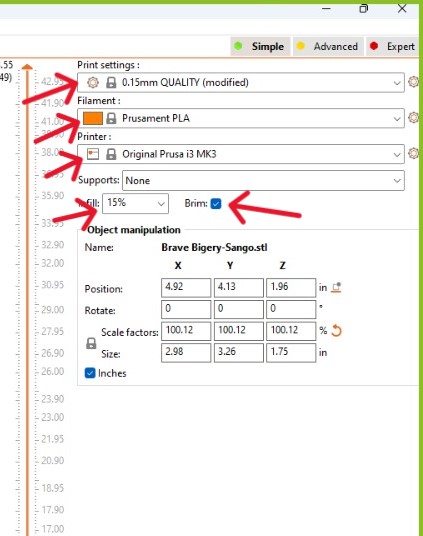
 selected the print settings to 0.15mm Quality.
Selected the filament type and the printer.
Gave 15% infill to have a stronger output and click on slicing.
selected the print settings to 0.15mm Quality.
Selected the filament type and the printer.
Gave 15% infill to have a stronger output and click on slicing.
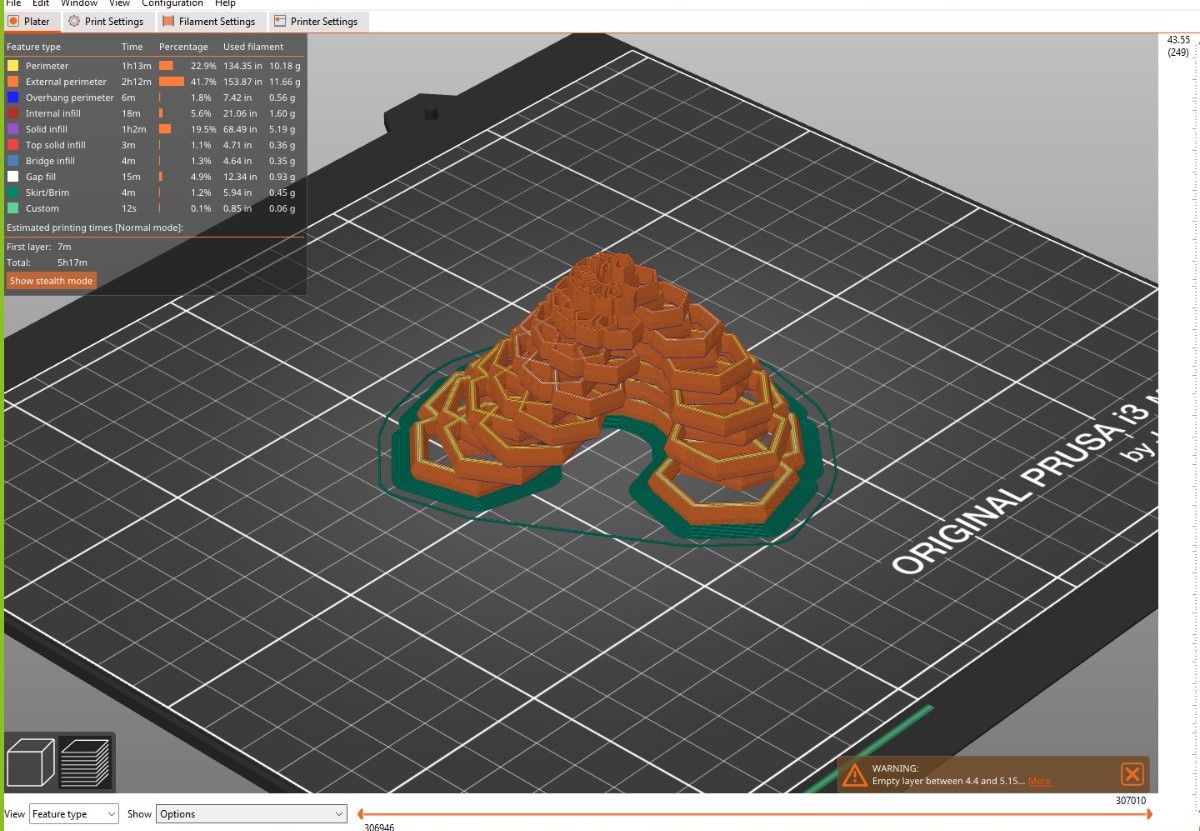
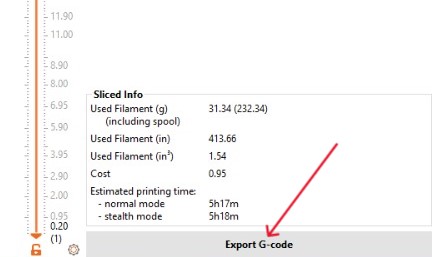
 After the slicing is done, it gives you the slice information and then click on export G-code.
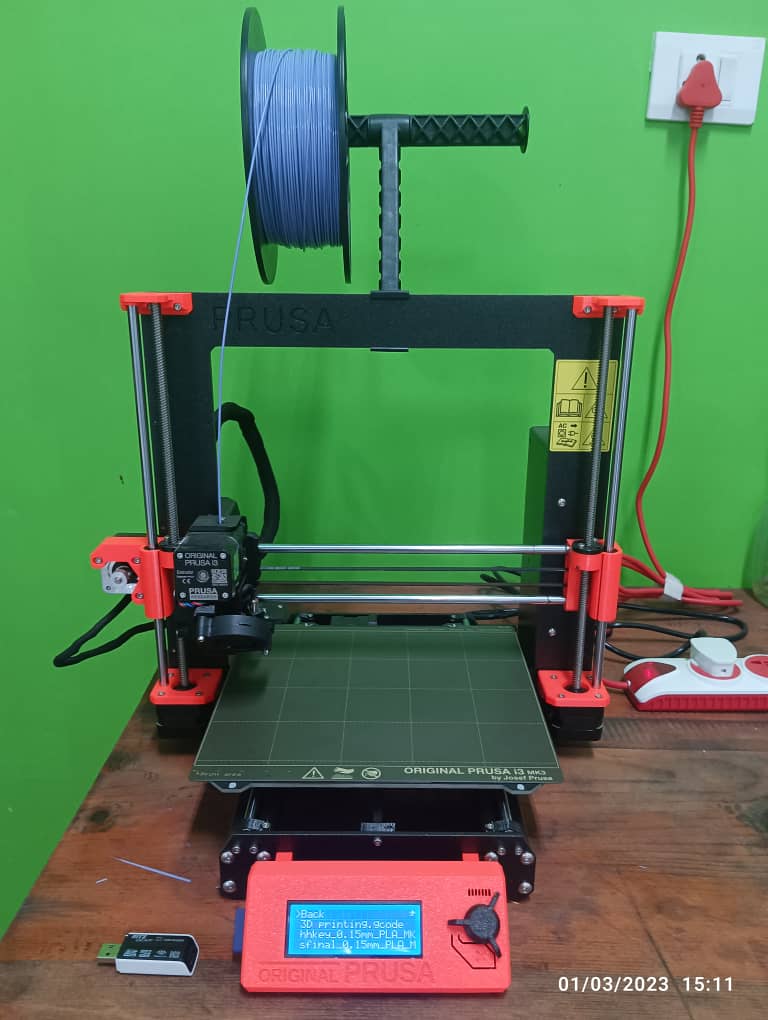
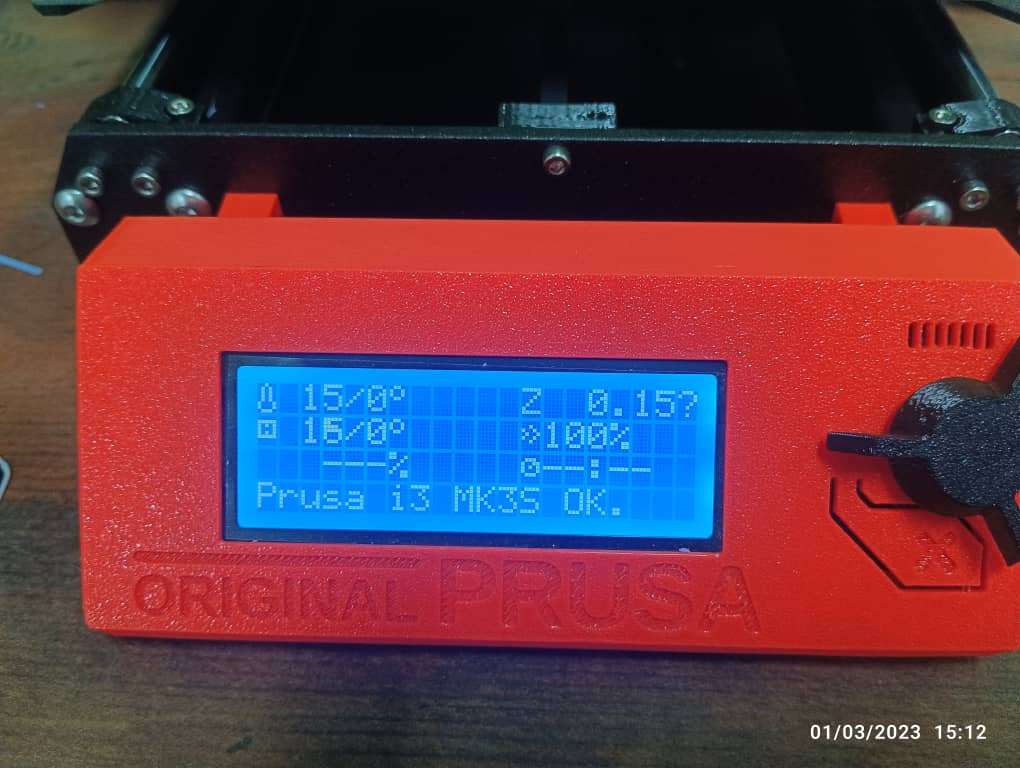
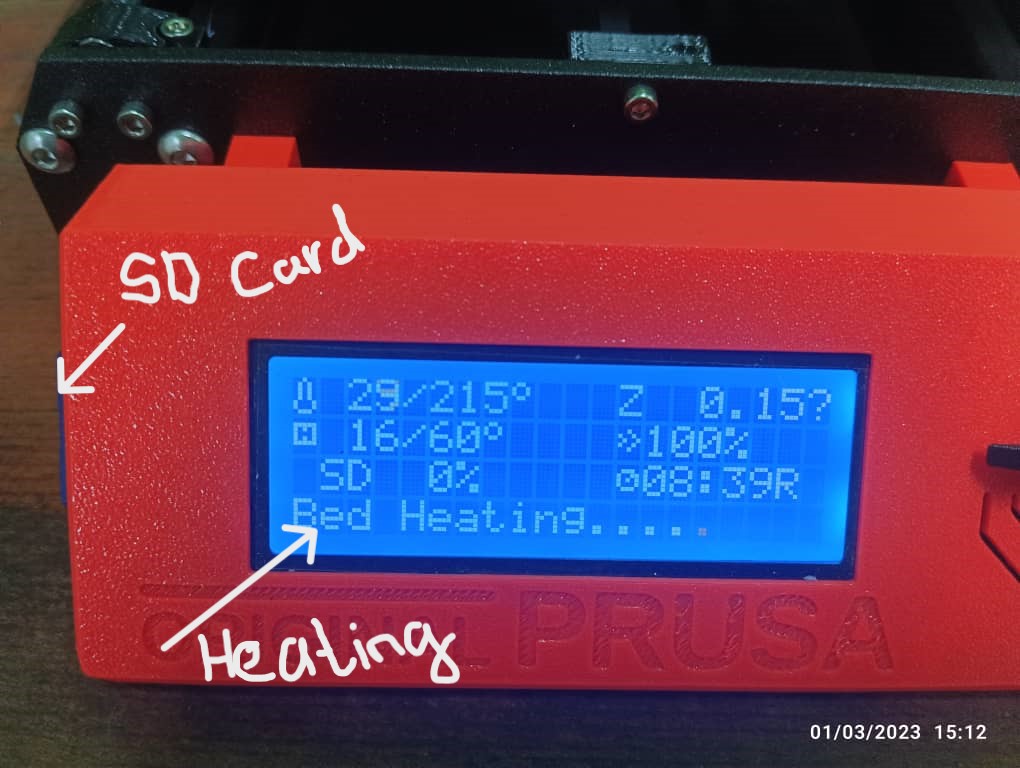
3D printing
I have used Pursa printer to print my design.
Firstly i have transfer my design file in SD card using card reader and inserted in pursa machine to print it.
 Finally, here is my design.
Explain why your work shows in advantage of 3-D printing that it’s impossible to do in other technology??
some advantages of 3D printing over other manufacturing technologies that make it unique and enable the creation of complex designs that may be challenging or impossible with traditional manufacturing methods.
Here are a few advantages of 3D printing:
1. Complex Geometries: 3D printing allows the production of highly intricate and complex geometries that are difficult to achieve with conventional manufacturing techniques. It can create complex internal structures, overhangs, undercuts, and intricate details without the need for assembly.
2. Design Freedom: Unlike traditional manufacturing processes that often require specific tooling or molds, 3D printing enables design freedom. It allows designers to create customized, one-off, or low-volume parts without the need for costly tooling changes.
3. Rapid Prototyping: 3D printing is an excellent tool for fast and cost-effective prototyping. It allows designers and engineers to quickly iterate designs, make improvements, and validate concepts before committing to mass production. It reduces the time and cost associated with traditional prototyping methods.
4. Material Variety: 3D printing supports a wide range of materials, including various plastics, metals, ceramics, composites, and even bio-compatible materials. This versatility allows for diverse applications across industries, including aerospace, healthcare, automotive, and consumer goods.
Reduced Waste: Unlike subtractive manufacturing processes like milling or turning, 3D printing is an additive process that builds parts layer by layer. This method reduces material waste since only the required material is used.
3D Scanning
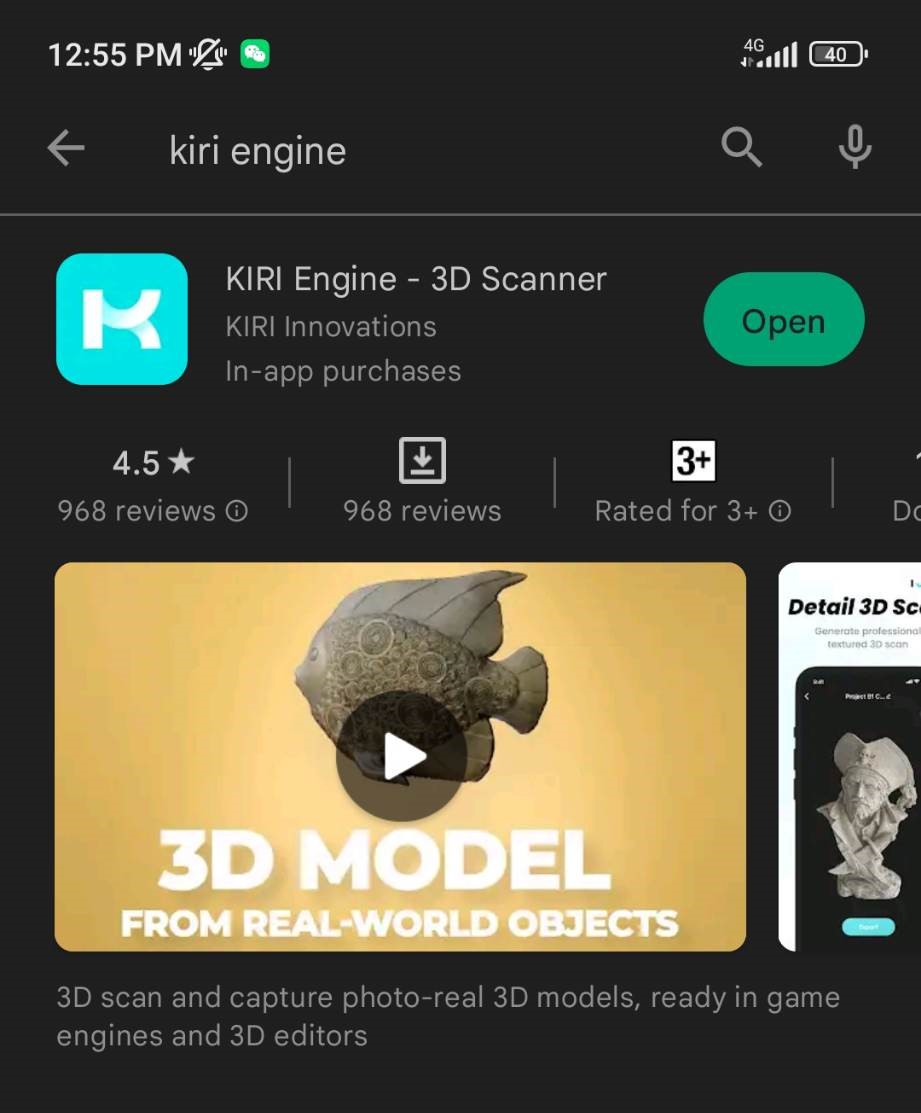
For 3D scanning, I have used Kiri Engine app version 2.1.3 from mobile to scan my 3D. Kiri engine app is a piece of software created to enable users to create textured 3D scan from mobile device. It is used to 3D scan and digitize physical object.
Firstly i have download kiri engine app from play store.
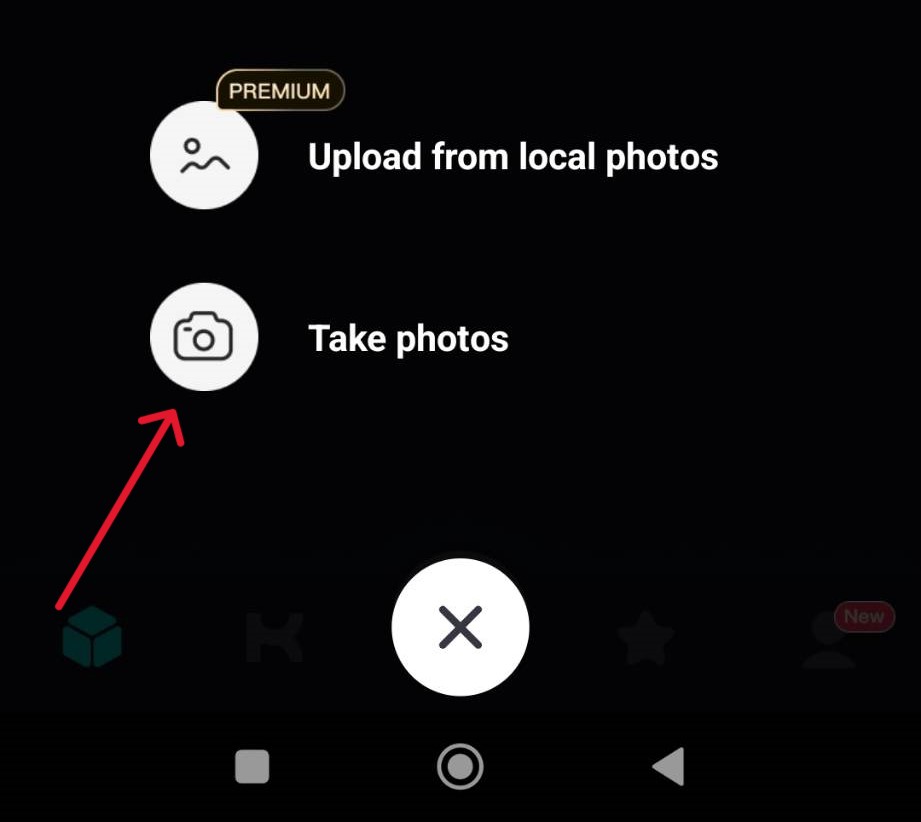
 open your app >> Hit the + Sign in the app >> select take photos
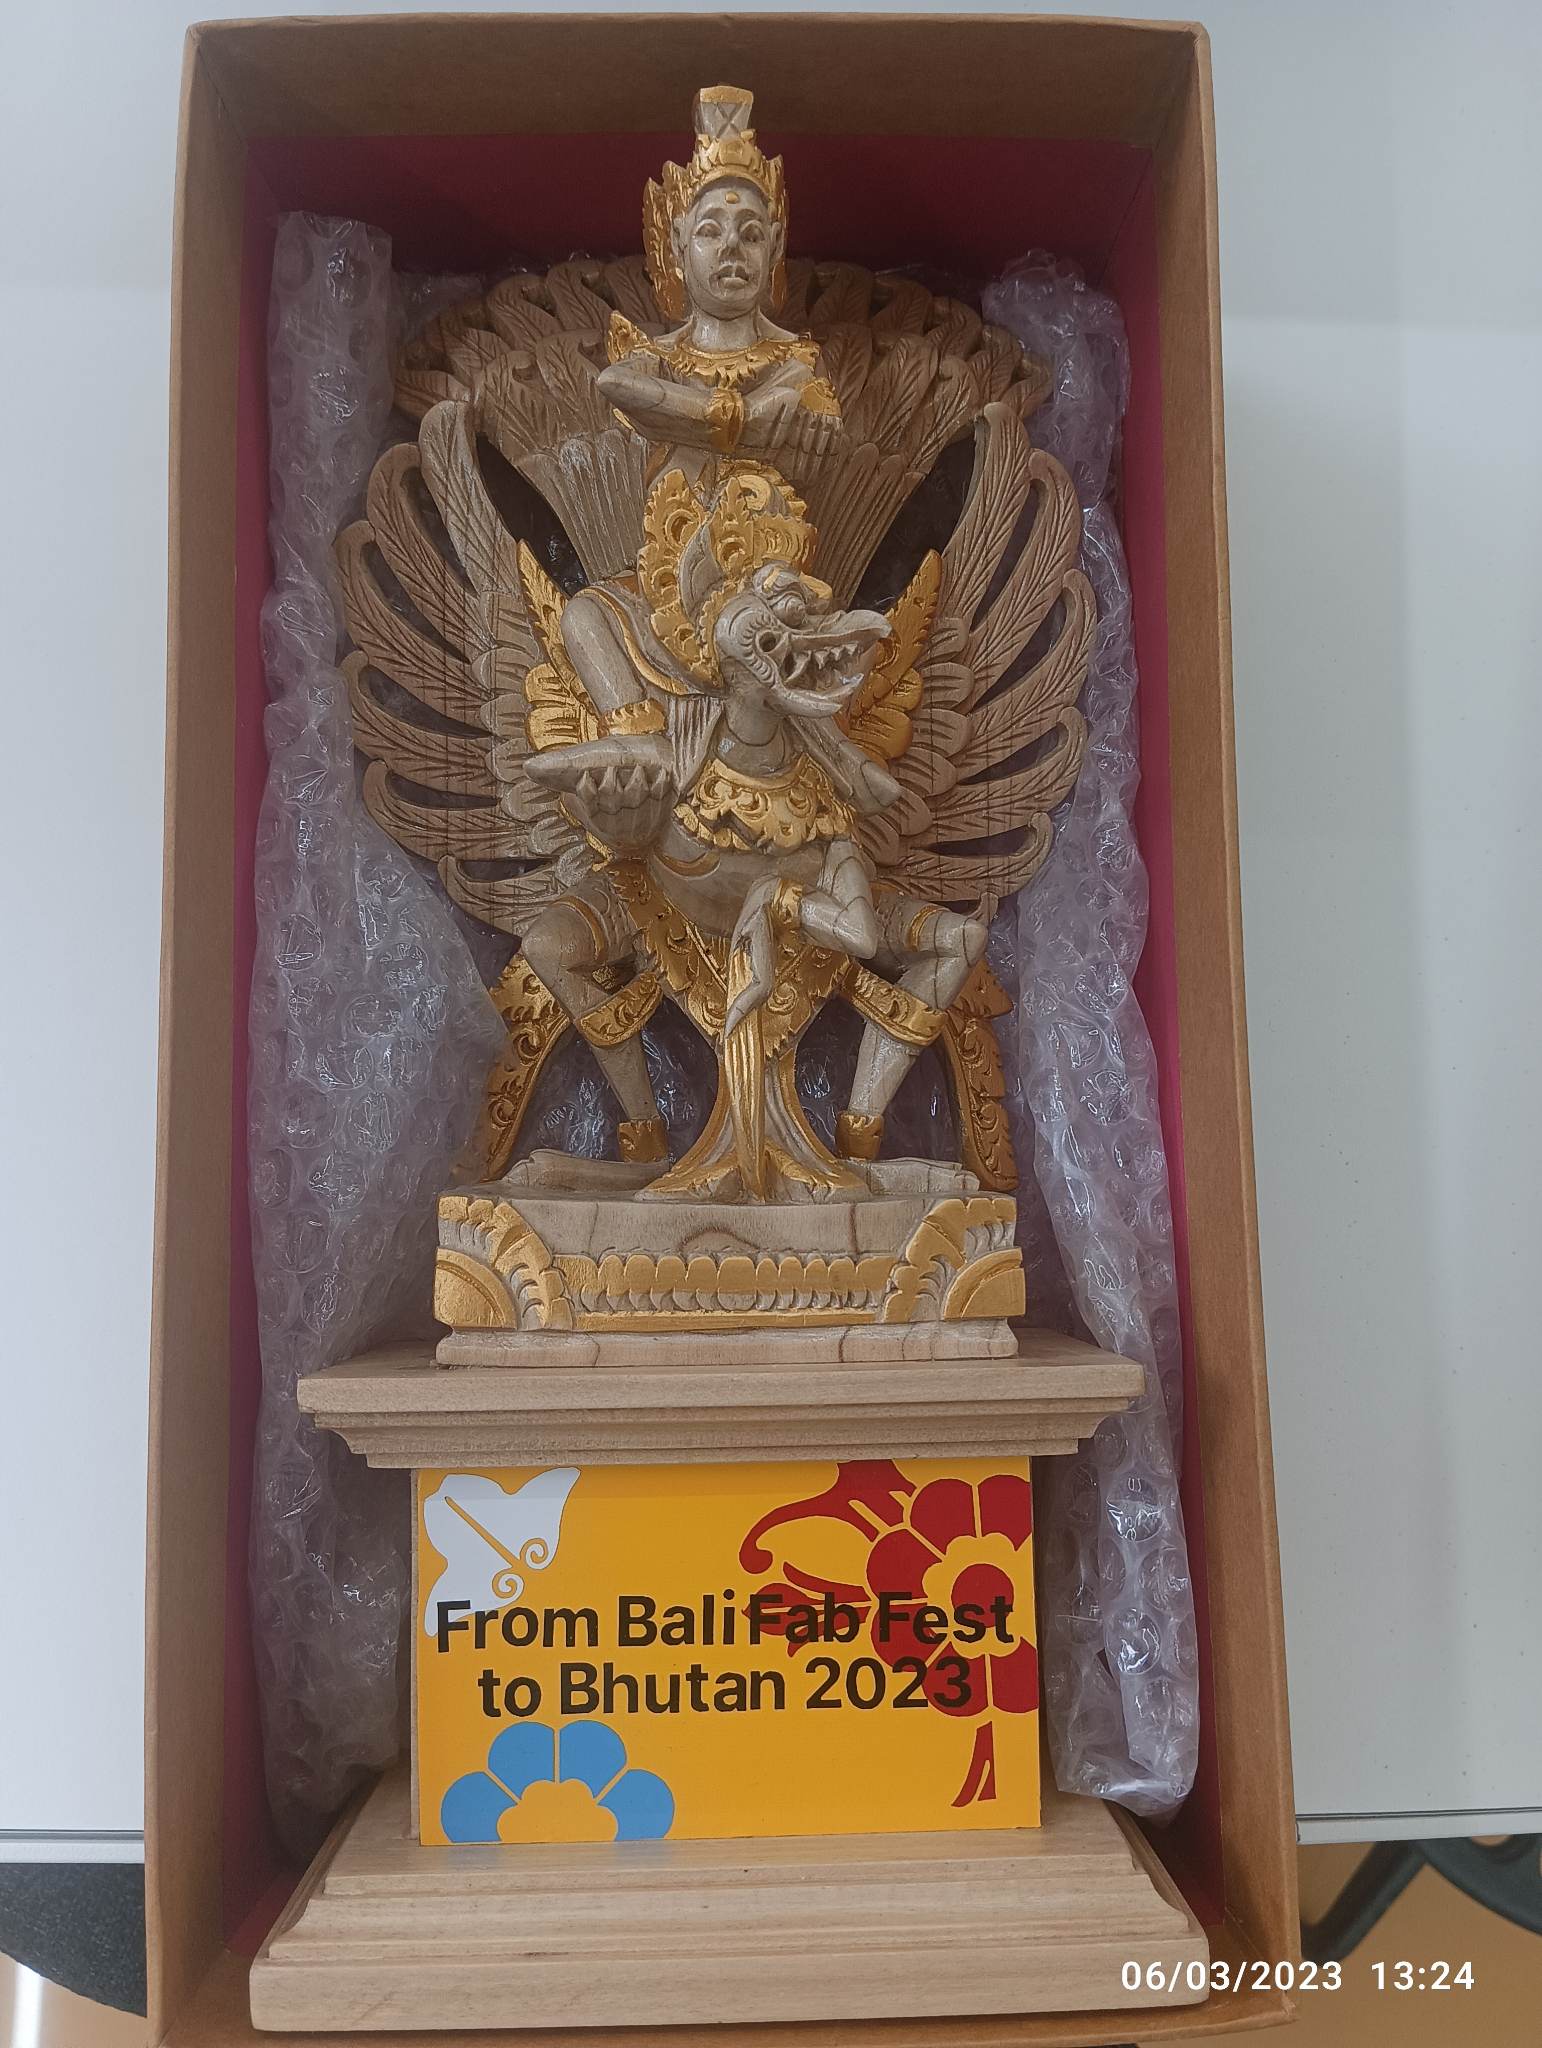
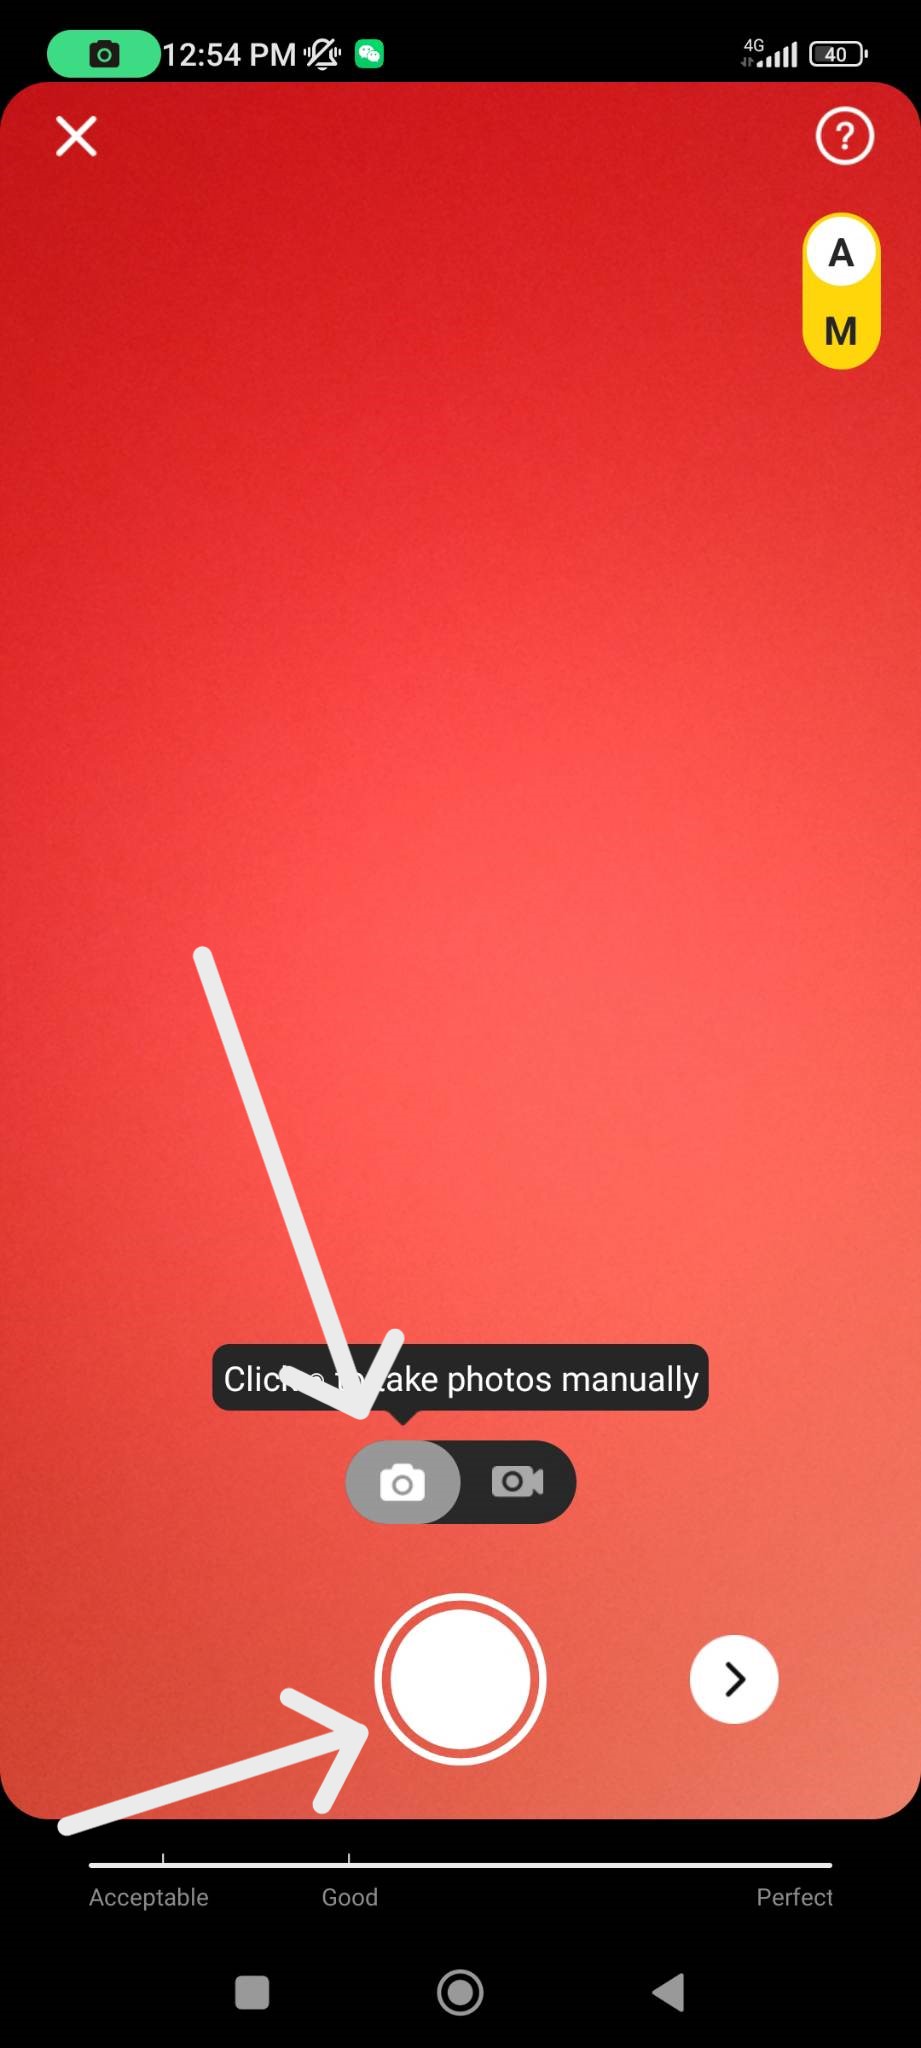 For my 3D scan i have used some kind of statue. so take as many photos of your object as you can (max 70), and also try to capture from different angles as possible.
 While scanning, make sure to use white background with your object.
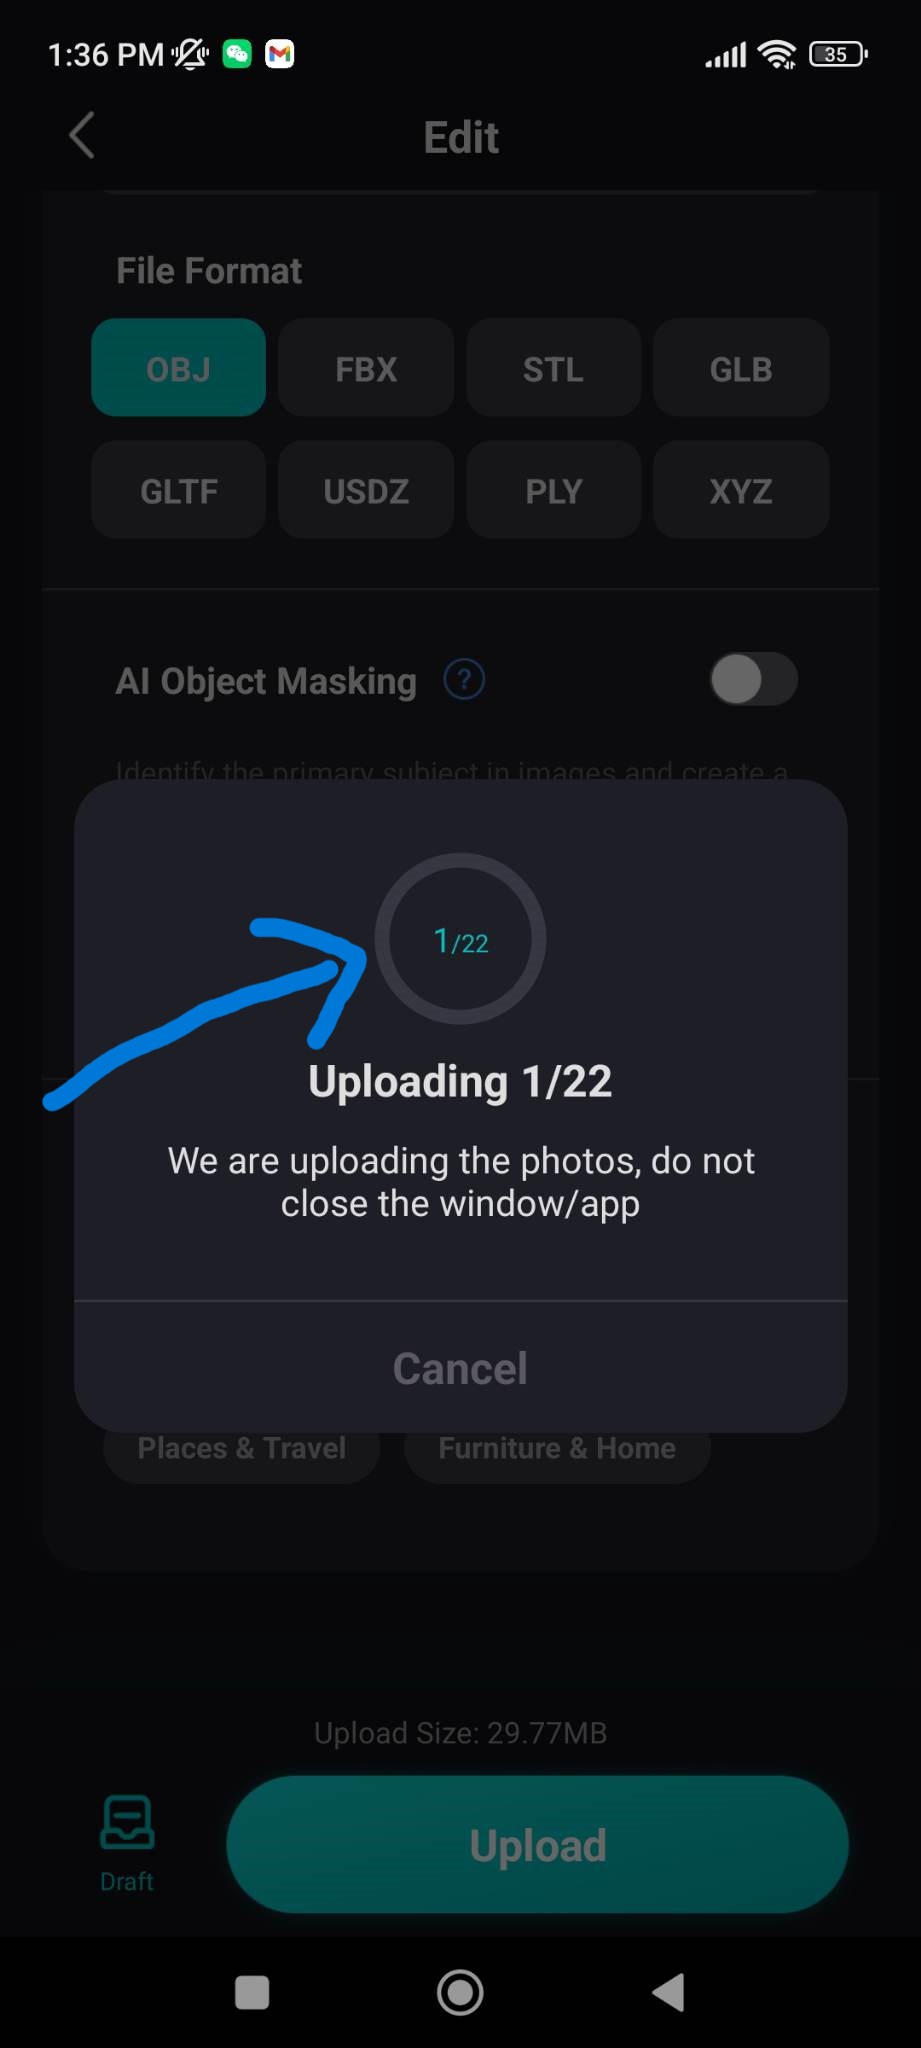
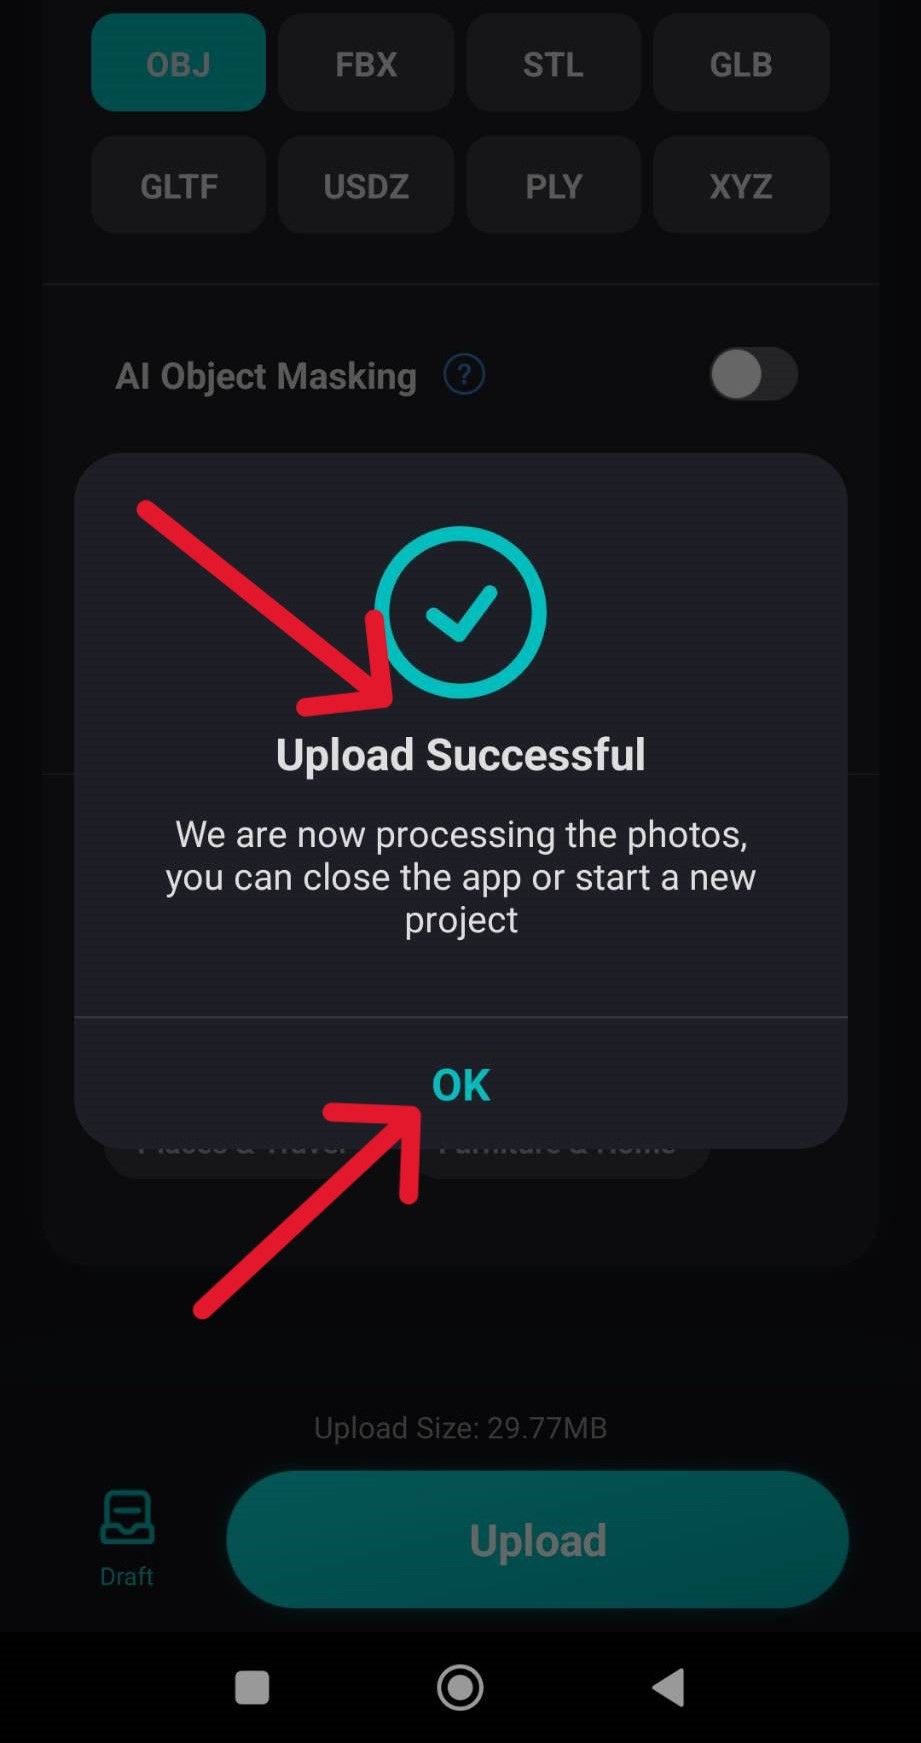
Click on Upload the photos >> auto uploading will process >> after upload is done the app will then create a render with the provided photos. This step takes a while.
While scanning, make sure to use white background with your object.
Click on Upload the photos >> auto uploading will process >> after upload is done the app will then create a render with the provided photos. This step takes a while.
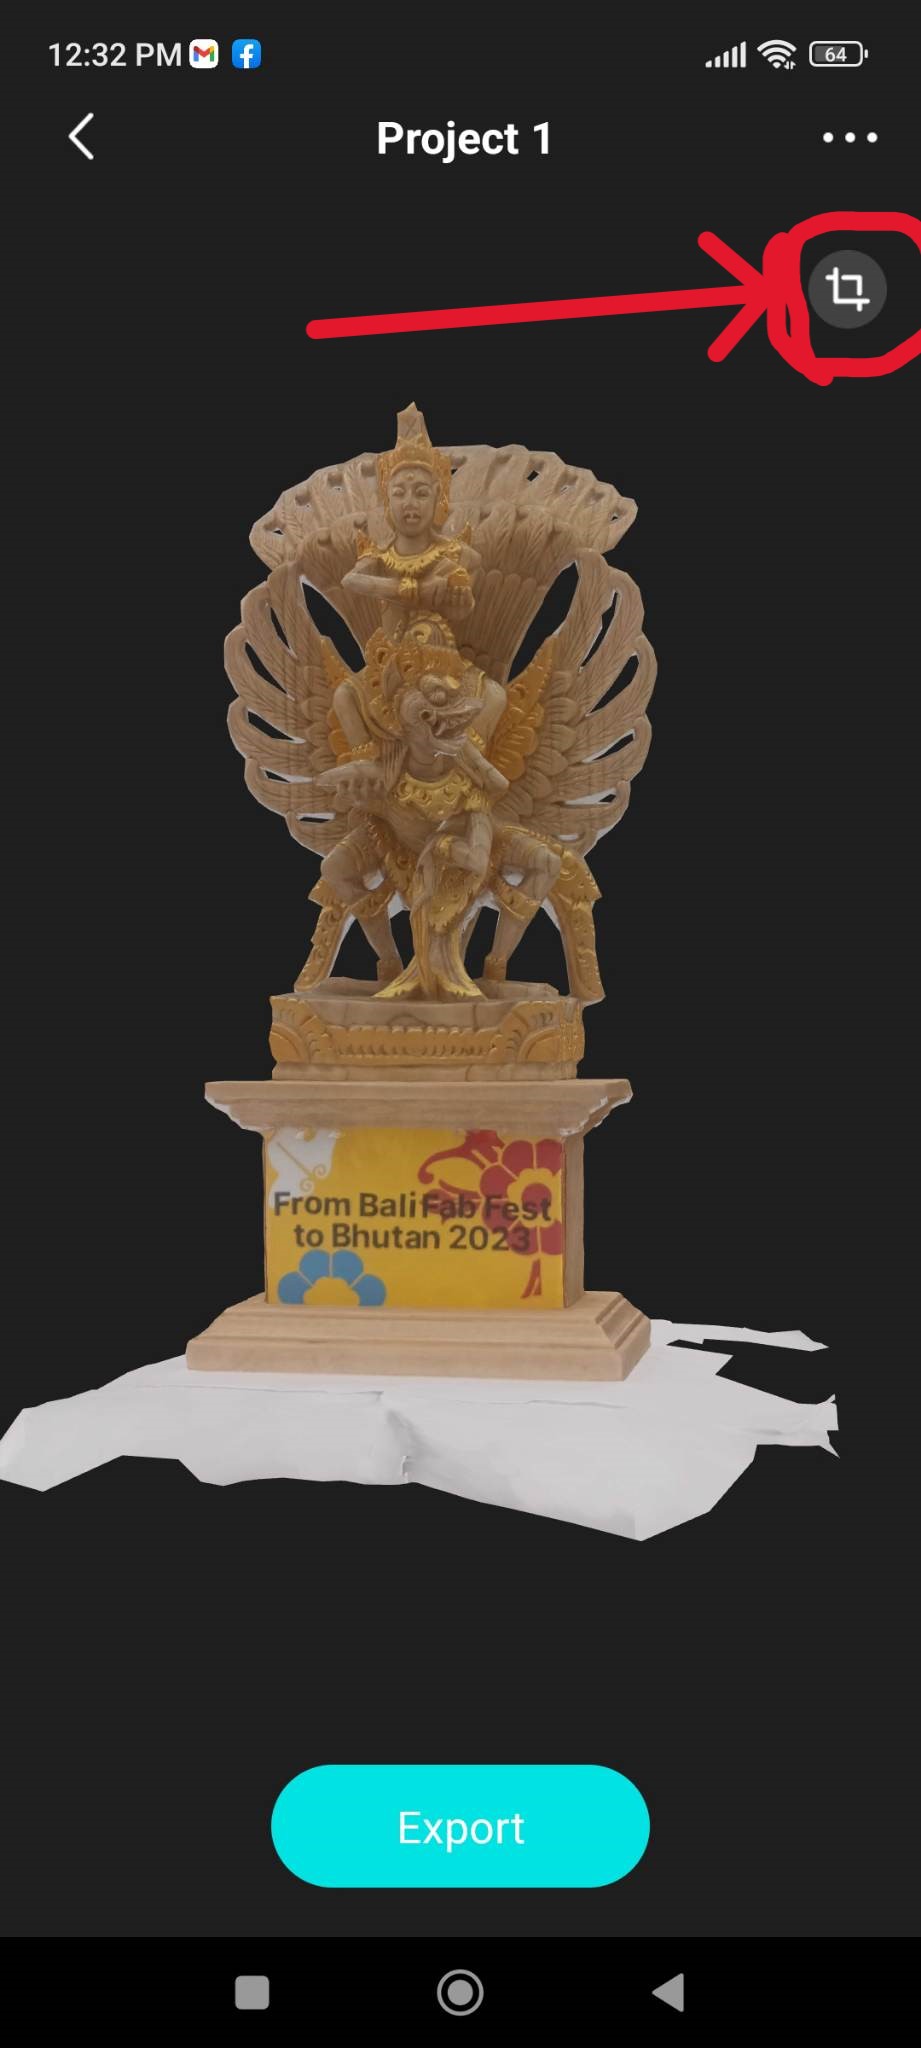
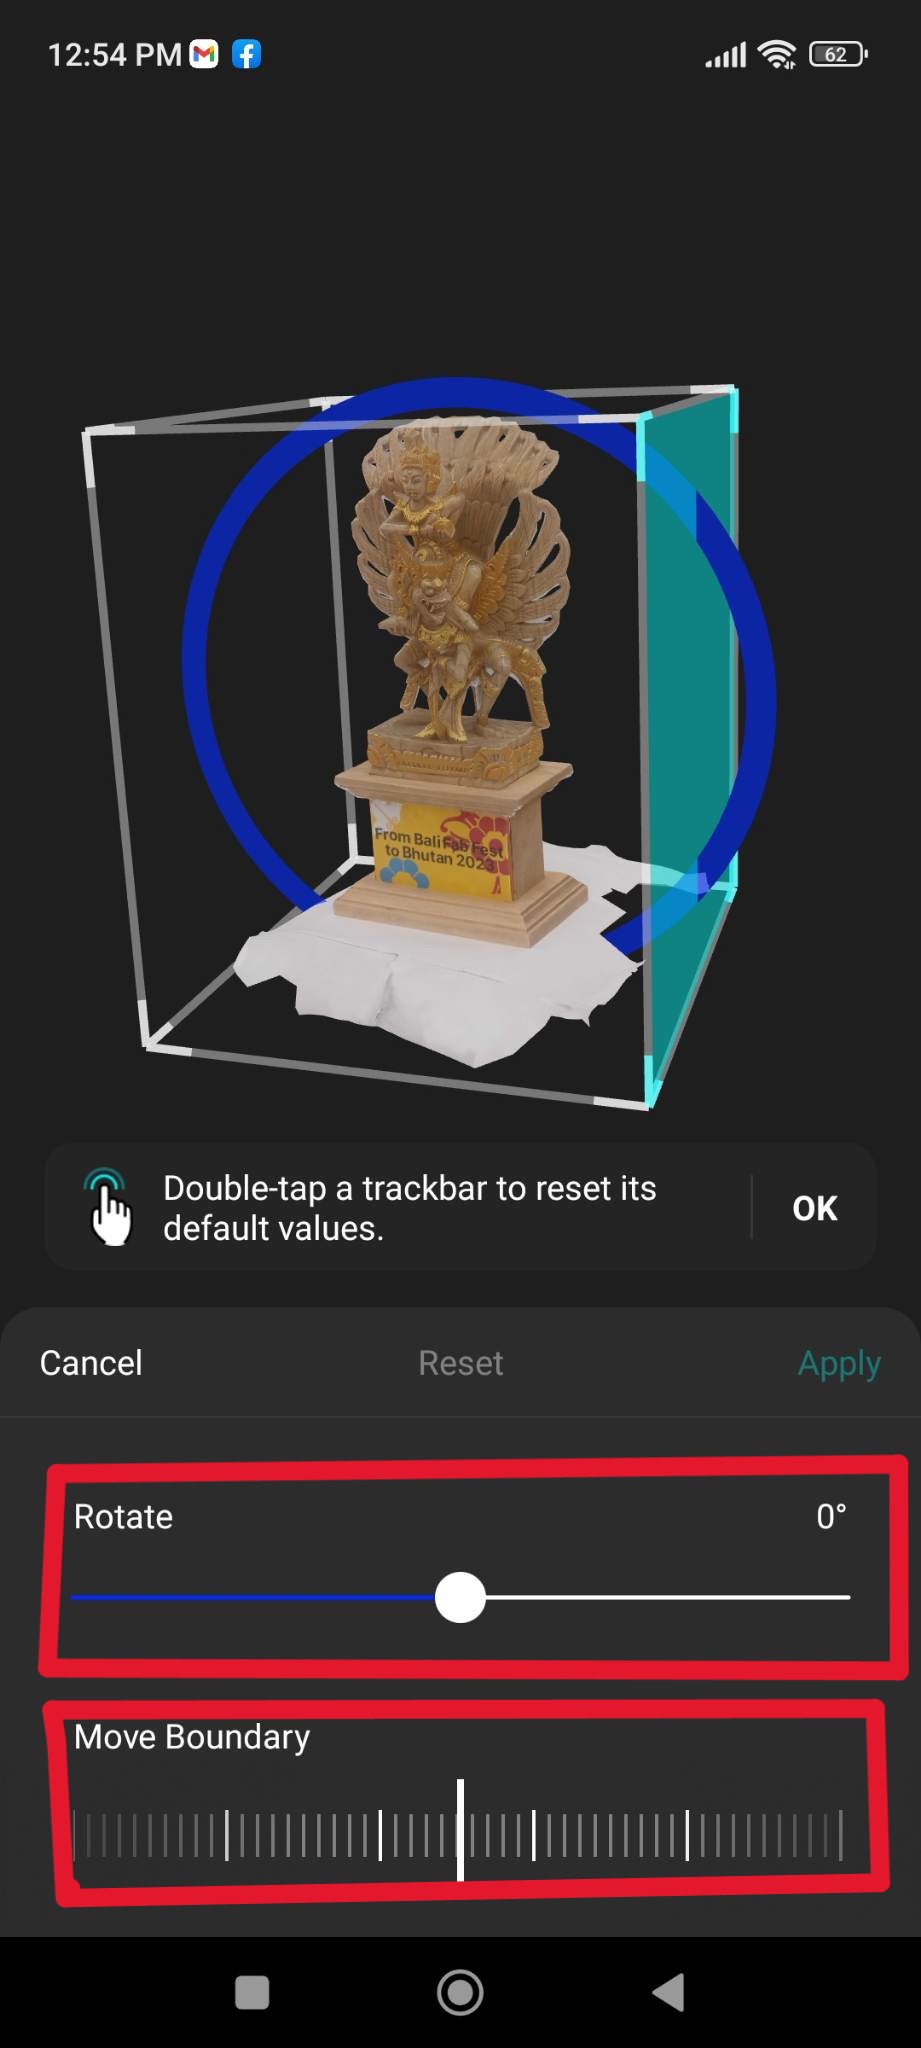
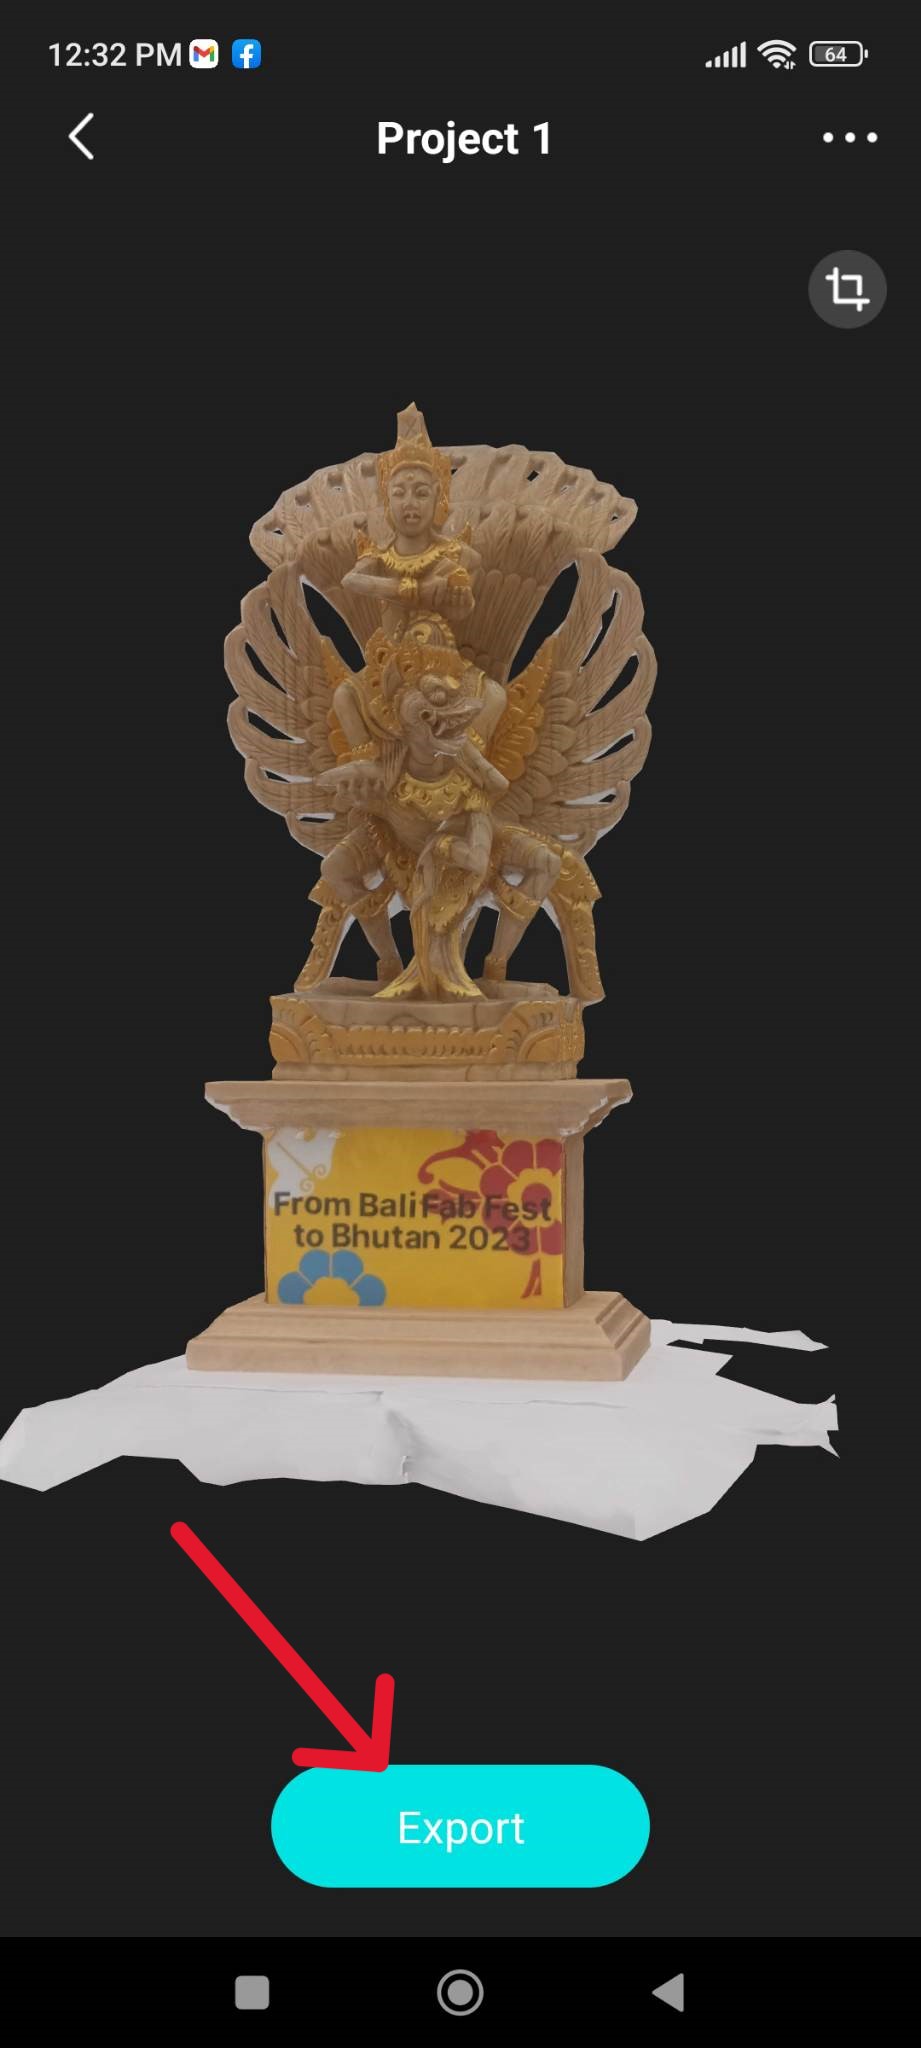
 Once the render is complete,You edit and crop your design.
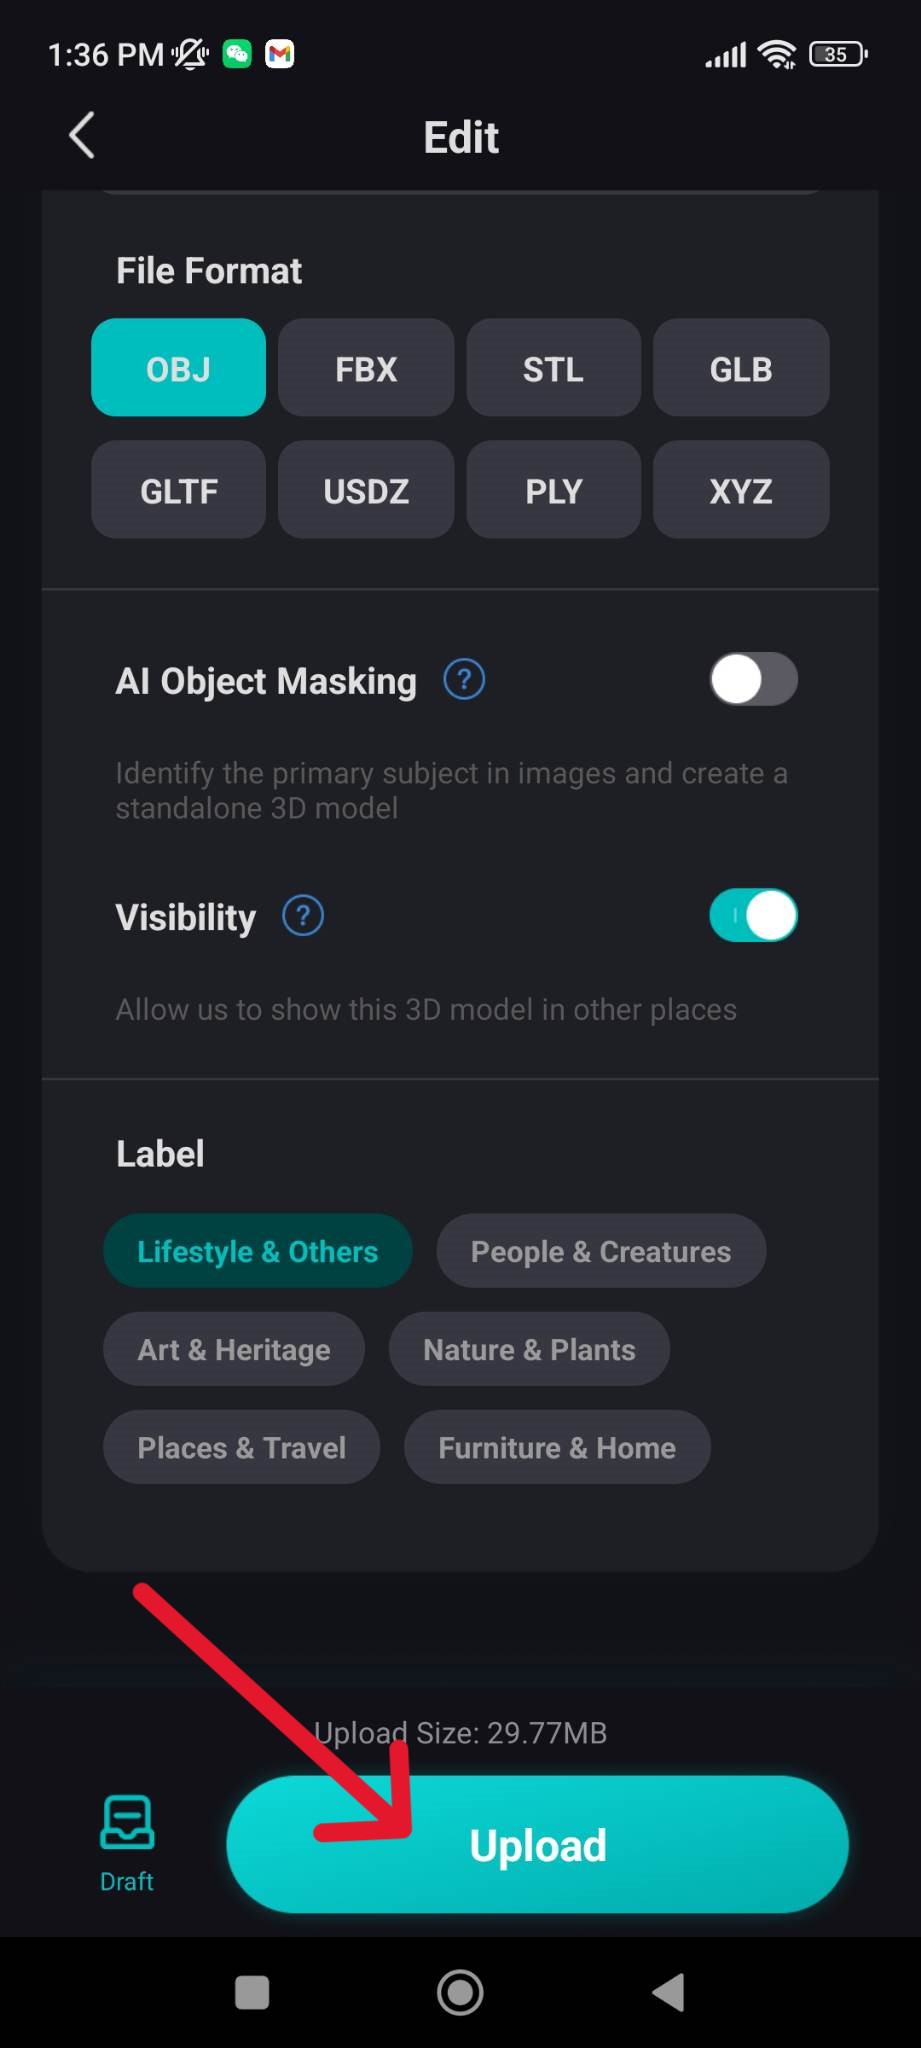
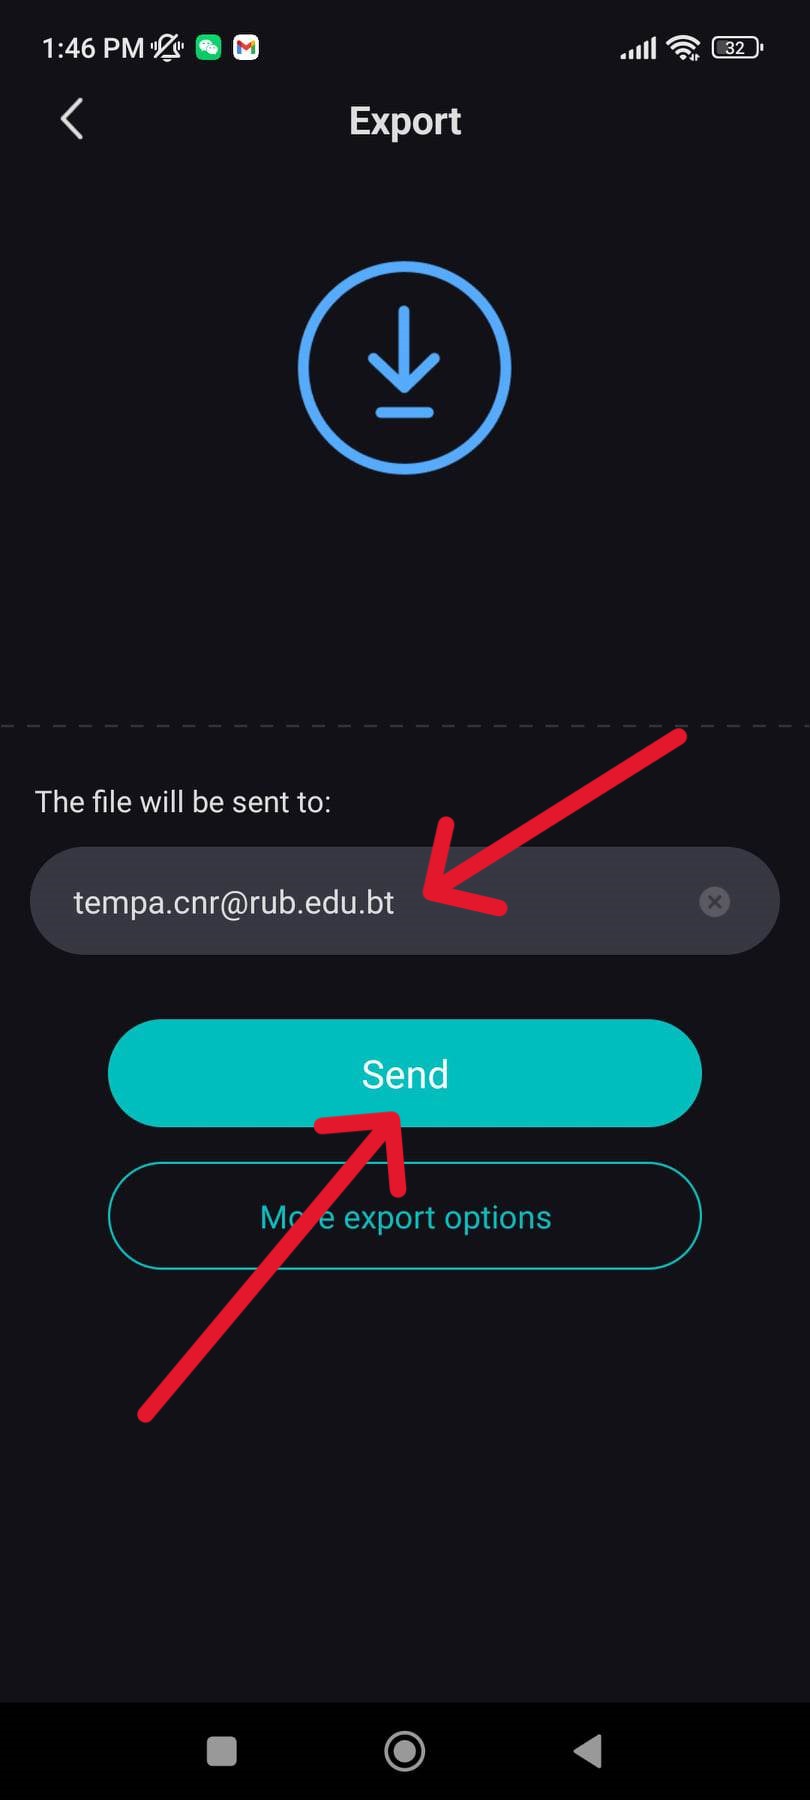
 You can now export the render as an STL as given below and download your stl file from your email.
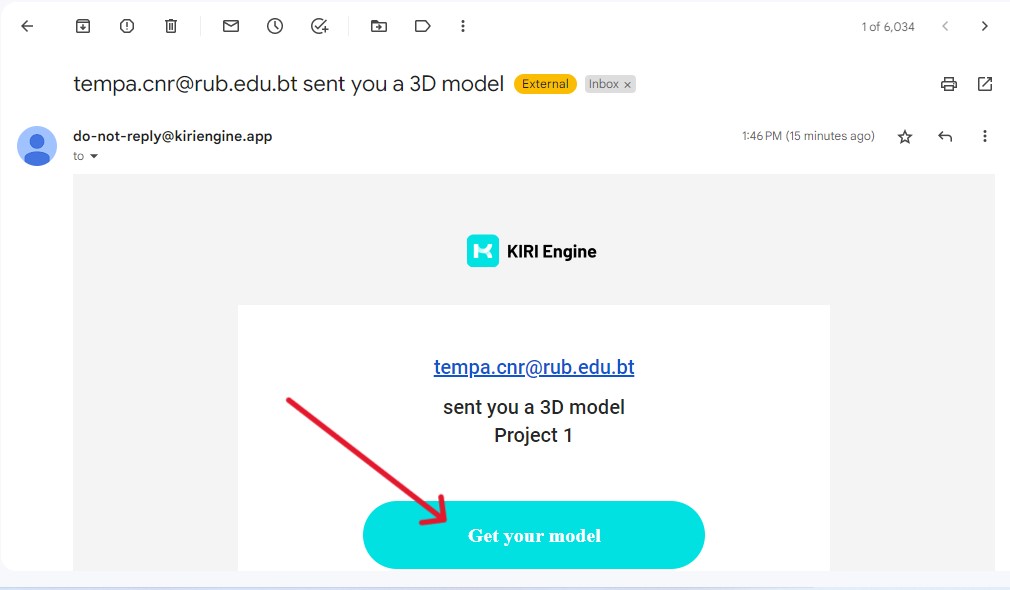
 Then opened my mail and got my design in STL and started downloading.
3D Design File
3D file in STL