2.Computer Aided design
Week two really seems like a heavy week with lots to do and play with differnet software. We are required to try many softwares and experience with it to select the one we are confortable to do it and we need to explore further by ourselves.
Assignment of the 2ndweek
Model (raster, vector, 2D, 3D, render, animate, simulate, …) a possible final project, compress your images and videos, and post it on your class page.
Task For Week 2
2D Design
A 2D drawing view is a representation of a 3D CAD part or assembly that is placed on a drawing sheet. A drawing view represents the shape of the object when viewed from various standard directions
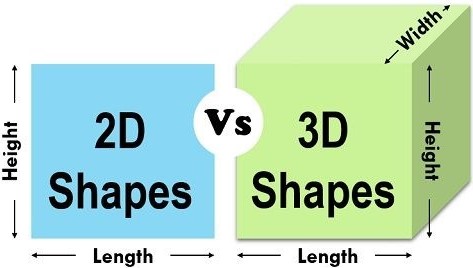
Image Source: GOOGLE
2D Design are 2 types
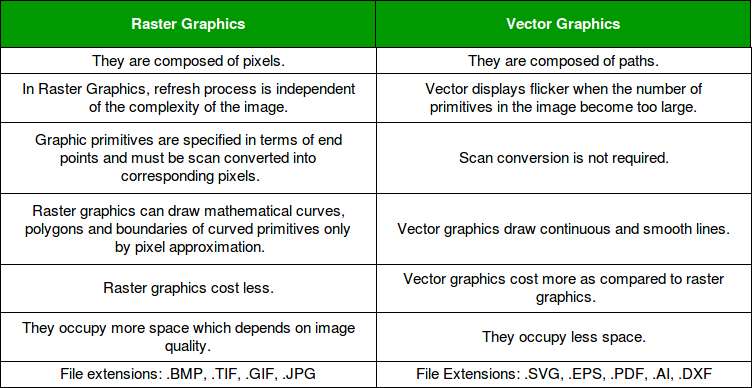
Raster Design are those made of pixels, or tiny dots that use color and tone to produce the image.
Vector designs are those consist of anchored dots and connected by lines and curves. As they are not based on pixels, they are also known as resolution independent, which makes them scalable and device independent.
Vector Vs Rastor
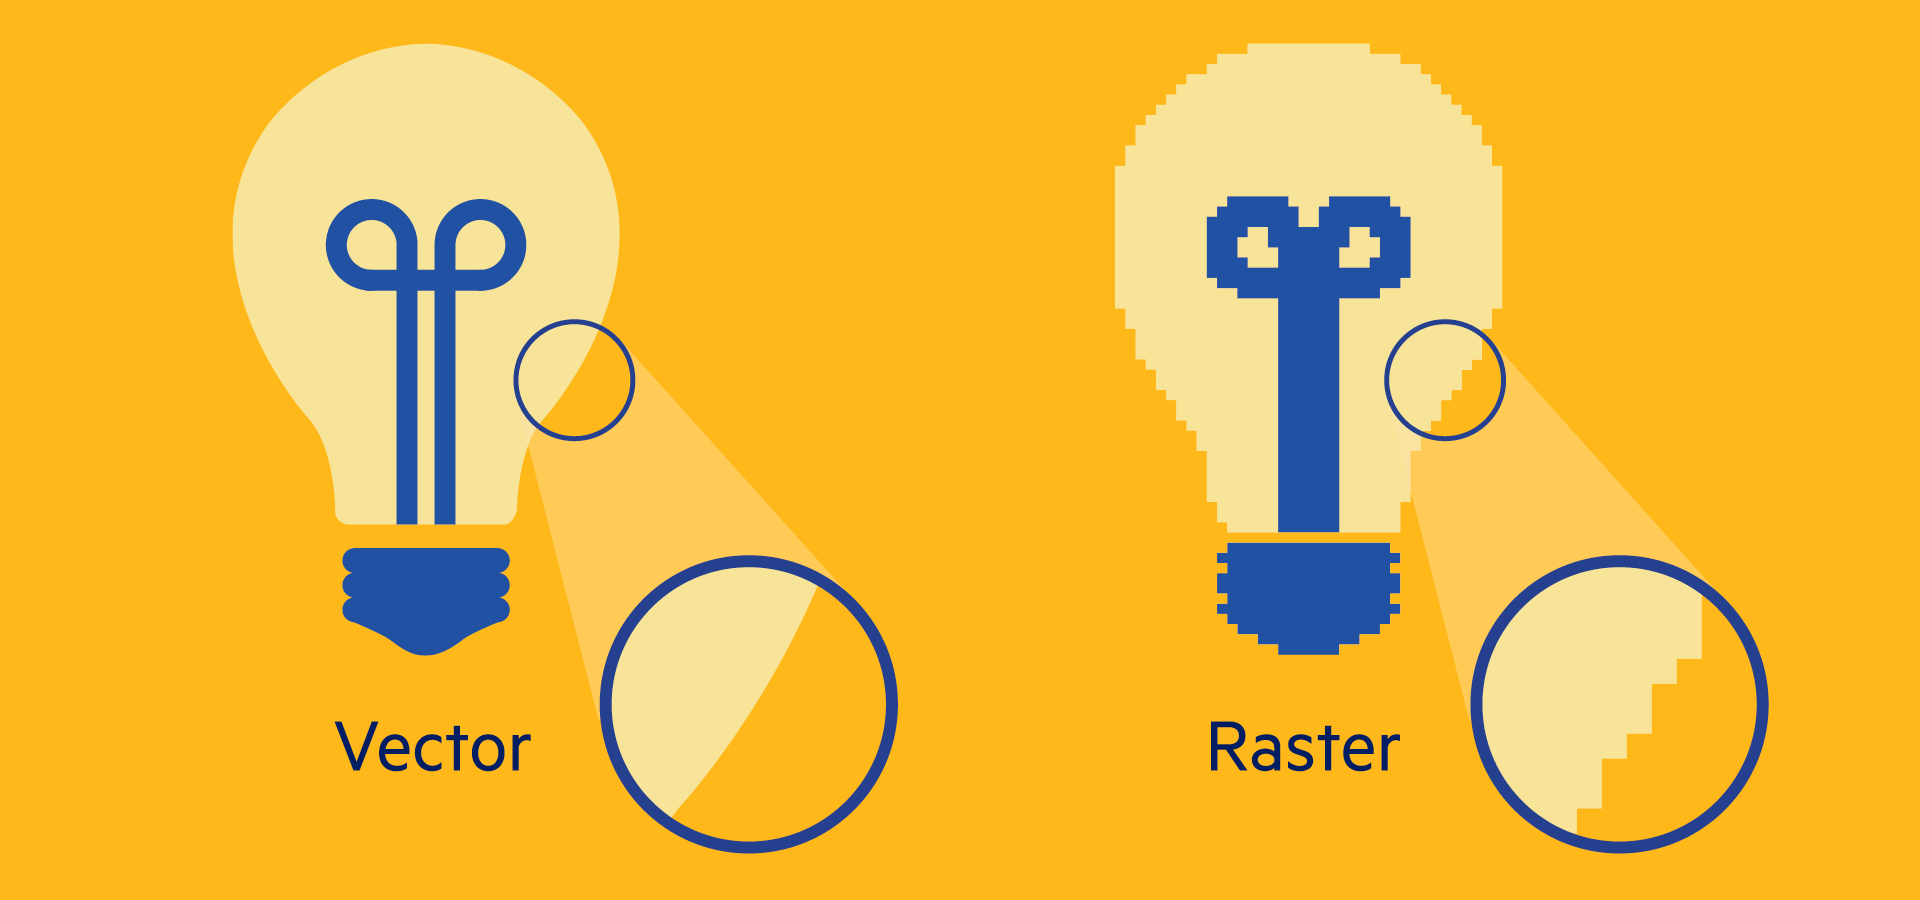
Difference Between Vector and Rasteer
Work flow of Raster and Vector
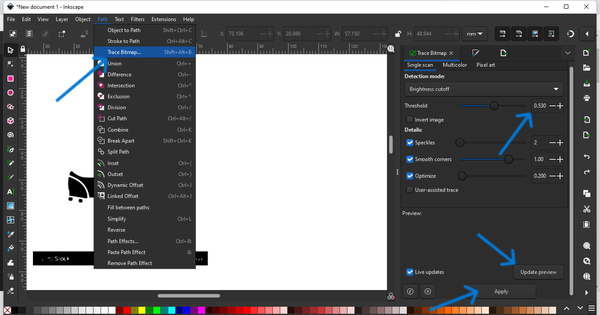
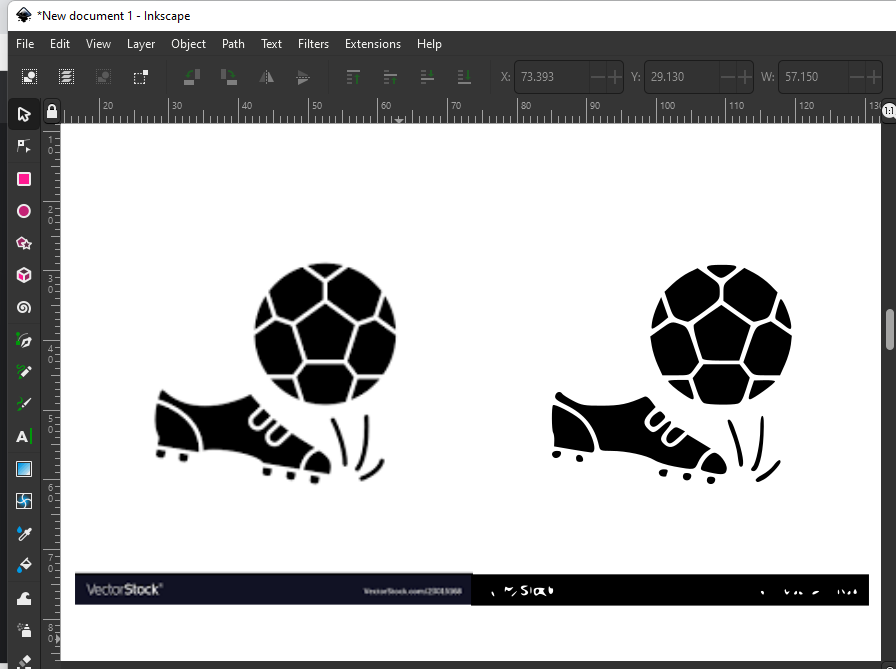
In this I have used inkscap software to generate a file and vectorize from rastor.
Raster Image
As google mention, Raster images are generally what you think about when thinking of images. These are the types of images that are produced when scanning or photographing an object. Raster images are compiled using pixels, or tiny dots, containing unique color and tonal information that come together to create the image.
Since raster images are pixel based, they are resolution dependent. The number of pixels that make up an image as well as how many of those pixels are displayed per inch, both determine the quality of an image. As you may have guessed, the more pixels in the image and the higher the resolution is, the higher quality the image will be
Here are some example of raster image editor that i have used with inbuilt image editor from window 11. In this image editor, it has many opting to change the;
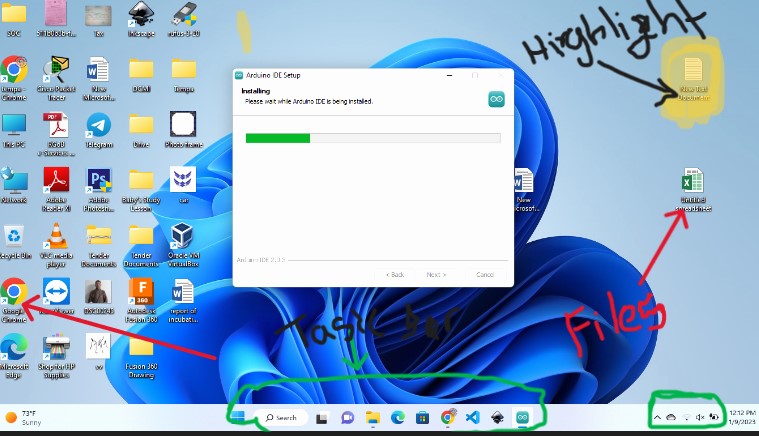
Here are some pictures to show you all:
Image/Video Compression
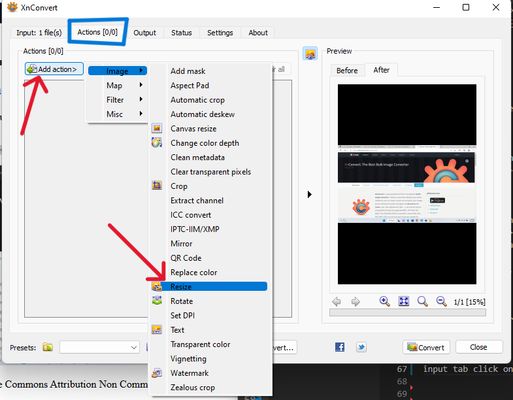
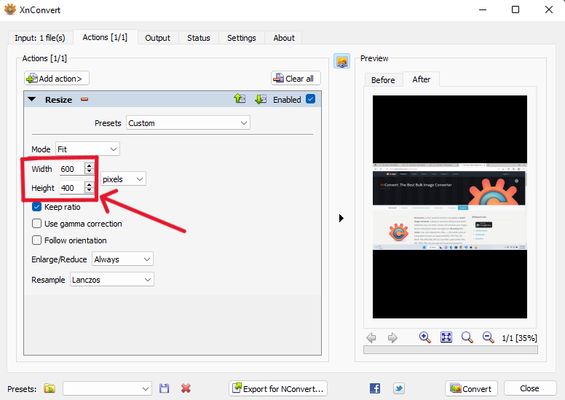
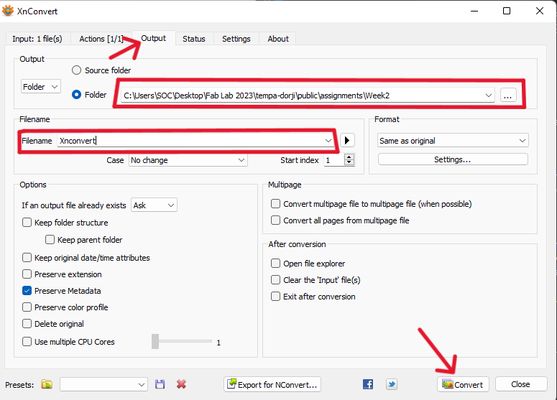
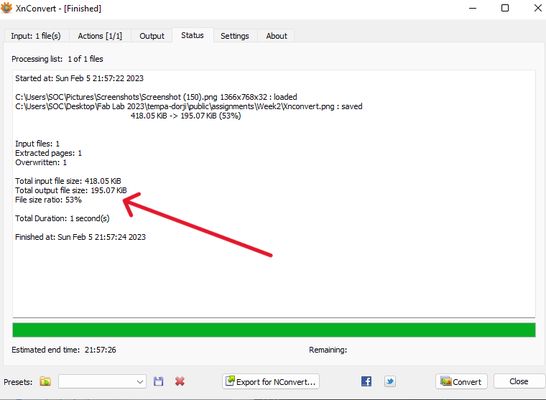
As we are aware from the last class on Thursday,we need to always compress our Images before pushing into repo so i have used Xnconvert Software as I am more comfortable and easy to use with the Xnconvert.
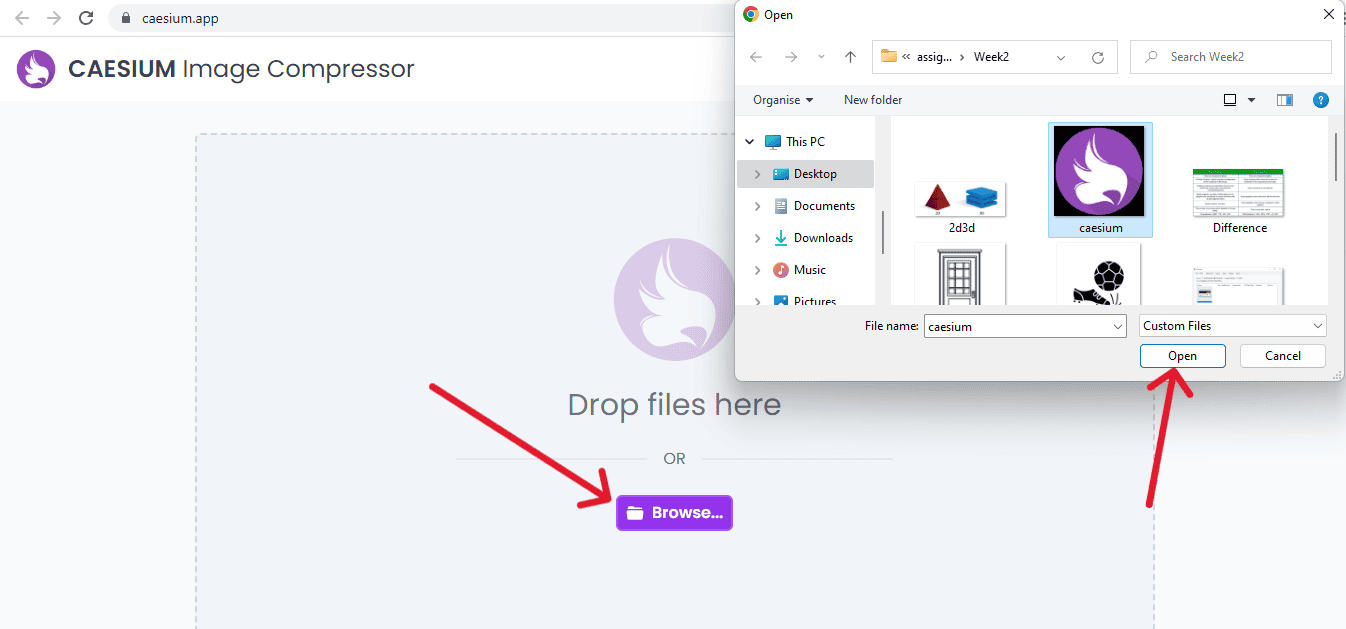
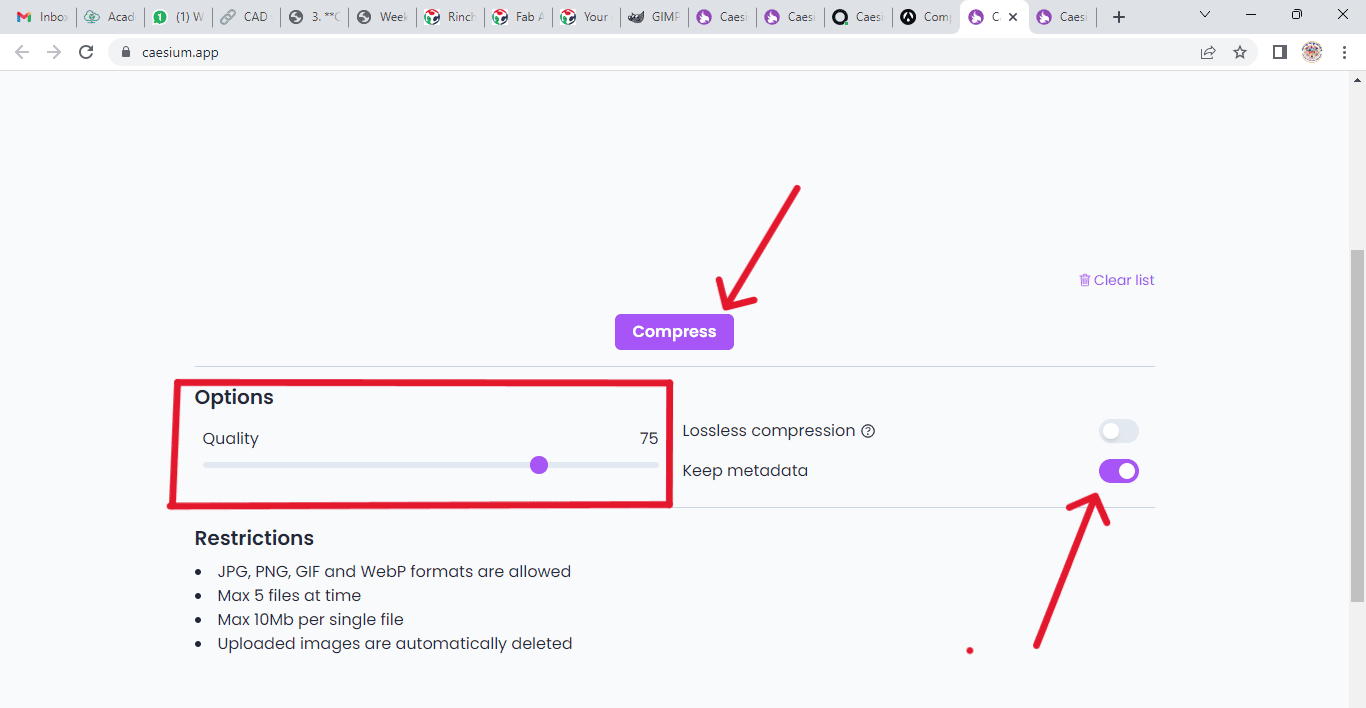
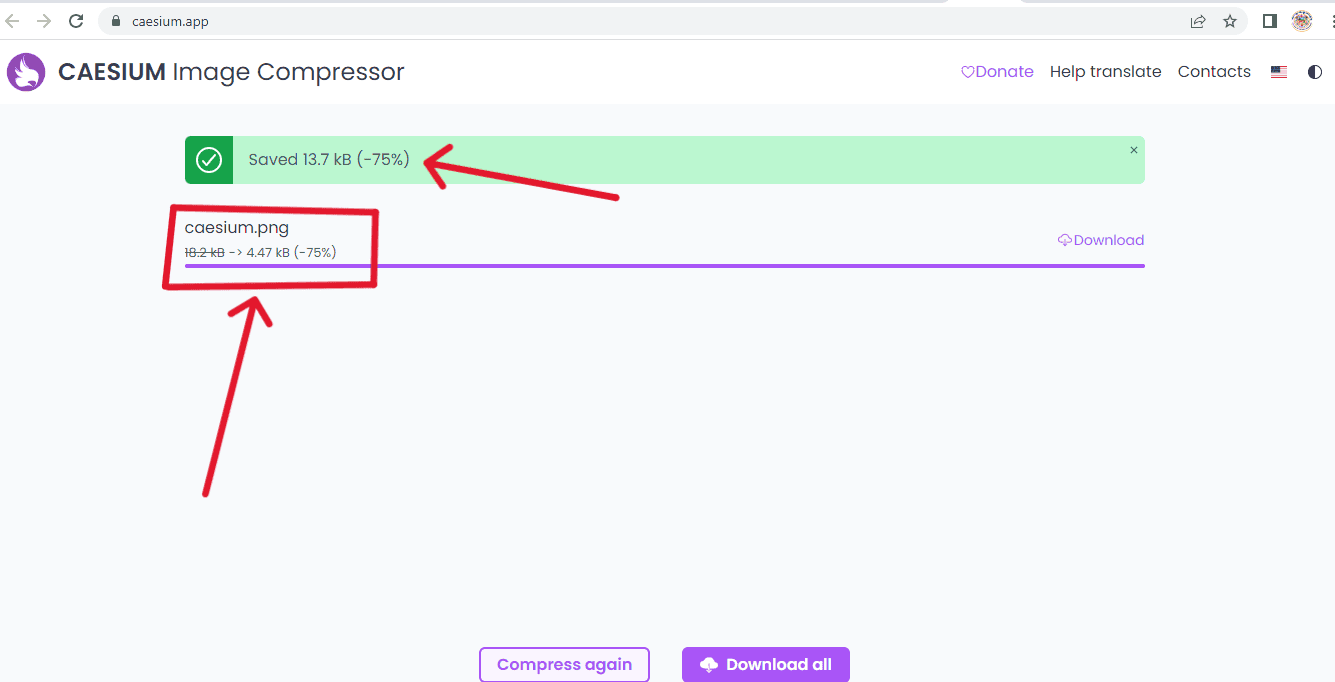
Compressing Using xnconvert Sofware and Online CAESIUM Image Compressor.
Online CAESIUM Image Compressor
Caesium Image Compressor is a free image compression application that allows you to compress your pictures up to 90% without visible quality loss. This tool is suitable for photographers,webmasters and businesses users that seek high flexibility image compression. It supports all types of images starting from JPEG, PNG, GIF, BMP, and WMF.

Video Compression
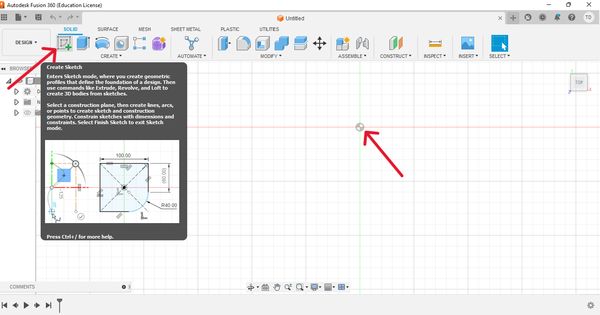
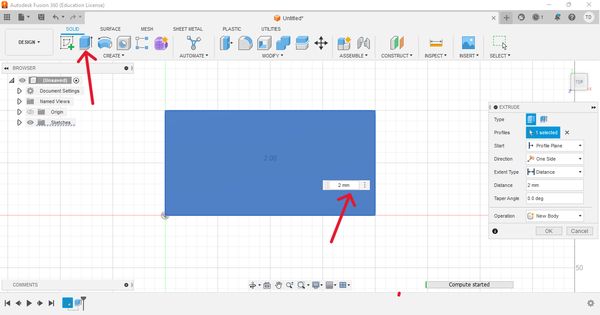
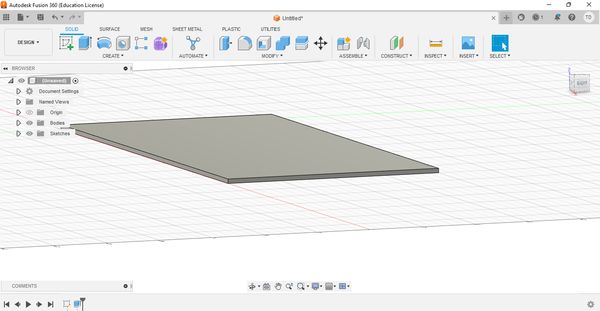
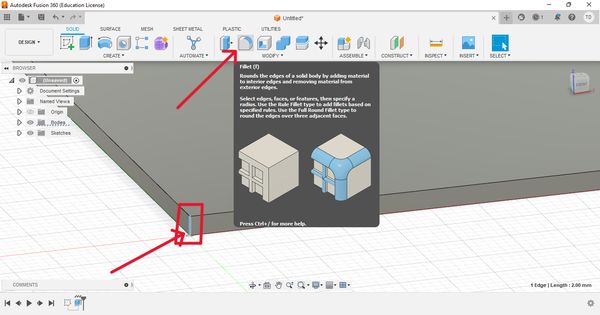
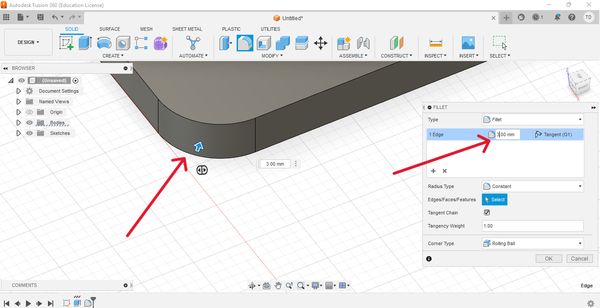
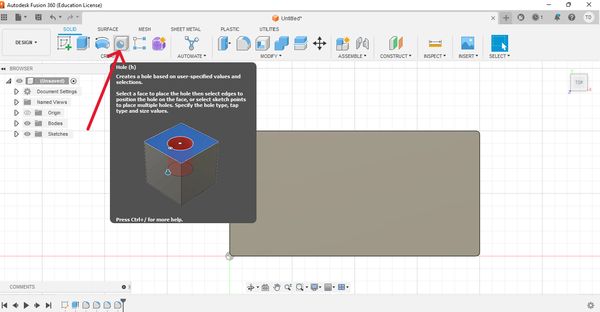
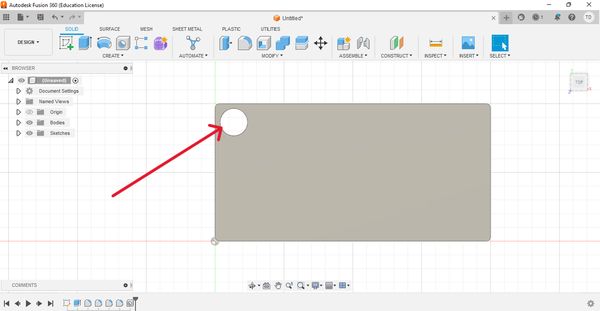
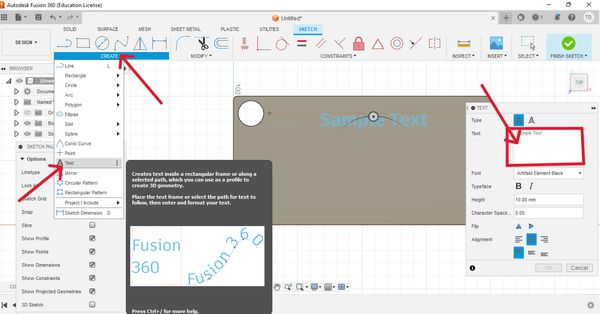
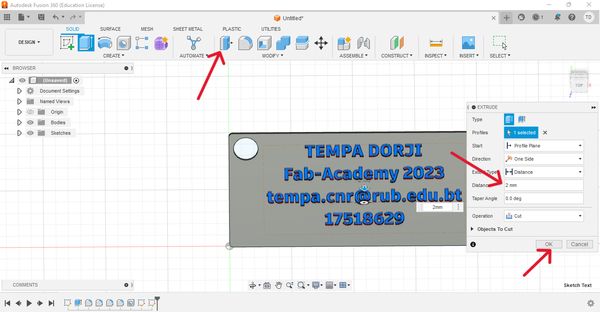
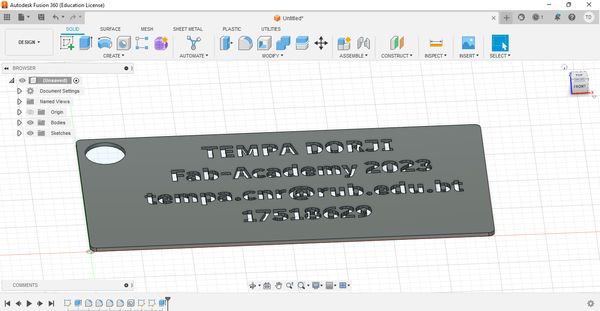
3D Design: Fusion360
Fusion 360 is a cloud-based 3D modeling, CAD, CAM, CAE, and PCB software platform for professional product design and manufacturing. For fabacademy, we were granted education license for fusion360 by the fab foundation. Therefore,I have installed fusion360 from here for the 3D designing tool. To go on this, first go into Autodesk website and sign in using your email that is linked to Fabacademy by clicking the “forgot my password”. Once login is complete, sign into fusion360 with the same email and you should have “education license” active.
In Fusion360, I am going to design a simple key hander with different tools and options. As I am alerdy familer with Fusion360 3D software from pre-fab academy so i have decided to work on this.

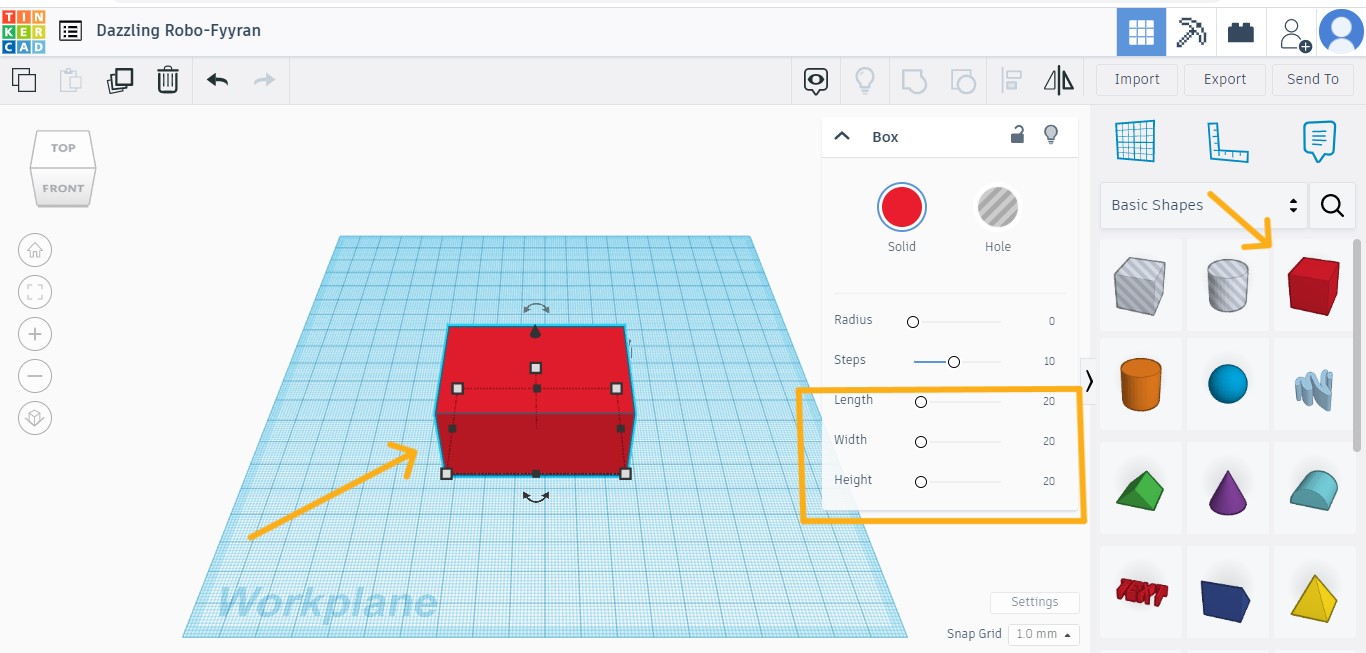
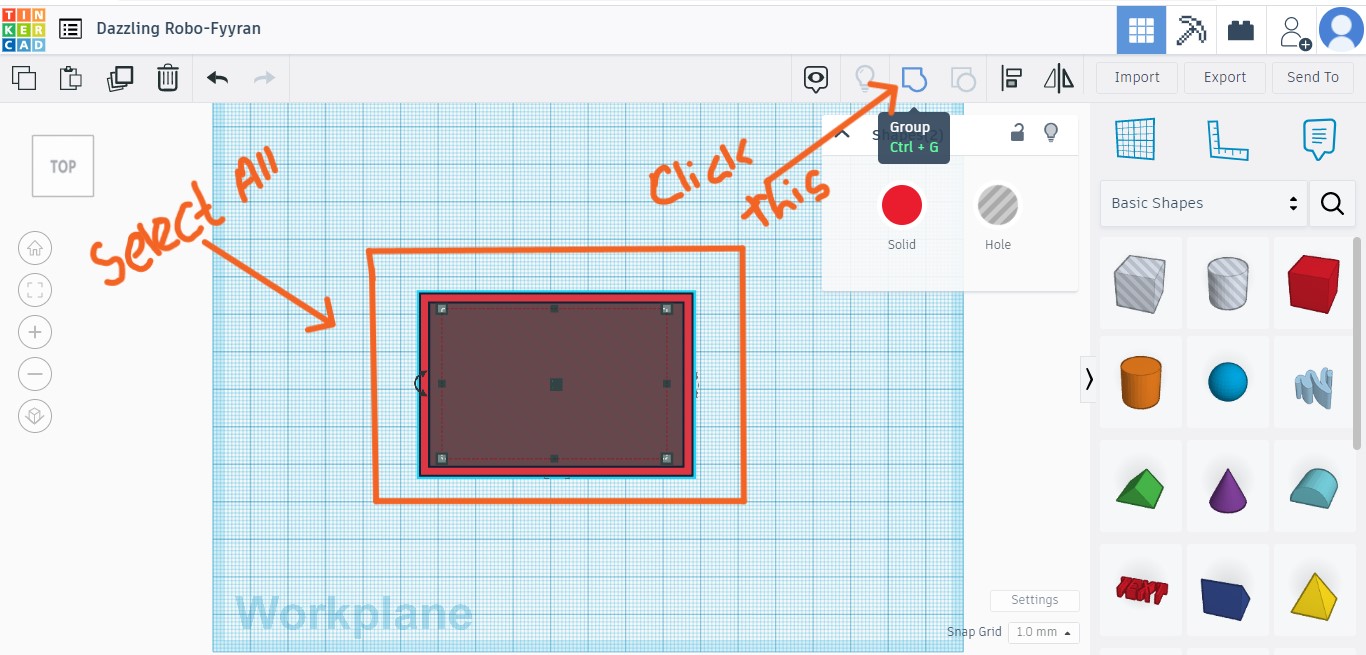
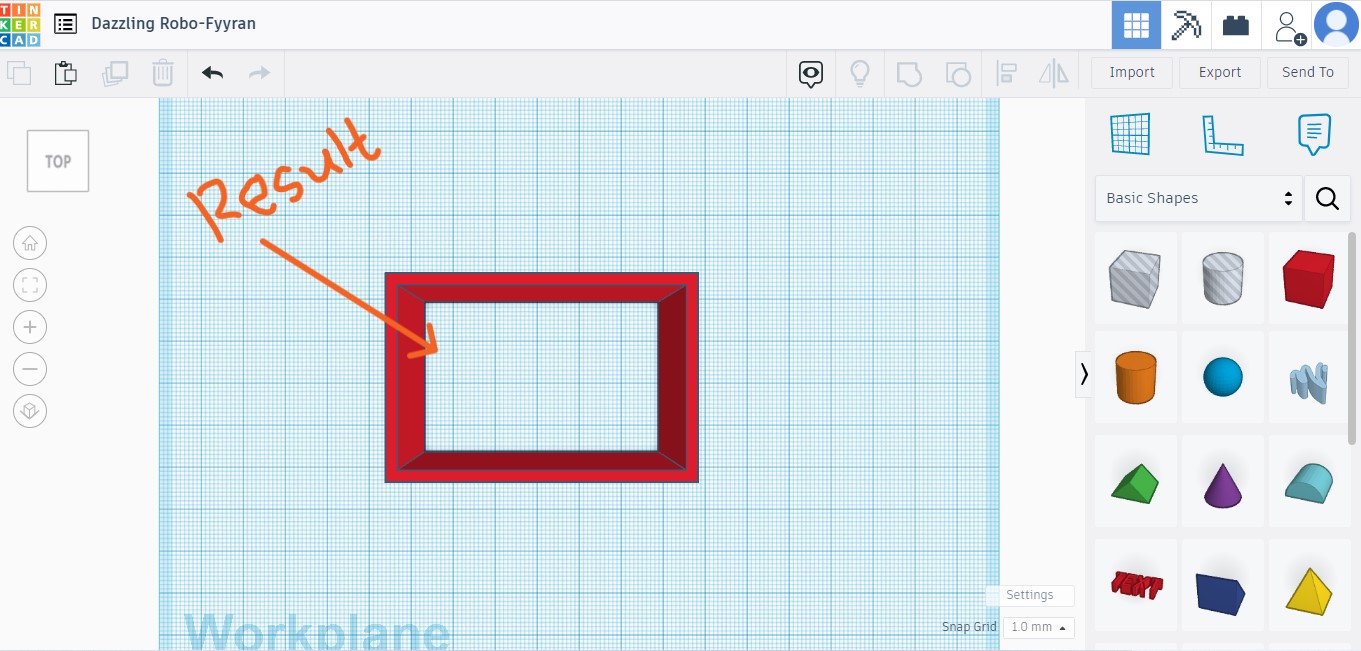
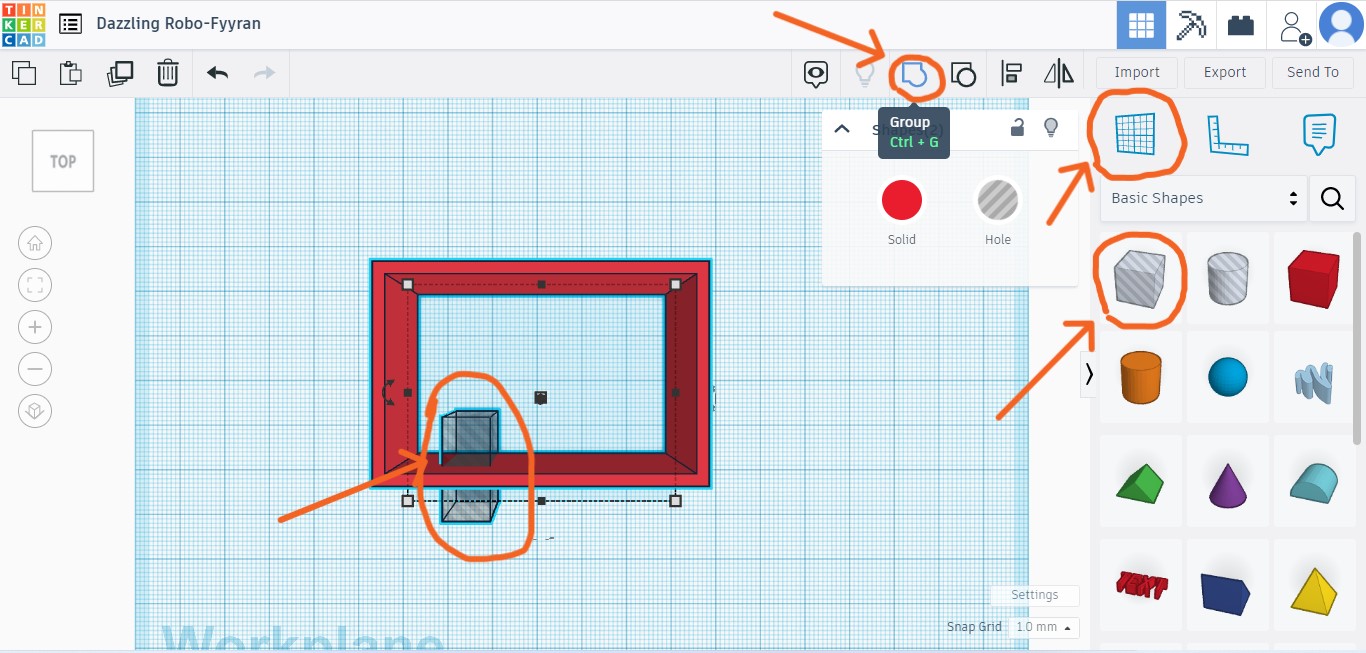
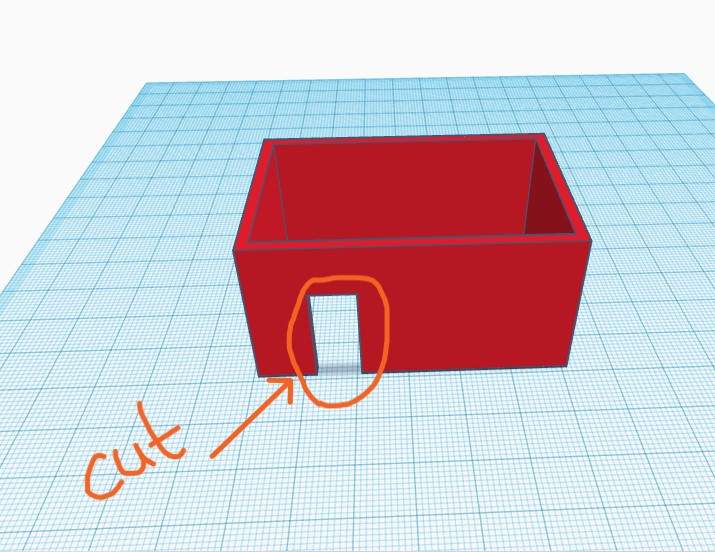
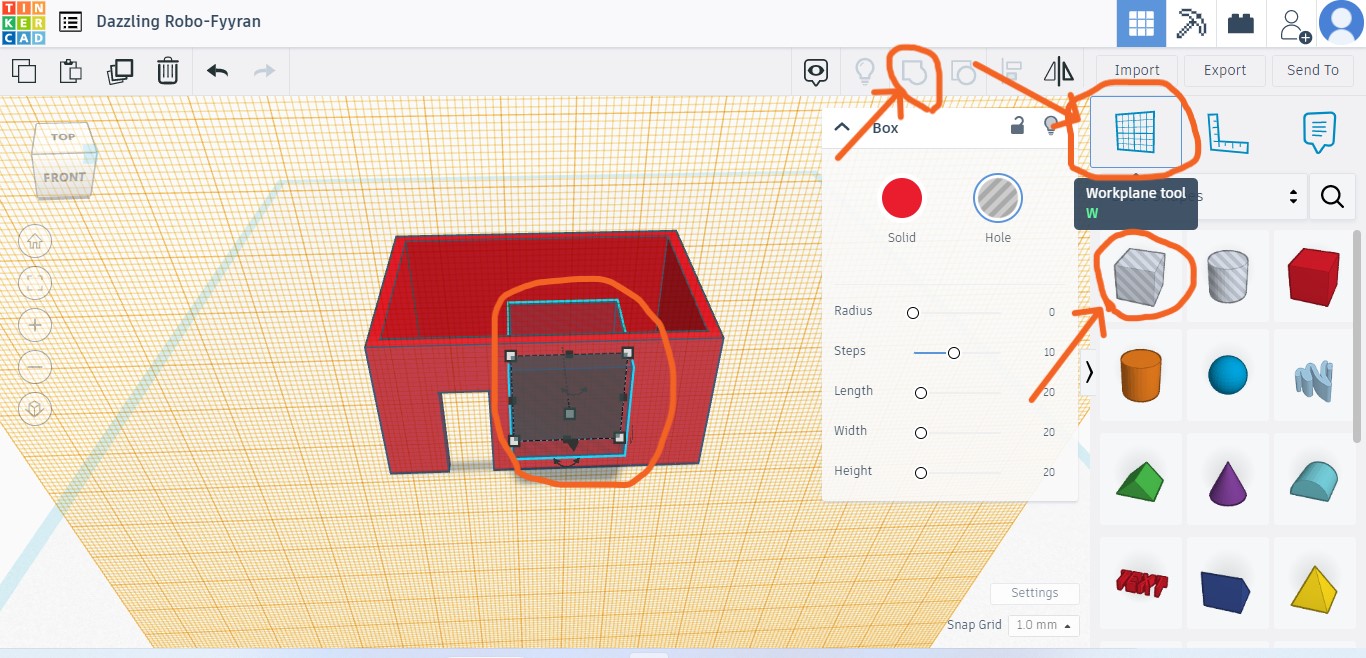
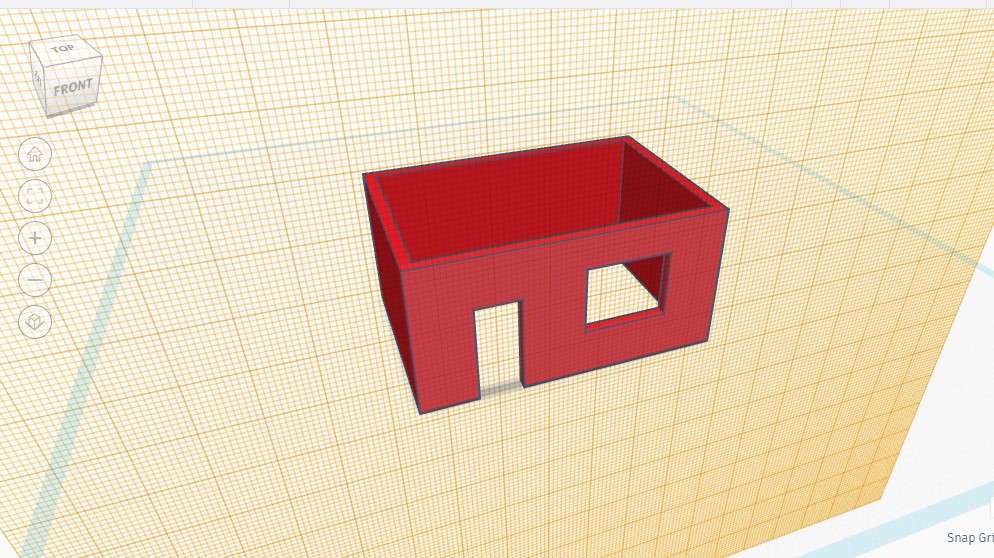
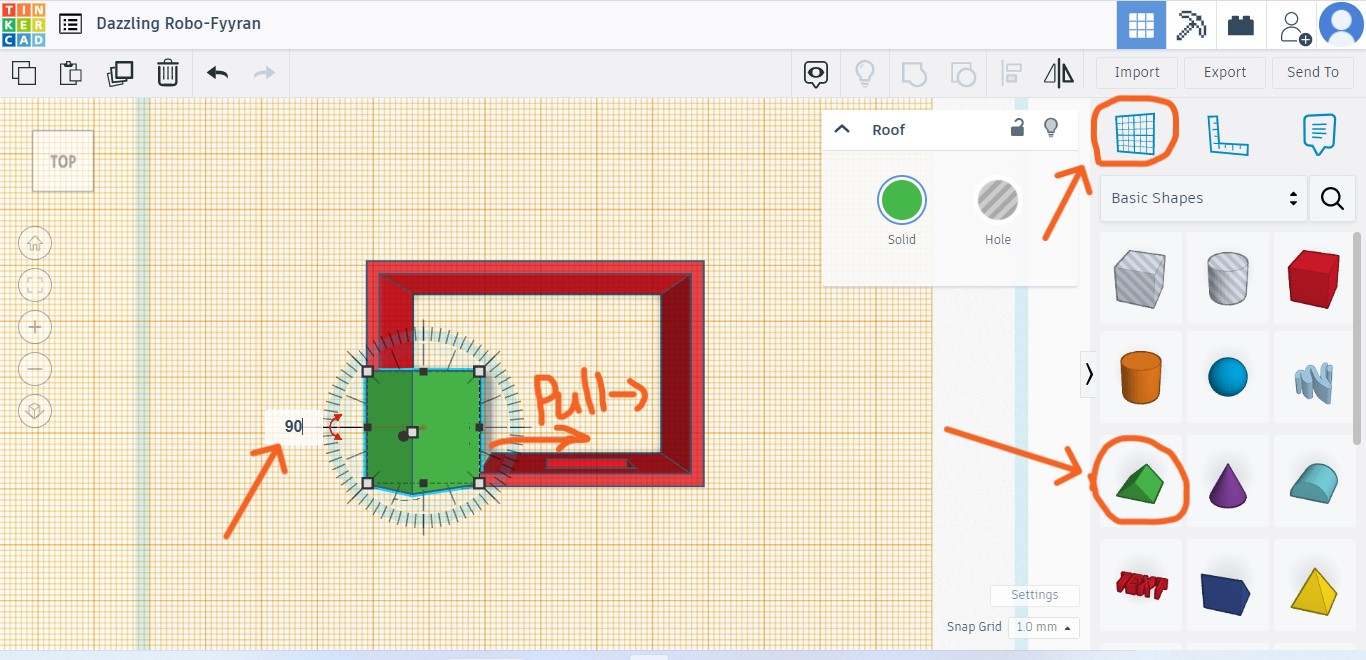
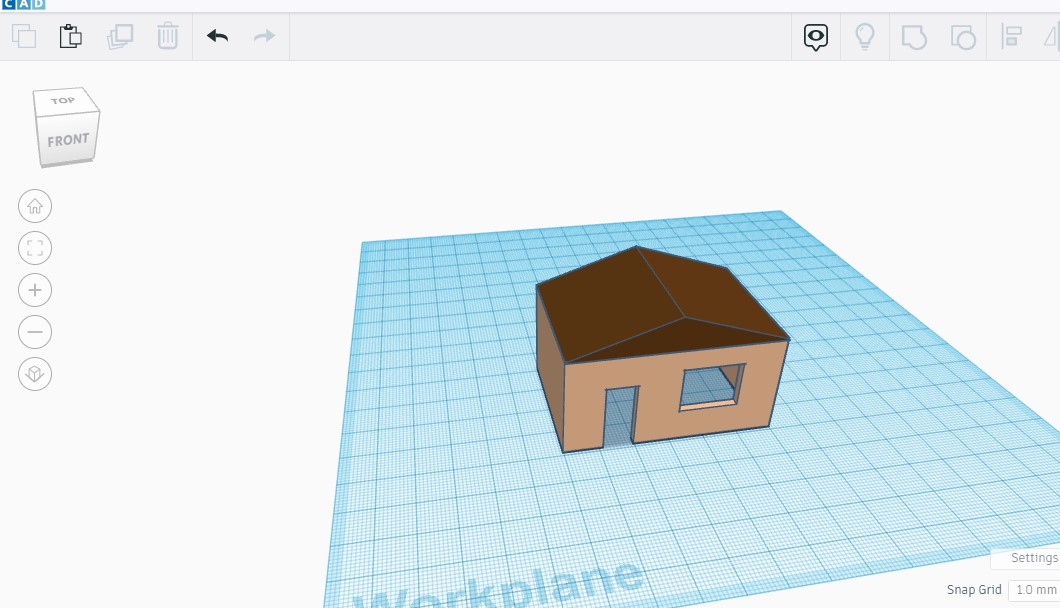
3D Design: Thinkercad
Tinkercad is a free web app for 3D design, electronics, and coding. We're the ideal introduction to Autodesk, a global leader in design and make technology.
In this thinkercad I have design a simple house with 3D design.

Video Compressing
As a IT person I am more familer with MP4 editor software so in this assignament i have used Kdenlive to compress my MP4 size. Link to download Software.
Kdenlive is an open source video editor. The project was started around 2003. Kdenlive is built on Qt and the KDE Frameworks libraries. Most of the video processing is done by the MLT Framework, which relies on many other open source projects like FFmpeg, frei0r, movit, ladspa, sox, etc…
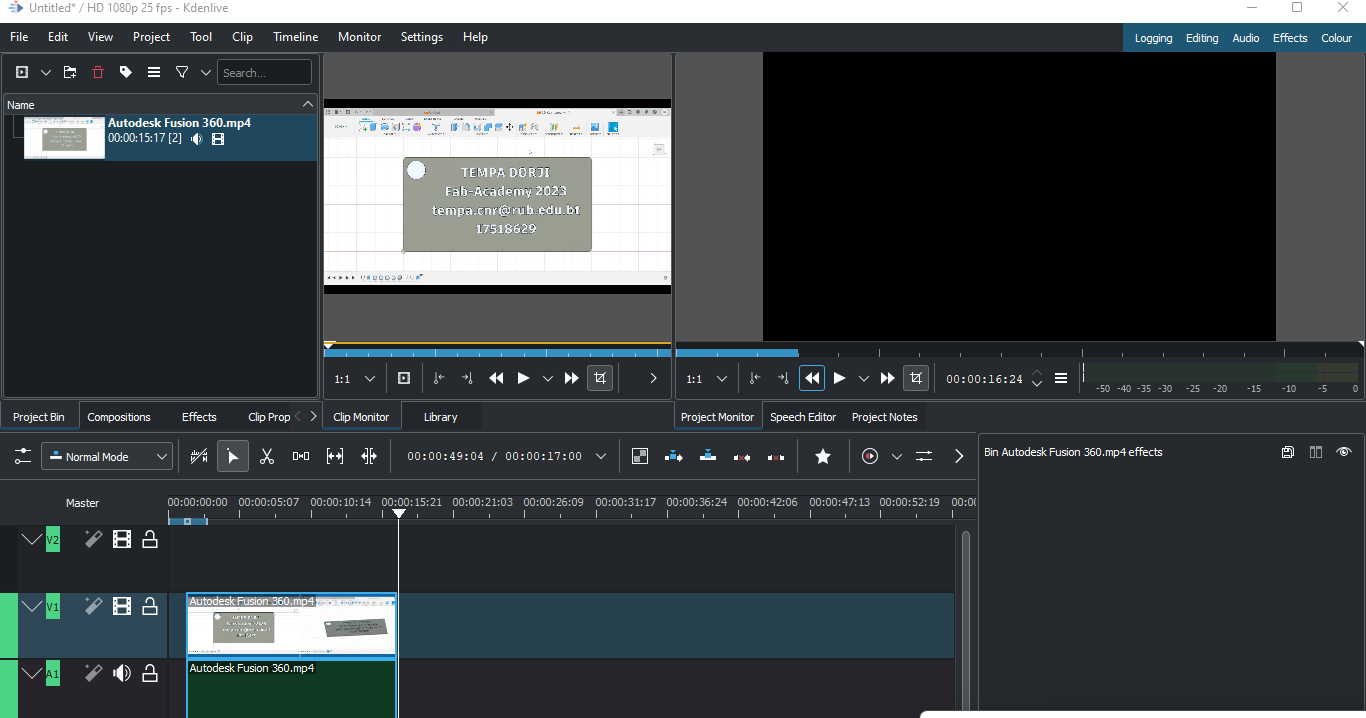
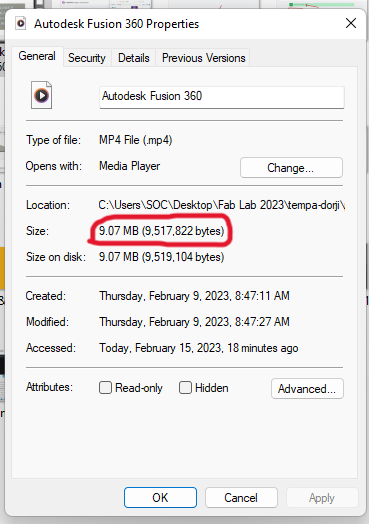
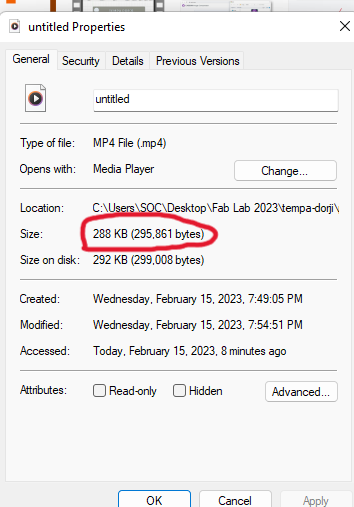
I have compressed the animated video which was created using fusion 360. Initially the video size was 9.7 MB.
Now to compress the video, I have draged and dropped my video in Kdenlive and put it in the timeline. Now click on the Render from project dropdown menu and select the more option button. Select the Rescale button and make sure to preserve the aspect ratio and clicked the render to file option.
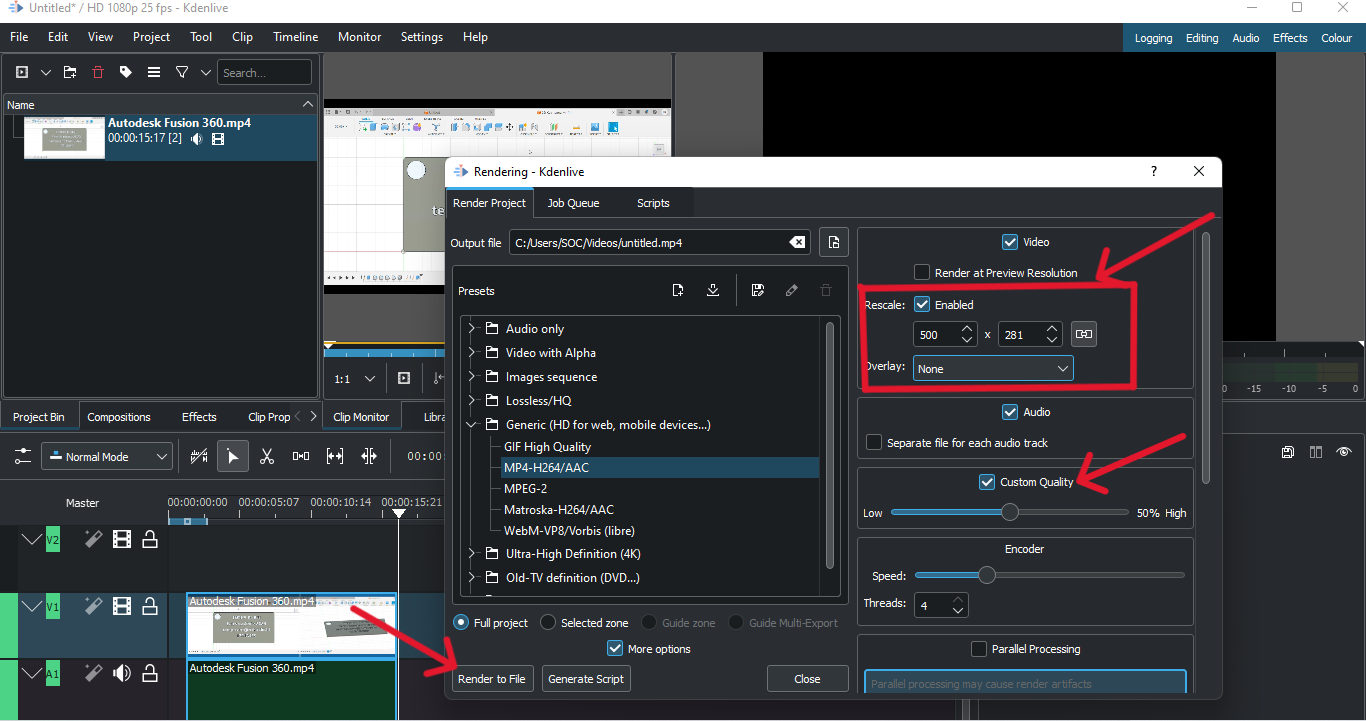
Now here we can see the compressed file size before and after.