
Week 01 - Project Management
This week was all about getting my website up and running. I had no background in web development nor coding. It is obvious that I should at least be familiar with coding since my background is in engineering, but I used to avoid all classes that did any form of coding. However, I was excited to learn all about HTML, CSS, and maybe some basics in Java script.
GitLab and Git Bash
Setting Up Git
At first, I had no idea what an online or a local repository was, I had to learn everything from scratch. With the span of one week, including the lectures provided, and our saviour YouTube, I managed to scratch the surface and learn enough to help me set up my GitLab account and clone the repository. After downloading and installing Git Bash, I have used the following commands to set up my username and email:
git config --global user.name “STUDENT_USERNAME”
git config --global user.email “STUDENT_EMAIL”
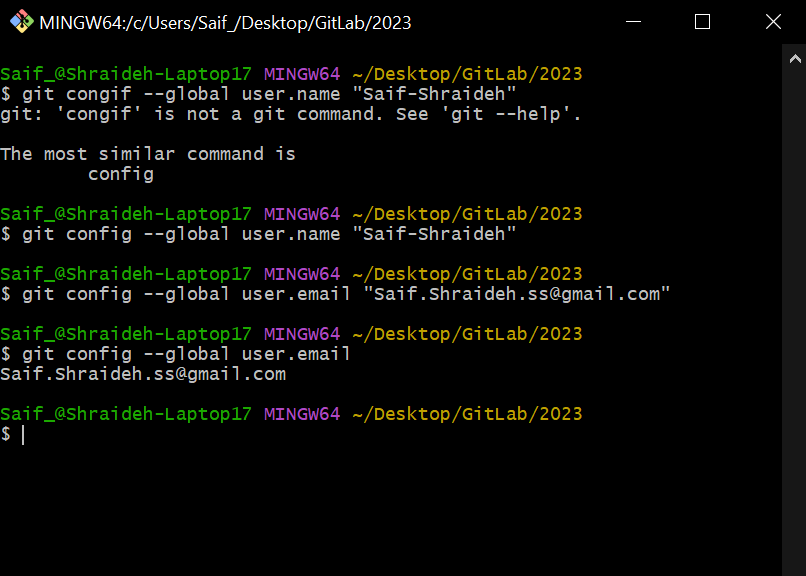
As you can see in the above image, my first mistake, a typo!
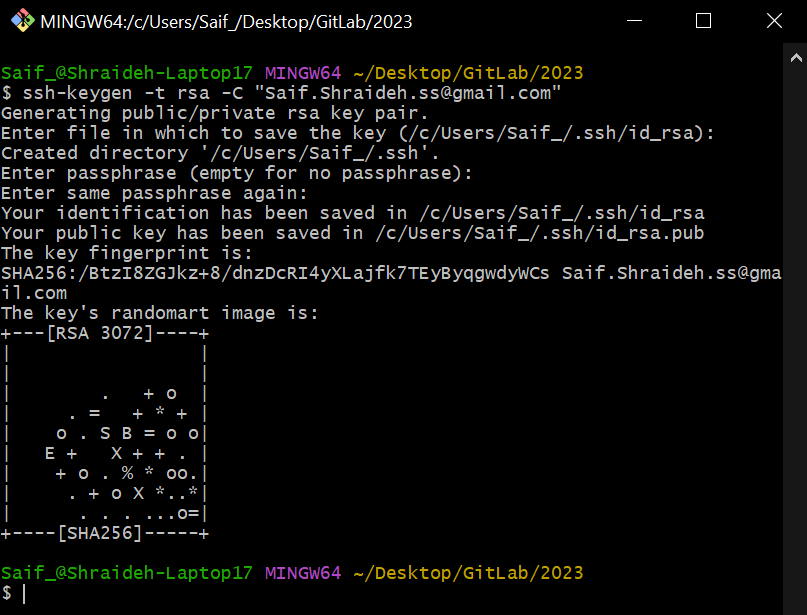
Then I had to connect my PC with the online repository by creating an SSH Key, I did so by using the following command:
ssh-keygen -t rsa -C "STUDENT_EMAIL"
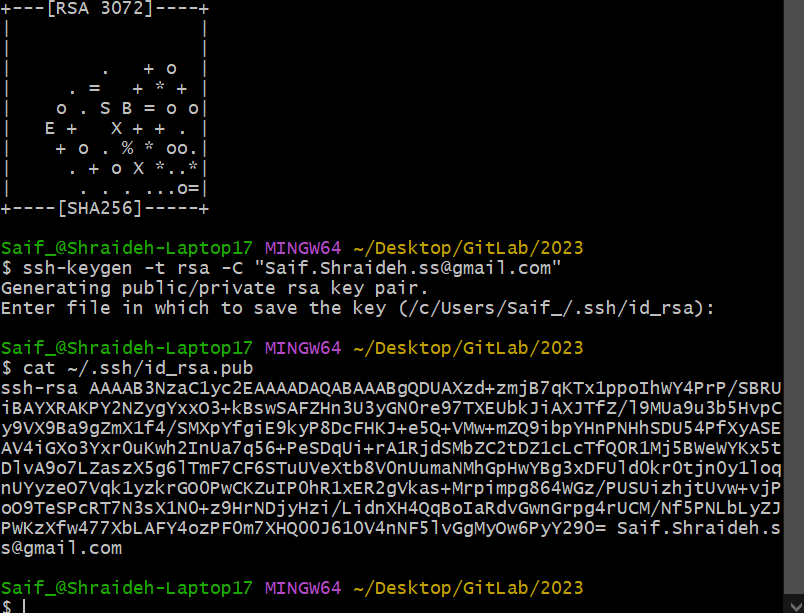
I used this command to check the SSH Key:
cat ~/.ssh/id_rsa.pub
Afterwards, I have copied and used the key in GitLab to connect my PC to the online repository. The whole reason we did this was to be able to work on our websites locally, or even offline. So, the final step was to download our online repository, so I did that using the following command:
git clone PERSONAL_GIT_URL
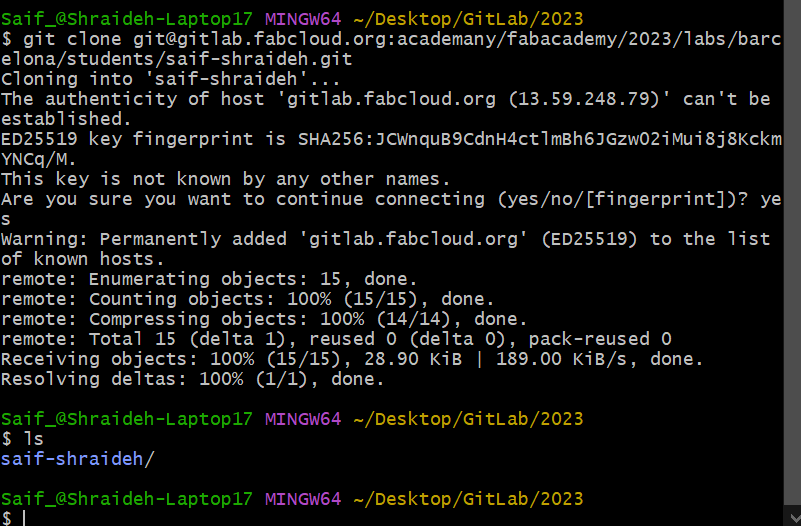
At this point, the local repository was setup and ready for work. I have decided to watch some YouTube tutorials about how to use Git Bash to help me get the basic commands and navigate between and/or create files and folders (directories). You can Click-Here to check the tutorial that helped me a great deal, also, I used Microsoft OneNote to create my own Git Bash cheat sheet.
Git Bash Cheat Sheet
| Command | Name | Function |
|---|---|---|
| pwd | Print Working Directory | • Shows which directory you are currently in |
| cd file_name
cd .. cd .. && cd .. |
Change Directory
- - |
• Takes you to the directory (folder) you chose
• Takes you to the previous directory • Takes you to the one before the previous directory |
| mkdir file_name | Make Directory | • Creates a directory |
| rmdir | Remove Directory | • Deletes a directory, can't delete if it contains folders |
| touch | - | • Creates a file, not directory |
| rm
rm * rm -r file_name |
Remove
- Remove Recursive |
• Deletes a file, not directory
• Deletes a file, not directory • Deletes a directory and all the files that it contains |
| command --help | Help | • Shows you all the options of the chosen command |
| start file_name
start . |
-
- |
• Opens the chosen folder
• Opens the current folder you are in |
| mv file_name directory /new_name | Move | • Moves files into chosen directories with the option of changing its name |
| ctrl c | - | • Terminates the current command |
| clear | - | • Clears the console |
| ls
ls file_name |
List
- |
• Lists all the files (white) and directories (blue) in a given directory
• Lists chosen file if it is available |
| echo "Text" > file.txt | - | • Creates a text file with the chosen text, add another '>' to add to the previous text without deleting it |
| cat file_name | - | • Gives you the content of any file |
| cp file_name directory/new_name
cp directory1/*directory2 |
Copy
Copy All |
• Copies a file to a chosen directory with the option of changing its name
• Copies all the files from 1 directory to the other |
| vim file_name
:q! :x! |
-
Exit Without Saving Exit With Saving |
• Opens the chosen file with the option of editing its contents, also, if the file name doesn't exist, it creates it and opens it |
| exit | - | • Exits the terminal |
Side note: I highly recommend Microsoft OneNote for taking notes or documenting information. It helps to create a file for each day and each session in an organized manner, which makes life a little easier.
Updating the Online Repository
At some point, we made changes to our files, since my changes were done locally, I had to update the online repository, so it stayed up to date. I like to think about the online repository as OneDrive, we work on our files locally, then we update OneDrive by copying local files and pasting them there. Updating the online repository had the same logic, but with a slightly different procedure, actually a completely different procedure.
The procedure followed three main codes in the following order:
git add “FILE_NAME”
git commit -m “MESSAGE”
git push
When committing, it was recommended to write a detailed/meaningful message that made sense to us. This helped us recall what changes we made if/when we visited them later in the future. Afterwards, the files are pushed to the online repository.
I usually like to check the status between each command to make sure that there are no errors within the process, I did that with the following code:
git status
The following images are an example of the process, of which I added a profile picture and updated the 'about me' page.
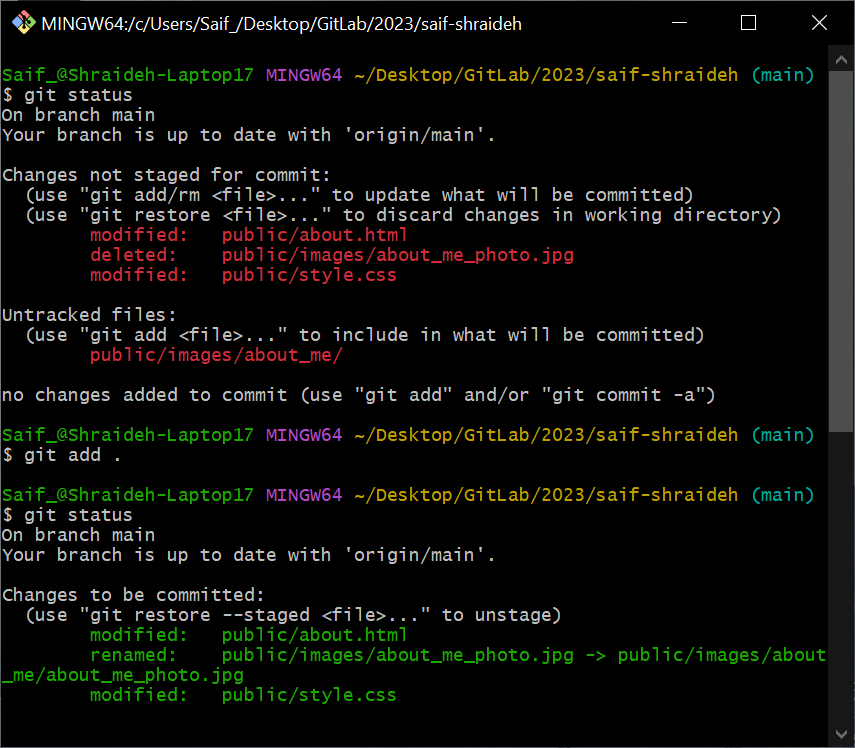
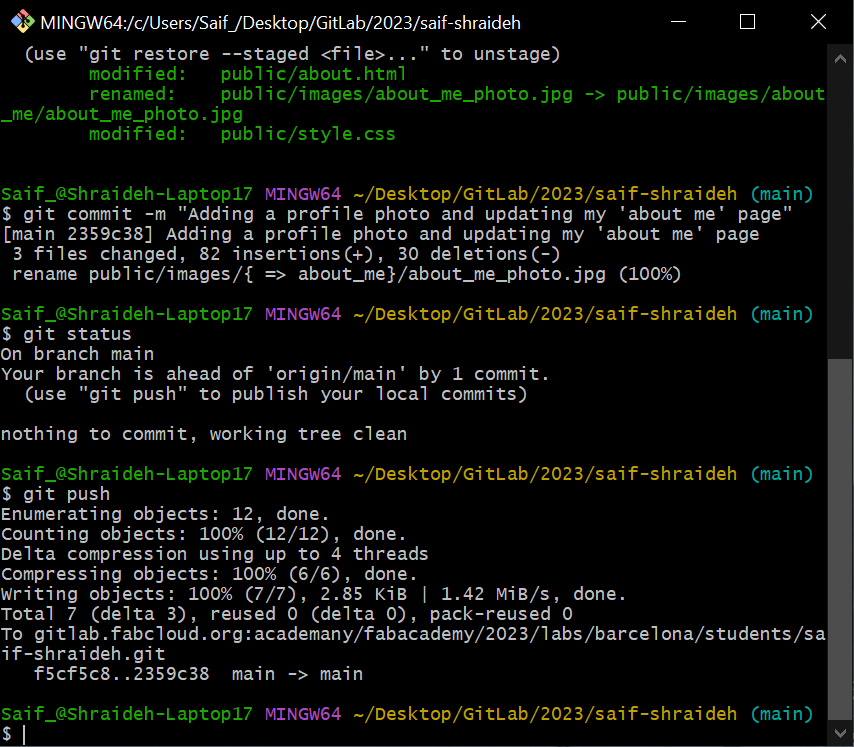
To triple check or quadruple… I lost count… well, you got the gist. I made sure that all the changes are up to date by checking the pipeline on my GitLab account, if all is green/passed then all is good.

In a nutshell, this is how I updated my online repository every time I made any change.
Lessons Learned
A lot of the errors and the failures that I used to get where either due to typos or executing a command in the wrong folder. Whenever I opened a certain folder in file explorer, I assumed that Git Bash was automatically there with me, I kept on forgetting that I needed to enter the path again using the ''cd' command. Then an error message pops up telling me that the file that I am looking for doesn't exist, which definitely did not make any sense at the time.
Another thing that confused me at first was whenever we updated our repository, we used the Git command, however, when we did normal file management, we only typed the commands without the word Git. Then my instructor got it to my attention that we use the command Git whenever we want to use Git itself for version control. In other words, to make Git keep a history of what we have done. For simplicity, we use the Git command whenever we want to update our online repository.
HTML and CSS
All I knew about HTML was that it existed… that's it. Anytime I opened a random file on my PC and found weird file extensions, I automatically knew that I should not be in this place. But thanks to Fab Academy and some YouTube tutorials, this was no longer the case. Building your own website from scratch using code always fascinated me, especially having a screen full of code made me feel like I am in the matrix. But in reality, all I was doing is updating the parameters of a broken image.
I had to download a text editor to be able to code a website. We had many options including Sublime Text, Atom, Visual Studio Code, Notepad++, and much more. After some research, I decided to download VS Code for few reasons, the user interface, and the extensions. Although most of the text editors had the same features, but with some online reviews, I was convinced to download VS Code.
I have watched many tutorials, but this tutorial helped me the most. I have learned the basics which helped me stand on my feet, and whenever I looked at a complicated code, I at least had a good idea what was going on. I have downloaded three extensions on VS Code: Prettier - Code Formatter, Live Server, and Auto-Open Markdown Preview. The first extension helped me in making the code more consistent and readable, added any missing apostrophes, cleaned extra spaces, it just made the code prettier. As for the second extension, whenever I modified the file, the browser automatically refreshed and displayed the updates, which gave me the ability to see the changes immediately, which is what is meant by "live server."
Finally, Auto-Open Markdown Preview extension hit two birds with one stone. I knew that Markdown had a simpler syntax than HTML and having the skill to use Markdown was a plus. The second bird was when I discovered that I could use Markdown directly on VS Code while having a live preview next to the code. That was the selling point for me, or in that case the installation point… well you know… because it was free. I found it quite easy to do certain complicated things on Markdown then convert them to HTML using their converter. But I preferred to use HTML as the main code since it had the upmost flexibility for designing a website.
After all that agony, I have decided to use a website template. Ideally, I wanted to create my own website from scratch, but creating something similar to what the templates provided was quite hard for the time span we had got. So, I decided to go with HTML5 UP website, it provided simple and clean templates given the sections that we needed to include in our websites.