
Week 00 - Principles and Practices
In this page, I will discuss some potential final project ideas. Some of these ideas where thought of and designed a while back, and some were new.
Tricopter Drone
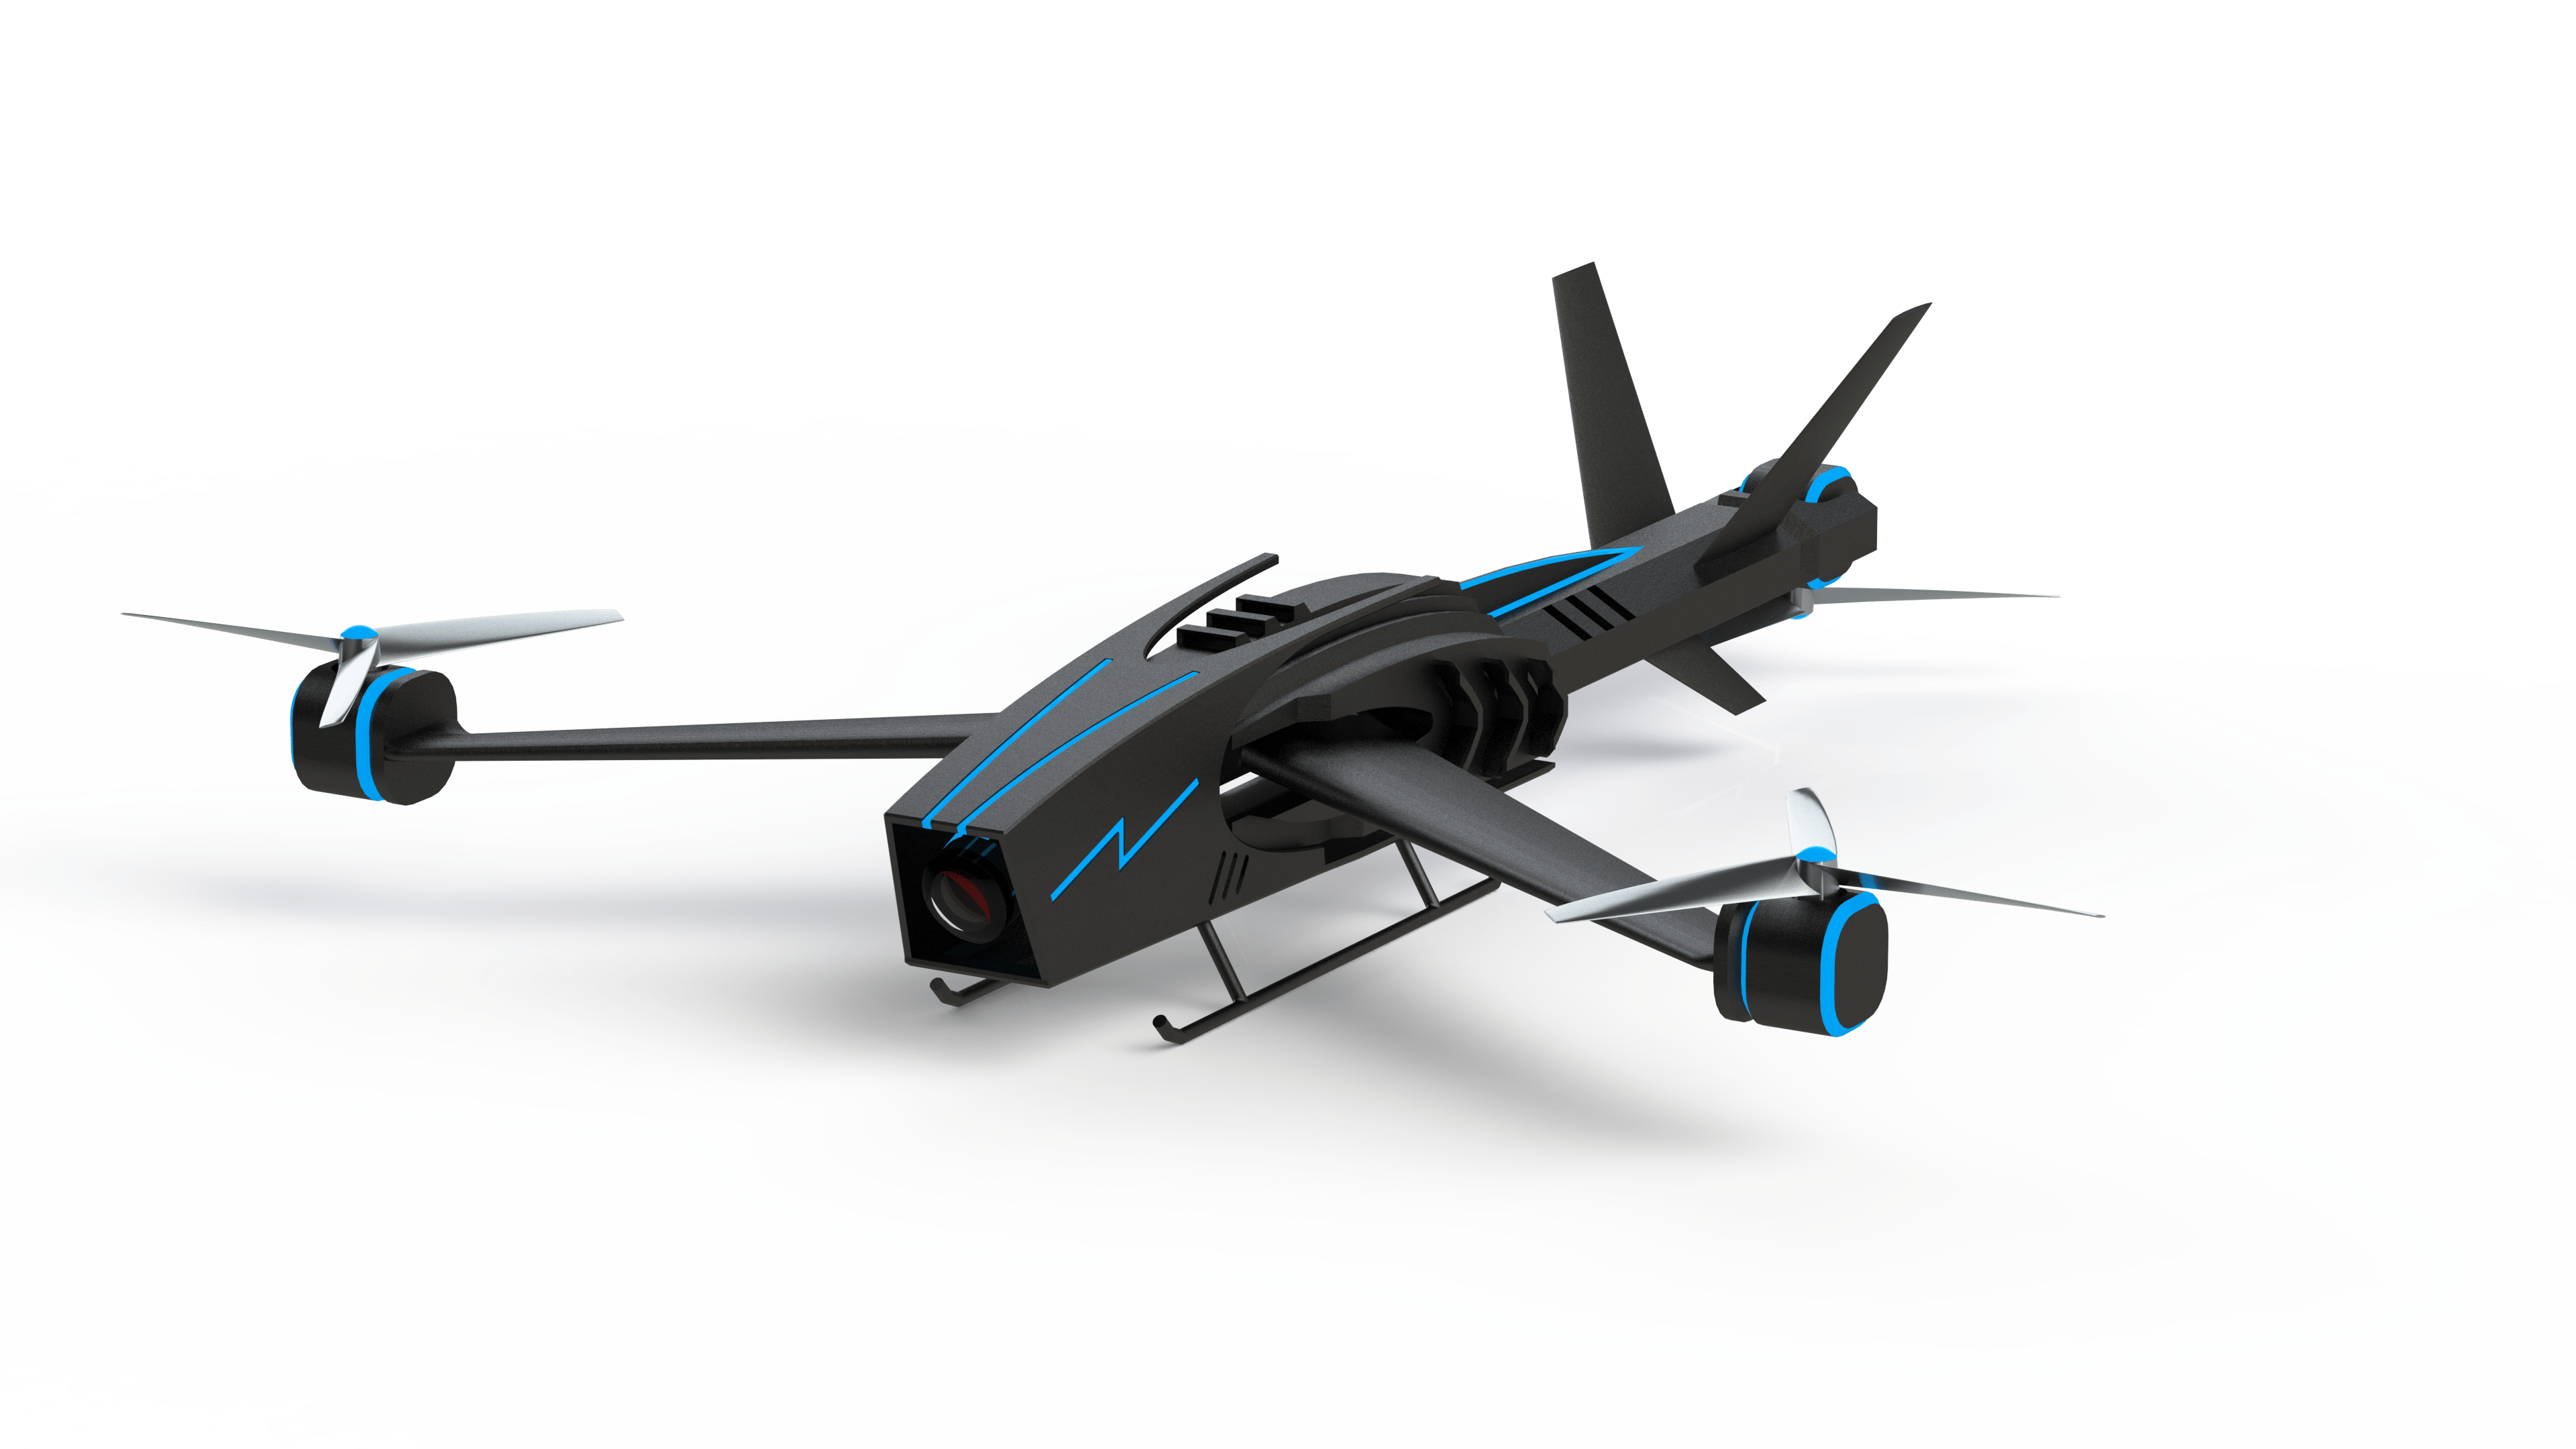
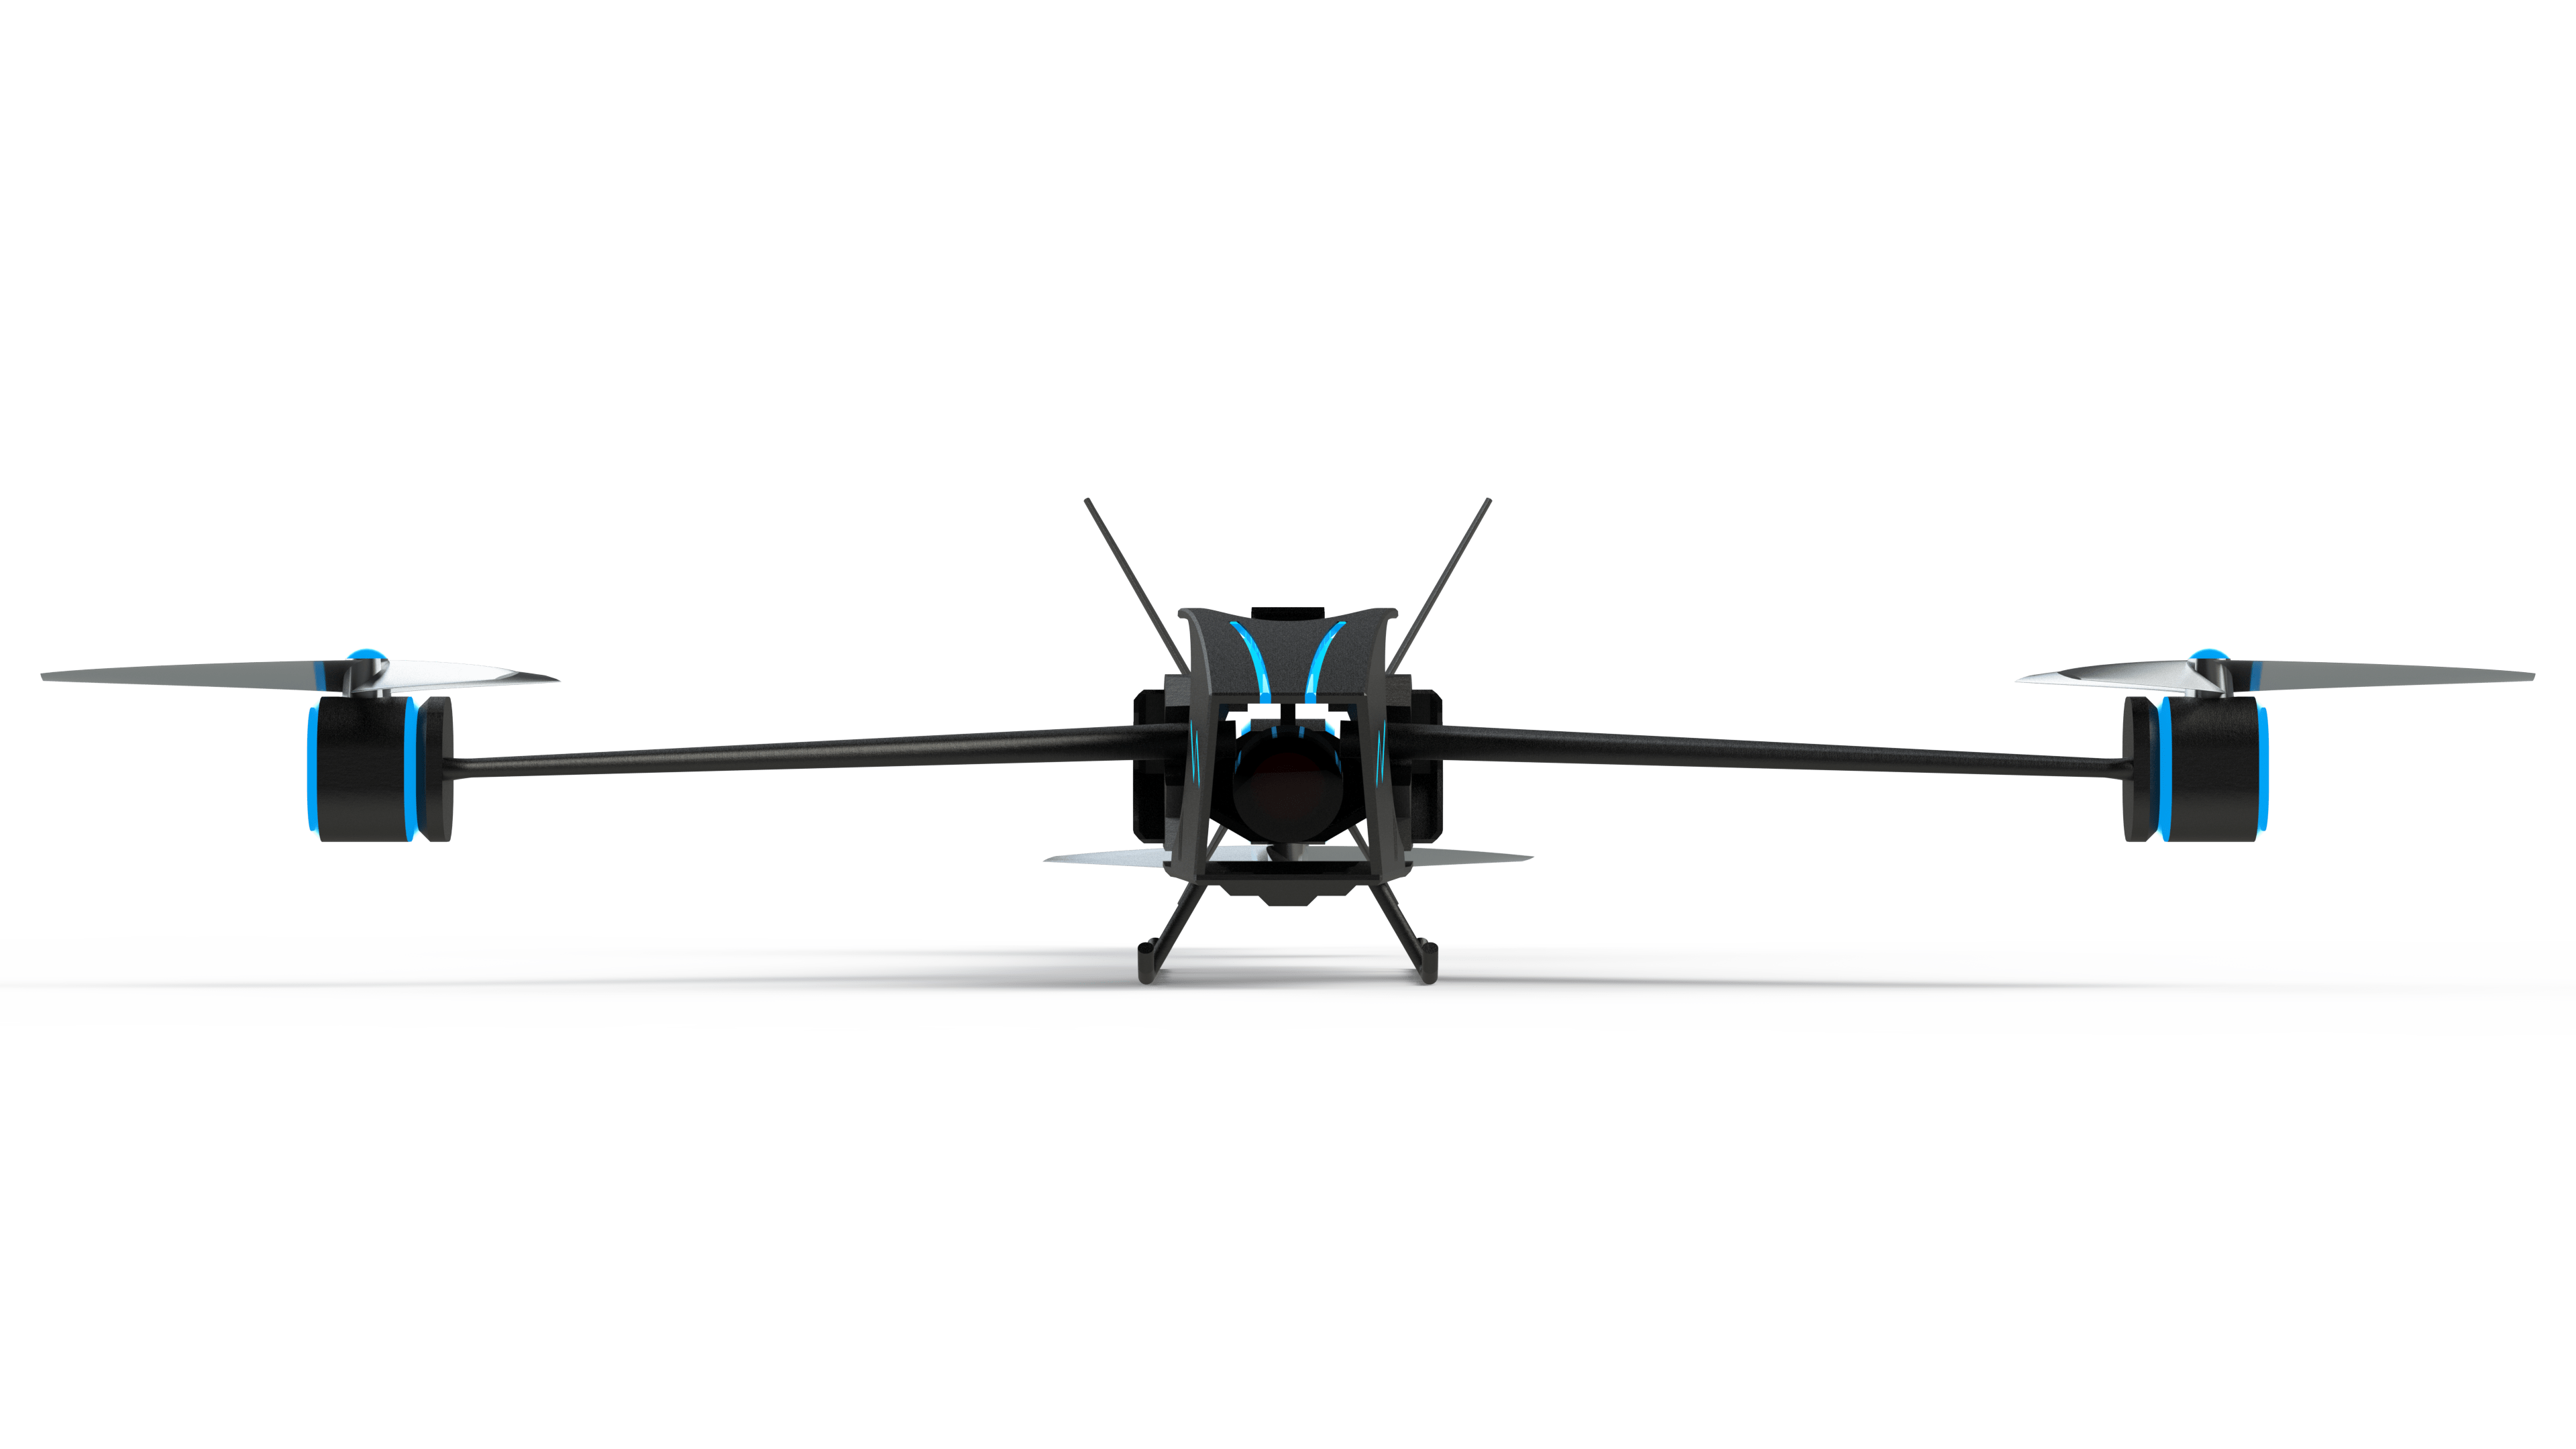
The tricopter is a drone I started designing a while back. The main concept of this drone is to have great maneuverability as a conventional quadcopter while performing forward flight as efficiently as a fixed wing craft. This combination allows this drone to be used in multiple applications. It can take-off and land similar to a conventional quadcopter due to the propeller positioning. The maneuverability characteristics will be different than a conventional quadcopter due to having one less propeller, this could be advantageous in certain applications. Then it can transition to forward flight by rotating the propellers, then use the front wings for lift. A normal quadcopter uses thrust differential to attain different movements which is not super-efficient. This tricopter will use thrust vectoring in addition to thrust differential which can offer better efficiency with greater control.
The potential idea of this drone is to be a base platform for more drone designs in the future, to serve governmental institutions such as police, ambulance, and fire departments. Due to the versatility of the design, the tricopter can be developed to suit each department's needs exactly. For instance, police could require an agile drone that can move quickly between buildings to follow a target. Fire departments might need drones for search and rescue, these drones could be equipped with fire retardant materials or supplies for the team at the desired location. The ambulance department could require a drone that flies as fast as possible to the desired location while carrying supplies customized to the case it is attending to. All these requirements can be achieved with this drone design.
If I chose this project, I will focus on one aspect of the design which is the control system of this tricopter. Ideally the materials required could be carbon fibre boards, but wooden boards would do. Some brushless motors, ESC's, Arduino board, flight controller, and some other electronics will be required to start designing the control system.
Miniature Wind Tunnel
As the name suggests, the wind tunnel is a large box tube structure that can simulate objects in flight. Wind tunnels come in various forms and sizes depending on the type of the research that is being done. What all wind tunnels have in common is that they reduce the costs of research by giving researchers the option to create a scaled version of the object being studied, rather than manufacturing the actual sized object hoping it performs as intended.
The idea behind the miniature wind tunnel is to provide students and hobbyists the ability to test their designs in what to be considered the closest to a real-world scenario given their budget. Although actual sized wind tunnels are cheaper than manufacturing a whole aircraft for instance, yet they are still too difficult and too expensive to operate. They are difficult in the sense of requiring fine tuning so researchers can get accurate results which can be scalable. Also, they require a very strong background in aeronautics and computer science to understand if the results that these machines are giving are logical. They are expensive in the sense of being energy hungry machines. Many wind tunnel designs include a closed loop wind tunnel, AKA 'Closed Return Wind Tunnel', which are cheaper to operate and more efficient. Still expensive for students and hobbyists.
The miniature wind tunnel will provide students and hobbyists access to visualize wind flowing around their intended object. Although the machine will not be as accurate as the life-sized ones, but it will provide a very good understanding of what is happening. The machine can be used to help in designing a remote-control aircraft, hobby rockets, or even flow around buildings for architectural applications. The intended uses for this machine are limitless.
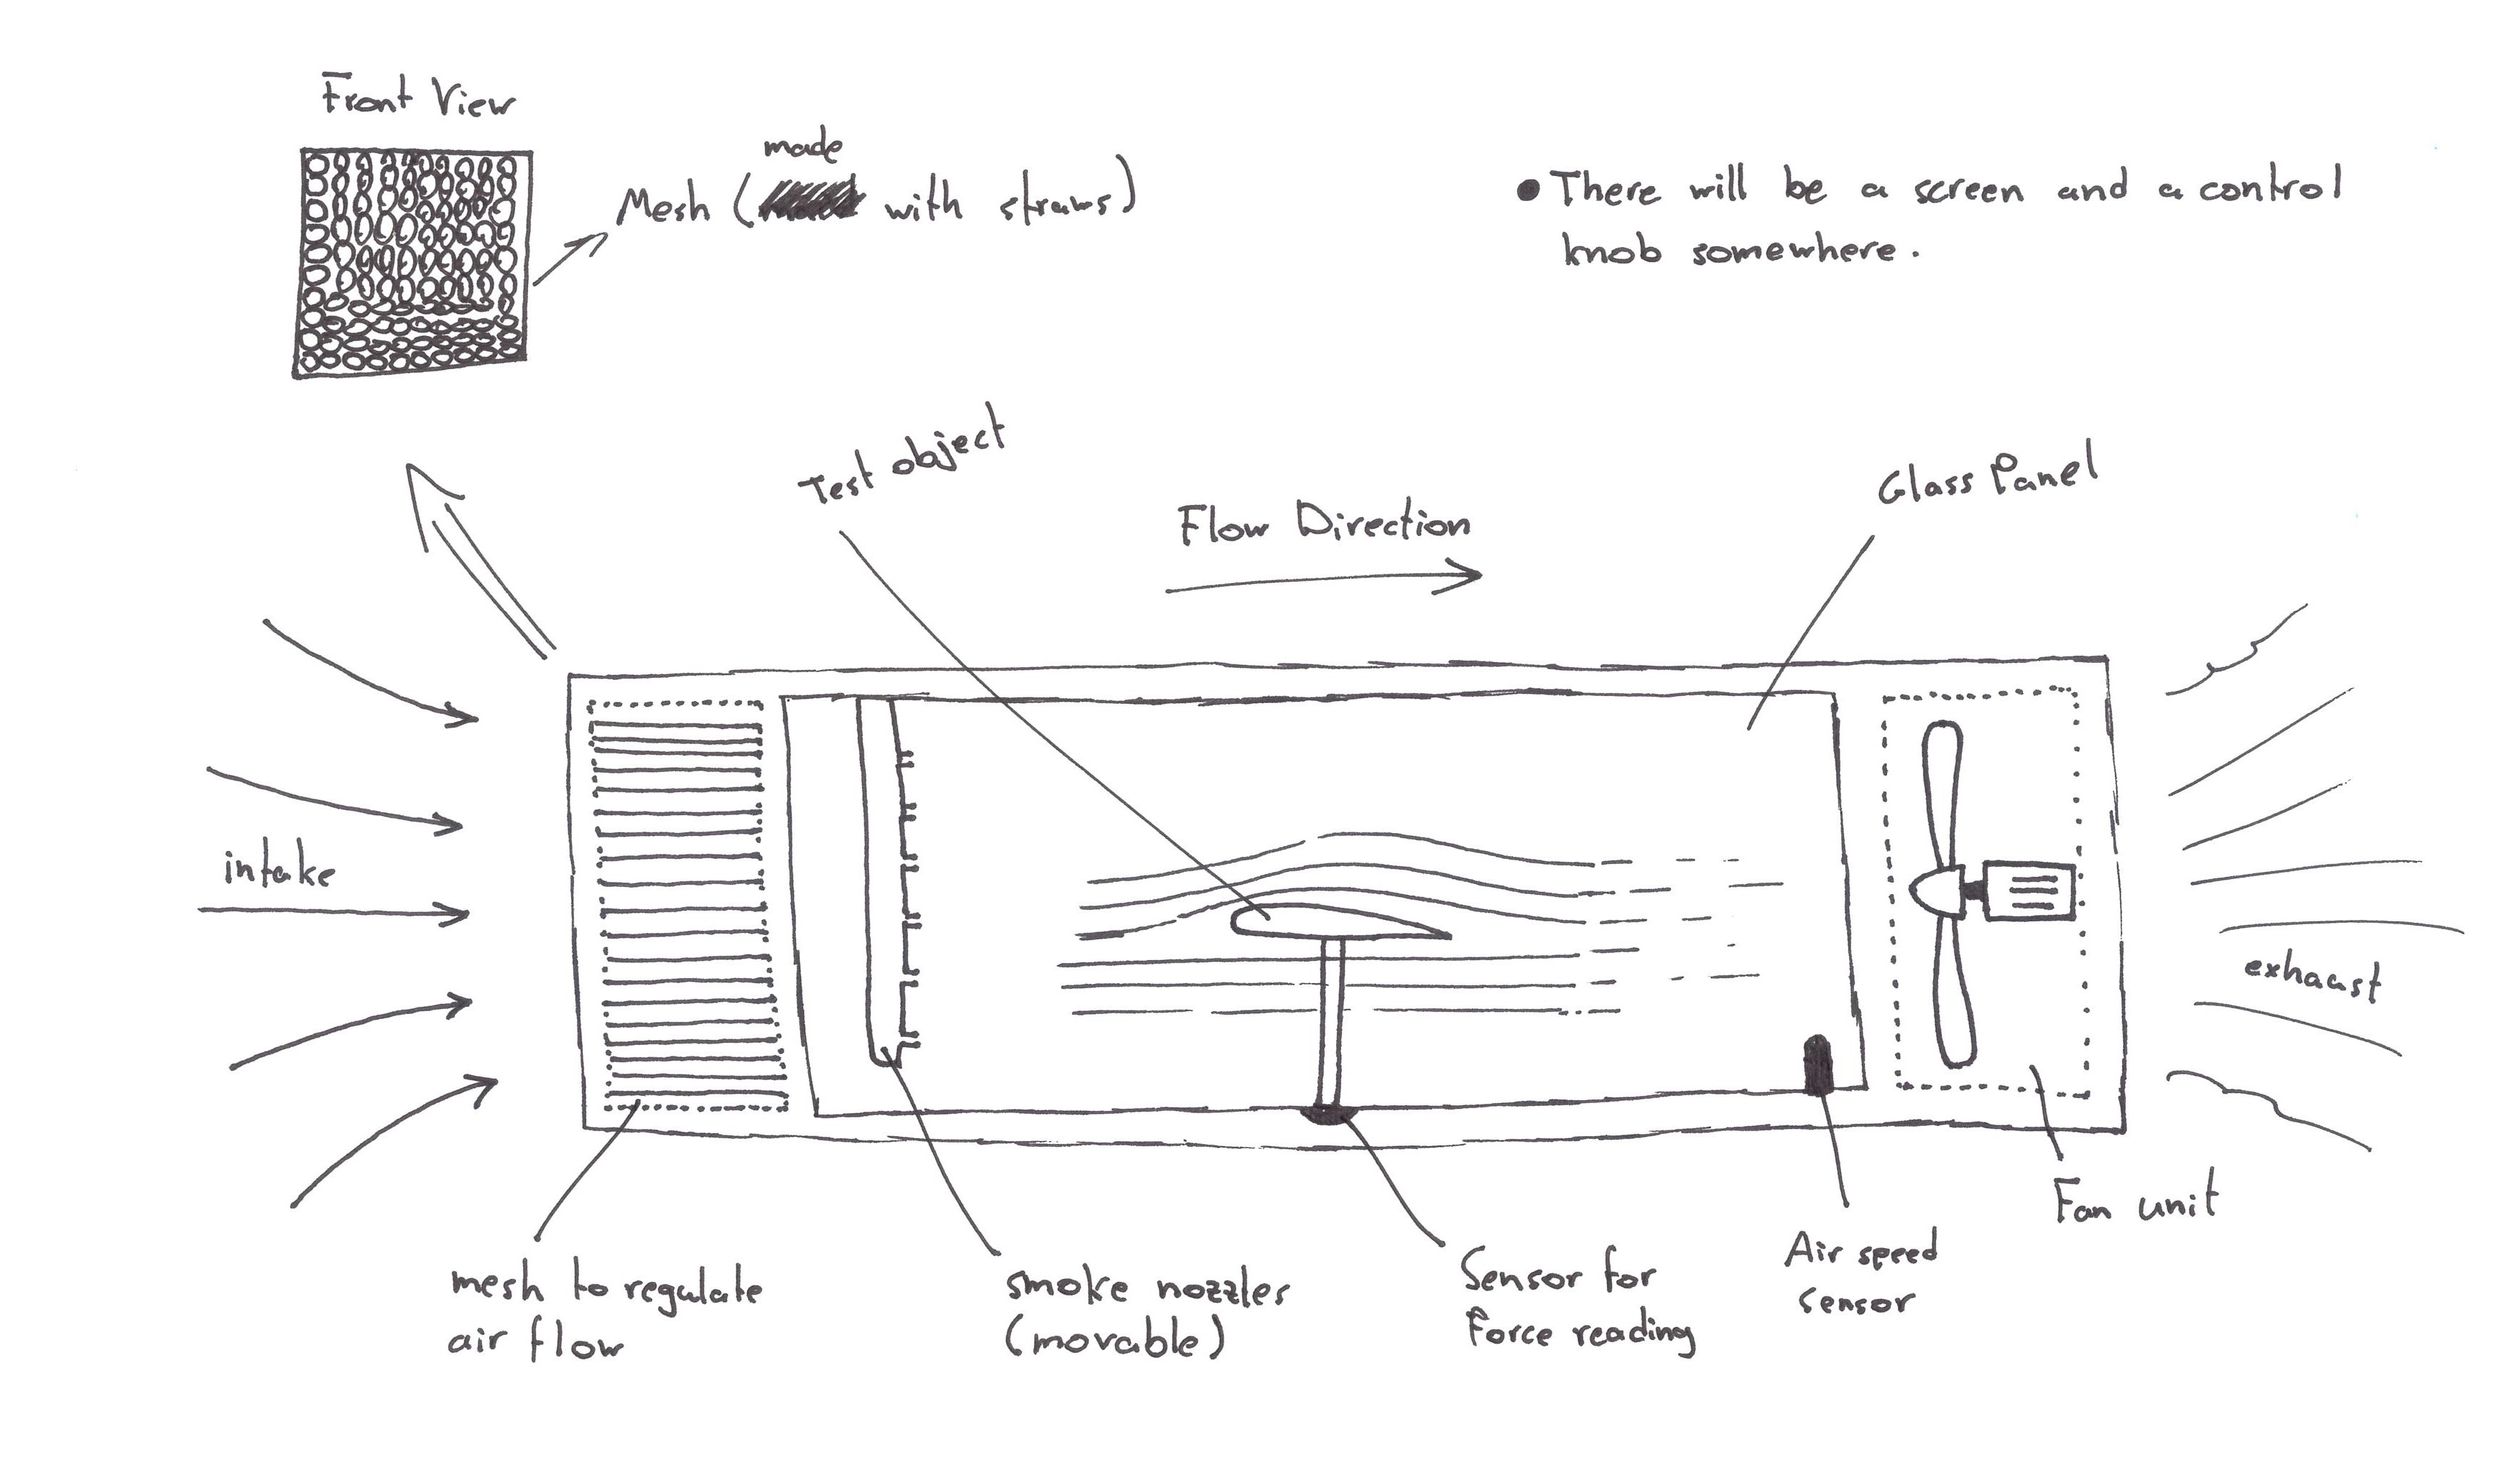
The way the machine will function is simple, a large airflow fan will be used to drive the air along the tunnel. At the front, there will be a mesh like object to regulate the airflow to be as laminar as possible. A glass panel will be installed from the side with a smoke machine to visualize the airflow. The machine will provide readings for the following:
- Air speed
- Force in X-direction: Corresponds to drag forces
- Force in Y-direction: Corresponds to lift forces
- Force in Z-direction: Corresponds to lateral forces
Motorcycle proximity indicator
As a motorcycle rider with two accidents on my resume, I do believe it's a good idea if there is a device that informs you whether there is a car in your proximity or not and where. Both accidents were due to blind spots, the first one was not my fault… I promise. But the second one was kind of my fault, well, both our faults, he was speeding, and I did not look behind my shoulder, I relied only on the mirror. Regardless of who's fault it is, if there was a device that informed me about my surroundings, I would have probably avoided them both.
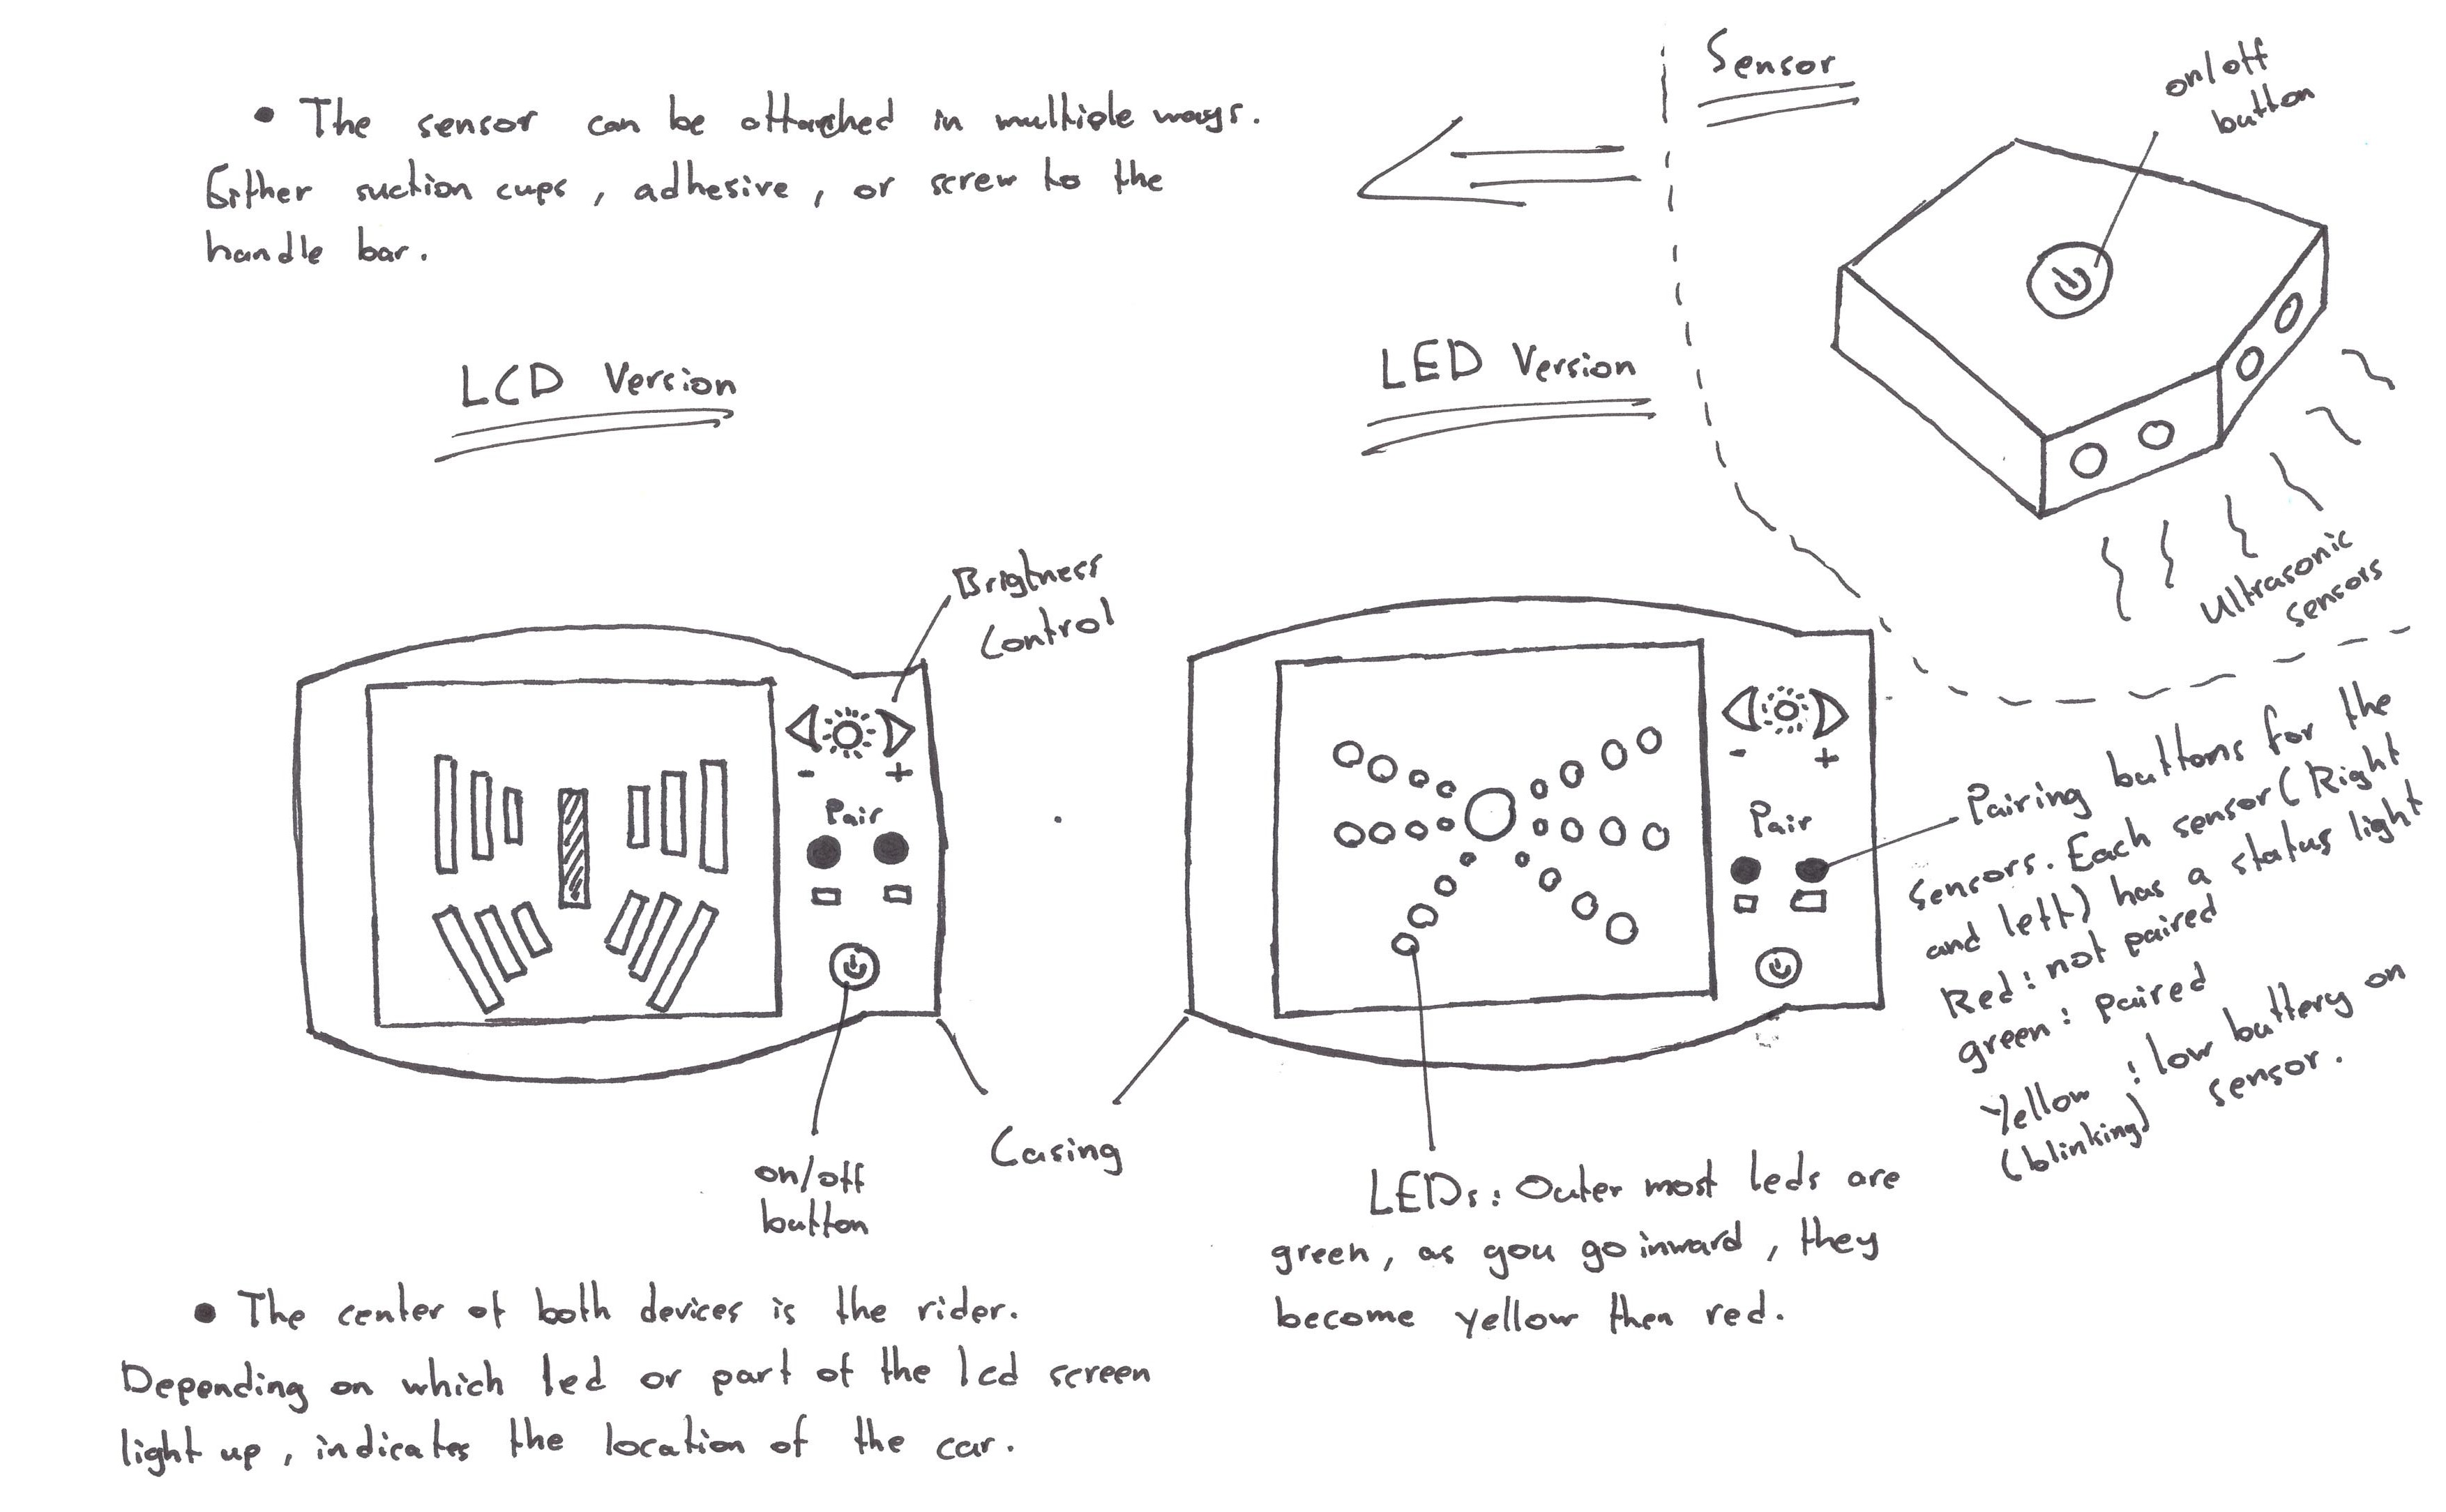
The idea behind this proximity indicator is that it is a small self-explanatory device that informs the rider about any car around them, where the car is, and how close. The device will be as simple as plug and play, this is done by attaching the sensors on their respective locations then pair them to the main device. The main device can be attached to the motorcycle handlebar and the rider is ready to go.
The location where the sensors will be attached is not finalized yet, but it is preferable to be on the handlebar ends. If users wish to stick them to the fuel tank, chassis, or any other location, they can be calibrated with a bubble level indicator to make sure that the sensors always look at the same direction and height regardless of where they are being installed.
The main device will either house a backlit LCD screen or an array of SMD LEDS. Colours can also be added to the screen with the following meanings:
- Green: There is a car but in a safe distance
- Yellow: The car is closing in, be careful
- Red: The car is dangerously close, move away
Automatic latex glove opener
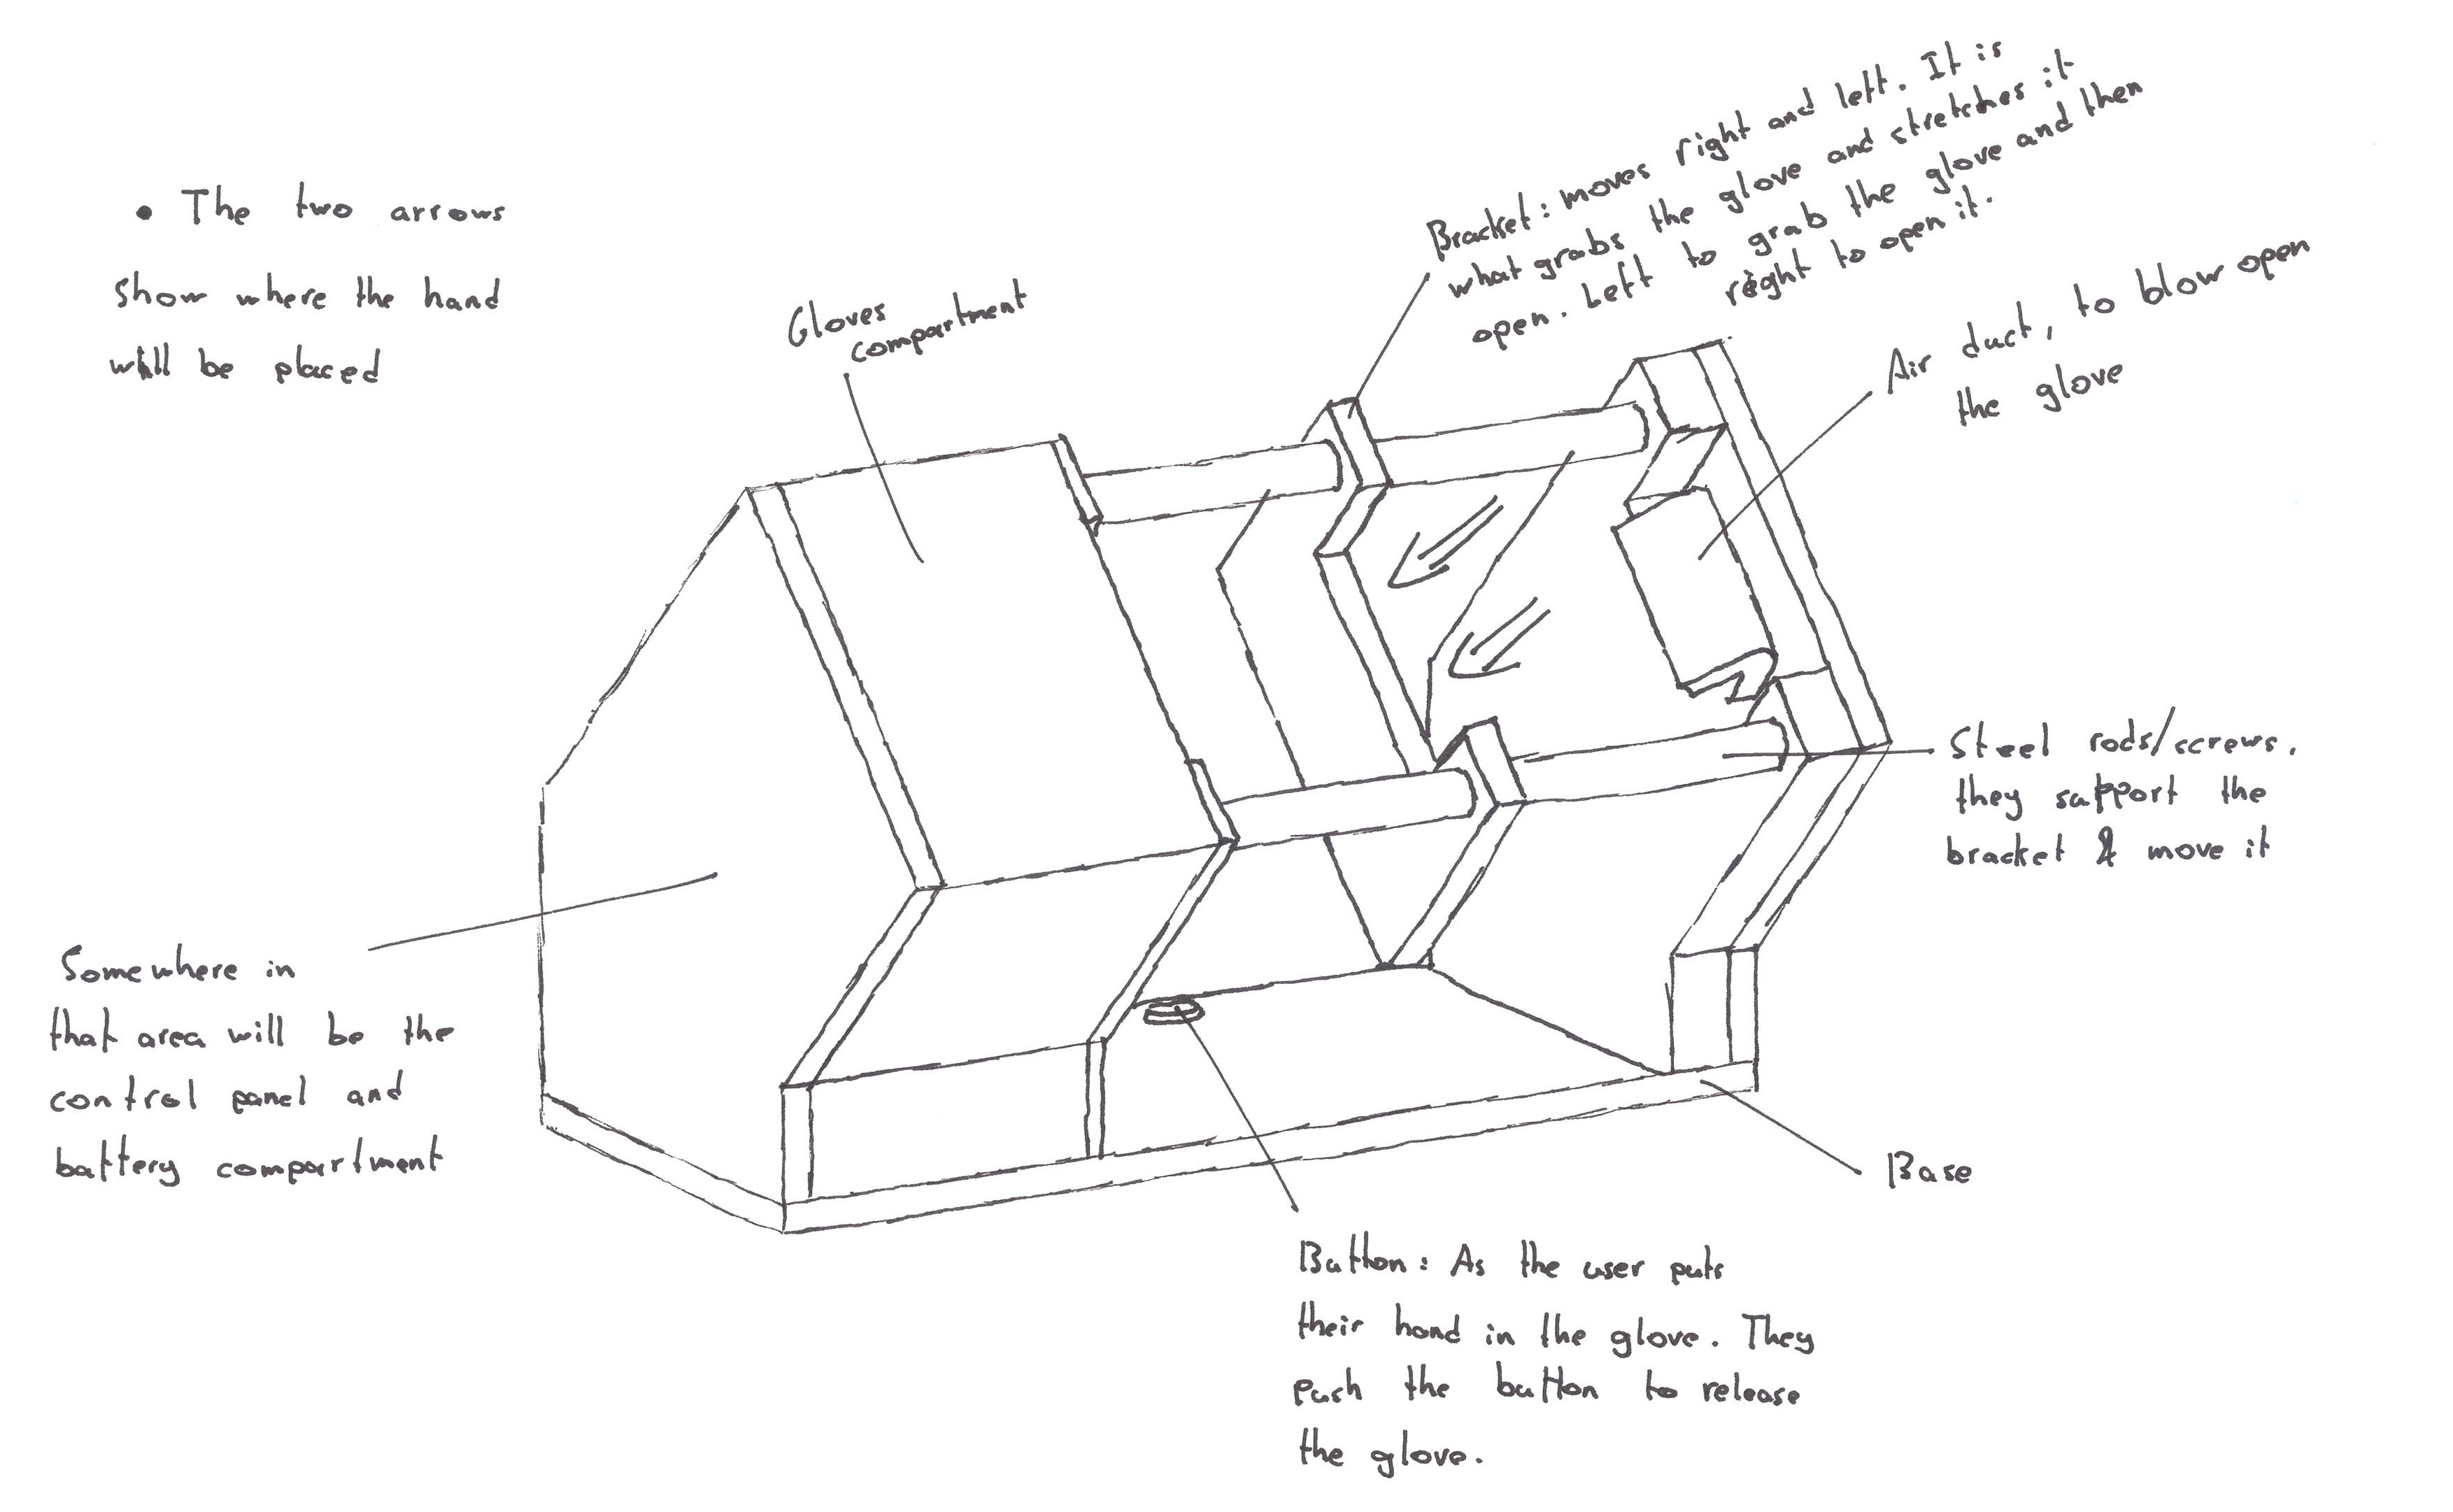
This small device could be one of those devices where you realize that you need it after you get it. The idea behind it is that it automatically opens latex gloves for the users, the only thing the user must do is to place their hand inside the glove. This device can be used in any industry/organization that uses latex gloves, which is more than we think; restaurants, hotels, hospitals, barber shops, pet shops, mechanic shops, veterinarians, supermarkets and even homes to name a few.
Wearing latex gloves can sometimes be inconvenient, gloves sticking to each other, sticking to wet hands, or sometimes the powder that they use inside can be allergic to some people. Also, hygiene is key in many industries, it is preferable that nothing touches the outside of the glove. This device can solve all these hassles by automatically opening the glove for you, blow air inside it, then the user places their hand.
The device will have a glove compartment with the latex gloves neatly placed. Then an bracket that moves both right and left to grab the lip of the glove to open it. As the glove is being stretched, a jet of air goes inside the glove to temporarily inflate it to loosen any sticking edges. The user places their hand inside and push until they press a button which releases the glove on their hands, then the process can be repeated for the other hand.
It is an automatic process which increases hygiene since the user does not touch the outside of the glove. The burst of air can also eliminate the use of powder since the powder is used to stop the glove from sticking to itself. The glove compartment can be easily refilled by unplugging the empty one and plugging in the new one.