The task list for this week:
- Build a personal site describing you and your final project.
- Upload it to the class archive.
- Work through a git tutorial.
Bulding my Website .
It was my first time making my own website. In fab Academy, students use their Website for presenting their weekly fab Assignments globally
Honestly, I was blank about Web Development. Though I wish it to develop, I just know a bit about it from my friends and the internet. So I start from the beginning by viewing some youtube content, tutorials , some websites for learning HTML code like W3School, Sololearn for HTML+CSS, also I refer to week 1 containing fabacademy.org/2022/schedule, it helps me a lot to build my initial concepts.
Following are the steps how I go through the journey of developing my web page:
Step 1:What I need to start.
For starting to build a website I need a Code editor. There are many code editor available A few of them are as follows.
I personally go with Visual Studio Code editor because it was already installed on my PC.also it is open source and many of the tutorials I go through suggest using it.
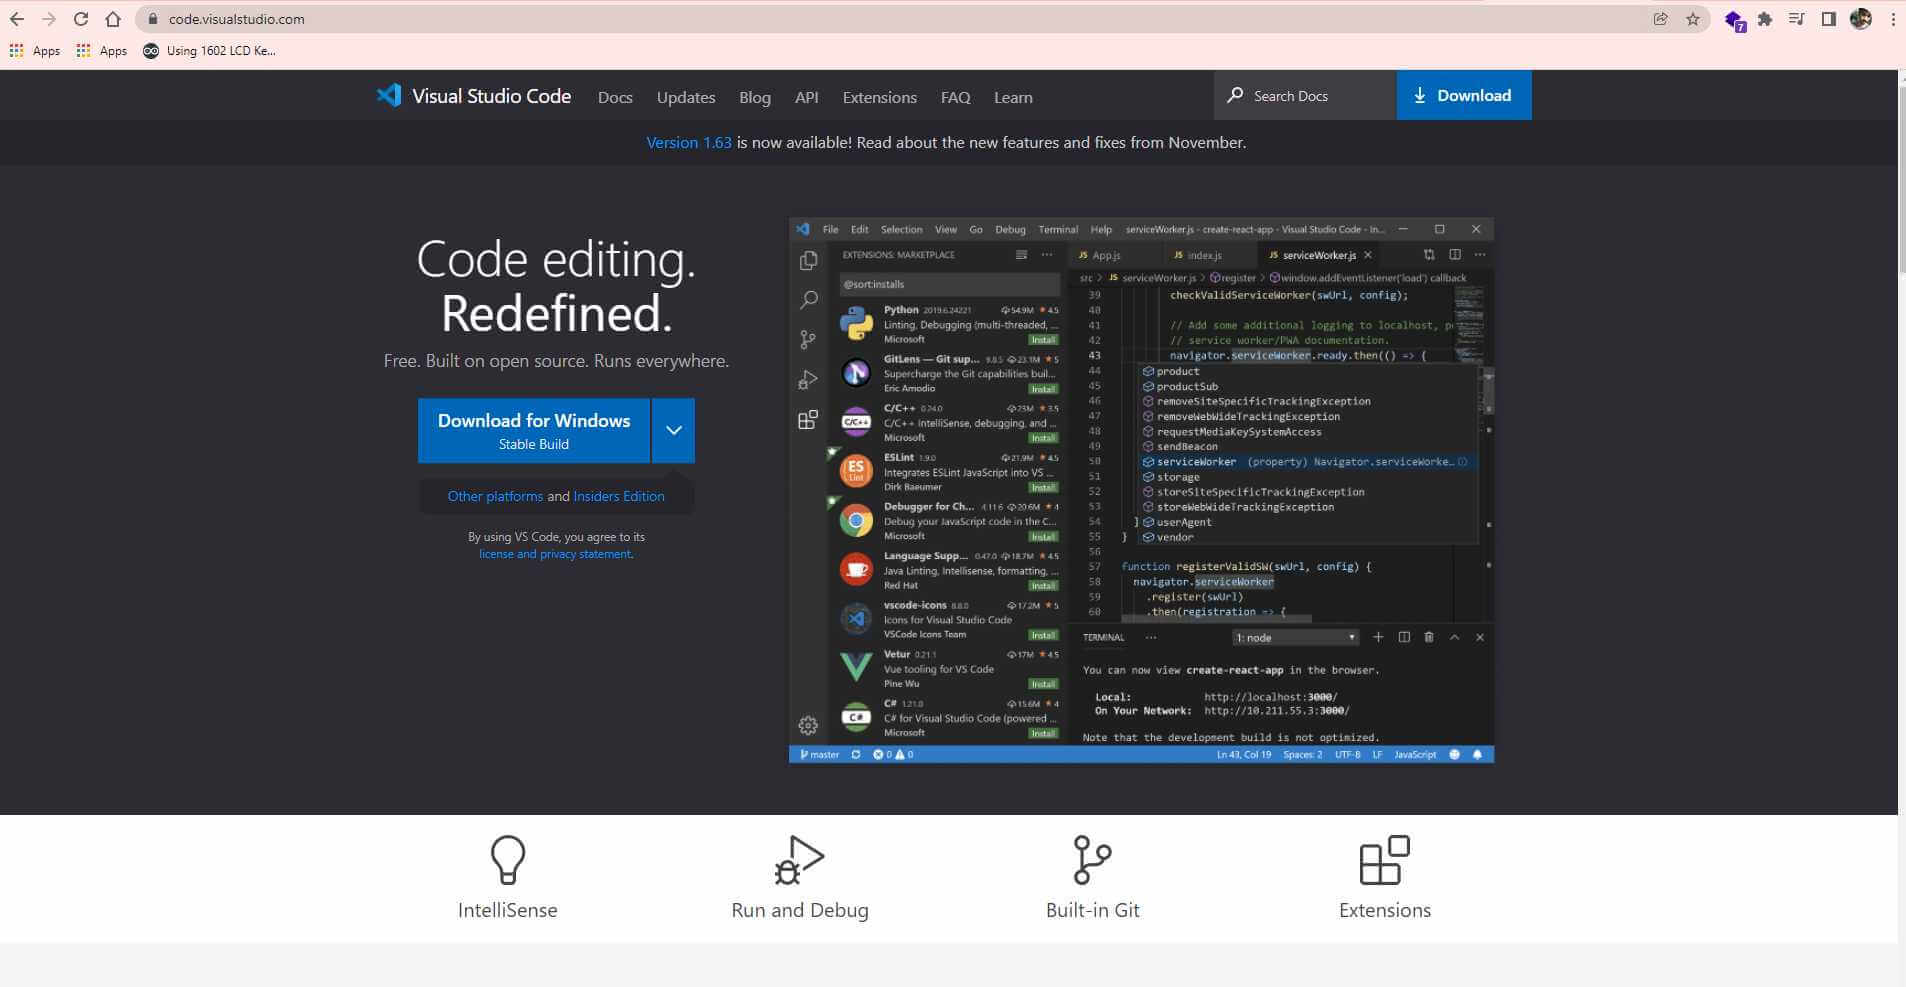
Microsoft Visual Studio Code.
Follow these steps to download and install Microsoft Visual Studio Code.
Inside VS Code editor I install a couple of additional extensions
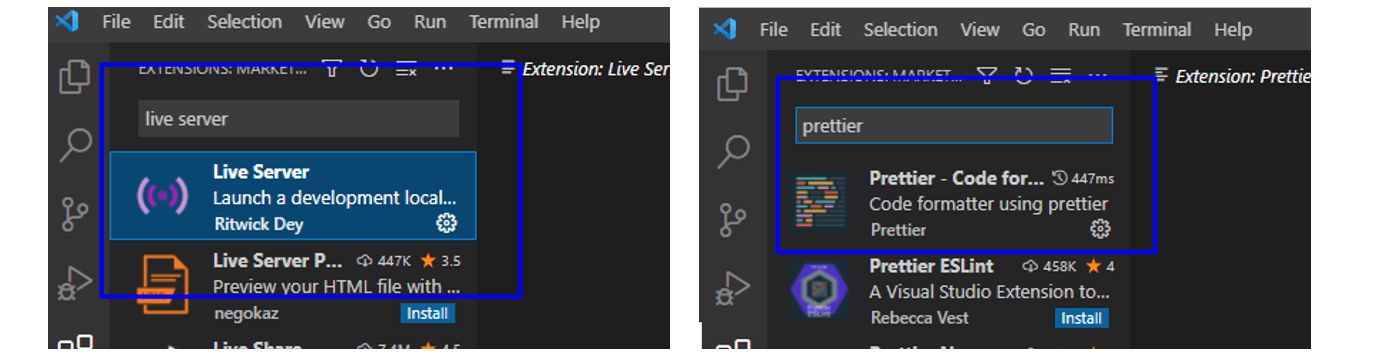
VS Code editor additional extensions .
Live Server:-I installed Live Server to reduce my effort of refreshing the browser after every update in my code. Click here to know about it.
Prettier:-Code formatter It is very useful for formatting the code . Sometimes we use it to download code sources directly from web development tools. That time the HTML /CSS code you get is not in a system format. prettier automatically format the pest code in a systematic way to make it readable.
Step 2:Languages and Tools of Web Development.
This was my first time exploring web development So I started to know about websites, how they are, and how they exactly work. So what I came to know is every website has 2 parts: front-end & back-end. Where the front end is part of the website which is visible on the window with which we interact. while the back end is a set of algorithms used to provide logic in the website. So I got to know most of the parts of my website will be based on the front-end. To develop a static front-end website. I need to learn web development languages HTML(Hypertext Markup Language) is the code that is used to structure a web page and its content, CSS(Cascading Style Sheets) is a stylesheet language used to describe the presentation of a document written in HTML and add beauty in it and JS(JavaScript) is a programing language used for performing functionality in web pages. I also came to know that we can use python as a scripting language in web development. Some people often use a framework for building their websites. A web framework is a software framework that is designed to support the development of web applications. this is what I came to know after watching some tutorials and surfing google.
Step 3:Finding Templates for my website.
Fab academy provides their own template of the webpage in mkdoc language which is a symbolic language. But I decided to make my own website using HTML + CSS coding. There are plenty of templates available on google for developing custom websites. I had to just search for HTML+CSS free templates on the internet and I got a list of websites offering basic HTML & CSS templates. To make my website simpler I was in search of a one-page template covering the basic content of the Fab Academy's website. So I go through many temples. Some of those are the following.
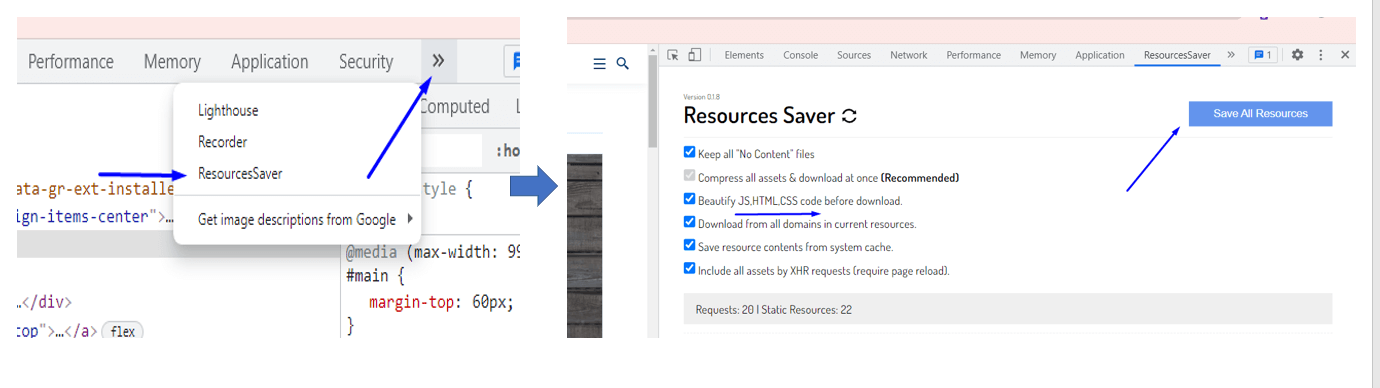
During Searching for templates I came to know some of the Websites are free and Some the Pade. Also, I found some of my favorite out-sides Which I wanted to download but I couldn't because I don't have a source code for them. So I started finding tools to download the source code. I searched a little bit and I got an extension on google code called Save all resources which allows me to Download the Source code on google Windows Which I found Interesting.
I downloaded some of the Fab Student's websites and studied their Code Structure. I was very confused about making the decision of choosing a template. I was searching for the perfect one for me. Which was consuming my timing and also I was not getting to stop on one website. Finally, I got too stuck on one of the temples and I came to know that it is not necessary to get a perfect template for my website but it is important to choose the one and work on it to make it the best one.
So I go with the first temple I have chosen. from the bootstrap-made website they are offering a lot of good quality templates .iPortfolio is one of the templates from their set. It is a modern personal CV and portfolio HTML template. Which I seem to be perfect to work on. I have a side navigation structure containing a profile photo and tabs covering Home, About, resume, portfolio, services, and finally a contact page. Which was enuff for covering my container.
I spend most of my time learning how to apply js code( particle.js liberty ) for the homepage of my website. It attracts me a lot. But I did not find any way to apply it. After spending 2 days on it I finally decided to do it later in my fab academy .become a particle. it was impossible to learn the entire web development in just one week's assignment timeline.
Step 4:Editing my template & Inspecting Pages Using DevTools.
Inspecting Pages Using DevTools.
The Chrome DevTools: are a set of web authoring and debugging tools built into Google Chrome. Using the DevTools you iterate, debug, and profile your site. I use the Dev tool for finding the source code at various elements on the window of my website. As follows.
Method 1:To open the Dev tool click to the extreme top right of chrome and go to more tools than to dev tools.
Method 2:left click on the mouse goes to incept
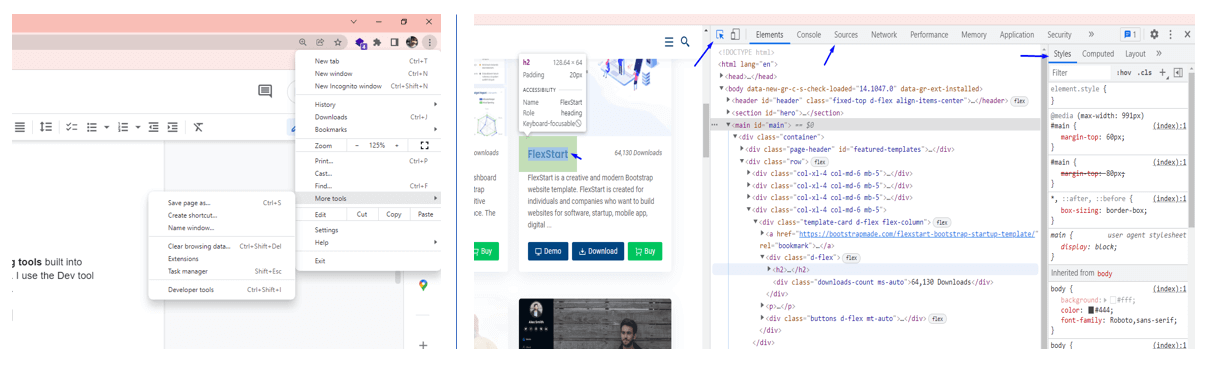
Google developer tool.
In the popup developer window, you can see many elements used by developers to see and make changes at the developer window. I use the extreme right Arrow to inspect the particular part of the website and see the functioning source code governing it. I also used this technique to inspect the CSS code applied to that particular element.
Concept sketch for 30 pads per bach LPG base Sanitary napkin incinerator.
Using the Save all resources tool You can download all the web page sources folder including js HTML, CSS files just by clicking on it in the form of the zip file to make changes in it offline.
Editing my templet:
Step 1 :Editing my templet.
To start Editing my website First of all I Download a zip file of the template I select
iPortfolio
from the
bootstrap-made
website.
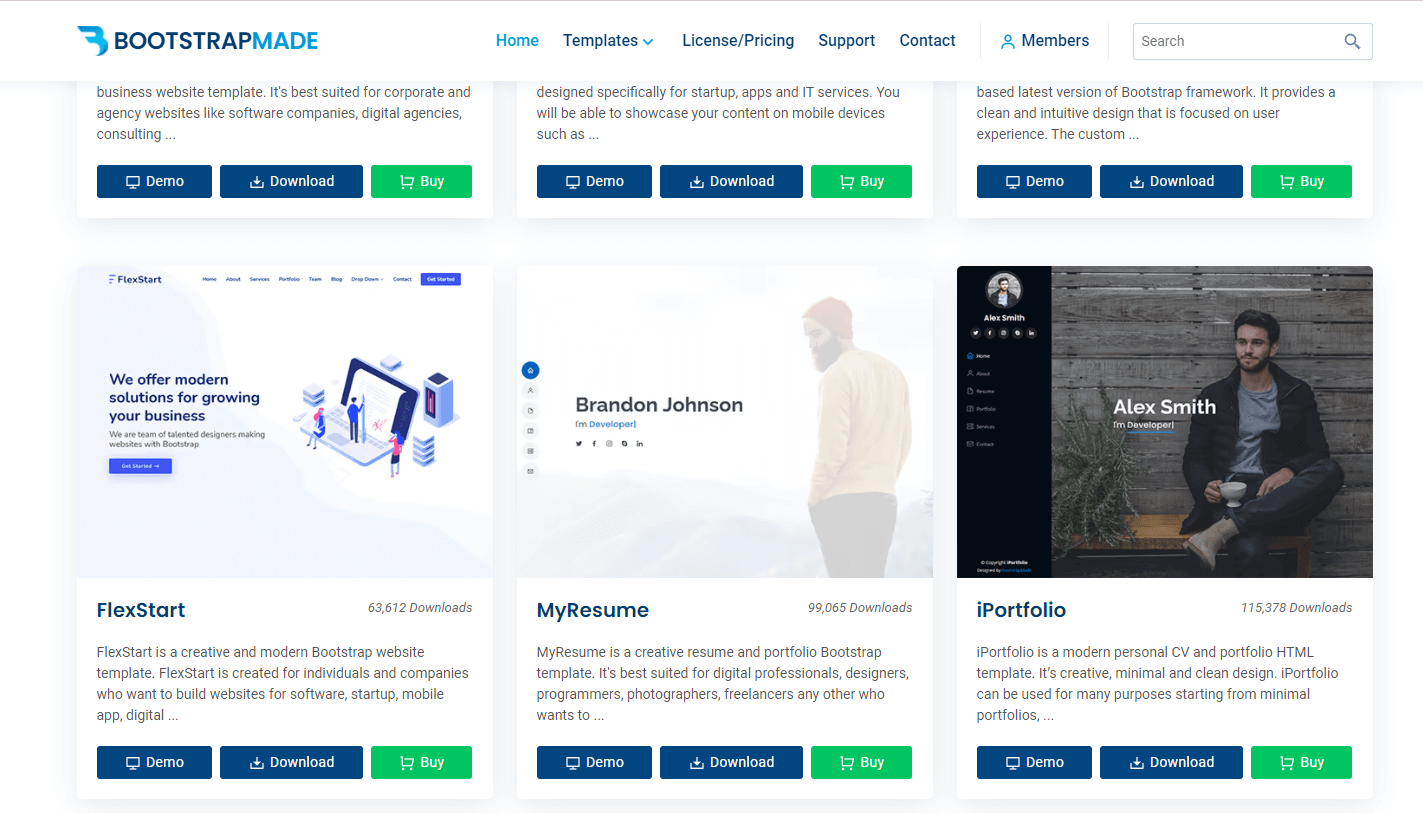
bootstrap-made websides.
Step 2:Selecting folder contains.
After opening the folder I found a list of other files and folders containing 3 HTML files namely index.html,inner-page.html,portfolio-details.html, and also some folders namely assets, forms, changelog and read.
Some of the folders are useful such as assets, index.HTML,forms they contain necessary files contain for website .while other folders such as inner-page.html,portfolio-details.html, Readme, change log contains excess sources such as some extra HTML template and text information which I found not that much useful .so i simply delete them.
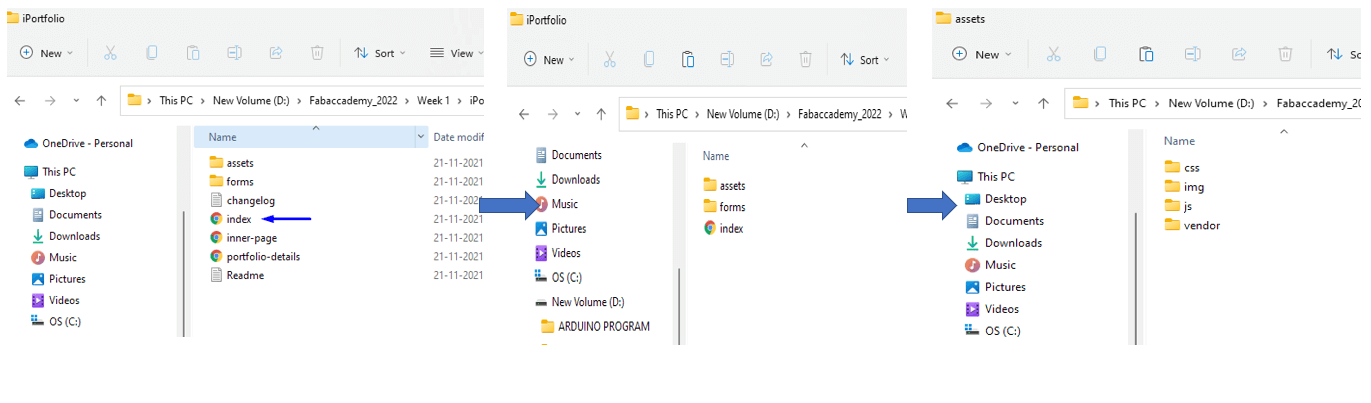
how i segregated and select neccery file contain for my webside.
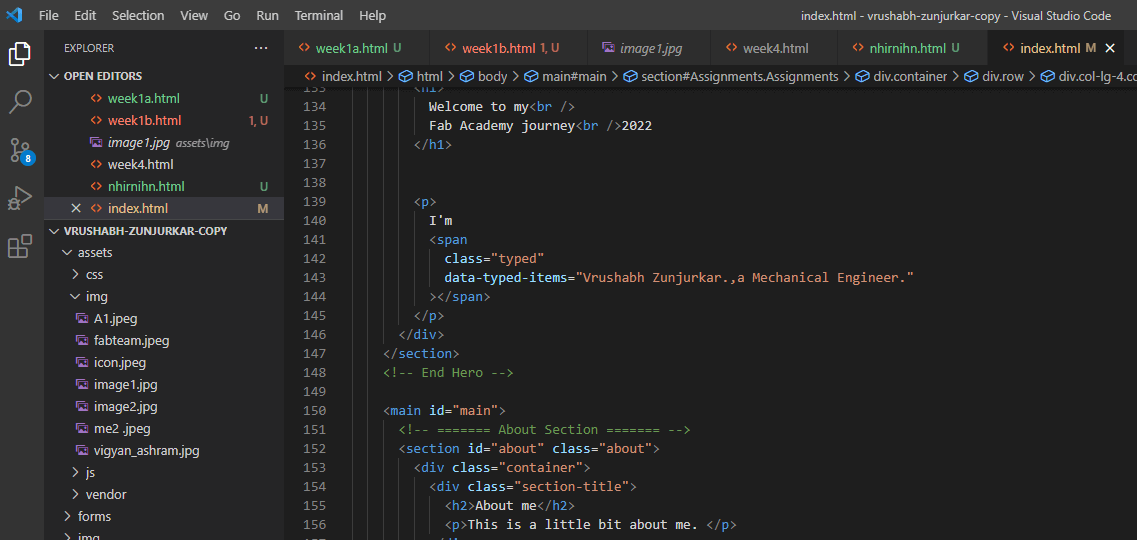
Step 3:Open the (Source code) folder in VS code.
After opening the folder . On the left-hand side, I can see all the files in the folder.
then I click on the index.html file for opening the code.
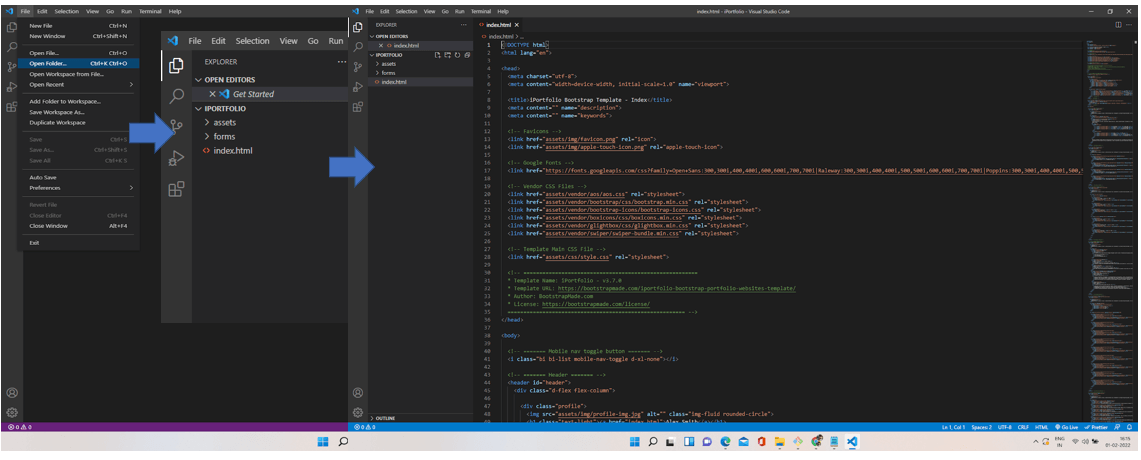
Open the Source code folder in VS code.
It opens HTML code on the screen. For opening the CSS file I use the split tool on the extreme right top of the window of VS code . Using the split tool I divide the screen in two parts. for my convenience to see the HTML and CSS code side by side.
In the above images, you can see on both parts Index.html file is open. For opening the CSS file click on the left part of the screen and open the asset folder go to CSS and then in Style.
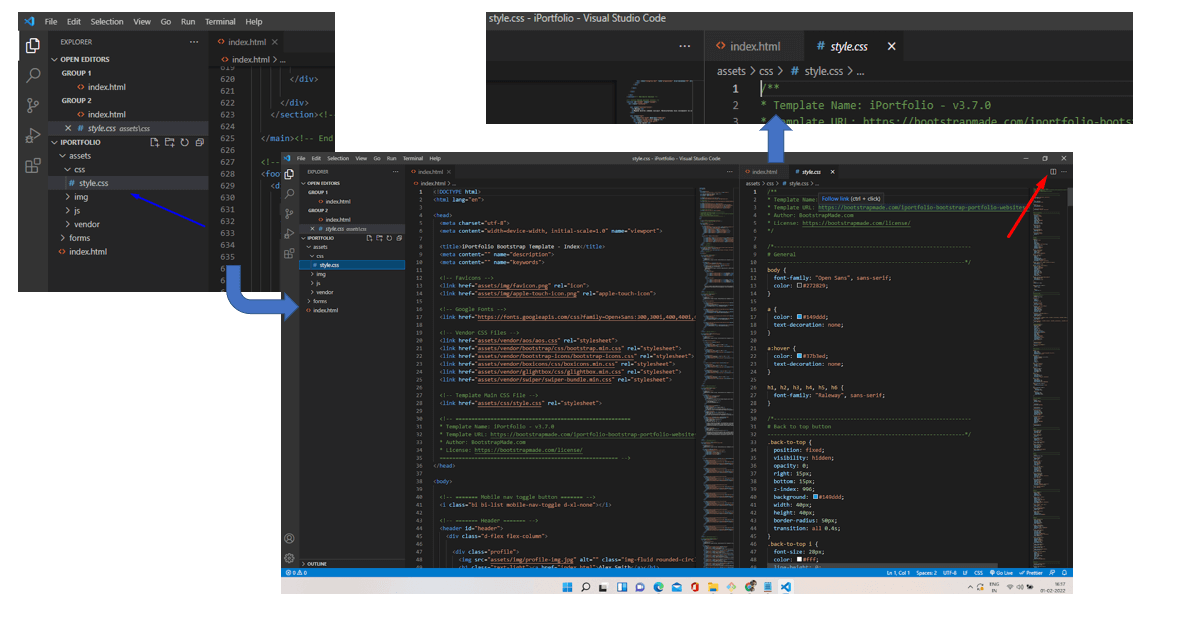
Now I can see the CSS code file style at the left part of the screen as in the above images.
Step 4:Now it is time to edit the Code.
Before editing, I decided to take a close look at code structure.
As we know HTML structure consists mainly of the Header part & Body let's understand the first header part and edit it first.
Editing header contain:
This portion of HTML code in the head section is responsible for all the visual effects of chrome or any browser tab bar, I edit it to replace the content for my website as shown in the below picture.
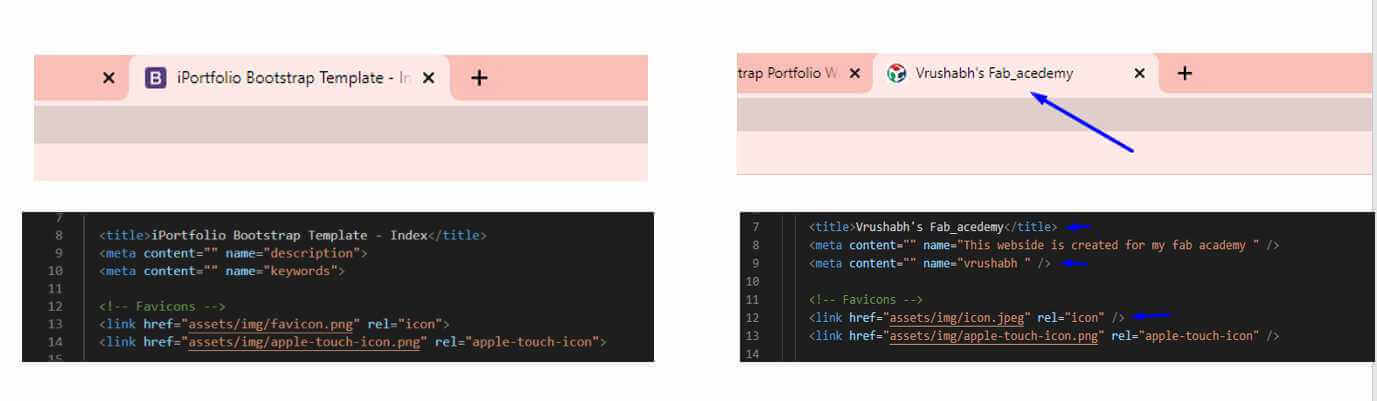
The results after changing the content.
Editing the body contains:
Text Editing:
I use clt+f to find the text I want to replace and clt+R to replace the text with a new one.
Using this method I change the sidebar content and replace it with the necessary content I need for my website.
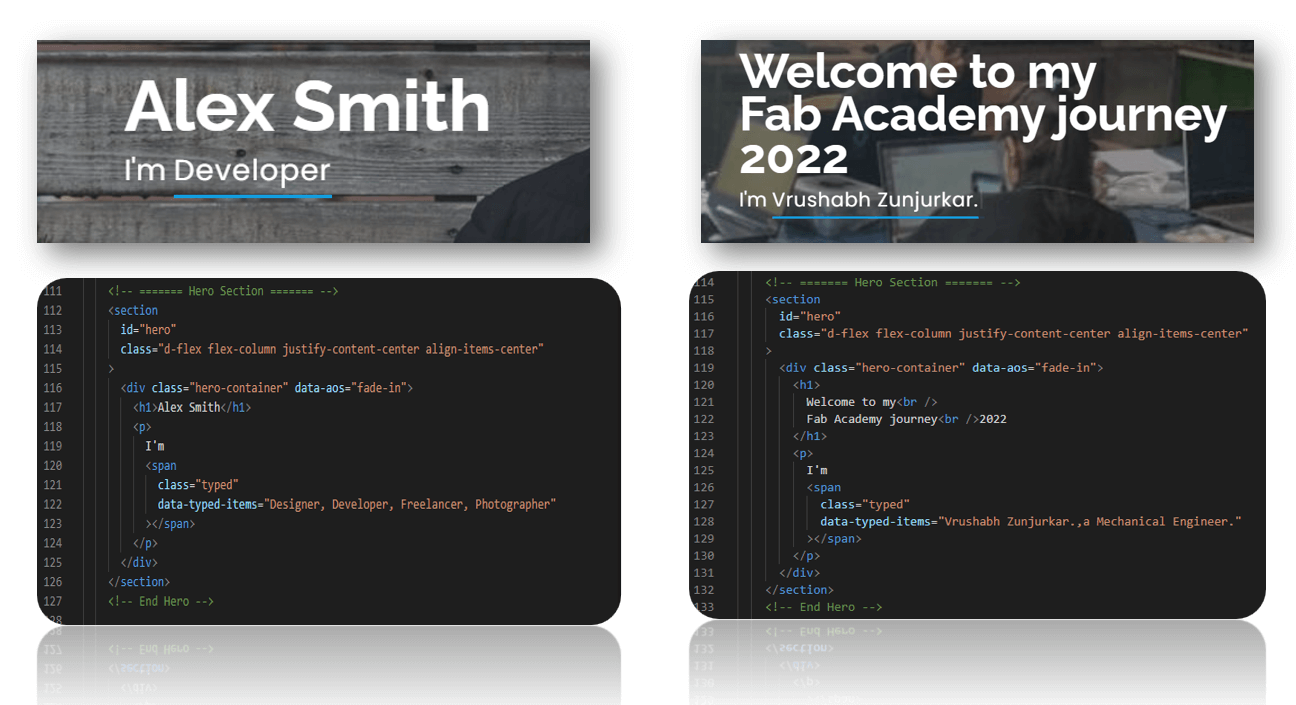
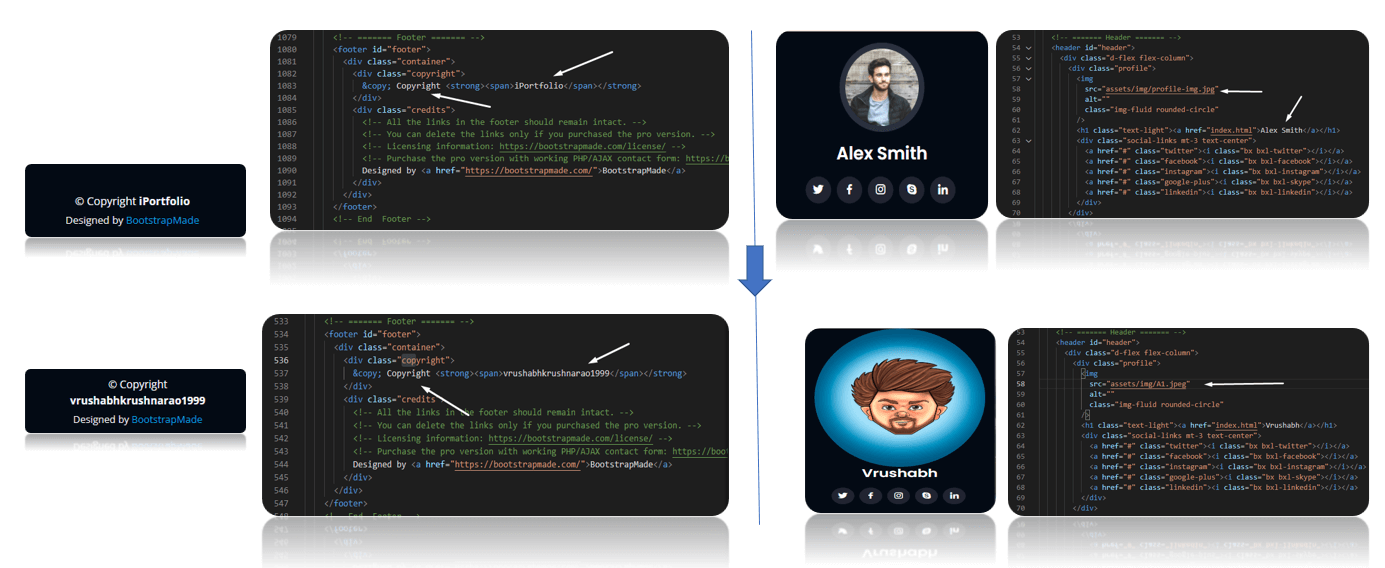
The result after changing the contain.
Image Editing:
For replacing photos I use the <img >tag to replace the images in the website and add my images.
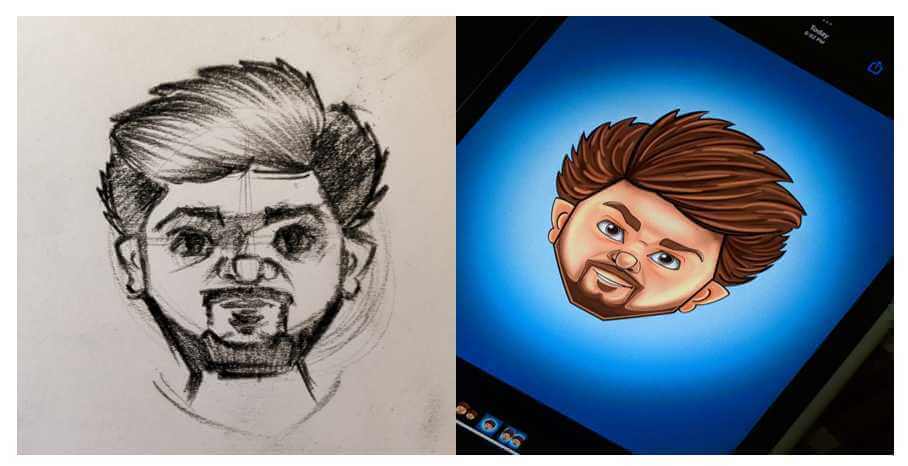
I asked my brother to help me and create an illustration image for me for a website.
Colour Editing:
For Image size editing and removing image margin, I did the changes in Dev-tool inspecting the image and inspecting the CSS code for it. Manipulate the code in my way and copy that CSS code. Then add it in the VC code editor in between <style > tags.
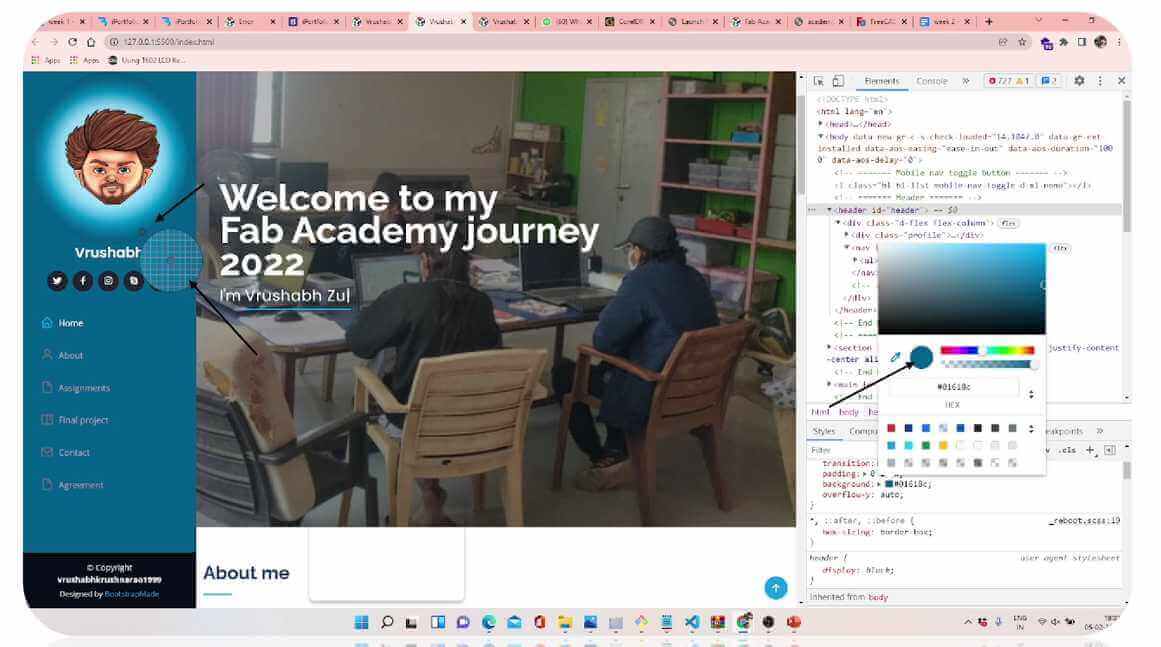
Use Dev tool to inspection the Colour.
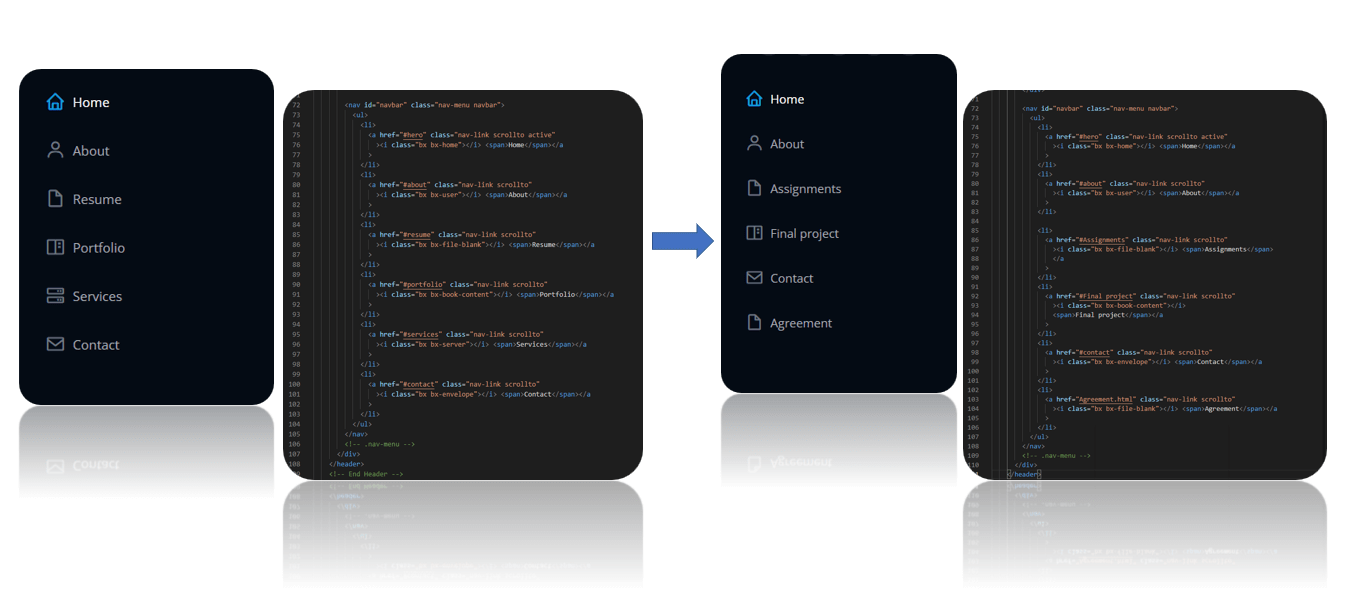
For removing the unnecessary portion such as the facts, skills, and resume I simply delete the HTML code of that section. And replace it with necessary content such as Services to assignments, portfolio to Final project, are shown in the following images.
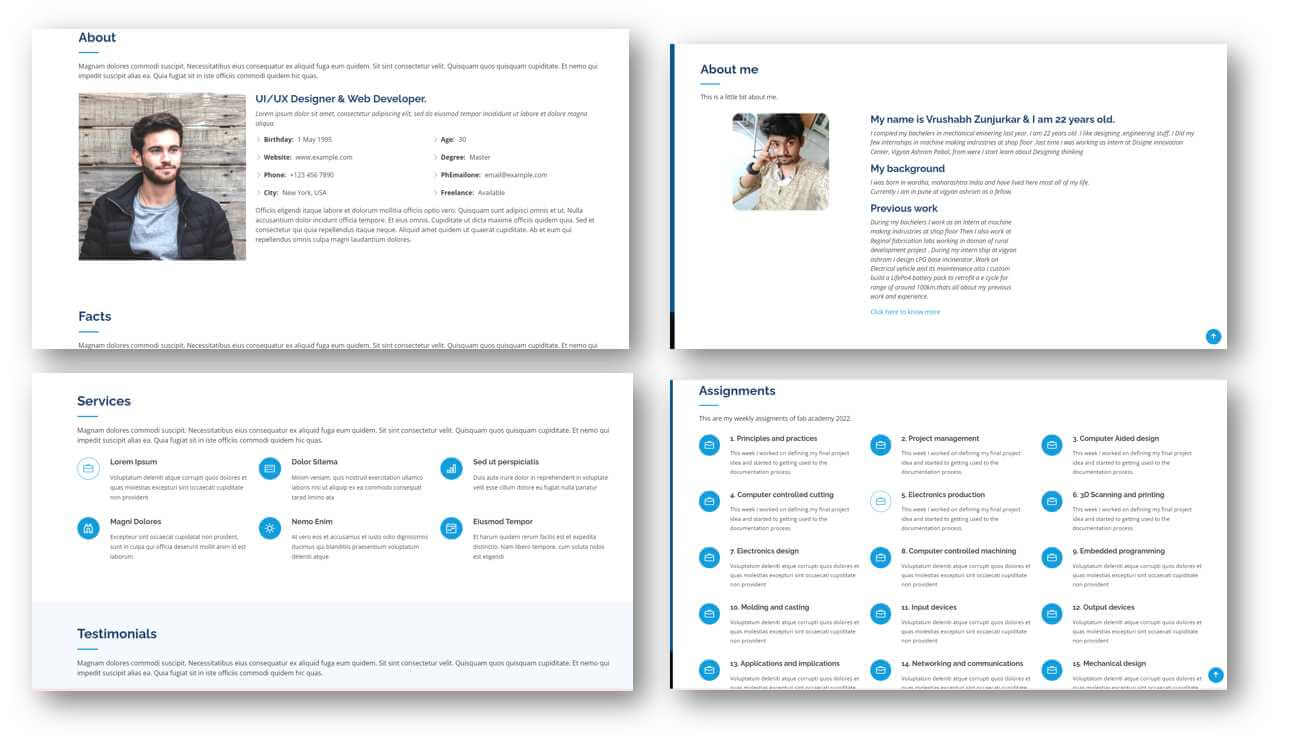
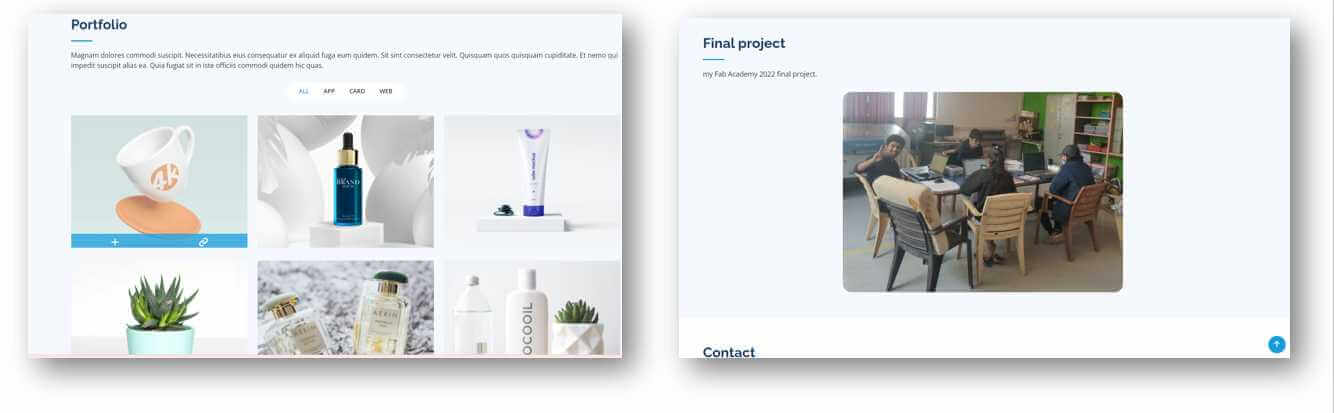
And here is my website ready.........
Work through git.
What Is Git? A Distributed Version Control Tool
What is version control?
Version control systems are a special type of software development tool kit designed to help software developers keep track of any changes done on the source code of any specific application. Usually in Fab academy projects are handled globally by various members including student team members, local instructors, global instructors, etc. sometimes each of the themes has to work on the same project or specific aspect of the project in the teamwork of the overall project. These developers need to write and test code for their assigned tasks without affecting the project's working version. This is where version control comes to help.
Type of version control system?
There are two types of VCS:
- Centralized Version Control System (CVCS)
- Distributed Version Control System (DVCS)
Centralized VCS:
A centralized version control system (CVCS) uses a central server to store all files and enables team collaboration. It works on a single repository to which users can directly access a central server.
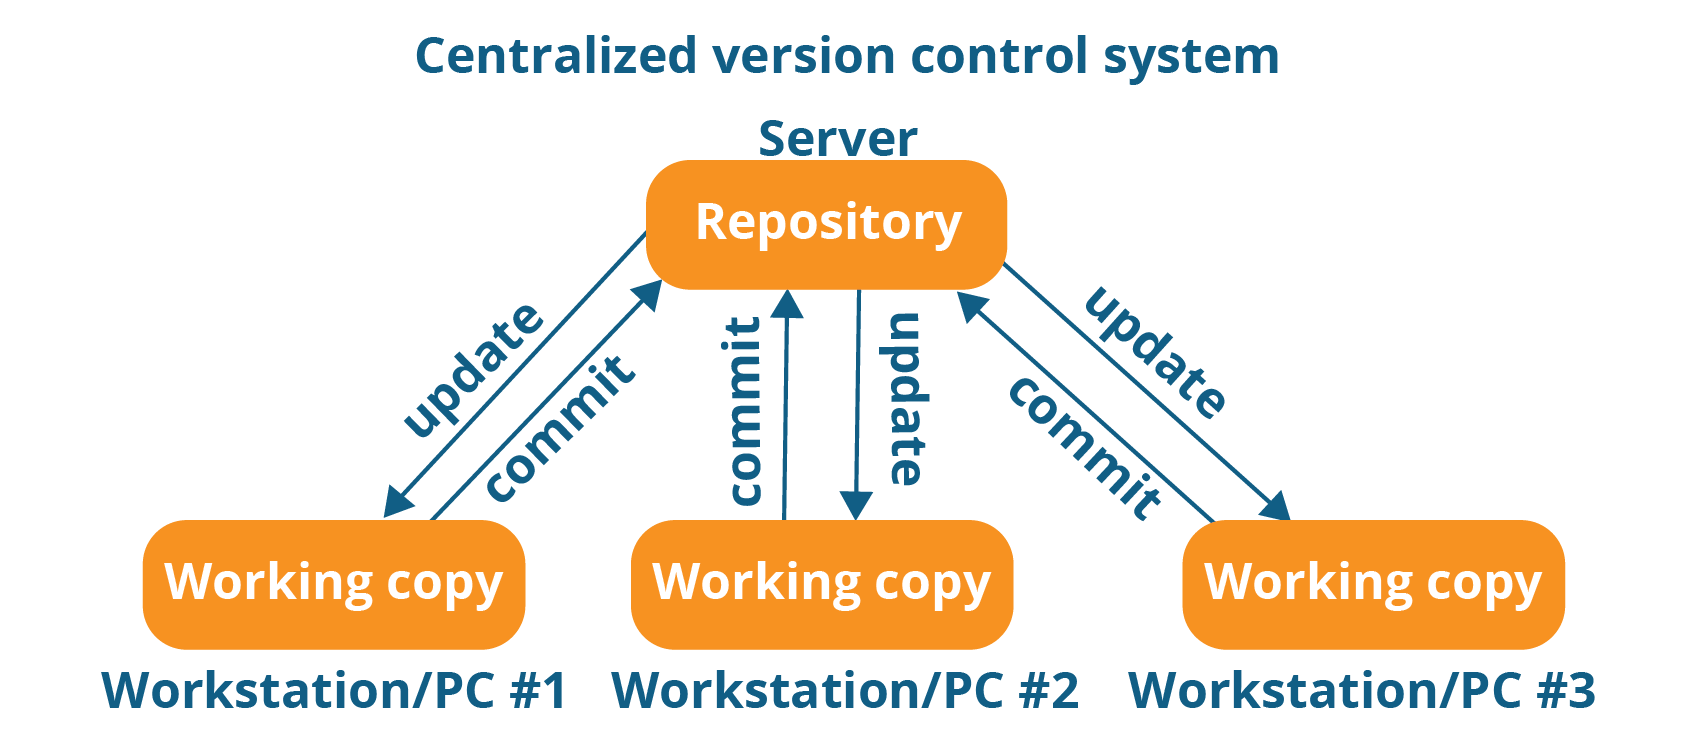
The repository in the above diagram indicates a central server that could be local or remote which is directly connected to each of the programmer’s workstations. Every programmer can extract or update their workstations with the data present in the repository or can make changes to the data or commit in the repository. Every operation is performed directly on the repository.
Even though it seems pretty convenient to maintain a single repository, it has some major drawbacks. Some of them are:
- It is not locally available; meaning you always need to be connected to a network to perform any action.
- Since everything is centralized, in any case of the central server getting crashed or corrupted will result in losing the entire data of the project.
This is when Distributed VCS comes to the rescue.
Distributed VCS:
These systems do not necessarily rely on a central server to store all the versions of a project file. In Distributed VCS, every contributor has a local copy or “clone” of the main repository i.e. everyone maintains a local repository of their own which contains all the files and metadata present in the main repository.
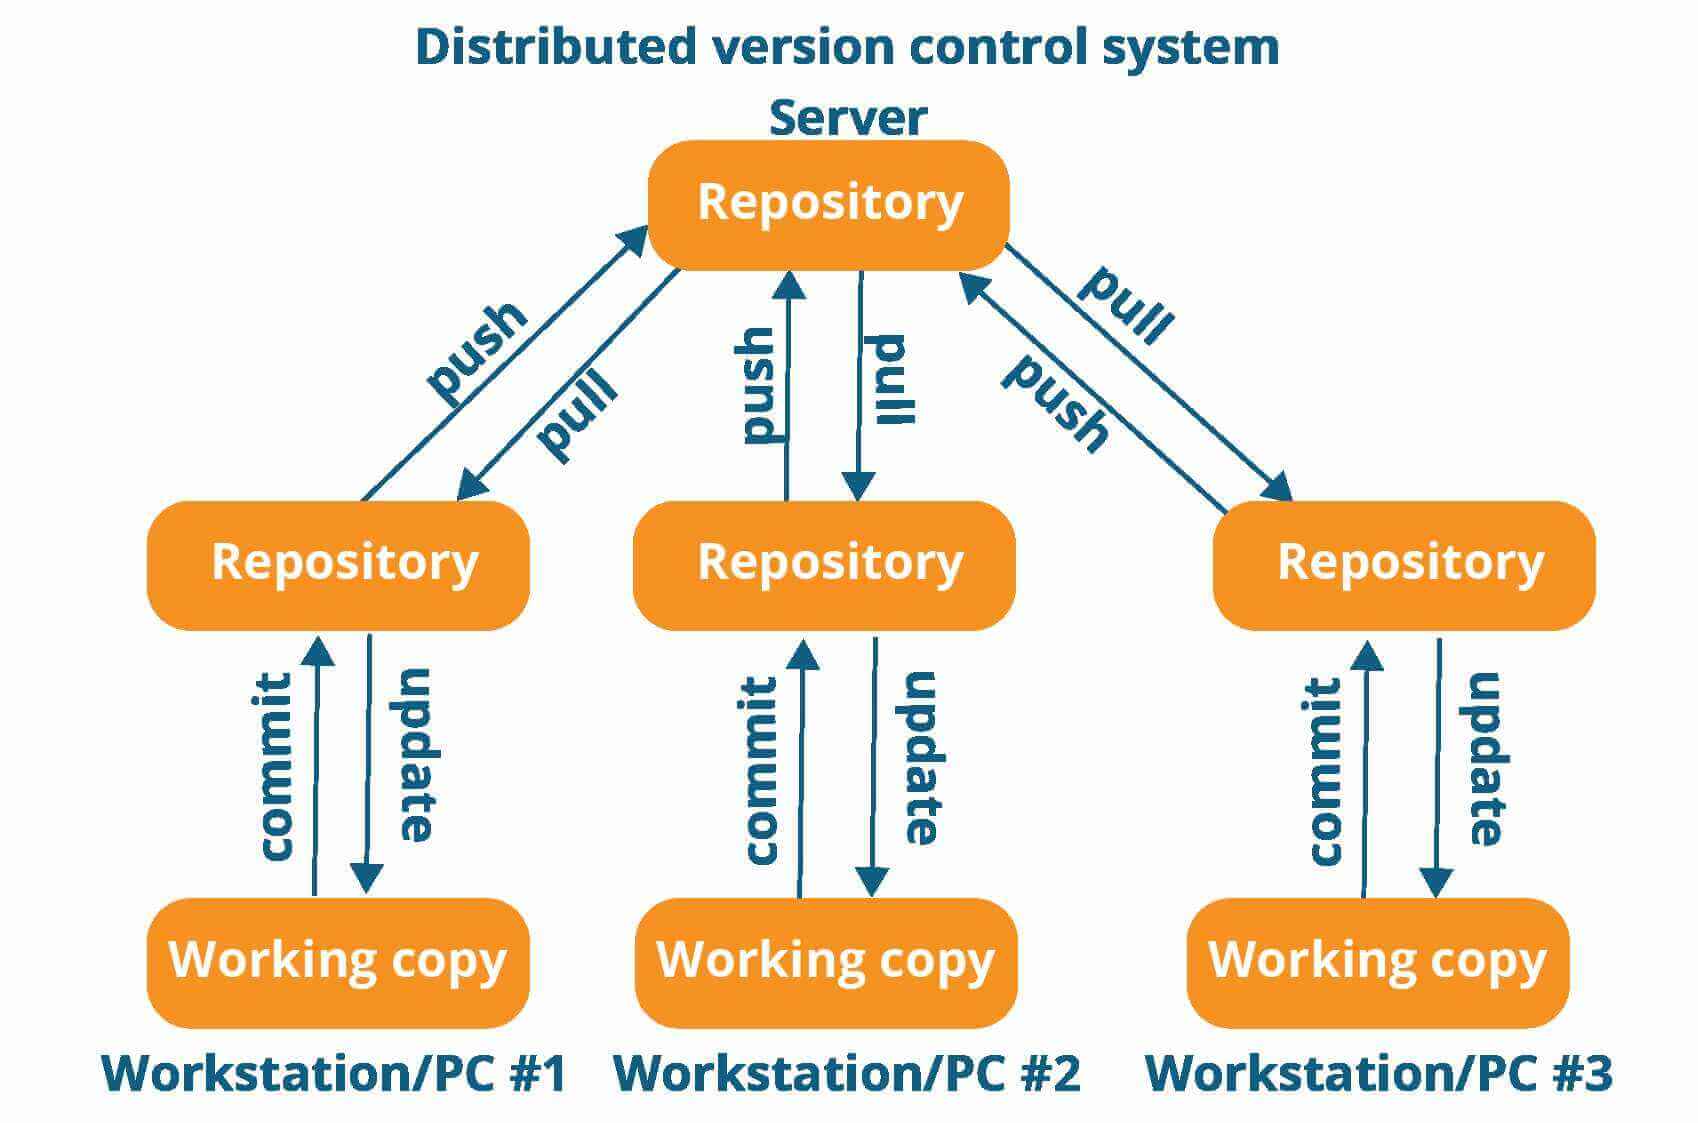
As you can see in the above diagram, every programmer maintains a local repository on its own, which is actually the copy or clone of the central repository on their hard drive. They can commit and update their local repository without any interference. They can update their local repositories with new data from the central server by an operation called “pull” and affect changes to the main repository by an operation called “push” from their local repository.
How do I Download and Install GitLab?
Let's install Git on my system. In case you want to know more about Git check out this blog by Reshma Ahmed.
In this Install Git section I will go throw :
- Install Git in Windows
- Install Git in CentOS
- Creation of repositories on GitLab
I personally use Windows 11 OS on my System. So, without any further ado, let us begin by understanding how to install Git on a Windows system.
Install Git On Windows
Step 1:To get started I Download the latest version of Git bash for Windows.After downloading the git bash application. I run the .exe file in my system. and finish the installation process.
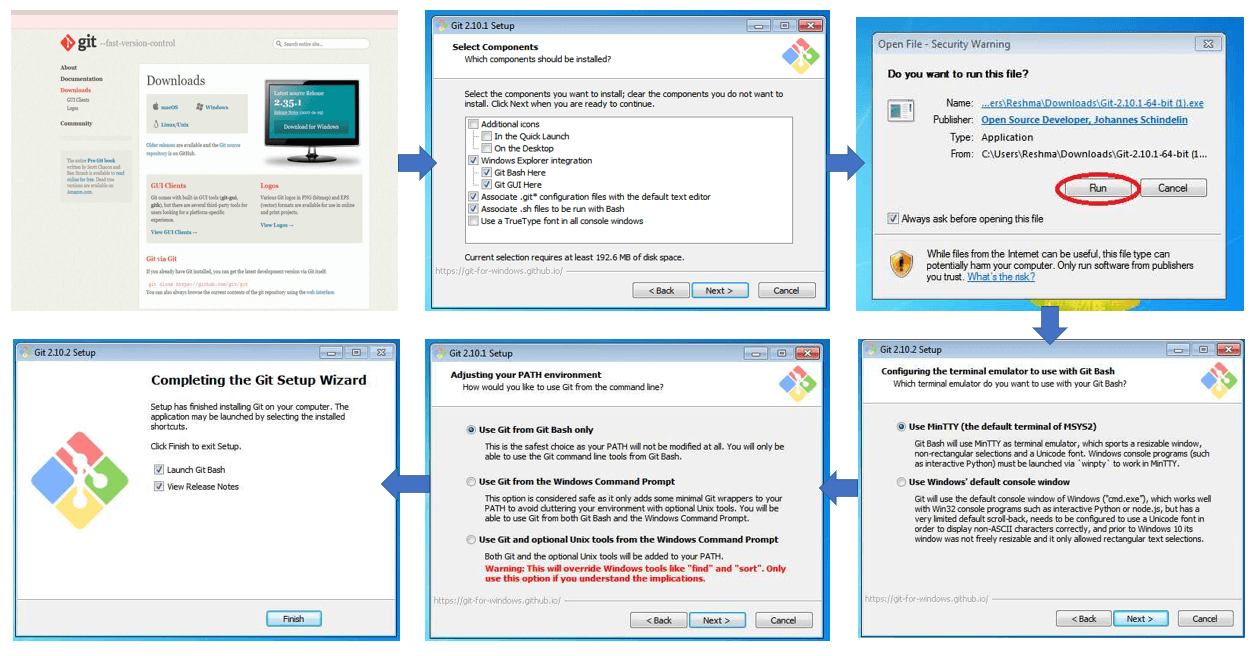
Install Git bash On Windows
After finishing all these steps I successfully installed the Git Bash application in my system.
Install Git in CentOS
open the Git Bash and launch Git Bash terminal panes screen which looks like as follows.

Step 2:Now for installation the git bash in my OS I run the following commands in git bash terminal.
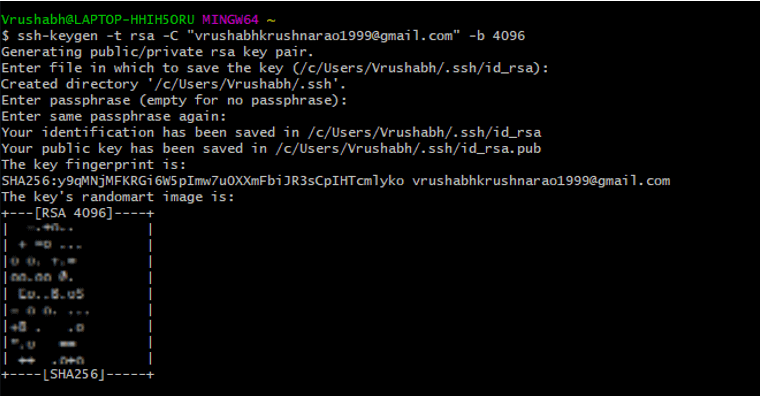
A: To generate your SSH key I use this command :
ssh-keygen -t rsa -C "yourmailID" -b 4096
B: Copy SSH key using this command :
cat ~/.ssh/id_rsa.pub | clip
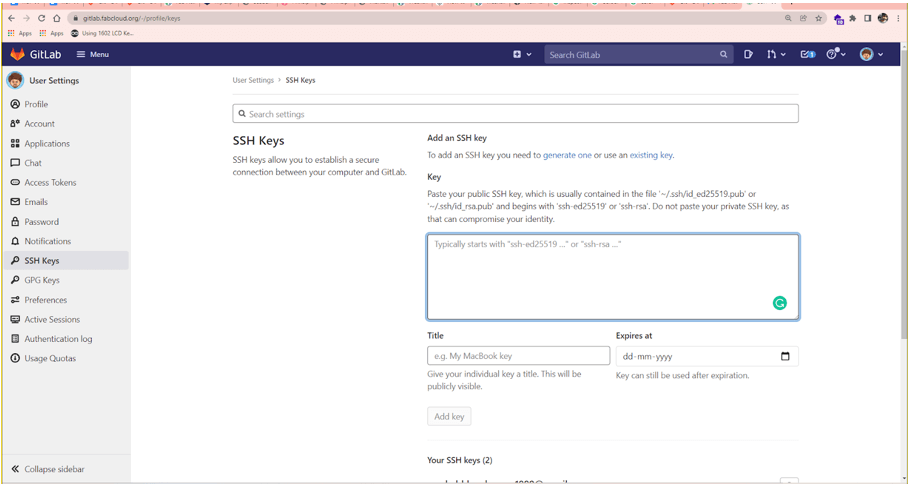
C: :Then I paste the key in Profile Settings---> SSH key in my gitlab account.
Step 3: Then I check whether it's linked with my GitLab account by using the following command.
D: Configure my username and email ID using the command :
git config --global user.name "USER NAME"
git config --global user.email "your mailID"
Step 4: connecting local repository with cloud.
E: Clone repository in the local system using the command:
cd Documents
git clone <copylink >
F:Enter in my cloned repository folder using the command:
cd folder_ name
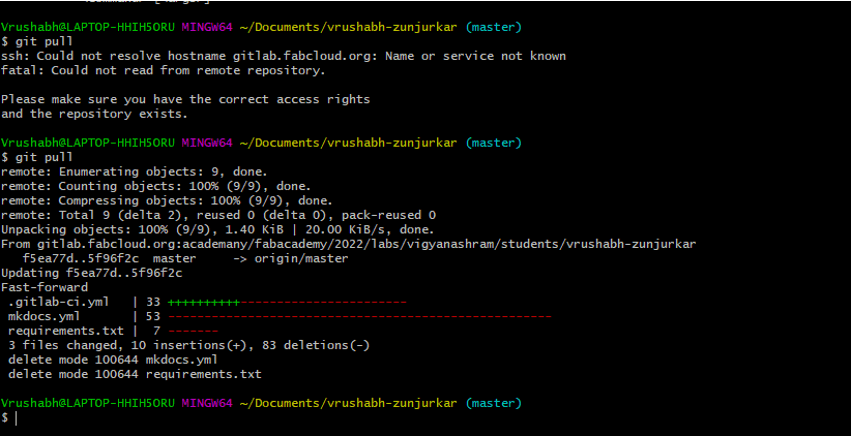
G:pull the contain in local system using pull command.
git pull
H: Then to chek the added folder size run the command :
git add --all
I: Next command to conform the contain as :
git commit -m"message"
J:last I push the side using command :
git push
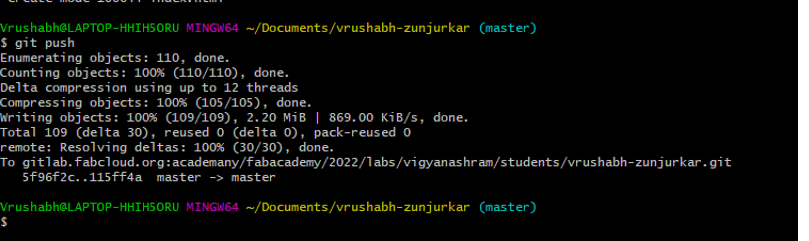
In this way i successfully Upload my web side to the class archive....🤩
----------------------------------------------------