Objective
Design and 3D print an object (small, few cm3, limited by printer time) that could not be made subtractively
3D scan an object (and optionally print it)
Introduction
3D printing was invented by Chuck Hull at Rock Hill, South Carolina, USA.
The term Stereolithography was coined on August 8th 1984.
When it comes to manufacturing processes there three main types they are
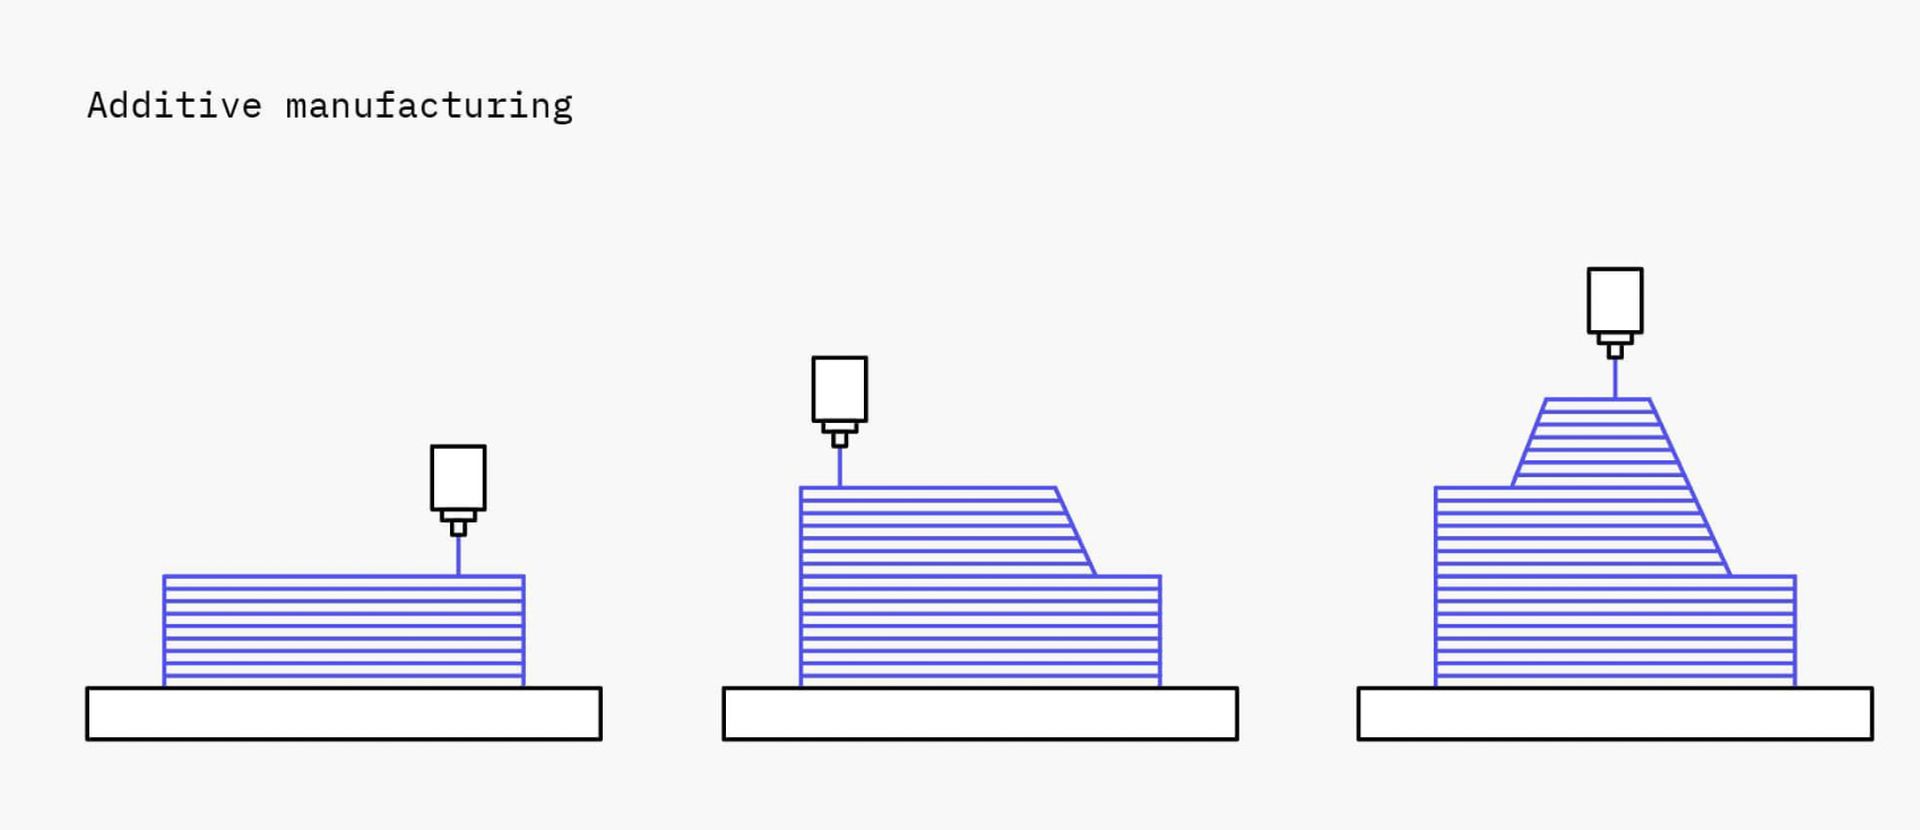
Additive manufacturing
It is a manufacturing techninique where material is extruded or put on top of one layer on another.
Additive manufacturing is a fairly new process and is being adopter in making rapid prototyping a possibility.
Nowadays Additive manufacturing is used in various fields like product designing,contruction of prefab buildings etc.
3D printing is an example of additive manufaturing.
The image below shows the process of additive manufacturing.
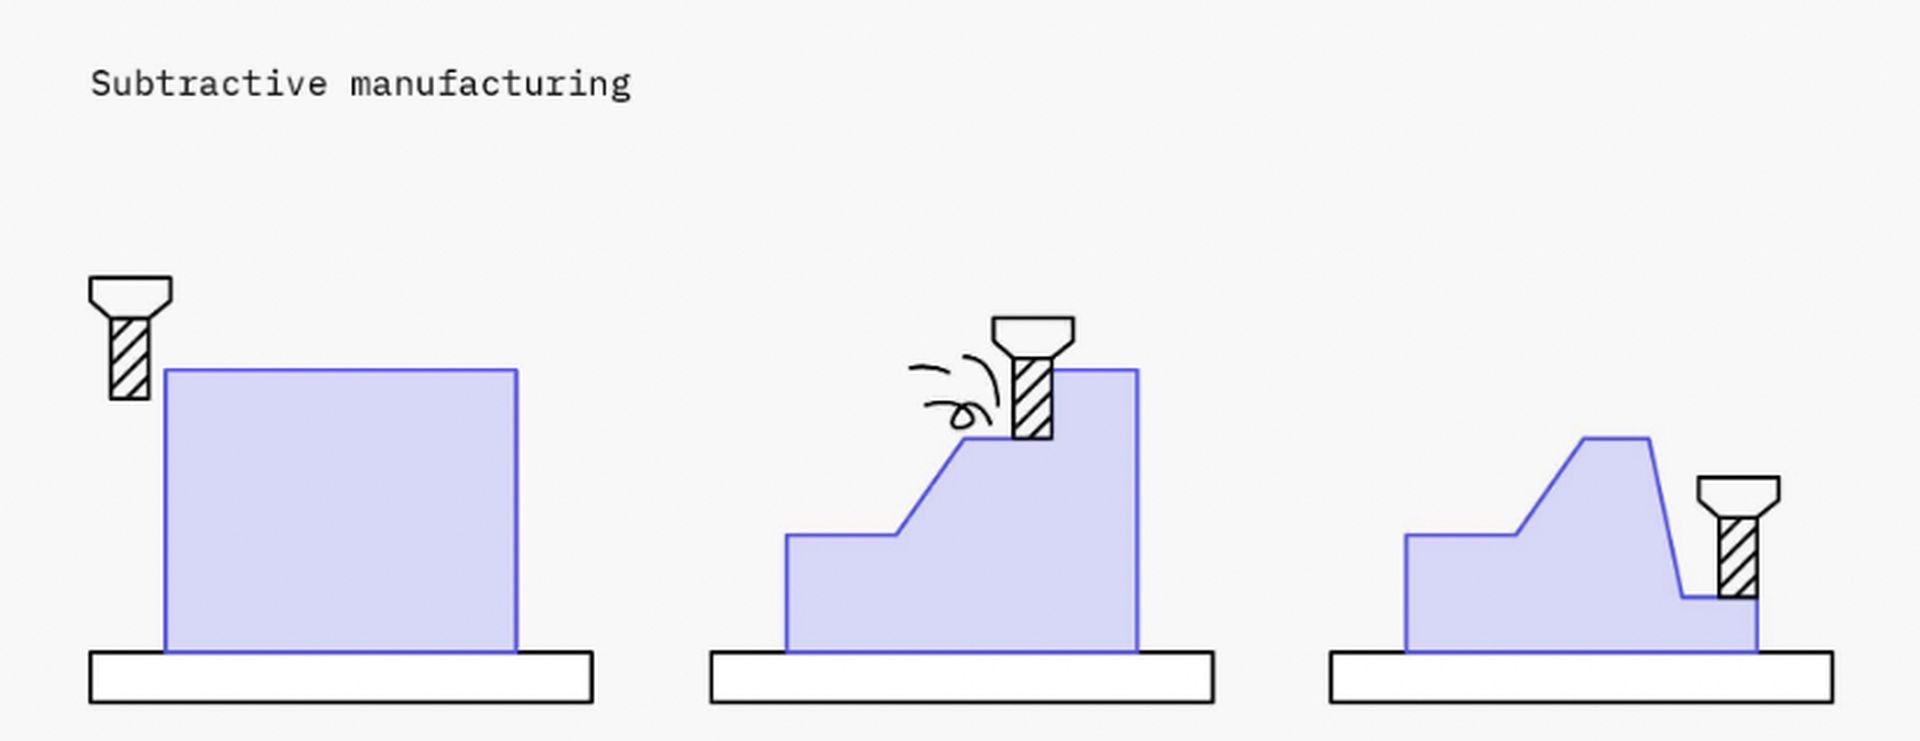
Substractive manufacturing
It is a manufacturing techninique where material is removed from the work piece layer by layer to form a product. Alot of modern manufacturing industries works on substractive manufacturing
Example production on IC Engine parts through CNC machinng, Wood milling etc.
The image below shows the process of substractive manufacturing.
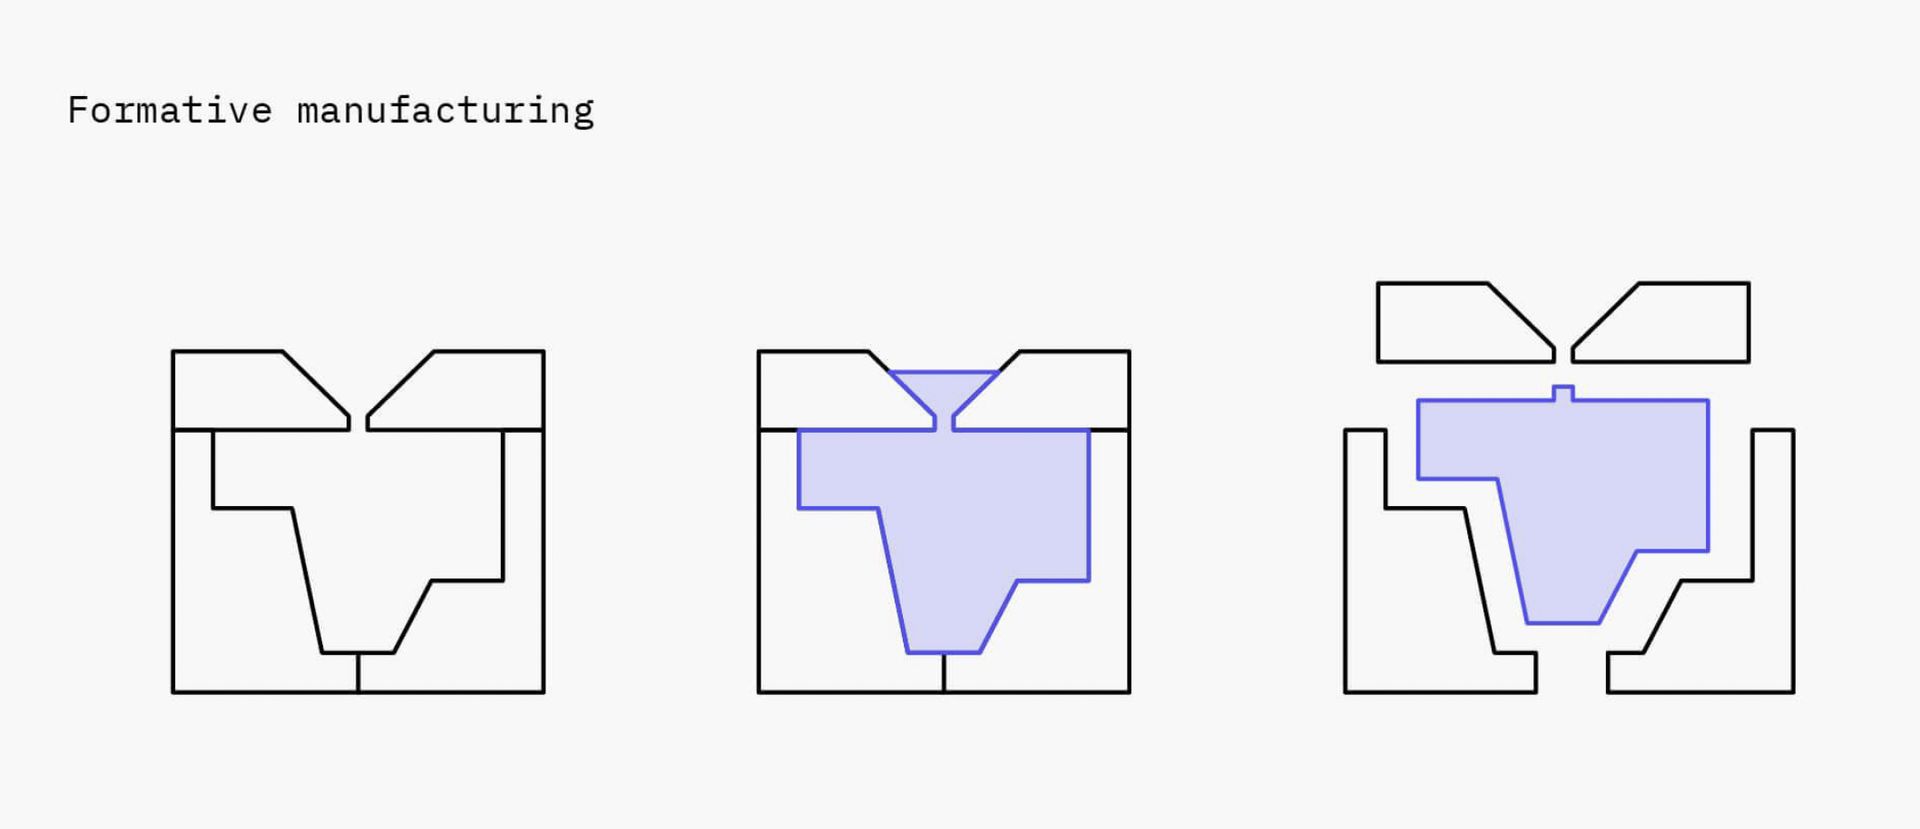
Formative Manufacturing
It is a manufacturing techninique where moulds are used to form different parts and components. Formative manufacturing is used where mass production of parts are required.
Due to economies of scale the cost to produce multiple batches of componts is low.
However a low demand for the same part means higher costs.
The image below shows the process of farmative manufacturing.
- FDM - Fused Deposition Modelling
- STL
- LPD - Layer Plastic Deposition
Fused Deposition Modelling
It is the most common type of 3D printing. In this method the filament is heated in a print head or an extruder and then used to create depositions then used for creating 3D objects.
At Vigyan Ashram we have an FDM Print by the brand Fracktal Julia Advanced.
The model is old but has alot of simplicity to it.
The technical specifications of the printer are given below.
For additional information I'll be leaving the link to its website over here.
Different materials for 3D printing
Different 3D printing processes use different materials to print a 3Dimensional structure.
For example SLA printers use light-reactive thermoset materials or UV cured resin .
There are different materials that can be used for 3D printing (FDM).
They are listed below.
PLA
ABS
TPU
PETG
and many more.
PLA - Poly Lactic Acid
PLA, also known as polylactic acid or polylactide, is a thermoplastic made from renewable resources such as corn starch, tapioca roots or sugar cane, unlike other industrial materials made primarily from petroleum. - source 3dnatives
Design Rules
Before printing there were some design rule for the 3D printer to be considered which are done in the group assignments I tried out the surface finish design to check the print resolution and finishing of the printer.
Below is the image of the group assignment. 
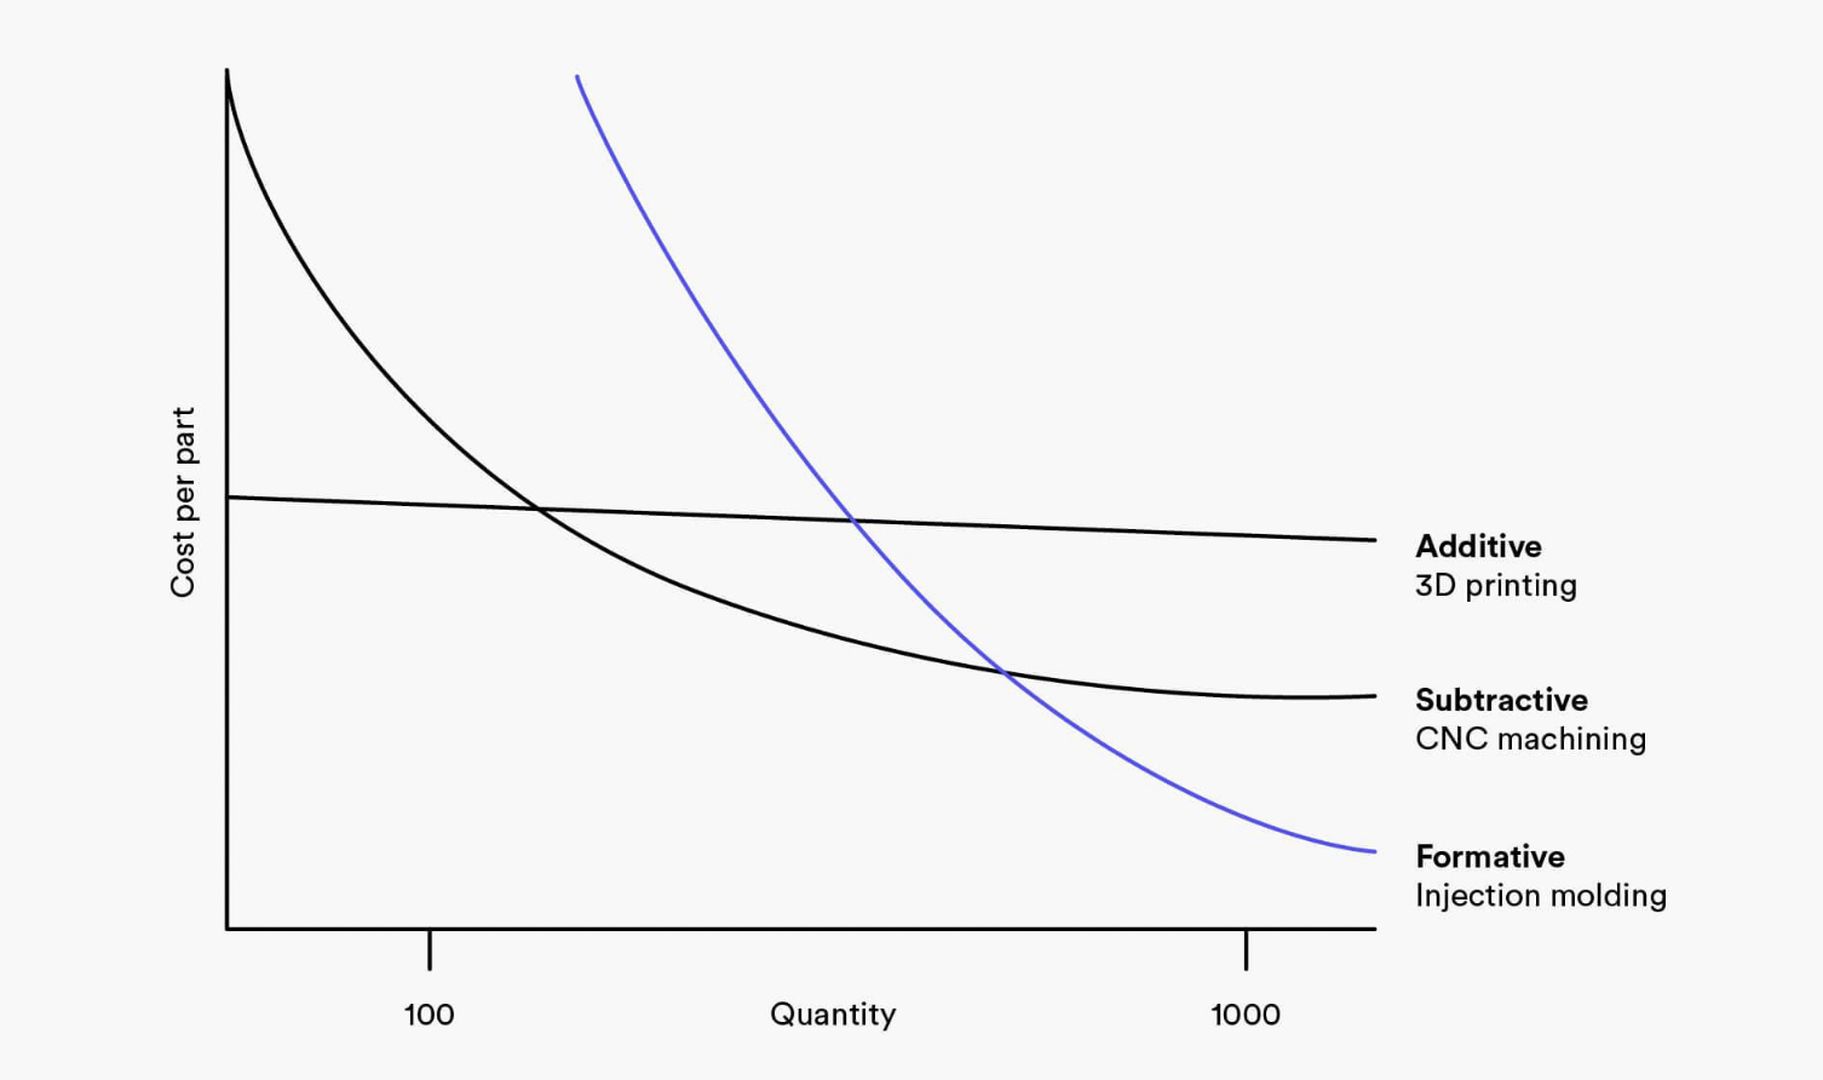
Benifits of additive manufacturing
Like other manufacturing processes additive manufacturing also has some key benifits and limitations.
One of the benifit is that it is used to produce low volume low cost components.
The graph below shwos the cost of different manufacturing processes with respect to quantity.
My Experiences
My experience with the 3D printer was good the stage of designing the file is easy but the second stage where the the file has to be converted to STL and the to gcodes using the software was rough even setting up the 3D printer was a challenge after which end end result also failed for some reason. The main reason was bed adhesion and bed levelling.
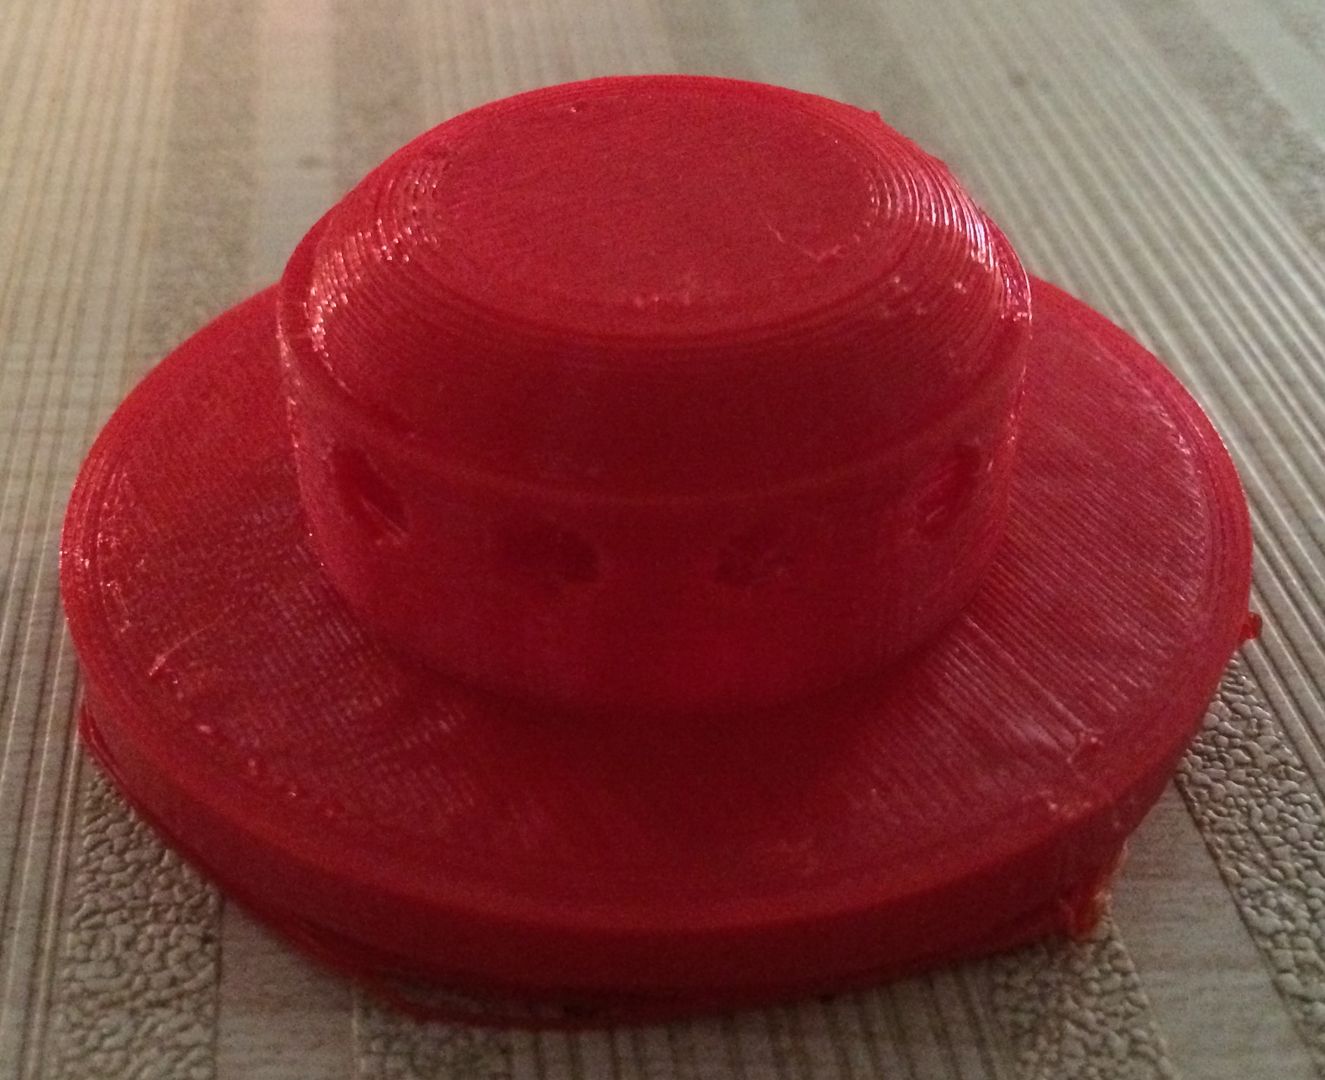
Shown below is my first 3D print titled Fabspace
By printing this cookie I was able to find out that we can give supports in the proper way and provide enough spaces.
Weekly assignment
I tried to 3D print a bell Siphone and was partially successfull.
- First I designed the siphone in Fusion360
-
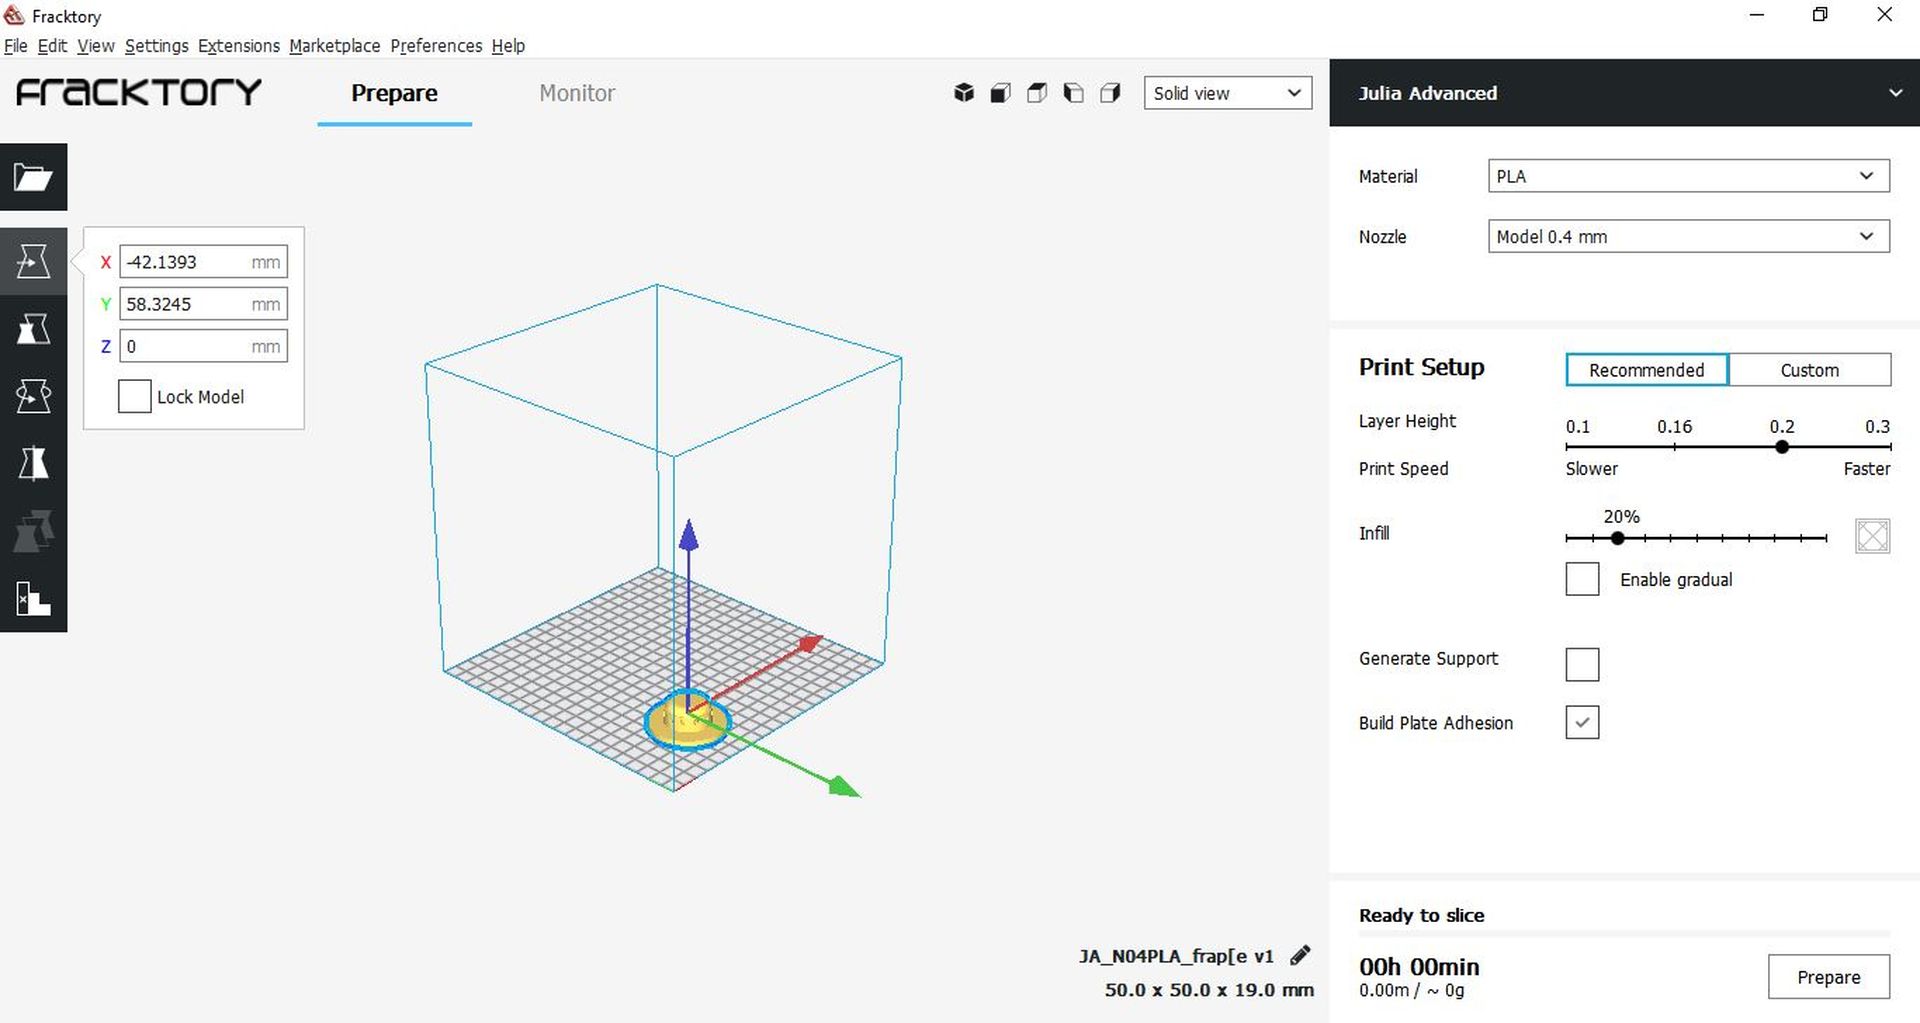
Then I exported the .STL file and used a software called Facktory
Then I printed the file in the 3D print using the gcode file
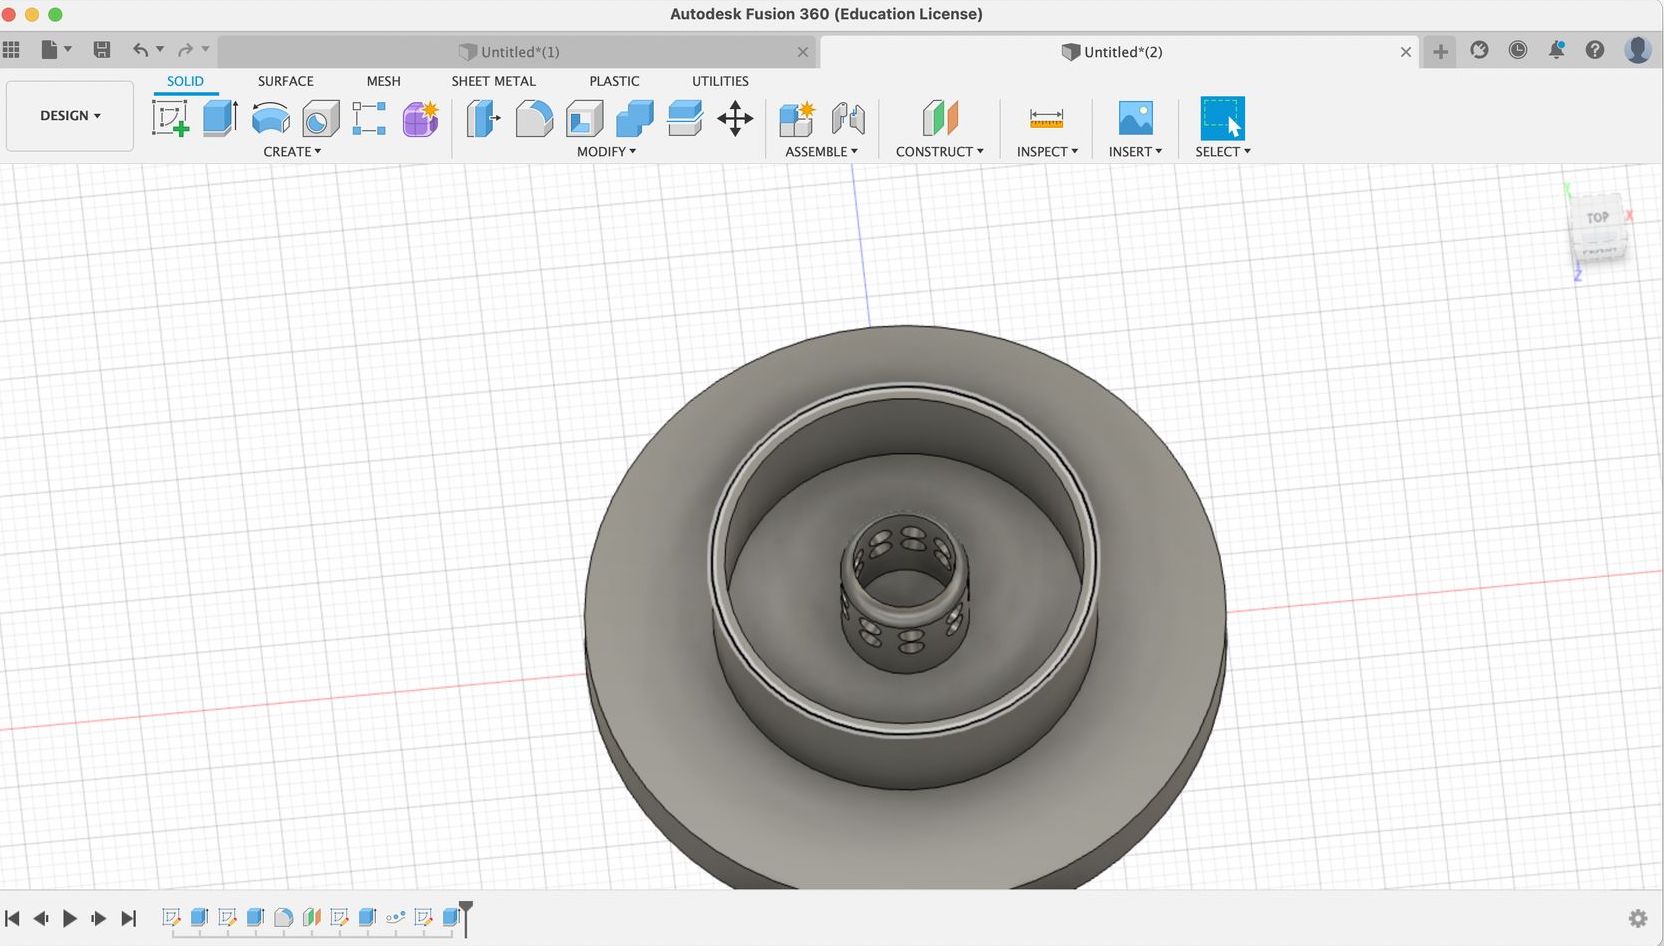
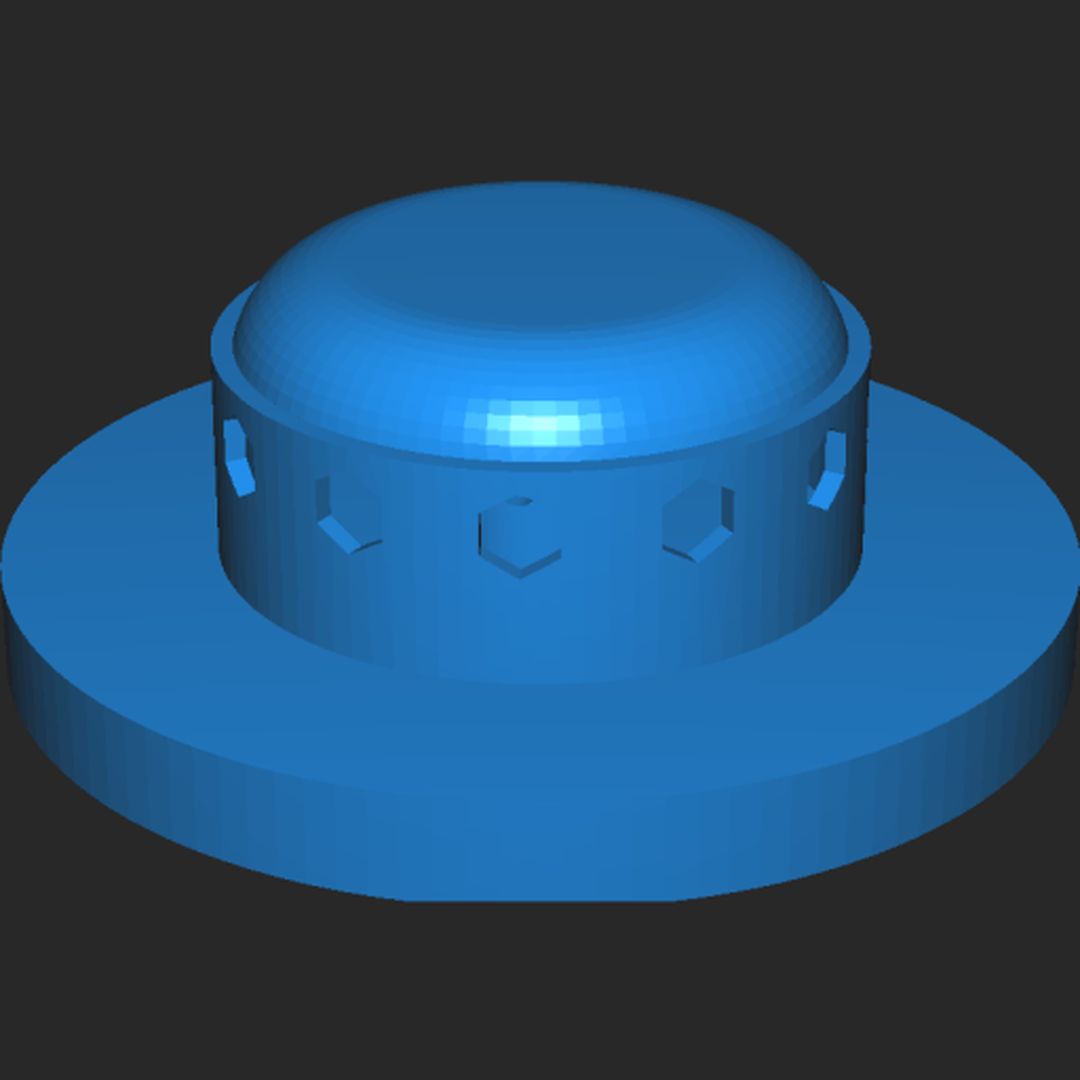
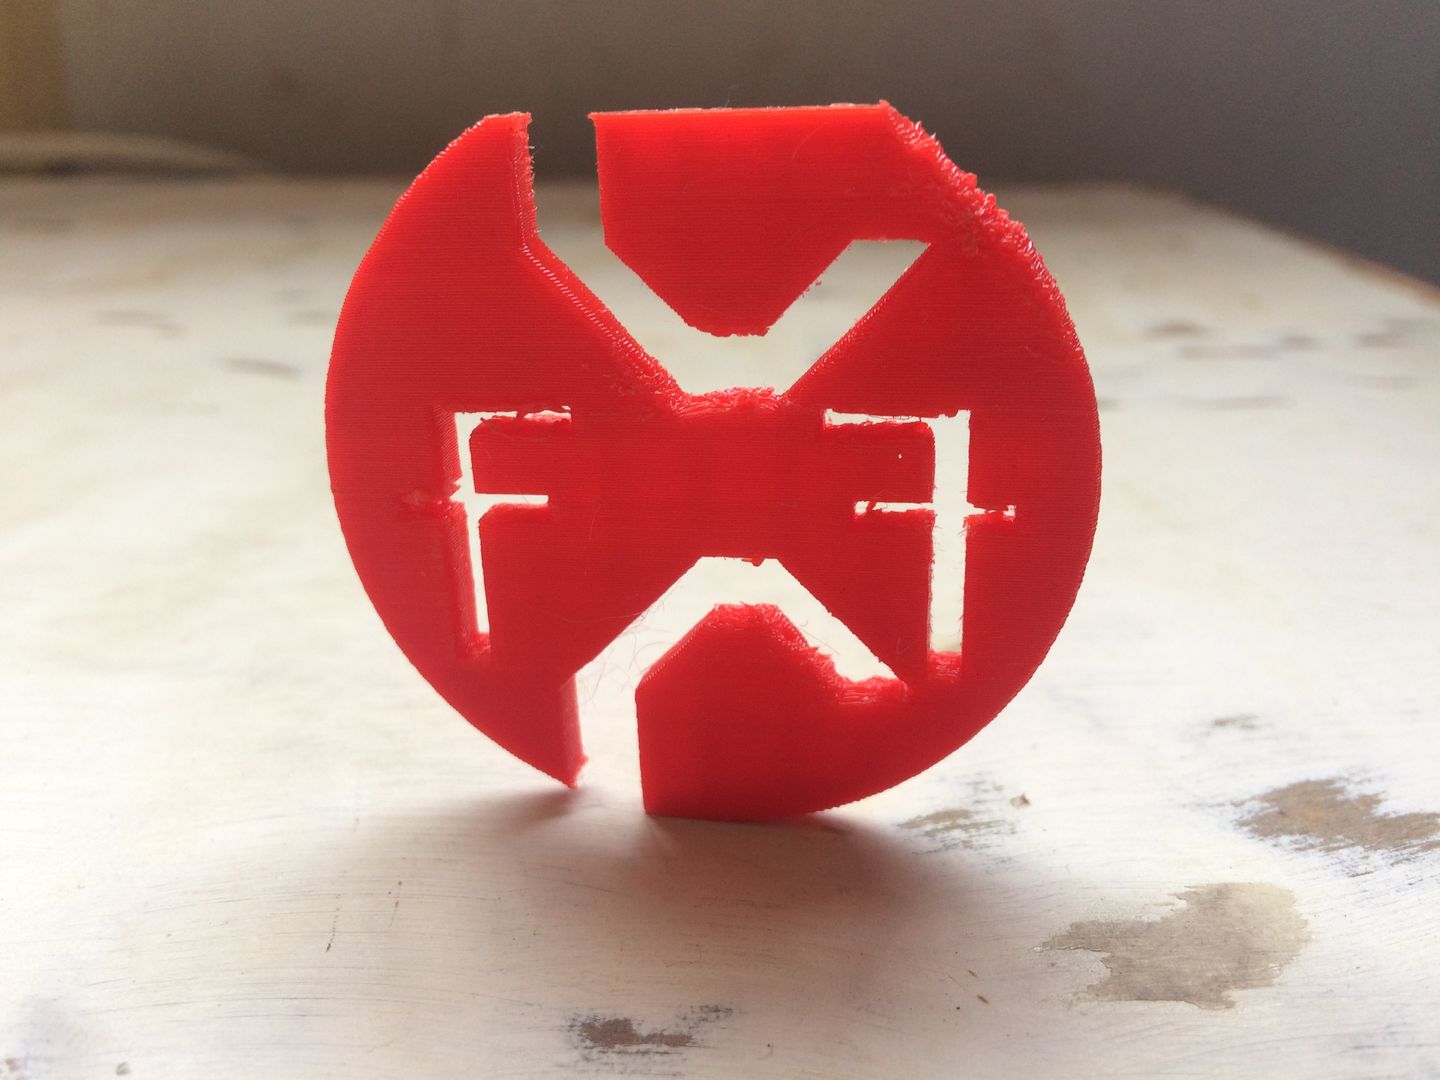
Reason for priting the structure
I wanted to create something usefull and had to look for something that can't be made using substractive manufacturing so I came up with this idea about the apparatus shown above . There hole provided inside inside and on the outter surface also I'm attaching an screenshot for the same below for better under standing. I'm also linking the original file below.
Original file
3D scan
3D scanning is used in varoious places nowadays like VR, Gamming, Modelling etc.
In this assignment I 3D scanned myself and created a file which is shown below via sketchfab.
Different parameters to consider
There were different paramenters that were needed to be taken into consideration therefore they are listed below
- Obejct
- light source
- Position
- Clearence Angle
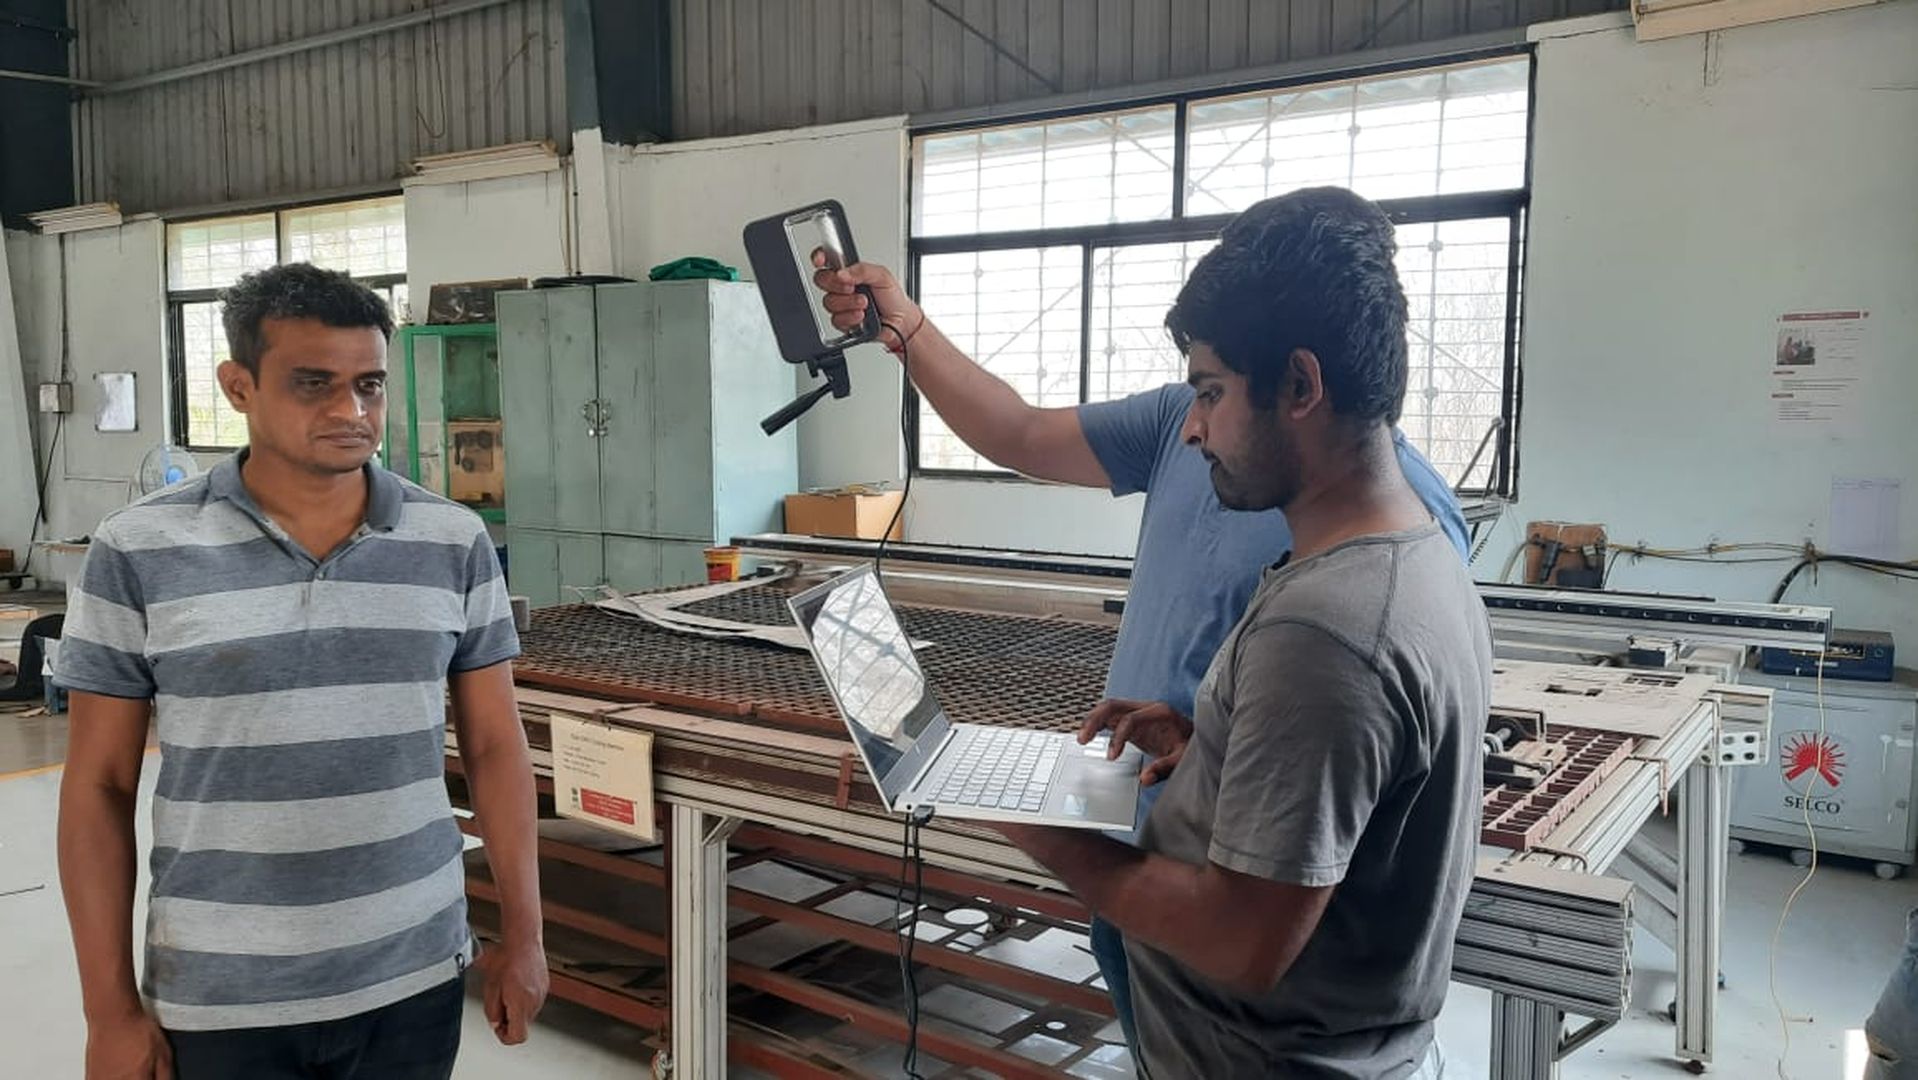
The picyure below shows the activity we performed while 3D scanning.
Software 3D sense and Meshmixer
The software as mentioned used for 3D Scanning was called 3D sense. It is used with the 3D scanner to detect and develop real-life 3D object in a virtual environment. 3D sense is a very sophisticated software though its old but for it worked like a charm. 3D sense was used to scan myself after which the software can export the scan to a .obj file. A picture of the interface is shown below.
Meshmixer
Meshmixer is an application developed by autodesk to skillfully play with meshes and objects though not available for the mac I might try it on windows.
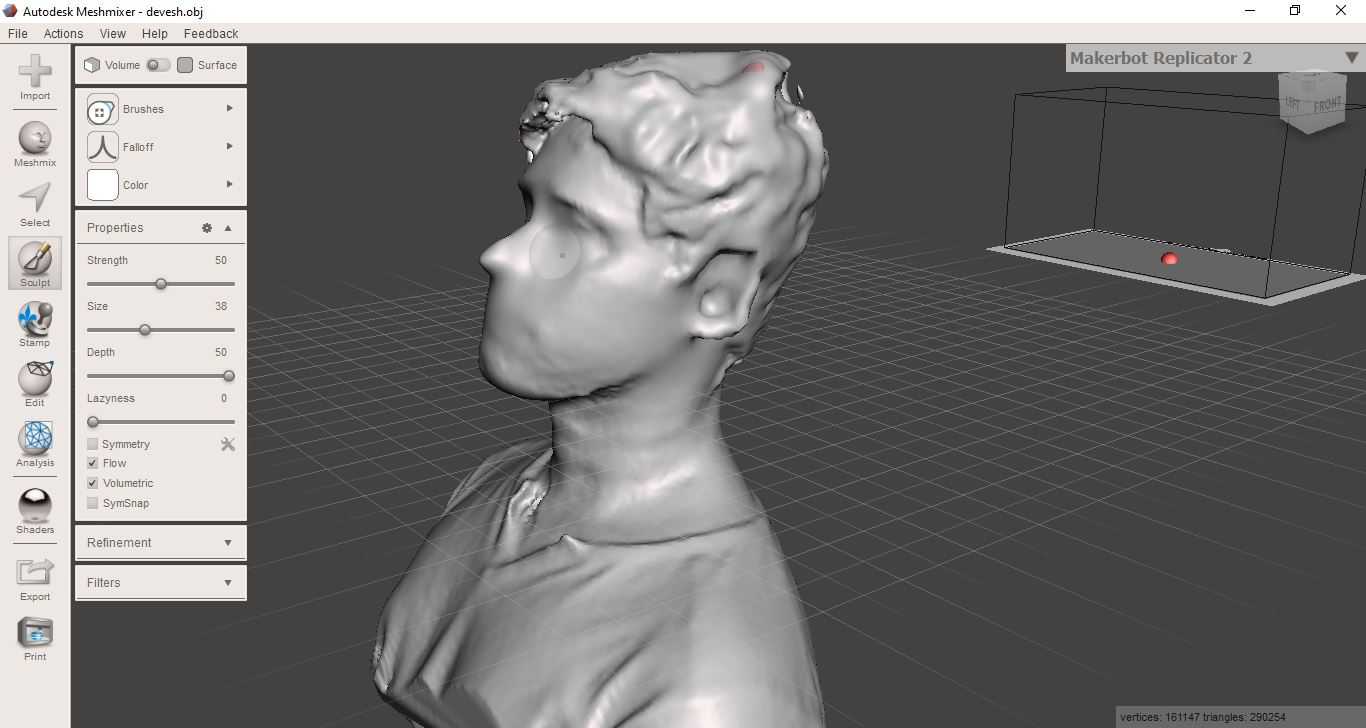
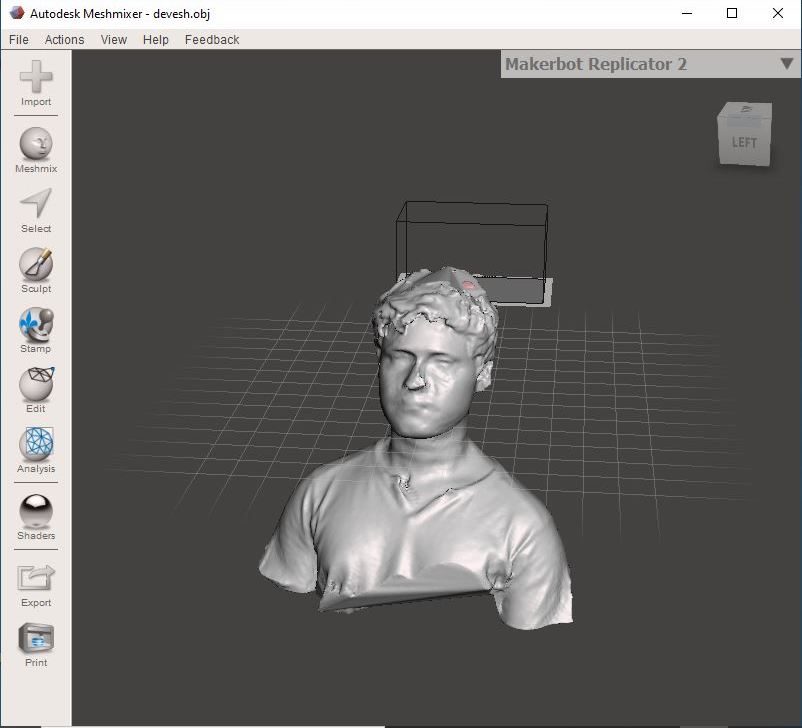
The interface of meshmixer is shown in the image below.

After the 3D scanning myself I did get an .obj file which needed some changes so I imported the files into meshmixer using the import feature.
After importing the .obj file I tried to use the tools that I could experienced some issues for the first time.
Given below is an image showing the usage of the sculpture tool to modify the facial feature of myself. A bit pointy nose using the fall off brush feature.
After this step I tried to soomth out some other features but failed. Here I learnt that meshmixer could be used for sulpturing just like blender.
Below given is an image that shows the before and after images of my facial feature in the .obj files.
Then I just exported and created another .obj file for my reference.
Original Design Files
Below I'm attching the original design files for download.
Click here to download the fusion 360 file
Click here to download the STL file

Fabspace by Devesh S Nair is licensed under a Creative Commons Attribution-NonCommercial 4.0 International License.