Electronics Production
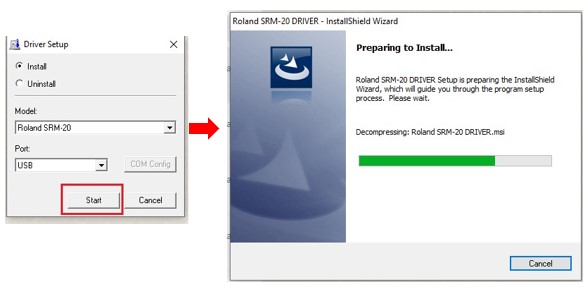
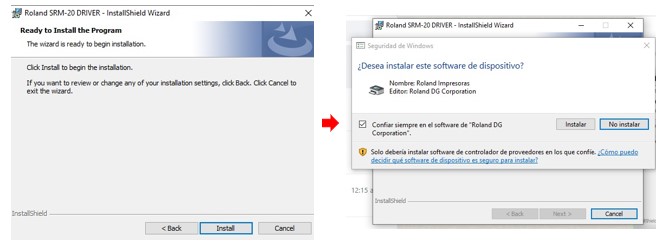
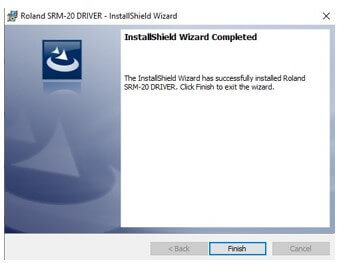
Among the difficulties encountered in carrying out this task was that we did not have our FABLAB implemented in our institution, so we had to look for a company in the city of Chiclayo where we could rent the table milling machine.
Group assignment
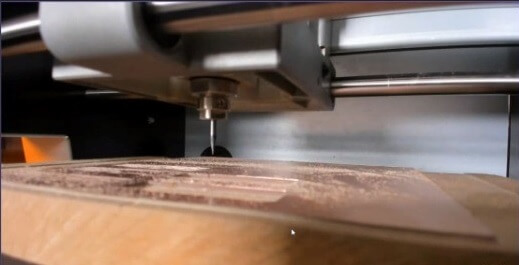
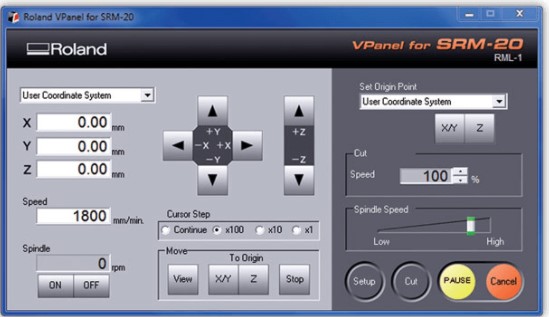
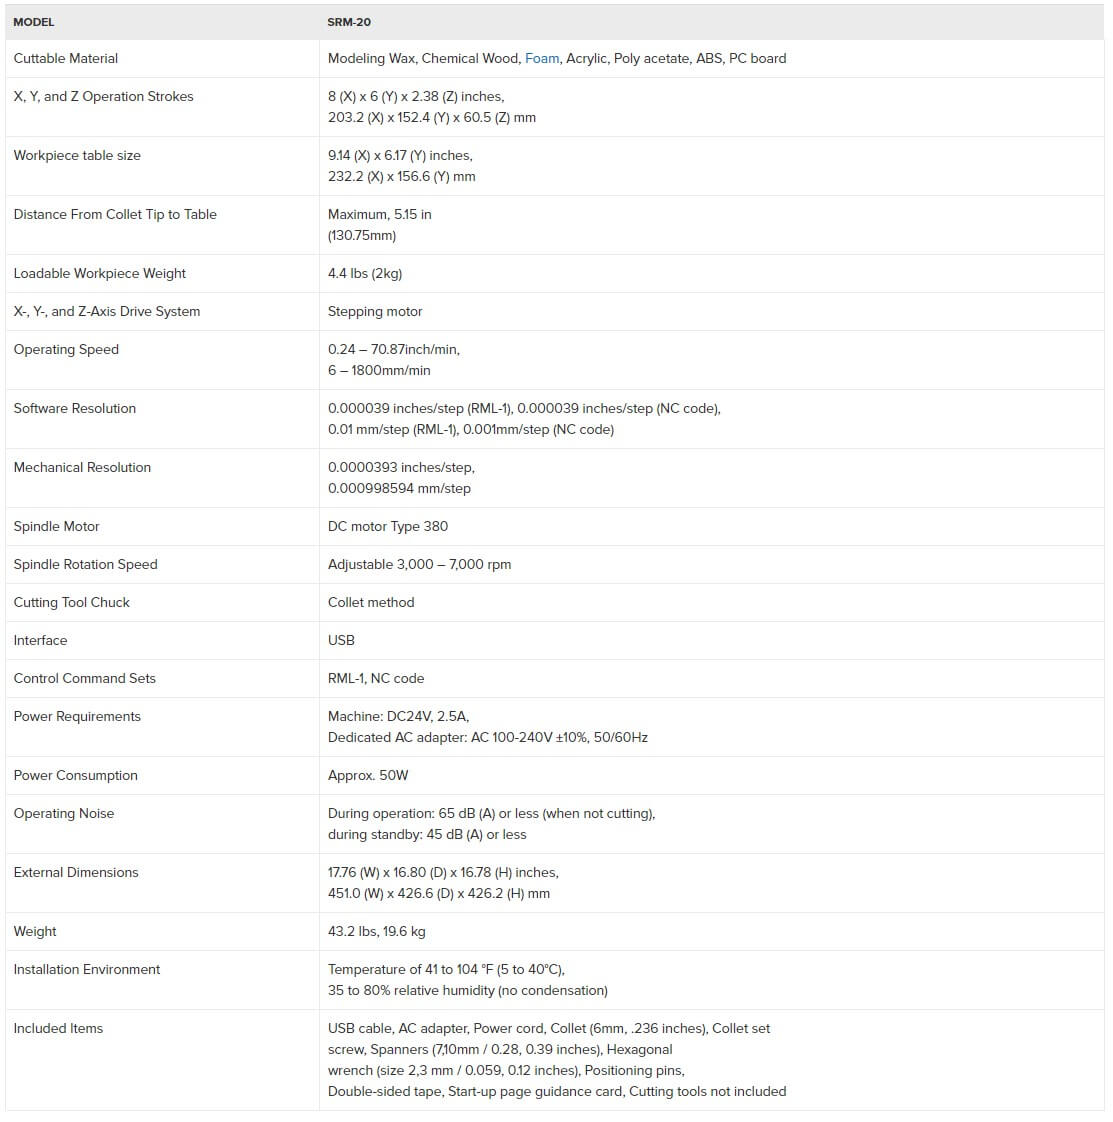
Roland SRM-20
The machine is MONOFAB SRM-20 is like a small milling machine, the SRM-20 offers a compact size and powerful functionality at an affordable price. Producing realistic parts and prototypes is made simple and convenient with a device that fits in any office, classroom, or home. For users looking for advanced milling skills without the need to be an expert, the SRM-20 is the most precise and easiest to operate milling machine in its class.

A wide range of materials, including wax, chemical wood, foam, acrylic, polyacetal, acrylonitrile butadiene styrene (ABS), and printed circuit boards, can be precision milled using the SRM-20 small milling machine, allowing you to create realistic 3D prototypes that are identical to the production parts. The SRM-20 has a fully enclosed cabinet that reduces dust and noise and includes a side window for easy viewing of progress. It also includes a safety interlock switch that automatically puts the machine into pause mode when the cover is open, allowing milling to restart when you close the cover and select “continue” (“continue”). Multi-axis milling is as easy as X, Y and Z.
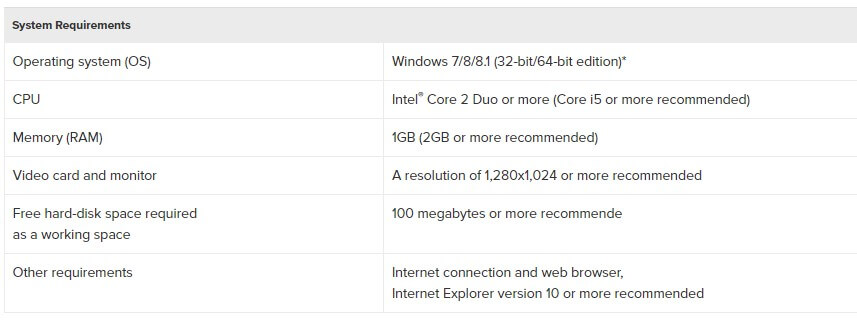
Specifications
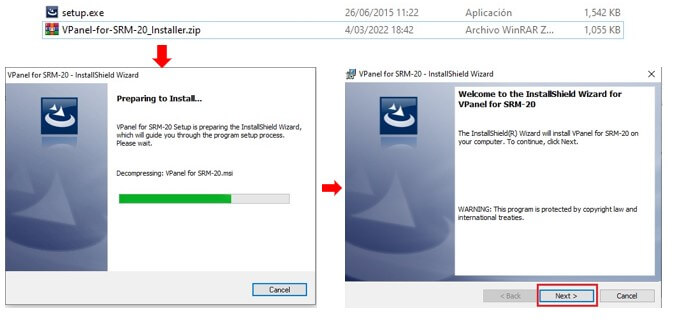
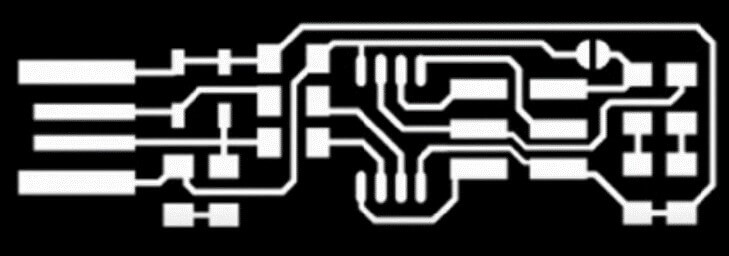
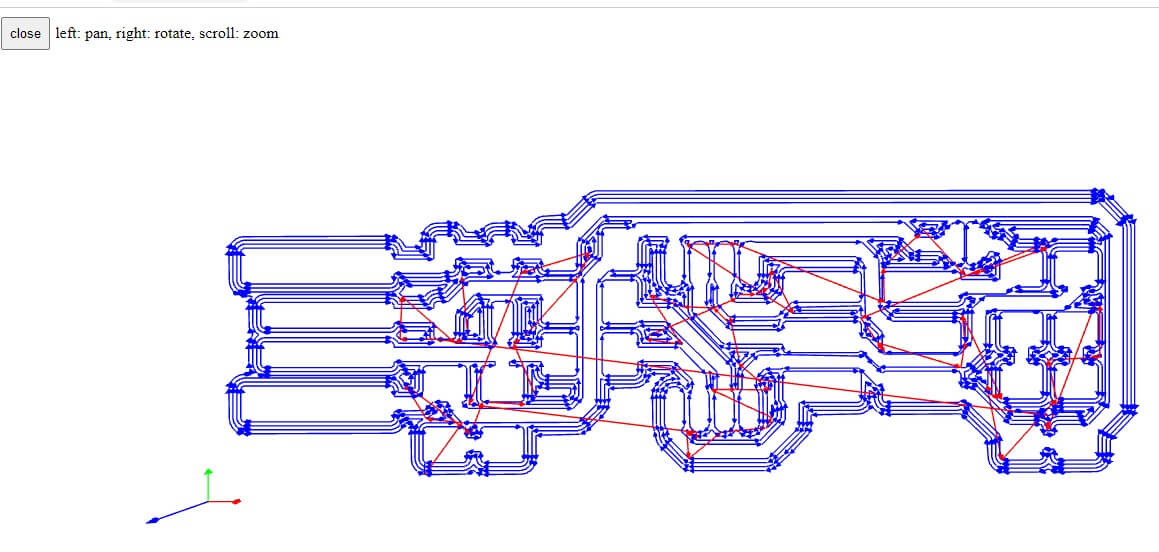
You can see images of the milling machine