Projrct Management
Objective:
1-Get familiar with Git
2-bulid my own website using HTML and MArkdown
Software used:
1-GitHub Git
2-Gitlab
3-Brackets
4-Atom
Before starting the Fabacademy diploma , we had a pre-fab course.Engineer Hashim gave us a brief description about the diploma.He also explained how time management is a key element to succeed in this program. We learned using Github how to build HTML websites and edit on it in brackets software.Also, we learned how to host website using markdown language
GitHub
First, we have downloaded Git that we will use to store our files at different versions. I face some problems in downloading this software since I have a MacBook and Git is not installed directly , another software is required in order to have Git . This program require 8 GB and my disk storage was almost full, so I had to free some space and that took some time.finally, we have create it an account in github that we will work on next week. Here are the steps to download Git in MacBook using Hombrew:-
1-open the terminal using the spotlight search and copy the highlited command
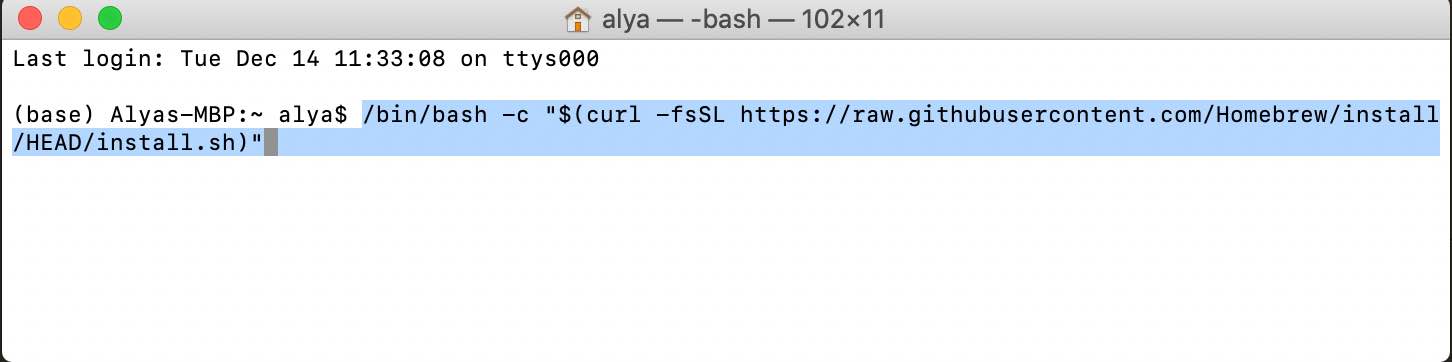
2-once the installation is complete download Git using the this command: brew install git
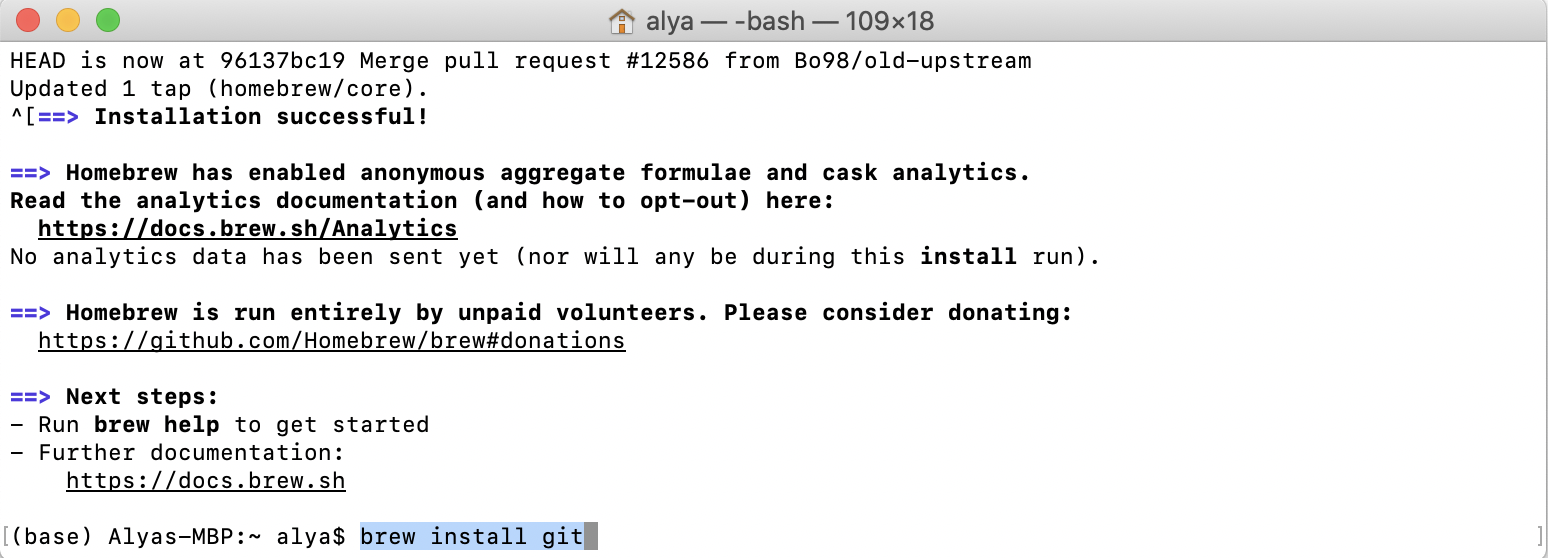
3-To check if git installed correctly copy this command : git--version and it should return the version of git

Github will be used to document and keep our files in various versions. To control the version of files, we will apply some commands in the terminal.Here are some basic commands:
- ls is used to display all the files and folders.
- cd is used to go to other directories.
- cd- go to previous directory.
- cd~ got home directory
- cd ../ go one level up
- mkdir use to create new folder
Configuring Git
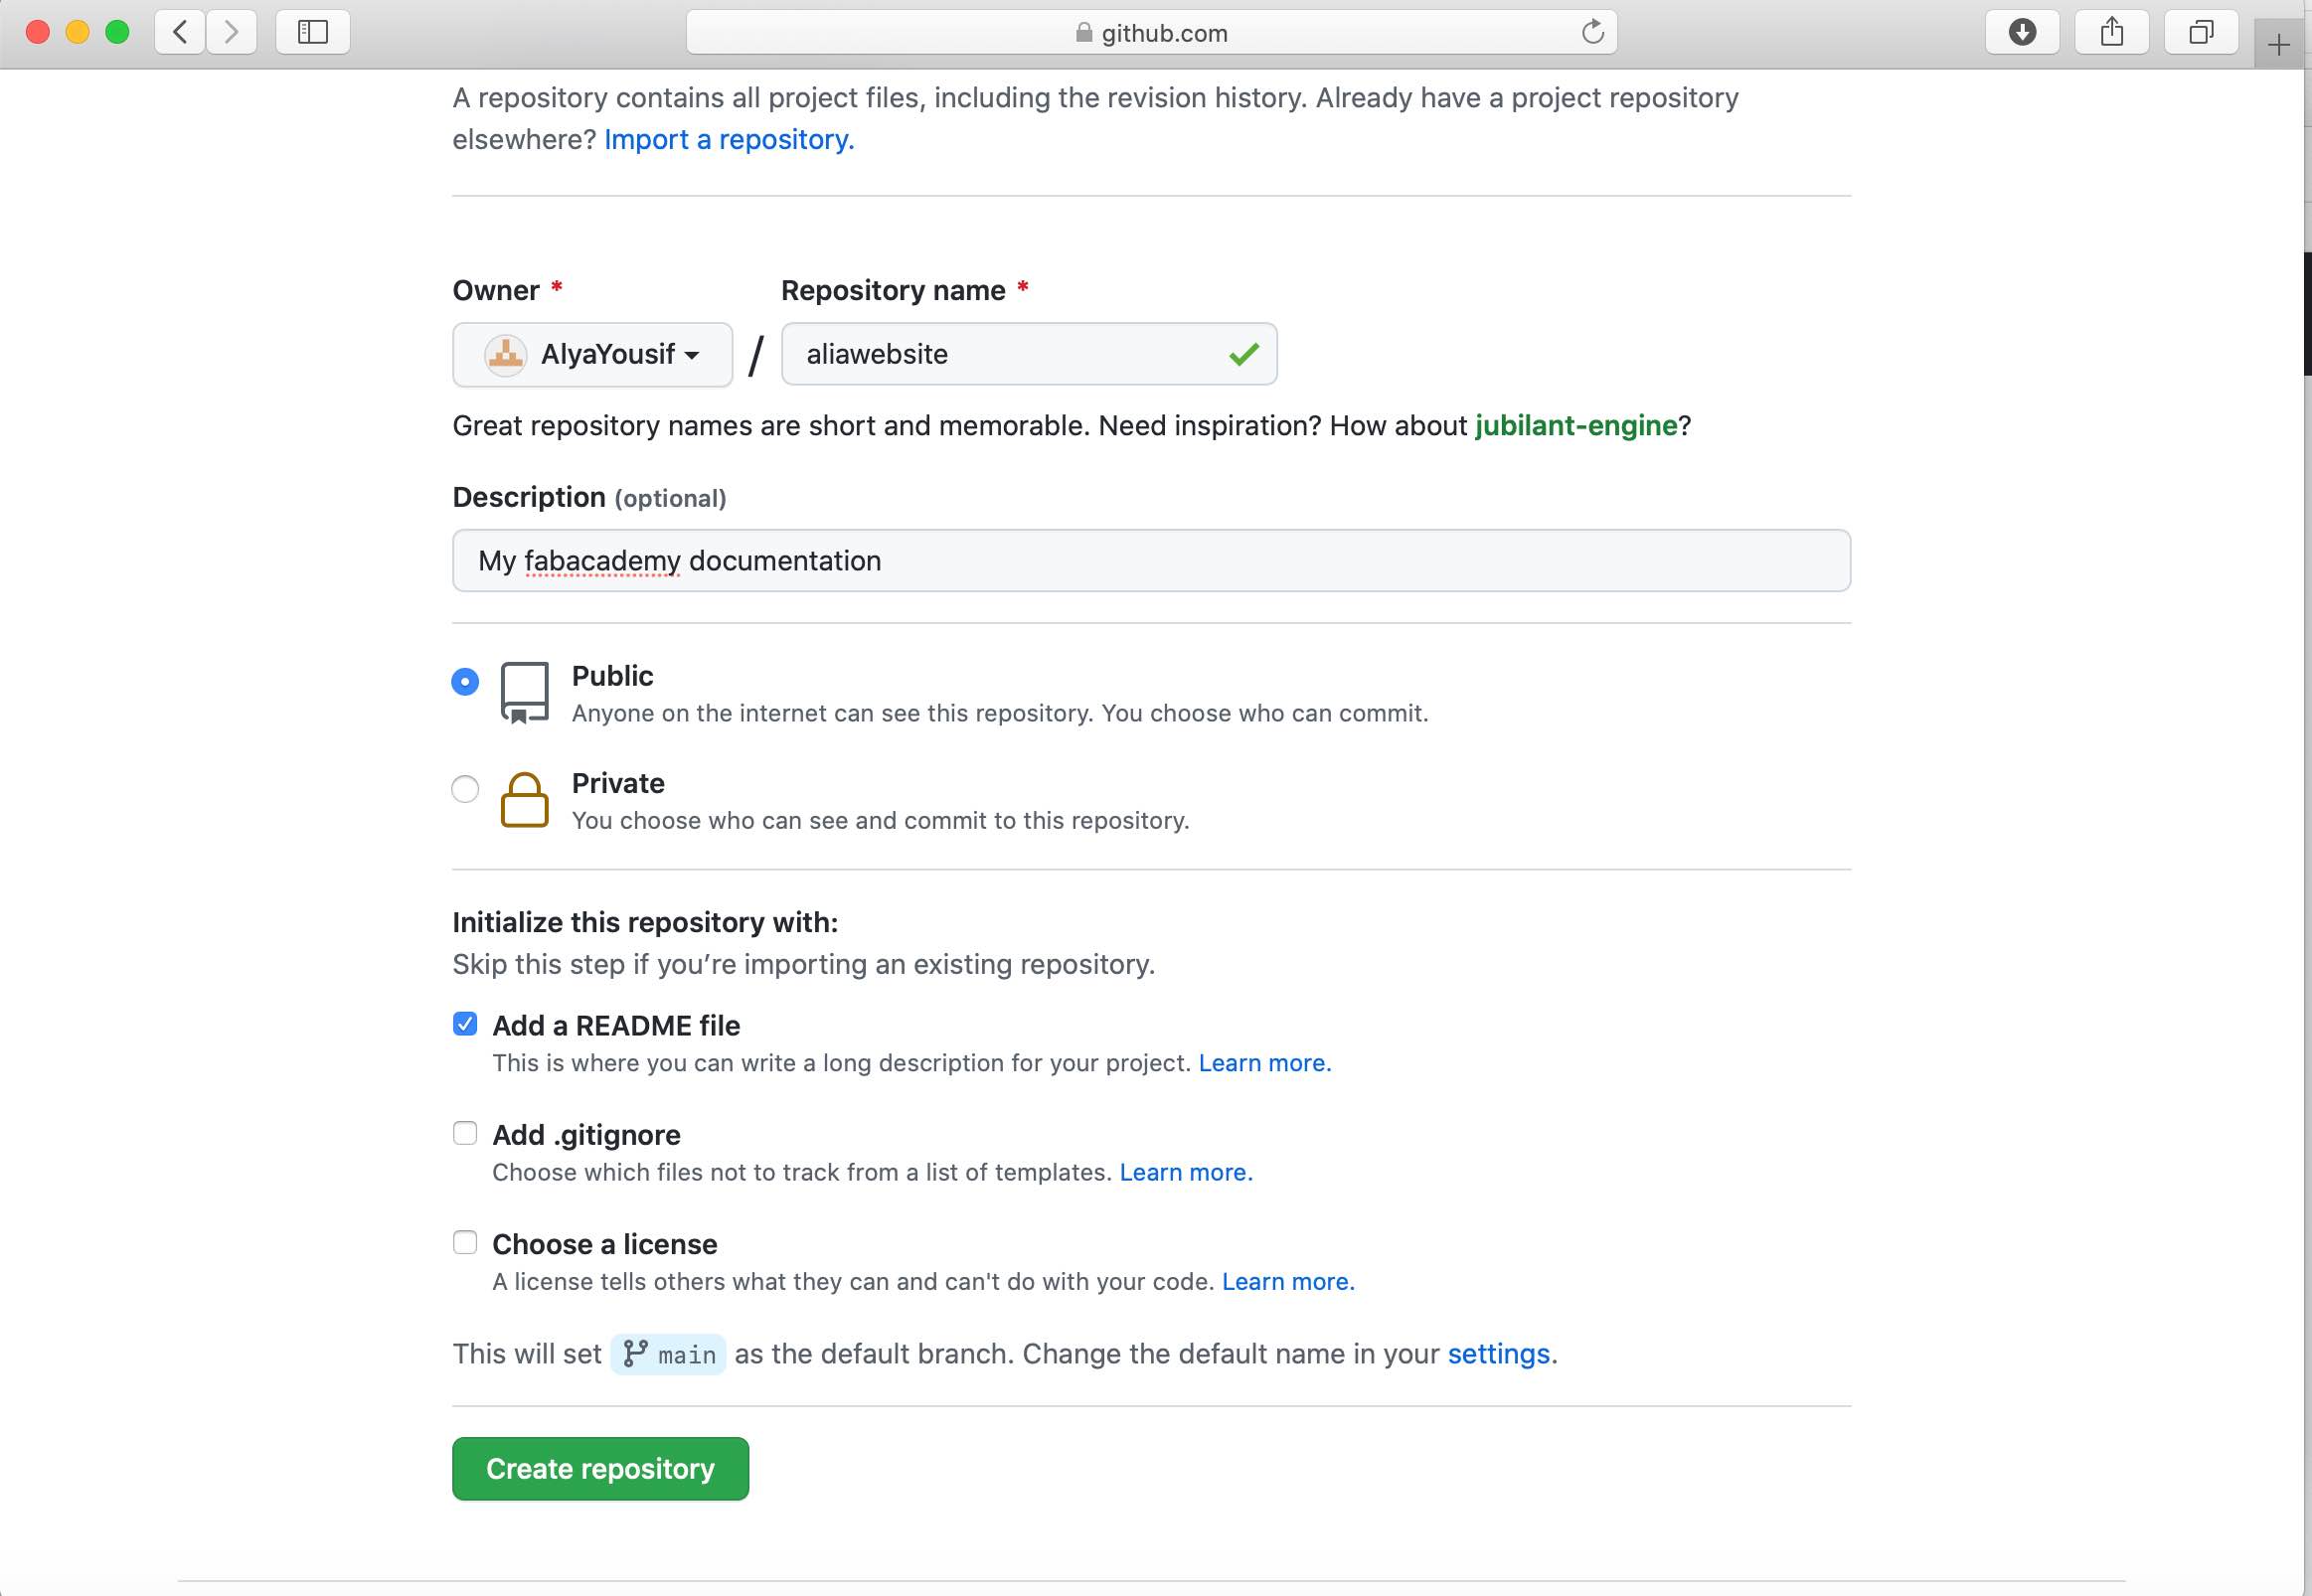
Before configuring Git, We created a repository on our profile which contains all files and history of them. Here are the steps of creating a repository:-
1-Click on the "+" icon of Github and choose new repository

2-Fill the name of repository ,description and add readme file then click on create repository button.
After that, we created a folder using commands to save all documents through the diploma.An image that show all commands used to create folder is shown below.First, we use ls command to list all files and directories.I decided to create a folder in the desktop, cd commaned is used to get to Desktop directory. mkdir commaned is then used to create a folder named myfabacademy on the Desktop.Inside this folder ,a new folder is created .finlly,cd is used to move to aliawebsite directory in order to start configuring.

for configuring Git, you need to know the name of your account and email you register in Github.The two images below shows two commands needed to configure the Git in your laptop:
Configuring Git username
To configure username use this command : git config --global user.name "username"

Configuring Git email
To configure your email use this command :git config --global user.email "email"

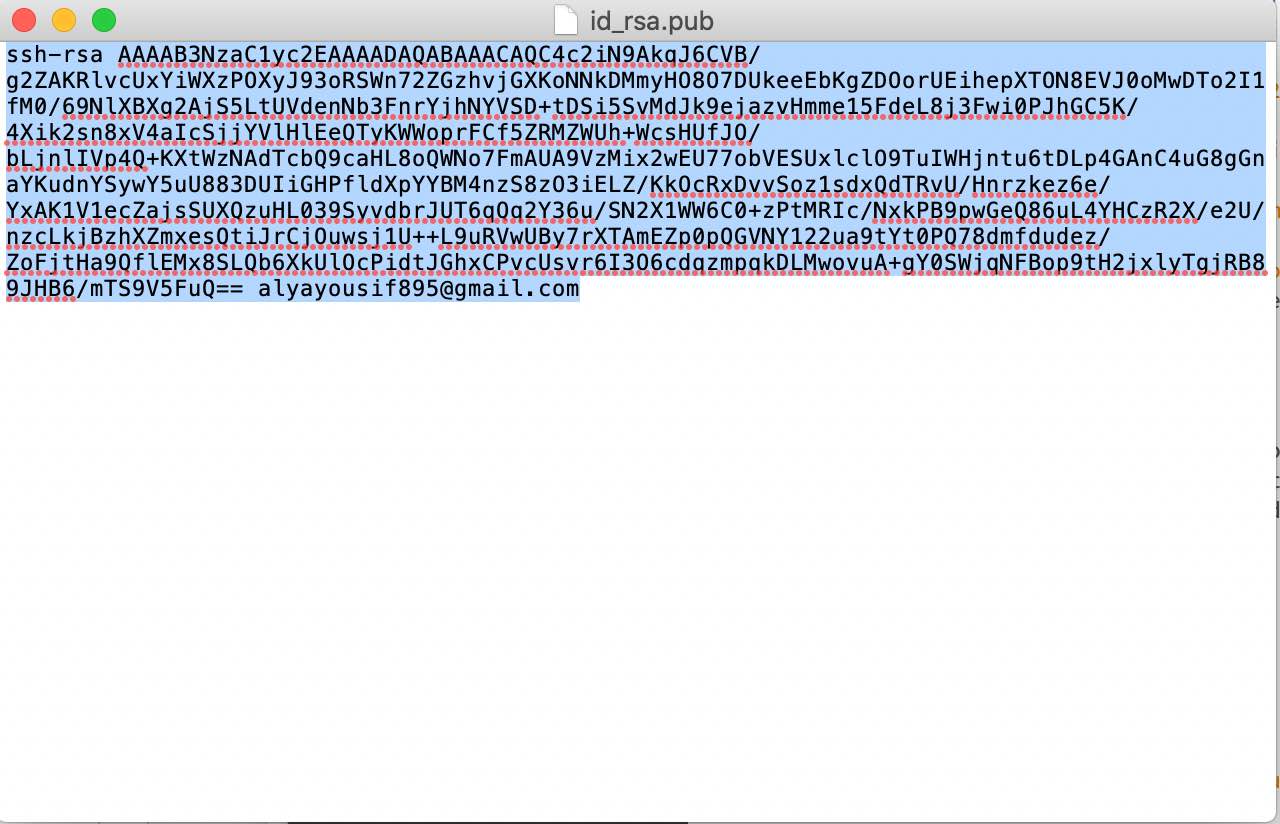
Generating ssh key
The ssh key is generate it so every time we connect to Github no username and password is asked. To generate ssh, we open the terminal and write the this command : ssh-keygen -t rsa -b 4096 -C "your_email@example.com"

After writing the command, a hidden file with the key is created inside the folder.I go where I saved my ssh and Press cmd + shift + "." to show the ssh hidden file.open id_rsa.pub file and copy all the text
Go to Github->setting->SSH and GPG keys->New key
Paste the text and click on Add key.

Cloning Github Project
The project is cloned to Github so that we can easily push our file to the repository. To do so I followed these steps:
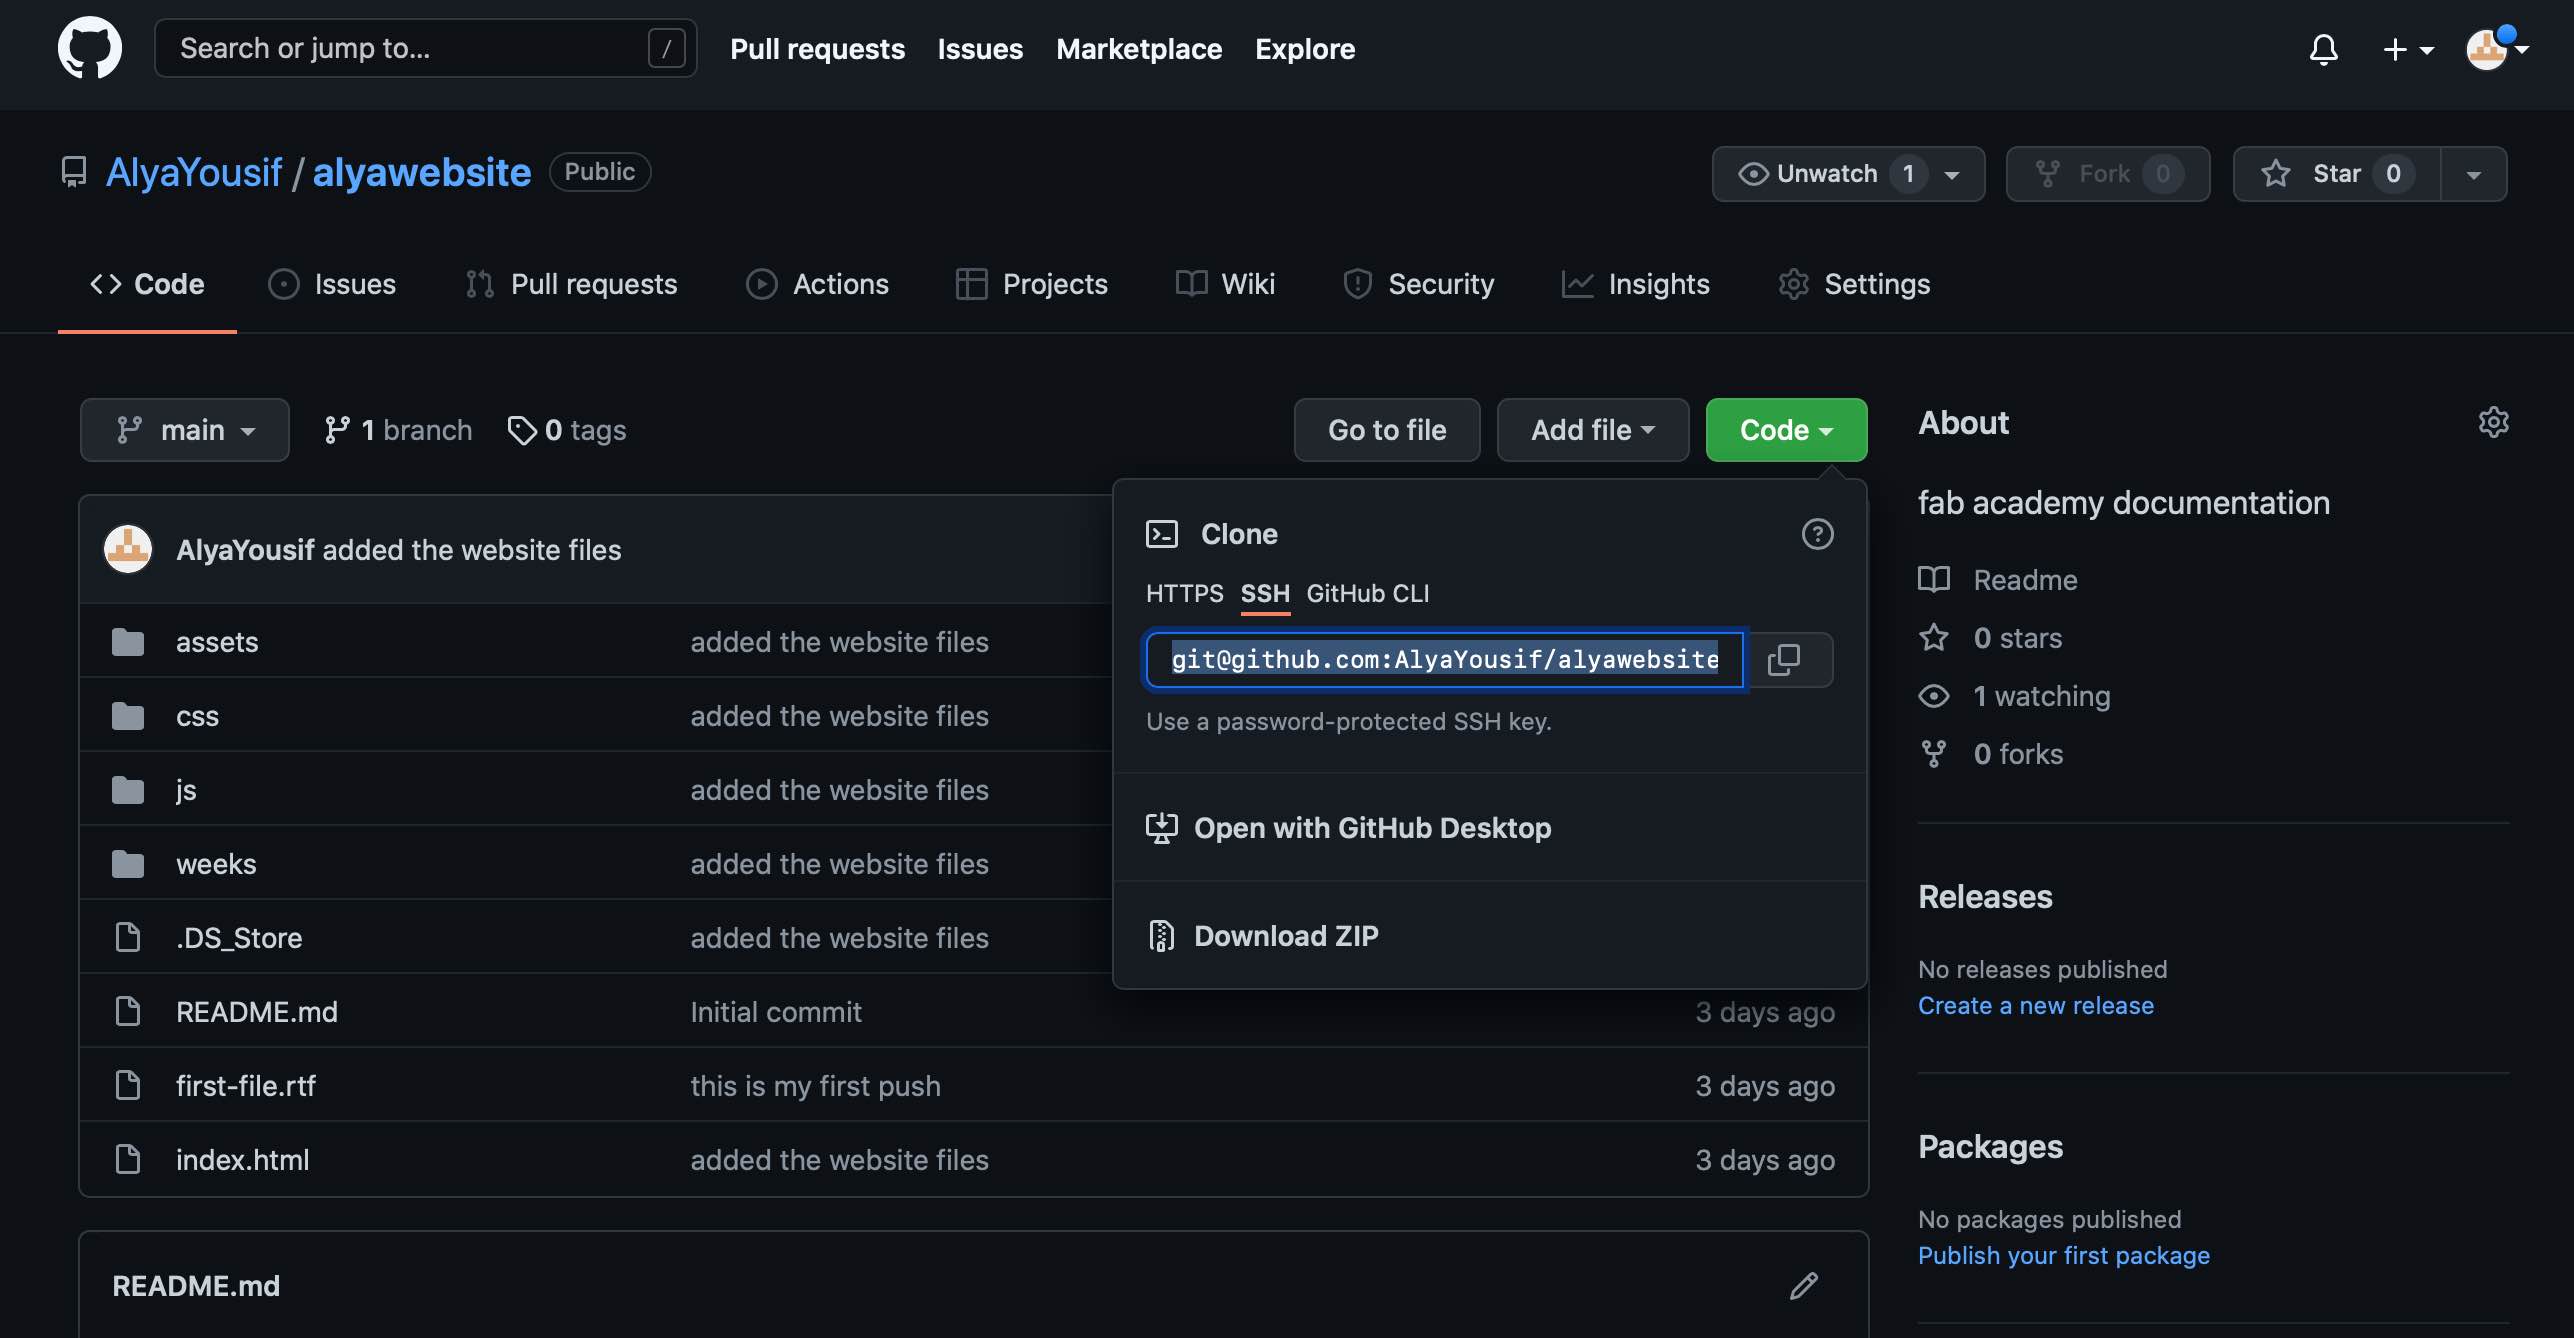
1-Go to my repository -> Code -> ssh and copy the text.
2-open terminal and go to the folder that we will save our project.
3-Use git clone commnad and paste the ssh clone.

Creating website using HTML syntax
We learned how to write code in HTML5 syntax. HTML is launguage used to structure the content of web browser.That's will help us to create our own website and document all our work throught the diploma. We learned the basic things like writing paragraph, headers , add images and hyperlinks all by the help of w3schools tutorials.After that we have installed Brackets to edit on HTML files.
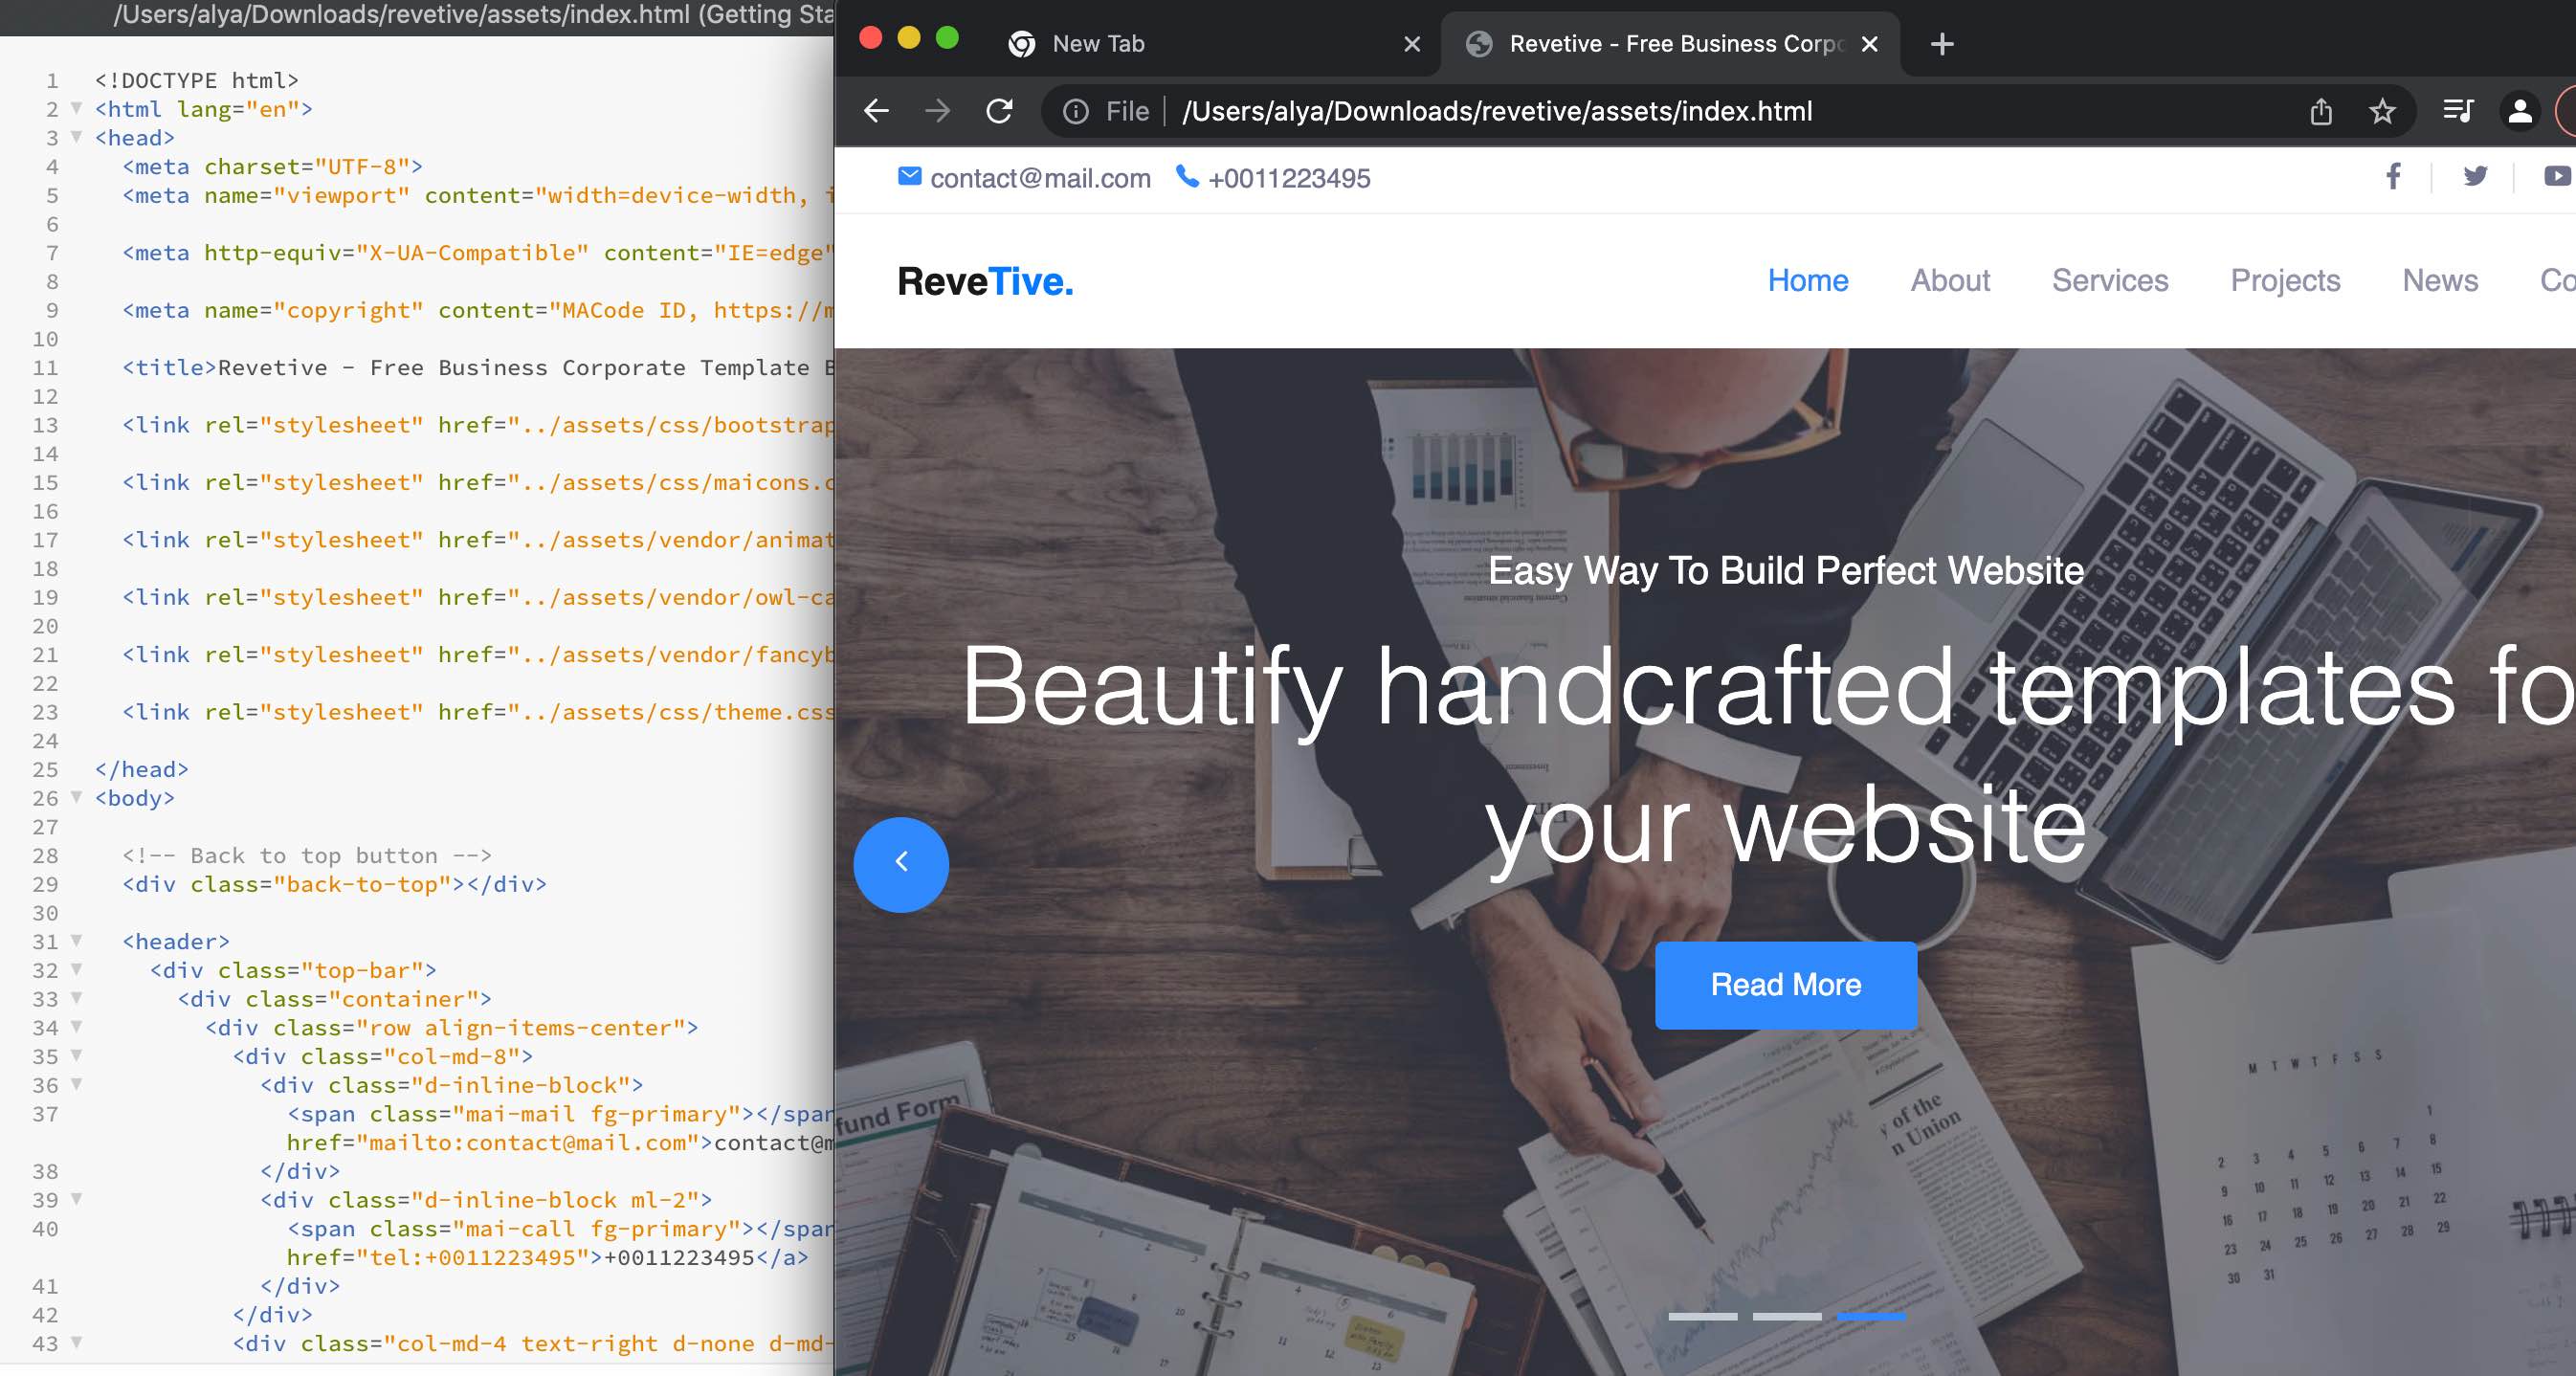
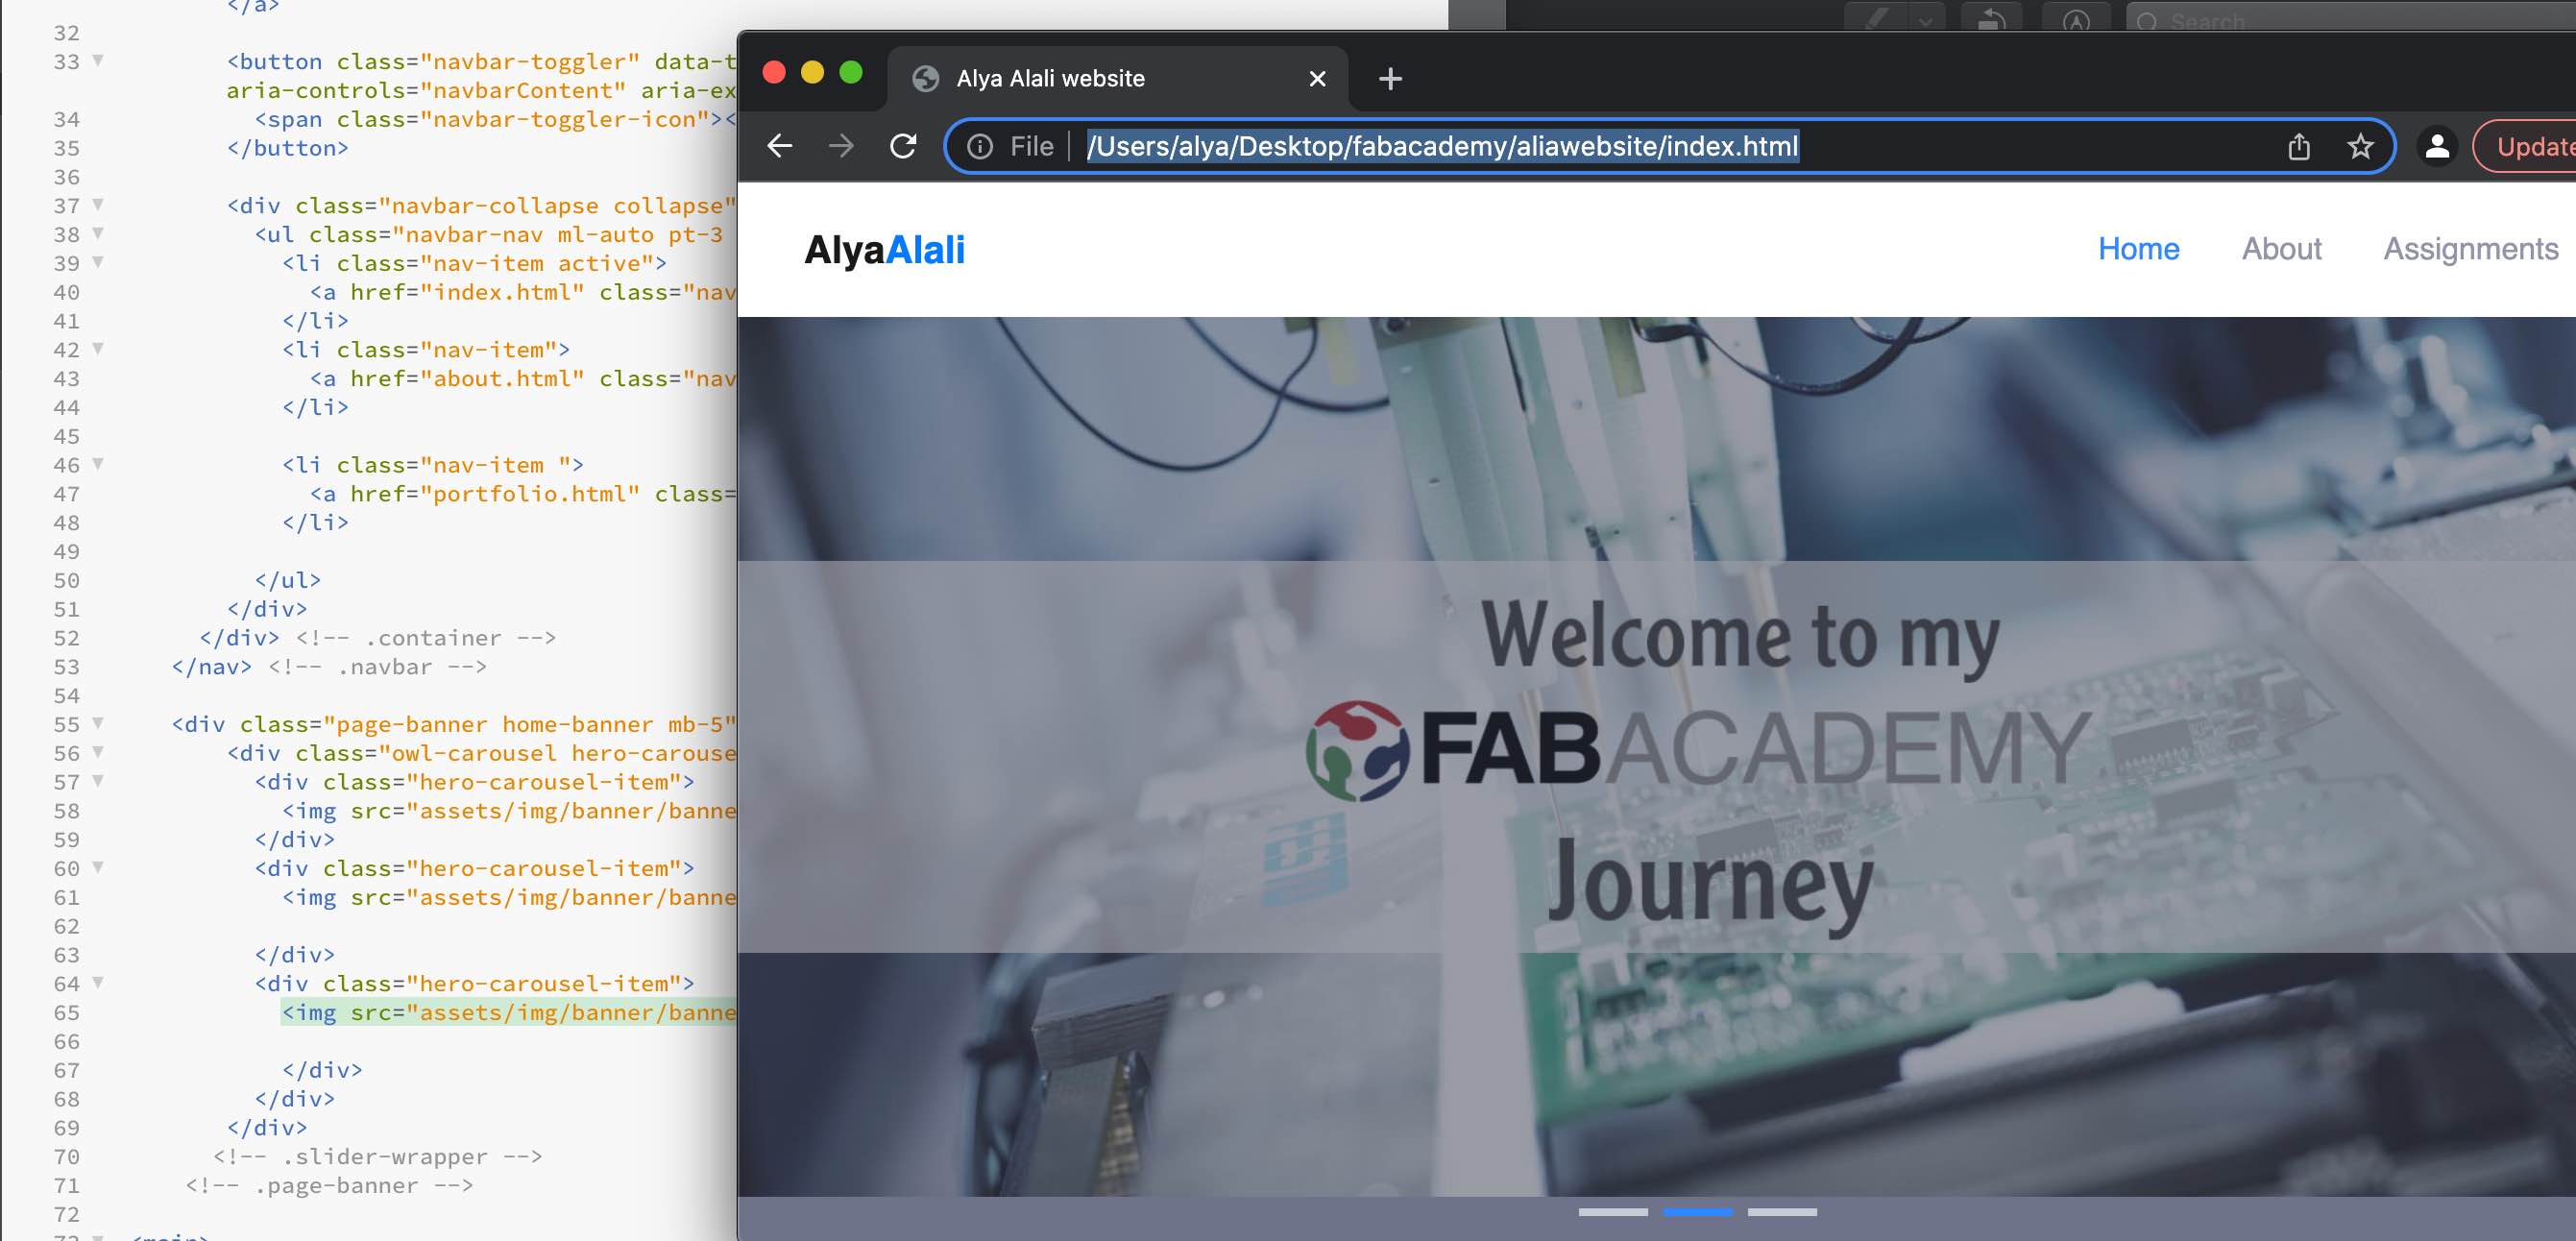
I created this website by altering a free template from free-css named REVETIVE. The downloaded template has a main folder that contain HTML files for the contant of the website and CSS files for the style of the website. After that, I open the brackets program and access the index file. The indix file contains the whole website's HTML syntax. I prefer to work in live preview mode so that I can see the changes as they happen in the browser. In addition to that , when you choose a line of code, it highlights the element that refers to it.
Below is picturas before and after changing the home page of the website.
Pushing in Github
Pushing in Github means to upload the project files in the Github repository.To do so we learned some basics command:-
- git status : used to know the status of the working directory
- git add . : to add all files , to add specific file write the name of the file.
- git commit -m " ": to commit on the changes happens on the files
Here I added and push my files to Git hub using the commands:
git add. -> git commit -> git push.
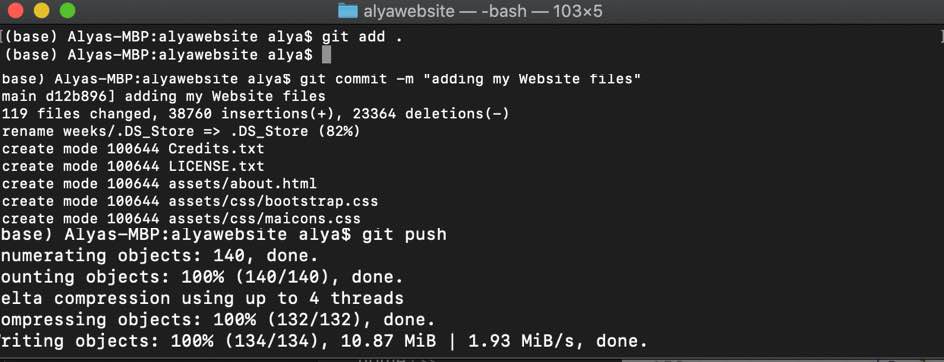
Here you can see that all files are uploaded in the repository

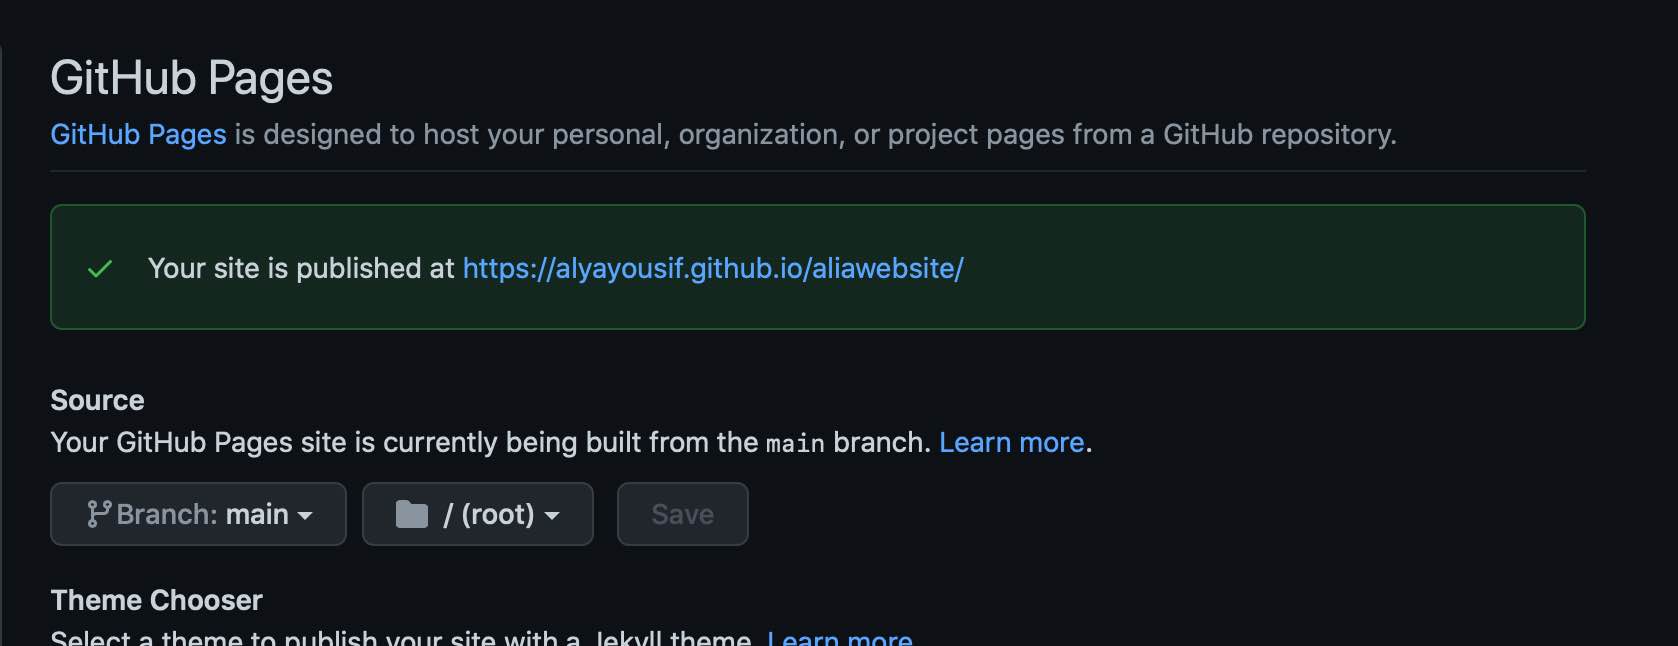
Hosting sites in Github
here are the steps of publising a website in Github:
1- Go to repository settings -> page section.
2- Change None to main and click on save.

3-After clicking on save , the website link will appear above
intro to Mkdocs
The seconed option we where given to design our website using markdown launguage. Mkdocs is a software that can be used to design websites with a simple lauguage called Markdown
To utilize Mkdocs, python should be downloaded (I already have it) and Atom software.
First I checked the version of python by using python --version command and also the version of pip using pip --version command

After that I install Mkdocs using sudo pip install mkdocs command

Then installed Mkdocs material using sudo pip install mkdocs material command andCheck if Mkdocs downloaded corectly uisng mkdocs --version command
.

Now after installing all required material for Mkdocs and we can start editing.First I downloaded the default website format for this academy.Use terminal to go to the directory where I saved the file. Run mkdocs serve command. I got the error below that "git-revision-date-localized" plugin is not installed.

I serach for a solution for this error in the serach engine of the fabacademy website and I found that a previous student faced the same problem.I run this command ip install mkdocs-git-revision-date-localized-plugins to solve the problem. Then I run mkdocs serve command again.I copy the website link and paste it in browser.Then I started editing on website by opening the file in Atom software.After saving , the changes will appear on the webiste .

Yes, Markdown is a simple and straightforward language to learn. But I prefer to use HTML because I've been using it for a long time and have become familiar to it.
Accessing Fab cloud
I recived an email from fabacademy with all instruction.First I signed in and reset my password as suggested.The fab cloud is in Gitlab and I practice on GitHub so I watched a Gitlab tutorial.I found that there some out no difference between them.After that , I give git an access to my laptop with my new credential as I did before.Also I added the ssh key I generated in previous step.I copied the ssh key and go to Perefrences-> ssh key and paste it.I opened my project page go to clone and copy the clone off ssh into the terminal.


Because I will be using my own website design , I should delete all files related to mkdocs.I used the following commands to do that:-
git rm -r file_name
git commit -m “message”
git push
git rm command is used to delete all files in the directory but adding -ryou can specify the file name you want to delete
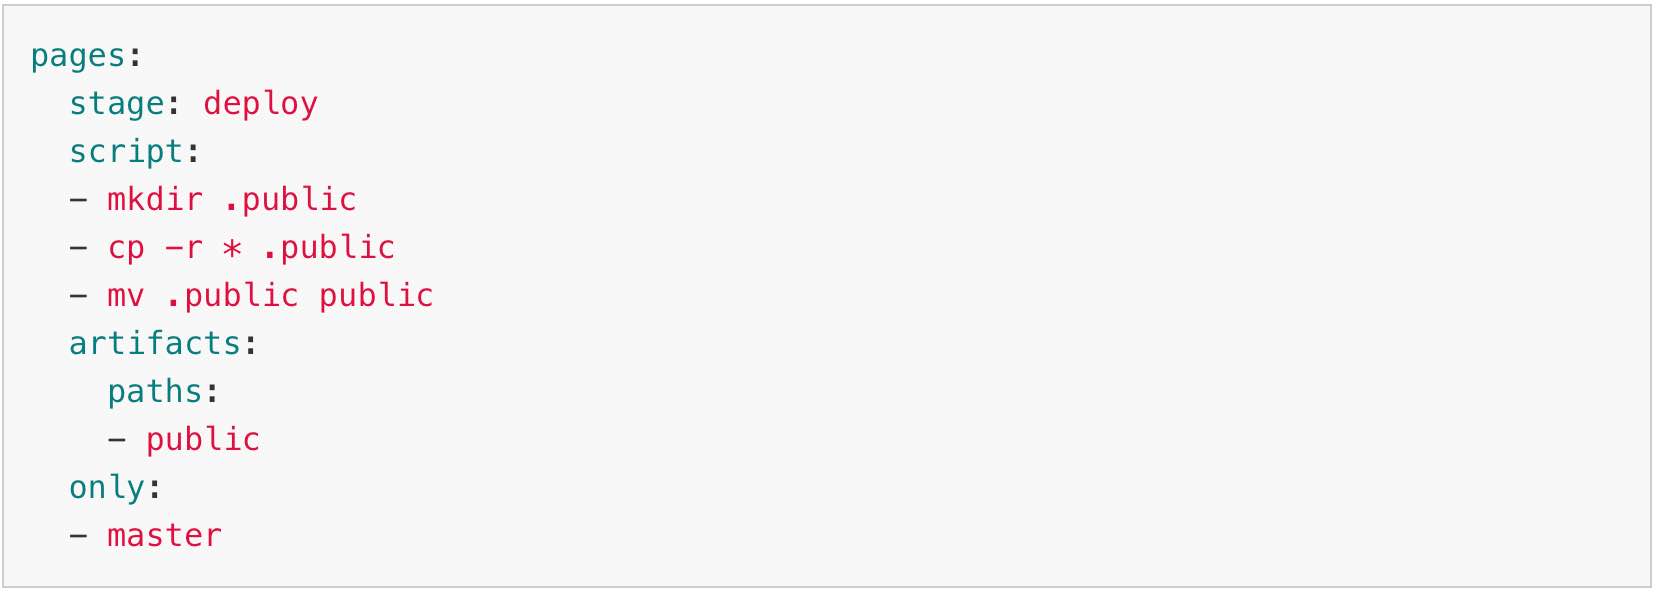
To use HTML launguage in Gitlab , I coppied the fllowing GitLab CI for plain HTML website code from this website.
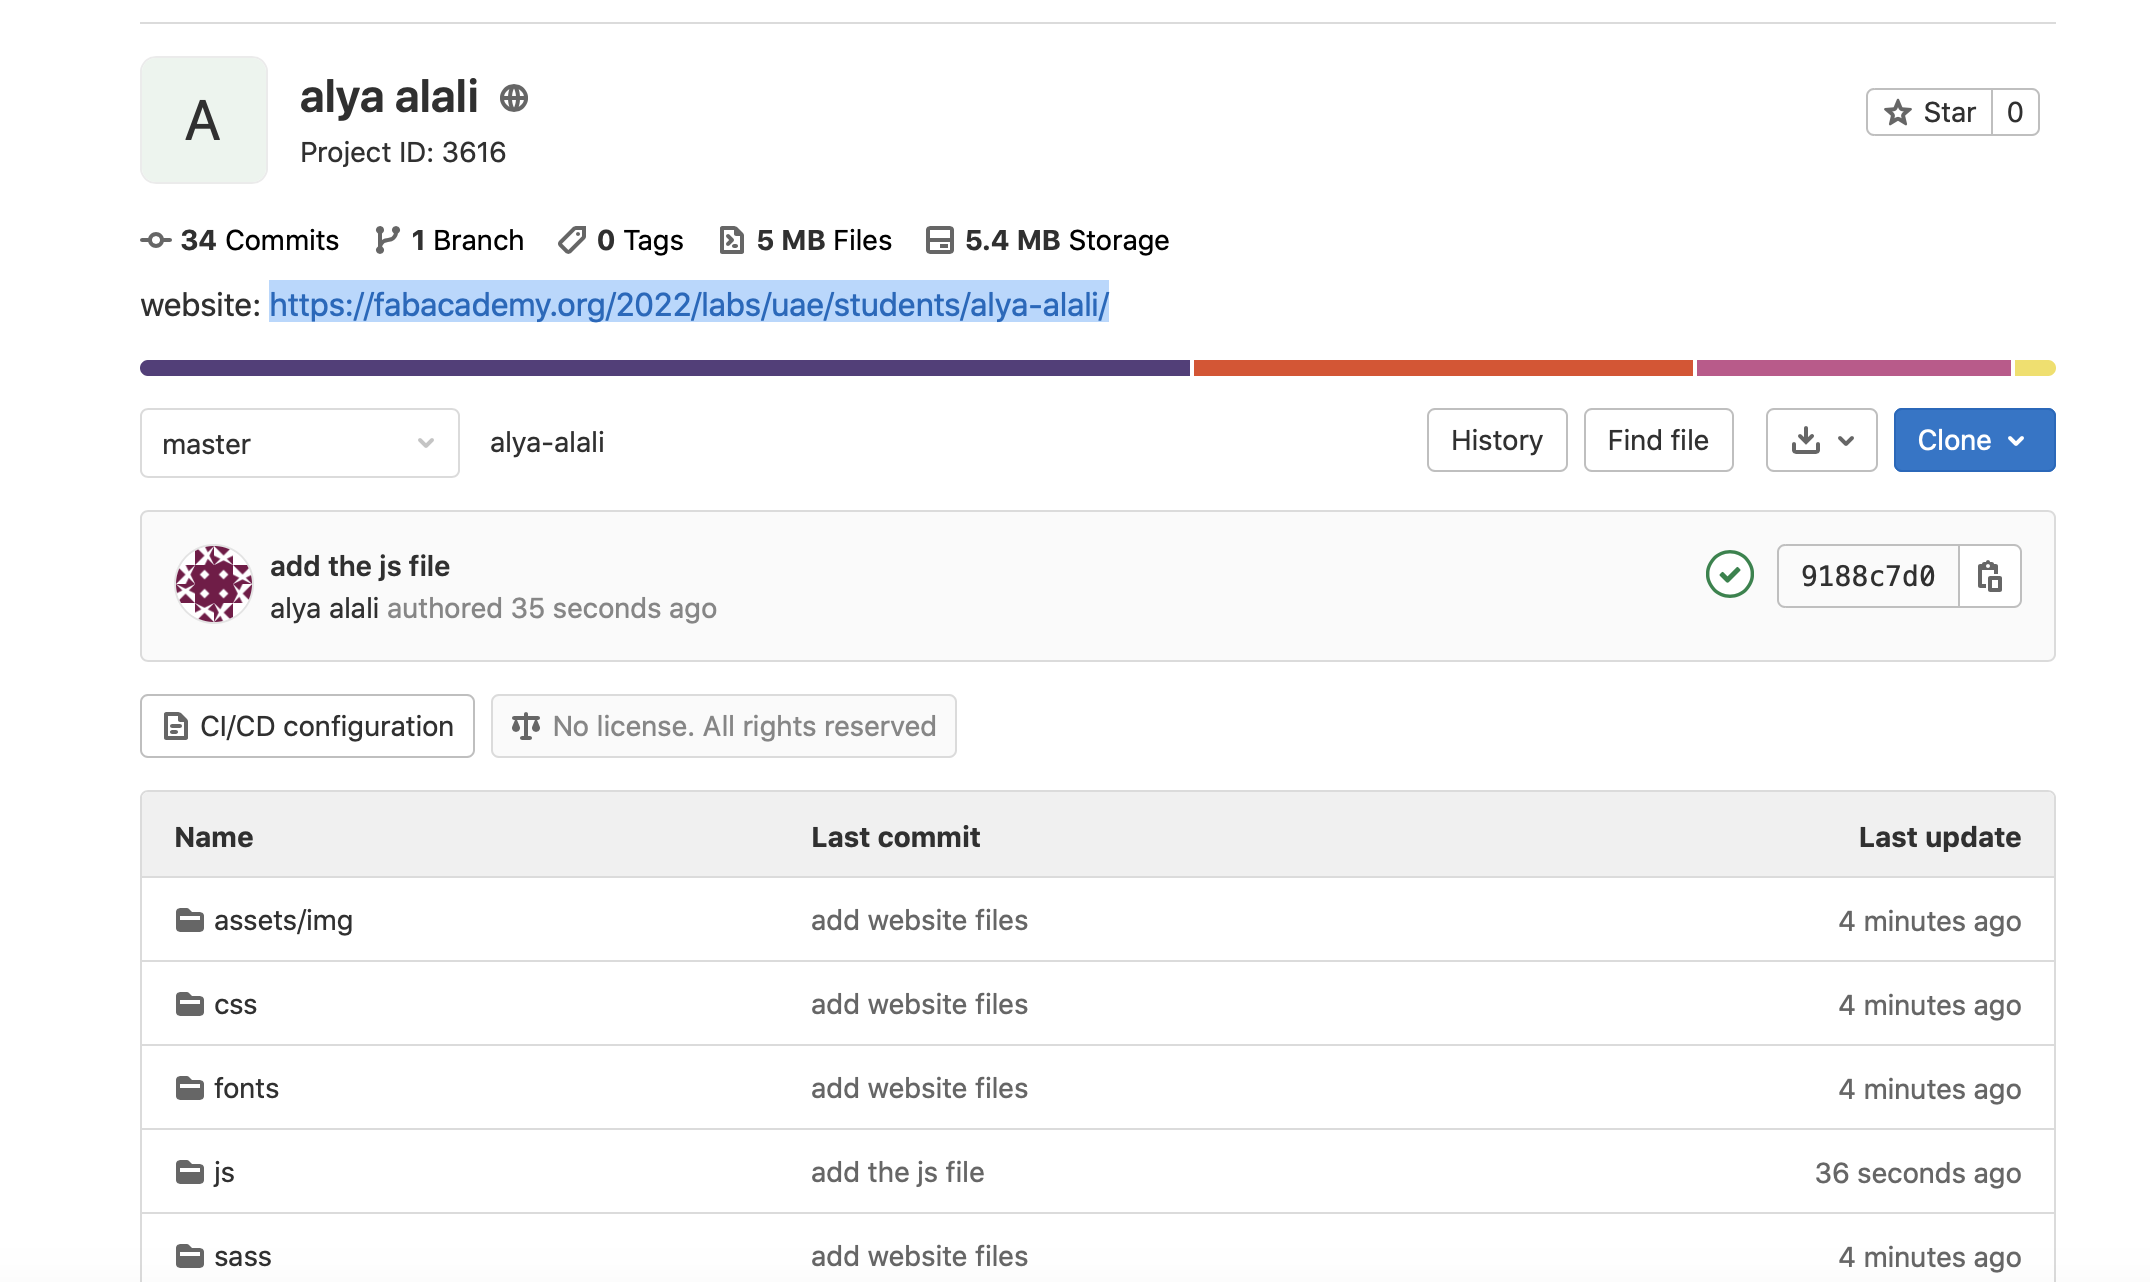
I copied all my files to the folder and added to the Gitlab cloud using git commands:
git add. -> git commit -> git push
After pushing my files to the repository, Now I can check my website link that appear on the main project page as it shown below:
Problems Faced:
1-Documentation part was challenging. I find some difficuilty in Documenting every step I do while working.THe best thing I did is to briefly write evrey step in a word document and adding the screenshot.
2-After pushing my files to github and cheking the webiste link, nothing appear.I found that my index file where inside a folderand it should be in the main root.The problem was fixed by moving the index file to the root.
3-The size of every push into Gitlab should be maximum 10 MB.Before pushing my files for the first time , my file size was 67 MB and the images takes much of the size.I compressed the images from this website.