3D Scanning and Printing

Group Assignments
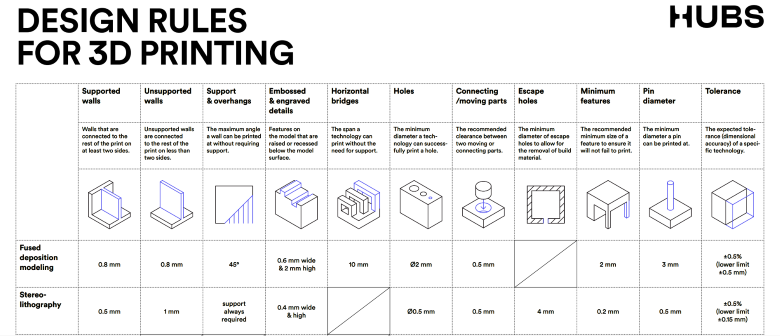
Design Rules
First of all, I recommend checking out the 3D Hubs. It is a site rich in information and important references for CNC and 3D printing, etc.
FDM / Original Prusa i3 MK3/S
Our first printer is Original Prusa i3 MK3/S Prusa i3 MK3/S.
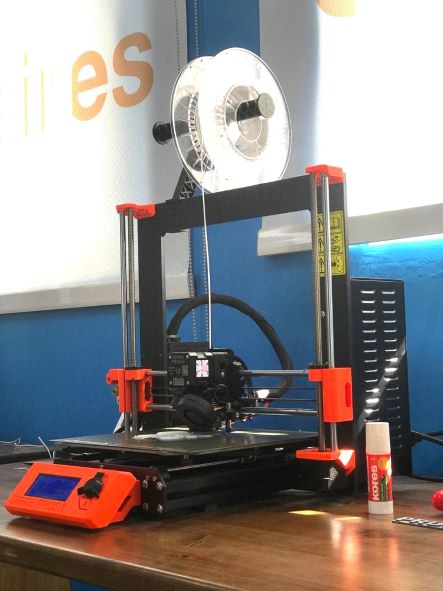
We did a All In One 3D Printer test to measured the settings.
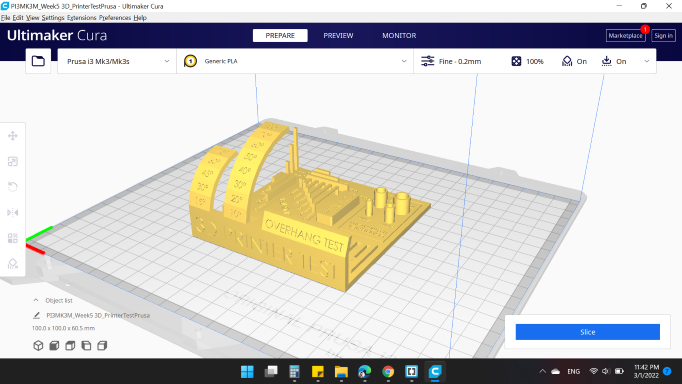
All settings have been made as defaults:
- Quality: Layer Height: 0.15 mm. (The height of each layer in mm)
- Walls: Wall Thickness: 0.8 mm. (The thickness of the walls in the horizontal direction)
- Infill: Infill Density: 20 %. (Adjusts the density of infill of the print) & the Infill Pattren was Grid
- Travel: Enable Retraction: "YES". (Retract the filament when the nozzle is moving over a non-printer area)
- Support: Generate Support: "NO". (Generate structures to support parts of the model which have overhangs)
- Build Plate Adhesion: Build Plate Adhesion Type: Skirt. (Different options that help to improve both priming your extrusion and adhesion to the build plate. Brim adds a single layer flat area around the base of your model to prevent warping).
The model needs: 5 hours 34 minutes & 38g of filament
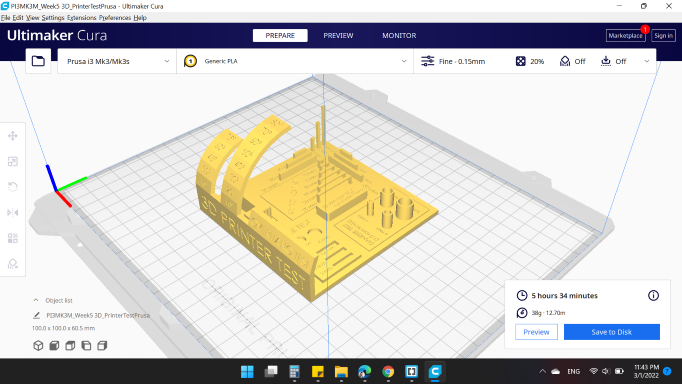
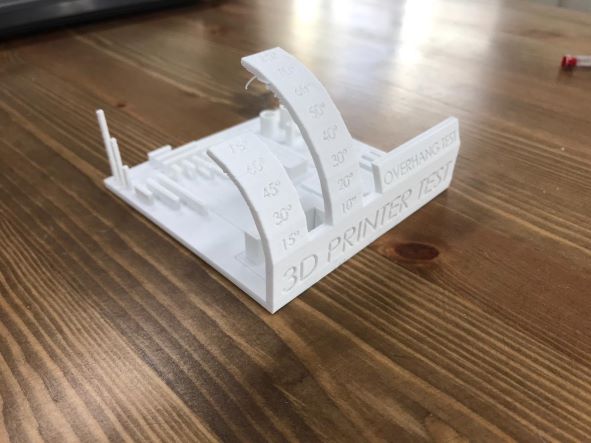
All print settings are correct, and observed that after the angle 60, there is some strings. That's normal, because over angle 60, we need support to carry the part.
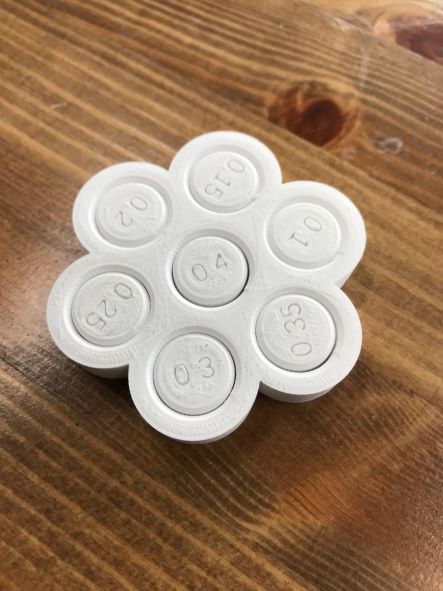
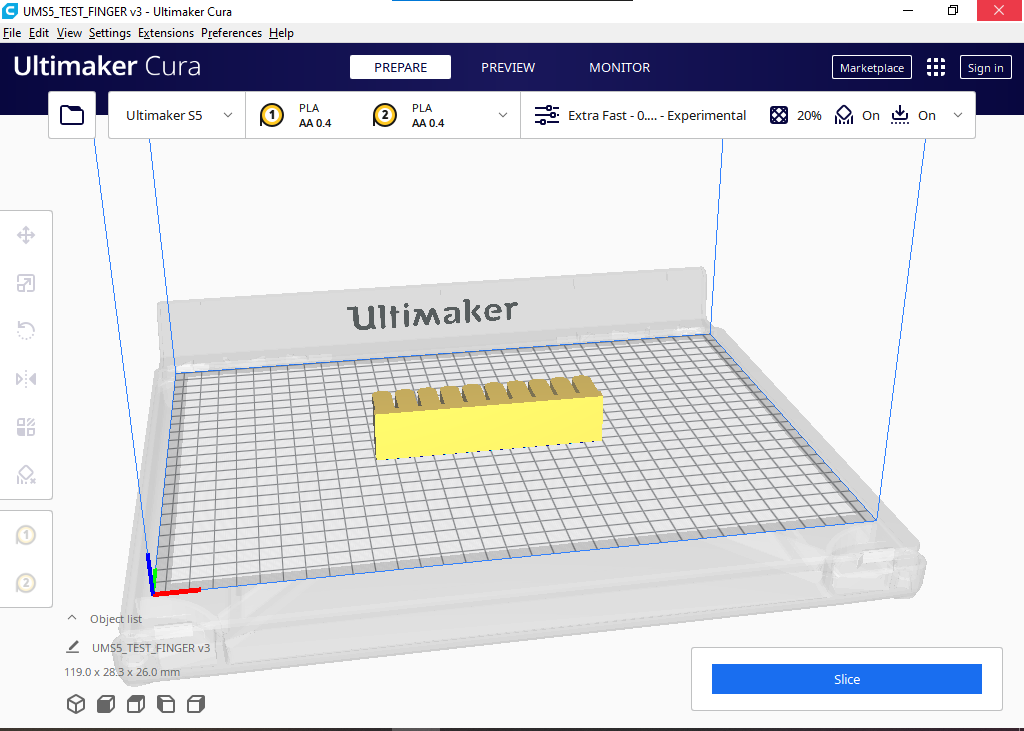
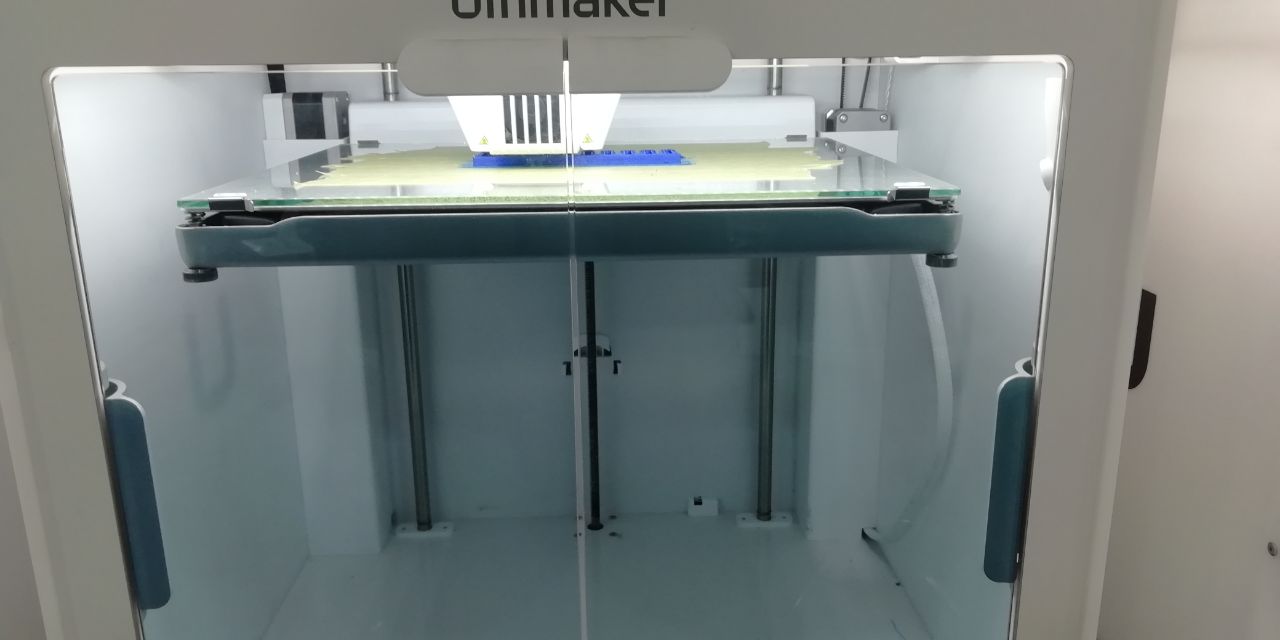
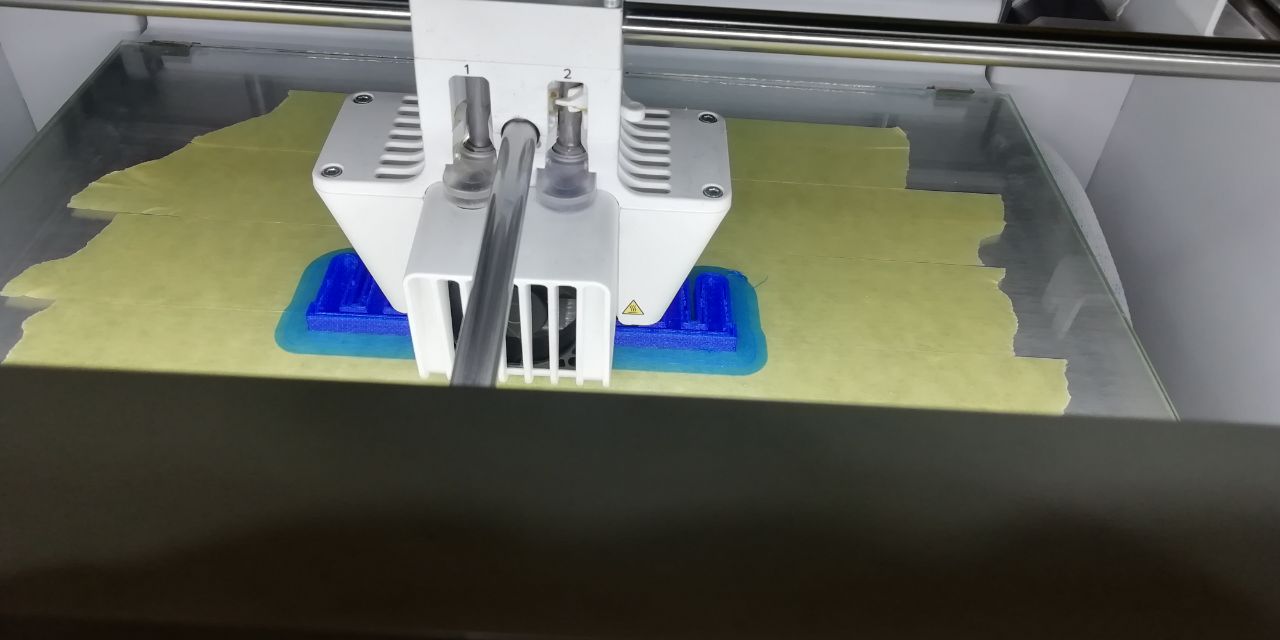
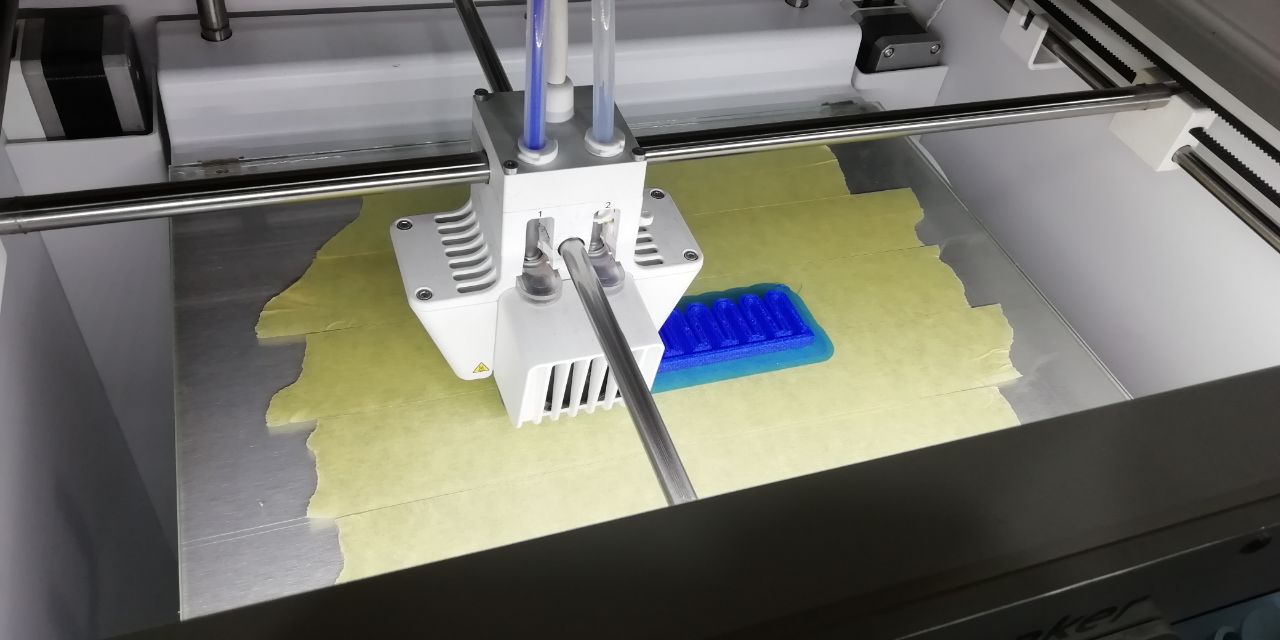
FDM / Ultimaker S5
Our second printer is Ultimaker S5
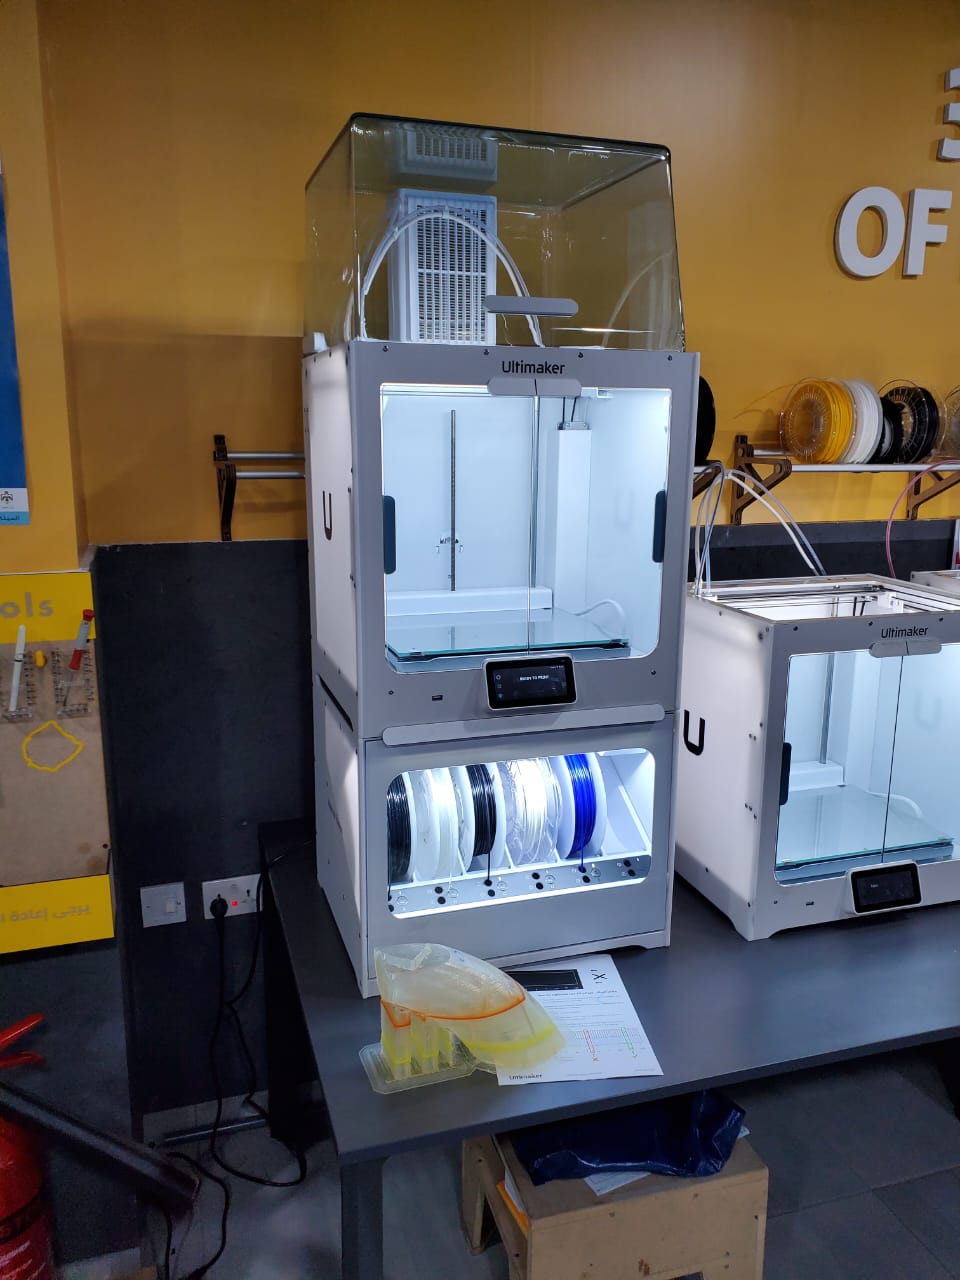
We did a Customizable 3D Clearance Test to measured the clearance.
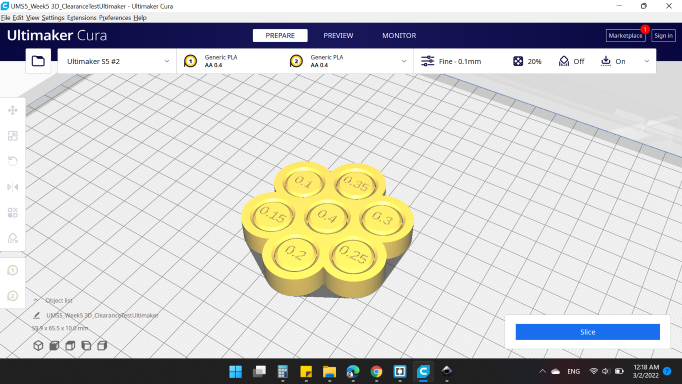
All settings have been made as defaults, and here's the result.
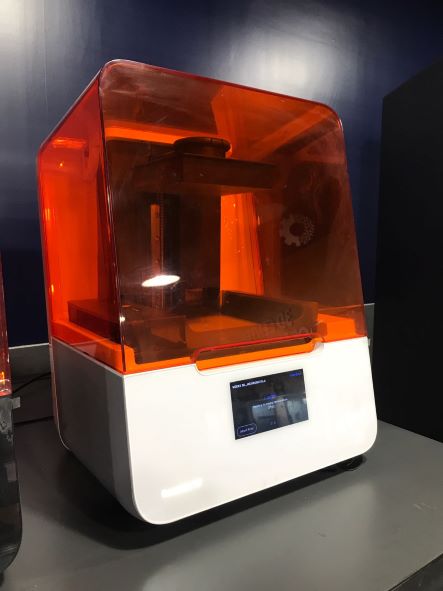
SLA / Form 3B+
Our third printer is Form 3B+ .
We did a XYZ Calibration Cube to measured the tolerance. We raised up the scale to 1.5 in order to become 30 mm.
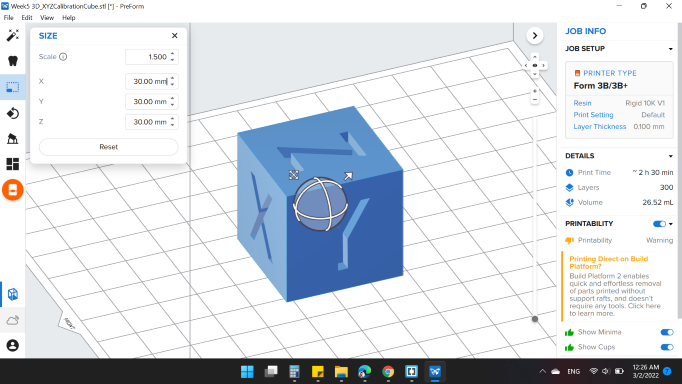
And applied Auto Generate Support.
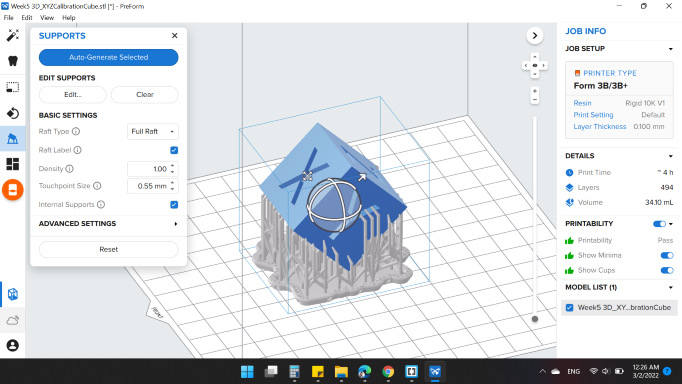
Here's the result.
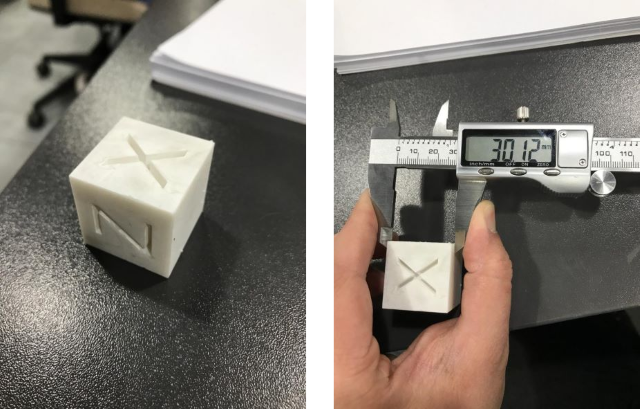
The cube is 30 mm dimensions, we got 30.12 mm when we measured with the caliper. That means tolerances by 0.12.
Delta WASP 3MT INDUSTRIAL 4.0
Techworks has a very large printer and its movement mechanism is awesome, which is Delta WASP 3MT INDUSTRIAL 4.0 .
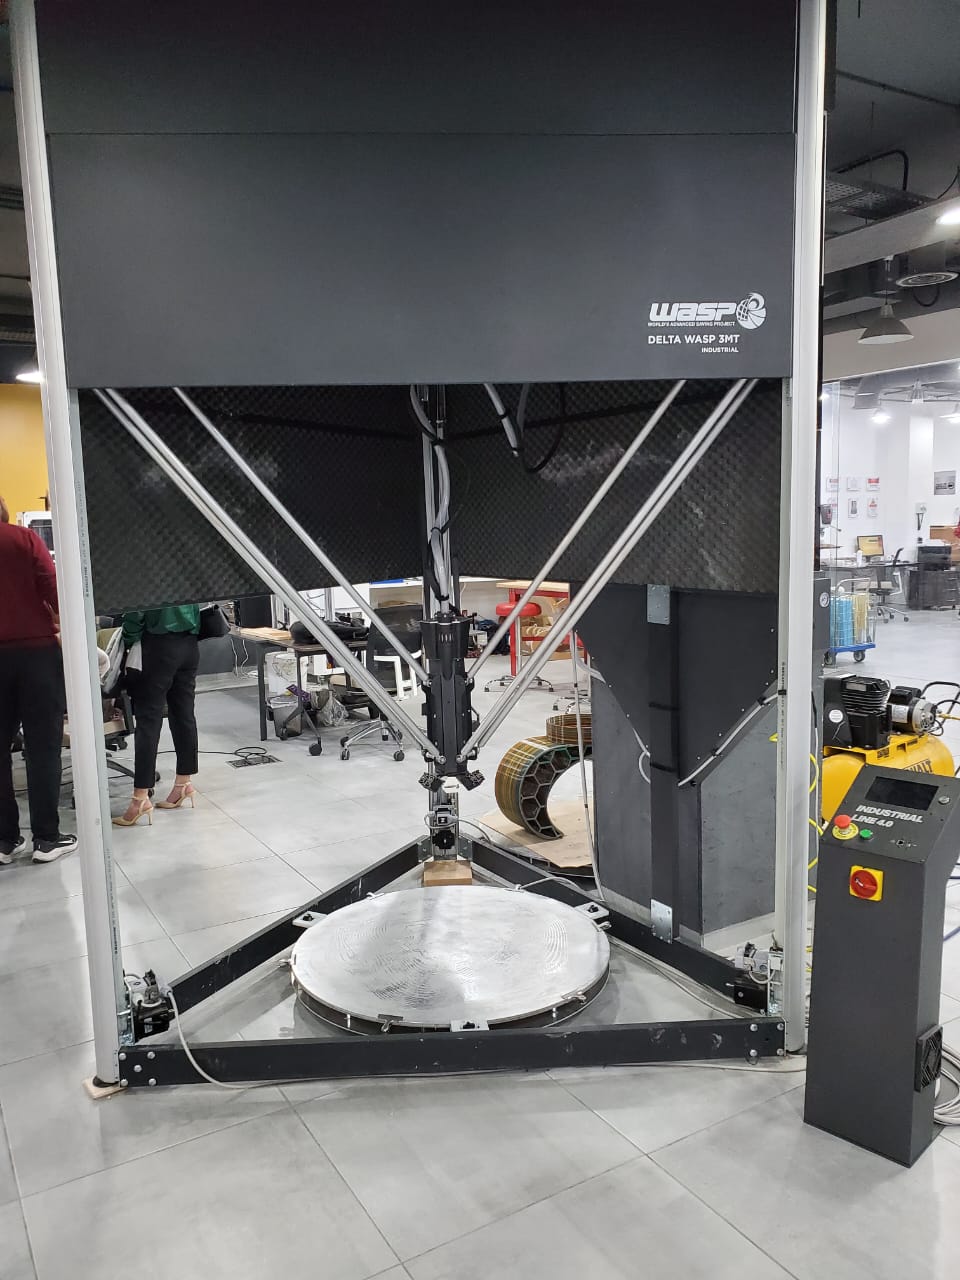
We wanted to see how it works, so the team helped us and showed us the process. The slicer software it's special for the printer and can't be download unless you have the machine. Which is Cura. We drew a cylinder using a CAD software, then exported as stl format, and imported in Simplify3D slicer.
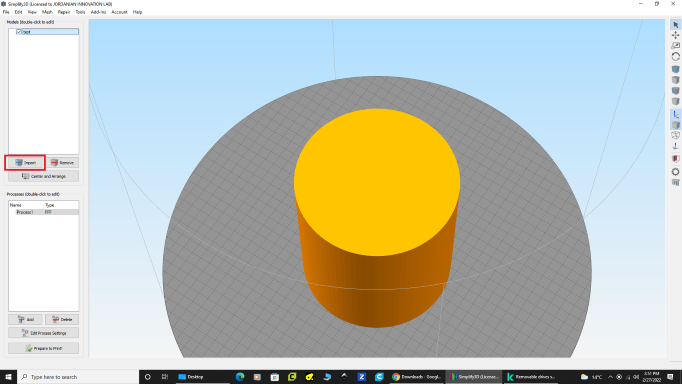
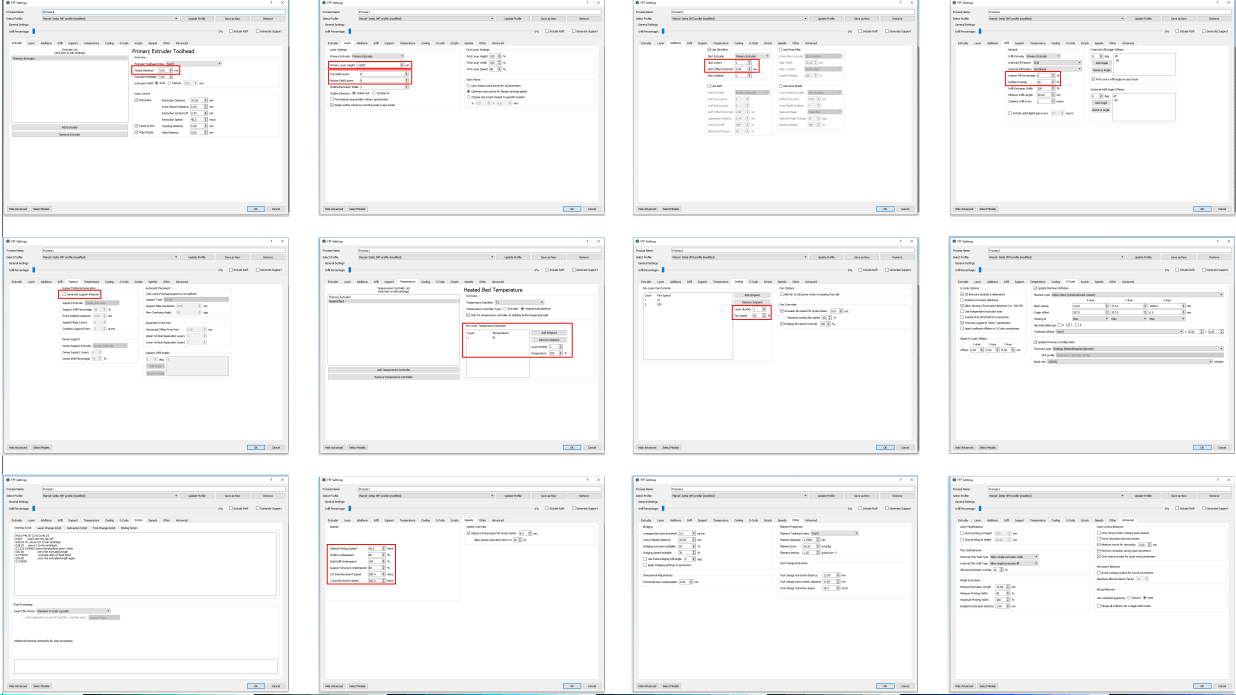
From Processes I double clicked on it to edit.The print settings are:
- Extruder: Nozzel Diameter: 3 mm.
- Layer: Primary Layer Height: 1 mm ,Top Layer Height: 0. & Bottom Layer Height: 0.
- Additions:Skirt Layers: 1 & Skirt Offset From Part: 5 mm.
- Infill:Outline Overlap: 20 %.
- Support: Generate Support Material "NO".
- Temperature: Temperature: 200 C.
- Cooling: Fan Speed: 60 %.
- Speeds: Default Printing Speed: 40 mm/s.
From Prepare to Print!, you can observe your model and how long will it take to print.
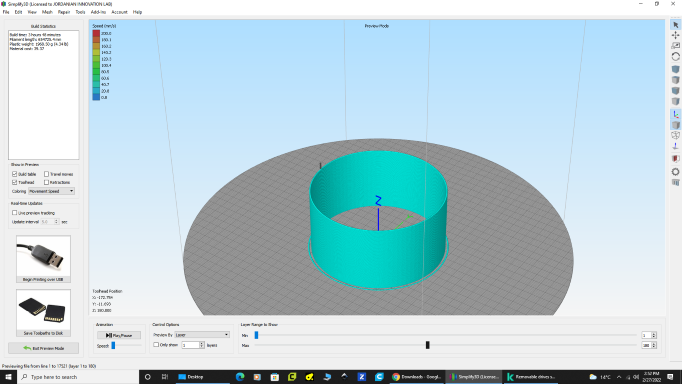
And here's the print : ).
individual assignment
this week I will print a part of my final project. the reason of why i used 3D printer to fabricate this model is cannot be done in the other way like Subtractive Manufacturing because It has undercuts that canoot be reach with by a milling tool.
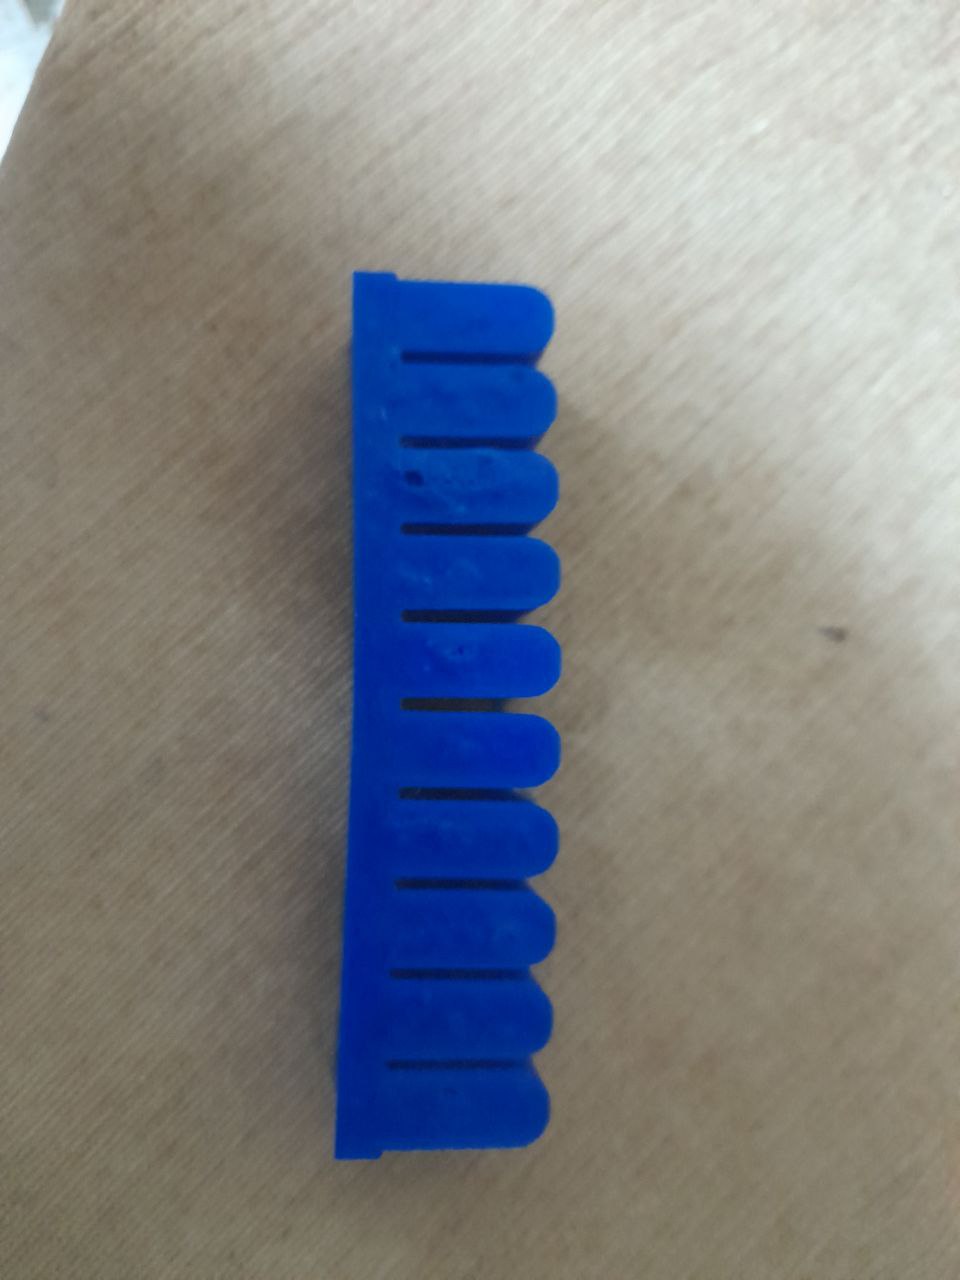
here is the design of the model that i will print which will be testing finger for soft gripper , and i will use TPU 95A because this material is flexible and could be inflated with air.
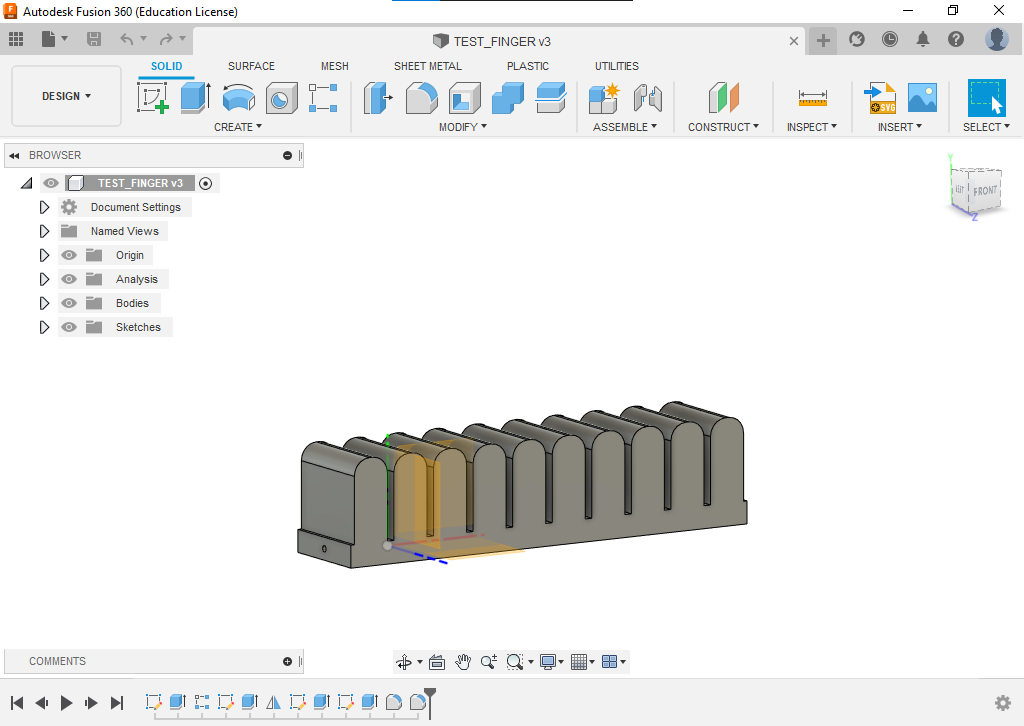
if you see this model for the first time you will think that this model can be done by cnc but actually you can't because this finger is empty from inside to make the air inflating possibly.
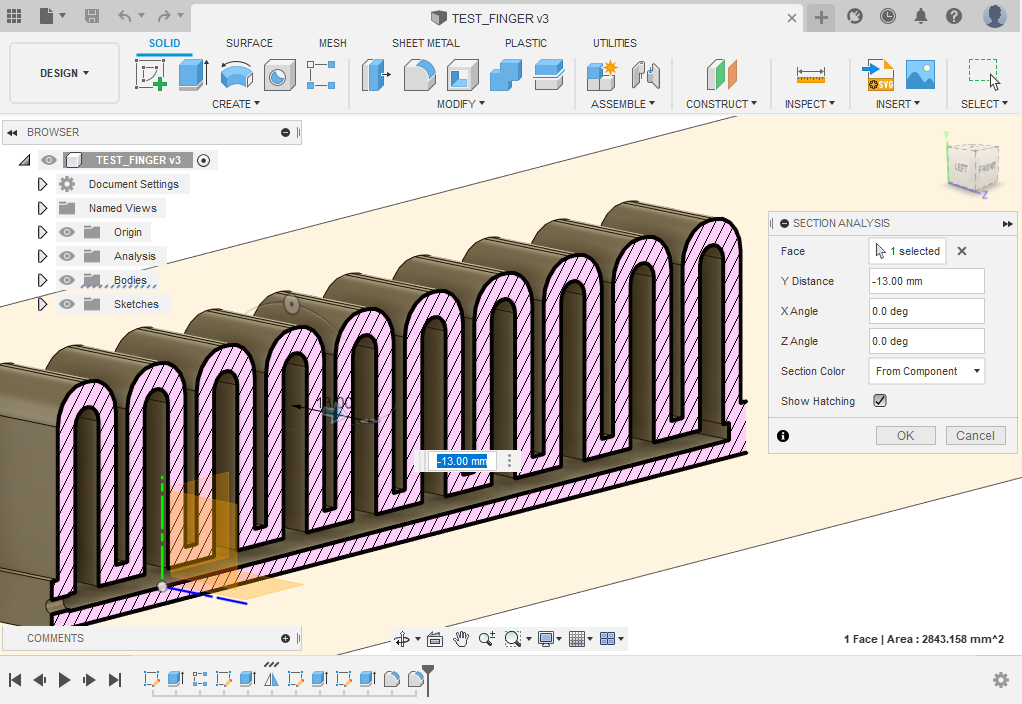
after making section analysis for this model we can see the inside details.
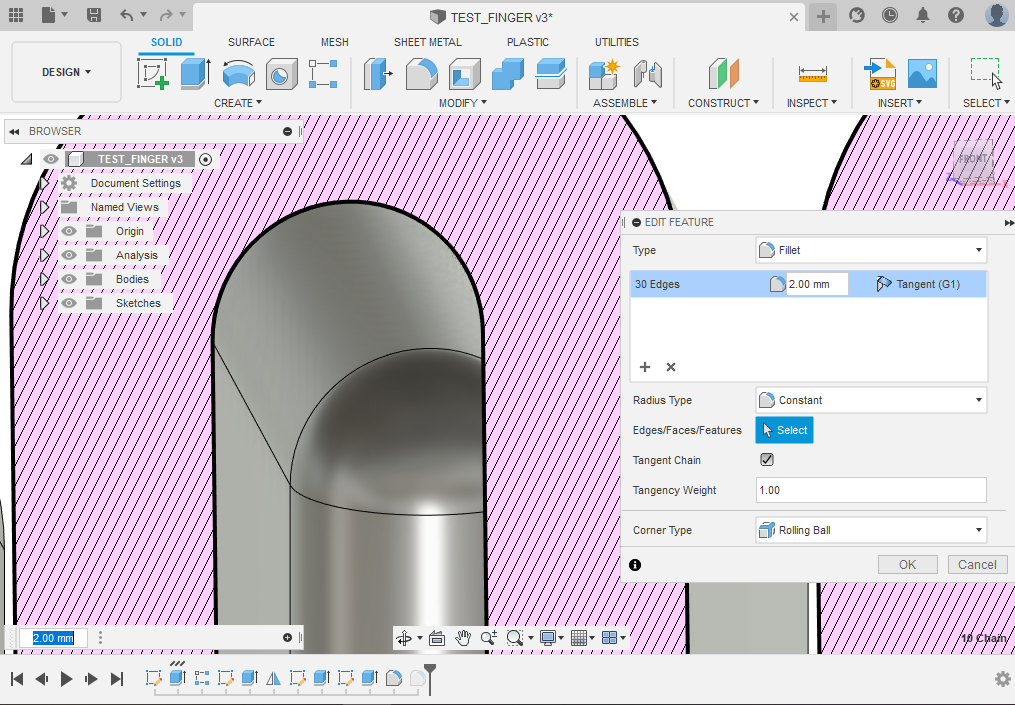
of Course when we print a model that will be inflated we have to make sure that the model is empty from inside. that's mean that we can't print this model with support so we have to find away to print without support .
to do that i make fillet for the corner inside the fingers to make arcs that can be carry the upper layers without supports .
Slicing for 3D model
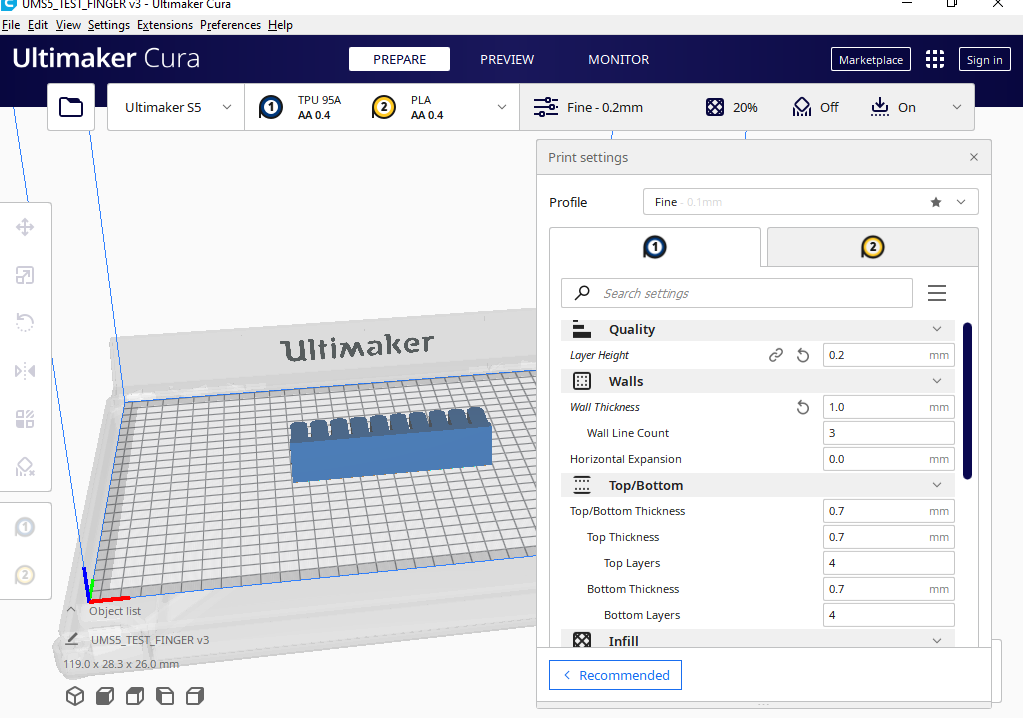
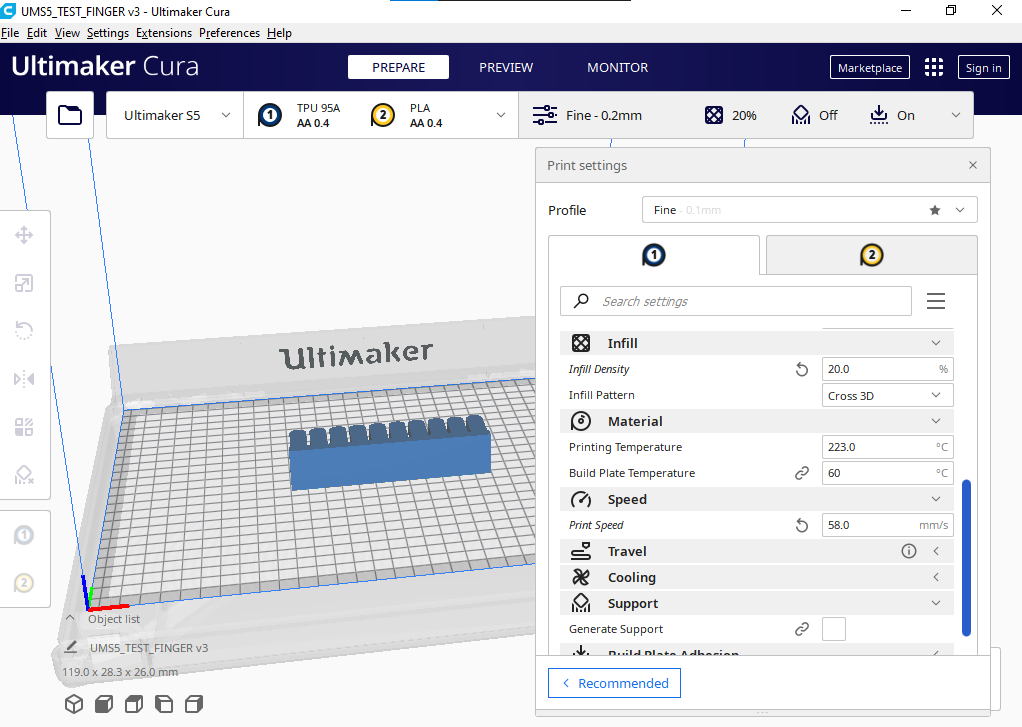
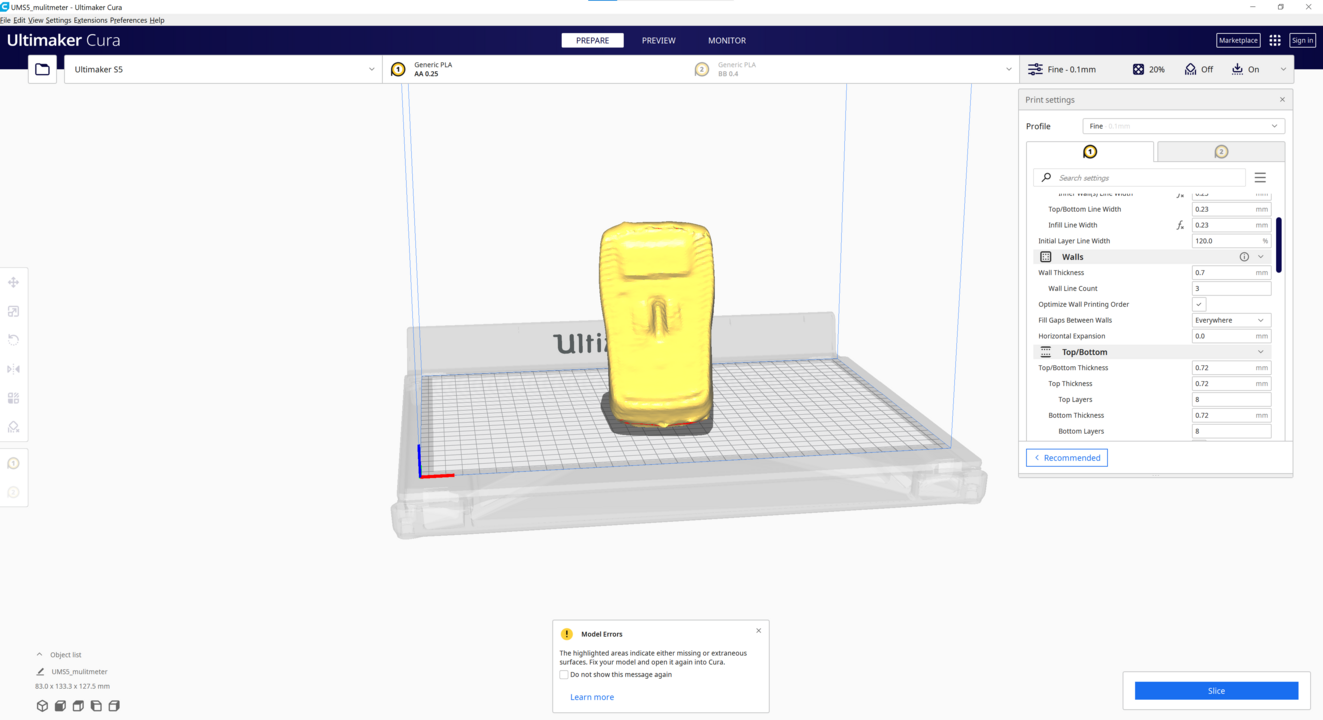
I used Ultimaker Cura to slice the STL file and PLA filament to print the object.
: Open Cura and import STL from previous section. Use “Move”, “Scale” and “Rotate” commands to work on the position, size and orientation of the STL file
Select machine, which is “Ultimaker S5” in my case. For material select “TPU_95A” and “Nozzle” 0.4 mm.
Print Settings
Quality
- Layer Height: 0.20 mm
Walls
- wall Thickness:1.0
- Wall line count: 3
Infill
- Infill Density: 20
- Infill Pattern: Cubic
Material
- Material Printing Temperature: 223 °C
- Build Plate Temperature: 60 °C
Speed
Speed Print Speed: 45 mm/s
Support
Generate Support: No
Click on “Slice” and Cura will slice your object and show time will take to 3D print, grams of TPU_95A filament needed and length in meters of TPU_95A filament needed.
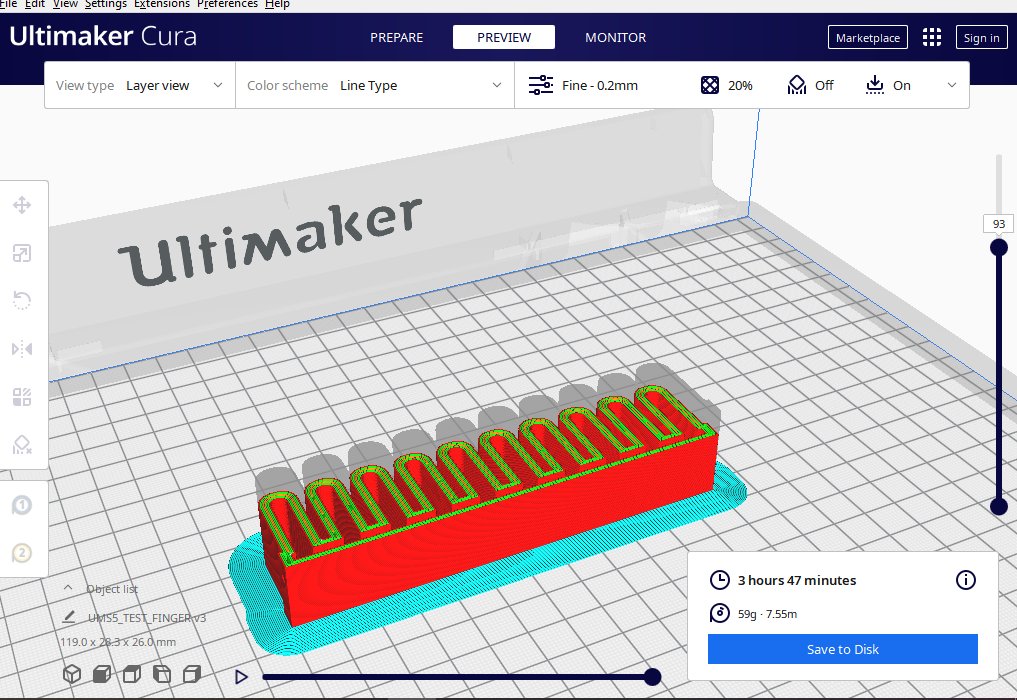
Click on “Preview” tab. Here you can move the vertical slide and check the print layer by layer. It is a good practice to review supports used and how the object will be built. The STL was sliced into 307 layers.
3D Printing
Files to Download
3D scanning
3D Scanner: Sense 1st Generation
Software:3DSystems Sense
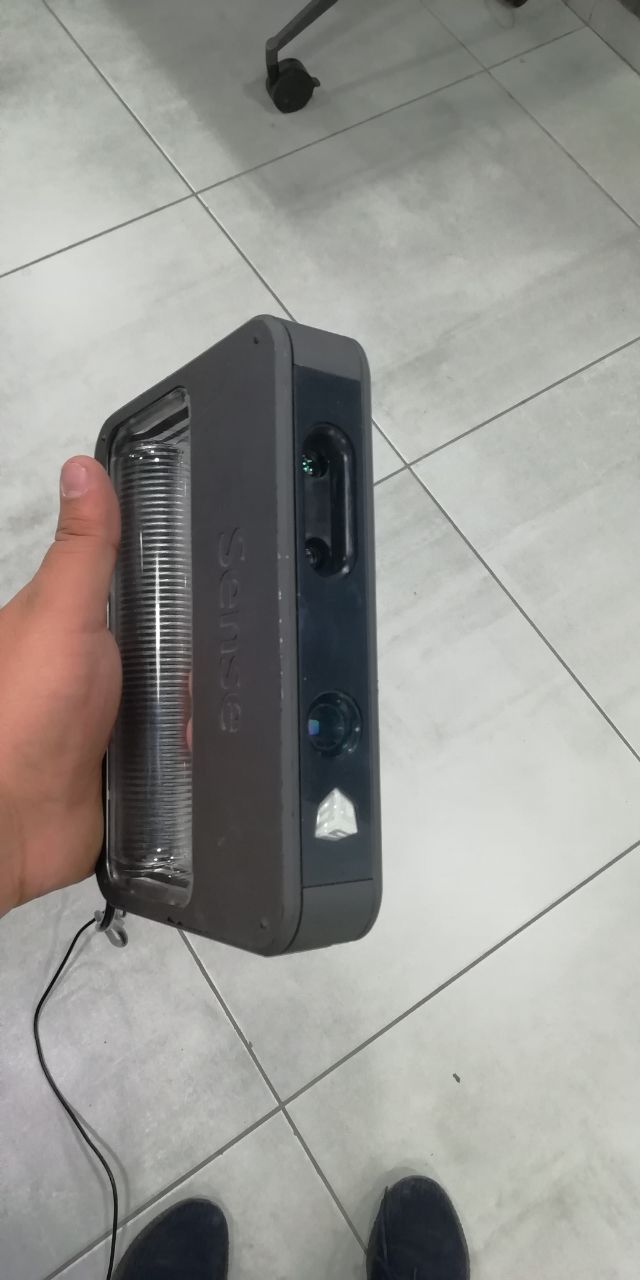
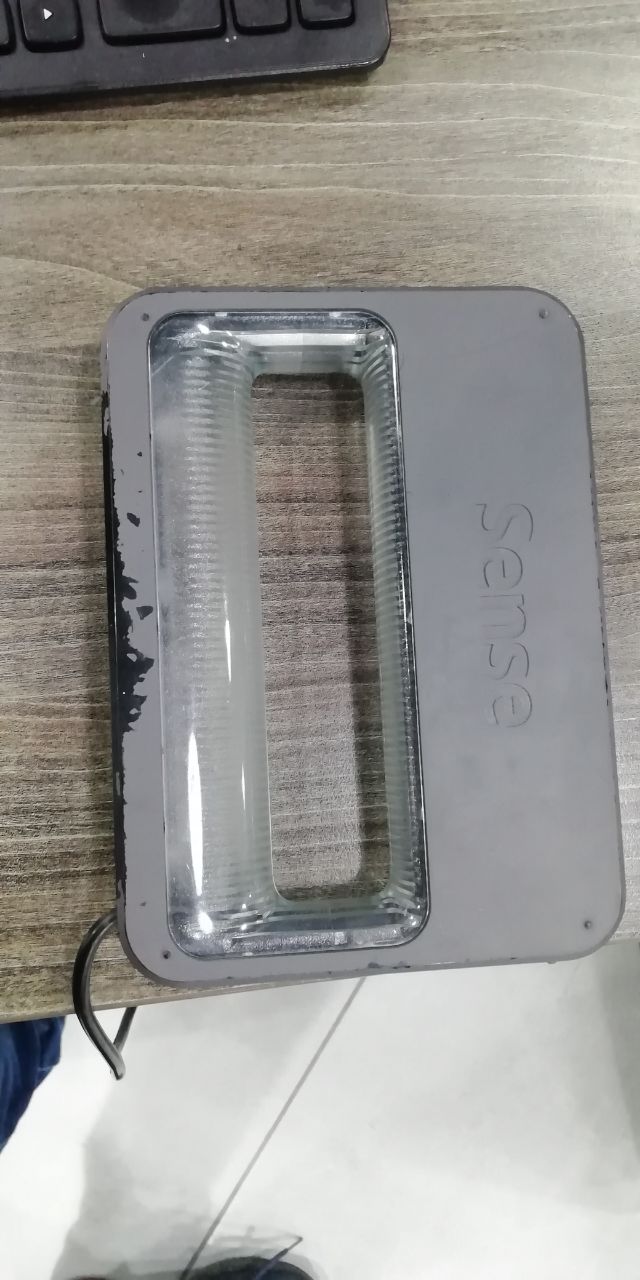
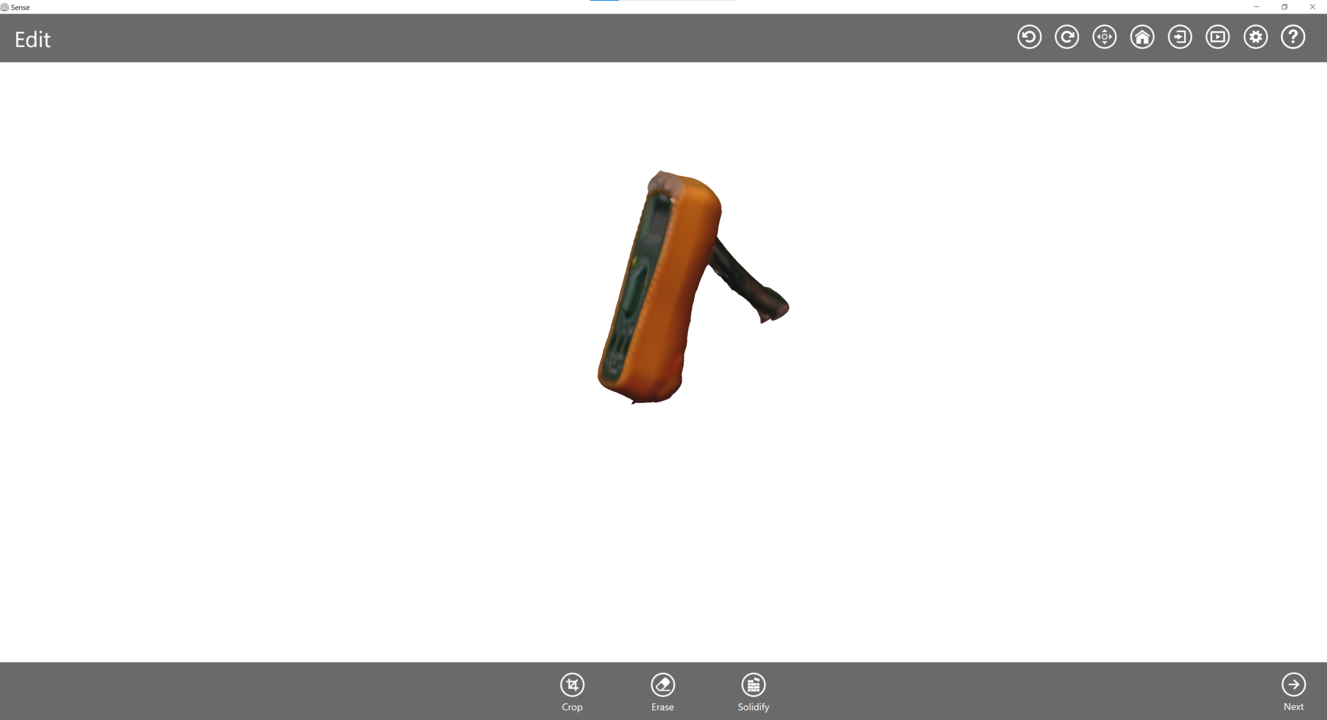
In this part, I scanned a digital multimeter using Sense 3D scanner and Sense software. The image below shows the scanner and the object I scanned
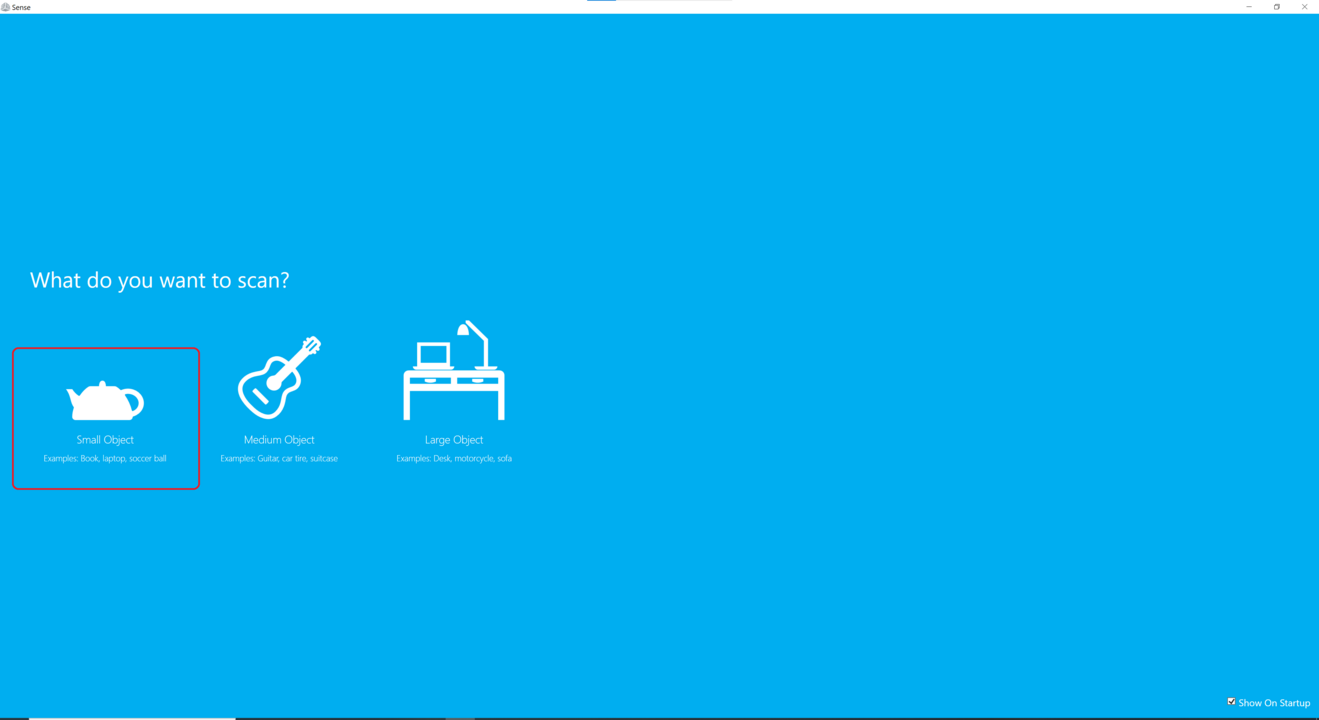
first of all Open the Sense software for the Sense 3D scanner. Select the type of scan (Person or Object), then select the size of the object to be scanned. In my case, it is a small object.

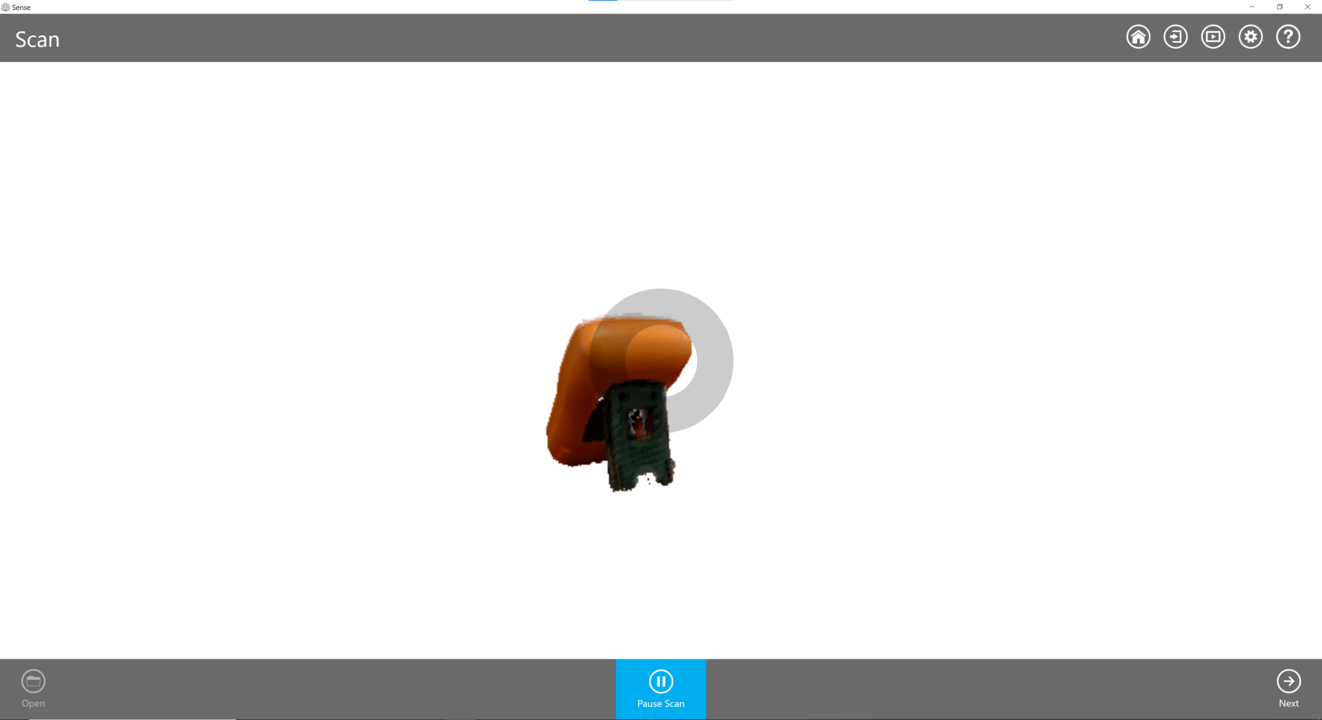
now start scanning until you have a completed shape for the object then click Next
Now the scan is hollow and should be solidified. Click “Solidify” to fill in the scan. Click “Next”.
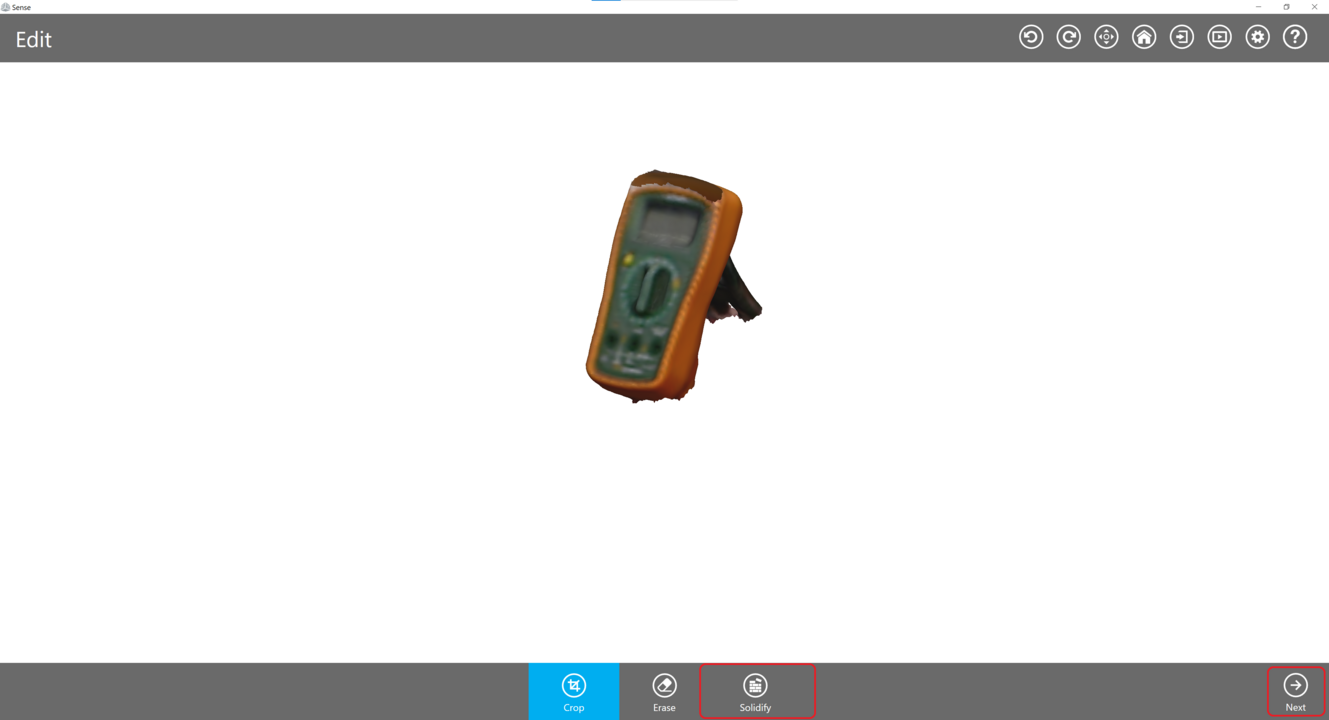
also you can use crop tool to make sure that there is no other object in the same scan
the last step is to save the scanned object, go to Save, and save the file with ".stl" format so you will be able to print this later .

Files to Download
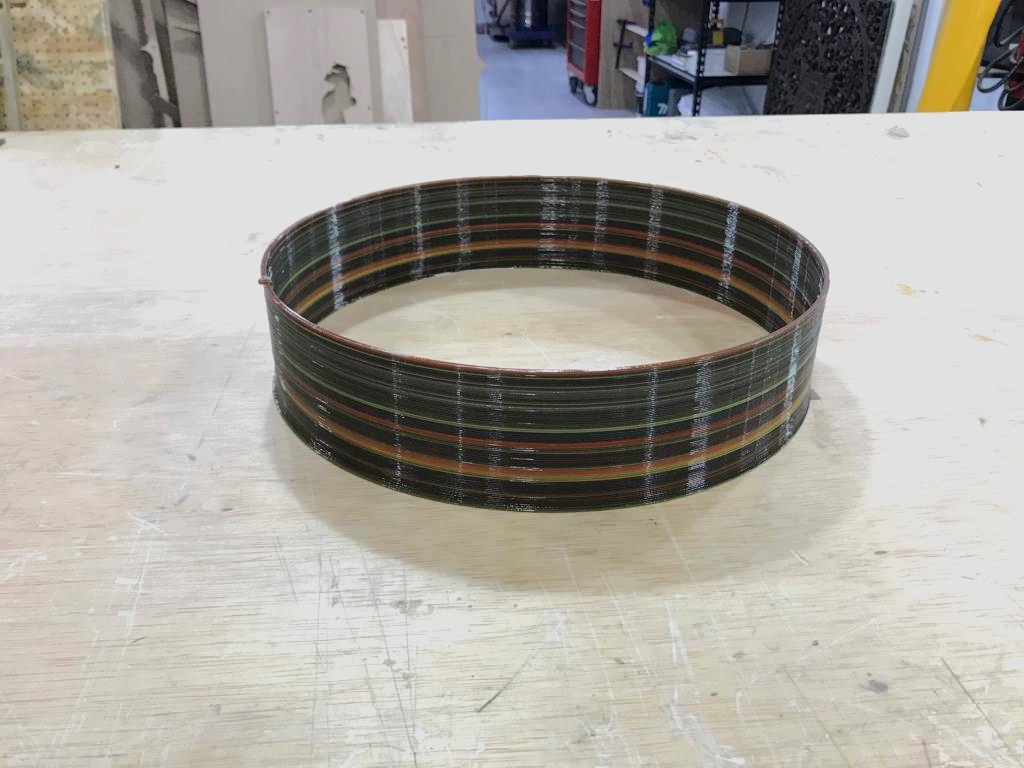
digital multimeter STL fileHero Shot !
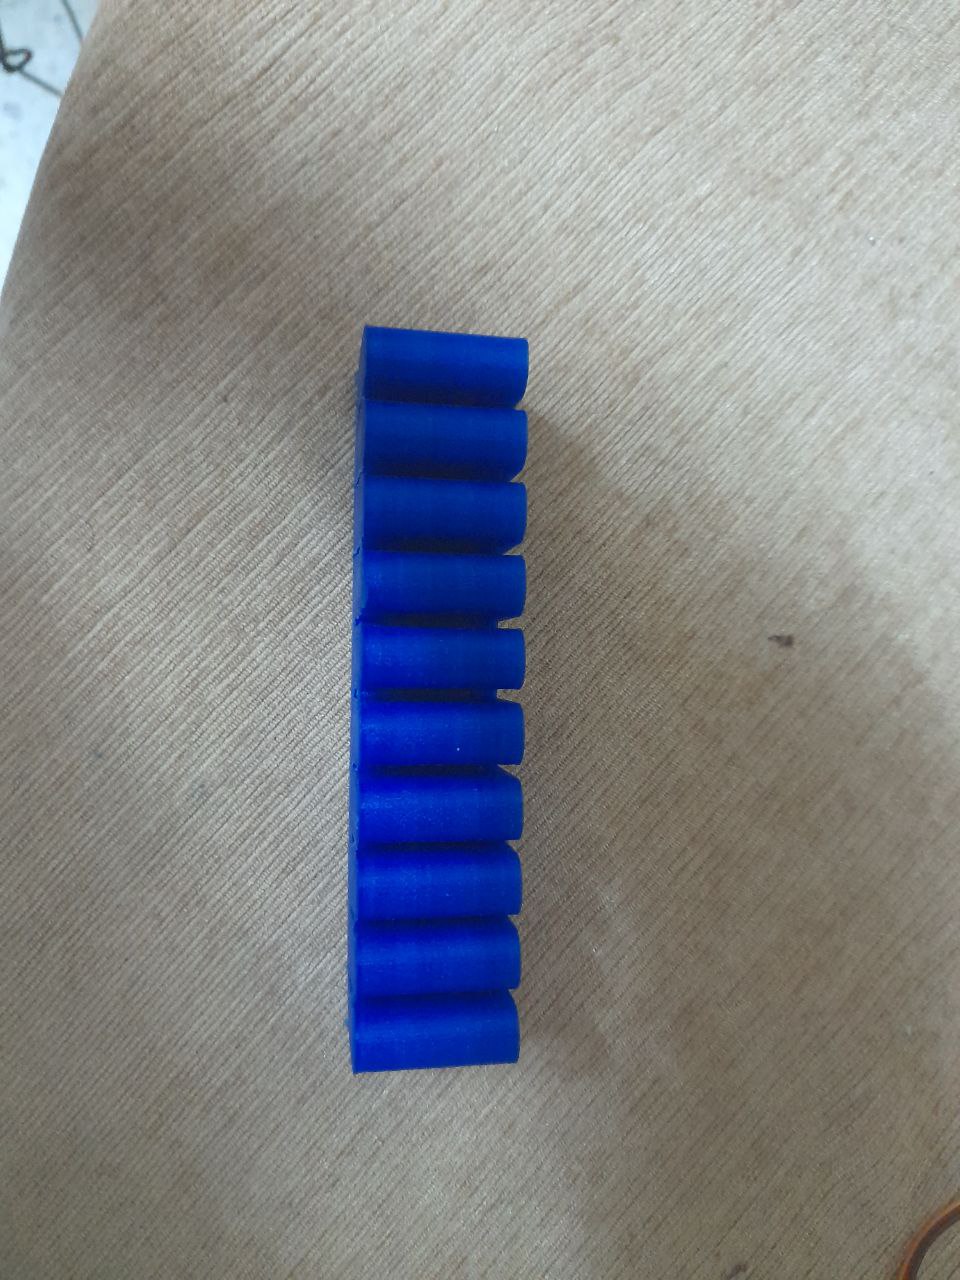
Note:I notice some problems with TPU printing first one is that there are some bubbles because there were some heat problems. the second problem was the printed piece wasn't said so it can't be inflated