## TLDR: Cut parameters for Cardboard
|Parameter|Value(lab)|Values(Our results)
|---------|-----|----|
|Speed|20%|25%|
|Power|60%|80%-85%|
|Frequency|20%|25%|
|Thickness|3mm|3mm|
**Updates to Global Evaluator**
To use the laser cutter, we have to do the following:
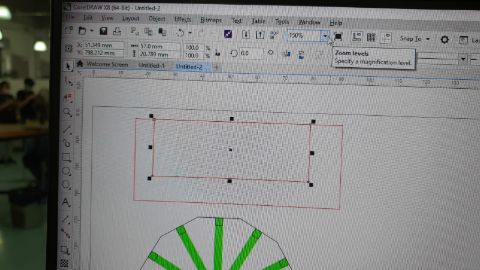
1. Load the `.dxf` or `.svg` files into CorelDraw, and click print with Epilog printer, which sends the vectors to the Epilog Software, ensuring vector cuts is hairline (0.01mm)
2. From the Laser Cutting interface, the lines are grouped by colors and we can set the parameters for each of these separately (see images below)
- By convention, we use red as the vector cut, and black/grey/white as engraving
The lab technicians have done the manual tuning of focus during predictive maintenance. A triangular piece is placed on the lens holder, and we need raise the bed and make
sure its tip is just touching the stock. This traingular piece should then be turned around and stored on top of the lens holder.
**Updates continue at the bottom of the page**
# Characterizing Laser Cutter parameter
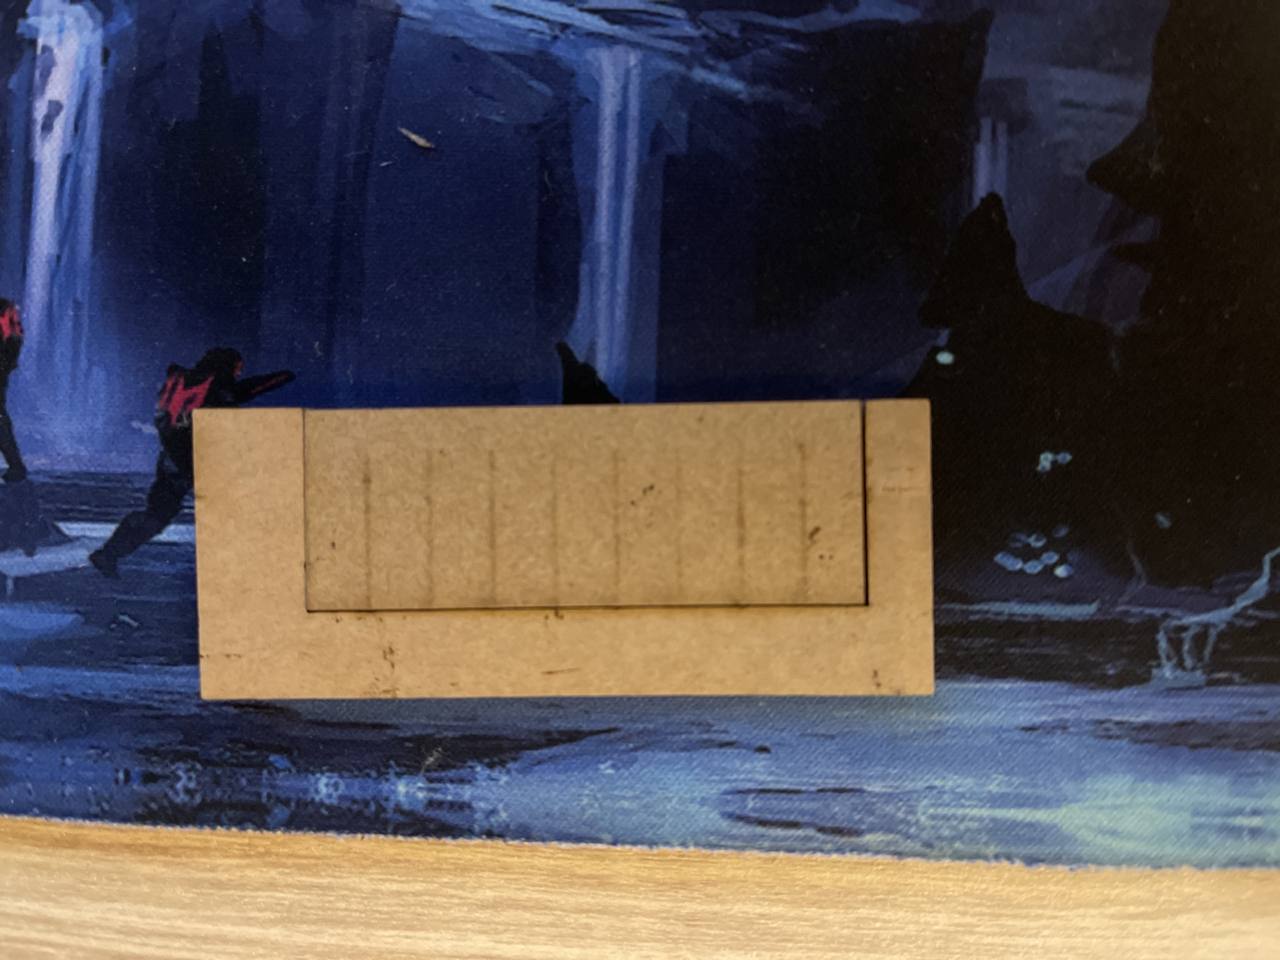
Our Laser Cutter was the Epilog Fusion Pro. We decided to start with just cardboard to learn how to characterize our Laser Cutter.
To characterize the laser cutter, we decided to cut this simple shape created from CorelDraw, and divide the difference between the cut out of inside piece and the actual design.
Initially, we wanted to refer to the vendor specification. However, we recalled during after lecture review, our instructor mentions that it is not sustainable for a printer to be running at 100% for any parameters. After some advice from our instructor, we decided that it is probably better to start from the lab tuned results.
Note the image below shows a different cut. However, the parameters used were the same.

|Parameter|Value|
|---------|-----|
|Speed|20%|
|Power|60%|
|Frequency|20%|
|Thickness|3mm|
Engraving settings are as follows
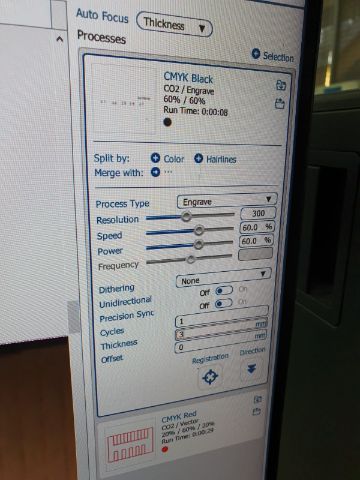
|Parameter|Value|
|---------|-----|
|Resolution|300|
|Speed|60%|
|Power|60%|
|Thickness|3mm|
Therefore, the kerf of our printer is (57 - 56.64)mm/2 = 0.18mm.
# Attempting to further tune
To continue to tune the cut parameters, want to see if we can increase the cut speed without significantly increasing the power.
To test the speed, we set the power as 80%, and have increments of 5% for speed
To test the power however, we set the speed as 25%, and have increments of 5% for power
Some engravings are added to identify which cuts were for which settings. The parameters for these engravings were as per settings above.
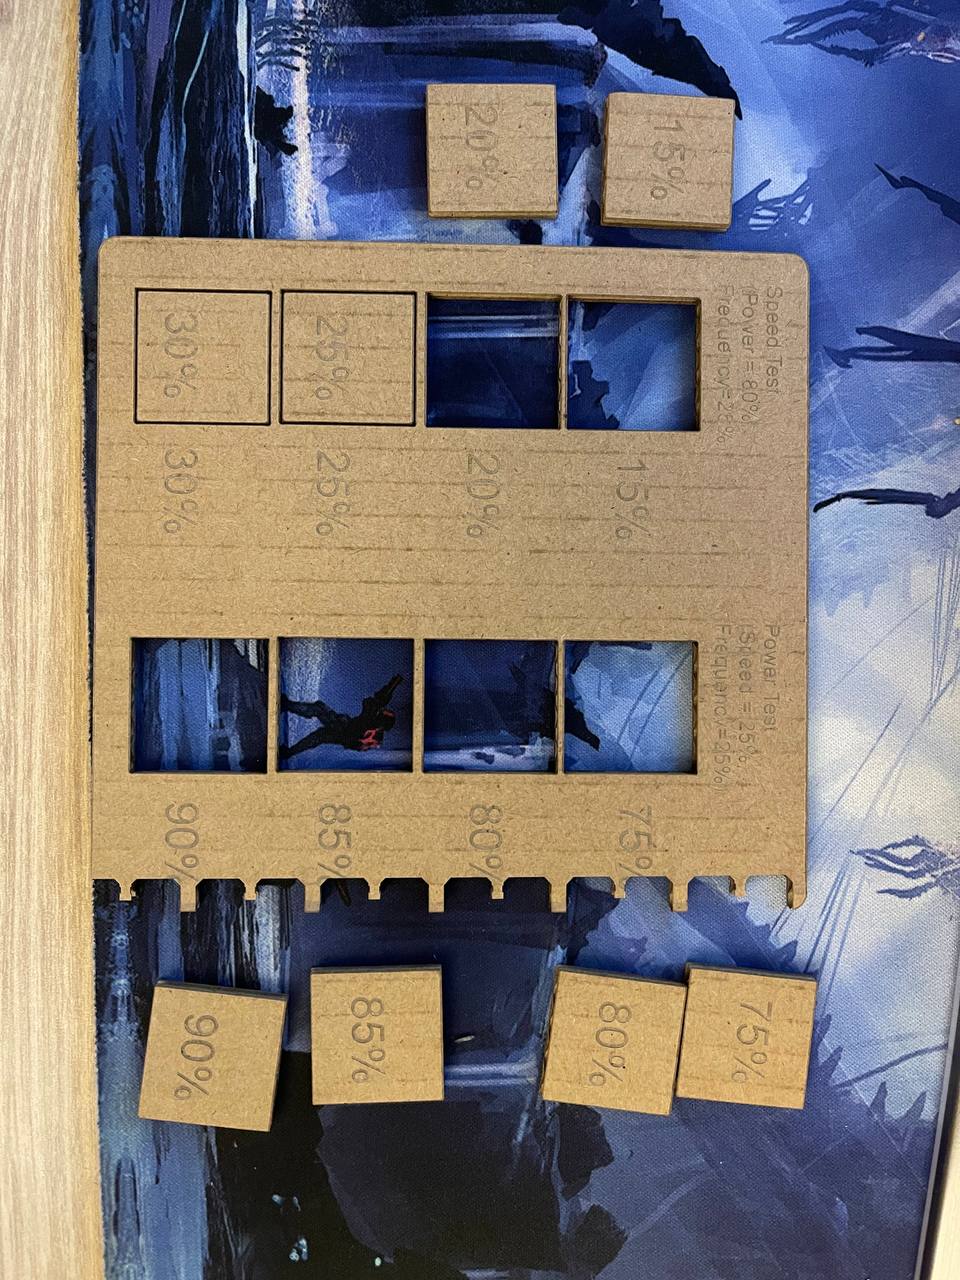
Hence, if we were to just increase the speed by 5%, we notice that 25% speed and 80% power barely cuts through for some parts (3rd one on the left side from the top), but 25% speed and 75% power cuts through for the others.
Increasing this speed is therefore not very reliable, hence the lab tuned results were guaranteed to cut through reliably.
**Continue updates to Global Evaluator**
This means the following:
1. Speed: decreasing this parameter increases depth of cut. Decreasing this also makes the job slower. Change either by entering manually in the textbox or changing the slider
2. Power: increasing this parameter increases depth of cut. However, having power be at 100% can lead to part failure at a much faster rate. Change either by entering manually in the textbox or changing the slider
3. Frequency: this controls the pulse duty cycle of the laser. If we set the Frequency to 100% then the laser will be always on while cutting, and 25% means that it will be on 25% of the time Change either by entering manually in the textbox or changing the slider
Freqency has an alternative name in some other software called `PPI (Pulse Per Inch)`, it changes the same value but expressed in a different way (frequency of pulse in 1 inch).
**End Updates**
We concluded that the best settings if we were to reduce the time to cut cardboard were as follows
|Parameter|Value|
|---------|-----|
|Speed|25%|
|Power|80% - 85%|
|Frequency|25%|
|Thickness|3mm|