8. Computer-Controlled Machining
This week, we did grop assignment as well as individual assignment
Group assignment:
- Understandting lab safety
- Test the safe working skpeed, feed rate and plunge rate
- Test torelence of different tool types and sizes
- Document your work the group work page reflect on your individual page what you learned
Individual project
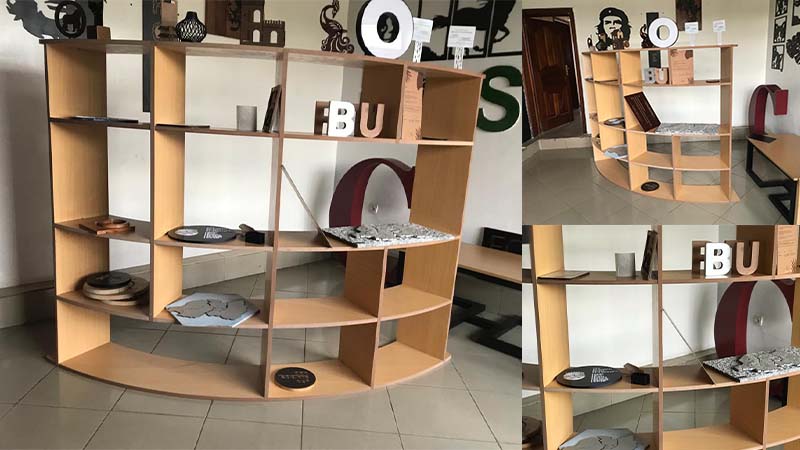
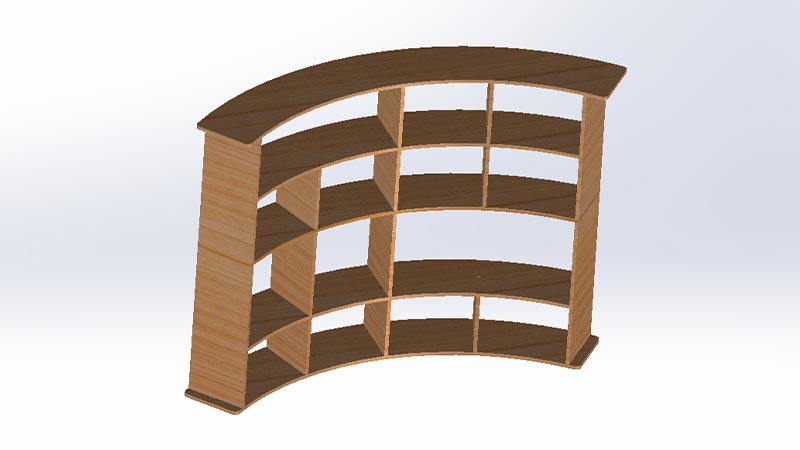
The individual assignment is to design and mill/cut and assemble something big. I decided to build a shelf where our lab will keep products on display
Design something big
I used SolidWorks to design the parts. I started by sketching on front plane the overal size of the shelf.
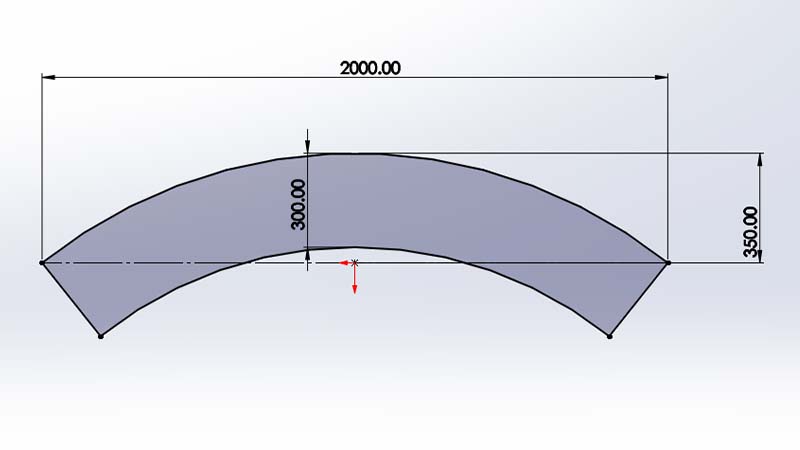
Secondly, I extruded the sketch to the overal height of the shelf
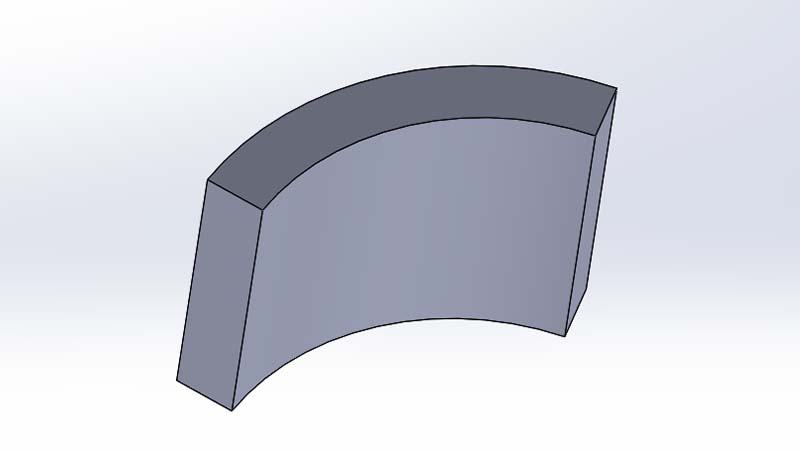
Following the first body created, I made a compy of the body. I used SolidWorks multbody instead of assembly, since it is relatively easy to design to get it correct
I sketched the vertical parts. The width is that of the thickness of the material I used. In this case, it 18mm MDF (Medium Density Formboard)

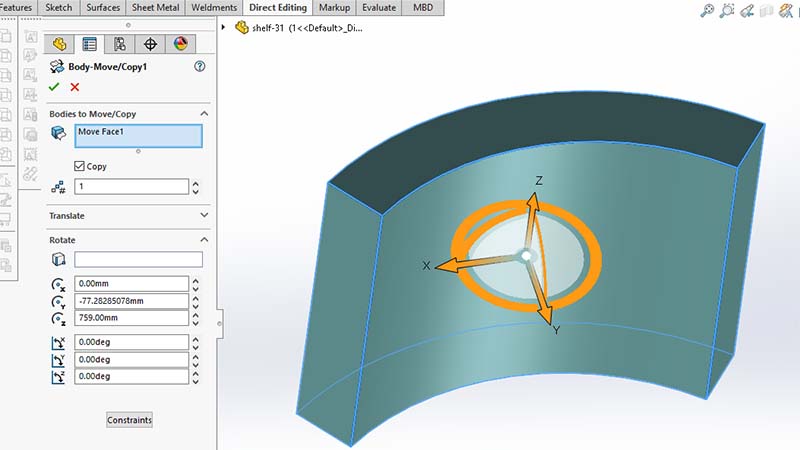
By using Extrude cut feature, I cut one body into multiple parts.
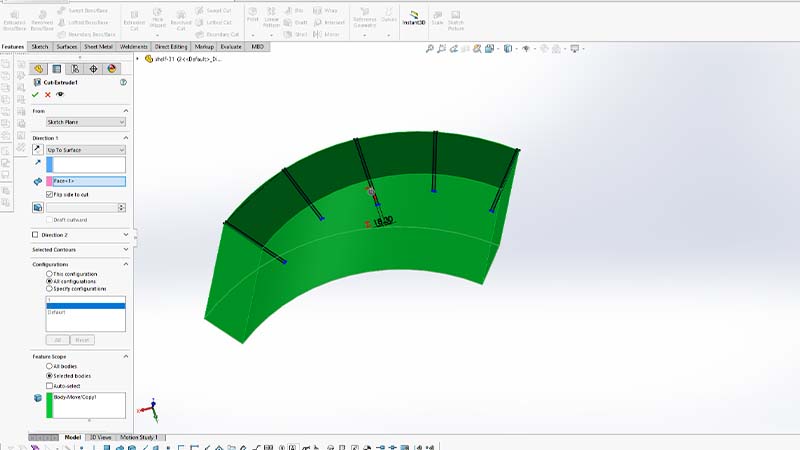
This is achieved by flipping side to cut and selecting on one (1) body to apply the features.

Next is to cut the remaining body into horizontal parts using the same techniques

I rearranged and removed some compartment so that products of large size can fit.
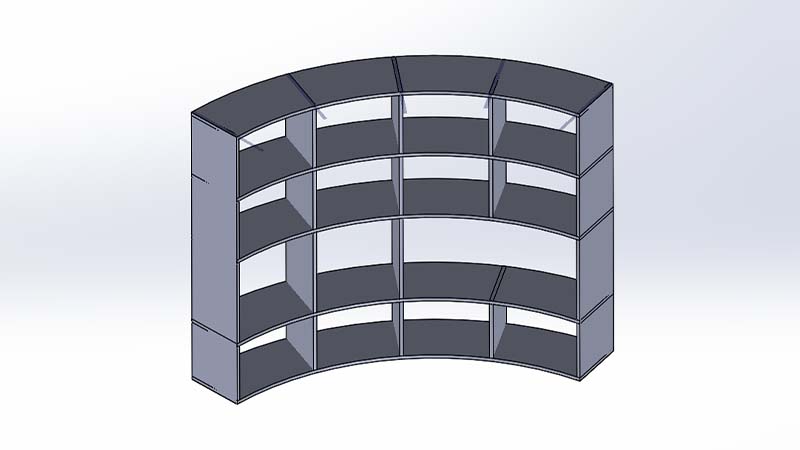
Extended the top and bottom pannels

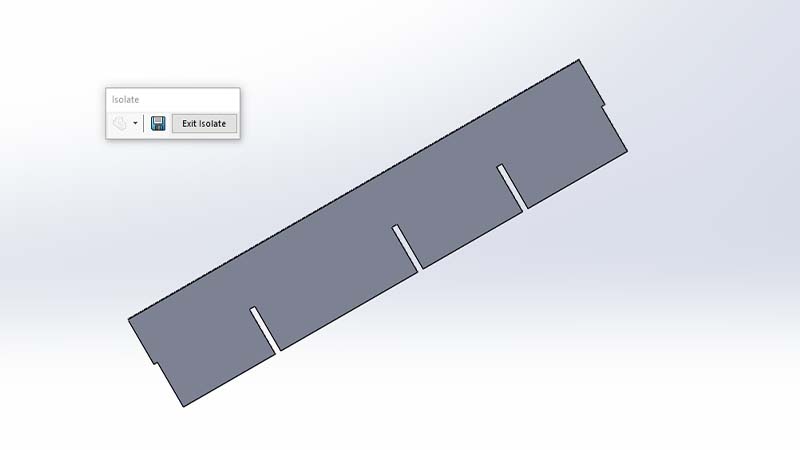
Cutting tabs
Tabs help you to assemblt the parts without using glue or screws. All parts must be cut (virtually) in such a way that there won't interference.
Tabs were cut by isolating one body at a time.

Done!
Joint
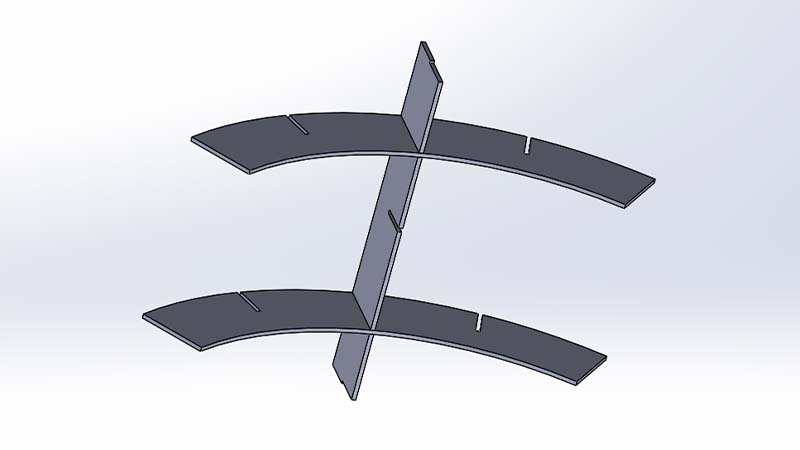
Finally, after all bodies are cut, I interference detection tool to evaluate whether if all bodies are well cut
After several try, I finally got it right where interference was not
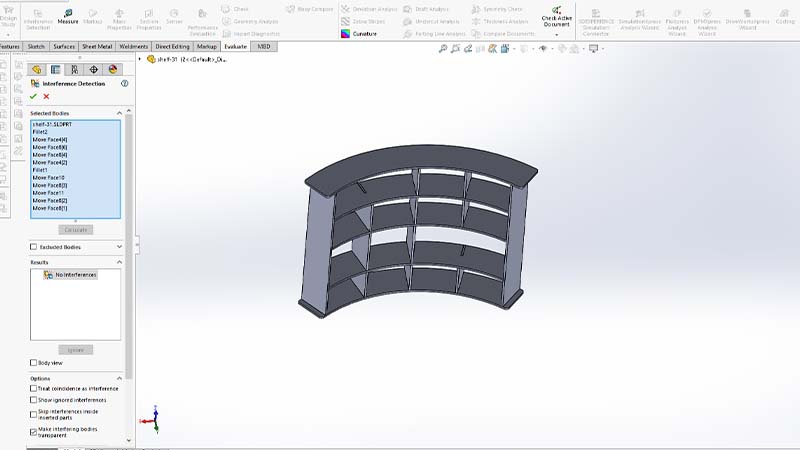
Final part
Cutting on the machine
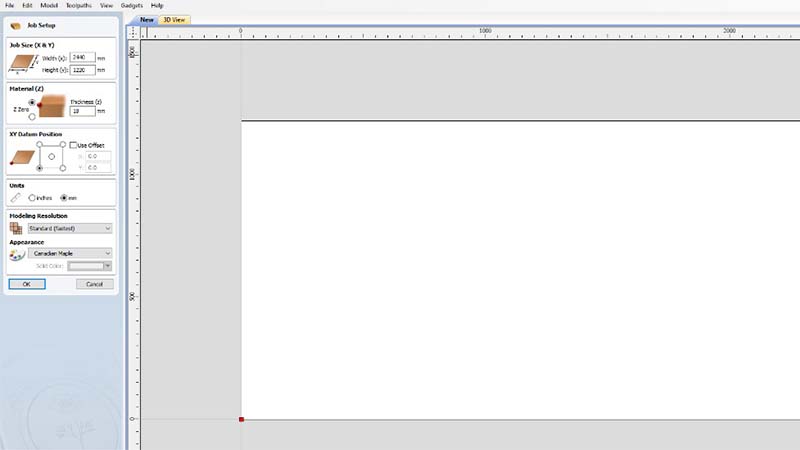
I first expoerted the file as dxf and imported them into VCarve afterward. I created new file and dimensioned the work piece 2440x1220x18 mm as the size of MDF.
I imported the dxf files in VCarve and rearrange/place them in such a way that they take as small space as possible

Next, I opened 2D Profile Toolpath
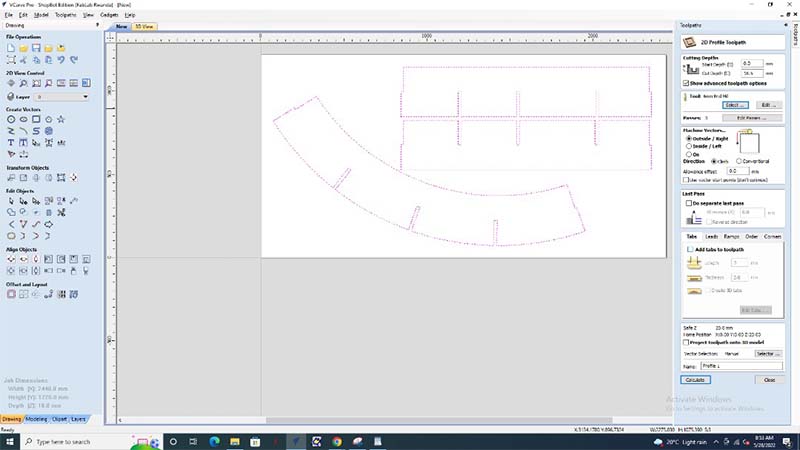
I used 6mm End Mill bit
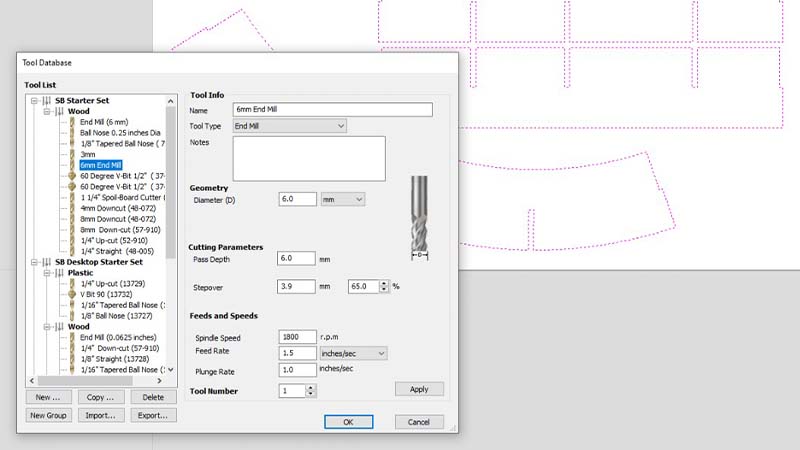
6mm End Mill

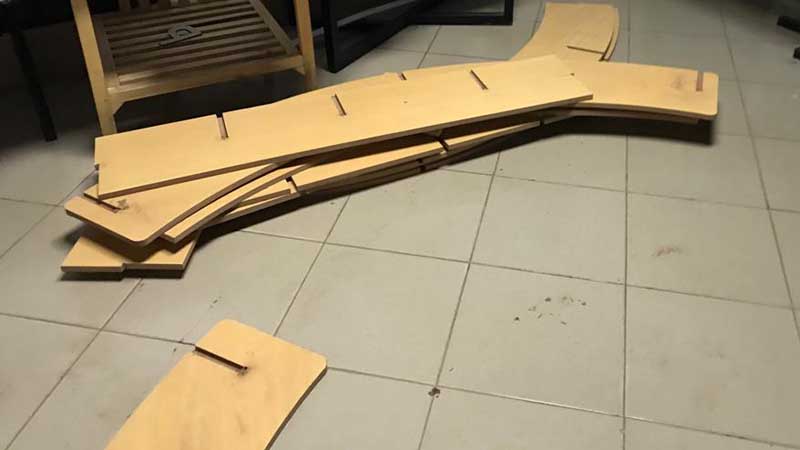
Cutting pieces

All pannels
assembling all the pannels. Since they have tabs, assembling was like connecting puzzle pieces. I was straight forward. All pieces have their corresponding places
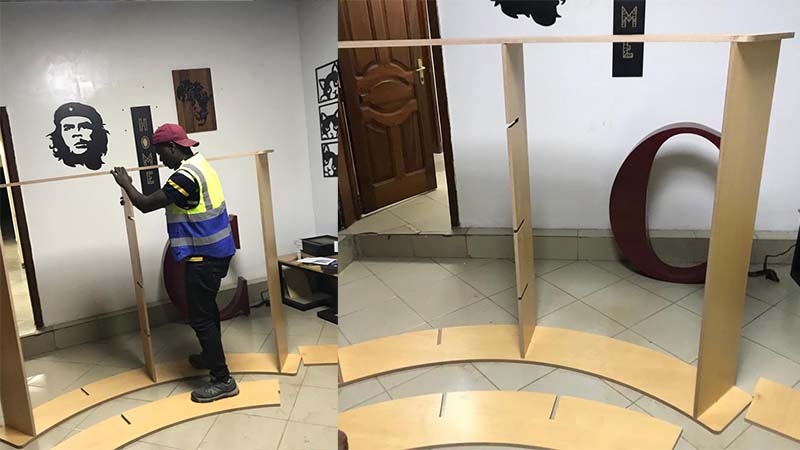
Final assembly

Shelf, put in good use.